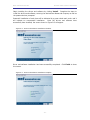
1
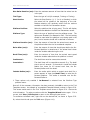
WATER MAZE VIDEO TRACKING SYSTEM
USER’S MANUAL
SOF-845 User’s Manual
DOC-214
Rev. 1.1
Copyright © 2009
All Rights Reserved
MED Associates, Inc.
P.O. Box 319
St. Albans, Vermont 05478
www.med-associates.com
MED ASSOCIATES INC.
WATER MAZE VIDEO TRACKING
- ii -
MED ASSOCIATES INC.
WATER MAZE VIDEO TRACKING
TABLE OF CONTENTS
Chapter 1 .............................................................................................. 1
Introduction ...................................................................................................... 1
System Overview ............................................................................................ 1
Key Terms ..................................................................................................... 2
Chapter 2 .............................................................................................. 3
Water Maze System Hardware.............................................................................. 3
General Computer Environment ......................................................................... 3
Hardware Guide .............................................................................................. 3
Standard Hardware....................................................................................... 3
Optional Hardware ....................................................................................... 4
Chapter 3 .............................................................................................. 7
Getting Started .................................................................................................. 7
Installing the Camera Mount ............................................................................. 7
Sheet Rock Ceiling ....................................................................................... 7
Drop Ceiling Instructions ............................................................................... 8
Leveling the Optional Pool Support .................................................................... 9
Assembling Hardware .................................................................................... 10
Wiring the System ......................................................................................... 11
Filling the Pool.............................................................................................. 13
Chapter 4 ............................................................................................ 14
User Interface ................................................................................................. 14
Main Screen Menu Bar ................................................................................... 14
File Menu .................................................................................................. 14
Edit Menu ................................................................................................. 14
View Menu ................................................................................................ 15
Export Menu .............................................................................................. 15
Trial Menu................................................................................................. 16
Analysis Menu............................................................................................ 16
Video Menu ............................................................................................... 17
Help Menu ................................................................................................ 17
Edit Project Menu Bar .................................................................................... 18
Animal Menu ............................................................................................. 18
- iii -
MED ASSOCIATES INC.
WATER MAZE VIDEO TRACKING
Trial Menu................................................................................................. 18
Edit Templates Menu Bar ............................................................................... 19
Template Menu .......................................................................................... 19
Chapter 5 ............................................................................................ 20
Starting a New Project ...................................................................................... 20
Naming or Selecting Project............................................................................ 20
Editing Pool Parameters ................................................................................. 21
Modify Pool Settings ................................................................................... 21
Modify Platforms ........................................................................................ 23
Thigmotaxis .............................................................................................. 25
Moser’s Zone ............................................................................................. 25
Wishaw’s Corridor ...................................................................................... 26
Save Pool Parameters ................................................................................. 26
Setting Preferences ....................................................................................... 27
Adding Animals to Project .............................................................................. 28
Creating a Trial Template ............................................................................... 30
Template Wizard ........................................................................................ 30
Applying the Template to the Animals .............................................................. 34
Starting a Trial ............................................................................................. 35
Chapter 6 ............................................................................................ 37
Opening an Existing Project ............................................................................... 37
Video Playback Controls ................................................................................. 39
Changing Analysis Settings ............................................................................. 39
Saving Analysis Settings .............................................................................. 39
Loading Analysis Settings ............................................................................ 40
Reanalyzing a Trial ..................................................................................... 40
Rerunning a Trial .......................................................................................... 40
Editing the Animal’s Position ........................................................................... 41
Automatically Recalculating the Animal’s Position ............................................ 42
Manually Recalculating the Animal’s Position .................................................. 42
Chapter 7 ............................................................................................ 43
Exporting Data ................................................................................................ 43
Generating Reports ....................................................................................... 43
Exporting Options ...................................................................................... 44
- iv -
MED ASSOCIATES INC.
WATER MAZE VIDEO TRACKING
Example Report in PDF Format ..................................................................... 45
Example Report in CSV / TTX Format ............................................................ 46
Exporting the Swim Path ................................................................................ 47
Exporting Video ............................................................................................ 48
Exporting Swim Path................................................................................... 48
Exporting Video with Swim Path ................................................................... 49
Appendix A .......................................................................................... 50
Configuring the Camera .................................................................................... 50
Adjusting Camera Zoom, Focus and Aperture .................................................... 50
Calibrating the Camera .................................................................................. 50
Tracking a Light Animal on a Dark Background ............................................... 51
Tracking a Dark Animal on a Light Background ............................................... 52
Appendix B .......................................................................................... 53
Driver and Software Installation ......................................................................... 53
- v -
MED ASSOCIATES INC.
WATER MAZE VIDEO TRACKING
CHAPTER 1
Introduction
System Overview
The MED Associates, Inc. Water Maze Video Tracking System uses a video camera to
capture video of an animal swimming in the water maze. The Water Maze Video Tracking
software uses this video to track the animal’s swim path and analyze swim patterns. The
video is stored on the computer. The Water Maze Video Tracking software features an
intuitive database that allows full control and management of protocols and study design.
The MED Associates, Inc. Water Maze Video Tracking Software tracks the animal’s
location in the water maze. The software can be programmed to raise the On-Demand
“Atlantis” Platform when the animal is within the Include Radius for a user-defined
duration. This is illustrated in Figure 1.1.
Figure 1.1– Raising the On-Demand Platform Using the Water Maze Video Tracking Software
- 1 -
MED ASSOCIATES INC.
WATER MAZE VIDEO TRACKING
Key Terms
•
Dwell Time:
The amount of time that an animal must remain inside the
Include Radius to raise the On Demand Platform.
•
Include Radius:
The radius within which an animal must dwell for a certain
amount of time (see Dwell Time) to raise the On Demand
Platform.
•
Moser’s Zone:
A circle with a user-defined radius drawn around the
location of the platform in training trials that are analyzed
during probe trials for platform crossings (a.k.a. passthroughs).
•
Platform Crossing:
Occurs in a probe trial when the animal’s path traverses the
precise location where the escape platform was positioned
during training.
•
Probe Trial:
Trial in which the platform has been removed following
training to assess the animal’s search strategy.
•
Start Sections:
Number of sections that the pool is divided into. This
number is user defined and can be used during data
analysis to determine how much time the animal spent in
each section.
•
Thigmotaxis:
The tendency of the animal to swim around the edge of the
pool.
•
Training Trial:
Trial in which an animal is placed in the water maze and
given a time to locate an escape platform.
•
Wishaw’s Corridor:
User-defined rectangular zone from the start position to the
platform.
•
Gallagher’s Proximity: The sum of the distance from the platform at each second
during the trial divided by the number of seconds (i.e.
average distance from the platform during the trial). This
is an average measure of total distance from the platform
during the trial. A correction procedure is used so that trial
performance is relatively unbiased by the differences in
distance to the goal from the various start locations at the
perimeter of the pool.
The correction is made by
calculating the average swimming speed for each trial, then
the amount of time required to swim to the platform at that
speed from the start location. This amount of time is
subtracted from the total distance from the platform during
the trial. By this method, scores obtained with proximity
measure are designed to reflect search error; they
represent deviations from a direct path to the platform.
- 2 -
MED ASSOCIATES INC.
WATER MAZE VIDEO TRACKING
CHAPTER 2
Water Maze System Hardware
General Computer Environment
The minimum recommended system is as follows:
•
•
•
•
•
A 3.4 GHz Pentium 4 Computer or 2.33 GHz CoreDuo or higher with an available USB
port and Firewire Card
Windows XP Operating System
1 GB of RAM
CD-ROM Drive, Keyboard and Mouse
Screen resolution of 1280 x 960 pixels recommended (1024 x 768 minimum)
Hardware Guide
Standard Hardware
Figure 2.1 - ENV-598 Camera Mount & Camera
ENV-598 Camera Mount
Length:
Figure 2.2 - DIG-703A USB Interface Front Panel
Figure 2.3 - DIG-703A USB Interface Back Panel
- 3 -
Adjustable from 9.5 – 14.0”
(24.1 – 35.6 cm)
MED ASSOCIATES INC.
WATER MAZE VIDEO TRACKING
Optional Hardware
Figure 2.4 – ENV-594-FI Floor Insert
ENV-594M-FI Mouse Floor Insert
Dimensions:
42.0” Diameter x 12.0” H
(107.0 x 30.5 cm)
ENV-594R-FI Rat Floor Insert
Dimensions:
Figure 2.5 – ENV-594 Water Maze Pool
66.0” Diameter x 6.50” H
(168.0 x 16.5 cm)
ENV-594M Mouse Pool
Dimensions:
48.0” Diameter x 24.0” H
(122.0 x 61.0 cm)
Capacity:
Designed to hold up to 150
gallons of water
ENV-594R Rat Pool
Figure 2.6 – ENV-593 Pool Support
Dimensions:
72.0” Diameter x 25.0” H
(183.0 x 63.5 cm)
Capacity:
Designed to hold up to 350
gallons of water
ENV-593M Mouse Pool Support
Dimensions:
48.0” W x 16.0 – 20.0” H x 48.0” D
(122.0 x 40.6 – 50.8 x 122.0 cm)
Weight:
Capacity:
70 pounds
Designed to hold up to 200 gallons
of water
ENV-593R Rat Pool Support
Dimensions:
70.0” W x 17.0 – 21.0” H x 70.0” D
(177.8 x 43.2 – 53.3 x 177.8 cm)
Weight:
Capacity:
120 pounds
- 4 -
Designed to hold up to 600
gallons of water
MED ASSOCIATES INC.
WATER MAZE VIDEO TRACKING
Figure 2.7 – ENV-597 Heater
ENV-597 Heater
Voltage: 120 V
Power:
1500 W
Features: Low Liquid Shut-Off
Ability to control temperature in °C or °F
Temperature Range: -30 to 220°F
-35 to 105°C
Figure 2.8 - ENV-596 Fixed Platform
ENV-596M Mouse Fixed Platform
Dimensions:
Base:
7.0” W x 7.0” D (17.8 x 17.8 cm)
Height:
Raised: 15.0” H (38.1 cm)
Lowered: 8.5” H (21.6 cm)
Platform Diameter: 4.0”
(10.2 cm)
Features: Textured surface facilitates
animal climbing onto platform
ENV-596R Rat Fixed Platform
Dimensions:
Base:
7.0” W x 7.0” D (17.8 x 17.8 cm)
Height:
Raised: 15.0” H (38.1 cm)
Lowered: 8.5” H (21.6 cm)
Platform Diameter: 6.0”
(15.2 cm)
Features: Textured surface facilitates
animal climbing onto platform
- 5 -
MED ASSOCIATES INC.
Figure 2.9 - ENV-595 On-Demand Platform
WATER MAZE VIDEO TRACKING
ENV-595M Mouse On-Demand Platform
Dimensions:
Base:
8.0” W x 8.0” D (20.3 x 20.3 cm)
Height:
Raised: 14.75” H (37.5 cm)
Lowered: 8.75” H (22.2 cm)
Platform Diameter: 4.0”
(10.2 cm)
Features: Textured surface facilitates
animal climbing onto platform
ENV-595R Rat On-Demand Platform
Dimensions:
Base:
8.0” W x 8.0” D (20.3 x 20.3 cm)
Height:
Raised: 14.75” H (37.5 cm)
Lowered: 8.75” H (22.2 cm)
Platform Diameter: 6.0”
(15.2 cm)
Features: Textured surface facilitates
animal climbing onto platform
Figure 2.10 - SG-596MR Water Maze On-Demand Platform Controller Front Panel
Figure 2.11 - SG-596MR Water Maze On-Demand Platform Controller Back Panel
- 6 -
MED ASSOCIATES INC.
WATER MAZE VIDEO TRACKING
CHAPTER 3
Getting Started
Installing the Camera Mount
It is recommended that Physical Plant complete the installation of the Camera Mount.
Sheet Rock Ceiling
Refer to Figure 3.1 to install the camera mount on a sheet rock (“dry wall”, “gypsum
board”) ceiling. Be sure that at least two of the screws are drilled into studs to ensure
that the mount is secure. If studs cannot be located, anchors should be used.
Figure 3.1 - Installing the Camera Mount on a Sheet Rock Ceiling
- 7 -
MED ASSOCIATES INC.
WATER MAZE VIDEO TRACKING
Drop Ceiling Instructions
The camera mounting system includes three clips for mounting the camera to a drop
ceiling without the use of screws. Orient the clips as shown Figure 3.2 and turn the clips
until they are secured to the ceiling braces. Once they are properly secured, slide the
clips into the correct location. Next, assemble the camera mount as shown in Figure 3.3.
Slide the screws on the mounting clips through the holes in the mounting bracket, secure
in place using the included nuts and screw the arm onto the mounting bracket.
Figure 3.2 - Orienting Drop Ceiling Camera Mounting Clips
Figure 3.3 - Installing the Camera Mount on a Drop Ceiling
- 8 -
MED ASSOCIATES INC.
WATER MAZE VIDEO TRACKING
Leveling the Optional Pool Support
The optional ENV-593 Pool Support is equipped with two bubble levels and height
adjustable legs that allow it to be leveled quickly and easily. Turn the handle on the
height adjustable legs clockwise to lower their height and counterclockwise to raise
them. Adjust the legs until the bubble levels are both aligned properly.
NOTE: The height of the legs should only be adjusted enough to level the pool support,
but not to raise and lower it’s height. Do not attempt to level the pool support
when the pool is filled.
Figure 3.4 - Optional Pool Support Leveling Features
- 9 -
MED ASSOCIATES INC.
WATER MAZE VIDEO TRACKING
Assembling Hardware
The diagram shown in Figure 3.5 illustrates the order in which the hardware should be
placed on the pool support. After installing the camera mount in the desired location
(see the Installing the Camera Mount section of this manual) and attaching the
camera to it, place the pool support in the desired location. It may be necessary to open
the software application and verify that the pool is oriented inside the camera field of
view. It is important to remember that once the pool is filled it cannot be moved easily.
Once the pool support is leveled and in the correct location, center the pool on top of it.
Next the floor insert should be placed inside the pool. If the pool is equipped with an
optional heater, it will be under the floor insert. The platforms should then be placed on
top of the floor insert. If an optional On-Demand Platform is being used it should be
connected to the bulkhead connector prior to filling the pool. Refer to the “On-Demand
Platform User’s Manual” for further information.
Figure 3.5 - Exploded Diagram of Water Maze Hardware
- 10 -
MED ASSOCIATES INC.
WATER MAZE VIDEO TRACKING
Wiring the System
1. Using the included Firewire cable, connect the Firewire camera to the Firewire card
on the back of the computer.
Figure 3.6 – Connect the Camera to the Firewire Card
2. Using the included USB cable, connect any available USB port on the computer to the
USB port on the back of the DIG-703A USB Interface.
Figure 3.7 - Connect the Computer to the USB Interface
- 11 -
MED ASSOCIATES INC.
WATER MAZE VIDEO TRACKING
3. Connect the SG-205-HD Water Resistant Pushbutton Switch to the appropriate
connector on the SG-597J Junction Box. Using the SG-222 cable, connect INPUT 1 on
the back of the DIG-703A USB Interface to the appropriate connector on the SG-597J.
Figure 3.8 - Connect the Remote to Input 1
4. Connect the DIG-703A USB Interface to a GFCI wall outlet.
Figure 3.9 - Connect the Interface to GFCI Wall Outlet
5. If an On-Demand Platform is being used, carefully read the “On-Demand Platform
User’s Manual” for setup and detailed wiring instructions.
- 12 -
MED ASSOCIATES INC.
WATER MAZE VIDEO TRACKING
Filling the Pool
Prior to filling the tank be sure the following tasks have been completed:
•
•
•
•
•
•
•
The camera is mounted in the correct location and is in focus (see the Adjusting
Camera Zoom, Focus and Aperture section of Appendix A)
The Optional Pool Support is level and stable
The Optional Floor Insert is installed
The platform (fixed or On-Demand) is in the pool
The pool is in the desired location and inside the camera’s field of view
The pool drain valve is closed
If the pool is equipped with a bulkhead connector for the On-Demand Platform, be
sure that the On-Demand Platform Cable or the bulkhead connector cover is applied
to the bulkhead connector.
- 13 -
MED ASSOCIATES INC.
WATER MAZE VIDEO TRACKING
CHAPTER 4
User Interface
Main Screen Menu Bar
If the cursor is held over a menu item, a description of its function will appear in the
status bar. This is the menu bar that is accessible from the Main Screen.
File Menu
Figure 4.1 - File Menu
Menu Item
Description
For More Info
New
Create new project
Chapter 5, Starting a New Project
Open
Open existing project
Chapter 6, Opening an Existing Project
Select Project
Wizard
Open the Select Project Wizard
screen (Figure 5.1)
Chapter 5, Starting a New Project and
Chapter 6, Opening an Existing Project
Exit
Close the application
N/A
Edit Menu
Figure 4.2 - Edit Menu
Menu Item
Description
For More Info
Pool
Open the Edit Pool Parameters
screen (Figure 5.3)
Chapter 5, Editing Pool Parameters
Preferences
Open the Preferences screen
(Figure 5.14)
Chapter 5, Setting Preferences
- 14 -
MED ASSOCIATES INC.
WATER MAZE VIDEO TRACKING
View Menu
Figure 4.3 - View Menu
Menu Item
Description
For More Info
Main Screen
Open the Main Screen (Figure 5.26)
Chapter 5, Starting a Trial
Edit Project
Open the Editing Project Screen (Figure 5.15)
Chapter 5, Adding Animals to
Project and Applying the
Template to the Animals
Edit Templates
Open the Trial Templates Screen (Figure 5.18)
Chapter 5, Creating a Trial
Template
Export Menu
Figure 4.4 – Export Menu
Menu Item
Description
For More Info
Generate Reports
Opens the Select Trials for Reporting
Screen and allows the user to generate
reports using data from completed trials
(Figure 7.1)
Chapter 7, Generating Reports
Swim Path
Opens the Export Options screen (Figure
7.2) and allows the user to export the swim
path data.
Chapter 7, Exporting Swim Path
Video
Swim Path: Exports a video of the swim
path
Video with Swim Path: Exports a video of
the video and the swim path
- 15 -
Chapter 7, Exporting Video
MED ASSOCIATES INC.
WATER MAZE VIDEO TRACKING
Trial Menu
Figure 4.5 - Trial Menu
Menu Item
Description
For More Info
Start
Starts the trial
Chapter 5, Starting a Trial
Stop
Stops the trial
Chapter 5, Starting a Trial
Show All
Shows all of the trials on the Trial List on
the Main Screen
Chapter 5, Starting a Trial
Rerun
Rerun the trial
Chapter 6, Rerunning a Trial
Edit Animal’s
Position
Edit the animal’s position during the trial
Chapter 6, Editing the Animal’s
Position
Analysis Menu
Figure 4.6 – Analysis Menu
Menu Item
Description
For More Info
Reanalyze
Reanalyze the trial data
Chapter 6, Changing Analysis
Settings
Load Settings
Load the analysis settings
Chapter 6, Loading Analysis
Settings
Save Settings
Save the analysis settings
Chapter 6, Saving Analysis
Settings
Show Swim
Path
Show the animal’s swim path during the trial
Chapter 5, Starting a Trial
Thigmotaxis
View or change the default Thigmotaxis setting
Chapter 5, Thigmotaxis
Moser’s Zone
View or change the default Moser’s Zone setting
Chapter 5, Moser’s Zone
Wishaw’s
Corridor
View or change the default Wishaw’s Corridor setting
Chapter 5, Wishaw’s Corridor
Sections
View or change the Sections settings
Chapter 5, Modify Pool Settings
- 16 -
MED ASSOCIATES INC.
WATER MAZE VIDEO TRACKING
Video Menu
Figure 4.7 - Video Menu
Menu Item
Description
Configure Camera
Opens the Calibrate Camera screen
(Figure A.2)
Camera Name
Selects the default camera
For More Info
Appendix A
N/A
Help Menu
Figure 4.8 - Help Menu
Menu Item
About Water Maze
Description
Displays the software revision and
copyright information (Figure 4.9)
Figure 4.9 - About Screen
- 17 -
For More Info
N/A
MED ASSOCIATES INC.
WATER MAZE VIDEO TRACKING
Edit Project Menu Bar
Most of the menu items on the Edit Project menu bar are the same as those on the Main
Screen; the only exceptions are the Animal and Trial menus, shown below.
Animal Menu
Figure 4.10 - Animal Menu
Menu Item
Description
For More Info
Apply Template
Apply a template to the selected animal
Chapter 5, Applying the
Template to the Animals
Add to Trials
Adds a new trial for the selected animal
Chapter 5, Template Wizard
Add
Add an animal
Chapter 5, Adding Animals to
Project
Edit
Open the Edit Animal screen
Chapter 5, Adding Animals to
Project
Delete
Delete the selected animal
Trial Menu
The items on the Trial Menu allow the user to make changes to individual trials from the
Trial Templates screen (Figure 5.21). This menu can also be viewed by right-clicking on
a trial. See Chapter 5, Creating a Trial Template for more information.
Figure 4.11 - Trial Menu
- 18 -
MED ASSOCIATES INC.
WATER MAZE VIDEO TRACKING
Edit Templates Menu Bar
Most of the menu items on the Trial Templates menu bar are the same as those on the
Main Screen; the only exceptions are the Template and Trial menus. The Template
Menus is shown below and the Trial menu is explained above in the Edit Project Menu
Bar section.
Template Menu
Figure 4.12 - Template Menu
Menu Item
Description
For More Info
Wizard
Open the Template Wizard (Figure 5.19)
Chapter 5, Creating a Trial
Template
New
Add a new template to the template list on
the Trial Templates screen (Figure 5.21)
Can also be accessed by rightclicking a trial template
Copy
Copy the highlighted trial template
Can also be accessed by rightclicking a trial template
Rename
Rename the highlighted trial template
Can also be accessed by rightclicking a trial template
Delete
Delete the highlighted trial template
Can also be accessed by rightclicking a trial template
Import
Import a trial template from another
project
- 19 -
MED ASSOCIATES INC.
WATER MAZE VIDEO TRACKING
CHAPTER 5
Starting a New Project
Naming or Selecting Project
Begin a new project by double clicking on the Water Maze Tracking Software shortcut on
the desktop. The Select Project Wizard, shown below, will appear. Click on New
Project and the screen shown in Figure 5.2 will appear.
Figure 5.1 - Select Project Wizard
Enter the desired file name in the File name field and click Create. The screen Edit
Pool Parameters screen shown in Figure 5.3 will appear.
Figure 5.2 - New Project Screen
- 20 -
MED ASSOCIATES INC.
WATER MAZE VIDEO TRACKING
Editing Pool Parameters
Modify Pool Settings
From the screen shown in Figure 5.3, click Modify Pool Settings to enable the pool
settings options. The screen will appear as shown in Figure 5.4.
Figure 5.3 – Edit Pool Parameters Screen with Settings Locked
The pool boundary is user defined and is indicated by the blue bounding circle. This
bounding circle should be adjusted until it is just inside the edges of the water surface.
Adjust the pool boundary by placing the cursor over a handle until it turns to a
,
then clicking and dragging. The circle can be rotated by placing the cursor close to a
handle until it changes to a
. It can be moved by placing the cursor inside the circle
until it changes to a
, then click and drag the circle to the desired location or using the
<,>,^,v buttons in the screen’s upper left corner.
Figure 5.4 – Modify Pool Settings
- 21 -
MED ASSOCIATES INC.
WATER MAZE VIDEO TRACKING
Once the pool boundary is in the desired location, click the Measure Pool button and
the Measure Pool dialog shown in Figure 5.5 will appear. Measure the width of the pool
at the water level in the location indicated by the orange line on the screen, then enter
this measurement and click OK.
Figure 5.5 - Measure Pool
Enter the number of Start Sections (see the Key Terms section of this manual). The
Start Sections are indicated in purple. The Start Sections can be rotated by entering a
value (in degrees) in the Rotate Start Sections field. Next, select which Start Sections
to include in the selection of Random Sections. Generally, every section but the one
containing the platform should be selected.
- 22 -
MED ASSOCIATES INC.
WATER MAZE VIDEO TRACKING
Modify Platforms
Click Modify Platforms to enable the platform settings options. The screen will appear
as shown in Figure 5.6. Click Add Platform and the Add Platform Name dialog shown in
Figure 5.7 will appear.
NOTE:
At least one platform must be added in order for data analysis to function
properly.
Figure 5.6 - Modify Platform Settings
Enter the desired platform name and click OK.
Figure 5.8.
Figure 5.7 - Add Platform Name
- 23 -
The screen will appear as shown in
MED ASSOCIATES INC.
WATER MAZE VIDEO TRACKING
The green circle that appears in the center of the screen represents the platform
boundary. Place the cursor inside the circle until it changes to a
, then click and drag
the green circle is directly over the platform location, as shown in Figure 5.9.
Figure 5.8 - Move Platform Boundary Location
The size of the green platform boundary circle can be adjusted by placing the cursor over
the perimeter of the circle until it changes to a
, then clicking and dragging until the
green platform boundary circle is the desired size. The name and diameter of the
platform will be displayed on the left side of the screen. The size of the platform is
calculated using the pool diameter value entered by the user. If the pool diameter was
entered incorrectly, this will affect the platform diameter calculation. Multiple platforms
may be added at this time.
Figure 5.9 - Platform Boundary in Correct Location
- 24 -
MED ASSOCIATES INC.
WATER MAZE VIDEO TRACKING
Thigmotaxis
To view or change the default Thigmotaxis setting, check the Thigmotaxis checkbox.
The default setting will be indicated on the screen by an orange circle, as shown in
Figure 5.10. This value can be changed by entering a value (in cm) in the Distance
from pool wall field, or by placing the cursor over the perimeter of the orange circle
until it changes to a
, then clicking and dragging until the circle is the desired
distance from the pool wall.
Figure 5.10 - Default Thigmotaxis Setting
Moser’s Zone
To view or change the default Moser’s Zone setting, check the Moser’s Zone checkbox.
The default setting will be indicated on the screen by an orange circle, as shown in
Figure 5.11. This value can be changed by entering a diameter (in cm) in the Diameter
field, or by placing the cursor over the perimeter of the orange circle until it changes to a
, then clicking and dragging until the circle is the desired diameter.
Figure 5.11 - Default Moser's Zone Setting
- 25 -
MED ASSOCIATES INC.
WATER MAZE VIDEO TRACKING
Wishaw’s Corridor
To view or change the default Wishaw’s Corridor setting, check the Wishaw’s Corridor
checkbox. The default setting will be indicated on the screen by a white rectangle, as
shown in Figure 5.12. Enter the corridor width (in cm) in the Width field or select the
Use platform width checkbox.
Figure 5.12 - Wishaw's Corridor Default Setting
Save Pool Parameters
To save the pool parameters and continue setting up the experiment, select Lock
Settings and click Exit, as shown in Figure 5.13. The screen Editing Project screen,
shown in Figure 5.15, will appear.
Figure 5.13 - Lock Pool Settings and Exit
- 26 -
MED ASSOCIATES INC.
WATER MAZE VIDEO TRACKING
Setting Preferences
Prior to starting a trial, set the tracking preferences and video file storage location by
selecting Edit | Preferences. The screen shown in Figure 5.14 will appear. Select the
color and species of animal that will be run in order to optimize the tracking algorithm.
It is recommended that the Either option be selected only if both dark and light colored
animals will be used in the same project. After verifying the Maximum Swim Duration
and the Data Directory, click OK to save and close. If at any time during the project the
color or species of animal changes, it is recommend that the Preferences settings be
changed accordingly.
Figure 5.14 - Preferences Screen
- 27 -
MED ASSOCIATES INC.
WATER MAZE VIDEO TRACKING
Adding Animals to Project
To begin adding animals, click the Add Animal button on the Editing Project screen.
This will open the Add Animal screen, shown in Figure 5.16.
Figure 5.15 - Editing Project Screen
Figure 5.16 - Add Animal
The following information may be entered in the Add Animal screen. The only required
field is number of animals.
Add
Animals:
Enter the number of animals to add. Note that if
more than one animal is added at once, they will all
have the same gender, species, strain, birth date
and weight. NOTE: This is the only required field
on the screen, all other fields are optional.
- 28 -
MED ASSOCIATES INC.
WATER MAZE VIDEO TRACKING
Animal Name/Prefix:
Enter the desired animal name. This will appear on
the Animal List on the Edit Project screen. If more
than one animal is being added the animals will be
named using the Prefix, then the number, then the
Suffix. If only one animal is being added, the
animal will be named using Name only. To produce
the animal names shown in Figure 5.17 the date
was entered in the Prefix field and the letter A was
entered in the suffix field.
Suffix:
Enter the desired suffix. This field is only enabled
if more than one animal is being added.
Gender:
Select male or female.
Species:
Select mouse or rat.
Strain:
Enter the animal strain.
Birth Date:
Enter the animal birth date.
Weight:
Enter the animal’s weight.
Once all of the necessary information has been entered, click OK to return to the Editing
Project screen. The animals that were added will appear on the animals list, as shown in
Figure 5.17.
Figure 5.17 – Editing Project Screen with Animals Added
- 29 -
MED ASSOCIATES INC.
WATER MAZE VIDEO TRACKING
Creating a Trial Template
A template is a trial format that will be used for each animal. To create a Trial Template
screen click View | Edit Templates. The Trial Templates screen shown in Figure 5.18
will appear. Click the Template Wizard button and the screen shown in Figure 5.19 will
appear.
Figure 5.18 - Trial Templates Screen
Template Wizard
Figure 5.19 - Template Wizard
The following information must be entered into the Template Wizard screen:
Template Name:
User defined Template Name.
Number of days:
Number of days that the project will run.
Number of trials per day: Number of trials per day, per animal.
Start on Day:
Enter the day to begin this template.
- 30 -
MED ASSOCIATES INC.
WATER MAZE VIDEO TRACKING
Max Swim Duration (sec): Enter the maximum amount of time that the animal can be
in the pool.
Trial Type:
Enter the type of trial (for example, Training or Testing).
Start Section:
Select the Start Section (1, 2, 3 or 4 or Random) in which
the animal will be placed at the beginning of the trial.
Random selection will randomly select from the sections
enabled on the Edit Pool Parameters screen.
Platform Position:
Select the platform that is being used. This list will display
the platforms added on the Edit Pool Parameters screen.
Platform Type:
Select the type of platform from the pulldown menu. The
options are Standard, On-Demand or Null. The Null setting
should be used when the platform is not being used in the
pool, but its location should still be defined in software.
Platform Duration (sec):
Enter the amount of time that the animal must remain on
the platform before the trial is considered complete.
Raise After (sec)*:
Enter the amount of time that should pass before the OnDemand platform is raised even if the animal hasn’t been
inside the include radius during the trial.
Dwell Time (sec)*:
Enter the amount of time that the animal must spend
inside the include radius before the platform is raised.
Continuous*:
The dwell time must be consecutive seconds.
Cumulative*:
The dwell time will be cumulative seconds. E.g. The dwell
time is set to 2 seconds. If the animal is inside the Include
Radius four times for 0.5 second each time, the OnDemand platform will be raised.
Include Radius (cm)*:
Enter the radius within which an animal must dwell for a
certain amount of time (see Dwell Time) to raise the On
Demand Platform. This radius is centered over the OnDemand Platform.
* These options only enabled if On-Demand is selected from the Platform Type
pulldown menu.
Once all of the necessary information has been entered, click OK to return to the Trial
Templates screen. An example of a completed Template Wizard is shown in Figure 5.20.
This screen would result in the Trial Template screen shown in Figure 5.21. Review the
trial information. To make corrections click the Template Wizard button again. If it is
correct, click View | Edit Project to return to the Editing Project screen.
To customize individual trials, right click on the desired trial, as shown in Figure 5.22.
Or, select the trial and open the Trial menu (Figure 4.11).
- 31 -
MED ASSOCIATES INC.
WATER MAZE VIDEO TRACKING
Figure 5.20 – Example Template Wizard
Figure 5.21 – Example Trial Templates Screen
- 32 -
MED ASSOCIATES INC.
WATER MAZE VIDEO TRACKING
Figure 5.22 - Modify Trial Settings
- 33 -
MED ASSOCIATES INC.
WATER MAZE VIDEO TRACKING
Applying the Template to the Animals
Select the animals from the list to apply the template to. To select all the animals on the
list, click on the animal at the top of the list, then hold down the shift key and click the
animal at the bottom of the list, or click any animal in the list, and press Ctrl+A. Right
click on the highlighted animal(s) or click the Animal menu and the menu items shown in
Figure 5.23 will appear.
Figure 5.23 – Apply Template to Selected Animals
Select Apply Template, and then select the template to apply to the animals. The Trial
List will then be populated with the trial information, as shown in Figure 5.24.
Figure 5.24 – Trial List Populated
- 34 -
MED ASSOCIATES INC.
WATER MAZE VIDEO TRACKING
Select the trials to run today. To select a
the trial at the top of the list, then hold
bottom of the list. To select all trials,
individual trials, hold the Ctrl key and click
contiguous section of multiple trials, click on
down the shift key and click the trial at the
click any trial and press Ctrl+A. To select
each desired trial to highlight blue.
In the example shown in Figure 5.25 the first trials on Day 1 are selected. Right click a
blue highlighted trial, or open the Trial menu and choose Modify Run Today. The Run
Today (leftmost) column will have the checkboxes filled for the selected trials. After
picking the trials to run today, click View | Main Screen and the screen shown in
Figure 5.26 will appear.
Figure 5.25 - Trials Selected
Starting a Trial
Select View | Main Screen then highlight (in blue) the trial to run on the Trial List, as
shown in Figure 5.26. Place the animal in the pool inside the start section, which is
highlighted in purple. Once the researcher is outside of the pool boundary, click the
Start button or press the remote pushbutton (Figure 3.8). Once the trial is started a red
+ indicates where the software has determined the animal’s location to be. The Start
Time field will be filled in with the current date and time and the trial will be highlighted
in red. If the Show Swim Path checkbox is filled a red line will trail the animal,
indicating its swim path.
The trial will automatically stop when either the animal remains on the platform for the
user defined Platform Duration or when the user defined Max Swim Duration has been
met. Clicking the Stop button or pressing the remote pushbutton (Figure 3.8) will also
end the trial.
- 35 -
MED ASSOCIATES INC.
WATER MAZE VIDEO TRACKING
The trial will be highlighted in yellow once it is complete and the next trial will
automatically be highlighted in blue. This allows the user to run every trial simply by
pressing the remote pushbutton. A completed trial will also have a Start Date & Time
and a Duration in the Main Screen’s Trial List. On the Editing Project screen completed
trials will be highlighted in yellow.
Once a trial has been completed the user can play back the video. Also, analysis settings
can be modified and reports can be generated detailing the experiment data and the
analysis results.
Figure 5.26 - Main Screen with Trials
- 36 -
MED ASSOCIATES INC.
WATER MAZE VIDEO TRACKING
CHAPTER 6
Opening an Existing Project
To open an existing project, open the software application and the Select Project Wizard
screen shown in Figure 6.1 will appear. Clicking File | Select Project Wizard will also
access this screen. Recently opened projects will be listed on the Select Project Wizard
screen; other projects can be accessed by clicking the Load Project button, which will
open the Open File screen shown in Figure 6.2.
Figure 6.1 – Select Project Wizard
Highlight the desired project and click Open.
again, as shown in Figure 6.3.
Figure 6.2 – Open File
- 37 -
The Select Project Wizard will appear
MED ASSOCIATES INC.
WATER MAZE VIDEO TRACKING
The desired project will now appear on the Select Project Wizard list. Highlight the
desired project and click OK. The main screen will appear as shown in Figure 6.4.
Figure 6.3 – Select Project Wizard with Desired Project
Highlight a trial to display the corresponding Analysis data and settings.
Figure 6.4 – Main Screen with Opened Existing Project
- 38 -
MED ASSOCIATES INC.
WATER MAZE VIDEO TRACKING
Video Playback Controls
Use the buttons shown in Figure 6.5 to control a file’s video playback. To advance one
frame at a time, click on the slider bar and the slider will turn from green to yellow, as
shown. The left and right arrow keys on the computer keyboard may now be used to
advance the video one frame at a time. The Page Up and Page Down keys on the
computer keyboard can be used to advance once second at a time. The video playback
speed can be adjusted using the Increase/Decrease Playback Speed keys indicated
below.
Figure 6.5 - Video Playback Controls Labeled
Changing Analysis Settings
The Show Swim Path, Thigmotaxis, Moser’s Zone, Wishaw’s Corridor and Sections
settings used to analyze the data of a completed project can be changed and the data
can be reanalyzed using the new settings. To alter an analysis parameter, e.g. the
Moser’s Zone diameter, fill the check box next to the parameter in the Main Screen’s
Analysis window. This will enable the parameter’s edit box for adjustment. After
changing an analysis setting, press the Reanalyze button to recalculate the percentage
or counts.
Saving Analysis Settings
To save new analysis settings, click the Save Settings button and the Save Analysis
screen shown in Figure 6.6 will appear. Enter the desired Analysis Name and click OK.
These settings will be applied to the entire project.
Figure 6.6 – Save Analysis
- 39 -
MED ASSOCIATES INC.
WATER MAZE VIDEO TRACKING
Loading Analysis Settings
To load previously saved analysis settings, click the Load Settings button and the Select
Analysis screen shown in Figure 6.7 will appear. Select the analysis settings to apply to
the project from the pulldown menu and click OK. The settings entered in the Edit Pool
Parameters screen (see the Editing Pool Parameters section of this manual) are
named Pool Settings.
Figure 6.7 – Select Analysis Screen
Reanalyzing a Trial
To apply the new analysis settings to a completed trial, highlight the desired trial and
click the Reanalyze button. The data will be reanalyzed and displayed using the new
analysis settings.
Rerunning a Trial
If for any reason the data recorded during a trial is incorrect, for example if the trial was
started prematurely, the trial can be rerun. The data recorded will be deleted and
replaced with new data. To rerun a trial, highlight the desired trial and select Trial |
Rerun. The prompt shown in Figure 6.8 will appear. Click Yes to proceed.
Figure 6.8 - Rerunning Trial Prompt
- 40 -
MED ASSOCIATES INC.
WATER MAZE VIDEO TRACKING
Editing the Animal’s Position
If the animal was not properly tracked during a trial, its position can be edited. Highlight
the completed trial to be edited and select Trial | Edit Animal’s Position. The
confirmation prompt shown in Figure 6.9 will appear. Click Yes to proceed and the main
screen will appear as shown in Figure 6.10.
Figure 6.9 - Editing Animal's Position Prompt
The selected trial will be highlighted in red. There are two editing modes. If the
Recalculate Animal’s Position checkbox is checked the software will automatically
relocate the animal. If it is unchecked the user may set the animal’s location for each
frame.
Figure 6.10 – Edit Animal’s Position
- 41 -
MED ASSOCIATES INC.
WATER MAZE VIDEO TRACKING
Automatically Recalculating the Animal’s Position
Refer to Figure 6.11 when completing the following steps. Check the Recalculate
Animals Position checkbox (1). Use the slider bar to locate the place in the video to
begin retracking the animal (2). Click on the animal (3) then click the play button (4).
When the video is complete, click the Stop trial button (5). The animal’s position should
now be properly tracked.
Figure 6.11 - Automatically Recalculating Animal's Position
Manually Recalculating the Animal’s Position
To manually recalculate the animal’s position, uncheck the Recalculate Animals
Position checkbox. Use the slider bar to locate the frame in the video to retrack the
animal and click on the animal. This will replace the animal’s location data for this frame
only. To retrack the animal in the next frame, click on the slider bar and use the left and
right arrow keys on the computer keyboard to advance the video one frame at a time.
Click on the animal in each frame where the animal’s location data should be replaced.
When done, click the Stop trial button. The animal’s position should now be properly
tracked.
- 42 -
MED ASSOCIATES INC.
WATER MAZE VIDEO TRACKING
CHAPTER 7
Exporting Data
Generating Reports
To generate reports select Export | Generate Reports. The Select Trials for Reporting
screen shown in Figure 7.1 will appear. Note that only completed trials will appear on
this list.
Select the Report Options at the bottom of the screen. The information included in the
report depends on the report options enabled. If Display Time in Seconds is unchecked
the time will be displayed in MM:SS format and if it is checked, all times will be in
seconds (e.g. 2 minutes, 11 seconds will appear as 131 sec).
Highlight the desired trials (use Ctrl + A to select all), and then select the Analysis
Settings to apply to the exported data. Then click Generate Report. The Export screen
shown in Figure 7.2 will appear.
Figure 7.1 – Select Trials for Reporting Screen
- 43 -
MED ASSOCIATES INC.
WATER MAZE VIDEO TRACKING
Exporting Options
Select the Format and Destination for the exported file. The options are as follows:
Format:
Adobe Acrobat (PDF):
Creates .pdf file that can be opened
in Adobe Acrobat.
Comma Separated Values (CSV):
Creates .csv file that is useful when
viewed in Microsoft Excel TM or other
spreadsheet program.
Tab Separated Text (TTX):
Creates .ttx file that is useful when
viewed in Microsoft Excel TM or other
spreadsheet program.
Destination:
Application:
Opens the file in the appropriate
application.
Disk File:
Opens a prompt to select a filename
and storage location.
Printer:
Opens a prompt to select the printer
and print settings.
Once the Format and Destination selections have been made, click OK to proceed. An
example report is shown in Figure 7.3. It was generated using the PDF format.
Figure 7.2 – Export Options
- 44 -
MED ASSOCIATES INC.
WATER MAZE VIDEO TRACKING
Example Report in PDF Format
The information included in the report depends on the report options enabled on the
Select Trials for Reporting screen (Figure 7.1). In the example below, all of the options
were enabled. Therefore the data for Platforms, Sections, Thigmotaxis, Moser’s Zone,
Wishaw’s Corridor and Gallagher’s Proximity are all included in the report. Also Display
Time in Seconds was enabled, so the Trial Duration is displayed in seconds rather than
HH:MM:SS format.
Figure 7.3 - Example PDF Report
- 45 -
MED ASSOCIATES INC.
WATER MAZE VIDEO TRACKING
Example Report in CSV / TTX Format
Reports generated using CSV or TTX format can be viewed in Microsoft Excel TM and will
appear as shown in Figure 7.4. Again, the information included in the report depends on
the report options enabled on the Select Trials for Reporting screen (Figure 7.1).
Figure 7.4 - Example Report in CSV Format
- 46 -
MED ASSOCIATES INC.
WATER MAZE VIDEO TRACKING
Exporting the Swim Path
The swim path can be exported in either Adobe Acrobat (.pdf) or Microsoft Excel TM (.xls)
formats. The swim path is translated into data points that are represented as polar
coordinates that are named Radius and Angle.
The radius is the distance, in
centimeters, from the center of the pool and the angle is in radians. This is represented
in the diagram in Figure 7.5.
To export the swim path select Export | Swim Path. An Export Options screen similar
to the one shown in Figure 7.2 will appear. Select the Format and Destination as
described in the Exporting Options section of this manual, then click OK.
An example swim path report in PDF format is shown in Figure 7.6.
Figure 7.5 - Diagram of Radius and Angle Values
Figure 7.6 - Example Swim Path Report in PDF Format
- 47 -
MED ASSOCIATES INC.
WATER MAZE VIDEO TRACKING
Exporting Video
Exporting Swim Path
To export the swim path of a trial to a video file, select Export | Video | Swim Path.
The screen shown in Figure 7.7 will appear. Select the desired video file and click Open.
Figure 7.7 – Open Video File
The screen shown in Figure 7.8 will appear. Select the destination folder, enter a file
name and click Save. When the video file is opened and played it will appear as shown
in the Microsoft Windows Media Player TM example in Figure 7.9.
Figure 7.8 - Enter a Video File Name
- 48 -
MED ASSOCIATES INC.
WATER MAZE VIDEO TRACKING
Figure 7.9 – Example Exported Swim Path Video
Exporting Video with Swim Path
To export the video with swim path of a trial to a video file, select Export | Video |
Video with Swim Path. The screen shown in Figure 7.7 will appear. Select the desired
video file and click Open. Then the screen shown in Figure 7.8 will appear. Enter a file
name and click Save. When the video file is opened and played it will appear as shown
in the Microsoft Windows Media Player TM example in Figure 7.9.
Figure 7.10 - Example Export Video with Swim Path Video
- 49 -
MED ASSOCIATES INC.
WATER MAZE VIDEO TRACKING
APPENDIX A
Configuring the Camera
Adjusting Camera Zoom, Focus and Aperture
Open the Water Maze Video Tracking software application and click View | Main Screen.
To adjust the camera focus or zoom, loosen the thumbscrew on the ring, and make the
necessary adjustment. Once proper image clarity is achieved, tighten the thumbscrew on
the ring. It is recommended that the lens aperture in the maximal open position.
Figure A.1 - Focus and Aperture Rings on Video Lens
Calibrating the Camera
Open the Water Maze Video Tracking software application. Click View | Main Screen,
then click Video | Configure Camera and the screen shown in Figure A.2 will appear.
With the main screen in the background, the camera image will be visible.
The Brightness, Gain and Shutter settings will depend on whether the software will be
tracking a light animal on a dark background or a dark animal on a light background. In
both cases it is desirable to have maximum contrast between the animal and the pool.
The grayscale histogram on the Calibrate Camera screen contains video data from inside
the pool boundary only, and does not include the video inside the platform boundary.
The camera calibration options are as follows:
•
Brightness:
Adjusts the black level of the camera.
•
Gain:
A multiplier for the camera sensor signal output
•
Shutter:
Determines how long the camera sensor is exposed during each
frame capture.
- 50 -
MED ASSOCIATES INC.
WATER MAZE VIDEO TRACKING
Figure A.2 – Calibrating the Camera
NOTE: It is important to note that these steps are MEANT TO BE USED AS A GUIDELINE
and that fine-tuning may still be necessary. The Brightness, Gain and Shutter
may need adjusting based on the color of the animal.
Tracking a Light Animal on a Dark Background
When tracking a light animal on a dark background the image should be slightly
underexposed, as shown in Figure A.3. This means that the grayscale histogram on the
Calibrate Camera screen should be shifted to the left. The example below illustrates
settings that may be desirable.
Figure A.3 – Example Settings for Tracking a Light Animal on a Dark Background
- 51 -
MED ASSOCIATES INC.
WATER MAZE VIDEO TRACKING
Tracking a Dark Animal on a Light Background
When tracking a dark animal on a light background the image should be slightly
overexposed, as shown in Figure A.4. This means that the grayscale histogram on the
Calibrate Camera screen should be shifted to the right. The example below illustrates
settings that may be desirable.
Figure A.4 - Example Settings for Tracking a Dark Animal on a Light Background
- 52 -
MED ASSOCIATES INC.
WATER MAZE VIDEO TRACKING
APPENDIX B
Driver and Software Installation
NOTE: Software installation requires a password that is issued during software registration.
If the computer being used was purchased as part of the Water Maze Video Tracking
system from MED Associates, the driver and software installation was completed at the
factory. If the computer was not purchased from MED Associates, follow the instructions
to install the hardware drivers and software programs.
Before beginning the installation, phone, fax or e-mail Med Associates with the
registration information in order to receive the software installation password.
This password will be necessary during the installation process.
Insert the Water Maze Video Tracking CD into the CD-ROM drive. The screen shown in
Figure B.1 will appear. Click Install Water Maze and the screen shown in Figure B.2
will appear.
Figure B.1 - Water Maze Video Tracking CD Main Screen
- 53 -
MED ASSOCIATES INC.
WATER MAZE VIDEO TRACKING
Begin installing the drivers and software by clicking Install. Complete the steps to
install the drivers and software, entering the desired User Name and Company as well as
the password when prompted.
Successful installation of each item will be indicated by a green check mark, and a red X
will indicate an unsuccessful installation.
Once the drivers and software have
successfully been installed, the screen shown in Figure B.3 will appear.
Figure B.2 - Driver and Software Installation Checklist
Driver and software installation has been successfully completed. Click Finish to close
this screen.
Figure B.3 - Driver and Software Installation Complete
- 54 -