1
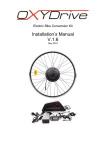
Electric Bike Conversion Kit
User’s Manual
V.1.1
January 2012
PLEASE READ ME FIRST
Table of contents:
1.
2.
3.
4.
5.
6.
Page
Concept and description of electric assistance
Recommendation for washing
Control of electric assist
Turning the power on
Selecting the level of pedal assist
Battery charge indicator
Specific recommendations for use of electric assistance
Common errors when using electric assist
Purpose of power displayer
Maximising the range and life time of the battery
Battery, Charger and the charging process
The battery charging
The battery care and maintenance
Charger and the labels contained on the charger
Battery storage and customers duty of care
2
3
3
3
3
3
4
4
4
4
5
6
6
6
7
7
1. Concept and description of electric assistance
Concept and purpose of electric assistance is to help cyclists to ride the bicycles
with the power assist coming from the electric motor. This is particularly helpful
during the hill climbing and the head winds. The electric motor can be fitted in
variety of locations including the front and rear hub as well as the centrally placed
crank drives.
2. Recommendation for washing
All washing of electric motor, battery and the controller should be carried on with
special attention and minimal use of water or any other liquids. During washing
it’s best to use wet but almost dry sponge and cloth.
IMPORTANT: Never use the pressurised KARTCHER’s for washing.
3. Control of electric assist
Turning the power on
In order to switch the power on two steps should be completed.
Step 1. The power has to be turned on at the battery. At the right hand side of the
battery there is a green button which should be in the ON position.
Step 2.
On the handlebar there are three control buttons. The button in the middle should
be pressed for approx 2-3 seconds until display will show all the figures.
Selecting the levels of pedal assist
On the same group of handle bar switches there is an option of selecting the level
of assistance in the pedelec mode. The levels of assist are from 1 to 5 with one
being the slowest and least powerful and 5 being the fastest and giving maximum
assist. It is entirely up to the user which level of pedal assist wants to ride on.
NOTE: For achieving maximum range from a single battery charge it is
recommended not to use the level 5 at all times. It is the most powerful level of
pedal assist and as result the power consumption is at the highest level.
3
Battery charge level indicator
The OXYDrive conversion kit is equipped with the battery indicators stating the
level of battery charge and the remaining charge left in the battery. One indicator
is located on the LCD display located n the top left corner. The less power is left
in the battery the less fields on the indicator will be displayed. The second indictor
located on the battery. In order to check the charge condition the button in the
middle has to be pressed in. The indicator works in the exactly the same way as
indicator on the LCD display. The full charge shows all lights on, then less power
left in the battery the less lights will be showing on.
4. Specific recommendations for use of electric
assistance
Common errors when using electric assist
It is important to understand what type of errors users make when using the
electric assist. One of the major errors that users make when using the electric
assist is misunderstanding the concept of the electric assist. It is important to
understand that having electric assist fitted to the bike will turn our bike into a
scooter or moped which can be used by ‘’twist and go’’. The user should bear in
mind that the power of the motor fitted to the bike is only 250W on the average
output. As a result it has enough power to give the assist while cycling uphill or
against headwinds. It may however not be enough to climb average weight person
up the hill by just twisting the throttle or pulling a trailer with a child at back.
It is worth to remember that riding on the twist throttle only is perfectly fine as
long as we ride it on the flat or downhill or against mild headwind. Riding with
the throttle only mode up the hill may cause the motor, battery or controller to
overheat or blown the fuse on the battery which will stop the entire system.
Purpose of power displayer
The main console is equipped with a power displayer showing a current power
output on the motor. The figures are shown in WATTS. This function apart from
being fantastic feature showing the user current power can also be used to
determine how much strain we put on the system. Once you start using OXYDrive
you will notice that the peak power can reach even 400 or 500 Watts. This is the
maximum power that the motor can achieve in the peak and this normally occurs
during the start or hill climbing.
The power displayer shows the user how much strain is put on the entire system
and if cycling with average power output close to 500Watts then we know we are
using 100% power available. We can use it with no problems for a while however
this level of power should not be used at all times or during a very long hill
climbing.
We recommend using the power with anything between the 100 to 250Watts of
power output on the flat road and up to 350W during long hill climbing. This way
you can maximise the efficiency and lifetime of the battery, motor and the entire
system. Please read the next chapter explaining in detail how to maximise the
range and lifetime of all components.
4
Maximising the range and the life time of the battery
This chapter explains how to get most out of your battery and how to maximise
lifetime of the entire system too.
Probably most of the OXYDrive users have a driving licence or had already
driven a car before. The example and the point we try to make in this manual is
that riding an electric bike is not much different from driving the car and that the
same rules apply for the bikes as well as for the cars. It’s all about the physics.
These days driving a car fast becomes a privilege and the cost of raising fuel
prices do not seem to see it ending. With the continuously rising fuel prices we try
to get more mpg (less l/100km in the EU) when driving the car. In order to do this
we try to keep the top recommended tyres pressure, carry with us least weight so
do not keep the useless luggage in the car boot etc etc. We also tend to drive more
carefully by not accelerating very quickly and always driving in the right gear so
the engine RPM is just optimal for the speed we drive.
The above example is just to illustrate what we can do to reduce the fuel
consumption. Riding an electric bike is exactly the same and it very much depends
on us how we can maximise the range and reduce the power consumption. Though
we can even say that electric assist is even more sensitive then a car when it
comes to power saving. Here is our ABC
A. Always try to give your own pedal assistance. Then more your own effort you
put into cycling the less power the motor will have to provide, the less strain will
go on the motor, battery and the controller. It also gives you some exercise when
you pedal assist your bike.
B. When cycling uphill try to give your own assistance but also look at the power
meter display. Try to avoid the levels of 400-500Watts of power output as much
as you can as it drains the battery very quickly and put a lot of strain on the motor
too. It’s like with driving a car, we normally drive a car within 2000 to 3000 RMP
as it’s most efficient in this range and it’s the healthiest level for the engine too.
Although most car engines are capable of achieving 5000-6000 RPM we don’t
drive at those levels very often unless we overtake for few seconds. It consumes
then a lot of fuel and it’s very unhealthy for the engine to drive for longer period
of time. Same rule applies to the electric bike. If you ride it with the top power
output it has a negative impact on the battery power consumption as well as it’s
unhealthy for the motor and the controller system due to high current level.
C. When climbing up very sharp hills we might actually find that our cursing
speed has decreased to approx 6-7 mph (10-12km/h) regardless of whether we are
in the pedal assist mode no 3 or 5. By bringing again our car example what
happens here is the loss of efficiency. Each motor or car engine has its own
optimal level of operations when it generates the highest efficiency. Giving an
example if we drive the car at 20mph up the hill on the 5th gear with only
1100RPM it does not matter if we press the accelerator a lot or just a little bit. The
car will usually drive with the same speed of 20mph and won’t accelerate because
the engine is not working at it’s optimal level. By pressing the accelerator pedal
5
we can however notice that power consumption increases a lot but the speed does
not really increase. Again the same rule applies with the bike hub motor. All hub
motors have their own optimal operational level when the efficiency is at the peak.
If the cursing speed drops down below certain level the motor then enters the level
of inefficiency. What happens then is the high power consumption but low power
output. Coming back to the beginning of the point C when we climb this sharp hill
we should never use the level 5 of pedal assist if our cursing speed dropped below
10mph because the motor is then inefficient a with large amount of power going
through the motor coils all electric power is simply turned into heat and not
redirected onto the drive system. If the cursing speed drops below 10mph then
please use the pedal assist level 3 at maximum. This will prevent the surplus of
power turning into heat and the motor will use just enough power.
5. Battery & charger and the charging process
Battery charging
It is important to follow these few steps before the first charge. Firstly, the battery
must be fully charged before the first use. In order to charge the battery, you will
first need to plug power socket into the mains and the charger’s round plug into
the battery’s socket. Once it’s done, you can plug the charger’s main plug to the
electricity socket. It is important that it is done in this specific order as connecting
the charger’s main plug first may cause a short circuit.
The charging cycle is competed once the green light appears on the charger. The
red light on means that the battery is still in the charging process and it should not
be disconnected from the charger until the green light appears.
Battery care and maintenance
Once the battery has been fully discharged, it is always best to charge it on the
same day, but not earlier than approx 10-20 minutes after your bike ride as the
battery needs some time to cool of.
If you are planning not to use your bike for a longer period of time, it is very
important that you charge the battery before. Batteries stored for longer period of
time should be charged for approx 1 hour every 2 months - neglecting this result
in the battery loosing its voltage and gradual damage to the battery.
6
Labels contained on the charger
Each battery has a appropriate label applied on the battery case. This label
contains basic information about the battery care and safety instructions which
strictly have to be followed. Failure to follow the battery guidelines may be
dangerous and may invalidate the battery warranty.
IMPORTANT: Never open the battery case - the battery case should only be
open by an authorised service centre appointed by Oxygen Bicycles. Unlawful
breach of this rule will automatically invalidate the battery warranty.
Opening the battery case by unauthorised individuals may cause a serious injury
or even death. Oxygen Bicycles is not responsible for any accidents and damages
caused by unlawful battery maintenance
6. Battery storage and customers duty of care
Storage recommendations
This is an important part of this manual this is why it should be read with
attention.
All lithium batteries should be stored at the home temperatures (16-24C). It is
important not to store the battery in wet, humid and cold conditions as this may
affect the battery performance.
Lithium batteries when stored for a longer period of time (anything from one
week to few months) without using them should be charged at approx 50-70%
charge state.
IMPORTANT: Please do not store batteries 100% fully charged as well as
completely flat with close to 0% charge state.
DUTY OF CARE
Each customer purchasing OXYDrive is obliged to read this manual and follow
the duty of care recommendation guidelines. Each battery when stored for a
longer period then one week should be recharged for approx 30min to one hour in
order to make sure that the battery is at approx 50-70% charge level. Failure to
follow these guidelines may cause the battery to loose its capacity and voltage
what at the worst resort may cause a complete damage to the battery.
WHY RECHARGE??? REASONING EXPLAINED IN DETAIL
Recharging process is essential because each lithium polymer battery is built up
with many smaller internal cells. All the cells being connected together create a
cell groups which are maintained by one BMS (Battery management system)
which is nothing else but a small tiny computer which continuously balances the
cells and makes sure that the voltage is same on cell groups. By doing so it
consumes very little amount of power which drain the battery. This is why it is
essential to re-charge the battery every approx 2 months.
Failing to do re-charge the battery may result in the battery cells to die. If the
voltage on each individual cell drop below 2.8V and 28V on the entire pack then
the cells are very likely to die leaving them with no option of recovery. All
7
batteries claimed under the warranty and found with a voltage lower then 28V are
very likely to have a warranty void due to lack of care and negligence. As a user
please take it seriously and make sure your battery is stored at approx 50-70%
charge state. This applies mainly to the autumn and winter months when bikes are
not very frequently used.
Thanks for reading, still got some question please email us at
[email protected] or call directly on +447738866502 or +442081443350
8