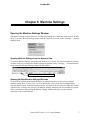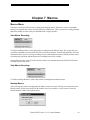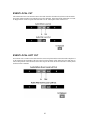
1
ViewNet MX Graphic Interface Network Modular Multitrack ViewNet MX 1.15 OWNER’S MANUAL CR1100-84393-5 ViewNet MX Assistance and Information Technical support is available free of charge only to registered owners of a TASCAM® MX-2424. Be prepared to provide the serial number of your TASCAM® MX-2424 when calling for technical support. For future reference, please write your serial number here: You may register your TASCAM® MX-2424 via the internet. Email: [email protected] Web: http://www.tascam.com Copyright and Trademark Software. Copyright 2000 by TimeLine Vista, Inc. All rights reserved. The software described in this document is supplied under license. The software may be used and/or copied only in accordance with the terms of the agreement. The purchaser may make copies of the software for backup purposes only. Manual. Copyright 1999 by TimeLine Vista, Inc. Copyright 2000 by TEAC America, Inc. All rights reserved. No part of this manual may be reproduced or transmitted in any form or by any means electronic or mechanical, including photocopying and recording for any purpose other than those specified in the license without prior written permission of TimeLine Vista, Inc. and TEAC America Inc. TASCAM is a registered trademark of TEAC Corporation. Disclaimer Information in this document is subject to change without notice. TimeLine Vista, Inc. and TEAC America, Inc. make no warranty of any kind with regard to this material or the product, including, but not limited to, the implied warranties or fitness for a particular purpose. TimeLine Vista, Inc. and TEAC America, Inc. shall not be liable for errors contained herein or for incidental or consequential damages in connection with the furnishing, performance, or use of this material or the product. ii ViewNet MX Version 1.1/1.5 Owners Manual ViewNet MX Trademarks ViewNet MX , is a registered trademark of TimeLine Vista, Inc. Use of this trademark for commercial purposes without the prior written consent of TimeLine Vista, Inc. may constitute trademark infringement and unfair competition in violation of federal and state laws. All other product names are trademarks or registered trademarks of their respective owners. Printed in the United States of America. Software License Agreement Software is Licensed. The ViewNet MX software (the “Software”) is licensed (and not sold) by TimeLine Vista, Inc. to the original purchaser for use only under the following terms, and TimeLine and/or its licenser(s) retain ownership and reserve all rights in the software not expressly granted herein. BY USING THIS SOFTWARE, YOU AGREE TO THE FOLLOWING LICENSE AGREEMENT. License Grant. You are hereby granted a non-exclusive, non-assignable (except as provided in item (c) of this sentence, nonsublicensable license to: (a) use the Software on a computer (or computers) that are part of a ViewNet MX network; (b) make copies of the software for backup purposes only; and (c) transfer the Software (and your rights under this license, with the exception of the source code rights), but only to another party, and only if such party is given a copy of this Agreement and agrees, in writing delivered to TimeLine, to accept the terms and conditions of this Agreement. Restrictions. You may not use, copy, modify, or transfer the software, in whole or in part, except as expressly permitted by this Agreement. Any attempt to transfer any of your rights, duties, or obligations hereunder except as expressly permitted in this Agreement is void. YOU SHALL NOT (NOR SHALL YOU ALLOW ANY THIRD PARTY TO) DECOMPILE, DISASSEMBLE, OR OTHERWISE REVERSE ENGINEER THE SOFTWARE BY ANY MEANS WHATSOEVER. Terms. This license is effective until terminated and will immediately and automatically terminate without notice if you fail to comply with the terms and conditions of this license. You agree upon termination to promptly destroy the software together with all copies thereof in any form. Termination is not an exclusive remedy, and all other remedies remain available whether or not the license is terminated. Compliance. You agree to certify to TimeLine, from time to time upon TimeLine’s request, your compliance with the terms and conditions of the license. TimeLine shall have the right to audit such compliance at any reasonable time upon reasonable notice. Maintenance Service. TimeLine shall provide maintenance service for the Software, at a reasonable fee if not pursuant to TimeLine’s limited warranty, in accordance with standard industry practices. Export Law Assurances. You agree that the Software will not be removed, transferred or exported from the United States, in violation of the restrictions and controls imposed by the United States Export Administration Act and the regulations thereunder (nor will it be transferred to anyone who intends to do so). ViewNet MX Version 1.1/1.5 Owners Manual iii ViewNet MX Limited Warranty. The Software is provided with a limited warranty as described in the User Manual. No other warranties, express or implied, shall apply. Limitation of Liability. TimeLine and/or TEAC America, Inc. will not be liable under any subject matter of this software license agreement under any contract, statute, tort, negligence or strict liability or other theory, for (a) loss or inaccuracy of data, cost of procurement of substitute goods, services, or technology; (b) any indirect, incidental or consequential damages, including, but not limited to, lost profits; and (c) any matter beyond its reasonable control. General. This license agreement for the Software, and the limited warranty, and related provisions in this manual will be governed exclusively by the laws of the State of California, without regard to the conflict of law provisions thereof. This is the complete and exclusive understanding of the parties relating to this subject matter, and may not be amended except in writing. Software Updates. Future updates of the Software, if produced, will be available for license by licensees for a reasonable fee or free of charge. Registered Licensees will be notified of such updates, if and when they become available. Government Licensees. If you are acquiring ViewNet MX on behalf of any unit or agency of the United States Government, the following provisions apply: The Government acknowledges that the ViewNet MX Software and documentation were developed at private expense and no part of them is in the public domain. The Government agrees that: (i) if the Software is supplied to the Department of Defense (DoD), the Software is classified as “Commercial Computer Software” and the Government is acquiring only “restricted rights” in the Software and its documentation as that term is defined in Clause 252.227-7013(c)(1) of the DFARS; and (ii) if the Software is supplied to any unit or agency of the United States Government other than the DoD, the Government’s rights in the Software and its documentation will be as defined in Clause 52.227-19(c)(2) of the DFARS. Use, duplication, or disclosure by the Government is subject to restrictions as set forth in subparagraph (c)(1)(ii) of the Rights in Technical Data and Computer Software clause of DFARS 252.227-701 iv ViewNet MX Version 1.1/1.5 Owners Manual ViewNet MX ViewNet MX Version 1.1/1.5 Table of Contents CHAPTER 1 VIEWNET MX INSTALLATION ......................................................................12 ABOUT VIEWNET AUDIO .............................................................................................................12 STEPS TO COMPLETE VIEWNET SETUP ........................................................................................12 NETWORK CONFIGURATION FOR THE MX-2424 ..........................................................................12 IP Address ..............................................................................................................................12 Setting the IP Address ...................................................................................................................... 13 Important Rules for IP Addresses ..................................................................................................... 13 Using the TimeLine IP Address........................................................................................................ 13 Next Available IP ...................................................................................................................13 Reserved IP Numbers ....................................................................................................................... 14 Errors Setting Next Available IP Address ........................................................................................ 14 IP Net Mask............................................................................................................................14 IP Gateway.............................................................................................................................15 INSTALLING THE VIEWNET MX APPLICATION .............................................................................16 Installing ViewNet Audio on a Macintosh..............................................................................16 Installing ViewNet Audio on a Windows Computer ...............................................................17 CONFIGURING COMPUTER NETWORK SETTINGS ..........................................................................18 Installing A Network Interface Card in the Computer ...........................................................18 Setting Windows TCP/IP Properties ......................................................................................18 TCP/IP Properties Window .............................................................................................................. 19 Setting IP Gateway Address ............................................................................................................. 20 WINDOWS NT 4.0 NETWORK CONFIGURATION ...........................................................................21 Windows NT Network Window ...............................................................................................22 Windows NT Network Adapter Selection ........................................................................................ 23 Windows NT TCP/IP Properties.............................................................................................24 APPLE MACINTOSH NETWORK CONFIGURATION .........................................................................25 The Macintosh TCP/IP Window.............................................................................................26 CHAPTER 2 SETTING UP THE NETWORK.........................................................................27 IMPORTANT NETWORK SET UP CONSIDERATIONS .......................................................................27 Terminating the Network Connection ....................................................................................27 ETHERNET CABLES AND CONNECTORS........................................................................................27 100Base-TX Specifications.....................................................................................................27 Ethernet Patch Cable .............................................................................................................28 Ethernet Crossover Cable Wiring ..........................................................................................28 Ethernet Hubs.........................................................................................................................28 USING VIEWNET WITH EXISTING LANS .......................................................................................28 CHAPTER 3 THE NETWORK SCREEN.................................................................................29 SECTIONS OF THE NETWORK SCREEN ..........................................................................................29 MACHINE STATUS INFORMATION COLUMNS................................................................................29 Name ......................................................................................................................................29 Ident .......................................................................................................................................29 Serial Number ........................................................................................................................29 Type........................................................................................................................................30 Project ....................................................................................................................................30 Sync Group.............................................................................................................................30 Bus status ...............................................................................................................................30 ViewNet MX Version 1.1/1.5 Owners Manual 5 ViewNet MX Sample Rate............................................................................................................................30 Frame Rate.............................................................................................................................30 Machine Sets ..........................................................................................................................30 NETWORK VIEW FILTERS.............................................................................................................31 Sync Group Filter...................................................................................................................31 Machine Set Filter..................................................................................................................31 Defining Machine Sets ...........................................................................................................32 Stage Machines Pre-Filter In Preferences .............................................................................33 SYSTEM STATUS PANEL...............................................................................................................33 Description .............................................................................................................................34 Online.....................................................................................................................................34 Connection Box ......................................................................................................................35 Active Connections.................................................................................................................35 Active Connections In Multi-Machine Operation ............................................................................ 35 Active Connections In Multiple Specific Machine Macros .............................................................. 36 THE PREFERENCES WINDOW .......................................................................................................36 Net Delay Compensation........................................................................................................37 Machine Offline Warning.......................................................................................................37 Always .............................................................................................................................................. 37 Stage ................................................................................................................................................. 37 Never ................................................................................................................................................ 37 Nudge Amount........................................................................................................................38 Coarse Nudge Amount ...........................................................................................................38 Machine Sets List ...................................................................................................................38 Creating Machine Sets...................................................................................................................... 38 Deleting Machine Sets...................................................................................................................... 38 Multi-Machine Behavior ........................................................................................................38 Creating New Projects ...................................................................................................................... 38 Propagate Edit Tracks....................................................................................................................... 39 Propagate In/Out............................................................................................................................... 39 Machine Sets Server IP..................................................................................................................... 39 VIEWNET DEFAULT PREFERENCES FILE ......................................................................................40 SAVING AND OPENING NAMED PREFERENCES FILES ...................................................................40 Opening Preferences Files .....................................................................................................40 Saving Preference Files .........................................................................................................41 Revert to Default ....................................................................................................................41 CHAPTER 4 PROJECTS AND TRACKS ................................................................................42 THE LOAD PROJECT/ TRACK WINDOW ........................................................................................42 Opening Load Project/Track from the Network View ............................................................42 Opening Load Project/Track Windows for Multiple Machines..............................................42 SECTIONS OF THE LOAD PROJECT/TRACK WINDOW ....................................................................43 Machine Name .......................................................................................................................43 Ident .......................................................................................................................................43 Serial Number ........................................................................................................................43 PROJECT LIST ..............................................................................................................................43 Showing Tracks ......................................................................................................................44 Choosing Project/Track To Be Loaded ..................................................................................44 Choosing A Destination Track ...............................................................................................44 Loading Projects ....................................................................................................................45 Loading Tracks.......................................................................................................................45 FILE UTILITIES .............................................................................................................................46 Opening File Utilities from the Network View .......................................................................46 Opening File Utilities Windows for Multiple Machines.........................................................46 SECTIONS OF THE FILE UTILITIES WINDOW ..................................................................................47 Machine Name .......................................................................................................................47 6 ViewNet MX Version 1.1/1.5 Owners Manual ViewNet MX Ident .......................................................................................................................................47 Serial Number ........................................................................................................................47 Disk Status..............................................................................................................................47 Project / Track Selection ........................................................................................................48 Rename...................................................................................................................................48 Smart Copy.............................................................................................................................48 Smart Copy Over An Existing Project .............................................................................................. 48 Disk Status Progress Display............................................................................................................ 49 Smart Copy Abort............................................................................................................................. 49 TapeMode Convert.................................................................................................................50 Auto Naming of TapeMode Converted Files.................................................................................... 50 Not Enough Space Warning ............................................................................................................. 51 TapeMode Convert Progress Display ............................................................................................... 51 Cancel TapeMode Convert ............................................................................................................... 52 Delete .....................................................................................................................................52 CREATING A NEW PROJECT .........................................................................................................53 UNLOADING TRACKS ...................................................................................................................54 CHAPTER 5 THE PROJECT VIEW SCREEN .......................................................................55 OVERVIEW...................................................................................................................................55 COMPONENTS OF THE PROJECT VIEW SCREEN ............................................................................55 SUMMARY OF SECTIONS IN THE PROJECT VIEW SCREEN .............................................................56 Transport Controls.................................................................................................................56 Network Panel ........................................................................................................................56 Project Overview....................................................................................................................56 Machine Status .......................................................................................................................56 Track Function Panel.............................................................................................................56 Memory Locations and Displays............................................................................................56 Network Access Button...........................................................................................................57 Machine/Project Name...........................................................................................................57 Edit Buttons............................................................................................................................56 TRANSPORT BUTTONS .................................................................................................................57 Online.....................................................................................................................................57 Loop .......................................................................................................................................57 Rewind....................................................................................................................................57 Reverse Play...........................................................................................................................57 Stop.........................................................................................................................................57 Play ........................................................................................................................................58 Fast Forward .........................................................................................................................58 Rehearse.................................................................................................................................58 Record ....................................................................................................................................58 Go to Head .............................................................................................................................58 Go to Tail ...............................................................................................................................59 Go to Next Edit.......................................................................................................................59 Go to Previous Edit ................................................................................................................59 Shuttle.....................................................................................................................................59 SYSTEM STATUS PANEL...............................................................................................................60 PROJECT OVERVIEW ....................................................................................................................60 Head and Tail.........................................................................................................................60 Navigating With The Overview ..............................................................................................62 The Playhead In The Overview ..............................................................................................61 View Follows Playhead .................................................................................................................... 61 View Pages With Playhead............................................................................................................... 61 Selecting A Region While In Play .................................................................................................... 61 MACHINE STATUS INFORMATION ................................................................................................62 TRACK FUNCTION AND INFORMATION .........................................................................................62 ViewNet MX Version 1.1/1.5 Owners Manual 7 ViewNet MX Track Name ............................................................................................................................62 Load Project / Track ..............................................................................................................62 Input .......................................................................................................................................62 Record ....................................................................................................................................63 Edit .........................................................................................................................................63 Select All Buttons ...................................................................................................................63 TIME REGISTERS AND DISPLAYS ..................................................................................................63 The Entry Register..................................................................................................................63 Changing The Value In The Entry Register...................................................................................... 64 Time Register Function Buttons .............................................................................................64 Capture ............................................................................................................................................. 64 Store.................................................................................................................................................. 64 Locate ............................................................................................................................................... 64 Clear ................................................................................................................................................. 64 Read-Only Display Registers .................................................................................................64 TC Read............................................................................................................................................ 65 User Registers ........................................................................................................................65 Current.............................................................................................................................................. 65 In....................................................................................................................................................... 65 Out .................................................................................................................................................... 66 Offset ................................................................................................................................................ 66 Memory Registers............................................................................................................................. 66 Duration Registers .................................................................................................................66 In > Out ............................................................................................................................................ 66 Out > In ............................................................................................................................................ 67 TIME RULER AND MARKS ............................................................................................................67 Time Ruler Scale ....................................................................................................................67 Playhead (Current Time Register) .........................................................................................67 In Mark...................................................................................................................................68 Out Mark ................................................................................................................................68 Memory Markers ....................................................................................................................68 PROJECT EDL VIEW ....................................................................................................................68 Tracks.....................................................................................................................................69 Hidden Track Names ........................................................................................................................ 69 Audio Events .................................................................................................................................... 69 Fades................................................................................................................................................. 69 Splice Points ..................................................................................................................................... 69 Selecting Material To Edit .....................................................................................................70 Selecting Clips.................................................................................................................................. 70 Multiple Clip Selection..................................................................................................................... 71 Selecting Regions ............................................................................................................................. 71 Audio Event Appearance In Record .......................................................................................72 Horizontal Scroll Bar .............................................................................................................72 Project View Adjustment ........................................................................................................73 Panel Resize Triangles...................................................................................................................... 73 Zoom ................................................................................................................................................ 73 EDL Height....................................................................................................................................... 73 Edit Buttons............................................................................................................................73 CURSOR FUNCTION SELECTION ...................................................................................................74 Marker Placement Cursor......................................................................................................74 Select In / Out Cursor.............................................................................................................74 Grab Cursor ...........................................................................................................................74 Zoom Cursor ..........................................................................................................................74 VIEW MENU SETTINGS ................................................................................................................75 Follows Playhead...................................................................................................................75 Pages with Playhead ..............................................................................................................75 Show Subframes .....................................................................................................................75 8 ViewNet MX Version 1.1/1.5 Owners Manual ViewNet MX Show Feet-Frames..................................................................................................................75 Show Splice Points .................................................................................................................76 Show Volume Automation ......................................................................................................76 Show Mute Automation ..........................................................................................................76 View Whole Project ................................................................................................................76 CHAPTER 6 MACHINE SETTINGS........................................................................................77 OPENING THE MACHINE SETTINGS WINDOW ...............................................................................77 Opening Machine Settings from the Network View................................................................77 Opening Multiple Machine Settings Windows........................................................................77 SECTIONS OF THE MACHINE SETTINGS WINDOW.........................................................................78 Legend for Numbered Tabs ....................................................................................................78 Working With Settings ............................................................................................................79 Settings Application Controls.................................................................................................79 Selecting Machines.................................................................................................................79 Original Machine.............................................................................................................................. 79 Sync Group / Machine Set ................................................................................................................ 79 Apply Changes .......................................................................................................................79 Apply All Settings ...................................................................................................................79 Settings Files ..........................................................................................................................79 Save .................................................................................................................................................. 80 Open ................................................................................................................................................. 80 Revert ............................................................................................................................................... 80 000 BASIC SETUP ........................................................................................................................81 Control Mode .........................................................................................................................81 Local/TL-Bus.................................................................................................................................... 81 Timecode Chase................................................................................................................................ 81 MTC Chase....................................................................................................................................... 82 Varispeed.......................................................................................................................................... 82 Frame Reference ....................................................................................................................82 Automatic ......................................................................................................................................... 82 Video ................................................................................................................................................ 82 Sample Reference ...................................................................................................................82 Internal/Frame .................................................................................................................................. 82 Ext Wordclock.................................................................................................................................. 82 Digital In........................................................................................................................................... 82 Sample Reference Status ........................................................................................................82 Timecode Type .......................................................................................................................83 Sample Rate............................................................................................................................83 Varispeed Rate .......................................................................................................................83 100 BUS CONTROL ......................................................................................................................84 TL-Bus Request ......................................................................................................................84 TL-Bus Assigned.....................................................................................................................84 Ident Request..........................................................................................................................85 Ident Assigned ........................................................................................................................85 200 TRANSPORT ..........................................................................................................................86 Record Mode ..........................................................................................................................86 Non-destructive ................................................................................................................................ 86 Tape Mode........................................................................................................................................ 86 Loop Mode .............................................................................................................................86 Loop Record ...........................................................................................................................87 Pre-roll...................................................................................................................................87 Post-roll..................................................................................................................................87 Tape Mode Start.....................................................................................................................87 Tape Mode Length..................................................................................................................87 Rollback Length .....................................................................................................................87 ViewNet MX Version 1.1/1.5 Owners Manual 9 ViewNet MX 300 MIDI ....................................................................................................................................88 MIDI Device ID......................................................................................................................88 400 INPUT/OUTPUT .....................................................................................................................89 Inputs......................................................................................................................................89 Analog .............................................................................................................................................. 89 Digital In........................................................................................................................................... 89 2CH In .............................................................................................................................................. 90 Analog I-8 ..............................................................................................................................90 Digital 1-8 ..............................................................................................................................90 Digital In Rate Conversion ............................................................................................................... 90 2CH In Rate Conversion................................................................................................................... 90 2 CH Input Source ............................................................................................................................ 90 2 CH Output Select.................................................................................................................90 2 CH Output Encoding ..................................................................................................................... 90 500 AUDIO CONTROLS ................................................................................................................91 Crossfade................................................................................................................................91 Gapless Punchout...................................................................................................................91 600 RESERVED FOR FUTURE ENHANCEMENTS ............................................................................91 700 DISK .....................................................................................................................................92 Disk Encoding ........................................................................................................................92 Record Disk SCSI ID..............................................................................................................92 Record Disk Status .................................................................................................................93 Target Disk Cleanup ..............................................................................................................93 Disks Mounted........................................................................................................................93 800 PROJECT ...............................................................................................................................93 Project Name..........................................................................................................................93 Track Prefix............................................................................................................................94 900 SYSTEM ................................................................................................................................94 Store/RecallUser Settings.......................................................................................................94 Date and Time ........................................................................................................................94 Machine Name .......................................................................................................................95 Software Version ....................................................................................................................95 MACHINE INFORMATION .............................................................................................................95 Machine Name .......................................................................................................................95 Description (short) .................................................................................................................95 Description (long) ..................................................................................................................95 Backup MX Software..............................................................................................................95 Update MX Software ..............................................................................................................96 MULTI-MACHINE .........................................................................................................................96 Starting Multi-machine Mode ................................................................................................96 Selecting the Multi-machine Group .......................................................................................97 Multi-machine Mode Indicator ..............................................................................................97 Exiting Multi-machine Mode..................................................................................................97 Multi-Machine Behavior ........................................................................................................97 Propagate Edit Tracks....................................................................................................................... 98 Propagate In/Out............................................................................................................................... 98 Propagate In/Out............................................................................................................................... 98 Propagate In/Out............................................................................................................................... 98 Propagate In/Out............................................................................................................................... 98 CHAPTER 7 MACROS ..............................................................................................................99 MACROS MENU ...........................................................................................................................99 Start Macro Recording...........................................................................................................99 Stop Macro Recording ...........................................................................................................99 Naming Macros ......................................................................................................................99 MANAGE / PLAY MACROS .........................................................................................................100 10 ViewNet MX Version 1.1/1.5 Owners Manual ViewNet MX Single nonspecific machine macros .....................................................................................101 Multiple specific machine macros ........................................................................................101 Import...................................................................................................................................102 Export...................................................................................................................................102 Delete ...................................................................................................................................103 Function Key Assign.............................................................................................................103 Checking Macro – Function Key Assignments............................................................................... 103 Play ......................................................................................................................................103 Play To Destination..............................................................................................................103 Original Machine............................................................................................................................ 103 Sync Group / Machine Set .............................................................................................................. 103 CHAPTER 8 HELP MENU ......................................................................................................104 THE HELP MENU .......................................................................................................................104 ABOUT VIEWNET AUDIO ...........................................................................................................104 NEXT AVAILABLE IP .................................................................................................................104 TIMECODE CALCULATOR ...........................................................................................................105 Entering Numbers In The Timecode Calculator...................................................................105 Arithmetic Operator Choice.................................................................................................105 TC Calculator Parameter Choices.......................................................................................105 Timecode Type ............................................................................................................................... 105 Sample Rate.................................................................................................................................... 105 Show Subframes ............................................................................................................................. 105 Show Feet-Frames .......................................................................................................................... 105 Time Field ............................................................................................................................105 CHAPTER 9 KEYBOARD SHORTCUTS..............................................................................106 CHAPTER 10 EDITING COMMAND....................................................................................107 ViewNet MX Version 1.1/1.5 Owners Manual 11 ViewNet MX Chapter 1 ViewNet MX Installation About ViewNet MX ViewNet MX is a graphical interface network created by TimeLine for the TASCAM MX-2424. It provides a graphical interface application which runs on personal computers using the Apple Macintosh or Microsoft Windows (98/NT), operating systems. This interface provides for viewing and editing of audio tracks loaded on the TASCAM MX-2424 and also provides access to all machine and system setup parameters. ViewNet MX works via a 100 Mbps (Megabit per second) Fast Ethernet connection linking the MX2424 and the 100Mbit Ethernet interface port of computers on the network running the ViewNet MX application. Steps to Complete ViewNet Setup Complete the following steps, explained in detail in this chapter, to operate ViewNet MX. 1) 2) 3) 4) Set the IP address, IP Net Mask, and IP Gateway settings for MX-2424 machines. Install the ViewNet MX application in the computer(s) that will be on the network. Set up TCP/IP settings on all computers running the ViewNet MX application. Connect the MX-2424(s) and Computer(s) using cat 5 UTP Ethernet cable and Fast Ethernet hubs, as appropriate. See Chapter 2, Setting Up The Network, for more information on Ethernet cables and connections, including hubs, switches, and routers. Network Configuration for the MX-2424 Before the ViewNet MX application can work with a TASCAM MX-2424, the proper network settings must be configured on the MX-2424. Once the network settings have been configured, the MX-2424 must be rebooted before these settings will take effect. There are three Setup Menu items on the MX2424 related to ViewNet network configuration. IP Address The IP (Internet Protocol) address for each machine must be entered manually at the front panel of the MX-2424 before that machine can be seen by the network and appear as a machine to the ViewNet MX software application. To set the IP address, press Setup on the front panel of the MX-2424, and use the wheel or arrows to move to Setup menu 950. 01234567890123456789 LCD characters indicate: 950 IP Address *000.000.000.000 Top: (menu name) Bottom:(shows IP Address) 12 ViewNet MX Version 1.1/1.5 Owners Manual ViewNet MX Setting the IP Address Enter the value for the IP Address by pressing Trim then using the Shuttle Ring to move the cursor and the Up/Down Arrows or Scrub Wheel to change the value of a single digit. When the desired value is entered press Yes to save it and reboot the MX-2424 for the change to take effect. Important Rules for IP Addresses It is important to make sure the first nine numbers of the IP address should be the same for all host machines on that network, and the final three numbers should set to a number which is unique for each device on the network. If the MX-2424 is to be used in a facility where IP addresses are managed by a network administrator, that person should assign and log the IP addresses for each MX-2424 and ViewNet MX computer according to the address scheme for the facility. IP addresses for MX-2424’s can always be changed by using Setup menu 950. Using the Default IP Address The Default network address can be safely used as a valid IP address for host machines on self-contained ViewNet MX networks. A self contained network is one that is not being used for access to the Internet and which will be dedicated to running ViewNet MX within a facility. If your ViewNet MX network will be connected to the Internet, you should be using your facility’s assigned IP addresses, not the default IP addresses. Next Available IP If the Default network address is used, the ViewNet MX application can see which unique host IDs have been used by MX-2424 units on the network and suggest the next valid host IP address for new units which will be added to the network. This function is listed under the ViewNet MX Help menu. ViewNet MX Version 1.1/1.5 Owners Manual 13 ViewNet MX Reserved IP Numbers When looking at the network for the next available IP address, the system will only see the IP addresses in use by MX-2424’s which are turned on and connected to the network, and will not detect the IP addresses of other host computers running the ViewNet MX application. The automatic next available IP function views IP host address numbers 1 through 15 as automatically reserved for computers on the network running the ViewNet MX application. It is therefore recommended that computers on the ViewNet MX network using the default IP address set the last three numbers of the IP address to a value between 1 and 15 in order for this scheme to work. This scheme will only report as available, IP address numbers whose last three numbers have a value of 16 and above and are not currently being used by an MX-2424. To summarize, when using the default IP address system for a ViewNet MX network, allocate IP address numbers according to this plan: Host Computers (ViewNet MX application) 192.168.001.001 through 192.168.001.015 MX-2424’s 192.168.001.016 through 192.168.001.254 Errors Setting Next Available IP Address If the IP address of the computer requesting the next available IP is set to a host address number higher than 15, the system will not be able to suggest the next available IP number and will give the following message. IP Net Mask Use this field to enter the IP Net mask. Set this value to 255.255.255.000 unless your network administrator advises that you should use a different setting. 01234567890123456789 LCD characters indicate: 951 Ip Net Mask *255.255.255.000 Top: (menu name) Bottom:(IP Net Mask address) 14 ViewNet MX Version 1.1/1.5 Owners Manual ViewNet MX IP Gateway Use this field to enter the IP Gateway if the ViewNet MX network is part of a larger network which uses a Gateway. If there is no Gateway in use, there is no need to enter any data in this menu. 01234567890123456789 LCD characters indicate: 952 Ip Gateway *000.000.000.000 Top: (menu name) Bottom:(IP Gateway address) ViewNet MX Version 1.1/1.5 Owners Manual 15 ViewNet MX Installing the ViewNet MX Application The ViewNet MX application is a software program designed to run on a personal computer. Each instance of the ViewNet MX application installed on a network computer operates independently and can view any MX-2424 or show an overview of the entire network. Installing ViewNet MX on a Macintosh To install ViewNet MX on a Macintosh. 1. Insert the CD-ROM included with the MX-2424 into your computer’s CD-ROM drive. 2. Open the CD-ROM and open the folder named “ViewNetMX1_1 Install” 3. Copy the folder named “ViewNet” from the CD-ROM to your computer’s hard drive by dragging its icon to your computer’s Hard Drive icon. 4. Double-click the MRJ Installer icon on the CD-ROM. This will place an MRJ Install icon on your desktop. 5. Open the MRJ Install icon from your desktop, inside will be an “Installer” icon. Double-click that icon to install the Java Runtime Environment. Accept all default choices by pressing AGREE in the License screen and pressing INSTALL in the MRJ Installer screen. 6. Once the MRJ installation is complete, drag MRJ Install icon on the desktop into the trash and remove the CD-ROM from the computer. 7. Access Menu 950 on the MX-2424 by pressing SETUP, the numerical key “0” then the Down Arrow Key six times. There will be an IP Address displayed similar to this: 192.168.100.001. NOTE: Your number may be different but will follow the XXX.XXX.XXX.XXX rule. 8. Open the TCI/IP control panel which is accessible under the Apple menu in the Control Panels folder. 9. Set the Connect via option to “Ethernet” and the Configure option to “Using Mac IP Manually”. 10. Enter the first three groups of numbers from Menu 950 on the MX-2424 into the IP Address field exactly as they are displayed on the MX-2424. Enter a different value for the last group of numbers. Example: If Menu 950 displays 192.168.100.001 then the IP Address field on the computer should display 192.168.100.XXX where XXX is anything except 001. 11. Close the TCP/IP control panel, saving changes and restart the computer. 12. Double-click the ViewNet icon in the folder on your hard drive that you copied from the CD-ROM in step #3 above to run ViewNet. You will see the ViewNet Network screen with connected machines listed on the right. Click the Connection box next to the desired machine to activate it. 16 ViewNet MX Version 1.1/1.5 Owners Manual ViewNet MX Installing ViewNet MX on a Windows Computer To install ViewNet Audio on a Windows PC. 1. 2. 3. 4. 5. 6. 7. 8. 9. 10. 11. 12. 13. 14. 15. 16. 17. 18. 19. Insert the CD-ROM included with the MX-2424 into your computer’s CD-ROM drive. Open the CD-ROM and double-click on the file named “ViewNet1_15MX-Win”. In the space provided type C:/Windows/Desktop Press Unzip The file will extract to your Windows Desktop and you will see an information box that 78 files have been unzipped successfully. Press OK and Close the WinZip Self-Extractor dialog box. You may remove the MX-2424 CD-ROM On your desktop will be a folder named ViewNet1_15 MX Install. Open that folder and double-click on the ViewNet Install icon for Windows 98 or the ViewNet Install NT icon for Windows NT. You will see a black ViewNet Install screen and indication that a total of 76 files have been copied. You will be prompted to proceed with the installation of the Java Runtime Environment 1.1.8. Press YES Accept all default choices by pressing NEXT in the Welcome screen, YES in the Software License screen, NEXT in the Select Components screen and NEXT in the Start Copying Files screen. When Java has finished installation press FINISH in the Setup Complete screen. This will take you back to the ViewNet Install screen, press the Space bar and close the window. You may delete the ViewNet1_15 MX Install folder on your desktop. Access Menu 950 on the MX-2424 by pressing SETUP, the numerical key “0” then the Down Arrow Key six times. There will be an IP Address displayed similar to this: 192.168.100.001. NOTE: Your number may be different but will follow the XXX.XXX.XXX.XXX rule. On your computer’s desktop right click the Network Neighborhood icon and select Properties. Highlight the TCP/IP icon that corresponds to the Ethernet card installed in your computer and press Properties. Select “Specify an IP address and enter the first three groups of numbers from Menu 950 on the MX2424 into the IP Address field exactly as they are displayed on the MX-2424. Enter a different value for the last group of numbers. Example: If Menu 950 displays 192.168.100.001 then the IP Address field on the computer should display 192.168.100.XXX where XXX is anything except 001. On the computer enter 255.255.255.000 as the value for Subnet Mask. Press OK twice and restart the computer. When the computer has restarted run ViewNet MX by double-clicking its icon on the Desktop. You will see the ViewNet Network screen with connected machines listed on the right. Click the Connection box next to the desired machine to activate it. ViewNet MX Version 1.1/1.5 Owners Manual 17 ViewNet MX Configuring Computer Network Settings To use the ViewNet MX application with an MX-2424, the computer running the ViewNet MX application must be configured with the proper IP (Internet Protocol) address and other network settings. Installing A Network Interface Card in the Computer A Windows PC running ViewNet MX must have a properly functioning Network Interface Card (NIC) installed before the ViewNet MX software will work. A NIC configured for operation with Fast Ethernet 100 Mbps (100BaseT) networks is required for proper function of ViewNet MX. Setting Windows TCP/IP Properties Right-click on the desktop icon “Network Neighborhood,” and select “Properties” from the pop-up menu. After clicking on properties, the Properties window will open. Click on the “Configuration” tab to bring the configuration page to the front. Highlight the correct TCP/IP for your NIC and click on Properties to open the TCP/IP Properties window. 18 ViewNet MX Version 1.1/1.5 Owners Manual ViewNet MX TCP/IP Properties Window The TCP/IP Properties Window has several tabs used for setting up various aspects of the TCP/IP network configuration for the computer. Click on the IP Address tab, click the button for “Specify an IP address” and enter an appropriate IP address in the field provided. Please note that no two computers may share an IP address. See the discussion on IP addresses earlier in this chapter for more information. Use the Subnet Mask field to enter the IP Net mask. Set this value to 255.255.255.000 unless your network administrator advises that you should use a different setting. ViewNet MX Version 1.1/1.5 Owners Manual 19 ViewNet MX Setting IP Gateway Address If you plan to connect two or more networks then you must enter a gateway IP address. To enter a gateway IP address, click on the “Gateway” tab and enter the appropriate address in the provided field. After the new number has been entered, click on “Add”. The new gateway address will then appear in the installed gateways box. If you are unsure about this please contact your network administrator. Fig. 8 20 ViewNet MX Version 1.1/1.5 Owners Manual ViewNet MX Windows NT 4.0 Network Configuration It is a good idea to have the Windows NT CD-ROM available when changing Windows network settings, because Windows may require that certain files be copied from the CD to the hard drive. The following assumes a dedicated Ethernet network of MX-2424’s and computers running ViewNet MX software. When running MX-2424’s or ViewNet MX on an existing local area network, please consult the network administrator for assistance in setting up the computer network. Right click on the desktop icon “Network Neighborhood,” and select “Properties” from the pop-up menu. ViewNet MX Version 1.1/1.5 Owners Manual 21 ViewNet MX Windows NT Network Window This will open the Windows NT Network window. Click on the “Protocols” tab. Make sure the TCP/IP Protocol installed. If it is not, click on “Add” to open the window called Select Network Protocol and then select TCP/IP from the available choices. Complete the installation of the TCP/IP protocol, then return to the Network window. 22 ViewNet MX Version 1.1/1.5 Owners Manual ViewNet MX Windows NT Network Adapter Selection In the Windows NT Network window, click on the “Adapters” tab. You must have a working network adapter in your hardware profile (in this example the Intel 82557-based 10/100 Ethernet PCI Adapter is installed). If you do not, please consult your Windows NT documentation or see your network administrator for help installing your Network Interface hardware. ViewNet MX Version 1.1/1.5 Owners Manual 23 ViewNet MX Windows NT TCP/IP Properties Select the Protocols tab in Network window, then select TCP/IP and click on Properties. This will open the TCP/IP Properties window. Click on the IP Address tab, click on “Specify an IP address” and enter an appropriate IP address in the field provided. Please note that no two computers may share an IP address, and that unpredictable behavior is likely to occur if they do. See the discussion on IP addresses earlier in this chapter for more information. Use the Subnet Mask field to enter the IP Net mask. Set this value to 255.255.255.000 unless your network administrator advises that you should use a different setting. If you plan to connect two or more networks then you must enter an IP Gateway address. To designate a gateway address, simply move the cursor to the Default Gateway field and enter the appropriate numbers. 24 ViewNet MX Version 1.1/1.5 Owners Manual ViewNet MX Apple Macintosh Network Configuration The following assumes a dedicated Ethernet network of MX-2424’s and computers running ViewNet MX software. When running MX-2424’s or ViewNet MX on an existing local area network, please consult the network administrator for assistance in setting up the computer network. To configure networking support on the Macintosh, follow these steps. Click on the apple menu in the upper left corner of the menu bar. From the pull down menu select “Control Panels” and then select “TCP/IP” within the Control Panels menu. ViewNet MX Version 1.1/1.5 Owners Manual 25 ViewNet MX The Macintosh TCP/IP Window From the TCP/IP window, select “Ethernet” in the box labeled “Connect Via.” In the “Configure” box choose “Manually.” Enter an appropriate IP address in the field provided. Please note that no two computers may share an IP address, and that unpredictable behavior is likely to occur if they do. See the discussion on IP addresses earlier in this chapter for more information. Use the Subnet Mask field to enter the IP Net mask. Set this value to 255.255.255.000 unless your network administrator advises that you should use a different setting. If you plan to connect two networks or more then you must enter a Router IP address (Gateway address). To specify a router IP address, move the cursor to Router Address box and enter the appropriate number. 26 ViewNet MX Version 1.1/1.5 Owners Manual ViewNet MX Chapter 2 Setting Up The Network This chapter gives a brief overview of the Fast Ethernet (100BaseT) networking protocol used by ViewNet MX and discusses some details concerning implementation of a 100 Mbps (Megabit per second) Ethernet network. As an aid to further research, links to additional information which can be found on the World Wide Web are also provided. Important Network Set Up Considerations Once the ViewNet MX software has been installed and the IP addresses have been set, the components must be physically connected before the network can be used. If the MX-2424 is being connected directly to the computer, a special type of Ethernet cable, called a crossover cable, must be used. To connect an MX-2424 or computer to an Ethernet hub, switch, or router, use a normal Ethernet cable. For more detailed information, see the section in this chapter called Ethernet Cables and Connectors. If the ViewNet MX network is going to be used in conjunction with an existing company Ethernet network, it is also vitally important that all ViewNet MX computers and MX-2424’s be located behind a network router to segregate the ViewNet MX components from the rest of the network. Please review the section in this chapter called Using ViewNet MX With Existing LANs, and the sections on network switches, routers, and hubs for more information. Terminating the Network Connection To properly terminate the network connection, exit the ViewNet Audio application, or turn the MX-2424 off before unplugging the cable. A physical disconnection, i.e., unplugging the cable from the back of either the MX-2424 or the computer (or an associated network hub or router), is not an acceptable means of breaking the connection, and is strongly discouraged. Doing so may require a restart of the MX-2424, the computer running ViewNet MX, or both, in order to restore normal operation. Ethernet Cables and Connectors The 100 Mbps Fast Ethernet used by ViewNet MX has a different set of cabling rules from 10 Mbps Ethernet. Fast Ethernet requires Category 5 cabling. Some existing installed networks, however, may have Category 3 cabling or poorly installed Category 5 cabling. Such cabling is adequate for 10 Mbps Ethernet, however, it can result in dropped or corrupted packets, network noise, and even failure when called upon to transmit Fast Ethernet. To achieve the best performance, make sure all network cabling meets Category 5 standards. 100Base-TX Specifications Maximum Stations per Segment: Cable: Maximum Length of Segments: 1024 2-Pair Category 5 UTP cable 100 meters ViewNet MX Version 1.1/1.5 Owners Manual 27 ViewNet MX Ethernet Patch Cable In a standard Fast Ethernet configuration with more than twodevices, a hub is used to provide a central means of connecting the units to each other. The cables used to connect each of the devices to the hub are standard Ethernet patch cables. These are typically available at computer stores in a variety of lengths. Keep in mind that only cat 5 UTP type cable should be used with ViewNet MX. These cables are wired directly through pin to pin.For direct connection between two Ethernet devices where no hub is used, see the next section on crossover cables. Ethernet Crossover Cable Wiring When connecting two Ethernet devices together directly (without a Hub), a crossover cable must be used. This type of cable is available from TASCAM or most computer stores. Ethernet Hubs When more than one MX-2424 is used in a network configuration with ViewNet MX, an Ethernet hub is required to connect the individual MX-2424’s and computers running the ViewNet MX software into a networked system. There are many commercially available hubs, which can be used with ViewNet MX. Any computer network hub that is a 100BaseT hub (Fast Ethernet) should work. Using ViewNet with existing LANs It is not recommended that the ViewNet MX network be run on the same physical network as a regular business LAN (Local Area Network) which also carries other network traffic such as company email and Internet access. Running the ViewNet MX network under these circumstances may adversely affect the speed of the network and the responsiveness of the ViewNet MX application. If the ViewNet MX network must coexist with a company LAN, it is advisable that it be segregated from the rest of the network traffic by means of a network switch or router which isolates traffic of the two sections of the network to minimize interference. Check with the Information Systems manager or Network manager for your company network to properly configure such systems. 28 ViewNet MX Version 1.1/1.5 Owners Manual ViewNet MX Chapter 3 The Network Screen When the ViewNet MX application is first started, it will open to the Network screen. This screen shows a list of all MX-2424’s currently operating and connected to the network. If no machines are connected, then nothing will appear in the list, most menu items will be grayed and unavailable, and the Project View screen can not be accessed. Click the button labeled Network (upper right corner) at any time to return to the Network View screen. Sections of the Network Screen The Network Screen consists of the following sections: These are described in detail below. Machine Status Information Columns When a network broadcast is received from one or more MX-2424’s, columns in the Network screen will show a list of setup parameters for each machine. To change any of the Setup parameters, select a machine by clicking in the row of settings, then choose the “Settings…” item in the Machine menu to open the Machine settings window. If it is desired to broadcast new settings to multiple machines change the “Applied to:” button from “Original machine” to “Machine Set ” then click on Apply Changes to apply only changes that have been made since the Machine Settings window was opened or Apply All to apply all current settings to the selected machine(s). Name This is the Machine Name, as entered in Setup Menu 940 of the MX-2424. The name can also be entered by using the Machine Information window which is available in the Machine menu of ViewNet. Ident This is the machine ID number which is assigned in Setup Menu 111 of the MX-2424. This number will have a value between 01 and 32, and must be unique for each MX-2424 connected together via the TLBus. This number can be changed by using the Ident Request item under the 100 tab in the Machine Settings window. Serial Number This displays the unique serial number of an MM series machine. This number is not displayed for the MX-2424. ViewNet MX Version 1.1/1.5 Owners Manual 29 ViewNet MX Type This field shows that the connected machine is an MX-2424. Project This is the name of the currently loaded Project, as indicated in Setup Menu 800 of the MX-2424. Note that if no Project is loaded, this will show the default name “MX Project.tl”. This name can also be changed by using the Project Name item under the 800 tab in the ViewNet MX Machine Settings window Create a new project by using the “New Project…” item in the File menu. This menu item is only available when in the Project View Screen. Sync Group This field is only used by MM series machines.. Bus status This field shows the current status of the machine on the TL-Bus (Off, Master, or Slave). This status can be changed by using the TL-Bus Request item under the 100 tab in the ViewNet Machine Settings window or Menu 110 on the MX-2424. If there is only one machine, activating the bus as either slave or master will show “master” in this field (because there is nothing to slave to). Sample Rate This field shows the digital sample rate of the MX-2424 as assigned in Setup Menu 005 of the MX-2424. This value can be changed by using the Sample Rate item under the 000 tab in the ViewNet Machine Settings window. Frame Rate This field shows the Timecode Type of the MX-2424 as assigned in Setup Menu 004 of the MX-2424. This value can be changed by using the Timecode Type item under the 000 tab in the ViewNet Machine Settings window. Machine Sets This field is only used by MM series machines. 30 ViewNet MX Version 1.1/1.5 Owners Manual ViewNet MX Network View Filters Since ViewNet MX works via a Fast Ethernet connection to all machines on the network, it can view all machines connected. In a facility with machines assigned to multiple studios, it may be useful to have a particular ViewNet MX application show only a subset of all available machines in the Network Screen and in the System Status Panel. There are two filters for selecting which machines will appear in the list. These Network View Filters are placed directly underneath the menu bar in the Network Screen. The list of machines shown will be filtered through both of these before appearing in the Network Screen and the System Status Panel. Sync Group View Filter Machine Set View Filter Sync Group Filter This is a function relevant only to MMR series machines and should always be left at the “All” setting when using MX-2424’s. Viewnet will not communicate properly with the MX2424 should this setting be changed. Machine Set Filter The list of machines can also be filtered to show only those units belonging to a specified Machine Set. A Machine Set is any set of machines selected by the user from among all machines available on the network and then saved as a named Machine Set. Once created, these will appear in a pop up list of available Machine Sets as shown here. ViewNet MX Version 1.1/1.5 Owners Manual 31 ViewNet MX Defining Machine Sets To define a Machine Set, first select the machines to be included in the set by clicking anywhere on the Machine Status Information row for each machine using Shift + click to select a range (group) of machines, or Control + click to select separate (non-adjacent) machines. Once the machines are selected, open the window labeled “Define set…” from the File menu, then type a name for the set and click OK. The Machine Set will be created and will now appear in the list of available Machine Sets. When this item is selected as a Network View filter, only machines belonging to the defined Machine Set will be listed in the Network View Screen and in the System Status Panel. Machine Sets are saved as part of the ViewNet MX Preferences file. For more information on ViewNet MX Preferences, see the section in this chapter entitled ViewNet MX Preference Files. To delete Machine Sets open the Preferences windows under the File Menu, select a Machine Set by clicking on it and press Delete. There is no Undo for this. 32 ViewNet MX Version 1.1/1.5 Owners Manual ViewNet MX Stage Machines Pre-Filter In Preferences As a safety measure for facilities which have more than one room using MX-2424’s on the ViewNet MX network, a pre-filter for machine sets is provided in the Preferences window. The drop down list labeled Stage Machines shows a list of all machine sets that are part of the current preferences settings. The choice labeled All in the machine sets filter in the Network Screen will use the machine set chosen here to be all machines that can be viewed on the network from this particular computer running the ViewNet MX application. Other computers on the network would have their own separate list of machine sets. The Stage Machines filter in Preferences will prevent an operator from accidentally choosing all machines from the Network Screen and affecting a machine in another room. By setting this preference here, the machines which can be chosen from the Network Screen will be limited to only those machines which are part of the chosen stage machine set. System Status Panel To the right of the Network screen is the System Status Panel which shows a brief description of each machine, the Online status of the machine and which machines (if any) have a direct network connection established. This panel is always present and active for both the Network Screen and the Project View (shown here). ViewNet MX Version 1.1/1.5 Owners Manual 33 ViewNet MX Description The machine description to the right of the Conn and online buttons in the System Status Panel can be entered by the user in the Machine Information window, which is available in the Machine menu of ViewNet. Type the description which will appear in the System Status Panel in the space labeled Description (short). After the description is entered, close the Information window and the description will appear on the right side of the System Status Panel for the selected machine. Machine Information is saved as a part of the ViewNet Preferences file, and will not affect the descriptions shown at other ViewNet MX workstations. Online Click in this box to toggle the Online status of the machine between Online and Offline. The color of the box indicates the current status of the machine. • • • • Black indicates the machine is offline. Orange indicates the machine is online. Green indicates the machine is online and locked to the sync source. Red indicates the machine is locked and in record. The keyboard shortcut Ctrl + J can be used to toggle the Online status of all selected machines simultaneously. If less than half of the selected machines are Online, using this shortcut will put all of them Online. If half or more of the selected machines are Online, using the shortcut takes all of them offline. 34 ViewNet MX Version 1.1/1.5 Owners Manual ViewNet MX Connection Box The left column of the System Status Panel is labeled Conn (abbreviation for Connection) and shows a box for each machine listed. This box operates as both a status indicator and also as a command button. Click in this box to establish an active connection directly to an MX-2424 and open the Project View Screen (EDL view) for that machine. When an active connection is established with a particular MX2424, this box will be colored blue. When an active connection is not currently established with this MM series machine, the Connection box will remain light gray. When multiple machines are displayed in the System Status Panel, the Conn box color is also used to indicate which machine currently has or most recently had an active connection to ViewNet Audio. Dark gray indicates the machine was the most recent to have an active connection, but does not have one now. Remember that clicking on any Conn box will always automatically open the Project View Screen for that MX-2424. • • • Blue indicates active connection established with this machine Light Gray indicates no active connection established with this machine Dark Gray indicates this machine had the most recently established active connection, but has no current active connection The keyboard shortcut Ctrl + Any Numerical Key (1-9) can be used to toggle the Connection status of any machine opening that machine’s Project View Screen. Active Connections Opening certain information or settings windows will also cause ViewNet to establish an active connection even when the Project View Screen is not open. These active connections are always indicated by the blue color of the Conn box for the machine which has the connection. Opening the following windows will always open an active connection to an MX-2424: • • • Machine Settings Load Project/track Utilities Active Connections In Multi-Machine Operation When ViewNet is working with more than one machine, actions are transmitted to all machines that are part of the network group. To do this, ViewNet establishes an active connection with each machine in turn, executes the command, closes the connection, then moves on to the next machine until the commands are executed across all machines. While this is occurring, the system status panel will indicate each active connection as it occurs by switching the Conn box from gray to blue then back again. This provides useful feedback to the user which shows each active connection as it occurs and is then terminated. ViewNet MX Version 1.1/1.5 Owners Manual 35 ViewNet MX Active Connections In Multiple Specific Machine Macros Multiple specific machine macros can be created by including the action of switching to a different machine while building the macro. These macros will establish a momentary active connection to each machine included in the macro when it is run. For example, a macro which disarms all tracks for recording on two different machines will disarm the first machine, then establish an active connection to the second machine, disarm those tracks, then close the active connection to that machine. While this is occurring, the system status panel will indicate each active connection as it occurs by switching the Conn box from gray to blue then back again. This behavior helps to illustrate that a multiple machine macro executes sequentially across machines, not simultaneously, thus cueing the operator to give the macro time to run across all machines. The Preferences Window The Preferences window contains user-selectable settings that govern the behavior of certain aspects of ViewNet MX. The Preferences window can be opened from the File menu. This is a screenshot of the Preferences window for ViewNet MX. The Preferences window are described in detail in the following sections. 36 ViewNet MX Version 1.1/1.5 Owners Manual ViewNet MX Net Delay Compensation Factors such as the number of machines using the network and the total volume of network traffic can influence the responsiveness of an MX-2424 to the ViewNet MX application. This in turn can influence the relationship between what is seen on the screen in ViewNet MX and the sound produced by the MX2424. The Net Delay Compensation item allows the user to adjust this relationship so that, for example, an audio clip shown in the Project View Screen will be seen to pass by the playhead in perfect synchronization with the sound. The default setting will probably work well for most systems, but the user can experiment with this control to find the optimum setting. Machine Offline Warning It is often important to know when a machine goes offline, and ViewNet can be set to bring up a warning message if this happens. The Machine Offline Warning item in the Preferences window allows the user to set criteria for when the warning will be shown. Always This setting will always bring up a machine offline warning if any machine on the entire network goes offline. Stage This setting will only bring up a machine offline warning if a machine belonging to the currently active Stage machines pre-filter in the Preferences window goes offline. Machines not part of the currently selected Stage machine pre-filter will not bring up the machine offline warning. Never This setting will ignore the offline status of all machines on the network and never bring up a machine offline warning. ViewNet MX Version 1.1/1.5 Owners Manual 37 ViewNet MX Nudge Amount This is the amount of time by which selected edit regions or clips in the Project View Screen will be moved when the Nudge left or Nudge right commands from the Edit menu are used. Coarse Nudge Amount This is the amount of time by which selected edit regions or clips in the Project View Screen will be moved when the Coarse nudge left or Coarse nudge right commands from the Edit menu are used. Machine Sets List This list shows all currently available machine sets. Click on the name of a machine set to select it for deleting. Creating Machine Sets For information on creating machine sets, see the section in this chapter labeled Defining Machine Sets. Deleting Machine Sets To delete a machine set from the current preferences file, first select the machine set by clicking on the name of the set to be deleted, then press the Delete key. Multi-Machine Behavior To enable Multi-Machine Mode, select Start multi-machine from the Machine menu, select the machine or machine set to be included and press Start. The Preferences window has two items relating to the Multi-machine mode of operation. When the Multi-machine mode is on, operations and commands issued for one machine are automatically propagated to all other machines which are part of the Multi-machine group. Multi-machine mode operation is discussed in more detail at the end of Chapter 7, Machine Settings. Creating New Projects When operating in Multi-Machine Mode and a new project is created on any machine on the network, that new project will be created on all connected machines. Before creating a new project in this manner, it is extremely important to verify that a project with the desired name of the new project does not exist on any machine on the network. 38 ViewNet MX Version 1.1/1.5 Owners Manual ViewNet MX Propagate Edit Tracks This setting governs the conditions under which edit actions and the selection or de-selection of track edit buttons is propagated to other machines in the Multi-machine group when Multi-machine mode is on. • • • Never – don’t send edit to other machines On Modify – only send edit when a change is made On Edit Operation – only send edit when an edit occurs Propagate In/Out This setting governs the conditions under which the action of setting In and Out marks is propagated to other machines in the Multi-machine group in Multi-machine mode. • • • Never – don’t send In/Out selection to other machines On Modify – only send In/Out when a change is made On Edit Operation – only send In/Out when an edit occurs Machine Sets Server IP This function is used by TASCAM MM-Series machines and should not be changed when operating ViewNet MX. ViewNet MX Version 1.1/1.5 Owners Manual 39 ViewNet MX ViewNet Default Preferences File The ViewNet MX application always maintains a default Preferences file. Whenever ViewNet MX is started, the settings stored in this default preferences file are used. This default Preferences file stores all information which is entered in the Preferences window. Any changes made to items in the Preferences window are written immediately to this default Preferences file on disk as soon as the change is made. Saving and Opening Named Preferences Files It is possible to create, save, and open named preference files. These files can be stored anywhere and may be copied to floppy disk or the network so that preference files can be duplicated on different ViewNet MX systems. Opening Preferences Files Click the Open button in the Preferences window to browse for a preferences file. Select the desired preferences file and click Open. The preferences file will open and these values will now be stored in memory. These preferences will be written to disk as the current values for the preferences and automatically recalled the next time ViewNet is started. 40 ViewNet MX Version 1.1/1.5 Owners Manual ViewNet MX Saving Preference Files To save the current preferences settings as a named preferences file, click Save. This will open a Save preferences as… dialog box. Name the preferences file and save. To update an existing preferences data file, select the named file you wish to update, click Save, then answer yes when the program asks if you want to replace the existing file. Revert to Default To return to the default preferences values, click Revert. The default preferences values are: • • • • • • • Net delay compensation Machine offline warning Nudge amount Coarse nudge amount Propagate Edit Tracks Propagate In/Out Stage Machines Almost all the way to the left Stage 00:00:00:01 H:M:S:F 00:00:01:00 H:M:S:F Never On edit operation All ViewNet MX Version 1.1/1.5 Owners Manual 41 ViewNet MX Chapter 4 Projects and Tracks The Load Project/ Track Window Projects and tracks can be loaded into an MX-2424 by using the “Load project/track” window. This window can be opened from either the Project view screen or the Network view screen. To load Projects or individual tracks into the MX-2424 from the Project view screen, simply choose “Load project/track…” from the File menu, or press Ctrl+O from the keyboard. Opening Load Project/Track from the Network View To open the Load project/track window from the Network View screen, first select a machine by clicking anywhere in the row of settings for the desired machine and then choose “Load project/track…” from the File menu to open the Load project/track window for that machine. Opening Load Project/Track Windows for Multiple Machines It is possible to open Load project/track Windows for multiple machines by first selecting multiple machines (using Shift+Click or Ctrl+Click) in the Network View screen, then choosing Load project/track … from the Machine menu. A Load project/track window will open for the first machine. When this window is dismissed by clicking in the close box, the Load project/track window for the next machine will appear, and so on until all windows have been dismissed. 42 ViewNet MX Version 1.1/1.5 Owners Manual ViewNet MX Sections of the Load Project/Track Window The Load project/track window has several different sections, as shown below. Machine Name The Machine name in the Load project/track window is a read-only display of the name given to the MX2424 in the Machine Information window (ViewNet MX Machine menu). This name can also be viewed and changed in the Machine Information window, the 900 bank of the Machine Settings window (ViewNet MX Machine menu), and from the front panel of the MX-2424 in Setup menu 940. Ident The Ident number in the Load project/track window is a read-only display of the machine TL-Bus ID number. This number can be set in the 100 bank of the Machine Settings window and from the front panel of the MX-2424 in Setup menu 111. Serial Number The Serial number in the Load project/track window is a read-only display of the machine’s unique factory identification number, not the TASCAM inventory serial number. This number is set during manufacture and can not be changed. Project List The Project list shows all Projects (OpenTL files) and tracks (within the projects) available for loading. When first opened, the list will show only project names next to file folder icons, which indicate that the named item is a Project and not a track. The SCSI device ID number of the drive where the Project is located is indicated in brackets. If there are more projects than can be shown, a scroll bar will appear so the list can be scrolled. If there are no projects shown in the list, then either the drive has no Project files or the MX-2424 has no drives mounted. For information on mounting drives, refer to the MX-2424 operations manual. ViewNet MX Version 1.1/1.5 Owners Manual 43 ViewNet MX Showing Tracks To show the list of tracks contained within a Project, double click on the folder icon or on the Project name. This will expand the list to show the names of all tracks within the selected Project. Double click again to hide the list of tracks so that only the Project name is shown. Choosing Project/Track To Be Loaded To load a Project or track, it is first necessary to select which Project or track is to be loaded by clicking on the Project or track name. The selected Project or track will appear highlighted. Projects or tracks may only be selected one at a time. Choosing A Destination Track Once a source Project or track is selected for loading, choose the destination track in the MX-2424 by selecting a track number from the drop down list of available destination tracks. 44 ViewNet MX Version 1.1/1.5 Owners Manual ViewNet MX Loading Projects To load a Project, click on the desired Project from the list to select it, then with the destination track from the “To track:” list set to 1, press the Load button. When a Project is loaded starting with track 1, the project attributes (sample rate, timecode type) are also loaded. Loading Tracks To load an individual track, open the list of tracks contained in a Project by double clicking on the folder icon or project name. Select the desired track from the list (only one track may be selected at a time) by clicking on it. Choose the desired destination from the list of destination tracks, then click Load. The selected track will be loaded into the destination but no other tracks will be affected. When a track is loaded, the Project attributes are not loaded, only the track itself. ViewNet MX Version 1.1/1.5 Owners Manual 45 ViewNet MX File Utilities The File Utilities window contains a number of functions relating to disk and file management. Functions available in this window include: • • • • Rename Smart Copy TapeMode Convert Delete To open the File Utilities window from the Project view screen, choose “Utilities…” from the File menu. Opening File Utilities from the Network View To open the File Utilities window from the Network View screen, first select a machine by clicking anywhere in the row of settings for the desired machine and then choose “Utilities…” from the File menu to open the File Utilities window for that machine. Opening File Utilities Windows for Multiple Machines It is possible to open File Utilities windows for multiple machines by first selecting multiple machines (using Shift+Click or Ctrl+Click) in the Network View screen, then choosing “Utilities …” from the File menu. A File Utilities window will open for the first machine. When this window is dismissed by clicking in the close box, the File Utilities window for the next machine will appear, and so on until all File Utilities windows have been dismissed. 46 ViewNet MX Version 1.1/1.5 Owners Manual ViewNet MX Sections of the File Utilities Window The File Utilities window has several different sections, as shown below. Machine Name The Machine name in the File Utilities window is a read-only display of the name given to the MX-2424 in the Machine Information window (ViewNet MX Machine menu). This name can also be viewed and changed in the Machine Information window, the 900 bank of the Machine Settings window (ViewNet Machine menu), and from the front panel of the MM series unit in Setup menu 940. The Machine name is stored internally on the MX-2424. Ident The Ident number in the Load project/track window is a read-only display of the machine TL-Bus ID number. This number can be set in the 100 bank of the Machine Settings window and from the front panel of the MX-2424 in Setup menu 111. Serial Number The Serial number in the Load project/track window is a read-only display of the machine’s unique factory identification number, not the TASCAM inventory serial number. This number is set during manufacture and can not be changed. Disk Status This is an information display that shows the current status of any File Utility disk activity. If there is no current activity the display will indicate “No backups active”: ViewNet MX Version 1.1/1.5 Owners Manual 47 ViewNet MX Project / Track Selection When the File Utilities window is first opened, no projects are selected and the command buttons are grayed out and not available. To select a project, click on the name of the project in the project list. The project will then be highlighted and the command buttons will become operational. Rename To rename a project, select a project to be renamed from the list, then click this button. The Rename dialog box will appear: Enter the new project name and click OK. The renamed project will appear at the bottom of the project list. The next time the File Utilities window is called up, the renamed project will appear in alphabetical order in the project list. To rename a track double click the project containing the track to be renamed and select that track by clicking on it with the mouse. With the track selected click the Rename button. Smart Copy To create a Smart Copy of a project, select a project to be copied from the list, then click the Smart Copy button. The Smart Copy dialog box will appear. Type the name of the file to be created (or keep the same name) and the number of the target drive SCSI ID. Finally, click OK to begin the Smart Copy process. Smart Copying Over An Existing Project Smart Copy will create an identical copy of the selected project, both EDL and audio files, using the new project name on the target drive. If any of the audio files required for the Smart Copy operation already exist on the target drive, they will not be copied redundantly to the target drive. If the name of the project is the same, but there is new information in the EDL, then the Smart Copy operation will update the EDL and write any new audio files, thus allowing this process to be used as an incremental backup to a work in progress. 48 ViewNet MX Version 1.1/1.5 Owners Manual ViewNet MX When the system detects that a project of the same name already exists, it will ask if you want to overwrite the existing project: Click OK to clear the box and return to normal operation. Disk Status Progress Display Once the copy process begins, the system will indicate progress of the copy operation as a Smart copy % in the Disk Status display at the top of the File Utilities window. Once the Smart Copy is complete, the Disk status will show “No backups active”. Smart Copy Abort To cancel (abort) a Smart Copy in progress, click the Abort button next to the Disk status indicator. The system will ask if you are sure you want to really abort the Smart Copy. To abort the Smart Copy, click Yes. To system will inform you that the Smart Copy operation has been successfully aborted. Click OK to clear the box and return to normal operation. ViewNet MX Version 1.1/1.5 Owners Manual 49 ViewNet MX TapeMode Convert The TASCAM MX-2424 has a special recording mode known as TapeMode, which creates a single audio file per track. This mode makes efficient use of disk space and processor resources for recording and works especially well when there are a lot of punch in and out events/edits over multiple tracks. Nondestructive projects (which may have many separate sound files referenced per track) can be converted to TapeMode. This process will convert all audio in each track to a new track, writing new audio files which incorporate all sound elements on that track,into a single audio file. To TapeMode convert a project, select a project to be converted from the list of projects, then click the TapeMode convert button. The TapeMode convert dialog box will appear. Type the SCSI ID number of the target drive and click OK to begin the conversion process. Individual tracks may also be TapeMode converted by double clicking on the Project folder to open it and selecting an individual track to be converted to TapeMode. Only one track at a time can be selected. Auto Naming of TapeMode Converted Files The TapeMode conversion process will use the same name as the original file but will append _TAPE to the end of the name. Since the name of the new project will always be different than the original (the system will keep appending _TAPE each time a conversion is made), it is not possible to overwrite an existing project using TapeMode convert. 50 ViewNet MX Version 1.1/1.5 Owners Manual ViewNet MX Not Enough Space Warning The TapeMode Convert, process will always write the converted tracks to disk as new audio files but will not delete the existing audio files. In some cases, there may not be enough space left on the target drive to perform the TapeMode Conversion. If this condition occurs, a warning message will alert you. If this occurs, it will be necessary to dismiss the warning then delete some existing material on the disk and perform a disk cleanup before the TapeMode Convert operation can be performed. Or select another target disk with more space availabe. Note that since TapeMode Convert writes data for the entire length of the track, even in places where no audio was recorded (these will be filled with digital zeros which still take up disk space) it is more likely for this situation to occur with TapeMode Convert than with Smart Copy. TapeMode Convert Progress Display Once the TapeMode conversion process begins, the system will indicate progress of the conversion operation as Tape convert % in the Disk Status display at the top of the File Utilities window. Once the conversion is complete, the Disk status will show “No backups active”. ViewNet MX Version 1.1/1.5 Owners Manual 51 ViewNet MX Cancel TapeMode Convert To cancel (abort) a TapeMode conversion in progress, click the Abort button next to the Disk status indicator. The system will ask if you are sure you want to abort the process. To abort the conversion, click Yes. To inform you that the TapeMode conversion has been successfully aborted, the system will show this message: Click OK to clear the box and return to normal operation. Delete To delete a project from the disk, select the project in the project list then click on the Delete button. The following safety warning will appear: To cancel the deletion and return to normal operation, click No. To delete the project, click yes. It is also possible to delete single tracks from a project by first selecting a track, then clicking the Delete button. The following safety warning will appear: To cancel the deletion and return to normal operation, click No. To delete the track, click yes. Note that this operation will only delete the project or track (EDL) file, but will not delete any audio files referenced by the project or track. Since it is possible for more than one project per track to reference the same audio files, this safeguards files from being accidentally deleted that are referenced by some other project or track. To delete the audio files that were referenced by the deleted project or track, use the 52 ViewNet MX Version 1.1/1.5 Owners Manual ViewNet MX Disk Cleanup function in the 700 bank of the Machine Settings window. See Chapter 7, Machine Settings for more information. Creating a New Project To create a new Project, choose “New project…” from the File menu while in the Project View window.. This will bring up the dialog box to enter the name for the new project: Creating a new project will automatically unmount all of the tracks for any currently loaded project. The new project exists first in the MX-2424’s RAM memory only and will not be written to the disk until some audio has been recorded on at least one track of the project. Naming the project using this function sets the project up, but it will not exist in the disk directory unless audio has been recorded to it. ViewNet MX Version 1.1/1.5 Owners Manual 53 ViewNet MX Unloading Tracks To unload a track or tracks, it is first necessary to be in the Project View screen. Select the track or tracks to be unloaded by first selecting them for editing. To do this, click the box with the letter “E” in the track information and settings panel. After the track is selected for editing (unloading), choose Unload tracks from the File menu. The track will be unloaded. The track will now be blank, so that if any new recording is done to this track, a new track will be created in the project. 54 ViewNet MX Version 1.1/1.5 Owners Manual ViewNet MX Chapter 5 The Project View Screen Overview The Project View screen provides a graphical view of project (OpenTL) files, as well as transport and editing functions for a selected MX-2424. To open the Project View screen, click the Conn Box for the desired machine in the Network View screen System Status panel: The Project View screen for the selected machine will open. Components of the Project View Screen The Project View screen has a number of different components and functional sections. These are indicated here: ViewNet MX Version 1.1/1.5 Owners Manual 55 ViewNet MX Summary of Sections in the Project View Screen These sections are described in more detail after this brief summary. Transport Controls Activates transport control functions plus toggles the online and loop functions. Network Panel Shows list of machines on network and their connection and online status. Project Overview Shows an overview of the entire project and indicates time for head and tail. Machine Status Shows important status information about the selected machine. Track Function Panel This panel has function controls for each track. Memory Locations and Displays Buttons permit capturing and storing times and displays show time locations. Network Access Button Press this to access and display the Network ScreenProject Edit View Machine & Project Name Displays the name of the machine currently active in the Project Edit View and the currently loaded project. Edit Buttons Allows quick access to most common edit functions. 56 ViewNet MX Version 1.1/1.5 Owners Manual ViewNet MX Transport Buttons The transport Buttons for the selected machine are presented in a strip across the bottom of the Project View window. Their functions are described here. Online The Online button toggles the unit between online and offline status. The function of this button is exactly the same as on the front panel of the MX-2424. Loop The Loop button toggles the loop status on and off. When off, the loop indicator is black, and when on the loop indicator turns green. Rewind The Rewind button will cause the playhead to move backwards faster than play speed. No audio will be played during rewind. Reverse Play The Reverse Play button will cause the playhead to move in reverse at normal play speed. If any audio tracks are present, they will play from disk (backwards) during the reverse play operation. Recording is not possible during Reverse Play. Stop The Stop button will cause play, reverse play, rewind and fast forward transport functions to stop. If the unit is in loop mode while any of these transport functions are active, the Stop button will stop the transport and cancel the loop mode state. ViewNet MX Version 1.1/1.5 Owners Manual 57 ViewNet MX Play The Play button will cause the MX’s transport to move forward at the nominal play speed. If Play is pressed while the system is in a record or rehearse state, the record or rehearse state will be inactivated and the transport will continue to play. Fast Forward The Fast Forward button will cause the playhead to move forwards faster than play speed. No audio will be played during fast forward. Rehearse The Rehearse button is used to put tracks which are armed for recording into input monitor status rather than playing from disk while the transport is moving. Tracks which are not armed for recording will be unaffected by the rehearse function. To use the rehearse function, press the Rehearse button to place it in a ready state, then press the Play button. Alternatively, the Rehearse button can be activated anytime the system is in play. To deactivate the rehearse state, press Play or Stop. Record The Record button is used to put tracks which are armed for recording into record while the transport is moving. Tracks which are not armed for recording will be unaffected by the record function. To use the record function, press the Record button to place it in a ready state, then press the Play button. Alternatively, the Record button can be activated anytime the system is in play. To deactivate the record state, press Play or Stop. Go to Head The Go to Head button will move the playhead immediately to the beginning of the project. The precise time location of the project head is always indicated in the lower left corner of the project overview area. 58 ViewNet MX Version 1.1/1.5 Owners Manual ViewNet MX Go to Tail The Go to Tail button will move the playhead immediately to the end of the project. The precise time location of the project end is always indicated in the lower right corner of the project overview area. Go to Next Edit The Go to Next Edit button will move the playhead immediately to the splice point at the beginning of the next edit event of the tracks which are selected for editing. If no tracks are selected for editing, this command will move the playhead to the splice point at the beginning of the next edit on any track. Go to Previous Edit The Go to Previous Edit button will move the playhead immediately to the splice point at the beginning of the previous edit event for tracks which are selected for editing. If no tracks are selected for editing, this command moves the playhead to the splice point at the beginning of the previous edit on any track. Shuttle The Shuttle control will move the playhead forward or backward and play audio at some percentage of nominal play speed, according to the scale shown on the shuttle control. The range of the shuttle function is from 0 to 1.5 times nominal play speed. Once the Shuttle control is moved, it will remain in the position set until some other transport button is activated. The shuttle function will preempt any other transport function and any other transport function will preempt the shuttle function. ViewNet MX Version 1.1/1.5 Owners Manual 59 ViewNet MX System Status Panel To the right of the Network screen is the System Status Panel which shows a brief description of each machine, the Online status of the machine and which machines (if any) have a direct network connection established. This panel is always present and active for both the Network Screen and the Project View (shown here). Project Overview The project overview is in the bottom part of the project view screen between the machine status displays and the scroll bar for the project EDL view. The project overview will always show a representation of the entire project from the beginning of the first audio clip (Head) to the end of the last audio clip (Tail). Clips are represented as gray blocks that are proportional in size to their length relative to the span of time represented by the entire overview. Crossfades of any length are represented in green at the beginning and end of clips where they occur. Head and Tail The time location of the head is shown in the lower left corner of the overview and the time location of the tail is shown in the lower right corner. 60 ViewNet MX Version 1.1/1.5 Owners Manual ViewNet MX Navigating With The Overview The Overview also functions as a tool for instantly navigating to any area for viewing in the project EDL display above the overview. To select an area for viewing, simply click and drag anywhere within the overview. The region will be selected in a highlighted color in the overview and that region of material will be shown in the project EDL above. Selecting a region in the overview will create a new view of the material in the project EDL but it will not move the playhead. The Playhead In The Overview The playhead position is represented as a vertical green line running through the overview. The playhead will move through the overview showing its relative location whenever the transport is in play. If the playhead moves to a location outside the bounds of the project (before the head or after the tail), it will be off screen and not be visible until it is once again within the bounds of the project. View Follows Playhead If the View menu item labeled Follows Playhead is selected, the playhead and the region selection will move continuously together in the Overview to show the current position whenever any of the transport functions causes the playhead to move. The region viewed can be changed by clicking and dragging in the overview, but this will disengage Follows Playhead. If View Follows Playhead is enabled and the view region and playhead are in different locations in the overview, the region will “snap to” the playhead position when a transport function is initiated. The keyboard shortcut for this function is Ctrl+F View Pages With Playhead If the View menu item Pages with Playhead is selected, the playhead will move through the selection region until it reaches the end of the region then the selection region will jump forward (page) to show the next region of the same length on the timeline. The keyboard shortcut for this function is Ctrl+P. Selecting A Region While In Play If the selection region is changed while the MX-2424 is playing, it will automatically disable the View Follows Playhead setting or the Pages with Playhead setting. The new region selection will be shown, but the playhead will remain where it is and continue to move through the overview. To reset View Follows Playhead or Pages with Playhead, choose them again from the View menu, or use the keyboard shortcuts. ViewNet MX Version 1.1/1.5 Owners Manual 61 ViewNet MX Machine Status Information Important machine settings are shown in the machine status information display between the overview and the transport buttons. The settings shown are: • Sample Rate • Timecode Type • Control Mode • Sample Reference • Disk Encoding • Record Mode The settings shown in the Project View screen are information displays only. To change settings, use the Machine Settings window from the Machine menu. Track Function and Information The track function and information panel is in the left center area of the Project View screen. This panel is used to show track names and provide selection buttons for setting the following functions for each track: • • • • • Load Project /track Input Record arm Edit selection Track Name when the EDL expanded. height is Track Name The name for each track is shown just below the track function buttons for that track when the EDL height is expanded. Track names can be changed under the File Utilities Menu. Load Project / Track To load a project, click the Folder icon at the top of the track function and information panel, or choose Load Project/Track from the File menu, or use the keyboard shortcut Ctrl+O. To pre-select a particular channel as the destination track for loading, click the number at the left of the panel for the desired track. The Load Project/Track window will open with the selected track set as the destination track in the track selector menu. Input The Input button may be used to set tracks to monitor signals coming through the audio inputs (analog or digital as set in Machine Settings bank 400). 62 ViewNet MX Version 1.1/1.5 Owners Manual ViewNet MX Record The Record button is used to arm a track for recording. If a track is armed but not actually recording, the Record button will blink alternately red and gray. If the track is actually recording, the record light will stay red with a black letter “R”. Edit Use the Edit buttons to select tracks for edit operations, or to select tracks for unloading. When a track is selected for editing, the region on the track between the In and Out marks will be highlighted blue to indicate it is selected for editing. To unload tracks, select the edit buttons then choose Unload from the File menu. Select All Buttons At the top of the panel are special buttons which will select all tracks for the specified function. If some tracks are already selected, the logic used will be to deselect all tracks if half or more of them are already selected. If less than half of the tracks are selected, using the select all button will select all of the tracks. Time Registers and Displays Directly above the main EDL view panel is a collection of time registers for storing and retrieving timecode or feet/frame numbers, and numeric displays to indicate the contents of some of these registers. Use the View menu to select between timecode or feet-frames and to toggle subframes on and off. The contents of the Current, In, and Out registers are always shown directly above their buttons. Other selected registers will display their contents in the Entry Register when they are selected. The behavior of all registers and displays is described in this section. The Entry Register The Entry Register shows the value and name of the currently selected register. The name of the current function of the Entry Register is indicated in the space just to the right of the numeric display. The Entry Register value is used by functions such as Sto, Clr, Loc, and the Edit In and Out points. Changing The Value In The Entry Register To change the value displayed in the Entry Register, click in the box to place the cursor there, type a new value and press Enter (Return) on the keyboard. The new value will be shown and written directly to the indicated register. This method can be used to enter or change any register’ values. ViewNet MX Version 1.1/1.5 Owners Manual 63 ViewNet MX Time Register Function Buttons Some of the buttons in this section are used to perform operations on the value of the Entry Register and other time registers. These are described here. Capture The Capture button is next to the Current button on the left side of the screen. Clicking on this button (or the up arrow on your keyboard) will automatically copy the location of the playhead to the Entry Register and prepare to store this value into the next selected user register. Store Clicking on Store (or the S key on your keyboard) will prepare to copy the value of the Entry Register into the next selected user register. The Store button will flash while the store operation is pending. Click on any register to complete the store operation or click again on the Store button to cancel the pending store operation. Locate Clicking on Locate (or the L key on your keyboard) will automatically paste the value shown in the Entry Register to the current playhead location. In other words, it will move the current location of the playhead directly to the time value shown in the Entry Register. This value will then be shown in the current display and be entered in the current time register. Clear Clicking Clear will set the value of the Entry Register to 0 (00:00:00:00 for timecode and 000000 00 for feet-frames). Read-Only Display Registers Some registers may not be written into directly and serve as a read-only display of time information in the Entry Register. 64 ViewNet MX Version 1.1/1.5 Owners Manual ViewNet MX TC Read Click this button to display the value of timecode coming into the selected MX2424 ’s rear panel TC input. User Registers The buttons that act as time registers where numbers can be stored by the user are shown in blue. If a number other than 0 is stored in one of these registers, the color of the button will change to dark blue. These registers are: • • • • • Current In Out Memory 0 – 9 Offset Current The Current time register shows the position of the playhead. The display shows the time as green numbers on a black background. Click the Current button to show the current time value in the Entry Register. In The In time register display shows the position of the In mark directly above the In button. Click the In button to show the In mark time value in the Entry Register. To change the In time, select the In time for display in the Entry Register, then change the value in the Entry Register and press Enter (Return) to store the new value. The In value can also be changed by using the In – Out mark cursor function or by using the hand cursor function to drag the red In mark in the Time Ruler area of the Project View display. ViewNet MX Version 1.1/1.5 Owners Manual 65 ViewNet MX Out The Out time register display shows the position of the Out mark directly above the Out button. Click the Out button to show the Out mark time value in the Entry Register. To change the Out time, select the Out time for display in the Entry Register, then change the value in the Entry Register and press Enter (Return) to store the new value. The Out value can also be changed by using the In – Out mark cursor function or by using the hand cursor function to drag the red Out mark in the Time Ruler area of the Project View display. Offset The Offset time register holds the time offset of the selected MX2424 machine relative to the external time reference (timecode orMTC). Click the Offset button to show the offset time value in the Entry Register. To change the offset time, select the offset time for display in the Entry Register, then change the value in the Entry Register and press Enter (Return) to store the new value. Memory Registers The MX2424 supports 99 timecode memory locations, and these can be accessed by the ten Memory Register buttons on the top right side of the screen labeled 0-9 . It should be noted that the MX remembers these location points as two-digit entries, so location number 1 would be entered as “01”. To capture a timecode location number on the fly, click Capture (or the keyboard up arrow), and then enter a two digit location number using the Memory Register buttons (or the keyboard). To Recall a Memory Location, simply type in the number, and it will be displayed in the Entry Register. To store a value from the Entry Register into a Memory Register, click Sto (or S on the keyboard), then enter the desired memory number. Duration Registers These registers show the duration of time between the In and Out marks. They have a special behavior for setting these marks to a specific duration value as described below. In > Out This register shows the duration between the In and Out marks. If a new value is entered by typing in numbers and pressing Enter (Return) on the keyboard, the current In mark time location will remain fixed and the Out mark will move to encompass the requested duration. 66 ViewNet MX Version 1.1/1.5 Owners Manual ViewNet MX Out > In This register shows the duration between the In and Out marks. If a new value is entered by typing in numbers and pressing Enter on the keyboard, the current Out mark location will remain fixed and the In mark will move to encompass the requested duration. Time Ruler and Marks A Time Ruler extends across the top of the project EDL view. The ruler shows a time scale and provides a place to display graphic marks corresponding to various time registers. Time Ruler Scale The Time Ruler Scale indicates the time location in terms of either timecode or feet-frames according to the display style designated in the View menu. The scale will automatically adjust to indicate major time divisions with numbers while sub divisions are indicated by small tic marks between the major time division numbers. The number and spacing of numbers and sub divisions is automatically adjusted depending on the zoom level of the display. Playhead (Current Time Register) The playhead shows the current time location. It is represented by a green triangle pointing to the right on the Time Ruler with an extended green line running down across the entire project EDL view. The playhead can be moved by clicking anywhere in the project EDL view with the marker placement cursor, or by adjusting the current time register. The playhead can also be moved by dragging it using the grab (hand) cursor. If View follows playhead is selected in the View menu, the playhead will remain stationary when the system is in play. If View follows playhead is not selected, the playhead will move across the screen when the system is in play. ViewNet MX Version 1.1/1.5 Owners Manual 67 ViewNet MX In Mark The location of the In mark is indicated by a red arrow which points to the right sitting on the Time Ruler. The In mark can be set by clicking anywhere in the project EDL view using the Marker Placement cursor when the In mark is selected as the active time register. Dragging across a region with the Select In/Out cursor will automatically set the In mark to the left boundary of the drag region. The In mark can also be moved by dragging it using the grab (hand) cursor. Out Mark The location of the Out mark is indicated by a red arrow which points to the left sitting on the Time Ruler. The Out mark can be set by clicking anywhere in the project EDL view using the Marker Placement cursor when the Out mark is selected as the active time register. Dragging across a region with the Select In/Out cursor will automatically set the Out mark to the right boundary of the drag region. The Out mark can also be moved by dragging it using the grab (hand) cursor. Memory Markers Memory Markers are graphic representations of the locations stored in the Memory Register, and are indicatedon the Time Ruler by diamond shaped boxes containing the number of the marker. To move the marker directly in the Time Ruler, use the grab (hand) cursor to drag the marker to the desired location. Project EDL View The project EDL view shows a graphic representation of the project edit decision list (EDL) and makes up the major portion of the project view screen. 68 ViewNet MX Version 1.1/1.5 Owners Manual ViewNet MX Tracks The project EDL view is subdivided into tracks displayed horizontally across the page. The track is defined on the left side by a row of track function selection buttons above the track name. The track number is shown on the leftmost button. Track height can be adjusted using the EDL Height adjustment slider at the bottom of the Project View screen. Shown here with the EDL Height expanded to show track names. Hidden Track Names If the track height is adjusted below a certain amount, the track name will be hidden. To see the track name in this case, place the cursor over the track number (do not click) and a pop up will show the name of the track. Audio Events Audio events are indicated by gray boxes sitting on the track dividing lines. The duration of an audio event is shown by its length along the timeline and can be measured against the Time Ruler at the top of the project EDL view. Fades Fade In Fade Out Fades are indicated by a green color at the edge of any clip where a fade is present. The fade shape is a linear ramp up from the baseline for a fade in and a ramp down for a fade out. The length of the fade is indicated by the length of the ramp. Whenever an edit or recording is made, the default fade amount defined in Setup Menu 510 will be applied at the ends of the clip. Fades also be edited by CTRL+ALT+Clicking with the Hand Tool on a lower corner of an audio event. Splice Points Every clip has a Splice Point which defines the precise location of the clip edit point. If an edit does not have a crossfade, it will still have a splice point. The splice points can be shown by choosing Show Splice Points from the View menu. ViewNet MX Version 1.1/1.5 Owners Manual 69 ViewNet MX Selecting Material To Edit Selected Region Edit operations are performed only on selected material, so it is first necessary to select a clip or region before editing. Selecting material means setting the In and Out marks and then enabling the Edit button for the desired track(s). Selecting Clips Single Selected Clip To select a clip for editing, use the grab (hand) cursor tool and click on the desired clip. The In and Out marks will automatically be set to the bounds of the selected clip and the track will be enabled for editing. 70 ViewNet MX Version 1.1/1.5 Owners Manual ViewNet MX Multiple Clip Selection Multiple Clip Selection To select multiple clips, hold the shift key while clicking on each clip. Multiple clips will be selected and the edit region will encompass the area from the beginning of the first selected clip to the end of the last selected clip. If the selected clips are edited using commands from the Edit menu, the entire range of material on tracks selected for editing between the In and Out marks is affected. If multiple selected clips are moved by dragging them within the EDL view, only the selected clips will be included in the drag (edit) operation. Unselected material within the selected region will not be affected by dragging the multiple clip selection. Selecting Regions Selected Region To select a region, set the In and Out marks then enable the Edit buttons for the tracks which will be included in the selection. The fastest way to select a region is to drag across the desired region using the In/Out selection tool. All edit operations performed on a region will include all material within the selected region. This may cause edits to occur within a clip rather than on clip boundaries. ViewNet MX Version 1.1/1.5 Owners Manual 71 ViewNet MX Audio event Appearance In Record When material is being recorded, the new event(s) will appear as a new red colored clip streaming onto the EDL view at the playhead position on the track(s) being recorded. Once recording is stopped, the system will finish writing the recorded data into the file on disk and the event will change to the normal gray color with the event name inside. The red event shown during the recording is actually an estimate of the event’s true location based on the time when the recording was detected by ViewNet Audio. The true location and duration of the event will be displayed after the recording is finished. Horizontal Scroll Bar Scroll Selection Handle The Horizontal Scroll Bar at the bottom of the EDL view panel allows for scrolling the EDL view panel over the duration of the project from head to tail. The range of the current view relative to the entire project will be reflected in the size of the blue scroll selection handle within the scroll bar. To scroll the view, drag the selection handle within the scroll bar. 72 ViewNet MX Version 1.1/1.5 Owners Manual ViewNet MX Project View Adjustment Adjustment Cursor The relative sizes of the Project EDL Panel and the Overview Panel can be adjusted by using the Project View Adjustment bar which is located directly beneath the horizontal scroll bar. The cursor shape automatically changes when it is placed over the adjustment bar to show that the bar can now be dragged to resize the division of the screen between the overview and the EDL view. Panel Resize Triangles Panel Resize Triangles There are two triangular-shaped buttons at the left side of the project view adjustment bar that can be used to immediately resize the Project EDL Panel and Overview Panel. From the default position (when the Project EDL View is first opened), click the upward facing triangle to maximize the Overview Panel or the Downward facing triangle to maximize the Project EDL View Panel. If a view is maximized, click the triangle facing the direction toward the middle of the screen to resize the panel to the previous position. Zoom A slider labeled Zoom on the left side of the screen below the head time in the overview display provides an alternate method to adjust the range of material displayed in the Project EDL View. Drag the Zoom slider to the right to show a smaller range of material centered on the current display region. Drag the Zoom slider to the left to show a wider range of material in the Project EDL View. EDL Height A slider labeled EDL Height on the left side of the screen below the head time in the Overview display provides a method to adjust the vertical height of tracks displayed in the Project EDL View. Drag the EDL Height slider to the right to increase the vertical height of tracks in the EDL. Drag the EDL Height slider to the left to decrease the vertical height of tracks in the EDL View Edit Buttons There is a row of Edit command buttons at the upper right side of the Project EDL View screen. These buttons provide a quick and convenient shortcut for the most commonly used edit commands. There is a full description of the operation of these edit commands in Chapter 6, Edit Commands. ViewNet MX Version 1.1/1.5 Owners Manual 73 ViewNet MX Cursor Function Selection Marker Placement Select In/Out Grab Zoom A set of icons between the Project EDL View display and the System Status Panel are used to set the function of the cursor for operations in the project EDL view. Click directly on the desired icon to set the function of the mouse cursor. Marker Placement Cursor Use the Marker Placement cursor to place the mark currently selected in the Entry Register (Current, In, Out, or Memory) directly on the Time Ruler. Select In / Out Cursor Drag the Select In/Out cursor within the Project EDL view to automatically set the In and Out marks around the selected region. Grab Cursor Use the Grab (hand) cursor to select clips in the Project EDL view. Use the grab cursor with Shift+Click to select multiple clips. The grab cursor can also be used to directly drag the playhead, In mark, Out Mark, and Memory Markers on the Time Ruler. Zoom Cursor Drag the Zoom cursor within the Project EDL view to automatically zoom in around the selected region. Use Shift + Click with the zoom cursor to zoom out. 74 ViewNet MX Version 1.1/1.5 Owners Manual ViewNet MX View Menu Settings Items in the View menu affect what will be shown in the Project EDL view and how some elements within the view will behave. Items with a box act as view settings. When the box is selected (checked) the listed View menu setting will apply. The last item, View whole project, is a direct command and will show the entire project EDL. Follows Playhead If View Follows playhead is selected in the View menu, the playhead will remain stationary on screen when the system is in play. If View Follows playhead is not selected, the playhead will move across the screen when the system is in play. Pages with Playhead If View Pages With Playhead is selected in the View menu, the playhead will move across the screen when the system is in play, then the next screen will automatically appear when the playhead gets near the right side of the screen. If View Pages with Playhead is not selected, the playhead will move across the screen when the system is in play and will move off the screen when it plays beyond the current view. Show Subframes Choose this setting to show subframes in the Time Ruler and Time Displays. Show Feet-Frames Choose this setting to show feet - frames in the Time Ruler and Time Displays. ViewNet MX Version 1.1/1.5 Owners Manual 75 ViewNet MX Show Splice Points Choose this setting to show splice points in the Project EDL display. Splice Points at Fade Splice Point at Edit – No Fade Show Volume Automation Choose this setting to show volume automation in the project EDL display when playing imported Open TL files which have volume automation. Volume Automation Overlay (red line) The volume automation data appears as a red line with break points layered on top of the track. The volume automation data is for display only and cannot be edited within the ViewNet application. Show Mute Automation Choose this setting to show mute automation in the project EDL display when playing imported Open TL files which have mute information. Mute Automation Overlay (blue line) The mute automation data appears as a blue line with break points layered on top of the track. The mute automation data is for display only and cannot be edited within the ViewNet application. View Whole Project The View Whole Project menu item is a command to force the range of the Project EDL view to encompass the whole project from the head time to the tail time. 76 ViewNet MX Version 1.1/1.5 Owners Manual ViewNet MX Chapter 6 Machine Settings Opening the Machine Settings Window The Machine Settings window allows for viewing and changing any of the Setup menu items for An MX2424. To open the Machine Settings window from the Project View screen, choose “Settings…” from the Machine menu. Opening Machine Settings from the Network View To open the Machine Settings window from the Network View screen, first select a machine by clicking anywhere in the row of settings for the desired machine and then choose “Settings…” from the Machine menu to open the Machine Settings window for that machine. Click settings row to select machine Opening Multiple Machine Settings Windows It is possible to open Machine Settings Windows for multiple machines by first selecting multiple machines (using Shift + Click or Ctrl + Click) in the Network View screen, then choosing Settings… from the Machine menu. A Machine Settings window will open for the first machine. When this window is dismissed by clicking in the close box, the Machine Settings window for the next machine will appear, and so on. Remember that opening the Machine Settings window establishes an active network connection to the selected machine. ViewNet MX Version 1.1/1.5 Owners Manual 77 ViewNet MX Sections of The Machine Settings Window The Machine Settings window has several different sections, as shown below. Legend for Numbered Tabs The Machine Settings window organizes the Setup menus of the MX 2424 under tabs that are labeled in banks according to function. These are numbered according to the way they appear on the front panel Setup menu system of the MX 2424. The menu banks and their functions are as follows: • • • • • • • • • • 000 Rates and References 100 Bus Controls 200 System Controls 300 MIDI 400 Input/Output 500 Audio Controls 600 Reserved for future use 700 Disk 800 Project 900 System To open the Machine Settings page for any bank of settings, click the tab with the appropriate number. The selected bank will come to the front. 78 ViewNet MX Version 1.1/1.5 Owners Manual ViewNet MX Working With Settings Most settings have a limited number of choices organized in a drop-down list. To select a setting, click the box to open the list of choices, then click on the desired choice to select it and automatically close the box. Use the TAB key to automatically select the next settings item (moving top to bottom on the page) in a bank. Use Shift + TAB to select the previous item (moving from bottom to top on the page). Settings which hold a numeric value will only allow values to be entered that are within the valid range for that item. Settings Application Controls When settings are changed for an item, the change is not communicated to the MX 2424 until they are applied by using the Settings Application Controls at the bottom of the Machine Settings window. These controls provide a convenient method for choosing which settings and machines will be updated. Selecting Machines Before applying changes, first select to which machines the settings will apply. Original Machine To change settings to the original machine (identified by Name, Ident, and Serial number), choose this selection by clicking the radio button as shown above. Sync Group / Machine Set To broadcast settings changes to all members of a selected Machine Set , choose this selection by clicking the radio button. (As a reminder, Sync Groups pertain only to MM series machines.) Apply Changes. To apply only changes that have been made since the Machine Settings window was opened for the selected machine(s), click the Apply changes button.7 Apply All Settings To apply all current settings to the selected machine(s), click the Apply all button. Settings Files Named settings can be created, opened, and saved from the Machine Settings window. The system default location for these files is the ViewNet folder, but settings files may be stored in any disk directory and copied to floppy or network drives for ease of distribution. ViewNet MX Version 1.1/1.5 Owners Manual 79 ViewNet MX Save To save the current settings (all settings for all menu banks), click the Save button to open the window called Save machine settings as: Type the name of the settings file to be saved, then click Save. Open To open a Machine settings file, click the Open button in the Machine Settings window, choose the desired file, then click Open. The new settings will be loaded into ViewNet. Note that the settings will not be transmitted to any MX 2424’s on the network until they are applied by clicking Apply changes or Apply all. Revert To revert to the previous settings for all Setup menus, click Revert. To recall the default settings for all menus, choose the default item from the Store user settings drop down list in the 900 settings menu bank and then click Recall. 80 ViewNet MX Version 1.1/1.5 Owners Manual ViewNet MX 000 Basic Setup This menu bank has settings for the most fundamental settings governing how the MX-2424 responds to external clocks and control. The items in this bank are: • • • • • • • Control Mode Frame Reference Sample Reference Sample Ref Status Timecode Type Sample Rate Varispeed Rate Control Mode The control mode governs what signal source controls the MX 2424’s transport functions. The control mode choices are described below. Local/ TL Bus In local mode (offline) the front panel transport buttons offer direct control over the all transport functions. When the TL-Bus mode is active and the unit is online, the MX-2424 can function as either a master or a slave to other TL-Bus devices, as set through Setup menu 110 (TL -Bus). This is the default value. Timecode Chase When Timecode chase is active and the unit is online, the MX-2424 will chase incoming LTC. ViewNet MX Version 1.1/1.5 Owners Manual 81 ViewNet MX MTC Chase When MTC Chase is active and the unit is online, the MX-2424 will chase incoming Midi Time Code. Varispeed Varispeed mode allows for setting playback speed within a range of 87.5% to 112.5% of nominal play speed. Varispeed varies the playback frequency as well as the digital sample clock on the digital output. Frame Reference These settings determine the source of the MX-2424’s video frame reference signal. Automatic Sets the unit to automatically use the sample reference defined by the Sample Reference pull-down menu. This is the default value. Video When set to Video, the MX 2424 will reference the video signal connected to the Video In port on the back of the machine. Sample Reference These settings determine the source of the MX 2424’s digital sample clock reference signal. Internal/Frame Sets the unit to use an internal word clock reference if no external reference is available. This is the default value. Ext Wordclock When set to external word clock Input, the MX 2424 will reference the external word clock signal connected to the machine’s Word Clock In connector. Digital In 1,2 Digital In 9,10 Digital In 17,18 When one of these is selected, the MX 2424 derives its sample clock from the digital expansion I/O (with this setting, the MX 2424 takes its clock from the first two channels of one of the three groups of eight: 1,2 – 9,10 – 17,18). 2 Channel Input This setting allows the MX to take its clock from one of the stereo digital inputs (AES/EBU or SPDIF). You must choose between AES and SPDIF in the 400 Menu tab. Sample Ref Status This is simply a status display for the value selected in the above menu. 82 ViewNet MX Version 1.1/1.5 Owners Manual ViewNet MX Timecode Type The following timecode types are provided as choices in this setting: • • • • • • 30ND (default) 30DF 25/25 24/24 29ND 29DF Sample Rate The following digital sample rates are provided as choices in this setting: • • • 44056 (44100-) 44100 44144 (44100+) • • • 47952 (4800-) 48000 (default) 48048 (4800+) Varispeed Rate This setting allows for setting a varispeed playback rate. This function allows playback of audio over a range of speeds from 87.5% to 112.5% of nominal play speed. Varispeed varies the playback frequency as well as the digital sample clock on the digital output. The precise speed can be set from ViewNet in increments of .01% over the entire range. This function works by changing the sampling rate of the unit and this is reflected in the sample rate of the digital audio output stream from the MX-2424 , which will vary according to the speed set in this menu. This is different from the jog/shuttle mode because that mode produces a constant sample rate output while scrubbing audio off speed. Note that the Varispeed Mode is mutually exclusive with Timecode Chase or MTCChase and thus the unit cannot be synchronized to an external source while in this mode. The default value is 100%. ViewNet MX Version 1.1/1.5 Owners Manual 83 ViewNet MX 100 Bus Control TLBus Request Sets the status request for the MX2424on the TL Bus. Off Slave Master The MX2424 will not be active on the TLBus (default). The MX2424will request to be a Slave on the TL Bus. The MX2424will request to be the Master on the TL Bus. TL Bus Assigned This setting shows the status assigned for the MX 2424unit on the TL-Bus. Since there can be only one TL-Bus Master at a time, it is possible that some units will be assigned a status other than that requested. (NOTE: When a TL Bus request is made with only one machine, Viewnet MX will display “Master”, regardless of the actual setting on the MX 2424. This is because there is nothing else on the TL Bus to slave to.). 84 ViewNet MX Version 1.1/1.5 Owners Manual ViewNet MX Ident Request Sets the TL Bus unit ID (Ident) request for the.MX 2424. This value can be any number between 01 and 32, or can be set to Auto, which is the default. When Auto request is on, the system will automatically assign ID numbers to the machines on the TL-Bus. Ident Assigned This is a status display of the MX 2424’s TL Bus ID number. ViewNet MX Version 1.1/1.5 Owners Manual 85 ViewNet MX 200 Transport Record Mode Sets the record mode on the MX 2424. Non-destructive Sets the MX 2424 to non-destructive record mode. In non-destructive record mode, every new recording creates a new audio file on the disk, and recordings can be undone with the Undo button. (Default setting) Tape Mode Sets the MX 2424 to TapeMode, also called Destructive record mode. In TapeMode, each track is always a single audio file, no matter how many punch in and out operations occur on that track. This means that when a track is being recorded, all previous material on the track is being destructively recorded over. There is no editing or undo function for recording TapeMode. Loop Mode Sets the behavior of the MX-2424 when the Loop function is active. The choices for the setting are: Play Repeatedly Loops between the In and Out points until the transport is stopped (default). Play Once and Cue Plays once from pre-roll before In to post-roll after Out then cues to pre-roll before In point and stops. Play Once and Stop Plays once from pre-roll before In to post-roll after Out then stops at end of post-roll. 86 ViewNet MX Version 1.1/1.5 Owners Manual ViewNet MX Loop Record Sets the behavior of the MX 2424 during Loop Record operation. Auto Unload On/Off With this setting on, the MX 2424 will create a new virtual track each time a record operation is performed. This is done by unloading the track last recorded on before recording a new one. The MX defaults to Auto Unload Off. Pre-roll Sets the amount of time before the In point (called the pre-roll amount) used for loop play and record functions. The default value is 00:00:03:00 Post-roll Sets the amount of time after the Out point (called the post-roll amount) used for loop play and record functions. The default value is 00:00:02:00. Tape Mode Start TapeMode uses a start time as a basis for time stamping of recorded audio files. Set the TapeMode start time using this setting. The default value is 01:00:00:00. Tape Mode Length TapeMode requires a defined project length. Set the TapeMode length using this setting. The default value is 00:10:00:00. Rollback Length This is a setting you can use to define a “playhead jump”. Pressing the “,” key will move the transport back by the value that you enter in this menu. Pressing the “.” key will advance the playhead forward by the same amount. The default setting is 00:00:10:00. ViewNet MX Version 1.1/1.5 Owners Manual 87 ViewNet MX 300 Midi This setting allows the Midi Device ID of the MX 2424 to be set. The default is 74. 88 ViewNet MX Version 1.1/1.5 Owners Manual ViewNet MX 400 Input/Output Inputs 1-8 Inputs 9-16 Inputs 17-24 These settings allow selection of input source for each group of eight channels. Analog When selected, input to tracks are taken from the corresponding inputs of the analog I/O module (IFAN24) if installed. Digital In When selected, input to tracks are taken from the corresponding inputs of a digital I/O module (IF-AE24, IF-AD24, IF-TD24). ViewNet MX Version 1.1/1.5 Owners Manual 89 ViewNet MX 2 Channel in When selected, the dedicated stereo digital inputs are routed to a group of eight tracks, with the left input routed to the odd-numbered tracks (1,3,5,7), and the right input routed to the even-numbered tracks (2,4,6,8). In addition to this menu, it will be necessary to choose which stereo digital I/O to use in menu 462, and to select 2CH as the Sample Reference in Menu 002. Analog 1-8 When selected, input to tracks are taken from inputs 1-8 of the analog I/O module (IF-AN24) if installed. This allows the MX-2424 to be used with analog 8-buss mixers. Digital 1-8 When selected, input to tracks are taken from inputs 1-8 of a digital I/O module (IF-AE24, IF-AD24, IFTD24). This allows the MX-2424 to be used with digital 8-buss mixers. Digital In rate converter This setting allows real time sample rate conversion in conjunction with the optional IF-AE24 AES/EBU digital I/O. The default is set to off. 2 Channel in rate converter This setting enables the sample rate converters on the stereo AES/EBU and SPDIF interfaces. This setting defaults to off. 2 Channel input source This setting allows you to choose between the stereo AES/EBU and SPDIF interfaces as inputs. 2 Channel output select This setting selects the pair of coincident tracks from the MX 2424 as the output source for the AES/EBU and S/PIF stereo outputs. 2 Channel output encoding This setting allows the chosen stereo digital outputs to send out either AES/EBU (professional) or SPDIF (consumer) protocol. The default setting is professional. 90 ViewNet MX Version 1.1/1.5 Owners Manual ViewNet MX 500 Audio Controls These settings are used to control the behavior of the system audio functions. Crossfade This sets the crossfade amount used at punch in/out and edit points.. The available settings are in milliseconds and are as follows: 0, 1, 2, 3, 4, 5, 6, 7, 8, 9, 10, 11, 13, 15, 18, 22, 30, 45, and 90. The default value is 10 ms. Gapless Punchout This setting toggles the gapless punchout feature. Gapless punchout allows underlying audio material to be heard immediately when a record punchout occurs on a track (this only affects the monitor section, as all punches are gapless). This setting will have no effect in TL Tape Mode, as it is gapless by nature. The default value for gapless punchout is on. ViewNet MX Version 1.1/1.5 Owners Manual 91 ViewNet MX 600 Reserved for future enhancements 700 Disk Disk Encoding The setting of this menu determines the file type and bit depth for the audio files the MX 2424 writes. The setting of the this menu only affects newly recorded files (thus it will not affect previously recorded tracks). It is possible to have both 16 and 24 bit files in the same session but not SDII and Broadcast Wave files since those file formats require different disk formats. SDII 16 bit SDII 24 bit Broadcast wave 16 bit Broadcast wave Records 16 bit Sound Designer II audio files to a Mac formatted disc Records 24 bit Sound Designer II audio files to a Mac formatted disc. Records 16 bit Broadcast Wave audio files to a PC formatted disc Records 24 bit Broadcast Wave audio files to a PC formatted disc Record disk SCSI ID This field determines which connected SCSI disk the MX 2424 will record to. It defaults to 0, which is the standard internal drive. 92 ViewNet MX Version 1.1/1.5 Owners Manual ViewNet MX Record disk status This is a status page, showing the format of the record disc. Target Disk – Cleanup This field has two purposes. The first is to determine which disc in the SCSI chain will be cleaned up, and the second is to initiate the procedure. The default disc is 0. Disks mounted This window displays the SCSI ID numbers of the drives currently mounted on the MX 2424. 800 Project Project Name This field is used to set the name for a new project. Once a new project name is applied, the existing project will be unmounted and a new blank project with the project name indicated here will be created as soon as some audio is recorded into the project. The default name is MX Project. Another way to start a new project is to choose New project from the file menu. Using the New project function also enters the project name into this field. ViewNet MX Version 1.1/1.5 Owners Manual 93 ViewNet MX Track Prefix This field is used to set the track prefix used for any newly created tracks. The default name is MX Trk. File Prefix When new audio is recorded onto the MX 2424, this user-definable default prefix will become part of the File Name. The default is MXAudio. 900 System Store User Settings / Store - Recall This Menu allows the current MX-2424 configuration to stored to one of eleven User Presets. The Store button is used to save the information into the User Setting and the Recall button is used to make the selected User File current. Date and Time This sets the date and time for the system. Machine Name This field sets the name of the MX-2424. This name can also be set using the Machine Information window available in the Machine menu. The machine name is shown in the Network and Project View screens. 94 ViewNet MX Version 1.1/1.5 Owners Manual ViewNet MX Software version This is a status display that shows the software version of the currently selected MX 2424. Machine Information Choose the item labeled Machine Information from the Machine menu to open the Machine information window. The Machine information window is designed to give a quick overview of the selected MX 2424. Serial number, TL-Bus ID and IP are read-only displays showing those values. Machine Name To create a name for an MX-2424, enter it here. When this window is closed, the name will be communicated to the machine and entered into Setup menu 940 as the machine name. This name is stored in the flash memory of the MX-2424. Description (short) Use this field to enter the short description that will be used in the column labeled “desc” in the System Status Panel. This information is stored locally as part of ViewNet Audio’s preferences file. This means each instance of the ViewNet application on the network can have a different description. Description (long) Use this field to enter any relevant information about the machine. This information can be recalled and viewed only in this window and is stored locally as part of ViewNet Audio’s preferences file. Each instance of ViewNet can have a different description. Backup MX software Selecting this from the Machine Menu creates a backup file of the current MX OS in use. A dialog will ask where it should be saved. ViewNet MX Version 1.1/1.5 Owners Manual 95 ViewNet MX Update MX software This menu updates the MX-OS on a Smart Card in an MX 2424 (the OS must be downloaded from Tascam’s website first). The dialog will ask where the file is on the computer’s hard drive that you wish to update. When downloaded, the file will be a self-extracting archive. The archive must be expanded and the resulting file used to update the card. Multi-Machine When the Multi-machine mode is on, operations and commands issued for one machine are automatically propagated to all other machines, which are part of the Multi-machine group. Multi-machine mode is especially intended for use when conforming edits across multiple machines. Although transport commands are also communicated in this mode, they are sent in sequence as an active connection is established for each machine and the transports will therefore not be synchronized. To accurately synchronize multiple machines, use the TL-Bus and control the group from the TL Bus Master machine. Starting Multi-machine Mode To start the Multi-machine mode, select the machines which will be part of the multi-machine group by selecting them in the Network Screen. Use Shift to select a range of machines and Ctrl+Click to select discontiguous machines from the list. If all machines belonging to a sync group or a machine set are to be used, these do not need to be selected in the Network Screen. After all desired machines are selected, choose Start multi-machine from the Machine menu to open the Multi-machine mode window. 96 ViewNet MX Version 1.1/1.5 Owners Manual ViewNet MX Selecting the Multi-machine Group Use the selection buttons in the Multi-machine mode window to choose which machines will be part of the multi-machine group. To select machines which were chosen in the Network Screen, choose Original machine(s). To choose all members of a selected sync group, choose from the drop down lists. Once the machine selection is made, click Start to begin operating in Multi-machine mode. Multi-machine Mode Indicator A bright red button labeled Multi-machine will appear directly above the Entry Register in the Project View Screen when this mode is on. This is a safety reminder that commands sent to one machine in the group will be echoed to all other machines. Exiting Multi-machine Mode To exit the Multi-machine mode, choose the command labeled Stop multi-machine from the Machine menu. Multi-Machine Behavior The Preferences window has two items relating to the Multi-machine mode of operation. These are described below. ViewNet MX Version 1.1/1.5 Owners Manual 97 ViewNet MX Propagate Edit Tracks This setting governs the conditions under which the action of selecting or deselecting track edit buttons is propagated to other machines in the Multi-machine group when Multi-machine mode is on. • • • Never – don’t send edit selection to other machines On Modify – only send edit selection when a change is made On Edit Operation – only send edit selection when an edit occurs Choosing On Modify will send the edit track status whenever any track edit button is enabled or disabled. Choosing On Edit Operation only changes track edit status for other machines in the multi-machine group when an actual edit operation is performed. To use multi-machine for performing edits across multiple machines, the On Edit Operation setting is the safest, since only edit operations will be propagated. This also allows operations such as Edit mode selection or unloading a track (the edit track button must be enabled to unload a track) to be performed independently on the local machine without propagating to other machines in the multi-machine group Propagate In/Out This setting governs the conditions under which the action of setting In and Out marks is propagated to other machines in the Multi-machine group when Multi-machine mode is on. • • • Never – don’t send In/Out selection to other machines On Modify – only send In/Out when a change is made On Edit Operation – only send In/Out when an edit occurs Choosing On Edit Operation is safest since changes to the In and Out marks are only sent when an actual edit operation is performed. Auto rehearse This setting enables Auto rehearse mode. The “Rehearse” button will flash, indicating that an Auto Rehearse operation will be performed using the In and Out points when PLAY is started. Auto record This setting enables Auto record mode. The “Record” button will flash, indicating that an Auto record operation will performed using the In and Out points when PLAY is started. Free space Click this button to show the available disc space on the record drive in the Entry Register based on the number of tracks enabled for record. If there are no tracks selected for record, it will calculate for one track. Subsequent additions to record enabled status will decrease the calculated free space. 98 ViewNet MX Version 1.1/1.5 Owners Manual ViewNet MX Chapter 7 Macros Macros Menu The Macros menu has selections for recording and managing macros. Macros are series of commands that may be captured into a macro file and replayed at another time. They are useful for creating shortcuts that allow sending an entire string of commands with a single keystroke. Start Macro Recording To begin recording a Macro, select Start macro recording from the Macros menu. The system will now record any commands sent to the MX-2424 into a new macro from the ViewNet MX appliction. The only indication that the system is actively recording macros is that the Macros menu will have the Start macro recording item grayed out and the Stop macro recording item will be available. Actions that only occur in the ViewNet interface and are not communicated to the MX 2424 will not be recorded as part of the macro. Stop Macro Recording To finish recording the macro, choose Stop macro recording from the Macros menu. Naming Macros After selecting Stop macro recording from the Macros menu, the system will ask you to name the macro. Enter the name for the macro and click OK to add it to the list of macros, or click cancel to close the Recorded macro window and void the macro. ViewNet MX Version 1.1/1.5 Owners Manual 99 ViewNet MX Macro names cannot contain characters that are forbidden for file names by the computer file system. If an illegal name is entered, the system will provide a warning. If this warning appears, click OK then choose a different name. Manage / Play Macros To work with macros after they have been created, open the Manage/play macros window from the Macros menu. 100 ViewNet MX Version 1.1/1.5 Owners Manual ViewNet MX Single nonspecific machine macros If a macro has been created in reference to a single MX 2424, it will be added to this list. These macros can be played to any machine specified in the Play destination area at the bottom of the Manage/play macros window. Multiple specific machine macros If more than one machine was included in the creation of a macro, (for example by creating a command on one machine then choosing a different machine from the System Status panel and creating a command targeting that machine) then that macro will appear in this list after it is named. These macros will be sent only to the specific machines (IP addresses) which were addressed when the macro was originally created. Note that this does not mean a macro created while the system was in Multi-machine mode, but only when multiple specific machines were addressed during creation of the macro. The Play to destination area at the bottom of the window will be grayed out when a multiple specific machine macro is selected. ViewNet MX Version 1.1/1.5 Owners Manual 101 ViewNet MX Import To open a macro that has been saved to disk, select the Import button. The Import window will open. Select the desired macro and click Open to import the macro into the list. Export Select the desired macro and click Export to name and save the macro to disk. 102 ViewNet MX Version 1.1/1.5 Owners Manual ViewNet MX Delete To delete a macro permanently from the list, select the macro then click the delete button. The system will not provide a safety warning, and the macro will be immediately deleted. There is no UNDO for this operation. Function Key Assign Any listed macro may be assigned to a function key. This allows the macro to be played from the keyboard with a single keystroke. To assign a macro to a function key, select the desired function key from the list, then select the macro to be assigned to that key and click the button labeled Assign. The selected function key is now assigned to the desired macro. Checking Macro – Function Key Assignments To check which macro is currently assigned to a particular function key, select the function key from the drop down list of function keys. The macro assigned to the selected key will highlight and will become the currently selected macro. Play To play the macro, click the Play button. Play To Destination This section of the window allows for setting to which machine or machines the macro will be sent when it is played. Original Machine For single nonspecific machine macros, macros can be sent to the specific machine listed here. The machine listed will be the current selection when the Macro window is opened. This setting is not available for multiple specific machine macros. Sync Group / Machine Set For single nonspecific machine macros, macros can be sent to all machines belonging to the machine set listed here. This setting is not available for multiple specific machine macros. ViewNet MX Version 1.1/1.5 Owners Manual 103 ViewNet MX Chapter 8 Help Menu The Help Menu The Help menu provides several utilities and some information about ViewNet. About ViewNet Audio This window shows the version number for ViewNet. Next Available IP If the TimeLine network address is used, the ViewNet Audio application can see which unique host IDs have been used by MX-2424 units on the network and suggest the next valid host IP address for new units which will be added to the network. This function is listed under the ViewNet Help menu. 104 ViewNet MX Version 1.1/1.5 Owners Manual ViewNet MX Timecode Calculator The Timecode Calculator is provided as a convenience for calculating sums and differences of SMPTE time code numbers or feet and frames numbers. Entering Numbers In The Timecode Calculator Click in the number field and then type the desired numbers. Use TAB and SHIFT+TAB to move between the number fields. Arithmetic Operator Choice Choose the + or – item after the second number field to choose the arithmetic operator used to generate the = timecode result. TC Calculator Parameter Choices Use the drop down lists and check boxes to choose the parameters used by the Timecode Calculator for its operations. Timecode Type Choose the desired timecode type from the drop down menu. Sample Rate Choose the desired sample rate type from the drop down menu. Show Subframes Click the appropriate check box to select whether or not subframes will be shown. Show Feet-Frames Click the appropriate check box to view timecode or feet-frames in the display. Time Field The field labeled Time at the bottom of the Timecode Calculator shows the current timecode – feet/frames display offset (also called the “local zero” offset). This is the value currently stored in the Time register which can be accessed at the top of the Project View Screen. If it is desired to make calculations without taking into account the Time register, or based on a different local zero offset, simply enter the desired value in the Time field in the Timecode Calculator. This will not change the value of the actual Time register, but it will remove that offset as a factor for the Timecode Calculator. If the Timecode Calculator is closed and opened again, the Time value will default to show the setting of the Time register again. For more information on using the Time register, see the entry labeled Time in Chapter 5, The Project View Screen. ViewNet MX Version 1.1/1.5 Owners Manual 105 ViewNet MX Chapter 9 Shortcut Keys Zoom modifiers: Click Shift-click Ctrl-shift-click Zoom Zoom out Zoom out all the way Grab cursor (hand) mode operation: Click Select Shift-click Select additional events Click & drag Move Alt-click & drag Move, constrained in time Ctrl-click & drag Copy Ctrl-alt-click & drag Event corner trim (individual gains, fade length) Ctrl-shift-click & drag Event edge trim (whole event gain, event edit points) ESC Terminate a drag View keys: Z Shift-Z Ctrl-shift-Z [/] Shift-[/] Ctrl-F Ctrl-P Ctrl-L Ctrl-J Ctrl-shift-J Transport keys: Right arrow Ctrl-right arrow Down arrow Left arrow F T Y Ctrl-shift-L H 106 Zoom Zoom out Zoom out all the way Move view to in/out Move view to head/tail View follows playhead View pages with playhead Toggle loop mode Toggle online (works on network panel too: toggles online for selected machines) Toggle online to a previously established synch point when in Biphase Chase mode (MM series machines only) (works on network panel too: toggles online for the selected machines) Play Record Stop Reverse play From (follow with In or Out) To (Follow with In or Out) Through (follow with In or Out) Last play In to Out ViewNet MX Version 1.1/1.5 Owners Manual ViewNet MX Register keys: Up arrow S L R 0-9 C I O F T ,/. Shift-,/. ,/. Ctrl-A Ctrl-shift-[/] Ctrl- -/+ or -/= Ctrl-shift -/+ or -/= Capture Store Locate Recall Memory location (two digit address) Current In Out From To Move playhead to next/prev edit Move in or out to prev or next edit (moving out to prev edit goes to the end of the next edit) Rollback, roll forward Move in to head and out to tail for the selected tracks Move in to head or out to tail for the selected tracks Nudge Entry Register Coarse nudge Entry Register Editing keys: Ctrl-Z Ctrl-Y Ctrl-X Ctrl-C Ctrl-V Delete or backspace Shift-I Shift-U Shift-O Ctrl-S Ctrl-D Ctrl-shift-D Ctrl-B Ctrl-K Ctrl-shift-O Ctrl-shift-P Shift-N Ctrl-G Ctrl-H Shift-G -/+ or -/= Shift- -/+ or -/= Back quote/tilde Undo Redo Cut Copy Paste Clear Insert Sync insert Open Split Duplicate Discard Sync paste Paste at left Paste at out Paste at playhead In to now Left cut Event local cut Event local left cut Nudge Coarse nudge Toggle edit mode Project keys: Ctrl-N Ctrl-O New project Load project ViewNet MX Version 1.1/1.5 Owners Manual 107 ViewNet MX Other: Ctrl-1 through 9 Ctrl-Q 108 Activate machine ID in edit window Quit ViewNet MX Version 1.1/1.5 Owners Manual Edit Commands Audio clips in the Project EDL view may be edited by using the edit command buttons at the top of the Project EDL screen, or the edit commands in the Edit menu. All possible edit operations are represented in the Edit menu (along with some of their corresponding keyboard shortcuts): 107 Preparing to Edit Two important things must occur before any edit operations can be performed. First, the material to be edited must be selected. Second, the desired tracks must be selected for editing. Selecting Range of Material to Edit To edit, a time span or range of material must first be defined. To select a range or span of time, set the In mark to the beginning of the region to be edited, and place the Out mark at the end of the range of material to be edited. There are several ways to accomplish setting In and Out marks. A location can be entered for the In or Out register by clicking the In or Out register button, typing the desired location into the Entry Register and pressing Enter (Return). The In and Out marks will move to the selected location. A more graphical way to enter In and Out marks is to use the Select In/Out cursor and drag across the selected range in the Project EDL view. When selecting an individual clip or group of clips, use the Grab (hand) cursor and click directly on the desired clip. Use Shift+Click to select multiple clips. Selecting Edit Tracks In addition to selecting the range of material to be edited, the tracks to be included in the edit operation must be selected from the Tracks Function and Information panel. Click on the button labeled with the letter E (for Edit) to select a track for editing. Selected edit buttons will appear with a yellow background. Use the button with the clipboard icon at the top of the edit button column to select all tracks for editing. If less than half of the tracks are selected, using the Select All button will select all of the tracks. If some tracks are already selected, the logic used will be to deselect all tracks if half or more of them are already selected. Refer to the section called Selecting Material To Edit in Chapter 5, The Project View Screen for more information on selecting regions and clips. 108 Editing Behaviors UNDO This steps backward through the Undo history. REDO This steps forward through the Undo history. CUT The CUT function removes the audio from the selected track(s) between the In and the Out points and places it into the clipboard. All subsequent audio will be slipped earlier in time to replace the audio that was cut. 109 COPY The COPY function copies the audio from the selected track(s) between the In and Out points and places it into the clipboard. PASTE PASTE places the contents of the clipboard into the selected track(s) at the position of the In point and overwrites any existing material on those selected tracks starting at the In point and extending for the duration of the clipboard contents. PASTE does not alter the placement of any other material on the track(s). 110 CLEAR The CLEAR function removes the audio between the In and Out points, replacing it with silence. It does not affect the position of any other audio material on the track(s). The clipboard is not affected. INSERT INSERT places the contents of the clipboard into the selected track(s) at the In point, while slipping all subsequent audio on the selected tracks later in time an amount equal to the inserted audio. 111 OPEN OPEN places a segment of silence into the selected track(s) at the In point equal to the time between the In and Out points, while slipping all subsequent audio later in time an amount equal to the time between the In and Out points. LEFT CUT Left Cut removes the audio from the selected track(s) between the In mark and the Out mark and places it into the clipboard, while slipping all previous events on the track later in time by an amount equal to the length of the cut track segment. The keyboard shortcut for this command is Ctrl+G. 112 EVENT LOCAL CUT The EVENT LOCAL CUT function removes the audio from the selected track(s) between the In and the Out points within an audio event and places it into the clipboard. Subsequent audio within that event will be slipped earlier in time to replace the audio that was cut. Subsequent events will not move. EVENT LOCAL LEFT CUT Event Local Left Cut removes the audio from the selected clip between the In and Out marks and places it on the clipboard. The remainder of the clip to the left of the In mark will be pulled up to the right (later in time) to the position of the Out mark, but no other clips on the track will be moved. There is no Keyboard shortcut for this command. 113 DISCARD The DISCARD function removes the audio on both sides of the In and Out points, replacing it with silence but will NOT remove audio beyond the next or previous edit boundaries. The clipboard is not affected. PASTE LEFT Paste Left will paste the contents of the clipboard on the selected track so that the right side of the clip (the point later in time) is placed at the In mark. The In and Out marks will then automatically surround the pasted clip. The keyboard shortcut for this command is Ctrl+K.. 114 PASTE AT OUT Paste at Out will paste the contents of the clipboard on the selected track so that the beginning of the clip is placed at the Out mark. The keyboard shortcut for this command is Ctrl-shift-O. PASTE AT PLAYHEAD Paste at Playhead will paste the contents of the clipboard on the selected track so that the beginning of the clip is placed at the Playhead (Current Time Register). The keyboard shortcut for this command is Ctrlshift-P. 115 SYNC PASTE (SHIFT then PASTE) Sync paste is similar to PASTE, but it allows the user to reference a location defined by the position of the play head other than the IN point. Essentially, the difference between the play head and the IN point when the audio is copied is maintained when a SYNC PASTE is performed. New IN and OUT points are generated at the Sync Past location. This allows the user to reference a downbeat in music or visual event in a video playback. SYNC INSERT (SHIFT then INSERT) Sync insert is similar to SYNC PASTE except instead of pasting over existing audio, the audio is moved later in time an amount equal to the pasted audio. Essentially, the difference between the play head and the IN point when the audio is copied is maintained when a SYNC INSERT is performed. New IN and OUT points are generated at the Sync Insert location. This allows the user to reference a downbeat in music or a visual event in a video playback. 116 SPLIT (SHIFT then COPY) The SPLIT function creates an event boundary at the play head location. IN→ →NOW (SHIFT then OPEN) This function will move the audio defined by the In and Out points to the current position of the play head overwriting any existing audio event(s). The audio’s In point is placed at the play head. 117 DUPLICATE The Duplicate command will create a new copy (duplicate) of the selected material and will automatically append it to the end of the selected edit region. The keyboard shortcut for this function is Ctrl+D. RENAME EVENT This function allows the name of selected audio event to be changed. RENDER The Render function creates a single continuous audio file from multiple audio events on editenabled track(s) between the In and Out points. 118 REVERSE The Reverse function reverses the audio on edit-enabled track(s) between the In and Out points. This function will split audio events if necessary. Nudge Left The Nudge Left command will move the selected material to the left (earlier in time) by an amount equal to the Nudge amount set in the Preferences window. The keyboard shortcut for this is – . Nudge Right The Nudge Right command will move the selected material to the right (later in time) by an amount equal to the Nudge amount set in the Preferences window. The keyboard shortcut for this is +. Coarse Nudge Left The Coarse Nudge Left command will move the selected material to the left (earlier in time) by an amount equal to the Coarse Nudge amount set in the Preferences window. The keyboard shortcut for this is Shift –. Coarse Nudge Right The Coarse Nudge Right command will move the selected material to the right (later in time) by an amount equal to the Coarse Nudge amount set in the Preferences window. The keyboard shortcut for this is Shift +. 119