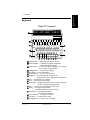
1
System Administrator’s
Manual
Programming and Installation
Direct-Line 700 Series
Congratulations and thank you for choosing the
Amtel Direct-Line™ system as your means of
intra-office communication and message delivery.
Over the years, Amtel products have proven to be an
invaluable and integral part in the overall efficiency of a
business. Using our state-of-the-art Amtel Direct-Line
system ensures that communications are handled easily
and efficiently.
Since 1978, Amtel Systems Corporation has remained
the leader in visual text communication intercom
systems by focusing on customer needs and being
responsive to the ever changing communications
technology. We maintain the highest quality in the
manufacture of our products.
With the benefits of the Amtel Direct-Line system,
coupled with our quality customer service, Amtel
dealers, and reliable factory support, you can feel
confident and proud to own an Amtel Direct-Line
system.
We welcome your comments and suggestions, and we
look forward to serving you.
AMTEL SYSTEMS CORPORATION
Eaglepointe Industrial Center
55 Pottstown Pike, Suite 800
Chester Springs, PA 19425
(800) 999-8903
© Copyright 1998 Amtel Systems Corporation
No portion of this manual may be reproduced or copied without the express consent
of Amtel Systems Corporation.
Introduction
1
Introduction
Using This Manual
The subject of this guide is communication — easy, quick, clear communication.
This manual provides step by step procedures to configure, program, and maintain an
Amtel network. It is intended primarily for the SYSTEM ADMINISTRATOR, the
person who will coordinate the initial set up and programming of units on an Amtel
network.
The manual is divided into sections; each section describes programming functions at
individual units and programming functions from a remote keyboard. Worksheets
which can be used for the recommended planning, documentation, Amtel unit set up,
and programming functions, are provided at the back of this manual.
Section 1: Introduction
Section 2: Addressing
Section 3: Programming a Keyboard, Panel or Wallmount Unit
Section 4: Customizing a Keyboard, Panel or Wallmount Unit
Section 5: Installation Information
Section 6: Problem Solving and Error Messages
Section 7: Templates and Worksheets
Format
The text for this manual is formatted in the following manner:
• BOLD CAPITALIZED words denote buttons and keys on the units.
• A box with text in this form represents the display screen of a unit along with
the associated text
TEXT SHOWN DURING PROCEDURE
• CAUTION NOTES will be in dash-line boxes.
CAUTION: regard with particular care
Ve r s i o n 2 . 0
Using This Manual
1 – 1
A Word from Amtel
Please READ
This one page introduction is the beginning of a long-term partnership. A word about
alerts and messages. And — almost forgot — reminders.
Amtel communicates with words. We make a distinction between the words that comprise alerts, messages and reminders in order to describe and make use of the different
applications provided by our software.
An alert is a communiqué designed to firmly get your attention. Upon receipt the unit
beeps; the alert is displayed and stored in the electronic storage bin. It will persist until
such time that you recognize its existence with a reply, or it will time out and be
stored. An alert is used to announce a telephone call, a visitor, etc.
A message, in contrast to an alert, is stored for later review and action. Upon receipt,
the message is briefly displayed on the screen, date and time stamped and stored in the
electronic recall storage bin. Think of it as an electronic “while you were out” message slip.
A reminder is a communiqué that you can prepare during a period of calm and then
have appear at another time to prompt your attention, as well as that of others, to issues that might otherwise have been forgotten. You may use reminders for meetings,
scheduled routine maintenance, appointments, etc.
Your Amtel provides you with audible signals to gain your attention when the foregoing appear. You can control the intensity and frequency of the sounds to meet your
requirements.
Our quick guides and manuals provide you with all the requisite information needed
to make your Amtel partnership productive and pleasurable.
INFORMATION IS BETTER AS TEXT
1 – 2
A Wo r d f r o m A m t el
Ve r s i o n 2 . 0
In order to accomplish essential tasks, interruptions must be kept to a minimum. It is
important to have the ability to screen calls and move messages around the office
without interrupting or distracting others.
The Amtel Direct-Line system provides a channel of communication with which you
can send alerts, messages, and reminders, quietly and in a timely manner to persons
while they remain free to continue a meeting or telephone conversation. In this way,
information that may even affect a current conversation can be delivered confidentially, without interruption. Staff can now decide if a communication merits an interruption.
When You
SEND
ALERTS
SEND
MESSAGES
SEND
REMINDERS
USE THE
TIMERS
You Can Do This . . .
•
•
•
•
•
Announce a telephone call or visitor.
Eliminate “telephone tag.”
Page someone.
Keep everyone informed quickly and easily.
Communicate with someone who is on the telephone or behind closed
doors in a meeting with minimal interruption.
• Eliminate hand written messages.
• Store messages for later review.
• Print outgoing messages to produce a “To Do” list, or keep a phone log.
• Remind anyone of appointments, meetings or returning phone calls.
• Remind yourself of important dates/events (birthdays or
anniversaries).
• Time a phone conversation or consultation – print the time as hard
copy to a companion printer.
• Time procedures by counting from a user-defined time to Ø.
• The Amtel can inform others while you are away from your desk
ACTIVATE
A STATUS
SET A
PASSWORD
Ve r s i o n 2 . 0
about where you are and when you will return, when an alert is
received at your unit.
• Incoming alerts to your unit are automatically answered with
information as to your whereabouts and/or time of return.
• Protect remote recall of messages or programming of your unit by
setting an individual password.
• Protect some of the programming of units by setting a setup password.
This Powerful Amtel Communication System
1 – 3
Introduction
The Amtel Direct-Line system is a powerful tool for controlling and routing incoming
calls, handling visitors, and keeping everyone in your office fully informed on a
need-to-know basis.
1
This Powerful Amtel Communication System
700 Series — New Features
The 700 series offers many improvements over the earlier series of the Amtel Direct-Line
systems. These improvements include:
ALERT STORAGE
store 50 alerts instead of 6
ALERT RENOTICE SCROLLING
allows multiple alerts to be displayed in a
scrolling fashion
GROUP ADDRESSING
using a pre-programmed distribution list of
Amtel users, information can now be sent
automatically to this select group of other Amtels
on the network, using a group address
EMERGENCY ALERT
when activated, this function will send a
continuous pre-programmed alert for help, until
the alert is canceled
INDIVIDUAL PASSWORD
now prevent unauthorized recall of messages or
unauthorized programming
SETUP PASSWORD
protect addresses and network communication
settings from being changed
TEXT FRAGMENTS
(for a panel and wallmount unit) used to
construct phrases and/or modify a phrase before
sending as an alert, message, or response
EVENT TIMER
counts down from a pre-set time to zero
EXPANDED USER DIRECTORY
increased from 10 to 20 addresses
We are always gathering suggestions, tips, and other helpful hints about our Amtel
system, and would like to share them with you. Send us a note, telling us how you use
Amtels in your office, and we’ll send you an occasional Direct-Line Newsletter that
will inspire a few “Aha!” insights into the power and enjoyment of good communications.
The Direct-Line Newsletter
Amtel Systems Corporation
Eaglepointe Industrial Center
55 Pottstown Pike, Suite 800
Chester Springs, PA 19425
1 – 4
7 0 0 S er i es — N ew Fea t u r es
Ve r s i o n 2 . 0
Applies to
Programming
Function
Keyboard
Panel
Wallmount
and is programmed
remotely
at Unit
from a
Keyboard
Note: Units must be
set to “Program.”
Address
User Directory
Distribution List
Display Brightness
Message Length
Auto Print
Receipt Print
Formfeed Length
CDD Duration
Msg Recall Order
Alert Renotice
Default Event Timer
Resetting a Unit
Comm-Network
Zone
Computer Input
Screen Exerciser
Special Function
Setup Password
Remote Access
Beeper Volume
Beeper Tone
Time Keeping
Date & Time
Initial Address
Text Fragment Lists
Phrases
Emergency Alerts
Emergency Phrase
Status
ü
ü
ü
ü
ü
ü
ü
ü
ü
ü
ü
ü
ü
ü
ü
ü
ü
ü
ü
ü
ü
ü
ü
ü
ü
ü
ü
ü
ü
ü
ü
ü
ü
ü
ü
ü
ü
ü
ü
ü
ü
ü
ü
ü
ü
ü
ü
ü
ü
ü
ü
ü
ü
ü
ü
ü
ü
ü
ü
ü
ü
ü
ü
ü
ü
ü
ü
ü
ü
ü
ü
ü
ü
ü
ü
ü
ü
ü
ü
ü
ü
ü
ü
ü
ü
ü
ü
ü
ü
ü
ü
ü
ü
ü
ü
ü
ü
ü
ü
ü
ü
ü
ü
ü
ü
ü
ü
ü
ü
ü
ü
ü
ü
ü
ü
ü
ü
Note: The functions that are marked with a ü in the “is programmed remotely from a
Keyboard” grid are easier to perform from a keyboard unit.
Ve r s i o n 2 . 0
Pr o g r a m m i n g O v er v i ew
1 – 5
Introduction
This grid is designed to give an easy-to-use overview guide to the programming functions as they apply to the units.
1
Programming Overview
Unit Overview
The Amtel Direct-Line system configuration may be designed using a combination of
our four models: keyboard, panel, wallmount, and printer. Each unit is a powerful
tool for controlling incoming calls, handling visitors and keeping everyone informed.
Every system must have at least one keyboard unit for programming functions, and it
features a full-size keyboard for ease of typing. A panel or wallmount unit offers a
touch keypad with programmed phrases eliminating the need to type. An optional
printer can also be used with the Amtel Direct-Line system.
1 – 6
U n i t O v er v i ew
Ve r s i o n 2 . 0
Introduction
1
Keyboard
Model 701 Keyboard
wed jan 1, 2ØØ3 9 -ØØ aM
D I R E C T- L I N E
1
YES/OK
Q
10
8
2
3
TAKE
MESSAGE
NO
I’M
BUSY
4
W
CALL
ME
E
I’LL CALL
BACK
SEND
THEM IN
R
5
6
COME
IN
I NEED
TO TALK
T
BRING
IN FILE
HOLD
WAIT
Y
7
ASK FOR
CALL BACK
MEETING
NOW
U
GIVE
CALL TO
!
1
@
2
$
4
3
8
9
10
11
12
13
14
15
16
Ve r s i o n 2 . 0
I
9
REF TO
WHAT?
O
OUT OF
TOWN
0
BE RIGHT
THERE
P
OUT OF
OFFICE
+
5
6
=
7
*
8
ß
CUSTOMER
SERVICE
IN
MEETING
)
0
(
9
PRINT
?
/
,
.
6
5
7
13
SHIFT
SEND
CLEAR
3
5
6
7
YOU
HANDLE
1234567890qwertyuiop
aasdfghjkla
azxcvbnm,a
a
a
SHIFT
11
8
9
4 14 15 16 12
Display Screen — displays day, date and time or text
Phrase Template — indicates pre-programmed phrases
associated with phrase keys
Delete/Timer — to erase stored alerts, messages, and reminders
and to activate the elapsed timer
Message Recall — to view stored messages
Alert Recall — to view stored alerts
Reminder Recall — to view stored reminders
Backspace — to scroll backwards through text for
editing purposes, and to display customer service #
7 messages
Print — to selectively print
Send — to transmit communications
Phrase Keys — programmable keys used for one-touch response
to alerts, messages and setting a status
Clear — to return unit to idle mode (date and time)
Set Up — for programming functions
(co-located with the comma/period key)
Next Person — for multiple addressing
(co-located with the ?/ key)
Reminder Enter — to program reminders
Alert Enter — to initiate custom alerts
Message Enter — to initiate custom messages
U n i t O v er v i ew
1 – 7
Panel & Wallmount
1 – 8
U n i t O v er v i ew
Ve r s i o n 2 . 0
Introduction
1
Wiring Connections to Units
Model 701 Keyboard & Model 702 Panel
Rear View
PRINT
I/O
Model 706 Wallmount Unit
Bottom View
Speaker Jack — attach point for auxiliary speaker
I/O Port — input/output port
Printer Port — attach point for optional printer or CDD
Power Inlet
Ve r s i o n 2 . 0
U n i t O v er v i ew
1 – 9
Terms and Definitions
ADDRESS
The address identifies an Amtel unit. Each Amtel unit must be
assigned a unique 2 character, alphanumeric address to
communicate with other units. Addresses are normally assigned
and maintained by the System Administrator.
ALERT
An alert is a short bit of information that is sent when you want
an immediate response. An alert is limited to one screen (29
spaces) of text. When an alert is received, the unit will emit a
single beep and display the alert text. You can send an alert to
announce a phone call or visitor, or to converse with another unit
— think of it as Amtel’s “chat” feature.
CDD
An optional device that will flash an external device (such as a
lamp) when an alert or message is received. It is used as a visual
signal in addition to an audible beep.
CENTRAL
TIMEKEEPER
The designated keyboard unit that maintains time and allows the
user to modify the date and time for the entire network by
sending electronic time updates to all other units set to “auto.”
There must be only one central timekeeper per network.
CHOICE
BUTTONS
The buttons on a panel unit or wallmount unit used to modify the
text fragments of a phrase before sending a response, or
initiating an alert or message.
COMMAND
CODE
A two or four digit number used to activate some programming
steps by the System Administrator.
DISTRIBUTION
LIST
A list containing two to twenty addresses of other units on the
same network. It is used to define a specific group and assigned
a unique group address.
ELAPSED TIMER
The elapsed timer counts up like a “stopwatch.”
ELECTRONIC
STORAGE BIN
The memory of the unit that stores alerts, messages and
reminders.
EMERGENCY
ALERT
A communication sent globally alerting all units of an
emergency.
EVENT TIMER
The event timer counts down to Ø.
FASTWIRE
A mode of communication that provides instantaneous alert and
message delivery. Fastwire is the recommended setting for
Amtel units in the 600 and 700 series.
1 – 10
Te r m s a n d Def i n i t i o n s
Ve r s i o n 2 . 0
GLOBAL
ADDRESS
The address “+ +” that sends an alert, message, or reminder to all
units simultaneously.
GROUP ADDRESS
An address used to identify a distribution list. When used it will
send an alert, message or reminder to all units contained in that
distribution list.
HARDWIRE
A mode of communication which allows 600 and 700 series
units to communicate with 500 series units.
IDLE MODE
The unit is waiting for use. When in idle mode, the screen
displays the day, date, and time.
The first address displayed when a phrase button/key, ALERT
or REMINDER ENTER is pressed.
INITIAL
ADDRESS
ENTER, MESSAGE ENTER,
I/O PORT
The port used to connect a data cord to the unit.
KEYBOARD UNIT
An Amtel unit with a keyboard. This unit can remotely program
other units.
LIFO
Last In First Out. A message recall option that defines the order
in which stored messages are retrieved. The last (most recent)
message will be the first recalled.
MESSAGE
A non-time critical communication. Messages are date and time
stamped, and stored for later review. A message can be up to 7
screens (224 characters) in length.
MULTIPLE
ADDRESSING
To address communication to more than one unit: type the
address of the first unit followed by pressing the NEXT PERSON
key. Continue typing addresses of additional units separating
each address by pressing the NEXT PERSON key.
NEXT PERSON
On the keyboard, use the NEXT PERSON key to send
communication or program more than one unit at a time by
pressing the NEXT PERSON key, between addresses (up to 20).
PANEL UNIT
An Amtel unit with a membrane touch pad and programmable
phrase buttons.
Ve r s i o n 2 . 0
Ter m s a n d Def i n i t i o n s
1 – 11
Introduction
First In First Out. A message recall option that defines the order
in which stored messages are retrieved. The first (oldest)
message will be the first recalled.
1
FIFO
PASSWORD
A programmable security function for an Amtel consisting of 4
alphanumeric characters.
Setup Password – Protects addresses and some setup
programming functions from being changed by unauthorized
users. Used by the System Administrator.
Individual Password – Protects messages at an individual unit
from being accessed either locally or remotely. Used by the
individual user at his/her unit.
PHRASE
The programmed text displayed when a phrase button is pressed.
PHRASE
BUTTON/KEY
Programmable button or key which displays a pre-programmed
phrase.
PHRASE SLIDE
CARD
A card on which the phrase labels are printed. It is located under the
front cover plate and is accessible through a slot to the left of the
card. (Available on wallmount units only.)
POWER SUPPLY
Provides power to the unit.
PRINTER PORT
Port to connect an optional printer or CDD.
RECALL
The function that enables a user to view a stored alert, message
or reminder.
REMINDER
A reminder is a message programmed to be sent at a later time
and/or date to a single unit (including the sending unit), a group,
or globally.
REMOTE ACCESS
Allows another keyboard user to recall messages or program
from a remote keyboard unit.
SCREEN
EXERCISE
This automatic function is designed to “exercise” every segment
of the screen ensuring consistent brightness across the display.
At a pre-programmed time (usually after office hours) the
display flashes alternating S Ø S Ø S Ø S across the entire
screen. This is Amtel’s screen saver feature.
SEND / SEND AS
Transmits a communication as an alert, message, or reminder.
SPEAKER PORT
Port for connecting auxiliary speaker devices for extra volume.
(Wallmount only)
STATUS
A status is a pre-programmed phrase which is automatically sent
in response to an alert. Setting your status is a way of giving
other Amtel users information when you are away from your
desk.
SYSTEM
ADMINISTRATOR
1 – 12
Person designated to configure and maintain the Amtel network.
Te r m s a n d Def i n i t i o n s
Ve r s i o n 2 . 0
TEXT PAGING
Optional function which allows messages to be sent to an
alphanumeric pager.
TIME KEEPING
Keyboard units have 3 ways of keeping time:
Central – designates the keyboard unit that keeps time and
allows the user to modify the date and time for all units on the
system that are set to auto. There can only be one central
timekeeper on a network.
Auto – designates that a unit automatically receives time
updates from the central timekeeper. The time cannot be changed
at this individual unit. Panel and wallmount units only function
on auto.
Local – this unit keeps track of, and changes its own time.
TIMER
FUNCTIONS
The Amtel unit measures time in two modes: elapsed time or
event time.
UNIT
Refers to any Amtel Direct-Line keyboard, panel, or wallmount
unit.
USER
DIRECTORY
The user directory is a programmed address list of other Amtel
units on the network. Each panel unit or wallmount unit has its
own user directory capable of storing up to 20 addresses.
WALLMOUNT
An Amtel unit with a membrane touch pad and programmable
buttons, designed to be mounted on a wall or in a cabinet.
ZONE
The zone acts as an extended address that enables a group of
Amtel units within a building or network to be separated from
other Amtel units. All Amtel units in a network that need to
communicate must be on the same zone.
Ve r s i o n 2 . 0
Ter m s a n d Def i n i t i o n s
Introduction
Portions of programmed text used by a panel unit or wallmount
unit to construct phrases and/or modify a phrase before sending
as or responding to an alert or message.
1
TEXT FRAGMENT
1 – 13
Initial Set Up
If your unit has been installed for you, proceed to step 3.
Now that you have unboxed your Amtel unit you will need to:
1. Remove the protective film from the display lens.
2. Plug the AC adapter power supply into an active electrical outlet and the
other end into the round connector hole in the back of the Amtel unit. Also,
plug one end of the hardwire cable (looks like a telephone cord) into the
Amtel designated data jack, and the other end into the I/O port in the back of
your Amtel unit. Make sure both ends are plugged in securely.
3. Your unit will cycle up and display on the screen:
AMTEL DIRECT-LINE ONE (or TWO)
Copyright © Amtel Systems 1997
SET address ? ?
At this point refer to the section for the unit you wish to set the address. If an
address already exists — refer to the section for the appropriate unit, titled
“Viewing / Changing the Assigned Address.”
Set the time keeping functions – refer to Time Keeping section.
Additional Programming – All other programming has been set at the factory. You
may wish to reprogram some of the settings now or to wait and do this at some point in
the future.
1 – 14
I n i t i a l S et U p
Ve r s i o n 2 . 0
For proper operation each unit must be assigned an address.
• The address identifies an Amtel unit. (Like an extension number on the phone.)
• Each Amtel unit must be assigned a unique 2 character address, a
combination of letters (A through Z) and/or numerals (Ø through 9).
• Addresses are usually assigned and maintained by the System Administrator.
• Addresses can be protected from change by entering a setup password.
Note: The unit address can be the user’s initials or the location of the unit.
Note: If there is more than one unit with the same address, communication delivery
can be unreliable.
Figure 2-1 This diagram displays, in a series of steps, how to customize the addresses
on an Amtel Unit.
Ve r s i o n 2 . 0
A s s i g n i n g a n Ad d r es s t o a U n i t
2 – 1
2
Assigning an Address to a Unit
Addressing
Addressing
Setting an address at a keyboard unit
If this is the first time the address is being set, or if the unit has been reset, follow the
steps below. The screen displays:
SET address ? ?
1. Enter the desired two character address.
2. Press SEND to save the address.
Setting an address at a panel unit or wallmount unit
If this is the first time the address is being set, or if the unit has been reset, follow the
steps below. The screen displays:
SET address ? ?
1. Press:
Ù or Ú to assign the 1st character.
CHOICE 2 Ú to move to the next space.
CHOICE 1 Ù or Ú to assign the 2nd character.
2. Press SEND/SEND AS ALERT to save the address.
CHOICE 1
Viewing/changing the assigned keyboard address
1. Press SET UP.
2. Press the 6 key. (If the screen displays ENTER PASSWORD, enter the setup password and press
SEND.) Screen displays the current address:
SET address A A
3. Press CLEAR to save the current displayed address, OR go to step 4 to
continue and change the address.
4. Enter the new address.
5. Press SEND to save the address.
Viewing/changing the assigned panel unit or
wallmount unit address
1. Press and hold CLEAR and CHOICE 1 Ú. (If the screen displays ENTER PASSWORD, enter the
setup password and press SEND/SEND AS ALERT.) Screen displays the current address:
SET address A A
2. Press CLEAR to save the current displayed address.
3. OR to change the assigned address, enter the new address:
Press: CHOICE 1 Ù or Ú to assign the 1st character.
CHOICE 2 Ú to move to the next space.
CHOICE 1 Ù or Ú to assign the 2nd character.
4. Press SEND/SEND AS ALERT to save the address.
2 – 2
A s s ig n i n g a n Ad d r es s t o a U n i t
Ve r s i o n 2 . 0
Programming a User Directory
• Should contain the addresses of the units with which it will communicate.
• The addresses should be listed in priority order. The most frequent contacts
first. The order they are listed in is the order the user will scroll through them.
• Each panel unit or wallmount unit can have its own custom user directory
unique to that unit.
• It is recommended that the global address + + be one of the entries in the user
directory in order that global alerts and messages can be sent.
• A user directory may contain a group address (+Ø through +9) from the
distribution list.
• A panel unit or wallmount unit is capable of storing 21 addresses — the initial
address plus 20 user directory addresses.
• The initial address (default ZZ) can only be programmed from a keyboard unit.
Note: This is the first address to appear when a phrase button is pressed.
• To view a user directory, repeatedly press a phrase button.
• The user directory can be programmed at a panel unit, wallmount unit or from
a remote keyboard unit. To program a unit remotely, the remote access must
be set to “Program” on the unit being programmed.
Note: It is easier to program a user directory for a panel unit or wallmount unit from
a keyboard unit.
Programming a user directory for a panel or
wallmount unit from a keyboard
Note: It is easier to program the user directory from a keyboard unit. To remotely program a unit(s), the remote access setting must be set to “Program” for the unit being
programmed. (Refer to the Setting Remote Access section.)
1. Press SET UP. The screen displays:
SELECT SET UP ?
Ve r s i o n 2 . 0
Pr o g r a m m i n g a U s er Di r ec t o r y
2 – 3
2
• Only a panel unit or wallmount unit use a user directory.
• In order for a panel unit or wallmount unit to communicate with other units, it
must be programmed with a user directory.
• The user directory begins the second time a phrase button is pressed.
• When assigning addresses for a user directory, it is recommended you use
Worksheet #1 in the back of this manual.
The user directory:
Addressing
A user directory is a programmed address list of other Amtel units on the network.
2. Press the number 4 key. (If the screen displays ENTER PASSWORD, enter the setup password
and press SEND/SEND AS ALERT.) The screen displays:
SET DIRECTORY FOR ? ?
3. Enter the address(es) of the unit(s) to be programmed.
Note: Program groups using the NEXT PERSON key, or all units using the global address + +.
4. Press SEND. The screen displays:
DIRECTORY ? ?
5. Enter the first address of the user directory.
6. Continue entering addresses of additional units separating each address by
pressing the NEXT PERSON key until all addresses are entered (maximum of
20 addresses).
7. Press SEND to save the user directory entries.
EXAMPLE: The Screen below shows the programming of three addresses,
FD, R1 and R2, before pressing the SEND key.
FD/R1/R2
Note: After entering a user directory, it is a good idea to check to be sure the directory
was entered as desired. At the unit programmed, to view the user directory list, repeatedly press a phrase button. The user directory addresses will be displayed to the left of
the phrase.
Modifying a user directory for a panel unit or
wallmount unit from a keyboard
Before modifying the user directory, it is recommended to record the list before making changes. (Refer to the User Directory Worksheet #1.)
If the user directory is to be modified from a keyboard, the list must be completely reentered.
Programming a user directory at a panel unit or
wallmount unit
When a user directory is programmed at a panel unit or wallmount unit, it is for that
unit only.
Note: When programming a user directory refer to the Unit Address Worksheet #1.
1. Press and hold CLEAR and CHOICE 1 Ú.
(If the screen displays ENTER PASSWORD, enter
the setup password and press SEND/SEND AS ALERT.) The screen displays the
current address:
SET address A a
2 – 4
Pr o g r a m m i n g a U s er Di r ec t o r y
Ve r s i o n 2 . 0
2. Press CHOICE 2 Ú two times. The screen displays the current setting:
SET DIRECTORY ENTRY 1 ? ?
Ù or Ú to assign the 1st character.
CHOICE 2 Ú to move to the next space.
CHOICE 1 Ù or Ú to assign the 2nd character.
4. Press CHOICE 2 Ú to move to the next entry. Screen displays:
SET DIRECTORY ENTRY 2 ? ?
5. Repeat steps 3 and 4 until the user directory list is complete.
6. Press SEND/SEND AS ALERT to save user directory entries.
Note: After programming a user directory, it is a good idea to check to be sure the directory was entered as desired. At the unit programmed, to view the user directory list,
repeatedly press any phrase button. The user directory addresses will be displayed to
the left of the phrase.
Modifying a user directory at a panel unit or
wallmount unit
Note: It is recommended to modify at a keyboard unit by re-entering the modified list.
Before modifying the user directory list, it is recommended to record the list before
making changes. (Refer to the User Directory Worksheet #1.)
Note: To change an address in a distribution list, go to the address to be changed, (or
to the address ??) and enter the new address. For example: if the list is AA/BB/CC,
and BB is to be changed, enter the new address, for this example EE. When the list is
recalled it will appear as AA/EE/CC.
You can add a user directory entry at any point in the list. Follow steps 1-6 above.
EXAMPLE:
If five user directory addresses are entered and you would like to
add # 6 at the end, press CHOICE 2 Ú until the screen displays
Entry 6 ? ?. Follow the above steps to add a user directory address.
Programming a Group Address
A group address is used to identify a distribution list. When used it will send an alert,
message or reminder to all units contained in that distribution list.
A distribution list is a list containing two to twenty addresses of other units on the
same network and zone. It is used to define a specific group and assigned a unique
group address.
Each unit can be programmed with up to 10 unique distribution lists. Each distribution list can contain a maximum of 20 addresses per list.
Note: A distribution list can only be viewed at the unit which contains the list.
Ve r s i o n 2 . 0
Pr o g r a m m i n g a G r o u p Ad d r es s
2 – 5
Addressing
CHOICE 1
2
3. Press:
EXAMPLE:
Assign a group address for management personnel, office personnel
or other groups.
• Using a group address simplifies communicating with multiple units without
entering each unit’s address individually.
• There can be up to 10 lists, each list containing up to 20 addresses. (Refer to
the Group Address — Distribution Lists Worksheet #2.)
• The address of a group address starts with “+” followed by the list number Ø 9 (example: + Ø through +9).
• A distribution list cannot contain the address of another distribution list, a
global + + address, or the address of the unit being programmed.
• Panel units and wallmount units may reference a group address to an
individual button as the initial address.
• Every 700 series Amtel unit is able to use group addresses.
• A panel unit or wallmount unit programs a group address only for itself.
• Group addresses can be entered at a keyboard, globally using the address + +
or multiple units using the NEXT PERSON key.
• A programmed group address list can be protected by entering a setup
password.
Programming a distribution list at a keyboard unit
for itself or other units
Use Worksheet #2 to plan the group address/distribution lists, prior to entering information.
Note: A distribution list can only be viewed at the unit which contains the list.
To program units remotely, the unit being programmed must have the remote access setting set to “Program.”
1. Press SET UP.
2. Press and hold SHIFT then press 4. (If the screen displays ENTER PASSWORD, enter the
setup password and press SEND.) The screen displays:
SET distribution list NEW
3. Press SEND. The screen displays:
SET distribution list FOR ? ?
4. Enter the address(es) of the unit(s) to be programmed with the new lists.
5. Press SEND. The screen displays:
LIST NUMBER Ø
2 – 6
Pr o g r a m m i n g a G r o u p Ad d r es s
Ve r s i o n 2 . 0
6. Enter the number of the list to be programmed and press SEND. The screen displays:
LIST addresses ? ?
LIST NUMBER Ø
To continue adding distribution lists:
to allow initializing of another list.
2
(with the current programmed list number flashing)
9. Follows steps 6 through 8 until all lists are entered.
10. Press CLEAR when finished to end the process.
To view or modify a distribution list for a keyboard unit
All units allow editing of their own distribution lists. This process may also be used to
initialize the lists.
To modify a panel or wallmount distribution list from a keyboard, the list must be reentered.
Note: To delete an address from a distribution list, go to the address to be changed and enter the new address or ?? to delete an address. For example: if the list is AA/BB/CC, and
BB is to be deleted, enter AA/??/CC. When the list is recalled it will appear as AA/CC.
To locate a programmed list:
1. Press SET UP.
2. Press and hold SHIFT then press 4. (If the screen displays ENTER PASSWORD, enter the
setup password and press SEND.) The screen displays:
SET DISTRIBUTION LIST NEW
3. Press the 4 key again and the screen displays:
SET distribution list EDIT
4. Press SEND. The screen displays:
LIST NUMBER Ø
5. Enter the desired list number and press SEND. The screen displays the last
five addresses of the list, with the last address flashing.
6. To view the programmed addresses: press and hold SHIFT and repeatedly
press BACKSPACE (ß).
7. Press CLEAR to exit without making changes, OR to modify the list:
8. Press and hold SHIFT and repeatedly press BACKSPACE (ß) to move to the
desired address.
9. Enter the new address.
Ve r s i o n 2 . 0
Pr o g r a m m i n g a G r o u p Ad d r es s
Addressing
7. Enter the addresses contained in the distribution list, separating each by pressing
the NEXT PERSON key.
8. Press SEND. The unit sends the distribution list to the receiving units, and the
screen displays:
2 – 7
10. Press SEND. The unit updates the specified list, and the screen displays:
LIST NUMBER Ø
(with the current programmed list number flashing)
To continue editing distribution lists:
to allow initializing of another list.
11. Follows steps 5 through 10 until all lists are entered.
12. Press CLEAR when finished to end the process.
Programming a distribution list at an individual panel
or wallmount unit
1. Press and hold CLEAR and press CHOICE 1 Ù. (If the screen displays ENTER PASSWORD,
enter the setup password and press SEND.) The screen displays:
SET distribution list Ø
2. Press CHOICE 1 Ù or Ú to enter the number of the list to be programmed (Ø - 9).
3. Press SEND/SEND AS ALERT. The screen displays:
SET LIST ENTRY 1 ? ?
4. Press:
Ù or Ú to assign the 1st character.
CHOICE 2 Ú to move to the next space.
CHOICE 1 Ù or Ú to assign the 2nd character.
5. Press CHOICE 2 Ú to move to the next entry. Repeat step 4 to add additional entries.
6. When all entries have been entered press SEND/SEND AS ALERT. The unit
saves the changes made to the distribution list. The screen displays:
CHOICE 1
LIST NUMBER Ø
(with the current programmed list number flashing)
To continue adding distribution lists:
to allow initializing of another list.
7. Follow steps 2 through 6 until all lists are entered.
8. Press CLEAR when finished to end the process.
To view or modify a distribution list at an individual
panel or wallmount unit
A distribution list can only be modified if you are adding an address at the end of the
programmed distribution list. If you would like to delete an address, the entire list
must be re-entered.
1. Press and hold CLEAR and press CHOICE 1 Ù. (If the screen displays ENTER PASSWORD,
enter the setup password and press SEND/SEND AS ALERT.) The screen displays:
SET distribution list Ø
2. Press CHOICE 1 Ù or Ú to the desired list number to be modified (Ø - 9).
2 – 8
Pr o g r a m m i n g a G r o u p Ad d r es s
Ve r s i o n 2 . 0
3. Press SEND/SEND AS ALERT. The screen displays:
7.
8.
SET DISTRIBUTION LIST Ø
(with the current programmed list number flashing)
To continue modifying distribution lists:
to allow initializing of another list.
9. Press CHOICE 1 Ù to the desired list number.
10. Follow steps 3 through 8 to continue.
11. Press CLEAR when finished to end the process.
Programming an Initial Address
Programming an initial address for all units from a
remote keyboard unit
The initial address is the first address to appear when a phrase button/key is pressed,
or on a keyboard when the ALERT ENTER, MESSAGE ENTER, or REMINDER ENTER
key is pressed.
Note: The factory default is Z Z.
The initial address can be:
• the same for all buttons/keys for a unit
• or individual buttons/keys can be assigned a different initial address
Note: It is recommended that the unit’s initial address be set before programming individual phrase buttons/keys with the initial address.
If you send communications to the same unit frequently, it is recommended that their
address be programmed for your unit’s initial address. If an individual phrase button/key is frequently sent to another unit, it is recommended this button be assigned
its own initial address. This will save time when sending communications, allowing
the user a one touch action as opposed to scrolling to the correct address or typing the
address.
Ve r s i o n 2 . 0
Pr o g r a m m i n g a n I n i t i a l Ad d r es s
2 – 9
2
4.
5.
6.
(AA is the first address in our example list.)
Press CHOICE 2 Ú repeatedly until the screen displays the desired entry.
Press CLEAR to exit without making changes, OR
Press: CHOICE 1 Ù or Ú to assign the 1st character.
CHOICE 2 Ú to move to the next space.
CHOICE 1 Ù or Ú to assign the 2nd character.
Press CHOICE 2 Ú to enter any additional addresses.
When all entries have been entered press SEND/SEND AS ALERT. The unit
saves the changes made to the distribution list. The screen displays:
Addressing
SET LIST ENTRY 1 A A
EXAMPLE:
A “master” initial address is the address which will be most frequently used by the unit. For instance, it could be the front desk or
reception area. In the case of an executive, the “master” initial address could be the Administrative Assistant. A unique initial address
can be set for individual phrase buttons/keys. You can, therefore,
have specific addresses in addition to the “master” initial address.
The keyboard unit is the only unit able to program the initial address. A keyboard unit
can program itself, or remotely program any other individual keyboard, panel or wallmount unit, if the remote access setting is set to “Program” on the unit being changed.
Programming the initial address for all buttons/keys
on a unit
Note: If setting globally, all units will receive the initial address setting except for the
keyboard you are using. To assign this unit an initial address, repeat procedures 1-6.
Note: To program units remotely, the unit being programmed must have the remote access setting set to “Program.”
1. Press SET UP. The screen displays:
SELECT SET UP ?
2. Press and hold SHIFT, then press the 6 key. The screen displays:
SET alert address FOR ? ?
3. Enter the address(es) of the unit(s) to be programmed.
Note: You may program groups, using the NEXT PERSON key, or you may enter the
global address of + + to program all units on the network.
4. Press SEND. The screen displays:
ALERT address ? ?
5. Enter the desired initial address.
6. Press SEND to save the setting(s).
Programming the initial address for individual
buttons/keys
Note: Refer to the section Programming a Phrase without Text Fragments.
Note: To program units remotely, the unit being programmed must have the remote access setting set to “Program.”
1. Press SET UP. The screen displays:
SELECT SET UP ?
2 – 10
Pr o g r a m m i n g a n I n i t i a l Ad d r es s
Ve r s i o n 2 . 0
2. Press the 2 key. The screen displays:
SET alert FOR ? ?
TO BE ASSIGNED TO KEY ?
5. To program a keyboard unit, press the key to be assigned. (Only keys in the top
two rows, 1 through Ø, excluding the BACKSPACE (ß) key, or Q through P of the keyboard
are valid.)
To program a panel unit or wallmount unit, enter the number or letter of the
button to be assigned. (Refer to the appropriate unit template in the Templates and
Worksheets section to determine the button number.)
6. Press SEND. Screen displays:
AND TO BE SENT TO ? ?
7. Enter the initial address for the phrase. (The address to which this phrase will be sent
when the phrase button/key is first pressed.)
8. Press SEND. Screen displays the address of the receiving unit followed by a
flashing cursor.
9. a. To keep the same phrase press SEND.
b. Type the new phrase and press SEND. (See Programming a Phrase section.)
Ve r s i o n 2 . 0
Pr o g r a m m i n g a n I n i t i a l Ad d r es s
2 – 11
2
4. Press SEND. The screen displays:
Addressing
3. Enter the address(es) of the unit(s) to be programmed.
Note: You may program groups, using the NEXT PERSON key, or you may enter the
global address of + + to program all units on the network.
This page intentionally left blank.
2 – 12
Pr o g r a m m i n g a n I n i t i a l Ad d r es s
Ve r s i o n 2 . 0
Programming Units
Programming the Keyboard Unit
The following programming functions are grouped sequentially — which we refer to
as the “Set Up Backspace” programming string because all of the functions are accessed by pressing SET UP and BACKSPACE (ß).
·
Display Brightness
· Message Length
· Auto Print
· Receipt Print
· Formfeed Length
· CDD Duration
· Message Recall Order
· Alert Renotice
· Default Event Time
· Reset Unit
• The “Set Up Backspace” string is not protected by a setup password.
• The next 39 programming steps can be performed as a group or individually.
Note: Pressing SEND at the end of a step will save changes made to that point. Pressing CLEAR at any point allows you to view the current setting(s) and exit without making changes.
DISPLAY BRIGHTNESS
The display brightness can be adjusted to meet network needs and/or personal preferences.
OPTIONS: LEVELS 1 through 4.
Factory default is level 3.
1. Press SET UP. Press BACKSPACE (ß). The screen displays:
SET DISPLAY BRIGHTNESS LEVEL 3
2. Press BACKSPACE (ß) to the desired brightness level.
3. Press SEND to save the setting, OR to continue go to step 5.
Ve r s i o n 2 . 0
Pro g r a m m i n g t h e Key b o a r d U n i t
3 – 1
3
All units have been pre-programmed at the factory. Information is provided in this
section to customize a keyboard unit to meet network requirements and/or personal
preferences.
Programming
Programming the “Set Up Backspace” String
MESSAGE LENGTH
Message length can be programmed for a minimum of 5 lines or a maximum of 7
lines. When typing a message, it is suggested to set the length to 7 lines in order to
maximize space in which to enter information. Seven lines is equal to 7 full screens of
text or 224 characters.
OPTIONS: 5 or 7 lines.
Factory default is 7 lines.
Press SET UP. Press BACKSPACE (ß). The screen
displays: SET DISPLAY BRIGHTNESS.
5. Press the SPACEBAR until the screen displays:
4.
(To begin from idle mode.)
SET message LENGTH 7 LINE
6. Press the BACKSPACE (ß) to the desired setting.
7. Press SEND to save the setting(s), OR to continue go to step 9.
AUTO PRINT
Note: This procedure applies only if a printer is connected to the keyboard unit you
are programming.
This feature enables an Amtel unit to automatically print incoming messages.
It may be useful at times to have a hard copy of the messages you received at your
Amtel unit. You can take these messages with you when you leave the office; you may
want a hard copy to keep as a phone log of your calls.
OPTIONS: OFF – MEMORY FULL – ALL MESSAGES Factory default is OFF.
• Off – No messages will be automatically printed. (You can still print on
demand.)
• Memory Full – Incoming messages will be automatically printed when the
unit’s storage capacity is full.
• All Messages – All messages received will be automatically printed.
8.
Press SET UP. Press BACKSPACE (ß). The screen
displays: SET DISPLAY BRIGHTNESS.
9. Press the SPACEBAR until the screen displays:
(To begin from idle mode.)
SET AUTO PRINT OFF
10. Repeatedly press BACKSPACE (ß) to the desired setting.
11. Press SEND to save the setting(s), OR to continue go to step 13.
RECEIPT PRINT
Note: This procedure applies only if a printer is connected to the keyboard unit you
are programming.
This feature enables an Amtel unit to print outgoing messages automatically.
3 – 2
Pr o g r a m m i n g t h e Key b o a r d U n i t
Ve r s i o n 2 . 0
It may be useful at times to have a hard copy of the messages you send from your Amtel unit to keep as a phone log of calls or messages you have sent to other units.
OPTIONS: ON – OFF
Factory default is OFF.
12. (To begin from idle mode.) Press SET UP. Press BACKSPACE (ß). The screen
displays: SET DISPLAY BRIGHTNESS.
13. Press the SPACEBAR until the screen displays:
SET RECEIPT PRINT OFF
14. Press BACKSPACE (ß) to the desired setting.
15. Press SEND to save the setting(s), OR to continue go to step 17.
Note: This procedure applies only if a printer is connected to the keyboard unit you
are programming.
This function determines the number of blank lines inserted at the end of printing a
message, in order to adjust the paper to fit different printers.
3
OPTIONS: 1 through 20 lines. Factory default is 3.
16. (To begin from idle mode.) Press SET UP. Press BACKSPACE (ß). The screen
displays: SET DISPLAY BRIGHTNESS.
17. Press the SPACEBAR until the screen displays:
SET FORMFEED LENGTH 3
18. Enter the desired line length, 1 through 20.
19. Press SEND to save the setting(s), OR to continue go to step 21.
CDD DURATION
Note: This procedure is only used if a CDD is connected to the keyboard unit you are
programming.
When a CDD device is connected to an Amtel unit, it will cause an external electrical
device, such as a lamp, to flash when an alert or message is received. Typically, it is
used in either noisy or noise sensitive areas.
OPTIONS: OFF – 2 through 10 seconds.
Factory default is 4 seconds.
20. (To begin from idle mode.) Press SET UP. Press BACKSPACE (ß). The screen
displays: SET DISPLAY BRIGHTNESS.
21. Press the SPACEBAR until the screen displays:
SET CDD DURATION
4 SEC
22. Press BACKSPACE (ß) to the desired setting.
23. Press SEND to save the setting(s), OR to continue go to step 25.
Ve r s i o n 2 . 0
Pro g r a m m i n g t h e Key b o a r d U n i t
Programming
FORMFEED LENGTH
3 – 3
MESSAGE RECALL ORDER
This programming step defines the order in which messages can be reviewed.
OPTIONS: LIFO or FIFO
Factory default is LIFO.
• FIFO – First In First Out – The first or oldest message stored is the first
message displayed.
• LIFO – Last In First Out – The last or most recent message stored is the first
message displayed.
24. (To begin from idle mode.) Press SET UP. Press BACKSPACE (ß). The screen
displays: SET DISPLAY BRIGHTNESS.
25. Press the SPACEBAR until the screen displays:
SET message RECALL ORDER LIFO
26. Press BACKSPACE (ß) to the desired setting.
27. Press SEND to save the setting(s), OR to continue go to step 29.
ALERT RENOTICE
This function manages:
• the length of time a received alert is displayed.
• how fast it will scroll when multiple alerts are received.
• how often a renotice beep will sound when an alert is not responded to.
Factory default setting(s) is - 3Ø/Ø1/ØØ where
• 3Ø is the number of seconds an alert will be displayed.
• Ø1 is the number of times an alert will appear.
• ØØ is the number of appearances of an alert before sounding a renotice beep.
Note: Please understand that this function may appear to be confusing as you read it.
We can explain it better than write it. Please do not hesitate to contact your local
authorized Amtel dealer or Amtel Systems Corporation, and we will be delighted to talk
with you. That being said, we will attempt to write this as simply as possible.
We will use as an example a setting of Ø5/12/Ø2:
When a single alert is received, and it is not responded to, it will display a total of 60
seconds (5 seconds, 12 times), and sound a renotice beep every 10 seconds (5 seconds, 2 times), and then will be sent, automatically, to the unit’s electronic storage bin.
When multiple alerts are received, and they are not responded to, the unit will scroll,
displaying each one every 5 seconds and sound a renotice beep every other time an
alert is displayed. While scrolling, each alert will be separated by the term NEW ALERT
the first time the alert is displayed, then NEXT ALERT every other time.
In order to respond to an alert while in the scrolling mode, the alert must be displayed.
28. (To begin from idle mode.) Press SET UP. Press BACKSPACE (ß). The screen
displays: SET DISPLAY BRIGHTNESS.
3 – 4
Pr o g r a m m i n g t h e Key b o a r d U n i t
Ve r s i o n 2 . 0
29. Press the SPACEBAR until the screen displays:
SET alert RENOTICE 3Ø /Ø1 /ØØ
30. Enter the:
• 1st set of numbers to set the seconds the alert will be displayed (1-99).
• 2nd set of numbers to set the number of times an alert will appear (1-99).
• 3rd set of numbers to set the number of appearances of an alert before a
renotice beep (Ø-99).
31. Press SEND to save the setting(s), OR to continue go to step 33.
DEFAULT EVENT TIME
The value set here will be the default initial time displayed when the event timer key is
pressed. The default event time can be modified by the user as necessary. (Refer to
Modifying Event Time in the User Manual.)
OPTIONS: Ø-99 (minutes) – Ø1-59 (seconds).
Factory default is ØØ-3Ø where
3
• ØØ represents the minutes
• 3Ø represents the seconds
32. (To begin from idle mode.) Press SET UP. Press BACKSPACE (ß). The screen
displays: SET DISPLAY BRIGHTNESS.
33. Press the SPACEBAR until the screen displays:
SET DEFAULT EVENT TIME ØØ - 3Ø
34. Enter the number of minutes and seconds.
35. Press SEND to save the setting(s), OR to continue go to step 37.
RESETTING A KEYBOARD UNIT
Note: This procedure is not a normal programming step and should not be implemented except under the circumstances mentioned below. Unless you intend to reset
the unit, press SEND to save the settings made to this point and exit this programming
string.
A unit can be reset when a new person is assigned to a previously used Amtel, or if a
password is forgotten or lost.
CAUTION: Resetting a unit will erase all customized programming,
addresses, stored messages, and reminders and will reset the unit to
factory default settings.
OPTIONS: YES or NO
Factory default is NO.
36. (To begin from idle mode.) Press SET UP. Press BACKSPACE (ß). The screen
displays: SET DISPLAY BRIGHTNESS.
Ve r s i o n 2 . 0
Pro g r a m m i n g t h e Key b o a r d U n i t
Programming
The event timer counts from a pre-set time down to zero.
3 – 5
37. Press the SPACEBAR until the screen displays:
RESET unit ? NO
38. Press BACKSPACE (ß) to scroll to YES. Then press SEND. The screen displays:
* ALL DATA WILL BE LOST * CANCEL
39. a. Press CLEAR to exit without resetting the unit, OR
b. Press BACKSPACE (ß) to “Reset” and press SEND to reset the unit.
The display goes blank and the unit reboots to factory defaults.
YOU HAVE NOW REACHED THE END OF ALL PROGRAMMING STEPS
IN THE “SET UP BACKSPACE” STRING.
3 – 6
Pr o g r a m m i n g t h e Key b o a r d U n i t
Ve r s i o n 2 . 0
Programming the “A-H Backspace” String
All the default settings have been pre-programmed at the factory. It should not be necessary to change programming values in this section. If network requirements make
changes necessary, information is provided in this section to customize a keyboard
unit.
The following programming functions are grouped sequentially — which we refer to
as the “A-H Backspace” programming string because all of the functions are accessed
by pressing and holding A and H and pressing BACKSPACE (ß).
COMMUNICATION NETWORK
In order to communicate, units must use the same network speed (fastwire or hardwire).
The recommended setting is fastwire, providing faster communication delivery.
Note: Fastwire is not compatible with Amtel 500 series units. (If there are 500 series
in the network, all units must be set to hardwire.)
OPTIONS: FASTWIRE or HARDWIRE
Factory default is FASTWIRE.
1. Press SET UP. Press and hold A and H, and press BACKSPACE (ß). (If the screen
displays ENTER PASSWORD, enter the setup password and press SEND.) The screen displays:
SET comm-network FASTWIRE
2. Press BACKSPACE (ß) to desired setting.
3. Press SEND to save the setting, OR to continue go to step 5.
Ve r s i o n 2 . 0
Pro g r a m m i n g t h e Key b o a r d U n i t
3 – 7
3
Communication Network
· Zone
· Computer Input
· Screen Exerciser
· Special Function
· Setup Password
• The “A-H Backspace” string can be protected by entering a setup password.
• The next 22 programming steps can be performed as a group or individually.
Note: Pressing SEND at the end of a step will save changes made to that point. Pressing CLEAR at any point allows you to view the current setting(s) and exit without making changes.
Programming
·
ZONE
The zone acts as an extended address that enables a group of Amtel units within a system to be separated from other Amtel units.
All Amtel units in a network that need to communicate must be on the same zone. If
you would like to isolate groups of Amtels to only be able to communicate within
their own network, you are able to set these units on another zone.
OPTIONS: Ø - 9
4.
Factory default is Ø.
The recommended setting is Ø.
(To begin from idle mode.) Press SET UP. Press and hold A and H and press
BACKSPACE (ß). (If the screen displays ENTER PASSWORD, enter the setup password and press
SEND.) The screen displays: SET comm-network.
5. Press the SPACEBAR until the screen displays:
SET zone Ø
6. Enter the desired number Ø - 9 to assign a zone.
7. Press SEND to save the setting(s), OR to continue go to step 9.
COMPUTER INPUT
This function is for future use. Ensure this feature is set to OFF.
Factory default is OFF.
8.
(To begin from idle mode.) Press SET UP. Press and hold A and H and press
BACKSPACE (ß). (If the screen displays ENTER PASSWORD, enter the setup password and press
SEND.) The screen displays: SET comm-network.
9. Press the SPACEBAR until the screen displays:
SET COMPUTER INPUT OFF
10. Press BACKSPACE (ß) to OFF.
11. Press SEND to save the setting(s), OR to continue go to step 13.
SCREEN EXERCISE
This function is designed to “exercise” every segment of the screen, ensuring consistent brightness across the display. At a pre-programmed time (usually after office
hours) the display flashes alternately S Ø S Ø S Ø S across the entire screen. This is
Amtel’s screen saver feature.
Note: While the screen exerciser is activated, the unit will still function normally.
Sending or receiving a communication will suspend the screen exerciser for one
minute and then re-activate.
Factory default is 12-AM / Ø1 HRS where
• 12-AM refers to the time the exercise will begin
• Ø1-HRS refers to the duration of the exercise
12. (To begin from idle mode.) Press SET UP. Press and hold A and H and press
BACKSPACE (ß). (If the screen displays ENTER PASSWORD, enter the setup password and press
SEND.) The screen displays: SET comm-network.
3 – 8
Pr o g r a m m i n g t h e Key b o a r d U n i t
Ve r s i o n 2 . 0
13. Press the SPACEBAR until the screen displays:
SET SCREEN EXERCISE 12-AM/Ø1-HRS
14. Enter the starting time indicating AM or PM and the duration of the exercise.
15. Press SEND to save the setting(s), OR to continue go to step 17.
SPECIAL FUNCTION
This feature is for technical troubleshooting and is used by qualified Amtel technicians.
16. (To begin from idle mode.) Press SET UP. Press and hold A and H and press
BACKSPACE (ß). (If the screen displays ENTER PASSWORD, enter the setup password and press
SEND.) The screen displays: SET comm-network.
17. Press the SPACEBAR until the screen displays:
SET SPECIAL FUNCTION NONE
3
18. Press SEND to save the setting(s), OR to continue go to step 20.
SETUP PASSWORD
This function is used to security-protect the 22 programming steps of the “A-H Backspace” programming string and the address(es) of the unit(s) being programmed.
• The setup password is four (4) characters in length, and it is made up of a
combination of letters and/or numerals.
• It is easier to program a setup password from a keyboard for all units.
• It is recommended that the same setup password be used throughout the
network. However, a unique setup password can be assigned to a unit.
• A keyboard unit can program a setup password locally or remotely — individually
or by groups using the NEXT PERSON key, or globally using the address + +. All
panel and wallmount units program a setup password only for itself.
Factory default is 9999.
The setting 9999 disables setup password protection.
CAUTION: Be sure to record the password and keep it in a safe location.
If the password is lost or forgotten, it cannot be recalled.
Note: If the password is lost or forgotten, the unit must be reset to clear the password
from the unit. Resetting a unit erases all customized programming, addresses, messages and reminders. Refer to Resetting a Keyboard Unit section.
Ve r s i o n 2 . 0
Pro g r a m m i n g t h e Key b o a r d U n i t
Programming
Factory default is NONE.
3 – 9
Assigning a setup password at the unit being programmed
19. (To begin from idle mode.) Press SET UP. Press and hold A and H and press
BACKSPACE (ß). (If the screen displays ENTER PASSWORD, enter the setup password and press
SEND.) The screen displays: SET comm-network.
20. Press the SPACEBAR until the screen displays:
Set SETUP PASSWORD ? ? ? ?
21. Enter the four digit password.
22. Press SEND to save all setting(s).
YOU HAVE NOW REACHED THE END OF ALL PROGRAMMING STEPS
IN THE “A-H BACKSPACE” STRING.
3 – 10
Pr o g r a m m i n g t h e Key b o a r d U n i t
Ve r s i o n 2 . 0
Changing a Setup Password at an Individual Unit
1. Press SET UP. Press and hold A and H and press BACKSPACE (ß). Enter the
setup password and press SEND. The screen displays: SET comm-network.
2. Press the SPACEBAR until the screen displays:
Set SETUP PASSWORD ? ? ? ?
3. Enter the new four digit password.
4. Press SEND to save the new password.
To program units remotely, the unit being programmed must have the remote access
setting set to “Program,” in order to accept the setup password.
Note: If setting globally, all units will receive the password setting except for the keyboard you are using. To assign this unit a setup password, repeat procedures 1-5.
1. Press SET UP. Then press 1. The screen displays:
SET SPECIAL FUNCTION FOR ? ?
2. To program all units enter the global address + +. To program multiple units
(up to 20) use the NEXT PERSON key between addresses. To program groups,
use a group address. To program a single unit, use the unit’s address.
3. Press SEND. The screen is blank.
4. Enter the command code 2049 and the 4 character password. (For this
example the password ABCD is used.)
2Ø49ABCD
5. Press SEND to assign the setup password to the unit(s) listed above.
Personal Preferences
REMOTE ACCESS
Remote access is a network and/or personal preference setting regarding access to this
unit.
OPTIONS: NONE – PROGRAM – RECALL
Factory default is PROGRAM.
• None – Secures a unit from remote access. This restricts any other unit from
recalling messages or remotely programming a unit.
• Program – Allows an Amtel to be programmed from a remote keyboard unit.
• Recall – Allows messages to be recalled from a remote keyboard unit
Note: Messages can be protected from being recalled by setting an individual password at your unit. (Refer to the Individual Password section in User Manual.)
Ve r s i o n 2 . 0
Pro g r a m m i n g t h e Key b o a r d U n i t
3 – 11
3
Note: 9999 disables the setup password.
Programming
Programming a Setup Password Remotely
1. Press SET UP. The screen displays:
SELECT SET UP ?
2. Press the 8 key. The screen displays the current setting:
SET REMOTE ACCESS PROGRAM
3. Press the 8 key repeatedly to change setting to your desired choice.
4. Press SEND to save the setting.
BEEPER VOLUME
The beeper volume level is set to meet personal preference.
OPTIONS: Levels OFF through 4.
Factory default is Level 3.
1. Press SET UP. The screen displays:
SELECT SET UP ?
2. Press the 5 key repeatedly to the desired setting.
SET BEEPER VOLUME LEVEL 3
3. Press SEND to save the setting.
BEEPER TONE
The beeper tone is set to meet personal preference.
OPTIONS: LOW – MEDIUM – HIGH
Factory default is MEDIUM.
1. Press SET UP. The screen displays:
SELECT SET UP ?
2. Press the 5 key. Press the SPACEBAR. Screen displays:
SET BEEPER TONE MEDIUM
3. Press the 5 key repeatedly to the desired setting.
4. Press SEND to save the setting.
Time Keeping Functions
All Amtel units on a network display the date and time.
There are three options for time keeping:
• Central – The central timekeeper sends time updates every minute to units set
to auto. Only one keyboard unit on the network may be designated as the
central timekeeper.
• Auto – All keyboard units on the network set to auto receive time updates
from the central timekeeper.
• Local – A keyboard unit set to local can keep track of its own time
independent of the network.
3 – 12
Pr o g r a m m i n g t h e Key b o a r d U n i t
Ve r s i o n 2 . 0
Note: Panel and wallmount units keep time only on auto.
If there is more than one central timekeeper, the time will flash erratically on the
screens of all units set to auto.
If one unit is programmed as the central timekeeper, all other units should be programmed to “auto.”
SETTING THE TIME KEEPING MODE
Factory default is auto.
1. Press SET UP. The screen displays:
SELECT SET UP ?
Programming
2. Press the 7 key. The screen displays the current setting:
SET TIME KEEPING AUTO
3. Press the 7 key repeatedly to the desired setting.
4. Press SEND to save the setting.
3
SETTING THE TIME AND DATE
The time can only be set on keyboard units that have the time keeping mode set to central or local.
You are unable to set the time for a unit set to auto. If you attempt to the screen displays:
AUTO TIME KEEPING MODE
and you are unable to enter any information.
To set the time and date, for units set to central or local, follow these steps.
1. Press SET UP. The screen displays:
SELECT SET UP ?
2. Press the Ø key. The screen displays the current setting:
SET TIME/DATE 12-ØØ AM Ø1/Ø1/99
3. Type the correct time and date. (Entering AM or PM.)
4. Press SEND to save the setting.
Ve r s i o n 2 . 0
Pro g r a m m i n g t h e Key b o a r d U n i t
3 – 13
Programming a Panel or Wallmount Unit
All units have been pre-programmed at the factory. Information is provided in this
section to customize a panel unit or wallmount unit to meet network requirements
and/or personal preferences.
Programming the “Delete, Choice One Down”
String
The following programming functions are grouped sequentially — which we refer to
as the “Delete, Choice One Down” programming string because all of the functions
are accessed by pressing DELETE and CHOICE 1 Ú.
·
Display Brightness
· Message Length
· Auto Print
· Receipt Print
· Formfeed Length
· CDD Duration
· Message Recall Order
· Alert Renotice
· Default Event Time
· Reset Unit
• The “Delete, Choice One Down” programming string is not protected by the
setup password.
• The next 37 programming steps can be performed as a group or individually.
Note: Pressing SEND/SEND AS ALERT at the end of a step will save changes made to
that point. Pressing CLEAR at any point allows you to view the current setting(s) and
exit without making changes.
DISPLAY BRIGHTNESS
The display brightness can be adjusted to meet network needs and/or personal preferences.
OPTIONS: Levels 1 though 4.
Factory default is level 3.
1. Press and hold DELETE and CHOICE 1 Ú. The screen displays:
SET DISPLAY BRIGHTNESS LEVEL 3
2. Press CHOICE 1 Ù or Ú repeatedly to the desired brightness level.
3. Press SEND/SEND AS ALERT to save the setting, OR to continue go to step 5.
3 – 14
Pr o g r a m m in g a Pa n el o r Wa l l m o u n t U n i t
Ve r s i o n 2 . 0
MESSAGE LENGTH
Message length can be programmed for a minimum of 5 lines or a maximum of 7
lines. When typing a message, it is suggested to set the length to 7 lines in order to
maximize space in which to enter information. Seven lines is equal to 7 full screens of
text or 224 characters.
OPTIONS: 5 or 7 lines.
Factory default is 7 lines.
4.
(To begin from idle mode.) Press and hold DELETE and CHOICE 1 Ú. The screen
displays: SET DISPLAY BRIGHTNESS.
5. Press CHOICE 2 Ú until the screen displays:
AUTO PRINT
Note: This procedure applies only if a printer is connected to the panel unit or wallmount unit you are programming.
This feature enables an Amtel unit to automatically print incoming messages.
It may be useful at times to have a hard copy of the messages you received at your
Amtel unit. You can take these messages with you when you leave the office; you
may want a hard copy to keep a phone log of your calls.
OPTIONS: OFF – MEMORY FULL – ALL MESSAGES Factory default is OFF.
• Off – No messages will be automatically printed. (You can still print on
demand.)
• Memory Full – Incoming messages will be automatically printed after the
unit’s storage capacity is full.
• All Messages – All messages received will be automatically printed.
8.
(To begin from idle mode.) Press and hold DELETE and CHOICE 1 Ú. The screen
displays: SET DISPLAY BRIGHTNESS.
9. Press CHOICE 2 Ú until the screen displays:
SET AUTO PRINT OFF
10. Press CHOICE 1 Ù or Ú to the desired setting.
11. Press SEND/SEND AS ALERT to save setting(s), OR to continue go to step 13.
RECEIPT PRINT
Note: This procedure applies only if a printer is connected to the panel unit or wallmount unit you are programming.
This feature enables an Amtel unit to print outgoing messages automatically.
Ve r s i o n 2 . 0
Pr o g r a m m i n g a Pa n el o r Wa l l m o u n t U n i t
3 – 15
3
6. Press CHOICE 1 Ù or Ú to the desired setting.
7. Press SEND/SEND AS ALERT to save setting(s), OR to continue go to step 9.
Programming
SET message LENGTH 7 LINE
It may be useful at times to have a hard copy of the messages you send from your Amtel unit to keep as a phone log of calls or messages you have sent to other units.
OPTIONS: ON – OFF
Factory default is OFF.
12. (To begin from idle mode.) Press and hold DELETE and CHOICE 1 Ú. The screen
displays: SET DISPLAY BRIGHTNESS.
13. Press CHOICE 2 Ú until the screen displays:
SET RECEIPT PRINT OFF
14. Press CHOICE 1 Ù or Ú to the desired setting.
15. Press SEND/SEND AS ALERT to save setting(s), or to continue go to step 17.
FORMFEED LENGTH
Note: This procedure applies only if a printer is connected to the panel unit or wallmount unit you are programming.
This function determines the number of blank lines inserted at the end of printing a
message, in order to adjust the paper to fit different printers.
OPTIONS: 1 through 20 lines.
Factory default is 3.
16. (To begin from idle mode.) Press and hold DELETE and CHOICE 1 Ú. The screen
displays: SET DISPLAY BRIGHTNESS.
17. Press CHOICE 2 Ú until the screen displays:
SET FORMFEED LENGTH 3
18. Press CHOICE 1 Ù or Ú to the desired setting.
19. Press SEND/SEND AS ALERT to save setting(s), OR to continue go to step 21.
CDD DURATION
Note: This procedure applies only if a CDD is connected to the panel unit or wallmount unit you are programming.
When a CDD device is connected to an Amtel unit, it will cause an external electrical
device, such as a lamp, to flash when an alert or message is received. Typically, it is
used in either noisy or noise sensitive areas.
OPTIONS: OFF – 2 through 10 seconds. Factory default is 4 seconds.
20. (To begin from idle mode.) Press and hold DELETE and CHOICE 1 Ú. The screen
displays: SET DISPLAY BRIGHTNESS.
21. Press CHOICE 2 Ú until the screen displays:
SET CDD DURATION
4 SEC
22. Press CHOICE 1 Ù or Ú to the desired setting.
23. Press SEND/SEND AS ALERT to save setting(s), OR to continue go to step 25.
3 – 16
Pr o g r a m m in g a Pa n el o r Wa l l m o u n t U n i t
Ve r s i o n 2 . 0
MESSAGE RECALL ORDER
This programming step defines the order in which messages can be reviewed.
OPTIONS: LIFO or FIFO
Factory default is LIFO.
• FIFO – First In First Out – The first or oldest message stored is the first
message displayed.
• LIFO – Last In First Out – The last or most recent message stored is the first
message displayed.
24. (To begin from idle mode.) Press and hold DELETE and CHOICE 1 Ú. The screen
displays: SET DISPLAY BRIGHTNESS.
25. Press CHOICE 2 Ú until the screen displays:
26. Press CHOICE 1 Ù or Ú to the desired setting.
27. Press SEND/SEND AS ALERT to save setting(s), OR to continue go to step 29.
3
ALERT RENOTICE
This function manages:
• the length of time a received alert is displayed.
• how fast it will scroll when multiple alerts are received.
• how often a renotice beep will sound when an alert is not responded to.
Factory default setting(s) is - 3Ø/Ø1/ØØ where
• 3Ø is the number of seconds an alert will be displayed.
• Ø1 is the number of times an alert will appear.
• ØØ is the number of appearances of an alert before sounding a renotice beep.
Note: Please understand that this function may appear to be confusing as you read it.
We can explain it better than write it. Please do not hesitate to contact your local
authorized Amtel dealer or Amtel Systems Corporation, and we will be delighted to
talk with you. That being said, we will attempt to write this as simply as possible.
We will use as an example setting of Ø5/12/Ø2.
When a single alert is received, and it is not responded to, it will display a total of 60
seconds, (5 seconds, 12 times), and sound a renotice beep every 10 seconds (5 seconds, 2 times), and then will be sent, automatically, to the unit’s electronic storage bin.
When multiple alerts are received, and they are not responded to, the unit will scroll,
displaying each one every 5 seconds and sound a renotice beep every other time an
alert is displayed. While scrolling, each alert will be separated by the term NEW ALERT
the first time the alert is displayed, then NEXT ALERT every other time.
In order to respond to an alert while in the scrolling mode, the alert must be displayed.
Ve r s i o n 2 . 0
Pr o g r a m m i n g a Pa n el o r Wa l l m o u n t U n i t
Programming
SET MESSAGE RECALL ORDER LIFO
3 – 17
28. (To begin from idle mode.) Press and hold DELETE and CHOICE 1 Ú. The screen
displays: SET DISPLAY BRIGHTNESS.
29. Press CHOICE 2 Ú until the screen displays:
SET alert RENOTICE 3Ø/Ø1/ØØ
30. Press:
Ù or Ú to set the seconds the alert will be displayed (1-99).
Ú to move to the 2nd set of numbers.
CHOICE 1 Ù or Ú to set the number of times an alert will appear (1-99).
CHOICE 2 Ú to move to the 3rd set of numbers.
CHOICE 1 Ù or Ú to set the number of appearances of an alert
before the renotice beep (Ø-99).
31. Press SEND/SEND AS ALERT to save setting(s), OR to continue go to step 33.
CHOICE 1
CHOICE 2
DEFAULT EVENT TIME
The event timer counts from a pre-set time down to zero.
The value set here will be the default initial time displayed when the event timer button is pressed. The default event time can be modified by the user as necessary. (Refer
to Modifying Event Time in the User Manual.)
OPTIONS: Ø1 - 99 (minutes) – Ø1 - 59 (seconds) Factory default is ØØ-3Ø where
• ØØ represents the minutes.
• 3Ø represents the seconds.
32. (To begin from idle mode.) Press and hold DELETE and CHOICE 1 Ú. The screen
displays: SET DISPLAY BRIGHTNESS.
33. Press: CHOICE 2 Ú until the screen displays:
SET DEFAULT EVENT TIME ØØ - 3Ø
Ù or Ú to scroll through (Ø-99) to set the minutes.
to move to the 2nd set of numbers.
CHOICE 1 Ù or Ú to scroll from Ø through 59 to set the seconds.
34. Press SEND/SEND AS ALERT to save setting(s), OR to continue go to step 36.
CHOICE 1
CHOICE 2 Ú
RESETTING A PANEL OR WALLMOUNT UNIT
Note: This procedure is not a normal programming step and should not be implemented except under the circumstances mentioned below. Unless you intend to reset
the unit, press SEND to save the settings made to this point and exit this programming
string.
A unit can be reset when a new person is assigned to a previously used Amtel, or if a
password is forgotten or lost.
CAUTION: Resetting a unit will erase all customized programming,
addresses, and stored messages and will reset the unit to factory default
settings.
3 – 18
Pr o g r a m m in g a Pa n el o r Wa l l m o u n t U n i t
Ve r s i o n 2 . 0
OPTIONS: YES or NO
Factory default is NO.
35. (To begin from idle mode.) Press and hold DELETE and CHOICE 1 Ú. The screen
displays: SET DISPLAY BRIGHTNESS.
36. Press: CHOICE 2 Ú until the screen displays:
RESET unit ? NO
CHOICE 1 Ù or Ú to scroll to yes.
SEND/SEND AS ALERT. Screen displays:
ALL DATA WILL BE LOST *CANCEL*
3
Programming
CHOICE 1 Ú to “Reset.”
37. a. Press CLEAR to exit without resetting the unit, OR
b. Press BACKSPACE (ß) to “Reset” and press SEND to reset the unit.
The display goes blank and the unit reboots to factory defaults.
YOU HAVE NOW REACHED THE END OF ALL PROGRAMMING STEPS
IN THE “DELETE, CHOICE ONE DOWN” STRING.
Ve r s i o n 2 . 0
Pr o g r a m m i n g a Pa n el o r Wa l l m o u n t U n i t
3 – 19
Programming the “Delete, Choice Two Up, Choice
One Down” String
All the default settings have been pre-programmed at the factory. It should not be necessary to change programming values in this section. If network requirements make
changes necessary, information is provided in this section to customize a panel unit or
wallmount unit.
The following programming functions are grouped sequentially — which we refer to
as the “Delete, Choice Two Up, Choice One Down” programming string because all
of the functions are accessed by pressing and holding DELETE and CHOICE 2 Ù and
pressing CHOICE 1 Ú.
·
Communication Network
Zone
· Computer Input
· Screen Exercise
· Special Function
· Setup Password
• The “Delete, Choice Two Up, Choice One Down” programming string can be
protected by entering a setup password.
• The next 20 programming steps can be performed as a group or individually.
·
Note: Pressing SEND/SEND AS ALERT at the end of a step will save changes made to
that point. Pressing CLEAR at any point allows you to view the current setting(s) and
exit without making changes.
COMMUNICATION NETWORK
In order to communicate, units must use the same network speed (fastwire or hardwire).
The recommended setting(s) is fastwire, providing faster communication delivery.
Note: Fastwire is not compatible with Amtel 500 series units. (If there are 500 series
in the network, all units must be set to hardwire.)
OPTIONS: FASTWIRE or HARDWIRE
Factory default is FASTWIRE.
1. Press and hold DELETE and CHOICE 2 Ù.
While holding these down, press CHOICE 1 Ú. (If screen displays ENTER PASSWORD,
enter the setup password, and press SEND.) The screen displays:
SET comm-network FASTWIRE
2. Press CHOICE 1 Ù or Ú to the desired setting.
3. Press SEND/SEND AS ALERT to save setting, OR to continue go to step 5.
3 – 20
Pr o g r a m m in g a Pa n el o r Wa l l m o u n t U n i t
Ve r s i o n 2 . 0
ZONE
The zone acts as an extended address that enables a group of Amtel units within a system to be separated from other Amtel units.
All Amtel units in a network that need to communicate must be on the same zone. If
you would like to isolate groups of Amtels to only be able to communicate within
their own network, you are able to set these units on another zone.
OPTIONS: Ø - 9. Factory default is Ø.
4.
The recommended setting is Ø.
Press and hold DELETE and CHOICE 2 Ù. While holding
these down press CHOICE 1 Ú. (If screen displays ENTER PASSWORD enter the setup
password, and press SEND.) The screen displays: SET comm-network.
5. Press CHOICE 2 Ú until the screen displays:
SET zone Ø
6. Press CHOICE 1 Ù or Ú to assign a zone (Ø - 9).
7. Press SEND/SEND AS ALERT to save setting(s), OR to continue go to step 9.
3
COMPUTER INPUT
This function is for future use. Ensure this feature is set to OFF.
Factory default is OFF.
8.
(To begin from idle mode.) Press and hold DELETE and CHOICE 2 Ù. While
holding these down, press CHOICE 1 Ú. (If screen displays ENTER PASSWORD, enter the
setup password, and press SEND.) The screen displays: SET comm-network.
9. Press CHOICE 2 Ú until the screen displays:
SET COMPUTER INPUT OFF
10. Press CHOICE 1 Ù or Ú to ensure your unit is set to OFF.
11. Press SEND/SEND AS ALERT to save setting(s), OR to continue go to step 13.
SCREEN EXERCISE
This function is designed to “exercise” every segment of the screen ensuring consistent brightness across the display. At a pre-programmed time (usually after office
hours) the display flashes alternately S Ø S Ø S Ø S across the entire screen. This is
Amtel’s screen saver feature.
Note: While the screen exerciser is activated, the unit will still function normally.
Sending or receiving a communication will suspend the screen exerciser for one
minute and then reactivate.
Factory default is 12-AM / Ø1 HRS where
• 12-AM represents the time the exercise will begin.
• Ø1-HRS represents the duration of the exercise.
Ve r s i o n 2 . 0
Pr o g r a m m i n g a Pa n el o r Wa l l m o u n t U n i t
Programming
(To begin from idle mode.)
3 – 21
12. (To begin from idle mode.) Press and hold DELETE and CHOICE 2 Ù. While holding
these down press CHOICE 1 Ú. (If screen displays ENTER PASSWORD, enter the setup
password, and press SEND.) The screen displays: SET comm-network.
13. Press: CHOICE 2 Ú until the screen displays:
SET SCREEN EXERCISE 12-AM/Ø1-HRS
Ù or Ú to enter the starting time.
Ú to move to the 2nd set of numbers.
CHOICE 1 Ù or Ú to enter the duration of the exercise.
14. Press SEND/SEND AS ALERT to save setting(s), OR to continue go to step 16.
CHOICE 1
CHOICE 2
SPECIAL FUNCTION
This feature is for technical troubleshooting and is used by qualified Amtel technicians.
Factory default is NONE.
15. (To begin from idle mode.) Press and hold DELETE and CHOICE 2 Ù. While holding
these down, press CHOICE 1 Ú. (If screen displays ENTER PASSWORD, enter the setup
password, and press SEND.) Screen displays: SET comm-network.
16. Press CHOICE 2 Ú until the screen displays:
SET SPECIAL FUNCTION NONE
17. Press SEND/SEND AS ALERT to save setting(s), OR to continue go to step 19.
SETUP PASSWORD FOR LOCAL PROGRAMMING
This function is used to security protect the “Delete, Choice Two Up, Choice One
Down” programming string and the address(es) of the unit(s) you are programming.
• The setup password is four (4) characters in length, and it is made up of a
combination of letters and/or numerals.
• It is easier to program a setup password from a keyboard for all units.
• It is recommended that the same setup password be used throughout the
network. However, a unique setup password can be assigned to a unit.
• A keyboard unit can program a setup password locally or remotely —
individually or by groups using the NEXT PERSON key, or globally using the
address + +. All panel and wallmount units program a setup password only
for itself.
Factory default is 9 9 9 9.
The setting 9999 disables setup password protection.
CAUTION: Be sure to record the password and keep it in a safe location.
If the password is lost or forgotten, it cannot be recalled.
3 – 22
Pr o g r a m m in g a Pa n el o r Wa l l m o u n t U n i t
Ve r s i o n 2 . 0
Note: If the password is lost or forgotten, the unit must be reset to clear the password
from the unit. Resetting a unit erases all customized programming, addresses and
messages. Refer to Resetting a Panel or Wallmount Unit section.
Assigning a setup password locally
18. (To begin from idle mode.) Press and hold DELETE and CHOICE 2 Ù. While
holding these down, press CHOICE 1 Ú. (If screen displays ENTER PASSWORD, enter the
setup password, and press SEND.) Screen displays: SET comm-network.
19. Press: CHOICE 2 Ú until the screen displays:
SET SETUP PASSWORD 9 9 9 9
Ù or Ú to assign 1st character.
CHOICE 2 Ú to move to the next space.
CHOICE 1 Ù or Ú to assign the 2nd character.
CHOICE 2 Ú to move to the next space.
CHOICE 1 Ù or Ú to assign the 3rd character.
CHOICE 2 Ú to move to the 4th space.
CHOICE 1 Ù or Ú to assign the 4th character.
20. Press SEND/SEND AS ALERT to save all setting(s).
3
Programming
CHOICE 1
YOU HAVE NOW REACHED THE END OF ALL PROGRAMMING STEPS
IN THE “DELETE, CHOICE TWO UP, CHOICE ONE DOWN” STRING
Ve r s i o n 2 . 0
Pr o g r a m m i n g a Pa n el o r Wa l l m o u n t U n i t
3 – 23
Changing a Setup Password
1.
(To begin from idle mode.) Press and hold DELETE and CHOICE 2 Ù. While
holding these down, press CHOICE 1 Ú. Screen displays:
ENTER PASSWORD ? ? ? ?
2. Enter the current setup password.
Press: CHOICE 1 Ù or Ú to assign 1st character.
CHOICE 2 Ú to move to the next space.
CHOICE 1 Ù or Ú to assign the 2nd character.
CHOICE 2 Ú to move to the next space.
CHOICE 1 Ù or Ú to assign the 3rd character.
CHOICE 2 Ú to move to the 4th space.
CHOICE 1 Ù or Ú to assign the 4th character.
3. Press SEND/SEND AS ALERT - screen displays:
SET comm-network
4. Press CHOICE 2 Ú repeatedly until screen displays:
SET SETUP PASSWORD ? ? ? ?
5. Follow step 19 of Assigning a Setup Password Locally section.
6. Press SEND/SEND AS ALERT to save the new password.
Personal Preferences
REMOTE ACCESS
Remote access is a network and/or personal preference setting(s) regarding access to
this unit.
OPTIONS: NONE – PROGRAM – RECALL
Factory default is PROGRAM.
• None – Secures a unit from remote access. This restricts any other unit from
recalling messages or remotely programming a unit.
• Program – Allows an Amtel to be programmed from a remote keyboard unit.
• Recall – Allows your messages to be recalled from a remote keyboard unit.
Note: Messages can be protected from being recalled by setting an individual password at your unit. (Refer to the Individual Password section in the User Manual.)
1. Press and hold CLEAR and press RECALL ALERT. The screen displays:
SET REMOTE ACCESS PROGRAM
2. Press CHOICE 1 Ù or Ú to the desired setting.
3. Press SEND/SEND AS ALERT to save the setting.
3 – 24
Pr o g r a m m in g a Pa n el o r Wa l l m o u n t U n i t
Ve r s i o n 2 . 0
BEEPER VOLUME
The beeper volume level is set to meet network requirements and/or personal preference.
OPTIONS: Levels OFF through 4.
Factory default is Level 3.
1. Press and hold CLEAR and press DELETE. Screen displays the current setting:
SET BEEPER VOLUME LEVEL 3
2. Press CHOICE 1 Ù or Ú to the desired setting.
3. Press SEND/SEND AS ALERT to save the setting.
BEEPER TONE
OPTIONS: LOW – MEDIUM – HIGH
Programming
The beeper tone is set to personal preference.
Factory default is MEDIUM.
1. Press and hold CLEAR and press DELETE. Screen displays:
2. Press CHOICE
2
3
SET BEEPER VOLUME ___
Ú. The screen displays:
SET BEEPER TONE MEDIUM
3. Press CHOICE 1 Ù or Ú to the desired setting.
4. Press SEND/SEND AS ALERT to save the setting(s).
Ve r s i o n 2 . 0
Pr o g r a m m i n g a Pa n el o r Wa l l m o u n t U n i t
3 – 25
This page intentionally left blank.
3 – 26
Pr o g r a m m in g a Pa n el o r Wa l l m o u n t U n i t
Ve r s i o n 2 . 0
Customizing Units
Customizing Text Fragments and Phrases
A phrase is the text displayed on the screen when a phrase button/key is pressed.
Phrases can be changed to meet network and/or personal preferences. Preprogrammed phrases can be changed.
Phrases can be programmed in one of two ways:
The phrase: I’LL CALL BACK _____, can be modified with up to
ten choices such as, “IN 10 MIN,” “TOMORROW,” “NEXT
WEEK” (see fig 4.1 list Ø).
• A keyboard unit only uses complete phrases. To change a phrase, the
keyboard user types new text.
• A panel unit or wallmount unit uses complete phrases in addition to phrases
using text fragments.
Note: Text fragment lists must be programmed and assigned a list number to be able
to be inserted into phrases. Use Worksheet #3 to assist in this programming function.
It is a good idea to first determine the phrase and list the different ways to complete
the phrase. This list will become the text fragment list.
Programming Text Fragment Lists
Text fragment lists can only be programmed from a keyboard unit. When programming a remote unit, the remote access must be set to “Program.”
Text Fragment(s):
•
•
•
•
•
are used by panel or wallmount units to modify a phrase.
are contained in text fragment lists.
are limited to 12 characters, including spaces.
should be entered in the order the user will scroll through them.
are identified by the flashing text in a phrase.
Ve r s i o n 2 . 0
C u s t o m i z i n g Tex t Fr a g m en t s a n d P h r a s es
4 – 1
4
EXAMPLE:
Customizing
• as a complete phrase, for example: I’LL CALL BACK, or
• with one or two pre-programmed text fragments.
A text fragment is a portion of text within a phrase that can be modified at a wallmount or a panel unit by using the choice buttons. A text fragment list provides the
user with options to complete a phrase.
Text Fragment Lists:
•
•
•
1.
each unit can have its own set of lists
are numbered Ø - 9
can contain up to ten programmed text fragment entries
Press SET UP. The screen displays:
SELECT SET UP ?
2. Press the 1 key. The screen displays:
SET SPECIAL FUNCTION FOR ? ?
3. Enter the address(es) of the unit(s) to be programmed. (To program more than one
unit, type the address of the first unit, followed by pressing the NEXT PERSON key. Continue
typing addresses of additional units separating each address by pressing NEXT PERSON, or
program all units using the global address of + +.)
4.
5.
6.
7.
Press SEND. The display will be blank with a flashing cursor.
Enter the command code Ø4.
Enter the text fragment list number to be programmed (Ø through 9).
Enter the first text fragment followed immediately by an asterisk (SHIFT and
number 8 key). (Maximum number of characters for a text fragment is 12,
including spaces.)
8. Enter the second text fragment followed immediately by an asterisk. Enter
each additional text fragment, separating each with an asterisk. You may
enter a maximum of ten (10) text fragments. See fig 4.1.
9. Press SEND to save all settings.
EXAMPLE: Fig 4.1 shows an example to program
List Ø
List 1
a text fragment list. For purposes of
Ø. IN 5 MIN
Ø. MY OFFICE
this illustration, the list number is
1. IN 10 MIN
1. ASSTS DESK
zero (Ø) and contains seven text frag2. IN 15 MIN
2. RECEPTION
ments.
3. IN 30 MIN
3. SERVICE
When this example list is inserted
4. IN 1 HOUR
4. ACCOUNTING
into a phrase, the user is able to scroll
5. TOMORROW
5.
through the text fragment list entries
6. NEXT WEEK
6.
to the desired choice to complete the
7.
7.
phrase.
8.
8.
PHRASE: I’LL CALL BACK
9.
9.
____________.
Figure 4-1
4 – 2
C u s t o m iz in g Tex t Fr a g m en t s a n d P h r a s es
Ve r s i o n 2 . 0
Programming a Phrase
A phrase is the text displayed on the screen when a phrase button/key is pressed.
Phrases:
• are used by all units.
• can be programmed with none, one or two text fragment lists (only panel and
wallmount units use text fragments).
• when displayed on the screen consist of: the initial address, the phrase and
(optional) text fragments (flashing).
• contain a maximum of 29 characters including spaces and any text fragments.
• are programmed from a remote keyboard unit.
Note: Use Customization Form Worksheet #3 to assist with programming phrases.
Programming a phrase without text fragments
To program units remotely, the unit being programmed must have the remote access setting set to “Program.”
2. Press the 2 key.
(For this example the initial address is AA.)
The screen displays:
SET alert FOR A A
3. Enter the address(es) of the unit(s) to be programmed. (To program more than one
unit, type the address of the first unit, followed by pressing the NEXT PERSON key. Continue
typing addresses of additional units separating each address by pressing NEXT PERSON, or
program all units using the global address of + +.)
4. Press SEND. The screen displays:
TO BE ASSIGNED TO KEY ?
5. To program a keyboard unit, press the key to which the phrase is to be
assigned. (Only keys in the top two rows, 1 through Ø, excluding the BACKSPACE key, or
Q through P of the keyboard are valid.)
To program a panel unit or wallmount unit, enter the number or letter of the
button to which the phrase is to be assigned. (Refer to the appropriate unit template in
the Templates and Worksheets section to determine the button number.)
6. Press SEND. The screen displays:
AND TO BE SENT TO ? ?
7. Enter the initial address for the phrase. (The address to which this phrase will be sent
when the phrase button/key is first pressed.)
8. Press SEND. The screen displays the initial address and a flashing cursor:
FD_
Ve r s i o n 2 . 0
C u s t o m i z i n g Tex t Fr a g m en t s a n d P h r a s es
4 – 3
4
SELECT SET UP ?
Customizing
1. Press SET UP. The screen displays:
9. Enter the text of the phrase. (The maximum number of characters for a phrase
is 29, including all spaces.)
10. Press SEND to save the settings.
Programming a phrase with text fragments
Note: Only panel and wallmount units use text fragment lists.
EXAMPLE:
To illustrate the programming of a
phrase with text fragment lists, we
will use the phrase “I’LL CALL
BACK IN_____,” and insert the text
fragment lists shown in fig 4.2. These
lists have been programmed according to the procedure outlined in the
section “Programming Text Fragment
Lists” and will be used in the construction of this phrase.
Each panel unit and wallmount unit
have factory default programmed text
fragments and phrases.
PHRASE: I’LL CALL BACK _______
Figure 4-2
List Ø
List 1
Ø. IN 5 MIN
Ø. MY OFFICE
1. IN 10 MIN
1. ASSTS
2. IN 15 MIN
2. RECEPTION
3. IN 30 MIN
3. SERVICE
4. IN 1 HOUR
4. ACCOUNTING
5. TOMORROW
5.
6. NEXT WEEK
6.
7.
7.
8.
8.
9.
9.
1. Press SET UP. The screen displays:
SELECT SET UP ?
2. Press the 2 key. (The initial address for this example is AA.) The screen displays:
SET alert FOR A A
3. Enter the address(es) of the unit(s) to be programmed. (To program more than one
unit, type the address of the first unit, followed by pressing the NEXT PERSON key. Continue
typing addresses of additional units separating each address by pressing NEXT PERSON, or
program all units using the global address + +.)
4. Press SEND. The screen displays:
TO BE ASSIGNED TO KEY ?
5. To program a panel unit or wallmount unit, enter the number or letter of the
button to which the phrase is to be assigned. (Refer to the appropriate unit template in
the Templates and Worksheets section determine the button number.)
6. Press SEND. The screen displays:
AND TO BE SENT TO ? ?
7. Enter the initial address for the phrase. (The address to which this phrase will be sent
when the phrase button/key is pressed.)
8. Press SEND. The screen displays the initial address and a flashing cursor:
FD_
4 – 4
C u s t o m iz in g Tex t Fr a g m en t s a n d P h r a s es
Ve r s i o n 2 . 0
9. To enter text fragments in a phrase, enter the text of the phrase inserting an
asterisk followed by the list number and the entry number. In fig 4.3, the list
number is Ø and the list entry number is 5. This corresponds to the text
“TOMORROW.”
Note: The order you enter the list entries is the order the user will scroll through them.
The phrase is “I’LL CALL BACK _____” with a text fragment list being used at the
end to modify the phrase.
After the above programming steps are completed, the phrase will
appear on the screen as illustrated above. The user can modify the
phrase and scroll to other choices of the text fragment list using the
CHOICE 1 Ù or Ú buttons.
10. To program a phrase using a second text fragment:
Follow the above procedure to enter a second text fragment. For example
programming the phrase would appear as:
Programming Process:
I’LL CALL BACK *14 *Ø1_
Resulting Phrase:
I’LL CALL BACK ACCOUNTING IN 1Ø MIN _
EXAMPLE:
After the above programming steps are completed, the phrase will
appear on the screen as illustrated above. The user may modify the
phrase by scrolling the other choices of the text fragment list using
the CHOICE 1 Ù or Ú buttons.
11. Press SEND to save the settings.
Ve r s i o n 2 . 0
C u s t o m i z i n g Tex t Fr a g m en t s a n d P h r a s es
4 – 5
4
EXAMPLE:
Customizing
Figure 4-3
Custom Phrase Slide Card
When the customization is complete, you may order a custom phrase slide card
through your dealer or from Amtel Systems Corporation. It will be printed with your
customized phrases, and mailed to you to insert into the wallmount, giving the unit a
clean professional look. To order, contact your local authorized Amtel dealer or Amtel Systems Corporation.
Slide
Card
Opening
Wed JAN 1, 2ØØ3 9 -ØØ AM
Inserting a Custom Phrase Slide Card
Using a thin bladed knife or a similar object, carefully insert the end into the slide card
opening and grasp the end with a tweezers. Slowly pull the old card out of the sleeve.
Insert the new card.
Emergency Alerts
An emergency alert is a communication sent system wide, alerting all units of an
emergency. Although all units on the network receive the emergency alert, it is not
necessary to program all units to be able to send the alert. The function, to send an
emergency alert, will not be enabled unless the programming procedure is performed.
If you program an emergency alert key or button, it is important to label the key or
button accordingly.
When the emergency alert is sent:
• it overrides all other network functions.
• turns the network to maximum beep volume and display brightness.
• every unit on the network will continuously beep in a distinctive two-tone
alarm until the alert is canceled.
• the displayed text at the receiving unit should display the address where the
emergency alert was initiated and the emergency alert phrase. (When
4 – 6
E m er g en c y A l er t s
Ve r s i o n 2 . 0
programming an emergency alert, it is recommended that the alert text include
the physical location of the unit.)
• the sending unit is silent and will display a pre-programmed phrase which can
be different from the receiving units, so as not to further disrupt and cause
additional anxiety at the location of the emergency.
CAUTION: Be sure to identify the emergency key/button so it is not
pressed accidentally.
EXAMPLE:
Sending unit’s screen:
SUMMONING ASSISTANCE
Receiving unit’s screen:
In the event that an emergency alert is initiated, each of units AA
through EE will cause SUMMONING ASSISTANCE AT FD to be displayed at
all receiving units on the network. Of course, you may choose a
unique emergency alert to be displayed for any or all units. In that
case, you do the programming one address at a time.
Ve r s i o n 2 . 0
E m er g en c y A l er t s
4 – 7
4
• The sending unit will flash the pre-programmed phrase, assuring the sender
that the emergency alert is being transmitted.
• An elapsed timer is activated at the sending unit when the emergency alert is
initiated but is not displayed until the emergency alert is canceled.
• The emergency alert can only be canceled at the sending unit by pressing the
CLEAR key/button which returns the network to normal functions. (The timer
at the sending unit is still counting up and displays the day of the week, the
elapsed timer counting up, and the current time of day.)
• Press TIMER, to stop the timer. The emergency alert is time and date stamped,
and the response time and will be stored it in the unit’s electronic storage bin
for later recall
• Press the CLEAR key/button to return the sending unit to normal functions.
• Only one emergency alert per unit can be stored.
EXAMPLE: Your keyboard unit address is AA and is one of 6 units on a network, the other addresses: BB, CC, DD, EE, FF. You decide that
units BB through EE, which are located in a production area, might
have a common emergency experience. You choose to exclude FF.
(Therefore, all units will receive the emergency alert, but FF cannot
send one.) Further you choose EMERGENCY AT FRONT DESK as
a common alert. Simply, you enter the address BB through EE into
your unit, you select the key or button that will send the emergency
alert and you enter EMERGENCY AT FRONT DESK as the emergency alert phrase.
Customizing
**emergency AT FRONT DESK**
To further customize — perhaps you wish to display a different
phrase on the sending unit, SUMMONING ASSISTANCE — the process is
similar, just refer to “Programming an Emergency Alert Phrase for a
Sending Unit.”
Programming an Emergency Alert
This step enables units to have the capability to send an emergency alert. Programming can only be done from a remote keyboard unit. To program units remotely, the
unit being programmed must have the remote access setting set to “Program.”
There are two steps in the programming procedure:
1. Assign a key or button.
2. Program the phrase that will be seen on all receiving units.
Note: A phrase must be programmed. No default is provided.
At the keyboard unit
1. Press SET UP. The screen displays:
SELECT SET UP ?
2. Press the number 1 key. The screen displays:
SET SPECIAL FUNCTION FOR ? ?
3. Enter the address(es) of the unit(s) to be programmed to be enabled to send
an emergency alert. (To program more than one unit, type the address of the first unit,
followed by pressing the NEXT PERSON key. Continue typing addresses of additional units
separating each address by pressing NEXT PERSON, or program all units using the global
address of + +.)
4. Press SEND. The screen is blank with a flashing cursor.
5. Enter the command code Ø2.
6. To program a panel unit or wallmount unit, enter the number or letter of the
button to which the emergency alert is to be assigned. (Refer to the phrase
button template to determine the button number.)
For a keyboard unit, press the key to which the emergency alert is to be
assigned. (Programmable keys are in the top two rows, 1 through Ø,
excluding the BACKSPACE key, or Q through P).
7. Enter the text for the emergency alert. This is the text that will be displayed
on all receiving units when the emergency alert is initiated. (The maximum
number of characters for an emergency alert is 29 including all spaces.)
8. Press SEND to save the setting.
4 – 8
E m er g en c y A l er t s
Ve r s i o n 2 . 0
EXAMPLE:
Figure 4-4
Fig 4-4 shows an example to program an emergency alert phrase for
unit(s) receiving the alert (before pressing the SEND key). The phrase
will be EMERGENCY AT FRONT DESK. It will be assigned to the
number 8 button on a panel or wallmount, or the number 8 key of a
keyboard unit.
This is the phrase seen on the screen of the sending unit. It can be different than the
phrase shown on the units receiving the emergency alert.
To program units remotely, the unit being programmed must have the remote access
setting set to “Program.”
4
Note: The default phrase is: **SENDING EMERGENCY ALERT**
1. Press SET UP. The screen displays:
SELECT SET UP ?
2. Press the number 1 key. The screen displays:
SET SPECIAL FUNCTION FOR ? ?
3. Enter the address(es) of the unit(s) to be programmed with the phrase to be
seen at the sending unit when an emergency alert is initiated. (To program more
than one unit, type the address of the first unit, followed by pressing the NEXT PERSON key.
Continue typing addresses of additional units separating each address by pressing NEXT
PERSON, or program all units using the global address of + +.)
4. Press SEND. The display will be blank with a flashing cursor.
5. Enter the command code Ø3.
6. Enter the text for the emergency display. (The maximum number of
characters is 29 including all spaces.)
7. Press SEND to save the setting.
Ve r s i o n 2 . 0
E m er g en c y A l er t s
Customizing
Programming an Emergency Alert Phrase for a
Sending Unit
4 – 9
EXAMPLE:
Fig 4-5 shows an example to program an emergency alert phrase for
unit(s) initiating the alert. The phrase will be SUMMONING ASSISTANCE.
Figure 4-5
Programming a Status
Setting a status is a way of letting other Amtel users know when you are away from
your desk, or, if you are in a meeting, it can also act as an electronic DO NOT DISTURB
sign. When activated, your status will flash on your unit’s display. When an alert is received, your unit will automatically respond with the status phrase. For example —
OUT TO LUNCH / RETURNING AT 1 PM.
The keyboard and panel unit have factory default status phrase keys and buttons.
Some wallmount models may not have a default status phrase, however it can be programmed to have a status. The phrase can be customized for any unit from a remote
keyboard unit. To program units remotely, the unit being programmed must have the
remote access setting set to “Program.”
• Only a keyboard unit can program a status for itself, or remotely for another
keyboard, panel or wallmount unit.
• A keyboard unit can also set a temporary status for itself or any other unit. For
example, the phrase OUT TO LUNCH / RETURNING AT 1PM could be changed to 2
pm.
1. Press SET UP. The screen displays:
SELECT SET UP ?
2. Press the 3 key. The screen displays:
SET status FOR ? ?
3. Enter the address(es) of the unit(s) to be programmed. (To program more than one
unit, type the address of the first unit, followed by pressing the NEXT PERSON key. Continue
typing addresses of additional units separating each address by pressing NEXT PERSON, or
program all units using the global address of + +.)
4. Press SEND. The screen displays:
TO BE ASSIGNED TO KEY ?
4 – 10
Pr o g r a m m i n g a S t a t u s
Ve r s i o n 2 . 0
5. To program a keyboard unit, press the key to be assigned the status. (Only keys
in the top two rows, 1 through Ø, excluding the BACKSPACE key, or Q through P of the
keyboard are valid.)
To program a panel unit or wallmount unit, enter the number or letter of the
button to be assigned the status. (Refer to the appropriate unit template in the Templates
and Worksheets section to determine the button number.)
4
Customizing
6. Press SEND. The screen displays 2 dashes and a flashing cursor.
7. Enter the text for the status (maximum 29 characters, including all spaces).
When in status mode, this text will be displayed in response to an alert to the
sending units.
8. Press SEND to save the setting.
Ve r s i o n 2 . 0
Pr o g r a m m i n g a S t a t u s
4 – 11
This page intentionally left blank.
4 – 12
Pr o g r a m m i n g a S t a t u s
Ve r s i o n 2 . 0
Installation Information
Two Installation Methods
Amtel’s Direct-Line system is easily installed in either of two methods:
1. Using a “spare pair” of existing telephone wires.
Each Amtel unit requires the use of one pair of designated wires for data
transmission. Most offices contain telephone cables with several pairs of
wires that are not in use. Each Amtel unit may use one of these “spare pair.”
If there is no spare pair available, it will be necessary to pull new wires.
Contact a local telephone installation company, telephone interconnect company, or
similar business that can take care of your wiring needs.
If you have any questions, please do not hesitate to call your Amtel dealer or us direct
at 1-800-999-8903.
Ve r s i o n 2 . 0
Tw o I n s t a l l a t i o n M et h o d s
5 – 1
5
If you are unsure as to which method to use, talk to your in-house telecommunications
manager, building manager, or electrician. You may also want to check your local
building and fire codes before installing any wire.
Installation
2. Using a “group power supply.”
A 28 volt group power supply is used to provide both power and data
communication. We supply two types of four conductor wire (plastic or
teflon coated), which is run from the group power supply to each of the
Amtel units. For a keyboard or panel unit, the wire is terminated at a custom
wall plate and connected to the Amtel by way of a power/data cord.
Wallmount units are connected by a wiring harness (pigtail) which passes
through the back of the unit. Detailed wiring instructions are provided with
the group power supply.
“Spare Pair” Installer’s Guide
Using a spare pair of telephone wires
A. In each location
Figure 5-1
where a unit is
going to be
installed, split off
the spare pair from
the existing
telephone outlet.
This usually is a
modular RJ-11
jack. (see fig 5-1)
B. Wire the spare pair
to a new 4 or 6
position modular
RJ-11 jack.
Connect the spare
pair to the
black/yellow pair
or positions 2 and
5 of the connector. You must maintain polarity.
C. Go to the telephone closet where the telephone lines are terminated. Split off
the same spare pair you just connected in each office and terminate them to
an unused punch down block on the main distribution frame.
D. Loop all the odd pins together and all the even pins together on the 66m block
dedicated to
Figure 5-2
Amtel. Connect
From the customer’s
the terminated
office phone and the
Amtel modular jack
To PBX or KSU
Amtel pairs to the
looped pins with
Bridge clips
the bridge clips.
Polarity must be
maintained.
(see fig 5-2)
E. Use a standard 4 or
6 position RJ-11
ended cord to
connect units to
wall jacks.
F. Double check
installation for
Station 66 block
Amtel 66 block
continuity and
Do not reverse the polarity of the wiring —
polarity.
BK
YL
BK
YL
WH
BL
WH
BL
RD
GR
RD
GR
To Telephone Room
the units will not work!
5 – 2
“ S p a r e Pa i r ” I n s t a l l er ’ s G u i d e
Ve r s i o n 2 . 0
Problem Solving and Error
Messages
If an Amtel unit stops communicating with other units, there are some basic problem
solving steps you can do to correct the problem, or help determine if the unit needs to
be sent to the manufacturer for repairs.
Problem Solving
Situation
Solution
• Check that the individual power supply is plugged
•
•
•
•
Display shows day with a
timer running in parentheses
followed by the time
Time/date incorrect
• The Screen Exerciser is activated. Re-program
setting to activate after office hours.
• The elapsed timer is running.
• For a keyboard, press the TIMER key, then CLEAR.
• For a panel/wallmount unit, press the TIMER
button, then CLEAR.
• At a keyboard unit, re-enter correct time/date at the
central timekeeper unit. Refer to the Time Keeping
section.
• More than one keyboard is set to be the central
Time/date erratic
Beeper volume is too low /
No beeper noise
Ve r s i o n 2 . 0
timekeeper. Identify which unit is to be the one
central, find the other unit(s) set to central, and set
their timekeeper status on auto or local. Refer to the
Time Keeping section.
• Check beeper volume setting.
Pr o b l em S o l v i n g
6 – 1
Problem
Solving
Display has asterisks
and Ø’s flashing
6
No power
No display on
keyboard /
panel / wallmount
into an electrical outlet,
OR
Check the Group Power Supply is plugged into the
electrical outlet, and check if that outlet has power.
Check that power cord is properly connected to the
back of the unit.
Check that the electrical outlet has power.
Check the screen brightness setting.
Situation
Solution
Incorrect initial address
displayed when phrase
button/key is pressed
• Program the initial address.
Messages/alerts not being
received
Flashing number on the right
side of display
•
•
•
•
Check the address of the receiving unit.
Check that 2 units do not have the same address.
Check the communication mode and zone settings.
Check the connection of data cord to the back of
unit and wall jack.
• A flashing number indicates at least one new
message has been received and not reviewed. The
number indicates how many messages are stored.
• Sometimes a unit will stop communicating after
Unit has stopped
communicating
6 – 2
being moved from one location to another. If the
unit is not working at the new location:
1. Check the mode of communication –
fastwire/hardwire.
2. Same zone as other units on the network.
3. Are hardwire cords plugged in properly? Make
sure the hardwire cable is plugged securely into
the I/O port, and in turn, plugged into the proper
Amtel dedicated RJ-11 jack.
4. Try swapping this unit with another working
unit. If another unit still is not able to establish
communication at your location, you will need
to have the vendor that did your hardwiring
check the network wiring.
5. If all units stop communicating, check to see if
any electrical or telephone work has been done
in your building. You may need to have the
vendor that did the hardwiring check the
network wiring. Electrical or telephone workers
can interrupt the Amtel network.
6. Sometimes you can re-establish communication
by simply unplugging and re-plugging the unit
(similar to rebooting a computer).
a) Check the data jack in the back of the Amtel.
b) Check the power cord. (Caution: unplugging
may cause loss of memory if the battery is dead
or not functioning.)
7. If something is plugged into an Amtel jack that
is not an Amtel, one or all units may not
communicate.
Pr o b l em S o l v i n g
Ve r s i o n 2 . 0
Error Messages
The Amtel unit is capable of distinguishing between several types of errors. The unit
will try to perform the function requested; however, if the function requested is not
valid, a flashing error message will be displayed. The following is a list of error messages, the types of situations that invoke them, and suggestions to correct them.
Error Message
Displayed
Flashing
Cause
Remedy
• A user is attempting to • Check with the System
AUTO
TIME KEEPING
MODE
change the date/time
on a keyboard unit set
to auto time keeping.
When set to auto time
keeping, time is kept
for all units by the
central timekeeper.
Administrator how time is kept for
your network, then refer to the Time
Keeping section.
Ve r s i o n 2 . 0
1. If the address is incorrect, wait
until the check address error code
stops flashing.
2. The alert/message address will
appear.
3. Press the SPACEBAR to get the
cursor.
4. Type in the correct address and
press SEND. The communication
was delivered if the display
returns to the idle mode.
• Check the communication path of
both units.
1. Same mode of communication
(fastwire/hardwire).
2. Same zone.
3. Check data cord connections —
is the hardwire cord (looks like a
phone cord) plugged into the I/O
port in the back/bottom of unit
and securely plugged into the
Amtel dedicated RJ-11 jack.
E r r o r M es s a g es
6 – 3
6
COMM ERROR
(SEE USER
GUIDE)
not the address of any
unit on the network.
• Receiving unit’s
address changed.
• Communication path
between the sending
and receiving unit has
been interrupted. The
display will flash the
error message, and
will time out, and the
display will show the
address entered.
Problem
Solving
• The address entered is • Check address entered.
Error Message
Displayed
Flashing
Cause
Remedy
• Data entered
INPUT FORMAT
ERROR
• Re-enter data.
incorrectly, or
• Refer to Programming section in this
invalid/improper data
manual for step by step instructions.
has been entered
while programming in
the “Special Function”
mode.
INVALID
PASSWORD
• Wrong password
• Re-enter the password.
• See System Administrator.
MESSAGE
STORAGE FULL
• Unit’s memory is at
• Delete unnecessary messages to
• Alert storage bin is
• No Action.
NO ALERTS
RECEIVED
NO MESSAGES
RECEIVED
NO REMINDERS
SET
NO TEXT
ASSIGNED
NON-PROGRAMMABLE
KEY
RECEIVING UNIT
MEMORY FULL
REJECTED
REMINDER TO
REMOTE ACCESS
DISABLED
6 – 4
entered.
capacity.
empty. No one is
looking for you.
provide additional memory in the
electronic storage bin.
• Message storage bin is • No Action.
empty.
• At a keyboard, no
• No Action.
• An attempt has been
• Re-program the key/button with an
• An invalid key/button
• Check the template for the unit
• The message storage
• The unit with the full message
• A reminder has been
• Redirect reminder to proper address.
reminders have been
entered.
made to customize a
key/button, but no text
is entered.
is being assigned a
phrase or status.
capacity in a unit is
full and not able to
accept another
message.
programmed to an
invalid address.
appropriate phrase. (Refer to
Customizing section.)
being programmed to determine
keys/buttons capable of accepting
programming. (Refer to
Customizing section.)
capacity must delete some of the
stored messages before any new
messages can be accepted.
• Receiving unit remote • Reset remote access function to
access function is set
to program or none.
recall. (Refer to Remote Access
section.)
E r r o r M es s a g es
Ve r s i o n 2 . 0
Error Message
Displayed
Flashing
REMOTE
PROGRAMMING
DISABLED
Cause
Remedy
• Receiving unit remote • Reset remote access function to
access function is set
to recall or none.
program. (Refer to Remote Access
section.)
• The 700 series has a
REPLY REJECTED
UNIT ERROR
(SEE USER
GUIDE)
• Resend the alert.
larger storage capacity
for alerts than older
units. The 700 series
stores 50 alerts, older
units store 6. When a
700 series tries to
recall an alert that
may have already
been deleted from the
older unit’s memory,
the alert is gone and
cannot be recalled,
and this “Reply
Rejected” message
will appear.
• If two units on a
• Check unit addresses.
network have the
same address as the
sending unit, the reply
may be rejected.
Note: Each unit on a
network must have a
unique address.
• The unit’s memory
data file has been
corrupted.
• Call customer service to arrange for
the unit to be sent in for repairs
6
Problem
Solving
Note: For further assistance or to arrange for the unit to be returned for repairs,
please contact your local authorized Amtel dealer or Amtel Systems Corporation.
Ve r s i o n 2 . 0
E r r o r M es s a g es
6 – 5
This page intentionally left blank.
6 – 6
E r r o r M es s a g es
Ve r s i o n 2 . 0
Templates and Worksheets
Programming Templates
Panel Programming Template
This template illustrates the numeric assignment for each phrase button on the phrase
pad of a panel unit. The numeric assignments are used when programming phrases,
emergency alerts, or a status. For example: TAKE MESSAGE phrase button is number 5.
6
I
HAVE THEM
CALL BACK
I'LL GET
BACK
GIVE
CALL TO
THANK
YOU
WHICH
LINE?
YOU
HANDLE
Q
0
9
5
TAKE
MESSAGE
8
Y
J
Z
I NEED
TO TALK
F
BE RIGHT
THERE
COME
IN
OUT OF
OFFICE
REF. TO
WHAT?
NO
INTEREST
PAGING
SEND
THEM IN
3
T
A
U
H
CALL
ME
IN
MEETING
X
7
4
2
1
I'LL CALL
BACK
HOLD
WAIT
NO
YES/OK
BKSP
RECALL
MESSAGE
RECALL
ALERT
SEND AS
MESSAGE
TIMER
CLEAR
CHOICE 1
CHOICE 2
SEND AS
ALERT
DELETE
PRINT
Wallmount Phrase Button Template
This template illustrates the numeric assignment for each phrase button on the phrase
pad of a wallmount unit. The numeric assignments are used when programming
phrases, emergency alerts, or a status.
7
Templates &
Worksheets
The I’LL CALL BACK phrase button for example is number 1.
Ve r s i o n 2 . 0
Pr o g r a m m i n g Tem p l a t es
7 – 1
Worksheets
Worksheet #1 Unit Address
• Use this worksheet to record the two character address, physical location, and
the model # of each keyboard, wallmount, panel unit on the Amtel Network.
• Used frequently are the User’s initials or the location’s initials. For example:
the Board Room address would be “BR.” The Front Desk address would be “FD.”
• Please make copies of this form as needed.
Address
Unit Location/User
Model
___ ___
___________________________________
___________
___ ___
___________________________________
___________
___ ___
___________________________________
___________
___ ___
___________________________________
___________
___ ___
___________________________________
___________
___ ___
___________________________________
___________
___ ___
___________________________________
___________
___ ___
___________________________________
___________
___ ___
___________________________________
___________
___ ___
___________________________________
___________
___ ___
___________________________________
___________
___ ___
___________________________________
___________
___ ___
___________________________________
___________
___ ___
___________________________________
___________
___ ___
___________________________________
___________
___ ___
___________________________________
___________
___ ___
___________________________________
___________
___ ___
___________________________________
___________
___ ___
___________________________________
___________
___ ___
___________________________________
___________
___ ___
___________________________________
___________
___ ___
___________________________________
___________
___ ___
___________________________________
___________
7 – 2
Wo r k s h eet s
Ve r s i o n 2 . 0
Worksheet #2 Group Address — Distribution Lists
If you find that you are frequently sending communications to the same units, separately, it may be convenient to include their addresses in a distribution list and assign a
group address.
An address is assigned to each distribution list such as, “Managers” or “Accounting”
or “Employees” and the members are then listed, by user initials/address.
Every time you send an alert, message, or a reminder from a keyboard to the group
address of the distribution list, the communication will be sent to each individual
on the list. Group addresses are given the address of + followed by the list number
(+Ø through +9). 20 addresses per group address.
GROUP
ADDRESS
GROUP
ADDRESS
GROUP
ADDRESS
GROUP
ADDRESS
GROUP
ADDRESS
GROUP
ADDRESS
GROUP
ADDRESS
GROUP
ADDRESS
GROUP
ADDRESS
GROUP
ADDRESS
+
+
+
+
+
+
+
+
+
+
Ø
UNIT
ADDRESS
1
UNIT
ADDRESS
2
UNIT
ADDRESS
3
UNIT
ADDRESS
4
UNIT
ADDRESS
5
UNIT
ADDRESS
6
UNIT
ADDRESS
7
UNIT
ADDRESS
8
UNIT
ADDRESS
9
UNIT
ADDRESS
____ ____ ____ ____ ____ ____ ____ ____ ____ ____ ____ ____ ____ ____ ____ ____ ____ ____ ____ ____
____ ____ ____ ____ ____ ____ ____ ____ ____ ____ ____ ____ ____ ____ ____ ____ ____ ____ ____ ____
____ ____ ____ ____ ____ ____ ____ ____ ____ ____ ____ ____ ____ ____ ____ ____ ____ ____ ____ ____
____ ____ ____ ____ ____ ____ ____ ____ ____ ____ ____ ____ ____ ____ ____ ____ ____ ____ ____ ____
____ ____ ____ ____ ____ ____ ____ ____ ____ ____ ____ ____ ____ ____ ____ ____ ____ ____ ____ ____
____ ____ ____ ____ ____ ____ ____ ____ ____ ____ ____ ____ ____ ____ ____ ____ ____ ____ ____ ____
____ ____ ____ ____ ____ ____ ____ ____ ____ ____ ____ ____ ____ ____ ____ ____ ____ ____ ____ ____
____ ____ ____ ____ ____ ____ ____ ____ ____ ____ ____ ____ ____ ____ ____ ____ ____ ____ ____ ____
____ ____ ____ ____ ____ ____ ____ ____ ____ ____ ____ ____ ____ ____ ____ ____ ____ ____ ____ ____
____ ____ ____ ____ ____ ____ ____ ____ ____ ____ ____ ____ ____ ____ ____ ____ ____ ____ ____ ____
____ ____ ____ ____ ____ ____ ____ ____ ____ ____ ____ ____ ____ ____ ____ ____ ____ ____ ____ ____
____ ____ ____ ____ ____ ____ ____ ____ ____ ____ ____ ____ ____ ____ ____ ____ ____ ____ ____ ____
____ ____ ____ ____ ____ ____ ____ ____ ____ ____ ____ ____ ____ ____ ____ ____ ____ ____ ____ ____
____ ____ ____ ____ ____ ____ ____ ____ ____ ____ ____ ____ ____ ____ ____ ____ ____ ____ ____ ____
____ ____ ____ ____ ____ ____ ____ ____ ____ ____ ____ ____ ____ ____ ____ ____ ____ ____ ____ ____
____ ____ ____ ____ ____ ____ ____ ____ ____ ____ ____ ____ ____ ____ ____ ____ ____ ____ ____ ____
____ ____ ____ ____ ____ ____ ____ ____ ____ ____ ____ ____ ____ ____ ____ ____ ____ ____ ____ ____
____ ____ ____ ____ ____ ____ ____ ____ ____ ____ ____ ____ ____ ____ ____ ____ ____ ____ ____ ____
7
____ ____ ____ ____ ____ ____ ____ ____ ____ ____ ____ ____ ____ ____ ____ ____ ____ ____ ____ ____
Templates &
Worksheets
____ ____ ____ ____ ____ ____ ____ ____ ____ ____ ____ ____ ____ ____ ____ ____ ____ ____ ____ ____
Ve r s i o n 2 . 0
Wo r k s h eet s
7 – 3
Panel or Wallmount Phrase Customization Form
INSTRUCTIONS
Each panel or wallmount is capable of having its own unique:
·
User Directory
Text Fragment Lists
· Phrases
· Phrase Slide Card (wallmount only)
The Phrase Customization Forms for the panel and wallmount units are to help you to
understand and facilitate the programming steps necessary to obtain optimum use of
the Amtel Direct-Line system.
·
Note: Blank customization forms are provided in this manual.
Should you require further assistance with this form or in programming the text fragments and phrases, please do not hesitate to contact your local authorized Amtel
dealer or Amtel Systems Corporation.
Note: Before programming any phrase, please enter an initial address for each unit.
(Refer to Programming an Initial Address section.)
1. Enter the unit address.
2. Enter the user directory.
3. Enter the text fragment lists beginning with list Ø. (Text fragments are
limited to 12 characters, including any spaces.)
4. For each phrase button, enter the initial address in the space marked “Address
To Be Sent To.”
5. Enter the phrase label. (The wallmount label is limited to 2 lines of 8 spaces
each.)
6. Enter the desired text of the phrase. Where text fragments are to be displayed
enter the phrase list number and the text fragment number. Contact Amtel or
your authorized dealer to obtain a custom slide card (for wallmount units
only).
7 – 4
Wo r k s h eet s
Ve r s i o n 2 . 0
Panel or Wallmount Factory Default Programming
7
Templates &
Worksheets
The following worksheet has been completed for a wallmount unit using the factory
default phrases, button labels, and addresses.
Ve r s i o n 2 . 0
Wo r k s h eet s
7 – 5
Panel Factory Default Phrases
The panel unit has 21 programmable buttons. Buttons are able to be programmed with
a unique initial address and phrase. The phrase may include one or two text fragments, or none at all.
The default phrases which contain text fragments are shown below with the text fragments in italics and the fragment list number and entry number in parentheses. Refer
to the default text fragment list contained on the default phrase worksheet in this section for list # and entry #.
Button
#
Address
To Be
Sent To
6
Panel
Button Label
(List Number / Entry Number)
Resulting Default Phrase
ZZ
HAVE THEM
CALL BACK
HAVE THEM CALL BACK PLEASE
I
ZZ
I’LL GET BACK
I’LL GET BACK TO YOU
8
ZZ
GIVE CALL TO
(list 2 entry 2)
GIVE CALL TO ASSISTANT
H
ZZ
CALL ME
CALL ME PLEASE
F
ZZ
I NEED TO TALK
I NEED TO TALK WHEN FREE
Y
ZZ
BE RIGHT THERE
I’LL BE RIGHT THERE
J
ZZ
COME IN
COME IN PLEASE
Z
(status)
OUT OF OFFICE
OUT OF OFFICE
Q
ZZ
THANK YOU
THANK YOU
Ø
ZZ
WHICH LINE?
WHICH LINE IS THE CALL ON?
9
ZZ
YOU HANDLE
YOU HANDLE IT PLEASE
3
ZZ
REF TO WHAT?
IN REFERENCE TO WHAT?
T
ZZ
NO INTEREST
NOT INTERESTED AT THIS TIME
A
+ +
PAGING
(list 3 entry Ø)
PAGING ASSISTANT
U
ZZ
SEND THEM IN
SEND THEM IN
X
ZZ
IN MEETING
IN MEETING
5
(status)
TAKE MESSAGE
TAKE MESSAGE
7
ZZ
I’LL CALL BACK
(list Ø entry Ø)
I’LL CALL BACK IN 5 MINUTES
4
ZZ
HOLD WAIT
HAVE THEM HOLD WAIT PLEASE
2
ZZ
NO
NO THANK YOU
1
ZZ
YES/OK
YES/OK THANK YOU
Phrases are limited to 29 spaces including list entries
7 – 6
Wo r k s h eet s
Ve r s i o n 2 . 0
Wallmount Factory Default Phrases
The wallmount unit has 10 programmable buttons. Buttons are able to be programmed with a unique initial address and phrase. The phrase may include one or two
text fragments, or none at all.
The default phrases which contain text fragments are shown below with the text fragments in italics and the fragment list number and entry number in parentheses. Refer
to the default text fragment list contained on the default phrase worksheet in this section for list # and entry #.
Button
#
Address
To Be
Sent To
Wallmount
Button Label
(List Number / Entry Number)
Resulting Default Phrase
1
ZZ
I’LL CALL
BACK
(list Ø entry 1)
I’LL CALL BACK IN 10 MIN
2
ZZ
WHICH
LINE ?
WHICH LINE IS THE CALL ON?
3
ZZ
COME IN
COME IN PLEASE
4
ZZ
SEND
CALL TO
(list 1 entry 0)
SEND THE CALL TO MY OFFICE
5
ZZ
I’LL BE
THERE
(list Ø entry 1)
I’LL BE THERE IN 10 MIN
6
ZZ
I NEED
(list 2 entry Ø)
I NEED FILE
7
ZZ
YOU
HANDLE
YOU HANDLE IT PLEASE
8
ZZ
NEED TO
TALK
NEED TO TALK WHEN FREE
9
++
PAGING
(list 3 entry Ø)
PAGING ASSISTANT
Ø
(status)
IN
MEETING
IN MEETING
7
Templates &
Worksheets
Wallmount labels are limited to 2 lines – 8 spaces each line
Phrases are limited to 29 spaces including list entries
Ve r s i o n 2 . 0
Wo r k s h eet s
7 – 7
Worksheet #3 Customization Form
Programming a phrase with text fragment lists. Full size versions are in back of manual.
7 – 8
Wo r k s h eet s
Ve r s i o n 2 . 0
Index
A
phrases . . . . . . . . . . . . . . . . . . . . . . . . . . 4 - 3
phrases using text fragment lists . . . . . . . 4 - 4
text fragment lists, panel or wallmount . . 4 - 2
address
changing keyboard . . . . . . . . . . . . . . . . . 2 - 2
changing panel or wallmount . . . . . . . . . 2 - 2
definition. . . . . . . . . . . . . . . . . . . . . . . . 1 - 10
setting keyboard . . . . . . . . . . . . . . . . . . . 2 - 2
setting panel or wallmount . . . . . . . . . . . 2 - 2
worksheet . . . . . . . . . . . . . . . . . . . . . . . . 7 - 2
E
emergency alert
definition. . . . . . . . . . . . . . . . . . . . . . . . 1 - 10
emergency alert phrase, receiving unit . . 4 - 8
emergency alert phrase, sending unit . . . 4 - 9
address - group address/distribution list
definition . . . . . . . . . . . . . . . . . 1 - 10, 1 - 11
from a keyboard . . . . . . . . . . . . . . . . . . . 2 - 6
from a panel or wallmount . . . . . . . . . . . 2 - 8
view or modify from a keyboard . . . . . . . 2 - 7
view or modify from a
panel or wallmount . . . . . . . . . . . . . . . . 2 - 8
worksheet . . . . . . . . . . . . . . . . . . . . . . . . 7 - 3
address - initial alert
definition. . . . . . . . . . . . . . . . . . . . . . . . 1 - 11
from a remote keyboard
for all buttons/keys . . . . . . . . . . . . . . . 2 - 10
from a remote keyboard
for individual buttons/keys . . . . . . . . . 2 - 10
error messages. . . . . . . . . . . . . . . . 6 - 3
F
fastwire
definition. . . . . . . . . . . . . . . . . . . . . . . . 1 - 10
G
global address
definition. . . . . . . . . . . . . . . . . . . . . . . . 1 - 11
group address
See address - group address/distribution list
definition. . . . . . . . . . . . . . . . . . . . . . . . 1 - 11
address - user directory
definition. . . . . . . . . . . . . . . . . . . . . . . . 1 - 13
from a panel or wallmount . . . . . . . . . . . 2 - 4
from a remote keyboard . . . . . . . . . . . . . 2 - 3
modify a panel or wallmount. . . . . . . . . . 2 - 5
modify from a remote keyboard . . . . . . . 2 - 4
worksheet . . . . . . . . . . . . . . . . . . . . . . . . 7 - 2
alert
definition. . . . . . . . . . . . . . . . . . . . . . . . 1 - 10
B
keyboard. . . . . . . . . . . . . . . . . . . . . . . . 3 - 12
panel / wallmount. . . . . . . . . . . . . . . . . 3 - 25
beeper volume
keyboard. . . . . . . . . . . . . . . . . . . . . . . . 3 - 12
panel / wallmount. . . . . . . . . . . . . . . . . 3 - 25
C
COMM ERROR . . . . . . . . . . . . . . . 6 - 3
customization worksheet. . . . . . . . 7 - 4, 7 - 8
Ve r s i o n 2 . 0
hardwire
definition. . . . . . . . . . . . . . . . . . . . . . . . 1 - 11
I
installation . . . . . . . . . . . . . . . . . . . 5 - 1
K
beeper tone
customizing
H
keyboard
a - h backspace string . . . . . . . . . . . . . . . 3 - 7
address - assign. . . . . . . . . . . . . . . . . . . . 2 - 2
address - changing . . . . . . . . . . . . . . . . . 2 - 2
alert renotice . . . . . . . . . . . . . . . . . . . . . . 3 - 4
auto print . . . . . . . . . . . . . . . . . . . . . . . . 3 - 2
beeper tone. . . . . . . . . . . . . . . . . . . . . . 3 - 12
beeper volume . . . . . . . . . . . . . . . . . . . 3 - 12
CDD duration . . . . . . . . . . . . . . . . . . . . . 3 - 3
computer input . . . . . . . . . . . . . . . . . . . . 3 - 8
customizing. . . . . . . . . . . . . . . . . . . . . . . 4 - 1
default event timer . . . . . . . . . . . . . . . . . 3 - 5
S y s t em Ad m i n i s t r a t o r ’ s M a n u a l
I n d ex – 1
display brightness . . . . . . . . . . . . . . . . . . 3 - 1
formfeed length . . . . . . . . . . . . . . . . . . . 3 - 3
message length . . . . . . . . . . . . . . . . . . . . 3 - 2
message recall order . . . . . . . . . . . . . . . . 3 - 4
overview . . . . . . . . . . . . . . . . . . . . . . . . . 1 - 7
receipt print. . . . . . . . . . . . . . . . . . . . . . . 3 - 2
remote access . . . . . . . . . . . . . . . . . . . . 3 - 11
resetting . . . . . . . . . . . . . . . . . . . . . . . . . 3 - 5
screen exercise . . . . . . . . . . . . . . . . . . . . 3 - 8
set up backspace string . . . . . . . . . . . . . . 3 - 1
setup password - changing . . . . . . . . . . 3 - 11
setup password - setting locally. . 3 - 9, 3 - 10
setup password - setting remotely . . . . . 3 - 11
special function . . . . . . . . . . . . . . . . . . . . 3 - 9
time keeping . . . . . . . . . . . . . . . . . . . . . 3 - 12
zone . . . . . . . . . . . . . . . . . . . . . . . . . . . . 3 - 8
message
definition. . . . . . . . . . . . . . . . . . . . . . . . 1 - 11
definition. . . . . . . . . . . . . . . . . . . . . . . . 1 - 12
printers
keyboard
auto print . . . . . . . . . . . . . . . . . . . . . . . 3 - 2
formfeed length . . . . . . . . . . . . . . . . . . 3 - 3
receipt print . . . . . . . . . . . . . . . . . . . . . 3 - 2
panel
auto print . . . . . . . . . . . . . . . . . . . . . . 3 - 15
formfeed length . . . . . . . . . . . . . . . . . 3 - 16
receipt print . . . . . . . . . . . . . . . . . . . . 3 - 15
printer port . . . . . . . . . . . . . . . . . . . . . . 1 - 12
R
reset unit
keyboard. . . . . . . . . . . . . . . . . . . . . . . . . 3 - 5
panel or wallmount . . . . . . . . . . . . . . . . 3 - 18
N
next person
definition. . . . . . . . . . . . . . . . . . . . . . . . 1 - 11
S
status
P
address - assign. . . . . . . . . . . . . . . . . . . . 2 - 2
address - changing . . . . . . . . . . . . . . . . . 2 - 2
alert renotice . . . . . . . . . . . . . . . . . . . . . 3 - 17
auto print . . . . . . . . . . . . . . . . . . . . . . . 3 - 15
beeper tone. . . . . . . . . . . . . . . . . . . . . . 3 - 25
beeper volume . . . . . . . . . . . . . . . . . . . 3 - 25
CDD duration . . . . . . . . . . . . . . . . . . . . 3 - 16
computer input . . . . . . . . . . . . . . . . . . . 3 - 21
customizing. . . . . . . . . . . . . . . . . . . . . . . 4 - 1
default event timer . . . . . . . . . . . . . . . . 3 - 18
delete, choice one down string . . . . . . . 3 - 14
delete, choice two up,
choice one down string . . . . . . . . . . . 3 - 20
display brightness . . . . . . . . . . . . . . . . . 3 - 14
formfeed length . . . . . . . . . . . . . . . . . . 3 - 16
message length . . . . . . . . . . . . . . . . . . . 3 - 15
message recall order . . . . . . . . . . . . . . . 3 - 17
overview . . . . . . . . . . . . . . . . . . . . . . . . . 1 - 8
receipt print. . . . . . . . . . . . . . . . . . . . . . 3 - 15
remote access . . . . . . . . . . . . . . . . . . . . 3 - 24
resetting . . . . . . . . . . . . . . . . . . . . . . . . 3 - 18
screen exercise . . . . . . . . . . . . . . . . . . . 3 - 21
setup password - changing . . . . . . . . . . 3 - 24
setup password - locally . . . . . . . . . . . . 3 - 22
Index – 2
password
problem solving . . . . . . . . . . . . . . . 6 - 1
M
panel / wallmount
setup password - remotely . . . . . . . . . . 3 - 22
special function . . . . . . . . . . . . . . . . . . . 3 - 22
time keeping . . . . . . . . . . . . . . . . . . . . . 3 - 18
zone . . . . . . . . . . . . . . . . . . . . . . . . . . . 3 - 21
customize - keyboard . . . . . . . . . . . . . . 4 - 10
customize - panel or wallmount. . . . . . . 4 - 10
definition. . . . . . . . . . . . . . . . . . . . . . . . 1 - 12
system administrator . . . . . . . . . . . 1 - 1
definition. . . . . . . . . . . . . . . . . . . . . . . . 1 - 12
T
time keeper
definition. . . . . . . . . . . . . . . . . . . . . . . . 1 - 13
keyboard. . . . . . . . . . . . . . . . . . . . . . . . 3 - 12
timer
definition. . . . . . . . . . . . . . . . . . . . . . . . 1 - 13
keyboard. . . . . . . . . . . . . . . . . . . . . . . . . 3 - 5
panel or wallmount . . . . . . . . . . . . . . . . 3 - 18
W
wiring . . . . . . . . . . . . . . . . . . . . . . 5 - 1
wiring connections. . . . . . . . . . . . . 1 - 9
S y s t e m Ad m i n i s t r a t o r ’ s M a n u a l
Ve r s i o n 2 . 0
AMTEL LIMITED WARRANTY (For End User)
Amtel Systems Corporation (Amtel) warrants the Amtel Direct-Line series product you
have purchased from Amtel or from an authorized Amtel dealer to be free from defects
in materials or workmanship under normal use during the warranty period of one year
from the date of purchase. Your original purchase invoice, showing the date of purchase
of the Amtel product, is the proof of the date of purchase. The warranty extends only to
you, the original purchaser. It is not transferable to anyone who may subsequently
purchase, lease or otherwise obtain the product from you.
In the event a warranty issue should arise, you are advised to call your authorized Amtel
dealer or Amtel at (800) 999-8903 for instructions.
FCC NOTICE
TM
AMTEL DIRECT-LINE
MODELS DL701, DL702 & DL706
This equipment has been tested and found to comply with the limits for a Class A digital
device pursuant to Part 15 of the FCC regulations. These limits are designed to provide
reasonable protection against harmful interference when operated and installed in
accordance with Amtel Systems Corporation’s recommendations. This device must
accept any interference that may cause undesired operations.
THIS WARRANTY IS IN LIEU OF ALL OTHER WARRANTIES, WHETHER
EXPRESSED OR IMPLIED, INCLUDING, WITHOUT LIMITATION, IMPLIED
WARRANTIES OR MERCHANTABILITY AND OF FITNESS FOR A
PARTICULAR PURPOSE. AMTEL SHALL HAVE NO RESPONSIBILITY FOR
PRODUCTS WHICH ARE ALTERED OR MODIFIED BY AGENT OR END USER.
IN THE EVENT OF ANY BREACH OF WARRANTY, THE COMPANY'S SOLE
RESPONSIBILITY SHALL BE TO REPAIR OR REPLACE THE PRODUCTS AT
THE COMPANY'S OPTION. THE RETURN OF DEFECTIVE PRODUCTS SHALL
BE AT AGENT'S OR REPRESENTATIVE'S EXPENSE, OR AT THE EXPENSE OF
AGENT'S CUSTOMERS. IN NO EVENT SHALL THE COMPANY BE LIABLE
FOR INCIDENTAL DAMAGES, CONSEQUENTIAL DAMAGES OR LOST
PROFITS.
AMTEL JUST KEEPS GETTING BETTER
Our Customers Spoke & We Listened!!
At Amtel, we value our customers, and we understand that this fast-paced world is becoming more complicated all the time. Therefore, we have streamlined our units with
some new features to ensure that the Amtel Direct-Line Text Communication System remains the leader in text communications. And, best of all, the Amtel unit is more
user-friendly and the overall operation of the Amtel unit is enhanced. The new functions are:
SET GLOBAL ALERT BYPASS (keyboard, panel and wallmount)
An Amtel user now has a choice how their Amtel unit will respond to global alerts.
Before, when any Amtel unit on the network replied to a global alert, only the responding unit would clear and return to idle mode. The global alert remained on all other
Amtel units until the alert timed out before returning to idle mode.
Now, when any Amtel unit (set to On) replies to a global alert, all Amtel units (set to
On) will immediately return to idle mode. However, when a unit receives a global alert
and it is cleared using the CLEAR button, only that unit will clear and return to the idle
mode. This feature can be enabled or disabled through programming.
SET ALERT/MESSAGE BEEPS (keyboard, panel and wallmount)
Before, alerts were announced with a single beep, and messages were announced with
three beeps. Now, an Amtel user has the choice of announcing an alert with three beeps
and a message with one beep or vice-versa.
SET EMERGENCY ALERT (keyboard, panel and wallmount)
Before, all units received the emergency alert (code blue). Now, it is possible to program specific Amtel units to receive an emergency alert (code blue) by setting this
function to On. A unit set to Off will not receive an emergency alert, however the unit is
still able to send an emergency alert. The benefit is that you may not want a code blue to
be received in certain areas of your facility.
SET SEND AS MESSAGE (panel and wallmount)
Before, the SEND AS MESSAGE button sent a phrase as a message. Now, the
button can be programmed to send a phrase in one of three ways:
SEND AS
MESSAGE
• Normal – When pressed, the SEND AS MESSAGE button will send the phrase as
a message.
• Warn User – When the SEND AS MESSAGE button is pressed, the prompt SEND
AS MESSAGE? is displayed. Press the SEND AS MESSAGE button again to send the
phrase as a message. Press SEND to send the phrase as an alert. Press CLEAR to
return to idle mode.
• Map-To-Alert – The SEND AS MESSAGE button has the same function as the
SEND button. Both buttons will send the phrase as an alert. The user is not
warned and sending of messages is disabled, except when responding to a
stored message.
Direct-Line 700 Series
A DDEN DU M T O
SYST EM A DMIN IST R AT OR’ S MA N UA L
Ver si o n 2. 0 / 0600
© 2000 Amtel Systems Corporation
Keyboard unit programming – new features
Note: these features belong on page 3-4 of the System Administrator's Manual
• after MESSAGE RECALL ORDER • before ALERT RENOTICE.
SET GLOBAL ALERT BYPASS
• On – When any Amtel unit on the network replies to a global alert, all other
Amtel units (set to On) will return to idle mode or display the next new alert.
When set to On and a global alert is received, if it does not apply to you, you
can ignore it and let it time out, or press CLEAR to remove it from your unit.
Pressing CLEAR will have no effect on other Amtel units.
• Off – When any Amtel unit on the network replies to a global alert, only the
responding unit will clear and return to idle mode. The global alert will
remain on all other Amtel units (set to Off or On) until the alert times out
before returning to idle mode.
a. (To begin from idle mode.) Press SET UP. Press BACKSPACE (ß). The screen
displays: SET DISPLAY BRIGHTNESS.
b. Press the SPACEBAR until the screen displays
Programming
Factory default is OFF.
3
OPTIONS: ON – OFF
SET GLOBAL ALERT BYPASS OFF
c. Press BACKSPACE (ß) to desired setting.
e. Press SEND to save the setting(s), OR to continue go to step f.
SET ALERT/MESSAGE BEEPS
This function determines the number of beeps to announce an alert and/or a message.
The user may choose to have an alert announced with 3 beeps, and a message with one
beep, or vice-versa.
OPTIONS: 1/3 OR 3/1.
Factory default is 1/3.
e.
(To begin from idle mode.) Press SET UP. Press BACKSPACE (ß). The screen
displays: SET DISPLAY BRIGHTNESS.
f. Press the SPACEBAR until the screen displays
SET ALERT/MESSAGE BEEPs 1/3
g. Press BACKSPACE (ß) to desired setting.
h. Press SEND to save the setting(s), OR to continue go step 29 in the manual.
Ve r s i o n 2 . 0 / 0 6 0 0 — A D D E N D U M T O S Y S T E M A D M I N I S T R AT O R ’ S M A N UA L
3 – 4a
Keyboard unit programming – new feature
Note: this feature belongs on page 3-8 of the System Administrator's Manual
• after COMPUTER INPUT • before SCREEN EXERCISE.
SET EMERGENCY ALERT
• On – all Amtel units set to On are capable of receiving and sending an
emergency alert (code blue).
• Off – an Amtel unit can be programmed not to receive an emergency alert.
This unit would still be capable of sending an emergency alert.
a. (To begin from idle mode.) Press SETUP. Press and hold A and H and press
BACKSPACE (ß). (If the screen displays ENTER PASSWORD, enter the setup password and press
SEND.) The screen displays: SET COMM-NETWORK.
b. Press the SPACEBAR until the screen displays:
SET EMERGENCY ALERT ON
c. Press the BACKSPACE (ß) to desired setting.
d. Press SEND to save the setting(s), OR to continue go to step 13 in the manual.
Ve r s i o n 2 . 0 / 0 6 0 0 — A D D E N D U M T O S Y S T E M A D M I N I S T R AT O R ’ S M A N UA L
3 – 8a
Programming
Factory default is ON.
3
OPTIONS: ON – OFF
Panel or Wallmount unit programming – new features
Note: these features belong on page 3-17 of the System Administrator's Manual
• after MESSAGE RECALL ORDER • before ALERT RENOTICE.
SET GLOBAL ALERT BYPASS
• On – When any Amtel unit on the network replies to a global alert, all other
Amtel units (set to On) will return to idle mode or display the next new alert.
When set to On and a global alert is received, if it does not apply to you, you
can ignore it and let it time out, or press CLEAR to remove it from your unit.
Pressing CLEAR will have no effect on other Amtel units.
• Off – When any Amtel unit on the network replies to a global alert, only the
responding unit will clear and return to idle mode. The global alert will
remain on all other Amtel units (set to Off or On) until the alert times out
before returning to idle mode.
Programming
Factory default is OFF.
3
OPTIONS: ON – OFF
(To begin from idle mode.) Press and hold DELETE and CHOICE 1 Ú. The screen
displays: SET DISPLAY BRIGHTNESS.
b. Press the CHOICE 2 Ú until the screen displays:
a.
SET GLOBAL ALERT BYPASS OFF
c. Press CHOICE 1 Ù or Ú to desired setting.
d. Press SEND to save the setting(s), OR to continue go to step f.
SET ALERT/MESSAGE BEEPS
This function determines the number of beeps to announce an alert and/or a message.
The user may choose to have an alert announced with 3 beeps, and a message with one
beep, or vice-versa.
OPTIONS: 1/3 OR 3/1.
Factory default is 1/3.
e.
(To begin from idle mode.) Press and hold DELETE and CHOICE 1 Ú. The screen
displays: SET DISPLAY BRIGHTNESS.
f. Press the CHOICE 2 Ú until the screen displays:
SET ALERT/MESSAGE BEEPS 1/3
g. Press CHOICE 1 Ù or Ú to desired setting.
h. Press SEND to save the setting(s), OR to continue go to step 29 in the manual.
Ve r s i o n 2 . 0 / 0 6 0 0 — A D D E N D U M T O S Y S T E M A D M I N I S T R AT O R ’ S M A N UA L
3 – 17a
Panel or Wallmount unit programming – new features
Note: these features belong on page 3-17 of the System Administrator's Manual
• after MESSAGE RECALL ORDER • before ALERT RENOTICE.
SET EMERGENCY ALERT
OPTIONS: ON – OFF
Factory default is ON.
(To begin from idle mode.) Press and hold DELETE and CHOICE 2 Ù. While
holding these down, press CHOICE 1 Ú. (If the screen displays ENTER PASSWORD, enter
the setup password and press SEND.) The screen displays: SET COMM-NETWORK.
b. Press CHOICE 2 Ú until the screen displays:
a.
3
SET EMERGENCY ALERT ON
c. Press the CHOICE 1 Ù or Ú to desired setting.
d. Press SEND to save the setting(s), OR to continue go to step f.
SET SEND AS MESSAGE
This changes the function of the SEND AS MESSAGE button on a panel or a wallmount unit.
OPTIONS: NORMAL – WARN USER – MAP-TO-ALERT
Factory default is MAP-TO-ALERT for a wallmount unit, NORMAL for a panel unit.
• Normal – Press the SEND AS MESSAGE button to send the phrase as a message.
• Warn User – When the SEND AS MESSAGE button is pressed, the prompt
SEND-AS-MESSAGE? is displayed. Press the SEND AS MESSAGE button again to
send the phrase as a message, or press SEND to send the phrase as an alert.
Press CLEAR, to return to idle mode.
• Map-To-Alert – The SEND AS MESSAGE button has the same function as the
SEND button – both buttons will send the phrase as an alert. The user is not
warned and the sending of messages is disabled except when responding to a
stored message. (Only alerts can be initiated.)
Note: The “reply to message” function is not affected by this programming step.
(To begin from idle mode.) Press and hold DELETE and CHOICE 2 Ù. While
holding these down, press CHOICE 1 Ú. (If the screen displays ENTER PASSWORD, enter
the setup password and press SEND.) The screen displays: SET COMM-NETWORK.
f. Press CHOICE 2 Ú until the screen displays:
e.
SET SEND-AS-MESSAGE
g. Press the CHOICE 1 Ù or Ú to desired setting.
h. Press SEND to save the setting(s), OR to continue go to step 13 in the manual.
Ve r s i o n 2 . 0 / 0 6 0 0 — A D D E N D U M T O S Y S T E M A D M I N I S T R AT O R ’ S M A N UA L
Programming
• On – all Amtel units set to On are capable of receiving and sending an
emergency alert (code blue).
• Off – an Amtel unit can be programmed not to receive an emergency alert.
This unit would still be capable of sending an emergency alert.
3 – 21a