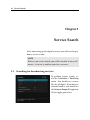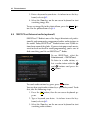
1
TOPFIELD TRC-1400 User Reference High Definition Digital Terrestrial Receiver Personal Video Recorder CONAX Chipset Pairing ii The lightning flash with arrowhead symbol, in an equilateral triangle, is intended to alert the user to the presence of uninsulated “dangerous voltage” within the product’s enclosure that may be of sufficient magnitude to constitute a risk of electric shock to a person. The exclamation point, in an equilateral triangle, is intended to alert the user to the presence of important operation and maintenance instructions in the literature accompanying the product. Precautions • • • • • • • • • • • • • • • Read, keep and follow these instructions. Heed all warnings. Clean with a dry cloth only. Do not block any of the ventilation openings. Do not install near any heat sources or in direct sunlight as this will impair cooling. Do not operate this product near water. Do not place any of the objects filled with liquids, such as vases on this unit. Do not try to change the plug or defeat its safety purpose. If the provided plug does not fit into your outlet, consult an electrician for replacement of the obsolete outlet. This product is designed for indoor use only. Place the digital receiver on a firm and level surface. Do not lay any objects such as magazines on this unit. Do not overload power outlets. Doing so may result in a risk of fire or electrical shock. Never open this unit’s casing under any circumstances, or the warranty will be void. Unplug this unit during lightning storms or when unused for long periods of time. Refer all servicing to qualified service personnel. Servicing is required when the unit has been damaged in any way, such as power supply cord or plug is damaged, liquid has been spilled or objects have fallen into the unit, the unit became wet from rain or moisture, does not operate normally, or has been dropped. Batteries, including those which contain no heavy metals, may not be disposed with other household wastes. Please dispose of used batteries in an environmentally sound manner. Find out the legal regulations which apply in your area. iii About this user guide Thank you for purchasing our digital receiver. Please read this user guide carefully before you use the digital receiver and keep it handy for future reference. This User Guide covers the model TRC-1400 . • Illustrations pictured in this manual may not be exactly the same as the actual product. • The screenshots used in this manual may not be exactly the same as those you see on the actual on-screen displays. • Designs and specifications of the digital receiver and other accessories are subject to change without any notice in order to introduce new features or improve the functionality of the product. iv CONTENTS Contents Contents 1 2 3 Introduction 1.1 Features . . . . . . . . . . . . . 1.2 Controlling the digital receiver . 1.2.1 Front panel . . . . . . . 1.2.2 Remote control . . . . . 1.3 Subscription card information . iv . . . . . . . . . . . . . . . . . . . . . . . . . . . . . . . . . . . . . . . . . . . . . . . . . . . . . . . . . . . . 1 1 2 3 4 6 Setup 2.1 Unpacking . . . . . . . . . . . . . . . . . . 2.2 Safety precautions . . . . . . . . . . . . . . 2.3 Rear panel connections . . . . . . . . . . . 2.4 Connecting up your digital receiver . . . . 2.4.1 Connecting to the antenna . . . . . 2.4.2 Connecting to your television set . 2.4.3 Connecting to your video recorder 2.5 Switching on for the first time . . . . . . . . . . . . . . . . . . . . . . . . . . . . . . . . . . . . . . . . . . . . . . . . . . . . . . . . . . . . . . . . . . . . . . . . . . . . . . . . . . . . . . . . . . . . . . . 7 7 7 8 10 11 11 14 14 . . . . 16 16 17 18 18 . . . . . . . . . . Service Search 3.1 Searching for broadcasting services 3.2 Resetting to factory settings . . . . 3.3 Resetting to user settings . . . . . . 3.4 Clearing the services list . . . . . . . . . . . . . . . . . . . . . . . . . . . . . . . . . . . . . . . . . . . . . . . . . . . . . . . . . . . . . . . . . . . . . . . . . . . . . CONTENTS v 4 5 6 Preference Settings 4.1 Language settings . . . . . . . . . 4.1.1 Menu language . . . . . . 4.1.2 Teletext Language . . . . . 4.1.3 Subtitle language . . . . . 4.1.4 Hard of Hearing . . . . . 4.1.5 Changing region . . . . . 4.1.6 Audio language . . . . . . 4.2 Video and audio settings . . . . . 4.2.1 High definition television 4.2.2 Television aspect ratio . . 4.2.3 Colour format . . . . . . . 4.2.4 Another video device . . . 4.2.5 Audio mode . . . . . . . . 4.3 Local time setting . . . . . . . . . 4.4 Parental control . . . . . . . . . . 4.5 Options for recording . . . . . . . 4.6 Options for playback . . . . . . . 4.7 Options for on-screen display . . 4.8 Options for the front display . . . 4.9 Options for Photo Album . . . . . 4.10 Options for standby mode . . . . . . . . . . . . . . . . . . . . . . . . . . . . . . . . . . . . . . . . . . . . . . . . . . . . . . . . . . . . . . . . . . . . . . . . . . . . . . . . . . . . . . . . . . . . . . . . . . . . . . . . . . . . . . . . . . . . . . . . . . . . . . . . . . . . . . . . . . . . . . . . . . . . . . . . . . . . . . . . . . . . . . . . . . . . . . . . . . . . . . . . . . . . . . . . . . . . . . . . . . . . . . . . . . . . . . . . . . . . . . . . . . . . . . . . . . . . . . . . . . . . . . . . . . . . . . . . . . . . . . . . . . . . . . . . . . . . . 20 20 20 21 21 21 21 21 22 22 23 24 24 25 26 27 29 30 31 32 32 33 Every Day Use 5.1 Volume control . . . . . . . . . . . . . . 5.2 Watching television . . . . . . . . . . . . 5.2.1 The services list . . . . . . . . . . 5.2.2 The favourite service lists . . . . 5.2.3 Viewing programme information 5.2.4 Selecting audio tracks . . . . . . 5.2.5 Selecting subtitle tracks . . . . . 5.2.6 Viewing teletext . . . . . . . . . . 5.3 Viewing electronic programme guide . . 5.4 Using time-shift . . . . . . . . . . . . . . . . . . . . . . . . . . . . . . . . . . . . . . . . . . . . . . . . . . . . . . . . . . . . . . . . . . . . . . . . . . . . . . . . . . . . . . . . . . . . . . . . . . . . . . . . . . . . . . . . . . . . . . . . . . . . . . . . . . . . . . 34 34 34 34 35 36 37 37 38 38 39 Organising Services . . . . . . . . . . . . . . . . . . . . . . . . . . . . . . . . . . . . . . . . . . . . . . . . . . . . . . . . . . . . . . . 41 vi CONTENTS 6.1 6.2 7 8 Editing the favourite lists . . . . . . . . . . . . . . . . . . . . . How to use on-screen keyboard . . . . . . . . . . . . . . . . . 41 43 Recording and Playback 7.1 Recording a programme . . . . . . . . . . . . . . . . . . . . 7.1.1 Instant recording . . . . . . . . . . . . . . . . . . . . 7.1.2 Timer recording . . . . . . . . . . . . . . . . . . . . . 7.1.3 Scheduling recordings using the programme guide . 7.1.4 Recording a time-shifted programme . . . . . . . . . 7.1.5 Recording a pay service programme . . . . . . . . . 7.2 File archive . . . . . . . . . . . . . . . . . . . . . . . . . . . . 7.2.1 To delete a recording . . . . . . . . . . . . . . . . . . 7.2.2 To sort recordings . . . . . . . . . . . . . . . . . . . . 7.2.3 To lock a recording . . . . . . . . . . . . . . . . . . . 7.2.4 To rename a recording . . . . . . . . . . . . . . . . . 7.2.5 To make a new folder . . . . . . . . . . . . . . . . . . 7.2.6 To move a recording to another folder . . . . . . . . 7.3 Playing back a recording . . . . . . . . . . . . . . . . . . . . 7.3.1 To navigate using the progress bar . . . . . . . . . . 7.3.2 To play in slow motion . . . . . . . . . . . . . . . . . 7.3.3 To play in fast motion . . . . . . . . . . . . . . . . . . 7.3.4 To make a bookmark . . . . . . . . . . . . . . . . . . 7.3.5 To play back a recording repeatedly . . . . . . . . . 7.3.6 To play back recordings in sequence . . . . . . . . . 7.3.7 To play back a scrambled recording . . . . . . . . . . 7.4 Copying a recording . . . . . . . . . . . . . . . . . . . . . . 7.5 Formatting the hard disk . . . . . . . . . . . . . . . . . . . . . . . . . . . . . . . . . . . . . . . . . . . 44 45 45 47 49 49 50 51 51 51 52 52 52 52 52 53 54 54 54 55 55 56 56 56 Entertainment 8.1 Configuring the network setting . . . . . . . . 8.2 Copying files . . . . . . . . . . . . . . . . . . . 8.3 Playing back MP3 files . . . . . . . . . . . . . 8.4 Viewing image files . . . . . . . . . . . . . . . 8.4.1 How to move a file to the photo album 8.5 Playing back a video file . . . . . . . . . . . . 8.6 Playing back YouTube contents (optional) . . . . . . . . . 58 58 59 59 60 60 61 62 . . . . . . . . . . . . . . . . . . . . . . . . . . . . . . . . . . . . . . . . . . . . . . . . . . . . . . . . CONTENTS vii 8.7 8.8 8.9 9 Sharing image files by Flickr (optional) . . . . . . . . . 63 SHOUTcast Internet radio (optional) . . . . . . . . . . . . . . 64 Weather forecast (optional) . . . . . . . . . . . . . . . 65 Firmware Update 9.1 From a memory stick . . . . . . . . . . . . . . . . . . . . . . . 9.2 Over the air (optional) . . . . . . . . . . . . . . . . . . . . . . 66 66 67 A Universal Remote Control A.1 Code list for television sets . . . . . . . . . . . . . . . . . . . . A.2 Code list for DVD players . . . . . . . . . . . . . . . . . . . . . A.3 Code list for audio-video receivers . . . . . . . . . . . . . . . 68 71 85 87 Chapter 1 Introduction The TRC-1400 digital receiver is fully compliant with the international Digital Video Broadcasting (DVB) standard, and thus is able to receive digital broadcasts of that standard. For its operation you need an antenna, which must be installed appropriately. NOTE In general we equate a channel with a frequency. However, unlike analogue broadcasts, digital broadcasts are not all assigned to their own frequencies; instead, multiple television broadcasts are transmitted through a single frequency. The frequency in digital broadcasting is usually called transponder or multiplex. To reduce confusion in this manual, the word service is preferably used than channel as a term to indicate one television or radio broadcast. 1.1 Features This digital receiver has the following features: • Can store up to 2,000 television and radio services. • Can create lists of your favourite services. 1 Introduction 1 2 Introduction • Can view information about the current television or radio programme. • Has an electronic programme guide that provides an overview of scheduled programmes. • You can record up to four services while you are currently watching another. • You can record many programmes using a built-in hard drive with large storage capacity. • Time-shift is a special technical feature available on this digital receiver. You can pause a programme you are watching and resume it again at a later time. Then you can quickly go to any part of the current programme by fast forward or rewind search. • You can play back video files of various formats including Xvid. • You can use various Web services including YouTube. (optional) 1.2 Controlling the digital receiver You can operate the digital receiver with the remote control or the buttons on the front panel. NOTE When the digital receiver is off but plugged into a wall socket, we say that it is in standby mode; on the other hand, when it is on, it is in active mode. Even when you are not using the digital receiver, you should keep it plugged into a wall socket to be in standby mode so that it can run timer events at any time. 1.2.1 Front panel Power button switches the digital receiver between standby and active mode. MENU button displays the main menu. It is also used to return to the previous menu from a submenu. OK button displays the services list. See §5.2.1 for more details. It is also used to select a menu item. , CHANNEL vice. VOLUME , buttons switch to the previous or next serbuttons decrease or increase the volume. You have to insert your subscription card into the front slot to watch pay services. When you insert the subscription card, the side on which the chip is mounted must face upward. 1 Introduction 1.2 Controlling the digital receiver 3 4 Introduction 1.2.2 Remote control • button switches the digital receiver between standby mode and active mode. • mutes the sound. Press again to switch it back on. • TV switches the remote control to television mode to operate your television. • PVR switches the remote control to receiver mode to operate the digital receiver. • AUX switches the remote control to operate your audiovideo receiver. • DVD switches the remote control to DVD mode to operate your DVD player. • Numeric buttons are used to enter a service number for service change or to specify values for menu options. • switches over between the current service and the previously viewed one. • displays the service information box. It is also used to display more information about a programme. • VOLUME− , VOLUME+ buttons decrease or increase the volume. • CHANNEL− , CHANNEL+ buttons switch to the previous or next service. • OK displays the services list. See §5.2.1 for more details. It is also used to select a menu item. • Navigation buttons are used to navigate in menus or to change values for menu options. • MENU displays the main menu. It is also used to return to the previous menu from a submenu. • GUIDE displays the electronic programme guide. • EXIT is used to exit a menu or to hide on-screen information. • is used to display the list of recorded programmes that are stored in the internal hard drive. See §7.2 for more details. • F1 has different functions per menu. • F2 is used to make a bookmark on playback or timeshift. • F4 has different functions per menu. • F3 is used to jump to next bookmark position. • Option has different functions per menu. • is used to select a subtitle track. • is used to select an audio track and a sound mode. • displays teletext. • VF changes video resolution. See §4.2.1 for more details. • AR changes aspect ratio. See §4.2.2 for more details. • switches over between television services and radio services. • is used to set a sleep timer in 10 minute increments. • is used to start recording. • is used to stop playback, to stop recording, or to jump back to live television from time-shifted television. • M switches the output of the TV SCART socket over between the digital receiver and the device connected to the VCR SCART socket. See §4.2.4 for more details. • SAT displays connected devices list. • is used to start reverse playback. Subsequent presses increase the rewind speed. • pauses live television or playback of a recorded programme. • is used to start fast forward playback. Subsequent presses increase the playback speed. 1 Introduction 1.2 Controlling the digital receiver 5 6 Introduction • resumes normal playback speed, or displays the progress bar for navigation on playback or time-shift. To . play a recorded programme, see button • is used to jump back to the beginning of the recording on playback. • is used to start slow motion playback. Subsequent presses change the playback speed. • is used to jump to the end of the recording on playback. • has different functions per menu. NOTE When using the remote control, point it at the remote sensor on the front panel of the digital receiver. The actual images and the number of buttons may be different depending on the type of remote control provided by the manufacturer. 1.3 Subscription card information With this digital receiver, you can view pay services scrambled with the CONAX conditional access system. Probably you have a subscription card. If you would like to view information in detail about your subscription card, select the Information > Conditional Access menu. There you can also check the messages from the broadcasting operator. 7 2 Setup Chapter 2 Setup 2.1 Unpacking Before going any further, check that you have received the following items with the digital receiver. • • • • • Remote control Two batteries for the remote control (AAA 1.5 V) One HDMI cable One loop cable A copy of the User manual NOTE Accessories may vary according to your local area. 2.2 Safety precautions Please read carefully the following safety precautions. • The mains voltage must range between 90 and 250 volts. Check it before plugging the digital receiver to the wall socket. For the power consumption of the digital receiver, refer to Table 2.1. 8 Setup • The wall socket should be near the equipment. Do not run an extension lead to the unit. • The mains plug shall remain readily operable so that it can be removed easily to disconnect the power. • When placed in a cabinet, make sure there is a minimum space of 10 centimetres around it. For the physical specification of the digital receiver, refer to Table 2.2. • Protect the power cord from being walked on or pinched. If the cord is damaged, do not use the digital receiver and get the cord replaced. • Refer all servicing to a qualified service technician. • To maintain proper ventilation, always leave sufficient space around the digital receiver. Table 2.1: Power specification Input voltage Power consumption 90 to 250 V AC, 50/60 Hz 30 W at maximum in active Under 1 W in passive standby Table 2.2: Physical specifications Size Weight Operating temperature Storage relative humidity 2.3 340× 60× 265 mm 2.6 ~ 3.1 kg (may vary by HDD kind) 0 to 39 ◦ C 5 to 90 % Rear panel connections The TRC-1400 has a wide range of connections on the back. 2.3 Rear panel connections 3 5 8 11 13 / 2 4 6 7 9 10 12 Check what connections your television set has in comparison with the digital receiver. 1 ANT 1 IN Terrestrial broadcasting signal input socket for the first tuner (5V, Max.100mA) 2 ANT 1 OUT Terrestrial broadcasting signal output socket through the first tuner 3 ANT 2 IN Terrestrial broadcasting signal input socket for the second tuner 4 ANT 2 OUT Terrestrial broadcasting signal output socket through the second tuner 5 AUDIO L/R Stereo audio output socket for the television set or the audio-video receiver (white/red) 6 VIDEO Composite video output socket for the television set (yellow) 7 S/PDIF Digital audio output socket for the audiovideo receiver 8 TV Audio and video output socket for the television set 9 VCR Audio and video input/output socket for another device such as a video recorder 10 HDMI Audio and video output socket for the high definition television set 11 LAN Local area network port 12 USB USB port for firmware update and data transfer. 2 Setup 1 9 10 Setup 13. ON/OFF . Power switch (You have to turn on this switch first to use this digital receiver.) Table 2.3: Connectors specifications HDMI TV VCR VIDEO AUDIO S/PDIF USB LAN 2.4 High definition video output Left & right audio output Digital audio output CVBS/S-Video video output Left & right audio output CVBS video output Left & right audio output CVBS/S-Video video input for bypass Left & right audio input for bypass Composite video (CVBS) output Left & right audio output Digital audio output 2.0 Host (5 V DC, 500 mA max.) 10/100 Ethernet Connecting up your digital receiver There are several ways to set up the digital receiver. Set up the digital receiver suitably to your television and other devices. If you have any problem with your setup or need help, contact your dealer. WARNING Connect any components before plugging the power cord into the wall outlet. Always turn off the product, TV and other components before you connect or disconnect any cables. NOTE If you encounter any problems setting up your product, please contact your local retailer. 2.4 Connecting up your digital receiver 11 Connecting to the antenna Whatever sort of connection you have between the digital receiver and the television, you need to connect the digital receiver to the antenna so that it can receive digital television broadcasts. Connect the antenna cable to the ANT 1 IN connector on the back panel of the digital receiver. Also, you must ensure that there is a connection to both the ANT 1 IN and ANT 2 IN connectors on your digital receiver, so that both tuners work properly. Normally you do that by using a loop cable to link from the ANT 1 OUT connector to the ANT 2 IN connector. NOTE However, if you are in a weak signal area or are using a signal amplifier with more than one output, you may achieve better results by connecting a cable from the antenna or the amplifier directly to the ANT 2 IN connector rather than using the loop cable. If you have another digital receiver, you may link it from the ANT 2 OUT connector. NOTE ANT 2 OUT may also be linked to your television, VCR, or DVD recorder to loop an analogue signal. 2.4.2 Connecting to your television set For all the following connections of the digital receiver, we recommend you to use the first connector to get the best picture quality. If your television does not have a matching connector, 2 Setup 2.4.1 12 Setup then use the next connector in the following order for a better picture quality. 1. HDMI connector (HDMI) 2. SCART connector (TV) 3. Composite connector (VIDEO) You should configure audio and video settings after connecting up the digital receiver. See §4.2 for a detailed description. To use the HDMI output If you have a high definition television set, you should use an HDMI cable for best results. Plug one end of the cable into the HDMI socket on the digital receiver, and plug the other end into the matching socket on your television. In this case, you do not have to make audio connection because it can output stereo audio or digital audio as well. In this case, you do not have to make audio connection because it can output stereo audio or digital audio as well. To use the SCART output For best results with a standard television set, you should use a SCART cable. Plug one end of the cable into the TV socket on the digital receiver, and plug the other end into a free SCART socket on your television. If you connect with a standard SCART cable, you do not have to make audio connection because it can output stereo audio as well. But if you use a conversion cable such as SCART-toComponent, then you have to make audio connection. 2.4 Connecting up your digital receiver 13 You cannot view high definition video by means of the SCART output. To use the Composite video output You need to obtain a Composite video cable (RCA cable) to use the Composite video output. Plug one end of the cable into the VIDEO (yellow) socket on the digital receiver, and plug the other end into the matching socket on your television. NOTE You cannot view high definition video by means of the Composite video output. To make the audio connection You need to obtain an audio cable (RCA cable) to link the audio connectors. Plug one ends of the cable into the AUDIO L (white) and AUDIO R (red) sockets on the digital receiver, and plug the other ends into the matching sockets on your television or audio-video receiver. To enjoy Dolby Digital audio, your television or audio-video receiver must be able to decode Dolby Digital audio, and you need to obtain an S/PDIF cable. Plug one end of the cable into the S/PDIF socket on the digital receiver, and plug the other end into the matching socket on your audio-video receiver. 2 Setup NOTE 14 Setup 2.4.3 Connecting to your video recorder The digital receiver can also output video through an auxiliary SCART connector to another device such as a video recorder. You need to obtain a SCART cable to link the auxiliary SCART connector. Plug one end of the cable into the VCR socket on the digital receiver, and plug the other end into the matching socket on your video recorder or suchlike. 2.5 Switching on for the first time Now that you have your digital receiver connected, you should plug it into a wall socket. Ensure that your television set is turned on and on the correct video channel so that you will be able to see the display from the digital receiver. Before switching on the digital receiver, you should insert batteries into the remote control. Open the battery compartment by removing the lid, and then insert the batteries observing the polarity, which is marked on the base of the battery compartment. Press the button on the top left corner on the remote control. In a little time, you may see a picture displaying a menu. If you do not see a picture, try pressing the VF button on the remote control. If after several tries you still get no picture, check that the television is set to the correct input. If the picture is good, you can skip to §3.1 to search for available television and radio services. Otherwise, you may need to temporarily connect the Composite video connector (VIDEO) to your television set so that you can see the menu in order to configure the video settings. 2.5 Switching on for the first time 15 If the digital receiver no longer reacts properly to the remote control commands, the batteries may be flat. Be sure to replace only with 1.5 V AAA size batteries, and observe the following precautions. • Do not mix different types of batteries, or new and old batteries. • Do not use rechargeable batteries. • Do not recharge the old batteries. • In order to avoid any risk of explosion, observe the polarities indicated inside the battery compartment. • Do not subject to excessive heat such as the sun and fire. • If you are not using the remote control for a long period of time, remove the batteries. The manufacturer accepts no liability for the damage resulting from leaking batteries. • Batteries, including those which contain no heavy metals, may not be disposed with other household wastes. Please dispose of used batteries in an environmentally sound manner. Find out the legal regulations which apply in your area. 2 Setup CAUTION 16 Service Search Chapter 3 Service Search After connecting up the digital receiver, you will need to perform a service search. NOTE If there is no service stored, you will be not able to access all menus. A is another name for a . 3.1 Searching for broadcasting services To perform service search, select the Installation > Searching menu. You should see a screen like the left figure. If you have an antenna booster, you should set the Antenna Supply 5V option to On to supply power to it. 3.2 Resetting to factory settings 17 You may choose to only search for the services of a specific transponder since more than one service are provided via each transponder. Set the Search Mode option to Manual, then select your desired transponder at the Channel option. The number ranges from 5 to 12 (or D to H) in VHF and 21 to 69 in UHF. You may need to set the Modulation option to match to that of your desired transponder. If the transponder is of the DVB-T2 standard, you should set it to DVB-T2. It is possible to search single service in a certain transponder only if you know the desired service’s audio and video packet identification (PID). Set the Search Mode option to Advanced, then the PID option becomes enabled. Specify the PIDs of your desired service with the numeric buttons. The digital receiver can check and notify if there is updated services list. Set the Automatic channel list update option to On if you want the unit to keep you updated on new services. A pop-up message will appear when there are new services detected. With the choice of Yes you will be moved to the service search screen automatically. If you prefer to check for updates manually, turn this option Off. To start service search, move down to the Start Search item, and press the OK button. The digital receiver will start to search for services and display a list of television and radio services as they are found. It is common for no channels to be found until quite late in the process. When the scan is complete, you will see a message telling you how many services have been found. Press the OK button to save the list. 3.2 Resetting to factory settings The digital receiver maintains the following data: • Services list 3 Service Search You should set the Search Mode option to Auto for the first time after connecting up the digital receiver, then the digital receiver will search for all available services. 18 Service Search • Favourite list • Timer list • Preference settings You can reset all data of the digital receiver. Select the Installation > System Recovery > Factory Setting menu, and then you get asked for confirmation. With the choice of Yes, the services list, favourite list and timer list will all be cleared, and preference options will be reset to the manufacturer’s factory settings. NOTE A factory reset will not delete any recorded programmes. However, you have to search services again after a factory reset. 3.3 Resetting to user settings You can store your own data including the following: • Services list • Favourite lists • Preference settings Also you can restore them at any time. To store your data, select the Installation > System Recovery > Store System Data menu, then you get asked for confirmation. If you select Yes, your data will be stored. Whenever you store your data, they are all overwritten. To restore your data, select the Installation > System Recovery > Recover System Data menu, then you get asked for confirmation. With the choice of Yes, your data will be restored. 3.4 Clearing the services list If you only want to clear the services list, select Installation > System Recovery > Reset Service List , then you get asked for 3.4 Clearing the services list 19 3 Service Search confirmation. With the choice of Yes, the services list will be cleared. After this, you have to do service search again. 20 Preference Settings Chapter 4 Preference Settings 4.1 Language settings You can select the language in which the menu will be displayed. In addition to that, you can select the language of audio track and of subtitle track. Select the Settings > Language menu. You should see a screen like the left figure. 4.1.1 Menu language The digital receiver provides menus in several different languages. Set the Menu Language option to your desired language. Once you select a language, the menu will be immediately displayed in the selected language. 4.1 Language settings 4.1.2 21 Teletext Language 4.1.3 Subtitle language Set the 1st Subtitle Language option and the 2nd Subtitle Language option to your desired languages. When you watch a programme, if the programme has a subtitle track of the language that is specified for the 1st Subtitle Language, it will be displayed. If the first language is not available but the second language is available, the subtitle of the second language will be displayed. If there is no available language, no subtitle will be displayed. Apart from this setting, you can select a subtitle track with the button. See §5.2.5 for a detailed description. 4.1.4 Hard of Hearing Some broadcasters may send a subtitle track dedicated to the hard-of-hearing. Even when a subtitle track or more is available, that subtitle track will be displayed prior to those you have specified for the 1st Subtitle Language and the 2nd Subtitle Language options if the Hard of Hearing option is set to On. 4.1.5 Changing region If you want to change the country, set the Region option to your desired region. When you search services, the digital receiver will search the nearest broadcasting services in your selected region. 4.1.6 Audio language Set the 1st Audio Language option and the 2nd Audio Language option to your desired languages. When you watch a 4 Preference Settings Set the Teletext Language option to your desired language. The teletext pages of the selected langauge will be displayed if available when you open teletext. 22 Preference Settings programme, if the programme has an audio track of the language that is specified for the 1st Audio Language, it will be output. If the first language is not available but the second language is, the audio of the second language will be output. Apart from this setting, you can select an audio track with the button. See §5.2.4 for a detailed description. 4.2 Video and audio settings You have to configure the video and audio settings appropriately for your television set and other devices. Select the Settings > A/V Output menu. You should see a screen like the left figure. 4.2.1 High definition television The digital receiver supports various video resolutions from 576 to 1080. In general, a resolution of 720 or more is considered high definition. The higher the resolution is, the better the quality is. However, if your television set does not support high definition, you cannot enjoy high definition quality picture. If your television set does not support high definition, set the HD Output option to SD. Otherwise, set it to HD. Set the Video Format option as you desire. If you set this option to 576P, the digital receiver will present even high definition programmes in resolution of 576. On the contrary, if you set it to 1080I, the digital receiver will present even standard definition programmes in resolution of 1080. 4.2 Video and audio settings 23 When you want to watch television via the HDMI output, if your television cannot handle the video input with High Definition Copy Protection (HDCP), you should set the HDCP option to Off. NOTE You can enjoy only standard definition video with the following video outputs: • Composite video output (VIDEO) • SCART output (TV) 4.2.2 Television aspect ratio If you have a wide-screen television, set the TV Aspect Ratio option to 16:9. You can enjoy both wide-screen programmes and normalscreen programmes with your wide-screen television as the above figures show. To watch normal-screen programmes in full screen like the left figure, set the Display Format option to Full. Normal-screen pictures then will be inflated to fit to the width of the wide screen. Otherwise, to watch them in the 4 Preference Settings It is recommended to set it to Original Format if you have a high definition television. With that setting the digital receiver will present a programme as it is without any resolution conversion. While watching television you can change the resolution with the VF button. Whenever you press it, the video resolution is changed in turn. 24 Preference Settings original ratio like the right figure, set it to Center. If you have a normal-screen television, set the TV Aspect Ratio option to 4:3. You cannot fully enjoy wide-screen programmes with your normal-screen television as the above figures show. The left figure shows a normal picture displayed in the normal screen. To watch wide-screen programmes in the shape like the centre figure, set the Display Format option to Letter Box. Widescreen pictures then will be reduced to fit to the width of the normal screen. Otherwise, to watch them in the shape like the right figure, set it to Center extract. Then wide-screen pictures will be cut out on the left and right sides equally to fit to the width of the normal screen. 4.2.3 Colour format Through the TV SCART output, the digital receiver is able to output video in various colour formats. If you have the digital receiver linked to your television via this output, you should set the SCART Output option to your desired colour format. If you have connected via the RCA socket labeled VIDEO on the back panel, you do not have to set this option because the digital receiver outputs CVBS video through that RCA output independently of the SCART output. 4.2.4 Another video device You can have the digital receiver linked to another video device like a video recorder or a DVD player via the VCR SCART output. In this case, the digital receiver will operate differently depending on the setting of the VCR SCART Type op- 4.2 Video and audio settings 25 4.2.5 Audio mode Basically, there are two audio sources as you can find two audio sockets on the back panel of the digital receiver. You can enjoy only one source or both of them in either stereo or mono. Set the Sound Mode option as you desire. Apart from this setting, you can change the sound mode with button. See §5.2.4 for a detailed description. the The digital receiver can output two types of digital audio signals via the S/PDIF output. One is an encoded signal, and the other is a decoded signal. If you have the digital receiver linked to your audio-video receiver via the S/PDIF output, you have to set the Digital Audio option to multi-channel, which means that the digital receiver will output encoded Dolby Digital audio without decoding so that your audio-video receiver can decode it. Otherwise, set it to PCM, then the digital receiver will output decoded Dolby Digital audio, scaling it down to two channels. NOTE Only if the service you are currently watching provides a Dolby Digital audio track, you can enjoy Dolby Digital sound. If you feel that the audio from the S/PDIF output does not synchronise with video, you can straighten it by adjusting the value of the S/PDIF Audio Delay option. 4 Preference Settings tion. If the option is set to Standard, the digital receiver will pass along the video from the video device to your television when it starts playback. But if the option is set to External A/V, the digital receiver will not pass the video automatically. You have to press the M button to pass it along. It is impossible for the digital receiver to record the video from the video device since the digital receiver is just a bypass for the video recorder. 26 Preference Settings Some programmes provide extra special audio track, which you can activate by setting the Audio Description option to On. 4.3 Local time setting You should set your local time for timer events. Select the Settings > Time menu. You should see a screen like the left figure. You can set the clock manually or use the time signal, Greenwich Mean Time (GMT), carried as part of the digital television broadcast. To use Greenwich Mean Time, take the following steps: 1. Set the Mode option to Auto, then the Time Offset option becomes enabled. 2. Set the Time Offset option to the time difference between your time zone and GMT referring to Table 4.1. 3. Make sure that your local time is correctly displayed on the Local Time item. To set the local time manually, set the Mode option to Manual and enter your local time to the Local Time option with the numeric buttons. The time format is day/month/year 24hour:minute. To change the time format to 12-hour format, set the Time Format option to 12 Hours. If daylight saving time is observed in your state at the moment, set the Daylight Saving Time option to On. NOTE Daylight saving time adds one hour to the time when the option is set to On. When setting the time offset from Green- 4.4 Parental control 27 Table 4.1: Time offset table 4.4 Time offset City GMT − 12:00 GMT − 11:00 GMT − 10:00 GMT − 09:00 GMT − 08:00 GMT − 07:00 GMT − 06:00 GMT − 05:00 GMT − 04:00 GMT − 03:30 GMT − 03:00 GMT − 02:00 GMT − 01:00 GMT GMT + 1:00 GMT + 2:00 GMT + 3:00 GMT + 3:30 GMT + 4:00 GMT + 4:30 GMT + 5:00 GMT + 5:30 GMT + 6:00 GMT + 7:00 GMT + 8:00 GMT + 9:00 GMT + 9:30 GMT + 10:00 GMT + 11:00 GMT + 12:00 Eniwetok, Kwajalein Midway Island, Samoa Hawaii Alaska Pacific Time US, Canada Mountain Time US, Canada Central Time US, Canada, Mexico City Eastern Time US, Canada, Bogota, Lima Atlantic Time Canada, La Paz, Dominican Republic Newfoundland Brazil, Georgetown, Buenos Aires Mid-Atlantic Azores, Cape Verde Islands London, Lisbon, Casablanca Paris, Brussels, Copenhagen, Madrid South Africa, Kaliningrad Baghdad, Riyadh, Moscow, St. Petersburg Tehran Abu Dhabi, Muscat, Baku, Tbilisi Kabul Ekaterinburg, Islamabad, Karachi, Tashkent Bombay, Calcutta, Madras, New Delhi Almaty, Dhaka, Colombo Bangkok, Hanoi, Jakarta Beijing, Perth, Singapore, Hong Kong Tokyo, Seoul, Osaka, Sapporo, Yakutsk Adelaide, Darwin Eastern Australia, Guam, Vladivostok Magadan, Solomon Islands, New Caledonia Fiji, Auckland, Wellington, Kamchatka Parental control In general, television programmes are classified according to the level of violence, nudity and language of their content. When you are watching a programme, you can check its programme classification on the information box. For the information box, see §5.2.3. You can prevent your children from 4 Preference Settings wich Mean Time, make sure that time offset does not include daylight saving time. 28 Preference Settings watching specific programmes by specifying a maximum permissible level. Select the Settings > Parental Control menu. You should see a screen like the left figure, and you will be asked your Personal Identification Number (PIN). The number is initially set to ‘0000’ as default. If you wish to block programmes for viewers aged 15 or above, set the Censorship option to 15 (age). Setting it to No block blocks no programme; on the other hand, setting it to Total block blocks every programme. NOTE If a programme has no rating information, your censorship setting will not take effect. If anyone is trying to watch a programme that is of or above the censorship setting, the person has to enter the personal identification number to override. To change the number, select the Change PIN Code menu, then a box pops up, asking a new PIN. Enter a desired number twice for confirmation. You can also restrict uses of some menus. Selecting the Access Control menu displays a list of menus that you can lock. If the Time item is set to Locked, you have to enter the PIN when accessing the Time menu. If you enter a wrong number, you cannot use the menu. To release a locked item, set it to Unlocked. 4.5 Options for recording 4.5 29 Options for recording To enable the time-shift function, you should set the Time Shifting option to anything other than Disable. The available range for this option is 30 minutes to 5 hours. You will have the latest of the current programme as long as the duration specified at this option. You can set the duration of the timer recording. Set the Timer Recording Duration option as you desire. Its available range is 10 minutes to 3 hours. Time padding is the feature of adding extra recording time to the beginning or end of a programme, so that you do not miss any part of the programme. Set the Time Padding of Timer Recording option as you desire. You can adjust the duration of the instant recording. Set the Instant Recording Duration option as you desire. Its available range is 30 minutes to 5 hours. 4 Preference Settings To set the options for recording, select the Settings > Recording menu. You should see a screen like the left figure. 30 4.6 Preference Settings Options for playback To set the options for playback, select the Settings > Playback menu. You should see a screen like the left figure. If you want to play back a recorded file from beginning, set Starting Position option to Beginning. To play back a recorded file from the part where you were watching, set this option to Continuing. You can adjust the jump interval that is for playback. Set the Jump Time Interval option as you desire. Its available range is 10 seconds to 3 minutes. If you want to enjoy more levels of playback speed, set the Trick Mode Level option to 2x, 4x, 8x, 16x, 32x, 64x; otherwise, set it to 4x, 16x, 64x. NOTE You can enjoy video files such as Xvid with the digital receiver. However, the above options might not be effective depending on the video files to be played. For detailed description on how to play back a video file, refer to §8.5. If you have subtitle files such as .smi, .sub, .idx, and .srt, the digital receiver can also display them. The Media Subtitle item provides some options for video subtitle. When you play back a video file with a subtitle file, if the subtitle does not match the video, then you can synchronise them by adjusting the value of the Sync option. In addition, you can change the colour and 4.7 Options for on-screen display 31 4.7 Options for on-screen display To set the options for the onscreen display (OSD), select the Settings > OSD menu. You should see a screen like the left figure. To adjust the transparency level of the OSD, set the OSD Transparency option as you desire. Its available range is 0 to 50 percent. To adjust the display time of the information box, set the Info Box Display Time option as you desire. Its available range is 1 to 30 seconds. If you set this option to No Info Box, the information box will not be displayed when you switch services. However, pressing the button will display the information box. If you set this option to Never Hide, the information box will always be displayed. For the information box, see §5.2.3. In addition, you can raise or lower the position of the information box. Set the Info Box Position option as you desire. Its available range is −10 to +3 lines. The higher you set the option, the lower the information box will be positioned. To use an animation effect when changing menu, set the Animation option to Enable. If any service’s name is too long to fit the width of the service name column on the services list screen, you can get it to scroll by setting the Text Scroll option to anything other than Disable. 4 Preference Settings size of subtitle by setting the Font Color and Font Size options to one you prefer. 32 Preference Settings With the choice of Full Scroll, it will be fully scrolled until its end disappears; with the choice of Part Scroll, it will be scrolled only to its end. 4.8 Options for the front display To set the options for the front display, select the Settings > Front Display menu. You should see a screen like the left figure. The front display shows the currently viewed service’s number and name. If any service’s name is too long to fit the width of the service name column, you can get it to scroll by setting the Main Display Scrolling option to anything other than Disable. With the choice of Unlimited, it will be repeatedly scrolled; with the choice of Once, it will be scrolled only once. If you want to have the current time displayed instead of the service number, set the Sub Display Content option to Time. You can also adjust the brightness of the front display in active mode and standby mode by setting the Brightness in Operation Mode option and the Brightness in Standby Mode option to any as you like. 4.9 Options for Photo Album You can change a time interval and effect of slideshow in the photo album. For the photo album feature, see §8.4. To change the time interval of slideshow, select the Settings > Miscellaneous menu, and then set the Slideshow Time Interval 4.10 Options for standby mode 33 option as you desire. Its available range is 3 to 10 seconds. Overlap overlaps the current picture and a following picture. Cover covers the current picture with a following picture. Move moves the current picture and displays a following picture. Mosaic displays a following picture with a mosaic effect. To use those effects ramdomly, set this option to Random. The default value is Random. 4.10 Options for standby mode You can have the current time displayed on the front display in standby mode. Select the Settings > Miscellaneous menu and set the Standby Mode option to Active; otherwise, set it to Passive. When you set the Standby Mode option to Active, the receiver can also bypass the signal from the antenna. To save power consumption, you might as well set the Automatic Power Down option to Enable. With this option enabled, the receiver will be turned off automatically when there is no manipulation over three hours. 4 Preference Settings To change the effect of slideshow, select the Settings > Miscellaneous menu, and then set the Slideshow Effect option as you desire. There are four types of effects as follows: 34 Every Day Use Chapter 5 Every Day Use 5.1 Volume control Use the VOLUME− and VOLUME+ buttons to alter the volume to a comfortable level. You may need to adjust the volume on your television set too. To temporarily switch off the sound, button. Press it again to restore the sound to prepress the vious level. 5.2 Watching television To change services, press the CHANNEL− or CHANNEL+ button. Pressing the button switches to the previously viewed service. In addition, you can switch to your desired service by entering its service number with the numeric buttons. You can also select a service to watch in the services list. 5.2.1 The services list To view the services list, press the OK button. 5.2 Watching television 35 On the services list, you can see the service information as follows: A dollar sign ($) may be marked on some entries, indicating pay service. To watch pay services, you need a subscription card. To select a desired service, put the highlight bar on its entry with the or button and press the OK button, then the selected service will be presented. Pressing the or button skips over 10 entries up or down. Entering a service number with the numeric buttons puts the highlight bar on its entry. You can switch between the television services list and the rabutton. dio services list by pressing the 5.2.2 The favourite service lists You can select a service on a favourite list as well as on the services list. 5 Every Day Use • Service number and name • Multiplex information 36 Every Day Use To display the favourite lists, press the F2 button at the services list screen. For the services list, see §5.2.1. To select a favourite list, put the highlight bar on a desired favourite group list and press the OK button, then the selected favourite group’s services will be listed. As to how to edit the favourite lists, refer to §6.1. To select a favourite service, put the highlight bar on a desired service and press the OK button, then it will be displayed. To select another group, press the button. After you have selected a favourite service, if you then switch to another service using the or button, it will be also another favourite service of the selected group. The digital receiver will remind you what group you have selected by displaying its name at the top right of the screen whenever you switch services. To return to the services list, press the F1 button. Besides that, you can add or delete a favourite group or service. To add the service you are currently watching into a favourite group, press the Option button to display additional options, and then select Add this service item. To remove the currently highlighted favourite grop or service, select Delete item in the additional option box, then you get asked for confirmation; with the choice of Yes, it will be removed. 5.2.3 Viewing programme information button displays the information box, on which Pressing the you can see all of the following: 5.2 Watching television Service number and name Signal level and quality Programme name Programme classification sign Programme summary Broadcasting time Current time In addition, you might see the following symbols: • Subtitle symbol ( ) if subtitle tracks are provided on the current programme. • Teletext symbol ( current service. ) if teletext pages are provided on the • Dolby Digital symbol ( ) if a Dolby Digital audio track is provided on the current programme. • Lock symbol ( ) if the current service is locked. • Dollar symbol ($) if the current service is a pay service. Pressing the button once more displays detailed information about the current programme. To hide the information box, press the EXIT button. 5.2.4 Selecting audio tracks Some programmes are provided with audio tracks in one or more languages. Pressing the button displays available audio tracks. Once you select an audio track, that track will be heard. In addition, you can enjoy audio tracks in four sound modes: Stereo, Mono, Left or Right. 5.2.5 Selecting subtitle tracks Some programmes are provided with subtitle tracks in one or more languages. If the current programme provides subtitle 5 Every Day Use • • • • • • • 37 38 Every Day Use tracks, the subtitle symbol ( ) will be marked on the information box. Pressing the button displays available subtitle tracks. Once you select a subtitle track, it will be displayed. 5.2.6 Viewing teletext On some services, such information as weather reports, news or stock quotations is provided by means of teletext. If the current service provides teletext, the teletext symbol ( ) will be displayed on the information box. Press the button to view teletext pages. Select a page to view by entering its page number with the nu meric buttons. You can zoom into a teletext page with the F3 button, and adjust its transparency level with the F4 button. To clear the teletext screen, press the EXIT button. 5.3 Viewing electronic programme guide The Electronic Programme Guide (EPG) shows the current and scheduled programmes that are or will be available on each service with a short summary for each programme. Pressing the GUIDE button displays the electronic programme guide, on which you can see the following: • • • • Scheduled programmes programme summary Broadcasting date Broadcasting time To see detailed information of a desired programme, put the highlight bar on the programme with the press the or or button and button. To switch to another service, press the button. 5.4 Using time-shift 39 You can travel over previous days with the F2 button, and can travel over next days with the F3 button. To see the programme guide for radio broadcasts, press the button. To switch it back, press the button again. You can make a timer recording on the electronic programme guide. See §7.1.3 for detailed description. 5.4 Using time-shift You can pause and resume a live television programme, and even rewind and replay it. When you are watching a programme and you miss something, you can rewind and replay it. Or when your attention is needed elsewhere, you can pause a live TV and resume a short time later without losing any of the programme. When you do this, you are no longer watching the live programme, instead you are watching a delayed presentation. This is called time-shifted television. You can skip commercials until you catch up to the live broadcast. In order to use the time-shift feature, set the Time Shifting option to desired duration of time. Then the digital receiver will archive the programme as much time as you set in the option. See §4.5. The time-shift will be reset each time you change to another service. With the time-shift, the following operations are pos- 5 Every Day Use Pressing the F1 button will rearrange the form, swapping the columns and rows. To switch it back, press the F1 button again. 40 Every Day Use sible: button; to go for• To go back in time, hold down the ward, hold down the button. The progress bar is displayed momentarily with a preview window. • You can navigate using the progress bar, refer to §7.3.1. • You can jump backward and forward by pressing the F4 and F3 buttons. You can change the jump time at the Jump Time Interval option. See §4.6. • You can change playback speed. See §7.3.2 for slow motion. For fast motion, see §7.3.3. • To check your current position in time-shift, press the button. The time difference compared to live programme is displayed momentarily in top right corner of the screen. A value of −02:00 means two minutes behind the live programme. • To make a recording of the time-shifted programme„ see §7.1.4. • To end time-shift, press the gramme will be displayed. button. The live pro- NOTE You can adjust some options for time-shift. Refer to §4.5. 41 6.1 Editing the favourite lists You can make your own favourite service lists. In fact, you can define multiple favourite service lists, each being a ‘group’ of chosen services. Select the Installation > Edit Favorite List menu. You should see a screen like the left figure. There are three columns: • Group name (left) • Favourites list (centre) • Services list (right) The services list contains all available services, whereas the favourites list contains only chosen services that have been added to the highlighted group. As you move the highlight bar up or down on the group list, favourite services belonging to the highlighted group get shown in the favourites list. Organising Services Organising Services 6 Chapter 6 42 Organising Services You can add up to 30 groups. To add a new group, select the NEW item in the group list, then the on-screen keyboard appears. See §6.2 as to how to use the on-screen keyboard. To rename a group, put the highlight bar on the group entry you want and press the F2 button, then the on-screen keyboard likewise appears. To delete a group, put the highlight bar on the group entry you want and press the F3 button, then a message box appears, asking you for confirmation. With the choice of Yes, it will be deleted. You can add a favourite service to a group by taking the following steps: 1. Put the highlight bar on a desired group entry in the group list and press the OK button to select it. The highlight bar then moves to the services list. 2. To add a service to the selected group, put the highlight bar on a desired service entry and press the OK button. The selected service entry gets added to the favourite list. Repeat this step to add more entries. 3. Press the F1 button, and the highlight bar gets moved to the favourite list. You can delete a favourite entry with the OK button. 4. To select another group, press the F1 button again, then the highlight bar gets moved to each column. Furthermore, you can rearrange a group’s favourites by moving a favourite entry. To move a favourite entry, put the high light bar on the favourite entry you want and press the F2 button. Press the and buttons or and buttons to move it to a desired place and press the OK button. To add radio services, press the button, then radio service entries get listed in the services list. To recall the television services button again. list after adding radio services, press the As to how to use the favourite service lists you organised, refer to §5.2.2. 6.2 How to use on-screen keyboard 43 6.2 How to use on-screen keyboard You can move the highlight key and horizontally with the buttons and vertically with the buttons. Pressing the To type a space, select the Space key or alternatively press the button. To type lower case letters or numerals, select the button. To delete a letShift key or alternatively press the ter, put the cursor to the right of the desired letter on the input butline and then select the Del key or alternatively press ton. You must select the Save key or alternatively press the button to complete your typing; otherwise if you press the EXIT button, it will not be saved. Organising Services ter in the input line. 6 and OK button on a key enters its let- 44 Recording and Playback Chapter 7 Recording and Playback NOTE To use an external hard drive, you must connect the external hard drive to the USB port of the digital receiver. The digital receiver has two tuners that allow you to record up to four different services at once while watching another one. However, this quadruple recording and playback is only possible when they are provided from the same transponder or not more than two different transponders. For example, if you attemp to record services from three different transponders an alert message appears to remind you to cancel one of the services currently being recorded. You can also enjoy the following features: • You can record four different services while playing back a previously recorded programme. • You can record four different services while watching one of them using the time-shift feature. See §5.4 for the time-shift feature. 7.1 Recording a programme 7.1 45 Recording a programme Once a recording gets started, a symbol like the left figure will be displayed at the top right of the screen for a few seconds. CAUTION Do not move the digital receiver nor pull out the power plug while it is running. It may cause damage to recorded programmes. Topfield is not responsible for damages inflicted on files that are stored on the hard drive. 7.1.1 Instant recording To instantly record a programme you are watching at present, button. press the Pressing the button will not pause the current recording like it does with a video recorder. Instead, pressing the button will pause the live show and begin time-shifting within the current recording even with the Time Shifting option disabled. In short, it is still possible to pause a recording, but literally recording continues in the digital receiver. 7 Recording and Playback When you are watching a different service from the service being recorded, you will see a number on the centre of the symbol, this indicates the order that the recording has started. To record four programmes simultaneously, two tuners are allocated for the recording. Therefore, you can only change to a limited number of services while the four programmes are being recorded. 46 Recording and Playback After a recording has started, pressing the button displays a menu like the left figure, in which you can set the recording duration. To specify an arbitrary recording duration, set the Duration opand buttons and press the tion as you desire with the OK button; the recording will end at the specified time. If the information about the next programme is provided by the electronic programme guide, the After this program and After next program options will be enabled. Once the After this program option is selected, the current recording will stop at the time when the current programme is scheduled to end. Likewise, once the After next program option is selected, the current recording will stop at the time when the next programme is scheduled to end. To stop recording, press the button; then a box like the left figure appears, which shows the programmes currently being recorded. Select recording by using navigation buttons then press OK button to stop the recording. While a recording is going on, you can watch or record another service. To additionally record another service, switch to the 7.1 Recording a programme 47 7.1.2 Timer recording You can set a programme to be recorded at a specific time. Even if the digital receiver is in standby mode, it will switch into active mode and start recording at a specified time. When the recording comes to the end, the digital receiver will switch back into standby mode again in one minute. However, if you press any button on the remote control or on the front panel even just one time, the digital receiver will not switch into standby mode. To add a timer recording, select the Recording > Reservation menu, then the timer list will be displayed. To add a new timer event, press the F1 button, and a box like the left figure appears. Take the following steps: 1. Set the Record option to On to make a recording. If this option is set to Off, the digital receiver will turn on at the specified time but not record; instead, you may record with your video recorder or suchlike in this case. 2. You may have two sources for recording, TV and radio. Set the Type option to your desired source. 7 Recording and Playback service you want to record, and press the button. Once a recording is started, it is put on the recorded programme list even though it is not finished yet. The recording file is named the program name if available or after its service name with a suffix of a number. To view the recorded programme list, button or alternatively select the Recording > press the Recorded Program menu. See §7.2 for detailed description about the recorded programme list. 48 Recording and Playback 3. Set the Service option to the service which provides the programme you want. Pressing the OK button on this option displays a services list, from which you can select your desired service. 4. Set the Mode option as you desire. There are five timer modes: One Time means literally ‘one time’. Every Day means literally ‘every day’. Every Weekend means ‘Saturday and Sunday every week’. Weekly means ‘one day every week’. Every Weekday means ‘from Monday to Friday every week’. If your favourite programme is broadcast at weekends and you wish to record every episode of the programme, set the Mode option to Every Weekend. 5. Set the Date option to a desired date, on which the digital receiver will turn on. The date format is day/month/yearday of the week. Set the Start Time option to a desired time, at which the recording will be started. The time format is hour:minute. 6. Set the Duration option to a desired time, in which the recording will be finished. 7. Pressing the OK button on the File Name option displays the on-screen keyboard, with which you can specify a file name for the timer recording. If you do not specify anything, it will be named after the service name. See §6.2 as to how to use the on-screen keyboard. 8. To set a recording reservation with the above settings, select the OK item; otherwise, it will not be saved and will not occur. You can also edit or delete timer events in the timer list. To edit a timer entry, put the highlight bar on the entry you want and 7.1 Recording a programme 49 press OK button; then appears a box in which you can change its settings in the same manner as making a new one. To delete a timer event, put the highlight bar on the entry you want to remove and press the F2 button, then you get asked for confirmation. With the choice of Yes, it will be deleted. To delete all timer event, press the F3 button. 7.1.3 Scheduling recordings using the programme guide If the electronic programme guide is properly provided, you can make timer events on it. The instructions on how to make timer recordings using the electronic programme guide are as follows: 1. Press the GUIDE button to display the electronic programme guide. 2. Select a programme you want to record with the navigation buttons. 3. To make a timer event without recording, press the OK button; the letter P is displayed. To make a timer event with recording, press it once more or alternatively press the button, then the letter R is displayed. 4. Pressing the OK button once more will cancel the timer. 7.1.4 Recording a time-shifted programme While watching a programme with time-shift, you can record it by performing the following steps: 1. Press the button to display the progress bar. 7 Recording and Playback You can sort timer events by time with the F4 button. 50 Recording and Playback 2. To move to the beginning of the desired scene, hold down the or button until it is reached. 3. Press the button to start recording. The time-shift buffer from that position onwards will now be recorded. 4. Press the button to stop recording. 5. Press the button once more to stop time-shift. See §5.4 for detailed description about the time-shift feature. 7.1.5 Recording a pay service programme You can record a pay service programme without the subscription card. However, you need the subscription card to play it back because it has not been descrambled. So it is recommended to record pay service programmes with a proper subscription card so that they can be descrambled and recorded. In that case, you can enjoy them without the subscription card like free services. To record a programme of a pay service in descrambled form, take the following steps: 1. Select a programme of a pay service you want to record. 2. Make sure that the subscription card is inserted in the slot on the front of the digital receiver. 3. Start recording. 4. Do not switch to other service nor use time-shift until recording is finished. NOTE If you switch to other service or use time-shift in the middle of recording a pay programme, it will be recorded without descrambling from that moment. Even if the recording is only partially descrambled, you need the subscription card to play it back. 7.2 File archive 51 7.2 File archive When a programme is recorded, it is stored as a file on the hard drive of the digital receiver. You can select a recording to play back from the recorded programme list. You can play, move, delete, rename and lock a recording file. You can also sort the recording files by file name, running time or file size. In addition, you can make a new folder. 7.2.1 To delete a recording To delete a recording, put the highlight bar on it and press the F4 button, then you get asked for confirmation. With the choice of Yes, it will be deleted. 7.2.2 To sort recordings To sort the recordings, take the following steps: 1. Press the Option button to display additional options. 2. Set the Sorting option to Alphabetic, Time or Size as you want. 3. Press the EXIT button. 4. They will be sorted by the specified option. 7 Recording and Playback Select the Recording > Recorded Program menu or alternatively press the button to display the recorded programme list. The file information is comprised of the following elements: file number, file name, recording time, running time, file size and so on. 52 Recording and Playback 7.2.3 To lock a recording To lock a recording so that other persons cannot play or delete it, take the following steps: 1. Put the highlight bar on a desired recording. 2. Press the Option button to display additional options. 3. Set the Lock option to Locked. 4. Press the EXIT button. 5. The lock symbol ( ) is displayed on it. If you select a locked recording to play it back, you will be asked for your personal identification number. 7.2.4 To rename a recording To change a recording’s name, take the following steps: 1. Put the highlight bar on a desired recording. 2. Press the Option button to display additional options. 3. Select the Rename option, and the on-screen keyboard appears. Change the name and save it. See §6.2 as to how to use the on-screen keyboard. 7.2.5 To make a new folder To make a new folder, press the F2 button, then a new folder named GROUP # is created. You can change its name in the same manner as renaming a recording. See above. 7.2.6 To move a recording to another folder To move a recording to another folder, put the highlight bar on a desired recording and press the F3 button. Once you choose a folder, the recording is moved to it. 7.3 Playing back a recording When a programme is recorded, its additional contents such as audio track or subtitle track are also recorded together. So you can enjoy them while playing back a recording. 7.3 Playing back a recording 53 The instructions on how to play a recording are as follows: 1. Select the Recording > Recorded Program menu or button to display the list of alternatively press the recorded programmes. 2. Put the highlight bar on a desired recording and press the OK button, then an option box pops up. 4. To stop playback, press the button. During playback, you can enjoy the following tricks: • To see the detailed information about the currently button; then the informaplayed recording, press the tion box appears and shows its file name, running time, programme information, and so on. • To pause playback, press the button. press the button. To resume it, • To view the progress bar, press the press the button again. button; to hide it, • When the progress bar is hidden, you can move to a desired scene by entering a progress percentage with the numeric buttons. 7.3.1 To navigate using the progress bar First press the button to display the progress bar. • To go forward, hold down the ward, hold down the button; to go back- button. • If there are no bookmarks, you can jump forward by the minute set to the Jump time Interval option with the F3 button. See §4.6 for that option. Refer to §7.3.4 as to how to bookmark a position. 7 Recording and Playback 3. To play from beginning, set the Starting Position option to Beginning; to play from the point that you have stopped at the last time, set it to Continuing. To start playback, select the Play item. 54 Recording and Playback • To jump to the beginning, press the • To jump to the end, press the button. • To hide the progress bar, press the 7.3.2 button. button again. To play in slow motion To watch in slow motion during a playback, press the button. If you press it repeatedly, the playback speed changes in 4 steps: 1/2, 1/4, 1/8 and 1/16 times. To resume normal speed, button. press the 7.3.3 To play in fast motion butTo watch in fast motion during a playback, press the ton. If you press it repeatedly, the playback speed changes. To button. resume normal speed, press the You can play not only forward but also backward in fast mobutton. If you press it tion. To play backward, press the repeatedly, the playback speed changes. To resume normal button. speed, press the You can change the playback speed in 3 steps (4, 16 and 64 times) or in 6 steps (2, 4, 8, 16, 32 and 64 times). See §4.6. 7.3.4 To make a bookmark You can mark favourite parts of a recording by creating bookmarks and then jump to them in sequence. Bookmarks are stored with the recording so that you can use them again afterwards. To make bookmarks, take the following steps during playback: 1. Press the button to display the progress bar. 7.3 Playing back a recording 55 2. To add a bookmark, press the F2 button at a desired scene, then you will see a small pointer appear above the progress bar like in the picture above. 3. To jump forward to the next bookmark, press the F3 button. 7.3.5 To play back a recording repeatedly button when the progress To play back in whole, press the bar is hidden, then the repetition symbol ( ) is displayed on the information box. To cancel it, press the button again. To play back in part, take the following steps: 1. Press the button to display the progress bar. 2. Move to the beginning scene of the part you want to play repeatedly by holding down the 3. Press the or button. button, then the pointer starts to blink. 4. Move to the end scene; the selected part is marked in black. 5. Press the button again to start repeated playback. 6. To cancel it, press the is displayed. 7.3.6 button when the progress bar To play back recordings in sequence You can play several recordings continuously in sequence by performing the following steps: button or alternatively select the Record1. Press the ing > Recorded Program menu to display the list of recorded programmes. 2. Select each desired recording with the F1 button. Once a recording is selected, it gets numbered. 3. Press the button to start playback. 7 Recording and Playback You can play back a recording repeatedly both in whole and in part. 56 Recording and Playback 4. The selected recordings are played in the sequence that they are numbered. 5. To jump to the beginning of the next recording in the button to display the progress bar, queue, press the then press the button. 7.3.7 To play back a scrambled recording If you have recorded a programme of a pay service with the subscription card, you can play it as freely like that of a free service. Otherwise you need the subscription card to play it back because it has been recorded without descrambling even though it may have been partially descrambled. On the recorded programme list, a purely green $ indicates the recording has been wholly descrambled; on the other hand, a yellowish green $ indicates it has been partially descrambled, and a purely yellow $ indicates it has not been descrambled at all. 7.4 Copying a recording You can record the file in whole or in part during a playback by performing the following steps: 1. Start playback of a recording you want. 2. Move to a scene from which you want to start copying by holding down the or button. 3. Press the button, then it will be copied in a new file which is named after the original recording with a suffix of ‘COPY’ and a number. 4. To stop copying, press the 7.5 button. Formatting the hard disk You can delete permanently all contents stored in a hard drive by formatting it. Select the Installation > System Recovery > Format Hard Disk menu. With pressing the OK button, you get 7.5 Formatting the hard disk 57 asked for confirmation. Formatting will start with the choice of Yes. 7 Recording and Playback 58 Entertainment Chapter 8 Entertainment This digital receiver provides several special features for entertainment. 8.1 Configuring the network setting You should configure the network settings to enjoy a variety web services. Select the Installation > Network Setting > IP Setting menu. The easiest way to configure the network settings is to assign a dynamic IP address to the digital receiver by setting the Connection Type option to DHCP. To assign a static IP address, set the Connection Type option to Static, then the IP Address, Subnet Mask, Gateway, Primary DNS and Secondary DNS options become enabled. You have 8.2 Copying files 59 to set these options to match with the configuration of your router. 8.2 Copying files To copy from the external to the internal hard drive, take the following steps: 1. Connect an external hard drive to the digital receiver. 2. Press the button and then press the to select the External List. or button 5. Press the OK button, then the selected file will be copied into the built-in hard drive. 8.3 Playing back MP3 files You can enjoy music or audio books in MP3 format on the digital receiver. Refer to §8.2 as to how to copy a file from an external hard drive into the built-in hard drive of the digital receiver. To play an MP3 file, take the following steps: 1. Select the Entertainment > MP3 Player or press the button and then the or button to display the MP3 file list. 2. Put the highlight bar on a desired file; if you want to play several files, select them with the F1 button. Entertainment 4. Select a folder in the built-in hard drive. 8 3. Put the highlight bar on a desired file and press the F3 button, then the list of folders gets displayed. 60 Entertainment 3. Press the button to start playback. 4. To stop playback, press the button. To play all MP3 files in a subfolder, put the highlight bar on a desired folder, and press the button. To change from one file to the next or previous file, use the or buttons. 8.4 8.4.1 Viewing image files How to move a file to the photo album You must move the jpg files into the Photo Album folder first. Please ensure your external hard drive is connected to your unit. 1. Select MENU button on your remote then go to Entertainment > Media Player. 2. Press the SAT button on your remote to bring up your external hard drive. 3. Select the external hard drive name and then press OK . 4. You will then get access to your external hard drive. Navigate through the external hard drive file and folders until you have selected the image file you want to transfer. 5. With the file selected, press the F3 button, then another screen will appear. Select Photo Album and press OK . Now, you can view the image files in jpg format by performing the following steps: 8.5 Playing back a video file 61 1. Select the Entertainment > Photo Album menu, and then press the or button to display the list of image files. 2. Put the highlight bar on a desired file and press the OK button; if you want to view several files using a slide show, press the F1 button. You can change a time interval and effect of slideshow. See §4.9. 3. To stop viewing, press the EXIT button. 8.5 Playing back a video file Refer to §8.2 as to how to copy a file from an external hard drive into the built-in hard drive of the digital receiver. To play a video file, take the following steps: 1. Select the Entertainment > Media Player, then press the button, and SAT button on the remote or press the then the or button to display the video file list. 2. Put the highlight bar on a desired file; if you want to play several files, select them with the F1 button. 3. Press the button to start playback. 4. If it has its own one or more subtitle files, you can select one you prefer with the button to display subtitle. Entertainment • video: XviD, VOB, MKV, MP4, and AVI • photo: JPG • music: MP3 8 You can play back media files such as photos, videos and music with this digital receiver. Media file formats that you can play back with the digital receiver are as follows: 62 Entertainment 5. To stop playback, press the button. NOTE Due to the variations of video/audio codec types, there could be certain files not playable. 8.6 Playing back YouTube contents (optional) YouTube is a video sharing website where users can upload, view and share video files. With the TRC-1400, you can access YouTube and play back various contents. When you select the Entertainment > YouTube, you should see a screen like the left figure. To play back a YouTube content, and select a content with the buttons and press the OK button. To play back the content with full screen, press the OK button again. You can sort the contents with the option buttons as follows: • F1 button by most featured • F2 button by view count • F3 button from most discussed to least discussed • F4 button by top favourites • button related contents By pressing the Option button, you can sort the contents by the updated date, country and quality. You can also search contents by a specific keyword. To search contents by a keyword, press the SAT button, then the onscreen keyboard appears. See §6.2 as to how to use the onscreen keyboard. 8.7 Sharing image files by Flickr (optional) 63 To see detailed information about the current one, press the button. To hide the information box, press the EXIT button. 8.7 Sharing image files by Flickr (optional) Flickr is an image hosting website and on-line community platform. You can search an image file from the network server and view the file using the Flickr. To use this function, select the Entertainment > Flickr. 2. Enter a desired user name. As to how to use the keyboard, refer to §6.2. 3. After adding a user, select the user with the buttons and press the OK button. and To delete a user, put the highlight bar on a desired user and press the F2 button, then you get asked for confirmation. If you select YES, it will be deleted. You can also search image files by a specific keyword. To do that, take the following steps: 1. Press the F3 button to go to the keyword search mode. 2. Press the F1 button, then the on-screen keyboard appears. Entertainment 1. Press the F1 button, then the on-screen keyboard appears. 8 You can see image files which belong to a specific user by adding a user. To add a user, take the following steps: 64 Entertainment 3. Enter a keyword as you desire. As to how to use the keyboard, refer to §6.2. 4. Select the Save key on the on-screen keyboard to start searching image files. To save an image file to the photo album, press the Option button. For the photo album see §8.4. 8.8 SHOUTcast Internet radio (optional) SHOUTcast™ Radio is one of the largest directories of professionally and community programmed online radio stations in the world. Today SHOUTcastTM Radio features over 25,000 stations from around the globe. If you are into pop or rock music, want to check out local or world programming, you’re sure to find something you like on SHOUTcastTM Radio. To use SHOUTcast, select the Entertainment > SHOUTcast. To listen to a radio station, select a radio station with the and buttons and press the OK button. To search radio stations by genre, press F1 button. You can also search radio stations by a specific keyword. To do that, take the following steps: 1. Press the F3 button, then the on-screen keyboard appears. 2. Type a keyword you desire. As to how to use the keyboard, refer to §6.2. 3. Select the Save key on the on-screen keyboard to start searching radio stations. 8.9 Weather forecast (optional) 65 To add a radio station to a favourite list, put the highlight bar on a desired radio station and press the Option button. To display the favourite list, press the F2 button. For more details, visit the SHOUTcast web site, http://www.shoutcast.com. You can check their terms of service at the http://www.shoutcast. com/disclaimer. 8.9 Weather forecast (optional) You can view the weather of your city or other cities. 1. Press the F1 button to see additional options. 2. Set the Continent, Country and City options as you desire with the navigation buttons. 3. Press the EXIT button. Pressing the Option button toggles between the Centigrade and Fahrenheit. Entertainment To change a city, take the following steps: 8 To view the weather, select the Entertainment > Weather, then you should see a screen like the left figure. 66 Firmware Update Chapter 9 Firmware Update The digital receiver has a stable and convenient firmware to use. However, once in a while a new firmware may be released to improve the digital receiver. You can get the latest firmware and the firmware update tool, which runs on most versions of Windows, from the Topfield website, http: //www.i-topfield.com. 9.1 From a memory stick If you have a USB memory stick, you can update the firmware from it by taking the following steps: 1. Download a new firmware from the Topfield website. 2. Copy the firmware file to your memory stick. 3. Insert the USB memory stick into the USB port on the digital receiver. 4. Select the Installation > Firmware Upgrade > USB Firmware Upgrade menu, and the files in the USB memory will be listed. 9.2 Over the air (optional) 67 5. Place the highlight bar on the right firmware file and press the OK button, and a countdown will be displayed on the front display of the digital receiver. 6. When the message of ‘END’ appears, restart the digital receiver. 9.2 Over the air (optional) 9 It is possible to update the firmware to the latest version over the air.(optional) If a new version is available at any time, then a message box pops up, asking you whether to start firmware update. With the choice of Yes, you will be moved to the SSU Software Upgrade menu, and the firmware update will be started. Firmware Update 68 Universal Remote Control Appendix A Universal Remote Control The universal remote control allows you to operate the most important functions such as power on/off and volume control on your television, audio-video receiver, or DVD player. For the use of buttons, refer to Table A.1. To be able to control the device, you must adapt the remote control to the device first. Take the following steps: 1. Turn on the device you want to operate. 2. Point the remote control at the remote sensor on the device. 3. Hold down the OK and device button simultaneously for two seconds until the light flashes on. For example, if you want to operate your television with the remote control, press the OK and TV buttons simultaneously. 4. Find the manufacturer of the device from the codes list. 5. Enter the three-digits code you have found for your de vice and press the OK button. 6. If the setting is finished correctly, the light blinks twice and the device will be turned off. Otherwise, repeat from the step 2. If you cannot find a code for your device, do as follows: 69 1. Turn on the device you want to operate. 2. Point the remote control at the remote sensor on the device. 3. Hold down the OK and device button simultaneously for two seconds until the light flashes on. For example, if you want to operate your television with the remote control, press the OK and TV buttons simultaneously. 4. Press the CHANNEL+ or CHANNEL− button until the device turns off. If you want to find out the number which you set for your device, do as follows: 2. Press the button. Then the light will show the number with blinks. For example, if the number is 3, the light will blink three times. In case of 0, the light will blink ten times. You can reset the settings by doing as follows: 1. Hold down the TV and 0 buttons simultaneously for more than five seconds. 2. Each device button blinks three times in the following order: PVR → DVD → AUX → TV 3. After that, all settings will be reset to the manufacturer’s factory settings. NOTE Some buttons may not work properly depending on a device. If your device code is not listed on the following pages, you will not be able to use this remote as a universal remote for your specific device. A Universal Remote Control 1. Hold down the OK and device button simultaneously for two seconds. For example, if you want to know the number which you set for your television, press the OK and TV buttons simultaneously. 70 Universal Remote Control Table A.1: Operating buttons PVR TV DVD AUX VOLUME + VOLUME − Power on/off Volume up Volume down Power on/off Volume up Volume down Power on/off Volume up Volume down CHANNEL + CHANNEL − 0 1 2 3 4 5 6 7 8 9 Mute X X 0 1 2 3 4 5 6 7 8 9 X X X 0 1 2 3 4 5 6 7 8 9 Mute Channel up Channel down X 1 2 3 4 5 6 7 8 9 TV INPUT X X X Up X X X Down OK X X Left Left X Right X X X Right Menu Guide Exit Right X X Exit X Stop X X Rewind X X Pause X X Play X X Fast forward X OK MENU GUIDE EXIT A.1 Code list for television sets A.1 71 Code list for television sets A. . ACCENT 049, 063 ACEC 112 ACURA 195 ADMIRAL 065, 076, 163, 171, 190, 307, 324, 369 ADYSON 379 AGASHI 076, 379 AGEF 324 AIKO 049, 063, 076, 102, 141, 172, 195, 225, 379 049, 063 AIWA 376, 377 AKAI 019, 049, 050, 055, 063, 076, 102, 107, 123, 133, 139, 141, 150, 172, 174, 182, 195, 209, 225, 326, 333, 379, 428, 432, 433, 437 AKIBA 006, 049, 063, 123, 380 AKITO 049, 063, 106 AKURA 006, 049, 076, 096, 123, 195, 419, 426 ALARON 042, 334 ALBA 018, 044, 049, 050, 107, 123, 134, 163, 179, 184, 195, 225, 228, 232, 239, 379, 413, 421, 431 ALBIRAL 121, 326, 372 ALCYON 407 ALLORGAN 050, 094, 236, 334 ALLSTAR 049, 063 AMPLIVISION 113, 379, 421, 425 AMSTRAD 004, 011, 049, 063, 076, 123, 131, 172, 195, 225, 426 ANAM 049, 063, 195 ANGLO 076, 195 APOLLO ARC EN CIEL ARCAM ARDEM ARISTONA A.R.SYSTEM ARTHUR MARTIN ASA ASBERG ASORA ASTRA ASUKA ATLANTIC ATORI AUCHAN AUDIOSONIC AUDIOTON AUSIND AUTOVOX AWA AYOMI 049, 063, 076, 195, 407 045, 049, 063, 107, 112, 195, 210, 242, 391, 413, 421 165 029, 034, 074, 182, 186, 415, 424 029, 379, 424 392 049, 050, 063, 065, 079, 112, 158, 160, 188 049, 063 075, 107, 127, 133, 136, 139, 148, 153, 307, 425 003, 020, 065, 078, 080, 091, 117, 146, 171, 197, 235, 307, 319, 324, 341, 375, 406, 408 049, 063, 407 195 195 006, 050, 076, 123, 379 049, 050, 063, 113, 236, 242, 379 195 107, 425 031, 049, 063, 074, 076, 195, 213, 379, 392, 421 050, 076, 379, 392, 421 075, 090, 407 050, 071, 078, 079, 080, 083, 090, 147, 156, 236, 254, 305, 319, 323, 324, 379, 407, 413, 416 018, 049, 063, 131, 195, 206, 320, 379, 426, 433 411 B. . BAIRD 074, 102, 182, 209, 321, 329, 379, 409 A Universal Remote Control AIM ANITECH ANSONIC 72 Universal Remote Control BANG & OLUFSEN 324 BARCO 107, 355, 371, 372, 422 BASIC LINE 006, 031, 049, 107, 123, 159, 195, 207, 226 BASTIDE 379 BAUR 012, 049, 053, 063, 107, 150, 172, 244, 245, 246, 247, 301, 357, 414, 416 BAZIN 379 BEKO 063, 184, 240, 241, 392, 421, 433 BEON 049, 063, 163 BEST 213, 421 BESTAR 049, 063, 421 BINATONE 379 BLACK STAR 413 BLACKTRON 006 BLACKWAY 006 BLAUPUNKT 019, 053, 057, 060, 113, 118, 244, 245, 246, 247, 248, 249, 308 BLUE SKY 006, 049, 063, 123, 195, 232 BLUE STAR 006 BONDSTEC 413 BOOTS 050, 106, 379 BPL 006, 049, 063 BRANDT 074, 182, 218, 415, 424, 436 BRANDT ELECTRONIQUE 029, 034, 074, 182, 186 BRINKMANN 049, 063, 163 BRION VEGA 049, 063, 065, 083, 167, 172, 173, 181, 196, 324, 356 BRITANNIA 379 BROTHER 076 BRUNS 056, 065, 324 BSR 094, 107, 110, 139, 168, 314 BTC 123 BUSH BUSH (UK) 006, 018, 049, 076, 094, 106, 107, 123, 134, 139, 142, 143, 172, 179, 195, 209, 223, 225, 226, 232, 239, 307, 379, 416 107, 147, 168 C. . CAPSONIC CARAD CARENA CARREFOUR CARVER CASCADE CASIO CATHAY CCE CENTURION CENTURY CGE CIHAN CIMLINE CITY CLARIVOX CLATONIC CLATRONIC CMS HIGHTEC COMTEL CONCORDE CONDOR CONTEC CONTINENTAL EDISON COSMEL CROSELY 076 049, 063 049, 063, 380 018, 406 177 049, 063, 064, 195 049, 063 049, 063 049, 063, 379 049, 063 044, 054, 065, 163, 189, 324, 411, 413 002, 044, 054, 090, 093, 094, 096, 107, 139, 142, 163, 168, 189, 369, 407, 413, 421 111 031, 123, 134, 195 195 056, 121, 125, 163, 406 076, 123 031, 045, 049, 063, 076, 113, 123, 195, 225, 379, 407, 413, 421, 431 379 111, 125 195 006, 045, 049, 050, 063, 113, 163, 195, 210, 379, 413, 421 018, 131, 195, 206, 302, 320, 379 029, 034, 074, 182, 186, 232, 415, 424 195, 213 044 A.1 Code list for television sets CROSLEY 054, 065, 090, 093, 094, 104, 107, 139, 324, 407, 413 CROWN 049, 063, 154, 163, 170, 195, 209, 232, 372, 407, 419, 421, 431 CS ELECTRONICS 031, 123, 379, 413 CTC 413 CTC CLATRONIC 045 CURTIS MATHES 126, 190, 212 CYBERTRON 123 D. . DTS DUAL DUAL-TEC DUMONT DUMONT-FINLUX DUX DYNATRON 73 195 049, 050, 063, 095, 107, 139, 156, 168, 182, 242, 243, 379, 414, 416, 423, 424 195, 168, 050, 040 045, 065, 080, 102, 139, 146, 319, 324, 339, 341, 375, 379, 406, 408 020, 045, 061, 075, 078, 091, 104, 117, 147 049, 063, 112 049, 063 E. . 042 DAEWOO 063, 123, 140, 145, 161, 193, 195, 379 DAINICHI 123, 379 DANSAI 063, 076, 141, 195, 379 DANSETTE 426 DANTAX 392, 421 DATSURA 209 DAWA 049, 063 DAYTRON 049, 063, 195, 226 DE GRAAF 023, 107, 122, 139, 209, 307 DECCA 049, 063, 102, 106, 111, 120, 200, 331, 379 DECCA (UK) 046, 050, 102, 106, 131 DEITRON 049, 063 DENKO 076 DENON 126, 212 DER 321 DERWENT 105 DESMET 049, 063, 113 DIAMANT 049, 063 DIGILINE 049, 063 DIXI 063, 195, 379, 413 DOMLAND 423 DORIC 104, 105 DREAN 049, 063 ELBE ELBIT ELCIT ELECTA ELECTRO TECH ELEKTA ELEKTRONSKA ELG ELIN ELITE ELMAN ELTA EMERSON EMPEROR ERRES ESC ETRON EURO-FEEL EUROMANN EUROPA 049, 063, 107, 121, 123, 172, 194, 210, 242, 337, 368, 369, 391, 411, 421, 435 111 045, 046, 047, 062, 065, 104, 107, 150, 168, 324, 413 006, 076 195 006, 076 318 049, 063 003, 020, 049, 063, 107, 139, 172, 195, 379, 408, 416 031, 049, 063, 123 045, 168 076, 195, 379 004, 006, 042, 044, 049, 063, 065, 113, 225, 324, 327, 406, 413 006 063, 112 049, 063 049, 063, 107, 139, 195 076 049, 063, 076, 379, 421 049, 063 A Universal Remote Control DAENYK 74 Universal Remote Control EUROPHON 044, 045, 046, 049, 050, 063, 068, 107, 120, 168, 318, 336, 379, 413 EXPERT 107, 236, 242, 425 EXQUISIT 049, 063, 413 F. FORMENTI 090, 107, 113, 139, 307, 324, 379, 407 FORMENTI-PHOENIX 050, 075, 104, 113, 148, 307 FORTRESS 190, 324 FRABA 049, 063, 421 FRIAC 045, 049, 063, 195 FRONTECH 076, 139, 195, 307, 379, 413, 416 . FAMILLY LIFE 049, 063 FENNER 063, 195 FERGUSON 001, 032, 050, 073, 074, 076, 080, 082, 102, 103, 121, 158, 182, 204, 218, 244, 245, 246, 251, 306, 319, 321, 322, 328, 329, 344, 409, 411, 436 FUJITSU 042, 045, 102, 107, 195, 236, 327, 379 FUJITSU GENERAL 195, 379 FUNAI 042, 076, 094, 314, 327 049, 050, 063, 076, 107, 158, 225, 307, 364, 379 GALAXI 045, 049, 063 GALAXIS 045, 049, 063, 163, 421 GBC 031, 104, 107, 139, 143, 168, 195 FIDELITY G. . FIDELITY (UK) 133 FILSAI 050, 379 FINHER 359 GE 006, 074, 182, 218 FINLANDIA 033, 122, 139, 172, 197, 209, 223, 307, 375, 419 GEANT CASINO 107, 425 GEC 049, 063, 102, 104, 107, 120, 171, 172, 192, 307, 379, 416 GEC (UK) 046, 050, 102, 107, 150, 162, 192 GELOSO 031, 047, 062, 104, 107, 139, 168, 171, 195, 307, 413 GENERAL 064, 074, 182 GENERAL TECHNIC 195 GENEXXA 049, 063, 123, 307, 426 GOLDHAND 379 GOLDLINE 213 GOODMANS 018, 042, 063, 076, 102, 134, 139, 141, 143, 155, 182, 195, 218, 225, 232, 379, 428 FINLUX FIRST LINE FISHER 003, 020, 042, 045, 049, 061, 063, 075, 078, 080, 090, 091, 102, 104, 107, 117, 139, 146, 147, 163, 197, 210, 235, 319, 324, 339, 341, 375, 379, 406, 407, 408, 428, 429, 437 045, 049, 063, 094, 102, 107, 134, 139, 191, 195, 209, 210, 379, 411, 413, 416 018, 041, 050, 056, 065, 069, 102, 104, 107, 117, 139, 143, 156, 172, 189, 206, 209, 320, 324, 379, 408, 414, 416, 421 FLINT 031, 049, 063, 102, 123, 379, 380 GORENJE 124, 189, 421 FNR 045 GPM 123 FORGESTONE 158 GRADIENTE 049, 063, 170, 177 A.1 Code list for television sets GRAETZ GRANADA 049, 063, 090, 104, 136, 139, 153, 159, 162, 171, 172, 198, 225, 307 013, 018, 033, 041, 063, 102, 104, 105, 112, 120, 148, 164, 165, 171, 209, 218, 237, 238, 240, 241, 252, 307, 325, 363, 379, 407, 418, 419 046, 050, 090, 107, 139, 143, 162, 307 GRANDIN 006, 031, 049, 063, 107, 113, 123, 195, 379, 380, 425, 431, 435 GRONIC 045 GRUNDIG 005, 019, 049, 053, 063, 080, 090, 101, 115, 118, 166, 232, 244, 245, 246, 247, 248, 249, 308, 340, 341, 406, 407 H. . HALIFAX 076, 379 HAMPTON 379 HANIMEX 094 HANSEATIC 006, 018, 049, 050, 063, 094, 104, 107, 113, 143, 172, 195, 324, 379, 391, 416, 421, 423 HANTAREX 045, 046, 049, 063, 195 HANTOR 049, 063 HARLEY DAVIDSON 042 HARWOOD 049, 063, 195, 426 HAUPPAUGE 049, 063 HCM 006, 031, 049, 063, 076, 123, 163, 195, 379, 426 HEMA 195, 379 HEMMERMANN HIFIVOX HIGASHI 050 HIGHLINE 049, 063, 076 HIKONA 123 HINARI 004, 018, 042, 049, 066, 094, 107, 119, 123, 133, 134, 139, 143, 179, 195, 209, 232, 307, 327 HISAWA 006, 031, 123, 380, 425 HIT 342 HITACHI 007, 009, 018, 020, 023, 033, 049, 050, 063, 074, 086, 102, 104, 107, 110, 126, 127, 139, 143, 150, 162, 168, 171, 176, 182, 185, 186, 192, 212, 218, 231, 304, 307, 309, 315, 333, 334, 344, 361, 379, 416, 418 HITASHI FUJIAN 013, 164, 252 HITSU 123, 195, 379 HORNYPHON 049, 063, 112 HOSHAI 123, 379 HUANYU 379 HYGASHI 379 HYPER 050, 168, 195, 254, 361, 379, 413 HYPERSONIC 172 HYPSON 006, 049, 063, 076, 379, 380, 411, 425 I. . IBERRIA 049, 063 ICE 049, 063, 076, 123, 195, 225, 379 ICES 123, 379 IMPERIAL 002, 044, 049, 054, 063, 090, 093, 094, 107, 142, 163, 168, 189, 301, 307, 369, 407, 413, 416, 421 150, 416 INDIANA 049, 063 029, 034, 074, 182, 186, 304, 424 INGELEN 090, 104, 136, 139, 153, 159, 162, 171, 198, 232, 435 INGERSOL 195 A Universal Remote Control GRANADA (UK) 75 76 Universal Remote Control INNO HIT 044, 046, 049, 050, 063, 066, 102, 123, 155, 195, 217, 379, 407, 413 INNOVATION 049, 063 INTERACTIVE 210 INTERBUY 076, 195, 413 INTERFUNK 049, 063, 065, 067, 074, 090, 104, 107, 112, 139, 150, 153, 159, 172, 182, 301, 302, 324, 363, 421 INTERVISION 006, 045, 049, 055, 063, 076, 107, 123, 225, 232, 378, 379, 380, 381, 382, 384, 385, 386, 387, 388, 389, 413, 421, 423 K. . KAISUI 006, 031, 049, 050, 063, 123, 195, 207, 379, 380 KAMOSONIC 050 KAMP 379 KAPSCH 107, 172, 236, 242, 408 KARCHER 003, 006, 020, 031, 045, 049, 050, 063, 068, 076, 107, 195, 207, 217, 421, 435 KATHREIN 124 KAWASHO 379 KB ARISTOCRAT 107 KENDO 044, 045, 049, 055, 063, 134, 172, 210, 413, 421, 435 KENNEDY 071, 079, 104, 107, 139, 236, 305, 323, 369 IRRADIO 031, 049, 063, 066, 075, 090, 123, 155, 195, 254, 407, 413 ISUKAI 006, 049, 063, 123 ITC 379 KINGSLEY 379 ITS 006, 031, 049, 063, 076, 123, 225, 379 KLARMAX 371, 372 KNEISSEL 049, 063, 210, 242, 369, 391, 411, 421, 435 KOLSTER 045, 049, 063, 416 KONKA 031, 049, 063, 123, 225, 232 KORPEL 049, 063 KORTING 027, 065, 094, 113, 324, 421 KOSMOS 049, 063 KOTRON 076, 426 KRAKING 411 KRIESLER 050, 063, 065, 079, 112, 158, 160, 188 KTV 050, 379 KYOSHU 076, 163 ITT ITT-NOKIA ITV 042, 090, 107, 117, 134, 139, 150, 157, 159, 162, 165, 171, 172, 193, 197, 198, 209, 301, 307, 343, 350, 375, 416, 428 042, 090, 097, 104, 107, 117, 134, 136, 139, 150, 153, 159, 162, 165, 171, 172, 185, 193, 197, 198, 209, 301, 307, 343, 350, 375, 416, 428, 433, 435, 437 049, 063, 076, 413 J. . JEAN 018 KYOTO 107 JEC 141 KYUSHU 426 JET POINT 365 JVC 018, 103, 123, 129, 143, 158, 170, 174, 182, 225, 364, 409, 433 L. . LECSON 049, 063 LEMAIR 210 A.1 Code list for television sets 049, 063, 107, 195, 408 050, 195 LESA 413 LEYCO 049, 063, 076, 094, 102, 431 LEYEO 076 LG (GOLDSTAR) 023, 049, 050, 055, 063, 107, 139, 152, 155, 168, 172, 195, 202, 203, 219, 254, 379, 413, 421 LIESENKOTTER 049, 063, 112 LIFETEC 049, 063, 076, 123, 195 LLOYD’S 195 LOEWE 049, 063, 089, 324, 391, 421 LOEWE OPTA 035, 046, 049, 052, 063, 065, 120, 144, 213, 324 LOGIC 331 LOGIK 032, 131, 158, 225, 364 LOGIX 195 LUMA 063, 107, 110, 133, 171, 172, 195, 210, 236, 242, 307 LUMATRON 049, 063, 076, 107, 172, 236, 242, 329, 379 LUX MAY 049, 063, 195 LUXOR 042, 050, 090, 107, 122, 127, 133, 139, 150, 155, 159, 165, 172, 185, 197, 209, 307, 312, 330, 416, 418, 428, 429 LYCO 076 MAGNAFON MAGNAVOX MANDOR MANESTH MANHATTAN MARANTZ MARELLI MARK MASUDA MATSUI MAXIMAL MAXWELL McMICHAEL MEDIATOR MEDION MEGAS MEGATRON MELECTRONIC MELVOX MEMOREX MEMPHIS MERCURY METZ M. . M ELECTRONIC 003, 235, 375 MAAZ 371, 372 MADISON 049, 063 MAGNADYNE 045, 046, 047, 062, 065, 104, 107, 120, 139, 150, 168, 318, 324, 413 MICROMAXX MINERVA MINOKA MISTRAL 045, 046, 050, 068, 075, 090, 120, 235, 336, 379, 407 018, 042, 049, 063 076 063, 076, 094, 113, 134, 141, 379 049, 063, 195 063 324 063, 195, 379 123, 195, 225 001, 004, 018, 041, 049, 050, 063, 094, 100, 102, 106, 107, 131, 134, 141, 143, 150, 171, 179, 180, 195, 209, 218, 225, 229, 232, 244, 245, 246, 307, 314, 331, 379, 380, 416, 431 119, 139 371, 372 192 049, 063, 112 049, 063, 195 435 126, 212 003, 049, 063, 074, 182, 195, 210, 375, 379, 408, 413, 416, 428, 429 425, 099, 195 102, 195, 213 049, 063, 195 019, 049, 051, 053, 065, 067, 070, 092, 118, 244, 245, 246, 247, 324, 412 049, 063, 195 019, 053, 080, 090, 118, 232, 244, 245, 246, 247, 248, 249, 340, 341, 406, 407 049, 063, 419, 426 158 A Universal Remote Control LENCO LENOIR 77 78 Universal Remote Control MITSUBISHI 013, 018, 019, 021, 049, 063, 065, 105, 124, 131, 132, 143, 157, 164, 183, 190, 244, 245, 246, 252, 326, 330, 331 MIVAR 043, 046, 050, 058, 072, 081, 090, 120, 155, 318, 337, 379, 391, 407, 421, 434 MONACO 195 MORGAN’S 049, 063 MOTION 407 MOTOROLA 190 MTC 049, 063, 379, 416, 421 MTEC 106 MULTISTANDARD 045 MULTITEC 049, 063, 195 MULTITECH 031, 045, 046, 049, 050, 063, 120, 189, 195, 379, 392, 413, 416, 421 MURPHY 102, 104, 105, 107, 117, 171, 254, 307, 379, 408 MURPHY (UK) 162 MUSIKLAND 123 NEI NESCO NETSAT NETWORK NEUFUNK NEW WORLD NEWTECH NICAMAGIC NIKKAI NIKKIA NOBLEX NOBLIKO NOGAMATIC NOKIA NORDMENDE N. . NAD 172, 209 NAIKO 049, 063 NAKIMURA 049, 063 NAONIS 036, 040, 071, 079, 110, 171 NAT 085, 149, 151 NATIONAL 033, 085, 104 NEC 018, 049, 063, 113, 131, 143, 177, 195, 379, 380 NECKERMANN 002, 012, 049, 050, 063, 065, 107, 133, 139, 163, 180, 189, 210, 247, 250, 307, 312, 324, 357, 379, 413, 416, 421 NEDIATOR 063 NOVATRONIC 063, 125, 225 042, 413 049, 063 213 049, 063, 195, 435 123 049, 050, 063, 182, 195, 379 379 018, 049, 063, 076, 102, 123, 139, 141, 195, 213, 379 066 049, 063, 076, 359, 360 044, 045, 050, 075, 080, 090, 235, 379, 406, 407 029, 034, 074, 182, 186, 424 090, 104, 107, 117, 134, 136, 139, 150, 153, 157, 159, 162, 165, 171, 172, 193, 197, 198, 209, 301, 307, 330, 343, 350, 416, 419, 428, 429, 433, 437 017, 029, 034, 038, 049, 063, 074, 083, 130, 150, 165, 174, 182, 186, 218, 244, 245, 246, 304, 307, 333, 334, 424 003, 020, 049, 063 O. . OCEANIC OCEANIC(F) ODEON OKANO OMEGA ONCEAS ONWA OPERA OPTIMUS OPTONICA 086, 094, 104, 107, 108, 109, 116, 139, 159, 172, 209, 425 150 076 049, 063, 076, 102, 421 076 050 031, 123, 225, 432 049, 063 099, 315 190 A.1 Code list for television sets 79 049, 063 PAUSA 195 004, 042, 045, 049, 051, 063, 076, 094, 113, 131, 134, 139, 150, 179, 191, 195, 199, 216, 314, 331, 366, 367, 426 PAUZA 195 PERDIO 049, 063, 102, 107, 113 PERFEKT 049, 063 PERSHIN 425 PHILCO 002, 016, 044, 049, 054, 063, 065, 090, 093, 094, 104, 107, 126, 142, 163, 168, 189, 212, 324, 369, 407, 413, 421 PHILHARMONIC 379 PHILIPS 015, 022, 049, 050, 063, 065, 079, 089, 111, 112, 157, 158, 160, 175, 182, 188, 192, 215, 217, 220, 221, 247, 250, 313, 324, 337, 342, 350, 363, 374, 427 PHOENIX 049, 050, 063, 075, 102, 104, 107, 113, 148, 324, 379, 392, 421 PHONOLA 022, 050, 063, 065, 079, 112, 158, 160, 188, 250, 324, 379 PILOT 049, 063 PIONEER 049, 063, 074, 172, 182, 209, 218, 227, 307, 421, 427 ORLINE 049, 063, 123 ORMENTI-PHOENIX 104 ORMOND 195 OSAKA 066 OSAKI 049, 063, 066, 076, 102, 106, 123, 379, 426 OSIO 049, 063, 155 OSO 123 OSUME 018, 102, 123, 302 OTTO VERSAND 012, 018, 049, 050, 053, 063, 074, 094, 104, 107, 113, 134, 139, 143, 172, 190, 244, 245, 246, 247, 250, 312, 357, 362, 379, 413, 414, 416 P. . P.T ACTRON 111 PAEL 050, 075, 379 PALLADIUM 012, 049, 063, 107, 163, 210, 247, 324, 357, 379, 413, 416, 421 PIONIER 392, 421 PLANTRON 049, 063, 076, 195 049, 055, 063, 076, 379, 426 PLAYSONIC 379 POLICOM 074 049, 063, 076, 195, 379, 413 POPPY 195 POWERPOINT 232 PANASONIC 049, 063, 099, 104, 107, 137, 139, 149, 151, 172, 397, 398, 400, 401, 405 PRANDONI-PRINCE 044, 046, 075, 090, 120, 171, 172, 307, 407, 413 PRECISION 379 PANAVISION 049, 063, 210 PREMIER 142 PATHE CINEMA 107, 113, 121, 379, 391, 411, 416, 425 PRIMA 076, 195, 307 PRINCE 044, 046, 075, 171 PATHE CINEMA(F) 050, 168 PRINZ 102, 185, 416 PATHE MARCONI 029, 034, 074, 182, 186, 415, 424 PROFEX 107, 139, 195 PROFI-TRONIC 045, 049, 063 PALSONIC PANAMA A Universal Remote Control ORBIT ORION 80 Universal Remote Control PROLINE 030, 049, 102, 112, 191, 366, 436 RBM (UK) 147 RCA 190, 218, 436 049, 063, 085, 149, 151, 195, 225, 379, 421, 431 RECOR 049, 063 RECTILIGNE 049, 063 PROTECH 045, 063, 076, 139, 163, 195, 379, 413, 416 REDIFFUSION 018, 059, 105, 139, 171, 172, 307, 343 PROVISION 049, 063 REDIFFUSION (UK) 150, 162 PYE 050, 063, 065, 079, 112, 157, 158, 160, 188, 250 REDIFUSION 104, 105 REDSTAR 049, 063 049, 063, 112, 195, 324 REFLEX 049, 063 REVOX 049, 063, 421 REX 036, 040, 063, 071, 079, 095, 107, 110, 171, 210, 236, 242, 243, 305, 307, 323, 338, 413 PROSONIC PYMI Q. . QUADRA VISION 425 QUASAR 045, 046, 068, 075, 099, 155, 413 QUELLE 003, 018, 019, 020, 049, 050, 053, 063, 074, 075, 076, 078, 080, 090, 091, 094, 113, 115, 117, 118, 131, 139, 146, 147, 150, 153, 155, 172, 195, 206, 235, 244, 245, 246, 247, 254, 301, 319, 320, 340, 341, 379, 406, 408, 413, 416 RFT 076, 102, 390, 391, 392, 393, 394, 395, 421 R-LINE 049, 063 ROADSTAR 031, 049, 063, 076, 163, 195 ROBOTRON 056, 065, 324 RODEX 049, 063 ROTEL 302 ROWSONIC 050 ROYAL LUX 421, 426 018 RTF 056, 065 QUESTA R. S. . . SABA 045, 046, 047, 062, 063, 065, 104, 105, 150, 168, 324, 413 014, 017, 029, 034, 038, 046, 065, 074, 077, 107, 120, 133, 139, 172, 182, 186, 218, 304, 307, 324, 333, 334, 424, 436 SACCS 121 RADIONETTE 003, 020, 117, 150 SAGEM 006, 380, 435 RADIO SHACK 049, 063 SAISHO RADIOTONE 049, 063, 076, 163, 195, 421, 426, 431 004, 050, 076, 084, 107, 131, 132, 134, 179, 195, 233, 307, 330, 331, 379 RAMK 341 SALORA RANDT 029 RANK 147, 406 RBM 341 033, 075, 107, 127, 133, 136, 139, 148, 150, 153, 171, 172, 185, 198, 209, 301, 307, 312, 416, 418, 419 RADIALVA 049, 063, 074, 107, 123 RADIOLA 050, 063, 065, 079, 112, 158, 160, 188, 250, 342 RADIOMARELLI A.1 Code list for television sets SAMBERS 81 SENTRA 123, 139, 141, 195 SERINO 380, 435 SAMSUNG 050, 063, 066, 076, 102, 155, 189, 195, 217, 359, 360, 365, 379, 421 SHARP 018, 094, 143, 170, 190, 206, 214, 302, 362, 364 SHORAI 042, 094 SANDRA 379 SIAM 049, 063 SANELA 411 SIAREM SANSUI 049, 063, 225 045, 046, 065, 104, 107, 120, 139, 324 SANTON 195 SICATEL 121 SIEMENS 003, 018, 019, 023, 049, 053, 063, 066, 113, 118, 206, 244, 245, 246, 247, 248, 249, 302, 307 SIERA 050, 063, 065, 079, 112, 158, 160, 188 SIERRA 049, 063, 112 SIESTA 421 SILVA 049, 063, 379 SILVER 018, 042, 049, 063, 076, 172 SINGER 045, 047, 049, 063, 065, 104, 195, 324, 369, 413, 425 SINUDYNE 004, 031, 045, 051, 063, 065, 094, 104, 107, 134, 139, 150, 172, 210, 216, 236, 314, 324, 357, 366, 367, 416 SANYO 003, 018, 020, 041, 049, 050, 056, 063, 065, 102, 107, 117, 131, 143, 189, 195, 198, 201, 206, 209, 302, 320, 325, 331, 351, 379, 391, 408, 421 SAVE 049, 063 SBR 063, 112, 157, 158, 192, 313 SCHAUB LORENZ SCHNEIDER 090, 104, 136, 139, 153, 159, 162, 171, 198, 307, 416, 433 031, 040, 050, 063, 065, 069, 079, 095, 104, 107, 112, 114, 139, 148, 156, 158, 160, 168, 172, 182, 188, 195, 225, 242, 243, 250, 307, 328, 342, 379, 413, 414, 416, 423 SCOTT SKANTIC 042, 327 307, 418 SKY 049, 063 SEARS 042 SOGERA 113 SEG 018, 045, 049, 050, 056, 063, 076, 107, 172, 195, 232, 379, 413 SOLAVOX 066, 102, 107, 123, 139, 172, 307 SONITRON 209, 379, 421 SEI 004, 045, 049, 051, 063, 094, 107, 139, 236, 314, 324, 357, 416 SONNECLAIR 049, 063 SONOKO 006, 050, 063, 076, 195, 379 SEL SINUDYNE 250 SONOLOR SELECO 036, 040, 063, 071, 079, 095, 107, 110, 171, 172, 210, 236, 242, 243, 305, 307, 323, 338, 339, 369 012, 107, 139, 159, 172, 209, 357, 425 SONTEC 049, 063, 094, 421 SONY 012, 018, 028, 045, 131, 143, 204, 208, 211, 331, 357, 358, 370 SENCORA 195 A Universal Remote Control 045, 046, 068, 075, 090, 120, 155, 336, 407 82 Universal Remote Control SOUND & VISION 031, 045, 123 SOUND WAVE 049, 113, 163 TEC 040, 050, 064, 168, 195, 213, 218, 242, 243, 379, 413 SOUNDESIGN 042 SPECTRA 195 TECH LINE 049, 063, 195 TECHICA SSANGYONG 195 123 TECHNEMA STANDARD 049, 050, 063, 113, 123, 195, 379 113 TECHNICS 099, 315 TEDELEX 379 STARLIGHT 049, 063, 076, 107, 195 TEIRON 195 STENWAY 006, 031, 123 TEKNIKA 042, 327 STERN 036, 040, 063, 071, 079, 095, 107, 110, 171, 236, 242, 243, 305, 307, 323, 338 TELEAVIA 029, 034, 074, 182, 186, 415, 424 TELECOR 049, 063, 107, 123, 242, 379, 423 STRATO 049, 063, 076, 195 TELEFUNKEN SUNKAI 049, 063, 094, 123, 134, 179, 191, 232, 314, 367 032, 049, 063, 064, 074, 082, 182, 186, 187, 218, 392, 424, 436 SUNSTAR 049, 063, 195, 225, 431 TELEFUSION 049, 063 TELEGAZI 049, 063, 076, 107, 123, 242 TELEMEISTER 049, 063, 113 TELESONIC 049, 063 SUNWOOD 049, 063, 195 SUPERLA 379 SUPERTECH 049, 063, 123, 195, 379 SUPRA 195 TELESTAR 049, 063 SUSMU 218 TELETECH 049, 063, 195, 213, 413 SUTRON 195 TELETON SWISSLINE 413 018, 067, 107, 236, 242, 379, 416 SYDNEY 379 TELEVIDEON SYTONG 425 050, 075, 104, 107, 113, 148, 379 TELEVISO 425 TEMCO 094 TEMPEST 049, 063, 195 TENNESSEE 049, 063 TENSAI 003, 020, 050, 055, 063, 094, 113, 117, 123, 195, 225, 379, 408, 413 T. . TACTUS 106 TANDBERG 065, 074, 078, 172, 182, 210, 213, 304 TANDY 050, 096, 102, 123, 190, 307, 379, 413 TETUNG 046 TASHIKO 018, 050, 107, 143, 177, 192, 201, 379, 419 TEVION 049, 063, 195 TEXET 050, 195, 379 TATUNG 049, 050, 063, 102, 106, 111, 120, 131, 200, 253, 331, 379 THOMSON TEAC 049, 063, 076, 195, 380, 416, 426 008, 010, 017, 024, 029, 034, 049, 063, 064, 074, 134, 147, 174, 182, 186, 218, 230, 234, 304, 309, 333, 334, 415, 424, 436 A.1 Code list for television sets THORN 049, 053, 063, 103, 106, 141, 158, 218, 222, 321, 329, 408, 409, 411, 419 THORN-FERGUSON 032, 073, 074, 076, 080, 082, 103, 121, 158, 306, 319, 321, 322, 328, 329, 357, 358, 364, 375 THRON 117 TMK 143 TOKAI 049, 063, 102, 107, 195, 213, 379 UTAX TOKYO 141, 379 TOMASHI 006, 031, 123 VEGAVOX VESTEL TOSHIBA 001, 018, 045, 128, 141, 143, 147, 205, 341, 369, 379, 406 TOWADA 045, 379, 416 TOYODA 195 TRAKTON 076 TRANS CONTINENS 044, 046, 049, 063, 075, 171, 307, 379 TRANSONIC 049, 063, 380 TRANSTEC 379 TRIDENT 379 TRISTAR 123, 364 TRIUMPH 004, 046, 049, 063, 128, 147, 197, 235, 339, 375 . UHER ULTRAVOX UNIVOX 003, 004, 012, 018, 020, 049, 063, 074, 076, 094, 107, 131, 155, 163, 165, 172, 195, 202, 206, 210, 213, 235, 244, 245, 246, 320, 357, 375, 379, 406, 407, 408, 413, 416, 421, 428, 429, 437 049, 063, 107, 121, 213, 324, 409, 411 050 V. . VEXA VICTOR VIDEO SYSTEM VIDEOLOGIQUE VIDEO SYSTEM VIDEOTECHNIC VIDEOTON VIDIKRON VIDTECH VIPER VISIOLA VISION VISTAR VOLTEC VORTEC VOXSON 163 049, 063, 107, 125, 364, 379 063, 195 174 049, 063 031, 123, 379 049, 063 113, 379 107, 418 045 018 213 379 049, 063, 113 172, 236 074 063 049, 063, 065, 090, 163, 171, 307, 324, 407 W. . 049, 063, 069, 080, 090, 113, 147, 148, 163, 236, 242, 307, 392, 407, 414, 421 044, 045, 047, 049, 050, 063, 065, 104, 107, 133, 139, 324, 379, 413 UMA 305 UNIC LINE 049, 063, 165 UNITED 049, 063 WALTHAM WATSON WATT RADIO WEGA WEGA COLOR 049, 063, 163, 182, 307, 379, 418 049, 063, 107, 113, 123, 195, 244, 245, 246, 423, 431 045, 050, 068, 104, 107, 121, 139, 150, 336, 379, 416 018, 049, 063, 139, 143, 324 065, 088 A Universal Remote Control U. UNIVERSUM 83 84 Universal Remote Control WEGAVOX 195 WELTBLICK 063, 113 WESTINGHOUSE 063, 094 WESTON WHARFEDALE WHITE 045 WHITE WESTINGHOUSE 049, 050, 063, 113, 213, 379 WINCO 426 WINDSTAR 006 WINTERNITZ 361 Y. . YAMISHI 006, 049, 063, 123, 379, 380 168 YOKAN 049, 063 049, 063 YOKO 049, 050, 063, 076, 123, 195, 379, 413, 421 YORX 123 X. Z. . ZANUSSI 036, 040, 063, 071, 079, 095, 110, 171, 236, 305, 307, 323, 338, 379 ZOPPAS 036, 040, 071, 079, 110, 171, 307 . XRYPTON 049, 063 A.2 Code list for DVD players 85 A.2 Code list for DVD players 3 DLAB 072 JVC 006 K. A. . . AIWA 075 KENWOOD 007, 034, 043, 050, 069 ALBA 087 KISS 077 AMSTRAD 085 L. A-TREND 086 B. . BLUE SKY BUSH 080 078, 079, 082, 085 C. . 082 CYBER HOME 086 D. . DAEWOO 083 DENON 002, 019, 022, 034, 051 DENVER 082 DENZEL 077 DIGITOR 079 DIVIDO 083 DUAL 076, 077 E. LAWSON 083 LECSON 081 LENCO 082 LG (GOLDSTAR) 005, 055, 064, 070 LIFETEC 076 LOGIX 083 M. . MAGNAVOX 009, 033, 056 MANHATTAN 083 MARANTZ 033, 059, 072 MATSUI 076, 080 MEDION 076, 083 MICROMEDIA 009 MICROMEGA 072 MINOWA 083 MITSUBISHI 023, 036 MONYKA 077 N. . . ELTA 079 NAD 010, 062 ENZER 077 NEUFUNK 077 G. O. . . GE 003, 004 ONKYO 009, 015, 048 GRUNDIG 072, 080 OPTIMUS 050 ORION 080 ORITRON 076 H. . HARMAN KARDON 001, 066 HITACHI 077 P. . J. PANASONIC 024, 025, 030, 034, 035, 044, 052 PHILIPS 009, 033, 056, 072 . JMB 080 A Universal Remote Control CINE ULTRA . 86 Universal Remote Control PHONOTREND 082 TEAC 087 PIONEER 010, 012, 020, 038, 041, 046, 065, 071, 074 TECHNICS 034 TENSAI 076, 079 PROLINE 076 TEVION 076 PROSCAN 003, 004, 037 THOMSON 003, 004, 073 PROVISION 082 TOKAI 077 TOKIWA 083 R. . RAITE 077 TOSHIBA 009, 010, 033, 057, 058 RCA 003, 004, 018, 037 TV PROJECT 008 REC 034, 078 REVOY 082 ROADSTAR 078, 079, 082 U. . UNIVERSUM 085 W. S. . . SANSUI 080 WALKVISION 087 SCAN 083 WESDER 082 SCHNEIDER 076 WHARFEDALE 081 SEG 077, 085 SHARP 021, 028, 050 SHINCO 087 YAMAHA 016, 017, 030, 034, 063 SM ELECTRONIC 079 YAMAKAWA 077, 084 SONY 015, 029, 043, 045, 067 STANDARD 076 Y. . Z. . T. . ZENITH 005, 009, 033, 055, 064, 083 A.3 Code list for audio-video receivers A.3 87 Code list for audio-video receivers A. H. . . ADCOM 082, 092, 225, 161, 023, 148, 149 HARMAN_KARDON 231, 233, 153, 154, 118, 119 AIWA 170, 018, 104, 202, 203, 213, 211, 188 HITACHI 020 AKAI 189 ANTHEM 127, 128 ARCAM 141, 255 ATLANTIC_TECHNOLOGY 134 AUDIO_FILE 071 I. . INTEGRA 029 J. . JVC 163, 191, 114, 034, 091 K. . B. . 096, 097 BOSE 070, 170, 224, 147, 227, 199 BOSTON_ACOUSTICS 246 KENWOOD 026, 066, 145, 192, 182, 005, 037, 196, 252 KLH 123 KRELL 150, 072, 197, 222 L. . C. . CARVER CLARION 006, 028, 061, 071, 201, 214, 226, 185, 022, 077, 050 LEXICON 120, 235, 236, 237, 159, 160 LINN 124, 206 LUXMAN 137, 139, 052, 165, 115, 004, 009 026 D. M. . . DELPHI 251 MAGNAVOX 086, 164, 152, 208 DENON 109, 215, 230, 234, 002, 121, 133 MARANTZ 006, 028, 031, 040, 063, 185, 186, 015, 056 MCINTOSH 238, 053 MERIDIAN 100, 012, 013 E. . ELAN 057, 090 MITSUBISHI 242, 243, 204 ESCIENT 229 MONDIAL 157, 158, 042, 043, 081, 112 MYRYAD 030, 099 F. . FISHER 047, 214, 182 FLEXTRONICS 207 FOSGATE_AUDIONICS 231, 134 N. . G. NAD 186, 113, 038, 216, 210 NAKAMICHI 111, 244, 245, 172, 183, 054 NIRO 135 . GOLDSTAR 008 A Universal Remote Control B&K 88 Universal Remote Control NILES 241 O. . ONKYO OPTIMUS OUTLAW 029, 017, 046, 108, 080, 209 026, 041 134 P. SAMSUNG 016 SANSUI 040, 048, 110, 065, 228, 063 SANYO 047, 059 SCOTT 019 SHARP 026, 094, 131, 175 SHERWOOD 024, 102, 106, 246 SONY 018, 247, 248, 166, 101, 184, 218, 025, 179, 180, 220 SOUNDESIGN 036 SUNFIRE 142, 143, 146 . PANASONIC 032, 195, 219, 177, 098, 221 PARASOUND 129, 130, 132, 003, 103, 105, 125, 126 PHILIPS 249, 250, 063 PIONEER 014, 039, 044, 069, 168, 116, 035, 078 POLKAUDIO 251 PROCEED 144, 021 T. . TEAC 005, 019, 049, 111, 212, 217 TECHNICS 122, 193, 219, 178, 177, 200, 254, 007 THETA_DIGITAL 136 TOSHIBA 060, 087, 033 R. . RCA 010, 048, 117, 156, 067, 055 REALISTIC 019, 073, 075 ROTEL 074, 083, 085 RUSSOUND 223, 239 Y. . S. . YAMAHA 026, 253, 169, 067, 173, 205, 011, 232, 089, 027, 051, 181 Correct disposal of this product This marking shown on the product or its literature indicates that it should not be disposed with other household wastes at the end o ts working life. To prevent possible harm to the environment or human health from uncontrolled waste disposal, please separate this from other types of wastes and recycle it responsibly to promote the sustainable reuse of material resources. Household users should contact either the retailer where they purchased this product or their local government e for details of where and how they can dispose this product for environmentally safe recycling. Business users should contact their supplier and check the terms and conditions of the purchase contract. This product should not be mixed with other commercial wastes for disposal. d Co., Ltd. may change or modify the hardware or At any time during the life of a product T software on any product to introduce new features or improve the functionality of the product. Copyright © 2013, T http://www.i-topfield.com Co., Ltd. All rights reserved. English version