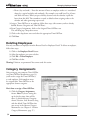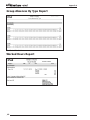
1
Easy employee absence tracking
for small business
Version 2
©2003 G.Neil
MyBiz™ Attendance Program and User Manual
SOFTWARE LICENSE AGREEMENT
IMPORTANT-READ CAREFULLY: THIS SOFTWARE LICENSE AGREEMENT (“SLA”) IS A LEGAL AGREEMENT
BETWEEN YOU (EITHER AN INDIVIDUAL OR A SINGLE ENTITY) AND G.NEIL CORPORATION (“G.NEIL”) FOR THE
SOFTWARE PRODUCT FOUND IN THIS PACKAGE, WHICH MAY INCLUDE ASSOCIATED MEDIA AND PRINTED
MATERIALS (“SOFTWARE PRODUCT”). BY INSTALLING, COPYING, OR OTHERWISE USING THE SOFTWARE
PRODUCT, YOU AGREE TO BE BOUND BY THE TERMS OF THE SLA. IF YOU DO NOT AGREE TO THE TERMS OF
THIS SLA, DO NOT INSTALL OR USE THE SOFTWARE PRODUCT; YOU MAY, HOWEVER, RETURN IT TO G.NEIL FOR
A FULL REFUND.
SOFTWARE PRODUCT LICENSE
THE SOFTWARE PRODUCT IS LICENSED, NOT SOLD; G.NEIL RETAINS FULL OWNERSHIP RIGHTS TO THE
SOFTWARE PRODUCT. G.NEIL, UPON YOUR PAYMENT OF THE APPLICABLE FEES, GRANTS TO YOU A
NONEXCLUSIVE LICENSE SUBJECT TO THE FOLLOWING CONDITIONS:
THE SOFTWARE PRODUCT MAY NOT BE EXPORTED, DISTRIBUTED, RENTED, LEASED, SUBLICENSED, OR
USED ON A SERVICE BUREAU, BULLETIN BOARD, OR AT ANY TIME-SHARING SYSTEM. IT MAY NOT BE COPIED,
ALTERED, MODIFIED, TRANSLATED, OR USED TO CREATE A DERIVATIVE WORK. YOU MAY NOT REVERSE
ENGINEER, DECOMPILE OR DISASSEMBLE THE SOFTWARE PRODUCT. YOU MAY USE THE SOFTWARE
PRODUCT FOR YOUR INDIVIDUAL USE OR FOR USE WITHIN YOUR COMPANY, BUT YOU MAY NOT USE THE
SOFTWARE PRODUCT TO PRODUCE ATTENDANCE RECORDS TO BE SOLD OR DISTRIBUTED OUTSIDE OF
YOUR COMPANY.
PURCHASERS WHO HAVE PAID FOR A LICENSE MAY INSTALL AND USE THE SOFTWARE PRODUCT ON A SINGLE
COMPUTER. FOR EACH ADDITIONAL INSTALLATION, AN ADDITIONAL LICENSE IS REQUIRED.
YOUR RIGHT TO USE OR INSTALL THE SOFTWARE PRODUCT AUTOMATICALLY TERMINATES UPON FAILURE TO
COMPLY WITH ANY PROVISION OF THIS SLA, VIOLATION OF ANY TERM OF THIS SLA, OR UPON YOUR
DESTRUCTION OF ALL COPIES OF THE SOFTWARE PRODUCT. IN ANY OF THE FOREGOING CIRCUMSTANCES,
YOU MUST REMOVE THE SOFTWARE PRODUCT FROM YOUR COMPUTER’S HARD DRIVE, APPLICATION SERVER
OR OTHER MASS DATA STORAGE DEVICES AND CEASE USE OF THE PRODUCT. THE LICENSE IS DEEMED
ACCEPTED AND DELIVERED IN THE STATE OF FLORIDA AND SHALL BE CONSTRUED, INTERPRETED AND
GOVERNED BY THE LAWS OF THE STATE OF FLORIDA, WITHOUT REGARD OR EFFECT GIVEN TO ITS OR ANY
OTHER JURISDICTION’S CHOICE OF LAW JURISPRUDENCE.
G.NEIL WARRANTS THE SOFTWARE PRODUCT WILL OPERATE IN ACCORDANCE WITH ITS PUBLISHED
SPECIFICATIONS FOR A PERIOD OF NINETY (90) DAYS FOLLOWING THE DATE OF PURCHASE. IN THE EVENT
THE SOFTWARE PRODUCT FAILS TO OPERATE IN ACCORDANCE WITH THE PUBLISHED SPECIFICATIONS
DURING THAT PERIOD, YOU MAY RETURN IT TO G.NEIL. G.NEIL WILL, AT ITS OPTION, REPAIR OR REPLACE THE
DEFECTIVE PROGRAM OR REFUND THE PURCHASE PRICE. THIS IS YOUR SOLE AND EXCLUSIVE REMEDY.
G.NEIL SPECIFICALLY DISCLAIMS ALL OTHER WARRANTIES, EXPRESSED OR IMPLIED, INCLUDING BUT NOT
LIMITED TO, IMPLIED WARRANTIES OF MERCHANTABILITY OR FITNESS FOR A PARTICULAR PURPOSE WITH
RESPECT TO THE USE AND INSTALLATION OF THE SOFTWARE PRODUCT, DEFECTS IN PRODUCT MEDIA AND
THE PROGRAM, AS WELL AS THE SOFTWARE PRODUCT’S INTERACTION AND COMPATIBILITY WITH OTHER
PROGRAMS, SYSTEMS, AND HARDWARE. IN NO EVENT SHALL G.NEIL BE LIABLE FOR ANY LOSS OF PROFIT OR
ANY OTHER COMMERCIAL DAMAGE, INCLUDING, BUT NOT LIMITED TO, SPECIAL, INCIDENTAL,
CONSEQUENTIAL OR OTHER DAMAGES EVEN IF G.NEIL HAS BEEN ADVISED OF THE POSSIBILITY OF SUCH
DAMAGES. THE SOLE AND EXCLUSIVE REMEDY AVAILABLE TO PURCHASERS/LICENSEES UNDER THIS
AGREEMENT IS LIMITED TO REPLACEMENT, REFUND OF SALES PRICE, OR FULL CREDIT. FAILURE TO COMPLY
WITH THE TERMS OF THIS SOFTWARE LICENSING AGREEMENT IS STRICTLY PROHIBITED AND MAY VIOLATE
COPYRIGHT LAW.
MyBiz is a trademark of G.Neil Corporation. Microsoft, Windows and Internet Explorer are registered trademarks of Microsoft
Corporation. Entire work © G.Neil 2003. All Rights Reserved.
We welcome your suggestions and comments. Contact us at G.Neil, 720 International Parkway, Sunrise, FL 33325
Tel (800) 999-9111 - Fax (954) 846-8551 – Customer Service e-mail [email protected]
Technical Support Tel (954) 845-9664 or www.gneiltechsupport.com
Shop Online at www.gneil.com
Table of Contents
Chapter 1 Welcome . . . . . . . . . . . . . . . . . . . . . . . . . . . . . . . . . . . . . . . . . . . . . . . . . . . . . . .7
How To Use This Guide . . . . . . . . . . . . . . . . . . . . . . . . . . . . . . . . . . . . . . . . . . . . . . . . . . . . . . . .8
Unlocking the Demo . . . . . . . . . . . . . . . . . . . . . . . . . . . . . . . . . . . . . . . . . . . . . . . . . . . . . . . . . .9
System Requirements . . . . . . . . . . . . . . . . . . . . . . . . . . . . . . . . . . . . . . . . . . . . . . . . . . . . . . . . . .9
Installing MyBiz Attendance . . . . . . . . . . . . . . . . . . . . . . . . . . . . . . . . . . . . . . . . . . . . . . . . . . . . .9
Chapter 2 Getting Started . . . . . . . . . . . . . . . . . . . . . . . . . . . . . . . . . . . . . . . . . . . . . . .11
Checklist . . . . . . . . . . . . . . . . . . . . . . . . . . . . . . . . . . . . . . . . . . . . . . . . . . . . . . . . . . . . . . . . . .11
Setting Up Locations & Departments . . . . . . . . . . . . . . . . . . . . . . . . . . . . . . . . . . . . . . . . . . . . .12
Setting Up Global Preferences . . . . . . . . . . . . . . . . . . . . . . . . . . . . . . . . . . . . . . . . . . . . . . . . . . .12
Company Information Tab . . . . . . . . . . . . . . . . . . . . . . . . . . . . . . . . . . . . . . . . . . . . . .13
Editing Company Information . . . . . . . . . . . . . . . . . . . . . . . . . . . . . . . . . . . . . . . . . . .13
General Settings . . . . . . . . . . . . . . . . . . . . . . . . . . . . . . . . . . . . . . . . . . . . . . . . . . . . . .13
Report Options . . . . . . . . . . . . . . . . . . . . . . . . . . . . . . . . . . . . . . . . . . . . . . . . . . . . . .14
Attendance Tab . . . . . . . . . . . . . . . . . . . . . . . . . . . . . . . . . . . . . . . . . . . . . . . . . . . . . . .15
Accrual Schedule Settings . . . . . . . . . . . . . . . . . . . . . . . . . . . . . . . . . . . . . . . . . . . . . . .15
Setting Up Time-Off Plans . . . . . . . . . . . . . . . . . . . . . . . . . . . . . . . . . . . . . . . . . . . . . . . . . . . . .16
Assigning Time-Off Plans . . . . . . . . . . . . . . . . . . . . . . . . . . . . . . . . . . . . . . . . . . . . . . . . . . . . . .16
Setting Up Absence Category Maintenance . . . . . . . . . . . . . . . . . . . . . . . . . . . . . . . . . . . . . . . . .17
Setting Up Holidays . . . . . . . . . . . . . . . . . . . . . . . . . . . . . . . . . . . . . . . . . . . . . . . . . . . . . . . . . .17
Adding Holidays . . . . . . . . . . . . . . . . . . . . . . . . . . . . . . . . . . . . . . . . . . . . . . . . . . . . . .17
Deleting a Holiday . . . . . . . . . . . . . . . . . . . . . . . . . . . . . . . . . . . . . . . . . . . . . . . . . . . .18
Editing a Holiday . . . . . . . . . . . . . . . . . . . . . . . . . . . . . . . . . . . . . . . . . . . . . . . . . . . . .18
Setting Up Absence Codes . . . . . . . . . . . . . . . . . . . . . . . . . . . . . . . . . . . . . . . . . . . . . . . . . . . . .18
Chapter 3 Security Options . . . . . . . . . . . . . . . . . . . . . . . . . . . . . . . . . . . . . . . . . . . . . .21
Overview . . . . . . . . . . . . . . . . . . . . . . . . . . . . . . . . . . . . . . . . . . . . . . . . . . . . . . . . . . . . . . . . . .21
Program Access . . . . . . . . . . . . . . . . . . . . . . . . . . . . . . . . . . . . . . . . . . . . . . . . . . . . . . . . . . . . . .21
Common Features . . . . . . . . . . . . . . . . . . . . . . . . . . . . . . . . . . . . . . . . . . . . . . . . . . . . . . . . . . .21
User Security – Detail Tab . . . . . . . . . . . . . . . . . . . . . . . . . . . . . . . . . . . . . . . . . . . . . . . . . . . . .22
User Security – Attendance Tab . . . . . . . . . . . . . . . . . . . . . . . . . . . . . . . . . . . . . . . . . . . . . . . . . .23
Program Features (Attendance) . . . . . . . . . . . . . . . . . . . . . . . . . . . . . . . . . . . . . . . . . . . . . . . . . .23
User Security – Location/Department Tab . . . . . . . . . . . . . . . . . . . . . . . . . . . . . . . . . . . . . . . . . .24
User Security – Other Tabs . . . . . . . . . . . . . . . . . . . . . . . . . . . . . . . . . . . . . . . . . . . . . . . . . . . . .24
Forgotten Password Feature . . . . . . . . . . . . . . . . . . . . . . . . . . . . . . . . . . . . . . . . . . . . . . . . . . . . .25
Chapter 4 Managing Employee Records . . . . . . . . . . . . . . . . . . . . . . . . . . . . . . . . . .27
Overview . . . . . . . . . . . . . . . . . . . . . . . . . . . . . . . . . . . . . . . . . . . . . . . . . . . . . . . . . . . . . . . . . .27
Using MyBiz Attendance . . . . . . . . . . . . . . . . . . . . . . . . . . . . . . . . . . . . . . . . . . . . . . . . . . . . . .27
The Menu Bar . . . . . . . . . . . . . . . . . . . . . . . . . . . . . . . . . . . . . . . . . . . . . . . . . . . . . . . . . . . . . .28
Elements of the Calendar Screen . . . . . . . . . . . . . . . . . . . . . . . . . . . . . . . . . . . . . . . . . . . . . . . . .31
3
Recording Absences . . . . . . . . . . . . . . . . . . . . . . . . . . . . . . . . . . . . . . . . . . . . . . . . . . . . . . . . . .33
Adding New Employees . . . . . . . . . . . . . . . . . . . . . . . . . . . . . . . . . . . . . . . . . . . . . . . . . . . . . . .33
Deleting Employees . . . . . . . . . . . . . . . . . . . . . . . . . . . . . . . . . . . . . . . . . . . . . . . . . . . . . . . . . .34
Category Assignments . . . . . . . . . . . . . . . . . . . . . . . . . . . . . . . . . . . . . . . . . . . . . . . . . . . . . . . . .34
Initial Balances . . . . . . . . . . . . . . . . . . . . . . . . . . . . . . . . . . . . . . . . . . . . . . . . . . . . . . . . . . . . . .35
Entering Initial Balances . . . . . . . . . . . . . . . . . . . . . . . . . . . . . . . . . . . . . . . . . . . . . . . . . . . . . . .35
Year In Review . . . . . . . . . . . . . . . . . . . . . . . . . . . . . . . . . . . . . . . . . . . . . . . . . . . . . . . . . . . . . .36
Transaction Editor . . . . . . . . . . . . . . . . . . . . . . . . . . . . . . . . . . . . . . . . . . . . . . . . . . . . . . . . . . .37
Adding a Transaction Entry . . . . . . . . . . . . . . . . . . . . . . . . . . . . . . . . . . . . . . . . . . . . . . . . . . . . .37
Editing Transactions . . . . . . . . . . . . . . . . . . . . . . . . . . . . . . . . . . . . . . . . . . . . . . . . . . . . . . . . . .38
Import Hours Worked . . . . . . . . . . . . . . . . . . . . . . . . . . . . . . . . . . . . . . . . . . . . . . . . . . . . . . . .38
Planner . . . . . . . . . . . . . . . . . . . . . . . . . . . . . . . . . . . . . . . . . . . . . . . . . . . . . . . . . . . . . . . . . . .39
Reminders . . . . . . . . . . . . . . . . . . . . . . . . . . . . . . . . . . . . . . . . . . . . . . . . . . . . . . . . . . . . . . . . .39
Setting a Reminder . . . . . . . . . . . . . . . . . . . . . . . . . . . . . . . . . . . . . . . . . . . . . . . . . . . . . . . . . . .40
Open Reminders . . . . . . . . . . . . . . . . . . . . . . . . . . . . . . . . . . . . . . . . . . . . . . . . . . . . . . . . . . . .41
Using Scheduler . . . . . . . . . . . . . . . . . . . . . . . . . . . . . . . . . . . . . . . . . . . . . . . . . . . . . . . . . . . . .41
Chapter 5 Attendance Operations . . . . . . . . . . . . . . . . . . . . . . . . . . . . . . . . . . . . . . . .43
The Calendar Pane . . . . . . . . . . . . . . . . . . . . . . . . . . . . . . . . . . . . . . . . . . . . . . . . . . . . . . . . . . .43
Assign Absence or Work Time Codes to the Calendar . . . . . . . . . . . . . . . . . . . . . . . . . . . . . . . . .43
Absence Details . . . . . . . . . . . . . . . . . . . . . . . . . . . . . . . . . . . . . . . . . . . . . . . . . . . . . . . . . . . . .44
Manual and Automatic Accruals . . . . . . . . . . . . . . . . . . . . . . . . . . . . . . . . . . . . . . . . . . . . . . . . .45
Automatic Accrual . . . . . . . . . . . . . . . . . . . . . . . . . . . . . . . . . . . . . . . . . . . . . . . . . . . . . . . . . . .45
Manual Accrual . . . . . . . . . . . . . . . . . . . . . . . . . . . . . . . . . . . . . . . . . . . . . . . . . . . . . . . . . . . . .46
Advanced Options . . . . . . . . . . . . . . . . . . . . . . . . . . . . . . . . . . . . . . . . . . . . . . . . . . . . . . . . . . .46
Accrue Through Date Option . . . . . . . . . . . . . . . . . . . . . . . . . . . . . . . . . . . . . . . . . . . . . . . . . . .46
Report Group Settings . . . . . . . . . . . . . . . . . . . . . . . . . . . . . . . . . . . . . . . . . . . . . . . . . . . . . . . .46
Export Options – Disable Headers on Export . . . . . . . . . . . . . . . . . . . . . . . . . . . . . . . . . . . . . . .46
Remove Transactions . . . . . . . . . . . . . . . . . . . . . . . . . . . . . . . . . . . . . . . . . . . . . . . . . . . . . . . . .47
Removing Unwanted Transactions . . . . . . . . . . . . . . . . . . . . . . . . . . . . . . . . . . . . . . . . . . . . . . . .47
Resetting the Last Accrual Date . . . . . . . . . . . . . . . . . . . . . . . . . . . . . . . . . . . . . . . . . . . . . . . . . .48
Chapter 6 Time-Off Plans . . . . . . . . . . . . . . . . . . . . . . . . . . . . . . . . . . . . . . . . . . . . . . . .49
Explaining Accruals . . . . . . . . . . . . . . . . . . . . . . . . . . . . . . . . . . . . . . . . . . . . . . . . . . . . . . . . . .49
Frequently Asked Questions . . . . . . . . . . . . . . . . . . . . . . . . . . . . . . . . . . . . . . . . . . . . . . . . . . . .49
I don’t want the program to run accruals for me. I want to enter
my time manually for each of my employees. Is there anything I need to setup? . . . . . . . . . . .49
What is an accrual? . . . . . . . . . . . . . . . . . . . . . . . . . . . . . . . . . . . . . . . . . . . . . . . . . . . . . . .49
What is a Time-Off Plan? . . . . . . . . . . . . . . . . . . . . . . . . . . . . . . . . . . . . . . . . . . . . . . . . . . .50
What are transactions? . . . . . . . . . . . . . . . . . . . . . . . . . . . . . . . . . . . . . . . . . . . . . . . . . . . . .50
How far back will MyBiz Attendance calculate transactions? . . . . . . . . . . . . . . . . . . . . . . . . .50
How many Time-Off Plans do I need to set up? . . . . . . . . . . . . . . . . . . . . . . . . . . . . . . . . . .50
4
Will my company policy fit into a Time-Off Plan? . . . . . . . . . . . . . . . . . . . . . . . . . . . . . . . .50
What should I do if my balances are incorrect? . . . . . . . . . . . . . . . . . . . . . . . . . . . . . . . . . . .50
What if I do not want to run accruals? . . . . . . . . . . . . . . . . . . . . . . . . . . . . . . . . . . . . . . . . .51
What if I want to turn off the accrual request
that appears each day when I enter the program? . . . . . . . . . . . . . . . . . . . . . . . . . . . . . . . . . .51
What if I ran the accruals by accident, can I remove them? . . . . . . . . . . . . . . . . . . . . . . . . . .51
Is there a limit to the number of Time-Off Plans? . . . . . . . . . . . . . . . . . . . . . . . . . . . . . . . . .51
Is there a limit to the number of absence categories?
(Such as Vacation, Sick, Personal, PTO, Birthday, Comp Time?) . . . . . . . . . . . . . . . . . . . . . .51
I entered a new employee, then ran an accrual and posted the time,
but my new employee didn’t earn time. Why? . . . . . . . . . . . . . . . . . . . . . . . . . . . . . . . . . . . .51
Time-Off Plans . . . . . . . . . . . . . . . . . . . . . . . . . . . . . . . . . . . . . . . . . . . . . . . . . . . . . . . . . . . . .51
Setting Up a Time-Off Plan . . . . . . . . . . . . . . . . . . . . . . . . . . . . . . . . . . . . . . . . . . . . . . . . . . . .53
Incorrect Balances – Where are they coming from? . . . . . . . . . . . . . . . . . . . . . . . . . . . . . . . . . . . .56
Setting Up a Time-Off Plan to Zero Out Balances . . . . . . . . . . . . . . . . . . . . . . . . . . . . . . . . . . . .57
Chapter 7 Reports . . . . . . . . . . . . . . . . . . . . . . . . . . . . . . . . . . . . . . . . . . . . . . . . . . . . . . .59
List of Reports . . . . . . . . . . . . . . . . . . . . . . . . . . . . . . . . . . . . . . . . . . . . . . . . . . . . . . . . . . . . . .59
Report Options . . . . . . . . . . . . . . . . . . . . . . . . . . . . . . . . . . . . . . . . . . . . . . . . . . . . . . . . . . . . .60
Employee Detail Report . . . . . . . . . . . . . . . . . . . . . . . . . . . . . . . . . . . . . . . . . . . . . . . . . . . .61
Employee Summary Report . . . . . . . . . . . . . . . . . . . . . . . . . . . . . . . . . . . . . . . . . . . . . . . . .61
Employee Balance Report . . . . . . . . . . . . . . . . . . . . . . . . . . . . . . . . . . . . . . . . . . . . . . . . . . .61
Employee Anniversary Report . . . . . . . . . . . . . . . . . . . . . . . . . . . . . . . . . . . . . . . . . . . . . . .61
Perfect Attendance Report . . . . . . . . . . . . . . . . . . . . . . . . . . . . . . . . . . . . . . . . . . . . . . . . . .61
Absence Detail Report . . . . . . . . . . . . . . . . . . . . . . . . . . . . . . . . . . . . . . . . . . . . . . . . . . . . .62
Absence Notes Report . . . . . . . . . . . . . . . . . . . . . . . . . . . . . . . . . . . . . . . . . . . . . . . . . . . . .62
Group Absence By Type Report . . . . . . . . . . . . . . . . . . . . . . . . . . . . . . . . . . . . . . . . . . . . . .62
Worked Hours Report . . . . . . . . . . . . . . . . . . . . . . . . . . . . . . . . . . . . . . . . . . . . . . . . . . . . .63
Planner Report . . . . . . . . . . . . . . . . . . . . . . . . . . . . . . . . . . . . . . . . . . . . . . . . . . . . . . . . . .63
Transaction Detail Report . . . . . . . . . . . . . . . . . . . . . . . . . . . . . . . . . . . . . . . . . . . . . . . . . .64
Year-In-Review Report . . . . . . . . . . . . . . . . . . . . . . . . . . . . . . . . . . . . . . . . . . . . . . . . . . . . .64
Adjustments Report . . . . . . . . . . . . . . . . . . . . . . . . . . . . . . . . . . . . . . . . . . . . . . . . . . . . . . .64
Reminders Report . . . . . . . . . . . . . . . . . . . . . . . . . . . . . . . . . . . . . . . . . . . . . . . . . . . . . . . .64
Charts . . . . . . . . . . . . . . . . . . . . . . . . . . . . . . . . . . . . . . . . . . . . . . . . . . . . . . . . . . . . . . . . .65
Absences by Type Chart . . . . . . . . . . . . . . . . . . . . . . . . . . . . . . . . . . . . . . . . . . . . . . . . . . . .65
Location and Department Comparison Chart . . . . . . . . . . . . . . . . . . . . . . . . . . . . . . . . . . . .65
Table Listings . . . . . . . . . . . . . . . . . . . . . . . . . . . . . . . . . . . . . . . . . . . . . . . . . . . . . . . . . . .66
5
Chapter 8 Back Up and Restore . . . . . . . . . . . . . . . . . . . . . . . . . . . . . . . . . . . . . . . . . .67
Overview . . . . . . . . . . . . . . . . . . . . . . . . . . . . . . . . . . . . . . . . . . . . . . . . . . . . . . . . . . . . . . . . . .67
Creating a Manual Backup . . . . . . . . . . . . . . . . . . . . . . . . . . . . . . . . . . . . . . . . . . . . . . . . . . . . .67
Restoring from a Backup . . . . . . . . . . . . . . . . . . . . . . . . . . . . . . . . . . . . . . . . . . . . . . . . . . . . . . .68
Chapter 9 Help . . . . . . . . . . . . . . . . . . . . . . . . . . . . . . . . . . . . . . . . . . . . . . . . . . . . . . . . . .69
Before Contacting Technical Support . . . . . . . . . . . . . . . . . . . . . . . . . . . . . . . . . . . . . . . . . . . . . .70
Contact Technical Support . . . . . . . . . . . . . . . . . . . . . . . . . . . . . . . . . . . . . . . . . . . . . . . . . . . . .70
Chapter 10 Import and Export . . . . . . . . . . . . . . . . . . . . . . . . . . . . . . . . . . . . . . . . . . .71
Features . . . . . . . . . . . . . . . . . . . . . . . . . . . . . . . . . . . . . . . . . . . . . . . . . . . . . . . . . . . . . . . . . . .71
Required Fields . . . . . . . . . . . . . . . . . . . . . . . . . . . . . . . . . . . . . . . . . . . . . . . . . . . . . . . . . . . . . .72
Importing . . . . . . . . . . . . . . . . . . . . . . . . . . . . . . . . . . . . . . . . . . . . . . . . . . . . . . . . . . . . . . . . .72
Exporting . . . . . . . . . . . . . . . . . . . . . . . . . . . . . . . . . . . . . . . . . . . . . . . . . . . . . . . . . . . . . . . . . .73
Appendix A: Reports . . . . . . . . . . . . . . . . . . . . . . . . . . . . . . . . . . . . . . . . . . . . . . . . . . . . .75
Report Icons . . . . . . . . . . . . . . . . . . . . . . . . . . . . . . . . . . . . . . . . . . . . . . . . . . . . . . . . . . . . . . . .75
Screenshots of Reports . . . . . . . . . . . . . . . . . . . . . . . . . . . . . . . . . . . . . . . . . . . . . . . . . . . . . . . .76
Employee Detail Report . . . . . . . . . . . . . . . . . . . . . . . . . . . . . . . . . . . . . . . . . . . . . . . . . . . .76
Employee Summary Report . . . . . . . . . . . . . . . . . . . . . . . . . . . . . . . . . . . . . . . . . . . . . . . . .77
Employee Balance Report . . . . . . . . . . . . . . . . . . . . . . . . . . . . . . . . . . . . . . . . . . . . . . . . . . .77
Employee Anniversary Report . . . . . . . . . . . . . . . . . . . . . . . . . . . . . . . . . . . . . . . . . . . . . . .78
Perfect Attendance Report . . . . . . . . . . . . . . . . . . . . . . . . . . . . . . . . . . . . . . . . . . . . . . . . . .78
Absence Detail Report . . . . . . . . . . . . . . . . . . . . . . . . . . . . . . . . . . . . . . . . . . . . . . . . . . . . .79
Absence Notes Report . . . . . . . . . . . . . . . . . . . . . . . . . . . . . . . . . . . . . . . . . . . . . . . . . . . . .79
Group Absences by Type Report . . . . . . . . . . . . . . . . . . . . . . . . . . . . . . . . . . . . . . . . . . . . . .80
Worked Hours Report . . . . . . . . . . . . . . . . . . . . . . . . . . . . . . . . . . . . . . . . . . . . . . . . . . . . .80
Planner . . . . . . . . . . . . . . . . . . . . . . . . . . . . . . . . . . . . . . . . . . . . . . . . . . . . . . . . . . . . . . . .81
Transaction Detail Report . . . . . . . . . . . . . . . . . . . . . . . . . . . . . . . . . . . . . . . . . . . . . . . . . .81
Year in Review . . . . . . . . . . . . . . . . . . . . . . . . . . . . . . . . . . . . . . . . . . . . . . . . . . . . . . . . . . .82
Adjustments Report . . . . . . . . . . . . . . . . . . . . . . . . . . . . . . . . . . . . . . . . . . . . . . . . . . . . . . .82
Appendix B: Troubleshooting . . . . . . . . . . . . . . . . . . . . . . . . . . . . . . . . . . . . . . . . . . . .83
Appendix C: Import/Export File Format . . . . . . . . . . . . . . . . . . . . . . . . . . . . . . . . . . .85
Appendix D: Using the Notes/Comments Editor and Attachments . . . . . . . . .87
Index . . . . . . . . . . . . . . . . . . . . . . . . . . . . . . . . . . . . . . . . . . . . . . . . . . . . . . . . . . . . . . . . . . . .91
6
Welcome!
Chapter 1
Welcome!
Thank you for choosing G.Neil’s MyBiz Attendance – the easy solution for tracking employee
absences and time off. Our software application includes many features based on the suggestions of
our customers, and we certainly welcome any further comments or improvements you may have.
When combined with other MyBiz software such as MyBiz Records and Time Clock, this powerful
tool helps you keep critical employee information without entering data twice.
MyBiz Attendance makes it easy to record employee absences for up to 100 employees quickly, lets
you see time-off at a glance and run reports. In addition, the program figures time-off balances with
credits and debits just like a checkbook. MyBiz Attendance also helps reveal excessive employee
absences, which can provide solid evidence for employee discipline or termination. The following
new features in MyBiz Attendance will make your job easier and keep you even better organized:
Features
• Open-ended licensing – Unlike many human resource software applications designed
for large companies, MyBiz Attendance does not require annual licensing. However, we do
encourage you to purchase upgrades so that you have the latest enhancements and newest
features to make your job easier.
• Easy, standalone PC installation – We made MyBiz simple to install and get running.
(Companies that want to install their employee database on a network or give multiple
users access should use or upgrade to G.Neil’s Optima software.)
• Password security – Anyone who uses the program must have a login ID and password,
and you can set different access levels for each user.
• Data import – If you already have information from a spreadsheet or other program, you
can save time setting up MyBiz Attendance by importing it.
• Calendar – Entering absences is easy! Just two clicks and you’re done. You can also enter
unlimited notes.
• Reminders – Set pop-up reminders for important dates, such as employee anniversaries,
birthdays and reviews.
• Time-Off Plans – Once you’ve set up your time-off plans, MyBiz Attendance will
automatically compute your employees’ benefit credits, debits, carryovers and balances.
• Reports – You can choose from 18 standard reports and change options to get the
information you need. Export information to other file formats such as Excel or text, too.
7
Welcome!
• Automatic backup – MyBiz Attendance can make sure you have a backup of your important
employee information each time you close the program.
• Up to 100 active employees – This application lets you manage attendance records
and time-off for up to 100 active employees. (Companies larger than 100 employees
can easily upgrade to G.Neil’s Optima Attendance Controller software.)
• FREE technical support – When you’ve exhausted the help and troubleshooting
information provided in this User’s Guide, you can contact Technical Support for
free assistance. (See page 70 for contact information.)
New Version 2.0 Features
• Scheduling screen – Now you can see time-off for several employees at once! See page 41 for
information on this new feature.
• Automatic reminders – Instantly create multiple reminders for anniversaries for all employees!
See page 39 for details.
• Add file attachments to notes/comments – Store all documentation in one place! Attach
Word, Excel, PDF and image files to any notes or comments field. For instance, you can
attach a completed MyBiz Forms FMLA Leave Request form to the comments field of the
Employee Detail screen for that employee. There’s also a full text editor available now.
See Appendix D.
• Quick print reports – In each program feature, you’ll find a print icon that lets you quickly
create related reports. Combined with the new, faster Employee Select Column, this makes
printing reports a breeze.
• New user interface design – There’s a whole new look and feel to MyBiz Attendance, which
is even easier to use than ever! For customers using MyBiz Attendance in concert with MyBiz
Records or Time Clock, a single login/password will grant access to all three programs.
How To Use This Guide
This User’s Guide contains detailed information for installing, setting up and using
MyBiz Attendance; however, you may also find the majority of this guide under
Help menu of the program.
Anytime you’d like to read the associated instructions for the screen you’re on, simply press F1.
You can also go to the Help menu at the top of the screen and select “Contents.” This allows you to
“drill down” through topics or search by keyword.
8
Welcome!
Unlocking The Demo
If you have already installed the MyBiz Attendance demo, you can permanently “unlock” it by
following the steps listed here.
1. Open MyBiz Attendance.
2. Select Alter Current Product License from the Help menu.
3. Select EDIT for the program you want to unlock and enter the Product Key you received
with your purchase. This will be located inside the front cover of this User’s Guide in the
lower right hand corner or sent to your e-mail address.
4. Click OK. If the confirmation message does not appear, verify that you entered the correct
key. The Product Key is not case-sensitive.
Note: There is a different Product Key for each G.Neil software product.
System Requirements
Required
•
•
•
•
•
•
Windows 98 (SE) or later
Pentium 266Mhz or faster processor
64 MB available RAM (Random Access Memory)
20 MB available hard disk space
Access to a CD-ROM drive
SVGA monitor with 800 x 600, 16-bit color depth or higher
Recommended
• Pentium III or higher processor
• 128 MB available RAM (Random Access Memory)
• 20 MB available hard disk space
• CD-ROM drive
• SVGA monitor with 1024 x 768, High Color or higher
• Windows-compatible graphics quality printer
MyBiz Attendance must be installed on a single, standalone computer. You can create multiple
accounts with different access levels, but the software runs on the PC you install it on.
Installing MyBiz Attendance
To begin installing MyBiz Attendance, follow these steps:
1. Close ALL running programs.
2. Insert the MyBiz Attendance CD into the CD-ROM drive of your computer.
Once the CD is inserted, if the browser menu does not appear, proceed to the next step.
Otherwise, skip to Step 6.
9
Welcome!
3. Click Start, Run. The Run dialog will appear.
4. In the dialog box, type D:\setup. exe where D: is the letter of your CD-ROM drive.
5. Click OK or press Enter.
6. The browser menu will appear. Select “Install MyBiz Attendance.”
Once the installation procedure begins, follow the on-screen instructions to install the
software. When installation is complete, the G.Neil program group will be added to your
Start menu and a MyBiz Attendance icon will be on your desktop.
10
Getting Started
Chapter 2
Getting Started
Before you begin using MyBiz Attendance, review the following checklist to get started quickly. Also
have available this information:
• Location and department names
• User information (managers and other users who will have access to the data)
• Your company time-off policies (vacation, sick, personal time, etc.)
• Employee data and balances [employee name, hire date, work status (full or part time), active
status (active, inactive, or terminated), location and department, work hours and week hours]
Logging In For The First Time
After installation, open the program. For first-time users, enter the program using
Login: Admin and Password: Admin.
Checklist For Setting Up
MyBiz Attendance first needs some information set up to correctly track your employee absences; to
get started, please follow the checklist below:
❑ Change the Admin password by going to Settings, User Security. If needed,
set up access for others who will need to continue setting up the program.
If you need to give access to specific locations and departments, or individual
employees, set these up first and then come back to User Security and complete
security access. (See Chapter 3 – Security Options on page 21)
❑ Create locations and departments. (See Chapter 2 – Locations & Departments on page 12)
❑ Set up Global Preferences. (See Chapter 2 – Company Information on page 13)
❑ Set up Time-Off Plans. (See Chapter 6 – Time-Off Plans on page 49)
❑ Set up absence categories. (See Chapter 2 – Absence Category Maintenance on page 17)
❑ Set up holidays. (See Chapter 2 – Holidays on page 17)
❑ Set up absence codes. (See Chapter 2 – Absence Codes on page 18)
❑ Enter employee information and assign Time-Off Plans.
(See Chapter 4 – Adding New Employees on page 33)
❑ Complete setting up user security if needed. (See Chapter 3 – User Security on page 21)
11
Getting Started
Setting Up
Locations & Departments
Locations and departments are required and
must be assigned to each of your employees.
(See Chapter 4 - Adding New Employees,
page 33 to assign locations and departments
to employees.)
Note: When setting up locations and
departments for the first time, a location
must be set up FIRST, and then you may
assign a department to that location.
Departments are assigned to locations. To set
up your locations and departments, follow
these steps:
1. Click on Locations and Departments from Settings menu.
2. Click Locations; then click New.
3. Enter the location name.
4. Click Save.
5. Click New again to create other locations.
6. Click the Departments tab; then click New.
7. Enter the department name.
8. Click Save.
9. Click New again to create other departments that will be assigned to the location.
After all departments are created, click the + sign next to Location in the right pane.
Select the assigned departments by clicking in the box next to the department.
Note: As you add more locations and departments, you’ll see that each location has ALL of the
departments that you’ve created. However, only those departments that you assign to a location
will show up when assigning them on other screens. You may not remove a department from
a location if an employee is still assigned to that location/department combination.
Setting Up Global Preferences
To access Global Preferences, go to Settings, Global Preferences.
This Global Preferences screen allows you to control your default program settings,
such as company info, report options and specific program options. If you are setting
up for the first time, please follow the checklist order.
Note: Before editing any of the Global Settings, you must first click the edit button.
12
Getting Started
Company Information Tab
The Company Information screen allows
you to enter your company name, address and
logo. The company name is required, as this will
print out on reports. Having a company logo is
recommended but not required. If you have
one, this will also print out on Reports.
• Company name (required for report
headings)
• Address, City, State, ZIP
and Country code (optional)
• Bitmap filename for your company
logo (optional.) If you have your
company logo available in a bitmap (. bmp) file format, you can have this logo appear on
reports. MyBiz Attendance supports .bmp file formats not to exceed 200x200 in size.
Enter the directory where the bitmap file is stored or use Browse to locate it.
Editing Company Information
1. Click Edit.
2. Enter information as needed.
3. To add a company logo, click Assign New Logo.
Navigate to where the directory path is and click on
the bitmap logo, then click Open.
4. Click Save.
General Settings Tab
• Epoch Setting – We strongly recommend keeping the default setting. This setting will allow
the program to appropriately interpret any two-digit year entered that is between 1920 and
2019. For example, with the default Epoch setting of 1920: If you enter a date (such as in the
Hire Date field) of 03/05/78, the program will interpret this as 03/05/1978. If you enter a
date of 03/05/01 within the program, it will be interpreted as 03/05/2001.
Note: If you need to enter a year prior to 1920 or after 2019 in a date field within the
program, you may enter the year as a four-digit number.
• Default Hours in a Day – These are the default hours that will be assigned when creating a
new employee. The day hours on the Employee Detail screen will be filled in automatically
with these default hours when a new employee is created.
• National ID Number Format /Label – Selecting one of these options will allow you to
set the mask for the National ID Number Format. The default mask is set to the USA SSN
format. With this selected, whenever you enter a new employee, the dashes will automatically
come up in the xxx-xx-xxxx format. The label is the title that will appear on the Employee
Detail screen (SSN by default).
13
Getting Started
• Allow use of Forgotten Password
Utility – This option allows access to a
utility that can be used only with
assistance from G.Neil Tech Support
to gain access into the MyBiz program.
In order to use this feature, we require
that you fax or mail a statement on
company letterhead signed by a
supervisor stating that the user is
allowed full access into the program.
We keep statements on file. Call
G.Neil Tech Support at 954.845.9664
if you have forgotten or lost your
MyBiz password.
• Forced Writes for Interbase – When running the MyBiz database on a standalone computer,
this option will help to keep the database more stable. If MyBiz is installed on a workstation
and the program is open at the time the computer locks up or crashes, the database is prone to
becoming corrupt and possibly unrepairable. A computer lockup or crash can be attributed to
several things, including having too many programs open at the same time from what your
computer memory can handle.
Note: We recommend keeping this option checked. The performance may lag a little, but you
may not even notice it. We also recommend always having a current backup.
• Prompt for backup on Exit – This option allows you to turn on or off the message
prompting for backup when you close out of the program. Backups are very important.
Report Options Tab
These settings affect how all reports will
appear by default:
• Print Preview – Toggles on and off
previews before printing
• Header Bold – Toggles on and off
making the Header Title bold
• Header Line – Toggles on and off
adding a line under the Header Title
• Header Shade – Toggles on and off
shading for Location or Department
title row
14
Getting Starting
•
•
•
•
Data Lines – Toggles on and off lines to separate data information
Print SSN – Toggles on and off ability to show Social Security Numbers
Print Picture – Toggles on and off ability to print picture
Print Totals – Toggles on and off whether or not totals show up on reports
Attendance Tab
• Display Model – This shows employee
totals in days or hours throughout the
program, depending on your choice.
• Fiscal Date – If used, the fiscal date
will affect Time-Off Plans set to accrue
on the fiscal date.
• Display only Absence Codes with
Descriptions – This allows you to view
only absence codes that are set up in
the Absence Code Maintenance screen
with other than (Not Assigned.)
• Retain Original Absence Class Settings – This gives you the option to keep original absence
class data and create new assignments. For example, say you had the absence code “A” assigned
to category vacation, so every time you put the absence code “A” onto the calendar the
program would assign the time used to vacation used. Then due to a new company policy,
you need to assign the code “A” to personal time; having this option checked would save the
previous absences to the old category and any new absences would be assigned to the new
category of personal time. Unchecking this option would allow all time used for the code
“A” to be entered under the new assignment.
• Show Warning on Weekend Assignments – If you attempt to mark an absence on a Saturday
or Sunday, a warning will notify you.
• Show Warning on Assignments to Inactive Employees – If you attempt to mark an inactive
employee absent, a warning will notify you.
• Show Warning on Assignments Before Hire Date – If you attempt to mark an employee
absent before he or she was hired, a warning will notify you.
Accrual Schedule Settings
• Accrue Automatically – If selected, this tells the program to run Time-Off Plans
automatically once each day according to which days are selected.
• Run Accruals On – This allows you to select which days the Perform Accruals screen
displays. If Accrue Automatically is selected, the program will automatically perform
an accrual on those days marked. Otherwise, the program will display the Perform
Accruals screen and you will need to select Accrue Now or Accrue Later.
15
Getting Started
• Default Hours in a Day – When entering a new employee, these amounts
will be the default and show up in the Day Hours block on the Detail screen.
Setting Up Time-Off Plans
For details on creating Time-Off Plans, please read Chapter 6, which begins on page 49. If you’re
familiar with your company benefit plans, you can create and test Time-Off Plans using the MyBiz
Attendance Time-Off Plan Wizard, located under Accrual Plan Maintenance. Just click the Wizard
icon
at the top of the screen.
Assigning Time-Off Plans
To assign a Time-Off Plan to a category, follow these steps:
1. The program comes with three default categories: Vacation, Sick and Personal. Create other
categories if needed (Birthday, Floating Day, etc.), by clicking on NEW and entering a
category name in the Absence Category Title block.
2. Click the down arrow in the Default Time-Off Plan block, and select the appropriate TimeOff Plan. (See Time-Off Plans for setting up a Time-Off Plans.)
3. Enter a Sort Order number in a two or three-digit format (01, 02, 03, 101, etc.) up to 200.
The Sort Order is the order you will view the categories throughout the program with the
lowest number being first. Calendar Totals, Transactions, and Category Assignments are some
of the areas for which you can control the sort order.
4. Enter comments, if needed.
5. Click Save.
The delete button deletes an Absence Category Title that is not already assigned to employees or that
has absence codes assigned to it. All employees and absence codes will need to be unassigned to
delete an absence category.
To delete an Absence Category, follow these steps:
1. Click on an Absence Category.
2. Choose an option by clicking in the box.
3. Click Save.
16
Getting Started
Setting Up Absence Categories
To access the Absence Category screen, go to
the Settings menu, then Absence Category
Maintenance.
The Absence Category Maintenance screen
allows you to create categories and then
assign Time-Off Planss to the category. An
absence category (or absence category title) is
a name or category heading. This is used to
label the available categories of stored totals.
You may have a category such as Vacation,
Sick, Personal, PTO, etc. (For information
on setting up a Time-Off Plan, see page 49.)
You may have an unlimited amount of
categories.
Assigning a Time-Off Plan to the absence category allows accrued time and lost time to be shown
under that category. For example, you have a Category called Vacation, and assign a Time-Off Plan
called Vacation – Full-time to it. Remember that a Category is a title, and a Time-Off Plan is the
actual plan of how your time-off policy works. When employees who are assigned to the Time-Off
Plan Vacation – Full-time accrue vacation time, their accruals will appear under the Category
Vacation under the Total This Year Tab on the Calendar screen.
Setting Up Holidays
To access Holidays, go to the Settings menu, then Company Holidays.
Overview
This section allows you to designate the
dates of specific company holidays on the
calendar. Holidays that have not occurred
will automatically apply to an employee when
you enter them into the program. The holiday
will show as an “H” on the calendar. You may
sort by the holiday name or by date.
Adding Holidays
To enter a holiday, follow these steps:
1. Click Settings from the main menu
and select Company Holidays.
17
Getting Started
2. Click New to add a company holiday.
3. Enter the name of the holiday you wish to add.
4. Press Tab on the keyboard and enter the date of the holiday (mm/dd/yyyy)
or click the drop-down arrow and navigate to the date.
5. Select Full Day, 3⁄4 Day, 1⁄2 Day, or 1⁄4 Day for how much credit for this holiday will be given.
This amount corresponds with the Day Hours block on the Employee Detail screen.
6. Click Save.
Deleting a Holiday
To delete a holiday, follow these steps:
1. From the Company Holiday screen, click on the holiday you wish to remove.
2. Click Delete.
3. Click Yes to the Warning box. This will remove the holiday from all employee calendars.
Editing a Holiday
Only the holiday name can be edited. If you need to change a holiday date, you’ll need to
delete the holiday and then re-add it. To edit an existing holiday name, follow these steps:
1. From the Company Holiday screen, click on the holiday you wish to edit.
2. Make the necessary changes.
3. Click Save.
Setting Up
Absence Codes
To access the Absence Codes, go to the
Settings menu, then Absence Code
Maintenance.
Overview
Absence Codes are letters that are on the
calendar to indicate an employee absence.
It is important to assign your absence codes to
the proper categories before marking any
codes on the calendar.
There are 22 absence codes. You may change the description of 21 of them. The description of
Holiday (“H” code) may not be changed, but you may change the settings for “Count Against Perfect
Attendance.” Each letter can be assigned to one of the absence categories, which are labeled in Global
Preferences. Once an absence code is assigned to a category, whenever you put that absence code on
the calendar, the time for the absence is shown in the Used column for that category.
18
Getting Started
For example, absence code “N” (Medical
Appointment) is assigned to the Personal
Category. When the absence code “N” is put
on the calendar, the time will be deducted
from used time in the Personal Category.
Edit Absence Codes
To edit the Absence Code Description, follow these steps:
1. Click in the Description box.
2. Enter the new description.
3. Click Save.
Changing Absence Categories
To change the Absence Category, follow these steps:
1. Click in the Category box.
2. Click on the drop-down arrow and select the appropriate category.
3. Click Save.
19
Getting Started
20
Security Options
Chapter 3
Security Options
Overview
Due to the confidential nature of information stored in MyBiz Attendance, security is always turned
on. This will help prevent unauthorized staff members from accessing critical employee data. The use
of security is required. Setting up access to MyBiz Attendance and any other G.Neil programs you
have should be the second thing you do. The first thing is set up locations and departments. You
may set up access for managers to view only their departments and/or view specific employees from
other departments. You also may set up employees to have read-only access to their records.
Program Access
The program is set up with a default Login: Admin and Password: Admin. We strongly
recommend changing the password for the Admin Login and set up other logins as necessary.
Setting up security is necessary to allow others to use the program. It is recommended that you
do not give out the login and password to the Admin login, but instead set up other user logins to
access only those features that they will need. The Detail Tab is the first screen that comes up
when going into User Security. You’ll need to set up access to the common features and the
specific program features.
Common Features
Features under the User Security Detail Tab are shared among MyBiz Attendance, Records and Time
Clock. For instance, Locations and Departments are common to all three programs, as are Global
Settings. Even if you only have one of the listed programs, you will need to follow these instructions
to set up user access rights.
21
Security Options
User Security - Detail Tab
Some of the common features are:
• Search For – This allows you to search
by User Name.
• Save As – This allows you to create
additional users based on the access
rights of another user.
• Employee Record Access - This
allows access to view, add or delete
employee records.
• View SSN – This allows access
to view Social Security Numbers.
• Run Reports – This allows access to run reports.
• Reminders – This allows access to add and delete reminders.
• Reminders, Assign Global – This allows access to assign reminders to everyone.
• Reminders, Assign Users – This allows access to assign reminders to specific users.
• User Security – This allows access to add, edit and delete users and user access.
• Location/Department Maint – This allows access to maintain locations and departments.
• Global Preferences – This allows access to edit Global Preferences.
• Import/Export – This allows access to import and export data.
• Database Backup – This allows access to back up the database.
• Database Restore – This allows access to restore a backed-up database.
• Alter Product License – This allows access to change the product license.
Setting up access to common features (Detail Tab):
1. Click New from the User Security, Detail screen.
2. Enter a login and password (letters and numbers only) and the user’s full name.
3. Select options for displaying reminder alarms and hints for this login.
4. Select Yes to allow the user to begin logging-in after giving access. Setting this option
to No is a good security measure when users are out of the office for a number of days.
5. Select what type of feature access users will have by clicking in the
Feature Access Rights block.
6. Clicking on the arrow will allow you to select from the following:
No Access – This gives no access to the selected feature.
Read Only – This allows the user to view the section but they cannot make any changes.
Read Write – This allows the user to view, add and edit; no deleting allowed.
Read Write Delete – This allows the user full editing rights to the feature.
22
Security Options
Yes – This option allows access to the feature.
No – This allows no access to the feature.
7. Click Save.
User Security – Attendance Tab
Once the above steps are completed, follow these steps to set up access to specific program features:
1. Click on the Attendance Tab from User Security, Details.
2. Select what type of features users will have access to by clicking in the Feature Access Rights
block. Clicking on the arrow will allow you to select from the following:
No Access – This gives no access to the selected feature.
Read Only – This allows the user to view the section, but he or she cannot make changes.
Read Write – This allows the user to view, add and edit; no deleting allowed.
Read Write Delete – This allows the user full editing rights to the feature.
3. Click Save.
Program Features (Attendance)
• Absence Category Maintenance – Allows user to create and edit Absence Categories
and assign Time-Off Plans. (See Absence Category Maintenance, page 17)
• Absence Code Maintenance – Allows user to view and edit Absence Codes.
(See Absence Code Maintenance, page 18)
• Absence Notes – Allows user to view, edit and print absence notes. (See Notes, page 43)
• Calendar – Gives the user access to the calendar screen and to add or edit employee absences.
(See Calendar Screen, page 34)
• Category Assignments – Allows user to view and edit Time-Off Plan Assignments.
(See Category Assignments, page 20)
• Holiday Maintenance – Allows user to add, delete and edit Holidays.
(See Holidays, page 17)
• Modify Initial Balances – Allows user to add, delete and edit Initial Balances.
(See Initial Balances, page 35)
• Perform Accrual – Allows user to click on the Perform Accrual button to accrue time
according to the assigned Time-Off Plans. (See Perform Accrual, page 45)
• Planner – Allows user to view and print reports. (See Planner, page 39)
• Scheduler – Grants access to view multiple employees’ schedules and reveal overlapping time
off. (See Scheduler, page 41)
• Time-Off Plan Maintenance – Allows user to view and create Time-Off Plans (from your
company’s time-off policy) settings. (See Time-Off Plans, page 49)
• Transaction Utility – Allows user to remove unwanted accrual balances and to reset the
Last Accrual Date.
23
Security Options
• Transactions – Allows user to view, edit and print transactions.
(See Transaction Editor, page 37)
• Year in Review – Allows user to view and print reports. (See Year in Review, page 36)
User Security – Location/Department Tab
You should have already set up your location and department names. Now you will want to set up
your users’ access to the locations and departments by following these steps:
1. Click on Location/Department Tab from Settings, User Security, Detail.
2. Click on the + sign next to Locations/Departments and next to
the location and department name to expand the list.
3. Click in the box next to the location and department name to select access
to these areas. This will put a checkmark in the box. Click in the box
again to unselect an area.
4. If you have already entered your employees in the program and assigned
them to locations and departments, when you expand a department, you
will see all the employees assigned to that location/department combination.
You then may assign access to individual employees by clicking in the box
next to the employee.
Note: If you haven’t entered your employees into the program, you still will be able to assign
access to a location/department combination, just not down to the employee level. You may
assign access down to the employee level after you enter your employees and assign a
location/department to them.
5. Click Save.
User Security – Other Tabs
For instructions on setting up access to any other G.Neil program (e.g., MyBiz Records and
Time Clock), please see User Security in the appropriate user manual.
24
Security Options
Forgotten Password Feature
MyBiz Attendance has a Forgotten Password feature that can be used in case of forgotten
or lost passwords. Please follow these instructions if you lose your password:
Fax a statement on your company letterhead to our Technical Support Team, signed by a manager or
supervisor, authorizing you to have a password that allows full access to the User Security within the
program. Example statement: (Name and title) is authorized to have full access to the (name of
program.) Signed by (Supervisor Name, title and contact information.)
Once you send the fax to 954-846-8551, call our Technical Support Team at 954-845-9664. Please
have the program opened to the Login/Password screen. The representative you contact will walk you
through steps to get you back into the program.
25
Security Options
26
Managing Employee Records
Chapter 4
Managing Employee
Records
Overview
This chapter will help you become acquainted with the program layout and how to enter employee
information. Throughout this chapter, there are examples of different program screens. You may wish
to view the sample database to get a better picture of how employee records look once they’re entered.
(See Chapter 9– Sample Database.)
Make sure you have gathered the following information for each employee before attempting to enter
employee records:
• Social Security Number
• Name (First, Middle, Last)*
• Employee identification number
• Date of hire*
• Job title
• The number of hours the employee works in a normal day*
• Location*
• Department*
• Full or part-time*
• Active, inactive or terminated status*
• Company time-off policy (Vacation, Sick, Personal, etc.)*
*Required fields
Using MyBiz Attendance
MyBiz Attendance is now easier to navigate than ever before. Even better, if you have other MyBiz
software installed such as MyBiz Records and Time Clock, you have access to all programs and
features from one convenient interface.
27
Managing Employee Records
The main parts of MyBiz Attendance are the Menu Bar, Program Bar, Feature Column, Employee
Select Column, Selected Feature Pane and the Recent Features Pane.
The Menu Bar
The Program Bar
The Feature Column
The Employee
Select Column
Recent Features Pane
The Menu Bar
File Menu
Maintenance Perform Accruals – This allows the program to accrue
time according to your Time-Off Plans as defined under
Settings/Time-Off Plans Maintenance.
Remove Transactions – This allows you to remove
transactions before re-running accruals.
Backup Database – This lets you perform a database
backup while running the program.
Import Data – Imports basic employee data into the MyBiz database.
Export Data – Exports basic employee data from the MyBiz database.
(See Chapter 10 Import and Export)
28
Feature Pane
Managing Employee Records
Import Hours Worked – Import hours worked from a tab-delimited file (SSN, Date Worked,
Amount of Hours Worked.) (See Import Hours Worked on page 38.)
Delete Employee – Deletes an employee from the Browse or Employee Detail screen.
Note: This cannot be undone and deletes all data for the selected employee!
Exit
MRU list – Allows you to quickly select an employee by clicking on his or her name.
View Menu
Filter Page – Gives other options for sorting
and filtering, such as hiding terminated or
inactive employees
Open Reminders – Brings up all open
reminders (those not checked as resolved)
Checklist – Displays Checklist screen that
helps you set up the program
Welcome – Displays initial Welcome screen
that pops up when you first run MyBiz
Attendance
Settings Menu
User Security
Global Preferences
Locations/Departments
Time-Off Plans Maintenance
Absence Category Maintenance
Absence Code Maintenance
Company Holidays
Reports Menu
Previews and prints up to 18 reports;
you can also access this list and select
a report by clicking Reports on the left Feature
Column. (See Chapter 7 Reports
and Appendix A for detailed information.)
29
Managing Employee Records
Help Menu
Contents
System Information
About
Alter Current Product License
The Program Bar
The Program Bar allows you to select the MyBiz program you wish to use and displays its features in
the Feature Column. The programs are color-coded as follows: MyBiz Attendance – Green; MyBiz
Records – Red; MyBiz Time Clock – Purple.
The Feature Column
The Feature Column allows you to select which feature will be displayed in the Feature Pane on the
right side. To make it easier, we also color-coded the features of each program. For example, if you
select MyBiz Attendance, and select Employee Detail from the feature column, you will see a green
title bar.
The Employee Select Column
The Employee Select Column allows you to select or find employees quickly and easily, as well as
select multiple employees for printing reports.
Browse mode allows you to perform an incremental search for an employee, move columns and
sort quickly.
An incremental search allows you to enter the first couple of letters of the employees’ last name
and will go to the first employee which matches those letters; and as you enter more letters, the
search will become more defined. For example, if you enter the letter “A” in the Search field, the
employee list will select the first employee name which starts with the letter “A.” If you enter the
letter “d,” so that now you have “Ad” it will bring up the first employee name which starts with
Ad, such as Adams.
You may move columns according to your preferences. To move a column, click and drag the
title to the left or right. Double arrows pointing inward will show you where you will drop the
title if you release the mouse button.
30
Managing Employee Records
Sorting fields is just as easy. Just click on the title of the column you want to sort. For example,
if you wanted to sort by first name, you would click on the First Name title. You can also set
multiple sorts by holding the CTRL key and clicking on fields; the sort priority will be displayed
above the field names.
TreeView mode allows you to find or select employees by location and department. For example, if
you were looking for employees who are under the Ft. Lauderdale location/Merchandising
department, TreeView mode could show you at a glance.
Tip: In TreeView, by default all locations and departments are unchecked. A quick way to select
just one department is to click-on the name of the department. This will select all employees
under that department. Likewise, in Browse mode, you can select or deselect all employees by
clicking on the red checkmark at the top left.
Selected Feature Pane
The Feature Pane is where the selected feature of the program will be displayed.
Note: Columns can be resized. To resize a column, move your cursor to the left or right edge of the
column until your cursor turns into a double arrow pointing left and right; click and drag your left
mouse button to the desired width and release. The Employee Select Column can also be hidden and
unhidden by clicking on the minus or plus sign in the top right corner.
Recent Features Pane
This is a list of the most recently used features. Clicking on a feature from this list will bring it up in
the Feature Screen. It’s a quick way to get back to a previous screen.
Elements Of
The Calendar Screen
You’ll likely use this screen more than any other because it’s where you enter absences and notes.
Here’s an overview:
• Absence Codes List – To place an absence, you’ll first select one of these codes, then select a
tool for placing the code on the calendar for the selected employee.
• Calendar Screen Tools
Full Day – This sets the amount of hours taken for an absence to the normal
hours in a day (usually eight hours for a full-time employee.) Normal day hours
are taken from the Employee Detail screen.
31
Managing Employee Records
⁄ Day – This sets the amount of hours
taken for an absence to 3⁄4 of the
normal day’s hours (usually 6 hours.)
1
⁄2 Day – This sets the amount of hours
taken for an absence to 1⁄2 of the
normal day’s hours (usually 4 hours.)
1
⁄4 Day – This sets the amount of hours
taken for an absence to 1⁄4 of the
normal day’s hours (usually 2 hours.)
Erase – This feature allows you to
delete absences from the calendar.
Select – Clicking on Select allows you
to enter notes on a specific day
without entering an absence.
Today – Brings the calendar to the current day.
Save – This saves current changes. If you select another employee, changes will be saved
automatically.
Cancel – This cancels current changes.
Display Hours Worked – This feature allows you to toggle the display for Hours Worked
on the calendar. Hours Worked is time entered on the calendar with a “W” code or from the
day’s totalled MyBiz Time Clock entries.
Display Absences – This option allows you to toggle the display for absences on the calendar.
Absences are time entered on the Calendar with any of the absences (A – V) code.
• Employee Balance Tabs
Total This Year Tab – This shows the employee’s current benefit year totals.
Total Since Hired Tab – This shows the cumulative total since the employee was entered.
Notes Tab – This allows you to enter comments for a specific day; a new feature of Version 2
is that you can also attach any file to the notes field now. (See Appendix D.)
Year Settings Tab – This shows assigned Time-Off Planss (tables.)
Note: Negative balances will show in yellow. As well, realize that absence codes entered on
future calendar months will affect employee balances negatively because accruals will likely
not have been run for future months.
3
4
The following symbols may be seen within calendar days:
• Magnifying Glass – This denotes partial day absences or that there are multiple absence codes
places for that day. For example, if an employee is set up with eight hours (as set up on the
Detail screen – Day Hours), the magnifying glass icon would be displayed when any single
absence posted on the calendar was less than eight hours.
• Asterisk – This denotes a note or comment on this day. After selecting the day, click on the
Notes Tab to view the note.
32
Managing Employee Records
Recording Absences
Follow these steps to record an absence for an employee, such as a vacation day:
1. Select an employee from the Select Employee Column.
2. Select the desired month of the calendar, if necessary, by using the arrows on either side
of the calendar. The arrows on the top left side of the calendar change the month. The arrows
on the top right side change the year. This will be the month the employee takes an absence.
3. Using the mouse, click an Absence Code from the Absence Code List so that it is highlighted, then
click a date on the calendar. Notice that the Full Day option is selected (above the calendar.) This
is the default setting when selecting an absence. To choose a different day increment, choose from
3
⁄4 day, 1⁄2 day or 1⁄4 day at the top of the calendar before selecting an absence.
Note: As you add absence codes to the calendar, the time is automatically deducted on the Totals Tab.
For example, if you select the absence code “V” and click on the Calendar, a full day is automatically
deducted from the Used Vacation time under the Total This Year Tab. The full-day assignment is set
from the Day Hours block on the Employee Detail screen (see below for more information.)
Adding New Employees
The Employee Detail screen allows you to
add new employees, and view and edit
existing employee records.
Note: Before adding new employees for the
first time, follow the checklist in Chapter 2
to set up Locations and Departments.
Follow these steps to add a new
employee to MyBiz Attendance:
1. Click the New icon. Enter at least the
required fields. (You can use the TAB
key to move from field to field or
hold down the SHIFT key and press
TAB to move back one field.)
2. Required Fields –
• First and last name
• Hire date
• Work status (full or part time)
• Employment status (active, inactive or terminated)
• Location
• Department
33
Managing Employee Records
• Hours (day and week) – Enter the amount of hours an employee works or is considered
absent for a typical workday and workweek. (For example, you could have Day: 8 hours
and Week: 40 hours) When you put a full-day absence onto the calendar, it pulls the
hours from this field. These numbers are used as defaults when assigning codes to the
calendar and when generating report totals.
3. Assign a Time-Off Plans to an employee, follow these steps (this assumes you have already
defined Absence Categories and Time-Off Plans):
4. From Category Assignments, click on the Assigned Time-Off Plans row.
This will bring up a drop-down arrow.
5. Click on the drop-down arrow and select the appropriate Time-Off Plans.
6. Click Save.
Deleting Employees
You only can delete an employee from the Browse Detail or Employee Detail. To delete an employee,
follow these steps:
1. Click on the Employee Detail Feature.
2. Select the employee you want to delete.
3. Click File > Delete Employee.
4. Click Yes to delete.
Warning: Deletions are permanent! You cannot undo this action.
Category Assignments
After setting up your company Time-Off Plan
(see Time-Off Plans Maintenance, page 53),
you’ll need to assign the Time-Off Plans(s)
to each employee. Each employee must
be assigned three Time-Off Plans to the
appropriate absence categories.
Here’s how to assign a Time-Off Plan:
1. Click the Category Assignments
feature. Note: If you are setting this
up for the first time, there will be
three (3) default Absence Categories
shown (Vacation, Sick, Personal) along
with the default Time-Off Plans that
were set up in the Absence Category
Maintenance (see Chapter 2 –Absence
Category Maintenance, page 17.)
34
Managing Employee Records
2. To assign (or change) a Time-Off Plan, click in the block across from the Absence Category
you would like to assign. For example, double-click in the Assigned Accrue Plan block across
from Vacation; this will bring up a drop-down list.
3. Choose the Time-Off Plan to associate with the Absence Category. For example, choose the
Full Time Vacation plan. This is the plan that will be associated with the category Vacation.
Whenever an accrual is run, the accrued time, as set up in the Full Time Vacation plan, will
be put into the Vacation block on the employee’s Calendar screen.
4. Click Save.
Note: All Absence Categories must have a Time-Off Plan assigned. If there is an absence category
that a specific employee will not accrue on, you will need to assign the “None” option to it. For
example, if you have a part-time employee who does not accrue any sick or personal time, you would
assign the “None” Time-Off Plan to the Sick and Personal categories.
Initial Balances
An Initial Balance is a starting balance for an employee and should only be entered once.
For example, an employee is transferred from another location and has five vacation days left.
You may enter his initial balance of five days or 40 hours, depending on your program display
settings of day or hours (see Global Preferences, page 12.) An initial balance also may be where
an employee receives a certain amount of vacation, sick or personal days when he or she is hired.
Entering Initial Balances
To enter an initial balance, follow these steps:
1. From Category Assignments, click on the Initial Balance Earned block
on the row of the selected category, such as the Vacation row.
2. Enter the amount of time in hours or days, depending on your setting in the Global
Preferences. Note: When entering a negative balance to the Initial Used block, do not
add the minus sign (-) to the amount. This column is automatically negative.
3. Click in the Initial Date block and click on the drop-down arrow.
4. Select the date of the initial balance.
5. Click Save.
Printing Reports
There are two ways to print employee information: (1) from a selected feature’s print icon and (2)
from the Reports menu, either from the pull down menu at the top or the Reports feature on the left.
Printing from a feature
Each feature, such as Employee Detail, Category Assignments, Calendar, Year in Review, etc., has
35
Managing Employee Records
a Printer icon that allows you to print the report associated with that feature. For example, to
print the Employee Detail report from the Employee Detail Feature, you would select an
employee and click on the Printer icon. You do not need to click in the checkbox if you’re going
to print only a single employee. To print the report for multiple employees, click the checkbox
next to each employee name in the Employee Select Column, then click the Printer icon.
Printing from the Reports Menus
Reports selected using the top pull-down menu or the Reports feature in the Feature List appear
in the right Feature Pane along with additional filters and options. You may print a report for a
single employee or multiple employees. (See page 60 and following, Report Options)
Tip: If you’re going to print a report for a whole department or location, you can use the Employee
Select Column TreeView Mode to select quickly.
Year In Review
The Year In Review Feature is used to view
selected categories of absence and work-time
codes for a selected range of months.
To access this feature, click on Year In
Review from the Feature List.
Absences Tab
The current year will be shown. To pick
another date range, use the up/down arrows
to scroll to the desired date. The letters on the
Absence screen are the absence codes that are
on the main calendar.
– This lets you enter notes on
a specific day. An asterisk on
the calendar denotes this.
– This will take you to the selected day on the calendar.
– This brings up employee browse.
– A plus sign next to a code denotes more than one absence code on the same day.
– Letters on the calendar are the absence codes for specific days.
Year-In-Review Settings Tab
The Settings Tab gives you several options.
• Only Show Months with Activity – Checking this option and then clicking back on the
Absences tab will show only months that have absences on the calendar.
• View Absences Assigned to – This option lets you select only the desired absences.
36
Managing Employee Records
• Sort – This allows you to sort by Absence Category or Absence Code to quickly show the
assigned absence category. For example, you may need to know that the code S (Suspension)
is assigned to category None instead of category Personal.
Transaction Editor
The Transactions Feature allows you to view employee balances in a checkbook-like journal. You also
may enter time manually and edit existing time. To access it, click on the Transactions feature.
Adding A
Transaction Entry
To add a new entry, whether it’s earned or
used time, follow these steps:
1. Click on the Category Tab you want to
add or deduct time from. For example,
the Vacation, Sick or Personal Tab.
2. From Transactions, click on New.
3. Click Yes.
4. From the Edit Transaction window,
enter the following:
A. Transaction Date – Enter the date
of the transaction.
B. Transaction Type – (Select one)
• Adjustment to Earned – Select this option when you want to show a manual
adjustment that has hours deducted. The Transaction Detail report will show
“Adjustment to Earned,” which is credited (giving time.)
• Adjustment to Used – Select this option when you want to show a credited manual
adjustment. The Transaction Detail report will show “Adjustment to Used,” which is
debited (deductingtime.)
• Loss: Carryover – Select this option if you want to show a manual carryover loss. The
Transaction Detail report will show Loss: Carryover (deducting) of amount.
A carryover loss happens at the end of a selected time period, usually at the end of
a benefit year in which the employee is not allowed to carry over a specific amount
of time.
• Loss: Exceeded Max Balance – Select this option if you want to note exceeded time.
The Transaction Detail report will show Loss: Exceeded Max Balance. An exceeded max
balance loss happens when an employee’s balance exceeds the maximum balance setting
in the Time-Off Plans.
37
Managing Employee Records
• Time Earned – Select this option if you want to show earned time. The Transaction
Detail report will show Earned. This option is normally used if you enter all your time
in manually.
• Time Used (absence code) – Select this option if you want to show used time.
The Transaction Detail report will show Used: (absence code.) You may either
drag an absence code to the calendar or manually enter the used time through
the Transaction Editor.
5. Amount in Days or Hours – Enter the amount of time to be earned or deducted.
Note: Do not add a minus sign (-) to this field if you’re deducting time. Selecting a loss or
used time option from above will automatically deduct the amount of time.
6. Transaction Notes – Enter any comments related to this transaction.
7. Click Save to keep this transaction or click Cancel to delete it.
Editing Transactions
To edit any transactions, follow these steps:
1. Click on the Category tab.
2. Click on the Transaction that you want to edit.
3. Click Edit.
4. Click Yes.
5. Make any necessary changes.
6. Click Save to keep changes.
Import Hours Worked
This feature allows you to import “W” transactions (worked time) into the database. Note: You must
have entered your employees’ time first. This will only import hours to existing employees.
Follow these steps to import hours worked:
1. Format a tab-delimited or fixed-length text file with the following order:
SSN - ###-##-#### (11 characters long) or ID
Date - MM/DD/YYYY (10 characters long)
Amount - ##.## (five characters long)
2. Validate the file using a text editor like NotePad or WordPad.
3. Go to File > Import Hours Worked.
4. Select the type of file (Fixed or Tab Delimited.)
5. Click Select to browse to your import file.
6. Click Test to verify there are no errors associated with the file.
7. Click Import to complete the process.
38
Managing Employee Records
Planner
The Planner shows you how many absences have been marked on the calendar for each month
by code. The difference between the Planner and the Year In Review (on page 36) is that the Planner
shows absences mainly by the absence code. The Year In Review shows absences mainly by month.
Otherwise, everything is the same.
Reminders
The Reminder feature will show you all open (unresolved) reminders and allow you to create, delete
and resolve reminders. If you have created a reminder it will show up when you first open the
program, starting on the reminder date. Reminders will continue to display until you click Resolve.
Reminders Tool Bar And
Pane Layout
Tool Bar
First-Prior-Next-Last arrows –
Navigates through selected reminders
New – Creates a new reminder
Edit – Allows you to make changes to
a reminder
Save – Saves reminder
Cancel – Cancels current changes
Delete – Deletes selected reminder
Print – Lets you print the Reminders
report for selected employees
Help – Brings up help for this screen
Pane Layout
Reminder Date – Date reminder should first display
Title – Heading of reminder
Resolved – Checkbox displays checked for resolved or unchecked for open (unresolved)
Employee Name – Displays name of employee that reminder is associated with
User – Displays name of user that reminder will display for
Description – The purpose of the reminder shows here
Filters
User – Allows you to view reminders associated with specific users (must have access to
Reminders, Assign Users under User Security)
Show Resolved – Displays Resolved reminders only
Show Unresolved – Displays Unresolved (open) reminders only
39
Managing Employee Records
Creating A New Reminder
There are two types of reminders in MyBiz:
One Time Reminders and Recurring Reminders.
One Time Reminders – These are reminders that are only meant to remind you of a one time
event, such as filing an Absence Report at the end of the year.
Recurring Reminders – These remind you of the following recurring events:
• Anniversaries (MyBiz Attendance)
• Birthdays, Performance Reviews, and I-9 Renewals (available if MyBiz Records
is also installed)
Setting A Reminder
One Time Reminder
1. Click on Reminders from the Features
Column.
2. Click New.
3. Select (check) One Time Reminder.
4. Enter a Title and Reminder Date.
5. If you want the reminder to be
associated with specific employees,
select the checkbox “Assign to all
selected (checked) employees.” This is
optional and will create a separate
reminder that is associated with each
employee.
6. If you selected the checkbox in Step 5, you will need to select (check) any employees that this
reminder is about in the Employee Select Column. Otherwise, skip to the next step.
7. By default, the User’s name will default to the login that was used to enter the program.
Change this if you want the reminder to come up for another user, or you may select Global
which allows the reminder to come up for all users logging in. Note: You must have access to
Reminders, Assign Users and Reminders, Assign Global under User Security to be able to
change this option.
8. Enter a description of the reminder, if needed.
9. Click Save.
Recurring Reminder
To create a recurring reminder, follow these steps:
1. Select Reminders from the feature list.
2. Click New.
3. Select (check) Recurring Reminder.
40
Managing Employee Records
4. Select the type of reminder: Anniversary, Birthday, Performance Review, or I-9 Renewal.
5. Select a Through Date (when do you want to stop the reminder from occurring.)
6. Select how many days you want to be reminded before the event.
7. By default, the User’s name will default to the login that was used to enter the program.
Change this if you want the reminder to come up for another user, or you may select Global
which allows the reminder to come up for all users logging in. Note: You must have access to
Reminders, Assign Users and Reminders, Assign Global under User Security to be able to change
this option.
8. Enter a description of the reminder, if needed.
9. Click Save.
Deleting Reminders
Reminders are deleted from the Main Reminders screen by clicking on the Delete icon.
Editing Reminders
There are two ways to edit reminders:
Main Reminders screen
From the main Reminders screen you can edit the following columns just by clicking in the
field: Reminder Date, Title, Resolved and Description.
Edit Reminders screen
Clicking on Edit from the main Reminders screen will bring up the Edit Reminder screen. You
may also double-click on the title of a reminder. The Edit Reminders screen allows you to
change the Title, Reminder Date, User and Description.
Note: If you need to change the Employee Name that this reminder is about, you’ll need to delete the
reminder and then re-add it.
Open Reminders
Open reminders will appear for the user they are assigned unless the Global option is checked. If a
reminder is marked with Global, then it will show for all users. You may view open reminders by
opening the program or selecting Reminders from the feature list.
Note: If you have security access to “Reminders, Assign Users” [See User Security p. 22], you may view
reminders set up by other users. You may also resolve reminders from the Open Reminders screen.
Using Scheduler
The Scheduler is a new feature that displays overlapping days off at a glance. You may view time off
by department, location or specific employees. You may also view by specific absence codes.
41
Managing Employee Records
Viewing Time-Off
To view time-off follow these steps:
1. Select Scheduler.
2. Select employees under the
Employee Select column. Note: To
quickly select a department or
location, click the TreeView button
under the Employee Select column.
3. On the Schedule Tab, select the
date range you wish to view and
then click Refresh. We recommend
selecting one or two months at a
time when viewing, as selecting
more months can slow performance
when scrolling to the right.
4. Select the Filters Tab if you want to view on specific absence codes. Click Refresh from the
Schedule Tab to refresh the data.
5. Clicking the Go to Calendar button will take you to the Calendar for the selected employee.
Sorting
Right-clicking anywhere on the Scheduler grid allows you to sort by:
• Name
• Title
• Location/Name
• Location/Title
• Department/Name
• Department/Title
• Location/Department/Name
• Location/Department/Title
Note: A bullet next to the sort order designates the current sort.
Moving and Resizing Columns in the Scheduler
Moving Columns
Moving a column allows you to view data more easily. To do so, simply click and drag the Title
column heading left or right. An arrow displays where the column will be “dropped.”
Resizing Columns
Sometimes you may not be able to see all of the data in a column because another column is
overlapping. To move the column, move your mouse pointer directly between two columns until
you get the resize icon (two arrows pointing in opposite directions.) Then click and drag with
your left mouse button to the left or right.
42
Attendance Operations
Chapter 5
Attendance Operations
The Calendar Pane
The Calendar Pane (select Calendar from the
Features Column list) allows you to log
absences and work time on the calendar,
view employee totals, log notes onto specific
days and search for employees in a quick,
efficient manner.
1. 1⁄4, 1⁄2, 3⁄4, Full Day – Use these in
conjunction with the worked time (W
code) and absence codes to log time
worked and used.
2. Erase – To erase an entry, click on
Erase and then click on the absence code on the calendar.
3. Select – Click on Select when you want to add a note to a specific day. Clicking on Select
allows you to click on the calendar without adding an absence code.
4. Today – This selects the current day and month.
5. Display Hours Worked – This allows you to toggle time worked codes on and off.
6. Display Absences – This allows you to toggle absence codes on and off.
7. Totals This Year – This shows current year totals.
8. Totals Since Hired – This shows totals since the employee was entered in the program.
9. Notes – This allows you to put notes on specific days. To add a note, click on Select (above
the calendar) and click on a date on the calendar; then click on the Notes tab. An asterisk (*)
will show on the calendar on the days with notes. Right-clicking brings up Text Editing and
Insert Object Options. (See Appendix D.)
10. Year Settings – This shows current year and Time-Off Plans settings.
Assign Absence Or Work-Time Codes To The Calendar
To assign an absence or work-time code to the calendar, follow these steps:
1. Click the Calendar feature from the Features Column list on the left.
2. Select the employee you want from the Employee Select Column.
43
Attendance Operations
3. Using the Absence Code List on the right, select the absence or work-time code you
wish to record. For example, select V for vacation.
4. Using the buttons above the calendar, select the amount this code should apply to
the total of hours used, for example, Full Day.
Note: When selecting 3⁄4, 1⁄2, or 1⁄4, the program will calculate the appropriate amount of hours
from the Hours Field on the Employee Detail Feature.
5. Select the calendar month and year using the arrows above the calendar.
6. Click once on the date you wish to apply the absence or work-time to. Time will
automatically be deducted on the totals (below the calendar.)
Absence Detail
The Absence Detail window allows you
to edit partial and multiple absences.
To access this, select the date on the calendar,
then right-click and select Absence Detail.
You may enter time down to 1⁄10th of
an hour. (See Minutes to Decimals
Conversion Table below.)
To enter time for an absence using the
Absence Detail window, follow these steps:
1. Click on Select button above the
calendar, and then click on the day
you wish to add an absence.
2. Right-click on the Calendar and select Detail.
3. Click in the appropriate Hours block and enter the time in decimals down to .06 (1/10th of
an hour.) The total hours will show in decimals and hours along with the date.
4. Click OK and then click Save on the Calendar screen.
Note: When entering time into the Absence Detail screen, the time must be entered in decimals.
When converting to whole minutes, values must be in .6-minute increments. To keep things simple,
you may want to round the time to 6-minute increments (see second column below.)
44
Attendance Operations
Minutes to Decimals Conversion Table
Minutes
Decimal
Minutes
Decimal
0.0
=
.00
6
=
.1
.6
=
.01
12
=
.2
1.2
=
.02
18
=
.3
1.8
=
.03
24
=
.4
2.4
=
.04
30
=
.5
3.0
=
.05
36
=
.6
3.6
=
.06
42
=
.7
4.2
=
.07
48
=
.8
4.8
=
.08
54
=
.9
5.4
=
.09
60
=
1.0
Formula for converting minutes to decimals: minutes divided by 60. Minutes must be in
.6-minute increments to be whole numbers.
Manual And Automatic Accruals
An accrual (the amount of time off that has accrued for each employee) can be run manually or
automatically. An automatic accrual occurs when the program is set to run an accrual on a daily or
weekly basis depending on the Accrue Schedule settings under the MyBiz Attendance Global
Preferences Attendance Tab.
Automatic Accrual
For an automatic accrual to run, you
must set the schedule and select the
Accrue Automatically Box under the
Global Preferences Attendance Tab.
Then, whenever the program is opened
for the first time during that day according
to the schedule, the program will accrue
automatically. For example, if your schedule
is set only to Mondays, then every Monday
when the program is first opened, the program
will run an accrual.
Note: We recommend running the first couple
of accruals manually to make sure the Time-Off Planss are set up correctly.
45
Attendance Operations
Manual Accrual
A manual accrual occurs by clicking on the Run Accrual button when the Perform Accruals screen
displays. The Perform Accruals screen will display when the program is first opened (if the Accrual
Schedule is set up), or you may go to File, Maintenance, Perform Accrual.
Here’s how to run a manual accrual:
1. Go to File, Maintenance, Perform
Accruals and click on Run Accrual.
Click Cancel to abort running
the accrual.
2. Once the accruals are finished, you
have the option to preview, which
allows you to see the current
transactions that took place, or post
accruals, which posts the transactions
to the employee’s records.
The Perform Accruals Screen allows you to run a manual accrual. This will accrue time, such
as vacation, sick or personal time for employees according to their assigned Time-Off Planss.
Run Accrual – Clicking this button runs a manual accrual. The program will accrue your
employee’s vacation, sick and personal time according to the Time-Off Planss you set up. (See
Chapter 6 – Time-Off Planss.) The program will normally run an accrual starting one day after
the last accrual date through today’s date. (For example, if the last accrual date was December
31, and an accrual was run on January 15, the program will accrue time for anybody that needed
to be accrued within those dates (from January 1 through January 15.) January 15 will now
become the last accrual date. The next time an accrual is run, it will accrue from January 16
through today’s date.
Cancel Run – This aborts the run.
Preview – This shows a print preview of accrued time.
Post Accruals – This posts the accrued time from the run to employee records.
Exit – This closes the screen. Note: If accrued time has not been posted, then clicking on Exit
will also cancel the accrual run.
Accrual last performed on mm/dd/yyyy – This is the last accrual date. This denotes the last
time an accrual (whether manual or automatic) was run. The next accrual will run from one day
after the last accrual date to today’s date.
Advanced Options
Accrue Thru Date – This is an advanced feature, and normally you will only want to accrue
through today’s date. This feature will allow you to accrue up to any date as long as it’s after
the last accrual date. The Enter Custom Date option under Accrue Through Date Options
must be selected for this option to be available.
46
Attendance Operations
Accrue Through Today – This is the default that the program is set to and will accrue from the
last accrual date through today’s date.
Enter Custom Date – This option allows you to select any date to accrue through as long as it’s
after the last accrual date. For example, if the last accrual date is December 31, and today’s date
is January 15, the program will normally accrue from January 1 (one day after the last accrual
date) through January 15. With this option selected, you may accrue through any date that is
after December 31 – not just through January 15.
Report Group Settings – Once an accrual is run, you will have the option to preview the
accrued time. This allows you to make sure your time given is working correctly before posting.
On the preview, you may sort by location and department to view the Accrual Summary report.
Export Option – Disable Headers on Export – On the preview, this option is the disk icon
on the menu bar. It allows you to save the report (export) in one of the following formats
(pictures are not exported): QRP, TXT, Comma Separated, Excel, Rich Text Format, and WMF.
(See Reports, page 75 for more information.)
Remove Transactions
To get to this screen, go to Settings,
Maintenance, then Remove Transactions.
This screen allows you to remove unwanted
transactions and reset the last accrual date so
that you may start accruing from a specific
date. This is also suggested if you’ve just
entered your employees and already set up your
Time-Off Planss and you want to accrue from
Jan. 1 of the current year or any other date.
Removing Unwanted
Transactions
These instructions will allow you to remove all accruals (earned time & losses), adjustments, used
time or just certain categories. Note: Using the Transaction Utility will not remove any initial
balances. If you have entered initial balances, you will need to remove these manually.
1. Create a backup before proceeding! (See Chapter 8 – Back Up and Restore.)
2. Select a Begin Date – This will remove transactions starting from this date.
This is also the date that the last accrual date will start from, if selected.
3. Select an Ending Date – This will remove transactions up to and including this date.
For example, enter 01/01/03 for the beginning date and today’s date for the ending date.
4. Select one or more of the following:
47
Attendance Operations
• Accruals – This removes earned and lost time (but not adjustments.)
• Adjustments – This removes manual adjustments (adjustment to earned or used time.)
• Used – This removes used time (but not adjustments.)
• Reset Last Accrual Date – The last accrual date is the date where the program will start
accruing from. This allows you to reset the last accrual date to the begin date, e.g.,
accruing from 01/01/03
• Remove Transactions for active employees only – This will not remove
transactions for inactive or terminated employees.
• Remove Transactions applied to these categories (None, Vacation,
Sick and Personal.) You may have more than just these default categories.
5. Click Run Process.
Using the Transaction Utility does not run any accruals. You will need to run a manual accrual to
accrue time. It will remove accruals according to the stated begin and end date and reset the last
accrual date to the begin date. Before running an accrual, make sure your Time-Off Plans are set up
correctly. (See Chapter 6 for setting up Time-Off Plans.)
Note: If you’re not sure which options to choose, use the defaults; these are the common settings.
Select your begin date and end date and click on Run Process.
Resetting The Last Accrual Date
You may want to reset only the last accrual date. For example, you’ve just entered all your employees
and want to begin accruing from Jan 1.
To reset the Last Accrual date, follow these steps:
1. Deselect all options EXCEPT the reset last accrual date option.
2. Enter your begin date.
3. Enter your end date.
4. Click Run Process.
Using this process will NOT remove or run any accruals. It will only reset the last accrual date to
the begin date. For example, if you selected 01/01/03 for your begin date and 06/31/03 for your end
date, and checked only reset last accrual date, the program will reset the last accrual date to 01/01/03.
When you run an accrual, either manually or automatically, the program will start accruing from this
date. The end date is not important, but it is required. You may have any end date that is equal to or
after the begin date. Note: Before running the accruals, make sure your Time-Off Plans are set up.
48
Time-Off Plans
Chapter 6
Time-Off Plans
MyBiz Attendance helps you manage your attendance with your Time-Off Plans. Based on your
company time-off policy, you can define how often employees will earn time off, how they can
carry over their balances from year to year and how much they will earn based on length of service.
Explaining Accruals
When an accrual is run in the MyBiz Attendance program, it calculates employee absences from the
last accrual date up to the current date or your computer’s date. The time calculates according to the
settings in your Time-Off Plans. The accruals can run as often as once per day. For example, if you
ran your last accrual on March 15, 2003, (your last accrual date), and if you ran your next accrual on
March 30, 2003, the program would check the Time-Off Plans that each employee is assigned to
and accrue time for employees who are supposed to receive time between those dates. So, if your
employees were supposed to receive vacation days on the anniversary of their hire dates, they
would receive these days. The program runs accruals manually or automatically.
Frequently Asked Questions
I don’t want the program to run accruals for me automatically. I want to enter my time
manually for each of my employees. Is there anything I need to set up?
Most of our customers who want to enter their own earned time manually also want to zero out at
the end of the year so that their balances start fresh. You can set up a Time-Off Plan that doesn’t give
time (so that you can enter your time in manually) and will zero out your balances each year on
December 31. This way, your employee balances start fresh each year. Or, you can do a manual
offsetting adjustment through the transaction editor to zero out your own balances each year.
(See Chapter 4 – Transaction Editor for more information.)
What is an accrual?
An accrual is simply an accumulation of time units. MyBiz Attendance can accumulate
earnings and deductions to an employee’s balance of paid time-off based on a Time-Off Plans
that you input into the program.
49
Time-Off Plans
What is a Time-Off Plan?
A Time-Off Plans is a set of rules for the program to follow when accumulating or deducting time
units from your employees’ balances. This is based on your company policy for time off. For example,
you can set up a Time-Off Plans that will give 40 hours vacation time on January 1 for employees
with less than five years, 80 hours vacation time for employees with less than 10 years, and allow only
a certain amount of carryover each year.
What are transactions?
Transactions affect employee balances. They are like checkbook entries. The more deposits (earned
time) you have, the higher your account balances. The more withdrawals (used time) you have, the
lower your balance. There are transaction entries for each time-off category and each earned amount.
How far back will MyBiz Attendance calculate transactions?
MyBiz Attendance accrues only from the last accrual date. The last accrual date in the program will
either be Jan 1 of the current year or the date of the last accrual run. However, you can always
remove accruals and re-run them for any date range. (See Removing Transactions to remove
unwanted accruals, page 47.)
How many Time-Off Plans do I need to set up?
In determining how many benefit plans you should create, consider the following:
• Does your company provide more than one category of time off? MyBiz Attendance allows
unlimited categories for each employee. We have included three default plans labeled Vacation,
Sick and Personal. You may add your own, such as PTO, Birthday, Comp Time, etc.
• Do you have separate time-off benefits for different employee categories? For example,
categories can include union, non-union, part-time, full-time or senior management. In other
words, do you give different time-off benefits, such as vacation time, to employees who worked
for the same amount of time?
For the above scenarios, you would set up separate Time-Off Plans.
Will my company policy fit into a Time-Off Plans?
Because each company’s policy may be different, we can’t guarantee that our Time-Off Plans will
work with every policy, but they will work with the majority. You also may use Remove Transactions
to enter time manually and not use the program to accrue for you if you choose. Or you may use
Transaction Editor in conjunction with the accruals.
What should I do if my balances are incorrect?
One of the major causes of erroneous balances is flawed Time-Off Plans. To help identify why your
balances are incorrect, see Incorrect Balances below.
50
Time-Off Plans
What if I do not want to run accruals?
Every employee must have an assigned accrual plan for each absence category your company has.
Remember that the absence categories are your buckets for your benefits (Vacation, Sick, Personal,
PTO, etc.). On the Category Assignments screen, there cannot be any “blank” entries for Assigned
Accrual Plan. We provide the (None) benefit plan for this purpose. (See Manually Entering Time
below for setting up without using the program accrue feature.)
What if I want to turn off the accrual request that appears each day when I enter the program?
Click on Settings, Global Preferences, and then select Attendance. Under Accrual Schedule, remove
all the check marks from each day. Click Save to change the request and then Exit to close this menu.
What if I ran the accruals by accident? Can I remove them?
Yes. Please see Chapter 5, Remove Accruals, page 47 for details.
Is there a limit to the number of Time-Off Plans?
No. There are no limits to the number of Time-Off Plans you can create.
Is there a limit to the number of absence categories (e.g., vacation, sick, personal, PTO, etc.)
No. With MyBiz Attendance, you can create unlimited absence categories.
I entered a new employee, then ran/posted accruals, but the employee didn’t earn time. Why?
Check the Time-Off Plans. If the Time-Off Plans is set up to run yearly on Jan. 1 and this employee
was hired after that date, this employee will earn time only when the program accrues on January 1
of the following year. We recommend using the Transaction Editor and entering the earned time
manually for new employees in this situation. (See Chapter 4 - Transaction Editor.)
Time-Off Plans
To set up a Time-Off Plans, we suggest
becoming familiar with the following
features first, then read the section
on Setting Up a Time-Off Plans.
• First – Prior – Next – Last - This
allows you to scroll through the
Time-Off Plans.
• Delete – This deletes the selected
Time-Off Plans only if employees are not
assigned to it.
• New – This creates a new plan
• Save – This saves current Time-Off Plans settings.
51
Time-Off Plans
•
•
•
•
•
•
•
Cancel – This cancels all changes.
Wizard – You can design and test a plan with this tool.
Print – This prints the Time-Off Plans.
Browse – This allows you to view all Time-Off Plans in table format.
Detail – This allows you to view selected Time-Off Plans settings.
Time-Off Plans Name – This is the name of a selected Time-Off Plans.
Method
Time of Service – This allows you to accrue from the hire date of employees.
Hours Worked – This allows you to accrue by hours worked.
• Select the Benefit Year
Hire date – This means the accrual occurs on the employee’s hiring anniversary date.
On the First (Calendar) – This means the accrual occurs on January 1 of each year.
Fiscal Year – This means the accrual occurs on the fiscal date. (See Fiscal Date in Global
Preferences, page 15)
• Select How Often to Accrue
Daily – This accrues an amount each day, 365 days a year (366 on leap years.)
Weekly – This accrues 52 weeks a year beginning on the employee’s anniversary date.
Monthly – This accrues monthly on the hire date, on the first or on the fiscal date.
Yearly – This accrues yearly (on the hire date, on the first or on the fiscal date.)
Custom – This allows you to enter custom dates.
Note: Custom dates do not roll over into the next year. For example, if you entered a custom
date of March 15, 2003, you also will need to manually enter a date for March 15, 2004, for the
program to accrue the following year. The program will not automatically roll dates over to the
following year.
• Select what to do with prior year balance –
Carry over balance from prior year – This allows carryover (negative and positive.)
Zero balance from prior year – This zeros out the balance at the end of the benefit year.
Zero balance each time earnings are applied – If Monthly was selected under How Often
to Accrue, the balance would zero out on a monthly basis.
• Pro-rate earnings for partial months and partial years – Calculations of partial years or
partial months can occur in some cases if the benefit year is set to “On the First” or “Fiscal
Year.” In most cases, pro-rating is not desirable. This option allows you to pro-rate. For
example, if a new employee was hired on December 12 and your accrual tables were set up to
accrue yearly on January 1, this employee’s time would be credited only from December 12
through January 1 if pro-rating was selected. It would be a partial amount. If the case were
NO pro-rating, then the employee would receive the full amount as if he had been there for a
full year.
52
Time-Off Plans
• Time earned in – This setting is how you will enter time into the Earning Levels:
Hours – This allows you to enter time in hours.
Days – This allows you to enter time in days.
Weeks – This allows you to enter time in weeks.
• Earning Levels
Level – Designates the row level. (Press TAB to create a new level.)
From Month – Designates starting month for the row.
Up To Month – Designates the month the benefit goes up to.
[Time] per Year – Shows how time is entered (hours, days or weeks.)
Max Balance Allowed – Allows you to set a specific maximum balance. Whenever this
maximum level is reached at anytime throughout the year, the program will deduct time
to bring the balance down to this number. Note: On the transaction detail report, this
time will show up as Loss: Maximum Balance
Max Annual Earn – This allows you to set a specific maximum amount for 12 months.
This means that the earnings cannot go over this amount within a 12-month period.
Whenever this maximum is reached, the program will deduct time to bring the balance
down to this number.
Max Annual Carry – This allows you to set a specific maximum amount to carry over.
This option will only allow up to this amount to be carried over from year to year on this
level. Excess carryover will be deducted and shown on the transaction detail report as:
Loss: Max Carryover.
• Comments – Not required. Enter notes pertaining to the selected Time-Off Plans.
Setting Up A Time-Off Plans
Note: It’s a good idea to have your company time-off policies regarding vacation, sick and personal
time with you when setting up your Time-Off Plans.
Here’s an example of a Time-Off Policy:
Say your company’s vacation policy for full-time employees gives two weeks to those on staff
for more than one year. (Employees under 12 months don’t receive any vacation time on this policy.)
The company gives three weeks to employees with over five years on the job and four weeks to all
other employees over 10 years. Vacation time is given all at once on each employee’s hire date each
year. Excess time left over at the end of the year is not allowed to carry over. (The company does not
pro-rate time.)
Following along in the Time-Off Plans Maintenance screen, we’ll break it down this way:
Accrue Plan Name: Full-time vacation
Method: Time of service
53
Time-Off Plans
(Select the Benefit Year and How Often to Accrue) When and How often
do they receive time: On their hire date, yearly – once per year.
(Select what to do with prior year balance) Carry over excess time?: Zero balance
from prior year.
(Pro-rate earnings from partial months & partial years) Pro-rate? No
Time earned in: Days
Earning Levels:
Up To
Days
Per Yr
0
12
0
0
0
0
2
12
60
10
0
0
0
3
60
120
15
0
0
0
4
120
9999
20
0
0
0
Level
From
1
Max Annual Max Annual Max Balance
Earned
Carry
Allowed
Explaining the Earning Levels
The From and Up To blocks must be entered in Months. The keywords are Up To. Level 1 defined
above shows From 0 months up to 12 months, not through or beyond 12 months. Level 2 shows
From 12 months up to 60 months. Again, it’s only up to the 60th month, and not through or beyond.
The Days Per Year block allows you to enter how much time an employee will receive per year.
An employee with three years will earn 10 days given on his or her anniversary date. An employee
with three years (or 36 months) will fall between row #2 above (12 – 60 months.) When that
employee reaches five years (or 60 months), he or she will automatically switch over to the
next row (#3) and earn 15 days per year.
Once you have set up your Time-Off Plans, follow these steps to complete setting up:
1. Assign the Time-Off Plans to your employees. (See Chapter 4 – Adding New Employees, page 33)
2. Enter (initial) balances for all employees from a specific start date. (See Chapter 4 – Transaction
Editor, page 37.) For example, if you wanted to start accruing from January 1, 2003, from
within the Category Assignments screen, you would enter the starting balance for each employee.
This would be what each employee would have as of December 31, 2002 (one day BEFORE
you want the program to take over.) The program needs to have accurate starting balances
for each employee.
3. When an accrual is run, the program will pick up where starting balances left off and accrue
according to how the Time-Off Plans are set up.
54
Time-Off Plans
This table is provided as an aid to help you convert days/weeks per year to the monthly amount in
hours. Note: This table assumes an eight-hour workday and five-day workweek.
Weeks Per
Year
1
2
3
4
5
6
Days Per
Year
Hours Per
Year
Hours Per
Month
1
8
0.6667
2
16
1.3334
3
24
2
4
32
2. 6667
5
40
3. 3334
6
48
4
7
56
4. 6667
8
64
5. 3334
9
72
6
10
80
6. 6667
11
88
7. 3334
12
98
8
13
104
8. 6667
14
112
9. 3334
15
120
10
16
128
10. 6667
17
136
11. 3334
18
144
12
19
152
12. 6667
20
160
13. 3334
21
168
14
22
176
14. 6667
23
184
15. 3334
24
192
16
25
200
16. 6667
26
208
17. 3334
27
216
18
28
224
18. 6667
29
232
19. 3334
30
240
20
55
Time-Off Plans
Accrual Formula for Hourly Rates:
(Number of hours per day multiplied by number of days total earned) divided by 12 months.
This total is the amount that is earned per month, rounded to three decimal places.
Example: (8 x 5)= 40 hours / 12 = 3. 333
Number of hours per day 8 multiplied by number of days earned 5 = 40.
40 divided by 12 months = 3.3333 (round to the fourth decimal place)
Incorrect Balances – Where are they coming from?
Balances may be incorrect for a number of reasons. The most likely reason is that the Time-Off Plans
are not set up correctly.
Here are some things to know and to check if your balances are incorrect and aren’t sure why:
• A good report to check is the Transaction Detail report. This will show each transaction of
absences and time given. This report will usually help identify where to start looking. If an
employee has 80 hours of vacation time within his second month of accruing, the transaction
will show how much was given and when.
• When an accrual is run, the program only accrues according to the Time-Off Plans. So, if
the Time-Off Plans is set to accrue 40 hours on a monthly basis, the employees set up on that
Time-Off Plans will receive 40 hours EACH month. Check the Time-Off Plans that the
employees are on (especially the employees with incorrect balances.)
• Are the entire employee balances incorrect or just one or two? If all of the employee balances
are incorrect, make sure the Time-Off Plans are correct, remove the accruals and then run the
accrual again. If just one or two are incorrect, the easiest thing to do is just make offsetting
adjustments in the transactions.
• Are new hires not receiving their time? Some companies allow their newly hired employees
to receive time (usually after 90 days) on personal or sick time. But their main policy for
employees over 12 months is to receive their time on January 1 of each year. When you set
up this type of policy, you can usually set it up to accrue only on January 1, and not after the
90 days. This requires the new hires to be set up on an accrual table and then switched over to
the main policy. Instead of creating two Time-Off Plans in this case, we recommend giving the
new hires their time manually for the first year, while keeping them assigned to the main
Time-Off Plans. After their first year, they will begin to accrue normally.
Manually Entering Time
There are a couple of items to set up even if you will be entering all of your time manually. Most
users who enter their time manually still want the program to zero out the balances at the end of the
year, or even on the anniversary date. All employees need to be set up on three Time-Off Plans even
if you carry over the balances each year.
56
Time-Off Plans
Setting Up A Time-Off Plans To Zero Out Balances
In order to accomplish this, you will need to set up an accrual table to handle this. The following
steps assume that you have already entered your employees. However, the accrual table can be set up
at any time.
1. Click on Settings from the main menu; then click Time-Off Plans Maintenance.
2. Click New.
3. Enter a Time-Off Plans name, such as Jan 1, Zero Out.
4. The following selections should be made:
A. Method – time of service
B. Select the benefit year – Select on the first (Calendar) if you want to zero out on
January 1 or Hire Date if you zero out on the anniversary date.
5. Select how often to accrue – Select yearly – Once per year.
6. Select what to do with prior year balance – Select Zero balance from prior year.
7. Leave all other default settings and click Save.
8. Click on the Category Assignments Tab.
9. Click in the white box next to Vacation and select the name of the Time-Off Plans you set up
in the above steps. Note: This step is only if you zero out your vacation time. If you don’t zero
out this time, then select the “None” plan for Vacation.
10. Follow Step 9 for the Sick and Personal categories.
Note: In order for the balances to zero out each year, you will need to run an accrual on Jan 1 of each
year by going to File, Maintenance and Perform Accrual and then clicking on Accrue Now. If you
selected to zero out on the Hire Date you will need to run an accrual whenever you need to see the
update balances.
57
Time-Off Plans
54
Reports
Chapter 7
Reports
MyBiz Attendance was designed to include 18 standard reports and charts that relate to tracking
employee absenteeism. For additional reports, please try MyBiz Records, which offers you the power
of additional employee information tracking.
List of Reports
Here are the standard reports you can run:
• Employee Detail
• Employee Summary
• Employee Balance
• Employee Anniversary
• Perfect Attendance
• Absence Details
• Absence Notes
• Group Absences by Type
• Hours Worked
• Planner
• Reminders
• Transaction Detail
• Year in Review
• Adjustments
• Charts (4)
• Table Listings
The report interface will allow you to select individual employees and gives you various options. The
screen shot at right shows basic options and each report may have other options, as well. See the
individual report for specific details. (See Appendix A for screen shots of actual reports.)
Printing Reports
There are two ways to preview and print a report.
1. You may preview and print from the individual feature by clicking on the Printer icon associated
with that feature or
2. You may go to the Reports drop-down menu or feature list for more sorting/filtering options.
59
Reports
Printing from the Reports feature
1. From the Employee Select column, select which employees you want to report on; you may
use either the Browse mode or TreeView mode to select employees.
2. From the feature list, click Reports and then choose a report.
3. Select options in the Feature Pane, if needed, and click Preview.
4. Click the printer icon to print.
Report Options
Each report has basic and additional options. Basic options are options that are available for all
reports. Additional options are options that are available only for specific reports.
Basic Report Options
Each report has the same Menu, Grouping and Export options:
Report Menu Options
Preview – Displays the report with options to print and set up printer.
Print – Sends the report to the selected printer.
Printer Setup – Allows you to change the printer and printer settings.
Help – Displays help pertaining to this screen.
Grouping Options
Location – Groups data by Location.
Department – Groups data by Department. With Location also selected, the report will group
by location, then department.
Show Group Totals – Shows total number of employees after Location and/or Departments
with a grand total at the end of the report. Location and/or Department must be selected for
this option to be enabled. With both Location and Department unselected, the report will
group by Last Name in alphabetically order.
Export Options
Disable Headers on Export – When saving a report from the preview screen, you are given
the option to save in different formats, such as .txt, .csv and .xls. With this option checked,
this saves the file without headers so that the data can be manipulated more easily without the
headers throwing the rows and columns out of place.
Display Options
Show Social Security Number on Report – This allows you the option of displaying the SSN
on reports that include this data field.
Alert for Version 1 MyBiz Users: Options for selecting only Active, Inactive or Terminated
employees no longer appear within the report options pane. However, if you do need to sort by
employment status, you can do so through the Sorting/Filter Page under the View menu.
60
Reports
Employee Detail Report
The Employee Detail Report shows pertinent employee information including accrual plan
assignments, balances, initial balances and notes from the Employee Detail screen. Use this report
when you need a quick overview of an employee’s balances.
Employee Summary Report
The Employee Summary Report shows an employee’s date of hire, title, status and work status. Use
this report when you want an employee listing.
Employee Balance Report
The Employee Balance Report shows accrual plan names and employee balances. Use this report to
quickly view which accrual plans your employees are on and their balances.
Additional Options for this report:
Select Totals – This allows you to view totals by Hire to Date or Year to Date. Hire to Date
shows grand totals since the employee was entered into the program. Year to Date shows
current year totals based on the Benefit Year setup under the accrual tables. A benefit year can
be set to Hire Date, On the 1st (Calendar), or Fiscal Year. This affects how the totals are
viewed on the Year to Date option. For example, if the benefit year for the accrual table an
employee is assigned to is set to Calendar (On the 1st), the current year totals would show
from January 1st to December 31st (Calendar year.) If the setting was on Hire Date, then the
current year totals would show from anniversary date to anniversary date for the current
benefit year.
Thru Date - This allows you to select an ending date to view totals.
Employee Anniversary Report
The Employee Anniversary Report shows an employee’s title, years of service, hire date and
anniversary date.
Additional options for this report:
• From & To Date – This allows you to select a beginning and ending date to view employee
anniversaries. For example: To view all anniversaries in 2001, you would enter From 01/01/01
To 12/31/01 and click on Preview. This will show you years of service and the date of an
employee’s anniversary, along with his or her name and title.
Perfect Attendance Report
The Perfect Attendance Report shows employees who do not have absences that count against perfect
attendance. Use this report to quickly spot employees who have good attendance.
61
Reports
Additional Options for this report:
Attendance Date – allows you to select a beginning and ending date to view employees who
don’t have absences that count against perfect attendance (see Count Against Perfect
Attendance under Absence Code Maintenance.)
Absence Detail Report
The Absence Detail Report shows employee absences. Use this report to quickly spot absence abuses
or trends.
Additional Options for this report:
Attendance Date – allows you to select
absence dates you want to view.
Report Only Selected Absence
Code(s) – When selected, this allows
you to select multiple absences by
holding down the Ctrl key and clicking
on an absence. Holding down the
Shift key and using the arrow keys on
your keyboard allow you to select
multiple absences consecutively.
Note: When selecting multiple absence codes, make sure you have one of these symbols next
to it:
or
. These designate selected absences to print. The second symbol (arrow
with a dot) designates which row your cursor is on. A filled-in arrow
designates only
which row your cursor is on, not that the absence is selected.
Absence Notes Report
The Absence Notes Report shows notes for absences according to the Attendance Date range. Use
this report when you want to view only absences for a particular date range.
Additional Options for this report:
Attendance Date – allows you to select dates to view with absence notes.
Note: If you want to view absences and notes together, see the Absence Detail report.
Group Absence By Type Report
Gives you a calendar format to view absences. This report is similar to the Absence Detail report
except that this report does not show absence notes.
62
Reports
Additional Options for this report:
Attendance Date – allows you to select absences by a date range. Quick Dates allow you to
select a date range at the click of a button.
Only Show Months With Activity – allows you to view only months with absences.
Report Only Selected Absence Code(s) – when selected, allows you to select multiple
absences by holding down the Ctrl key and clicking on an absence. Holding down the Shift
key and using the arrow keys on your keyboard allow you to select multiple absences
consecutively. If unselected, it will report on all absences.
Note: When selecting multiple absence codes, make sure you have one of these symbols next
to it:
or
. These designate selected absences to print. The second symbol (arrow
with a dot) designates which row your cursor is on. A filled-in arrow
designates only
which row your cursor is on, not that the absence is selected.
Worked Hours Report
The Worked Hours Report shows hours worked by a selected date range. The “W” Worked Time
code must be placed on the calendar for each day worked for each employee being tracked. Be careful
when unselecting the Use Date Range box as this will show all dates of time worked and may take a
while to show the report.
Additional Options for this report:
Use Date Range – This allows you to select a date range.
Print Detail – Clicking this off allows you to view only summary of totals.
Sorting – This allows you to sort by Date or Employee.
Group Hours Worked By – This allows you to group by Week, Month, Year or None of
these. As you select one of these options, the Date Range changes to reflect the selection.
Week Starts On – This allows you to select a starting day. As you select one of these options,
the Date Range changes to reflect the selection. Note: Week must be selected under Group
Hours Worked By for this option to be activated.
Planner Report
The Planner Report allows you to view absences by hours in a calendar format. This report is similar
to the Year in Review, except the Planner Report is mainly by absences.
Additional Options for this report:
From Date and Through Date – This allows you to select specific dates.
Date Range Used for Year to Date Totals – Report Date Range allows you to view totals
from a specific date range. This date range defaults to January to December of the current
year. Date Range Assigned by Accrual Plans allows you to view totals that reflect the Calendar
screen.
Only Show Months With Activity – This allows you to view only months with absences.
Absence Categories – This allows you to choose which categories you want to view.
63
Reports
Transaction Detail Report
The Transaction Detail Report allows you to view all transactions since the employee was entered into
the program or within a selected date range. Use this report to view transactions in a checkbook-style
format.
Additional Options for this report:
Report Settings – allows you to select a date range for transactions and whether to show
“Holiday and Other.”
Year-In-Review Report
The Year-In-Review Report allows you to view selected absence categories in a calendar format. This
report is similar to the Planner Report, except the Year-In-Review absences are mainly by dates.
Additional Options for this report:
From Date and Through Date – This allows you to select specific dates.
Date Range Used for Year to Date Totals:
Report Date Range – allows you to view totals from a specific date range. This date range
defaults to January through December of the current year.
Date Range Assigned by Accrual Plans allows you to view totals that reflect the Calendar
screen.
Only Show Months with Activity – This allows you to view only months with absences.
Absence Categories – This allows you to choose which categories you want to view.
Adjustments Report
The Adjustments Report shows manual adjustments and notes. A manual adjustment is entered
through the Transaction Editor as an Adjustment.
Additional Options for this report:
From Date and Through Date – allows you to select a date range for to view adjustments.
Reminders Report
The Reminders Report shows reminders sorted by Date, Name, Topic or User Name.
Additional Options for this report:
Sort Options – This allows you to sort by Date, Name, Topic or User Name.
Filters – This allows you to filter by User Name, All Users, Resolved, Unresolved and Global
Only reminders.
64
Reports
Charts
Charts can help you identify absence trends in your company. Using the charts, you can track
employee absences. MyBiz Attendance has four charts to choose from:
Absences over Time – Enables you to view and compare employee absences over a one-year period.
Absences by Type – Enables you to view and compare employee absences by type of absence.
Location Comparisons – Enables you to view and compare employee absences by location.
Department Comparisons – Enables you to view and compare employee absences by department.
Chart Options
When you click on Run Graph you will have the following options:
Preview & Print – This shows a preview of the chart.
Printer Setup – This allows you to change your printer settings.
Close – Exits the Chart screen.
Help – Brings up Help pertaining to this screen.
Chart Type – Gives you the choice of viewing as a Pie, Bar Graph, Line, or Point Chart.
Color assignments – This allows you to set the colors of a specific data set.
Display – Toggles the Legend (data box next to the chart), Parameters (data at the bottom of the
chart), and Ignore Zeros (any data on the chart with zeros.)
Label Display – Toggles the Label only (months), Value only (see Value Display), or Label and
Value.
Value Display – Toggles the value as a number (count), percentage, or Percentage Of (shows as:
[percentage] of [total count]).
3D Control – This allows you to view the depth of 3D by moving the arrows.
Rotation – Rotates the chart in the desired direction.
Explode Biggest – Moves the largest piece away from the pie.
Absences by Type Chart
The Absences by Type Interface allows you to select by Absence Date Range.
Location and Department Comparison Chart
Follow the steps here to print a chart:
1. Click Reports from the MenuBar or Feature Column and select Charts; then select the Chart
you wish to use.
2. Select the Options you want.
3. Click Run Graph. The chart control window will appear.
4. The selections here will affect the chart as it is shown on screen. Select the options you want
and click the Preview icon to see how the chart will appear.
5. From the Preview screen, click the Printer icon to print the chart.
65
Reports
Table Listings
Table Listings enable you to view and print
out the following settings:
• User Security – This prints user name
with security settings.
• Global Preferences – This prints
global preferences settings.
• Locations – This prints all locations.
• Departments – This prints all
departments.
• Assigned Departments – This prints locations with assigned departments.
• Time-Off Plans – This prints all Time-Off Plans.
• Absence Categories – This prints all absence categories.
• Absence Codes – This prints all absence codes.
• Company Holidays – This prints all holidays entered into the program.
Steps to print a Table Listings report:
1. From the Reports menu, select Table Listings. You will then see the screen at right.
2. Choose the Table Listings report you would like to run.
3. Click Preview to view the report or Print to print out the report.
4. In Preview mode click the print icon to send the report to your printer.
66
Backup and Restore
Chapter 8
Back Up and Restore
Overview
A Backup is essentially a “copy” of your employee records. Backing up ensures that you can recover
from a computer failure or emergency. You also may install MyBiz Attendance on another computer
(even as a demo) and restore from your backup.
Back Up after you make changes to your employee records.
It is recommended that you back up your database after making any significant changes to the
records. For example, any time you enter several employees or input many changes to absence
information would be a good time to back up.
Rotate backups and store backup copies off-site.
A good backup routine is to have at least three sets of backups covering different days of the week.
This practice is called “rotation” and reduces your risk of data loss. It also is a good practice to always
keep one copy off-site in case of a fire or flood. Consult your system administrator for your company
policy regarding data storage.
A Restore is when you recover from a backup. There are three different uses for the restore feature.
1. To overwrite the current data with archived data
2. To recover from a hardware crash
3. To move information onto a new computer
Please keep in mind that when you restore data that your information will only be as current as the
backup from which you are restoring.
Creating a manual backup
To create a manual backup, follow these steps:
1. Open MyBiz Attendance.
2. Go to File > Maintenance.
3. Click Backup Database.
4. Click Yes to the message, “Do you want to perform a sweep after the back up completes?”
Note: A Sweep is a maintenance feature that keeps the database working at peak performance.
67
Backup and Restore
5. Click OK at the Select Directory screen. We highly recommend you keep the default location.
6. Click Close when the backup is complete.
Restoring From A Backup
Remember, restoring a backup will overwrite all data in the current database.
To restore, follow these steps:
1. Open MyBiz Attendance.
2. Go to File > Maintenance.
3. Click Restore Database.
4. Click Start Restore.
5. After Restore is complete, click OK.
68
Help
Chapter 9
Help
Sample Database
A sample company (called a tutorial database) is provided so that you may view the different screens
with sample data already filled in. It is recommended that you use the program with the tutorial
database in order to get a feel for the program without having to worry about altering live data.
When you are in the tutorial database, no changes are made to your live database. To open the
tutorial database, click Start, Programs, G.Neil Software, Sample Database.
The Help Menu
From the Help menu, select Contents. A list of help topics is displayed. Select the book that interests
you (using a double-click) and then double-click the topic you wish to display.
The F1 Key
Pressing the F1 key is another way to obtain help within the program. From most areas of the
program, pressing F1 will display the topic associated for that screen.
Searching For Help
You can search for Help two different ways using the Help File.
Method 1 – From the Help menu, select Search for Help on. The Help Topics Index will
appear. Select the Topic that interests you.
Method 2 – From the Help menu, select Contents. Click the Find tab. If you have not used
this feature before, the Find Setup Wizard will walk you through setting up the search index.
Once the search index has been created, type in the key words you would like to search for and
the results will be displayed.
Typical errors (onscreen messages) that are known at the time of publication are in Appendix B Troubleshooting. For more information, please refer to one of the following:
• Readme.txt file located in the Program Files\G.Neil Software\Attendance program
directory.
• Help File located in Program Files\G.Neil Software\Attendance or accessible
from the Start Menu.
• Internet Site: http://www.gneiltechsupport.com
69
Help
Before Contacting Technical Support
Please follow these guidelines before contacting Technical Support:
Note: G.Neil cannot support setting up networks or configuring computers.
• If you are having problems with your computer, try rebooting first to see if
that corrects the issue.
• If you are getting an error message, please write down the whole message or take a screenshot
of it. Pressing the PrintScrn button on your keyboard will copy the screen to the clipboard;
you may then open Word or WordPad and paste it to the document. From here, you may
print it out.
• If you are having problems with our program (getting error messages, program locking up or
other strange things happening), please write down the steps to recreate the issue. This will
speed things up when talking with a support representative.
• To get help in a timely manner, check the manual (Troubleshooting section), click on
the Help files within the program and visit our Website at www.gneiltechsupport.com
for known issues and help on using the program.
• If you do have to call, please be near the computer and have the following available:
G.Neil Account Number
Program Name
Program Version Number (you may find this by going to Help,
About within the program)
Full error message (and the steps to recreate, if possible)
Contact Technical Support
FREE technical support for MyBiz Attendance is available the following ways:
Internet www.gneiltechsupport.com
E Mail Requests [email protected] or fill out the online form at the Web site above
Phone Requests 954-845-9664 (8:30 a.m. to 6 p.m., EST, M-F)
70
Import and Export
Chapter 10
Import and Export
The import feature allows you to add new
data from a text file into the MyBiz program.
Conversely, the export feature allows you to export
data from the MyBiz program.
The software that you export your data
from must be able to export the required
information to a tab-delimited or fixed-length text
file. (See Appendix C for the required import
fields.) Note: We cannot provide support for other
software program(s.) Please contact the software
vendor or manufacturer for more information
about how to export data from your other
software.
Features
Load File – Loads the selected file into the data window.
Test – This tab will not highlight until a file is loaded. This checks for blank records and ensures
that the department and location names that are being imported are already in the database.
Import – This tab imports the file into the database.
Help – This brings up the Help file pertaining to importing.
Close – This closes the Import screen and takes you back to the main screen.
Import File Type – This allows you to select the file type.
• Tab Delimited – We recommend exporting or importing as this type of file.
• Fixed Length – MyBiz may export or import fields with a fixed length. (See Appendix C
about the field lengths.)
Skip First Line (Headers) – This will take out the first line, in case you have headers.
Import File Browse Button – This allows you to enter the path or navigate to the file you will
be importing.
Check Duplicates – This allows you to check for duplicates against the import file and the files
already in the database.
71
Import and Export
Required Fields
The following are required fields for importing:
Last Name
First Name
Location – The name must be in the MyBiz database prior to importing
Department – The name must be in the MyBiz database prior to importing
Date of Hire
Full/Part Time
Active Status (Active, Inactive, or Terminated)
Importing
To import your information, follow these steps:
From within the program click File, Import.
1. Enter the path of the file or click on the
to navigate to it.
2. Select Tab Delimited or Fixed Length. This should correspond
with the way the import file was saved.
3. Select Skip First Line if you have title
headings. Do not select Yes if you don’t
have title headings or you may lose the
first line of data.
4. Click Load File to preview the file.
At this point, you should check that all
column headings match the fields that
will be imported.
Note: Check the columns SSN, Lastname, Firstname, and Middlename to make sure the
appropriate data is in the correct column. For example, the SSN field should have an 11-digit
number with two hyphens.
5. Select which fields to check for duplicates in the Check Duplicates box.
Duplicates will be checked during the Test File phase.
6. Click Test File. This checks for blank required fields, and in the case of location and
department, it checks to make sure that the name of the location and department
has already been set up within the program.
Caution: If duplicates were detected and you click on Import, these fields will be imported into
the program.
7. Once it passes the test portion, you will be able to click on Import File.
72
Import and Export
Exporting
The export feature is used to transfer basic employee information into a text file that you can open in
any word processor or spreadsheet application. Only the basic information (see Field Layout in
Appendix C) will be exported.
To export your information, follow these steps:
1. Click File, Export.
2. Select Tab Limited or Fixed Length for the Export File Type.
3. Enter a path and file name or keep the default name.
4. Click Export.
Your export file will be created as the file designated in the file block. You may rename the file, but
we recommend keeping the file extension of .txt. After exporting, you may open the file from within
any other spreadsheet or word processing program.
Note: Only the information in the Field Layout will be available for export.
73
Import and Export
74
Appendix A
Appendix A
Reports
Report Tools
You’ll see each of these tools when you click on Preview for a specific report.
1. The first three icons control how the report page is previewed on the screen. The first icon zooms
the report to fit the whole page. The second icon zooms the report to 100% of its size. The third
icon zooms the report to the width of the screen, the normal view when previewing reports.
2. The arrow buttons are the navigational buttons that allow you to go from one page to another.
In the bottom left of the Preview screen is the number of pages for this report.
3. The first printer icon (with the wrench) is the Printer Setup icon. This icon will allow you
to change to a different printer and allows you to select a print range. This is a good selection
to choose if you want to print only some pages.
Note: After selecting your print range and clicking OK, you will need to click on the Printer icon to
print the page. The Printer icon brings up the Printer screen.
4. Save Report (Export) – This allows you to save a report in one of the following formats
(pictures are not exported):
QuickReport file (*. QRP) – Normally, you will not need to save it in this
type of format. This is the format that the Reports themselves are written in.
Text file (*. TXT) – This exports as a text file. It allows you to open
the file with any word processing program.
Comma Separated (*. CSV) – This exports as comma-separated fields. This allows you
to open the file with any spreadsheet program. Word processing programs can open
it as well, but the formatting may not be right.
HTML document (*. HTM) – This exports as an HTML file. This allows
you to open the file with a browser, but the formatting may be a little off.
Excel spreadsheet (*. XLS) – This exports as an Excel spreadsheet file. It allows you
to open the file with Microsoft® Excel and other spreadsheet programs. This is probably
the best choice for exporting.
75
Appendix A
RTF File (*. rtf ) – It exports as Rich Text Format. This is another good choice for exporting,
especially for Microsoft® Word and other word processing programs that support Rich Text
Format.
WMF File (*. wmf ) – This exports as a Windows meta file. This is a format used by Microsoft®
to transfer graphics between Windows applications. Normally, you would not need to export to
this type of file. Certain graphic programs can open this type of file.
5. Load Report – This opens a QRP file. Normally, you will not use this.
6. Close – This closes the preview screen and returns to the Report Interface.
Screen Shots Of Reports
The following are screen shots of the reports that are included with MyBiz Attendance. This
appendix will show you partial screen shots of each report to give you an idea of what the report will
look like. (See Chapter 7 – Reports.) All reports print out on letter-size paper, 81⁄2” x 11.”
Employee Detail Report
76
Appendix A
Employee Summary Report
Employee Balance Report
77
Appendix A
Employee Anniversary Report
Perfect Attendance Report
78
Appendix A
Absence Detail Report
Absence Notes Report
79
Appendix A
Group Absences By Type Report
Worked Hours Report
80
Appendix A
Planner
Transaction Detail Report
81
Appendix A
Year In Review
Adjustments Report
82
Appendix B
Appendix B
Troubleshooting
Some of the more common issues you may experience when using MyBiz Attendance
are listed below. Please see Support Documents on our Website at www.gneiltechsupport.com
for the latest issues.
• Getting SQL Parse Error: EOF in String Detected message when logging in
• Cannot install on a Win NT or 2000 system
• Moving database from one location to another
SQL Parse Error: EOF in String Detected
Issue
Getting the above error message when logging in
Description
This is caused when pressing the single quote key ( ‘ ) and Enter key at the same time.
Possible Resolution(s)
Avoid pressing the single quote and Enter key at the same time.
Unable to Install on a Win NT or 2000 system
Issue
Program doesn’t finish installation.
Description
This usually happens if you do not have full administrator rights on the Win NT
or 2000 computer.
Possible Resolution(s)
Make sure you have full administrator rights before installing.
Moving Database from One Location to Another
Issue
Moving your MyBiz database from one computer (or drive) to another
Description
You may need to move the MyBiz database because of receiving a new computer or operating
system, or if you’re running out of disk space, among other reasons.
83
Appendix B
Possible Resolution
The easiest way to move the database is to make a backup of your current database, install
MyBiz Attendance on the new computer and restore the database. Follow the detailed
instructions below:
1. From the current database, back up your files from within the MyBiz program by going
to File > Maintenance > Backup Database. Put this file in a location where you can get
to it from the new computer. For example, onto a shared network drive or Zip Drive.
2. On the new computer, we recommend installing MyBiz using Express as the Setup Type.
This will put a blank database at that location. Restore the database (from Step 1) by
going to File > Maintenance > Restore Database.
Please contact G.Neil Tech Support if you’re having problems installing
or connecting to the database.
Note: G.Neil Tech Support cannot assist you with network issues, such as setting up
network access rights or checking your TCP/IP connection, but they may be able to
give suggestions to common issues.
84
Appendix C
Appendix C
Import/Export File
Format
You may import and export only the fields on the Field Layout page. There are two different formats
that you may use: Tab Delimited and Fixed Length.
For a tab-delimited format, you may use any program that allows you to save tab-delimited files.
Excel and Access are two good examples and the easiest formats.
When entering your information into a spreadsheet such as in Excel, you will need to follow the
order of the field names according to the Field Layout page.
For example, the columns should have SSN first, then Last Name, First Name, etc. Also, you will
need to leave a blank column for any fields that you will leave blank. For example, following the
format on the Field Layout page, we create a tab-delimited file with the fields SSN, Last Name, First
Name, [blank column for Middle Initial field], Location, Department, Date of Hire, Full/Part
Time, [blank column for Title field], [blank column for Employee Code field] and Active Status.
All of the fields in bold are required. We would still need to have a blank column for MI, Title and
Employee Code in the order of the fields.
For a fixed-length format, you may use the DOS Editor or any other editor that shows you the field
length. The lengths of each field must correspond to the length column under the Field Layout page.
We recommend using the tab-delimited format.
85
Appendix C
The following is the field layout for importing text files into MyBiz Attendance.
Fields shown in bold type are required and all import text files must include them.
Field Name
Length
Format
(if fixed
length
format)
Social Security Number
Last Name
First Name
Middle Initial
Location
Department
Date Of Hire
Full/Part-Time
Title
Employee Code
Active Status A, I, T
11
20
20
20
50
50
10
10
30
14
10
123-45-6789
up to 21 characters
up to 21 characters
up to 20 characters
up to 25 characters or numbers
up to 25 characters or numbers
MM/DD/YYYY (slashes required)
Full-Time or Part-Time (only)
up to 30 characters or numbers
up to 14 characters or numbers
Active or Inactive or Terminated (only)
If you have also installed MyBiz Records,
your text file also can include the following fields:
Date of Birth
10
MM/DD/YYYY (slashes required)
Address 1
30
up to 30 characters or numbers
Address 2
30
up to 30 characters or numbers
Home Phone
30
800-123-4567 (dashes required)
City
30
up to 20 characters or numbers
State (2 character)
2
2 characters, i.e., FL
Zip Code
15
33325-1234 (-1234 can be omitted)
Salutation
5
Mr. – Ms. – Mrs. – Dr. (only)
Employee Security Level
16
up to 16 characters or numbers
Security Clearance Date
10
MM/DD/YYYY (slashes required)
Race
25
Must match a valid race on the detail tab.
EEO Category
25
Must match a valid category on the detail tab.
Sex M/F
1
M or F only
Driver’s License Number
15
up to 15 characters or numbers
I9 Renewal Date
10
MM/DD/YYYY (slashes required)
Veteran Status
25
Disabled - Vietnam Era - Other Veteran –
Not Applicable (only)
Office Phone & Ext.
30
800-123-4567 Ext. 123
Fax
30
800-123-4567
Email address
30
up to 30 characters or numbers
Address Effective Date
10
MM/DD/YYYY (slashes required)
86
Appendix D
Appendix D
Using the Notes/
Comment Editor and
Attachments
MyBiz Attendance Version 2 includes new, powerful word processing features for all comments and
notes fields, as well the ability to attach objects and documents within these fields. When
documenting employee absences, you may find it useful to attach:
• Copies of e-mails
• Word or Excel attachments that you’ve used for tardies, warnings and
specific sections of reviews
• MyBiz Forms personnel forms for vacation requests, FMLA requests and
company responses, warnings and counseling reports
Right-Click Menu Commands
Right-click on any notes or comments field – the menu shown at
right will pop up with the following options:
Edit – Opens the full text editor
Cut – Copies to the clipboard and deletes the currently selected text
Copy – Copies the currently selected text to the clipboard
Paste – Pastes the currently selected text into the comments or text
field
Font – Brings up a standard font edit window, with settings for font,
style, size, effects and color
Bullet Style – Toggles bullets for selected paragraphs on and off
Paragraph – Brings up a standard paragraph settings window for alignment style, indentation, and
line spacing
Tabs – Lets you set tab stops for selected paragraphs
Find – Searches for the text you enter
Replace – Searches and replaces text according to your settings
Insert Object … – Opens the Insert Object window and lets you select either a type of new object to
insert into the notes/comments field or attach an existing file
Check Spelling – Launches the Microsoft® Word spell checker
87
Appendix D
Using the Rich Text
Editor
When you right-click and select Edit,
the text editor opens in a separate
window, giving you access to all RightClick Menu commands in a word
processor-like environment. Here’s a
brief overview:
Adding Attachments to Comments or Notes
Each Comment or Note field allows you to insert an attachment to that field. Attachments can be a
Word Document, Excel Spreadsheet, PDF, Rich Text Format, or even a picture file. Attachments may
be linked to a file, displayed as an icon or inserted into the field.
Inserting an Attachment
To insert an attachment, follow these
steps:
1. Locate the Comment or Note field
you want to insert an attachment into.
2. Right-click on this field and select
Insert Object.
3. Select Create from File.
4. Click Browse to navigate to the file
you want to attach and click Open.
5. Select Display as Icon.
6. Click Change Icon and change the
Label, if necessary, to make the name
more descriptive.
7. Click OK, then OK one more time.
88
Appendix D
Insert Object Options
Create New
Selecting Create New allows you to insert a new object that you want to create from scratch. For
example, selecting Create New and clicking on Microsoft® Word Document for the Object Type and
then clicking OK will bring up a blank Word Document for you to enter text. When you close out
of the Word Document it will appear in the Comments field. Double-clicking on the Word
Document object will bring up Microsoft® Word so that you may again edit the document.
If the Display As Icon option is checked, then the Word Document (or object type) will appear as
an icon in the Comments field.
Create from File
Selecting Create from File will allow you to insert an existing object type, such as a Microsoft® Word
document, PDF file or Excel spreadsheet. Normally, this will be the option you will use for every day
use.
If you do not select the Link or Display as Icon option, then the object type will be inserted into
the Comments field. In other words, you will see the text as you would see the text on a Word
Document within the Comments field. Double-clicking on this text in the Comments block will
bring up Microsoft® Word so that you may edit the document.
We recommend selecting the Display as Icon option when inserting an object. This inserts the
object type within the Comments field; however, it shows as an icon. When you double-click on the
icon, it brings up the object within the program that created it.
The Link and Display as Icon options will perform the following, depending on your selections:
Link
Display
as Icon
X
X
X
X
Results
Inserts the contents of the file as an object into your document so that
you may activate it using the program which created it.
Inserts a picture of the file contents into your document. The picture will
be linked to the file so that changes to the file will be reflected in your
document.
Inserts the contents of the file as an object into your document so that
you may activate it using the program that created it. It will be displayed
as an icon.
Inserts a shortcut that represents the file. The shortcut will be linked to
the file so that changes to the file will be reflected in your document.
89
Appendix D
90
Index
INDEX
A
Absence Category Maintenance, 17
Absence Codes, 18
Edit the Absence Code Description, 19
Absence Details, 44
Accrue Through Date Option, 46
Adding a Transaction Entry, 37
Adding New Employees, 33
Advanced Options, 46
Assign Absence or Work Time Codes, 43
Assign a Time-Off Plans to a category, 16
Automatic Accrual, 45
B
Back Up, 67
C
Calendar, 31
Carry over balance from prior year, 52
Category Assignments, 34
Contacting Technical Support, 70
D
Days (Defined), 34
Deleting a Holiday, 18
91
Index
E
Earning Levels, 54
Editing a Holiday, 18
Editing Transactions, 38
Entering Initial Balances, 35
Explaining Accruals, 49
Export Options – Disable Headers on Export, 60
F
Fiscal Date, 15
Forgotten Password Feature, 25
Frequently Asked Questions, 49
How far back will Attendance Controller calculate transactions?, 50
How many Time-Off Plans do I need to set up?, 46
I entered a new employee, then ran an accrual and posted the time, but my new employee didn’t
earn time. Why?, 51
Is there a limit to the number of Absence Categories? (Such as Vacation, Sick, Personal, PTO,
Birthday, Comp Time?), 51
Is there a limit to the number of Time-Off Plans?, 51
What are transactions?, 50
What if I do not want to run accruals?, 51
What if I ran the accruals by accident, can I remove them?, 51
What if I want to turn off the accrual request that appears each day when I enter the program?, 51
What is a Time-Off Plan?, 50
What is an accrual?, 49
Will my company policy fit into a Time-Off Plans?, 50
From Month, 53
92
Index
G
Getting Started, 11
Checklist, 11
Global Preferences, 12
Accrual Schedule Settings, 15
Attendance Tab, 15
Company Information Tab, 13
Company Logo, 13
Editing Company, 13
Report Options Tab, 14
H
Hire date, 52
Holidays, 17
Adding Holidays, 17
Hours, 53
I
Incorrect Balances, 56
Initial Balances, 35
Installation, 9
L
Level, 54
Locations and Departments
Setting up Locations and Departments, 12
M
Managing Employee Records, 27
Manual Accrual, 46
Manual and Automatic Accruals, 45
Manually Entering Time, 56
Monthly, 52
93
Index
O
On the First (Calendar), 52
Open Reminders, 41
P
Time-Off Plans, 49
Planner, 39
Program Features (Attendance), 23
Pro-rate earnings for partial months & partial years, 52
R
Recording Absences, 33
Reminders, 39
Removing unwanted transactions, 47
Resetting the Last Accrual date, 48
S
Security Options, 21
Select How Often to Accrue, 52
Select the Benefit Year, 52
Select what to do with prior year balance, 52
Setting a Reminder, 40
Setting Up a Time-Off Plans, 53
T
Technical Support, 70
Time earned in, 53
Time of Service, 52
Transaction Editor, 37
Transaction Utility (Remove Accruals), 47
94
Index
Troubleshooting, 83
Moving Database from One Location to Another, 83
SQL Parse Error: EOF in String Detected, 83
Unable to install on a Win NT or 2000 system, 83
U
Unlocking the Demo, 9
Up To Month, 53
User Security – Attendance Tab, 23
User Security - Detail Tab, 22
User Security – Location/Department Tab, 24
User Security – other tabs, 24
W
Weekly, 52
Weeks, 53
Y
Year In Review, 36
Yearly, 52
Z
Zero balance each time earnings are applied, 52
Zero balance from prior year, 52
95