1
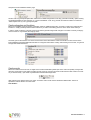
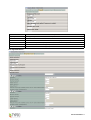
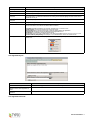
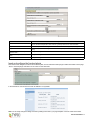
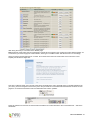
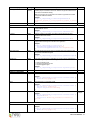
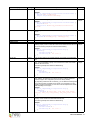
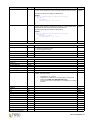
EXT: Event Database
Extension Key: rlmp_eventdb
Copyright 2003-2006, [email protected], <[email protected]>
This document is published under the Open Content License
available from http://www.opencontent.org/opl.shtml
The content of this document is related to TYPO3
- a GNU/GPL CMS/Framework available from www.typo3.com
Table of Contents
EXT: Event Database....................................1
Introduction.......................................................................1
What does it do?.........................................................1
Key features................................................................1
Live example...............................................................2
Sponsorship and donations.........................................2
Installation.........................................................................2
Basic setup and configuration...........................................2
Overview.....................................................................2
Preparations................................................................2
Create categories and locations..................................3
Create events..............................................................3
Insert and configure the frontend plugin.......................8
Setting up the single view............................................9
Single view with TemplaVoila......................................9
Classic templating.....................................................11
Advanced settings...........................................................11
Additional roles: agents and administrators................11
Customize notification and confirmation emails.........11
Customize event data................................................11
Customize registration screens.................................11
Configure payment methods......................................11
Reference.................................................................11
Development...................................................................15
User's manual.................................................................15
Introduction...............................................................15
Creating categories...................................................15
Creating locations.....................................................15
Creating events.........................................................15
Managing registrations..............................................15
Managing payments..................................................15
Appendix A: Upgrading from version 0.x.x......................15
Introduction...............................................................15
Modify data structure.................................................15
Installation.................................................................15
Appendix B: Payment......................................................16
Introduction...............................................................16
Changelog......................................................................16
Introduction
What does it do?
This extension contains a frontend plugin for displaying re-ocurring events on your website. It was written for Tourismus-Service
Scharbeutz, the touristic department of some small city at the Baltic Sea. Version 1.0.0 was a complete rewrite of the extension
which adds much flexibilty and new features like registration and payment management for events.
The event database extension supports two different templating methods, the classic and the TemplaVoila approach. It works
with TYPO3 3.7.0 > and TemplaVoila 0.3.0 > and was cleanly coded according to the TYPO3 Coding Guidelines.
Important notice:
If you want to upgrade from an earlier version (below 1.0.0), please read the chapter Upgrading from version 0.x.x which
contains important information.
Key features
These are the key features of rlmp_eventdb version 1.0.0:
•
Intelligent support for TemplaVoila templating, detailed and highly customizable single views of events with sub menu
items. Fallback mode for classic templating.
•
Support for bookable events with configurable multi-step registration wizard
•
Support for different payment methods and payment handling (based on paymentlib, requires PHP5)
•
Flexform-based event records with many new properties, among them:
event id, categories, location, description, pages / content elements containing more information, frequency and dates,
EXT: Event Database - 1
registration enabled, term of registration, minimum / maximum participants, wait-list, freely configurable bookable
features, payment methods, layout settings, email addresses for notifications, frontend user handling plus 5
customizable fields.
•
Frontend plugin with search-, list- and single view, each configurable by the plugin options dialog or TypoScript.
•
Single view with additional sub views, including registration and participant list
•
Backend module with overview of events and registration / payment management
•
Currently fully supporting German and English.
Live example
For a live working example, visit www.scharbeutz.de (section: Events, or german: Veranstaltungen). Note that usually there are
more events in the german version than for the english speaking visitors.
Sponsorship and donations
Although a big part of the development has been paid by the Tourismus Service Scharbeutz, I invested almost double the time
again in order to make this extension general and solid enough so others can also use it for their projects. If this extension helped
you making a great website and you liked my work, please consider a donation to sponsor a part of the development already
done.
More information about sponsorship and the further development of this extension can be found at
http://robertlemke.de/en/resources/extensions.html
Installation
The Event Database requires some other extensions to be installed. Just download and install the following extensions in the
given order from the TYPO3 extension repository:
Extension Key
Extension Name
Required Version
Purpose
address
Addresses
any
“address” is a replacement for tt_address and is used for saving address data
frondendformslib
Frontend Forms
Code Library
any
The Frontend Forms Code Library is used for rendering the forms for
registratration for events
moneylib
Money Code
Library
any
Moneylib provides some functions for rendering currencies and other monetary
information
overlib
OverLib
any
OverLib is a DHTML code library for displaying nice tool tips
rlmp_dateselectlib
Date Selector
Code Library
any
Provides a DHTML date selector
Important notice:
If you want to upgrade from an earlier version (below 1.0.0), please read the chapter Upgrading from version 0.x.x which
contains important information.
These extensions are neccessary for a basic installation. If you want to use the payment features for registration handling, please
have a look at the appendix Payment.
Basic setup and configuration
Overview
This section describes a basic setup of the event database. Generally you have to decide if you want to use TemplaVoila or the
classic templating approach before setting up this extension, both methods are supported but TemplaVoila offers more flexibility
and is easier to use. If TemplaVoila is installed, it will be used automatically.
Note: At the time of this writing (version 1.0.5) the classic templating mode does not support registration for events and might
have some other glitches
Preparations
During this chapter we will create a test site which demonstrates the most important features of the event database. As a start,
we create some empty pages for displaying events and a sysfolder “General Storage” which will hold the event records,
categories and location records:
Make sure that you have defined the “General Storage” folder as the general storage page of one of the top level pages (for
EXT: Event Database - 2
example the “Event Database Testsite” page:
We also need a TypoScript template which will hold our modified configuration for the rlmp_eventdb. Personally I prefer creating
an individual template for each extension, so I create one labelled “+ EXT: rlmp_eventdb” and make sure that it's included as a
“basis template” into my root TypoScript template.
Create categories and locations
Before we can display events grouped by categories and show additional information, we need to create some categories and
locations. In reality you'll likely create locations whenever you add an event taking place at a venue which doesn't exist yet.
In order to create a category, just insert a new record into the general storage folder using the List module. Currently a category
record consists of only one field, the category name:
The same goes for the locations: Just insert a new location record and enter the name of the location. Future versions of the
Event Database might allow additional information for categories and locations. Finally, after inserting some records, our general
storage folder holds these items:
Create events
Before we create the event records, we might want to create a dedicated sysfolder just for the events. Especially on larger sites
with many events this is much easier to handle, because you'll not only have the event records but also other content for events
as you will see shortly. I just create a sysfolder below the General Storage folder:
After inserting a new element of the type “event” we see the event record which is divided into different tabs. Here is an
explanation of all the fields in an event record:
Tab “General”:
EXT: Event Database - 3
Field label
Description
Name of the event
This is the name of the event which is shown in the various views in the frontend and backend
Hide / Start / Stop
Like everywhere in TYPO3, these fields determine if the event is visible or not. Don't mix up Start and Stop with
the start and end date!
Categories
Depending on the category records you created, you can bind an event to on or more categories which are used
in the list views.
Hint: If you created category records but they don't appear here, check your General Storage settings
Event organizer
Not implemented yet!
Event code
If your event is identified by a certain id, you can enter it hear. It will be available for display in the single view
later on
Location
Venue where the event takes place
Sponsor
Not implemented yet!
Teaser text
In basic single view mode, this text will be displayed as an description of the event.
Page / Content elements
containing more information
about the event
Depending on wether TemplaVoilà is installed or not, this enables you to adds pages or reference content
elements which hold further information about the event. Each page / content element represents a kind-of sub
page in the single view of the event. As soon as you select pages / content elements here, their content will be
shown instead of the teaser text (see above).
Tab “User-defined”:
EXT: Event Database - 4
The fields of the “User-defined” tab are for your specific needs in your project. You can disable some or all of these fields in the
backend by adding some Page TSconfig to a branch of your website:
TCEFORM.tx_rlmpeventdb_events.user4.disabled = 1
TCEFORM.tx_rlmpeventdb_events.user5.disabled = 1
If you would like to rename the labels, you have to create a little extension which provides a locallang.xml (or .php) file containing
the labels you'd like to change. The following example is an excerpt of a locallang.xml file which replaces three labels of user
defined fields and modifies the name of the whole tab, too:
<T3locallang>
<data type="array">
<languageKey index="default" type="array">
<label index="tx_rlmpeventdb_events.tabs.userdefined">Details</label>
<label index="tx_rlmpeventdb_events.user1">Duration</label>
<label index="tx_rlmpeventdb_events.user2">Course</label>
<label index="tx_rlmpeventdb_events.user3">Remarks</label>
</languageKey>
<languageKey index="dk" type="array"/>
<languageKey index="de" type="array">
<label index="tx_rlmpeventdb_events.tabs.userdefined">Details</label>
<label index="tx_rlmpeventdb_events.user1">Dauer</label>
<label index="tx_rlmpeventdb_events.user2">Ablauf / Treffpunkt</label>
<label index="tx_rlmpeventdb_events.user3">Bemerkungen</label>
</languageKey>
Tab “Dates”:
EXT: Event Database - 5
Field label
Description
Frequency of the event
Currently you may select between “once” and “weekly”
Start date
Defines the date when the event starts
End date
Defines the date when the event ends. Set this to the start date if you plan for a one-day event.
Day of the week
If you selected “weekly” for the frequency of the event, this defines at which day of the week the event ocurrs.
Start time
Defines the time when the event starts (optional)
End time
Defines the time when the event ends (optional)
Tab “Registration basics”:
EXT: Event Database - 6
Field label
Description
Enable registration?
Only if checked, registration for the event is possible at all
Registration start
Defines the day when registration starts. Before this date registration is not possible
Registration end
Defines the day when registration ends. After this date registration is not possible
Minimal number of
participants
(Currently) for informational purposes only: Defines the minmal number of participants which is required for the
event to take place. The backend module will honor setting of this field with highlight of events which haven't
reached the minum yet.
Maximal number of
participants
Upper limit of participants. If that limit is reached, no more registrations are possible
Enable waiting-list?
Not implemented yet!
Bookable features
Defines features you may book for this event. Just click on the selectorbox on the top, select “NEW feature” and
save the event record. You will then be able to define a “feature”:
Description: Describes the feature. For example “Admission fee” or “Dinner for two”
Minimum amount: You have to at least book x times this feature
Maximum amount: You can't book more than x times this feature within one registration
Display amount: Should the amount be displayed in the registration form?
Amount fixed: Is it possible to change the amount at all?
Price per unit: How much does a single feature cost? Enter the smallest currency unit, eg. “123” for “1,23€”
Increase number of participants by: For example “1” for “Admission fee” and “2” for “Dinner for two”
Allowed payment methods
If the extension paymentlib and some payment methods are installed you may select the allowed payment
methods here.
Tab “Registration layout”:
Field label
Description
Text to show before registration form
Well, as the label suggests: This text is shown before the registration form.
Page / Content element to show in the
registration screen if the registration is
closed
Guess what
Content element to show on successful
registration
Like it says.
Tab “Registration advanced”:
EXT: Event Database - 7
Field label
Description
Email addresses to be notified ...
Comma separated list of email addresses which shall be notified on new registrations. For that
purpose the email template file is used, see the TypoScript reference for more information.
Template file for email notifications
Defines a template file for sending out the notifications – overrides the TypoScript setting
Template file for confirmation emails
Defines a template file for sending out confirmations to the participants – overrides the TypoScript
setting
Frontend usergroups for newly
registered users
Not implemented yet!
Page where newly created users are
stored
Not implemented yet!
Frontend user mode
Not implemented yet!
Insert and configure the frontend plugin
Now that we have categories, locations and events in place, we can insert the frontend plugin to make them visible. On the page
“Home” I insert the plugin and select “List of events” as the view mode:
In the frontend we now see a list of events we defined in our sysfolder:
Hint: You can easily change the design of the list by adding some CSS to your page template. Just have a look at the HTML
EXT: Event Database - 8
source code to find out which style classes are used.
Setting up the single view
You might notice that you can't click on the events yet which appear in the list view. Before we can see the single view of an
event, we have to configure that.
The first step is to create a page which will hold the single view. I just create one called “Details” below the “Home” page and
mark it “Not in menu”.
The second step is to let the Event DB know about this page. Add this TypoScript to your Event DB specific TypoScript template:
plugin.tx_rlmpeventdb_pi1.singleView {
pid = 158
}
Finally we need something which actually renders the single view of the selected extension – and this is the part where
rlmp_eventdb differs from many other extensions. Usually you would insert another frontend plugin which is configured to show a
single view. Instead of inserting a plugin, we will now insert a special Flexible Content Element.
Single view with TemplaVoila
The idea for the single view display is that rlmp_eventdb delivers a static data structure which enables you to just map the offered
fields to an HTML template of your choice. The first thing we need therefore is an HTML template – here is a very simple one:
<html>
<head>
<title>Event</title>
</head>
<body>
<div>
<h3>Beispiel Event</h3>
<div class="tx-rlmpeventdb-pi1-singleview-menu">Description | Venue | Registration</div>
<div class="tx-rlmpeventdb-pi1-singleview-content">... lots of content ...</div>
</div>
</body>
</html>
We use this HTML file as a basis for the Flexible Content Element we're going to create. If you're not familiar with creating FCEs
and the TemplaVoila mapping tool, please consult the TemplaVoila documentation.
In order to map our FCE template, I enter the Filelist module, click the icon of our HTML template file and select “TemplaVoilà”. In
the mapping tool I click on the “Load” button and select the static datastructure which is provided by the rlmp_eventdb extension.
Note: At the time of this writing TemplaVoila does not show static data structures in the selector box! As a workaround follow
these steps before you continue:
•
In the List module select the General Storage folder and insert a TemplaVoila Template Object record manually
•
Enter a nice title, choose the HTML file in “File reference” and select “Static: FCE – Event DB – Single View” as the data
structure
•
Save and close the TO record
•
Enter the TemplaVoila Control Center, go to the FCE tab and click on “Update mapping” for our newly created TO
record
Now you see the data structure / set of fields which is provided by the rlmp_eventdb extension. Just map those fields you want to
display in your single view to the respective parts in your HTML templates. Here is a screenshot of my mapping:
EXT: Event Database - 9
After saving the FCE you can insert it at the “Details” page.
Note: At the time of this writing, the new FCE based on a static DS won't appear in the “Create-new-content-element-wizard”. As
a workaround, just create any type of content element, switch type to “Flexible Content” and select the DS / TO accordingly.
We're now read to test the single view of our event. Go to the list view in the front end and click on the event name. You'll
hopefully see this kind of single view:
This view is called the “basic view”, because it just shows the details of the event. Especially when you enable registrations for
your event, you're encouraged to use the “fancy view”. We just create two content elements which hold the content of two subpages for our event and store them in their own folder below the “Events” sysfolder:
Finally we edit the event record of the T3CON event and add the two content elements to the “Content elements ...” field in the
General tab:
EXT: Event Database - 10
Now, we reload the single view of our event in the frontend and – voilà, we have three sub pages:
Classic templating
[ to be written]
Advanced settings
Additional roles: agents and administrators
Customize notification and confirmation emails
Customize event data
Customize registration screens
Configure payment methods
Reference
plugin.tx_rlmpeventdb properties: TS configuration
Property:
Data type:
Description:
Default:
General Settings:
viewMode
string /
stdWrap
Code to define what view should be rendered. You may override this setting by
choosing a different value directly in the Insert Plugin content element.
eventlist
Possible values:
“eventlist” - Renders a list view of events
“eventsearch” - Renders a listview with a search form on top
“single” - Renders the single view of an event
Example:
plugin.tx_rlmpeventdb_pi1.viewMode = eventlist
showCategories
pidList
list of integer Comma separated list of page UIDs which contain event records and should be
taken into account when rendering the list- or search-view. When this is not set,
all event records found anywhere in the installation will be used.
Example:
plugin.tx_rlmpeventdb_pi1.pidList = 32,37
recursive
boolean
EXT: Event Database - 11
Property:
defaultPaymentMethods
Data type:
string /
stdWrap
Description:
Default:
Comma separated list of payment method keys which sets the by default
available payment methods for all events. Selection of payment methods in the
event record overrides this setting.
Note: This property only has an effect if the extension paymentlib and at least
one payment method is installed.
Example:
plugin.tx_rlmpeventdb_pi1.defaultPaymentMethods =
paymentlib_ipayment_cc_visa2,paymentlib_ipayment_cc_master
card
Registration::
addressPid
integer
Page ID, typically of a sysfolder, of a page containing existing and newly
created address records.
Example:
plugin.tx_rlmpeventdb_pi1.registration.addressPid = 26
FEuserPid
integer
Page ID, typically of a sysfolder, of a page containing existing and newly
created frontend user records.
Example:
plugin.tx_rlmpeventdb_pi1.registration.FEuserPid = 28
confirmationPopupHeaderInclud
e
cObj
A content object which renders some content to be inserted as a header in the
popup window containing the confirmation of a registration.
Example:
plugin.tx_rlmpeventdb_pi1.registration {
confirmationPopupHeaderInclude = FILE
confirmationPopupHeaderInclude.file = myHeader.html
}
agentUserGroupId
integer
ID of the agents frontend user group. All frontend users being member of this
group will be considered as agents.
Example:
plugin.tx_rlmpeventdb_pi1.registration.agentUserGroupId =
2
requiresLogin
integer
This option controls access to registration for events in general. Depending on
the value, a login is required in order to register for an event:
0
0 = does not require a login
1 = requires any logged in FE user
2 = requires logged in agent
Example:
plugin.tx_rlmpeventdb_pi1.registration.requiresLogin = 2
registration.confirmationMail
sender
string
Sender email address for confirmation emails.
Example:
plugin.tx_rlmpeventdb_pi1.registration.confirmationMail {
sender = [email protected]
}
subject
stdWrap
The subject line for confirmation emails.
Example:
plugin.tx_rlmpeventdb_pi1.registration.confirmationMail {
subject = Your registration
subject.lang.de = Ihre Anmeldung
}
template
cObj
Template for the message body. Can be overriden by the event record.
Example:
plugin.tx_rlmpeventdb_pi1.registration.confirmationMail {
template = FILE
template.file = EXT:rlmp_eventdb/res/confirmationmail.txt
}
see
example
registration.notificationMail
sender
string
Sender email address for notification emails.
Example:
plugin.tx_rlmpeventdb_pi1.registration.notificationMail {
sender = [email protected]
}
EXT: Event Database - 12
Property:
subject
Data type:
stdWrap
Description:
Default:
The subject line for notification emails.
Example:
plugin.tx_rlmpeventdb_pi1.registration.notificationMail {
subject = New registration!
subject.lang.de = Neue Anmeldung!
}
template
cObj
Template for the message body. Can be overriden by the event record.
Example:
plugin.tx_rlmpeventdb_pi1.registration.notificationMail {
template = FILE
template.file = EXT:rlmp_eventdb/res/notificationmail.txt
}
recipient
stdWrap
see
example
Recipient(s) for notification emails. You can override this setting via the event
record.
Example:
plugin.tx_rlmpeventdb_pi1.registration.notificationMail {
recipient = [email protected], [email protected]
}
registration.steps
features.infoText
stdWrap
This text will be displayed before the first field of the features form. The special
see
stdWrap property current contains the content of the infotext field from the event example
record.The following example also reflects the default setting.
Example:
plugin.tx_rlmpeventdb_pi1.registration.steps {
features {
infoText.current = 1
infoText.wrap = | <br /><br />
}
}
features.hide
Boolean
If set, the step displaying the available features will be hidden in the registration
form.
0
address.infoText
stdWrap
This text will be displayed before the first field of the address / personal data
form. The special stdWrap property current contains the content of the infotext
field from the event record.
see
example
The following example also reflects the default setting.
Example:
plugin.tx_rlmpeventdb_pi1.registration.steps {
address {
infoText =
infoText.wrap = | <br /><br />
}
}
address.fieldList
stdWrap
With this option you may define the fields which are shown in the registration
step “Address”. All field names must exist in the table tx_address_addresses
and have a proper TCA configuration (which is the case by default).
see
example
By prepending a field name with an asterisk (*) you can define that entering data
for this field is required, regardless of the original TCA configuration. By using
standard TypoScript techniques you even can control the requirement of certain
fields depending on user logins!
Example:
plugin.tx_rlmpeventdb_pi1.registration.steps {
address {
fieldList = *first_name, *last_name, home_street,
home_zip, home_city, home_country, tel_home1_voice, email
}
}
paymentmethod.infoText
stdWrap
This text will be displayed before the payment details form. The special stdWrap see
property current contains the a default localized info text.
example
The following example also reflects the default setting.
Example:
plugin.tx_rlmpeventdb_pi1.registration.steps {
paymentmethod {
infoText.current = 1
infoText.wrap = | <br /><br />
}
}
EXT: Event Database - 13
Property:
remarks.infoText
Data type:
stdWrap
Description:
Default:
This text will be displayed before the first remarks form. The special stdWrap
property current contains the content of the infotext field from the event record.
see
example
The following example also reflects the default setting.
Example:
plugin.tx_rlmpeventdb_pi1.registration.steps {
remarks {
infoText =
infoText.wrap = | <br /><br />
}
}
overview.infoText
stdWrap
This text will be displayed before the overview screen. The special stdWrap
property current contains a message asking the user to check the details of the
booked features before finally submitting the registration form.
see
example
The following example also reflects the default setting.
Example:
plugin.tx_rlmpeventdb_pi1.registration.steps {
overview {
infoText.current = 1
infoText.wrap = | <br /><br />
}
}
participantsList
adminUserGroupId
integer
UID of the user group for administrators of the list of participants
requiresLogin
integer
0 = does not require a login
1 = requires any logged in FE user
2 = requires logged in list admin
2
listView:
results_at_a_time
10
maxPages
10
displayIcons
showTodayMessage
boolean
1
listView.displayConditions:
registrationEnabled
boolean
Only show those events for which the registration was enabled.
0
registrationPossible
boolean
Only show those events for which the registration was enabled and is (still)
possible. This option checks
0
•
•
•
if registration is yet / still open
if registration is possible for the currently logged in or anonymous
frontend user [FIXME: NOT IMPLEMENTED YET!]
if the maximum number of participants is not reached yet or a waiting
list exists
singleView
menu
cObj
USER
name
cObj
USER
frequency
cObj
USER
features
cObj
USER
termofreservation
cObj
USER
numberofparticipants
cObj
USER
user1
cObj
USER
user2
cObj
USER
user3
cObj
USER
user4
cObj
USER
cObj
USER
user5
[tsref:plugin.tx_rlmpeventdb]
EXT: Event Database - 14
Development
This section contains documentation for the development of the event extension itfself, but it might also be interesting for others.
User's manual
Introduction
Creating categories
Creating locations
Creating events
Managing registrations
Managing payments
Appendix A: Upgrading from version 0.x.x
Introduction
READ THIS SECTION BEFORE INSTALLING THE NEW VERSION!
As mentioned, version 1.0.0 was a major overhaul of the event database extension which includes many new features and some
changes in the data structure as well as the TypoScript. This section gives you a step-by-step guideline how you can upgrade to
version 1.x.x and keeping your existing data from earlier versions.
Modify data structure
Before upgrading or installing the new version of the rlmp_eventdb extension, the table / field structure has to be modified a bit.
Just go to phpMyAdmin or your favourite SQL client and execute this SQL query:
ALTER TABLE `tx_rlmpeventdb_events` CHANGE `location` `locationid` INT(11) UNSIGNED DEFAULT
'0' NOT NULL;
ALTER TABLE `tx_rlmpeventdb_events` CHANGE `shortdescription` `name` tinytext NOT NULL;
ALTER TABLE `tx_rlmpeventdb_events` CHANGE `description` `teasertext` text NOT NULL;
Installation
Now you are ready to install (i.e. upgrade) the rlmp_eventdb extension with the Extension Manager. A bunch of new fields and
tables will be created, just confirm this creation as it won't overwrite any of your existing data. After successful installation you
should enter the install tool, go to the “Database Analyzer” section, choose “compare” and drop the fields which are not used
anymore:
[FIXME: Screenshot install tool]
After installing the new version you have
Next steps:
- Edit all frontend plugins (because now uses flexforms)
Appendix B: Payment
Introduction
The event database offers an integration of the extension paymentlib. By using these features you will be able to offer different
payment methods for the registration of your events. You may choose for each event separately which payment methods are
available and if payment is required at all.
To enable payment functionality you have to install the Payment Code Library (paymentlib) and at least one payment
implementation which supports a specific payment provider. Please refer to the paymentlib manual how to install and configure
the different extensions.
EXT: Event Database - 15
Changelog
Version 0.x.x to 1.0.0
•
Basically a complete rewrite! Now supports all modern features like FlexForms, database abstraction etc.
•
!!! Fields events.remarks, events.description and events.picture will not be displayed anymore and won't be supported in
the future. Instead we now use content elements and pages.
•
!!! The tt_content fields for configuring categories and display mode for the frontend plugin are replaced by flexforms. That
means you will have to edit each “Insert Plugin” content element where you use the event database and update
configuration (which you want to do anyways).
•
Because too many labels changed, I deleted the Finnish and Swedish translation so we get a clean start.
EXT: Event Database - 16