1
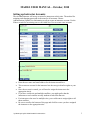
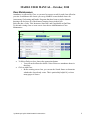
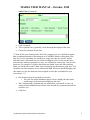
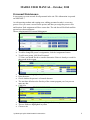
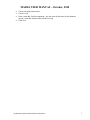
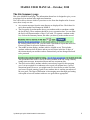
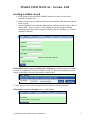
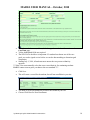
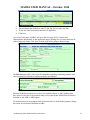
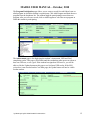
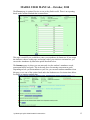
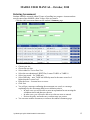
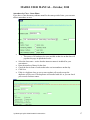
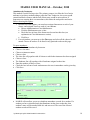
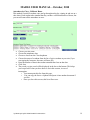
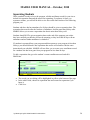
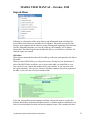
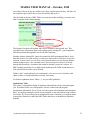
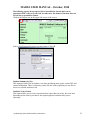
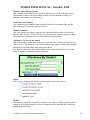
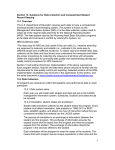
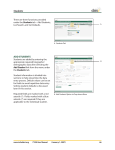
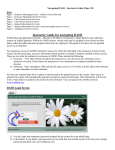
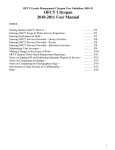
MABLE USER MANUAL October, 2010 MABLE USER MANUAL – October, 2010 Setting up an account and changing your password If you will be doing data entry in MABLE as a site administrator, the state administrator will set up your account, assigning you a user name and giving you rights to specific sites. MABLE will generate a password for you to use for logging in the first time. The assigned password is not user friendly; you should copy and paste it rather than trying to type it in the first time you log in. You will want to change that password as soon as you log in. Choose Change Password from the Help menu. Paste the password you received into the Old Password field and then type in your new password twice. Click Change Password. Because you are logging into a state network, you will be forced to change your password every 60 days. On login, you will be directed to the above screen where you will make the change. Once the password has been changed successfully, you will be allowed to Continue into MABLE. You can change your password more often if you like by returning to Help>Change Password. If you suspect your password has been compromised, you should change it immediately. ***Remember that MABLE contains confidential student information, and you are required to treat it responsibly. For example: don’t write your password on a piece of paper and ‘hide’ it somewhere on your desk. When you step away from your computer, you should lock the screen so no one can access it in your absence. \\opihln2k3prd1\pdf\in\ITSD\MABLEUserManual.doc 2 MABLE USER MANUAL – October, 2010 Setting up Instructor Accounts The site administrators will set up accounts for instructors at their sites. The method for assigning and changing passwords is the same for all accounts. Choose Administration>Update User Information to edit or create an instructor account. Use the Filter to search for an existing user or click Add New User to create a new account. Enter the user name and email address for the instructor and Save. This creates an account for the instructor but does not give him/her rights to your site. Once the account is created, you will need to assign the instructor to the appropriate site(s). If you have a main site and multiple satellites, you might prefer that the instructors at each satellite see only student records from that site. For instructors who travel to multiple sites, you would want to assign rights to all those satellites. Be sure to scroll to the bottom of the page and click Save once you have assigned the instructor to the appropriate sites. \\opihln2k3prd1\pdf\in\ITSD\MABLEUserManual.doc 3 MABLE USER MANUAL – October, 2010 Class Maintenance Attendance is collected by Class, so you need to create a record for each class offered at your site. In addition to the classes you set up, MABLE creates default classes for Assessment, Goal-setting and Intake. Programs that have been set up for distance learning will also have all of the distance learning classes in their lists. Each class has a Code, Title, Instructor, Start Date, and if applicable an End Date. To edit and existing class or create a new class choose Administration>Class Maintenance. To Edit or Delete a class, choose the appropriate button. o You will not be allowed to delete a class if there are attendance hours in that class. Click on Add Class o Before creating a new class, you can use the Search feature to determine whether the class already exists. This is particularly helpful if you have many pages of classes. \\opihln2k3prd1\pdf\in\ITSD\MABLEUserManual.doc 4 MABLE USER MANUAL – October, 2010 Add a Class (Continued) Code is required Title is optional, but is generally a more thorough description of the class Choose the start date for the class ***New for this year: Starting in the 2010-2011 program year, we would like to gather data on student attendance at the instructor level. MABLE already collects data at the class level, so the remaining step would be to assign each class to a specific teacher. Select the name of the instructor who will be teaching the class. If you currently have more than one instructor assigned to a class, you will need to create a new class for each instructor. For example: If you have had instructors Smith, Jones and Allen teaching Math, you will need to create 3 Math classes and assign one instructor to each class. You can name each class uniquely or just call them all Math. Whenever MABLE displays the class names in a list, the instructor name assigned to each class is included for your convenience. *** One instructor must be assigned to each class. o The class lists on the attendance pages will now display the class name and the name of the instructor assigned to that class. The Comment field is optional and was included for your benefit, in case you want to include additional notes about a class. Include any comments that will be useful for you. Click Save \\opihln2k3prd1\pdf\in\ITSD\MABLEUserManual.doc 5 MABLE USER MANUAL – October, 2010 Personnel Maintenance It is necessary to create records for all personnel at the site. This information is reported on NRS Table 7. As with entering students and creating users, adding personnel records is a two-step process. First you create a record for the person, and then you assign the person a role and location. Each assignment will have a start date. The end date will be blank until the person leaves that assignment. Choose Administration>Personnel Maintenance To edit an existing person’s information, click the Edit button. To add or change the person’s assignments, click the Assignments button To add a new person, click New Personnel. ***Note: you should first do a search to determine if there is already a record for that person in the system. The new record is highlighted in yellow. Enter the name Check whether the person is a licensed educator The start date defaults to the first day of the current program year, but you can enter any date Click Save On Save, a new Assignment screen will open for the new person The new fields are highlighted in yellow Choose a site \\opihln2k3prd1\pdf\in\ITSD\MABLEUserManual.doc 6 MABLE USER MANUAL – October, 2010 Choose an employment status Choose a role Enter a start date for this assignment – the date must be the same or later than the person’s start date already entered in the last step Click Save \\opihln2k3prd1\pdf\in\ITSD\MABLEUserManual.doc 7 MABLE USER MANUAL – October, 2010 The Site Summary page This is the MABLE Home page. The information shown here is designed to give you an at-a-glance look at students who might need attention. You will be able to choose which of your sites to view from the dropdown list. In most cases, there is only one site. Any current messages from the state director are displayed first. Check here for news about updates and changes in MABLE. The first group of student names shows you students with no attendance within the last 90 days. Those students should be given a separation date. You can filter the list for a different number of days if you wish. To separate a student on this list, click on the Summary button; this takes you directly to the student record. By clicking on the above link, you can create a spreadsheet report that shows the last activity date for all active students at your site. The middle section displays students who are eligible to test. This includes students with more than 60 hours and no post test, those in the last 30 days of their instructional year and those whose instructional year has changed and need to be pretested. The spreadsheet link creates a list of all active students at the site, along with any testing status message, instructional hours and last assessment date. The final section shows students who have not selected a goal for this program year. It is not required for a student to select a goal; all students have a goal of educational gains. However, you might want to review the list to make sure that you haven’t missed entering a goal for any student who is working toward one of the core goals. The Dept of Education is encouraging more thorough goal-setting with a plan to have all students with two core goals where appropriate. \\opihln2k3prd1\pdf\in\ITSD\MABLEUserManual.doc 8 MABLE USER MANUAL – October, 2010 Creating a student record Each student is entered into the MABLE database just once, but he can be enrolled at multiple sites. Before creating a new student record, you must determine if the student is already in the system. Choose Student Locator from the Student menu, and do a search by name, date of birth or SSN. If you are unsure of the spelling, check the Search for Similar Sounding Names box and the program will return various spellings. (e.g. Gardner, Gardiner, Gardener). If the student record you are searching for is displayed: click Enroll next to the name to create an enrollment record for the student at your site. Once the enrollment record is created, you will have access to the student’s entire record. Joe Student ***Note that you can see in which other sites the student is currently enrolled. If the student record is not found: click on Add Student. \\opihln2k3prd1\pdf\in\ITSD\MABLEUserManual.doc 9 MABLE USER MANUAL – October, 2010 Enter the student’s name, address, birth date, gender and other information on the Core Data page. Yellow highlighted fields are required. The SSN waiver checkbox is important. If a student has chosen one of the core goals, we need a signed waiver before we can do data matching to determine goal completion. Starting July 1, 2010, all students must answer the two-part race/ethnicity question. ***Note: You must manually select the correct race/ethnicity for continuing students. MABLE cannot convert prior year data to the new standard.*** Click Save. This will create a record for the student, but will not enroll him in your site. You need to create an enrollment record for the student at your site. Choose Click Here for New Enrollment \\opihln2k3prd1\pdf\in\ITSD\MABLEUserManual.doc 10 MABLE USER MANUAL – October, 2010 The new enrollment record will be highlighted in yellow. The enrollment date defaults to today’s date but you can enter any date. Select site name and primary instructor if applicable. Click Save. As you save each page, MABLE will go to the next page. Fill in Contact and Demographics information on the appropriate pages, making sure you enter data into all yellow (required) fields. Click Save on each page before going to the next page. The Referral page allows sites to track information regarding community partners and other programs in which their students might be participating. Reasons for Referral include Assessment Only and Enrollment in ABE. Students who have come to your site for Assessment Only can be entered into MABLE but will not be included on any ABE or NRS reports. If a student comes for Assessment Only and returns later to enroll in the program, change his reason for referral to Enrollment in ABE. \\opihln2k3prd1\pdf\in\ITSD\MABLEUserManual.doc 11 MABLE USER MANUAL – October, 2010 The Program Participation page allows you to create a record for each federal, state or tribal program in which the student is a participant. Click Add Program and then choose a program from the dropdown list. The student might be participating in more than one program; after you save one record, click on Add Program to select the next program in which the student is participating. The Achievement page is for displaying the student’s Assessment, GED and Goal completion results. This page will be blank until the student has taken post tests, taken at least one GED test, or set a goal. If the student has signed an SSN waiver, you will be able to click the Update button on this page to see his latest GED results. If the SSN waiver box is not checked on the Core Data page, the Update button will not be visible for that student. \\opihln2k3prd1\pdf\in\ITSD\MABLEUserManual.doc 12 MABLE USER MANUAL – October, 2010 The Classes page is optional for sites to use as they find it useful. There is no reporting based on the student schedule that is entered here. This page is useful if you would like to enter your attendance by Instructor. If you assign the student to classes on this page, and assign each of your classes to an instructor, you can use the Attendance by Instructor option described below. The Summary page is where you can enter and view the student’s attendance record, assessment history and goals. This is the only place for entering assessment or goals. Depending on how you do attendance at your site, you can enter student attendance from this page, or use one of the options listed under the Student menu. See instructions below for details on entering student data. \\opihln2k3prd1\pdf\in\ITSD\MABLEUserManual.doc 13 MABLE USER MANUAL – October, 2010 Entering Goals Click the Add Goal button at the bottom of the student’s Summary page. Choose the program year Pick a goal from the dropdown list Save the record Current student goals will be displayed at the top of the student record right under Primary Area of Instruction. If the chosen goal is one of the core goals, MABLE will mark the goal as complete at the end of the program year by using Data Match. For secondary goals, you will need to click on the Edit button next to the goal on the Summary page. That will take you back to this page where you can select the goal and mark it complete. There are no reports generated for secondary goal completion. ***If a student has selected a core goal, he/she must have signed a waiver in order for the OPI to do data matching. Indicate whether the waiver has been signed on the Core Data page. \\opihln2k3prd1\pdf\in\ITSD\MABLEUserManual.doc 14 MABLE USER MANUAL – October, 2010 Entering Assessment Students should be assessed within 12 hours of enrolling in a program. Assessment data must be entered into MABLE within 30 days of the occurrence. Click the Add Assessment button on the student’s Summary page. Choose your site Choose the test date Select either Pre-Test or Post-Test Select the test administered: BEST Plus, Locator TABE 9 or TABE 10 Select Area tested – for TABE only Select Difficulty – note, TABE test difficulty must be the same or one level higher than the Locator level Enter the Score – Locators have no scores Click Save You will get a message confirming the assessment was saved, or a message explaining why the assessment didn’t meet validation criteria. o In some cases you will be able to enter an explanation for not meeting the validation criteria and then save the test. o In other cases, you will not be able to save the test score as entered. o Review the policy and make sure your data entry was correct. You can enter another assessment, or return to the student’s Summary page \\opihln2k3prd1\pdf\in\ITSD\MABLEUserManual.doc 15 MABLE USER MANUAL – October, 2010 Entering Attendance MABLE attendance entry screens were designed to accommodate the various methods that sites use to collect attendance. MABLE will not allow entry of attendance dates more than 30 days old, so you must keep your data entry current. Individual Student attendance entry If you collect attendance by individual student, you may want to enter each student’s attendance from the individual student summary page. Click Add Attendance Select a site Select a date Select a class Once you have made those selections, the student’s name should appear in the Students list. MABLE confirms that he was enrolled in the selected site on the selected date and that the class was a valid class on that date. Enter his hours of attendance and Save You can enter another attendance record or Return to the student’s Summary page Group Attendance Entry If you collect attendance by class or by day, you might prefer to enter attendance using one of the choices from the Student menu. This can be a time-saver over entering attendance individually by student. \\opihln2k3prd1\pdf\in\ITSD\MABLEUserManual.doc 16 MABLE USER MANUAL – October, 2010 Attendance by Class – Same Hours If you have a class that many students attend for the same period of time, you can enter all their attendance at once. Select your site name and a date o The names of all students who were enrolled at that site on that date will populate the page in alphabetical order. Select the class name – notice that the instructor name is included for your convenience. Enter the number of hours for the class Check the box in front of each student who was in attendance on that day. Click Save If this is a duplicate class or one or more students, all records except the duplicates will be saved. The duplicates will marked with ### so you can check your records for those names. \\opihln2k3prd1\pdf\in\ITSD\MABLEUserManual.doc 17 MABLE USER MANUAL – October, 2010 Attendance by Instructor This method is useful for large sites. The primary purpose is to filter the list of active students to just those students taking a particular class. Otherwise, the screen would contain hundreds of names and the task of data entry would be more tedious. If Instructors are entering their own attendance, this makes the task quicker and easier. Before choosing this option: 1. In order to use this option, you must have assigned instructors to each of your classes, and assigned classes to each of your students. Choose Administration>Class Maintenance. Click the Edit button next to a class. Check the box in front of the Instructor who teaches this class (see explanation in Class Maintenance section) Click Save 2. For each student, you must go to the Class page and select all the classes he will attend. Classes do not have to be listed in any particular order on this page. To enter attendance: choose Student>Attendance by Instructor Choose a site name Choose an instructor name Choose a date The class list will populate with all classes to which that instructor has been assigned Choose a class The Students: list will populate with all students assigned to that class Enter the number of hours of class Check the box in front of each student name who was in attendance on the given day Click Save MABLE will not allow you to save duplicate attendance records for a student. If a student you have selected already has attendance in that class on that day, that student’s name will be marked with ### and not saved. The rest of the selected student records will be saved. \\opihln2k3prd1\pdf\in\ITSD\MABLEUserManual.doc 18 MABLE USER MANUAL – October, 2010 Attendance by Class – Different Hours This method is useful if students come and go throughout the day, signing in and out on a class sheet. Each student who attended that day can have a different number of hours, but you can still enter all the attendance at once. Choose your site name Choose the attendance date Choose a class from the Class dropdown Choose the name of a student from the list of active students at your site (if you start typing the last name, the name will auto-fill) Enter the number of hours that student attended that class on that date Click Save The record you just saved will be displayed in the box at the bottom. This helps you keep track of what you have done so far in this session, in case of interruption. o You cannot print this list from this page. o You can copy the list to a clipboard and paste it into another document if you like. o Once you leave this screen, this list will not save. \\opihln2k3prd1\pdf\in\ITSD\MABLEUserManual.doc 19 MABLE USER MANUAL – October, 2010 Separating Students When a student is ready to leave the program, edit his enrollment record for your site to include his separation date and the reason for separating, if you know it. Once you separate a student, you will still be able to view his record until October of the following program year. Students who have had no attendance for 90 days should be given a separation date. The separation date must be after the last date of attendance, but not more than 90 days after. MABLE allows you to enter a separation date that is more than 30 days old. Students should NOT be given separation dates at the end of the program year unless they have notified you that they will not be returning, or they have had 90 days with no attendance and no further attendance is scheduled. If a student is separated from your program and then returns to your program in less than 90 days, you should delete his last separation date and he will continue with the same instructional year schedule. MABLE will not allow you to create a new enrollment record for a student who has been gone from your program for less than 90 days. To add a separation date, go to the student’s current enrollment record and click Edit/Delete. The record you are editing will be highlighted in yellow at the bottom of the page. In the white fields, choose his separation date and reason for separation if you know it. Click Save. \\opihln2k3prd1\pdf\in\ITSD\MABLEUserManual.doc 20 MABLE USER MANUAL – October, 2010 Reports Menu Following is a description of the menu choices and information about selecting each report. Most of the reports are available in Excel format. That means you can save the report to your computer and do whatever sorting, filtering and organizing of the data that you like. Remember that once you save the report to your computer, it is no longer current data. The default report name includes the date, so you will have a reference for when the report was created. NRS tables These reports contain the data that will be rolled up to the state and reported to the feds in December. When you select NRS Tables you will get this screen, which gives you descriptions of each of the NRS Tables, and allows you to select which table you would like to view. You can elect to see a report that includes all of your satellites, or you can view each site’s data separately. You can view counts of just those students who will be reported to the NRS, or you can view all of your student results. If you run your satellite reports separately and then compare the totals to a report that includes all satellites, the numbers might not match. A student might be counted once on each of several satellites, but only once on the complete report. Also, students who have \\opihln2k3prd1\pdf\in\ITSD\MABLEUserManual.doc 21 MABLE USER MANUAL – October, 2010 fewer than 12 hours at any one satellite won’t show on that report, but they will show on the complete report if their hours across all satellites add up to 12. Also included on the list of NRS Tables are some reports that will help you ensure your data is complete before final reporting. The Student List shows all students who will be counted for the selected year. This spreadsheet has information about each student’s goals, starting EFL, goal completion and other pertinent demographic data for the NRS reporting. Students with no starting EFL cannot be counted for NRS reporting until that is fixed. Run this list and view each student’s record to see what needs to be done to correct the situation. In some cases, you can fix it yourself and in others you may need to submit a student change request. One common error is that you forgot to select a PAI for the student after pretesting. Sometimes the student is missing a pretest or a locator. If a BEST student pretested at 541 or higher, that student must be TABE tested and have a PAI selected before he/she can be counted. Tables 1 and 2 count students by race and gender, so be sure to review Students with either no Race or Gender and make necessary corrections. For further explanation about Tables 1-7, see your NRS guidelines. Student Data Table This report is a spreadsheet listing all students with attendance in the selected program year. It includes all the core, demographic, referral, contact info and program participation information. If you elect to view this report with enrollment and separation dates, you might get multiple records for each student, so the total student count will not be accurate. If you are looking for an unduplicated count of students, you might be better selecting the Student List under the NRS Tables and choose to include non-reportable students. \\opihln2k3prd1\pdf\in\ITSD\MABLEUserManual.doc 22 MABLE USER MANUAL – October, 2010 The following reports do not open as Excel spreadsheets, but the data can be exported to PDF or Excel if you wish. In some cases, the format of the data does not fit well into a spreadsheet format. Click on the Export icon in the upper left corner of the screen. Select a File Format and choose your page range. Click OK. Student Summary by Site This report provides a list of students, core data, enrollment dates, goals, current EFL and contact information. There is a directory on the left side of the page that you can click to move to a selected student record. Student List by Criteria This report allows you to create a report based on criteria that you select. Be aware that depending on the criteria you choose, the report might not return the data you are expecting. \\opihln2k3prd1\pdf\in\ITSD\MABLEUserManual.doc 23 MABLE USER MANUAL – October, 2010 Student Contact Info by Criteria This is another report that you can customize with the same caveat as the prior report. The data that is returned for each student includes contact information, last date of attendance and number of contact hours. Assessment Only Students This report shows the students whose reason for referral is Assessment Only, and the dates and types of assessments they have taken. Student Comments This is an alphabetical listing of students and comments added to their records during specified time periods. You can choose to view the report for a specific program year or narrow the list of comments to those entered between specified dates. Attendance – by class or by student Both of these report options provide the same selection criteria. Choose specific dates or classes to view. The report by class will be sorted by class with all students who attended during the chosen dates listed along with contact hours. The report by student will list students alphabetically along with the classes, dates and hours of attendance during the chosen date range. Charts This is a series of graphs for which you can customize some of the criteria. STARS This selection creates the export file necessary for use with the STARS reporting system created by the Billings program. For more information about using this data, contact the Billings program directly. \\opihln2k3prd1\pdf\in\ITSD\MABLEUserManual.doc 24