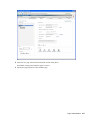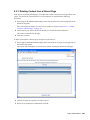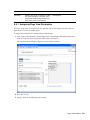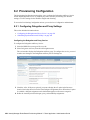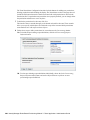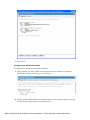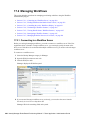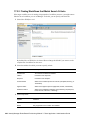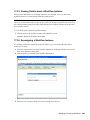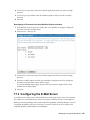
1
AUTHORIZED DOCUMENTATION User Application: Administration Guide Novell ® Identity Manager Roles Based Provisioning Module 3.7 February 10, 2012 www.novell.com Legal Notices Novell, Inc. makes no representations or warranties with respect to the contents or use of this documentation, and specifically disclaims any express or implied warranties of merchantability or fitness for any particular purpose. Further, Novell, Inc. reserves the right to revise this publication and to make changes to its content, at any time, without obligation to notify any person or entity of such revisions or changes. Further, Novell, Inc. makes no representations or warranties with respect to any software, and specifically disclaims any express or implied warranties of merchantability or fitness for any particular purpose. Further, Novell, Inc. reserves the right to make changes to any and all parts of Novell software, at any time, without any obligation to notify any person or entity of such changes. Any products or technical information provided under this Agreement may be subject to U.S. export controls and the trade laws of other countries. You agree to comply with all export control regulations and to obtain any required licenses or classification to export, re-export or import deliverables. You agree not to export or re-export to entities on the current U.S. export exclusion lists or to any embargoed or terrorist countries as specified in the U.S. export laws. You agree to not use deliverables for prohibited nuclear, missile, or chemical biological weaponry end uses. See the Novell International Trade Services Web (http://www.novell.com/company/policies/trade_services/) page for more information on exporting Novell software. Novell assumes no responsibility for your failure to obtain any necessary export approvals. Copyright © 1997-2007 Novell, Inc. All rights reserved. No part of this publication may be reproduced, photocopied, stored on a retrieval system, or transmitted without the express written consent of the publisher. Novell, Inc. has intellectual property rights relating to technology embodied in the product that is described in this document. In particular, and without limitation, these intellectual property rights may include one or more of the U.S. patents listed at http://www.novell.com/company/legal/patents/ (http://www.novell.com/company/legal/patents/) and one or more additional patents or pending patent applications in the U.S. and in other countries. Title to the Software and its documentation, and patents, copyrights and all other property rights applicable thereto, shall at all times remain solely and exclusively with Novell and its licensors, and you shall not take any action inconsistent with such title. The Software is protected by copyright laws and international treaty provisions. You shall not remove any copyright notices or other proprietary notices from the Software or its documentation, and you must reproduce such notices on all copies or extracts of the Software or its documentation. You do not acquire any rights of ownership in the Software. Novell, Inc. 404 Wyman Street, Suite 500 Waltham, MA 02451 U.S.A. www.novell.com Online Documentation: To access the online documentation for this and other Novell products, and to get updates, see www.novell.com/documentation (http://www.novell.com/documentation). Novell Trademarks For Novell trademarks, see the Novell Trademark and Service Mark (http://www.novell.com/company/legal/ trademarks/tmlist.html) list. Third-Party Materials All third-party trademarks are the property of their respective owners. Third-Party Legal Notices The Apache Software License, Version 1.1 Copyright (c) 2000 The Apache Software Foundation. All rights reserved. Redistribution and use in source and binary forms, with or without modification, are permitted provided that the following conditions are met: 1. Redistributions of source code must retain the above copyright notice, this list of conditions and the following disclaimer. 2. Redistributions in binary form must reproduce the above copyright notice, this list of conditions and the following disclaimer in the documentation and/or other materials provided with the distribution. 3. The end-user documentation included with the redistribution, if any, must include the following acknowledgment: "This product includes software developed by the Apache Software Foundation (http://www.apache.org/)." Alternately, this acknowledgment may appear in the software itself, if and wherever such third-party acknowledgments normally appear. 4. The names "Apache" and "Apache Software Foundation" must not be used to endorse or promote products derived from this software without prior written permission. For written permission, please contact [email protected]. 5. Products derived from this software may not be called "Apache", nor may "Apache" appear in their name, without prior written permission of the Apache Software Foundation. THIS SOFTWARE IS PROVIDED ``AS IS'' AND ANY EXPRESSED OR IMPLIED WARRANTIES, INCLUDING, BUT NOT LIMITED TO, THE IMPLIED WARRANTIES OF MERCHANTABILITY AND FITNESS FOR A PARTICULAR PURPOSE ARE DISCLAIMED. IN NO EVENT SHALL THE APACHE SOFTWARE FOUNDATION OR ITS CONTRIBUTORS BE LIABLE FOR ANY DIRECT, INDIRECT, INCIDENTAL, SPECIAL, EXEMPLARY, OR CONSEQUENTIAL DAMAGES (INCLUDING, BUT NOT LIMITED TO, PROCUREMENT OF SUBSTITUTE GOODS OR SERVICES; LOSS OF USE, DATA, OR PROFITS; OR BUSINESS INTERRUPTION) HOWEVER CAUSED AND ON ANY THEORY OF LIABILITY, WHETHER IN CONTRACT, STRICT LIABILITY, OR TORT (INCLUDING NEGLIGENCE OR OTHERWISE) ARISING IN ANY WAY OUT OF THE USE OF THIS SOFTWARE, EVEN IF ADVISED OF THE POSSIBILITY OF SUCH DAMAGE. Autonomy Copyright ©1996-2000 Autonomy, Inc. Bouncy Castle License Copyright (c) 2000 - 2004 The Legion Of The Bouncy Castle (http://www.bouncycastle.org) Permission is hereby granted, free of charge, to any person obtaining a copy of this software and associated documentation files (the "Software"), to deal in the Software without restriction, including without limitation the rights to use, copy, modify, merge, publish, distribute, sublicense, and/or sell copies of the Software, and to permit persons to whom the Software is furnished to do so, subject to the following conditions: The above copyright notice and this permission notice shall be included in all copies or substantial portions of the Software. THE SOFTWARE IS PROVIDED "AS IS", WITHOUT WARRANTY OF ANY KIND, EXPRESS OR IMPLIED, INCLUDING BUT NOT LIMITED TO THE WARRANTIES OF MERCHANTABILITY, FITNESS FOR A PARTICULAR PURPOSE AND NONINFRINGEMENT. IN NO EVENT SHALL THE AUTHORS OR COPYRIGHT HOLDERS BE LIABLE FOR ANY CLAIM, DAMAGES OR OTHER LIABILITY, WHETHER IN AN ACTION OF CONTRACT, TORT OR OTHERWISE, ARISING FROM, OUT OF OR IN CONNECTION WITH THE SOFTWARE OR THE USE OR OTHER DEALINGS IN THE SOFTWARE. Castor Library The original license is found at http://www.castor.org/license.html The code of this project is released under a BSD-like license [license.txt]: Copyright 1999-2004 (C) Intalio Inc., and others. All Rights Reserved. Redistribution and use of this software and associated documentation ("Software"), with or without modification, are permitted provided that the following conditions are met: 1. Redistributions of source code must retain copyright statements and notices. Redistributions must also contain a copy of this document. 2. Redistributions in binary form must reproduce the above copyright notice, this list of conditions and the following disclaimer in the documentation and/or other materials provided with the distribution. 3. The name "ExoLab" must not be used to endorse or promote products derived from this Software without prior written permission of Intalio Inc. For written permission, please contact [email protected]. 4. Products derived from this Software may not be called "Castor" nor may "Castor" appear in their names without prior written permission of Intalio Inc. Exolab, Castor and Intalio are trademarks of Intalio Inc. 5. Due credit should be given to the ExoLab? Project (http://www.exolab.org/). THIS SOFTWARE IS PROVIDED BY INTALIO AND CONTRIBUTORS ``AS IS'' AND ANY EXPRESSED OR IMPLIED WARRANTIES, INCLUDING, BUT NOT LIMITED TO, THE IMPLIED WARRANTIES OF MERCHANTABILITY AND FITNESS FOR A PARTICULAR PURPOSE ARE DISCLAIMED. IN NO EVENT SHALL INTALIO OR ITS CONTRIBUTORS BE LIABLE FOR ANY DIRECT, INDIRECT, INCIDENTAL, SPECIAL, EXEMPLARY, OR CONSEQUENTIAL DAMAGES (INCLUDING, BUT NOT LIMITED TO, PROCUREMENT OF SUBSTITUTE GOODS OR SERVICES; LOSS OF USE, DATA, OR PROFITS; OR BUSINESS INTERRUPTION) HOWEVER CAUSED AND ON ANY THEORY OF LIABILITY, WHETHER IN CONTRACT, STRICT LIABILITY, OR TORT (INCLUDING NEGLIGENCE OR OTHERWISE) ARISING IN ANY WAY OUT OF THE USE OF THIS SOFTWARE, EVEN IF ADVISED OF THE POSSIBILITY OF SUCH DAMAGE. Indiana University Extreme! Lab Software License Version 1.1.1 Copyright (c) 2002 Extreme! Lab, Indiana University. All rights reserved. Redistribution and use in source and binary forms, with or without modification, are permitted provided that the following conditions are met: 1. Redistributions of source code must retain the above copyright notice, this list of conditions and the following disclaimer. 2. Redistributions in binary form must reproduce the above copyright notice, this list of conditions and the following disclaimer in the documentation and/or other materials provided with the distribution. 3. The end-user documentation included with the redistribution, if any, must include the following acknowledgment: "This product includes software developed by the Indiana University Extreme! Lab (http:// www.extreme.indiana.edu/)." Alternately, this acknowledgment may appear in the software itself, if and wherever such third-party acknowledgments normally appear. 4. The names "Indiana University" and "Indiana University Extreme! Lab" must not be used to endorse or promote products derived from this software without prior written permission. For written permission, please contact http:/ /www.extreme.indiana.edu/. 5. Products derived from this software may not use "Indiana University" name nor may "Indiana University" appear in their name, without prior written permission of the Indiana University. THIS SOFTWARE IS PROVIDED "AS IS" AND ANY EXPRESSED OR IMPLIED WARRANTIES, INCLUDING, BUT NOT LIMITED TO, THE IMPLIED WARRANTIES OF MERCHANTABILITY AND FITNESS FOR A PARTICULAR PURPOSE ARE DISCLAIMED. IN NO EVENT SHALL THE AUTHORS, COPYRIGHT HOLDERS OR ITS CONTRIBUTORS BE LIABLE FOR ANY DIRECT, INDIRECT, INCIDENTAL, SPECIAL, EXEMPLARY, OR CONSEQUENTIAL DAMAGES (INCLUDING, BUT NOT LIMITED TO, PROCUREMENT OF SUBSTITUTE GOODS OR SERVICES; LOSS OF USE, DATA, OR PROFITS; OR BUSINESS INTERRUPTION) HOWEVER CAUSED AND ON ANY THEORY OF LIABILITY, WHETHER IN CONTRACT, STRICT LIABILITY, OR TORT (INCLUDING NEGLIGENCE OR OTHERWISE) ARISING IN ANY WAY OUT OF THE USE OF THIS SOFTWARE, EVEN IF ADVISED OF THE POSSIBILITY OF SUCH DAMAGE. JDOM.JAR Copyright (C) 2000-2002 Brett McLaughlin & Jason Hunter. All rights reserved. Redistribution and use in source and binary forms, with or without modification, are permitted provided that the following conditions are met: 1. Redistributions of source code must retain the above copyright notice, this list of conditions, and the following disclaimer. 2. Redistributions in binary form must reproduce the above copyright notice, this list of conditions, and the disclaimer that follows these conditions in the documentation and/or other materials provided with the distribution. 3. The name "JDOM" must not be used to endorse or promote products derived from this software without prior written permission. For written permission, please contact [email protected]. 4. Products derived from this software may not be called "JDOM", nor may "JDOM" appear in their name, without prior written permission from the JDOM Project Management ([email protected]). In addition, we request (but do not require) that you include in the end-user documentation provided with the redistribution and/or in the software itself an acknowledgement equivalent to the following: "This product includes software developed by the JDOM Project (http://www.jdom.org/)." Alternatively, the acknowledgment may be graphical using the logos available at http://www.jdom.org/images/logos. THIS SOFTWARE IS PROVIDED ``AS IS'' AND ANY EXPRESSED OR IMPLIED WARRANTIES, INCLUDING, BUT NOT LIMITED TO, THE IMPLIED WARRANTIES OF MERCHANTABILITY AND FITNESS FOR A PARTICULAR PURPOSE ARE DISCLAIMED. IN NO EVENT SHALL THE JDOM AUTHORS OR THE PROJECT CONTRIBUTORS BE LIABLE FOR ANY DIRECT, INDIRECT, INCIDENTAL, SPECIAL, EXEMPLARY, OR CONSEQUENTIAL DAMAGES (INCLUDING, BUT NOT LIMITED TO, PROCUREMENT OF SUBSTITUTE GOODS OR SERVICES; LOSS OF USE, DATA, OR PROFITS; OR BUSINESS INTERRUPTION) HOWEVER CAUSED AND ON ANY THEORY OF LIABILITY, WHETHER IN CONTRACT, STRICT LIABILITY, OR TORT (INCLUDING NEGLIGENCE OR OTHERWISE) ARISING IN ANY WAY OUT OF THE USE OF THIS SOFTWARE, EVEN IF ADVISED OF THE POSSIBILITY OF SUCH DAMAGE. Phaos This Software is derived in part from the SSLavaTM Toolkit, which is Copyright ©1996-1998 by Phaos Technology Corporation. All Rights Reserved. Customer is prohibited from accessing the functionality of the Phaos software. W3C W3C® SOFTWARE NOTICE AND LICENSE This work (and included software, documentation such as READMEs, or other related items) is being provided by the copyright holders under the following license. By obtaining, using and/or copying this work, you (the licensee) agree that you have read, understood, and will comply with the following terms and conditions. Permission to copy, modify, and distribute this software and its documentation, with or without modification, for any purpose and without fee or royalty is hereby granted, provided that you include the following on ALL copies of the software and documentation or portions thereof, including modifications: 1. The full text of this NOTICE in a location viewable to users of the redistributed or derivative work. 2. Any pre-existing intellectual property disclaimers, notices, or terms and conditions. If none exist, the W3C Software Short Notice should be included (hypertext is preferred, text is permitted) within the body of any redistributed or derivative code. 3. Notice of any changes or modifications to the files, including the date changes were made. (We recommend you provide URIs to the location from which the code is derived.) THIS SOFTWARE AND DOCUMENTATION IS PROVIDED "AS IS," AND COPYRIGHT HOLDERS MAKE NO REPRESENTATIONS OR WARRANTIES, EXPRESS OR IMPLIED, INCLUDING BUT NOT LIMITED TO, WARRANTIES OF MERCHANTABILITY OR FITNESS FOR ANY PARTICULAR PURPOSE OR THAT THE USE OF THE SOFTWARE OR DOCUMENTATION WILL NOT INFRINGE ANY THIRD PARTY PATENTS, COPYRIGHTS, TRADEMARKS OR OTHER RIGHTS. COPYRIGHT HOLDERS WILL NOT BE LIABLE FOR ANY DIRECT, INDIRECT, SPECIAL OR CONSEQUENTIAL DAMAGES ARISING OUT OF ANY USE OF THE SOFTWARE OR DOCUMENTATION. The name and trademarks of copyright holders may NOT be used in advertising or publicity pertaining to the software without specific, written prior permission. Title to copyright in this software and any associated documentation will at all times remain with copyright holders. 8 Identity Manager Roles Based Provisioning Module 3.7 User Application: Administration Guide Contents About This Guide 21 Part I Overview 23 1 Introduction to the User Application 25 1.1 1.2 1.3 1.4 1.5 About the User Application. . . . . . . . . . . . . . . . . . . . . . . . . . . . . . . . . . . . . . . . . . . . . . . . . . . . 1.1.1 About Identity Self-Service . . . . . . . . . . . . . . . . . . . . . . . . . . . . . . . . . . . . . . . . . . . . 1.1.2 About Roles-Based Provisioning . . . . . . . . . . . . . . . . . . . . . . . . . . . . . . . . . . . . . . . . 1.1.3 About Resource-Based Provisioning . . . . . . . . . . . . . . . . . . . . . . . . . . . . . . . . . . . . . 1.1.4 About Workflow-Based Provisioning . . . . . . . . . . . . . . . . . . . . . . . . . . . . . . . . . . . . . 1.1.5 About Compliance . . . . . . . . . . . . . . . . . . . . . . . . . . . . . . . . . . . . . . . . . . . . . . . . . . . User Application Architecture . . . . . . . . . . . . . . . . . . . . . . . . . . . . . . . . . . . . . . . . . . . . . . . . . . 1.2.1 User Interface . . . . . . . . . . . . . . . . . . . . . . . . . . . . . . . . . . . . . . . . . . . . . . . . . . . . . . 1.2.2 Directory Abstraction Layer . . . . . . . . . . . . . . . . . . . . . . . . . . . . . . . . . . . . . . . . . . . . 1.2.3 Workflow Engine . . . . . . . . . . . . . . . . . . . . . . . . . . . . . . . . . . . . . . . . . . . . . . . . . . . . 1.2.4 SOAP Endpoints . . . . . . . . . . . . . . . . . . . . . . . . . . . . . . . . . . . . . . . . . . . . . . . . . . . . 1.2.5 Application Server (J2EE-Compliant) . . . . . . . . . . . . . . . . . . . . . . . . . . . . . . . . . . . . 1.2.6 Database . . . . . . . . . . . . . . . . . . . . . . . . . . . . . . . . . . . . . . . . . . . . . . . . . . . . . . . . . . 1.2.7 User Application Driver . . . . . . . . . . . . . . . . . . . . . . . . . . . . . . . . . . . . . . . . . . . . . . . 1.2.8 Role and Resource Service Driver . . . . . . . . . . . . . . . . . . . . . . . . . . . . . . . . . . . . . . 1.2.9 Designer for Identity Manager . . . . . . . . . . . . . . . . . . . . . . . . . . . . . . . . . . . . . . . . . . 1.2.10 iManager . . . . . . . . . . . . . . . . . . . . . . . . . . . . . . . . . . . . . . . . . . . . . . . . . . . . . . . . . . 1.2.11 Identity Manager Engine . . . . . . . . . . . . . . . . . . . . . . . . . . . . . . . . . . . . . . . . . . . . . . 1.2.12 Identity Vault . . . . . . . . . . . . . . . . . . . . . . . . . . . . . . . . . . . . . . . . . . . . . . . . . . . . . . . 1.2.13 Novell Audit . . . . . . . . . . . . . . . . . . . . . . . . . . . . . . . . . . . . . . . . . . . . . . . . . . . . . . . . User Application User Types . . . . . . . . . . . . . . . . . . . . . . . . . . . . . . . . . . . . . . . . . . . . . . . . . . 1.3.1 Administrative Users . . . . . . . . . . . . . . . . . . . . . . . . . . . . . . . . . . . . . . . . . . . . . . . . . 1.3.2 Domain Administrators, Domain Managers, and Team Managers . . . . . . . . . . . . . . 1.3.3 Designers. . . . . . . . . . . . . . . . . . . . . . . . . . . . . . . . . . . . . . . . . . . . . . . . . . . . . . . . . . 1.3.4 Business Users . . . . . . . . . . . . . . . . . . . . . . . . . . . . . . . . . . . . . . . . . . . . . . . . . . . . . Design and Configuration Tools . . . . . . . . . . . . . . . . . . . . . . . . . . . . . . . . . . . . . . . . . . . . . . . . What’s Next . . . . . . . . . . . . . . . . . . . . . . . . . . . . . . . . . . . . . . . . . . . . . . . . . . . . . . . . . . . . . . . 25 26 26 27 29 30 31 31 32 32 32 33 33 34 35 36 36 36 36 36 37 37 38 41 41 42 44 Part II Configuring the User Application Environment 47 2 Designing the Production Environment 49 2.1 2.2 Topology . . . . . . . . . . . . . . . . . . . . . . . . . . . . . . . . . . . . . . . . . . . . . . . . . . . . . . . . . . . . . . . . . 2.1.1 Design Constraints . . . . . . . . . . . . . . . . . . . . . . . . . . . . . . . . . . . . . . . . . . . . . . . . . . 2.1.2 High Availability Design . . . . . . . . . . . . . . . . . . . . . . . . . . . . . . . . . . . . . . . . . . . . . . . Security . . . . . . . . . . . . . . . . . . . . . . . . . . . . . . . . . . . . . . . . . . . . . . . . . . . . . . . . . . . . . . . . . . 2.2.1 Security Overview . . . . . . . . . . . . . . . . . . . . . . . . . . . . . . . . . . . . . . . . . . . . . . . . . . . 2.2.2 Self-Signed Certificates . . . . . . . . . . . . . . . . . . . . . . . . . . . . . . . . . . . . . . . . . . . . . . . 2.2.3 Enabling SSL . . . . . . . . . . . . . . . . . . . . . . . . . . . . . . . . . . . . . . . . . . . . . . . . . . . . . . . 2.2.4 Turning on SOAP Security. . . . . . . . . . . . . . . . . . . . . . . . . . . . . . . . . . . . . . . . . . . . . 2.2.5 Mutual Authentication . . . . . . . . . . . . . . . . . . . . . . . . . . . . . . . . . . . . . . . . . . . . . . . . 2.2.6 Third-Party Authentication and Single Sign-On . . . . . . . . . . . . . . . . . . . . . . . . . . . . . 2.2.7 Encryption of Sensitive User Application Data . . . . . . . . . . . . . . . . . . . . . . . . . . . . . 2.2.8 Preventing XSS Attacks. . . . . . . . . . . . . . . . . . . . . . . . . . . . . . . . . . . . . . . . . . . . . . . 49 49 51 51 52 53 53 54 54 54 54 55 Contents 9 2.3 2.4 2.5 2.6 2.7 2.8 2.9 2.10 2.11 2.12 2.13 2.14 2.15 2.2.9 Modifying the Trustee Rights for User Preferences . . . . . . . . . . . . . . . . . . . . . . . . . . 56 2.2.10 Modifying the Trustee Rights for a Provisioning Request Definition . . . . . . . . . . . . . 56 2.2.11 Disabling the JMX Management Console on JBOSS . . . . . . . . . . . . . . . . . . . . . . . . 57 Single Sign On (SSO) Configuration . . . . . . . . . . . . . . . . . . . . . . . . . . . . . . . . . . . . . . . . . . . . 57 Digital Signature Configuration . . . . . . . . . . . . . . . . . . . . . . . . . . . . . . . . . . . . . . . . . . . . . . . . 57 2.4.1 Setting Up the User Certificates . . . . . . . . . . . . . . . . . . . . . . . . . . . . . . . . . . . . . . . . 58 2.4.2 Configuring the Application Server . . . . . . . . . . . . . . . . . . . . . . . . . . . . . . . . . . . . . . 61 2.4.3 Configuring Logging. . . . . . . . . . . . . . . . . . . . . . . . . . . . . . . . . . . . . . . . . . . . . . . . . . 63 2.4.4 Configuring the User Application . . . . . . . . . . . . . . . . . . . . . . . . . . . . . . . . . . . . . . . . 63 2.4.5 Configuring the Provisioning Request Definitions . . . . . . . . . . . . . . . . . . . . . . . . . . . 63 Enabling Anonymous or Guest Access to the User Application. . . . . . . . . . . . . . . . . . . . . . . . 64 2.5.1 Establishing the Guest Account . . . . . . . . . . . . . . . . . . . . . . . . . . . . . . . . . . . . . . . . . 65 Configuring Forgotten Password Self-Service . . . . . . . . . . . . . . . . . . . . . . . . . . . . . . . . . . . . 65 2.6.1 Accessing an External Password WAR . . . . . . . . . . . . . . . . . . . . . . . . . . . . . . . . . . . 67 Performance Tuning. . . . . . . . . . . . . . . . . . . . . . . . . . . . . . . . . . . . . . . . . . . . . . . . . . . . . . . . . 68 2.7.1 Logging . . . . . . . . . . . . . . . . . . . . . . . . . . . . . . . . . . . . . . . . . . . . . . . . . . . . . . . . . . . 68 2.7.2 Identity Vault . . . . . . . . . . . . . . . . . . . . . . . . . . . . . . . . . . . . . . . . . . . . . . . . . . . . . . . 69 2.7.3 JVM . . . . . . . . . . . . . . . . . . . . . . . . . . . . . . . . . . . . . . . . . . . . . . . . . . . . . . . . . . . . . . 70 2.7.4 Session Time-out Value. . . . . . . . . . . . . . . . . . . . . . . . . . . . . . . . . . . . . . . . . . . . . . . 71 2.7.5 Tuning JBoss . . . . . . . . . . . . . . . . . . . . . . . . . . . . . . . . . . . . . . . . . . . . . . . . . . . . . . . 71 2.7.6 Using Secure Sockets for User Application Connections to the Identity Vault . . . . . 71 Clustering . . . . . . . . . . . . . . . . . . . . . . . . . . . . . . . . . . . . . . . . . . . . . . . . . . . . . . . . . . . . . . . . . 73 2.8.1 Clustering an Application Server . . . . . . . . . . . . . . . . . . . . . . . . . . . . . . . . . . . . . . . . 73 2.8.2 Things to Do Before Installing the User Application . . . . . . . . . . . . . . . . . . . . . . . . . 74 2.8.3 Installing the User Application to a JBoss Cluster . . . . . . . . . . . . . . . . . . . . . . . . . . . 76 2.8.4 Installing the User Application to a WebSphere Cluster . . . . . . . . . . . . . . . . . . . . . . 81 2.8.5 Things to Do After Installing the User Application . . . . . . . . . . . . . . . . . . . . . . . . . . . 81 Localizing and Customizing User Application Strings . . . . . . . . . . . . . . . . . . . . . . . . . . . . . . . 84 2.9.1 Localizing User Application Strings . . . . . . . . . . . . . . . . . . . . . . . . . . . . . . . . . . . . . . 85 2.9.2 Customizing Text . . . . . . . . . . . . . . . . . . . . . . . . . . . . . . . . . . . . . . . . . . . . . . . . . . . . 85 Configuring the Roles and Resources Tab . . . . . . . . . . . . . . . . . . . . . . . . . . . . . . . . . . . . . . . 89 2.10.1 Role Service Driver Configuration . . . . . . . . . . . . . . . . . . . . . . . . . . . . . . . . . . . . . . . 89 2.10.2 User Application Configuration . . . . . . . . . . . . . . . . . . . . . . . . . . . . . . . . . . . . . . . . . 92 2.10.3 Security Roles . . . . . . . . . . . . . . . . . . . . . . . . . . . . . . . . . . . . . . . . . . . . . . . . . . . . . . 92 2.10.4 View Request Status Search Limit . . . . . . . . . . . . . . . . . . . . . . . . . . . . . . . . . . . . . . 93 2.10.5 Result Set and Pagination Settings . . . . . . . . . . . . . . . . . . . . . . . . . . . . . . . . . . . . . . 93 2.10.6 E-Mail Notification . . . . . . . . . . . . . . . . . . . . . . . . . . . . . . . . . . . . . . . . . . . . . . . . . . . 94 2.10.7 Enabling Drivers for Resource Mappings . . . . . . . . . . . . . . . . . . . . . . . . . . . . . . . . . 95 2.10.8 Creating a List in the RBPM Database . . . . . . . . . . . . . . . . . . . . . . . . . . . . . . . . . . . 95 Configuring the Compliance Tab . . . . . . . . . . . . . . . . . . . . . . . . . . . . . . . . . . . . . . . . . . . . . . . 98 2.11.1 Security Roles . . . . . . . . . . . . . . . . . . . . . . . . . . . . . . . . . . . . . . . . . . . . . . . . . . . . . . 98 2.11.2 E-Mail Notification . . . . . . . . . . . . . . . . . . . . . . . . . . . . . . . . . . . . . . . . . . . . . . . . . . . 98 Configuring the Work Dashboard Tab . . . . . . . . . . . . . . . . . . . . . . . . . . . . . . . . . . . . . . . . . . . 99 Recreating the Database After Installation. . . . . . . . . . . . . . . . . . . . . . . . . . . . . . . . . . . . . . . . 99 Changing the Default Administrator Assignments After Installation . . . . . . . . . . . . . . . . . . . . 100 Setting up JMS in WebSphere and WebLogic . . . . . . . . . . . . . . . . . . . . . . . . . . . . . . . . . . . . 102 2.15.1 Setting up JMS on WebSphere 6.1 . . . . . . . . . . . . . . . . . . . . . . . . . . . . . . . . . . . . . 102 2.15.2 Setting up JMS on WebSphere 7.0 . . . . . . . . . . . . . . . . . . . . . . . . . . . . . . . . . . . . . 106 2.15.3 Setting up JMS on WebLogic 10.3 . . . . . . . . . . . . . . . . . . . . . . . . . . . . . . . . . . . . . 109 3 Setting Up Logging 3.1 3.2 10 About Event Logging . . . . . . . . . . . . . . . . . . . . . . . . . . . . . . . . . . . . . . . . . . . . . . . . . . . . . . . 3.1.1 About the Log Level Settings . . . . . . . . . . . . . . . . . . . . . . . . . . . . . . . . . . . . . . . . . . 3.1.2 Changing the User Application Log Level Settings . . . . . . . . . . . . . . . . . . . . . . . . . Logging to a Novell Audit or Sentinel Server . . . . . . . . . . . . . . . . . . . . . . . . . . . . . . . . . . . . Identity Manager Roles Based Provisioning Module 3.7 User Application: Administration Guide 113 113 113 114 114 3.2.1 3.3 3.4 Adding the Identity Manager Application Schema to your Novell Audit Server as a Log Application . . . . . . . . . . . . . . . . . . . . . . . . . . . . . . . . . . . . . . . . . . . . . . . . . . . . . . . . 115 3.2.2 Enabling Audit or Sentinel Logging . . . . . . . . . . . . . . . . . . . . . . . . . . . . . . . . . . . . . 116 3.2.3 Log Reports . . . . . . . . . . . . . . . . . . . . . . . . . . . . . . . . . . . . . . . . . . . . . . . . . . . . . . . 116 Logging to OpenXDAS . . . . . . . . . . . . . . . . . . . . . . . . . . . . . . . . . . . . . . . . . . . . . . . . . . . . . . 120 3.3.1 Using OpenXDAS with Sentinel. . . . . . . . . . . . . . . . . . . . . . . . . . . . . . . . . . . . . . . . 120 3.3.2 Enabling OpenXDAS Logging in the User Application . . . . . . . . . . . . . . . . . . . . . . 121 3.3.3 Troubleshooting . . . . . . . . . . . . . . . . . . . . . . . . . . . . . . . . . . . . . . . . . . . . . . . . . . . . 121 Log Events . . . . . . . . . . . . . . . . . . . . . . . . . . . . . . . . . . . . . . . . . . . . . . . . . . . . . . . . . . . . . . . 122 Part III Administering the User Application 129 4 Using the Administration Tab 131 4.1 4.2 4.3 4.4 About the Administration Tab . . . . . . . . . . . . . . . . . . . . . . . . . . . . . . . . . . . . . . . . . . . . . . . . . Who Can Use the Administration Tab . . . . . . . . . . . . . . . . . . . . . . . . . . . . . . . . . . . . . . . . . . Accessing the Administration Tab . . . . . . . . . . . . . . . . . . . . . . . . . . . . . . . . . . . . . . . . . . . . . Administration Tab Actions You Can Perform . . . . . . . . . . . . . . . . . . . . . . . . . . . . . . . . . . . . 5 Application Configuration 5.1 5.2 5.3 5.4 Portal Configuration Tasks . . . . . . . . . . . . . . . . . . . . . . . . . . . . . . . . . . . . . . . . . . . . . . . . . . . 5.1.1 Caching Management . . . . . . . . . . . . . . . . . . . . . . . . . . . . . . . . . . . . . . . . . . . . . . . 5.1.2 Driver Status . . . . . . . . . . . . . . . . . . . . . . . . . . . . . . . . . . . . . . . . . . . . . . . . . . . . . . 5.1.3 Identity Vault Settings . . . . . . . . . . . . . . . . . . . . . . . . . . . . . . . . . . . . . . . . . . . . . . . 5.1.4 Logging Configuration . . . . . . . . . . . . . . . . . . . . . . . . . . . . . . . . . . . . . . . . . . . . . . . 5.1.5 Portal Settings . . . . . . . . . . . . . . . . . . . . . . . . . . . . . . . . . . . . . . . . . . . . . . . . . . . . . 5.1.6 Single Sign On (SSO) Configuration . . . . . . . . . . . . . . . . . . . . . . . . . . . . . . . . . . . . 5.1.7 Theme Administration . . . . . . . . . . . . . . . . . . . . . . . . . . . . . . . . . . . . . . . . . . . . . . . 5.1.8 Assigning the User Application Administrator . . . . . . . . . . . . . . . . . . . . . . . . . . . . . Working with the Import and Export Tools . . . . . . . . . . . . . . . . . . . . . . . . . . . . . . . . . . . . . . . 5.2.1 Requirements . . . . . . . . . . . . . . . . . . . . . . . . . . . . . . . . . . . . . . . . . . . . . . . . . . . . . 5.2.2 Restrictions . . . . . . . . . . . . . . . . . . . . . . . . . . . . . . . . . . . . . . . . . . . . . . . . . . . . . . . 5.2.3 Exporting Portal Data. . . . . . . . . . . . . . . . . . . . . . . . . . . . . . . . . . . . . . . . . . . . . . . . 5.2.4 Importing Portal Data . . . . . . . . . . . . . . . . . . . . . . . . . . . . . . . . . . . . . . . . . . . . . . . . Password Management Configuration . . . . . . . . . . . . . . . . . . . . . . . . . . . . . . . . . . . . . . . . . . 5.3.1 About Password Management Features . . . . . . . . . . . . . . . . . . . . . . . . . . . . . . . . . 5.3.2 Configuring Challenge Response . . . . . . . . . . . . . . . . . . . . . . . . . . . . . . . . . . . . . . 5.3.3 Configuring Forgotten Password . . . . . . . . . . . . . . . . . . . . . . . . . . . . . . . . . . . . . . . 5.3.4 Configuring Login. . . . . . . . . . . . . . . . . . . . . . . . . . . . . . . . . . . . . . . . . . . . . . . . . . . 5.3.5 Configuring Password Sync Status . . . . . . . . . . . . . . . . . . . . . . . . . . . . . . . . . . . . . 5.3.6 Configuring Password Hint Change. . . . . . . . . . . . . . . . . . . . . . . . . . . . . . . . . . . . . 5.3.7 Configuring Change Password . . . . . . . . . . . . . . . . . . . . . . . . . . . . . . . . . . . . . . . . Web Services . . . . . . . . . . . . . . . . . . . . . . . . . . . . . . . . . . . . . . . . . . . . . . . . . . . . . . . . . . . . . 5.4.1 Directory Layer Service . . . . . . . . . . . . . . . . . . . . . . . . . . . . . . . . . . . . . . . . . . . . . . 5.4.2 Metrics Service . . . . . . . . . . . . . . . . . . . . . . . . . . . . . . . . . . . . . . . . . . . . . . . . . . . . 5.4.3 Notification Service . . . . . . . . . . . . . . . . . . . . . . . . . . . . . . . . . . . . . . . . . . . . . . . . . 5.4.4 Provisioning Service . . . . . . . . . . . . . . . . . . . . . . . . . . . . . . . . . . . . . . . . . . . . . . . . 5.4.5 Role Service . . . . . . . . . . . . . . . . . . . . . . . . . . . . . . . . . . . . . . . . . . . . . . . . . . . . . . 6 Page Administration 6.1 About Page Administration. . . . . . . . . . . . . . . . . . . . . . . . . . . . . . . . . . . . . . . . . . . . . . . . . . . 6.1.1 About Container Pages . . . . . . . . . . . . . . . . . . . . . . . . . . . . . . . . . . . . . . . . . . . . . . 6.1.2 About Shared Pages . . . . . . . . . . . . . . . . . . . . . . . . . . . . . . . . . . . . . . . . . . . . . . . . 6.1.3 An Exception to Page Usage. . . . . . . . . . . . . . . . . . . . . . . . . . . . . . . . . . . . . . . . . . 131 131 132 133 135 135 135 146 146 148 153 153 170 177 179 179 179 180 181 184 185 189 190 194 197 201 202 204 204 205 205 206 206 207 207 207 214 215 Contents 11 6.2 6.3 6.4 6.5 6.6 Creating and Maintaining Container Pages . . . . . . . . . . . . . . . . . . . . . . . . . . . . . . . . . . . . . . 6.2.1 Creating Container Pages . . . . . . . . . . . . . . . . . . . . . . . . . . . . . . . . . . . . . . . . . . . . 6.2.2 Adding Content to a Container Page . . . . . . . . . . . . . . . . . . . . . . . . . . . . . . . . . . . . 6.2.3 Deleting Content from a Container Page . . . . . . . . . . . . . . . . . . . . . . . . . . . . . . . . . 6.2.4 Modifying the Layout of a Container Page. . . . . . . . . . . . . . . . . . . . . . . . . . . . . . . . 6.2.5 Arranging Content on the Container Page. . . . . . . . . . . . . . . . . . . . . . . . . . . . . . . . 6.2.6 Displaying a Container Page . . . . . . . . . . . . . . . . . . . . . . . . . . . . . . . . . . . . . . . . . . Creating and Maintaining Shared Pages . . . . . . . . . . . . . . . . . . . . . . . . . . . . . . . . . . . . . . . . 6.3.1 Creating Shared Pages . . . . . . . . . . . . . . . . . . . . . . . . . . . . . . . . . . . . . . . . . . . . . . 6.3.2 Adding Content to a Shared Page . . . . . . . . . . . . . . . . . . . . . . . . . . . . . . . . . . . . . . 6.3.3 Deleting Content from a Shared Page . . . . . . . . . . . . . . . . . . . . . . . . . . . . . . . . . . . 6.3.4 Modifying the Layout of a Shared Page. . . . . . . . . . . . . . . . . . . . . . . . . . . . . . . . . . 6.3.5 Arranging Content on the Shared Page. . . . . . . . . . . . . . . . . . . . . . . . . . . . . . . . . . 6.3.6 Displaying a Shared Page . . . . . . . . . . . . . . . . . . . . . . . . . . . . . . . . . . . . . . . . . . . . Assigning Permissions for Pages. . . . . . . . . . . . . . . . . . . . . . . . . . . . . . . . . . . . . . . . . . . . . . 6.4.1 Assigning Page View Permission . . . . . . . . . . . . . . . . . . . . . . . . . . . . . . . . . . . . . . 6.4.2 Assigning Shared Page Owners . . . . . . . . . . . . . . . . . . . . . . . . . . . . . . . . . . . . . . . 6.4.3 Enabling User Access to the Create User or Group Page. . . . . . . . . . . . . . . . . . . . 6.4.4 Enabling User Access to Individual Administration Pages . . . . . . . . . . . . . . . . . . . Setting Default Pages for Groups . . . . . . . . . . . . . . . . . . . . . . . . . . . . . . . . . . . . . . . . . . . . . Selecting a Default Shared Page for a Container Page . . . . . . . . . . . . . . . . . . . . . . . . . . . . . 7 Portlet Administration 7.1 7.2 7.3 About Portlet Administration. . . . . . . . . . . . . . . . . . . . . . . . . . . . . . . . . . . . . . . . . . . . . . . . . . Administering Portlet Definitions . . . . . . . . . . . . . . . . . . . . . . . . . . . . . . . . . . . . . . . . . . . . . . 7.2.1 Accessing Portlet Definitions in the Deployed Portlet Application . . . . . . . . . . . . . . 7.2.2 Registering Portlet Definitions . . . . . . . . . . . . . . . . . . . . . . . . . . . . . . . . . . . . . . . . . 7.2.3 Viewing Information About Portlet Definitions . . . . . . . . . . . . . . . . . . . . . . . . . . . . . Administering Registered Portlets . . . . . . . . . . . . . . . . . . . . . . . . . . . . . . . . . . . . . . . . . . . . . 7.3.1 Accessing Portlet Registrations in the Deployed Portlet Application . . . . . . . . . . . . 7.3.2 Viewing Information about Portlet Registrations . . . . . . . . . . . . . . . . . . . . . . . . . . . 7.3.3 Assigning Categories to Portlet Registrations . . . . . . . . . . . . . . . . . . . . . . . . . . . . . 7.3.4 Modifying Settings for Portlet Registrations . . . . . . . . . . . . . . . . . . . . . . . . . . . . . . . 7.3.5 Modifying Preferences for Portlet Registrations . . . . . . . . . . . . . . . . . . . . . . . . . . . 7.3.6 Assigning Security Permissions for Portlet Registrations . . . . . . . . . . . . . . . . . . . . 7.3.7 Unregistering a Portlet . . . . . . . . . . . . . . . . . . . . . . . . . . . . . . . . . . . . . . . . . . . . . . . 8 RBPM Provisioning and Security Configuration 8.1 8.2 8.3 8.4 12 About RBPM Provisioning and Security Configuration. . . . . . . . . . . . . . . . . . . . . . . . . . . . . . Provisioning Configuration . . . . . . . . . . . . . . . . . . . . . . . . . . . . . . . . . . . . . . . . . . . . . . . . . . . 8.2.1 Configuring Delegation and Proxy Settings . . . . . . . . . . . . . . . . . . . . . . . . . . . . . . . 8.2.2 Configuring the Digital Signature Service . . . . . . . . . . . . . . . . . . . . . . . . . . . . . . . . 8.2.3 Configuring the Provisioning UI Display Settings . . . . . . . . . . . . . . . . . . . . . . . . . . 8.2.4 Configuring the Workflow Engine and Cluster Settings . . . . . . . . . . . . . . . . . . . . . . Administrator Assignments . . . . . . . . . . . . . . . . . . . . . . . . . . . . . . . . . . . . . . . . . . . . . . . . . . 8.3.1 Viewing Administrator Assignments . . . . . . . . . . . . . . . . . . . . . . . . . . . . . . . . . . . . 8.3.2 Creating New Assignments . . . . . . . . . . . . . . . . . . . . . . . . . . . . . . . . . . . . . . . . . . . 8.3.3 Editing an Existing Assignment . . . . . . . . . . . . . . . . . . . . . . . . . . . . . . . . . . . . . . . . 8.3.4 Deleting Assignments . . . . . . . . . . . . . . . . . . . . . . . . . . . . . . . . . . . . . . . . . . . . . . . 8.3.5 Refreshing the Assignment List . . . . . . . . . . . . . . . . . . . . . . . . . . . . . . . . . . . . . . . . Team Configuration . . . . . . . . . . . . . . . . . . . . . . . . . . . . . . . . . . . . . . . . . . . . . . . . . . . . . . . . 8.4.1 Viewing Team Configurations . . . . . . . . . . . . . . . . . . . . . . . . . . . . . . . . . . . . . . . . . 8.4.2 Creating New Teams . . . . . . . . . . . . . . . . . . . . . . . . . . . . . . . . . . . . . . . . . . . . . . . . 8.4.3 Editing an Existing Team . . . . . . . . . . . . . . . . . . . . . . . . . . . . . . . . . . . . . . . . . . . . . 8.4.4 Deleting Teams . . . . . . . . . . . . . . . . . . . . . . . . . . . . . . . . . . . . . . . . . . . . . . . . . . . . Identity Manager Roles Based Provisioning Module 3.7 User Application: Administration Guide 215 216 219 220 221 222 224 224 225 227 229 230 230 232 232 233 234 236 237 237 239 241 241 241 242 242 243 245 246 247 248 249 250 252 254 257 257 258 258 260 262 265 269 270 271 281 281 281 281 282 284 289 290 8.5 8.4.5 Refreshing the Team List. . . . . . . . . . . . . . . . . . . . . . . . . . . . . . . . . . . . . . . . . . . . . 290 Navigation Access Permissions . . . . . . . . . . . . . . . . . . . . . . . . . . . . . . . . . . . . . . . . . . . . . . . 290 Part IV Portlet Reference 295 9 About Portlets 297 9.1 9.2 9.3 9.4 Accessory Portlets . . . . . . . . . . . . . . . . . . . . . . . . . . . . . . . . . . . . . . . . . . . . . . . . . . . . . . . . . Admin Portlets . . . . . . . . . . . . . . . . . . . . . . . . . . . . . . . . . . . . . . . . . . . . . . . . . . . . . . . . . . . . Identity portlets . . . . . . . . . . . . . . . . . . . . . . . . . . . . . . . . . . . . . . . . . . . . . . . . . . . . . . . . . . . . System Components . . . . . . . . . . . . . . . . . . . . . . . . . . . . . . . . . . . . . . . . . . . . . . . . . . . . . . . 10 Create Portlet Reference 10.1 10.2 10.3 10.4 About the Create portlet . . . . . . . . . . . . . . . . . . . . . . . . . . . . . . . . . . . . . . . . . . . . . . . . . . . . . Configuring the Create Portlet . . . . . . . . . . . . . . . . . . . . . . . . . . . . . . . . . . . . . . . . . . . . . . . . 10.2.1 Directory Abstraction Layer Setup . . . . . . . . . . . . . . . . . . . . . . . . . . . . . . . . . . . . . . Setting Preferences . . . . . . . . . . . . . . . . . . . . . . . . . . . . . . . . . . . . . . . . . . . . . . . . . . . . . . . . Configuring the Create Portlet for Self-Registration . . . . . . . . . . . . . . . . . . . . . . . . . . . . . . . . 10.4.1 Guest Access Required Settings . . . . . . . . . . . . . . . . . . . . . . . . . . . . . . . . . . . . . . . 11 Detail Portlet Reference 11.1 11.2 11.3 11.4 11.5 11.6 About the Detail portlet. . . . . . . . . . . . . . . . . . . . . . . . . . . . . . . . . . . . . . . . . . . . . . . . . . . . . . 11.1.1 Displaying Entity Data . . . . . . . . . . . . . . . . . . . . . . . . . . . . . . . . . . . . . . . . . . . . . . . 11.1.2 Editing Entity Data . . . . . . . . . . . . . . . . . . . . . . . . . . . . . . . . . . . . . . . . . . . . . . . . . . 11.1.3 E-Mailing Entity Data . . . . . . . . . . . . . . . . . . . . . . . . . . . . . . . . . . . . . . . . . . . . . . . . 11.1.4 Linking to an organization chart . . . . . . . . . . . . . . . . . . . . . . . . . . . . . . . . . . . . . . . . 11.1.5 Linking to Details of Other Entities. . . . . . . . . . . . . . . . . . . . . . . . . . . . . . . . . . . . . . 11.1.6 Printing Entity Data . . . . . . . . . . . . . . . . . . . . . . . . . . . . . . . . . . . . . . . . . . . . . . . . . 11.1.7 Setting Preferred Locale . . . . . . . . . . . . . . . . . . . . . . . . . . . . . . . . . . . . . . . . . . . . . 11.1.8 Overriding the Default Entity . . . . . . . . . . . . . . . . . . . . . . . . . . . . . . . . . . . . . . . . . . Prerequisites . . . . . . . . . . . . . . . . . . . . . . . . . . . . . . . . . . . . . . . . . . . . . . . . . . . . . . . . . . . . . 11.2.1 Configuring the Directory Abstraction Layer . . . . . . . . . . . . . . . . . . . . . . . . . . . . . . 11.2.2 Assigning rights to entities . . . . . . . . . . . . . . . . . . . . . . . . . . . . . . . . . . . . . . . . . . . . Launching Detail from Other Portlets . . . . . . . . . . . . . . . . . . . . . . . . . . . . . . . . . . . . . . . . . . . 11.3.1 Launching Detail from the Search List Portlet . . . . . . . . . . . . . . . . . . . . . . . . . . . . . 11.3.2 From the Org Chart Portlet . . . . . . . . . . . . . . . . . . . . . . . . . . . . . . . . . . . . . . . . . . . Using Detail on a Page . . . . . . . . . . . . . . . . . . . . . . . . . . . . . . . . . . . . . . . . . . . . . . . . . . . . . Setting Preferences . . . . . . . . . . . . . . . . . . . . . . . . . . . . . . . . . . . . . . . . . . . . . . . . . . . . . . . . 11.5.1 About the Preferences . . . . . . . . . . . . . . . . . . . . . . . . . . . . . . . . . . . . . . . . . . . . . . . Setting up Detail for Anonymous Access . . . . . . . . . . . . . . . . . . . . . . . . . . . . . . . . . . . . . . . . 12 Org Chart Portlet Reference 12.1 12.2 12.3 About Org Chart . . . . . . . . . . . . . . . . . . . . . . . . . . . . . . . . . . . . . . . . . . . . . . . . . . . . . . . . . . . 12.1.1 About Org Chart Relationships . . . . . . . . . . . . . . . . . . . . . . . . . . . . . . . . . . . . . . . . 12.1.2 About Org Chart Display . . . . . . . . . . . . . . . . . . . . . . . . . . . . . . . . . . . . . . . . . . . . . Configuring the Org Chart Portlet. . . . . . . . . . . . . . . . . . . . . . . . . . . . . . . . . . . . . . . . . . . . . . 12.2.1 Directory Abstraction Layer Setup . . . . . . . . . . . . . . . . . . . . . . . . . . . . . . . . . . . . . . 12.2.2 Setting Preferences . . . . . . . . . . . . . . . . . . . . . . . . . . . . . . . . . . . . . . . . . . . . . . . . . 12.2.3 Dynamically Loading Images . . . . . . . . . . . . . . . . . . . . . . . . . . . . . . . . . . . . . . . . . . Configuring Org Chart for Guest Access . . . . . . . . . . . . . . . . . . . . . . . . . . . . . . . . . . . . . . . . 12.3.1 Modifying the Org Chart Preferences . . . . . . . . . . . . . . . . . . . . . . . . . . . . . . . . . . . 12.3.2 Modifying the User Application WAR . . . . . . . . . . . . . . . . . . . . . . . . . . . . . . . . . . . . 297 297 298 299 301 301 303 303 305 306 307 309 309 309 313 315 316 316 317 318 318 320 320 321 321 321 322 322 322 322 324 327 327 330 331 332 333 334 354 355 355 355 Contents 13 13 Resource Request Portlet 13.1 13.2 About the Resource Request Portlet . . . . . . . . . . . . . . . . . . . . . . . . . . . . . . . . . . . . . . . . . . . 357 Configuring the Resource Request Portlet. . . . . . . . . . . . . . . . . . . . . . . . . . . . . . . . . . . . . . . 357 13.2.1 Setting Preferences . . . . . . . . . . . . . . . . . . . . . . . . . . . . . . . . . . . . . . . . . . . . . . . . . 358 14 Search List Portlet Reference 14.1 14.2 14.3 About Search List . . . . . . . . . . . . . . . . . . . . . . . . . . . . . . . . . . . . . . . . . . . . . . . . . . . . . . . . . . 14.1.1 About Results List Display Formats . . . . . . . . . . . . . . . . . . . . . . . . . . . . . . . . . . . . . Configuring the Search List portlet . . . . . . . . . . . . . . . . . . . . . . . . . . . . . . . . . . . . . . . . . . . . . 14.2.1 Directory Abstraction Layer Setup . . . . . . . . . . . . . . . . . . . . . . . . . . . . . . . . . . . . . . 14.2.2 Setting Search List preferences. . . . . . . . . . . . . . . . . . . . . . . . . . . . . . . . . . . . . . . . Configuring Search List for Anonymous Access . . . . . . . . . . . . . . . . . . . . . . . . . . . . . . . . . . 359 359 361 363 364 365 370 Part V Configuring and Managing Provisioning Workflows 373 15 Configuring the User Application Driver to Start Workflows 375 15.1 15.2 About the User Application Driver . . . . . . . . . . . . . . . . . . . . . . . . . . . . . . . . . . . . . . . . . . . . . Setting Up Workflows to Start Automatically . . . . . . . . . . . . . . . . . . . . . . . . . . . . . . . . . . . . . 15.2.1 About Policies . . . . . . . . . . . . . . . . . . . . . . . . . . . . . . . . . . . . . . . . . . . . . . . . . . . . . 15.2.2 Using the Policy Builder . . . . . . . . . . . . . . . . . . . . . . . . . . . . . . . . . . . . . . . . . . . . . . 15.2.3 Using the Schema Mapping Policy Editor . . . . . . . . . . . . . . . . . . . . . . . . . . . . . . . . 16 Managing Provisioning Request Definitions 16.1 16.2 16.3 About the Provisioning Request Configuration Plug-in . . . . . . . . . . . . . . . . . . . . . . . . . . . . . Working with the Installed Templates . . . . . . . . . . . . . . . . . . . . . . . . . . . . . . . . . . . . . . . . . . Configuring a Provisioning Request Definition . . . . . . . . . . . . . . . . . . . . . . . . . . . . . . . . . . . . 16.3.1 Selecting the Driver . . . . . . . . . . . . . . . . . . . . . . . . . . . . . . . . . . . . . . . . . . . . . . . . . 16.3.2 Creating or Editing a Provisioning Request . . . . . . . . . . . . . . . . . . . . . . . . . . . . . . . 16.3.3 Deleting a Provisioning Request . . . . . . . . . . . . . . . . . . . . . . . . . . . . . . . . . . . . . . . 16.3.4 Filtering the List of Requests . . . . . . . . . . . . . . . . . . . . . . . . . . . . . . . . . . . . . . . . . . 16.3.5 Changing the Status of an Existing Provisioning Request. . . . . . . . . . . . . . . . . . . . 16.3.6 Defining Rights on an Existing Provisioning Request . . . . . . . . . . . . . . . . . . . . . . . 17 Managing Provisioning Workflows 17.1 17.2 17.3 17.4 14 357 About the Workflow Administration Plug-in . . . . . . . . . . . . . . . . . . . . . . . . . . . . . . . . . . . . . . Managing Workflows . . . . . . . . . . . . . . . . . . . . . . . . . . . . . . . . . . . . . . . . . . . . . . . . . . . . . . . 17.2.1 Connecting to a Workflow Server . . . . . . . . . . . . . . . . . . . . . . . . . . . . . . . . . . . . . . 17.2.2 Finding Workflows that Match Search Criteria. . . . . . . . . . . . . . . . . . . . . . . . . . . . . 17.2.3 Controlling the Active Workflows Display . . . . . . . . . . . . . . . . . . . . . . . . . . . . . . . . 17.2.4 Terminating a Workflow Instance . . . . . . . . . . . . . . . . . . . . . . . . . . . . . . . . . . . . . . 17.2.5 Viewing Details about a Workflow Instance . . . . . . . . . . . . . . . . . . . . . . . . . . . . . . . 17.2.6 Reassigning a Workflow Instance . . . . . . . . . . . . . . . . . . . . . . . . . . . . . . . . . . . . . . 17.2.7 Managing Workflow Processes in a Cluster . . . . . . . . . . . . . . . . . . . . . . . . . . . . . . Configuring the E-Mail Server . . . . . . . . . . . . . . . . . . . . . . . . . . . . . . . . . . . . . . . . . . . . . . . . Working with E-Mail Templates . . . . . . . . . . . . . . . . . . . . . . . . . . . . . . . . . . . . . . . . . . . . . . . 17.4.1 Default Content and Format . . . . . . . . . . . . . . . . . . . . . . . . . . . . . . . . . . . . . . . . . . 17.4.2 Editing E-mail Templates . . . . . . . . . . . . . . . . . . . . . . . . . . . . . . . . . . . . . . . . . . . . . 17.4.3 Modifying Default Values for the Template . . . . . . . . . . . . . . . . . . . . . . . . . . . . . . . 17.4.4 Adding Localized E-Mail Templates . . . . . . . . . . . . . . . . . . . . . . . . . . . . . . . . . . . . Identity Manager Roles Based Provisioning Module 3.7 User Application: Administration Guide 375 376 376 376 380 389 389 390 393 393 395 414 415 416 417 419 419 420 420 422 423 424 425 425 426 427 428 430 441 442 443 Part VI Web Service Reference 445 18 Provisioning Web Service 447 18.1 18.2 18.3 About the Provisioning Web Service . . . . . . . . . . . . . . . . . . . . . . . . . . . . . . . . . . . . . . . . . . . 18.1.1 Provisioning Web Service Overview . . . . . . . . . . . . . . . . . . . . . . . . . . . . . . . . . . . . 18.1.2 Removing Administrator Credential Restrictions . . . . . . . . . . . . . . . . . . . . . . . . . . . 18.1.3 Provisioning Web Service Method Categories . . . . . . . . . . . . . . . . . . . . . . . . . . . . Developing Clients for the Provisioning Web Service . . . . . . . . . . . . . . . . . . . . . . . . . . . . . . 18.2.1 Web Access to the Provisioning Web Service . . . . . . . . . . . . . . . . . . . . . . . . . . . . . 18.2.2 A Java Client for the Provisioning Web Service . . . . . . . . . . . . . . . . . . . . . . . . . . . 18.2.3 Developing a Mono Client . . . . . . . . . . . . . . . . . . . . . . . . . . . . . . . . . . . . . . . . . . . . 18.2.4 Sample Ant File . . . . . . . . . . . . . . . . . . . . . . . . . . . . . . . . . . . . . . . . . . . . . . . . . . . . 18.2.5 Sample Log4J File . . . . . . . . . . . . . . . . . . . . . . . . . . . . . . . . . . . . . . . . . . . . . . . . . . Provisioning Web Service API . . . . . . . . . . . . . . . . . . . . . . . . . . . . . . . . . . . . . . . . . . . . . . . . 18.3.1 Processes . . . . . . . . . . . . . . . . . . . . . . . . . . . . . . . . . . . . . . . . . . . . . . . . . . . . . . . . 18.3.2 Provisioning . . . . . . . . . . . . . . . . . . . . . . . . . . . . . . . . . . . . . . . . . . . . . . . . . . . . . . . 18.3.3 Work Entries . . . . . . . . . . . . . . . . . . . . . . . . . . . . . . . . . . . . . . . . . . . . . . . . . . . . . . 18.3.4 Comments . . . . . . . . . . . . . . . . . . . . . . . . . . . . . . . . . . . . . . . . . . . . . . . . . . . . . . . . 18.3.5 Configuration . . . . . . . . . . . . . . . . . . . . . . . . . . . . . . . . . . . . . . . . . . . . . . . . . . . . . . 18.3.6 Miscellaneous . . . . . . . . . . . . . . . . . . . . . . . . . . . . . . . . . . . . . . . . . . . . . . . . . . . . . 18.3.7 Cluster . . . . . . . . . . . . . . . . . . . . . . . . . . . . . . . . . . . . . . . . . . . . . . . . . . . . . . . . . . . 19 Metrics Web Service 19.1 19.2 19.3 About the Metrics Web Service . . . . . . . . . . . . . . . . . . . . . . . . . . . . . . . . . . . . . . . . . . . . . . . 19.1.1 Web Service Semantics. . . . . . . . . . . . . . . . . . . . . . . . . . . . . . . . . . . . . . . . . . . . . . 19.1.2 Accessing the Test Page . . . . . . . . . . . . . . . . . . . . . . . . . . . . . . . . . . . . . . . . . . . . . 19.1.3 Web Service Methods Grouped by Security Permissions . . . . . . . . . . . . . . . . . . . . 19.1.4 Specifying Filters . . . . . . . . . . . . . . . . . . . . . . . . . . . . . . . . . . . . . . . . . . . . . . . . . . . 19.1.5 Generating the Stub Classes . . . . . . . . . . . . . . . . . . . . . . . . . . . . . . . . . . . . . . . . . . 19.1.6 Obtaining the Remote Interface . . . . . . . . . . . . . . . . . . . . . . . . . . . . . . . . . . . . . . . . 19.1.7 Metrics Configuration Settings . . . . . . . . . . . . . . . . . . . . . . . . . . . . . . . . . . . . . . . . . Metrics Web Service API . . . . . . . . . . . . . . . . . . . . . . . . . . . . . . . . . . . . . . . . . . . . . . . . . . . . 19.2.1 Team Manager Methods . . . . . . . . . . . . . . . . . . . . . . . . . . . . . . . . . . . . . . . . . . . . . 19.2.2 Provisioning Application Administrator Methods . . . . . . . . . . . . . . . . . . . . . . . . . . . 19.2.3 Utility Methods . . . . . . . . . . . . . . . . . . . . . . . . . . . . . . . . . . . . . . . . . . . . . . . . . . . . . Metrics Web Service Examples . . . . . . . . . . . . . . . . . . . . . . . . . . . . . . . . . . . . . . . . . . . . . . . 19.3.1 General Examples . . . . . . . . . . . . . . . . . . . . . . . . . . . . . . . . . . . . . . . . . . . . . . . . . . 19.3.2 Other Examples . . . . . . . . . . . . . . . . . . . . . . . . . . . . . . . . . . . . . . . . . . . . . . . . . . . . 20 Notification Web Service 20.1 20.2 20.3 About the Notification Web Service . . . . . . . . . . . . . . . . . . . . . . . . . . . . . . . . . . . . . . . . . . . . 20.1.1 Accessing the Test Page . . . . . . . . . . . . . . . . . . . . . . . . . . . . . . . . . . . . . . . . . . . . . 20.1.2 Accessing the WSDL . . . . . . . . . . . . . . . . . . . . . . . . . . . . . . . . . . . . . . . . . . . . . . . . 20.1.3 Generating the Stub Classes . . . . . . . . . . . . . . . . . . . . . . . . . . . . . . . . . . . . . . . . . . Notification Web Service API . . . . . . . . . . . . . . . . . . . . . . . . . . . . . . . . . . . . . . . . . . . . . . . . . 20.2.1 iRemoteNotification . . . . . . . . . . . . . . . . . . . . . . . . . . . . . . . . . . . . . . . . . . . . . . . . . 20.2.2 BuiltInTokens . . . . . . . . . . . . . . . . . . . . . . . . . . . . . . . . . . . . . . . . . . . . . . . . . . . . . . 20.2.3 Entry . . . . . . . . . . . . . . . . . . . . . . . . . . . . . . . . . . . . . . . . . . . . . . . . . . . . . . . . . . . . 20.2.4 EntryArray . . . . . . . . . . . . . . . . . . . . . . . . . . . . . . . . . . . . . . . . . . . . . . . . . . . . . . . . 20.2.5 NotificationMap . . . . . . . . . . . . . . . . . . . . . . . . . . . . . . . . . . . . . . . . . . . . . . . . . . . . 20.2.6 NotificationService . . . . . . . . . . . . . . . . . . . . . . . . . . . . . . . . . . . . . . . . . . . . . . . . . . 20.2.7 StringArray . . . . . . . . . . . . . . . . . . . . . . . . . . . . . . . . . . . . . . . . . . . . . . . . . . . . . . . . 20.2.8 VersionVO . . . . . . . . . . . . . . . . . . . . . . . . . . . . . . . . . . . . . . . . . . . . . . . . . . . . . . . . Notification Example . . . . . . . . . . . . . . . . . . . . . . . . . . . . . . . . . . . . . . . . . . . . . . . . . . . . . . . 447 447 448 449 449 450 452 457 459 460 460 461 471 483 499 505 509 512 517 517 518 518 518 521 523 523 525 526 526 528 530 531 531 532 535 535 535 535 536 536 536 537 538 539 540 540 541 541 542 Contents 15 21 Directory Abstraction Layer (VDX) Web Service 21.1 21.2 21.3 About the Directory Abstraction Layer (VDX) Web Service . . . . . . . . . . . . . . . . . . . . . . . . . 21.1.1 Accessing the Test Page . . . . . . . . . . . . . . . . . . . . . . . . . . . . . . . . . . . . . . . . . . . . . 21.1.2 Accessing the WSDL . . . . . . . . . . . . . . . . . . . . . . . . . . . . . . . . . . . . . . . . . . . . . . . . 21.1.3 Generating the Stub Classes . . . . . . . . . . . . . . . . . . . . . . . . . . . . . . . . . . . . . . . . . . 21.1.4 Removing Administrator Credential Restrictions . . . . . . . . . . . . . . . . . . . . . . . . . . . VDX Web Service API . . . . . . . . . . . . . . . . . . . . . . . . . . . . . . . . . . . . . . . . . . . . . . . . . . . . . . 21.2.1 IRemoteVdx . . . . . . . . . . . . . . . . . . . . . . . . . . . . . . . . . . . . . . . . . . . . . . . . . . . . . . . 21.2.2 Attribute . . . . . . . . . . . . . . . . . . . . . . . . . . . . . . . . . . . . . . . . . . . . . . . . . . . . . . . . . . 21.2.3 AttributeArray . . . . . . . . . . . . . . . . . . . . . . . . . . . . . . . . . . . . . . . . . . . . . . . . . . . . . . 21.2.4 AttributeType . . . . . . . . . . . . . . . . . . . . . . . . . . . . . . . . . . . . . . . . . . . . . . . . . . . . . . 21.2.5 BooleanArray . . . . . . . . . . . . . . . . . . . . . . . . . . . . . . . . . . . . . . . . . . . . . . . . . . . . . . 21.2.6 ByteArrayArray . . . . . . . . . . . . . . . . . . . . . . . . . . . . . . . . . . . . . . . . . . . . . . . . . . . . 21.2.7 DateArray. . . . . . . . . . . . . . . . . . . . . . . . . . . . . . . . . . . . . . . . . . . . . . . . . . . . . . . . . 21.2.8 EntryAttributeMap . . . . . . . . . . . . . . . . . . . . . . . . . . . . . . . . . . . . . . . . . . . . . . . . . . 21.2.9 Entry . . . . . . . . . . . . . . . . . . . . . . . . . . . . . . . . . . . . . . . . . . . . . . . . . . . . . . . . . . . . 21.2.10 EntryArray . . . . . . . . . . . . . . . . . . . . . . . . . . . . . . . . . . . . . . . . . . . . . . . . . . . . . . . . 21.2.11 IntegerArray . . . . . . . . . . . . . . . . . . . . . . . . . . . . . . . . . . . . . . . . . . . . . . . . . . . . . . . 21.2.12 StringArray . . . . . . . . . . . . . . . . . . . . . . . . . . . . . . . . . . . . . . . . . . . . . . . . . . . . . . . . 21.2.13 StringEntry . . . . . . . . . . . . . . . . . . . . . . . . . . . . . . . . . . . . . . . . . . . . . . . . . . . . . . . . 21.2.14 StringEntryArray . . . . . . . . . . . . . . . . . . . . . . . . . . . . . . . . . . . . . . . . . . . . . . . . . . . 21.2.15 StringMap . . . . . . . . . . . . . . . . . . . . . . . . . . . . . . . . . . . . . . . . . . . . . . . . . . . . . . . . 21.2.16 VdxService. . . . . . . . . . . . . . . . . . . . . . . . . . . . . . . . . . . . . . . . . . . . . . . . . . . . . . . . 21.2.17 VersionVO . . . . . . . . . . . . . . . . . . . . . . . . . . . . . . . . . . . . . . . . . . . . . . . . . . . . . . . . VDX Example . . . . . . . . . . . . . . . . . . . . . . . . . . . . . . . . . . . . . . . . . . . . . . . . . . . . . . . . . . . . . 22 Role Web Service 22.1 22.2 16 About the Role Web Service . . . . . . . . . . . . . . . . . . . . . . . . . . . . . . . . . . . . . . . . . . . . . . . . . 22.1.1 Accessing the Test Page . . . . . . . . . . . . . . . . . . . . . . . . . . . . . . . . . . . . . . . . . . . . . 22.1.2 Accessing the WSDL . . . . . . . . . . . . . . . . . . . . . . . . . . . . . . . . . . . . . . . . . . . . . . . . 22.1.3 Generating the Stub Classes . . . . . . . . . . . . . . . . . . . . . . . . . . . . . . . . . . . . . . . . . . 22.1.4 Removing Administrator Credential Restrictions . . . . . . . . . . . . . . . . . . . . . . . . . . . Role API . . . . . . . . . . . . . . . . . . . . . . . . . . . . . . . . . . . . . . . . . . . . . . . . . . . . . . . . . . . . . . . . . 22.2.1 IRemoteRole . . . . . . . . . . . . . . . . . . . . . . . . . . . . . . . . . . . . . . . . . . . . . . . . . . . . . . 22.2.2 Approver . . . . . . . . . . . . . . . . . . . . . . . . . . . . . . . . . . . . . . . . . . . . . . . . . . . . . . . . . 22.2.3 ApproverArray . . . . . . . . . . . . . . . . . . . . . . . . . . . . . . . . . . . . . . . . . . . . . . . . . . . . . 22.2.4 Category . . . . . . . . . . . . . . . . . . . . . . . . . . . . . . . . . . . . . . . . . . . . . . . . . . . . . . . . . 22.2.5 CategoryArray . . . . . . . . . . . . . . . . . . . . . . . . . . . . . . . . . . . . . . . . . . . . . . . . . . . . . 22.2.6 CategoryKey . . . . . . . . . . . . . . . . . . . . . . . . . . . . . . . . . . . . . . . . . . . . . . . . . . . . . . 22.2.7 CategoryKeyArray . . . . . . . . . . . . . . . . . . . . . . . . . . . . . . . . . . . . . . . . . . . . . . . . . . 22.2.8 Configuration . . . . . . . . . . . . . . . . . . . . . . . . . . . . . . . . . . . . . . . . . . . . . . . . . . . . . . 22.2.9 Container . . . . . . . . . . . . . . . . . . . . . . . . . . . . . . . . . . . . . . . . . . . . . . . . . . . . . . . . . 22.2.10 DNString . . . . . . . . . . . . . . . . . . . . . . . . . . . . . . . . . . . . . . . . . . . . . . . . . . . . . . . . . 22.2.11 DNStringArray . . . . . . . . . . . . . . . . . . . . . . . . . . . . . . . . . . . . . . . . . . . . . . . . . . . . . 22.2.12 Entitlement. . . . . . . . . . . . . . . . . . . . . . . . . . . . . . . . . . . . . . . . . . . . . . . . . . . . . . . . 22.2.13 EntitlementArray . . . . . . . . . . . . . . . . . . . . . . . . . . . . . . . . . . . . . . . . . . . . . . . . . . . 22.2.14 Group. . . . . . . . . . . . . . . . . . . . . . . . . . . . . . . . . . . . . . . . . . . . . . . . . . . . . . . . . . . . 22.2.15 IdentityType . . . . . . . . . . . . . . . . . . . . . . . . . . . . . . . . . . . . . . . . . . . . . . . . . . . . . . . 22.2.16 IdentityTypeDnMap . . . . . . . . . . . . . . . . . . . . . . . . . . . . . . . . . . . . . . . . . . . . . . . . . 22.2.17 IdentityTypeDnMapArray . . . . . . . . . . . . . . . . . . . . . . . . . . . . . . . . . . . . . . . . . . . . . 22.2.18 LocalizedValue . . . . . . . . . . . . . . . . . . . . . . . . . . . . . . . . . . . . . . . . . . . . . . . . . . . . 22.2.19 LongArray . . . . . . . . . . . . . . . . . . . . . . . . . . . . . . . . . . . . . . . . . . . . . . . . . . . . . . . . 22.2.20 NrfServiceException . . . . . . . . . . . . . . . . . . . . . . . . . . . . . . . . . . . . . . . . . . . . . . . . 22.2.21 RequestCategoryType . . . . . . . . . . . . . . . . . . . . . . . . . . . . . . . . . . . . . . . . . . . . . . . 22.2.22 RequestStatus . . . . . . . . . . . . . . . . . . . . . . . . . . . . . . . . . . . . . . . . . . . . . . . . . . . . . 22.2.23 Role . . . . . . . . . . . . . . . . . . . . . . . . . . . . . . . . . . . . . . . . . . . . . . . . . . . . . . . . . . . . . Identity Manager Roles Based Provisioning Module 3.7 User Application: Administration Guide 545 545 545 545 546 546 547 547 549 551 552 552 552 553 554 554 555 556 556 557 557 558 559 559 559 569 569 569 572 572 572 573 573 586 587 587 588 589 589 590 593 594 595 595 596 597 598 600 601 601 602 603 603 605 607 22.3 22.2.24 RoleAssignment. . . . . . . . . . . . . . . . . . . . . . . . . . . . . . . . . . . . . . . . . . . . . . . . . . . . 22.2.25 RoleAssignmentArray . . . . . . . . . . . . . . . . . . . . . . . . . . . . . . . . . . . . . . . . . . . . . . . 22.2.26 RoleAssignmentActionType. . . . . . . . . . . . . . . . . . . . . . . . . . . . . . . . . . . . . . . . . . . 22.2.27 RoleAssignmentRequest . . . . . . . . . . . . . . . . . . . . . . . . . . . . . . . . . . . . . . . . . . . . . 22.2.28 RoleAssignmentRequestStatus . . . . . . . . . . . . . . . . . . . . . . . . . . . . . . . . . . . . . . . . 22.2.29 RoleAssignmentType. . . . . . . . . . . . . . . . . . . . . . . . . . . . . . . . . . . . . . . . . . . . . . . . 22.2.30 RoleAssignmentTypeInfo. . . . . . . . . . . . . . . . . . . . . . . . . . . . . . . . . . . . . . . . . . . . . 22.2.31 RoleInfo . . . . . . . . . . . . . . . . . . . . . . . . . . . . . . . . . . . . . . . . . . . . . . . . . . . . . . . . . . 22.2.32 RoleInfoArray . . . . . . . . . . . . . . . . . . . . . . . . . . . . . . . . . . . . . . . . . . . . . . . . . . . . . . 22.2.33 RoleLevel. . . . . . . . . . . . . . . . . . . . . . . . . . . . . . . . . . . . . . . . . . . . . . . . . . . . . . . . . 22.2.34 RoleLevelArray . . . . . . . . . . . . . . . . . . . . . . . . . . . . . . . . . . . . . . . . . . . . . . . . . . . . 22.2.35 RoleRequest . . . . . . . . . . . . . . . . . . . . . . . . . . . . . . . . . . . . . . . . . . . . . . . . . . . . . . 22.2.36 RoleServiceDelegate . . . . . . . . . . . . . . . . . . . . . . . . . . . . . . . . . . . . . . . . . . . . . . . . 22.2.37 RoleServiceSkeletonImpl. . . . . . . . . . . . . . . . . . . . . . . . . . . . . . . . . . . . . . . . . . . . . 22.2.38 Sod . . . . . . . . . . . . . . . . . . . . . . . . . . . . . . . . . . . . . . . . . . . . . . . . . . . . . . . . . . . . . 22.2.39 SodArray . . . . . . . . . . . . . . . . . . . . . . . . . . . . . . . . . . . . . . . . . . . . . . . . . . . . . . . . . 22.2.40 SodApprovalType . . . . . . . . . . . . . . . . . . . . . . . . . . . . . . . . . . . . . . . . . . . . . . . . . . 22.2.41 SodJustification . . . . . . . . . . . . . . . . . . . . . . . . . . . . . . . . . . . . . . . . . . . . . . . . . . . . 22.2.42 SodJustificationArray . . . . . . . . . . . . . . . . . . . . . . . . . . . . . . . . . . . . . . . . . . . . . . . . 22.2.43 User . . . . . . . . . . . . . . . . . . . . . . . . . . . . . . . . . . . . . . . . . . . . . . . . . . . . . . . . . . . . . 22.2.44 VersionVO . . . . . . . . . . . . . . . . . . . . . . . . . . . . . . . . . . . . . . . . . . . . . . . . . . . . . . . . Role Web Service Example . . . . . . . . . . . . . . . . . . . . . . . . . . . . . . . . . . . . . . . . . . . . . . . . . . 22.3.1 Retrieving Roles for a Group . . . . . . . . . . . . . . . . . . . . . . . . . . . . . . . . . . . . . . . . . 22.3.2 Retrieving Role Assignment Request Status . . . . . . . . . . . . . . . . . . . . . . . . . . . . . . 22.3.3 Retrieving Type Information for a Role Assignment . . . . . . . . . . . . . . . . . . . . . . . . 22.3.4 Retrieving Role Categories . . . . . . . . . . . . . . . . . . . . . . . . . . . . . . . . . . . . . . . . . . . 22.3.5 Retrieving Role Levels . . . . . . . . . . . . . . . . . . . . . . . . . . . . . . . . . . . . . . . . . . . . . . . 22.3.6 Verifying Whether a User Is In a ROle. . . . . . . . . . . . . . . . . . . . . . . . . . . . . . . . . . . 23 Resource Web Service 23.1 23.2 About the Resource Web Service . . . . . . . . . . . . . . . . . . . . . . . . . . . . . . . . . . . . . . . . . . . . . 23.1.1 Accessing the Test Page . . . . . . . . . . . . . . . . . . . . . . . . . . . . . . . . . . . . . . . . . . . . . 23.1.2 Accessing the WSDL . . . . . . . . . . . . . . . . . . . . . . . . . . . . . . . . . . . . . . . . . . . . . . . . 23.1.3 Removing Administrator Credential Restrictions . . . . . . . . . . . . . . . . . . . . . . . . . . . Resource Web Service Interface . . . . . . . . . . . . . . . . . . . . . . . . . . . . . . . . . . . . . . . . . . . . . . 23.2.1 IRemoteResource . . . . . . . . . . . . . . . . . . . . . . . . . . . . . . . . . . . . . . . . . . . . . . . . . . 23.2.2 ResourceRequestParam . . . . . . . . . . . . . . . . . . . . . . . . . . . . . . . . . . . . . . . . . . . . . 23.2.3 ResourceAssignmentRequestStatus . . . . . . . . . . . . . . . . . . . . . . . . . . . . . . . . . . . . 24 Forgot Password Web Service 24.1 24.2 24.3 About the Forgot Password Web Service . . . . . . . . . . . . . . . . . . . . . . . . . . . . . . . . . . . . . . . 24.1.1 Accessing the Service . . . . . . . . . . . . . . . . . . . . . . . . . . . . . . . . . . . . . . . . . . . . . . . 24.1.2 Accessing the WSDL . . . . . . . . . . . . . . . . . . . . . . . . . . . . . . . . . . . . . . . . . . . . . . . . Password Management Web Service Interface . . . . . . . . . . . . . . . . . . . . . . . . . . . . . . . . . . . 24.2.1 processForgotConf . . . . . . . . . . . . . . . . . . . . . . . . . . . . . . . . . . . . . . . . . . . . . . . . . 24.2.2 processUser. . . . . . . . . . . . . . . . . . . . . . . . . . . . . . . . . . . . . . . . . . . . . . . . . . . . . . . 24.2.3 processChaRes . . . . . . . . . . . . . . . . . . . . . . . . . . . . . . . . . . . . . . . . . . . . . . . . . . . . 24.2.4 processChgPwd. . . . . . . . . . . . . . . . . . . . . . . . . . . . . . . . . . . . . . . . . . . . . . . . . . . . ForgotPasswordWSBean . . . . . . . . . . . . . . . . . . . . . . . . . . . . . . . . . . . . . . . . . . . . . . . . . . . . 612 614 614 616 619 622 624 626 627 628 629 630 633 637 642 644 645 646 647 648 652 652 652 653 654 655 656 657 659 659 659 660 661 662 662 664 665 669 669 669 669 670 670 670 671 672 672 Contents 17 Part VII REST Services 675 25 Introduction to Resource Information Services 677 25.1 25.2 25.3 About RIS. . . . . . . . . . . . . . . . . . . . . . . . . . . . . . . . . . . . . . . . . . . . . . . . . . . . . . . . . . . . . . . . 25.1.1 How it Works . . . . . . . . . . . . . . . . . . . . . . . . . . . . . . . . . . . . . . . . . . . . . . . . . . . . . . 25.1.2 Configuring the RIS WAR . . . . . . . . . . . . . . . . . . . . . . . . . . . . . . . . . . . . . . . . . . . . Security . . . . . . . . . . . . . . . . . . . . . . . . . . . . . . . . . . . . . . . . . . . . . . . . . . . . . . . . . . . . . . . . . 25.2.1 Architecture . . . . . . . . . . . . . . . . . . . . . . . . . . . . . . . . . . . . . . . . . . . . . . . . . . . . . . . 25.2.2 Authorization REST Service . . . . . . . . . . . . . . . . . . . . . . . . . . . . . . . . . . . . . . . . . . 25.2.3 Configuration Parameters . . . . . . . . . . . . . . . . . . . . . . . . . . . . . . . . . . . . . . . . . . . . WADL Document . . . . . . . . . . . . . . . . . . . . . . . . . . . . . . . . . . . . . . . . . . . . . . . . . . . . . . . . . 26 Identities Service 26.1 26.2 About the Identities Service . . . . . . . . . . . . . . . . . . . . . . . . . . . . . . . . . . . . . . . . . . . . . . . . . . Accessing and Using the Identities Service . . . . . . . . . . . . . . . . . . . . . . . . . . . . . . . . . . . . . . 26.2.1 Available Resources . . . . . . . . . . . . . . . . . . . . . . . . . . . . . . . . . . . . . . . . . . . . . . . . 26.2.2 Complete URI Syntax . . . . . . . . . . . . . . . . . . . . . . . . . . . . . . . . . . . . . . . . . . . . . . . 26.2.3 JSON Representations Received by the Client . . . . . . . . . . . . . . . . . . . . . . . . . . . . 26.2.4 Event Status Codes . . . . . . . . . . . . . . . . . . . . . . . . . . . . . . . . . . . . . . . . . . . . . . . . . 27 Password Management and SSO Services 27.1 27.2 About the Password Management and SSO Services. . . . . . . . . . . . . . . . . . . . . . . . . . . . . . Accessing and Using the Password Management and SSO Services. . . . . . . . . . . . . . . . . . 27.2.1 Available Resources . . . . . . . . . . . . . . . . . . . . . . . . . . . . . . . . . . . . . . . . . . . . . . . . 27.2.2 Complete URI Syntax . . . . . . . . . . . . . . . . . . . . . . . . . . . . . . . . . . . . . . . . . . . . . . . 27.2.3 JSON Representations Received by the Client . . . . . . . . . . . . . . . . . . . . . . . . . . . . 28 Roles Service 28.1 28.2 About the Role Service . . . . . . . . . . . . . . . . . . . . . . . . . . . . . . . . . . . . . . . . . . . . . . . . . . . . . Accessing and Using the Role Service . . . . . . . . . . . . . . . . . . . . . . . . . . . . . . . . . . . . . . . . . 28.2.1 Available Resources . . . . . . . . . . . . . . . . . . . . . . . . . . . . . . . . . . . . . . . . . . . . . . . . 28.2.2 Complete URI Syntax . . . . . . . . . . . . . . . . . . . . . . . . . . . . . . . . . . . . . . . . . . . . . . . 28.2.3 JSON Representations Received by the Client . . . . . . . . . . . . . . . . . . . . . . . . . . . . 28.2.4 Event Status Codes . . . . . . . . . . . . . . . . . . . . . . . . . . . . . . . . . . . . . . . . . . . . . . . . . 29 Work Items Service 29.1 29.2 About the Work Items Service . . . . . . . . . . . . . . . . . . . . . . . . . . . . . . . . . . . . . . . . . . . . . . . . Accessing and Using the Work Items Service . . . . . . . . . . . . . . . . . . . . . . . . . . . . . . . . . . . . 29.2.1 Available Resources . . . . . . . . . . . . . . . . . . . . . . . . . . . . . . . . . . . . . . . . . . . . . . . . 29.2.2 Complete URI Syntax . . . . . . . . . . . . . . . . . . . . . . . . . . . . . . . . . . . . . . . . . . . . . . . 29.2.3 JSON Representations Received by the Client . . . . . . . . . . . . . . . . . . . . . . . . . . . . 29.2.4 JSON Representations Sent by the Client. . . . . . . . . . . . . . . . . . . . . . . . . . . . . . . . 29.2.5 Event Status Codes . . . . . . . . . . . . . . . . . . . . . . . . . . . . . . . . . . . . . . . . . . . . . . . . . 29.2.6 JSON Schema . . . . . . . . . . . . . . . . . . . . . . . . . . . . . . . . . . . . . . . . . . . . . . . . . . . . . 30 Workflow Process and Definition Service 30.1 30.2 18 677 677 678 681 681 688 690 692 697 697 697 697 697 699 702 703 703 703 703 704 706 713 713 713 713 714 716 721 723 723 723 723 724 726 730 731 732 737 About the Workflow Process and Definition Service . . . . . . . . . . . . . . . . . . . . . . . . . . . . . . . 737 Accessing and Using the Workflow Process and Definition Service . . . . . . . . . . . . . . . . . . . 737 30.2.1 Available Resources . . . . . . . . . . . . . . . . . . . . . . . . . . . . . . . . . . . . . . . . . . . . . . . . 737 Identity Manager Roles Based Provisioning Module 3.7 User Application: Administration Guide 30.2.2 30.2.3 30.2.4 30.2.5 30.2.6 30.2.7 Complete URI Syntax . . . . . . . . . . . . . . . . . . . . . . . . . . . . . . . . . . . . . . . . . . . . . . . JSON Representations Received by the Client . . . . . . . . . . . . . . . . . . . . . . . . . . . . JSON Representations Sent by the Client. . . . . . . . . . . . . . . . . . . . . . . . . . . . . . . . Event Status Codes . . . . . . . . . . . . . . . . . . . . . . . . . . . . . . . . . . . . . . . . . . . . . . . . . JSON Schema . . . . . . . . . . . . . . . . . . . . . . . . . . . . . . . . . . . . . . . . . . . . . . . . . . . . . Testing the Client with the CURL Command . . . . . . . . . . . . . . . . . . . . . . . . . . . . . . 738 741 745 745 746 750 Part VIII Appendixes 753 A Schema Extensions for the User Application 755 A.1 A.2 A.3 A.4 A.5 A.6 A.7 Attribute Schema Extensions . . . . . . . . . . . . . . . . . . . . . . . . . . . . . . . . . . . . . . . . . . . . . . . . . Objectclass Schema Extensions . . . . . . . . . . . . . . . . . . . . . . . . . . . . . . . . . . . . . . . . . . . . . . Resource Definition Object (nrfResource) . . . . . . . . . . . . . . . . . . . . . . . . . . . . . . . . . . . . . . . Resource Request Object (nrfResourceRequest) . . . . . . . . . . . . . . . . . . . . . . . . . . . . . . . . . A.4.1 Resource Request Status Codes (nrfStatus). . . . . . . . . . . . . . . . . . . . . . . . . . . . . . Role-Resource Configuration (nrfConfiguration) . . . . . . . . . . . . . . . . . . . . . . . . . . . . . . . . . . Resource Binding to Users (nrfIdentity) . . . . . . . . . . . . . . . . . . . . . . . . . . . . . . . . . . . . . . . . . Resource Containers . . . . . . . . . . . . . . . . . . . . . . . . . . . . . . . . . . . . . . . . . . . . . . . . . . . . . . . B JavaScript Search API B.1 B.2 B.3 B.4 B.5 B.6 Launching a Basic Search using the SearchListPortlet . . . . . . . . . . . . . . . . . . . . . . . . . . . . . B.1.1 Passing Request Parameters . . . . . . . . . . . . . . . . . . . . . . . . . . . . . . . . . . . . . . . . . B.1.2 Using a JSON-formatted String to Represent a Query . . . . . . . . . . . . . . . . . . . . . . Creating a New Query using the JavaScript API . . . . . . . . . . . . . . . . . . . . . . . . . . . . . . . . . . B.2.1 JavaScript API . . . . . . . . . . . . . . . . . . . . . . . . . . . . . . . . . . . . . . . . . . . . . . . . . . . . . Performing an Advanced Search Using a JSON-formatted Query . . . . . . . . . . . . . . . . . . . . Retrieving all Saved Queries for the Current User . . . . . . . . . . . . . . . . . . . . . . . . . . . . . . . . . Running an Existing Saved Query . . . . . . . . . . . . . . . . . . . . . . . . . . . . . . . . . . . . . . . . . . . . . Performing a Search on All Searchable Attributes . . . . . . . . . . . . . . . . . . . . . . . . . . . . . . . . . C Trouble Shooting C.1 C.2 C.3 C.4 C.5 C.6 Permgen Space Error . . . . . . . . . . . . . . . . . . . . . . . . . . . . . . . . . . . . . . . . . . . . . . . . . . . . . . E-Mail Notification Templates . . . . . . . . . . . . . . . . . . . . . . . . . . . . . . . . . . . . . . . . . . . . . . . . Org Chart and Guest Access . . . . . . . . . . . . . . . . . . . . . . . . . . . . . . . . . . . . . . . . . . . . . . . . . Provisioning Notification . . . . . . . . . . . . . . . . . . . . . . . . . . . . . . . . . . . . . . . . . . . . . . . . . . . . . javax.naming.SizeLimitExceededException. . . . . . . . . . . . . . . . . . . . . . . . . . . . . . . . . . . . . . Linux Open Files Error . . . . . . . . . . . . . . . . . . . . . . . . . . . . . . . . . . . . . . . . . . . . . . . . . . . . . . 755 758 759 760 761 762 762 762 763 763 763 765 766 767 770 770 770 771 773 773 773 773 774 774 774 Contents 19 20 Identity Manager Roles Based Provisioning Module 3.7 User Application: Administration Guide About This Guide This guide describes how to administer the Novell Identity Manager User Application. It includes these parts: Part I, “Overview,” on page 23 Part II, “Configuring the User Application Environment,” on page 47 Part III, “Administering the User Application,” on page 129 Part IV, “Portlet Reference,” on page 295 Part V, “Configuring and Managing Provisioning Workflows,” on page 373 Part VIII, “Appendixes,” on page 753 To learn about administering the other features of Identity Manager (which are common to all packagings), see the Novell Identity Manager: Administration Guide. Audience The information in this guide is for system administrators, architects, and consultants who are responsible for configuring, deploying, and managing the identity self-service features and workflow-based provisioning features of the Identity Manager User Application. End-user documentation for these features is provided in the Identity Manager User Application: User Guide. Feedback We want to hear your comments and suggestions about this manual and the other documentation included with this product. Please use the User Comments feature at the bottom of each page of the online documentation, or go to www.novell.com/documentation/feedback.html and enter your comments there. Documentation Updates For the most recent version of the Identity Manager User Application: Administration Guide, visit the Identity Manager Documentation Web site (http://www.novell.com/documentation/idmrbpm37). Documentation Conventions In Novell documentation, a greater-than symbol (>) is used to separate actions within a step and items in a cross-reference path. A trademark symbol (®, TM, etc.) denotes a Novell trademark. An asterisk (*) denotes a third-party trademark. When a single pathname can be written with a backslash for some platforms or a forward slash for other platforms, the pathname is presented with a backslash. Users of platforms that require a forward slash, such as Linux or UNIX, should use forward slashes as required by your software. About This Guide 21 22 Identity Manager Roles Based Provisioning Module 3.7 User Application: Administration Guide I Overview I This section introduces you to the Identity Manager User Application, and helps you plan for its use in your organization. Chapter 1, “Introduction to the User Application,” on page 25 Overview 23 24 Identity Manager Roles Based Provisioning Module 3.7 User Application: Administration Guide 1 Introduction to the User Application 1 This section introduces the Identity Manager User Application. Topics include: Section 1.1, “About the User Application,” on page 25 Section 1.2, “User Application Architecture,” on page 31 Section 1.3, “User Application User Types,” on page 37 Section 1.4, “Design and Configuration Tools,” on page 42 Section 1.5, “What’s Next,” on page 44 1.1 About the User Application The Identity Manager User Application is the business user’s view into the information, resources, and capabilities of Identity Manager. The User Application is a browser-based Web application that gives the user the ability to perform a variety of identity self-service tasks. The User Application provides a complete roles-based provisioning solution, giving users the ability to initiate and manage provisioning and role-based requests and approvals. In addition, the User Application offers support for compliance features, giving an organization a way to ensure that personnel conform to relevant business laws and regulations. The User Application enables you to address the following business needs: Providing a convenient way to perform roles-based provisioning actions. The User Application allows you to manage role definitions and role assignments within your organization. Role assignments can be mapped to resources within a company, such as user accounts, computers, and databases. For details on setting up the Roles and Resources tab, see Section 2.10, “Configuring the Roles and Resources Tab,” on page 89. Ensuring that an organization has a method for verifying that personnel are fully aware of organizational policies and are taking steps to comply with these policies. For details on setting up the Compliance tab, see Section 2.11, “Configuring the Compliance Tab,” on page 98. Providing user self-service, allowing a new user to self-register, and providing access to anonymous or guest users. For more information, see Part IV, “Portlet Reference,” on page 295. Ensuring that access to corporate resources complies with organizational policies and that provisioning occurs within the context of the corporate security policy. You can grant users access to identity data within the guidelines of corporate security policies. For more information, see Section 2.2, “Security,” on page 51. Reducing the administrative burden of entering, updating, and deleting user information across all systems in the enterprise. Introduction to the User Application 25 You can create customized workflows to provide a Web-based interface for users to manipulate distributed identity data triggering workflows as necessary. For more information, see Part V, “Configuring and Managing Provisioning Workflows,” on page 373. Managing manual and automated provisioning of identities, services, resources, and assets, and supporting complex workflows. You can implement manual provisioning by creating workflows that route provisioning requests to one or more authorities. For automated provisioning, you can configure the User Application to start workflows automatically in response to events occurring in the Identity Vault. For more information, see Part V, “Configuring and Managing Provisioning Workflows,” on page 373. IMPORTANT: The User Application is an application and not a framework. The areas within the User Application that are supported to be modified are outlined within the product documentation. Modifications to areas not outlined within the product documentation are not supported. 1.1.1 About Identity Self-Service Identity is the foundation of the User Application. The application uses identity as the basis for authorizing users access to systems, applications, and databases. Each user’s unique identifier—and each user’s roles—comes with specific access rights to identity data. For example, users who are identified as managers can access salary information about their direct reports, but not about other employees in their organization. The Identity Self-Service tab within the application gives users a convenient way to display and work with identity information. It enables your organization to be more responsive by giving users access to the information they need whenever they need it. For example, users might use the Identity Self-Service tab to: Manage their own user accounts directly Look up other users and groups in the organization on demand Visualize how those users and groups are related List applications with which they are associated The User Application Administrator is responsible for setting up the contents of the Identity SelfService tab. What business users can see and do is typically determined by how the application has been configured, by their job requirements and level of authority. 1.1.2 About Roles-Based Provisioning The purpose of the Roles and Resources tab within the User Application is to give you a convenient way to perform roles-based provisioning actions. These actions allow you to manage role definitions and role assignments within your organization. Role assignments can be mapped to resources within a company, such as user accounts, computers, and databases. For example, you might use the Roles and Resources tab to: Make role requests for yourself or other users within your organization Create roles and role relationships within the roles hierarchy 26 Identity Manager Roles Based Provisioning Module 3.7 User Application: Administration Guide Create separation of duties (SoD) constraints to manage potential conflicts between role assignments Look at reports that provide details about the current state of the Role Catalog and the roles currently assigned to users, groups, and containers When a role assignment request requires permission from one or more individuals in an organization, the request starts a workflow. The workflow coordinates the approvals needed to fulfill the request. Some role assignment requests require approval from a single individual; others require approval from several individuals. In some instances, a request can be fulfilled without any approvals. When a role assignment request results in a potential separation of duties conflict, the initiator has the option to override the separation of duties constraint, and provide a justification for making an exception to the constraint. In some cases, a separation of duties conflict can cause a workflow to start. The workflow coordinates the approvals needed to allow the separation of duties exception to take effect. Your workflow designer and system administrator are responsible for setting up the contents of the Roles and Resources tab for you and the others in your organization. The flow of control for a rolesbased workflow or separation of duties workflow, as well as the appearance of forms, can vary depending on how the approval definition for the workflow was defined in the Designer for Identity Manager. In addition, what you can see and do is typically determined by your job requirements and your level of authority. For details on setting up the Role Subsystem, see Section 2.10, “Configuring the Roles and Resources Tab,” on page 89. For details on using the Roles and Resources tab, see the discussion of the Roles and Resources tab in the Identity Manager User Application: User Guide (http:// www.novell.com/documentation/idmrbpm37/pdfdoc/ugpro/ugpro.pdf). 1.1.3 About Resource-Based Provisioning The purpose of the resource functionality within the User Application is to give you a convenient way to perform resource-based provisioning actions. These actions allow you to manage resource definitions and resource assignments within your organization. Resource assignments can be mapped to users or to roles within a company. For example, you might use resources to: Make resource requests for yourself or other users within your organization Create resources and map them to entitlements When a resource assignment request requires permission from one or more individuals in an organization, the request starts a workflow. The workflow coordinates the approvals needed to fulfill the request. Some resource assignment requests require approval from a single individual; others require approval from several individuals. In some instances, a request can be fulfilled without any approvals. The following business rules govern the behavior of resources within the User Application: Resources can only be assigned to a user. This does not preclude a resource being granted to users in a container or group based on implicit role assignment. However, the resource assignment will only be associated with a user. Resources can be assigned in any of the following ways: Directly by a user through UI mechanisms Introduction to the User Application 27 Through a provisioning request Through a role request assignment Through a Rest or SOAP interface The same resource can be granted to a user multiple times (if this capability has been enabled in the resource definition). A resource definition can have no more then one entitlement bound to it. A resource definition can have one or more same-entitlement references bound to it. This capability provides support for entitlements where the entitlement parameters represent provisionable accounts or permssions on the connected system. Entitlement and decision support parameters can be specified at design time (static) or at request time (dynamic). Your workflow designer and system administrator are responsible for setting up the User Application for you and the others in your organization. The flow of control for a resource-based workflow, as well as the appearance of forms, can vary depending on how the approval definition for the workflow was defined in the Designer for Identity Manager. In addition, what you can see and do is typically determined by your job requirements and your level of authority. Resources A resource is any digital entity such as a user account, computer, or database that a business user needs to be able to access. The User Application provides a convenient way for end users to request the resources they need. In addition, it provides tools that administrators can use to define resources. Each resource is mapped to an entitlement. A resource definition can have no more than one entitlement bound to it. A resource definition can be bound to the same entitlement more than once, with different entitlement parameters for each resource. Resource Requests Resources can be assigned to users only. They cannot be assigned to groups or containers. However, if a role is assigned to a group or container, the users in the group or container may automatically be granted access to the resources associated with the role. Resource requests may require approvals. The approval process for a resource may handled by a provisioning request definition, or by an external system by setting the status code on the resource request. If a resource grant request is initiated by a role assignment then it is possible that the resource will not be granted, even though the role is provisioned. The most likely reason for this would be that the necessary approvals were not provided. A resource request can grant a resource to a user or revoke a resource from a user. Role and Resource Service Driver The User Application uses the Role and Resource Service Driver to manage back-end processing of resources. For example, it manages all resource requests, starts workflows for resource requests, and initiates the provisioning process for resource requests. 28 Identity Manager Roles Based Provisioning Module 3.7 User Application: Administration Guide Resource Request Process Flow The following example shows the process flow for a resource assignment request. In this example, a user requests a resource that grants access to an SAP profile: Figure 1-1 Process Flow for a Resource Request The steps in the process are described below: 1. A user requests a resource within the User Application. 2. A User Request object is created in the Identity Vault. 3. The Role and Resource Service Driver processes the new request. 4. The Role and Resource Service Driver starts a workflow, and changes the request status. 5. The approval process is performed within the User Application. Upon completion of the approval process, the workflow activity changes the request status. 6. The Role and Resource Driver picks up the change in the status, and begins to provision the resource, if all of the necessary approvals have been provided. 7. The User Object attributes are updated to included the resource binding and approval information. 8. An entitlement request is made for the SAP Profile. 9. The SAP Driver processes the entitlement and creates the profile in SAP. 1.1.4 About Workflow-Based Provisioning A key feature of the Identity Manager User Application is workflow-based provisioning, which enables you to initiate workflow processes to manage the approval and revocation of user access to your organization’s secure systems. Introduction to the User Application 29 The User Application’s Work Dashboard tab gives users a convenient way to make workflow process requests. A provisioning request is a user or system action intended to initiate a process. Provisioning requests can be initiated directly by the user (through the Work Dashboard tab), or indirectly in response to events occurring in the Identity Vault. When a provisioning request requires permission from one or more individuals in an organization, the request starts one or more workflows. The workflows coordinate the approvals needed to fulfill the request. Some provisioning requests require approval from a single individual; others require approval from several individuals. In some instances, a request can be fulfilled without any approvals. By default, the Work Dashboard tab in the User Application does not display any provisioning requests. To configure a provisioning request a designer familiar with your business needs creates a provisioning request definition, which binds the resource to a workflow. The designer can configure workflows that proceed in a sequential fashion, with each approval step being performed in order, or workflows that proceed in a parallel fashion. A parallel workflow allows more than one user to act on a workflow task concurrently. Identity Manager provides a set of Eclipse-based tools for designing the data and the flow of control within the workflows. In addition, Identity Manager provides a set of Web-based tools that provide the ability to view existing provisioning requests and manage workflows that are in process. For more information, see Section 1.4, “Design and Configuration Tools,” on page 42. The Provisioning Administrator is responsible for managing the workflow-based provisioning features of the User Application. For more information, see Section 1.3, “User Application User Types,” on page 37. 1.1.5 About Compliance Compliance is the process of ensuring that an organization conforms to relevant business laws and regulations. One of the key elements of compliance is attestation. Attestation gives an organization a method for verifying that personnel are fully aware of organizational policies and are taking steps to comply with these policies. By requesting that employees or administrators regularly attest to the accuracy of data, management ensures that personnel information such as user profiles, role assignments, and approved separation of duties (SoD) exceptions are up-to-date and in compliance. To allow individuals within an organization to verify the accuracy of corporate data, a user makes an attestation request. This request in turn initiates one or more workflow processes. The workflow processes give the attesters an opportunity to attest to the correctness of the data. A separate workflow process is initiated for each attester. An attester is assigned a workflow task in the My Tasks list on the Requests & Approvals tab. To complete the workflow process, the attester opens the task, reviews the data, and attests that it is correct or incorrect. The Roles Based Provisioning Module supports four types of attestation: User profile SoD violations Role assignment User assignment 30 Identity Manager Roles Based Provisioning Module 3.7 User Application: Administration Guide For details on setting up the Compliance tab, see Section 2.11, “Configuring the Compliance Tab,” on page 98. For details on using the Compliance tab, see the discussion of the Compliance tab in the Identity Manager User Application: User Guide (http://www.novell.com/documentation/ idmrbpm37/pdfdoc/ugpro/ugpro.pdf). 1.2 User Application Architecture The Identity Manager User Application relies on a number of independent components acting together. The core components are shown in Figure 1-2. Figure 1-2 User Application Core Components 1.2.1 User Interface The Identity Manager User Application is a browser-based Java* application. It is comprised of a collection of JSR168-compliant portlets, JavaServer* Pages, and JavaServer Faces that run within a Java Web application on a J2EE*-compliant application server. The User Application framework provides container services, such as managing window state, portlet preferences, persistence, caching, theming, logging, and acts as a security gatekeeper. The application server, on which the User Application runs, provides various services to the application as a whole, such as scalability through clustering, database access via JDBC*, and support for certificate-based security. Introduction to the User Application 31 1.2.2 Directory Abstraction Layer The directory abstraction layer provides a logical view of the Identity Vault data. You define a set of entities and their related attributes based on the Identity Vault objects that you want users to view, modify, or delete in the User Application. The Directory Abstraction layer: Performs all of the User Application’s LDAP queries against the Identity Vault. This isolates presentation-layer logic from the Identity Vault, so that all requests for identity data go through the directory abstraction layer. Checks constraints and access control on data requests made via the User Application. Caches runtime configuration and entity-definition data obtained from the Identity Vault. See Section 5.1.1, “Caching Management,” on page 135 You use the directory abstraction layer editor plug-in (available in Designer for Identity Manager) to define the structure of the directory abstraction layer data definitions. To learn more, see the section on the directory abstraction layer editor in the Identity Manager User Application: Design Guide. 1.2.3 Workflow Engine The Workflow Engine is a set of Java executables responsible for managing and executing steps in an administrator-defined workflow and keeping track of state information (which is persisted in a database). When the necessary approvals have been given, the Provisioning System provisions the resource as requested. During the course of workflow execution, the Workflow Engine can send one or more e-mail messages to notify users of changes in the state of the workflow. In addition, it can send e-mail messages to notify users when updates have been made to proxy, delegate, and availability settings. You can edit an e-mail template in the Designer for Identity Manager or in iManager and then use this template for e-mail notifications. At runtime, the Workflow Engine retrieves the template from the directory and replaces tags with dynamic text suitable for the notification. Additional details about the Workflow Engine, including how to configure and manage provisioning workflows, are in Part V, “Configuring and Managing Provisioning Workflows,” on page 373. 1.2.4 SOAP Endpoints The User Application provides the following SOAP endpoints to allow third-party software applications to take advantage of User Application services: Table 1-1 SOAP Endpoints 32 SOAP Endpoint Description Provisioning Web Service To support third-party access, the provisioning Workflow Engine includes a Web service endpoint. The endpoint offers all provisioning functionality (for example, allowing SOAP clients to start a new approval flow, or list currently executing flows). Identity Manager Roles Based Provisioning Module 3.7 User Application: Administration Guide SOAP Endpoint Description Metrics Web Service The workflow engine also includes a Web Service for gathering workflow metrics. The addition of the Metrics Web Service to the Workflow Engine lets you monitor an approval flow process. In addition, it provides indicators the business manager can use to modify the process for optimal performance. Notification Web Service The Provisioning System includes an e-mail notification facility that lets you send e-mail messages to notify users of changes in the state of the provisioning system, as well as tasks that they need to perform. To support third-party access, the notification facility includes a Web service endpoint that lets you send an e-mail message to one or more users. Directory Abstraction Layer (VDX) Web Service The directory abstraction layer provides a logical view of the Identity Vault data. To support access by third-party software applications, the directory abstraction layer includes a Web service endpoint called the VDX Web Service. This endpoint lets you access the attributes associated with entities defined in the directory abstraction layer. It also lets you perform ad hoc searches for entities and execute predefined searches called global queries. Role Web Service To support access by third-party software applications, the Role subsystem includes a Web service endpoint called the Role Web Service. It supports a wide range of role management and SoD management functions. 1.2.5 Application Server (J2EE-Compliant) The application server provides the runtime framework in which the User Application, directory abstraction layer and Workflow Engine execute. The User Application is packaged as a Java Web Application Archive, or WAR file. The WAR is deployed to the application server. The User Application runs on JBOSS and WebSphere. For a complete list of supported platforms, see the Roles Based Provisioning Module Installation Guide. 1.2.6 Database The User Application relies on a database (MySQL* by default; see the Roles Based Provisioning Module Installation Guide for a list of supported databases) to store several kinds of information: User application configuration data: for example, Web page definitions, portlet instance registrations, and preference values. Workflow state information is persisted in the database. (The actual workflow definitions are stored in the User Application driver in the Identity Vault.) Novell Audit logs Introduction to the User Application 33 1.2.7 User Application Driver The User Application driver is an important enabling piece of the User Application. It is responsible for: Storing application-specific environment configuration data. Notifying the directory abstraction layer when important data values change in the Identity Vault. This causes the directory abstraction layer to update its cache. The User Application driver can be configured to: Allow events in the Identity Vault to trigger workflows. Communicate the success or failure of a workflow's provisioning activity back to the User Application database, which allows users to view the final status of their requests. Start workflows automatically in response to changes of attribute values in the Identity Vault. The User Application driver is not only a runtime component but a storage wrapper for directory objects (comprising the User Application’s runtime artifacts). Table 1-2 Artifacts Stored in the User Application Driver 34 Artifacts Description Driver Set Object Every Identity Manager installation requires that drivers be grouped into driver sets. Only one driver set can be active at a time (on a given directory server). The drivers within that set can be toggled on or off individually without affecting the driver set as a whole. The User Application driver (like any other Identity Manager driver) must exist inside a driver set. The driver set is not automatically created by the User Application; you must create one, then create the User Application driver within it. User Application The User Application driver object is the container a variety of artifacts. The User Application driver implements Publisher and Subscriber channel objects and policies. The Publisher channel is not used by the User Application but is available for custom user cases. Identity Manager Roles Based Provisioning Module 3.7 User Application: Administration Guide Artifacts Description App Config Object The AppConfig object is a container for the following User Application configuration objects. RequestDefs: Container for Provisioning Request Definitions. The definitions stored here (as XML) represent the classes of requests that end users with appropriate rights can instantiate via the User Application. WorkflowDefs: :Container for Workflow objects, including designtime descriptions plus any template or unused flows. ResourceDefs: Container for Provisioned Resource definitions, including design-time descriptions plus any templates or unused targets. ServiceDefs: Container for Service Definition objects, which wrap Web Services called by workflows. DirectoryModel: Directory abstraction layer objects that represent different types of content of the Identity Vault that can be exposed in the User Application. AppDefs: Container for configuration objects that initialize the runtime environment, such as cache configuration information and e-mail notification properties. ProxyDefs: Container for proxy definitions. DelegateeDefs: Container for delegate definitions. 1.2.8 Role and Resource Service Driver The Roles subsystem uses the Role and Resource Service driver to manage backend processing of roles. For example, it manages all role assignments, starts workflows for role assignment requests and SoD conflicts that require approvals, and maintains indirect role assignments according to group and container membership, as well as membership in related roles. The driver also grants and revokes entitlements for users based on their role memberships, and performs cleanup procedures for requests that have been completed. The Role and Resource Service driver performs the following functions: Starts an SoD workflow and waits for approvals in situations where a role request requires an SoD workflow Starts a role assignment workflow and waits for approvals in situations where a role request requires a workflow Adds users to and remove users from roles. To do this, the Role and Resource Service driver: Waits for a start date before making assignments Terminates a role assignment when the end date is reached Adds and removes higher-level and lower-level role relationships Adds and removes role assignments for groups Adds and removes role assignments for containers Maintains all role membership information for indirect role assignments, including: Role assignments acquired through role relationships Introduction to the User Application 35 Role assignments that result from membership in groups Role assignments that result from membership in containers Grants and revokes entitlements to and from users according to their role memberships Maintains additional reporting information that is associated with each role assignment Maintains additional reporting information on objects in eDirectory, such as: Approval information Where indirect assignments come from Where entitlements come from Logs events to Novell Audit Cleans up processed requests after a user-specified amount of time Recalculates role assignments based on dynamic and nested groups on a polled basis 1.2.9 Designer for Identity Manager Designer for Identity Manager provides a set of plug-ins you can use to define the directory abstraction layer objects and provisioning requests and their associated workflows. For more information, see Section 1.4, “Design and Configuration Tools,” on page 42 1.2.10 iManager iManager provides a set of plug-ins you can use to view provisioning requests and manage their associated workflows. For more information, see Section 1.4, “Design and Configuration Tools,” on page 42. 1.2.11 Identity Manager Engine The Identity Manager engine provides the runtime framework that monitors events in the Identity Vault and connected systems. It enforces policies and routes data to and from the Identity Vault. The Identity Manager User Application is a connected system. Communication between the Identity Vault, the User Application’s directory abstraction layer, and the Workflow Engine occurs through the User Application driver. 1.2.12 Identity Vault The Identity Vault is the repository for user data (and other identity data) plus the Identity Manager driver set and the User Application driver. Because the User Application relies on various Identity Vault objects, it’s necessary to extend the eDirectory schema to accommodate the custom LDAP objects and attributes required by the User Application. The schema extension occurs automatically as part of the User Application install. The custom objects and attributes are populated with default values after the User Application driver is installed and activated. 1.2.13 Novell Audit Novell Audit is an independent logging server that can persist a variety of kinds of data (such as data generated by steps of a workflow). For more information, see Chapter 3, “Setting Up Logging,” on page 113. 36 Identity Manager Roles Based Provisioning Module 3.7 User Application: Administration Guide 1.3 User Application User Types The Identity Manager User Application users fall into these categories: Administrative Users Domain Administrators, Domain Managers, and Team Managers Designers Business Users 1.3.1 Administrative Users The User Application defines several types of administrative users. The administrative users defined in Table 1-3 are defined at installation. Table 1-3 User Application Administrative Users User Description Identity Vault Administrator A user who has rights to configure the Identity Vault. This is a logical role that can be shared with other administrative user types. The Identity Vault Administrator account is a proxy user for the User Application to carry out tasks on the LDAP server that an ordinary logged-in user might not have permission to execute, such as creating a new user, group, or container. It represents credentials (username and password) used to bind to the Identity Vault to perform system LDAP operations, so these are the rights that the User Application itself needs to run. The Identity Vault Administrator needs: Supervisor rights to the User Application Driver and all the objects it contains. You can accomplish this by setting the rights at the driver container level and making them inheritable. Supervisor Entry rights to any of the users that are defined through the directory abstraction layer user entity definition. This should include Write attribute rights to objectClass and any of the attributes associated with the DirXML-EntitlementRecipient, srvprvEntityAux and srvprvUserAux auxiliary classes. Supervisor rights to the container object cn=DefaultNotificationCollection, cn=Security. This object persists e-mail server settings used for automated provisioning e-mails. It can contain SecretStore credentials for authenticating to the e-mail server itself. Introduction to the User Application 37 User Description User Application Administrator A user who has the rights to perform administrative tasks for the User Application. This user can: Use the Administration of the User Application to manage the User Application. Use iManager to administer workflow tasks (such as enabling, disabling, or terminating an in-process workflows) Run reports on Novell Audit logging data. This user does not have any special privileges within the User Application. This user does not need any special directory rights because it controls application level access via the Administration page. Although a User Application Administrator has the ability to manage themes in the Administration page, the User Application uses the LDAP administrator credentials to modify the theme selections in the Identity Vault. Password self-service: One task of the User Application Administrator is to configure password self-service for the User Application. A feature of password self-service is password synchronization status.To enable the User Application Administrator to view the password synchronization status for other users (for troubleshooting or other reasons), it is recommended that you create a PasswordManagement group and assign one or more users to this group. The members of this group are allowed to view the password synchronization status of other users. If you choose to create this group, it must: Be named PasswordManagement. Be given the privileges to the Identity Vault. The group must have rights to read the user’s eDirectory object attribute for users whose password synchronization status they need to view. 1.3.2 Domain Administrators, Domain Managers, and Team Managers The Roles Based Provisioning Module uses a security model that recognizes three general categories of administrators and managers: The Domain Administrator is an administrator who has the full range of capabilities within a particular domain, which gives a user assigned to be this type of administrator the ability to perform all operations on all objects within the domain for all users. The Domain Manager is a delegated administrator who has the ability to perform selected operations for a subset of authorized objects within the domain for all users. The Team Manager is a business line manager who can perform selected operations for a subset of authorized objects within the domain, but only for a designated set of users (team members). The following diagram illustrates the security model: 38 Identity Manager Roles Based Provisioning Module 3.7 User Application: Administration Guide Figure 1-3 Security Model Domain Administrators and Domain Managers Domain Administrators and Domain Managers are designated through system role assignments. The Roles Based Provisioning Module allows you to assign users to any of the following system roles: Table 1-4 System Roles for Domain Administrators and Domain Managers Role Description Compliance Administrator A Domain Administrator who has the full range of capabilities within the Compliance domain. The Compliance Administrator can perform all possible actions for all objects within the Compliance domain. Configuration Administrator A Domain Administrator who has the full range of capabilities within the Configuration domain. The Configuration Administrator can perform all possible actions on all objects within the Configuration domain. The Configuration Administrator controls access to navigation items with the Roles Based Provisioning Module. In addition, the Configuration Administrator configures the delegation and proxy service, the digital signature service, the provisioning user interface, and the workflow engine. Introduction to the User Application 39 Role Description Provisioning Administrator A Domain Administrator who has the full range of capabilities within the Provisioning domain. The Provisioning Administrator can perform all possible actions for all objects within the Provisioning domain. Provisioning Manager A Domain Manager who can perform only allowed actions for a subset of objects within the Provisioning domain. Resource Administrator A Domain Administrator who has the full range of capabilities within the Report domain. The Report Administrator can perform all possible actions for all objects within the Reports domain. Resource Manager A Domain Manager who can perform only allowed actions for a subset of objects within the Resource domain. Role Administrator A Domain Administrator who has nearly the full range of capabilities within the Role domain. The Role Administrator can perform all possible actions for all objects (except for the System Roles) within the Role domain.D Role Manager A Domain Manager who can perform only allowed actions for a subset of objects within the Role domain. Security Administrator A Domain Administrator who has the full range of capabilities within the Security domain. The Security Administrator can perform all possible actions for all objects within the Security domain. The Security domain allows the Security Administrator to configure access permissions for all objects in all domains within the Roles Based Provisioning Module. The Security Administrator can configure teams, and also assign domain administrators, delegated administrators, and other Security Administrators. These roles are assigned through the Administrator Assignments user interface on the Administration tab. For details on assigning users to the system roles, see Section 8.3, “Administrator Assignments,” on page 269. Team Managers A Team Manager is a user designated as a manager of a team through the Team Configuration user interface on the Administration tab. For details on configuring teams, see Section 8.4, “Team Configuration,” on page 281. 40 Identity Manager Roles Based Provisioning Module 3.7 User Application: Administration Guide 1.3.3 Designers Designers use the Designer for Identity Manager to customize the User Application for your enterprise. Designer is a tool aimed at information technology professionals such as enterprise IT developers, consultants, sales engineers, architects or system designers, and system administrators who have a strong understanding of directories, databases, and their information environment and who act in the role of a designer or architect of identity-based solutions. To create or edit or edit workflow objects in Designer, the user needs the following rights on the RequestDefs.AppConfig container for the specific User Application driver. [Entry Rights] Supervisor or Create. [All Attribute Rights] Supervisor or Write. To initiate a workflow, the user must have Browse [Entry Rights] on the RequestDefs.AppConfig container for the specific User Application driver or individually per request definition object if you are using a delegated model. 1.3.4 Business Users Business users interact with the User Application’s Identity Self-Service, Work Dashboard, and Roles and Resources tabs. A business user can be: An authenticated user (such as an employee, a manager, or a delegate or proxy for an employee or manager). A delegate user is a user to whom one or more specific tasks (appropriate to that user’s rights) can be delegated, so that the delegates can work on those specific tasks on behalf of someone else. A proxy user is an end user who acts in the role of another user by temporarily assuming that user’s identity. All of the rights of the original user apply to the proxy. Work owned by the original user continues to be owned by that user. An anonymous or guest user. The anonymous user can be either the public LDAP guest account or a special account set up in your Identity Vault. The User Application Administrator can enable anonymous access to some features of the Identity Self-Service tab (such as a search or create request). In addition, the User Application Administrator can create pages that allow the user to request a resource. See Table 1-9 on page 45 for information on configuring anonymous access. The user’s capabilities within the User Application depend on what features the User Application Administrator has enabled for them. They can be configured to: View hierarchical relationships between User objects by using the Org Chart portlet. View and edit user information (with appropriate rights). Search for users or resources using advanced search criteria (which can be saved for later reuse). Recover forgotten passwords. The User Application can be configured so that users can: Request a resource (start one of potentially many predefined workflows). View the status of previous requests. Claim tasks and view tasklists (by resource, recipient, or other characteristics). View proxy assignments. Introduction to the User Application 41 View delegate assignments. Specify one’s availability. Enter proxy mode in order to claim tasks on behalf of another. View team tasks, request team resources, and so forth. 1.4 Design and Configuration Tools The various administrators can use the following tools to design and configure the Identity Manager User Application. Table 1-5 Tools for Designing and Configuring the User Application Tool Purpose Designer for Identity Manager A powerful, graphical toolset for configuring and deploying Identity Manager. The following plug-ins are designed to help you configure the User Application: Directory Abstraction Layer editor: Lets you define the Identity Vault objects needed for your User Application. Provisioning Request Definition editor: Lets you create workflows for provisioning request definitions. Also allows you to customize the forms by which users make and approve requests and e-mail templates. Provisioning view: Lets you import, export, deploy, and migrate directory abstraction layer and provisioning requests to the User Application driver. Role editor: Lets you create and configure roles for use within the User Application. Resource editor: Lets you create and configure resources for use within the User Application. For more information, see the Identity Manager User Application: Design Guide. 42 Identity Manager Roles Based Provisioning Module 3.7 User Application: Administration Guide Tool Purpose iManager A Web-based administration console. The following plug-ins are designed to help you configure and administer the User Application: Provisioning Request Configuration plug-in: Gives you a read-only view of provisioning request definitions created through Designer and allows you to mark them active or inactive. Workflow Administration plug-in: Provides a browserbased interface that lets you view the status of workflow processes, reassign activities within a workflow, or terminate a workflow in the event that it is stopped and cannot be restarted. Provisioning Team plug-in: Not supported with this release of the Roles Based Provisioning Module. The Team Configuration user interface on the Administration of the User Application replaces this iManager tool. Provisioning Team Request plug-in: Not supported with this release of the Roles Based Provisioning Module. The Team Configuration user interface on the Administration of the User Application replaces this iManager tool. For more information, see Part V, “Configuring and Managing Provisioning Workflows,” on page 373 User Application Administration tab A Web-based administration console that allows you to configure, manage, and customize the User Application. It contains the following pages: Application Configuration: Lets you configure caching, LDAP parameters, logging, themes, password module setup Page Administration: Lets you create new portlets or customize existing Identity Self-Service pages Portlet Administration: Lets you create new or customize the existing portlets used on the Identity Self-Service pages. RBPM Provisioning and Security: Lets you define administrator assignments, configure teams, and specify navigation access permissions. In addition, it allows you to configure delegation, proxy, tasks, digital signature service, and engine and cluster settings. For more information, see Part III, “Administering the User Application,” on page 129. lreport.exe (log report tool) and iManager Auditing and Logging feature A number of predefined log reports (that come with Identity Manager) are available in Crystal Reports* (.rpt) format for filtering data logged to the Novell Audit database. The lreport.exe log report tool (Windows* only) is one way to generate the reports. You can also use other methods to create the reports. See Chapter 3, “Setting Up Logging,” on page 113 for details. Introduction to the User Application 43 1.5 What’s Next Now that you have learned about the features and architecture of the Identity Manager User Application, you can start to customizing it as needed for your own business needs. Typically, you’ll be: Customizing the user interface and identity self-service features. See Table 1-6 on page 44. Setting up the requests and approval features (if provisioning is installed). See Table 1-7 on page 44. Setting up your production environment. See Table 1-8 on page 45. Table 1-6 Customizing the User Interface and Identity Self-Service Features To learn about See Setting up directory abstraction layer objects Identity Manager User Application: Design Guide Customizing the Identity Self-Service pages Part IV, “Portlet Reference,” on page 295 Adding new pages and setting page security Chapter 6, “Page Administration,” on page 207 Creating custom instances of the identity portlets Chapter 7, “Portlet Administration,” on page 241 Changing the User Application’s theme or branding Section 5.1.7, “Theme Administration,” on page 170 Localizing the User Application user interface Section 2.9, “Localizing and Customizing User Application Strings,” on page 84 Enabling password self-service Section 5.3, “Password Management Configuration,” on page 184 Table 1-7 Setting Up the Provisioning, Roles, and Resources Features 44 To learn about See Creating provisioning requests Identity Manager User Application: Design Guide and Chapter 16, “Managing Provisioning Request Definitions,” on page 389 Customizing request and approval forms Identity Manager User Application: Design Guide Defining administrator assignments Section 8.3, “Administrator Assignments,” on page 269 Defining teams Section 8.4, “Team Configuration,” on page 281 Defining navigation access permissions Section 8.5, “Navigation Access Permissions,” on page 290 Defining e-mail templates Identity Manager User Application: Design Guide and Section 17.4, “Working with E-Mail Templates,” on page 428 Identity Manager Roles Based Provisioning Module 3.7 User Application: Administration Guide Table 1-8 Setting Up the User Application Production Environment To learn about See Your production environment topology Section 2.1, “Topology,” on page 49 Setting up security Section 2.2, “Security,” on page 51 Setting up digital signature support Section 2.4, “Digital Signature Configuration,” on page 57 Performance tuning strategies Section 2.7, “Performance Tuning,” on page 68 Setting up a cluster Section 2.8, “Clustering,” on page 73 Setting up logging Chapter 3, “Setting Up Logging,” on page 113 Table 1-9 User Application Configuration for Guest Access To learn about See Guest or anonymous accounts Section 2.5, “Enabling Anonymous or Guest Access to the User Application,” on page 64 Allowing anonymous users to self-register Section 10.4, “Configuring the Create Portlet for SelfRegistration,” on page 306 Allowing anonymous access to the directory search Section 14.3, “Configuring Search List for Anonymous Access,” on page 370 Allowing anonymous access to the My profile or Section 11.6, “Setting up Detail for Anonymous Organizational charts Access,” on page 324 and Section 12.3, “Configuring Org Chart for Guest Access,” on page 355 Allowing anonymous access to a workflow Chapter 13, “Resource Request Portlet,” on page 357 Introduction to the User Application 45 46 Identity Manager Roles Based Provisioning Module 3.7 User Application: Administration Guide Configuring the User Application Environment I II These sections describe how to configure various aspects of the Identity Manager User Application environment to meet the needs of your organization. Chapter 2, “Designing the Production Environment,” on page 49 Chapter 3, “Setting Up Logging,” on page 113 Configuring the User Application Environment 47 48 Identity Manager Roles Based Provisioning Module 3.7 User Application: Administration Guide 2 Designing the Production Environment 2 This section discusses issues relating to setting up a production environment. It provides guidance on a number of considerations that come into play when making the transition from a sandbox, test, or other pre-production environment to a production environment. This section is organized as follows: Section 2.1, “Topology,” on page 49 Section 2.2, “Security,” on page 51 Section 2.3, “Single Sign On (SSO) Configuration,” on page 57 Section 2.4, “Digital Signature Configuration,” on page 57 Section 2.5, “Enabling Anonymous or Guest Access to the User Application,” on page 64 Section 2.6, “Configuring Forgotten Password Self-Service,” on page 65 Section 2.7, “Performance Tuning,” on page 68 Section 2.8, “Clustering,” on page 73 Section 2.9, “Localizing and Customizing User Application Strings,” on page 84 Section 2.10, “Configuring the Roles and Resources Tab,” on page 89 Section 2.11, “Configuring the Compliance Tab,” on page 98 Section 2.12, “Configuring the Work Dashboard Tab,” on page 99 Section 2.13, “Recreating the Database After Installation,” on page 99 Section 2.14, “Changing the Default Administrator Assignments After Installation,” on page 100 Section 2.15, “Setting up JMS in WebSphere and WebLogic,” on page 102 2.1 Topology Each major subsystem can have many instances and many ways of connecting. Not every possible layout is supported. This section includes the following subsections that describe the possible configurations. Section 2.1.1, “Design Constraints,” on page 49 Section 2.1.2, “High Availability Design,” on page 51 2.1.1 Design Constraints Novell Audit Server: This application is responsible for capturing event information (and possibly a good deal of other information) from the User Application environment at runtime. It might also be doing double duty as a persistence store for other applications in your company. For a variety of reasons, you must never put other major pieces of the Identity Manager system (for example, the application server or the Identity Vault) on the same machine as the Audit server. Designing the Production Environment 49 Identity Vault: This is a heavily trafficked component with a need for good performance and good scalability. You must put the Identity Vault on a dedicated machine. You should never put another high-traffic system, such as an application server with a deployment of the User Application, on the same machine as the Identity Vault. Database: If this instance of a supported database is also your Novell Audit database, it is probably on a dedicated machine. The User Application uses this component in the following ways: As a persistence store for portal configuration data As the persistence store for state information on in-process workflows Optionally, as the logging store for Novell Audit. Application Server: For performance and capacity reasons, you must run this piece on a dedicated machine. These considerations require at a minimum a three-machine configuration. Additional Constraints The following additional architectural constraints apply to any User Application configuration: No User Application instance can service (search, query, add users to, and so forth) more than one user container. Also, a user container association with an application is meant to be permanent. No User Application driver can be associated with more than one User Application, except when the User Applications are installed on sister nodes of the same JBoss cluster. In other words, a one-to-many mapping of drivers to User Applications is not supported. The first constraint enforces a high degree of encapsulation in User Application design. Suppose you have the following organizational structure: Figure 2-1 Sample Organizational Structure During installation of the User Application, you are asked to specify the top-level user container that your installation looks for in the Identity Vault. In this case, you could specify ou=Marketing,o=ACME or (alternatively) ou=Finance,o=ACME. You cannot specify both. All User Application searches and queries (and administrator log-ins) are scoped to whichever container you specify. NOTE: In theory, you could specify a scope of o=ACME in order to encompass Marketing and FInance. But in a large organization, with potentially many ou containers (rather than just two relating to Marketing and Finance), this is not likely to be practical. 50 Identity Manager Roles Based Provisioning Module 3.7 User Application: Administration Guide It is possible, of course, to create two independent installations of the User Application (sharing no resources in common), one for Marketing and another for Finance. Each installation would have its own database, its own appropriately configured User Application driver, and each User Application would be administered separately, possibly having unique themes. If you truly need to place Marketing and Finance within the same scope for one User Application installation, there are two possible tactics to consider. One is to insert a new container object (for example, ou=MarketingAndFinance) in the hierarchy, above the two sibling nodes; then point to the new container as the scope root. Another tactic is to create a filtered replica (a special type of eDirectory tree) that combines the needed parts of the original ACME tree, and point the User Application at the replica’s root container. (Consult the Novell eDirectory Administration Guide for more information on filtered replicas.) If you have questions about a particular system layout, contact your Novell representative for assistance or advice. 2.1.2 High Availability Design Clustering for high availability and capacity is discussed in Section 2.8, “Clustering,” on page 73. For now, you should know that: Identity Manager supports high availability of the Identity Vault, engine, and drivers through the multinode installation and shared-storage mechanisms described in the section “High Availability” in the Identity Manager Administration Guide. A comprehensive procedure for setting up such a system using SUSE® Linux is at: http://support.novell.com/cgi-bin/search/searchtid.cgi?/10093317.htm (http:// support.novell.com/cgi-bin/search/searchtid.cgi?/10093317.htm) High availability of the User Application is available through JBoss clustering. You can set up a JBoss cluster so that each node runs one User Application instance. The instances are all coequals (peers). Automatic failover is supported. An interrupted workflow can resume after the loss of a cluster node. See Section 2.8, “Clustering,” on page 73 for more information. 2.2 Security This section includes the following topics: Section 2.2.1, “Security Overview,” on page 52 Section 2.2.2, “Self-Signed Certificates,” on page 53 Section 2.2.3, “Enabling SSL,” on page 53 Section 2.2.4, “Turning on SOAP Security,” on page 54 Section 2.2.5, “Mutual Authentication,” on page 54 Section 2.2.6, “Third-Party Authentication and Single Sign-On,” on page 54 Section 2.2.7, “Encryption of Sensitive User Application Data,” on page 54 Section 2.2.8, “Preventing XSS Attacks,” on page 55 Section 2.2.9, “Modifying the Trustee Rights for User Preferences,” on page 56 Designing the Production Environment 51 Section 2.2.10, “Modifying the Trustee Rights for a Provisioning Request Definition,” on page 56 Section 2.2.11, “Disabling the JMX Management Console on JBOSS,” on page 57 2.2.1 Security Overview Moving from pre-production to production usually involves hardening the security aspects of the system. In sandbox testing, you might use regular HTTP to connect the User Application driver to the application server, or you might use a self-signed certificate (as a temporary measure) for driver/ app-server communication. In production, on the other hand, you probably use secure connections, with server authentication based on your company’s Verisign* (or other trusted provider) certificate. It is typical for X.509 certificates to be used in a variety of places in the Identity Manager User Application environment, as shown in the following diagram. Figure 2-2 Identity Manager User Application Environment All communication between the User Application and the Identity Vault is secure, using Transport Layer Security, by default. The installation of the Identity Vault (eDirectory) certificate into the JBoss application server keystore is done automatically at install time. Unless you specify 52 Identity Manager Roles Based Provisioning Module 3.7 User Application: Administration Guide otherwise, the User Application installer places a copy of the eDirectory certificate in the JRE’s default cacerts store. The installation of the certificate into the WebSphere application server or the WebLogic keystore must be done manually using your vendor’s tools. The server certificate needs to be in several places, if communications are to be secure, as shown in the diagram. Different setup steps might be needed depending on whether you intend to use a selfsigned certificate in the various places in the diagram shown with a JBoss cert box, or you intend to use a certificate issued by a trusted certificate authority (CA) such as Verisign. 2.2.2 Self-Signed Certificates If you are using a certificate from a well-known trusted issuer (for example, Verisign), no special configuration steps should be necessary. But if you intend to create and use a self-signed certificate, use the following steps: 1 Create a keystore with a self-signed certificate, using command line syntax similar to the following. Change the dname value to match your web site and organization; change other values as appropriate. keytool -genkey -alias IDM -keyalg RSA -storepass changeit -keystore jboss.jks -dname "cn=www.novell.com,o=Novell,s=MA,c=US" -keypass changeit Notice that you are creating the file jboss.jks as well as the certificate. 2 Copy the keystore file jboss.jks to your JBoss User Application directory, for example: cp jboss.jks ~/jboss-4.2.0.GA/WAR/conf 2.2.3 Enabling SSL The User Application uses HTML forms for authentication. As a result, user credentials are exposed during login. We strongly recommend that you enable SSL to protect sensitive information. Table 2-1 on page 53 lists references to directions on implementing SSL. Table 2-1 Directions on Implementing SSL For Directions On See Configuring Access Manager to use SSL Novell Access Manager 3.0 SP1 Setup Guide (http:// www.novell.com/documentation/novellaccessmanager/ basicconfig/index.html?page=/documentation/ novellaccessmanager/basicconfig/data/bookinfo.html) if you are using Access Manager to log in to the User Application. Configuring the application server to use SSL Documentation provided by the application server manufacturer. Configure the application server to user SSL before you configure the IDM User Application to use SSL. Configuring the IDM User Application Roles Based Provisioning Module Installation Guide (http:// (as client) to use SSL to connect to www.novell.com/documentation/idmrbpm37/pdfdoc/install/ the Identity Vault install.pdf) for information on setting the following User Application configuration parameters at installation: Secure Admin Connection and Secure User Connection. These parameters can also be edited with the configupdate utility. Designing the Production Environment 53 2.2.4 Turning on SOAP Security 1 In IDMProv.war, find the web.xml file and open it in a text editor. 2 At the bottom of the file, uncomment the following section: <security-constraint> <web-resource-collection> <web-resource-name>IDMProv</web-resource-name> <url-pattern>/*</url-pattern> <http-method>POST</http-method> <http-method>GET</http-method> <description>IDM Provisioning Edition</description> </web-resource-collection> <user-data-constraint> <transport-guarantee>CONFIDENTIAL</transport guarantee> </user-data-constraint> </security-constraint> 3 Save the file and the archive, then restart JBoss. 2.2.5 Mutual Authentication The Identity Manager User Application does not support client certificate-based authentication out of the box. That functionality can be obtained, however, by using Novell® Access Manager. See your Novell representative for more information. See also Section 2.2.6, “Third-Party Authentication and Single Sign-On,” on page 54. 2.2.6 Third-Party Authentication and Single Sign-On The Identity Manager User Application supports single sign-on through Access Manager using any third-party authentication service that can log into Access Manager. This capability enables using a non-password-based technology to log into the User Application through Access Manager. An example is logging in through a user (client) certificate, for example from a smart card. Access Manager maps the user to a DN in the IDM Identity Vault. When a user logs into the User Application through Access Manager, Access Manager can inject a SAML assertion (with the user’s DN as the identifier) into an HTTP header and forwards the request to the User Application. The User Application uses the SAML assertion to establish the LDAP connection with the Identity Vault. For information on configuring Access Manager to support this capability, refer to the Access Manager documentation. To secure the channels that carry requests, place the channels behind a firewall or on SSL connections. Table 2-1 on page 53 lists references to directions on setting up SSL in your User Application environment. Accessory portlets that allow single sign-on authentication based on passwords currently do not support single sign-on when SAML assertions are used for User Application authentication. 2.2.7 Encryption of Sensitive User Application Data Any sensitive information associated with the User Application that is stored persistently is encrypted by using the symmetric algorithm AES-128. The master key itself is protected by password-based cryptography using PBEWithSHA1AndDESede. The password is never persisted or stored out of memory. 54 Identity Manager Roles Based Provisioning Module 3.7 User Application: Administration Guide Information that is encrypted includes (but is not limited to): LDAP administrator user password LDAP guest user password DSS trusted CA keystore password DSS signature key keystore password DSS signature key entry password Novell Audit signature key However, in a cluster environment, if session failover is enabled, some sensitive data (for example, a login-password for portlet single sign-on) in the user session can be transferred on the network during session replication. This can expose sensitive data to network sniffers. To protect this sensitive data, do one of the following: Enable encryption for JGroups. For information about enabling JGroups encryption, see JGroups Encrypt (http://wiki.jboss.org/wiki/Wiki.jsp?page=JGroupsENCRYPT). Make sure that the cluster is behind a firewall. 2.2.8 Preventing XSS Attacks The User Application supports the concept of XSS (Cross-Site Scripting) blacklists to allow you to prevent scripting attacks. The XSS blacklists prevent XSS injection in the free text input fields within the Detail portlet, approval flow, and role assignments pages within the application. The User Application provides default values for two blacklists, one for the Detail Portlet, and one for the workflow system (which handles the approval flow and role assignments pages). However, you can customize the blacklists to suit the requirements of your environment. To customize the either of the blacklists, you need to enter the words or characters you want to block in the sys-configuration-xmldata.xml file. In JBoss, you can find this file in the <jboss_home>/ server/<IDM>/conf folder. Open the file with a UTF-8 friendly editor. To modify the blacklist for the Detail portlet, open <jboss_home>/server/<IDM>/conf/sysconfiguration-xmldata.xml in a UTF-8 editor, and find the com.novell.xss.blacklist.detailportlet property: <property> <key>com.novell.xss.blacklist.detailportlet</key> <value>...</value> </property> The text node of <value> is the blacklist for Detail portlet. The blocked words are separated by comma (for example, blocked_word1,blocked_word2,...). The default setting is: ",< This means that double quote and < are disallowed. To modify the blacklist for the approval flow and role assignments pages, locate the com.novell.xss.blacklist.workflow property. Designing the Production Environment 55 <property> <key>com.novell.xss.blacklist.workflow</key> <value>...</value> </property> The syntax is the same. The default value is: < which means that < is disallowed. If you decide to customize the blacklists, be careful not to remove the default values. If you remove these values, you will make the lists less restricted, and therefore increase the risk of XSS attacks. 2.2.9 Modifying the Trustee Rights for User Preferences To allow user preferences to be saved, the administrator must ensure that the permissions on the srvprvUserPrefs and srvprvQueryList attributes are set so that the user is able to write to these attributes. The necessary rights should be set for [This] at the tree root level, since [This] is a special alias to the object itself, causing only the user to have rights to modify its own preferences. To set the proper permissions, the administrator needs to modify the trustees for these attributes in iManager, as shown below: 2.2.10 Modifying the Trustee Rights for a Provisioning Request Definition To view the details and comments associated with a task in the Task Notifications section of the Work Dashboard tab, the Domain Administrator or Delegated Administrator must have the proper rights to the provisioning request definition. In particular, the user must have the nrfAccessMgrTaskAddressee right to the provisioning request definition, with write access enabled. To set the proper permissions, the administrator needs to modify the trustees for the provisioning request definition, as described below: 1 Log into iManager as an administrator. 2 Select Modify Trustee from the Rights left-navigation menu. 3 Browse to the provisioning request definition. 4 If necessary, click Add Trustee to add the user. 5 Click on the Assign rights link. 56 Identity Manager Roles Based Provisioning Module 3.7 User Application: Administration Guide Notice that nrfAccessMgrTaskAddressee is not listed with the write permission checked, which means that the user does not have the proper rights for the provisioning request definitiion. 6 Click the Add Property button. 7 Check the check box for Show all properties in schema. 8 Select nrfAccessMgrTaskAddresss. 9 Check the write checkbox for Assigned Rights. 10 Click Done. 11 Click OK. 2.2.11 Disabling the JMX Management Console on JBOSS The results from a Nessus scan show that the JBoss product installer does not secure the JMX management console by default. This creates a potential security hole. To solve this problem, you need to disable the JMX console by following your JBoss documentation. 2.3 Single Sign On (SSO) Configuration Version 3.7 of RBPM includes an enhanced SSO architecture that provides an easy way to integrate single sign on functionality into the User Application. This new architecture works with a variety of system environments and is very secure. The 3.7 architecture for single sign on consists of the following key components: SSO Providers SSO Controller Each SSO Provider handles a specific SSO user scenario. The SSO Provider recognizes the login identity, then transfers the information to the SSO Controller. The SSO Controller then verifies the information and converts the login identity to an eDirectory identity. Next, it issues a SAML authentication token and passes it to the login module to finish the login process. The SSO Providers and the SSO Controller are loosely coupled. They communicate through an HTTP header that is digitally signed. The Roles Based Provisioning Module ships with Kerberos and SAP SSO Providers. However, you can also implement your own custom SSO Provider to suit the requirements of your organization. For complete details on SSO configuration, see Section 5.1.6, “Single Sign On (SSO) Configuration,” on page 153. 2.4 Digital Signature Configuration This section provides instructions on configuring your environment to take advantage of the digital signature support provided with the Identity Manager User Application. NOTE: If you want to use the Novell Certificate Server (Novell PKI infrastructure) for digital signing features, you need to use eDirectory 8.8 or later. The digital signature functionality requires PKI 3.1, which ships with eDirectory 8.8. Designing the Production Environment 57 WARNING: You must use Novell Audit (or Sentinel) to preserve documents that you digitally sign. Digital signature documents are not stored with workflow data in the User Application database, but are stored in the logging database. You must enable logging to preserve these documents. This section includes the following topics: Section 2.4.1, “Setting Up the User Certificates,” on page 58 Section 2.4.2, “Configuring the Application Server,” on page 61 Section 2.4.3, “Configuring Logging,” on page 63 Section 2.4.4, “Configuring the User Application,” on page 63 Section 2.4.5, “Configuring the Provisioning Request Definitions,” on page 63 2.4.1 Setting Up the User Certificates 1 Create the user certificates using iManager. 1a Log in as an administrator. 1b Under Novell Certificate Server, select Create User Certificate. 1c Select the users for whom you want to create certificates and click Next. You can use the Object Selector or Object History to pick the users. 1d Select the server and specify the certificate nickname. Specify Custom as the creation method and click Next. 58 Identity Manager Roles Based Provisioning Module 3.7 User Application: Administration Guide 1e Specify a key size of 1024 or 2048 bits, depending on which size suits your requirements. Set the key type to Signature. Leave other settings as is and click Next. 1f If you’re using the default configuration, leave the certificate parameters as is and click Next. To enable certificate revocation list (CRL) support, select Custom and check the CRL signing check box. Designing the Production Environment 59 For complete details on CRL configuration, see the Novell Certificate Server documentation. 1g Click Finish. 1h Log out. 2 Export the user certificate as a PFX file that contains the private key. 2a Log in as the user for whom you want to export a certificate. 2b Under Novell Certificate Access, select View My Certificates. 2c Select a certificate and click the Export button. 2d In the Export Certificate Wizard, click Yes to indicate that you want to export the private key with the certificate. Then click Next. 60 Identity Manager Roles Based Provisioning Module 3.7 User Application: Administration Guide 2e Enter a password to protect the private key and click Next. 2f Select Export the certificate into the browser if you do not have a card reader. Otherwise, click on the link that says Save exported certificate to a file. You can also import to the browser later. Therefore, you might want to click on Save exported certificate to a file to import to a different browser. 2g Click Save to Disk to save the file rather than opening it. 2h Click Close. 3 If you’re using a smart card, install the smart card reader driver. 4 Install the software needed to transfer certificate information to the smart card. 5 Import the key pair (certificate) to the smart card: If you are planning to use browser certificate support, rather than the smart card, you can skip steps 3 through 5 above. Certificates can be imported into a browser using iManager or the browser certificate management user interface. 2.4.2 Configuring the Application Server To configure the application server, follow these steps: 1 Copy the following JARs to the JBOSS_HOME/server/IDM/lib directory if you are running JBoss, or to the /IBM/WebSphere/AppServer/lib/ext directory if you are using WebSphere: dom.jar xmldigsig.jar xmlsec.jar Designing the Production Environment 61 You can download dom.jar, xmldsig.jar, and xmlsec.jar from http://java.sun.com. These JARs are included with the Web Services Developer Pack. 2 To deploy to JBoss, copy xmlsigner.war to the JBOSS_HOME/server/IDM/deploy directory. To deploy to WebSphere, deploy xmlsigner.war using the WebSphere administration console. 3 Export the trusted root and all intermediate certificates (using iManager) and import them into the key store specified in your system’s local configuration using the keytool command. For example, for JBoss: keytool -import -trustcacerts -file certFile The certFile is a fully qualified path to the certificate file. For example, for WebSphere: keytool -import -trustcacerts -file servercert.der -alias myserveralias keystore trust.p12 -storetype PKCS12 If you’re using the Novell Certificate Server, you do not need to export the trusted root. 4 Start the User Application Configuration utility by running the configupdate script (configupdate.bat on Windows or configupdate.sh on Linux/Solaris). 5 Click Show Advanced Options. 6 Under Trusted Key Store, type the path to the certificate file in the Trusted Store Path. Also, type your password in the Keystore Password field. The default password is changeit. The Trusted Key Store contains all trusted signers’ certificates used to validate digital signatures. NOTE: For JBoss, if you’re using the Novell Certificate Server, you can simply paste the complete string (for example, C:\Program Files\Java\jdk1.5.0_08\jre\lib\security\cacerts) from the Keystore Path field under eDirectory Certificates to the Trusted Store Path under Trusted Key Store. You can also paste the Keystore Password to the Trusted Store Password field. For WebSphere, an example of a string is /opt/IBM/WebSphere/AppServer/profiles/AppSrv01/ config/cells/citgoNode01Cell/nodes/MyServerNode01/trust.p12. 7 If you are using OCSP, under Miscellaneous, type the URI for OCSP in the OCSP URI field. This value is used to update the status of trusted certificates online. The URI points to the access point for the Online Certificate Status Protocol server. For more information about JBoss application server setup, refer to manufacturer’s instructions, such as: JBoss Enterprise Application Platform 4.2.0 Getting Started Guide (https://www.redhat.com/ docs/manuals/jboss/jboss-eap-4.2/doc/Getting_Started.pdf) JBoss Enterprise Application Platform 4.2.0 Configuration Guide (https://www.redhat.com/ docs/manuals/jboss/jboss-eap-4.2/doc/Server_Configuration_Guide.pdf) 62 Identity Manager Roles Based Provisioning Module 3.7 User Application: Administration Guide 2.4.3 Configuring Logging To enable logging of digital signatures, you need to configure the logging Platform Agent. The Platform Agent is required on any client that reports events to Novell Audit or Sentinel. You configure the platform agent through the logevent configuration file. This file provides the configuration information that the platform agent needs to communicate with the Novell Audit server. IMPORTANT: If you are logging events that include digital signatures, it is critical that the value of the LogMaxBigData parameter be large enough to handle the data being logged. For details on logging configuration, see Chapter 3, “Setting Up Logging,” on page 113. 2.4.4 Configuring the User Application To configure digital signature support for the User Application, you need to use the Digital Signature Service page on the Administration within the User Application. For details, see Section 8.2.2, “Configuring the Digital Signature Service,” on page 260. 2.4.5 Configuring the Provisioning Request Definitions You can use Designer for Identity Manager or iManager to configure digital signature support for your provisioning request definitions. The basic requirements for digital signature support are the same whether you perform your configuration steps in Designer or iManager. To configure a provisioning request definition to support digital signatures, you need to: 1 Indicate whether a digital signature is required to initiate the provisioning request. 2 Indicate whether a digital signature is required for each approval step within the workflow. Because each approval step might have more than one outgoing link, you need to specify whether a digital signature is required for each link. After you have indicated whether a digital signature is required to initiate a request or perform an approval step, you need to also specify the following for each request or approval step where a digital signature is required: Designing the Production Environment 63 Table 2-2 Digital Signature Settings Setting Description Digital Signature Type Specifies whether the digital signature uses data or form as its type: Data: Specifies that the XML signature serves as the user agreement. When Data is selected, the XML data is written to the audit log. The user can preview XML data before submitting a signature. Form: Specifies that a PDF document that includes the digital signature declaration be generated. This document serves as the user agreement. The user can preview the generated PDF document before submitting a request or approval. When Form is selected, the PDF document (encapsulated in XML) is written to the audit log. WARNING: You must use Novell Audit (or Sentinel) to preserve documents that you digitally sign. Digital signature documents are not stored with workflow data in the User Application database, but are stored in the logging database. You must enable logging to preserve these documents. Digital Signature Declaration Specifies a digital signature confirmation string that confirms the user’s signature. For details on configuring provisioning request definitions in Designer, see the Identity Manager User Application: Design Guide. For details on configuring provisioning request definitions in iManager, see Chapter 16, “Managing Provisioning Request Definitions,” on page 389. 2.5 Enabling Anonymous or Guest Access to the User Application To enable anonymous or guest user to access the Identity Self-Service features of the User Application, follow the steps outlined in Table 2-3. Table 2-3 Setting Up Anonymous Access 64 Task For more information Determine the guest account you want to use for the anonymous access. See “Establishing the Guest Account” on page 65. Identity Manager Roles Based Provisioning Module 3.7 User Application: Administration Guide Task For more information Assign the proper Identity Vault rights to the guest user. Define rights based on the features you want exposed to non-authenticated Web application users. In the User Application, you can expose identity portlets such as the search, detail, or chart and create portlet. You can also allow users to initiate a workflow. In these cases the guest user account is used to bind to eDirectory and perform the underlying LDAP operation. To perform Identity Self-Service tasks, create new pages and portlets specifically for guess access. See Part IV, “Portlet Reference,” on page 295. To perform a resource request, use the resource request portlet. See Chapter 13, “Resource Request Portlet,” on page 357. 2.5.1 Establishing the Guest Account There are two ways to support anonymous or guest access to the User Application. You can: Setup a dedicated user account. Set up the permissions that are needed for the activities of that anonymous user. Remember that if this user is inside the user container, this guest account is returned during searches of the tree. To prevent this, consider putting the guest user outside the user container. Use the public LDAP guest account that corresponds to the [Public] object in eDirectory. The default access for [Public] is Browse rights to the entire tree. You must set up whatever permissions are necessary for this user to perform the guest tasks you provide. If you do not want all anonymous users to perform some of these tasks, this might not be the correct option for your installation. The User Application allows you to specify only one type of anonymous user, and you are required to specify that user during installation. The installation options are: Use Public Anonymous Account: This uses the LDAP guest account. LDAP Guest: This is the dedicated user account. You can modify your installation choice by running the configupdate utility after the installation is complete. 2.6 Configuring Forgotten Password SelfService The User Application provides password self-service for users who have forgotten their passwords. This service enables Prompting for challenge responses Displaying a password hint Allowing a password change The forgotten password service is available by default to users inside your corporate firewall through the deployed User Application WAR. Designing the Production Environment 65 You can also set up a separate forgotten-password management WAR, IDMPwdMgt.WAR, and deploy it on a system inside your corporate firewall or external to the firewall. Deploying this WAR outside the firewall can provide an additional layer of security while providing forgotten-password selfservice to remote users. The forgotten-password WAR is also called the external password WAR. To set up the external password WAR, see Table 2-4. IDMPwdMgt.WAR contains only forgotten-password self-service software and the default User Application theme. Table 2-4 Steps for Enabling an External Password WAR Task Description Install the User Application. During the installation, you are asked to specify User Application configuration parameters. Specify the following to enable the external password WAR: When you specify Use External Password WAR, the install program generates and installs IDMPwdMgt.WAR in the install directory that you specify. Use External Password WAR Forgot Password Link Forgot Password Return Link You can also update the configuration after installation with the configupdate tool. For Forgot Password Link, specify the location for the external password WAR. Include the application server host and its secure port, for example http://localhost:8080/ExternalPwd/ jsps/pwdmgt/ForgotPassword.jsf. The install program renames IDMPwdMgt.WAR based on the location you specify. For Forgot Password Return Link, supply the path that the external password WAR uses to call back the User Application, (it uses a Web Service), for example https://idmhost:sslport/idm. If you want to change the link locations, you can do so in the User Application Administration tab. Deploy the external password WAR to an application server. Before you deploy the external password WAR to an application server, ensure that the application server is configured to support SSL. See Section 2.2.3, “Enabling SSL,” on page 53. In addition: If the external password WAR is deployed outside the firewall, make sure that the firewall’s SSL port is open to allow communication between both application server hosts. The application server that hosts the external password WAR must have the server certificate of the application server hosting the core User Application. Use the keytool import command to import the server certificate to the keystore (cacerts) of the JRE used by the application server hosting the external password WAR. The keytool command has this syntax: keytool -import -file certname.cer -keystore cacerts -storepass changeit -alias uacerts 66 Identity Manager Roles Based Provisioning Module 3.7 User Application: Administration Guide Task Description Do you want to customize the theme for the external password WAR? For more information, see “Customizing the Theme for External Password WAR” on page 177. The external password WAR location is saved to the configuration.AppDefs.AppConfig.driver.driverset as <property> <key>com.novell.pwdmgmt.login.PREF_FORGOT_PSWD_LINK_KEY</key> <value>http://localhost:8080/ExternalPwd/jsps/pwdmgt/ForgotPassword.jsf</ value> The return location is saved to the configuration.AppDefs.AppConfig.driver.driverset as <property> <key>com.novell.pwdmgmt.login.PREF_FORGOT_PSWD_RETURN_LINK_KEY</key> <value>https://localhost:8443/IDMProv</value> </property> The return location is saved to the userAppURL property in External WAR/WEB-INF/facesmanaged-beans.xml, for example <property-name>userAppURL</property-name> <property-class>java.lang.String</property-class> <value>https://localhost:8443/IDMProv</value> 2.6.1 Accessing an External Password WAR Users can go to the Forgot Password page in the external password WAR directly from a browser like this: http://localhost:8080/ExternalPwd/jsps/pwdmgt/ForgotPassword.jsf. When accessed directly, the external password WAR checks the WEB-INF\faces-managedbeans.xml for this entry: <property-name>userAppURL</property-name> <property-class>java.lang.String</property-class> <value>https://151.155.254.69:8443/IDM</value> The external password WAR uses the userAppURL entry to call the Web Service that handles the forgot password functionality in the User Application WAR. Users can access the Forgot Password page by clicking the Forgot Password? link in the User Application’s Login page. The User Application redirects the user to the external password WAR based on the value specified for the Forgot Password link. The external password WAR uses the Forgot Password Return Link value to call back to the User Application. Designing the Production Environment 67 2.7 Performance Tuning Performance tuning is a complex subject. The Identity Manager User Application relies on diverse technologies with many interactions. It is not possible to anticipate every single configuration scenario or user interaction scenario that could result in poor performance. Nevertheless, some subsystems are subject to best practices that can boost performance. See the following sections for information: Section 2.7.1, “Logging,” on page 68 Section 2.7.2, “Identity Vault,” on page 69 Section 2.7.3, “JVM,” on page 70 Section 2.7.4, “Session Time-out Value,” on page 71 Section 2.7.5, “Tuning JBoss,” on page 71 Section 2.7.6, “Using Secure Sockets for User Application Connections to the Identity Vault,” on page 71 2.7.1 Logging The User Application allows logging with Novell Audit as well as with the open source Apache log4j framework. Logging via Novell Audit is turned off by default. However, file and console logging with log4j are enabled by default. NOTE: The kinds of events you can log, and how to enable or disable logging, are covered in Chapter 3, “Setting Up Logging,” on page 113. The log4j configuration settings are contained in a file called jboss-log4j.xml in the install directory (if you are using a JBoss application server) log4j.xml in the User Application WAR (if you are using a non-JBoss application server) Near the bottom of the jboss-log4j.xml file, look for the following entry: <root> <priority value="INFO" /> <appender-ref ref="CONSOLE" /> <appender-ref ref="FILE" /> </root> Assigning a value to root ensures that any log appenders that do not have a level explicitly assigned inherit the root level (in this case, INFO). For example, by default, the FILE appender does not have a threshold level assigned and so it assumes the root’s. The possible log levels used by log4j are DEBUG, INFO, WARN, ERROR, and FATAL, as defined in the org.apache.log4j.Level class. Inattention to the proper use of these settings can be costly in terms of performance. A good rule of thumb is to use INFO or DEBUG only when debugging a particular problem. Any appender included in the root that does have a level threshold set, should set that threshold to ERROR, WARN, or FATAL unless you are debugging something. 68 Identity Manager Roles Based Provisioning Module 3.7 User Application: Administration Guide The performance hit with high log levels has less to do with verbosity of messages than with the simple fact that console and file logging, in log4j, involve synchronous writes. An AsyncAppender class is available, but its use does not guarantee better performance. The issues are well-known and are Apache log4j issues, not Identity Manager issues. The default of INFO in the User Application’s log config file (above) is satisfactory for many environments, but where performance is critical, you should consider changing the above jbosslog4j.xml entry to: <root> <priority value="ERROR"/> <appender-ref ref="FILE"/> </root> In other words, remove CONSOLE and set the log level to ERROR. For a fully tested/debugged production setup, there is no need to log at the INFO level, nor any need to leave CONSOLE logging enabled. The performance payoff of turning these off can be significant. For more information on log4j, consult the documentation available at http:// logging.apache.org/log4j/docs. For more information on the use of Novell Audit with Identity Manager, consult the Novell Identity Manager: Administration Guide. 2.7.2 Identity Vault LDAP queries can be a bottleneck in a heavily utilized directory-server environment. To maintain a high level of performance with large numbers of objects, Novell eDirectory (which is the basis of the Identity Vault in Identity Manager) records frequently requested information and stores it in indexes. When a complex query is run against objects with indexed attributes, the query returns much faster. Out of the box, eDirectory comes with the following attributes already indexed: Aliased Object Name cn dc Equivalent to Me extensionInfo Given Name GUID ldapAttributeList ldapClassList Member NLS: Common Certificate Obituary Reference Revision Surname uniqueID uniqueID_SS Designing the Production Environment 69 When you install Identity Manager, the default directory schema is extended with new object class types and new attributes pertaining to the User Application. User-application-specific attributes are by default not indexed. For better performance, you might find it useful to index some of those attributes (and perhaps a few traditional LDAP attributes as well), particularly if your user container contains over 5,000 objects. The general idea is to index only those attributes that you know are regularly queried, which could be different attributes in different production environments. The only way to know which attributes are heavily used is to collect predicate statistics at runtime. The collection process itself degrades performance, however. The process for collecting predicate statistics is discussed in detail in the eDirectory Administration Guide. Indexing is also discussed in more detail there. In general, you need to do the following: Use ConsoleOne® to turn on predicate-statistics collection for attributes of interest Put the system under load Disable statistics collection and analyze the results Create an index for each type of attribute that might benefit from having one If you already know which attributes you want to index, there is no need to use ConsoleOne. You can create and manage indexes in iManager with eDirectory Maintenance > Indexes. For example, if you know that users of your org chart are likely to perform searches based on the isManager attribute, you can try indexing that attribute to see if performance is enhanced. NOTE: As a best practice, it is recommended that you index, at a minimum, the manager and isManager attributes. For an in-depth discussion of attribute indexing and performance, see “Tuning eDirectory” in Novell’s Guide to Troubleshooting eDirectory by Peter Kuo and Jim Henderson (QUE Books, ISBN 0-7897-3146-0). Also read about performance tuning in “Maintaining Novell eDirectory” in the eDirectory Administration Guide. 2.7.3 JVM The amount of heap memory allocated to the Java virtual machine can impact performance. If you specify minimum or maximum memory values that are either too low or too high (too high meaning more than the physical memory of the machine), you could experience excessive pagefile swapping. For a JBoss server, you can set the maximum JVM* size by editing the run.conf or run.bat file (the former for Linux, the latter for Windows) under [IDM]/jboss/bin/ in a text editor. Increase “Xmx” from 128m to 512m, or possibly higher. Some experimentation might be needed to determine the optimal setting for your particular environment. NOTE: JBoss and Tomcat performance tuning tips are at http://wiki.jboss.org/wiki/ Wiki.jsp?page=JBossASTuningSliming (http://wiki.jboss.org/wiki/ Wiki.jsp?page=JBossASTuningSliming) 70 Identity Manager Roles Based Provisioning Module 3.7 User Application: Administration Guide 2.7.4 Session Time-out Value The session time out (the amount of time a user can leave a page unattended in his or her Web browser before the server causes a session-time-out warning dialog box to appear) can be changed in the web.xml file in the IDMProv.war archive. This value should be tuned to match the server and usage environment in which the application runs. In general, it is advised that the session time out be as small as practicable. If business requirements can tolerate a 5-minute session time out, this would allow the server to release unused resources twice as early as it would if the time-out value were 10 minutes. This improves performance and scalability of the Web application. Consider the following when adjusting the session time out: Longer session time-outs can cause the JBoss server to run out of memory if many users log in over a short period of time. This is true of any application server that has too many open sessions. When a user logs in to the User Application, an LDAP connection is created for the user and bound to the session.Thus, the more sessions that are open, the greater the number of LDAP connections that are held. The longer the session time out, the longer these connections are held open. Too many open connections to the LDAP server (even if they are idle) can cause system performance degradation. If the server starts experiencing out-of-memory errors, and the JVM heap and garbage collection tuning parameters have already been optimally tuned for the server and usage environments, consider lowering the session time out. You can set the session time out value on the User Application Configuration screen at installation time. Alternatively, you can modify the session time out after installation by performing a configuration update. 2.7.5 Tuning JBoss By default, the JBoss deployment scanner runs every five seconds. For a production server, this is typically not necessary and might impact performance. You should consider changing the scan period so that the deployment scanner runs less frequently, or turn the deployment scanner off entirely. For information about configuring the deployment scanner, see ConfiguringTheDeploymentScannerInConfjbossSystem (http://wiki.jboss.org/wiki/ Wiki.jsp?page=ConfiguringTheDeploymentScannerInConfjbossSystem.xml). For more information about tuning JBoss for production environments, see JBossASTuningSliming (http://wiki.jboss.org/wiki/Wiki.jsp?page=JBossASTuningSliming). 2.7.6 Using Secure Sockets for User Application Connections to the Identity Vault By default, secure sockets are used for communication between the User Application server and the Identity Vault. However, in some environments, not all communication needs to be secured. For example, if the User Application and Identity Vault servers are on an isolated network, and the only ports available to the outside are the HTTP ports, it might be acceptable for some communication between the two servers to be accomplished using non-secure sockets. Some aspects of the application will always use a secure connection (for example, a user changing a password) even though the setting might indicate that secure connections are not required. Turning off secure connections, especially for user connections, can greatly increase performance and scalability. If, in Designing the Production Environment 71 a particular environment, there are many concurrent logins, and communication between the User Application server and the Identity Vault server have been secured using the network setup, then turning off the secure connection for user connections greatly increase the number of concurrent logins that can be processed. We recommend that this option be used only when there is actual evidence of scaling or performance problems in the environment, and adding additional eDirectory servers is not an option. Additionally, secure connections can be turned off for administrative connections. These connections are used for general queries on the Identity Vault server that do not require user credentials. These connections are pooled and used round-robin. The bind over a secure connection is only done once at application startup (or possibly again later on if the connection becomes unresponsive) and so does not represent the scalability issues that can arise with the user connections. However, the time it takes to encrypt and decrypt the data at both ends does add overhead. We recommend that the default setting be used, unless there is a need to gain extra performance. Secure communications for administrative and user connections must be disabled in both the User Application and in iManager. To disable secure communications for administrative and user connections, see the following topics: “Disabling Secure Communications Using the User Application Configuration Tool” on page 72 “Disabling Secure Communications Using iManager” on page 72 Disabling Secure Communications Using the User Application Configuration Tool To disable the secure administrative and user connections in the User Application: 1 Run the configupdate script, located in the User Application directory, as follows: Linux: Type the following to run configupdate.sh: ./configupdate.sh Windows: Run configuupdate.bat The User Application configuration utility starts. 2 Deselect Secure Admin Connection and Secure User Connection. 3 Click OK. Disabling Secure Communications Using iManager To disable the requirement for secure LDAP (LDAPS) connections for administrative and user connections to eDirectory using iManager or ConsoleOne: 1 Log into your eDirectory tree. 2 Navigate to the LDAP group object and display its properties. 3 Click General. 4 Deselect Require TLS for Simple Binds with Password. 72 Identity Manager Roles Based Provisioning Module 3.7 User Application: Administration Guide NOTE: In a multi-server eDirectory tree, disabling TLS on the LDAP group removes the TLS requirement from all servers. If you want mixed TLS requirements for each individual server in your tree, you must enable the TLS requirement on each server. 2.8 Clustering This section includes the following topics: Section 2.8.1, “Clustering an Application Server,” on page 73 Section 2.8.2, “Things to Do Before Installing the User Application,” on page 74 Section 2.8.3, “Installing the User Application to a JBoss Cluster,” on page 76 Section 2.8.4, “Installing the User Application to a WebSphere Cluster,” on page 81 Section 2.8.5, “Things to Do After Installing the User Application,” on page 81 2.8.1 Clustering an Application Server A cluster is a collection of application server nodes that provide a set of services. The purpose of a cluster is to increase performance and reliability of applications. In general, a cluster provides three key benefits for enterprise applications: High availability Scalability (more capacity) Load balancing High availability means that an application is reliable and available for a high percentage of the time that it is deployed. Clusters provide high availability because the same application is running on all nodes. If one node fails, the application is still running on other nodes. The Identity Manager User Application benefits from higher availability when running in a cluster. In addition, the Identity Manager User Application supports HTTP session replication and session failover. This means that if a session is in process on a node and that node fails, the session can be resumed on another server in the cluster without intervention. For more information about JBoss clusters, see the JBoss wiki page for High availability and clustering services (http://wiki.jboss.org/wiki/Wiki.jsp?page=JBossHA). JGroups Cluster Groups The JGroups communications module provides communications among groups that share a common name, multicast address, and multicast port. JGroups is installed with JBoss, but it can also be used without JBoss. The User Application includes a JGroups module in the User Application WAR to support caching in a cluster environment. JBoss Cluster JBoss clusters are implemented by JBoss using the JGroups communications module. The configuration of JGroups and session replication is defined by JBoss and depends on the version of JBoss you are using. See the JBoss Administration Guide (http://www.redhat.com/docs/en-US/ JBoss_Enterprise_Application_Platform/5.0.0/html/Administration_And_Configuration_Guide/ clustering-intro.chapt.html) for more detailed information on configuring JBoss clusters. Designing the Production Environment 73 User Application Cluster Group The Identity Manager User Application uses an additional cluster group solely to coordinate User Application caches in a clustered environment on either JBoss or WebSphere clusters. The User Application cluster group is independent of the two JBoss cluster groups and does not interact with them. By default, the User Application cluster group and the two JBoss groups use different group names, multicast addresses, and multicast ports, so no reconfiguration is necessary. By default, this cluster group uses a UUID name to minimize the risk of conflicts with other cluster groups that users might add to their servers. The default name is c373e901aba5e8ee9966444553544200. By default, the group uses multicast address 228.8.8.8 and runs on port 45654. This cluster isn't configured using a JBoss service file. Instead, the configuration settings are located in the directory and can be configured using the User Application administration features. If you are familiar with JGroups and JBoss clustering, you can adjust the User Application cluster configuration using this interface. Changes to the cluster configuration only take effect for a server node when that node is restarted. User Application cluster group settings are shared by any Identity Manager application that shares the directory configuration. The purpose of the local settings option in the User Application administration interface is to allow an administrator to remove a node from a cluster, or change the membership of servers in a cluster. For example, you can disable clustering globally, then enable it locally for a subset of your servers sharing the directory configuration. 2.8.2 Things to Do Before Installing the User Application This section provides information that you should be aware of before you install the User Application, and describes tasks that you should perform before installing the User Application. This section includes the following topics: “About Multiple Clusters on the Same Network” on page 74 “Synchronizing Application Server Clocks” on page 75 “Avoiding Multiple Browser Logins from the Same Browser Window in a Cluster” on page 75 “About the User Application Database” on page 75 About Multiple Clusters on the Same Network If you have more than one cluster running on a network, you must separate the clusters to prevent performance problems and anomalous behavior. You accomplish this by ensuring that each cluster uses a different partition name, multicast address, and multicast port. Even if you are not running multiple clusters on the same network, it’s a good idea to specify a unique partition name for the cluster, rather than using the default partition. The following are important points: The cluster must have a unique cluster partition name and multicast address. For JBoss, specify the cluster partition name and multicast address by editing the JBoss startup script (start-jboss.bat or start-jboss.sh for Windows or Linux, respectively) supplied with the User Application. You need to modify the JBoss startup scripts for your servers to start JBoss with a -D flag and set the jboss.partition.name and jboss.partition.udpGroup system properties (see “Configuring the Workflow Engine” on page 77). 74 Identity Manager Roles Based Provisioning Module 3.7 User Application: Administration Guide The cluster must use a unique multicast port. For JBoss, specify the port to use by editing the mcast_port attribute in the JBoss server deploy\cluster-services.xml file. For JBoss, you can find instructions about running more than one cluster on a network by using your browser to view Two Clusters Same Network (http://wiki.jboss.org/wiki/ Wiki.jsp?page=TwoClustersSameNetwork). Synchronizing Application Server Clocks You must synchronize the clocks of the servers in a User Application cluster. If server clocks are not synchronized, sessions might time out early, causing HTTP session failover to not work properly. There are many time synchronization methods available. The method that you use depends on the needs of your organization. One common approach is to use the Network Time Protocol (NTP). For a discussion of using the xNTP protocol for time synchronization, see Time Synchronization using Extended Network Time Protocol (xntp) (http://www.novell.com/coolsolutions/trench/15650.html). Avoiding Multiple Browser Logins from the Same Browser Window in a Cluster We do not recommend using multiple logins across browser tabs or browser sessions on the same host. Some browsers share cookies across tabs and processes, so using multiple logins might cause problems with HTTP session failover (in addition to risking unexpected authentication functionality if multiple users share a computer). About the User Application Database When you install the User Application using the User Application installation program, you designate an existing version of a supported database to use (for example, MySQL, Oracle or Microsoft SQL Server). The database is used to store User Application data and User Application configuration information. When the User Application is installed in a cluster environment, all nodes in the JBoss cluster must access the same database instance. The User Application uses standard JDBC calls to access and update the database. The User Application uses a JDBC data source bound to the JNDI tree to open a connection to the database. When you install the User Application into a JBoss cluster by using the User Application installation program, the data source is installed for you. The installation program creates a data source file named IDM-ds.xml, and places this file in the deploy directory (for example, server/IDM/ deploy). The installation program also places the appropriate JDBC driver for the database specified during installation in the lib directory (for example, /server/IDM/lib). For more information about setting up the User Application database for a cluster, see “Specifying the User Application Database” on page 76. NOTE: By default, MySQL sets the maximum number of connections to 100. This number might be too small to handle the workflow request load in a cluster. If the number is too small, you might see the following exception: (java.sql.SQLException: Data source rejected establishment of connection, message from server: "Too many connections.") To increase the maximum number of connections, set the max_connections variable in my.cnf to a number greater than 100. Designing the Production Environment 75 2.8.3 Installing the User Application to a JBoss Cluster To install the User Application to a cluster, use the User Application installation program to install the User Application to each node in the cluster (see the Roles Based Provisioning Module Installation Guide). This section provides notes that are specific to installing the User Application to a cluster. This section includes the following topics: “About the Server Configuration” on page 76 “Specifying the User Application Database” on page 76 “Selecting the Cluster (all) Option” on page 77 “Configuring the Workflow Engine” on page 77 “Using the Same Master Key for Each User Application in the Cluster” on page 78 “Starting the User Application Cluster Group” on page 80 About the Server Configuration JBoss comes with three different ready-to-use server configurations: minimal, default and all. Clustering is only enabled in the all configuration. A cluster-service.xml file in the /deploy folder describes the configuration for the default cluster partition. When you install the User Application and indicate to the installation program that you want to install into a cluster, the installation program makes a copy of the all configuration, names the copy IDM (this is the default; the installation program allows you to change the name), and installs the User Application into the this configuration. Specifying the User Application Database All nodes in the JBoss cluster must access the same database instance. When you use the User Application installation program, you are prompted to specify the database name, host and port: Figure 2-3 Specifying the Database Host and Port 76 Identity Manager Roles Based Provisioning Module 3.7 User Application: Administration Guide Make sure that you specify the same database parameters each time you install the User Application to a cluster node. Selecting the Cluster (all) Option When you use the User Application installation program, you are prompted to specify the IDM configuration: Figure 2-4 Specifying the Cluster (all) Option and Engine ID Select the clustering (all) option. Configuring the Workflow Engine Workflow engine clustering works independently of the User Application cache framework. There are several steps that you must perform to ensure that the workflow engine works correctly in a cluster environment. All servers in the cluster need to be pointing to the same database. When you install the User Application to the cluster using the User Application installation program (see “Installing the User Application to a JBoss Cluster” on page 76), you accomplish this by specifying the IP address or host name of the server on which the database for the User Application is installed. Each server in the cluster needs to be started with a unique engine-id. You can accomplish this by setting the com.novell.afw.wf.engine-id system property at server startup. For example, if you wanted to start JBoss and assign the engine id ENGINE1 to the workflow engine for that server, you would use the following command: run.sh -Dcom.novell.afw.wf.engine-id=ENGINE1 (Linux) run.bat -Dcom.novell.afw.wf.engine-id=ENGINE1 (Windows) You might want to combine the setting of this system property with the setting of other system properties (see “Setting JBoss system properties in the JBoss startup script” on page 78). For information about managing running workflows, see “Managing Workflows in a Cluster” on page 84. Designing the Production Environment 77 Setting JBoss system properties in the JBoss startup script Each server in the cluster should be started using the same partition name and partition UDP group (see “About Multiple Clusters on the Same Network” on page 74). Each server in the cluster should use a unique engine ID (see “Configuring the Workflow Engine” on page 77). You can modify your JBoss startup script (start-jboss.bat for Windows, start-jboss.sh for Linux) to specify all of these system properties. This script is located in the directory in which your User Application files are stored. For example, to start a server using the partition name “Example_Partition”, the UDP group “228.3.2.1” and the Engine ID “Engine1” you would add the following to the start-jboss script: start run.bat -c IDM -Djboss.partition.name=Example_Partition Djboss.partition.udpGroup=228.3.2.1 -Dcom.novell.afw.wf.engine-id=Engine1 Using the Same Master Key for Each User Application in the Cluster The Identity Manager User Application encrypts sensitive data (see Section 2.2.7, “Encryption of Sensitive User Application Data,” on page 54). A master key is used to access encrypted data. All User Applications in a cluster must use the same master key. Follow these steps to ensure that all User Applications in a cluster use the same master key. 1 Using the User Application installation program, install the User Application to the first node in the cluster. For information about using the User Application installation program, see “Installing the User Application in the Roles Based Provisioning Module Installation Guide. When you use the User Application installation program to install the first User Application in a cluster, at the end of the installation you are presented with a new master key for the User Application: 78 Identity Manager Roles Based Provisioning Module 3.7 User Application: Administration Guide Figure 2-5 Master Key Follow the on-screen instructions to save the master key to a text file. 2 Using the User Application installation program, install the User Application to the other nodes in the cluster. When you install the User Application to the other nodes in the cluster, the installation program provides a page that you use to import the master key: Designing the Production Environment 79 Figure 2-6 Pasting Master Key in User Application Installation Program 3 Import the master key that you saved to a text file in Step 1 on page 78. Starting the User Application Cluster Group After the User Applications in your cluster have been installed, you must enable the cluster in the User Application cluster configuration. 1 Start the first User Application in the cluster. 2 Log in as the User Application administrator. Don’t start any other servers yet. 3 Click Administration. The User Application displays the Application Configuration portal. 4 Click Caching. The Caching Management page is displayed. 5 Select True for the Cluster Enabled property. 6 Click Save. 7 Restart the server. 8 If you are using local settings (see “Specifying the User Application Cluster Group Caching Configuration” on page 82), repeat this procedure for each server in the cluster. 80 Identity Manager Roles Based Provisioning Module 3.7 User Application: Administration Guide 2.8.4 Installing the User Application to a WebSphere Cluster This section outlines the process for installing and starting the User Application on a WebSphere cluster. This section assumes you are an experienced user of the WebSphere Application Server. 1 Install and configure your WebSphere Application Servers and cluster according to manufacturer’s instructions, such as those at the following links: For information about application server setup, refer to: WebSphere Application Server, Version 6.1 Information Center (http:// publib.boulder.ibm.com/infocenter/wasinfo/v6r1/index.jsp) For a road map, see Network Deployment: (Distributed platforms and Windows), Version 6.1 > Installing your application serving environment > Distributed operating systems >Installing the product and additional software > Roadmap: Installing Network Deployment. IBM WebSphere Extended Deployment, Version 6.1 Information Center (http:// publib.boulder.ibm.com/infocenter/wxdinfo/v6r1/index.jsp) 2 Install and create a database according to manufacturer’s instructions. Enable the database for UTF-8. 3 Add and configure the database driver on a WebSphere server. 4 Create a JDBC Provider. 5 Create a data source for your relational database. 6 Run the User Application installer to install and configure the User Application on your WAS console system. Directions are in the Roles Based Provisioning Module Installation Guide. The installer writes the sys-configuration-xmldata.xml file to the directory you choose during installation. 7 In your post-installation tasks, while creating JVM Custom Properties in the WAS console as directed in the Roles Based Provisioning Module Installation Guide, create a new JVM Custom Property for each User Application server in the cluster. Name the Custom Property com.novell.afw.wf.engine-id and give it a unique value. Each User Application server runs a workflow engine, and each engine requires a unique engine ID. 8 Import the directory server certificate authority to the WebSphere keystore. 9 Deploy the IDM WAR file from the WebSphere administration console. 10 Start the application. Access the User Application portal using the context you specified during deployment. The default port for the web container on WebSphere is 9080, or 9443 for the secure port. The URL would look something like this: http://<server>:9080/IDMProv 2.8.5 Things to Do After Installing the User Application This section describes User Application cluster configuration actions that you perform after installing the User Application. This section includes the following topics: “Configuring the User Application Driver for Clustering” on page 82 “Specifying the User Application Cluster Group Caching Configuration” on page 82 “Configuring Logging in a Cluster” on page 83 Designing the Production Environment 81 “Managing Workflows in a Cluster” on page 84 “Checking the Health of the Server” on page 84 Configuring the User Application Driver for Clustering Clustering is the only scenario in which the same User Application driver is used by multiple User Applications. The User Application driver stores various kinds of information (such as workflow configuration and cluster information) that is application-specific. Therefore, a single instance of the User Application driver should be not shared among multiple applications. The User Application stores application-specific data to control and configure the application environment. This includes JBoss application server cluster information and the workflow engine configuration. The only User Applications that should share a single User Application driver instance are those applications that are part of the same JBoss cluster. In a cluster, the User Application driver must be configured to use the host name or IP address of the dispatcher or load balancer for the cluster. You create the User Application driver when you install the User Application (see the Roles Based Provisioning Module Installation Guide). You configure the User Application driver using iManager. 1 Log into the instance of iManager that manages your Identity Vault. 2 Click the Identity Manager node in the iManager navigation frame. 3 Click Identity Manager Overview. 4 Use the search page to display the Identity Manager Overview for the driver set that contains your User Application driver. 5 Click the round status indicator in the upper right corner of the driver icon: A menu is displayed that lists commands for starting and stopping the driver, and editing driver properties. 6 Click Edit Properties. 7 In the Driver Parameters section, change the Host parameter to the host name or IP address of the dispatcher. 8 Click OK. Specifying the User Application Cluster Group Caching Configuration Users who are familiar with JGroups and JBoss clustering can modify the cluster group caching configuration, using the User Application administration user interface (see “Cache Settings for Clusters” on page 143). Changes to the cluster configuration only take effect for a server node when the server node is restarted. In most cases you should use global settings when configuring a cluster. However, global settings present a problem if you need to use TCP, because the IP address of the server must be specified in the JGroups initialization string for each server. You can use local settings to specify a JGroups 82 Identity Manager Roles Based Provisioning Module 3.7 User Application: Administration Guide initialization string by checking Enable Local for Cluster Properties, then typing the JGroups initialization string in the Local field. For an example of a working JGroups TCP protocol stack, see JGroupsStackTCP (http://wiki.jboss.org/wiki/Wiki.jsp?page=JGroupsStackTCP). WARNING: If you specify local settings and enter an incorrect configuration in the JGroups initialization string, the cache cluster function might not start. Unless you know how to configure JGroups correctly and understand the protocol stack, you should not use local settings. Alternatively, you can add a token (for example, “IDM_HOST_ADDR”) to the global settings for the Cluster Properties. You can then edit the hosts file on each server in the cluster to specify the IP address for that server. Configuring Logging in a Cluster This section includes tips for configuring logging in a cluster. No tips are included for WebSphere or WebLogic. “JBoss Logging” on page 83 “User Application Logging” on page 84 JBoss Logging You can configure JBoss for logging in a cluster. To enable logging for clusters, you need to edit the jboss-log4j.xml configuration file, located in the \conf directory for the JBoss server configuration (for example, \server\IDM\conf), and uncomment the section at the bottom that looks like this: <!-- Clustering logging --> - <!-Uncomment the following to redirect the org.jgroups and org.jboss.ha categories to a cluster.log file. <appender name="CLUSTER" class="org.jboss.logging.appender.RollingFileAppender"> <errorHandler class="org.jboss.logging.util.OnlyOnceErrorHandler"/> <param name="File" value="${jboss.server.home.dir}/log cluster.log"/> <param name="Append" value="false"/> <param name="MaxFileSize" value="500KB"/> <param name="MaxBackupIndex" value="1"/> <layout class="org.apache.log4j.PatternLayout"> <param name="ConversionPattern" value="%d %-5p [%c] %m%n"/> </layout> </appender> <category name="org.jgroups"> <priority value="DEBUG" /> <appender-ref ref="CLUSTER"/> </category> <category name="org.jboss.ha"> <priority value="DEBUG" /> <appender-ref ref="CLUSTER"/> </category> --> You can find the cluster.log file in the log directory for the JBoss server configuration (for example, \server\IDM\log). Designing the Production Environment 83 User Application Logging The User Application logging configuration (see Section 5.1.4, “Logging Configuration,” on page 148) is not propagated to all servers in cluster. For example, if you use the Logging administration page on a server in a cluster to set the logging level for com.novell.afw.portal.aggregation to Trace, this setting is not propagated to the other servers in the cluster. You must individually configure the level of logging messages for each server in the cluster. Managing Workflows in a Cluster The Identity Manager User Application workflow cluster implementation binds process instances to the engine on which they started. This is done by associating a workflow process instance with an engine-id and is maintained in the cluster database. When a workflow engine is started, it resumes process instances that are assigned to its engine-id. This prevents multiple engines in a cluster from resuming the same process instance. If a workflow engine fails, processes that were running on that engine are automatically resumed on another engine in the cluster. You can manually reassign processes to other engines in the cluster. For example, an administrator could reassign processes back to a failed workflow engine when the workflow engine is brought back online, or redistribute processes to other engines when an engine is permanently removed from the cluster (see Section 17.2.7, “Managing Workflow Processes in a Cluster,” on page 426). When the workflow engine starts up it checks to see if its engine ID is already in use by another node in the cluster. When this is the case, the workflow engine checks the cluster database to see if the status of the engine is SHUTDOWN or TIMEDOUT. If it is, the workflow engine starts. If the status is STARTING or RUNNING, the workflow engine logs a warning, then waits for a heartbeat time out to occur. If the heartbeat time out occurs, that means that the other workflow engine with the same ID was not shut down properly, so it's safe to start. If the heartbeat timer is updated, that means another workflow engine with the same ID is running in the cluster, so the workflow engine cannot start. You can specify the heartbeat time out (the maximum elapsed time between heartbeats before a workflow engine is considered timed out) by setting the Heartbeat Interval and Heartbeat Factor properties in the User Application (see “Configuring the Workflow Cluster” on page 268). Checking the Health of the Server Most loadbalancers or dispatchers provide a healthcheck feature for determining whether an HTTP server is up and listening. The User Application contains a blank page that can be used for configuring HTTP healthchecks on your loadbalancer. The page can be addressed at this URL: http://<HOSTNAME>/<CONTEXT>/jsps/healthcheck.jsp 2.9 Localizing and Customizing User Application Strings Identity Manager provides several tools for localizing or customizing the User Application’s text. This section includes the following topics: Section 2.9.1, “Localizing User Application Strings,” on page 85 Section 2.9.2, “Customizing Text,” on page 85 84 Identity Manager Roles Based Provisioning Module 3.7 User Application: Administration Guide 2.9.1 Localizing User Application Strings See Table 2-5 for links to the documentation that describes how to localize User Application components. Table 2-5 Localization and Customization Topics Topic Where to find it: To set the User Application’s preferred locale See the sections “Preferred Locale” and “Choosing a Preferred Language” in the Identity Manager User Application: User Guide (http:// www.novell.com/documentation/idmrbpm37/ index.html). To localize e-mail templates See Section 17.4.4, “Adding Localized E-Mail Templates,” on page 443. To localize challenge questions See “Security: Best Practices” in the Novell Identity Manager Administration Guide. To localize the password sync status application name See Table 5-14, “Password Sync Status Application Settings,” on page 200. To localize the names of container or shared pages See the Page Name property in Section 6.2.1, “Creating Container Pages,” on page 216. See Section 6.3.1, “Creating Shared Pages,” on page 225. To localize portlet preferences See Section 7.3.5, “Modifying Preferences for Portlet Registrations,” on page 250. To localize or customize the text in the provisioning See Section 16.3.2, “Creating or Editing a request definitions you create by using iManager Provisioning Request,” on page 395. For general information about localizing provisioning objects or customizing their display text, such as: See the section “Localizing Provisioning Objects” in the Identity Manager User Application: Design Guide. Directory abstraction layer objects. Provisioning request definitions Workflow activity display names Digital signature declaration strings See the section “Creating a Signature Declaration” in the Identity Manager User Application: Design Guide. 2.9.2 Customizing Text The text displayed in the User Application is stored in either the User Application driver or in a set of language-based JAR files (UserAppStrings_xx.JAR) located in the User Application WAR. You use different tools to customize the text depending on where the text is stored. For text stored in the: User Application driver: Use the provisioning tools in Designer for Identity Manager. Designing the Production Environment 85 For more information, see the section “Localizing Provisioning Objects” in the User Application: Design Guide (http://www.novell.com/documentation/idmrbpm37/index.html). User Application WAR: Follow the procedure described in this section. The text strings stored in the User Application WAR file are stored in a language-based JAR file. There is one JAR for each supported language, and the JAR file names indicate the associated language by appending the Java locale code for the associated language. The base name of the JAR file is UserAppStrings_locale-code.JAR. For example, the English language strings are stored in the UserAppStrings_en.JAR. The JAR files are copied to the l10nresources subfolder of the User Application’s installation directory. NOTE: To customize graphics or theming, see Section 5.1.7, “Theme Administration,” on page 170 To customize the text stored in the User Application WAR, decide: “What strings do I want to change?” on page 86 “What languages do I want to support?” on page 87 Once you know what to change, follow these steps: “Modify or customize the strings” on page 87 “Repackage the updated files and deploy” on page 87 “Test your changes” on page 88 You can follow the example outlined in “Text Change Example” on page 88 The User Application strings typically change between versions. This means that you have to apply your string changes or customizations to each new release. What strings do I want to change? Review the User Application tabs. Make a list that includes each string you want to change and where the string is located in the User Application user interface. You can use this list when testing your changes to ensure that you made the text changes in the appropriate places. Determine whether the strings are stored in the User Application driver or in the language- based JAR. The following guidelines help you determine where the strings are stored: Navigation, headers, names, and instructions: This content is stored in language-based JARs. Identity Self-Service tab: This content is stored in language-based JARs, unless it is related to directory abstraction layer entities (such as display name, lists, and categories). Content related to directory abstraction layer entities is stored in the User Application driver. Work Dashboard tab: This content is stored in language-based JARs, unless it is in the Form Details section. The content in the Form Details section is stored in the User Application driver. Administration tab: This content is stored in language-based JARs. Roles and Resources tab: This content is stored in language-based JARs unless it is related to role or SoD names or descriptions. Role or SoD names and descriptions are stored in the User Application driver. 86 Identity Manager Roles Based Provisioning Module 3.7 User Application: Administration Guide Compliance tab: This content is stored in the language-based JARs unless it is related to the provisioning request definition. Content related to the provisioning request definition is stored in the User Application driver. For information on changing the strings stored in the User Application driver, see the section “Localizing Provisioning Objects” in the User Application: Design Guide. What languages do I want to support? Locate the JAR files corresponding to the language(s) you want to support. For example, English strings are located in UserAppStrings_en.JAR. Unzip the JARs into a working directory using a zip tool or the Java JDK JAR program. Modify or customize the strings Search the files in the working directory to locate the strings you want to change. Use a tool that allows you to search for a specified string across all of the files in a folder (the string(s) you want to change might be located in more than one file). TIP: The strings in the files are in the properties file format of key=value. Modify only the value, and not the key. Modifying the key can cause run-time errors. Follow the additional editing tips identified below. When editing the properties files: Use an editor that formats properties files for improved readability, when possible. Use an editor that displays characters rather than unicode encoding for improved readability. Some of the properties files contain unicode-encoding. In the editor, turn off wrapping to improve readability. It helps identity each property on a separate line. In some files, the key value might be difficult to identify, especially if your editor does not provide automatic property file formatting. In these cases, search for the equals sign, and find the first occurrence of the equals sign that does not have a backslash preceding it (\=). The key precedes the equals sign (=), and the value follows it. Make sure to maintain the proper properties file format. To learn more, see Java Properties Object (http://www.java.sun.com/j2se/1.5.0/docs/api/ java/util/Properties.html#load) Repackage the updated files and deploy Add the properties files back to the JAR using the Java JDK jar program. You must maintain the folder location within the JAR. Add the modified JAR into the User Application WAR maintaining the folder location within the WAR. You can use the Java JDK Jar program. This example uses the Java JDK Jar program and maintains the folder location: jar -uvf IDMPRov.WAR WEB-INF/lib/UserAppStrings_en.jar Redeploy the WAR file to your application server. Designing the Production Environment 87 Test your changes Access the User Application. Using your list of changes, review each occurrence of the string you changed to determine if you made the change appropriately. Text Change Example This section provides a simple text change example. Open the User Application Welcome page and notice the text that says Securely manage the access needs of your ever-changing user community Figure 2-7 Sample Text Change To change this string in the English language JAR. 1 Expand the UserAppStrings_en.JAR file to a temporary directory. 2 Use a find tool to locate the string. Notice that it is located in this properties file ./com/novell/afw/portal/portlet/ message/IDMWelcomeMessageRsrc_en.properties 3 Open the properties file and change the text from: Securely manage the access needs of your ever-changing user community to Test text change 4 Save and close the file. 5 Follow the steps described in “Repackage the updated files and deploy” on page 87. 88 Identity Manager Roles Based Provisioning Module 3.7 User Application: Administration Guide 6 Open the User Application’s Welcome page and verify your changes. 2.10 Configuring the Roles and Resources Tab This section provides details on configuring the underlying subsystem for the Roles and Resources tab. Topics include: Section 2.10.1, “Role Service Driver Configuration,” on page 89 Section 2.10.2, “User Application Configuration,” on page 92 Section 2.10.3, “Security Roles,” on page 92 Section 2.10.4, “View Request Status Search Limit,” on page 93 Section 2.10.5, “Result Set and Pagination Settings,” on page 93 Section 2.10.6, “E-Mail Notification,” on page 94 Section 2.10.7, “Enabling Drivers for Resource Mappings,” on page 95 Section 2.10.8, “Creating a List in the RBPM Database,” on page 95 2.10.1 Role Service Driver Configuration After creating the Role Service driver at installation time, you can optionally modify some of the driver configuration settings in iManager. To configure the Role Service driver: 1 In iManager, click Identity Manager>Identity Manager Overview. 2 Browse to the driver set where the driver exists, then click Search. 3 Click the upper-right corner of the Role Service driver icon, then click Edit Properties. 4 Click on the Driver Configuration tab. 5 Scroll down to the Driver Settings section of the page. Designing the Production Environment 89 6 Make any changes you would like to the settings, and click OK to commit your changes. You can modify the following standard driver settings (listed under User Application/Workflow Connection on the Driver Configuration page), which get their initial values at installation time: Table 2-6 Standard Driver Settings 90 Option Description User Application Driver DN The distinguished name of the User Application driver object that is hosting the role system. Use the eDirectory format, such as UserApplication.driverset.org, or browse to find the driver object. This is a required field. User Application URL The URL used to connect to the User Application in order to start Approval Workflows. This is a required field. Identity Manager Roles Based Provisioning Module 3.7 User Application: Administration Guide Option Description User Application Identity The distinguished name of the object used to authenticate to the User Application in order to start Approval Workflows. This needs to a user who has been assigned as a Provisioning Administrator for the User Application. Use the eDirectory format, such as admin.department.org, or browse to find the user. The identity needs to be entered in LDAP format (for example, cn=admin,ou=department,o=org), rather than dot format. Note that this is different from the format required at driver install time, where dot notation is expected. This is a required field. User Application Password Password of the account specified in the User Application Identity field. The password is used to authenticate to the User Application in order to start approval workflows. This is a required field. Reenter User Application Password Re-enter the password of the account specified in the User Application Identity field. In addition, you can modify the following additional settings (listed under Miscellaneous on the Driver Configuration page) to customize the behavior of the Role Service driver: Table 2-7 Additional Settings for Customizing the Role Service Driver Option Description Number of days before processing removed request objects Specifies the number of days the driver should wait before cleaning up request objects that have finished processing. This value determines how long you are able to track the status of requests that have been fulfilled. Frequency of reevaluation of dynamic and nested groups (in minutes) Specifies the number of minutes the driver should wait before reevaluating dynamic and nested groups. This value determines the timeliness of updates to dynamic and nested groups used by the User Application. In addition, this value can have an impact on performance. Therefore, before specifying a value for this option, you need to weigh the performance cost against the benefit of having up-to-date information in the User Application. Generate audit events Determines whether audit events are generated by the driver. For details on audit configuration, see Chapter 3, “Setting Up Logging,” on page 113. Designing the Production Environment 91 Indexing for the Role Service Driver The Role Service driver creates relevant indexes in eDirectory for roles definitions. If you upload a large number of roles, the indexing of these values may take some time. You can monitor these indexes under Index Management in iManager. Here is the list of Index Names for the indexes created for the Role Service driver: nrf(Object Class) nrf(nrfMemberOf) nrf(nrfStatus) nrf(nrfStartDate) nrf(nrfNextExpiration) nrf(nrfParentRoles) nrf(nrfChildRoles) nrf(nrfCategory) nrf(nrfRoleCategoryKey) nrf(nrfLocalizedNames) nrf(nrfLocalizedDescrs) nrf(nrfRoles) 2.10.2 User Application Configuration The Configure Roles and Resources Settings action on the Roles and Resources tab of the User Application allows you to specify administrative settings for the Role Subsystem. For details on using the Configure Roles and Resources Settings action, see the section on configuring the role subsystem in the Identity Manager User Application: User Guide (http://www.novell.com/ documentation/idmrbpm37/pdfdoc/ugpro/ugpro.pdf). 2.10.3 Security Roles The Role Subsystem uses a set of system roles to secure access to functions within the Roles and Resources tab. Each menu action in the Roles and Resources tab is mapped to one or more of the system roles. If a user is not a member of one of the roles associated with an action, the corresponding menu item is not displayed on the Roles and Resources tab. The system roles are administrative roles automatically defined by the system at install time for the purpose of delegated administration. These include the following: Role Administrator Role Manager To assign users to the system roles, you need to use the RBPM Provisioning and Security action on the Administration tab. For details on assigning users to roles, see Section 8.3, “Administrator Assignments,” on page 269. The initial assignment of the Role Administrator is specified at installation time and processed when the Role Subsystem is first initialized at startup time. 92 Identity Manager Roles Based Provisioning Module 3.7 User Application: Administration Guide 2.10.4 View Request Status Search Limit By default, the View Request Status action retrieves up to 10,000 request objects. If a user attempts to retrieve a larger result set, the user will see a message indicating that the limit has been reached. In this case, the user should narrow the search (by specifying a particular user or status, for example) to limit the number of objects returned in the result set. Note that when a user applies a filter to a role name, the filter limits what the user sees and its order, not the number of objects returned. The administrator can change the maximum number of request objects retrieved by modifying the entity definition for the nrfRequest object in iManager. To do this, the administrator needs to modify the <search-max>10000</search-max> setting by editing the XmlData attribute of the sys-nrfrequest object. The sys-nrf-request object can be found under EntityDefs.DirectoryModel.AppConfig within the User Application driver for the Roles Based Provisioning Module. 2.10.5 Result Set and Pagination Settings The Administration tab in the User Application provides several settings you can use to control how result sets are processed and displayed on pages within the application. To configure the settings for result sets and pagination: 1 Open the Administration in the User Application. 2 Select the RBPM Provisioning and Security tab. 3 Select Provisioning UI Display Settings from the left navigation menu. 4 Scroll down to the General Display Settings section of the page. 5 Modify any of the following settings, and click Save. Setting Description Default number of results displayed per page Specifies the default number of rows to display in lists shown on the Roles and Resources tab. When a user initiates a query on any of the pages listed above, the User Application caches the data obtained by the query, and returns the number of rows specified for this setting to the browser. Each time the user requests to see the next page, another set of rows is returned from the cache. The default value for this setting is 25. Designing the Production Environment 93 Setting Description Options for number of results displayed per page Allows you to specify additional values that the (use spaces to separate values) user can select to override the default number of rows displayed on the My Roles, View Request Status, Browse Role Catalog, and Manage Role Relationships pages. The list of values you type must be separated by spaces. Note that the number specified in the Default number of results displayed per page control is always included in the list of values for the user to select. The default value for this setting is 5 10 50 100 500. NOTE: This setting also applies to the Team Tasks page on the Work Dashboard tab and to the Object Selector. The default number of rows displayed on the Team Tasks page and in the Object Selector, however, is not controlled by the Default number of results displayed per page setting. The default number of rows for team tasks is set at 5, and the default number of rows for the Object Selector is set at 10. Threshold for browser-based sorting and filtering Specifies the maximum amount of memory (expressed in rows) for the client browser to use for sorting and filtering. If you specify a very high value, client-side sorting and filtering will be very fast, but an excessive amount of memory might be used on the client. If you specify a very low value, the client-side memory usage might be low, but sorting and filtering might also be too slow. This setting applies only if the size of the result set is less than or equal to the threshold value. If the size of the result set is larger than the threshold value specified, sorting and filtering operations are performed on the server. The default value for this setting is 1000. 2.10.6 E-Mail Notification The Role Subsystem uses two templates that are specific to roles-based provisioning: New Role Request (Role Request Notification) Role Request Approval Notification (Role Request Approval Completed Notification) New Resource Request (Resource Request Notification) Resource Request Approval Notification (Resource Request Approval Completed Notification) You can edit the templates to change the content and format of e-mail messages. For more information on these templates, see Section 17.4, “Working with E-Mail Templates,” on page 428. 94 Identity Manager Roles Based Provisioning Module 3.7 User Application: Administration Guide 2.10.7 Enabling Drivers for Resource Mappings Version 3.7 of the Roles Based Provisioning Module ships with updated configuration files for the following drivers: Active Directory GroupWise LDAP Notes eDirectory SAP User Management SAP Portal SAP GRC Access Control All of these updated driver configuration files contain a new section on the driver's Global Configuration Values (GCV) page labeled Role and Resource Mapping. To display the configuration options available in the new section, select show for the Show role and resource mapping configuration GCV. To enable resource mapping for the driver, select Yes for the Enable resource mapping GCV. Depending on the driver's capabilities, one or more lower-level options are displayed once resource mapping is turned on. The Active Directory driver, for example, has three lower-level options: Allow mapping of user accounts Allow mapping of groups Allow mapping of Exchange mailboxes Each option can be turned on or off individually by selecting Yes or No. After saving the changes and restarting the driver, RBPM will detect the driver as enabled for resource mapping. 2.10.8 Creating a List in the RBPM Database You can use lists in request forms to display various options for specifying a resource assignment. This section provides instructions for adding lists to the database by executing a few SQL statements. Once these lists have been created, they can be displayed on a request form on the Roles and Resources tab. The following example shows how you would create a simple set of values for a list. This example uses SQL statements that work with MySQL: Designing the Production Environment 95 INSERT INTO PROVISIONING_CODE_MAP SET VIEWID='Factory-Locations', VERSIONNO=1, DESCRIPTION='Factory Locations', NAME='Factory Locations',ENTITYKEY='Factory-Locations', ENTITYTYPE=1, LASTREFRESHED=UNIX_TIMESTAMP(); INSERT INTO PROVISIONING_VIEW_VALUE SET VALUEID='Factory-Locations-1', VERSIONNO=1, VIEWID='Factory-Locations', PARAMVALUE='Cambridge, MA 02440'; INSERT INTO PROVISIONING_VIEW_VALUE SET VALUEID='Factory-Locations-2', VERSIONNO=1, VIEWID='Factory-Locations', PARAMVALUE='Provo, UT 97288'; For PostgreSQL, the syntax would be the same except that you would need to replace UNIX_TIMESTAMP() with epoch. The VIEWID is the primary key for the PROVISIONING_CODE_MAP. The ENTITYTYPE value 1 identifies the map type as a list. The VIEWID is the foreign key for the PROVISIONING_VIEW_VALUE relationship to the PROVISIONING_CODE_MAP table. The VALUEID is the primary key for the PROVISIONING_VIEW_VALUE table. After the Company Location field has been added to the form, you can specify that the company location value should come from the Company Locations list at request time: After the Factory Location field has been added, you can specify that the factory location value must come from the Factory Locations list at request time: 96 Identity Manager Roles Based Provisioning Module 3.7 User Application: Administration Guide At request time, the user can then select the company location and factory location values when assigning the resource: After the resource has been assigned, the Request Status tab for the resource displays the parameter values chosen from the lists for the request form fields: Designing the Production Environment 97 2.11 Configuring the Compliance Tab This section provides details on configuring the Compliance tab. Topics include: Section 2.11.1, “Security Roles,” on page 98 Section 2.11.2, “E-Mail Notification,” on page 98 2.11.1 Security Roles The Compliance tab enforces the RBPM security model to secure access to compliance functions. If a user is not a Compliance Administrator, the Compliance tab is not available. A Compliance Administrator is designated at installation time. After installation, the Security Administrator can assign additional users to the Compliance Administrator role. For details on assigning users to the Compliance Administrator role, see Section 8.3, “Administrator Assignments,” on page 269. 2.11.2 E-Mail Notification When an attestation process is initiated, each attester receives an e-mail message indicating that they must complete a compliance task. The message provides a link to the workflow activity that has been assigned to the attester. This behavior is enabled by default, but can be disabled in Designer. The Compliance Task (Attestation Notification) template determines the content and format of email messages sent to attesters. For more information on this template, see Section 17.4, “Working with E-Mail Templates,” on page 428. 98 Identity Manager Roles Based Provisioning Module 3.7 User Application: Administration Guide 2.12 Configuring the Work Dashboard Tab If you want users to be able to save their preferences within the Work Dashboard tab, you need to set the permissions appropriately for a couple of attributes in the Identity Vault. Specifically, if you want users to be able to save customizations associated with the Customize, Filter, and Rows actions (actions which allow control the display of data on several sections of the Work Dashboard), or change the sort of the data displayed, you need to ensure that the permissions on the srvprvUserPrefs and srvprvQueryList attributes are set so that the user is able to write to these attributes. 2.13 Recreating the Database After Installation Starting with the 3.7.0 release of the Roles Based Provisioning Module, database table creation has been removed from the start-up process for the User Application and incorporated into the installation procedure. In previous releases (3.0.0 through 3.6.1), it was possible to recreate the database tables after installation without having to reinstall by deleting the database and creating a new database with the same name. In previous releases, the database tables were created at start up. If the tables did not exist, then the tables would be created. This approach does not work with the 3.7.0 release. With the 3.7.0 release, you can recreate the database tables after an installation, without having to reinstall the product. However, the procedue is somewhat different. There are two options for recreating the database. If a SQL file was generated during the User Application installation, follow these steps: 1 Stop the Application Server. 2 Login to the Database Server. 3 Delete the database that is used by the User Application. 4 Create a new database with the same name as the one that was deleted in Step 3. 5 Use the SQL file that was created during the installation of the User Application to create the database tables. 6 Restart the Application Server. If a SQL file was not generated during the User Application installation, or if the SQL file cannot be found, follow these steps: 1 Stop the Application Server. 2 Login to the Database Server. 3 Delete the database that is used by the User Application. 4 Create a new database with the same name as the one that was deleted in Step 3. 5 Open the Novell-Custom-Install.log file, which is located at the root of the User Application install directory. For example: /home/lab/IDM370/idm 6 Search for an entry similar to the following: Designing the Production Environment 99 ************************************************** If a failure is encountered while creating the tables, verify that this string is correct If not , you can modify this string and copy/paste to a command line to run ************************************************** 7 Copy the command outlined and paste it into a terminal on the machine where the User Application is installed. NOTE: You will have to replace the the stars (*) that appear for the database username and password with the actual values required to authenticate. 8 If a SQL file is generated, then use the generated SQL file to create the database. Otherwise, the database tables were created as a result of issuing the command. 9 Restart the Application Server. 2.14 Changing the Default Administrator Assignments After Installation In the 3.7.0 release, the following administrative accounts are assigned once during the initialization of the User Application: Compliance Administrator Provisioning Administrator RBPM Configuration Administrator Resource Administrator Roles Administrator Security Administrator Modifying the mappings for these administrative accounts in the configupdate utility after the installation and initialization process will not work in this release. The check for assigning the administrative roles happens only once. At this time, a property is set that keeps track of when these roles were assigned. If you want to modify the default assignments for the administrative roles without deleting the Driver (which would cause all role assignments to be removed), you need to follow one of the three procedures shown below. To grant or remove the role assignment through the User Application: 1 Login to the User Application as the Security Administrator. 2 Go to the Roles Catalog on the Roles and Resources tab. 3 Select the administrative role you want to change (for example, the Provisioning Administrator). 4 Select Edit. 5 Select the Assignments tab. 6 If you want to remove the current assigned user, then select the user and press the Remove link. 7 To add a user, press the assign button where you will need to provide a description and the user to assign the role to and the press the Assign button. 100 Identity Manager Roles Based Provisioning Module 3.7 User Application: Administration Guide To change any or all of the administrative assignments and keep the existing (default) users that have been granted the role assignment: 1 Stop the Application Server that the User Application WAR is deployed on. 2 Stop the User Application Driver. 3 Stop the Roles and Resource Service Driver. 4 Launch the configupdate utility. 5 Change the mappings for the administrative roles outlined above as required, and then press OK. 6 Using either iManager or ConsoleOne, go to %DriverSet% -> %userApplication Driver% -> AppConfig -> AppDefs -> Configuration. Then, go to the Other tab and open the XMLData. 7 Find the following entry: <property> <key>com.novell.idm.security.domain-admin.initialized</key> 8 Delete the entry, from <property> to </property>. For example: <property> <key>com.novell.idm.security.domain-admin.initialized</key> <value>20090831124642Z</value> </property> 9 Close and Save. 10 Restart the User Application. 11 Restart the User Application Driver. 12 Restart the Roles and Resource Service Driver. 13 Access the User Application and in the logs you will see the administrative roles will be issued. To change any or all of the administrative assignments and remove the existing (default) users that have been granted the role assignment: 1 Stop the Application Server that the User Application WAR is deployed on. 2 Stop the User Application Driver. 3 Stop the Roles and Resource Service Driver. 4 Launch the configupdate utility. 5 Change the mappings for the administrative roles outlined above as required, and then press OK. 6 Using either iManager or ConsoleOne, go to %DriverSet% -> %userApplication Driver% -> AppConfig -> AppDefs -> Configuration. Then, go to the Other tab and open the XMLData. 7 Find the following entry: <property> <key>com.novell.idm.security.domain-admin.initialized</key> 8 Delete the entry, from <property> to </property>. For example: <property> <key>com.novell.idm.security.domain-admin.initialized</key> <value>20090831124642Z</value> </property> 9 Close and Save. Designing the Production Environment 101 10 Using either ConsoleOne or iManager, remove the user from the role and then the role from the user. 11 Restart the User Application. 12 Restart the User Application Driver. 13 Restart the Roles and Resource Service Driver. 14 Access the User Application and in the logs you will see the administrative roles will be issued. 2.15 Setting up JMS in WebSphere and WebLogic The User Application relies on a Java Message Service (JMS) persistent store to persist e-mail messages. If JMS is not properly configured, any e-mail messages in the memory queue will be lost if the Application Server is shut down. As a convenience, JMS is configured for JBoss automatically. For WebSphere and WebLogic, you need to perform setup steps to configure JMS manually. This section includes the following topics: Section 2.15.1, “Setting up JMS on WebSphere 6.1,” on page 102 Section 2.15.2, “Setting up JMS on WebSphere 7.0,” on page 106 Section 2.15.3, “Setting up JMS on WebLogic 10.3,” on page 109 2.15.1 Setting up JMS on WebSphere 6.1 To configure JMS on WebSphere 6.1: 1 Login to the WebSphere Console as the Administrative User: http://server:port/ibm/console 2 Go to Service integration->Buses: 2a Press the New button. 2b Create a new bus. 2b1 Provide a name for the bus. For example: IDMProvBus 2b2 Uncheck the check box for Bus Security. 2b3 Press the Next button. 2c Confirm the creation of the new bus. Press the Finish button. 3 Go to Service integration->Buses: 3a Select the bus that was created above. For example: IDMProvBus 3b On the Configuration Tab -> General Properties area, perform these steps: 3b1 Provide a Description. For example: Bus to be used with the IDM User Application 102 Identity Manager Roles Based Provisioning Module 3.7 User Application: Administration Guide 3b2 Press the Apply button. 3b3 Press Save. 4 Go to Service integration -> Buses. 4a Select the bus that was created above. For example: IDMProvBus 4b On the Configuration Tab -> Topology -> Bus Members. Press the Add button and perform these steps: 4b1 Select server, cluster, or WebSphere MQ server. Select the correct Server that the User Application WAR is deployed on and press the Next button. 4b2 Select the type of message store. Select the radio button next to File Store and press the Next button. 4b3 Provide the message store properties. Leave all of the default values on this page and press the Next button. 4b4 Confirm the addition of a new bus member. Press the Finish button 4c Press the Save link. 5 Go to Resources -> JMS -> Topic connection factories. 5a In the scopes drop down, select the correct scope. For example: Node=MyNode01, Server=server1 5b Press the New button. 5b1 Select the radio button next to Default messaging provider. 5b2 Press the OK button. 5c On the Configuration tab. 5c1 Provide a name. For example: ConnectionFactory 5c2 Provide the following as the JNDI name. ConnectionFactory 5c3 Provide a Description. For Example: Topic Connection Factory to be used with the IDM User Application 5c4 In the Bus Name drop down box, select the Bus that was created above. For Example: IDMProvBus 5c5 Provide the following in the Client identifier field under the Durable Subscription area: IDMNotificationDurableTopic 5c6 In the Persistent message reliability drop down box under Quality of Service, select the following: Reliability persistent Designing the Production Environment 103 5c7 In the Share durable subscriptions drop down box under Advanced Messaging, select the following: Never shares 5d Press the Apply button. 5e Press the Save link. 6 Go to Resources -> JMS -> Topics. 6a In the scopes drop down, select the correct scope. For example: Node=MyNode01, Server=server1 6b Press the New button. 6b1 Select the radio button next to Default messaging provider. 6b2 Press the OK button. 6c On the Configuration tab, perform these steps: 6c1 Provide a Name. For Example: IDMNotificationDurableTopic 6c2 Provide the following as the JNDI name. topic/IDMNotificationDurableTopic 6c3 Provide a Description. For Example: Topic to be used with the IDM User Application 6c4 In the Bus Name drop down box, select the Bus that was created above. For Example: IDMProvBus 6c5 In the Topic space drop down box, select the following: Default.Topic.Space 6c6 In the JMS delivery mode drop down box, select the following: Persistent 6d Press the Apply button. 6e Press the Save link. 6f Logout of the WebSphere console. 7 Restart the WebSphere Application Server with the User Application WAR deployed: 7a In the SystemOut.log, the following three lines will appear in sequence if the JMS server is not set up correctly: INFO [JMSConnectionMediator] Starting JMS notification system WARN [NotificationEngine] Could not properly initialize JMS persistence for the notification system. Will revert back to nonpersistent asynchronous notification system. INFO [NotificationThread] Starting asynchronous notification system 7b In the server log, the following two lines will appear with some information about the connection if the JMS Server is set up correctly: 104 Identity Manager Roles Based Provisioning Module 3.7 User Application: Administration Guide INFO [JMSConnectionMediator] Starting JMS notification system %connection information% INFO [NotificationThread] Starting asynchronous notification system ======== [8/8/09 16:14:28:978 EDT] 0000000a SibMessage I [:] CWSID0021I: Configuration reload is enabled for bus IDMProvBus. [8/8/09 16:14:29:118 EDT] 0000000a SibMessage I [:] CWSIS1569I: Messaging engine N35020Node01.server1-IDMProvBus is using a file store. ======== [8/8/09 16:16:13:285 EDT] 00000017 SystemOut O 16:16:13,255 INFO [JMSConnectionMediator] Starting JMS notification system [8/8/09 16:16:13:502 EDT] 00000017 SharedPool I J2CA0086W: Shareable connection MCWrapper id 32e432e4 Managed connection [com.ibm.ws.sib.api.jmsra.impl.JmsJcaManagedConnection@847917706 <managedConnectionFactory=[com.ibm.ws.sib.api.jmsra.impl.JmsJcaManage dTopicConnectionFactoryImpl@1943565272 <logWriter=null> <busName=IDMProvBus> <clientID=IDMNotificationDurableTopic> <userName=null> <password=null> <xaRecoveryAlias=> <nonPersistentMapping=ExpressNonPersistent> <persistentMapping=ReliablePersistent> <durableSubscriptionHome=N35020Node01.server1-IDMProvBus> <readAhead=Default> <temporaryQueueNamePrefix=null> <temporaryTopicNamePrefix=> <target=> <targetSignificance=Preferred> <targetTransportChain=> <targetType=BusMember> <providerEndpoints=> <connectionProximity=Bus> <shareDataSourceWithCMP=false> <shareDurableSubscriptions=NeverShared> <cachedFactory=com.ibm.ws.sib.api.jms.impl.JmsFactoryFactoryImpl@2f8a 2f8a>]> <coreConnection=com.ibm.ws.sib.processor.impl.ConnectionImpl@3ac03ac> <localTransaction=[com.ibm.ws.sib.api.jmsra.impl.JmsJcaManagedConnect ion$JmsJcaLocalTransaction@887895276 <localSITransaction=null>]> <xaResource=null> <metaData=null> <userDetails=[com.ibm.ws.sib.api.jmsra.impl.JmsJcaUserDetails@1130382 176 <userName=null> <password=null>]> <subject=null> <logWriter=null> <sessions=[[com.ibm.ws.sib.api.jmsra.impl.JmsJcaSessionImpl@160893335 0 <managedConnection=847917706> <connection=2119728728> <transacted=false> <applicationLocalTransaction=null> <reqInfo=[com.ibm.ws.sib.api.jmsra.impl.JmsJcaConnectionRequestInfo@8 71511026> <userDetails=null> <coreConnection=com.ibm.ws.sib.processor.impl.ConnectionImpl@72bc72bc > <request counter=0>]> <sessionClosed=false> <sessionInvalidated=false>]]> <connectionListeners=[com.ibm.ejs.j2c.ConnectionEventListener@3370337 0]>] State:STATE_TRAN_WRAPPER_INUSE from resource ConnectionFactory was used within a local transaction containment boundary. [8/8/09 16:16:13:527 EDT] 0000001e SystemOut O 16:16:13,526 INFO [NotificationThread] Starting asynchronous notification system Designing the Production Environment 105 2.15.2 Setting up JMS on WebSphere 7.0 To configure JMS on WebSphere 7.0: 1 Login to the WebSphere Console as the Administrative User: http://server:port/ibm/console 2 Go to Service integration->Buses: 2a Press the New button. 2b Create a new bus. 2b1 Provide a name for the bus. For example: IDMProvBus 2b2 Uncheck the check box for Bus Security. 2b3 Press the Next button. 2c Confirm the creation of the new bus. Press the Finish button. Then, press the Save link. 3 Go to Service integration->Buses: 3a Select the bus that was created above. For example: IDMProvBus 3b On the Configuration Tab -> General Properties area, perform these steps: 3b1 Provide a Description. For example: Bus to be used with the IDM User Application 3b2 Press the Apply button. 3b3 Press Save. 4 Go to Service integration -> Buses. 4a Select the bus that was created above. For example: IDMProvBus 4b On the Configuration Tab -> Topology -> Bus Members. Press the Add button and perform these steps: 4b1 Select server, cluster, or WebSphere MQ server. Select the correct Server that the User Application war is deployed on and press the Next button. 4b2 Select the type of message store. Select the radio button next to File Store and press the Next button. 4b3 Configure the file store. Leave all of the default values on this page and press the Next button. 4b4 Tune the performance parameters, if necessary. Leave all of the default values, unless your situation requires them to be changed. Press the Next button. 4b5 Press the Finish button. 4c Press the Save link. 106 Identity Manager Roles Based Provisioning Module 3.7 User Application: Administration Guide 5 Go to Resources -> JMS -> Topic connection factories. 5a In the scopes drop down, select the correct scope. For example: Node=MyNode01, Server=server1 5b Press the New button. 5b1 Select the radio button next to Default messaging provider. 5b2 Press the OK button. 5c On the Configuration tab. 5c1 Provide a name. For example: ConnectionFactory 5c2 Provide the following as the JNDI name. ConnectionFactory 5c3 Provide a Description. For Example: Topic Connection Factory to be used with the IDM User Application 5c4 In the Bus Name drop down box, select the Bus that was created above. For Example: IDMProvBus 5c5 Provide the following in the Client identifier field under the Durable Subscription area: IDMNotificationDurableTopic 5c6 In the Persistent message reliability drop down box under Quality of Service, select the following: Reliability persistent 5c7 In the Share durable subscriptions drop down box under Advanced Messaging, select the following: Never shares 5d Press the Apply button. 5e Press the Save link. 6 Go to Resources -> JMS -> Topics. 6a In the scopes drop down, select the correct scope. For example: Node=MyNode01, Server=server1 6b Press the New button. 6b1 Select the radio button next to Default messaging provider. 6b2 Press the OK button. 6c On the Configuration tab, perform these steps: 6c1 Provide a Name. For Example: IDMNotificationDurableTopic 6c2 Provide the following as the JNDI name. topic/IDMNotificationDurableTopic 6c3 Provide a Description. For Example: Topic to be used with the IDM User Application Designing the Production Environment 107 6c4 In the Bus Name drop down box, select the Bus that was created above. For Example: IDMProvBus 6c5 In the Topic space drop down box, select the following: Default.Topic.Space 6c6 In the JMS delivery mode drop down box, select the following: Persistent 6d Press the Apply button. 6e Press the Save link. 6f Logout of the WebSphere console. 7 Restart the WebSphere Application Server with the User Application WAR deployed: 7a In the SystemOut.log, the following three lines will appear in sequence if the JMS server is not set up correctly: INFO [JMSConnectionMediator] Starting JMS notification system WARN [NotificationEngine] Could not properly initialize JMS persistence for the notification system. Will revert back to nonpersistent asynchronous notification system. INFO [NotificationThread] Starting asynchronous notification system 7b In the server log, the following two lines will appear with some information about the connection if the JMS Server is set up correctly: INFO [JMSConnectionMediator] Starting JMS notification system %connection information% INFO [NotificationThread] Starting asynchronous notification system ======== [9/7/09 14:39:52:167 EDT] 00000000 SibMessage I [:] CWSID0021I: Configuration reload is enabled for bus IDMProvBus. [9/7/09 14:39:52:372 EDT] 00000000 SibMessage I [:] CWSIS1569I: Messaging engine N35020Node02.server1-IDMProvBus is using a file store. ======== [9/7/09 14:41:32:613 EDT] 0000000c SystemOut O 14:41:32,608 INFO [JMSConnectionMediator] Starting JMS notification system [9/7/09 14:41:32:841 EDT] 0000000c SharedPool I J2CA0086W: Shareable connection MCWrapper id 5c175c17 Managed connection [com.ibm.ws.sib.api.jmsra.impl.JmsJcaManagedConnection@490f490f <managedConnectionFactory=[com.ibm.ws.sib.api.jmsra.impl.JmsJcaManage dTopicConnectionFactoryImpl@1f9c1f9c <logWriter=null> <busName=IDMProvBus> <clientID=IDMNotificationDurableTopic> <userName=null> <password=null> <xaRecoveryAlias=> <nonPersistentMapping=ExpressNonPersistent> <persistentMapping=ReliablePersistent> <durableSubscriptionHome=N35020Node02.server1-IDMProvBus> <readAhead=Default> <temporaryQueueNamePrefix=null> <temporaryTopicNamePrefix=null> <target=null> <targetSignificance=Preferred> <targetTransportChain=null> <targetType=BusMember> <providerEndpoints=null> <connectionProximity=Bus> <shareDataSourceWithCMP=false> 108 Identity Manager Roles Based Provisioning Module 3.7 User Application: Administration Guide <shareDurableSubscriptions=NeverShared> <cachedFactory=com.ibm.ws.sib.api.jms.impl.JmsFactoryFactoryImpl@4fb2 4fb2> <producerDoesNotModifyPayloadAfterSet=false> <consumerDoesNotModifyPayloadAfterGet=false>]> <coreConnection=com.ibm.ws.sib.processor.impl.ConnectionImpl@b0b0b0b> <localTransaction=[com.ibm.ws.sib.api.jmsra.impl.JmsJcaManagedConnect ion$JmsJcaLocalTransaction@78ce78ce <localSITransaction=null>]> <xaResource=null> <metaData=null> <userDetails=[com.ibm.ws.sib.api.jmsra.impl.JmsJcaUserDetails@5b4d5b4 d <userName=null> <password=null>]> <subject=null> <logWriter=null> <sessions=[[com.ibm.ws.sib.api.jmsra.impl.JmsJcaSessionImpl@21ff21ff <managedConnection=1225738511> <connection=828453217> <transacted=false> <applicationLocalTransaction=null> <reqInfo=[com.ibm.ws.sib.api.jmsra.impl.JmsJcaConnectionRequestInfo@2 19a219a> <userDetails=null> <coreConnection=com.ibm.ws.sib.processor.impl.ConnectionImpl@b0b0b0b> <request counter=0>]> <sessionClosed=false> <sessionInvalidated=false>]]> <connectionListeners=[com.ibm.ejs.j2c.ConnectionEventListener@1572625 852]>] State:STATE_TRAN_WRAPPER_INUSE from resource ConnectionFactory was used within a local transaction containment boundary. [9/7/09 14:41:32:938 EDT] 0000001a SystemOut O 14:41:32,938 INFO [NotificationThread] Starting asynchronous notification system 2.15.3 Setting up JMS on WebLogic 10.3 To configure JMS on WebLogic 10.3: 1 Login to the WebLogic Console as the Administrative User: http://server:port/console 2 Go to Domain Configuration->Services->Persistent Stores: 2a Select New->Create File Store screen. 2b On the Create a new File Store screen. 2b1 Provide a Name. For example: FileStore-0 2b2 Select the correct Target Server. This needs to be the same Target Server that the User Application WAR is deployed on. For Example: AdminServer 2b3 Provide a Directory Location for where the JMS Server will be able to store. The location must already exist on the server. For example: /opt/bea/JMS 2b4 Press the OK button. 3 Go to Domain Configuration->Services->Messaging->JMS Servers: 3a Select the New button. 3b On the Create a New JMS Server screen #1, perform these steps: 3b1 Provide a Name. For example: JMSServer-0 3b2 In the Persistent Store dropdown, select the persistent store that was created above. Designing the Production Environment 109 For example: FileServer-0 3b3 Press the Next button. 3c On the Create a New JMS Server screen #2, perform these steps: 3c1 In the Target dropdown, select the correct Target Server. This needs to be the same Target Server that the User Application WAR is deployed on. For example: AdminServer 3c2 Press the Finish button. 4 Go to Domain Configuration -> Services -> Messaging -> JMS Modules. 4a Select the New button. 4b Provide a Name. For example: SystemModule-0 4c Press the Next button. 4d On the Create JMS System Module screen #2: 4d1 Select the checkbox next to the correct Target Server. This needs to be the same Target Server that the User Application WAR is deployed on. For example: AdminServer 4d2 Press the Next button. 4e On the Create JMS System Module screen #3: 4e1 Select the checkbox next to Would you like to add resources to this JMS System Module. 4e2 Press the Finish button. 4f On the Settings for %name% (for example: SystemModule-0), select the Configuration tab. 4f1 Under Summary of Resources area, press the New button. 4f1aOn the Create a New JMS System Module Resource screen #1, select the radio button next to Connection Factory, and press the Next button. 4f1bOn the Create a New JMS System Module Resource screen #2, follow these steps: Provide a Name. For example: ConnectionFactory-0 Provide the following as the JNDI Name: ConnectionFactory Press the Next button. 4f1cOn the Create a New JMS Module Resource screen #3, perform these steps: Select the Target Server that the User Application WAR is deployed on. For example: AdminServer Press the Finish button. 4f2 Under Summary of Resources area, press the New button. 4f2aOn the Create a New JMS System Module Resource screen #1, select the radio button next to Topic, and press the Next button. 110 Identity Manager Roles Based Provisioning Module 3.7 User Application: Administration Guide 4f2bOn the Create a New JMS System Module Resource screen #2, follow these steps: Provide a Name. For example: Topic-0 Provide the following as the JNDI Name: topic/ IDMNotificationDurableTopic Press the Next button. 4f2cOn the Create a New JMS Module Resource screen #3, perform these steps: Press the Create a New Subdeployment button. Provide a Subdeployment Name. The Subdeployment name needs to be the same as the Name provided for the Topic. For example: Topic-0. Press the OK button. 4f3 Under Targets, select the correct JMS Server. This has to be the same JMS server that was defined above. For example: JMSServer-0 4f4 Press the Finish button. 4g Logout of the WebLogic console. 5 Restart the WebLogic Server with the User Application WAR deployed: 5a In the server log, the following three lines will appear in sequence if the JMS server is not set up correctly: INFO [com.novell.soa.notification.impl.jms.JMSConnectionMediator] Starting JMS notification system WARN [com.novell.soa.notification.impl.NotificationEngine] Could not properly initialize JMS persistence for the notification system. Will revert back to non-persistent asynchronous notification system. INFO [com.novell.soa.notification.impl.NotificationThread] Starting asynchronous notification system 5b In the server log, the following two lines will appear in sequence if the JMS Server is set up correctly: INFO INFO [JMSConnectionMediator] Starting JMS notification system [NotificationThread] Starting asynchronous notification system Designing the Production Environment 111 112 Identity Manager Roles Based Provisioning Module 3.7 User Application: Administration Guide 3 Setting Up Logging 3 This section includes the following: Section 3.1, “About Event Logging,” on page 113 Section 3.2, “Logging to a Novell Audit or Sentinel Server,” on page 114 Section 3.3, “Logging to OpenXDAS,” on page 120 Section 3.4, “Log Events,” on page 122 3.1 About Event Logging Section 3.1.1, “About the Log Level Settings,” on page 113 Section 3.1.2, “Changing the User Application Log Level Settings,” on page 114 The Identity Manager User Application implements logging by using log4j, an open-source logging package distributed by The Apache Software Foundation. See Logging Services (http:// logging.apache.org/log4j) for details. By default, event messages are logged to the system console and to the application server’s log file at logging level INFO and above. You can also configure the User Application to log to Novell® Audit and OpenXDAS. Events are logged to all activated loggers. The default behavior of the JBoss server is to limit the console log4j appender to display log messages with a verbosity of INFO or less. In order to see log messages for more verbose levels (for example, DEBUG), you need to examine the server log file. IMPORTANT: If you are logging to Novell Audit, review the Novell Audit documentation (http:// www.novell.com/documentation/novellaudit20/index.html). WARNING: You must use Novell Audit (or Sentinel) to preserve documents that you digitally sign. Digital signature documents are not stored with workflow data in the User Application database, but are stored in the logging database. You must enable logging to preserve these documents. The log4j configuration settings are in jboss-log4j.xml in the install directory on a JBoss application server log4j.xml in the User Application WAR on a non-JBoss application server 3.1.1 About the Log Level Settings Console logging involves synchronized writes. This means that logging can become a processor usage issue as well as a concurrency impedance. You can change the priority value default setting to ERROR, on a JBoss server, by modifying the setting in the <installdir>/jboss/server/IDM/ conf/jboss-log4j.xml. Locate the root node that looks like this: <root> <priority value="INFO"/> Setting Up Logging 113 <appender-ref ref="CONSOLE"/> <appender-ref ref="FILE"/> </root> Change the priority value to: <root> <priority value="ERROR"/> <appender-ref ref="CONSOLE"/> <appender-ref ref="FILE"/> </root> Assigning a value to the root ensures that any appenders that do not explicitly have a level assigned inherit the root's level. 3.1.2 Changing the User Application Log Level Settings The User Application enables you to change the log level settings of individual loggers. 1 Log in to the User Application as the User Application Administrator. 2 Select the Administration tab. 3 Select the Logging link. 4 Change the Log Level of any logger. 5 To save the changes for application server restarts, select Persist the logging changes. 6 Click Submit. The User Application logging configuration is saved in the file idmuserapp_logging.xml. On JBoss, the path is <installdir>/jboss/server/IDM/conf/idmuserapp_logging.xml. 3.2 Logging to a Novell Audit or Sentinel Server To log to a Novell Audit or Sentinel server: 1 Add the Identity Manager application schema to the Novell Audit server as a log application This step applies to Novell Audit only. For more information, see Section 3.2.1, “Adding the Identity Manager Application Schema to your Novell Audit Server as a Log Application,” on page 115 2 Configure the Novell Audit platform agent on your application server The Platform Agent is required on any client that reports events to Novell Audit or Sentinel. You configure the platform agent through the logevent configuration file. This file provides the configuration information that the platform agent needs to communicate with the Novell Audit server. The default location for this file, on the application server, is: Linux: /etc/logevent.conf Windows: /<WindowsDir>/logevent.cfg (Usually c:\windows) Specify the following four properties: Loghost: The IP address or DNS name of your Novell Audit or Sentinel server. For example: LogHost=xxx.xxx.xxx.xxx 114 Identity Manager Roles Based Provisioning Module 3.7 User Application: Administration Guide LogJavaClassPath: The location of the lcache jar file NauditPA.jar. For example: LogJavaClassPath=/opt/novell/idm/NAuditPA.jar LogCacheDir: Specifies where lcache stores cache files. For example: LogCacheDir=/opt/novell/idm/naudit/cache LogCachePort: Specifies on which port lcache listens for connections. The default is 288, but in a Linux server, set the port number greater than 1000. For example: LogCachePort=1233 BigData Specifies the maximum number of bytes that the client will allow. Larger amounts of logging data will be truncated. The default value is 3072 bytes, but you should change this to at least 8192 bytes to handle a typical form that has approximately 15 fields on a half page. LogMaxBigData=8192 IMPORTANT: If your data is very large, you may want to increase this value. If you are logging events that include digital signatures, it is critical that the value of LogMaxBigData be large enough to handle the data being logged. Specify any other settings needed for your environment. NOTE: You must restart the Platform Agent any time you change the configuration. For more information about the structure of the logevent configuration file, see the section on configuring platform agents (http://www.novell.com/documentation/novellaudit20/index.html) in the section on the logging system in the Novell Audit Administration Guide. 3 Enable Novell Audit or Sentinel logging. This step applies to both Novell Audit and Sentinel. For more information, see Section 3.2.2, “Enabling Audit or Sentinel Logging,” on page 116. 3.2.1 Adding the Identity Manager Application Schema to your Novell Audit Server as a Log Application If you are using Novell Audit (not Sentinel), you need to add the schema to your Novell Audit Server as a log application. This section applies to Novell Audit only. To configure Audit to use the Identity Manager User Application as a log application: 1 Locate the following file: dirxml.lsc This file is located in the Identity Manager User Application installation directory after the install, for example /opt/novell/idm. 2 Use a Web browser to access an iManager with the Novell Audit plug-in installed, and log in as an administrator. 3 Go to Roles and Tasks > Auditing and Logging and select Logging Server Options. 4 Browse to the Logging Services container in your tree and select the appropriate Audit Secure Logging Server. Then click OK. 5 Go to the Log Applications tab, select the appropriate Container Name, and click the New Log Application link. 6 When the New Log Application dialog box displays, specify the following: Setting Up Logging 115 For this setting Do this Log Application Name Type any name that is meaningful for your environment Import LSC File Use the Browse button to select the dirxml.lsc file Click OK. The Log Applications displays the added application name. 7 Click OK to complete your Novell Audit server configuration. 8 Make sure the status on the Log Application is set to ON. (The circle under the status should be green. If it is red, click it to switch it to ON.) 9 Restart the Novell Audit server to activate the new log application settings. 3.2.2 Enabling Audit or Sentinel Logging To enable Novell Audit or Sentinel logging in your Identity Manager User Application: 1 Log in to the User Application as the User Application Administrator. 2 Select the Administration tab. 3 Select the Logging link. 4 Select the Also send logging messages to Novell Audit check box (near the bottom of the page). 5 To save the changes for any subsequent application server restarts, make sure Persist the logging changes is selected. 6 Click Submit. NOTE: To enable logging for Role events, the Role Service driver Generate audit events property must be selected. For more information on this property, see Section 2.10.1, “Role Service Driver Configuration,” on page 89. 3.2.3 Log Reports If you log events to the Novell Audit database channel, you can run reports on the data. There are several ways to generate reports against data logged to a Novell Audit database: Use the Novell Audit Report application to run your own reports or to run the predefined reports described in “Predefined Log Reports for Novell Audit” on page 116. Write queries against the logged data by using iManager to select Auditing and Logging > Queries (Novell Audit only). Write your own SQL queries against the logged data. Produce Identity Manager reports in Sentinel (see “Sentinel Reports” on page 119). The default Novell Audit table is called NAUDITLOG. Predefined Log Reports for Novell Audit The following predefined log reports are created in Crystal Reports (.rpt) format for filtering data logged to the Novell Audit database: 116 Identity Manager Roles Based Provisioning Module 3.7 User Application: Administration Guide Report Name Description Administrative Action Shows all administrative actions initiated from the Identity Manager User Application portal. This report includes the administrator who initiated the action. It excludes any administrative changes made using iManager or the Designer for Identity Manager. Historical Approval Flow Shows all approval flow activities for a specified time frame. Resource Provisioning Shows all provisioning activities, sorted by resource. User Audit Trail Shows all activity relating to a user. Activities include both provisioning and self-service activities. Specific User Provisioning Shows all provisioning activities for a specific user. User Provisioning Shows all provisioning activities, sorted by user. The following graphic shows an example of the Specific User Audit Trail report: Setting Up Logging 117 Figure 3-1 Sample Audit Trail Report The report files are in the following locations: Platform Location Windows /nt/dirxml/reports 118 Identity Manager Roles Based Provisioning Module 3.7 User Application: Administration Guide You can use these reports as templates for creating custom reports in the Crystal Reports Designer or you can run the reports using Audit Report (lreport.exe), a Windows program supplied with Novell Audit. The predefined reports query data from the default Novell Audit log database named naudit and a database table named nauditlog. If your Novell Audit log database has a different name, use the Set Datasource Location menu item in Crystal Reports Designer to replace the naudit database name with the one in your environment. For more information, see the section on working with reports in the Novell Audit documentation (http://www.novell.com/documentation/novellaudit20). Sentinel Reports If you have configured the platform agent to send events to Sentinel, you can produce the following reports about Identity Manager events in Sentinel: Account_Access_Assignments_[Oracle/SQL].rpt Collector_Pack_Audit_Trail_[Oracle/SQL].rpt Object_Provisioning_[Oracle/SQL].rpt Periodic_Password_Change_Violations_[Oracle/SQL].rpt Self_Password_Changes_[Oracle/SQL].rpt User_Account_Provisioning_[Oracle/SQL].rpt Account_Trust_Assignments_[Oracle/SQL].rpt Collector_Pack_Status_Dashboard_[Oracle/SQL].rpt Password_Management_[Oracle/SQL].rpt Periodic_Password_Change_Violations_Test_[Oracle/SQL].rpt Top_10_Dashboard_[Oracle/SQL].rpt User_Status_Management_[Oracle/SQL].rpt Administrative_Activity_[Oracle/SQL].rpt Configuration_Changes_[Oracle/SQL].rpt Password_Resets_[Oracle/SQL].rpt Resource_Request_Errors_[Oracle/SQL].rpt Top_10_Object_Access_Dashboard_[Oracle/SQL].rpt Workflow_Proxy_Delegation_Management_[Oracle/SQL].rpt Authentication_by_Server_[Oracle/SQL].rpt Event_Count_Trend_[Oracle/SQL].rpt Per_Object_Modification_[Oracle/SQL].rpt Resource_Requests_Rejected_[Oracle/SQL].rpt Trust_Access_Assignments_[Oracle/SQL].rpt Authentication_by_User_[Oracle/SQL].rpt Inactive_Users_[Oracle/SQL].rpt Per_Trust_Modification_[Oracle/SQL].rpt Resource_Requests_by_Process_[Oracle/SQL].rpt Trust_Management_[Oracle/SQL].rpt Setting Up Logging 119 Collector_Management_[Oracle/SQL].rpt Inactive_Users_Test_[Oracle/SQL].rpt Per_User_Modification_[Oracle/SQL].rpt Resource_Requests_by_User_[Oracle/SQL].rpt Trust_Provisioning_[Oracle/SQL].rpt You can access the full set of reports by downloading the Novell Identity Manager collector pack (http://support.novell.com/products/sentinel/zip/collectors/Novell_Identity-Manager_6.1r5.spz.zip). 3.3 Logging to OpenXDAS To use OpenXDAS for logging events, you must install, configure, then enable OpenXDAS in the User Application. To learn about: Installing Open XDAS, see the OpenXDAS instructions at OpenXDAS.org (http:// downloads.sourceforge.net/openxdas) Configuring OpenXDAS logging, see the “OpenXDAS Logger Configuration” in the OpenXDAS User’s Manual. The OpenXDAS daemon or service (xdasd) must be running when you start the User Application (if you have enabled OpenXDAS logging). For this reason, you should configure the OpenXDAS daemon to start automatically. On Linux, use the /etc/init.d/xdasd start command to start the daemon. To start it automatically, change the runlevel using the “System Services” editor (SUSE) or directly edit the /etc/init.d/rc* directories. On Windows, install as a service, or use the command-line options on xdasd.exe to create the service. See “Command Line Configuration” in the OpenXDAS User’s Manual. If your OpenXDAS daemon/service is not running and you are configured for OpenXDAS logging you'll get a error stack trace and the User Application might not start successfully. The error message looks like this: "ERROR [com.sssw.fw.servlet.Boot:contextInitialized] Unable to configure logging. com.novell.soa.common.LocalizedRuntimeException: Error Initializing OpenXDAS Audit." 3.3.1 Using OpenXDAS with Sentinel To use OpenXDAS with Sentinel, you must configure the netstream logger. The netstream logger is undocumented, but it is required to send XDAS audit messages to a Sentinel server. The netstream logger does not perform any encryption, so the stream needs to be secured in another way (for example, SSH tunnel). You must specify netstream entries in the xdasd.conf file for the loggers, server and port. For example on Linux: xdasd.loggers=/user/lib(64)/openxdas/libxdm_netstream.so xdasd.loggers.netstream.server = 151.155.226.50 xdasd.loggers.netstream.port = 1468 On Windows, the server and port entries are the same, but the location of the xdasd.loggers entry is different. For example, on Windows: 120 Identity Manager Roles Based Provisioning Module 3.7 User Application: Administration Guide xdasd.loggers=c:\Program Files\OpenXDAS\Loggers\xdm_netstream.dll xdasd.loggers.netstream.server = 151.155.226.50 xdasd.loggers.netstream.port = 1468 NOTE: On Windows, you must move the xdasd.conf file to the c:\windows folder. If you do not, the xdasd.exe is unable to locate it. 3.3.2 Enabling OpenXDAS Logging in the User Application You can enable OpenXDAS logging in your Identity Manager User Application in two ways: Select OpenXDAS as a logging option during the installation procedure. Enable OpenXDAS logging using the User Application Administration (described next). 1 Log in to the User Application as the User Application Administrator. 2 Select the Administration tab. 3 Select the Logging link. 4 Select the Also send logging messages to OpenXDAS check box (near the bottom of the page). 5 To save the changes for any subsequent application server restarts, make sure Persist the logging changes is selected. 6 Click Submit. NOTE: To enable logging for Role events, the Role Service driver Generate audit events property must be selected. For more information on this property, see Section 2.10.1, “Role Service Driver Configuration,” on page 89. 3.3.3 Troubleshooting If you enable OpenXDAS logging, but the OpenXDAS daemon is not running, the User Application fails to start. View the xdasd.log to verify that XDAS started successfully or to determine the reason for an unsuccessful start. If you stop OpenXDAS and restart it, you must also stop and restart the User Application. If you do not restart the User Application, the connection between OpenXDAS and the User Application is lost so no User Application events are logged. Table 3-1 Commands for Starting/Stopping the XDASD daemon/service Action Command To start XDAS xdasd -s To stop XDAS xdasd - x Setting Up Logging 121 3.4 Log Events The Identity Manager User Application logs a set of events automatically from workflow, search, detail, and password requests. By default, the Identity Manager User Application automatically logs the following events to all active logging channels: Table 3-2 Logged Events Event ID Process Novell Audit Event 31400 Detail portlet Delete_Entity Info Update_Entity Info Change Password portlet Change_Password_Failure Error Change_Password_Success Info Forgot Password portlet Forgot_Password_Change_Fail ure Error Forgot_Password_Change_Suc cess Info Search_Request Info Search_Saved Info 31401 31410 31411 31420 31421 31430 Search portlet 31431 XDAS Event Severity 31440 Create portlet Create_Entity Info 31470 Digital Signature Digital_Signature_Verification_R equest Info 31471 Digital_Signature_Verification_F ailure Error 31472 Digital_Signature_Verification_S uccess Info 122 Identity Manager Roles Based Provisioning Module 3.7 User Application: Administration Guide Event ID Process Novell Audit Event 31520 Workflow Workflow_Error Error 31521 Workflow_Started Info 31522 Workflow_Forwarded Info 31523 Workflow_Reassigned Info 31524 Workflow_Approved Info 31525 Workflow_Refused Info 31526 Workflow_Ended Info 31527 Workflow_Claimed Info 31528 Workflow_Unclaimed Info 31529 Workflow_Denied Info 31534 Workflow_Escalated Info 31535 Workflow_Reminder_Sent Info 31536 Digital_Signature Info 31537 Workflow_ResetPriority Info 3152A Workflow_Completed Info 3152B Workflow_Timedout Info 3152C User_Message Info 31533 Workflow_Retracted Info 31538 Role_Approved Info 31539 Role_Denied Info 3153A SOD_Exception_Approved Info 3153B SOD_Exception_Denied Info 3153C Start_Correlated_Workflow XDAS_AE_CREATE_D ATA_ITEM info 3153D Role_Request_Submitted XDAS_AE_CREATE_R OLE Info 3152D Provisioning XDAS Event Severity Provision_Error Error 3152E Provision_Submitted Info 3152F Provision_Success Info 31530 Provision_Failure Error 31531 Provision_Granted Info 31532 Provision_Revoked Info 31550 Login_Success XDAS_AE_CREATE_S ESSION Info Setting Up Logging 123 Event ID Process 31551 31450 XDAS Event Severity Login_Failure XDAS_AE_CREATE_S ESSION Info Create_Proxy_Definition_Succe ss Info 31451 Create_Proxy_Definition_Failur e Error 31452 Update_Proxy_Definition_Succe ss Info 31453 Update_Proxy_Definition_Failur e Error 31454 Delete_Proxy_Definition_Succe ss Info 31455 Delete_Proxy_Definition_Failure Error 31456 Create_Delegatee_Definition_S uccess Info 31457 Create_Delegatee_Definition_F ailure Error 31458 Update_Delegatee_Definition_S uccess Info 31459 Update_Delegatee_Definition_F ailure Error 3145A Delete_Delegatee_Definition_S uccess Info 3145B Delete_Delegatee_Definition_F ailure Error 3145C Create_Availability_Success Info 3145D Create_Availability_Failure Error 3145E Delete_Availability_Success Info 3145F Delete_Availability_Failure Error 31600 Security Context Novell Audit Event Role Provisioning 31601 31610 Role Assignment Request Role_Provisioning XDAS_AE_APPROVAL _REQUESTED Info Role_Provisioning_Failure XDAS_AE_APPROVAL _REQUESTED Error Role_Request Info 31611 Role_Request_Failure Error 31612 Role_Request_Workflow Info 31613 SOD_Exception_Auto_Approval XDAS_AE_CREATE_D ATA_ITEM_ASSOC Info 124 Identity Manager Roles Based Provisioning Module 3.7 User Application: Administration Guide Event ID Novell Audit Event XDAS Event 31614 Retract_Role_Request XDAS_AE_TERMINATE Info _PEER_ASSOC 31615 Retract_Role_Request_Failure XDAS_AE_TERMINATE Error _PEER_ASSOC Entitlement_Grant XDAS_AE_CREATE_D ATA_ITEM_ASSOC Info 31621 Entitlement_Grant_Failure XDAS_AE_CREATE_D ATA_ITEM_ASSOC Error 31622 Entitlement_Revoke XDAS_AE_TERMINATE Info _DATA_ITEM_ASSOC 31623 Entitlement_Revoke_Failure XDAS_AE_TERMINATE Error _DATA_ITEM_ASSOC 31624 Entitlement_Invalid_Reference Error Create_Role Info 31631 Create_Role_Failure Error 31632 Delete_Role Info 31633 Delete_Role_Failure Error 31634 Modify_Role Info 31635 Modify_Role_Failure Error 31640 Create_SOD Info 31641 Create_SOD_Failure Error 31642 Delete_SOD Info 31643 Delete_SOD_Failure Error 31644 Modify_SOD Info 31645 Modify_SOD_Failure Error 31646 Modify_Config XDAS_AE_MODIFY_D ATA_ITEM_ATT Info 31647 Modify_Config_Failure XDAS_AE_MODIFY_D ATA_ITEM_ATT Error 31620 31630 Process User Entitlement Role Management Severity Events Not Sent Through OpenXDAS The User Application supports sending events to both Sentinel Audit through NAudit Platform Agent and to Sentinel Syslog through OpenXDAS. However, the following events, which are generated from the IDM Engine, are only sent to Sentinel Audit through NAudit Platform Agent, and not through OpenXDAS: Setting Up Logging 125 00031665,Resource Provisioning 00031666,Resource Provisioning Failure 00031600,Role Provisioning 00031601,Role Provisioning Failure 00031677,Create 00031678,Delete 00031679,Delete 0003167A,Modify 0003167B,Modify Resource Resource Resource Resource Resource Association Failure Association Association Failure Association Association Failure #^GROUP^Engine events logged from vrdim^00030001-00030032 00030001,Status Success 00030002,Status Retry 00030003,Status Warning 00030004,Status Error,Channel 00030005,Status Fatal 00030006,Status Other 00030007,Search 00030008,Add Entry 00030009,Delete Entry,Channel 0003000A,Modify Entry 0003000B,Rename Entry 0003000C,Move Entry 0003000D,Add Association 0003000E,Remove Association 0003000F,Query Schema 00030010,Check Password 00030011,Check Object Password 00030012,Change Password 00030013,Sync,Channel 00030014,Input XML Document 00030015,Input Transformation Document 00030016,Output Transformation Document 00030017,Event Transformation Document 00030018,Placement Rule Transformation Document 00030019,Create Rule Transformation Document 0003001A,Input Mapping Rule Transformation Document 0003001B,Output Mapping Rule Transformation Document 0003001C,Matching Rule Transformation Document 0003001D,Command Transformation Document 0003001E,Publisher Filter Transformation Document 0003001F,User Agent Request 00030020,Resync Driver 00030021,Migrate 00030022,Driver Start 00030023,Driver Stop 00030024,Password Sync 00030025,Password Reset 00030026,DirXML Error 00030027,DirXML Warning 00030028,Custom Operation 00030029,Clear Attribute 0003002A,Add Value - Modify Entry 0003002B,Remove Value 0003002C,Merge Entries 0003002D,Get Named Password 0003002E,Reset Attributes 126 Identity Manager Roles Based Provisioning Module 3.7 User Application: Administration Guide 0003002F,Add Value - Add Entry 00030030,Set SSO Credential 00030031,Clear SSO Credential 00030032,Set SSO Passphase #^GROUP^Job events logged from vrdim^000303E4-000303E7 000303E4,Job Result Aborted 000303E5,Job Result Error 000303E6,Job Result Warning 000303E7,Job Result Success # #^GROUP^Server events Logged from DXevent^000307D0-000307E2 000307D0,Config:Log Events 000307D1,Config:Driver Cache Limit 000307D2,Config:Driver Set 000307D3,Config:Driver Start Option 000307D4,Driver Resync 000307D5,Migrate Application 000307D6,Shim Password Set 000307D7,Keyed Password Set 000307D8,Remote Loader Password Set 000307D9,Regenerate Key Pair 000307DA,Get Server Certificate 000307DB,Cache Utility 000307DC,Check Object Password 000307DD,Initialize Driver Object 000307DE,Notify Job Update 000307DF,Open Driver Action 000307E0,Queue Driver Event 000307E1,Start Job 000307E2,Abort Job #^GROUP^Remote Loader^00030BB8-00030BBB 00030BB8,Remote Loader Start 00030BB9,Remote Loader Stop 00030BBA,Remote Loader Connection Established 00030BBB,Remote Loader Connection Dropped Setting Up Logging 127 128 Identity Manager Roles Based Provisioning Module 3.7 User Application: Administration Guide III Administering the User Application I These sections describe how to configure and manage the Identity Manager User Application by using the Administration tab of the user interface. Chapter 4, “Using the Administration Tab,” on page 131 Chapter 5, “Application Configuration,” on page 135 Chapter 6, “Page Administration,” on page 207 Chapter 7, “Portlet Administration,” on page 241 Chapter 8, “RBPM Provisioning and Security Configuration,” on page 257 Administering the User Application 129 130 Identity Manager Roles Based Provisioning Module 3.7 User Application: Administration Guide 4 Using the Administration Tab 4 This section introduces you to the Administration tab of the Identity Manager user interface. You’ll learn how to use the Administration tab to configure and manage the Identity Manager User Application. Topics include: Section 4.1, “About the Administration Tab,” on page 131 Section 4.2, “Who Can Use the Administration Tab,” on page 131 Section 4.3, “Accessing the Administration Tab,” on page 132 Section 4.4, “Administration Tab Actions You Can Perform,” on page 133 4.1 About the Administration Tab The Identity Manager user interface is primarily accessed by end users, who work with the tabs and pages it provides for identity self-service and workflow-based provisioning. However, this browserbased user interface also provides an Administration and page, which administrators can use to access a page and configure various characteristics of the underlying Identity Manager User Application. For example, choose the Administration to: Change the theme used for the look and feel of the user interface Customize the identity self-service features available to end users Specify who is allowed to perform administration actions Manage other details about the User Application and how it runs 4.2 Who Can Use the Administration Tab The Administration tab is not visible to typical end users of the Identity Manager user interface. There are three kinds of users who can see and access this tab: User Application Administrators: A User Application Administrator is authorized to perform all management functions related to the Identity Manager User Application. This includes accessing the Administration tab of the Identity Manager user interface to perform any administration actions that it supports. During installation, a user is specified as User Application Administrator. After installation, that user can use the Security page on the Administration tab to specify other User Application administrators, as needed. For details, see Section 5.1.8, “Assigning the User Application Administrator,” on page 177. Domain Administrators and Domain Managers: Domain Administrators and Domain Managers are authorized to perform provisioning and security tasks for the Identity Manager User Application. For details, see Chapter 8, “RBPM Provisioning and Security Configuration,” on page 257. Using the Administration Tab 131 4.3 Accessing the Administration Tab When you are a User Application Administrator (or other permitted user), you can access the Administration tab of the Identity Manager user interface to manage the Identity Manager User Application. You just need a supported Web browser. For a list of supported Web browsers, see the Roles Based Provisioning Module Installation Guide. NOTE: To use the Identity Manager user interface, make sure your Web browser has JavaScript* and cookies enabled. To access the Administration tab: 1 In your Web browser, go to the URL for the Identity Manager user interface (as configured at your site). For example: http://myappserver:8080/IDM The Welcome Guest page of the user interface displays: 2 Click the Login link in the page header. The user interface prompts you for a username and password: 132 Identity Manager Roles Based Provisioning Module 3.7 User Application: Administration Guide 3 Specify the username and password of a User Application Administrator (or a user with some Administration permissions), then click Login. After you log in, you see the appropriate user-interface content for that user. By default, you are on the Identity Self-Service tab. 4 Click the Administration tab. The Administration tab displays a menu of the administration actions you can perform. Each choice shows a corresponding page of settings and controls. For more general information about accessing and working in the Identity Manager user interface, see the Identity Manager User Application: User Guide. 4.4 Administration Tab Actions You Can Perform After you’re on the Administration tab, you can use any available actions to configure and manage the Identity Manager User Application. Table 4-1 contains a summary. Table 4-1 Administration Tab Actions Summary Action Description Application Configuration Controls User Application configuration of caching, logging, password management, and LDAP connection parameters. Provides read-only information about the driver status and the portal. Provides access to tools that allow you to export or import portal content (pages and portlets used in the Identity Manager User Application. For details, see Chapter 5, “Application Configuration,” on page 135. Page Admin Controls the pages displayed in the Identity Manager user interface and who has permission to access them For details, see Chapter 6, “Page Administration,” on page 207. Using the Administration Tab 133 Action Description Portlet Admin Controls the portlets available in the Identity Manager user interface and who has permission to access them For details, see Chapter 7, “Portlet Administration,” on page 241. RBPM Provisioning & Controls the provisioning configuration, as well as security permissions and Security navigation access. For details, see Chapter 8, “RBPM Provisioning and Security Configuration,” on page 257. 134 Identity Manager Roles Based Provisioning Module 3.7 User Application: Administration Guide 5 Application Configuration 5 This section describes the tasks that you can perform from the Application Configuration page. It includes the following sections: Section 5.1, “Portal Configuration Tasks,” on page 135 Section 5.2, “Working with the Import and Export Tools,” on page 179 Section 5.3, “Password Management Configuration,” on page 184 Section 5.4, “Web Services,” on page 204 5.1 Portal Configuration Tasks This section includes information about: Section 5.1.1, “Caching Management,” on page 135 Section 5.1.2, “Driver Status,” on page 146 Section 5.1.3, “Identity Vault Settings,” on page 146 Section 5.1.4, “Logging Configuration,” on page 148 Section 5.1.5, “Portal Settings,” on page 153 Section 5.1.6, “Single Sign On (SSO) Configuration,” on page 153 Section 5.1.7, “Theme Administration,” on page 170 Section 5.1.8, “Assigning the User Application Administrator,” on page 177 5.1.1 Caching Management You can use the Caching page to manage various caches maintained by the Identity Manager User Application. The User Application employs these caches to store reusable, temporary data on the application server so it can optimize performance. You have the ability to control these caches when necessary by flushing their contents and changing their configuration settings. Flushing caches The caches are named according to the subsystems that use them in the Identity Manager User Application. Normally, you don’t need to flush them yourself, because the User Application does that automatically based on how frequently their data is used or when the source data changes. However, if you have a specific need, you can manually flush selected caches or all caches. 1 Go to the Caching page: Application Configuration 135 2 In the Flush Cache section of the page, use the drop-down list to select a particular cache to flush (or select Flush all): 136 Identity Manager Roles Based Provisioning Module 3.7 User Application: Administration Guide The list of available caches is dynamic; it changes depending on what data is cached at the moment. 3 Click Flush Cache. Flushing the Directory Abstraction Layer Cache The User Application’s directory abstraction layer also has a cache. The DirectoryAbstractLayerDefinitions cache stores abstraction layer definitions on the application server to optimize performance for all data model operations. In a typical situation, the User Application automatically keeps the DirectoryAbstractLayerDefinitions cache synchronized with the abstraction layer definitions stored in the Identity Vault. But, if necessary, you can manually flush the DirectoryAbstractLayerDefinitions cache as described in “Flushing caches” on page 135 to force the latest definitions to be loaded from the Identity Vault. For more information on the User Application’s directory abstraction layer, see the Identity Manager User Application: Design Guide. Flushing Caches in a Cluster Cache flushing is supported in both clustered and non-clustered application server environments. If your application server is part of a cluster and you manually flush a cache, that cache is automatically flushed on every server in the cluster. Configuring Cache Settings You can use the Caching page to display and change cache configuration settings for a clustered or non-clustered application server environment. Your changes are saved immediately, but they don’t take effect until the next User Application restart. TIP: To restart the User Application, you can reboot the application server; redeploy the application (if the WAR has been changed in some way); or force the application to restart (as described in your application server’s documentation). How Caching Is Implemented In the Identity Manager User Application, caching is implemented via JBoss Cache. JBoss Cache is an open source caching architecture that’s included with the JBoss Application Server but also runs on other application servers. To learn more about JBoss Cache, go to www.jboss.org/products/jbosscache (http://www.jboss.org/ products/jbosscache). How Cache Settings Are Stored Two levels of settings are available for controlling cache configuration: global, and local. Use these settings to customize the caching behavior of the Identity Manager User Application. Table 5-1 on page 138 describes the cache configuration settings. Application Configuration 137 Table 5-1 Cache Configuration Settings Level Description Global settings Global settings are stored in a central location (the Identity Vault) so that multiple application servers can use the same setting values. For example, someone with a cluster of application servers would typically use global settings for the cluster configuration values. To find the global settings in your Identity Vault, look for the following object under your Identity Manager User Application driver: configuration.AppDefs.AppConfig For example: configuration.AppDefs.AppConfig.MyUserApplicationDriv er.MyDriverSet.MyOrg The XmlData attribute of the configuration object contains the global settings data. Local setting Local settings are stored separately on each application server so that an individual server can override the value of one or more global settings. For example, you might want to specify a local setting to remove an application server from the cluster specified in the global settings, or to reassign a server to a different cluster. To find the local settings on your JBoss application server, look for the following file under your JBoss server configuration’s conf directory: sys-configuration-xmldata.xml, for example jboss/server/ IDM/conf/sys-configuration-xmldata.xml. To find the local settings on your WebSphere application server, look for the sys-configuration-xmldata.xml file at the location you specified in the extend.local.config.dir property that you set at installation. If your server has local settings, that data is contained in this file. (If no local settings have been specified, the file won’t exist.) You should think of global settings as the default values for every application server that uses a particular instance of the User Application driver. When you change a global setting, you are affecting each of those servers (at the next User Application restart), except for those cases where an individual server specifies a local override. How Cache Settings Are Displayed The Caching page displays the current cache settings (from the latest User Application restart). It also displays the corresponding global and local values of those settings, and lets you change them (for use at the next User Application restart). 138 Identity Manager Roles Based Provisioning Module 3.7 User Application: Administration Guide The global settings always have values. The local settings are optional. Basic Cache Settings These cache settings apply to both clustered and non-clustered application servers. To configure basic cache settings: 1 Go to the Caching page. 2 In the Cache Configuration section of the page, specify global or local values for the following settings, as appropriate: Setting What to do Lock Acquisition Timeout Specify the time interval (in milliseconds) that the cache waits for a lock to be acquired on an object. You might want to increase this setting if the User Application gets a lot of lock timeout exceptions in the application log. The default is 15000 ms. Wake Up Interval Seconds Specify the time interval (in seconds) that the cache eviction policy waits before waking up to do the following: Process the evicted node events Clean up the size limit and age-out nodes Application Configuration 139 Setting What to do Eviction Policy Class Specify the classname for the cache eviction policy that you want to use. The default is the LRU eviction policy that JBoss Cache provides: org.jboss.cache.eviction.LRUPolicy If appropriate, you can change this to another eviction policy that JBoss Cache supports. To learn about supported eviction policies, go to www.jboss.org/ products/jbosscache (http://www.jboss.org/products/ jbosscache). Max Nodes Specify the maximum number of nodes allowed in the cache. For no limit, specify: 0 You can customize this setting for some cache holders. See “Customizable Cache Holders” on page 140. Time To Live Seconds Specify the time to idle (in seconds) before the node is swept away. For no limit, specify: 0 You can customize this setting for some cache holders. See “Customizable Cache Holders” on page 140. Max Age Specifies the number of seconds an entry should be allowed to stay in the cache holder since its creation time. For no time limit, specify: 0 This setting is only available for “Customizable Cache Holders” on page 140. These settings are required, which means that there must be a global value for each, and optionally a local value too. If you want to override the global value of a setting with a local value, select the Enable Local check box for that setting. Then specify the local value. (Make sure that all of your local values are valid. Otherwise, you won’t be able to save your changes.) NOTE: For those settings where Enable Local is deselected, any existing local values are deleted when you save. 3 Click Save. 4 When you’re ready for your saved settings to take effect, restart the User Application on the applicable application servers. Customizable Cache Holders You can customize the Max Nodes, Time To Live, and Max Age settings for some cache holders. The cache holders are listed in Table 5-2. 140 Identity Manager Roles Based Provisioning Module 3.7 User Application: Administration Guide Table 5-2 Customizable Cache Holders Cache Holder Name Description DirectoryAbstractionLayerDefinitions Caches the Directory Abstraction Layer definitions to optimize performance for all data model operations. See “Flushing the Directory Abstraction Layer Cache” on page 137. DirectoryService.ContainerCacheHolder Caches containers in the directory layer. Containers are shared by many users and groups, and reading them from the directory layer involves both network communication (with the LDAP server) and object creation. By default, the cache is limited to 50 containers, and the LRUs have a default Time To Live (TTL) of 10 minutes. Depending on the directory topography in your enterprise, you might need to adjust the maximum number of nodes or the TTL if you find the performance is suffering because of queries to the LDAP server for container objects. Making settings too high in combination with a large number of usable containers can cause unneeded memory consumption and net lower performance from the server. DirectoryService.DelProxyRuntimeServiceDelegate Caches delegate assignments. DirectoryService.DelProxyRuntimeService.Delegation Caches user availability settings. DirectoryService.DelProxyRuntimeService.Delegator Caches the delegator entities. DirectoryService.DelProxyRuntimeService.Proxy Caches proxy assignments. DirectoryService.GroupCacheHolder Caches groups in the directory layer. Groups are often shared by many users, and reading them from the directory layer involves both network communication (with LDAP server) and object creation. By default, the cache is limited to 500 groups, and the LRUs have a default TTL of 10 minutes. Depending on the user/group topography in your enterprise, you might need to adjust the maximum number of nodes or the TTL if you find the performance is suffering because of queries to the LDAP server for groups objects. Settings that are too high, in combination with a large number of usable groups, can cause unneeded memory consumption, and net lower performance from the server. Application Configuration 141 Cache Holder Name Description DirectoryService.MemberhipCacheHolder Caches the relationship between a user and a set of groups. Querying the set of groups a user belongs to can be a network and CPU intensive operation on the LDAP server, especially if dynamic groups are enabled. For this reason, relationships are cached with an expiration interval so that changes in the criteria for inclusion/exclusion in a group (such as timebased dynamic groups) are reflected. The default Max Age is five minutes. However, if you use dynamic groups which have a requirement for finer grained time control, then you can adjust the Max Age on this cache holder to be just below the minimum time your finest grained time based dynamic group requires. The lower this value is, the more times the user's groups are queried during a session. Setting a value too high keeps the user/group relationships in memory perhaps longer than the user's session needlessly consuming memory. DirectoryService.RolesMembershipCacheHolder Caches the application role membership list by role. DirectoryService.TeamManagerRuntime.Team Caches the application team instances and team provisioning requests. DirectoryService.UserCacheHolder Caches users in the directory layer. Reading users from the directory layer involves both network communication (with LDAP server) and object creation. By default, the cache is limited to 1000 users, and the LRUs have a default TTL of 10 minutes. Depending on the user topography in your enterprise, you might need to adjust the maximum number of nodes or the TTL if you find the performance is suffering because of queries to the LDAP server for user objects. Making settings too high combined with a large number of different users logging in can cause unneeded memory consumption, and net lower performance from the server. GlobalCacheHolder The general purpose cache holder. This configuration applies to all caches that are not customizable (that is, all cache holders not listed in this table.) 142 Identity Manager Roles Based Provisioning Module 3.7 User Application: Administration Guide Cache Holder Name Description JUICE Caches the resource bundles used by the user interface controls and DN display expression lookup results. Changing the setting of the cache holder has a performance impact for the DN display expression lookups because they are frequently used in the User Application. The low value should be at least 300 seconds, but a higher value than 900 seconds is ok. A lower value should be used if the customer is frequently changing the attributes that are used in the DN display expression RoleManager.RolesCacheHolder Caches user role memberships listed by user. Workflow.Model.Process Caches the provisioning process XML object structure. Workflow.Model.Request Caches the provisioning request XML object structure. Workflow.Provisioning Caches provisioning request instances that have not completed. The default maximum capacity for the LRU cache is 500. The capacity can be modified by clicking the Administration/Provisioning and choosing the Engine and Cluster settings. The Process Cache Maximum Capacity appears on this page. This cache reduces the memory footprint for workflow processing without compromising performance. Cache Settings for Clusters This section discusses how to configure caching when you run the Identity Manager User Application across a cluster of application servers. In the Identity Manager User Application, cluster support for caching is implemented via JGroups. JGroups is an open-source clustering architecture that’s included with the JBoss Application Server but also runs on other application servers. The User Application’s cluster consists of nodes on a network that run JGroups and use a common Group ID. By default, the Group ID provided for the User Application’s cluster is a UUID that looks like this: c373e901aba5e8ee9966444553544200 The UUID helps ensure uniqueness, so that the Group ID of the User Application’s cluster doesn’t conflict with the Group IDs of other clusters in your environment. For instance, the JBoss Application Server itself uses several JGroups clusters and reserves associated names including the Group IDs DefaultPartition and Tomcat-Cluster for them. To learn more about JGroups, go to www.jboss.org/products/jgroups (http://www.jboss.org/ products/jgroups). Application Configuration 143 How Caching Works with a Cluster When you start the User Application, the application’s cluster configuration settings on the Caching page determine whether to participate in a cluster and invalidates cache changes in the other nodes in that cluster. If clustering is enabled, the User Application accomplishes this by sending cache entry invalidation messages to each node as changes occur. Preparing to Use a Cluster To use caching across a cluster: 1 Set up your JGroups cluster. This involves using the User Application installation program to install the Identity Manager User Application to each application server in the cluster (see Section 2.8, “Clustering,” on page 73). 2 Enable the use of that cluster in the User Application’s cache configuration settings See “Configuring Cache Settings for Clusters” on page 144. Configuring Cache Settings for Clusters After you have a cluster ready to use, you can specify settings for the support of caching across that cluster. 1 Go to the Caching page. 2 In the Cluster Configuration section of the page, specify global or local values for the following settings, as appropriate: Setting What to do Cluster Enabled Select True to invalidate cache changes to the other nodes in the cluster specified by Group ID. If you don’t want to participate in a cluster, select False. Group ID Specify the Group ID of the JGroups cluster in which you want to participate. There’s no need to change the default Group ID that’s provided for the User Application’s cluster, unless you want to use a different cluster. The Group ID must be unique and must not match any of the known JBoss cluster names such as DefaultPartition and Tomcat-Cluster. TIP: To see the Group ID in logging messages, make sure that the level of the caching log (com.sssw.fw.cachemgr) is set to Info or higher. Cluster Properties Specify the JGroups protocol stack for the cluster specified by Group ID. This setting is for experienced administrators who might need to adjust the cluster properties. Otherwise, you should not change the default protocol stack. To see the current cluster properties, click view. For details on the JGroups protocol stack, go to www.joss.org/wiki/ Wiki.jsp?page=JGroups (http://www.jboss.org/wiki/ Wiki.jsp?page=JGroups). 144 Identity Manager Roles Based Provisioning Module 3.7 User Application: Administration Guide If you want to override the global value of a setting with a local value, select the Enable Local check box for that setting. Then specify the local value. For those settings where Enable Local is unselected, any existing local values are deleted when you save. Make sure that all nodes in your cluster specify the same Group ID and Cluster Properties. To see these settings for a particular node, you must access the Identity Manager user interface running on that node—by browsing to the URL of the user interface on that server—and then display the Caching page there. If you need to use the TCP protocol instead of the default UDP protocol, see “Specifying the User Application Cluster Group Caching Configuration” on page 82. 3 Click Save. 4 When you’re ready for your saved settings to take effect, restart the User Application on the applicable application servers. Configuring User Application Caching to use TCP You can configure caching for the User Application to use TCP. The configuration process must be completed on each server in the cluster because the Local Settings are saved on the file system for each server. To configure User Application caching to use TCP: 1 Log in as the User Application Administrator and go to Administration->Application Configuration->Caching. 2 Enable the Enable Local checkbox in the Cluster Enabled row and set Local=TRUE. And for each of the individual properties in the following steps enable the Enable Local checkbox for that property and specify a value in the textfield in the Local column. The Local value for the property will then override the Global value. 3 Copy this string and paste it in to the Cluster Properties field. It is very important to paste as a single string with no carriage returns embedded: TCP(bind_addr=164.99.208.68;start_port=7815;loopback=true):TCPPING(initia l_hosts=164.99.208.68[7815],164.99.208.36[7815];port_range=3;timeout=3500 ;num_initial_members=3;up_thread=true;down_thread=true):MERGE2(min_interv al=5000;max_interval=10000):FD(shun=true;timeout=2500;max_tries=5;up_thre ad=true;down_thread=true):VERIFY_SUSPECT(timeout=1500;down_thread=false;u p_thread=false):pbcast.NAKACK(down_thread=true;up_thread=true;gc_lag=100; retransmit_timeout=3000):pbcast.STABLE(desired_avg_gossip=20000;down_thre ad=false;up_thread=false):pbcast.GMS(join_timeout=5000;join_retry_timeout =2000;shun=false;print_local_addr=true;down_thread=true;up_thread=true):p bcast.STATE_TRANSFER(up_thread=true;down_thread=true) The properties in this string are defined by JBoss. Refer to JBoss documentation for more information. 4 Set bind_addr to the local host IP address of the server you are logged into. 5 Next you need to set the start_port. This value must take into account ports already in use as well as the value for port_range in order to avoid port conflicts. Depending on your configuration you may need to troubleshoot to find an unused port. 6 Change the IP addresses for TCPPING to include the IP addresses of all the nodes in the cluster and their start_port values. The list should begin with the local IP address. Application Configuration 145 7 Save changes. These changes are written to the local file system for your server. Remember to make these changes for all servers in the cluster. Any server that does not have these changes will use the Global Settings values. 8 Restart the server. 5.1.2 Driver Status You can use the Driver Status pane to determine the expiration status of your driver. Figure 5-1 Sample Driver Status The Driver Status pane displays the following two entries: Driver Name Expiration Date The Expiration Date displays one of the following values: 1. Unlimited (if the activation has occurred) 2. Expiration date of the driver (if the driver is a trial driver) 5.1.3 Identity Vault Settings You can use the Identity Vault Settings pane to: Change the credentials used by the Identity Manager User Application when connecting to the Identity Vault (LDAP provider) Change the credentials for the guest account, if your system is configured to use a specific guest account, rather than LDAP anonymous account. View other LDAP properties of the Identity Manager User Application. The values of these settings are determined when you install the User Application. The user interface displays different fields depending on how you configured the guest account during installation. If you specified a guest account, the user interface includes fields that let you update the credentials for that account. If you have configured your system to use the LDAP Public Anonymous account, the user interface displays this message: The application is configured to use public anonymous account. To use a specific guest account, enable the guest account using the ldap configuration tool. 146 Identity Manager Roles Based Provisioning Module 3.7 User Application: Administration Guide To administer Identity Vault settings: 1 On the Application Configuration page, select Identity Vault Settings from the navigation menu on the left. The Identity Vault Settings panel displays: 2 Examine and modify the settings, as appropriate. For details, see:“LDAP Settings You Can Change” on page 147. 3 If you make changes that you want to apply, click Submit. LDAP Settings You Can Change On the Identity Vault Connection Settings panel, you can modify settings for the credentials for: The Identity Manager User Application whenever it connects to the Identity Vault (LDAP provider). The guest account (if configured). The initial values for the credentials are specified during installation. These installation values are written to the sys-configuration-xmldata file. If you make changes to these credentials via the Administration tab, your changes are saved to the User Application’s database; they are not saved to the sys-configuration-xmldata file. After values are written to the database, the User Application no longer checks the values written to the sys-configuration-xmldata file. This means that you cannot use the configupdate utility to change the credentials because they are ignored. However, you can use configupdate to change the type of guest user (LDAP Guest or Public Anonymous Account). Application Configuration 147 Table 5-3 LDAP Parameters Setting What to do Identity Vault Administrator Type the name of a user who has full administrator rights in the Identity Vault. The Identity Manager User Application needs to access the Identity Vault as an administrator in order to function. It is typical to specify the Identity Vault’s root administrator as the LDAP connection username. The root administrator has full control over the tree, so you need not assign any special trustee rights. For example: cn=admin,o=myorg If you specify some other user, you need to assign inheritable trustee rights to the properties [All Attributes Rights] and [Entry Rights] on your User Application driver. NOTE: To avoid confusion, it is recommended that you do not specify the User Application’s User Application Administrator as the LDAP connection username. It is best to use separate accounts for these two different purposes. Identity Vault Administrator Password Type the password that is currently set for that username in the Identity Vault. and Confirm Identity Vault Administrator Password Guest Username Type the guest user’s distinguished name Confirm Guest Password Type the password for the guest user. If TLS is enabled for your LDAP server, you might encounter the following error when you update the Admin username and password: Unable to authenticate to LDAP Provider. Disable this error by disabling TLS via iManager. 5.1.4 Logging Configuration You can use the Logging page to control the levels of logging messages you want the Identity Manager User Application to generate and specify whether those messages are sent to Novell® Audit. The Identity Manager User Application implements logging by using log4j, an open-source logging package distributed by The Apache Software Foundation. By default, event messages are logged to both of the following: The system console of the application server where the Identity Manager User Application is deployed A log file on that application server, for example: jboss/server/IDM/log/server.log 148 Identity Manager Roles Based Provisioning Module 3.7 User Application: Administration Guide This is a rolling log file; after it reaches a certain size, it rolls over to another file. If you have configured your environment to include Novell Audit, you have the option of logging event messages there as well. For details on configuring your logging environment and Novell Audit, see Chapter 3, “Setting Up Logging,” on page 113. About the Logs The Logging page lists a variety of logs, each outputting event messages from a different part of the Identity Manager User Application. Each log has its own independent output level. The log names are based on log4j conventions. You’ll see these log names in the event messages that are generated, indicating the context of the message output. Table 5-4 on page 149 lists and describes the logs. Table 5-4 Identity Manager User Application Logs Log Name Description com.novell Parent of other Identity Manager User Application logs com.novell.afw.portal.aggregat Messages related to portal page processing ion com.novell.afw.portal.persist Messages related to the persistence of portal data (including portal pages and portlet registrations) com.novell.afw.portal.portlet Messages from the portal core portlets and accessory portlets com.novell.afw.portal.util Messages from the portal import/export and navigation portlets com.novell.afw.portlet.consume Messages related to portlet rendering r com.novell.afw.portlet.core Messages related to the core portlet API com.novell.afw.portlet.persist Messages related to the persistence of portlet data (including portlet preferences and setting values) com.novell.afw.portlet.produce Messages related to the registration and configuration of r portlets within the portal com.novell.afw.portlet.util Messages related to utility code used by portlets com.novell.afw.theme Messages from the theme subsystem com.novell.afw.util Messages related to portal utility classes com.novell.soa.af.impl Messages from the approval flow (provisioning workflow) subsystem com.novell.srvprv.apwa Messages from the Web application (actions and tags) com.novell.srvprv.impl.portlet Messages from the core identity portlets and password .core portlets com.novell.srvprv.impl.portlet Messages from the identity-related utility portlets .util Application Configuration 149 Log Name Description com.novell.srvprv.impl.servlet Messages from the UI control framework’s ajax servlet and ajax services com.novell.srvprv.impl.uictrl Messages from the UI control registry API and approval form rendering com.novell.srvprv.impl.vdata Messages from the directory abstraction layer com.novell.srvprv.spi Messages from the UI control registry API com.sssw.fw.cachemgr Messages related to the framework cache subsystem com.sssw.fw.core Messages related to the framework core subsystem com.sssw.fw.directory Messages related to the framework directory subsystem com.sssw.fw.event Messages related to the framework event subsystem com.sssw.fw.factory Messages related to the framework factory subsystem com.sssw.fw.persist Messages related to the framework persistence subsystem com.sssw.fw.resource Messages related to the framework resource subsystem com.sssw.fw.security Messages related to the framework security subsystem com.sssw.fw.server Messages related to the framework server subsystem com.sssw.fw.servlet Messages related to the framework servlet subsystem com.sssw.fw.session Messages related to the framework session subsystem com.sssw.fw.usermgr Messages related to the framework user subsystem com.sssw.fw.util Messages related to the framework utility subsystem com.sssw.portal.manager Messages related to the Portal Manager com.sssw.portal.persist Messages related to portal persistence The User Application logs are hierarchical. For example, com.novell is the parent of other logs underneath it. Any additional logs inherit its properties. Changing Log Levels You can control the amount of information that is written to a particular log by changing the level that is set for it. By default, all logs are set to Info, which is an intermediate level. 1 Go to the Logging page: 150 Identity Manager Roles Based Provisioning Module 3.7 User Application: Administration Guide 2 At the top of the page, find a log whose level you want to change. 3 Use the drop-down list to select one of the following levels: Level Description Fatal The least detail. Writes fatal errors to the log. Error Writes errors (plus all of the above) to the log. Warn Writes warnings (plus all of the above) to the log. Info Writes informational messages (plus all of the above) to the log. Debug Writes debugging information (plus all of the above) to the log. Trace The most detail. Writes tracing information (plus all of the above) to the log. 4 Repeat Step 2 and Step 3 for other logs, as needed. Application Configuration 151 5 Click Submit. You can change the log level for all of the logs to one setting by selecting Change log level of all above logs and using the drop-down list to select the level. Adding Logs for Other Packages You can add logs for other packages used by the User Application. 1 Go to the Logging page: 2 At the bottom of the page, select Add Log Level for Package, then use the drop-down list to select the package. 3 Choose a log level from the drop-down, then click Submit. Sending Log Messages to Novell Audit You can use the Logging page to control whether the Identity Manager User Application sends event message output to Novell Audit. Novell Audit logging is off by default, unless you turn it on when installing the User Application. To toggle Novell Audit logging on/off: 1 Go to the Logging page. 2 Select or deselect the following setting, as appropriate: Also send logging messages to Audit. 3 Click Submit. Persisting Your Log Settings By default, changes you make on the Logging page stay in effect until the next application-server restart or User Application redeployment. After that, the log settings revert to their default values. However, the Logging page does offer you the option of persisting your changes to its settings. If you turn on this feature, values for the log settings are stored in a logging configuration file on the application server where the Identity Manager User Application is deployed. For example: On JBoss, this file is jboss/server/IDM/conf/idmuserapp_logging.xml On WebSphere, this file is specified according to the custom property named idmuserapp.logging.config.dir. To toggle persistence of settings on or off: 1 Go to the Logging page. 2 Select or deselect the following setting, as appropriate: Persist the logging changes 3 Click Submit. 152 Identity Manager Roles Based Provisioning Module 3.7 User Application: Administration Guide 5.1.5 Portal Settings You can use the Portal page to view characteristics of the Identity Manager User Application.The settings are for informational purposes and cannot be changed.The values of these settings are set in the User Application WAR. (Default Theme reflects your current theme choice from the Themes page.) 5.1.6 Single Sign On (SSO) Configuration The Application Configuration section within the Administration tab now provides a left navigation choice that allows administrators to configure the User Application to support single sign on. The Single Sign On (SSO) page looks like this: Figure 5-2 Single Sign On (SSO) Page You must be a User Application Administrator to access this page. This section provides details on SSO configuration. Topics include: “About SSO Configuration” on page 153 “Preparing for Single Sign On” on page 154 “Configuring the SSO Controller” on page 157 “Configuring a Kerberos Provider” on page 157 “Configuring an SAP Provider” on page 165 “Adding a Custom SSO Provider” on page 168 About SSO Configuration Version 3.7 of RBPM includes an enhanced SSO architecture that provides an easy way to integrate single sign on functionality into the User Application. This new architecture works with a variety of system environments and is very secure. Application Configuration 153 The 3.7 architecture for single sign on consists of the following key components: SSO Providers SSO Controller Each SSO Provider handles a specific SSO user scenario. The SSO Provider recognizes the login identity, then transfers the information to the SSO Controller. The SSO Controller then verifies the information and converts the login identity to an eDirectory identity. Next, it issues a SAML authentication token and passes it to the login module to finish the login process. The SSO Providers and the SSO Controller are loosely coupled. They communicate through an HTTP header that is digitally signed. The Roles Based Provisioning Module ships with Kerberos and SAP SSO Providers. However, you can also implement your own custom SSO Provider to suit the requirements of your organization. The SSO Providers are stackable, which means that you can enable multiple providers at the same time for a single User Application. Preparing for Single Sign On This section provides general setup procedures that must be performed to prepare your environment for single sign-on. These procedures are required for all single sign-on environments, including Kerberos and SAP configurations. Topics include: “Creating the Certificates” on page 154 “Configuring eDirectory” on page 155 Creating the Certificates The single sign-on environment requires that you have a set of certificates and private keys. A minimum of one set of certificates and private keys is necessary. For a more secure environment, there should be one set for each SSO Provider being used, in addition to the set for the SSO Controller. Currently SSO configuration only supports X509 PEM format for a X509 certificate and PKCS8 DER format for a private key. To generate key pairs, you can use openSSL: openssl req -newky rsa:1024 -x509 -keyout name.key -out name.cert -days expiration For example: openssl req -newkey rsa:1024 -x509 -keyout rbpm.key -out rbpm.cert -days 365 NOTE: The openSSL tool is acceptable for test environments. However, for production environments, you should use a Truster Signer, such as Verisign. When asked for a password phrase, provide a phrase, such as novell. This generates the key pair and self-signed certificate: rbpm.key is the DES encrypted raw RSA private key. rbpm.cert is the PEM format X509 certificate. 154 Identity Manager Roles Based Provisioning Module 3.7 User Application: Administration Guide Now, perform the following command to convert private key file to PKCS8 with encryption (you will be prompted to enter a password): openssl pkcs8 -in name.key -topk8 -out name.pkcs8 -outform DER For example: openssl pkcs8 -in rbpm.key -topk8 -out rbpm.pkcs8 -outform DER Now you have two files: rbpm.pkcs8 and rbpm.cert that you can use in the next steps. rbpm.cert needs to be imported to eDirectory as well (see eDirectory preparation). Configuring eDirectory SAML and NMAS methods must be installed to the eDirectory Server that the User Application is configured to use. Currently, Novell provides SAML methods for the following 32 bit operating systems: Windows Linux Netware SAML methods are not available for Solaris or any 64 bit operating system. The SAML methods are included with the Roles Based Provisioning Module and with Access Manager. To install the SAML and NMAS authentication methods on eDirectory: 1 Unzip authsaml.zip. 2 Install the SAML and NMAS methods into your eDirectory tree: 2a Extend the schema stored in authsaml.sch. Refer to How to Extend the Schema (http:// www.novell.com/documentation/edir88/edir88/index.html?) for more information. If eDirectory is installed on Linux, you can use the following command to extend the schema: ndssch -h edir_ip edir_admin authsaml.sch 2b Install the methods. Refer to How to Install NMAS Method (http://www.novell.com/ documentation/nmas32/admin/index.html?) for more information. If eDirectory is installed on Linux, you can use the following command to install the methods: nmasinst -addmethod edir_admin tree ./config.txt To create the Trusted Root Container: 1 In iManager, select Roles & Tasks>Novell Certificate Servers>Create Trusted Root Container. 2 Enter a Name for the Trusted Root Container (for example, RBPMTrustedRootContainer). 3 For the Context, press the Search button and select the Security Container. 4 Press OK. 5 Press OK. To create a Trusted Root for the certificate that your affiliate will use to sign assertions: 1 In iManager, select Roles & Tasks>Novell Certificate Servers>Create Trusted Root. Application Configuration 155 2 Enter a Name for the Trusted Root (for example, RBPMTrustedRoot). 3 For the Container, press the Search button and select the Trusted Root Container you created earlier. 4 For the Certificate File, press the Browse button and select the certificate that will be used for the SSO Controller. You must have a DER encoded copy of the certificate. To create the SAML Authorization Object: 1 In iManager, select Roles & Tasks>Directory Administration>Create Object. 2 Select the checkbox for Show all object classes. 3 Scroll down and select authsamlAffiliate. 4 Press OK. 5 Enter a Name for the authsamlAffiliate (for example, RBPMSAML). 6 For the Context, press the Search button and follow these steps: 6a Select the down arrow next to Security. 6b Select the down arrow next to Authorized Login Methods. 6c Select SAML Assertion. 7 Press OK. 8 Press Modify. 9 Under Unvalued Attributes: 9a Select authsamlProvider and press the left arrow. Enter rbpm.idm.novell.com. NOTE: This attribute is used to match an assertion with its affiliate. The contents of this attribute must be an exact match with the Issuer attribute in assertions sent by this affiliate. It has to be rbpm.idm.novell.com for RBPM. 9b Select authsamlValidAfter and press the left arrow. Enter an appropriate amount of time. The authsamlValidBefore and authsamlValidAfter attributes define a window of time around the IssueInstant in an assertion in which the assertion will be considered valid. 9c Select authsamlValidBefore and press the left arrow. Enter an appropriate amount of time. 9d Select authsamlCertContainerDN and press the left arrow. Press the Browse button and select the Trusted Root Container created earlier. This attribute is used to verify the certificate chain of the signing certificate. 9e Select authsamlTrustedCertDN and press the left arrow. Press the Browse button and select the Trusted Root created earlier. This will be located inside of the Trusted Root Container that was created earlier. All assertions for the affiliate must be signed by certificates pointed to by this attribute, or they will be rejected. 10 Press Apply. 11 Restart eDirectory. 156 Identity Manager Roles Based Provisioning Module 3.7 User Application: Administration Guide Configuring the SSO Controller This section provides instructions on configuring the SSO controller. To configure the controller, you use the Single Sign On (SSO) page on the Administration tab of the User Application. To configure the SSO Controller: 1 Login to the User Application as a User Application Administrator. 2 On the Administration tab, select the Application Configuration tab. 3 Select Single Sign On (SSO) from the left navigation menu. The Single Sign On (SSO) page displays: 4 Select Enable Single Sign On (SSO). 5 Browse to the Signing Certificate file used to create the Trusted Root in eDirectory and upload it to the User Application. 6 Browse to the Signing Key file that was created with the certificate above and upload it to the User Application. 7 Type the Signing Key password. 8 Click Save. Configuring a Kerberos Provider This section provides instructions on preparing and configuring a Kerberos provider. Preparing to Use Microsoft Active Directory Kerberos To prepare the Key Distribution Center (KDC): 1 Prepare RBPM's Service Principal Name (SPN) and Keytab: 1a Create a user account for RBPM in a Microsoft Active Directory. On the Microsoft Active Directory server, click Start>Programs>Administrative Tools>Active Directory Users and Computers. Then click Users>New, specifying any name, such as rbpm. Provide a password you will remember. This account should only be used for the Roles Based Provisioning Module. Application Configuration 157 Select Account never expires and Password never expires. Do not select User must change password at next logon. 1b Map the user account to SPN. setspn -A HTTP/dns-name-for-UA userID For example: setspn -A HTTP/myRBPM.novell.com rbpm Type setspn -L userID to confirm the mapping. For example: setspn -L rbpm 1c Create key tab for SPN. If Active Directory is installed on Windows 2008, execute this command: ktpass -out keytab-name.keytab -princ HTTP/dns-name-for-UA@WINDOWSDOMAIN -mapUser userid -mapOp set -pass password -crypto All -pType KRB5_NT_PRINCIPAL For example: ktpass -out rbpm.keytab -princ HTTP/ [email protected] -mapUser rbpm -mapOp set -pass N0v3ll -crypto All -pType KRB5_NT_PRINCIPAL If Active Directory is installed on Windows 2003, execute this command: ktpass -out keytab-name.keytab -princ HTTP/dns-name-for-UA@WINDOWSDOMAIN -mapUser userid -mapOp set -pass password -pType KRB5_NT_PRINCIPAL For example: ktpass -out rbpm.keytab -princ HTTP/ [email protected] -mapUser rbpm -mapOp set -pass N0v3ll -pType KRB5_NT_PRINCIPAL Note that for Windows 2003, by not specifying a crypto algorithm, you are defaulting the algorithm to RC4-HMAC. 2 Prepare end user accounts for SSO. The end user account name has to match some attribute value of an eDirectory user in order to support single sign on. Create an end user in Active Directory, as follows: 2a On a Microsoft Active Directory server, click Start>Programs>Administrative Tools>Active Directory Users and Computers. Then click Users>New, specifying the user name, such as cnano. Provide a password you will remember. Do not select User must change password at next logon. To prepare the Application Server environment: 1 Define the OS settings for the Kerberos configuration. Open and edit the krb5 file to include the following information: 158 Identity Manager Roles Based Provisioning Module 3.7 User Application: Administration Guide [libdefaults] default_realm = WINDOWS-DOMAIN kdc_timesync = 0 forwardable = true proxiable = false [realms] WINDOWS-DOMAIN = { kdc = fully-qualified-name-AD-Server admin_server = fully-qualified-name-AD-Server } [domain_realm] .your.domain = WINDOWS-DOMAIN your.domain = WINDOWS-DOMAIN For example: [libdefaults] default_realm = MYDOMAIN.NOVELL.COM kdc_timesync = 0 forwardable = true proxiable = false [realms] MYDOMAIN.NOVELL.COM = { kdc = myadserver.cam.novell.com admin_server = myadserver.cam.novell.com } [domain_realm] .novell.com = MYDOMAIN.NOVELL.COM novell.com = MYDOMAIN.NOVELL.COM The krb5 file is located in one of the following directories: Linux: /etc/krb5.conf Windows: c:\Windows\krb5.ini Unix: /etc/krb5/krb5.conf 2 Define the Web Container settings (JBoss): 2a Copy the keytab from Active Directory. Copy myRBPM.keytab from myadserver.cam.novell.com to myRBPM. 2b Edit login-config.xml. Open and add the following fragment to JBoss/server/context/conf/login-config.xml: <application-policy name = "com.sun.security.jgss.krb5.accept"> <authentication> <login-module code = "com.novell.common.auth.sso.KerberosCredentialLoginModule" flag = "required" /> <login-module code = "com.sun.security.auth.module.Krb5LoginModule" flag = "required"> <module-option name = "debug">false</module-option> <module-option name = "kdc">fully-qualified-name-ADServer</module-option> <module-option name = "realm">WINDOWS-DOMAIN</moduleoption> <module-option name = "useKeyTab">true</module-option> <module-option name = "keyTab">path-to-keytab</moduleoption> <module-option name = "storeKey">true</module-option> Application Configuration 159 <module-option name = "useFirstPass">true</module-option> <module-option name = "principal">HTTP/dns-name-for-UA</ module-option> <module-option name = "noPrompt">true</module-option> </login-module> </authentication> </application-policy> For example: <application-policy name = "com.sun.security.jgss.krb5.accept"> <authentication> <login-module code = "com.novell.common.auth.sso.KerberosCredentialLoginModule" flag = "required" /> <login-module code = "com.sun.security.auth.module.Krb5LoginModule" flag = "required"> <module-option name = "debug">false</module-option> <module-option name = "kdc">myadserver.cam.novell.com</ module-option> <module-option name = "realm">MYDOMAIN.NOVELL.COM</ module-option> <module-option name = "useKeyTab">true</module-option> <module-option name = "keyTab">/home/userapp/IDM370/ rbpm.keytab</module-option> <module-option name = "storeKey">true</module-option> <module-option name = "useFirstPass">true</module-option> <module-option name = "principal">HTTP/rbpm.novell.com</ module-option> <module-option name = "noPrompt">true</module-option> </login-module> </authentication> </application-policy> NOTE: For WebSphere and WebLogic, a configuration file must be created and a property needs to be set to make the Application Server aware that Kerberos authentication will be used. 3 Enable the Kerberos SSO Provider, as described in “Using the Administration Tab to Configure the Kerberos Provider” on page 163. To prepare the end user browser (Internet Explorer 7): 1 Open Internet Explorer>Options>Advanced, make sure integrated windows authentication is enabled. 2 Open Internet Explorer>Options>Intranet>Sites, add the dns-name-for-UA (for example, rbpm.novell.com) to the trusted intranet sites list. To prepare the end user browser (Firefox 3): 1 Type about:config in the address bar. 2 Type network.n in the Filter. 3 Modify network.negotiate-auth.trusted-uris to include your domain (for example, .novell.com). 4 Close and restart Firefox. 160 Identity Manager Roles Based Provisioning Module 3.7 User Application: Administration Guide Preparing to Use MIT Kerberos To prepare the Key Distribution Center (KDC): 1 Install and configure the MIT KDC software. Install MIT Kerberos 5 server on a machine that will be used as the KDC, assuming the Kerberos domain is MYDOMAIN.NOVELL.COM and the KDC is myadserver.cam.novell.com. NOTE: SLES 11 comes with a pre-installed version of MIT Kerberos V5. You can configure it through yast2. Default Domain, Default Realm, and KDC Server Address for basic setup. You'll need to configure the Kerberos Server for the KDC, and the Kerberos client for the client side. After you've enabled these, you still need to follow the steps below. However, this will save you time by removing the need to download and install Kerberos in your environment. 1a In /etc/krb5.conf, make sure you define the domain and mapping correctly: [libdefaults] default_realm = MYDOMAIN.NOVELL.COM [realms] MYDOMAIN.NOVELL.COM = { kdc = myadserver.cam.novell.com admin_server = myadserver.cam.novell.com } [domain_realm] .novell.com = MYDOMAIN.NOVELL.COM novell.com = MYDOMAIN.NOVELL.COM 1b In /usr/local/var/krb5kdc/kdc.conf (or /var/lib/kerberos/krb5kdc/kdc.conf, depending on your OS), make sure you specified the following entries with reasonable values: max_life = 8h 0m 0s max_renewable_life = 1d 0h 0m 0s 1c Initialize the database: kdb5_util create -s 1d Start KDC and Kadmin: /etc/init.d/krb5kdc start /etc/init.d/kadmind start 2 Prepare the RBPM Service Principal Name and Keytab. 2a Create a principal for RBPM on MIT KDC. Suppose the User Application will be running on rbpm.novell.com. On the MIT KDC machine, execute the following command to create the service principal and assign it a random key. kadmin.local >ank -randkey HTTP/rbpm.novell.com 2b Export the key into a keytab. ktadd -k /tmp/userapp.keytab HTTP/rbpm.novell.com 3 Prepare end user accounts for SSO. The end user name should be able to map to an eDirectory user (for example, cnano): kadmin.local >ank cnano Application Configuration 161 To prepare the Application Server environment: 1 Define the OS settings for the Kerberos configuration. Open and edit /etc/krb5.conf to make sure it has the same content as the one on the KDC (see above). 2 Define the Web Container settings (JBoss): 2a Copy the keytab from KDC. Copy rbpm.keytab from the KDC (for example, myadserver.cam.novell.com) /tmp to the User Application server, securely. 2b Edit login-config.xml. Open and add the following fragment to JBoss/server/context/conf/login-config.xml: <application-policy name = "com.sun.security.jgss.krb5.accept"> <authentication> <login-module code = "com.novell.common.auth.sso.KerberosCredentialLoginModule" flag = "required" /> <login-module code = "com.sun.security.auth.module.Krb5LoginModule" flag = "required"> <module-option name = "debug">false</module-option> <module-option name = "kdc">fully-qualified-name-ADServer</module-option> <module-option name = "realm">WINDOWS-DOMAIN</moduleoption> <module-option name = "useKeyTab">true</module-option> <module-option name = "keyTab">path-to-keytab</moduleoption> <module-option name = "storeKey">true</module-option> <module-option name = "useFirstPass">true</module-option> <module-option name = "principal">HTTP/dns-name-for-UA</ module-option> <module-option name = "noPrompt">true</module-option> </login-module> </authentication> </application-policy> For example: <application-policy name = "com.sun.security.jgss.krb5.accept"> <authentication> <login-module code = "com.novell.common.auth.sso.KerberosCredentialLoginModule" flag = "required" /> <login-module code = "com.sun.security.auth.module.Krb5LoginModule" flag = "required"> <module-option name = "debug">false</module-option> <module-option name = "kdc">myadserver.cam.novell.com</ module-option> <module-option name = "realm">MYDOMAIN.NOVELL.COM</ module-option> <module-option name = "useKeyTab">true</module-option> <module-option name = "keyTab">/home/userapp/IDM370/ rbpm.keytab</module-option> <module-option name = "storeKey">true</module-option> 162 Identity Manager Roles Based Provisioning Module 3.7 User Application: Administration Guide <module-option name = "useFirstPass">true</module-option> <module-option name = "principal">HTTP/rbpm.novell.com</ module-option> <module-option name = "noPrompt">true</module-option> </login-module> </authentication> </application-policy> NOTE: For WebSphere and WebLogic, a configuration file must be created and a property needs to be set to make the Application Server aware that Kerberos authentication will be used. 3 Enable the Kerberos SSO Provider, as described in “Using the Administration Tab to Configure the Kerberos Provider” on page 163. To prepare the end user browser (Internet Explorer 7): 1 Initialize the ticket. Make sure you have same content in /etc/krb5.conf as in the KDC (see above). If your local login is "cnano", do kinit. Otherwise, do kinit cnano. 2 Prepare Firefox (Firefox 3): 2a Type about:config in the address bar. 2b Type network.n in Filter. 2c Modify network.negotiate-auth.trusted-uris to include .novell.com. 2d Close and restart Firefox. Using the Administration Tab to Configure the Kerberos Provider To configure the Kerberos provider in the Administration tab of the User Application: 1 Select the Kerberos provider name and click Edit. The Kerberos dialog displays. Application Configuration 163 2 In the Expiration Interval field, specify the number of seconds that the SSO Header will be kept alive before expiring. This value defines the lifecycle of the SSO Header from the time it is issued. The expiration interval is needed to prevent replay attacks. You need to consider the network latency between your SSO Provider and the SSO Controller, as well as clock synchronization between the two components, if they are deployed on different machines. 3 In the User ID Mapping field, indicate whether the user ID will be associated with a user DN or with a user attribute, such as a CN. The User ID Mapping maps the user ID in the original realm to the eDirectory realm. If Distinguished Name is selected, the SSO UserID that appears in the SSO header has to be the full DN recognized by eDirectory. The SSO Controller will not try to do any user mapping. If User Attribute is selected, the SSO Controller will try to map the user from UserID to a full user DN. For a particular mapping, if the result is not unique (in other words, a single UserID maps to multiple users in eDirectory), or the result is none, the SSO Controller will refuse the SSO header, and the single sign on operation will fail. 4 Browse to the Signing Certificate file you created earlier (for example, rbpm.cert) and upload it to the User Application. This file can be the same one used for the SSO Controller, or it can be generated separately for the Kerberos provider. To make your environment more secure, you should use a different certificate than the one used for the SSO Controller. 5 Browse to the Signing Key file you created earlier (for example, rbpm.pkcs8) and upload it to the User Application. This file can be the same one used for the SSO Controller, or it can be generated separately for the Kerberos provider. To make your environment more secure, you should use a different key than the one used for the SSO Controller. 6 In the Server protected by field, specify how the server will be protected by selecting Key or Password. The recommended approach is Key. 7 Click Save. 164 Identity Manager Roles Based Provisioning Module 3.7 User Application: Administration Guide 8 Select the checkbox next to Kerberos, and select Enable. 9 Restart the Application Server. To confirm that the SSO Controller and SSO Provider are enabled, you can look for the following two lines in the server log file: INFO [com.novell.common.auth.saml.AuthTokenGenerator] (main) SSO Framework is enabled INFO [com.novell.common.auth.sso.SSOFilter] (main) SSO Filter kerberos is enabled. On the Single Sign On (SSO) page, you should also see that the Enable Single Sign On (SSO) checkbox is selected. In addition, you should see that the SSO Provider has a green check mark in the Status column. Testing Single Sign On with Kerberos To test the single sign on feature with Kerberos: 1 Login to the Windows Client Machine (on XP or Vista). 2 Open a browser and access the User Application by using a URL of this format: http://dns-name-for-UA:port/context/Kerberos For example: http://rbpm.novell.com:8080/IDM/Kerberos 3 If all of the components have been configured properly, you should see your default page in the User Application. Configuring an SAP Provider This section provides instructions on preparing and configuring the SAP provider. Preparing to Use an SAP Logon Ticket To configure the domains: 1 Make sure the User Application is in the same domain as the SAP portal. Single sign on with the SAP logon ticket only works when both are in the same domain. To configure the SAP logon ticket properties: 1 Follow the instructions on configuring SAP logon provided at Configuring Authentication and Single Sign-On (http://help.sap.com/saphelp_nwce10/helpdata/en/45/ b6af6e3753003ae10000000a11466f/content.htm). The steps below provide a simple example for the NW7 environment: 1a Login to the SAP portal NWA (management) as administrator/passw0rd: http://w2k3entnw7.novell.com:50000/webdynpro/dispatcher/sap.com/ tc~lm~webadmin~mainframe~wd/WebAdminApp 1b Switch from the overview to the configuration tab. Choose system properties. Expand NW7 in right hand pane and choose global server configuration. Switch from Kernel to Services in Details section. 1c Page down to row 31 and choose com.sap.security.core.ume.service. The Expanded Details section shows up at the bottom. Application Configuration 165 1d Enable Filter on and type login. You should understand most of the settings and be able to verify that they are appropriate. Note that the login.ticket_lifetime is using minute as the time unit. This number must be very large. 1e Now change the filter to logon. Note the item called ume.logon.security.relax_domain.level. It defines the domain level in which the ticket will take effect. For example, if the portal server is A.B.C.com and you set the domain level to 1, then any website under B.C.com will be able to single sign on. If you set the domain level to 2, then any website under C.com will be able to single sign on. This is achieved by the Set-Cookie's domain attribute. To create a user in the SAP portal: 1 Login to the SAP portal as an administrator. To be able to single sign-on to the User Application, you must create a portal user who also has an account in eDirectory. To configure SSO on the User Application: 1 Create the private keys and certificates, if you have not already done so. For details, see “Creating the Certificates” on page 154. 2 Enable the SSO Controller, if you have not already done so. For details, see “Configuring the SSO Controller” on page 157. 3 Enable the SAP SSO Provider, as described in “Using the Administration Tab to Configure the SAP Provider” on page 166. When you enable the SAP provider, you need to provide the SAP native library path and SAP ticket signing certificate path. You can download the native libraries through your SAP support channel (https://websmp110.sap-ag.de/support). On the downloads page, select support packages and patches, and then choose applications by index. The name of the package is SAPSSOEXT. You will need to unzip the .SAR file by using SAPCAR utility. You can download the certificate from: http://w2k3entnw7.novell.com:50000/irj/portal --> system admin --> system configuration --> keystore administration --> download verify.pse Using the Administration Tab to Configure the SAP Provider To configure the SAP provider in the Administration tab of the User Application: 1 Select the SAP provider name and click Edit. The SAP dialog displays. 166 Identity Manager Roles Based Provisioning Module 3.7 User Application: Administration Guide 2 In the Expiration Interval field, specify the number of seconds that the SSO Header will be kept alive before expiring. This value defines the lifecycle of the SSO Header from the time it is issued. The expiration interval is needed to prevent replay attacks. You need to consider the network latency between your SSO Provider and the SSO Controller, as well as clock synchronization between the two components, if they are deployed on different machines. 3 In the User ID Mapping field, indicate whether the user ID will be associated with a user DN or with a user attribute, such as a CN. The User ID Mapping maps the user ID in the original realm to the eDirectory realm. If Distinguished Name is selected, the SSO UserID that appears in the SSO header has to be the full DN recognized by eDirectory. The SSO Controller will not try to do any user mapping. If User Attribute is selected, the SSO Controller will try to map the user from UserID to a full user DN. For a particular mapping, if the result is not unique (in other words, a single UserID maps to multiple users in eDirectory), or the result is none, the SSO Controller will refuse the SSO header, and the single sign on operation will fail. 4 Browse to the Signing Certificate file you created earlier and upload it to the User Application. This file can be the same one used for the SSO controller, or it can be generated separately for the SAP provider. To make your environment more secure, you should use a different certificate than the one used for the SSO controller. 5 Browse to the Signing Key file you created earlier and upload it to the User Application. This file can be the same one used for the SSO controller, or it can be generated separately for the SAP provider. To make your environment more secure, you should use a different key than the one used for the SSO controller. 6 Specify the path to the SAP Certificate File. 7 Specify the SAP Library Path. 8 Click Save. 9 Select the checkbox next to SAP, and select Enable. 10 Restart the Application Server. Application Configuration 167 Testing Single Sign On with SAP To perform single sign-on with SAP: 1 Login to the SAP portal as an SAP user. NOTE: After logging in, you may see a message indicating that no portal roles have been assigned. This is because no portal permissions have been set up for this user. This is not a problem for single sign-on. As long as you see Log off link under the warning, you are logged in. 2 Access your User Application. To logout: 1 Logoff from the SAP portal. 2 Logoff from the User Application. NOTE: If you don't logoff from the SAP portal, you won't be able to logout of the User Application. There is no mechanism to notify SAP that a user wants to logoff globally. Therefore, the ticket will keep you logged in. Adding a Custom SSO Provider This section provides instructions for creating a custom SSO Provider and configuring this provider to work with the Roles Based Provisioning Module. Topics include: “Implementing and Deploying a Custom SSO Provider” on page 168 “Configuring the Custom SSO Provider in the SSO Configuration Page” on page 169 Implementing and Deploying a Custom SSO Provider A custom SSO Provider can be implemented in various ways, but it must support the basic protocol outlined below. Once the custom SSO Provider recognizes the login user identity, it must insert the following HTTP header into the HTTP request that is sent to the RBPM User Application: <SSO Header Name>: BASE64<SSO UserID>:<TimeStamp>:BASE64(<Signature>) The SSO Header Name must be named carefully to avoid conflicts with regular HTTP headers and other SSO providers. The SSO UserID represents the login user’s identity. The SSO Controller will later map this identity to the user’s DN name. For details on user mapping, see “Configuring the Custom SSO Provider in the SSO Configuration Page” on page 169. The Signature is a digital signature (SHA1WithRSA) of SSO UserID and TimeStamp in UTF-8 String representation. Here is a code fragment that shows how you might generate the signature: 168 Identity Manager Roles Based Provisioning Module 3.7 User Application: Administration Guide // Signing Signature sig = Signature.getInstance("SHA1withRSA"); sig.initSign(privatekey, SecureRandom.getInstance("SHA1PRNG")); sig.update(userId.getBytes("UTF-8")); String timestamp = Long.valueOf(System.currentTimeMillis()).toString(); sig.update(timestamp.getBytes("UTF-8")); byte[] signature = sig.sign(); // Build the content return new String(Base64.encodeBase64(userId.getBytes("UTF-8")), "UTF-8") + ":" + timestamp + ":" + new String(Base64.encodeBase64(signature), "UTF-8"); Configuring the Custom SSO Provider in the SSO Configuration Page To configure a custom provider in the Single Sign On page within the User Application: 1 Select the New button in the menu on the Single Sign On (SSO) page. The New SSO Provider dialog displays. 2 In the SSO Provider Name field, specify a name for the provider. This name must match the SSO Header Name, as described in “Implementing and Deploying a Custom SSO Provider” on page 168. 3 In the Expiration Interval field, specify the number of seconds that the SSO Header will be kept alive before expiring. This value defines the lifecycle of the SSO Header from the time it is issued. The expiration interval is needed to prevent replay attacks. You need to consider the network latency between your SSO Provider and the SSO Controller, as well as clock synchronization between the two components, if they are deployed on different machines. 4 In the User ID Mapping field, indicate whether the user ID will be associated with a user DN or with a user attribute, such as a CN. The User ID Mapping maps the user ID in the original realm to the eDirectory realm. If Distinguished Name is selected, the SSO UserID that appears in the SSO header has to be the full DN recognized by eDirectory. The SSO Controller will not try to do any user mapping. If User Attribute is selected, the SSO Controller will try to map the user from UserID to a full user DN. For a particular mapping, if the result is not unique (in other words, a single UserID maps to multiple users in eDirectory), or the result is none, the SSO Controller will refuse the SSO header, and the single sign on operation will fail. 5 Browse to the Signing Certificate file you created earlier and upload it to the User Application. Application Configuration 169 The file you use must be match the certificate of the private key used for the Signature, as described in “Implementing and Deploying a Custom SSO Provider” on page 168. 6 Click Save. 7 Select the checkbox next to the new custom provider, and select Enable. 8 Restart the Application Server. 5.1.7 Theme Administration You can use the Themes page to control the look and feel of the Identity Manager user interface. A theme is a set of visual characteristics that apply to the entire user interface (including the guest and login pages, the Identity Self-Service tab, the Work Dashboard tab, and the Administration tab). There’s always just one theme in effect for the user interface. The Themes page offers a choice of several themes, in case you want to switch to a different one. The Themes page also enables you to: Preview each theme choice to see how it looks Customize any theme choice to reflect your own branding (such as a logo) Previewing a Theme Before choosing a theme, you can preview how it will change the look of the Identity Manager user interface. 1 Go to the Themes page: 170 Identity Manager Roles Based Provisioning Module 3.7 User Application: Administration Guide The following themes are supported in Version 3.7: BlueGloss Neptune (new theme introduced in this release) Several of the themes introduced in earlier versions of the User Application have been deprecated in this release. The following themes have been deprecated: Manilla Linen Medico IDMStandard These themes are no longer supported with the current release. You cannot select any of these themes on the Theme Administration page on the Administration tab. The Manilla, Linen, Medico, and IDMStandard themes will most likely be removed in a future release. If you use any of these themes, you should migrate them to Version 3.7 of the User Application. If you use a custom theme that is based on one of the deprecated themes, you need to follow these steps to migrate the theme: 1a Look inside the theme.css for your custom theme and copy any custom selectors (new or edited) from this theme into either the BlueGloss or Neptune theme. 1b Save a new custom theme, which now includes your customizations as well as selectors from the BlueGloss or Neptune theme. 2 Find a theme that you are interested in, then click the corresponding Preview button. The preview for that theme displays in a new browser window: Application Configuration 171 3 Scroll through the preview to see the characteristics of this theme. 4 When you’re done, click Close Preview Page (in the top left corner) or close the preview window manually. Choosing a Theme When you find a theme that you like, you can choose to make it the current theme for the Identity Manager user interface. 1 Go to the Themes page. 2 Click the radio button for the theme you want. 3 Click the Save button. The look of the user interface changes to reflect your chosen theme. 172 Identity Manager Roles Based Provisioning Module 3.7 User Application: Administration Guide Customizing a Theme's Branding You can tailor any theme by substituting your own images and changing some color settings. This enables you to give the Identity Manager user interface a custom look to meet the branding requirements of your company or organization. 1 Go to the Themes page. 2 Find a theme that you want to customize, then click the corresponding Customize button. The Themes page displays the Customize Branding settings for that theme: 3 Specify your customizations by changing the settings in one or more tabs (as needed). Each contains the settings for different parts of the User Application interface. They include: General: Lets you specify general theming properties such as a favorites icon, background, link and hover color, and the left navigation area properties. Header: Lets you specify the header color, texture, logo and username properties. Application Configuration 173 NOTE: The Left Background image needs to be the size indicated on the Header page (which defaults to 272 x 79 pixels) in order to display properly. The user interface does not attempt to resize the image automatically. For example, it will not stretch the image if it is too small. Header tabs: Lets you specify the properties for the header tabs. Admin subnavigation: Lets you specify the properties for the Admin tab. Login: Lets you specify the properties for the login screen. Follow the on-screen instructions for specifying each setting. The changes are not reflected in the User Application until you save them. If you have made unsaved changes, the Save button displays an asterisk * to indicate that the changes are pending a save. 4 Click Save. If you’re editing the current theme, the look of the user interface changes to reflect your customizations. If you want to undo all of your customizations to the theme, click the Reset button. 5 When you’re done working on this theme, click Back to Theme Selector. Defining a Custom Theme You can also create and deploy your own custom themes and deploy them in their own WAR file. When they are deployed, the custom themes are available through the Themes management page of the Administration tab. Before attempting to create your own custom theme, make sure you have a working knowledge of the following technologies: The structure of J2EE WAR files, how to modify the contents of a WAR file, and how to deploy one to your application server. How to modify CSS and XML files How to create the graphic elements for your theme Creating a Custom Theme To create a custom theme, begin with a copy of an existing theme (such as BlueGloss) from the User Application WAR: 1 Back up the deployed User Application WAR file (IDMProv.WAR) to the directory in which you install, for example the /opt/novell/idm subdirectory. 2 In a test environment, extract the contents of the User Application WAR file. The files that comprise the User Application’s themes are located in the resource\themes subdirectory. Each theme resides in its own directory with an appropriate name. 3 In the test environment, create a directory for the custom theme. The directory name can be any valid directory name, but it should reflect the name of the theme, and it should not contain spaces. 4 Copy the contents of the BlueGloss theme from the extracted WAR file to the new subdirectory. You will be working with the following files: 174 Identity Manager Roles Based Provisioning Module 3.7 User Application: Administration Guide File Name Description theme.xml The theme descriptor file. It includes entries for display name and description. They are used in the Themes page of the Administration tab. The remaining entries correspond to the brandable selectors. The width and height attributes on these entries are used in the branding page to reference the exact dimensions needed when a user uploads a customized version of these images. These entries must match their respective images, width and height as found in the themes.css. theme.css Contains the CSS selectors used to style the look and feel of the user interface. print.css Contains the CSS selectors used to style a print friendly version of the user interface. dojo.css Contains a pointer to additional CSS files used by RBPM 3.7 (or later). An images subdirectory Contains the images used by the theme. Rules for working with these files: Do not change the names of the theme.xml, theme.css, print.css and dojo.css files. The CSS Selector names must remain the same, but you can change the properties of the selectors to establish the look and feel. The images subdirectory can have any name, but you must reference it correctly in the CSS and XML files. 5 Make your changes to the images, CSS style sheets and other theme elements as needed. The following changes are recommended: In the theme.xml file: display-name: Change this to a value that represents your theme. It displays as the Theme-name in the Themes page of the User Application’s Administration tab. description: Change this to a value that describes your theme. It displays as the Description in the Themes page of the User Application’s Administration tab. Consider whether to localize the display-name and Description fields. Remove the following: <resource-bundle>com.novell.afw.portal.artifacts.theme.BlueGloss</ resource-bundle> <resource-group>admin-resgrp</resource-group> In the dojo.css file, change the @import line to the following value: @import url("../../../../IDMProv/javascript/dijit/themes/idmua/ idmua.css"); where IDMProv is the name of your WAR context. Application Configuration 175 If you wish to change the appearance of some Dojo elements, such as the menu buttons within the profile section on the Work Dashboard, you should take the following steps, instead of performing the steps above: 1. Copy the following from your extracted WAR in this location: /javascript/dijit/ themes: dijit.css dijit_rtl.css idmua (folder) Paste these items into your new theme folder. 2. Change the @import line in the dojo.css file, as follows: @import url("idmua/idmua.css"); In the graphics directory: thumbnails.gif: Replace the copy with your own image. This image displays along with the Theme-name and Description of the theme (described above) that is shown in the Themes page of the Administration tab. It typically illustrates what the User Application landing page looks like when the associated theme is applied Renaming graphics files: If you change the names of graphics files (rather than just substituting a different image of the same name), make sure to change the reference to the image in both the theme.xml and the theme.css file. If the image is not used in the branding interface (for example, if it is not listed as one of the subset of brandable images in the theme.xml file), then you will only need to change the reference to the image in the theme.css file. Suppose you want to rename images/ header_left.gif to images/my_company_name.gif. Edit the theme.css file to reflect the new image name. 6 After you make all of the desired changes to the theme files, add your customized theme directory to a new WAR file that contains one or more custom themes. Deploy the new WAR to your test application server. Testing tip: Open the Themes page (available under the Administration tab). Your theme should display along with the prepackaged themes. Use the Theme Preview action to see how the customized changes to your new theme will render. This is a useful way to preview many of your intended changes to your theme. Running through commonly used features of the application is also a recommended testing step. 7 After your changes are fully tested, you can deploy the WAR containing the custom theme to your production application server. Any number of custom themes can reside in a single WAR. Any number of custom WARs containing custom themes can be deployed. To undeploy the theme, remove the WAR that contains the theme from the application server’s deploy directory. Before undeploying, make sure that any themes it contains are not defined as the User Application’s default theme. If you remove the WAR and it does contain the default theme, the Theme Administration screen displays an error message and reverts the User Application theme to the original default theme defined at installation time. 176 Identity Manager Roles Based Provisioning Module 3.7 User Application: Administration Guide Customizing the Theme for External Password WAR If you configured Password Management to use an External Password WAR, the theme for the Forgot Password page is defined in that external password WAR. The default name for the external password WAR is IDMPwdMgt.WAR. The IDMPwdMgt.WAR contains one theme; by default, it is BlueGloss. It does not include a user interface for modifying or branding this theme. You can define a custom theme for the external Forgot Password page. The procedure for defining a custom theme is described in “Defining a Custom Theme” on page 174; however, the deployment procedure for the external Forgot Password page is different and the rules about the custom theme WAR are more restrictive. After you define the custom theme: Package the theme in a WAR named IDMPwdMgtTheme.WAR. The IDMPwdMgtTheme.WAR can contain a single theme, and the theme must be located in the resource/themes/Theme directory within the WAR. Deploy the IDMPwdMgtTheme.WAR on the application server where the external WAR is located. Only one custom theme can be deployed at a time. 5.1.8 Assigning the User Application Administrator The User Application Administrator performs administrative tasks for the Identity Manager User Application, using the Administration panel of the Identity Manager User Application. The User Application Administrator does not have provisioning administration rights, and is considered an ordinary user while using the Work Dashboard panel. There can be more than one User Application Administrator. One user must be assigned to the User Application Administrator role at installation. The User Application Administrator created during installation can administer everything in the User Application including the Provisioning system and can designate other users as User Application Administrators. You can assign the User Application Administrator at installation and on the Application Configuration page on the Administration tab of the Identity Manager User Application. When you assign the administrator at installation, IDM writes the assignment to the User Application configuration file, which is editable with the configupdate utility. But, at deployment of the WAR, the assignment is written to the User Application database. Thus, after you start the JBoss Application Server the first time after installation, you cannot change the assignment with the configupdate utility--it must be changed from the Application Configuration page. A user who is to be a User Application Administrator should typically be located under the user root container specified in the User Application’s LDAP configuration. This enables the user to log in simply by username (instead of requiring the fully distinguished name each time). The user who is a User Application Administrator does not need special directory rights because this role controls application-level access. When assigning User Application Administrators, you can specify users, groups, or containers. 1 Go to the Application Configuration page: Application Configuration 177 2 Under Portal Configuration, select User App Administrator Assignment. 3 Specify values for the following search settings: Setting What to Do Search for Select one of the following from the drop-down menu: Users Groups Containers Starts with If you want to: Find all available objects of your specified type (user), then make this setting blank. Find a subset of those objects, then enter the starting characters of the CN values you want. (Case is not considered. Wildcards are not supported.) 4 Click Go. The results of your search appear in the Results list. 5 Select the users, group, or container you want to assign as User Application Administrators, then click Add (>). Hold down the Ctrl key to make multiple selections. 6 Click Save. To unassign User Application Administrators: 1 In the Current Assignments list, select the users, group, or container you want to unassign as User Application Administrators, then click Remove (<). Hold down the Control key to make multiple selections. 2 Click Save. 178 Identity Manager Roles Based Provisioning Module 3.7 User Application: Administration Guide You cannot delete yourself as User Application Administrator. This is a safeguard to ensure that the User Application always has at least one User Application Administrator. 5.2 Working with the Import and Export Tools You can use the Tools page to export or import portal content (pages and portlets) used in the Identity Manager User Application. This content is also known as the portal configuration state and it includes: Container and shared pages (including each page’s assigned portlets, and each portlet’s preferences and settings) Portlet registrations Table 5-5 Portal Data Export and Import Tools Tool How it works Portal Data Export Generates XML descriptions of a set of selected container and shared pages, and portlets. The XML files are stored in a portal data export ZIP file that can be used as input to the Portal Data Import tool. Portal Data Import Accepts a portal data export ZIP file as input. Uses the portal data export ZIP file to generate container and shared pages, and portlets in a portal (User Application). The Export and Import tools enable you to move the portal configuration state from one portal (User Application) to another, as needed. Table 5-5 on page 179 describes how these tools work. You can use the Portal Data Export and Import tools to: Move your portal configuration state from a test (source) environment to a production (target) environment Update the configuration state of a portal incrementally Clone a portal Optionally, overwrite the configuration state on the target portal 5.2.1 Requirements To use the Portal Data Export and Import tools, make sure that the Identity Manager User Application (portal) is deployed and running on your source and target application servers. It is not required that your source and target servers access the same Identity Vault; they can access different ones, if appropriate. The users, groups, and containers in those Identity Vaults are not required to be the same. 5.2.2 Restrictions You cannot use the Portal Data Export and Import tools to: Export or import portal configuration state when a server is currently servicing user requests Export or import portal classes and resources Application Configuration 179 Export or import portlet classes and resources Export or import the identity and provisioning data used in a portal Export or import administration settings other than for pages and portlets Migrate configuration state from an earlier portal version to a later version (the portals must be the same version) 5.2.3 Exporting Portal Data This section describes how to export a portal’s configuration state to a portal data export ZIP file. 1 If you are performing an incremental update, back up the target portal. 2 On the Application Configuration page, select Portal Data Export from the navigation menu on the left. The Portal Data Export panel displays: 3 Follow the on-screen instructions to select the portal pages and portlets that you want to export. Some portlets that you have not selected for export might still be exported. If you export a page that contains a portlet, but do not select that portlet for export, the portlet is still exported (to ensure that a runtime error does not occur for the exported page). 4 When you are done making selections, click Export Portal Data. Your new portal data export ZIP file is generated, with a default name that includes the current date and time. For example: PortalData.21-Oct-05.09.12.16.zip You are then prompted to save this ZIP file locally (or to open it in an appropriate archive utility). For example: 180 Identity Manager Roles Based Provisioning Module 3.7 User Application: Administration Guide 5 Save the portal data export ZIP file to an appropriate location. 5.2.4 Importing Portal Data This section describes how to import a portal data export ZIP file to a portal. NOTE: Remember that, during the import, your target application server must be running but not currently servicing user requests. 1 If you are performing an incremental update, back up the target portal. 2 On the Tools page, select Portal Data Import from the navigation menu on the left. The Portal Data Import panel displays: Application Configuration 181 3 Specify the following general import settings: Setting What to Do Archive Click Browse to select the portal data export ZIP file to import. For example: PortalData.21-Oct-05.09.12.16.zip Import security settings? Select one of the following: Yes: If you want to import the permissions that the portal data export ZIP file specifies for access to pages and portlets by users, groups, and containers. Make sure that the users, groups, and containers involved exist in the target portal’s Identity Vault; permissions for missing entities fail to be imported. No: If you want to ignore the permissions that the portal data export ZIP file specifies. 4 Click View Import Archive. The panel displays more specifics about your selected portal data export ZIP file and how you want to import it: 5 Specify the following detailed import settings: 182 Identity Manager Roles Based Provisioning Module 3.7 User Application: Administration Guide Setting What to Do Replace existing data? Select one of the following: Yes: If you want the contents of the portal data export ZIP file to overwrite corresponding pages and portlets that already exist in the target portal. For example, if the portal data export ZIP file contains a shared page named MyPage and the target portal contains a shared page named MyPage, that existing page is overwritten in the target portal. No: If you want to skip the import for all existing pages and portlets. Access level for imported objects Select one of the following: All Users: For unrestricted access to imported pages and portlets. Administrator only: For restricted access to imported pages and portlets. If you chose to import security settings, then this access level is applied only to those imported pages and portlets where a security setting failed to be imported, typically because specified users, groups, or containers do not exist in the target portal’s Identity Vault. If you chose not to import security settings, then this access level is applied to all pages and portlets that are imported. Import group settings? (If you chose to import security settings) Select one of the following: Yes: If you want to import the default container page and default shared page assignments that the portal data export ZIP file specifies for groups. Make sure that the groups involved exist in the target portal’s Identity Vault; assignments for missing groups fail to be imported. No: If you want to ignore the default page assignments that the portal data export ZIP file specifies for groups. Import Container Pages Import Shared Pages Follow the on-screen instructions to select the pages and portlets that you want to import from the portal data export ZIP file to the target portal. Import Portlets NOTE: Some portlets that you have not selected for import might still be imported. If you import a page that contains a portlet, but do not select that portlet for import, the portlet is still imported to ensure that a runtime error does not occur for the imported page. Please map the portlet application names... Archive/ Local Use the Archive and Local drop-down menus to map the portlet application names in the archive (portal data export ZIP file) to existing portlet applications on the local (target) application server. 6 When you’re ready to begin the import, click Import Portal Data. Application Configuration 183 When the import completes, the Portal Data Import Results panel displays: Unsuccessful imports display in red. To troubleshoot import or export problems, look at your application server’s system console or log file (such as jboss/server/IDM/log/ server.log) for messages from the following User Application log: com.novell.afw.portal.util 7 Test the target portal to ensure that you imported the data that you expected. 5.3 Password Management Configuration This section describes how to configure password self-service and user authentication features to your Identity Manager User Application. Topics include: Section 5.3.1, “About Password Management Features,” on page 185 Section 5.3.2, “Configuring Challenge Response,” on page 189 Section 5.3.3, “Configuring Forgotten Password,” on page 190 Section 5.3.4, “Configuring Login,” on page 194 Section 5.3.7, “Configuring Change Password,” on page 202 Section 5.3.5, “Configuring Password Sync Status,” on page 197 Section 5.3.6, “Configuring Password Hint Change,” on page 201 Section 5.3.7, “Configuring Change Password,” on page 202 184 Identity Manager Roles Based Provisioning Module 3.7 User Application: Administration Guide 5.3.1 About Password Management Features The password management features supported by an Identity Manager User Application encompass user authentication and password self-service. When you put these features into use, they enable your application to: Prompt for login information (username and password) to authenticate against Novell eDirectoryTM Provide users with password change self-service Provide users with forgotten password self-service (including prompting for challenge responses, displaying a password hint, or allowing a password change, as needed). You can configure forgotten password self-service to run inside the firewall (the default), or you can configure it to run outside the firewall. Provide users with challenge question self-service Provide users with password hint self-service Required Setup in eDirectory Before you can use most of the password self-service and user authentication features, you need to do the following in eDirectory: Enable Universal Password Create one or more password policies Assign the appropriate password policies to users A password policy is a collection of administrator-defined rules that specify the criteria for creating and replacing user passwords. Novell Identity Manager takes advantage of NMASTM (Novell Modular Authentication Service) to enforce password policies that you assign to users in eDirectory. You can use Novell iManager to perform the required setup steps. For example, here’s how someone defined the DocumentationPassword Policy in iManager. Application Configuration 185 Figure 5-3 Sample Password Policy This password policy specifies: Universal Password settings 186 Identity Manager Roles Based Provisioning Module 3.7 User Application: Administration Guide Figure 5-4 Sample Universal Password Settings Settings to deal with forgotten-password situations Figure 5-5 Sample Password Policy Assignments that apply the policy to specific users Application Configuration 187 Figure 5-6 Sample Policy Assignments For more information on setting up Universal Password and password policies in eDirectory, see the Novell Identity Manager Administration Guide (http://www.novell.com/documentation/dirxml20/ index.html). Case-Sensitive Passwords By default passwords are not case-sensitive. You can create a password policy that allows casesensitive passwords. You can specify the Allow the password to be case-sensitive in the Password Policies > Universal Password > Advanced Password Rules. If you enable case-sensitive password, you must also enable the Allow user to retrieve password setting. It is enabled by default, but you can verify it through the iManager Password Policies > Universal Password > Configuration Options tab. Password Policy Compliance If you enable Universal Password, it is recommended that you also configure the system to verify that existing passwords comply with the password policy. You can configure this through iManager. In iManager, go to Passwords > Password Policies > Universal Password > Configuration Options. Make sure the following option is selected: Verify whether existing passwords comply with password policy (verification occurs on login). This ensures that users created through the User Application are forwarded to the Change Password page to enter a password that complies with the Identity Manager password policy. 188 Identity Manager Roles Based Provisioning Module 3.7 User Application: Administration Guide 5.3.2 Configuring Challenge Response The Challenge Response self-service page lets users: Set up the valid responses to administrator-defined challenge questions, and set up user-defined challenge questions and responses Change the valid responses to administrator-defined challenge questions, and change user- defined challenge questions and responses NOTE: The password management facility makes passwords case-sensitive, by default, and also allows you to configure case sensitivity for passords. This is not the case with the Challenge Response facility. Challenge Response answers are not case sensitive, and cannot be configured to support case sensitivity. TIP: If you have localized the Challenge Response questions in iManager set the Login Configuration setting Enable Locale Check to True. Figure 5-7 Challenge Response Example Requirements The Challenge Response requirements are described Table 5-6 on page 189. Table 5-6 Challenge Response Requirements Topic Requirements Password policy A password policy with forgotten password enabled and a challenge set. Universal Password Does not require Universal Password to be enabled. Application Configuration 189 Topic Requirements eDirectory configuration Requires that you grant supervisor rights to the LDAP Administrator for the container in which the logged-in user resides. Granting these privileges allows the user to write a challenge response to the secret store. For example, suppose the LDAP realm administrator is cn=admin, ou=sample, n=novell and you log in as cn=user1, ou=testou, o=novell. You need to assign cn=admin, ou=sample, n=novell as a trustee of testou, and grant supervisor rights on [All attribute rights]. Using the Challenge Response Feature To use the Challenge Response feature, you need to know about the following: “How Challenge Response Is Used During Login” on page 190 “How Challenge Response Is Used in the User Application” on page 190 How Challenge Response Is Used During Login During the login process, the Login page automatically redirects to Challenge Response whenever the user needs to set up challenge questions and responses (for example, the first time a user attempts to log in to the application after an administrator assigns the user to a password policy in iManager. The password policy must have forgotten password enabled and include a challenge set). How Challenge Response Is Used in the User Application By default, the User Application provides users with self-service for changing challenge questions and responses. Configuring Challenge Response The Challenge Response Configuration settings (on the Administration tab) are described in the following table. Table 5-7 Challenge Response Configuration Settings Setting Description Mask Response Text Choosing Yes means that user-entered response text is masked with asterisk (*) characters. 5.3.3 Configuring Forgotten Password This feature uses challenge/response authentication to let users get information about their passwords. The result, which depends on the assigned password policy, can include: Displaying the user’s password hint on the screen E-mailing the hint to the user E-mailing the password to the user Prompting the user to reset (change) the password 190 Identity Manager Roles Based Provisioning Module 3.7 User Application: Administration Guide Forgotten password self-service is typically available to users inside your corporate firewall through the deployed User Application WAR, but you can also configure your system so that the forgotten password management features are stored in a separate password management WAR. You can then deploy the password management WAR on a separate system that can be located inside or outside your corporate firewall. To learn how to setup Forgot Password outside the core User Application WAR, see Section 2.6, “Configuring Forgotten Password Self-Service,” on page 65. Requirements The Forgot Password feature requirements are listed in Table 5-8 on page 191. Table 5-8 Forgotten Password Requirements Topic Requirements Password policy Requires a password policy with forgotten password enabled and with a challenge set. When using password policies, you also need to configure the following settings on the Password Policy page in iManager to ensure that the User Application prompts the user to change the password on first login. Force user to configure Challenge Questions and/or Hint upon authentication must be enabled. This setting is on the Forgotten Password panel, under Authentication. Verify whether existing passwords comply with the password policy (verification occurs on login) must be enabled. This setting is on the Universal Password Policy panel, under Configuration Options>Authentication. Limit the number of grace logins allowed (0-254) must be enabled. You can accept the default value of 6. This setting is on Universal Password panel, under Advanced Password Rules>Password Lifetime. This setting is required to support the Create User action. The Create User action expires the user’s password and sets the grace login value to 1, so that the user is forced to change the password on first login. Universal Password Does not require Universal Password to be enabled, unless you want to support resetting the password or e-mailing the password to the user. Using the Forgot Password Feature To use the Forgot Password feature, you need to know about the following: “How the Forgot Password feature Is Used During Login” on page 191 “Configuring Your Environment for E-mail Actions” on page 192 “Forgot Password Configuration Settings” on page 192 How the Forgot Password feature Is Used During Login During the login process, the Login page redirects to the Forgot Password page if the user clicks the Forgot Password link. When Forgot Password displays, it does the following: 1. Prompts for username. Application Configuration 191 2. Redirects to the Challenge/Response page to perform challenge/response authentication for that user. 3. Performs the forgotten password action specified in the authenticated user’s assigned password policy. It does one of the following: Redirects to the Change password page so the user can reset their password E-mails the password or hint to the user Displays the hint Configuring Your Environment for E-mail Actions If you want to support the Forgot Password e-mail actions, you need to make sure your e-mail notification server is set up properly: 1 Use a Web browser to access iManager on your eDirectory server and log in as an administrator. 2 Go to Roles and Tasks > Passwords and select Email Server Options. 3 Specify the appropriate settings, then click OK. Forgot Password uses two e-mail templates. In iManager, you find them in Roles and Tasks > Passwords > Edit Email Templates. They are named: Password hint request Your password request You can change the content of these templates as needed for your application, but don’t change the structure. The Forgot Password page determines, based on the user’s preferred locale, whether to display a localized e-mail template. Forgot Password Configuration Settings You set the Forgot Password page configuration settings in the Administration tab. They are described in Table 5-9 on page 192. Table 5-9 Forgot Password Configuration Settings Configuration Setting Description Login Sequence The NMAS login sequence to use. In this version, only Challenge Response is supported. LDAP secure port The secure LDAP port to use. The default is 636. Allow Wild Cards in Login Select True if you want users to be able to type the first few characters of a username. (The default is false). Display DN Information must also be true. When True, the user is able to type a few characters of a username and the Forgot Password page returns a list of DNs that match the user-entered string. Do not enter “*” or “?” in the username as part of search string. 192 Identity Manager Roles Based Provisioning Module 3.7 User Application: Administration Guide Configuration Setting Description Display Full User Name Select True when you want the Forgot Password page to display the full user name. This can be used in conjunction with Allow Wild Cards in Login. If set to False, no name is displayed. Generic Password Policy User DN Specify the DN of an existing Identity Vault user established to prevent unauthorized users from accessing your system by guessing valid usernames. By default, if the user enters an invalid name, the User Application displays the message User not Found. Under some circumstances an unauthorized user might be able to guess a valid name and answer the challenge questions correctly. One way to prevent this is to specify this value. See “Setting Up a Generic Password Policy User DN” on page 194 for additional required configuration steps. Encoding The character encoding to use. The default is utf-8. Display Hint in Password Reset Select True (the default) to display the user’s password hint on the Password Reset screen. Select False to avoid displaying the user’s password hint on the Password Reset screen. Display Return to Calling Page Allows administrator to show or hide Return to Calling Page Link after a forgot password action is performed. If the Novell Client Login Extension (CLE) Restricted Browser is used, the link should be disabled because pressing on the link when using the Restricted Browser does not work. Forgot Password Link This value defines the name and path to the Forgot Password page. This initial value is established during installation. If you do not use an external password management WAR, you can leave the default value. For more information, see Section 2.6, “Configuring Forgotten Password Self-Service,” on page 65. Forgot Password Return Link Like the Forgot Password Link, this value is set during installation and you do not need to make any changes if you do not use an external password management WAR. If you do use an external password WAR, use this setting to specify the URL that the Forgot Password page can use to return to the User Application when the user clicks Submit. The return link should take the form of: protocol://servername:port/userappcontext For example, https://idmhost:8080/IDMProv For more information, see Section 2.6, “Configuring Forgotten Password Self-Service,” on page 65. Application Configuration 193 Configuration Setting Description Forgot Password Web Service URL This setting allows the External Forgot Password WAR to call the Forgot Password Web Service defined in the User Application. The format of this field is: https://host:port/idm_ctx/pwdmgt/service Setting Up a Generic Password Policy User DN To support the Generic Password Policy User DN, you need to set up a user in the users container for this purpose. This user should: Have a password that is difficult to guess. Have his or her e-mail address assigned to a User Application Administrator. You must set up: A Challenge Set for this user and establish only Admin defined questions. A Password Policy that uses this Challenge Set. The Password Policy should have ForgotPassword enabled You must log in to the User Application as this user at least once to supply the answers to the Admin-defined questions. Finally, log in to the User Application as the User Application administrator and go to the Forgot Password configuration page of the Administration tab. Specify false for Allow Wild Cards in Login and Display Full User Name. Specify this newly established user as the Generic Password Policy User DN. 5.3.4 Configuring Login The Login page performs a very robust user authentication supported by Identity Manager (through Universal Password, password policies, and NMAS). The Login page redirects to the other password pages as needed during the login process. 194 Identity Manager Roles Based Provisioning Module 3.7 User Application: Administration Guide Requirements The Login page requirements are listed in Table 5-10 below. Table 5-10 Login Requirements Topic Requirements Password policy This page does not require a password policy, unless you want to use advanced password rules or let users click the Forgot Password link. Universal Password This page does not require Universal Password to be enabled, unless you want to use a password policy with advanced password rules. SSL This page uses SSL, so make sure that your application server is properly configured to support SSL connections to your LDAP realm. Use the Password Module Setup Login Action to configure the following settings: Table 5-11 Login Configuration Settings Configuration Setting Description Allow ID Wildcard If True, users can specify the first few characters of a username and a list of usernames that include those characters is displayed so the use can select the user to login as. Enable Forgot Password Link If True, the User Application Login page displays the Forgot Password link. Enable SSO If True, the Username and password are stored in the session and can be accessed by other properly configured portlets. The username is stored in the SSO User ID Key and the password in the SSO Password Key SSO User ID Key If Enable SSO is True the username is stored in the session using this key. SSO Password Key if Enable SSO is True the password is stored in the session using this key. Enable Hint Migration If True, any existing hints are moved from the nsimHint to the nsimPasswordReminder. Enable Locale Check If True, and the user has not set their locale preferences, the User Application displays a page that allows them to set their preferred locale. Enable Password Autocomplete If True and supported by the browser, the user’s browser opens a window asking if the user wants to save the login credentials. If False (the default), the user does not receive a browser prompt to save the login credentials. Application Configuration 195 Configuration Setting Description Guest Container Page Allows you to specify a custom guest container page. For example, you might specify any of the following values to direct the user to the MyOrgChart page : /IDMProv/portal/cn/DefaultContainerPage/ MyOrgChart /portal/cn/DefaultContainerPage/MyOrgChart http://localhost:9000/IDMProv/portal/cn/ DefaultContainerPage/MyOrgChart The default value is: GuestContainerPage Logout URL This value specifies the URL that a user is redirected to after the user presses the Logout button in the User Application. Password Change Return Page This value specifies the URL that a user is redirected to after a password change in Access Manager. After the password is changed, a message is displayed: Your password has been changed, please logout and close your browser to sign on to other applications with your new password. A Password Change Return Page link is also shown so user can click to be redirected to the URL specified. If user changes the password through an application other than Access Manager, or if the Password Change Return Page option is not configured, then Password Change Return Page is not shown after user changes the password. Enable Password Expiration Warning This setting gives you the ability to enable or disable the expired password warning. This feature is useful in configurations where another product has detected an expired password and already warned the user prior to redirecting to the Identity Manager portlets. Using SSL Login This setting gives you the ability to configure the Login to redirect to https. If you set Using SSL Login to true, then when user goes to the login.jsp (either directly or through a redirect from NONE SSL page), the login.jsp page will be presented with https with the SSL port configured (Server SSL Port). After user logs in, he see the https (SSL) landing page. Server SSL Port Specifies the SSL port that the User Application is running on. Using the Login Page To use the Login page, you need to know about the following: “How Login Redirects to Other Pages” on page 196 “Using Grace Logins” on page 197 How Login Redirects to Other Pages At runtime, the Login page redirects to other password pages, depending on what’s needed to complete the login process. Table 5-12 on page 197 directs you to descriptions. 196 Identity Manager Roles Based Provisioning Module 3.7 User Application: Administration Guide Table 5-12 Login Directions to Other Pages If the user Login redirects to Clicks the link Forgot Password Forgot Password page Needs to set up challenge questions and responses Challenge response page Needs to set up a password hint Hint Definition page Needs to reset an invalid password Change password page Using Grace Logins If you use a grace login, the Login page displays a warning message that asks you to change your password and indicates the number of grace logins that remain. If you are on your last login, the Login page redirects you to the Change Password page. 5.3.5 Configuring Password Sync Status Password Sync Status lets users check the progress of the password change process on connected systems. You can specify a different image to represent each connected system. To set up password sync status checking: Define the connected applications whose status the user should be able to view during the synchronization process. You define the connected applications in the Password Sync Status Application Settings described in Table 5-14 on page 200. Define the settings for the password sync status page displayed to users. These settings are described in Table 5-13, “Password Sync Status Client Settings,” on page 199. By default, the User Application Administrator can view the password sync status of other users when the User Application Administrator accesses the Password Sync Status page, shown in Figure 5-8 on page 198. The administrator can access the sync status for another user by specifying the other user’s DN, then clicking Check Sync Status. Application Configuration 197 Figure 5-8 Password Sync Status In addition to the User Application Administrator, you can define a set of users to perform the Check Sync Status for other users (for troubleshooting or other purposes). The members of a group called PasswordManagement are also automatically allowed to view the password synchronization status of other users. This group does not exist by default. If you choose to create this group, it must be: Named PasswordManagement. Given privileges to the Identity Vault. The group must have rights to read the user’s eDirectory object attribute for users whose password synchronization status they need to view. The system accesses the DirXML-passwordSyncstatus, the pwdChangedTime, and the DirXMLAssociations attributes. 198 Identity Manager Roles Based Provisioning Module 3.7 User Application: Administration Guide Table 5-13 Password Sync Status Client Settings Configuration Setting Description Password Sync Buffer Time (milliseconds) The password sync status checking compares time stamps across different Identity Vaults and connected systems. This buffer time is intended to account for differences between the system times on these different machines. This time is added to the time stamp on the user object’s password change attribute to determine if a change has occurred. It is used like this: The Password Sync Status process uses the buffer time as follows: If the time stamp value (password sync time) in DirXMLPasswordSyncStatus for the connected system is older than the last password change time stamp (pwdChangedTime attribute of user object) + password sync buffer time, then the status is considered old and the system continues polling for an updated status for the connected system. If the time stamp value in DirXML-PasswordSyncStatus for the connected system is newer than the last password change time stamp + password sync buffer time, then the password sync functionality returns the status code or message and displays the updated status of the connected system. The last password change time stamp is populated to the user object after the user’s password change. This functionality is available in NMAS 3.1.3 and higher. Image Per Row The number of application images to display per row in the Identity Self-Service Password Sync Status page. Individual Application Timeout (milliseconds) The amount of time that the Password Sync Status process waits for a response for each connected application’s status before checking for the next one. All Application Timeout (milliseconds) This value indicates the amount of time allowed for the entire password sync status process (of all connected systems) to complete. Before this timeout is reached, the password sync process continues to poll until all status values are updated or this timeout is reached. When the timeout status is reached, the system displays an error message to the user that indicates that a timeout condition has been reached. Process Count The number of times each connected system is checked for the password sync status. Pass Phrase If the DirXML-PasswordSyncStatus contains a password hash, then the value entered in this field is compared to that value. If they are not equal, the User Application displays an invalid hash message. Application Image Size Limit (bytes) Lets you set the maximum size (in bytes) of the application image that can be uploaded. You specify this image in the Application Image setting described in Table 5-14. Application Configuration 199 Configuration Setting Description Show Password Sync Status After Password Change If this field is set to true, after the user changes a password, the interface presents the Password Sync Status screen. If this field is set to false, the Password Sync Status screen is not displayed after a password change. The password Sync Status Application Settings are described in Table 5-14. Table 5-14 Password Sync Status Application Settings Configuration Setting Description Password Synchronization Application Name The name used to describe the connected application. You can enter the application name in multiple locales. To add a language (locale): 1. Click Add Language (+). 2. Type the Application Name for the desired localized languages in the appropriate field. 3. Click Save. If you do not specify localized application names, the value specified in the Password Synchronization Application Name is used. Application DirXML-PasswordSyncStatus GUID You can get the driver GUID by browsing the attributes on the driver object in one of two ways: Click the browse button next to this field. This browse button obtains only GUIDs of drivers in the current driverset that the User Application driver resides in. Use iManager to browse for the driver (use the General - Other tab, used when modifying the object) and manually copy and paste the GUID into this field. Application Image The name of the connected application Image to upload. The Application Image size can be configured from the Application Image Size Limit field in the Password Sync Status Client Settings section. Supported file types are .bmp, .jpeg, .jpg, .gif, and .png. Application Filter Optional. Specify an LDAP filter that allows or prohibits users’ viewing the application name on their Check Password Synchronization pages. You can use any standard LDAP filter. 200 Identity Manager Roles Based Provisioning Module 3.7 User Application: Administration Guide Configuration Setting Description Dependent Driver Optional. Specify any additional driver this application depends on. If any driver in the dependent driver chain is not visible to the user, the driver specified by Application DirXML-PasswordSyncStatus GUID is also not visible to the user. If any driver in the dependent driver chain fails to check password sync status, the driver specified by Application DirXML-PasswordSyncStatus GUID also fails to check password sync status. You can get the driver GUID by browsing the attributes on the driver object in one of two ways: Use the object selector button beside the Dependent Driver field. This method saves the application driver's fully distinguished name (FDN). When a user checks password sync status, this FDN is compared to the value of the FDN field in the DirXML-Associations attribute of the user object. If the two FDNs do not match, this application is not visible to the user. If there is a match, and if the DirXML-Associations attribute's driver status field is not 0 and the driver data field is not null, this application is visible to the user. Manually enter the GUID for the dependent driver. Use this method when this application driver is not from the current driverset that the User Application driver resides in. This method does not save an FDN. When a user checks password sync status, FDNs are not compared, and this dependent driver is visible to the user unless you apply an Application Filter that excludes the user. 5.3.6 Configuring Password Hint Change This self-service page lets users set up or change their password hints, which can be displayed or emailed as a clue in forgotten password situations. Application Configuration 201 Figure 5-9 Define Password Hint Sample Requirements The Password Hint Change requirements are listed in Table 5-15. Table 5-15 Password Hint Change Requirements Topic Requirements Universal Password Does not require Universal Password to be enabled. Using the Password Hint Change Page To use the Password Hint Change page, you need to know about the following: “How Password Hint Change Is Used During Login” on page 202 “Using Password Hint Change in the User Application” on page 202 How Password Hint Change Is Used During Login During the login process, the Login page automatically redirects to the Password Hint Change page whenever users need to set up their password hints. For example, the first time a user attempts to log in to the application after an administrator assigns the user to a password policy in iManager, the password policy has forgotten password enabled and has the action set to Email hint to user or Show hint on page. Using Password Hint Change in the User Application By default, the User Application provides users with self-service for changing a password hint. 5.3.7 Configuring Change Password This self-service page lets users change (reset) their Universal Passwords, according to the assigned password policy. It uses that policy to display the rules that the new password must conform to. If Universal Password is not enabled, this page changes the user’s eDirectory (simple) password, as permitted in the user's Password Restrictions. 202 Identity Manager Roles Based Provisioning Module 3.7 User Application: Administration Guide Figure 5-10 Change Password There are no Password Change configuration settings. Requirements The Change Password page requirements are listed in Table 5-16. Table 5-16 Change Password Requirements Topic Requirements Directory Abstraction Layer configuration No directory abstraction layer configuration is required for this page. Password policy This page does not require a password policy, unless you want to use advanced password rules (with Universal Password enabled). Universal Password To use this page for a Universal Password, the setting Allow user to initiate password change must be enabled in the Advanced Password Rules of the user's assigned password policy. To use this page for an eDirectory (simple) password, the setting Allow user to change password must be enabled in the user’s Password Restrictions. Using the Change Password Page To use the Change Password page, you need to know about the following: “How Change Password Is Used During Login” on page 204 “Using Change Password in the User Application” on page 204 Application Configuration 203 How Change Password Is Used During Login During the login process, the Login page automatically redirects to the Change Password page whenever the user needs to reset an invalid password. For example, the first time a user attempts to log in to an application after an administrator implements a password policy that requires users to reset their passwords. The Forgot Password page also redirects to Change Password automatically if the user’s assigned password policy specifies reset password as the action for forgotten password situations. Using Change Password in the User Application By default, the User Application provides users with the password change self-service using the Change Password page. 5.4 Web Services This section describes how to access basic information about the SOAP endpoints for the User Application. This information includes the WSDL document, remote interface, and type mappings for each endpoint. Topics include: Section 5.4.1, “Directory Layer Service,” on page 204 Section 5.4.2, “Metrics Service,” on page 205 Section 5.4.3, “Notification Service,” on page 205 Section 5.4.4, “Provisioning Service,” on page 206 Section 5.4.5, “Role Service,” on page 206 5.4.1 Directory Layer Service To access information about the Directory Layer Service: 1 Select the Application Configuration tab. 2 Select Web Services from the left navigation menu. 3 Select Directory Layer Service. The user interface displays the Directory Layer Service page. 204 Identity Manager Roles Based Provisioning Module 3.7 User Application: Administration Guide For more information about the Directory Layer Service, see Chapter 21, “Directory Abstraction Layer (VDX) Web Service,” on page 545. 5.4.2 Metrics Service To access information about the Metrics Service: 1 Select the Application Configuration tab. 2 Select Web Services from the left navigation menu. 3 Select Metrics Service. The user interface displays the Metrics Service page. For more information about the Metrics Service, see Chapter 19, “Metrics Web Service,” on page 517. 5.4.3 Notification Service To access information about the Notification Service: 1 Select the Application Configuration tab. 2 Select Web Services from the left navigation menu. 3 Select Notification Service. The user interface displays the Notification Service page. For more information about the Notification Service, see Chapter 20, “Notification Web Service,” on page 535. Application Configuration 205 5.4.4 Provisioning Service To access information about the Provisioning Service: 1 Select the Application Configuration tab. 2 Select Web Services from the left navigation menu. 3 Select Provisioning Service. The user interface displays the Provisioning Service page. For more information about the Provisioning Service, see Chapter 18, “Provisioning Web Service,” on page 447. 5.4.5 Role Service To access information about the Role Service: 1 Select the Application Configuration tab. 2 Select Web Services from the left navigation menu. 3 Select Role Service. The user interface displays the Role Service page. For more information about the Role Service, see Chapter 22, “Role Web Service,” on page 569. 206 Identity Manager Roles Based Provisioning Module 3.7 User Application: Administration Guide Page Administration 6 This section describes how to use the Page Admin page on the Administration of the Identity Manager user interface. Topics include: Section 6.1, “About Page Administration,” on page 207 Section 6.2, “Creating and Maintaining Container Pages,” on page 215 Section 6.3, “Creating and Maintaining Shared Pages,” on page 224 Section 6.4, “Assigning Permissions for Pages,” on page 232 Section 6.5, “Setting Default Pages for Groups,” on page 237 Section 6.6, “Selecting a Default Shared Page for a Container Page,” on page 239 For more general information about accessing and working with the Administration tab, see Chapter 4, “Using the Administration Tab,” on page 131. 6.1 About Page Administration You use the Page Admin page to control the pages displayed in the Identity Manager user interface and who has permission to access them. The user interface includes two types of pages. Table 6-1 Page Types Type of Page Description Container Container pages wrap shared pages with a consistent look and feel, corporate branding, and navigation approach. Shared Shared pages provide a coherent set of content that is used for a specific purpose (such as updating a user’s profile). They are called shared pages because they offer services used by multiple people. Both page types include content in the form of portlets (a Java standard for pluggable user-interface elements). To learn more about portlets, see Chapter 7, “Portlet Administration,” on page 241 and Part IV, “Portlet Reference,” on page 295. 6.1.1 About Container Pages This section introduces you to some container pages that play an important role in the Identity Manager user interface: “GuestContainerPage” on page 208 “DefaultContainerPage” on page 210 “Admin Container Page” on page 212 Page Administration 207 Keep in mind that you can modify these container pages if necessary. You also have the option of adding your own container pages. To learn about working with container pages, see Section 6.2, “Creating and Maintaining Container Pages,” on page 215. GuestContainerPage By default, when users arrive at the Identity Manager user interface prior to logging in, they see the container page named GuestContainerPage shown in Figure 6-1. Figure 6-1 Default Guest Container Page Internally, GuestContainerPage has the following layout: 208 Identity Manager Roles Based Provisioning Module 3.7 User Application: Administration Guide 6 Figure 6-2 GuestContainerPage Layout The GuestContainerPage layout is divided into three regions, which display the following portlets: Table 6-2 Layout Regions Portlet Description HeaderPortlet Displays the header information and top-level controls for the user interface Shared Page Navigation Displays a vertical menu from which the user can select a shared page to display Portal Page Controller Displays the shared page that the user has currently selected via the Shared Page Navigation portlet By default, users see only the following in those portlets prior to logging in: A single link in the header: Login A single shared page: Welcome Because the user has not logged in yet, the Shared Page Navigation portlet shows only shared pages that are in the Guest Pages category; it filters out all other categories. By default, Welcome is the only page in the Guest Pages category. Page Administration 209 After login, the Shared Page Navigation portlet filters out the Guest Pages category. Instead, it shows other categories of shared pages (as specified in its preferences). For more information on the Shared Page Navigation portlet, see Chapter 9, “About Portlets,” on page 297. DefaultContainerPage By default, after users log in to the Identity Manager user interface, they go to the container page named DefaultContainerPage shown in Figure 6-3. Figure 6-3 Default Container Page Internally, DefaultContainerPage has the layout shown in Figure 6-4. 210 Identity Manager Roles Based Provisioning Module 3.7 User Application: Administration Guide Figure 6-4 Default Container Page Layout The DefaultContainerPage layout is divided into three regions, which display the portlets described in Table 6-3. Table 6-3 Default Container Page Portlets Portlet Description HeaderPortlet Displays the header information and top-level controls for the user interface Shared Page Navigation Displays a vertical menu from which the user can select a shared page to display Portal Page Controller Displays the shared page that the user has currently selected via the Shared Page Navigation portlet Session Timeout Warning Displays an alert message whenever a user’s session is about to time out After user login, DefaultContainerPage automatically opens the Identity Self-Service in HeaderPortlet. Page Administration 211 Admin Container Page By default, when User Application Administrators (and other authorized users) click the Administration tab of the Identity Manager user interface, they go to the container page named Admin Container Page, which displays as shown in Figure 6-5. Figure 6-5 Default Admin Container Page Internally, Admin Container Page has the layout shown in Figure 6-6. 212 Identity Manager Roles Based Provisioning Module 3.7 User Application: Administration Guide Figure 6-6 Admin Container Page Layout The Admin Container Page layout is divided into two regions, which display the portlets described in Table 6-4. Table 6-4 Default Admin Container Page Portlets Portlet Description HeaderPortlet Displays the header information and top-level controls for the user interface Admin List Display Displays a second level of tabs from which the user can select an administration action to perform Portal Page Controller Displays a shared page that corresponds to the currently selected by the user via the Admin List Display portlet Session Timeout Warning Displays an alert message whenever a user’s session is about to time out Page Administration 213 6.1.2 About Shared Pages The Identity Manager user interface includes many shared pages, which provide the major content within its container pages. You can modify these shared pages if necessary. You also have the option of adding your own shared pages. To learn about working with shared pages, see Section 6.3, “Creating and Maintaining Shared Pages,” on page 224. A Typical Shared Page As an example of one of these shared pages, Organization Chart is the default shared page that DefaultContainerPage displays after users log in to the Identity Manager user interface. It is shown in Figure 6-7. Figure 6-7 Sample Shared Page Internally, Organization Chart has the layout shown in Figure 6-8. 214 Identity Manager Roles Based Provisioning Module 3.7 User Application: Administration Guide Figure 6-8 Default Org Chart Layout The Organization Chart layout consists of just one region, which displays just one portlet (the Org Chart portlet). 6.1.3 An Exception to Page Usage In this section, you have seen how these top-level tabs of the Identity Manager user interface are based on pages: The Identity Self-Service uses the DefaultContainerPage The Administration uses the Admin Container Page However, the Work Dashboard is based on a different architecture and cannot be manipulated through Page Admin. 6.2 Creating and Maintaining Container Pages The process of creating and maintaining container pages involves the following steps: 1 Create a new container page or select an existing container page, as described in Section 6.2.1, “Creating Container Pages,” on page 216. Page Administration 215 2 Add content (in the form of portlets) to the page, as described in Section 6.2.2, “Adding Content to a Container Page,” on page 219. You can also delete content from the page, as described in Section 6.2.3, “Deleting Content from a Container Page,” on page 220. 3 Choose a portal layout, as described in Section 6.2.4, “Modifying the Layout of a Container Page,” on page 221. 4 Arrange the order and position of content on the selected layout, as described in Section 6.2.5, “Arranging Content on the Container Page,” on page 222. 5 Immediately display the new page by specifying the container page URL in your browser, as described in Section 6.2.6, “Displaying a Container Page,” on page 224. You can switch layouts for container pages without losing page contents. When you apply a new layout to a container page, portlets in the page are automatically displayed using the new layout. You might need to fine-tune the content placement in the new layout. 6.2.1 Creating Container Pages You can create container pages from scratch or by copying existing pages. This section describes both procedures. To create a container page from scratch: 1 On the Page Admin page, select Maintain Container Pages. The Maintain Container Pages panel displays: 216 Identity Manager Roles Based Provisioning Module 3.7 User Application: Administration Guide 2 Select the New page action (in the bottom left section of the panel). An untitled, uncategorized container page is created. 3 Specify the page properties of the container page: Page Administration 217 Property What to do Page Link Name (URI) Specify the URI name for the page (as it is to appear within the user interface URL). For example, if you specify the URI: MyContainerPage it appears within the URL like this: http://myappserver:8080/IDM/portal/cn/ MyContainerPage NOTE: The User Application does not support multibyte characters in the Page Link Name (URI) for a portal page. Multibyte characters are supported in the Page Name. Page Name Specify the display name for the page. For example: My Container Page Click Localize to specify localized versions of this name for other languages. Navigation Priority Specify one of the following: None if you don’t need to assign a priority to this container page. Set value to assign a priority to this container page, relative to other container pages. The priority must be an integer between 0 and 9999, where 0 is the lowest priority and 9999 is the highest. Setting priority values is useful if you want to ensure a particular order when pages are listed by priority, or if you want to ensure a particular selection when multiple default pages exist (in the case of a user who belongs to multiple groups). Default Shared Page See Section 6.6, “Selecting a Default Shared Page for a Container Page,” on page 239. Assign Categories Select zero or more of the following categories in which you want the page to belong: Administration General Assigning categories is useful if you want to ensure proper organization when pages are listed by category, or if you want to ensure an appropriate subset when pages are filtered by category. Description Type text that describes the page. 4 Click Save Page (at the bottom of the page properties section). 218 Identity Manager Roles Based Provisioning Module 3.7 User Application: Administration Guide To create a container page by copying an existing page: 1 On the Page Admin page, select Maintain Container Pages. The Maintain Container Pages panel displays (as shown in the previous procedure). 2 In the list of container pages, select the page you want to copy. If the list is long, you can refine it (by category or starting text) to more easily find the desired page. 3 Select the Copy page action (in the bottom left section of the panel). A new container page is created with the name Copy of OriginalPageName. 4 Specify the page properties of the container page (as described in the previous procedure). 5 Click Save Page (at the bottom of the page properties section). 6.2.2 Adding Content to a Container Page After you create a container page, the next step is to add content by selecting portlets to place on the page. You can use prebuilt portlets supplied with the Identity Manager User Application or other portlets you have registered. To add content to a container page: 1 Open a new or existing page on the Maintain Container Pages panel, then click the Select Content page task (at the bottom of the panel). The Content Selector displays in a new browser window: Page Administration 219 2 If you want to display a specific category of available content, select a category from the Filter list. 3 Select one or more portlets from the Available Content list. Hold down Control to select multiple non-contiguous portlets from the list; use Shift to make multiple contiguous selections. 4 Click Add to move your choices to the Selected Content list. 5 You can click Content Preferences to edit the preferences of any portlet you have selected for your container page. The preference values you specify take effect for the instance of the portlet that appears on your page. 6 Click Save Contents. Now that you have chosen the content for your container page, you can select a new layout as described in Section 6.2.4, “Modifying the Layout of a Container Page,” on page 221, or arrange the content on the current layout as described in Section 6.2.5, “Arranging Content on the Container Page,” on page 222. 6.2.3 Deleting Content from a Container Page In the process of creating container pages, you might want to delete content by removing portlets from a page. You can use the Content Selector or Layout Selector, as described in the following procedures. To delete content from a container page using the Content Selector: 1 Open a page on the Maintain Container Pages panel, then click the Select Content page task (at the bottom of the panel). The Content Selector displays in a new browser window as shown in Step 1 on page 219. 2 Select a portlet you want to delete from the Selected Content list and click Remove. The portlet is removed from the page. 3 Click Save Contents. To delete content from a container page using the Layout Selector: 1 Open a page on the Maintain Container Pages panel, then click the Arrange Content page task (at the bottom of the panel). The Layout Selector displays in a new browser window, showing the portlets on that page: 220 Identity Manager Roles Based Provisioning Module 3.7 User Application: Administration Guide 2 Click the X button for a portlet you want to remove. 3 When you’re prompted for confirmation, click OK. The portlet is removed from the page. 4 Click Save Layout. 6.2.4 Modifying the Layout of a Container Page When you modify the layout of a container page, existing content is shifted to accommodate the new layout. In some cases, you might need to fine-tune the end result. To modify the layout of a container page: 1 Open a page on the Maintain Container Pages panel, then click the Select Layout page task (at the bottom of the panel). The Portal Layouts list displays in a new browser window: Page Administration 221 2 Scroll through the choices and select the layout you want. 3 Click Select Layout. 6.2.5 Arranging Content on the Container Page After you have designated the content and layout for your container page, you can position the content in the selected layout, add other portlets in specific locations, or delete portlets. 1 Open a page on the Maintain Container Pages panel, then click the Arrange Content page task (at the bottom of the panel). The Layout Selector displays in a new browser window, showing the portlets on that page: 222 Identity Manager Roles Based Provisioning Module 3.7 User Application: Administration Guide 2 To add a portlet to the page: 2a Click Add Content in the desired layout frame. The Portlet Selector displays in a new browser window. 2b If you want to display a specific category of available content, select a category from the Filter drop-down list. 2c Select a portlet you want from the Available Content list. 2d Click Select Content. The Portlet Selector closes and the portlet you selected appears in the target layout frame of the Layout Selector. 3 If you want to move a portlet to a different location in the layout, follow these browser-specific steps: Browser Internet Explorer What to do 1. Move your cursor over the title bar of the portlet until the cursor changes to a hand shape. 2. Hold down the left mouse button and drag the portlet to the desired location in the layout. Mozilla 1. Click the portlet you want to move. 2. Click inside the destination layout frame. The portlet moves to the destination. Page Administration 223 4 If you want to remove a portlet from the layout, follow these steps: 4a Click the X button for the portlet you want to remove. 4b When you’re prompted for confirmation, click OK. The portlet is removed from the layout. 5 To edit the preferences of a portlet: 5a Click the pencil button for the portlet you want to edit. The portlet’s Content Preferences display in your browser. 5b Change preference values, as appropriate. The preference values you specify take effect for the instance of the portlet that appears on your page. 5c Click Save Preferences. 6 Click Save Layout to record your changes and close the Layout Selector. 6.2.6 Displaying a Container Page You can display your page by going to the container page URL in your browser. Specify the following URL in your web browser: http://server:port/IDM-war-context/portal/cn/container-page-name For example, to display the container page named MyContainerPage: http://myappserver:8080/IDM/portal/cn/MyContainerPage 6.3 Creating and Maintaining Shared Pages The process of creating and maintaining shared pages involves the following steps: 1 Create a new shared page or select an existing shared page, as described in Section 6.3.1, “Creating Shared Pages,” on page 225. 2 Add content (in the form of portlets) to the page, as described in Section 6.3.2, “Adding Content to a Shared Page,” on page 227. You might also want to delete content from the page, as described in Section 6.3.3, “Deleting Content from a Shared Page,” on page 229. 3 Choose a portal layout, as described in Section 6.3.4, “Modifying the Layout of a Shared Page,” on page 230. 4 Arrange the order and position of content on the selected layout, as described in Section 6.3.5, “Arranging Content on the Shared Page,” on page 230. 5 Display the new page by entering the shared page URL in your browser, as described in Section 6.3.6, “Displaying a Shared Page,” on page 232. 224 Identity Manager Roles Based Provisioning Module 3.7 User Application: Administration Guide Shared Pages and Layouts Shared pages are not tightly bound to portal layouts. That means you can switch layouts for shared pages without losing any page contents. When a new layout is applied, any portlets that have been added to the page are automatically displayed using the new layout. You might need to fine-tune the content placement in the new layout. 6.3.1 Creating Shared Pages You can create shared pages from scratch or by copying existing pages. This section describes both procedures. To create a shared page from scratch: 1 On the Page Admin page, select Maintain Shared Pages. The Maintain Shared Pages panel displays: 2 Select the New page action (in the bottom left section of the panel). An untitled, uncategorized shared page is created. 3 Specify the page properties of the shared page: Page Administration 225 Property What to do Page Link Name (URI) Specify the URI name for the page (as it is to appear within the user interface URL). For example, if you specify the URI: MySharedPage it appears within the URL like this: http://myappserver:8080/IDM/portal/cn/ MyContainerPage/MySharedPage NOTE: The User Application does not support multibyte characters in the Page Link Name (URI) for a portal page. Multibyte characters are supported in the Page Name. Page Name Specify the display name for the page. For example: My Shared Page You can click Localize to specify localized versions of this name for other languages. Navigation Priority Specify one of the following: None if you don’t need to assign a priority to this shared page. Set value to assign a priority to this shared page, relative to other shared pages. The priority must be an integer between 0 and 9999, where 0 is the highest priority and 9999 is the lowest. Setting priority values is useful if you want to ensure a particular order when pages are listed by priority, or if you want to ensure a particular selection when multiple default pages exist (in the case of a user who belongs to multiple groups). Parent Page If you want this shared page to be the child of another shared page, click Select Parent. Make sure that both the parent and child pages belong to the same categories (to prevent display problems). At runtime, the end user sees this relationship when using the Shared Page Navigation portlet. When displaying the list of shared pages, it shows children indented under their parents. Child pages do not inherit content, preferences, or settings from their parent pages. Conversely, parent pages do not automatically display the content of child pages along with their own content. 226 Identity Manager Roles Based Provisioning Module 3.7 User Application: Administration Guide Property What to do Assign Categories Select zero or more of the following categories in which you want the page to belong: Administration Directory Management General Guest Pages Information Management Password Management Assigning categories is useful if you want to ensure proper organization when pages are listed by category, or if you want to ensure an appropriate subset when pages are filtered by category. NOTE: Guest Pages is a special category used to identify shared pages that can be displayed prior to user login but not after. For more information, see the section on the Shared Page Navigation portlet in Chapter 9, “About Portlets,” on page 297. Description Type text that describes the page. 4 Click Save Page (at the bottom of the page properties section). To create a shared page by copying an existing page: 1 On the Page Admin page, select Maintain Shared Pages. The Maintain Shared Pages panel displays as shown in “To create a shared page from scratch:” on page 225. 2 In the list of shared pages, select the page you want to copy. If the list is long, you can refine it (by category or starting text) to more easily find the desired page. 3 Select the Copy page action (in the bottom-left section of the panel). A new shared page is created with the name Copy of OriginalPageName. 4 Specify the page properties of the shared page as described in “To create a shared page from scratch:” on page 225. 5 Click Save Page (at the bottom of the page properties section). 6.3.2 Adding Content to a Shared Page After you create a shared page, the next step is to add content by selecting portlets to place on the page. You can use prebuilt portlets supplied with the Identity Manager User Application or other portlets you have registered. 1 Open a new or existing page on the Maintain Shared Pages panel, then click the Select Content page task (at the bottom of the panel). The Content Selector displays in a new browser window: Page Administration 227 2 If you want to display a specific category of available content, select a category from the Filter drop-down list. 3 Select one or more portlets from the Available Content list. Hold down the Ctrl key to select multiple non-contiguous portlets from the list; use the Shift key to make multiple contiguous selections. 4 Click Add to move your choices to the Selected Content list. 5 You can click Content Preferences to edit the preferences of any portlet you have selected for your shared page. The preference values you specify take effect for the instance of the portlet that appears on your page. 6 Click Save Contents. Now that you have chosen the content for your shared page, you can select a new layout as described in Section 6.3.4, “Modifying the Layout of a Shared Page,” on page 230, or arrange the content on the current layout as described in Section 6.3.5, “Arranging Content on the Shared Page,” on page 230. 228 Identity Manager Roles Based Provisioning Module 3.7 User Application: Administration Guide 6.3.3 Deleting Content from a Shared Page In the process of creating shared pages, you might want to delete content by removing portlets from a page. You can use the Content Selector or Layout Selector, as described in the following procedures. 1 Open a page on the Maintain Shared Pages panel, then click the Select Content page task (at the bottom of the panel). The Content Selector displays in a new browser window as shown in Section 6.3.2, “Adding Content to a Shared Page,” on page 227. 2 Select a portlet you want to delete from the Selected Content list and click Remove. The portlet is removed from the page. 3 Click Save Contents. To delete content from a shared page by using the Layout Selector: 1 Open a page on the Maintain Shared Pages panel, then click the Arrange Content page task (at the bottom of the panel). The Layout Selector displays in a new browser window, showing the portlets on that page: 2 Click the X button for a portlet you want to remove. 3 When you’re prompted for confirmation, click OK. Page Administration 229 The portlet is removed from the page. 4 Click Save Layout. 6.3.4 Modifying the Layout of a Shared Page When you modify the layout of a shared page, existing content is shifted to accommodate the new layout. In some cases, you might need to fine-tune the end result. To modify the layout of a shared page: 1 Open a page on the Maintain Shared Pages panel, then click the Select Layout page task (at the bottom of the panel). The Portal Layouts list displays in a new browser window: 2 Scroll through the choices and select the layout you want. 3 Click Select Layout. 6.3.5 Arranging Content on the Shared Page After you have designated the content and layout for your shared page, you can position the content in the selected layout, add other portlets in specific locations, or delete portlets. 230 Identity Manager Roles Based Provisioning Module 3.7 User Application: Administration Guide To arrange content on a shared page: 1 Open a page on the Maintain Shared Pages panel, then click the Arrange Content page task (at the bottom of the panel). The Layout Selector displays in a new browser window, showing the portlets on that page: 2 If you want to add a portlet to the page: 2a Click Add Content in the desired layout frame. The Portlet Selector displays in a new browser window. 2b If you want to display a specific category of available content, select a category from the Filter drop-down list. 2c Select a portlet you want from the Available Content list. 2d Click Select Content. The Portlet Selector closes and the portlet you selected appears in the target layout frame of the Layout Selector. 3 If you want to move a portlet to a different location in the layout, follow these browser-specific steps: Page Administration 231 Browser What to do Internet Explorer 1. Move your cursor over the title bar of the portlet until the cursor changes to a hand shape. 2. Hold down the left mouse button and drag the portlet to the desired location in the layout. Mozilla Firefox 1. Click the portlet you want to move. 2. Click inside the destination layout frame. The portlet moves to the destination. 4 If you want to remove a portlet from the layout: 4a Click the X button for the portlet you want to remove. 4b When you’re prompted for confirmation, click OK. The portlet is removed from the layout. 5 If you want to edit the preferences of a portlet: 5a Click the pencil button for the portlet you want to edit. The portlet’s Content Preferences display in your browser. 5b Change preference values, as appropriate. The preference values you specify take effect for the instance of the portlet that appears on your page. 5c Click Save Preferences. 6 Click Save Layout to record your changes and close the Layout Selector. 6.3.6 Displaying a Shared Page To display your shared page, go to this URL in your Web browser: http://server:port/IDM-war-context/portal/pg/shared-page-name For example, to display the shared page named MySharedPage: http://myappserver:8080/IDM/portal/pg/MySharedPage 6.4 Assigning Permissions for Pages You can assign permission to other users, groups, and containers to work with specific container pages and shared pages. Two security levels of permission can be assigned. Table 6-5 Page Permissions Permission Description Can be assigned for View Allows a user, group, or container to access Container pages and shared pages the page and see it in a list of available pages 232 Identity Manager Roles Based Provisioning Module 3.7 User Application: Administration Guide Permission Description Can be assigned for Ownership Allows a user, group, or container to modify the content and layout of the page, and to assign View and Ownership permission to other users, groups, and containers Shared pages 6.4.1 Assigning Page View Permission When you assign users View permission for a container page or shared page, they can access the page and see it in a list of available pages. To assign View permission for container pages or shared pages: 1 Open a page on the Maintain Container Pages panel or the Maintain Shared Pages panel, then click the Assign Permissions page task (at the bottom of the panel). The Page Permissions dialog box displays in a new browser window: 2 Go to the View tab. 3 Specify values for the following search settings: Page Administration 233 Setting What to do Search for Select one of the following from the drop-down menu: Users Groups Containers Starts with If you want to: Find all available objects of your specified type (user, group, or container), then make this setting blank. Find a subset of those objects, then enter the starting characters of the CN values you want. (Case is not considered. Wildcards are not supported.) For example, searching for groups that start with S would narrow your search results to something like this: cn=Sales,ou=groups,o=MyOrg cn=Service,ou=groups,o=MyOrg cn=Shipping,ou=groups,o=MyOrg Searching for groups that start with Se would return: cn=Service,ou=groups,o=MyOrg 4 Click Go. The results of your search appear in the Results list. 5 Select the users, groups, or containers you want to assign to the page, then click the Add (>) button. Hold down the Ctrl key to make multiple selections. 6 Enable or disable page lock-down as follows: If you want to Do this Lock down the page so only User Application Administrators can view it Select View Permission Set to Admin Only Allow all assigned users, groups, and containers Deselect View Permission Set to Admin Only to view the page NOTE: If you deselect this setting but there are no users, groups, or containers explicitly assigned to the page, then everyone has View permission for this page. 7 Click Save, then click Close. 6.4.2 Assigning Shared Page Owners Users who own shared pages can modify the content of the pages they own and change the preferences of portlets on those pages. 234 Identity Manager Roles Based Provisioning Module 3.7 User Application: Administration Guide To assign Ownership permission for shared pages: 1 Open a page on the Maintain Shared Pages panel, then click the Assign Permissions page task (at the bottom of the panel). The Page Permissions dialog box displays in a new browser window as shown in Step 1 on page 233. 2 Go to the Ownership tab. 3 Specify values for the following search settings: Setting What to do Search for Select one of the following from the drop-down menu: Users Groups Containers Starts with If you want to: Find all available objects of your specified type (user, group, or container), then make this setting blank. Find a subset of those objects, then enter the starting characters of the CN values you want. (Case is not considered. Wildcards are not supported.) For example, searching for groups that start with S would narrow your search results to something like this: cn=Sales,ou=groups,o=MyOrg cn=Service,ou=groups,o=MyOrg cn=Shipping,ou=groups,o=MyOrg Searching for groups that start with Se would return: cn=Service,ou=groups,o=MyOrg 4 Click Go. The results of your search appear in the Results list. 5 Select the users, groups, or containers you want to assign to the page, then click the Add (>) button. Hold down the Ctrl key to make multiple selections. 6 Enable or disable page lock-down as follows: Page Administration 235 If you want to Do this Lock down the page so only User Application Administrators can work with it Select Ownership Permission Set to Admin Only Allow all assigned users, groups, and containers Deselect Ownership Permission Set to Admin to work with the page Only NOTE: If you deselect this setting but there are no users, groups, or containers explicitly assigned to the page, then everyone has Ownership permission for this page. 7 Click Save, then click Close. 6.4.3 Enabling User Access to the Create User or Group Page By default, only User Application Administrators can see and use the Create User or Group page, which is a shared page on the Identity Self-Service of the Identity Manager user interface. But, where appropriate, a User Application Administrator can assign permission for one or more end users to access that page. For instance, selected people in administration or management positions might need the ability to create users, groups, or task groups. To give users access to the Create User or Group page: 1 On the Maintain Shared Pages panel, open the page named Create User or Group. 2 Use the Assign Permissions page task to give View permission to the appropriate users, groups, or containers for the Create User or Group shared page. 3 Switch from Page Admin to Portlet Admin, and open the CreatePortlet portlet registration (which is used on the Create User or Group page). 4 Use the Security panel to give List and Execute permissions to the appropriate users, groups, or containers for the CreatePortlet portlet registration. For more information about assigning permissions for portlets, see Chapter 7, “Portlet Administration,” on page 241. 5 Go to iManager and use an administrator account to log in to the tree for your Identity Vault. 6 Make sure that the people who will be using Create User or Group have Create rights for the [Entry Rights] property on the containers in which objects (users, groups, or task groups) will be created. For example, you can modify trustees for a chosen container and add the appropriate users, groups, or containers as trustees. Then, for each trustee, you can assign the following rights: Property name [All Attributes Rights] Assigned rights Compare Inherit Yes (select this check box) Read Write 236 Identity Manager Roles Based Provisioning Module 3.7 User Application: Administration Guide Property name Assigned rights [Entry Rights] Browse Inherit Yes (select this check box) Create If you don’t assign the necessary rights in the Identity Vault (or if those rights can’t somehow be derived), an end user might get an error message such as this one from Create User or Group: User 'cn=mmackenzie,ou=users,ou=idmsample,o=novell' does not have permission to create 'cn=MyNewGroup,ou=groups,ou=idmsample,o=novell' or modify related objects. To learn how the Create User or Group page is used (by those with access to it), see the Identity Manager User Application: User Guide. 6.4.4 Enabling User Access to Individual Administration Pages By default, only User Application Administrators can access the Administration tab of the Identity Manager user interface and the pages contained on that (Application Configuration, Page Admin, Portlet Admin, Provisioning, Security). But if necessary, a User Application Administrator can assign permission for one or more end users to see and use specific pages on the Administration tab. For example, a small group of users might need to change themes periodically, even though they are not User Application Administrators. To give users access to individual Administration pages: 1 On the Maintain Container Pages panel, open Admin Container Page. This is the container page that’s used when you go to the Administration of the Identity Manager user interface. 2 Use the Assign Permissions page task to give View permission to the appropriate users, groups, or containers for Admin Container Page. 3 On the Maintain Shared Pages panel, open the appropriate Administration page (one of the shared pages under the category Administration). 4 Use the Assign Permissions page task to give View and Ownership permissions to the appropriate users, groups, or containers for that shared page. 5 Make sure the specified users, groups, or containers have Execute permission for each portlet used on a specified page (if you have restricted those portlets). For more information about assigning permissions for portlets, see Chapter 7, “Portlet Administration,” on page 241. 6.5 Setting Default Pages for Groups You can assign a default container page and a default shared page for any authorized group of users. These settings affect the container page those users see when they log in and the shared page they see on the container page. Page Administration 237 When users belong to multiple groups with default page assignments, Navigation Priority is used in determining which container page and shared page to display. To assign a default container page or a default shared page to a group: 1 Open a page on the Maintain Container Pages panel or the Maintain Shared Pages panel, then click the Set As Default page task (at the bottom of the panel). The Page Defaults dialog box displays in a new browser window: 2 Specify values for the following search settings: Setting What to do Search for Groups is automatically selected. 238 Identity Manager Roles Based Provisioning Module 3.7 User Application: Administration Guide Setting What to do Starts with If you want to: Find all available groups, then make this setting blank. Find a subset of those groups, then enter the starting characters of the CN values you want. (Case is not considered. Wildcards are not supported.) For example, searching for groups that start with S would narrow your search results to something like this: cn=Sales,ou=groups,o=MyOrg cn=Service,ou=groups,o=MyOrg cn=Shipping,ou=groups,o=MyOrg Searching for groups that start with Se would return: cn=Service,ou=groups,o=MyOrg 3 Click Go. The results of your search appear in the Results list. 4 Select the groups for whom this page is to be a default, then click the Add (>) button. Hold down the Ctrl key to make multiple selections. 5 Click Save, then click Close. 6.6 Selecting a Default Shared Page for a Container Page You can assign a default shared page to each container page you have. The user interface considers this page assignment when determining what to display. 1 Open a container page on the Maintain Container Pages panel. 2 In the page properties section, look for Default Shared Page and click Select Default. The Choose a Default Shared Page dialog box displays in a new browser window: Page Administration 239 3 If the shared page list is long, you can refine it by category or starting text to more easily find the desired page. 4 Select a shared page to use as the default for the container page or select None for no default. 5 Click Save to accept your selection and close the dialog. 6 Click Save Page (at the bottom of the page properties section). 240 Identity Manager Roles Based Provisioning Module 3.7 User Application: Administration Guide Portlet Administration 7 This section describes how to use the Portlet Admin page on the Administration of the Identity Manager user interface. Topics include: Section 7.1, “About Portlet Administration,” on page 241 Section 7.2, “Administering Portlet Definitions,” on page 241 Section 7.3, “Administering Registered Portlets,” on page 245 For more general information about accessing and working with the Administration tab, see Chapter 4, “Using the Administration Tab,” on page 131. 7.1 About Portlet Administration You can use the Portlet Admin page to control the portlets available in the Identity Manager user interface and who has permission to access them. Portlets are pluggable user-interface elements (based on a Java standard) that provide the content for pages in the user interface, including container pages and shared pages. Table 7-1 describes how to manage portlets. Table 7-1 Managing Portlets What you work with Description Portlet definitions Descriptors (read from portlet.xml) that specify portlet configuration parameters. There is one definition for each portlet in an application. See Section 7.2, “Administering Portlet Definitions,” on page 241. Portlet registrations Registrations of portlets, based on their definitions. Multiple registrations of the same portlet can exist in a single portlet application. See Section 7.3, “Administering Registered Portlets,” on page 245. For details on the portlets provided with the Identity Manager user interface, see Part IV, “Portlet Reference,” on page 295. To learn about using portlets on container pages and shared pages, see Chapter 6, “Page Administration,” on page 207. 7.2 Administering Portlet Definitions The Portlet Admin page enables you to perform the following tasks related to portlet definitions in a portlet application: Section 7.2.1, “Accessing Portlet Definitions in the Deployed Portlet Application,” on page 242 Section 7.2.2, “Registering Portlet Definitions,” on page 242 Section 7.2.3, “Viewing Information About Portlet Definitions,” on page 243 Portlet Administration 241 7.2.1 Accessing Portlet Definitions in the Deployed Portlet Application The Portlet Applications list shows the portlet definitions in a selected portlet application. In the Portlet Applications list, expand the portlet application whose portlet definitions you want to access. The tree displays all of the portlet definitions under that portlet application: 7.2.2 Registering Portlet Definitions Before you can use a portlet, you must register that portlet definition with the portal (Identity Manager User Application). A registered portlet definition is called a portlet registration. You can create multiple registrations for a single portlet, which enables you to put multiple instances of that portlet on the same page. The portlet registration inherits all the preferences and settings of the portlet class, but you can modify these values in the following ways: When registering the portlet definition. See Section 7.3, “Administering Registered Portlets,” on page 245 When adding an instance of the portlet to a page. See Chapter 6, “Page Administration,” on page 207 All portlets that ship with the Identity Manager User Application are automatically registered. If the portlet definition provides an Edit mode, the end user can modify specific preferences of the portlet registration at runtime, according to the logic of the portlet’s doEdit() method. The Identity Manager User Application also provides a default implementation for Edit mode. If the doEdit() method is not explicitly implemented, a default preference sheet is displayed. 242 Identity Manager Roles Based Provisioning Module 3.7 User Application: Administration Guide To register a portlet definition: 1 In the Portlet Applications list, select the portlet definition for which you want to create a portlet registration. A General panel displays on the right: All existing registrations of the selected portlet are listed in the Portlet Applications tree (on the left), under the corresponding portlet definition name. 2 In the Register New Portlet Instance text box, specify a unique name for the portlet registration, then click Register. The new portlet registration is created and listed in the Portlet Applications tree. 3 If you want to modify the preferences and settings of the new portlet registration, see Section 7.3, “Administering Registered Portlets,” on page 245. 7.2.3 Viewing Information About Portlet Definitions You can view the following read-only information about a listed portlet definition: Display name Class name Portlet title Type of execution (synchronous or asynchronous) Portlet Administration 243 Short title Type of registration Style name Cache expiration time Description Initialization parameters Keywords Supported mime types Modes supported by the portlet Supported locales Supported devices Security roles To view information about portlet definitions: 1 In the Portlet Applications list, select the portlet definition that you want to learn about. A General panel displays on the right, showing information about the selected portlet definition: 244 Identity Manager Roles Based Provisioning Module 3.7 User Application: Administration Guide 2 Go to the Additional Information panel to view further details about the selected portlet definition: 7 7.3 Administering Registered Portlets The Portlet Admin page enables you to perform the following tasks related to portlet registrations in a portlet application: Section 7.3.1, “Accessing Portlet Registrations in the Deployed Portlet Application,” on page 246 Section 7.3.2, “Viewing Information about Portlet Registrations,” on page 247 Section 7.3.3, “Assigning Categories to Portlet Registrations,” on page 248 Section 7.3.4, “Modifying Settings for Portlet Registrations,” on page 249 Section 7.3.5, “Modifying Preferences for Portlet Registrations,” on page 250 Section 7.3.6, “Assigning Security Permissions for Portlet Registrations,” on page 252 Section 7.3.7, “Unregistering a Portlet,” on page 254 Portlet Administration 245 7.3.1 Accessing Portlet Registrations in the Deployed Portlet Application The Portlet Applications list shows the portlet registrations for each portlet definition in a selected portlet application. To access portlet registrations in the deployed portlet application: 1 In the Portlet Applications list, expand the portlet application whose portlet definitions and registrations you want to access. The tree displays all of the portlet definitions under that portlet application: 2 Expand the portlet definition whose portlet registrations you want to access. The tree displays all of the portlet registrations under that portlet definition: 246 Identity Manager Roles Based Provisioning Module 3.7 User Application: Administration Guide 7.3.2 Viewing Information about Portlet Registrations You can view the following read-only information about a listed portlet registration: Display name Type of registration Portlet title Type of execution (synchronous or asynchronous) Class name Description In the Portlet Applications list, select the portlet registration that you want to learn about. A General panel displays on the right, showing information about the selected portlet registration as shown in Figure 7-1. Figure 7-1 Portlet Registration: General Properties Portlet Administration 247 7.3.3 Assigning Categories to Portlet Registrations To facilitate searching for specific portlets in a portlet application, you can organize portlet registrations by category. 1 In the Portlet Applications list, select the portlet registration that you want to categorize. A General panel displays on the right. 2 Go to the Categories panel. This panel displays lists of available and assigned categories for the selected portlet registration: 3 Update the Assigned Categories list, as appropriate: 248 Identity Manager Roles Based Provisioning Module 3.7 User Application: Administration Guide If you want to Do this Assign one or more categories to the portlet registration Select each category you want to assign and click > Assign all categories to the portlet registration Click >> Remove one or more category assignments Select each category you want to remove and click < Remove all category assignments Click << 4 Click Save Categories. 7.3.4 Modifying Settings for Portlet Registrations Portlet settings define how the portal (Identity Manager User Application) interacts with individual portlets. Each portlet is configured with these settings: Title Maximum timeout Requires authentication Display title bar Hidden from user Options defined in the portlet application Standard Java Portlet 1.0 settings are defined in the portlet deployment descriptor (portlet.xml) of the portlet application WAR. You can change the values of these settings on a registration-byregistration basis by using the Portlet Admin page. In this case, the new values take effect only for the selected portlet registration. To modify portlet registration settings: 1 In the Portlet Applications list, select the portlet registration whose settings you want to modify. A General panel displays on the right. 2 Go to the Settings panel. This panel displays the current settings for the selected portlet registration: Portlet Administration 249 3 Modify settings, as appropriate. While working on this panel, you can also perform the following actions: If you want to Do this Discard your unsaved changes Click Cancel Return all settings for this portlet registration to their Click Reset All default values (as defined in the corresponding portlet definition) Return an individual setting to its default value Click the Reset link beside that setting 4 Click Save Settings. 7.3.5 Modifying Preferences for Portlet Registrations Portlet preferences are defined by the portlet developer at design time in the portlet deployment descriptor. Preferences vary from portlet to portlet, based on the portlet developer’s implementation. 250 Identity Manager Roles Based Provisioning Module 3.7 User Application: Administration Guide You can change the values of these preferences on a registration-by-registration basis by using the Portlet Admin page. In this case, the new values take effect only for the selected portlet registration. To modify portlet registration preferences: 1 In the Portlet Applications list, select the portlet registration whose preferences you want to modify. A General panel displays on the right. 2 Go to the Preferences panel. This panel displays the current preferences for the selected portlet registration: 3 Modify preferences, as appropriate. While working on this panel, you can also perform the following actions: If you want to Do this Display more information about the preferences Click Descriptions Discard your unsaved changes Click Cancel Return all preferences for this portlet registration to their default values (as defined in the corresponding portlet definition) Click Reset All Return an individual preference to its default value Click the Reset link next to that preference 4 To modify the localized version of a preference for each locale specified in the portlet definition: 4a Click the Detail link beside that preference (if available). Portlet Administration 251 The panel displays the preference values for each locale. 4b Modify values, as appropriate. 4c Click OK to apply your changes and return to the main preferences list. 5 Click Save Preferences. 7.3.6 Assigning Security Permissions for Portlet Registrations You can assign the security permissions described in Table 7-2 to users, groups, and containers for portlet registrations. Table 7-2 Security Permissions for Portlet Registrations Permission Description List Users can view the portlet registration from a selection list Execute Users can run the portlet registration on a portal page When you modify security permissions, the new values take effect only for the selected portlet registration. To assign security permissions for portlet registrations: 1 In the Portlet Applications list, select the portlet registration whose security permissions you want to modify. A General panel displays on the right. 2 Go to the Security panel. This panel displays the current security permissions for the selected portlet registration: 252 Identity Manager Roles Based Provisioning Module 3.7 User Application: Administration Guide 3 Go to the List or Execute tab, depending on which type of permission you want to assign. 4 Specify values for the following search settings: Setting What to do Search for Select one of the following from the drop-down menu: Users Groups Containers Portlet Administration 253 Setting What to do Starts with If you want to: Find all available objects of your specified type (user, group, or container), then make this setting blank. Find a subset of those objects, then enter the starting characters of the CN values you want. (Case is not considered. Wildcards are not supported.) For example, searching for groups that start with S would narrow your search results to something like this: cn=Sales,ou=groups,o=MyOrg cn=Service,ou=groups,o=MyOrg cn=Shipping,ou=groups,o=MyOrg Searching for groups that start with Se would return: cn=Service,ou=groups,o=MyOrg 5 Click Go. The results of your search appear in the Results list. 6 Select the users, groups, or containers you want to assign to the portlet registration, then click the Add (>) button. Hold down the Ctrl key to make multiple selections. 7 Enable or disable lock-down for the portlet registration as follows: If you want to Do this Lock down the portlet registration so only User Application Administrators can list/execute it Select List/Execute Permission Set to Admin Only Allow all assigned users, groups, and containers Deselect List/Execute Permission Set to Admin to list/execute the portlet registration Only NOTE: If you deselect this setting but there are no users, groups, or containers explicitly assigned to the portlet registration, then everyone has List/Execute permission for this portlet registration. 8 Click Save. 7.3.7 Unregistering a Portlet You can use the Portlet Admin page to unregister a portlet if necessary. NOTE: If you unregister a portlet that is defined as auto-registered, that portlet is registered again automatically when you restart your application server. To unregister a portlet: 1 In the Portlet Applications list, select the portlet registration that you want to unregister. 254 Identity Manager Roles Based Provisioning Module 3.7 User Application: Administration Guide A General panel displays on the right, showing information about the selected portlet registration: 2 Click Unregister Portlet. 3 When you are prompted to confirm the unregister operation, click OK. Portlet Administration 255 256 Identity Manager Roles Based Provisioning Module 3.7 User Application: Administration Guide RBPM Provisioning and Security Configuration 8 This section describes the tasks that you can perform from the RBPM Provisioning and Security page. Topics include: Section 8.1, “About RBPM Provisioning and Security Configuration,” on page 257 Section 8.2, “Provisioning Configuration,” on page 258 Section 8.3, “Administrator Assignments,” on page 269 Section 8.4, “Team Configuration,” on page 281 Section 8.5, “Navigation Access Permissions,” on page 290 8.1 About RBPM Provisioning and Security Configuration The Administration tab now provides a new RBPM Provisioning and Security tab, which replaces the Provisioning and the Security tab. This incorporates left navigation options that were previously available on the Provisioning and the Security tab. In addition, it includes several new left navigation options that give administrators the ability to assign security permissions in accordance with the new consolidated security model. The RBPM Provisioning and Security looks like this: Figure 8-1 RBPM Provisioning and Security tab RBPM Provisioning and Security Configuration 257 8.2 Provisioning Configuration The Provisioning Configuration actions allow you to configure the Delegation and Proxy Service and the Digital Signature Service. In addition, they allow to define provisioning user interface settings, as well as settings for the Workflow Engine and clustering. To access the Provisioning Configuration actions, you need to be a Configuration Administrator. 8.2.1 Configuring Delegation and Proxy Settings This section includes information about: “Configuring the Delegation and Proxy Service” on page 258 “Scheduling Synchronization and Cleanup” on page 260 Configuring the Delegation and Proxy Service To configure the Delegation and Proxy Service: 1 Select the RBPM Provisioning and Security tab. 2 Select Delegation and Proxy from the left navigation menu. The user interface displays the Delegation and Proxy page. To configure the service, you need to make some changes in the Delegation and Proxy Service Settings box. 3 Check the Allow All Requests option if you want to display the All option in the Resource Search Criteria drop-down list for the Team Delegate Assignments action. When the All option is available, a delegate assignment can be defined that applies to all resource categories. 4 Define the retention period for delegate, proxy, and availability assignments: 258 Identity Manager Roles Based Provisioning Module 3.7 User Application: Administration Guide Field Description Retention time for Delegation assignments Specifies the number of minutes to retain delegate assignments in the directory after they have expired. The default is 0, which indicates that the assignments will be removed after the expiration time has been reached. Retention time for Proxy assignments Specifies the number of minutes to retain proxy assignments in the directory after they have expired. The default is 0, which indicates that the assignments will be removed after the expiration time has been reached. Retention time for Availability settings Specifies the number of minutes to retain availability settings in the directory after they have expired. The default is 0, which indicates that the assignments will be removed after the expiration time has been reached. 5 Select the e-mail templates you want to use for delegation, proxy, and availability notifications: Field Description Delegation notification template Specifies the language-independent name for the template to use for delegation e-mail notifications. After the template name has been specified, the notification engine can determine which language-specific template to use at runtime. For details on creating and editing e-mail templates, see Section 17.4, “Working with EMail Templates,” on page 428. Proxy notification template Specifies the language-independent name for the template to use for proxy e-mail notifications. After the template name has been specified, the notification engine can determine which language-specific template to use at runtime. For details on creating and editing e-mail templates, see Section 17.4, “Working with EMail Templates,” on page 428. Availability notification template Specifies the language-independent name for the template to use for availability e-mail notifications. After the template name has been specified, the notification engine can determine which language-specific template to use at runtime. For details on creating and editing e-mail templates, see Section 17.4, “Working with EMail Templates,” on page 428. RBPM Provisioning and Security Configuration 259 Scheduling Synchronization and Cleanup To configure the Synchronization and Cleanup Service: 1 Select the RBPM Provisioning and Security tab. 2 In the Provisioning Configuration group of actions, select Delegation and Proxy from the left navigation menu. The user interface displays the Delegation and Proxy page. To schedule synchronization and cleanup, you need to make some changes in the Synchronization and Cleanup Service box. 3 To specify how often you want to activate the synchronization service, type the activation interval (in minutes) in the Synchronization Service Activation Interval field. The default value is 0, which means that the service is not activated. When the synchronization service runs, any modifications (or deletions) made to delegate assignments are synchronized with the corresponding availability settings for the user. 4 To specify how often you want to activate the cleanup service, select Cleanup Service Activation Interval, then type the activation interval (in minutes). Alternatively, select Cleanup Date and use the calendar tool to specify the date when you want to activate the service. The default value is 0, which means that the service is not activated. If no cleanup date is specified, the date is set to null. If no cleanup interval is specified, the interval is set to 0. When a cleanup date is specified, the interval is set to be 0. When an interval value other than 0 is specified, the date is set to null. If you check the cleanup interval option without putting in a number (the default is 0), the interface will show the original cleanup date after you submit the page, just as if you had not performed a submit. When the cleanup service runs, all obsolete proxy and delegate assignments are removed from the system. If the cleanup service has been activated, the Last cleanup performed field indicates when the last cleanup was performed. 8.2.2 Configuring the Digital Signature Service This section provides details on configuring the Digital Signature Service. To configure the Digital Signature Service: 1 Select the RBPM Provisioning and Security tab. 2 Select Digital Signature Service from the left navigation menu. The user interface displays the Digital Signature Service panel: 260 Identity Manager Roles Based Provisioning Module 3.7 User Application: Administration Guide 8 3 Perform these steps to configure the Digital Signature Service: 3a Select the Enable Digital Signature Support check box. If this check box is not selected, users will see an error message when they try to access any provisioning resource that requires a digital signature. Before enabling digital signature support, make sure all of the required JARs are present. If any of the JARs are missing, you will see an error message when you select the check box. For details on which JARs are required for digital signatures, see Section 2.4, “Digital Signature Configuration,” on page 57. 3b Select the Use XML Signature check box if you want to use an XML Signature. 3c Optionally select the Enable Signed Document Preview to allow users to preview signed documents. 3d Type the name of the class for your digital signature service in the Class Name field. 3e Optionally specify an entity key in the Alternative Certificate Subject Virtual Entity Key field. The entity key maps to an entity defined in the data abstraction layer. The entity provides a calculated attribute that can be used instead of the LDAP common name to ensure that only authorized users can perform digital signing. In the Designer, you define the entity, giving the key any name you like. On the Digital Signature Service configuration panel, you specify the key for the entity you defined. The alternative subject is an optional feature that you can use to add an extra layer of protection. 3f Optionally select the Certificate Authorization check box to ensure that the authenticated user matches the user associated with the selected user certificate. When Certificate Authorization is enabled, the current user is not permitted to use a certificate on the smart card (or browser) that has been given to a different user. 3g Optionally select the Enable Revocation Check check box to cause the application to check the certificate revocation list (CRL) before using a certificate to be sure that it is still valid. A certificate might be revoked for several reasons. For example, the certificate RBPM Provisioning and Security Configuration 261 authority might determine that a particular certificate was improperly issued. Alternatively, the certificate might be revoked if the private key for the certificate has been lost or stolen. 3h Optionally select the Enable OCSP Query check box to perform a query against an Online Certificate Status Protocol (OCSP) server before using a certificate. OCSP is an alternative to certificate revocation lists that addresses problems associated with using CRLs in a public key infrastructure (PKI). The OCSP access point for the server is specified in the User Application Configuration utility. 4 To view the settings for a previously configured applet, select the applet from the Signature Applet dropdown list. 5 Perform these steps to add a new signature applet configuration: 5a Click Add. The user interface makes the fields in the Signature Applet panel editable. 5b Provide a name for this applet configuration in the Display Name field. 5c Specify the class ID for the applet in the Class ID field. 5d Specify the entry of the JAR that contains the applet in the Archive Name field. 5e Specify <context root path> of the Web application that contains the applet archive for the Context Root. (If the context root points to a different application, always start it with a “/ ” character.) 5f Specify the callback name in the Callback Name field. 5g Specify the XML declaration string in the Declaration Template field. 5h Specify the invocation string in the Invocation Template field. 5i Specify the callback function in the Callback Function Template field. 5j Select the browser type (for example, IE 6.0) in the Browser Type select list. 6 Click Save to save your settings. 8.2.3 Configuring the Provisioning UI Display Settings This section provides instructions on configuring various user interface settings. Some of the settings control system-wide behavior within the User Application. Others are specific to the Work Dashboard. 262 Identity Manager Roles Based Provisioning Module 3.7 User Application: Administration Guide To access the Provisioning UI Display Settings: 1 Select the Administration tab. 2 Select the RBPM Provisioning and Security tab. 3 Select Provisioning UI Display Settings from the left navigation menu. The user interface displays the Provisioning UI Display Settings page. To configure the display settings for the Work Dashboard, you can make changes in the Task Settings and Request Status Settings box, which appear after the General Display Settings. Configuring the General Display Settings For details on the general settings, see Section 2.10.5, “Result Set and Pagination Settings,” on page 93. Configuring the Task Settings To configure the administrative settings for the Tasks list on the Work Dashboard: 1 Scroll down to the Task Settings box: 2 To specify whether you want the Task List to be displayed when users first open the dashboard, select either the Yes or No radio button for the Expand Task List in default view of Work Dashboard option. 3 To set the default sort column for the task list, pick the column in the Task Notifications List default sort field. Indicate whether the sort order will be ascending or descending by selecting or deselecting the Descending checkbox. RBPM Provisioning and Security Configuration 263 The default sort column is required in the task list display. When you select a default sort column, this column is automatically added to the User default columns list. To allow the user to override the default sort column and sort order, click the the Allow user to override checkbox. 4 To include a column in the task list, select it in the Available Columns list box, and drag them to the User default columns list box. To remove a column, select it in the User default columns list box and drag it to the Available Columns list box. You can select multiple columns to include or exclude by using the Ctrl or Shift key while clicking on the columns. To allow the user to override the column selections you’ve made, click the Allow user to override checkbox. When you click this checkbox, the user interface displays the Available columns for User override list box. Any columns you add to the Available columns for User override list box are included in the Available columns list that the user sees on the Work Dashboard. To allow the user to override the default column list, select and drag one or more columns to the Available columns for User override list box from either the User default columns list box or the Available Columns list box. When you add a column to the Available columns for User override list box, that column is automatically removed from the list box from which you dragged it. 5 To specify how the task details should be displayed when the user clicks on a task, select one of the following options: Option Description In line with list Displays the details within the Task Notifications list, directly under the task selected. This is the default. In modal dialog Displays the details in a separate dialog box that must appears on top of the Task Notifications list. After viewing the details for a task, the user needs to close the dialog to see the list again. Configuring the Request Status Settings To configure the administrative settings for the Request Status list on the Work Dashboard: 1 Scroll down to the Request Status Settings box: 264 Identity Manager Roles Based Provisioning Module 3.7 User Application: Administration Guide 2 To set the default sort column for the request status list, pick the column in the TRequest Status List default sort field. Indicate whether the sort order will be ascending or descending by selecting or deselecting the Descending checkbox. The default sort column is required in the request status list display. When you select a default sort column, this column is automatically added to the User default columns list. To allow the user to override the default sort column and sort order, click the the Allow user to override checkbox. 3 To include a column in the request status list, select it in the Available Columns list box, and drag them to the User default columns list box. To remove a column, select it in the User default columns list box and drag it to the Available Columns list box. You can select multiple columns to include or exclude by using the Ctrl or Shift key while clicking on the columns. To allow the user to override the column selections you’ve made, click the Allow user to override checkbox. When you click this checkbox, the user interface displays the Available columns for User override list box. Any columns you add to the Available columns for User override list box are included in the Available columns list that the user sees on the Work Dashboard. To allow the user to override the default column list, select and drag one or more columns to the Available columns for User override list box from either the User default columns list box or the Available Columns list box. When you add a column to the Available columns for User override list box, that column is automatically removed from the list box from which you dragged it. 4 To specify how the request status details should be displayed when the user clicks on one of the items requested, select one of the following options: Option Description In line with list Displays the details within the Request Status list, directly under the request selected. This is the default. In modal dialog Displays the details in a separate dialog box that must appears on top of the Task Notifications list. After viewing the details for a task, the user needs to close the dialog to see the list again. 8.2.4 Configuring the Workflow Engine and Cluster Settings This section provides instructions on configuring the Workflow Engine and on configuring cluster settings. These settings apply to all engines in the cluster. When any of these settings are changed, other engines in the cluster will detect these changes in the database and use the new values. The engines check for changes to these settings at the same rate as specified by the pending process interval. The process cache settings and heartbeat settings require a server restart to take effect. Configuring the Workflow Engine To configure the Workflow Engine settings: 1 Select the Provisioning tab. 2 Select Engine and Cluster Settings from the left navigation menu. RBPM Provisioning and Security Configuration 265 The user interface displays the Workflow Configuration Settings page. To configure the engine, you need to make some changes in the Workflow Engine box. 3 To change an engine setting, click the target field for the setting and type the new value. The engine settings are described below: Engine Setting Description Email Notification (per workflow engine) Enables or disables e-mail notifications for the entire workflow engine. Defaults to enabled. Web Service Activity Timeout (minute) Specifies the default Web Service activity timeout in minutes. The default is 50 minutes. User Activity Timeout (hour, 0 for Specifies the default user activity timeout. The default is 0 days, no timeout) which indicates no timeout. Completed Process Timeout (day) Specifies the number of days that a completed process state is kept in the system. The default is 120 days. Completed Process Cleanup Interval (hour) Specifies how often the engine checks for and removes completed processes that have been in the system for longer than the completed process timeout. The default is 12 hours. Pending Process Interval (second) User activities that are executed on an engine which the process is not bound to are put into a pending state. This interval specifies how often to check for pending activities in order to continue their execution. The default is 30 seconds. 266 Identity Manager Roles Based Provisioning Module 3.7 User Application: Administration Guide Engine Setting Description Retry Queue Interval (minute) Activities that fail because of suspected database connectivity issues are put on a retry queue. This interval specifies how often the engine attempts to retry these activities. The default is 15 minutes. Maximum Thread Pool Size The maximum number of threads that the engine uses to execute activities. The default is 20. Minimum Thread Pool Size The minimum number of threads that the engine uses to execute activities. When a thread is requested and fewer than the minimum are in the pool, a new thread will be created even if there are idle threads in the pool. The default is 10. Initial Thread Pool Size Number of prestarted threads in the pool when it is created. The default is 5. Thread Keep Alive Time (second) If the pool is larger than the minimum size, excess threads that have been idle for more then the keep alive time will be destroyed. The default is 5 minutes. Process Cache Load Factor The load factor specifies how full the cache is allowed to get before increasing its capacity. If the number of entries in the cache exceeds the product of the load factor multiplied by the current capacity, then the capacity is increased. The default is 0.75. Process Cache Initial Capacity The process cache is backed by a hash map. The capacity is the number of buckets in the hash map. The initial capacity is the number of buckets at the time the cache is created. The default is 700. RBPM Provisioning and Security Configuration 267 Engine Setting Description Process Cache Maximum Capacity Before adding a process to the cache, if the number of processes in the cache equals or exceeds the Process Cache Maximum Capacity, the cache attempts to remove the oldest inactive process from the cache. The maximum capacity is a soft limit, so the number of processes in the cache might exceed the Process Cache Maximum Capacity if there are no inactive processes (only active processes) in the cache. A good value for this setting should be less than product of the Process Cache Initial Capacity and the Process Cache Load Factor. This gives the cache a chance to remove older inactive processes from the cache before having to increase its capacity. Take the following example: Process Cache Initial Capacity = 700; Process Cache Load Factor =.75; Process Cache Maximum Capacity = 500; Number of processes in cache = 500; In this case, the number of processes in the cache that will trigger the cache to grow its capacity and perform a rehash would be 525, because the Initial capacity multiplied by the load factor is equal to 525. In this example, when there are 500 processes in the cache, the cache is approaching the point where it must increase its size and perform a rehash, which is at 525 processes. When another process is added to the cache, the engine attempts to remove the least recently used inactive process instead of letting the cache get closer to 525 processes. The default is 500. Maximum Engine Shutdown Timeout (minute) The engine attempts to shutdown gracefully. When shutting down it stops queuing new activities for execution and attempts to complete any activities already queued. This timeout specifies the maximum time that the engine waits for all queued activities and threads executing activities to complete. If this time is exceeded, the engine halts processing of queued activities and attempts to stop all threads executing activities. The default is 1 minute. Configuring the Workflow Cluster To configure the Workflow Cluster settings: 1 Select the Provisioning tab. 2 Select Engine and Cluster Settings from the left navigation menu. The user interface displays the Workflow Configuration Settings page. To configure cluster settings, you need to make some changes in the Workflow Cluster box. 268 Identity Manager Roles Based Provisioning Module 3.7 User Application: Administration Guide 3 To change a cluster setting, click the target field for the setting and type the new value. The cluster settings are described below: Cluster Setting Description Heartbeat Interval (second, minimum 60) Specifies the interval at which the workflow engine’s heartbeat is updated. When the workflow engine starts up, it detects if its engine ID is already being used by another node in the cluster and refuses to start if the ID is in use. The User Application database maintains a list of engine IDs and engine states. If an engine crashes and is restarted, its last state in the database indicates that it is still running. The workflow engine therefore uses a heartbeat timer, which writes heartbeats at the specified interval, to determine if an engine with its ID is still running in the cluster. If it’s already running, it refuses to start. The minimum value for the heartbeat interval is 60 seconds. Heartbeat Factor (minimum 2) Specifies the factor that is multiplied with the hearbeat interval to arrive at the heartbeat timeout. The timeout is the maximum elapsed time permitted between heartbeats before an engine will be considered timed out. The minimum value for the heartbeat factor is 2. 8.3 Administrator Assignments The Administrator Assignments page allows you to assign users, groups, and containers to administrative roles. An administrator assignment specifies a domain type (Security, Provisioning, Role, Resource, Configuration, and Compliance), as well as a set of permissions for the assignment. The Administrator Assignments page is accessible to the following users: RBPM Provisioning and Security Configuration 269 Table 8-1 User Access to the Administrator Assignments Page User Capabilities Security Administrator Can perform all operations on the Administrator Assignments page. Other Domain Administrators Can view administrator assignments and request assignments (or revoke assignments) for the domain over which this user has authority. He/she cannot view assignments or request assignments within another domain. Delegated administrators of a domain have no access to this page. The permissions for an administrator assignment define the actions that administrators can take on a particular scope of object instances within the domain type selected. For example, if you select the Role domain as the domain type for an assignment, the permissions determine what actions the administrators can take on the set of role instances selected as the scope for the assignment. These permissions might specify, for the selected scope of roles, that administrators can perform actions such as assigning roles to users, viewing role assignments, and reporting on role assignments. Changing the Default Administrator Assignments The default administrator assignment settings are established at the time the User Application driver is initialized. After the driver has been initialized, you can change the default settings on the Administrator Assignments page, as long as your “admin” user account still exists. If the account has been deleted, deactivated, or moved to a different location, you will not be able to login to make the new assignments. In this case, you need to reset the values in the configupdate utility and delete the initialization property in the User Application Driver. Here are the basic steps you need to follow to do this: 1. Change the administrator assignment values in the configupdate utility. 2. Delete the initialization parameter in the User Application Driver. 3. Restart the User Application Driver and the Roles and Resources Driver. 4. Restart the User Application. For complete details, see Section 2.14, “Changing the Default Administrator Assignments After Installation,” on page 100. 8.3.1 Viewing Administrator Assignments To view existing administrator assignments: 1 Select Administrator Assignments on the RBPM Provisioning & Security tab. 270 Identity Manager Roles Based Provisioning Module 3.7 User Application: Administration Guide The Administrator Assignments page displays the list of administrator assignments currently defined. 8.3.2 Creating New Assignments To define a new administrator assignment: 1 Click the Assign button at the top of the Administrator Assignments display. The New Administrator Assignment dialog displays: 2 Select one of the following domains: The Compliance domain defines rights to launch attestation requests and view the status of attestation requests. RBPM Provisioning and Security Configuration 271 The Configuration domain defines rights to configure access to User Application header tabs and navigation items. The Provisioning domain defines rights to launch and retract process requests, manage addressee tasks, and configure delegate, proxy, and availability settings. The Resource domain defines rights to manage resources, assign, revoke, and report on resources, as well as rights to configure resource settings and bind entitlements. The Role domain defines rights to manage roles and SoDs, assign, revoke, and report on roles, as well as rights to configure role settings. The Security domain defines rights to manage User Application security, such as assign and revoke domain administrators, domain managers, and teams. The domain determines what types of objects the administrator can act on. An administrator assignment can only be associated with a single domain. NOTE: If a particular user has been designated as a manager of a team, Novell recommends that this user should not also be designated as a domain administrator for the domain associated with the team. To see a description of a particular domain, click the Info icon to the right of the Domain list: 3 Specify one of the following choices for the Type of Assignment: User Group Container Role 4 Select the users (or groups, containers, or roles) in the Select Users field. The label for the control, and the objects available for selection, vary according to the type of assignment you’ve specified. 5 Select an Effective Date for the assignment. This date (and time) determines when the permissions are enabled for the assignment. 6 Select an Expiration Date for the assignment. This date (and time) determines when the permissions are disabled for the assignment. 7 To give the administrator full permissions for the selected domain, click the All Permissions checkbox. 272 Identity Manager Roles Based Provisioning Module 3.7 User Application: Administration Guide When the All Permissions checkbox is checked, the assignment creates a Domain Administrator. When it is unchecked, the assignment creates a Delegated Administrator. When the domain selected is Security, Configuration, or Compliance, the assignment automatically gives full permissions for the selected domain, and the All Permissions checkbox is not displayed. NOTE: When a user is assigned a Compliance Administrator role, the user interface shows two rows in the Administrator Assignments page, one for the Compliance Administrator role, and one for a Provisioning Manager role with no permissions visible. Note that this latter row should not be removed. If the row is removed, the user assigned to be Compliance Administrator will not be able to launch attestation requests successfully. The Compliance Administrator role is automatically given rights to initiate and retract attestation provisioning requests. For this reason, the Provisioning Manager role is required. 8 Click Save to preserve your administrator assignment settings. If the domain for the assignment is Provisioning, Role, or Resource domain, and you’ve unchecked the All Permissions checkbox, the Permissions section is added to the page. 9 To define the permissions, click New. This interface shows controls that apply to the domain selected for the assignment. These controls allow you to specify which objects are within the scope of the assignment and which permissions administrators have with respect to these objects. 10 Follow these steps to define permissions for an assignment that uses the Provisioning domain: 10a To include all provisioning request definitions, click the All Provisioning Request Definition button. 10b To select provisioning request definitions individually, choose the Select Provisioning Request Definition radio button, and use the Object Selector to pick one provisioning request definition at a time: RBPM Provisioning and Security Configuration 273 NOTE: If you select All Provisioning Request Definitions, and define a permission at this level, and then try to define the same permission for a particular provisioning request definition, the Administration Assignment page will not create the permission for the provisioning request definition, since it has already been defined at a higher level. In general, a permission will not be set on a lower level object if it has been already defined for a higher level object. However, if it is defined on a lower level object first, the same permission can be set on a higher level set of objects as well. 10c Once you’ve defined the scope, choose the permissions you want to allow for each object by selecting the object and picking the desired permissions in the list on the right side of the dialog. Permission Description Initiate PRD Allows the user to initiate the selected provisioning requests. NOTE: The Initiate PRD permission has no effect on the behavior of the Novell-installed PRDs for resources, roles, and attestation within the User Application, since these PRDs cannot be initiated directly from the User Application. However, this permission does control whether these PRDs can be initiated from a SOAP call. Retract PRD Allows the user to retract the selected provisioning requests when they are in progress. View Running PRD Allows the user to view the selected provisioning requests when they are in progress. 274 Identity Manager Roles Based Provisioning Module 3.7 User Application: Administration Guide Permission Description Configure Delegate Allows the user to configure delegate assignments for the selected provisioning requests. Manage Addressee Task Allows the user to manage tasks associated with the selected provisiong requests that have been addressed to other users. When this permission is enabled, Domain and Delegated Administrators can manage tasks for all users, including addressess and recipients. Team Managers are able to manage tasks for addressees, but not for recipients. Configure Availability Allows the user to configure availability for tasks associated with the selected provisioning requests. 10d In the Add User Application Driver Permissions section of the page, optionally select the Configure Proxy permission to allow the selected user(s) to configure proxy assignments. This setting applies to the driver as a whole. 10e Click Save to save the permissions for the selected objects or containers. To delete a permission, select the permission and click Delete. To refresh the list of permissions, click Refresh. 11 Follow these steps to define permissions for an assignment that uses the Role domain: 11a To include all roles in all levels in the roles hierarchy, choose All Role Levels in the Role Level control. RBPM Provisioning and Security Configuration 275 To include all roles at a particular level in the role hierarchy, choose one of the following levels: Business Role IT Role Permission Role To include all roles in a particular sub container under the selected role level, use the Object Selector to select the sub container. 11b To select roles individually, choose Select Roles radio button, and use the Object Selector to pick one or more roles: 276 Identity Manager Roles Based Provisioning Module 3.7 User Application: Administration Guide 11c Once you’ve defined the role scope, choose the permissions you want to allow for each object by selecting the object and picking the desired permissions in the list on the right side of the dialog. Permission Description Create Role Allows the user to create roles. This permission is hidden when a particular role is selected. Delete Role Allows the user to delete the selected roles. This setting applies only at the container level. At installation time, no user has the ability to delete system roles. However, the administrator may grant user access to the system roles. The permission to delete roles should not be given for the RoleConfig, Level20, and System roles containers. Also, in general, you should not set permissions on those containers, because permissions on these containers will be propagated to the system roles. Instead, you should create role subcontainers under the role level container and set permissions on each subcontainer. RBPM Provisioning and Security Configuration 277 Permission Description Update Role and Role Relationship Allows the user to update the selected roles and modify role relationships. This setting applies only at the container level. View Role Allows the user to view the selected roles. This setting applies only at the container level. Assign Role To User Allows the user to assign users to the selected roles. IMPORTANT: Only the Security Administrator can assign system roles on the Work Dashboard tab and the Roles and Resources tab. Revoke Role From User Allows the user to revoke user assignments for the selected roles. Assign Role To Group And Container Allows user to assign groups and containers to the selected roles. Revoke Role From Group And Container Allows the user to revoke group and container assignments for the selected roles. Report On Role Allows the user to generate reports that provide information about the selected roles. 11d To include all separation of duties constraints, choose All Separation of Duties Constraints radio button. 11e To select separation of duties constraints individually, choose Select Separation of Duties Constraint radio button, and use the Object Selector to pick one or more constraints. 11f Once you’ve defined the separation of duties scope, choose the permissions you want to allow for each object by selecting the object and picking the desired permissions in the list on the right side of the dialog. Permission Description Create SoD Allows the user to create separation of duties constraints. This permission is hidden when a particular SoD constraint is selected. Update SoD Allows the user to update the selected separation of duties constraints. Delete SoD Allows the user to delete the selected separation of duties constraints. View SoD Allows the user to look at the selected separation of duties constraints. 278 Identity Manager Roles Based Provisioning Module 3.7 User Application: Administration Guide Permission Description Report On SoD Allows the user to generate reports that provide information about the selected separation of duties constraints. 11g In the Add Role Configuration Permissions section of the page, optionally select the Configure Roles Settings permission for the configuration object. This setting controls access to the Configure Role and Resource Settings page on the Roles and Resources tab. To access this page, the user must have the Configure Roles Settings permission as well as the Configure Resource Settings permission, which is given through a Resource Manager (or Resource Administrator) assignment. If a user does not have both of these permissions, the Configure Roles and Resource Settings page displays read-only information, and cannot be edited. 11h Click Save to save the permissions for the selected objects or containers. To delete a permission, select the permission and click Delete. To refresh the list of permissions, click Refresh. 12 Follow these steps to define permissions for an assignment that uses the Resource domain: 12a To include all resources, click the All Resources button. 12b To select resources individually, choose the Select Resources radio button, and use the Object Selector to pick one or more resources: RBPM Provisioning and Security Configuration 279 12c Once you’ve defined the resource scope, choose the permissions you want to allow for each object by selecting the object and picking the desired permissions in the list on the right side of the dialog. Permission Description Create Resource Allows the user to create resources. This permission is hidden when a particular resource is selected. Delete Resource Allows the user to delete the selected resources. Update Resource Allows the user to update the selected resources. View Resource Allows the user to view the selected resources. Assign Resource Allows the user to assign users to the selected resources. Revoke Resource Allows the user to revoke user assignments for the selected resources. Report On Resource Allows the user to generate reports that provide information about the selected resources. 12d To include all drivers for entitlements, click the All Drivers radio button. 280 Identity Manager Roles Based Provisioning Module 3.7 User Application: Administration Guide 12e To select drivers individually, choose the Select Driver radio button, and use the Object Selector to pick a resource. 12f Once you’ve defined the driver scope, optionally select the Bind Entitlement permission to allow the selected user(s) to bind resources to entitlements. To allow the user to generate reports on entitlements, optionally select the Report On Entitlement permission. 12g In the Add Resource Configuration Permissions section of the page, optionally select the Configure Resources Settings permission for the configuration object. This setting controls access to the Configure Role and Resource Settings page on the Roles and Resources tab. To access this page, the user must have the Configure Resources Settings permission as well as the Configure Roles Settings permission, which is given through a Role Manager (or Role Administrator) assignment. If a user does not have both of these permissions, the Configure Roles and Resource Settings page displays read-only information, and cannot be edited. 12h Click Save to save the permissions for the assignment. To delete a permission, select the permission and click Delete. To refresh the list of permissions for the assignment, click Refresh. 13 Click Save to save the assignment and permissions. 8.3.3 Editing an Existing Assignment To edit an existing administrator assignment: 1 Select a previously defined assignment and click Edit. 2 Make your changes to the administrator settings and click Save. 8.3.4 Deleting Assignments To delete an assignment: 1 Select a previously defined assignment and click Edit. 8.3.5 Refreshing the Assignment List To refresh the list of administrator assignments: 1 Click Refresh. 8.4 Team Configuration The Team Configuration page allows you to create teams and define permissions for these teams. A team definition specifies a domain type (Provisioning, Role, or Resource), as well as a set of team members and managers. The Team Configuration page is accessible to the following users: RBPM Provisioning and Security Configuration 281 Table 8-2 User Access to the Team Configuration Page User Capabilities Security Administrator Can perform all operations on the Team Configuration page. Other Domain Administrators Can define a team for the domain over which the administrator has authority. Team Manager Can view a team definition for which he/she is configured to be the manager. When a team manager edits a team, the team definition itself is read-only, because the team manager cannot modify the team configuration. The members of a team can be specified individually as a set of users, groups, or containers, or can be defined based on a business relationship, such as the Manager-Employee relationship. Alternatively, the team member list can include all users within the container. When a team definition includes a container or group in its membership list, the User Application expands the list within the container or group to show the users within the container or group. Therefore, the User Application only allows the team manager to specify a particular user within the container or group as the recipient for a team request; the team manager is not permitted to specify a container or group as the recipient for a team request. The managers for a team can be a one or more users or groups. When you define a team, you can specify whether you want the team managers to also be members of the team. The permissions for a team define the actions that team members can take on a particular scope of object instances within the domain type selected for a team. For example, if you select the Role domain as the domain type for a team, the team permissions determine what actions the members can take on the set of role instances selected as the scope for the team. These permission might specify, for the selected scope of roles, that members can perform actions such as assigning roles to users, viewing role assignments, and reporting on role assignments. 8.4.1 Viewing Team Configurations To view existing team configurations: 1 Select Team Configuration on the RBPM Provisioning and Security tab. 282 Identity Manager Roles Based Provisioning Module 3.7 User Application: Administration Guide The Team Configuration page displays a list of team configurations currently defined. Filtering the Team List 1 Click the Display Filter button in the upper right corner of the Resource Catalog display. 2 Specify a filter string for the team name or description in the Filter dialog, or select a particular domain, and click Filter: 3 To remove the current filter, click Reset. RBPM Provisioning and Security Configuration 283 Setting the Maximum Number of Rows on a Page 1 Click on the Rows dropdown list and select the number of rows you want to be displayed on each page: Scrolling within the Team List 1 To scroll to another page in the resource list, click on the Next, Previous, First or Last button at the bottom of the list. Sorting the Team List To sort the team list: 1 Click the header for the column you want to sort on. The pyramid-shaped sort indicator shows you which column is the new sort column. When the sort is ascending, the sort indicator is shown in its normal, upright position. When the sort is descending, the sort indicator is upside down. The default sort column is the Resource Name column. If you override the default sort column, your sort column is added to the list of required columns. Required columns are indicated with an asterisk (*). When you modify the sort order for the task list, your preference is saved in the Identity Vault along with your other user preferences. 8.4.2 Creating New Teams To define a new team: 1 Click the New button at the top of the Team Configuration display. The New Team dialog displays: 284 Identity Manager Roles Based Provisioning Module 3.7 User Application: Administration Guide 2 Select one of the following domains: Provisioning Domain Role Domain Resource Domain The domain determines what types of objects the team members can act on. A team can only be associated with a single domain. NOTE: If a particular user has been designated as a domain administrator, Novell recommends that this user should not also be designated as a manager of a team for the same domain for which the user is a domain administrator. 3 Provide a name and description for the team. 4 In the Managers control, select the users and groups that will be managers of the team. 5 In the Members control: 5a Indicate whether the managers will also be members of the team by selecting or deselecting the Also include selected managers in members list checkbox. 5b Define the members of the team by selecting one of the following radio buttons: Option Description All Users Includes all users in the container. Relationship Includes all users that have a relationship with the users in the Managers list. For example, if you select the Manager-Employee relationship, the members report directly to the users in the Managers list. Select Members Includes the users, groups, and containers you select. 6 Click Save to preserve your team configuration settings. Once you’ve saved a team, the Permissions section is added to the page, and the Team Permissions Configuration interface is displayed. RBPM Provisioning and Security Configuration 285 The Team Permissions Configuration interface includes buttons for adding new permissions, deleting permissions and refreshing the display. The Permissions section of the page does not include an Edit button because the details associated with each permission are shown in the Permissions list. If a particular team permission is not properly defined, you can simply delete the permission and add a new one in its place. 7 To define the permissions for the team, click New. This interface shows controls that apply to the domain selected for the team. These controls allow you to specify which objects are within the scope of the team and which permissions team members have with respect to these objects. 8 Follow these steps to define permissions for a team that uses the Provisioning domain: 8a To include all provisioning request definitions, click the All Provisioning Request Definition button. 8b To select provisioning request definitions individually, choose the Select Provisioning Request Definition radio button, and use the Object Selector to pick one or more provisioning request definitions: 286 Identity Manager Roles Based Provisioning Module 3.7 User Application: Administration Guide 8c Once you’ve defined the scope for the team, choose the permissions you want to allow for each object by selecting the object and picking the desired permissions in the Permissions control. The provisioning permissions are the same for team configurations as for RBPM administrator assignments. See Step 10c on page 274 for details on the provisioning permissions. 8d To define permissions that apply to the User Application driver as a whole, open the Add User Application Driver Permisions section of the page and select the permissions you want to allow with this assignment. 8e Click Save to save the permissions for the selected objects or containers. To delete a permission, select the permission and click Delete. To refresh the list of permissions for the team, click Refresh. 9 Follow these steps to define permissions for a team that uses the Role domain: 9a To include all roles in all levels in the roles hierarchy, choose All Role Levels in the Role Level control: RBPM Provisioning and Security Configuration 287 To include all roles at a particular level in the role hierarchy, choose one of the following levels: Business Role IT Role Permission Role To include all roles in a particular sub container under the selected role level, use the Object Selector to select the sub container. 9b To select roles individually, choose Select Roles radio button, and use the Object Selector to pick one or more roles: 9c Once you’ve defined the role scope for the team, choose the permissions you want to allow for each object by selecting the object and picking the desired permissions in the Permissions control. The following role permissions are supported in team configurations: View Role Assign Role Revoke Role Assign Role to Group and Container Revoke Role from Group and Container These role permissions have the same behavior as for RBPM administrator assignments. See Step 11c on page 277 for details on these role permissions. 9d Click Save to save the permissions for the selected objects or containers. To delete a permission, select the permission and click Delete. To refresh the list of permissions for the team, click Refresh. 10 Follow these steps to define permissions for a team that uses the Resource domain: 10a To include all resources, click the All Resources button. 288 Identity Manager Roles Based Provisioning Module 3.7 User Application: Administration Guide 10b To select resources individually, choose the Select Resources radio button, and use the Object Selector to pick one or more resources: 10c Once you’ve defined the resource scope for the team, choose the permissions you want to allow for each object by selecting the object and picking the desired permissions in the Permissions control. The following resource permissions are supported in team configurations: View Resource Assign Resource Revoke Resource These resource permissions have the same behavior as for RBPM administrator assignments. See Step 12c on page 280 for details on these resource permissions. 10d Click Save to save the permissions for the team. To delete a permission, select the permission and click Delete. To refresh the list of permissions for the team, click Refresh. 11 Click Save to save the team configuration and team permissions. 8.4.3 Editing an Existing Team To edit an existing team: 1 Select a previously defined team and click Edit. RBPM Provisioning and Security Configuration 289 When a team manager edits a team, the team definition itself is read-only, because the team manager cannot modify the team configuration. 2 Make your changes to the team settings and click Save. 8.4.4 Deleting Teams To delete an existing team: 1 Select a previously defined team and click Delete. 8.4.5 Refreshing the Team List To refresh the list of teams: 1 Click Refresh. 8.5 Navigation Access Permissions The Navigation Access Permissions page allows you to set the access permissions for some of the navigation items within the User Application. It allows you to control access to three of the main header tabs with the application: Roles and Resources tab, Identity Self-Service tab, and Work Dashboard tab. In addition, it allows you to define permissions for lower-level navigation items within the Provisioning and Security, Roles and Resources, and Work Dashboard areas of the application. NOTE: The Compliance and Administration tabs cannot be configured through the Navigation Access Permissions page. The Compliance tab is only visible to Compliance Administrators, and the Administration tab is only visible to Security Administrators, Domain Administrators (such as the Role Domain Administrator and Resource Domain Administrator), and Configuration Administrators. To define navigation access permissions: 1 Select Navigation Access Permissions on the RBPM Provisioning & Security tab. The Navigation Access Permissions page displays. 290 Identity Manager Roles Based Provisioning Module 3.7 User Application: Administration Guide 2 Click on the Name drop-down list to see the navigation items for which you can define permissions: The navigation areas appear in bold. Within each area, you can see the items. 3 Select the navigation item for which you want to define permissions. RBPM Provisioning and Security Configuration 291 4 Select one or more trustees for the navigation item. When a trustee logs on to the User Application, the navigation item is displayed. Otherwise, the navigation item is hidden. You can add users, groups, roles, and containers as trustees. Each navigation item has a set of default trustees that is suitable for the services that can be accessed through the navigation item. Make a Process Request By default, the Make a Process Request navigation item is shown on the Work Dashboard. To hide the Make a Process Request item, remove all trustees for this item. If you remove all trustees, only Configuration Administrators will be able to see the item. To show the Make a Process Request item on the Work Dashboard again, select Make a Process Request and choose the users, groups, roles, or containers that you want to be able to access the item. 5 To make the currently selected navigation item the default for the navigation area, select Check to make this the default navigation item for selected area. The Check to make this the default navigation item for selected area control is not available for navigation items within the Work Dashboard area. 6 Click Save. If you add a user as a trustee for a navigation item, and this user is a member of a container that was previously added as a trustee, this user will have access to the navigation item, but will not be added to the list of trustees. NOTE: If a user does not have access to the default tab (or to the default menu item within a navigation area), the User Application will attempt to display a tab (or menu item) for which the user has authorization. If the user has not been given authorization for any tab or menu item, the 292 Identity Manager Roles Based Provisioning Module 3.7 User Application: Administration Guide default page will display. If the user is not authorized for the default page, or if the user goes directly to an unauthorized bookmark, an error message is displayed indicating that the user does not have the proper authorization. If the user has been authorized to access a tab, but nothing under the tab, the page will still show and an error message will be displayed indicating that the user does not have the proper authorization. Conversely, if the tab has not been authorized, the tab will not show. However, if the user is authorized to access menu items under the tab, the user will be able to access these menu items by using bookmarks. Proxy Mode When a user is in proxy mode, the navigation access permissions for menu items on the Dashboard will show the proxied user's permissions, not the permissions for the logged in user. For all other navigation, the menu items will be controlled by the permissions set for the logged in user. The Manage control (for selecting a user, group, role, or container) is not available in proxy mode, even if a user is proxying for a user that is a Domain Administrator or Domain Manager. RBPM Provisioning and Security Configuration 293 294 Identity Manager Roles Based Provisioning Module 3.7 User Application: Administration Guide IV Portlet Reference IV These sections describe how to configure the identity and system portlets used in the Identity Manager user interface: Chapter 9, “About Portlets,” on page 297 Chapter 10, “Create Portlet Reference,” on page 301 Chapter 11, “Detail Portlet Reference,” on page 309 Chapter 12, “Org Chart Portlet Reference,” on page 327 Chapter 13, “Resource Request Portlet,” on page 357 Chapter 14, “Search List Portlet Reference,” on page 359 Portlet Reference 295 296 Identity Manager Roles Based Provisioning Module 3.7 User Application: Administration Guide 9 About Portlets 9 This section provides information about the portlets you can use in the Identity Manager User Application. Topics include: Section 9.1, “Accessory Portlets,” on page 297 Section 9.2, “Admin Portlets,” on page 297 Section 9.3, “Identity portlets,” on page 298 Section 9.4, “System Components,” on page 299 For more information about managing portlets, see Chapter 7, “Portlet Administration,” on page 241. Many of the portlets include preferences that enable you to customize the portlet’s behavior or appearance. You localize the preferences by clicking the Detail link in the Content Preferences page. As a general guideline, if the preference value is a free-form text input field, do not localize it unless the value is a message displayed in the user interface. You can however, localize the preference name and description. Localizing a preference value, that is not a message, can cause the portlet to malfunction. 9.1 Accessory Portlets Accessory portlets provide a diverse set of functions that you can add to your Identity Manager User Application. Accessory portlets provide e-mail, file system, and other functions. For more information, see the Identity Manager Accessory Portlet Reference Guide. 9.2 Admin Portlets The portlets in the Admin category are used to control the layout and contents of the user interface. WARNING: In general, you should not use or modify these portlets. They provide framework services to the User Application. However, you may want to modify the localized strings in the Header Portlet. If you do so, be sure not to delete the localized value for any of the menu items. If you leave a menu item blank, the corresponding will not display in the User Application. Table 9-1 describes Admin portlets. Table 9-1 Admin Portlets Portlet Name Description Header Portlet Displays the header information and top-level controls for the user interface. Shared Page Navigation Displays a menu containing the Identity Manager User Application shared pages. About Portlets 297 9.3 Identity portlets The Identity portlets are used by the Identity Self-Service tab of the Identity Manager User Application. Table 9-2 on page 298 lists the Identity portlets. Table 9-2 Identity Portlets Portlet Name Description Associations Report Shows the DirXML-Associations attributes for the logged on user. This attribute maps a user to an external application. There are no preferences for this portlet. Create Provides a wizard-based interface that enables users to create objects in the Identity Vault. See Chapter 10, “Create Portlet Reference,” on page 301. Detail Lets users display and manipulate an entity’s attribute data. See Chapter 11, “Detail Portlet Reference,” on page 309. Org Chart Lets users view and browse the hierarchical relationships between objects in the Identity Vault. See Chapter 12, “Org Chart Portlet Reference,” on page 327. Resource Request Lets you provide access to resource requests to anonymous or guest users. You must create a new shared page for this portlet and ensure that the page is available to guest or anonymous users. See Chapter 13, “Resource Request Portlet,” on page 357. Search List Allows users to search for objects in the Identity Vault. See Chapter 14, “Search List Portlet Reference,” on page 359. At runtime, the identity portlets might also call the ContainerLookup portlet or the ParamLookup portlet depending on user interaction. The ContainerLookup portlet is launched by the identity portlets when the user performs a lookup on a container object, and the ParamLookup portlet is launched when the user performs a lookup on an attribute. Users launch these portlets by clicking the Lookup button. These portlets have a similar runtime appearance. 298 Identity Manager Roles Based Provisioning Module 3.7 User Application: Administration Guide Figure 9-1 Sample ParamLookup Portlet These portlets are also referred to as object selectors, and their contents are defined by the DNLookup definition in the directory abstraction layer. There are no preferences for these portlets, and you cannot add them to a page. The only time you might modify them is when you allow guest access to the identity portlets. The modifications that you need to make for guest access are described in each identity portlet reference section. 9.4 System Components The system portlets provide services to the Identity Manager User Application. IMPORTANT: You should not use or modify portlets in this category. Table 9-3 on page 299 lists the system portlets. Table 9-3 System Portlets Portlet Name Description Portal Page Controller Displays the shared page that the user has currently selected via the Shared Page Navigation portlet. There are no preferences for this portlet. About Portlets 299 300 Identity Manager Roles Based Provisioning Module 3.7 User Application: Administration Guide 10 Create Portlet Reference 10 This section describes how to use the Create portlet in your Identity Manager User Application. Topics include: Section 10.1, “About the Create portlet,” on page 301 Section 10.2, “Configuring the Create Portlet,” on page 303 Section 10.3, “Setting Preferences,” on page 305 Section 10.4, “Configuring the Create Portlet for Self-Registration,” on page 306 10.1 About the Create portlet The Create portlet provides an easy-to-use wizard that allows users to create Identity Vault objects of different types. Portlet preferences control the following: The types of objects that the user can create. The attributes that the user can supply. You can also configure the portlet to allow guest users to self-register. The default configuration of the Create portlet (accessed via the Create User or Group action of the Identity Manager User Application) allows users to create a User or a Group. This portlet is restricted, by default, to the User Application Administrator. The following example shows how the default Create portlet wizard prompts the user to: Select the type of object to create: Populate the object’s attributes: Create Portlet Reference 301 Prompt for a password, when required by the object type: If a password policy is assigned, the portlet displays any custom policy messages. Provide an informational message when the object is successfully created. The message contains a link to the Detail portlet for that object for further editing (assuming the Detail portlet is likewise configured). 302 Identity Manager Roles Based Provisioning Module 3.7 User Application: Administration Guide 10.2 Configuring the Create Portlet Follow the steps in Table 10-1 on page 303 to configure the Create portlet. Table 10-1 Steps to Configure the Create Portlet Step Task Description 1 Decide if the default Create User or Group feature meets your needs. If it does, then you do not need to take any further action; otherwise complete the remaining steps. 2 Define the types of objects that you want to allow users to create. Add the objects and attributes to the directory abstraction layer. For more information, see Section 1.2.2, “Directory Abstraction Layer,” on page 32. 3 Determine how you want users to access this new portlet. Do you want users to launch this portlet from an existing or a new page? Which users can access the portlet and the page? For more information about pages, see Chapter 6, “Page Administration,” on page 207. 4 Specify the users that have access to the page and the portlet instance. Edit the page security and add the users to the list. For more information on restricting user access to pages, see Chapter 6, “Page Administration,” on page 207. Edit the portlet instance to change security. For more information on restricting user access to portlets, see Chapter 7, “Portlet Administration,” on page 241. Do you want anonymous users to access this portlet? For more information on setting up the Create portlet specifically for anonymous access, see Section 10.4, “Configuring the Create Portlet for Self-Registration,” on page 306. 5 Set preferences for the portlet. Preferences let you define: Which objects users can create. Which attributes to supply during the create. For more information, see Section 10.3, “Setting Preferences,” on page 305. 6 Test. Verify that the objects are created and that the attributes are populated properly. 7 Establish the proper effective rights in eDirectoryTM for your users. Make sure the users have sufficient rights to create the object. 10.2.1 Directory Abstraction Layer Setup Objects that can be created and attributes that can be populated by users of the Create portlet must be defined in the directory abstraction layer, as described in Table 10-2 on page 304. Create Portlet Reference 303 Table 10-2 Settings for the Directory Abstraction Layer Definition Type Property Value entity create Selected. view Selected. If it is not selected, the entity does not display in the list of entities that can be created. Create Container for Create: Specify a valid Identity Vault container. If you do not assign a container, the user is prompted to select one. The user is allowed to select any container beginning with the root container specified during the User Application installation. For anonymous users, it is recommended that you specify a Container for Create. If you do not, then you must also modify the security setting for the ContainerLookupPortlet, as described in Section 10.4, “Configuring the Create Portlet for Self-Registration,” on page 306. Create naming attribute: Specify the entity’s naming attribute. This shows up in the Create portlet as the Object ID. You can specify different text to display by using the Create naming label. NOTE: Because the naming attribute is defined in this way, you do not need to add it to the directory abstraction layer as a separate attribute. Password Management: Selected, if the entity type requires a password on create. Password Required When If the Create portlet is configured to create users and you Entity is Created want to assign the users to an iManager password policy, then you must also assign this container to the same iManager password policy. This ensures that users created in the User Application are automatically assigned to the default iManager password policy. By default, anyone who has access to the Create Users and Groups action and has Trustee rights to the OU can create users and assign the initial password. When the new user first logs in, he or she is redirected to the Change Password page to modify the initial password. You can change the default behavior via the Expire password on initial login preference. For more information on this preference, see Section 10.3, “Setting Preferences,” on page 305. For more information on the Change Password page, Section 5.3.1, “About Password Management Features,” on page 185. attribute enabled Selected. viewable If enabled or viewable are not selected (false), the attribute cannot be used by the portlet. 304 Identity Manager Roles Based Provisioning Module 3.7 User Application: Administration Guide For more information on setting up the abstraction layer, see Section 1.2.2, “Directory Abstraction Layer,” on page 32. 10.3 Setting Preferences Preferences allow you to configure the types of objects and the attributes that users are prompted for. There are two types of preferences: general and complex. The general preferences are described in Table 10-3 on page 305 followed by the complex preferences in Table 10-4 on page 305. Table 10-3 Create Portlet: General Preferences Preference Description Detail Portlet Name Specify the instance of the Detail Portlet to display when the user clicks the Object Created link after the object is successfully created. It defaults to the standard DetailPortlet. See Section 11.6, “Setting up Detail for Anonymous Access,” on page 324. Custom Class Name Specify the name of the class for processing create events. The default is com.novell.srvprv.impl.portlet.create.CreateCustomEventDefau ltHandler. Expire password on initial login Specify whether to expire the newly created user’s password on initial login (True), or whether to default to the Identity Vault’s password policy GraceLogin setting. Display password with attributes Specify whether to display the password on the same page as the other attributes (True) or on its own page (false). Create Virtual Entity complex preference Click View/Edit Custom Preference to access the Entity and Attribute definitions for the create portlet. The preferences are described in Table 10-4 on page 305. Table 10-4 Create Portlet: Complex Preferences Preference Description Entity Definition The name of the object type to create. This represents the beginning of an entity definition block where you define how the portlet handles the create operation. Objects listed in the complex preferences are displayed to the user in a dropdown list. To restrict the objects that users can create, remove objects from this preference sheet with the delete button. To add other entities, click Add Entity Definition and complete the wizard. Create Portlet Reference 305 Preference Description Attributes Controls the attributes that the user is prompted to populate. You must include all of the object’s required attributes; otherwise, the actual create of the object will fail. In addition, the preferences do not save properly if a required attribute is missing. To add or remove an attribute: Click the Modify Attributes button. To add an attribute, select it (from the list of Available attributes). You can multi-select attributes by using the Ctrl or Shift keys. Click the arrow to move the attribute to the Selected list. Do the reverse to remove an attribute. To reorder the attributes list, click the up and down arrows to the right of the Selected list. Click Submit. Attributes and data types: The attribute’s data type affects the way it is displayed. For example, if an attribute is defined as a Local or Global list subtype, then it displays in a list box. NOTE: The create portlet automatically prompts for an object ID. (The label displays as the entity type and appends the string ID, for example, user ID or Group ID.) The object ID is the naming attribute for the object. for the object. You do not have to add the CN as an attribute. For more information, see the Novell Identity Manager User Application: Design Guide. Completing the Preferences Panel To verify that you submitted valid entries, click Submit. If an entry is invalid, an error message is displayed at the top of the preferences page. Click Return to List View when you are able to click Submit and no errors occur. You must click Save Preferences when you return to List View. 10.4 Configuring the Create Portlet for SelfRegistration You can configure the Create portlet so that guest users are able to self-register. Enabling anonymous access to the create portlet is a two-step process. First, configure a Create portlet instance for anonymous use, then create a shared page to host the new portlet instance. You have the option to force the newly registered user to log in or to allow anonymous access to other identity self-service features. To create a portlet instance: 1 Go to the Portlet Admin page. 2 Register and name a new instance of the CreatePortlet, for example, Self Registration. 3 Select the new portlet instance, then click Settings. 306 Identity Manager Roles Based Provisioning Module 3.7 User Application: Administration Guide 4 Set Require Authentication to false, then click Save Settings. 5 Select Preferences and modify the preferences as needed. For example, you could specify a DetailPortlet that supports anonymous access, or you could limit the set of attributes displayed by the default instance. (The changes you make to the default instance are reflected in other parts of the User Application that use that instance.) TIP: If you do specify the default DetailPortlet, the user is forced to log in when viewing the detail of the newly created object. For details, see Section 10.4.1, “Guest Access Required Settings,” on page 307 To create a shared page: 1 Go to the Page Admin tab. 2 Create a new page. 3 Under Assign Categories, select Guest Pages. You can select other categories if you also want logged-in users to see this. 4 Click Save Page. 5 Click Select Content, add the new instance to the page, then click Save Contents. 6 Click Assign Permissions and make sure that View Permissions Set to Admin Only is unselected. 7 Save the page. 10.4.1 Guest Access Required Settings Other required settings include: Create container: Every entity requires a create container. You can define a default create container for each entity type in the directory abstraction layer, or you can allow the user to select one. When you specify a default create container for the entity type, the user is never prompted for the container. When you do not specify a default, the user must select one. To allow anonymous users access to the selection list, you must change the ContainerLookupPortlet setting Require Authentication to false. For more information about the default Create container, see the section on the directory abstraction layer editor in the Identity Manager User Application: Design Guide. Identity Vault Rights: The user is initially the guest user. When he or she self-registers, the User Application writes an object to the create container. To create a user object, the guest user must have create [Entry rights] in the container where new users are created. This could be inherited or restricted by using an inherited rights filter. The guest user must also have Write rights to the attribute(s) that they are allowed to create. DNLookup controls: If the user is required to provide a value for an attribute defined as a control type of DNLookup, you need to change the ParamlistPortlet setting Requires authentication to false. Detail portlet: When the object is successfully created, the portlet displays a link to the object displayed, via the Detail portlet. The default Detail portlet requires authentication so that users are forced to log in with the new identity credentials before they are able to view the detail. You Create Portlet Reference 307 can create a separate instance of the detail portlet for anonymous login, or you can modify the default detail portlet so that Requires authentication is set to false. See Section 11.6, “Setting up Detail for Anonymous Access,” on page 324. Passwords: If you allow an anonymous user to create an entity that requires a password, you must ensure that the anonymous account has the rights to create a password. 308 Identity Manager Roles Based Provisioning Module 3.7 User Application: Administration Guide 11 Detail Portlet Reference 1 This section describes the Detail portlet, which lets users display and manipulate an entity’s attribute data. The detail portlet is the basis for the My Profile action in the Identity Manager User Application’s Identity Self-Service tab. Topics include: Section 11.1, “About the Detail portlet,” on page 309 Section 11.2, “Prerequisites,” on page 320 Section 11.3, “Launching Detail from Other Portlets,” on page 321 Section 11.4, “Using Detail on a Page,” on page 322 Section 11.5, “Setting Preferences,” on page 322 Section 11.6, “Setting up Detail for Anonymous Access,” on page 324 11.1 About the Detail portlet The Detail portlet provides users with a detailed view of an entity’s attributes and their values. The portlet has two modes: display and edit. When accessing the Detail portlet, users can take advantage of its built-in capabilities to work with this information, including: Section 11.1.1, “Displaying Entity Data,” on page 309 Section 11.1.2, “Editing Entity Data,” on page 313 Section 11.1.3, “E-Mailing Entity Data,” on page 315 (display mode only) Section 11.1.4, “Linking to an organization chart,” on page 316 (display mode only) Section 11.1.5, “Linking to Details of Other Entities,” on page 316 (display mode only) Section 11.1.6, “Printing Entity Data,” on page 317 (display mode only) Section 11.1.7, “Setting Preferred Locale,” on page 318 (display mode only) 11.1.1 Displaying Entity Data When accessed, the Detail portlet displays attribute data about a selected entity, such as a user or group. For example, Figure 11-1 displays what the Detail portlet might display when user Bill Brown selects the My Profile action. Detail Portlet Reference 309 Figure 11-1 Sample MyProfile Data User images. By default, the Detail portlet is configured to include the User Photo attribute. However, if your Identity Vault does not include this attribute or it is not populated, a default image is displayed at runtime. If you store your user images in a different location, you can configure the portlet to display them from that location instead. For more information, see “Dynamically loading images.” on page 313. Determining Which Attributes Display The Detail portlet (display mode) displays the attributes that Your directory abstraction layer data definitions make available for viewing. For more information on directory abstraction layer configuration, see Section 1.2.2, “Directory Abstraction Layer,” on page 32. Are specified in the Attributes to display in view mode preference. To learn about specifying which attributes display in the Detail portlet, see Section 11.5, “Setting Preferences,” on page 322. The current user has rights to view. For instance, managers with rights to the salary attribute will see that data, but other users won’t. For more information, see Section 11.2.2, “Assigning rights to entities,” on page 321. Are currently populated with a value. Determining How Attributes Display When displaying attributes, Detail formats the data as text, with some exceptions. Exceptions are listed in Table 11-1 on page 311. 310 Identity Manager Roles Based Provisioning Module 3.7 User Application: Administration Guide Table 11-1 Detail Portlet: Attributes That Do Not Display As Text Format Specification in Directory Abstraction Layer Definition How It Displays Format: email As a mail-to link Format: As an icon that initiates a chat and adds that user groupwise-im aol-im yahoo-im Data type: Binary As the image Format: image Data type: Boolean As disabled radio buttons indicating true or false The buttons display without indicating a default value because the attribute is not actually created for the user until a value is specified. Multivalue: Selected A comma-separated list Control type: DNLookup As a link In the example above, a link (Terry Mellon) displays to access the Detail data of Bill Brown’s manager. Control type: As the display-label rather than the actual (key) value Local List For example, the EmployeeType attribute displays Full Global List Time instead of the actual value ft. Determining What the Heading Area Displays You can lay out the heading area of the Detail portlet using standard HTML features. Figure 11-2 Detail Portlet: Heading Area The Detail preferences provide an HTML Layout Editor that you can use to create the look and content you want: Detail Portlet Reference 311 Using the HTML Layout Editor The HTML Layout Editor provides the typical features of an HTML editor for defining text formatting and lists, and for specifying anchors, images, and so on. Keywords. When designing your layout, you can use the Keywords drop-down list to insert variables within the heading area of the Detail portlet to be replaced at runtime with specific attribute values. You can also type them using this syntax: $[[keyword]] Where keyword is the value of an attribute such as LastName. You can concatenate attributes using this syntax: $[[keyword+keyword]] For example: $[[FirstName+LastName]] You can concatenate as many attributes as you want and can also include quoted strings like this: $[[keyword+”sample text”+keyword]] This renders the values of the keywords and the quoted text. NOTE: When manually typing a keyword placeholder instead of selecting it from the dropdown list, make sure that it does not contain HTML formatting. It is recommended that you use the View Source mode for manual entry of keywords. When. a keyword is mistyped in a layout, it is rendered as-is at runtime (including the $[[]]). 312 Identity Manager Roles Based Provisioning Module 3.7 User Application: Administration Guide Dynamically loading images. To display images that are stored in your Identity Vault (such as user photos), you can add the attribute name using the HTML Layout Editor. For example, adding the User Photo attribute displays the user’s photo. If you store images outside the Identity Vault, you’ll need to use the IMG: tag (from the View Source mode of the HTML Editor) as follows: 1 Go to the portlet’s preferences and access the HTML Editor. 2 Click View Source. 3 Use the IMG: tag to combine a location, an attribute key, and a file extension using a syntax like this: $[[IMG:”URL” + attribute-key-name + ”fileextension”]] The following example shows the syntax you would use if you stored employee photos as JPG images by Last Name in the /images subdirectory of your application server: $[[IMG:"http://myhost:8080/images/"+LastName+".jpg"]] At runtime, the portlet concatenates the URL with the LastName attribute and the file extension.jpg. The HTML Editor supports a flexible syntax. It supports any combination of text and attributes so that the syntax is $[[IMG:”some text” + attribute-key-name + ...]] 11.1.2 Editing Entity Data The Detail portlet automatically provides an Edit link (such as Edit Your Information or Edit User) to switch from display mode to edit mode. This enables users with appropriate rights for the current entity to change its attribute values and save those changes. For example, here’s what Detail might display when user Bill Brown (who has the necessary rights) edits his own information: Detail Portlet Reference 313 Figure 11-3 MyProfile Edit Mode NOTE: For Boolean attributes, when both radio buttons are unselected it means that the attribute does not exist for the user. Selecting true or false creates the attribute for the user and also sets its value. Determining Which Attributes Display In edit mode, you can specify the attributes to display and their display order by using the Detail portlet’s Attributes to display in edit mode preference. In addition, the Detail portlet displays only attributes that Are defined as viewable in the directory abstraction layer data definitions. For more information on data definitions, see Section 1.2.2, “Directory Abstraction Layer,” on page 32. The current user has rights to view. For instance, managers with rights to the salary attribute will see that data, but other users won’t. For more information, see Section 11.2.2, “Assigning rights to entities,” on page 321. 314 Identity Manager Roles Based Provisioning Module 3.7 User Application: Administration Guide Determining How Attributes Display In edit mode, Detail formats each editable attribute as a text box, except in the following cases: Table 11-2 Detail Portlet: Recognizing Non-Text-Box Editable Attributes Attribute Type Specification (in directory abstraction layer) Data type: Binary Format: image How It Displays As a button and link to the Entity Image Upload portlet for viewing, updating, or adding the image Data type: Boolean As radio buttons indicating true or false hide: Selected As radio buttons labeled Hide and Display multivalue=Selected As a set of controls for editing, adding, and removing attribute values Control type: DNLookup As a button to launch the Param List portlet for searching and selecting a DN Control type: As a drop-down list (allowing multiple selections if applicable) Local list Global list Attributes that can’t be edited (either by definition or because of inadequate user rights) display as disabled or read only. Validating Changes During editing, data validation is automatically performed for the following attribute type specifications: Format: email Data type: Integer Control type: Range When using a control type of local or global list, it is possible for the displayed list to include values that are outside of an attribute’s specified bounds. However, such values are flagged as out-of-range, and validation prevents them from being submitted. 11.1.3 E-Mailing Entity Data The Detail portlet automatically provides a link named Send Identity Info. Users can click it to email the URL of the current entity’s Detail to one or more other users. By e-mailing the Detail URL rather than the actual information, security is maintained because anyone receiving the URL will need appropriate authority to use it. Detail Portlet Reference 315 11.1.4 Linking to an organization chart The Detail portlet automatically provides a link named Display Organization Chart. Users can click it to display the Org Chart portlet for the current entity. For example, if you’re viewing Detail for user Bill Brown, clicking this link displays: Figure 11-4 My Profile: Linking to Org Chart You can suppress automatic linking to the Org Chart by setting Detail’s Enable org chart display preference to false. See Section 11.5, “Setting Preferences,” on page 322. 11.1.5 Linking to Details of Other Entities When configuring the Detail portlet, you might want to enable users to link to related entities from the current one. You can do that by including attributes that are defined with the control type DNLookup (in your directory abstraction layer). When the Manager attribute is displayed in a user’s Detail, it appears as a link. Clicking that link displays Detail for the Manager. 316 Identity Manager Roles Based Provisioning Module 3.7 User Application: Administration Guide Figure 11-5 Linking to Other Entities from My Profile For more information on the directory abstraction layer, see Section 1.2.2, “Directory Abstraction Layer,” on page 32. To learn about specifying which attributes display in the Detail portlet, see Section 11.5, “Setting Preferences,” on page 322. 11.1.6 Printing Entity Data By default, the display settings for the Detail portlet enable the Print option on the portlet’s title bar. If you keep Print enabled, users can click it to display a printer-friendly version of the Detail content. To change this or other settings for the Detail portlet, use the Administration to update the Portlet Registration for DetailPortlet (on the Portlet Administration page). For more information, see Chapter 7, “Portlet Administration,” on page 241. Detail Portlet Reference 317 11.1.7 Setting Preferred Locale The Detail portlet automatically provides a link named Edit Preferred Locale. It appears for an administrator or for a user editing their own information. Users can click it to display the settings, and they can use the dialog to change it. Changes to the preferred locale require that the user logout and log back in for the proper locale to display, otherwise, inconsistent locales can be displayed. For example, if you are viewing Detail for user Bill Brown, clicking this link displays: Figure 11-6 Sample Edit Preferred Locale Dialog You can suppress the link by setting the Enable edit of preferred locale preference to false. 11.1.8 Overriding the Default Entity You can override the default entity type for an instance of the Detail Portlet. To do this, you need to use the Portlet Admin facility within the Administration tab of the User Application. The Default ‘My Profile’ Entity Definition preference allows you to set the default entity, as shown below: 318 Identity Manager Roles Based Provisioning Module 3.7 User Application: Administration Guide Figure 11-7 Setting the Default Entity for an Instance of the Detail Portlet The initial value of this preference is set in the driver configuration in Designer, as shown below: Detail Portlet Reference 319 Figure 11-8 Initial Setting for the Default Entity for My Profile in Designer 11.2 Prerequisites Before you start using the Detail portlet, review the following information. Section 11.2.1, “Configuring the Directory Abstraction Layer,” on page 320 Section 11.2.2, “Assigning rights to entities,” on page 321 11.2.1 Configuring the Directory Abstraction Layer The Detail portlet depends on directory abstraction layer definitions in a variety of ways. Instructions on how to configure your abstraction layer data definitions to support specific Detail portlet features are provided in the following sections: Section 11.1.1, “Displaying Entity Data,” on page 309 Section 11.1.2, “Editing Entity Data,” on page 313 Section 11.4, “Using Detail on a Page,” on page 322 For more information on configuration, see Section 1.2.2, “Directory Abstraction Layer,” on page 32. 320 Identity Manager Roles Based Provisioning Module 3.7 User Application: Administration Guide 11.2.2 Assigning rights to entities In order to access an entity and its attributes in the Detail portlet, users must have the appropriate rights assigned in eDirectoryTM: To Do This A User Needs This Right Display an attribute Read Edit an attribute Write You can assign rights by specifying that a user is a trustee of an object (entity). You can also specify the rights to assign for each of the attributes that are available via the Detail portlet. 11.3 Launching Detail from Other Portlets A common use of the Detail portlet is to launch it after selecting an entity from one of the other identity portlets. You can launch Detail from the Search List portlet or from the Org Chart portlet: Section 11.3.1, “Launching Detail from the Search List Portlet,” on page 321 Section 11.3.2, “From the Org Chart Portlet,” on page 322 11.3.1 Launching Detail from the Search List Portlet In the Search List portlet, users can click an entity row in the search results in order to display Detail for that entity. For example, clicking the Bill Brown row in the following list displays the Detail portlet with his attribute data: Figure 11-9 Launching Detail from Directory Search For more information on the Search List portlet, see Chapter 14, “Search List Portlet Reference,” on page 359. Detail Portlet Reference 321 11.3.2 From the Org Chart Portlet In the Org Chart portlet, users can click the Identity Actions icon for an entity and then select Show Info to display details for that entity. For more information on the Org Chart portlet, see Chapter 12, “Org Chart Portlet Reference,” on page 327. 11.4 Using Detail on a Page If you want to provide users with self-service for displaying and possibly editing their own attribute data, you can add the Detail portlet to a shared page. When used on a shared page, the Detail portlet automatically accesses the data of the current user. 11.5 Setting Preferences To define the contents and appearance of the Detail portlet, you set preferences. The way you use the Detail portlet determines where you set its preferences: To learn about accessing portlet preferences from a shared or container page, see Chapter 6, “Page Administration,” on page 207. To learn about accessing portlet preferences for a portlet registration, see Chapter 7, “Portlet Administration,” on page 241. 11.5.1 About the Preferences The Detail portlet has two preference pages: one for general preferences (shown in Figure 11-10 on page 322) and one for complex preferences. Figure 11-10 Detail Preferences: General Preferences 322 Identity Manager Roles Based Provisioning Module 3.7 User Application: Administration Guide Table 11-3 Detail Portlet: General Preferences Preference Description OrgChart Portlet Name The name of the registered instance of the org chart portlet that you want to launch if the enable org chart display preference is set to true. Entity Detail Complex Preference Click View/Edit Custom Preferences to access the detail portlet’s complex preferences. When you open this complex preference, the individual Detail preferences are presented: Figure 11-11 Detail Portlet: Complex Preferences Detail Portlet Reference 323 Table 11-4 Detail Portlet: Complex Preferences Preference Details Entity Definition Specifies the attribute list and HTML layout to display when Detail is used for a particular entity type (such as User, Device, or Group). You can click Add Entity Definition to specify Detail support for additional entity types. Attributes to display in view mode Specifies which attributes of the selected entity you want the portlet to display in view mode. These attributes are listed in the order you choose. A button is provided to let you add or remove attributes as needed. Attributes to display in edit mode Specifies which attributes of the selected entity you want the portlet to display in edit mode. These attributes are listed in the order you choose. A button is provided to let you add or remove attributes as needed. HTML Layout Provides a button to open the HTML Layout Editor, where you can design the heading area that the Detail portlet is to display for the selected entity. For details, see “Determining What the Heading Area Displays” on page 311. Enable edit entity Choose True if you want to enable the Edit Your Information link in the header of the detail portlet. Enable send entity info Choose True if you want to enable the Send Identity Info link in the header of the detail portlet. Enable org chart display Choose True if you want to enable the Display Organization Chart link in the header of the detail portlet. Enable edit of preferred locale Choose True if you want to display the Edit Preferred Locale link in the header of the detail portlet. 11.6 Setting up Detail for Anonymous Access An anonymous user might navigate to the Detail portlet after completing the Create portlet or performing a Search. You can set up a special instance of the Detail portlet just for access by an anonymous or guest user. If you do not set up a separate instance for anonymous access, the user might be prompted to log in before being allowed to access any details of an Identity Vault object. As an alternative to setting up a unique instance for guest access, you could also change the authentication requirement of the standard detail portlet To set up the detail portlet for anonymous access: 1 Go to Administration > Portlet Admin. 2 Register and name a new instance of the DetailPortlet, for example, Public Detail. 3 Select the new detail portlet instance. 4 Go to Settings. Set Requires authentication to false. 324 Identity Manager Roles Based Provisioning Module 3.7 User Application: Administration Guide 5 Click Save Settings. 6 Go to Preferences and modify the preferences as required. For example, you might want to change the entities or the attributes to display in view and edit mode. If the anonymous user is allowed to view the detail without logging in, Detail does not display Edit User or Edit Your Information because the portlet detects that the user is not logged in and has no Edit rights. If the anonymous user is forced to log in, edit rights are determined by any policies set in eDirectory for new users in that container. Detail Portlet Reference 325 326 Identity Manager Roles Based Provisioning Module 3.7 User Application: Administration Guide 12 Org Chart Portlet Reference 12 This section describes how to modify or add new org chart features to your Identity Manager User Application. Topics include: Section 12.1, “About Org Chart,” on page 327 Section 12.2, “Configuring the Org Chart Portlet,” on page 332 Section 12.2.2, “Setting Preferences,” on page 334 Section 12.3, “Configuring Org Chart for Guest Access,” on page 355 12.1 About Org Chart The Org Chart portlet allows users to view and browse a graphical representation of the relationships between objects in the Identity Vault. For example, you can define Org Chart portlets that show relationships, such as An organization (such as employees and managers) A group’s membership (such as all of the employees in a group) Devices assigned to a user (such as cell phones and laptops) The default configuration of the Identity Manager User Application Identity Self-Service tab includes an Organization Chart action. This action is an Org Chart portlet configured to show relationships among user objects in the Identity Vault. The following example shows how the default Org Chart portlet renders this relationship (using sample data). Org Chart Portlet Reference 327 Figure 12-1 Default Org Chart Built-in links. The Org Chart portlet includes these built-in links. The built-in links are configurable via the Org Chart Layout Preferences described in “Org Chart Presentation Layout Preferences” on page 345. Link Description Allows the user to navigate to the next upper level. This is only available when viewing a relationship where the target and source entities are the same type (such as user). Relationships are defined in the directory abstraction layer editor. Lets users expand or collapse the default relationship. The default relationship is defined in the preferences. It is the relationship that is initially displayed. Lets users reset the root of the org chart currently displayed. The root is the starting point or orientation point of the org chart. Lets users choose a relationship to expand or collapse from a drop-down list. If users choose to expand a relationship, Org Chart allows them to choose which direction to expand it (left or right). 328 Identity Manager Roles Based Provisioning Module 3.7 User Application: Administration Guide Link Description Launches the Detail portlet. Displays a list of org charts. Lets users choose one or more org charts to view. This list of org charts is dynamic. It displays other org charts that share the same source entity type. For example, if you are viewing a manager/employee org chart (the source entity is user) and you click this icon, then the list of org charts you can view only contains relationships where the source entity is also user. . Launches an e-mail tool to: Send the identity details of the currently selected user. Compose an e-mail. Allows users to perform entity searches. The searches result in the found entity becoming the top node of the chart displayed. (This is not configurable via preferences.) For more information about adding and restricting the built-in links on your org charts, see “Org Chart Presentation Layout Preferences” on page 345. Org Chart also provides a view of the relationships in a 508-compliant format. You can set preferences that display this view by default or as an option. Figure 12-2 shows the same Org Chart data as Figure 12-1 but in the 508-compliant format. Org Chart Portlet Reference 329 Figure 12-2 Org Chart Accessible View 12.1.1 About Org Chart Relationships The Org Chart portlet displays relationships that are defined in the directory abstraction layer. The following relationships are available after the Identity Manager User Application is installed: Group’s membership Manager-Employee User Groups To learn more about creating or modifying Org Chart relationships, see Section 1.2.2, “Directory Abstraction Layer,” on page 32. NOTE: Dynamic groups are not fully supported by the Org Chart portlet. You cannot define a dynamic group as the source entity of a relationship, but you can define a dynamic group as the target entity in a relationship. 330 Identity Manager Roles Based Provisioning Module 3.7 User Application: Administration Guide 12.1.2 About Org Chart Display The Org Chart portlet can display in HTML mode (the default) or in Accessible mode which is the 508-compliant mode. You can enable or disable these views via the portlet preferences. When both modes are enabled, users see a tabbed page. You can control the titles through preference definitions. Users are able to display multiple relationships in one org chart as long as the relationships share the source entity. For example, Figure 12-3 shows the org chart with both manager-employees, and users-groups for the root entity. Figure 12-3 Org Chart Displaying Multiple Relationships If the manager attribute is multi-valued, the org chart automatically allows users to choose which manager’s org chart to display, as shown in Figure 12-4 on page 332. Org Chart Portlet Reference 331 Figure 12-4 Displaying Multi-valued Manager Attributes User Images By default, the org chart HTML layout for the User object includes the User Photo attribute. However, if your Identity Vault does not include this attribute or it is not populated, the org chart ignores this attribute at runtime. If you store your photos in a different location, you can configure the org chart to display those photos instead. The default user image shipped with the User Application is 86 x 86 pixels. For consistency, you should use images that are approximately this size. You can use images of any size and dimension, but they are displayed in that size. This can affect the layout of the business card view. For more information, see Section 12.2.3, “Dynamically Loading Images,” on page 354. 12.2 Configuring the Org Chart Portlet To configure the Org Chart portlet, complete the steps in Table 12-1. Table 12-1 Org Chart Portlet: Configuration Steps Step Task Description 1 Define the relationship that you want to display. You can use one of the predefined relationships that are installed with the Identity Manager User Application, or you can create your own. For more information about defining a relationship, see Section 1.2.2, “Directory Abstraction Layer,” on page 32. 2 Verify that the entities and attributes that you want to use in the relationship are available in the directory abstraction layer. For more information about defining a relationship, see Section 12.2.1, “Directory Abstraction Layer Setup,” on page 333. 332 Identity Manager Roles Based Provisioning Module 3.7 User Application: Administration Guide Step Task Description 3 Determine where you want to display this relationship. Do you want to create a new page for launching the org chart? Or, do you want to launch it from the Detail portlet or from another org chart? For more information about creating pages and adding portlets to those pages, see Chapter 6, “Page Administration,” on page 207. 4 Set preferences for the portlet. Preferences let you define: Which attributes to display. How to display them (their HTML layout). For more information, see Section 12.2.2, “Setting Preferences,” on page 334. 5 Test. Test the relationship definitions and layout. 6 Set eDirectoryTM rights and establish any indexes needed to enhance performance. Effective rights. To display attributes defined by the portlet, users must have Read rights to the attributes. Performance enhancement. The performance of the org chart display can be enhanced by adding an eDirectory value index to the relationship’s target attribute because the target attribute is used to do the LDAP search. 12.2.1 Directory Abstraction Layer Setup The entities and attributes displayed within an Org Chart must be defined in the directory abstraction layer. Table 12-2 on page 333 shows the attributes and properties that you must set for each entity and attribute displayed in an org chart. Table 12-2 Org Chart Portlet: Entity and Attribute Settings Definition Type Setting Value entity view Selected (true) attribute read Selected (true) search Selected (true) Lookup Link requirements. Lookup Link allows users to navigate the org chart by performing searches for other objects of the same type as the Source Entity key. The Lookup Link requires that the source entity key have at least one attribute with the require and search access properties set to true (selected in the directory abstraction layer editor). If not, the lookup link’s Object Lookup dialog cannot be populated and is empty when displayed. For more information on entity and attribute configuration, see Section 1.2.2, “Directory Abstraction Layer,” on page 32. Org Chart Portlet Reference 333 12.2.2 Setting Preferences You can define preferences for the relationships, the presentation (such as attributes and their order) and general display preferences. For more information, see: “Org Chart General Preferences” on page 334 “Org Chart Data/Relationship Preferences” on page 341 “Org Chart Presentation Layout Preferences” on page 345 Org Chart General Preferences This category includes the preferences on the main preferences page and excludes the custom preferences. The preference page is shown in Figure 12-5 and Figure 12-6 on page 336. 334 Identity Manager Roles Based Provisioning Module 3.7 User Application: Administration Guide Figure 12-5 Org Chart Preferences Org Chart Portlet Reference 335 Figure 12-6 Org Chart Preferences (continued) Table 12-3 Org Chart Portlet: Preferences Preference What to Do Data Click View/Edit Custom Preferences to access the preferences that define the org chart’s relationships. See “Org Chart Data/Relationship Preferences” on page 341. Enable HTML Pane Click True to enable the HTML display of related objects. This is the default display. It displays the related objects as business cards. HTML Pane Title Type the text to display in the HTML Pane tab. If you enable the display of the Accessible Pane and the HTML Pane, this text is displayed as the title of the containing the HTML display. Enable Accessible Pane Click True to enable the Accessible display of related objects. The Accessible pane displays the objects and links as text strings. This display provides 508-compliant access. Accessible Pane Title Type the text to display in the Accessible Pane tab. If the HTML Pane and the Accessible Pane are enabled, this text is displayed as the title of the containing the Accessible display. Default Pane Choose the pane to display as the default when a user clicks the Organization Chart action. It must be enabled. 336 Identity Manager Roles Based Provisioning Module 3.7 User Application: Administration Guide Preference What to Do Detail Portlet Name Specify the name of the Detail portlet instance to launch when the user clicks the Show Info link. Presentation Layouts Click View/Edit Custom Preferences to access the layout preferences. They are described in “Org Chart Presentation Layout Preferences” on page 345. Maximum Depth Defines the maximum depth the user can drill down in an org chart. This is not the same as the ability to navigate through an org chart, which is restricted by effective rights. Maximum Initial Depth Defines the depth of the initial display. Show Scrollbars Click True to enable scrollbars. Org Chart Portlet Reference 337 Preference What to Do OrgChart Skin Specify one of the skins for the org chart listed below: Business Card: eGuide: Novell.com: Wired: True Blue: Connect wires to items Specifies whether the org chart cards are connected by wires. False means not connected. 338 Identity Manager Roles Based Provisioning Module 3.7 User Application: Administration Guide Preference What to Do Tree Presentation Defines the Org Chart orientation (horizontal or vertical) and whether the chart displays as business cards or text. Values range between 0 and 5. Values of 0, 2, and 4 display business cards. Values of 1, 3, and 5 display text. Tree Presentation Values of 0, 2, and 4 display business cards. Specify 0, to place a card above a vertical list of items. Specify 2, to place a business card above a horizontal list of items. Specify 4, to place card before a vertical list of items Org Chart Portlet Reference 339 Preference What to Do Tree Presentation Values of 1, 3, and 5 display the org chart using lines. Specify 1, to display a line above a vertical list of items Specify 3, to display a line above a horizontal list of items Specify 5, to display a line before a vertical list of items Minimum item width The minimum width (in pixels) of the business card display (in HTML mode). This value should equal to round ('item min height' * 1.618). Minimum item height The minimum height (in pixels) of the business card display. This value should equal to round ('item min width' / 1.618). 340 Identity Manager Roles Based Provisioning Module 3.7 User Application: Administration Guide Preference What to Do Separator for multi-valued attributes The character used as a separator for attributes with more than one value. Org Chart Data/Relationship Preferences You access the Org Chart relationship preferences by clicking the View/Edit Custom Preferences link of the Data preference. The initial preference page is shown below. It displays the default relationship used in the default Org Chart. Figure 12-7 Org Chart Data/Relationship Preferences To edit the entity and relationships available to the org chart, click edit button . See Editing Data/ Relationship Preferences (page 342). To modify the display settings for the expanded nodes, click the modify button . See Modifying Expanded Nodes (page 343). Org Chart Portlet Reference 341 Editing Data/Relationship Preferences This set of preferences affects the initial display of the org chart and the relationships displayed when users click the expand/collapse relationship button. . You can define any number of relationship levels. Figure 12-8 Edit Default Data/Relationship Preferences Table 12-4 Org Chart Data/Relationship Preference Preference Description Entity Settings The Select Entity Definition Type preference lets you choose the entity whose relationships you want to display. Only entities defined in the directory abstraction layer are available in this drop-down list. The Select Object Entity preference lets you choose the chart’s root entity. Click the object selector button to search for an object. If the selected entity type definition is a user, then you can select Self instead of an object. Choosing Self means that the org chart root is the loggedon user. 342 Identity Manager Roles Based Provisioning Module 3.7 User Application: Administration Guide Preference Description Relationship Settings The settings in this category let you specify the details about the relationships displayed by the default chart. The Relationship preference lets you choose a relationship from the drop-down list. Only the relationships that make sense for the selected entity are included in this list. The Display Depth preference controls how many levels of the relationship are displayed. Only display depths allowed for the selected relationship are displayed. The expanded node preferences are the same, except that they control the relationships displayed after the user clicks the expand/collapse button . Modifying Expanded Nodes Expanded nodes preferences let you control what is displayed when the user clicks the expand/ collapse button of the org chart. . Org Chart Portlet Reference 343 Figure 12-9 Preferences for Modifying Expanded Nodes 344 Identity Manager Roles Based Provisioning Module 3.7 User Application: Administration Guide Org Chart Presentation Layout Preferences The Org Chart Presentation Layout preferences let you define the HTML layout for the display of the org chart entries. You can use the HTML editor available from the preferences sheet, or you can use the HTML editor of your choice for more precise editing. See “Using an External HTML Editor” on page 354. The HTML editor, available from the preferences page, provides a WYSIWYG interface for defining the layout of the leaves of the org chart. It provides the typical features of an HTML editor for defining text formatting and lists, specifying anchors and images, and so on. Use the Keywords drop-down list to place attributes, commands, and navigation URLs within the layout area. When you choose a keyword from the drop-down list, it is inserted with the proper syntax, but you can also add HTML within the layout area. Org Chart Portlet Reference 345 Figure 12-10 Org Chart Presentation Layouts Preferences Table 12-5 HTML Layout Definitions Layout Section Description HTML Layout Section Business Cards The default layout. The layout displayed when Tree Presentation is set to 0, 2, or 4. 346 Identity Manager Roles Based Provisioning Module 3.7 User Application: Administration Guide Layout Section Description HTML Layout Section for Section 508 Display The default layout for the Accessible Pane. HTML Layout Section for Simple Layout The layout when the Tree Presentation is set to 1, 3, or 5. Using the HTML Editor You access the HTML editor by clicking the Edit button. The HTML editor is shown in Figure 1211. Figure 12-11 HTML Editor HTML Editor Features and Keywords Table 12-6 describes the HTML editor features and Keywords drop-down list. To save your layouts, click Submit. Org Chart Portlet Reference 347 Table 12-6 HTML Editor Features Feature Tip Insert Link button In Mozilla: 1. Select the text you want to link, then click Insert Link. 2. Type the URL and click Create Link. 3. Save the preferences. In IE: 1. Click Insert Link. 2. Type the URL in the pop-up window. 3. Select the text you want to link, then click Create Link in the pop-up window. 4. Save the preferences. NOTE: If your image or URL is located in the upper-left quadrant of the HTML editor, the pop-up window overlaps it. Because the pop-up cannot be moved, you must create the text you want elsewhere in the editor and cut and paste it to the correct location. Add Image button In Mozilla: 1. Place the cursor where you want to insert an image, then click Add Image. 2. Type the URL and text, then click Create Image in the pop-up window. 3. Save the preferences. In IE: 1. Click Add Image. 2. Type the URL and text in the pop-up window, place the cursor where you want to insert an image, then click Create Image in the pop-up window. 3. Save the preferences. NOTE: If your image or URL is located in the upper-left quadrant of the HTML editor, the pop-up window overlaps it. Because the pop-up cannot be moved, you must create the text you want elsewhere in the editor and cut and paste it to the correct location. 348 Identity Manager Roles Based Provisioning Module 3.7 User Application: Administration Guide Feature Tip Keyword drop-down List: Attributes The set of attributes available for this entity. When designing your layout, you can use the Keywords drop-down list to insert variables that are replaced at runtime with specific attribute values. You can also type the attributes directly in the editor using the following syntax: $[[keyword]] where keyword is the value of an entity attribute such as LastName. You can concatenate attributes using this syntax: $[[keyword+keyword]] $[[FirstName+LastName]] For example, you can concatenate as many attributes as you want and can also include quoted strings like this: $[[keyword+”sample text”+keyword]] This renders the values of the keywords and the quoted text. NOTE: When a keyword is mistyped in a layout, it is rendered as-is in the org chart (including the $[[]]). Keyword drop-down List: Commands These commands allow the Org Chart portlet to display the links or buttons for the built-in links described in “Built-in links.” on page 328. The keyword commands generate: Navigation URLs. See Table 12-7, “Org Chart Keywords: Built-in Action URLs,” on page 350. Action Links. See Table 12-8, “Org Chart Keywords: Built-in Action Links,” on page 352. Navigation Buttons. Table 12-9, “Org Chart Buttons Built-in Action Buttons,” on page 353. There is a set of commands that generate buttons for the HTML display and a set of commands that generate links for the accessible view. The links do not display with link attributes. See Table 12-8 on page 352. Org Chart Portlet Reference 349 Table 12-7 Org Chart Keywords: Built-in Action URLs Menu Item Source Created Usage OrgChart Navigation Click (Link) @OCNavClick Use this keyword for an onClick event. It makes the clicked entity the new org chart root. To use this keyword: 1. Click View Source. 2. Type the @NavClick keyword using this syntax: <A href="javascript:return false;" onClick="$[[@NavClick]]">$[[SomeAt tribute]]</A> where SomeAttribute is an entity attribute that becomes a clickable link. The "javascript:return false;" is required. Omitting it will cause an error. OrgChart Up Navigation (Link) @OCUpClick Use this keyword for an onClick event. It navigates to the current entity’s parent. If there is more than one parent, it displays a popup menu with selectable options. To use this keyword, you must: 1. Click View Source. 2. Type @OCUpClick using this syntax: <A href="javascript:return false;" onClick="$[[@OCUpClick]]">$[[SomeA ttribute]]</A> where SomeAttribute is an entity attribute that becomes a clickable link. The "javascript:return false;" is required. Omitting it will cause an error. 350 Identity Manager Roles Based Provisioning Module 3.7 User Application: Administration Guide Menu Item Source Created Usage @OCExpCollClick Use this keyword on an onClick event. It allows the user to Expand/Collapse existing relationships from the clicked entity. To use this keyword, you must: 1. Click View Source. 2. Type @OCExpCollClick using this syntax: <A href="javascript:return false;" onClick="$[[@OCExpCollClick]]">$[[ SomeAttribute]]</A> where SomeAttribute is an entity attribute that becomes a clickable link. The "javascript:return false;" is required. Omitting it will cause an error. Org Chart Portlet Reference 351 Menu Item Source Created OrgChart Navigation Url (Link) @OCNavURL Usage Specify a URL or entity attribute to display as a link. When clicked, the org chart displays with the clicked entity becoming the root node. This is only valid when the Source and Target entities are the same object type. For example, in the Manager-Employee relationship, both are users. Use this keyword as follows: 1. Click View Source. 2. Type the @NavUrl keyword using this syntax: <a href="javascript:$[[@NavUrl]]">som eText</a> where someText is the text or an entity attribute. In the following example, Click here becomes a clickable link: <a href="javascript:$[[@NavUrl]]">Cli ck here</a> Here, the FirstName attribute is the clickable link: <a href="javascript:$[[@NavUrl]]">$[[ FirstName]]</a> With Internet Explorer, do not use the following syntax. IE adds a context before the @NavURL; it will not display correctly. <a href="$[[@NavUrl]]">someText</ a> The keywords in Table 12-8 generate localized text links for use on the HTML pane. Table 12-8 Org Chart Keywords: Built-in Action Links Menu Item Source Created Expand/Collapse Current Relationship (Link) @OCLazyExpCollLink Renders as a Localized Link of This Text Expand/Collapse current relationship Finds the first reentrant relationship and collapses it. 352 Identity Manager Roles Based Provisioning Module 3.7 User Application: Administration Guide Menu Item Source Created Renders as a Localized Link of This Text Org Chart Up Button (Link) @OCUpLink Go up a level Goes to the current entity’s parent. If there is more than one parent, it displays a popup that allows the user to select the parent. Show Info (Link) @ShowInfoLink Show info Launches the Detail portlet for the selected entity. Email Info (Link): @SendInfoLink Email Info Launches an e-mail that contains the clicked entity’s information. Email to team (Link) @MailTeamLink Email to team Launches an e-mail to the selected entity’s team. The keywords in Table 12-9 generate image buttons for use with the HTML pane. Table 12-9 Org Chart Buttons Built-in Action Buttons Menu Item Syntax OrgChart Leap (Action Button) @OCLeapBtn Renders As The button makes the clicked entity the new root. OrgChart Up Button (Action Button) @OCUpButton Choose relationship to Expand/ Collapse (Action Button) @OCExpColBtn Expand/Collapse current relationship (Action Button) @OCLazyExpColBtn The button goes to the current entity’s parent. If there is more than one parent, it displays a popup that allows the user to select the parent. This buttons expands/collapses existing relationships from the clicked entity. This button finds the first reentrant relationship and collapses it. Org Chart Portlet Reference 353 Menu Item Syntax OrgChart (Action Button) @OCSwitchBtn Renders As This buttons shows the available relationships from the clicked entity. When the user picks one, the clicked entity becomes the new root and the selected relationship is expanded. Info (Action Button) @InfoBtn Displays the detail portlet for the selected entity. IM (Action Button) @IMBtn Allows the user to send instant messages and add contacts. The entity must include the appropriate attributes or the org chart displays a message indicating that no data is available. Mail (Action Button) @MailBtn Launches an e-mail that contains the clicked entity’s information. Using an External HTML Editor Use the following process to work in an external HTML editor: 1 Create the HTML source for the entity attributes, commands, and keywords using HTML Layout Editor, available in the preferences. 2 Copy the HTML source to the editor of your choice. 3 Make the changes that you want. 4 Copy the HTML source back to the HTML Layout Editor preference when you have finished editing it. 12.2.3 Dynamically Loading Images To display images that are stored in your Identity Vault (such as user photos), you can add the attribute name to the business card. For example, adding the User Photo attribute to the business card layout displays the user’s photo. If you store images outside the Identity Vault, you need to use the IMG: tag within the View Source mode of the HTML Editor as follows: 1 Go to the Org Chart portlet’s preferences and access the HTML Editor. 2 Click View Source. 3 Use the IMG: tag to combine a location, an attribute key, and a file extension using a syntax like this: 354 Identity Manager Roles Based Provisioning Module 3.7 User Application: Administration Guide $[[IMG:”URL” + attribute-key-name + ”fileextension”]] The following example shows the syntax you would use if you stored employee photos as JPG images by Last Name in the /images subdirectory of your application server: $[[IMG:"http://myhost:8080/images/"+LastName+".jpg"]] At runtime, the org chart concatenates the URL with the LastName attribute and the file extension .jpg. The HTML Editor supports a flexible syntax. It supports any combination of text and attributes so that the syntax is: $[[IMG:”some text” + attribute-key-name + ...]] 12.3 Configuring Org Chart for Guest Access To configure the org chart portlet for anonymous access you must modify settings in the Org Chart preferences and also in the User Application WAR file. The steps are described in: Section 12.3.1, “Modifying the Org Chart Preferences,” on page 355 Section 12.3.2, “Modifying the User Application WAR,” on page 355 12.3.1 Modifying the Org Chart Preferences 1 Go to Administration > Portlet Admin. 2 Register and name a new instance of the OrgChartPortlet, for example, Public OrgChart. 3 Select the new instance, then go to the Settings tab. 4 Set Requires Authentication to false, then click Save Settings. 5 Go to the Preferences and modify the preferences as needed. 6 Reference this instance of Org Chart from the Create or Detail portlets defined for anonymous access. 12.3.2 Modifying the User Application WAR The org chart portlet relies on controls defined in the User Application WAR’s UIControlRegistry.xml file. By default, these controls require authentication. To allow guest access to the org chart portlet, you must set the authentication requirement to false in the definitions for the portal and vdm services in the WEB-INF\UIControlRegistry.xml file. Perform these instructions in a test environment before attempting them on a working version of the User Application. Make sure you backup your files before you begin. To change the authentication requirements for the portal and vdm service definitions: 1 Open the User Application WAR and extract the contents. 2 Locate the UIControlRegistry.xml file in the WAR’s WEB-INF directory. 3 In the UIControlRegistry.xml file, locate the service definition for the portal service. It is shown below: <service resultType="json" authenticated="true" config="false"> Org Chart Portlet Reference 355 <key>portal</key> <classname>com.novell.srvprv.impl.servlet.service.PortalBridge </classname> </service> 4 Change the value of authenticated to false. 5 In the UIControlRegistry.xml file, locate the service definition for the vdm service. It is shown below: <service resultType="json" authenticated="false" config="false"> <key>vdm</key> <classname>com.novell.srvprv.impl.servlet.service.VDMBridge </classname> </service> 6 Change the value of authenticated to false. 7 Save your changes. 8 Repackage the User Application WAR file. To repackage the WAR file, you need to use the jar tool included with the JDK. Note that the configupdate.sh script may fail after you manually add custom files to an IDM.war, if the WAR was created with the jar binary in /usr/bin/jar distributed in SLES 9. The error is: DEBUG===WAR updating...java.util.zip.ZipException: invalid entry compressed size (expected 16176 but got 16177 bytes) at java.util.zip.ZipOutputStream.closeEntry(Unknown Source) at java.util.zip.ZipOutputStream.putNextEntry(Unknown Source) To solve or prevent the problem, use a newer version of the jar tool to create the WAR, as in this example: /usr/lib/java/bin/jar -cvf IDM.war * 9 Deploy the updated WAR in your test environment. 356 Identity Manager Roles Based Provisioning Module 3.7 User Application: Administration Guide 13 Resource Request Portlet 13 This section describes how to set up and customize the Resource Request portlet for use with the User Application. It includes these topics: Section 13.1, “About the Resource Request Portlet,” on page 357 Section 13.2, “Configuring the Resource Request Portlet,” on page 357 Section 13.2.1, “Setting Preferences,” on page 358 13.1 About the Resource Request Portlet The Resource Request portlet allows the guest user to execute resource requests. For example, you could set up a resource request that allows a user to self-register upon a completed and approved workflow. 13.2 Configuring the Resource Request Portlet Follow these steps to configure the Resource Request portlet: Table 13-1 Resource Request Configuration Steps Step Task Description 1 Define the guest account for your system. Only non-anonymous guest accounts can start provisioning requests. This is due to the fact that the initiator must be a valid DN for further processing by the Workflow engine. You can define a non-anonymous guest account when you install the User Application or by running the configupdate tool. 2 Specify the resource request to be executed from this portlet. For more information, see Section 13.2.1, “Setting Preferences,” on page 358. 3 Create a new page to contain the resource request. The security on this page should allow guest access. For more information, see Section 6.3, “Creating and Maintaining Shared Pages,” on page 224. 4 After you create the new shared page, make sure that you specify the Guest Category and deselect the page’s View permission Set to Admin only. Test the resource request as the guest Verify that the workflow completes as expected. user. TIP: When you create the workflows to use with the Resource Request portlet and you define the To token in the e-mail notification as _default_, the addressee expression must be an IDVault expression. Resource Request Portlet 357 13.2.1 Setting Preferences Preferences include: Table 13-2 Resource Request Portlet: General and Custom Preferences Preference Description Resource Request Click View/Edit Custom Preference to access the list of resource requests to add to the page. This list is populated with any resource requests deployed to the User Application driver. Choose a single resource request. The list is populated with the resource requests that are deployed to the User Application driver. 358 Identity Manager Roles Based Provisioning Module 3.7 User Application: Administration Guide 14 Search List Portlet Reference 14 This section describes how to set up and customize the Search List portlet for use with the Identity Manager User Application. Topics include: Section 14.1, “About Search List,” on page 359 Section 14.2, “Configuring the Search List portlet,” on page 363 Section 14.2.2, “Setting Search List preferences,” on page 365 Section 14.3, “Configuring Search List for Anonymous Access,” on page 370 14.1 About Search List The Search List portlet allows users to search and display the contents of the Identity Vault. It is the basis for the Directory Search action of the Identity Manager User Application Identity Self-Service tab. The Directory Search action is configured to allow users to search for users and groups, but you can modify it to change the scope of searchable objects and attributes. Figure 14-1 on page 359 shows how the Directory Search action allows users to define search criteria. Figure 14-1 Basic Search Table 14-1 Directory Search Criteria User Interface Element Description Search for Users select the object type to search. For more information on defining the contents of this list, see Section 14.2.2, “Setting Search List preferences,” on page 365. Search List Portlet Reference 359 User Interface Element Description With this criteria Users define the search criteria by selecting attributes and search operators from the drop-down list. When users select Advanced Search, they are able to specify multiple rows and multiple blocks of search criteria groupings that can be made inclusive (AND) or exclusive (OR). For more information on defining the searchable attributes, see “Setting Search List preferences” on page 365. Search Runs the specified search criteria. For more information on defining the default search, see “Setting Search List preferences” on page 365. My Saved Searches Allows the user to run, edit, or delete a previously saved search. Advanced Search Lets users add rows or blocks of search criteria, but in an advanced search, they are able to specify multiple rows and multiple blocks of search criteria groupings that can be made inclusive (AND) or exclusive (OR). For more information on defining the searchable attributes, see “Setting Search List preferences” on page 365. This example shows how the portlet displays (using sample data) after the search criteria First name starts with A is entered: Figure 14-2 Sample Search List Results The Search List portlet provides support for the features listed in Table 14-2 on page 361. Some of these features require configuration, as described in Section 14.2, “Configuring the Search List portlet,” on page 363. 360 Identity Manager Roles Based Provisioning Module 3.7 User Application: Administration Guide Table 14-2 Search List Portlet Features User Interface Element Description Identity, Location, Organization tabs Users click one of these tabs to see the results list displayed in different ways. For more information on formats, see “About Results List Display Formats” on page 361. My Saved Searches Allows users to select a previously saved search. Save Search Allows users to save search criteria and rerun the saved searches as needed. The searches are saved to the currently logged on user’s srvprvQueryList attribute. Export Results Lets users export the search results to a different format. Revise Search Lets users change the search criteria. New Search Lets users define a new search. By default, Search List also allows users to: Print the search results Launch e-mail from the results list Launch the Detail portlet from the results list 14.1.1 About Results List Display Formats You can define how data that is returned from the Identity Vault search is displayed to users. The data can be organized in one or more of these page types: Identity Pages typically include contact information, as shown here: Search List Portlet Reference 361 Location Pages typically include location information, as shown here: 362 Identity Manager Roles Based Provisioning Module 3.7 User Application: Administration Guide Organization Pages typically include organization hierarchy information, as shown here: You can define other result list formats using the portlet’s complex preferences. For example, if your Identity Vault schema includes information about employee skills, you can set up a results list to display this information. Depending on how you configure the portlet, users are able to: Choose the types of Identity Vault objects to search (such as users and groups) Specify the criteria that they want to search (such as First name starts with, Last name includes, and so on) Choose the display format that they want to view the search results Change the sort order 14.2 Configuring the Search List portlet To configure the Search List portlet, follow the steps in Table 14-3. Table 14-3 Search List Portlet Configuration Steps Step Task Description 1 Define: You can use the predefined Directory Search action that gets installed with the Identity Manager User Application as-is. You can modify it, or you can create your own. The entities and attributes you allow users to search. How you display the results list. For more information, see “Setting Search List preferences” on page 365. Search List Portlet Reference 363 Step Task Description 2 Verify that the set of entities and attributes for searching are defined in the directory abstraction layer. For more information, see Section 1.2.2, “Directory Abstraction Layer,” on page 32. 3 Determine how you want users to access the portlet. Do you want users to launch this portlet from an existing or a new page? For more information about pages, see Chapter 6, “Page Administration,” on page 207. 4 Set preferences for the portlet. Preferences for the search list portlet let you define: The attributes displayed for each results list format. The results list display format that a search produces. The default sort order for the results list formats. For more information, see Section 14.2.2, “Setting Search List preferences,” on page 365. 5 Test your settings. Verify that the results lists show the desired attributes. 6 Set eDirectoryTM rights and establish any indexes needed to enhance performance. eDirectory rights: To execute a search: The user performing the search needs Browse rights to any users or objects being searched. To save a search (for non-Administrative users): Trustee of the organizational unit and the organization where they will be executing the search. User requires write, self, and supervisor rights. Performance enhancement. The performance of the search can be improved by adding an eDirectory value index to the attribute on which the search is based. For more information on defining different results list display formats, see Section 14.2.2, “Setting Search List preferences,” on page 365. 14.2.1 Directory Abstraction Layer Setup The entities and attributes that can be selected from the search criteria drop-down list and data returned from the Identity Vault searches must be defined in the directory abstraction layer. Table 14-4 shows the properties that you should set for the entities and attributes used by search list. Table 14-4 Search List Entities and Attributes Definition Type Setting Directory Abstraction Layer Value entity view Selected (true) 364 Identity Manager Roles Based Provisioning Module 3.7 User Application: Administration Guide Definition Type Setting Directory Abstraction Layer Value attribute enable Selected (true). search Selected (true). Any attribute that you want to appear in the list of available search criteria must have search=true. When false, you cannot define a search on this attribute or include it in a results list format. hide Unselected (false). Any attribute that you want to include in the results list must have hide=false. Other Directory abstraction layer settings. The directory abstraction layer data type, format type, filters, and search scope also impact the Search List portlet. The data type and format type affect the appearance; the filter and search scope affect how much data is returned. For more information, see Identity Manager User Application: Design Guide. 14.2.2 Setting Search List preferences You can define two types of preferences: “Search preferences” on page 365 “Results List format preferences” on page 367 Search preferences The search preferences are contained in a single preference page: Search List Portlet Reference 365 The search preferences are defined in Table 14-5 on page 367. 366 Identity Manager Roles Based Provisioning Module 3.7 User Application: Administration Guide Table 14-5 Search List Portlet Preferences Preference What to Do Default Mode Specify how you want the portlet to display when a user first accesses it. Values are: Basic Search. Allows users to enter a single search criteria. For example: First Name starts with A Advanced search. Allows users to define multiple search criteria in one or more search blocks. Users can use the and and or logical operators within the search criteria or among the search blocks. For example, users can create a search like this: (First Name starts with A or First Name starts with B) and (Region = Northeast or Region = Southeast) OR (First Name starts with A and Last Name starts with B) or (First Name starts with B and Last Name starts with A) My Saved Searches. Displays a list of searches saved by the currently logged in user. The searches are saved in the user’s srvprvQueryList attribute. NOTE: Users can access any of these modes at runtime by executing or editing a search or clicking a button at the bottom of the portlet. Pagination The maximum number of rows shown at a time. Results Limit The maximum number of matches returned by the search. If set to 0, then the maximum defers to the directory abstraction layer setting. Search and List complex preference Click to refine the Entities to search Result set type Attributes to include in the pages and the order in which they appear Results List format preferences The complex preferences page lets you define the entities to include in the search and how to format the results list. The default preferences page looks like this: Search List Portlet Reference 367 The complex preferences are listed in Table 14-6 on page 369. 368 Identity Manager Roles Based Provisioning Module 3.7 User Application: Administration Guide Table 14-6 Search List Portlet: Complex Preferences Preference What to Do Entity Definition Each object that is valid for searching (view=true) has a corresponding Entity Definition block on this preferences page. Use these preferences to: Define the objects included in the search. Modify the results list format definitions (such as adding and removing the attributes that are displayed and their default sort order). Remove any objects that you do not want included in the search by clicking Delete, shown on the Entity Definition line. This deletes the entire entity definition block. You can add the object back to the search later by clicking Add Entity Definition (located at the bottom of the page) and completing the wizard selection panels. TIP: If an object does not appear in this list, but is listed in the directory abstraction layer, check the view modifier (on the entity object). If it is set to false, then the entity cannot be used by the identity portlets. Show email as Icon When set to True and an e-mail attribute is specified in the results list, it displays as an icon. When set to False, the e-mail attribute displays the full e-mail address. The e-mail attribute (whether text or icon) is a clickable mailto: link. Results List Types (default) Specifies the results list default format for the current entity. The default is used only when a different format is not selected by the current user. Results List display format block Specifies the display format (such as Identity, Location, or Organizational pages) and includes the set of attributes to include for the type. To remove a Results List Type: Click Delete next to the Results List Type. This deletes the page type and all of its associated attributes from the search. To add a result set page: Click Expand and select the result set format from the list of choices. Search List Portlet Reference 369 Preference What to Do Attributes Specifies the set of attributes that will be displayed for the particular display format. To add or remove an attribute: Click the Modify attributes button. To add an attribute, select it (from the list of Available attributes). Click the arrow to move it to the Selected list. Do the reverse to remove an attribute from the Results List. To reorder the attributes list, click the up and down arrows to the right of the selected list. Click Submit. Attributes and data types. The attribute’s data type affects the way it is displayed. For example, if an attribute is defined as a sub-type of local list or global list then possible values are displayed in a dropdown list box in the Basic or Advanced Search Criteria screens. If the type is DN then a finder and history button are displayed to allow users to select a value in the Basic or Advanced Search Criteria screens, and the DN are resolved to a user-friendly display in the results list. The data type and sub-type also restrict the comparison operator displayed for the user to ensure that only valid comparisons are constructed. For more information, see Section 1.2.2, “Directory Abstraction Layer,” on page 32. Results List display format block Sort The sort order for the Results List is based on this attribute. The default sort order only takes effect if the Result Set Type is not the display format for the current user session. Multi-valued attributes and single-valued attributes. The number of records displayed in a results list varies depending on whether the sort attribute is single- or multi-valued. Sorting on multi-value attributes generally appears to result in more records, although the total number of matches remains the same. This is because each value of a multi-valued attribute is shown on a line by itself. Completing the Preferences Panel To verify that you have submitted valid entries, click Submit. If an entry is invalid, you will see an error message displayed at the top of the preferences page. When you are able to resolve all of the errors, click Return to List View, then click Save Preferences. 14.3 Configuring Search List for Anonymous Access To set up the Search List portlet for anonymous access: 1 Go to Administration > Portlet Admin. 2 Register and name a new instance of the Search List portlet, for example, Public Search. 3 Select the new instance and go to Settings. 370 Identity Manager Roles Based Provisioning Module 3.7 User Application: Administration Guide 4 Set Requires Authentication to false, then click Save Settings. 5 Go to Preferences, then Change Default Search Mode to Basic or Advanced (Saved Search mode is not valid for an anonymous user). Consider specifying a Detail Portlet instance that is also set up for public access (Requires Authentication is set to false). If you use the default DetailPortlet, the user will be forced to log in when viewing the detail of any result list link. Go to View/Edit Custom preferences and remove any entities or attributes that you do not want the guest user to see. To create a new shared page for the anonymous Search List: 1 Go to Administration > Page Admin. 2 Create a new Page and add it to the Guest Pages category (and any other categories for loggedin users.) 3 Click Add Permissions. Deselect View Permissions set to admin only. 4 Save the page. If the Search List portlet instance requires a DNLookup attribute, you need to change the ParamListPortlet setting Requires Authentication to false. Search List Portlet Reference 371 372 Identity Manager Roles Based Provisioning Module 3.7 User Application: Administration Guide Configuring and Managing Provisioning Workflows V V These sections describe how to configure and manage provisioning requests and workflows: Chapter 15, “Configuring the User Application Driver to Start Workflows,” on page 375 Chapter 16, “Managing Provisioning Request Definitions,” on page 389 Chapter 17, “Managing Provisioning Workflows,” on page 419 Configuring and Managing Provisioning Workflows 373 374 Identity Manager Roles Based Provisioning Module 3.7 User Application: Administration Guide Configuring the User Application Driver to Start Workflows 15 15 This section describes the User Application driver and how to configure it to automatically trigger a workflow based on an event in the Identity Vault. Section 15.1, “About the User Application Driver,” on page 375 Section 15.2, “Setting Up Workflows to Start Automatically,” on page 376 15.1 About the User Application Driver The User Application driver is responsible for starting provisioning workflows and for notifying the User Application of changes in the Identity Vault (for example, when you make changes to the directory abstraction layer using the Designer for Identity Manager). Only the Subscriber channel is used in this driver. The driver processes messages from the Identity Vault to the User Application running on an application server. Although there are events that occur in the User Application that are reported back to the Identity Vault, these events do not flow through the Publisher channel of the User Application driver. When the application server is started, the driver establishes a session with the application server. The driver sends messages to the User Application running on the application server (for example, “retrieve a new set of virtual directory definitions”). The source components of the driver include: ComposerDriverShim.jar – the Composer Driver Shim. It is installed in the lib directory \Novell\NDS\lib in Windows or the classes directory /usr/lib/dirxml/classes in Linux. srvprvUAD.jar – The Application Driver Shim. It is installed in the lib directory \Novell\NDS\lib in Windows or the classes directory /usr/lib/dirxml/classes in Linux. UserApplicationDriver.xml - A file that contains configuration data for setting up the new driver. It is installed in the DirXML.Drivers directory, which is \Tomcat\webapps\nps\DirXML.Drivers in Windows or /usr/lib/dirxml/rules/ DirXML.Drivers in Linux. The User Application driver components are installed when you install Identity Manager. Before you can run the Identity Manager User Application, you must add the User Application driver to a new or existing driver set, and activate the driver. Depending on your work environment, very little configuration of the User Application driver might be required, or you might want to implement a complex set of business rules in the driver policies. The User Application driver provides the same flexible mechanisms for data synchronization as other Identity Manager drivers. Configuring the User Application Driver to Start Workflows 375 15.2 Setting Up Workflows to Start Automatically Workflows are automatically started when a user starts a provisioning request by requesting a resource. In addition, the Identity Manager User Application driver listens for events in the Identity Vault and, when configured to do so, responds to events by starting the appropriate provisioning workflows. For example, you can configure the User Application driver to automatically start a provisioning workflow if a new user is added to the Identity Vault. You configure the User Application driver to automatically start workflows using Identity Manager policies and rules. 15.2.1 About Policies You can use filters and policies with the User Application driver in the same way that you can with other Identity Manager drivers. When an event occurs in the Identity Vault, Identity Manager creates an XML document that describes the event. The XML document is passed along the channel to the connected system (in this case, the connected system is the User Application). Filters and policies associated with a driver allow you to define how to respond to the event, and in the process transform that XML document to the format that is expected by the connected system. Identity Manager provides several categories of policies (for example, Event Transformation, Command Transformation, Schema Mapping, Output Transformation) that you can apply, in a prescribed order, to transform the XML document. This section provides an example of starting a workflow based on events in the Identity Vault. Although any of the policies can be used to trigger a workflow, the example presented in this section demonstrates the easiest and most useful method. When you create a User Application driver, an Event Transformation Policy is created for use by the driver. The Event Transformation Policy is responsible for creating the XML document that is processed by the remaining Subscriber channel policies. NOTE: Do not change the Event Transformation policy that was created when the User Application driver was created. The DN of this policy begins with Manage.Modify.Subscriber. Changing this policy might cause the workflow process to fail. An empty Schema Mapping Policy is also created. You can use this policy as a starting point for triggering a workflow, based on events in the Identity Vault. 15.2.2 Using the Policy Builder The easiest way to automatically start a workflow based on an Identity Vault event is to use the Policy Builder. The Policy Builder provides a Start Workflow action that simplifies the process of setting up a workflow to start automatically. 1 In iManager, expand the Identity Manager Role, then click Identity Manager Overview. 2 Specify a driver set. 3 Click the driver for which you want to manage policies. The Identity Manager Driver Overview opens. 4 Click the policy that you want to edit. 5 Click Insert to open the Policy Builder. 376 Identity Manager Roles Based Provisioning Module 3.7 User Application: Administration Guide 6 Click Create a new policy. 7 Type a name for the policy. 8 Click Policy Builder. 9 Click OK. iManager displays a screen that lists defined policy rules. 10 Click Append New Rule. iManager displays the Rule Builder. Configuring the User Application Driver to Start Workflows 377 11 Type a Description for the rule. 12 Select operation attribute for the If condition in Condition Group 1. 13 Use the Browse attributes button for the Enter name field to specify the Identity Vault attribute that you want to use to start the workflow. For example, to start a workflow when a telephone number changes, select the Telephone Number attribute. 14 Use the Select Operator list to select the operator to use to test the specified attribute. For example, to start a workflow when a telephone number changes, select changing. 15 Select start workflow from the Action list. 378 Identity Manager Roles Based Provisioning Module 3.7 User Application: Administration Guide 16 Use the Object Selector in the Enter provisioning request DN field to select the provisioning request definition that you want to be executed when the if condition is true. The Enter user application URL and Enter authorized user DN fields are filled in automatically. 17 Type the password for the User Application administrator in the Enter authorized user password field. We recommend using a named password, because typing a password in clear text is a security risk. 18 In the Enter recipient DN field, specify the DN of the recipient of the workflow in LDAP format. The expression for the recipient DN must evaluate to a DN that conforms to RFC 2253 format (in other words, cn=user,ou=organizational unit,o=organization). For example, you can click the Argument Builder button in the Enter recipient DN field to create the following expression to pass the recipient’s DN to the workflow: Parse DN("qualified-slash","ldap",XPath("@qualified-src-dn")) Configuring the User Application Driver to Start Workflows 379 19 Specify the arguments for the workflow in the Enter additional arguments field. You must use this field to specify the reason attribute, which is required by the workflow. You can click the String Builder button in the Enter additional arguments field to specify the reason attribute and create a value for the attribute (for example, “the recipient’s telephone number has changed”). 20 Click OK to close the Rule Builder. 21 Click OK to close the Policy Builder. 22 Click OK to close the Policies screen. 23 Make sure that you add any attributes needed by the workflow to the filter. In the example described in this procedure, you would need to add Telephone Number and CN to the filter. 15.2.3 Using the Schema Mapping Policy Editor The Schema Mapping Policy Editor provides an alternative method of starting a workflow automatically, by mapping Identity Vault attributes to workflow runtime data. To get you started, the User Application driver provides an empty policy to edit. Workflow runtime data is available from the workflow definition template described in Chapter 16, “Managing Provisioning Request Definitions,” on page 389. When a workflow is created, the following global attributes are created in the Identity Vault: <workflowName>_StartWorkflow. This attribute starts a workflow. <workflowName>_recipient. This attribute accepts runtime data needed by the workflow from the Identity Vault. <workflowName>_reason. This attribute accepts runtime data needed by the workflow from the Identity Vault. 380 Identity Manager Roles Based Provisioning Module 3.7 User Application: Administration Guide Two other attributes always exist and accept runtime data needed by the workflow from the Identity Vault: AllWorkflows:reason AllWorkflows:recipient Ensure you have the following information before you set up a workflow to start based on an event in the Identity Vault: The name of the Identity Vault attribute that you want to use as a trigger for the workflow The name of the workflow that you want to start. All workflows include a special attribute named <workflowName>_StartApprovalFlow. You configure a workflow to start automatically based on an event in the Identity Vault by mapping the desired eDirectory attribute to the <workflowName>_StartApprovalFlow attribute for the workflow. To set up a workflow to start based on an event in the Identity Vault: 1 In iManager, click the Identity Manager Overview link under Identity Manager in the iManager navigation tree. The Identity Manager Overview page displays. This page prompts you to select a driver set. 2 Click Search Entire Tree; then click Search. The Identity Manager Overview page displays, with a graphic that depicts the drivers in the currently selected driver set. 3 Click the large driver icon for the User Application driver: The Identity Manager Driver Overview displays: The top horizontal arrow represents the Publisher channel (which is not used in the User Application driver) and the bottom horizontal arrow represents the Subscriber channel. As you pass the mouse pointer over an object in the graphic, a description of the object displays: Configuring the User Application Driver to Start Workflows 381 4 Click the Schema Mapping Policies icon. The Schema Mapping Policies dialog box displays: 5 Click Edit. The Identity Manager Policy dialog box displays. (This dialog box maps Identity Vault classes to application classes, but this procedure uses it to map eDirectory attributes to global User Application attributes.) 382 Identity Manager Roles Based Provisioning Module 3.7 User Application: Administration Guide 6 Click Refresh Application Schema. A message displays informing you that the driver must be stopped in order to read the schema, then restarted. It might take about 60 seconds to refresh the schema. This step reads the latest set of workflow information in preparation for the following step, which specifies the information to move from the Identity Vault to the workflow that will be started. 7 Click OK to refresh the schema. A message displays when the schema refresh is completed. 8 Click OK to close the schema refresh message. You are returned to the Identity Manager Policy dialog box. 9 Click Non Class Specific Attributes. The Identity Manager Schema Mapping Policy Editor displays. Configuring the User Application Driver to Start Workflows 383 The eDirectory Attributes drop-down list contains all eDirectory attributes. The Application Attributes drop-down list contains the attributes in all active Workflows. Attributes in the list are prefaced with either AllWorkflows (meaning that the attribute applies to all workflows) or the name of a specific workflow. If you want the same eDirectory attribute (for example manager) to be mapped to the manager attribute for all workflows, map manager to Allworkflows:manager. If you want a different eDirectory attribute (for example, HRmanager) to be used for a specific workflow, map the eDirectory attribute to the specific workflow attribute (for example BusinessCardChange:manager). Attributes that have been mapped are displayed side-by-side in the eDirectory Attributes and Application Attributes columns. In the following steps, map the eDirectory attribute that you want to use to start the workflow to the _StartWorkflow attribute for that workflow. If additional eDirectory attributes are expected by the workflow, you should also map those attributes. For example, if an eDirectory Address attribute is the trigger for a workflow, the workflow can also require attributes like City and State. Alternatively, these attributes can be mapped in policies. 10 In the Application Attributes list, select the _StartWorkflow attribute for the workflow that you want to configure. The following example shows the _StartWorkflow attribute for a BusinessCardChange workflow (BusinessCardChange_StartWorkflow). 384 Identity Manager Roles Based Provisioning Module 3.7 User Application: Administration Guide 11 In the eDirectory Attributes list, select the eDirectory attribute that you want to use to start the workflow when that attribute changes. In the following example, the Telephone attribute is selected. This means that the BusinessCardChange workflow starts whenever an employee’s telephone number changes. Configuring the User Application Driver to Start Workflows 385 12 Click Add. The eDirectory attribute is mapped to the Application attribute. 13 Repeat Step 10 through Step 12 to map eDirectory attributes to the workflow _reason and _recipient attributes. 14 If additional eDirectory attributes are needed by the workflow, repeat Step 10 through Step 12 until you have mapped all of the attributes that you need to map. The workflow starts automatically when a change occurs in the eDirectory attribute that is mapped to an application _StartApprovalFlow attribute. However, the eDirectory attribute only reaches the Schema Mapping policy if the eDirectory attribute is included in the Driver Filter. In the following steps, add the eDirectory attribute to the Driver Filter. 15 Click OK to close the Schema Mapping Policy Editor. 16 Click OK to close the Identity Manager Policy dialog box. 17 Click Close to close the Schema Mapping Policies dialog box. 18 Click the Driver Filter icon. The filter window displays: 386 Identity Manager Roles Based Provisioning Module 3.7 User Application: Administration Guide Event filters specify the object classes and the attributes for which the Identity Manager engine processes events. The read-only Filter list on the left shows the attributes of the class. The Class Name list on the right displays options associated with the target object. 19 Click the name of the class to which the attribute that you want to add to the filter belongs (for example, User). 20 Click Add Attribute. A list of attributes displays. 21 Select an attribute, then click OK. The attribute is added to the Filter list. 22 Click the attribute name. The synchronization options for the attribute are displayed on the panel on the right. Configuring the User Application Driver to Start Workflows 387 23 Under Subscribe, click Synchronize. 24 Specify any other attributes for the filter. Select Synchronize for an attribute if you want changes to attribute values to be reported and synchronized. Select Ignore if you do not want changes to attribute values to be reported and synchronized. 25 Click OK. A message displays asking you if you would like the driver to be restarted to put the changes into effect. 26 Click OK. You are returned to the Identity Manager Driver Overview page. 388 Identity Manager Roles Based Provisioning Module 3.7 User Application: Administration Guide Managing Provisioning Request Definitions 16 16 This section provides instructions for managing provisioning request definitions. Topics include: Section 16.1, “About the Provisioning Request Configuration Plug-in,” on page 389 Section 16.2, “Working with the Installed Templates,” on page 390 Section 16.3, “Configuring a Provisioning Request Definition,” on page 393 16.1 About the Provisioning Request Configuration Plug-in You can use the Provisioning Request Configuration plug-in to iManager to view a read-only display of a provisioning request definition that was created in the Designer for Identity Manager. This plug-in allows you to delete, activate, inactivate and retire existing provisioning request definitions. NOTE: The Provisioning Request Configuration plug-in to iManager does not allow you to create or edit provisioning request definitions. To create or edit a provisioning request definition, you need to use the Designer for Identity Manager. IMPORTANT: For RBPM 3.7, you need to have the Identity Manager 3.6.1b Plug-in for iManager 2.7. You can find the Provisioning Request Configuration plug-in in the Identity Manager category in iManager. The plug-in includes the Provisioning Requests task in the Provisioning Configuration role. The Provisioning Requests task consists of the panels described in Table 16-1. Table 16-1 Provisioning Requests Task: Panels Panel Description Provisioning Driver Selection Gives you the opportunity to select an Identity Manager User Application driver. The driver contains a set of predeployed provisioning request definitions, so you need to pick a driver before you can begin configuring your provisioning requests. Managing Provisioning Request Definitions 389 Panel Description Provisioning Request Configuration Provides tools that let you: Browse the available provisioning request definitions and select one to configure Create a new provisioning request definition based on an existing definition Set the properties of a provisioning request definition Assign the provisioning request definition to a provisioned resource Edit the addressee and timeout settings for each activity in the associated workflow When you choose to create a new provisioning request or edit an existing one, the plug-in runs the Provisioning Request Configuration Wizard. 16.2 Working with the Installed Templates You can define provisioning request definitions from scratch in the Designer for Identity Manager. Alternatively, you can define provisioning requests by modeling them after the provisioning request templates that ship with the product. To use the templates, you define new objects based on the installed templates and customize these objects to suit the needs of your organization. The installed templates let you determine the number of approval steps required for the request to be fulfilled. You can configure a provisioning request to require: No approvals One approval step Two approval steps Three approval steps Four approval steps Five approval steps You can also specify whether you want to support sequential or parallel processing, and whether you want to approve or deny the request in the event that the workflow times out during the course of processing. Identity Manager ships with the templates listed in Table 16-2. Table 16-2 Templates for Provisioning Requests Template Description Self Provision Approval Allows a provisioning request to be fulfilled without any approvals. 390 Identity Manager Roles Based Provisioning Module 3.7 User Application: Administration Guide Template Description One Step Approval (Timeout Approves) Requires a single approval for the provisioning request to be fulfilled. If an activity times out, the activity approves the request and the work item forwards to the next activity. Two Step Sequential Approval (Timeout Approves) Requires two approvals for the provisioning request to be fulfilled. If an activity times out, the activity approves the request and the work item forwards to the next activity. This template supports sequential processing. Three Step Sequential Approval (Timeout Approves) Requires three approvals for the provisioning request to be fulfilled. If an activity times out, the activity approves the request and the work item forwards to the next activity. This template supports sequential processing. Four Step Sequential Approval (Timeout Approves) Requires four approvals for the provisioning request to be fulfilled. If an activity times out, the activity approves the request and the work item forwards to the next activity. This template supports sequential processing. Five Step Sequential Approval (Timeout Approves) Requires five approvals for the provisioning request to be fulfilled. If an activity times out, the activity approves the request and the work item forwards to the next activity. This template supports sequential processing. One Step Approval (Timeout Denies) Requires a single approval for the provisioning request to be fulfilled. If an activity times out, the workflow denies the request. This template supports sequential processing. Two Step Sequential Approval (Timeout Denies) Requires two approvals for the provisioning request to be fulfilled. If an activity times out, the workflow denies the request. This template supports sequential processing. Three Step Sequential Approval (Timeout Denies) Requires three approvals for the provisioning request to be fulfilled. If an activity times out, the workflow denies the request. This template supports sequential processing. Four Step Sequential Approval (Timeout Denies) Requires four approvals for the provisioning request to be fulfilled. If an activity times out, the workflow denies the request. This template supports sequential processing. Managing Provisioning Request Definitions 391 Template Description Five Step Sequential Approval (Timeout Denies) Requires five approvals for the provisioning request to be fulfilled. If an activity times out, the workflow denies the request. This template supports sequential processing. Two Step Parallel Approval (Timeout Approves) Requires two approvals for the provisioning request to be fulfilled. If an activity times out, the activity approves the request and the work item forwards to the next activity. This template supports parallel processing. Three Step Parallel Approval (Timeout Approves) Requires three approvals for the provisioning request to be fulfilled. If an activity times out, the activity approves the request and the work item forwards to the next activity. This template supports parallel processing. Four Step Parallel Approval (Timeout Approves) Requires four approvals for the provisioning request to be fulfilled. If an activity times out, the activity approves the request and the work item forwards to the next activity. This template supports parallel processing. Five Step Parallel Approval (Timeout Approves) Requires five approvals for the provisioning request to be fulfilled. If an activity times out, the activity approves the request and the work item forwards to the next activity. This template supports parallel processing. Two Step Parallel Approval (Timeout Denies) Requires two approvals for the provisioning request to be fulfilled. If an activity times out, the workflow denies the request. This template supports parallel processing. Three Step Parallel Approval (Timeout Denies) Requires three approvals for the provisioning request to be fulfilled. If an activity times out, the workflow denies the request. This template supports parallel processing. Four Step Parallel Approval (Timeout Denies) Requires four approvals for the provisioning request to be fulfilled. If an activity times out, the workflow denies the request. This template supports parallel processing. Five Step Parallel Approval (Timeout Denies) Requires five approvals for the provisioning request to be fulfilled. If an activity times out, the workflow denies the request. This template supports parallel processing. 392 Identity Manager Roles Based Provisioning Module 3.7 User Application: Administration Guide Workflows and provisioned resources. When you create a new provisioning request definition, you bind it to a provisioned resource. You can change the provisioned resource associated with the request definition, but not the workflow or its topology. Categories for provisioning requests. Each provisioning request template is also bound to a category. Categories provide a convenient way to organize provisioning requests for the end user. The default category for all provisioning request templates is Entitlements. The category key, which is the value of the srvprvCategoryKey attribute, is entitlements (lowercase). You can create your own categories by using the directory abstraction layer editor. When you create a new category, make sure the category key (the value of srvprvCategoryKey) is lowercase. This is necessary to ensure that categories work properly in the Identity Manager User Application. For details on creating provisioning categories, see the Identity Manager User Application: Design Guide. 16.3 Configuring a Provisioning Request Definition Before configuring a provisioning request definition, you need to select the Identity Manager User Application driver that contains the definition. Having selected the driver, you can create a new provisioning request definition or edit an existing definition. You can also delete provisioning request definitions, change the status of a request definition, or define rights for a request definition. 16.3.1 Selecting the Driver To select an Identity Manager User Application driver: 1 Select the Identity Manager category in iManager. 2 Open the Provisioning Request Configuration role. 3 Click the Provisioning Requests task. iManager displays the User Application Driver panel. Managing Provisioning Request Definitions 393 4 Specify the driver name in the User Application Driver field, then click OK. iManager displays the Provisioning Request Configuration panel. The Provisioning Request Configuration panel displays a list of available provisioning request definitions. 394 Identity Manager Roles Based Provisioning Module 3.7 User Application: Administration Guide The installed templates appear in dark text with a status of Template. Request definitions that are templates do not display hypertext links because they are read only. NOTE: If the request definitions were configured to use localized text, the names and descriptions for these definitions show text that is suitable for the current locale. Changing the driver. When you have selected a driver, the driver selection remains in effect for the duration of your iManager session, unless you select a new driver. To select a new driver, click the Actions command, then choose Select User Application Driver from the Actions menu. 16.3.2 Creating or Editing a Provisioning Request To create a new provisioning request: 1 Click the name of the provisioning request you want to use as a template in the Provisioning Request Configuration panel. 2 Click the Create From command in the Provisioning Request Configuration panel. The first page of the Configure New Provisioning Request wizard displays. Managing Provisioning Request Definitions 395 3 Type a common name for the new object in the Name field. 4 For each language you want to support in your application, type the localized text in the Display Name and Description fields under Provisioning Request Localized Strings. This text is used to identify the provisioning request throughout the User Application. 5 To add a new language to the list, click Add, then select the desired language. By default, a newly created provisioning request supports only English. 6 Click Next. 7 Specify the provisioned resource for the request definition, as described in “Specifying the Provisioned Resource” on page 399. 8 Configure the activities for the workflow associated with the request definition, as described in “Configuring the Workflow Activities” on page 402. 9 Specify the access rights for the request definition, as described in “Specifying the Access Rights for the Provisioning Request” on page 412. 10 Specify the initial status for the request definition, as described in “Specifying the Initial Status of the Provisioning Request” on page 413. 396 Identity Manager Roles Based Provisioning Module 3.7 User Application: Administration Guide 11 Review your settings, then click Finish. To edit an existing provisioning request: 1 Click the name of the provisioning request in the Provisioning Request Configuration panel. Managing Provisioning Request Definitions 397 You are not permitted to edit a provisioning request that is a template. Request definitions that have a status of Template do not display hypertext links because they are read only. If you have a large number of request definitions, you might want to sort the list by a particular column, such as the Name or Description. To sort by a particular column, click the column heading. 2 For each language you want to support in your application, click the check box beside the language in the list under Provisioning Request Localized Strings, then type the localized text in the Display Name and Description fields. This text is used to identify the provisioning request throughout the User Application. 3 To add a new language to the list, click Add, then select the desired language. By default, a newly created provisioning request supports only English. 4 Click Next. 5 Specify the provisioned resource for the request definition, as described in “Specifying the Provisioned Resource” on page 399. 6 Configure the activities for the workflow associated with the request definition, as described in “Configuring the Workflow Activities” on page 402. 7 Specify the access rights for the request definition, as described in “Specifying the Access Rights for the Provisioning Request” on page 412. 8 Specify the initial status for the request definition, as described in “Specifying the Initial Status of the Provisioning Request” on page 413. 9 Review your settings, then click Finish. 398 Identity Manager Roles Based Provisioning Module 3.7 User Application: Administration Guide Specifying the Provisioned Resource This section provides instructions for specifying a provisioned resource that is based on an entitlement. It does not provide conceptual information about entitlements or instructions for creating and using entitlements. For complete details on entitlements, see the Novell Identity Manager: Administration Guide. To specify the provisioned resource: 1 To use the target that is currently associated with the request definition, select Provisioned resource. Provisioned resource is selected by default if you’re editing a request definition that refers to a valid resource. If you’re defining a new provisioning request, this option is not selected. 2 To bind the request definition to another resource that was previously defined within the currently selected driver, select Available provisioned resources, then pick a target from the drop-down list. If the request definition was bound to a resource that is not an entitlement, you are not permitted to change the resource. 3 Select a category for the provisioned resource definition in the Category drop-down list. Managing Provisioning Request Definitions 399 The category defaults to the category for the currently selected provisioned resource. Whenever you change the provisioned resource, the category for the request definition is also changed to match the category for the resource. If you want to assign a different category to the request definition, select that category in the Category drop-down list. 4 To create a new resource based on an Identity Manager entitlement, click the + icon. To edit an existing resource, click the pen icon. To define the characteristics of the resource: 4a Specify the name for the resource in the Name (CN) field. 4b Select a category for the resource in the Category drop-down list. 4c Specify the entitlement in the Entitlement field. 4d For each language you want to support in your application, click the check box beside the language in the list under Provisioned Resource Localized Strings, then type the localized text in the Display Name and Description fields. This text is used to identify the provisioning resource throughout the User Application. 4e To add a new language to the list, click Add, then select the desired language. By default, a newly created provisioning resource supports only English. 5 Click Next. 400 Identity Manager Roles Based Provisioning Module 3.7 User Application: Administration Guide The Provisioned Resource wizard displays a page to allow you to provide data for any parameters required for the entitlement. 6 If the entitlement does not require any entitlement parameters, click Next. The Create New Provisioned Resource wizard displays the Summary page, which provides information about the resource you’re defining. Managing Provisioning Request Definitions 401 7 Click Finish. Configuring the Workflow Activities To configure the activities for the associated workflow: 1 Specify whether you want to enable e-mail notifications for the workflow by selecting or deselecting the Notify participants by e-mail check box. 2 Specify whether a digital signature is required to initiate the provisioning request by selecting or deselecting the Digital signature required check box. 402 Identity Manager Roles Based Provisioning Module 3.7 User Application: Administration Guide 2a If you enable the Digital signature required check box, specify whether the digital signature will use data or form as its type: Data specifies that the XML signature serve as the user agreement. When Data is selected, the XML data is written to the audit log. Form specifies that a PDF document that includes the digital signature declaration be generated. This document serves as the user agreement. The user can preview the generated PDF document before submitting a request or approval. When Form is selected, the PDF document (encapsulated in XML) is written to the audit log. WARNING: You must use Novell Audit (or Sentinel) to preserve documents that you digitally sign. Digital signature documents are not stored in the User Application database, but are stored in the logging database. You must enable logging to preserve these documents. 2b If you enable the Digital signature required check box, you also need to specify a digital signature confirmation string. To do this, click the Declarations icon. Type the signature confirmation string, then click OK. 3 (Optional) For each workflow activity, change the display label by clicking the icon beside the name of the activity (in this case, Manager Approval). Managing Provisioning Request Definitions 403 Type the display label in the Display Label field, then click OK. 404 Identity Manager Roles Based Provisioning Module 3.7 User Application: Administration Guide The default display labels (First approval, Second approval, and so on) suggest that approvals are processed sequentially. For parallel flows, you might want to specify labels that do not imply sequential processing. For example, you might want to assign labels such as One of Three Parallel Approvals, Two of Three Parallel Approvals, and so on. 4 (Optional) For each workflow activity that supports quorums or multiple addressees, add additional addressees by clicking the Add another addressee to this user activity icon beside the name of the activity. When you click this button, a new Addressee section is presented on the page. You can use the controls in this section to define an expression or DN for the addressee (as described in the next step in this procedure). To delete the addressee, you can click the minus sign next to the addressee: Managing Provisioning Request Definitions 405 5 For each workflow activity, also provide the following information: Field Description Reminder email Indicates whether reminder e-mail messages should be sent for this activity. Click the Edit this activity’s reminder email icon to configure reminder notifications. Specify these settings: Start specifies when to send the first reminder. The start value is an offset from the time of the first assignment associated with the activity. Interval specifies how often to send reminders after the first reminder has been sent. Email Template specifies the language-independent name for the template to use for reminder e-mail messages. After the template name has been specified, the notification engine can determine which language-specific template to use at runtime. The language-independent template can have any name you like. The default template for reminder e-mail messages is called: Provisioning Reminder Each language-specific version of a template must have a suffix that provides a language code (for example, _fr for French, _es for Spanish, and so forth). 406 Identity Manager Roles Based Provisioning Module 3.7 User Application: Administration Guide Field Description Notification email Indicates whether notification e-mail messages should be sent for this activity. Click the Edit this activity’s notification email icon to configure notification e-mail messages. Specify these settings: Email Template specifies the language-independent name for the template to use for notification e-mail messages. After the template name has been specified, the notification engine can determine which language-specific template to use at runtime. The language-independent template can have any name you like. The default template for notification e-mail messages is called: Provisioning Notification Each language-specific version of a template must have a suffix that provides a language code (for example, _fr for French, _es for Spanish, and so forth). Replacement Parameters Map specifies one or more substitution values for the replacement parameters used in the e-mail template. To edit an existing value, click the replacement parameter, then specify an ECMAScript expression or fixed value. To add a new substitution value, click Add, select the target parameter, then specify an expression or fixed value. Managing Provisioning Request Definitions 407 Field Description Digital signature required Indicates whether a digital signature is required to approve the request. Because each approval step might have more than one outgoing link, you need to specify whether a digital signature is required for each link. When you enable this check box, you are prompted to select the link for which a digital signature is required. Select the link, then click Close. If you enable the Digital signature required check box, specify whether the digital signature will use data or form as its type: Data specifies that the XML signature serve as the user agreement. When Data is selected, the XML data is written to the audit log. Form specifies that a PDF document that includes the digital signature declaration be generated. This document serves as the user agreement. The user can preview the generated PDF document before submitting a request or approval. When Form is selected, the PDF document (encapsulated in XML) is written to the audit log. If you enable the Digital signature required check box, you also need to specify a digital signature confirmation string. First, create an identifier for the string by selecting Create one in the Declarations list box. Then select the ID and click the Declarations icon. Type the signature confirmation string, then click OK. 408 Identity Manager Roles Based Provisioning Module 3.7 User Application: Administration Guide Field Description Approver Condition Specifies the approver condition for quorums. When the approver type for an activity is configured to support quorums, you can set the approver condition to define the number of approvers required to approve the activity. You can specify the condition as a numeric constant or a percentage of addressees. For example, if you wanted to require a 25-percent majority, you would specify an approver condition of 25%, as shown below. Alternatively, if you wanted to require approvals from two of the addressees, you would set the approver condition to 2. NOTE: When quorum support is enabled for an activity, you cannot specify retry settings for the activity. Therefore, the Retry Escalation Reminder Email, Retry Attempts, Retry Interval, and Retry Addressee fields are not displayed. Managing Provisioning Request Definitions 409 Field Description Addressee Expression Specifies a dynamic expression that identifies the addressee for the activity. The addressee is determined at runtime, based on how the expression is evaluated. The first term of an addressee expression can be any of the following values: Initiator Recipient Addressee of activity-name A separate Addressee of activity-name term is listed in the Expression drop-down list for each activity in the workflow (except the activity you are currently configuring). The activity-name is the display label you specified for the activity, or the default name, if you did not specify a display label. The second term of an addressee expression can be either of the following values: Manager <No attribute> The Manager attribute is available automatically because it has been previously defined on the User entity in the abstraction layer. Other attributes (in addition to Manager) are available for selection if they meet the following requirements: Must be defined on the User entity in the abstraction layer Must be single-valued Must have a DN data type Addressee DN Specifies the distinguished name for a user, group, or task group. NOTE: If you want Task Group Managers to be able to search for tasks by task group (in the My Team Tasks action in the User Application), you need to specify the task group as the addressee. Timeout Specifies the period of time allotted for the activity to complete its processing. The timeout interval is the total time allowed for the activity, not the time allowed for each retry. The Timeout setting for the activity takes precedence over the Retry Attempts and Retry Interval values. Therefore, if the Timeout setting for the activity is reached before one or more of the retries have been attempted, the activity finishes processing without executing these retries. For example, if you set the timeout to 10 minutes, and define three retries with a retry interval of 5 minutes, the activity will finish after 10 minutes without attempting all of the retries. In this example, the second retry will be canceled. At the conclusion of the activity, the workflow engine will follow the link defined by the final timeout action in Designer. Specify a value in milliseconds, seconds, minutes, hours, or days. 410 Identity Manager Roles Based Provisioning Module 3.7 User Application: Administration Guide Field Description Retry Escalation Reminder Email Specifies whether e-mail messages should be sent to remind the current addressee of the activity that an action is required. Check this box to enable this feature. To change the retry escalation reminder notification settings for this activity, click the Edit this activity’s retry reminder email icon to configure escalation reminder notifications. Specify these settings: Start specifies when to send the first reminder. The start value is an offset from the time of the retry assignment. Interval specifies how often to send reminders after the first reminder has been sent. Email Template specifies the language-independent name for the template to use for reminder e-mail messages. After the template name has been specified, the notification engine can determine which language-specific template to use at runtime. The language-independent template can have any name you like. The default template for reminder e-mail messages is called: Provisioning Reminder Each language-specific version of a template must have a suffix that provides a language code (for example, _fr for French, _es for Spanish, and so forth). Retry Attempts Specifies the number of times to retry the activity in the event that the retry interval has been reached. When an activity reaches the retry interval, the workflow process tries to complete the activity again, depending on the retry count specified for the activity. With each retry, the workflow process can escalate the activity to another user. In this case, the activity is reassigned to a new addressee (the user’s manager, for example) to give this user an opportunity to finish the work of the activity. In the event that the last retry is executed, the activity might be marked as approved or denied, depending on how the workflow was configured. The Timeout setting for the activity takes precedence over the Retry Attempts and Retry Interval values. Therefore, if the Timeout setting for the activity is reached before one or more of the retries have been attempted, the activity finishes processing without executing these retries. For example, if you set the timeout to 10 minutes, and define three retries with a retry interval of 5 minutes, the activity will finish after 10 minutes without attempting all of the retries. In this example, the second retry will be canceled. At the conclusion of the activity, the workflow engine will follow the link defined by the final timeout action in Designer. Retry Interval Defines the period of time allotted for the addressee to complete the task. When the Retry Interval is reached, the workflow can optionally reassign the activity to a new addressee or try again with the original addressee. The Addressee Expression gives you control over the reassignment. Managing Provisioning Request Definitions 411 Field Description Retry Addressee Expression Specifies a dynamic expression that identifies the user who should get this task in the event that the timeout limit has been reached. The retry addressee is determined at runtime, based on how the expression is evaluated. The first term of an addressee expression can be any of the following values: Initiator Recipient Addressee of activity-name A separate Addressee of activity-name term is listed in the Expression drop-down for each activity in the workflow (including the activity you are currently configuring). The activity-name is the display label you specified for the activity, or the default name, if you did not specify a display label. The second term of an addressee expression depends on how the data abstraction layer has been defined. For example, you might see the following values: Manager Group Direct Reports <No attribute> If you select Manager, each retry will escalate to a new manager at a higher level within the organization. Therefore, be sure to set the retry count to a number that is suitable for your organization. In any case, the retry count should not exceed the number of levels of management above the current addressee. Retry Addressee DN Specifies the distinguished name for a user or group that should get this task in the event that the retry limit has been reached. 6 When you finish configuring an activity, you might need to scroll down to see the other activities for the flow. 7 Click Next. NOTE: The number of activities you can configure varies, depending on which provisioning request definition was used as the basis for creating this definition. The number and type of entitlement parameters varies, depending on the provisioned resource associated with the request. Specifying the Access Rights for the Provisioning Request To specify the access rights for a provisioning request: 1 To add a user, group, or other eDirectoryTM object to the list of trustees for this request definition, click Add, then select the object. After you have added an object, it is included in the list of trustees. 412 Identity Manager Roles Based Provisioning Module 3.7 User Application: Administration Guide 2 To remove a user, group, or other object, select the item in the Trustee list, then click Remove. 3 Click Next. Specifying the Initial Status of the Provisioning Request To set the initial status of the provisioning request: 1 Click the button for the desired status: Status Description Active Available for use. Inactive Temporarily unavailable for use. This is the default. Retired Permanently disabled. Managing Provisioning Request Definitions 413 2 Click the button for the correct action (Grant or Revoke). 3 Click Next. 16.3.3 Deleting a Provisioning Request To delete a provisioning request: 1 Select the provisioning request you want to delete by clicking the check box next to the name. You are not permitted to delete a provisioning request that is a template. 414 Identity Manager Roles Based Provisioning Module 3.7 User Application: Administration Guide 2 Click the Delete command in the Provisioning Request Configuration panel. 16.3.4 Filtering the List of Requests To filter the list of requests: 1 Click the Actions command in the Provisioning Request Configuration panel. 2 Click the Define a Filter command on the Actions menu. Specify the filter characteristics: Choice Description Turn off filtering Disables any existing filtering for the list. Filter for status equals Filters based on the status. You can filter the list based on any of the following status codes: Active Inactive Template Retired Filter for category equals Filters based on category. Select any of the defined categories. Managing Provisioning Request Definitions 415 Choice Description Filter for description contains Allows you to search for text in the request description. Type the string you want to search for. 16.3.5 Changing the Status of an Existing Provisioning Request To change the status of an existing provisioning request: 1 Select the provisioning request for which you want to change status by clicking the check box beside the name. 2 Click the Actions command in the Provisioning Request Configuration panel. 3 Click the Change Status command on the Actions menu. 4 Click the status in the Status menu: Status Description Active Available for use. Inactive Temporarily unavailable for use. Retired Permanently disabled. 5 Click the button for the correct action (Grant or Revoke). 6 Click Finish. 416 Identity Manager Roles Based Provisioning Module 3.7 User Application: Administration Guide 16.3.6 Defining Rights on an Existing Provisioning Request To define rights on an existing provisioning request: 1 Select the provisioning request for which you want to define rights by clicking the check box beside the name. 2 Click the Actions command in the Provisioning Request Configuration panel. 3 Click the Define Rights command on the Actions menu. 4 Follow the steps described in “Specifying the Access Rights for the Provisioning Request” on page 412. To define rights on a provisioning request with iManager: 1 Select the provisioning request for which you want to define rights by clicking the check box beside the name. 2 Click the Actions command in the Provisioning Request Configuration panel. 3 Click the Define Rights with iManager command on the Actions menu. Managing Provisioning Request Definitions 417 418 Identity Manager Roles Based Provisioning Module 3.7 User Application: Administration Guide Managing Provisioning Workflows 17 17 This section provides instructions for managing provisioning workflows at runtime. It also provides instructions for configuring e-mail notification for provisioning workflows. Topics include: Section 17.1, “About the Workflow Administration Plug-in,” on page 419 Section 17.2, “Managing Workflows,” on page 420 Section 17.3, “Configuring the E-Mail Server,” on page 427 Section 17.4, “Working with E-Mail Templates,” on page 428 17.1 About the Workflow Administration Plug-in The Workflow Administration plug-in to iManager provides a browser-based interface that lets you view the status of workflow processes, reassign activities within a workflow, or terminate a workflow in the event that it is stopped and cannot be restarted. IMPORTANT: For RBPM 3.7, you need to have the Identity Manager 3.6.1b Plug-in for iManager 2.7. You can find the Workflow Administration plug-in in the Identity Manager category in iManager. The plug-in includes the Workflows task in the Workflow Administration role. The Workflow Administration role also includes the Email Templates and Email Server Options tasks. These tasks are shortcuts to other tasks listed under the Passwords role. The Workflows task comprises the panels listed in Table 17-1. Table 17-1 Workflows Task: Panels Panel Description Workflows Provides the primary user interface for administering provisioning workflows. The interface lists workflows currently being processed and lets you perform various actions on these workflows. When you first start the Workflows task, the Workflows panel requires that you select an Identity Manager User Application driver. The driver points to a workflow server. You need to select a driver before you can log in to the server and begin workflow administration. When you have selected a driver, you can specify search criteria for selecting the workflows to manage. Workflow Detail Provides a read-only user interface for viewing the details about a specific workflow. Managing Provisioning Workflows 419 17.2 Managing Workflows This section includes procedures for managing provisioning workflows using the Workflow Administration plug-in: Section 17.2.1, “Connecting to a Workflow Server,” on page 420 Section 17.2.2, “Finding Workflows that Match Search Criteria,” on page 422 Section 17.2.3, “Controlling the Active Workflows Display,” on page 423 Section 17.2.4, “Terminating a Workflow Instance,” on page 424 Section 17.2.5, “Viewing Details about a Workflow Instance,” on page 425 Section 17.2.6, “Reassigning a Workflow Instance,” on page 425 Section 17.2.7, “Managing Workflow Processes in a Cluster,” on page 426 17.2.1 Connecting to a Workflow Server Before you can begin managing workflows, you need to connect to a workflow server. If the User Application driver is bound to a single workflow server, you can simply specify the name of the driver to use. If the driver is associated with multiple workflow servers, you need to select the target workflow server. To connect to a workflow server: 1 Select the Identity Manager category in iManager. 2 Open the Workflow Administration role. 3 Click the Workflows task. iManager displays the Workflows panel. 4 If you accessed the target workflow server previously, you can select the server from the Previously accessed servers drop-down list. iManager fills in the remaining fields on the panel. 420 Identity Manager Roles Based Provisioning Module 3.7 User Application: Administration Guide 5 If you have not yet accessed a workflow server, specify the driver name in the User Application Driver field, then click OK. iManager fills in the Workflow server URI and User fields. 6 Type the password for the user in the Password field. 7 Click Login. The Workflow Administration plug-in displays a page that allows you to specify a filter for finding workflows: Managing Provisioning Workflows 421 17.2.2 Finding Workflows that Match Search Criteria If the target workflow server is running a large number of workflow processes, you might want to filter the list of workflows you see in iManager. To do this, you can specify search criteria. 1 Select Show Workflows with. By default, Show all Workflows is selected. Do not change the default if you want to see the complete list of workflows on the server. 2 Select the attribute for which you want to specify criteria. Attribute Description Creation time Time that the workflow was initiated. Initiator Username of the requestor. Recipient Username of the recipient. Process Status Status of the workflow process as a whole (Completed, Running, or Terminated). Approval status Status of the approval process (Approved, Denied, or Retracted). Entitlement status Status of the entitlement initiated by the provisioning request (Error, Fatal, Success, Unknown, or Warning). 3 Select an operator: Operator Comment Equals Supported for all attributes. Before Only supported for the Creation time attribute. 422 Identity Manager Roles Based Provisioning Module 3.7 User Application: Administration Guide Operator Comment After Only supported for the Creation time attribute. Between Only supported for the Creation time attribute. 4 Specify a value in the field below the attribute and operator. For Creation time, you can use the Date and time control to select the value. For Initiator and Recipient, you can use Object History or Object Selector to specify a value. For all other attributes, select the value from the drop-down list. 5 Click OK. iManager displays the workflows you have selected on the Workflows panel. Changing the target server and filter. When you have selected a workflow server, this selection remains in effect for the duration of your iManager session, unless you select a new server. To select a new server, click the Actions command, then choose Select Server from the Actions menu. To specify different search criteria, choose Define Filter on the Actions menu. 17.2.3 Controlling the Active Workflows Display The Workflows panel lists the workflows that match the search criteria you specified. In addition to filtering the list, you can control the display. For example, you can specify how often to refresh the list and sort the list on a particular column. Refreshing the List of Workflows When the workflow server is very busy, the list of active workflows can change very frequently. In this case, you should refresh the list of active workflows running on the server. 1 Click the Refresh command in the Workflows panel. 2 Specify the refresh interval you want to use by selecting one of these options from the Refresh menu: Refresh Off Refresh Now 10 seconds 30 seconds 60 seconds 5 minutes 3 Click OK. Using Quick Filters to Control the Display Sometimes you might want to show or hide workflows that have a particular status. 1 Click the Quick Filters command in the Workflows panel. Managing Provisioning Workflows 423 2 Select one of the following choices to filter the items in the list: Choice Description Show all workflows Disables all previous filters and displays all workflows in process. Hide/show completed workflows Hides or shows workflows that have completed processing. Hide/show terminated workflows Hides or shows workflows that have been terminated. Hide/show stopped workflows Hides or shows workflows that have been stopped by user action. Hide/show running workflows Hides or shows workflows that are still running. Sorting the List of Workflows If you have a large number of request definitions, you might want to sort the list by a particular column, such as Name or Description. 1 Click the heading for the sort column. Displaying the Process Request ID You can display and sort data based on the internal process ID for a request. 1 Click the Actions command in the Workflows panel. 2 Click Show Request ID on the Actions menu. Depending on your display, you might need to scroll to the right to see the Request ID column. To sort the data based on the process request ID, click the heading for the Request ID column. 17.2.4 Terminating a Workflow Instance If you do not want a workflow instance to continue its processing, you can terminate the workflow. 1 Select the workflow in the Workflows panel by clicking the check box next to the workflow name. 2 Click the Terminate command in the Workflows panel. 424 Identity Manager Roles Based Provisioning Module 3.7 User Application: Administration Guide 17.2.5 Viewing Details about a Workflow Instance When you have displayed a set of running workflows on a particular server, you can select a workflow instance to see more details about the running process. NOTE: If a workflow instance uses a serial processing design pattern, the display shows a single activity as current because only one user can act on the work item at any point in time. However, if the workflow handles parallel processing and branching, there might be multiple current activities for a workflow instance. To view details about a particular workflow instance: 1 Click the name of the workflow instance in the Workflows panel. iManager displays the Workflow Detail panel. 17.2.6 Reassigning a Workflow Instance If a workflow instance has stopped and cannot be restarted, you can reassign the work item to another user or group. 1 Select the current activity associated with the workflow by clicking the check box next to the name in the Workflow Detail panel. 2 Click the Reassign command in the Workflow Detail panel. 3 Select the user or group to which you want to reassign the work item. Managing Provisioning Workflows 425 17.2.7 Managing Workflow Processes in a Cluster You can use the Workflows screen to reassign processes from one workflow engine to another. For example, you could use this feature to reassign processes back to a failed workflow engine when the workflow engine is brought back online, or you could redistribute processes to other engines when an engine is permanently removed from the cluster. The source engine(s) must be a in a SHUTDOWN or TIMEDOUT state. The target engine must be restarted in order to restart the processes that were reassigned to that engine. Reassigning a Process from One Workflow Engine to Another 1 In the Workflows panel, select the workflow that you would like to reassign by clicking the check box next to the workflow name. 2 Select Actions > Reassign. 3 Select the workflow engine to which you want to reassign the workflow process from the Target Engine list. 4 Click OK. Reassigning a Percentage of Processes from One Workflow Engine to Another 1 In the Workflows panel, select the workflow that you would like to reassign by clicking the check box next to the workflow name. 2 Select Actions > Reassign Percentage. 3 In the Percentage field, type the percentage of workflow processes that you would like to reassign from one workflow engine to another. 426 Identity Manager Roles Based Provisioning Module 3.7 User Application: Administration Guide 4 Use the Source engine list to select the workflow engine from which you want to reassign processes. 5 Use the Target engine field to select the workflow engine to which you want to reassign processes. 6 Click OK. Reassigning All Processes from One Workflow Engine to Another 1 In the Workflows panel, select the workflow that you would like to reassign by clicking the check box next to the workflow name. 2 Select Actions > Reassign All. 3 Use the Source engine list to select the workflow engine from which you want to reassign processes. 4 Select the workflow engines to which you would like to reassign processes by clicking the check box next to the name of the workflow engine. If you select multiple target engines, the processes from the source engine will be evenly distributed to the target engine. 5 Click OK. 17.3 Configuring the E-Mail Server A workflow process often sends e-mail notifications at various points in the course of its execution. For example, an e-mail might be sent when a user assigns a workflow activity to a new addressee. Before you can take advantage of the e-mail notification capabilities of Identity Manager, you need to configure the SMTP e-mail server. To do this, you need to use the Email Server Options task within the Workflow Administration role in iManager. Managing Provisioning Workflows 427 NOTE: This task is a shortcut to the Email Server Options task under the Passwords role. To configure the e-mail server: 1 Select the Identity Manager category in iManager. 2 Open the Workflow Administration role. 3 Click on the Email Server Options task. iManager displays the Email Server Options panel. 4 Type the name (or IP address) of the host server in the Host Name field. 5 Type the e-mail address for the sender in the From field. When the recipient opens the e-mail, this text is displayed in the From field of the e-mail header. Depending on your mail server settings, the text in this field might need to match a valid sender in the system in order to allow the mail server to do reverse lookups or authentication. An example is [email protected] instead of descriptive text such as The Password Administrator. 6 If your server requires authentication before sending e-mail, select the Authenticate to server using credentials check box and specify the username and password. 7 When you are finished, click OK. 17.4 Working with E-Mail Templates Identity Manager includes e-mail notification templates that are designed specifically for workflowbased provisioning. These e-mail templates include the following. New Provisioning Request (Provisioning Notification) Availability Setting Notification (Availability) Delegate Assignment Notification (Delegate) Provisioning Approval Notification (Provisioning Approval Completed Notification) Reminder - A request is waiting on your approval (Provisioning Reminder) 428 Identity Manager Roles Based Provisioning Module 3.7 User Application: Administration Guide Proxy Assignment Notification (Proxy) New Role Request (Role Request Notification) Role Request Approval Notification (Role Request Approval Completed Notification) Compliance Task (Attestation Notification) New Resource Request (Resource Request Notification) Resource Request Approval Notification (Resource Request Approval Completed Notification) The subject lines are listed first above. The template names (as they appear in iManager and Designer) are given in parentheses. You can edit the templates to change the content and format of e-mail messages. You can also create new templates. If you create new templates, you need to follow these naming conventions. The language-independent version of the Provisioning Notification template can have any name you like. The default template for notification e-mail messages is called: Provisioning Notification The language-independent version of the Provisioning Reminder template can have any name you like. The default template for reminder e-mail messages is called: Provisioning Reminder Each delegation template must have a name that begins with the word: delegate The language-independent name can be followed by one or more characters that describe the purpose or content of the template. Each proxy template must have a name that begins with the word: proxy The language-independent name can be followed by one or more characters that describe the purpose or content of the template. Each availability template must have a name that begins with the word: availability The language-independent name can be followed by one or more characters that describe the purpose or content of the template. Each language-specific version of a template must have a suffix that provides a language code (for example, _fr for French, _es for Spanish, and so forth). To create or edit an e-mail template, use the Email Templates task within the Workflow Administration role in iManager. NOTE: This task is a shortcut to the Edit Email Templates task under the Passwords role. You also can create and edit e-mail templates in Designer. When you create a User Application driver in iManager or Designer, any e-mail notification templates that are missing from the standard set of e-mail notification templates are replaced. Existing e-mail notification templates are not updated. This is to prevent overwriting e-mail notification templates that you have customized. You can update existing e-mail notification templates manually using Designer (see the section “About E-Mail Notification Templates” in the Managing Provisioning Workflows 429 Identity Manager User Application: Design Guide (http://www.novell.com/documentation/ idmrbpm37/index.html)). For more information about e-mail notification templates, see “Setting up E-Mail Notification Templates” in the Novell Designer for Identity Manager Administration Guide. NOTE: When you use a localized e-mail template in a provisioning request definition, the preferred locale setting of the recipient of the notification is ignored. For example, the Provisioning Notification of a request using a localized e-mail notification template of Spanish will only send a Spanish e-mail, regardless of the preferred locale setting for the user. 17.4.1 Default Content and Format This section shows you what the content of the e-mail templates looks like after you install the product. It also describes the replacement tags that can be used in the e-mail template. New Provisioning Request This template identifies the provisioning request definition that triggered the e-mail message. In addition, it includes a URL that redirects the addressee to the task that requires approval, as well as a URL that displays the complete list of tasks pending for that user. Hi, A new provisioning request has been submitted that requires your approval. Request name: $requestTitle$ Submitted by: $initiatorFullName$ Recipient: $recipientFullName$ Please review the details of this request at $PROTOCOL$://$HOST$:$PORT$/ $TASK_DETAILS$ to take the appropriate action. You can review a list of all requests pending your approval at $PROTOCOL$:// $HOST$:$PORT$/$TASKLIST_CONTEXT$. Table 17-2 New Provisioning Request Template: Replacement Tags Tag Description $userFirstName$ The first name of the addressee. $requestTitle$ The display name of the provisioning request definition. $initiatorFullName$ The full name of the initiator. $recipientFullName$ The full name of the recipient. $PROTOCOL$ The protocol for URLs included in the e-mail message. $SECURE_PROTOCOL$ The secure protocol for URLs included in the e-mail message. 430 Identity Manager Roles Based Provisioning Module 3.7 User Application: Administration Guide Tag Description $HOST$ The host for the JBoss application server that is running the Identity Manager User Application. For information about setting the value for this parameter, see Section 17.4.3, “Modifying Default Values for the Template,” on page 442. $PORT$ The port for the Identity Manager User Application. For information about setting the value for this parameter, see Section 17.4.3, “Modifying Default Values for the Template,” on page 442. $SECURE_PORT$ The secure port for the Identity Manager User Application. For information about setting the value for this parameter, see Section 17.4.3, “Modifying Default Values for the Template,” on page 442. $TASKLIST_CONTEXT$ The page that displays the list of all requests pending for the addressee. $TASK_DETAILS$ The page that displays details for the request for which this email message was generated. Availability Setting Notification This template identifies a user whose availability has been updated. It includes the start time and expiration time of the period for which the user is unavailable, and the resources for which the user is unavailable. Hi, $submitterFirstName$ $submitterLastName$ has updated availability settings for $userFirstName$ $userLastName$. This user has $operation$ an availability setting that applies to the following resources: $resources$ This setting indicates that $userFirstName$ $userLastName$ is unavailable to work on these resources during the timeframe outlined below: Start time: $startTime$ Expiration time: $expirationTime$ When a user is unavailable, any delegates assigned may handle resource requests for that user. You can review a list of your availability settings at $PROTOCOL$:// $HOST$:$PORT$/$AVAILABILITY_CONTEXT$. Managing Provisioning Workflows 431 Table 17-3 Availability Setting Notification Template: Replacement Tags Tag Description $submitterFirstName$ The first name of the user who updated the availability setting. $PROTOCOL$ The protocol for URLs included in the e-mail message. $PORT$ The port for the Identity Manager User Application. For information about setting the value for this parameter, see Section 17.4.3, “Modifying Default Values for the Template,” on page 442. $startTime$ The start time of the workflow for this provisioning request. $resources$ The resources (provisioning requests) for which the addressee is unavailable. $SECURE_PROTOCOL$ The secure protocol for URLs included in the e-mail message. $expirationTime$ The time at which the availability will expire. $submitterLastName$ The last name of the user who updated the availability setting. $SECURE_PORT$ The secure port for the Identity Manager User Application. For information about setting the value for this parameter, see Section 17.4.3, “Modifying Default Values for the Template,” on page 442. $userFirstName$ The first name of the user to whom this availability setting applies. $userLastName$ The last name of the user to whom this availability setting applies. $HOST$ The host for the JBoss application server that is running the Identity Manager User Application. For information about setting the value for this parameter, see Section 17.4.3, “Modifying Default Values for the Template,” on page 442. $ASSIGNMENT_LIST_CONTEXT$ The context or path of the URL to the provisioning User Application. Delegate Assignment Notification This template notifies a user when a provisioning request has been submitted that requires the user’s approval. It includes the name of the request, the user who submitted the request, and the full name of the recipient. It includes links for viewing the provisioning request and for viewing all provisioning requests awaiting the user’s approval. 432 Identity Manager Roles Based Provisioning Module 3.7 User Application: Administration Guide Hi, A new provisioning request has been submitted that requires your approval. Request name: $requestTitle$ Submitted by: $initiatorFullName$ Recipient: $recipientFullName$ Please review the details of this request at $PROTOCOL$://$HOST$:$PORT$/ $TASK_DETAILS$ to take the appropriate action. You can review a list of all requests pending your approval at $PROTOCOL$:// $HOST$:$PORT$/$TASKLIST_CONTEXT$. _SUBJECT Table 17-4 Delegate Assignment Notification: Replacement Tags Tag Description $submitterFirstName$ The first name of the user who assigned the delegate. $PROTOCOL$ The protocol for URLs included in the e-mail message. $PORT$ The port for the Identity Manager User Application For information about setting the value for this parameter, see Section 17.4.3, “Modifying Default Values for the Template,” on page 442. $resources$ The resources (provisioning requests) for which the delegate is available. $SECURE_PROTOCOL$ The secure protocol for URLs included in the e-mail message. $fromUsers$ The users for which the assigned delegate is authorized to handle resource requests. $relationship$ The relationship defined in the directory abstraction layer that was selected for this delegate assignment. $expirationTime$ The time at which the delegate assignment will expire. $fromContainers$ The containers for which the assigned delegate is authorized to handle resource requests. $fromGroups$ The groups for which the assigned delegate is authorized to handle resource requests. $submitterLastName$ The last name of the user who assigned the delegate. $SECURE_PORT$ The secure port for the Identity Manager User Application. For information about setting the value for this parameter, see Section 17.4.3, “Modifying Default Values for the Template,” on page 442. Managing Provisioning Workflows 433 Tag Description $userFirstName$ The first name of the user who has been assigned as a delegate. $userLastName$ The last name of the user who has been assigned as a delegate. $HOST$ The host for the JBoss application server that is running the Identity Manager User Application. For information about setting the value for this parameter, see Section 17.4.3, “Modifying Default Values for the Template,” on page 442. $ASSIGNMENT_LIST_CONTEXT$ The context or path of the URL to the provisioning User Application. Provisioning Approval Notification This template notifies a user when an approval process for a provisioning request submitted by the user has been completed. Hi, The approval process of your provisioning request has completed. Request name: $requestTitle$ Request id: $requestId$ Submitted by: $initiatorFullName$ Submitted on: $requestSubmissionTime$ Recipient: $recipientFullName$ Status: $requestStatus$ Table 17-5 Provisioning Approval Notification: Replacement Tags Tag Description $initiatorFullName$ The full name of the initiator. $requestSubmissionTime$ The time at which the request was submitted. $requestTitle$ The display name of the provisioning request definition. $requestId The ID of the provisioning request. $recipientFullName$ The full name of the recipient. Reminder - A Request Is Waiting on Your Approval This template reminds a user that a provisioning request that requires the user’s approval is waiting in a queue for approval. It includes the name of the request, the user who submitted the request, and the recipient. It includes links for viewing the provisioning request and for viewing all provisioning requests awaiting the user’s approval. 434 Identity Manager Roles Based Provisioning Module 3.7 User Application: Administration Guide Hi, This is a reminder that a provisioning request is sitting in your queue waiting on your approval. Request name: $requestTitle$ Submitted by: $initiatorFullName$ Recipient: $recipientFullName$ Please review the details of this request at $PROTOCOL$://$HOST$:$PORT$/ $TASK_DETAILS$ to take the appropriate action. You can review a list of all requests pending your approval at $PROTOCOL$:// $HOST$:$PORT$/$TASKLIST_CONTEXT$. Table 17-6 Reminder - A request is waiting on your approval: Replacement Tags Tag Description $TASKLIST_CONTEXT$ The page that displays the list of all requests pending for the addressee. $PROTOCOL$ The protocol for URLs included in the e-mail message. $PORT$ The port for the Identity Manager User Application. For information about setting the value for this parameter, see Section 17.4.3, “Modifying Default Values for the Template,” on page 442. $SECURE_PROTOCOL$ The secure protocol for URLs included in the e-mail message. $initiatorFullName$ The full name of the initiator. $recipientFullName$ The full name of the recipient. $TASK_DETAILS$ The page that displays details for the request for which this e-mail message was generated. $SECURE_PORT$ The secure port for the Identity Manager User Application. For information about setting the value for this parameter, see Section 17.4.3, “Modifying Default Values for the Template,” on page 442. $userFirstName$ The first name of the addressee. $HOST$ The host for the JBoss application server that is running the Identity Manager User Application. For information about setting the value for this parameter, see Section 17.4.3, “Modifying Default Values for the Template,” on page 442. $requestTitle$ The display name of the provisioning request definition. Managing Provisioning Workflows 435 Proxy Assignment Notification This template notifies the recipient that a proxy has been assigned. The user who has been assigned as a proxy is identified, as are the users, groups, and containers for which the user is authorized to act as proxy. It includes links for viewing the recipient’s list of proxy assignments. Hi, A proxy assignment that authorizes a user to act as proxy for one or more users, groups, or containers was $operation$ by: $submitterFirstName$ $submitterLastName$. Unlike delegate assignments, proxy assignments are independent of resource requests, and therefore apply to all work and settings actions. The user selected as proxy is: $userFirstName$ $userLastName$ The assigned proxy is authorized to handle all work for these users, groups, and containers: Users: $fromUsers$ Groups: $fromGroups$ Containers: $fromContainers$ This proxy assignment expires at: $expirationTime$ You can review a list of your proxy assignments at $PROTOCOL$://$HOST$:$PORT$/ $PROXY_CONTEXT$. Table 17-7 Proxy Assignment Notification: Replacement Tags Tag Description $submitterFirstName$ The first name of the user who assigned the proxy. $PROTOCOL$ The protocol for URLs included in the e-mail message. $PORT$ The port for the Identity Manager User Application. For information about setting the value for this parameter, see Section 17.4.3, “Modifying Default Values for the Template,” on page 442. $resources$ The resources (provisioning requests) for which the proxy is available. $SECURE_PROTOCOL$ The secure protocol for URLs included in the e-mail message. $fromUsers$ The users for which the assigned proxy is authorized to handle resource requests. $expirationTime$ The time at which the proxy assignment will expire. 436 Identity Manager Roles Based Provisioning Module 3.7 User Application: Administration Guide Tag Description $fromContainers$ The containers for which the assigned proxy is authorized to handle resource requests. $fromGroups$ The groups for which the assigned proxy is authorized to handle resource requests. $submitterLastName$ The last name of the user who assigned the proxy. $SECURE_PORT$ The secure port for the Identity Manager User Application. For information about setting the value for this parameter, see Section 17.4.3, “Modifying Default Values for the Template,” on page 442. $userFirstName$ The first name of the user who has been assigned as a proxy. $userLastName$ The last name of the user who has been assigned as a proxy. $HOST$ The host for the JBoss application server that is running the Identity Manager User Application. For information about setting the value for this parameter, see Section 17.4.3, “Modifying Default Values for the Template,” on page 442. $ASSIGNMENT_LIST_CONTEXT$ The context or path of the URL to the provisioning User Application. New Role Request This template identifies the provisioning request definition that triggered the e-mail message. In addition, it includes a URL that redirects the addressee to the task that requires approval, as well as a URL that displays the complete list of tasks pending for that user. Hi, A new role request has been submitted that requires your approval. Request name: $requestTitle$ Submitted by: $initiatorFullName$ Recipient: $recipientFullName$ Please review the details of this role request at $PROTOCOL$://$HOST$:$PORT$/ $TASK_DETAILS$ to take the appropriate action. You can review a list of all role requests pending your approval at $PROTOCOL$://$HOST$:$PORT$/$TASKLIST_CONTEXT$. Table 17-8 New Role Request Template: Replacement Tags Tag Description $userFirstName$ The first name of the addressee. $requestTitle$ The display name of the request definition. Managing Provisioning Workflows 437 Tag Description $initiatorFullName$ The full name of the initiator. $recipientFullName$ The full name of the recipient. $PROTOCOL$ The protocol for URLs included in the e-mail message. $SECURE_PROTOCOL$ The secure protocol for URLs included in the e-mail message. $HOST$ The host for the JBoss application server that is running the Identity Manager User Application. For information about setting the value for this parameter, see Section 17.4.3, “Modifying Default Values for the Template,” on page 442. $PORT$ The port for the Identity Manager User Application. For information about setting the value for this parameter, see Section 17.4.3, “Modifying Default Values for the Template,” on page 442. $SECURE_PORT$ The secure port for the Identity Manager User Application. For information about setting the value for this parameter, see Section 17.4.3, “Modifying Default Values for the Template,” on page 442. $TASKLIST_CONTEXT$ The page that displays the list of all requests pending for the addressee. $TASK_DETAILS$ The page that displays details for the request for which this email message was generated. Role Request Approval Notification This template notifies a user when an approval process for a role request submitted by the user has been completed. Hi, The approval process of your role request has completed. Request name: $requestTitle$ Request id: $requestId$ Submitted by: $initiatorFullName$ Submitted on: $requestSubmissionTime$ Recipient: $recipientFullName$ Status: $requestStatus$ Table 17-9 Role Request Approval Notification: Replacement Tags Tag Description $initiatorFullName$ The full name of the initiator. $requestSubmissionTime$ The time at which the request was submitted. 438 Identity Manager Roles Based Provisioning Module 3.7 User Application: Administration Guide Tag Description $requestTitle$ The display name of the provisioning request definition. $requestId The ID of the role request. $recipientFullName$ The full name of the recipient. Compliance Task This template notifies an attester when an attestation process has assigned a task to the attester. Hi, A new compliance activity has been submitted that requires your attention. Request name: $requestTitle$ Submitted by: $initiatorFullName$ Please review the details of this compliance activity request at $PROTOCOL$:// $HOST$:$PORT$/$TASK_DETAILS$ to take the appropriate action. You can review a list of all requests pending your action at $PROTOCOL$:// $HOST$:$PORT$/$TASKLIST_CONTEXT$. Table 17-10 Compliance Task: Replacement Tags Tag Description $initiatorFullName$ The full name of the initiator. $requestTitle$ The display name of the attestation request. New Resource Request This template identifies the resource request definition that triggered the e-mail message. In addition, it includes a URL that redirects the addressee to the task that requires approval, as well as a URL that displays the complete list of tasks pending for that user. Hi, A new resource request has been submitted that requires your approval. Request name: $requestTitle$ Submitted by: $initiatorFullName$ Recipient: $recipientFullName$ Please review the details of this role request at $PROTOCOL$://$HOST$:$PORT$/ $TASK_DETAILS$ to take the appropriate action. You can review a list of all resource requests pending your approval at $PROTOCOL$://$HOST$:$PORT$/$TASKLIST_CONTEXT$. Managing Provisioning Workflows 439 Table 17-11 New Resource Request Template: Replacement Tags Tag Description $userFirstName$ The first name of the addressee. $requestTitle$ The display name of the request definition. $initiatorFullName$ The full name of the initiator. $recipientFullName$ The full name of the recipient. $PROTOCOL$ The protocol for URLs included in the e-mail message. $SECURE_PROTOCOL$ The secure protocol for URLs included in the e-mail message. $HOST$ The host for the JBoss application server that is running the Identity Manager User Application. $PORT$ The port for the Identity Manager User Application. $SECURE_PORT$ The secure port for the Identity Manager User Application. $TASKLIST_CONTEXT$ The page that displays the list of all requests pending for the addressee. $TASK_DETAILS$ The page that displays details for the request for which this email message was generated. Resource Request Approval Notification This template notifies a user when an approval process for a resource request submitted by the user has been completed. Hi, The approval process of your resource request has completed. Request name: $requestTitle$ Request id: $requestId$ Submitted by: $initiatorFullName$ Submitted on: $requestSubmissionTime$ Recipient: $recipientFullName$ Status: $requestStatus$ Table 17-12 Role Request Approval Notification: Replacement Tags Tag Description $initiatorFullName$ The full name of the initiator. $requestSubmissionTime$ The time at which the request was submitted. $requestTitle$ The display name of the provisioning request definition. $requestId The ID of the role request. 440 Identity Manager Roles Based Provisioning Module 3.7 User Application: Administration Guide Tag Description $recipientFullName$ The full name of the recipient. 17.4.2 Editing E-mail Templates You can change the content or format of the supplied e-mail templates. For information about creating e-mail templates, see “Configuring E-Mail Notification” in the Novell Identity Manager Administration Guide. To edit a template: 1 Select the Identity Manager category in iManager. 2 Open the Workflow Administration role. 3 Click the Email Templates task. iManager displays the Edit Email Templates panel. 4 Click the name of the e-mail template that you would like to edit. iManager displays the Modify E-mail Message screen. Managing Provisioning Workflows 441 5 Make your changes in the Message Body box. 6 If necessary, copy one or more of the supplied tags in the Replacement Tags list to include dynamic text in the message body. For a description of the replacement tags, see Section 17.4.1, “Default Content and Format,” on page 430. 7 When you are finished, click OK. 17.4.3 Modifying Default Values for the Template At installation time, you can set default values for several of the replacement tags used in e-mail templates. After you have completed the installation, you can also modify these values by using the User Application Configuration tool. 1 Run the configupdate.sh script in the idm folder. ./configupdate.sh On Windows, run configupdate.bat. 442 Identity Manager Roles Based Provisioning Module 3.7 User Application: Administration Guide 2 Make changes as necessary to any of the following fields: Field Description Email Notify Host Used to replace the $HOST$token in e-mail templates used in approval flows. If left blank, computed by the server. Email Notify Port Used to replace the $PORT$token in e-mail templates used in approval flows. Email Notify Secure Port Used to replace the $SECURE_PORT$token in e-mail templates used in approval flows. 3 Click OK to confirm your changes. 17.4.4 Adding Localized E-Mail Templates To add localized e-mail templates: 1 Select the Identity Manager category in iManager. 2 Open the Workflow Administration role. 3 Click the Email Templates task. iManager displays the Edit Email Templates panel. Managing Provisioning Workflows 443 4 Identify the e-mail template (without any locale in the name) that you want to copy. 4a Write down the template name to use in Step 5. 4b Click the template subject to open the template and view its message subject, body, and replacement tags. 4c Copy the message subject, body (to be translated), and replacement tags that you want to use in your new template. 4d Click Cancel. 5 Click Create, then enter the template name with a locale extension. For example, to create a Forgot Hint template in German, enter the name Forgot Hint_de, where _de signifies Deutsch (German). If you use a two-letter language and two-letter country code, this works fine. If you attempt to use a locale with a variant such as en_US_TX, only the variant and language are considered. Do not use locale variants when naming e-mail templates. 6 Click OK. 7 In the template list, click the newly created template, for example Forgot Hint_de, and enter the translated subject and message body. Be sure to preserve the replacement tags surrounded by the dollar ($) sign in the message body. 8 If necessary, copy one or more of the supplied tags in the Replacement Tags list to include dynamic text in the message body. For a description of the replacement tags, see Section 17.4.1, “Default Content and Format,” on page 430. 9 Click Apply. 10 Click OK. NOTE: E-mail templates only send localized content if the preferred locale is set for the user (to whom the mail is sent). 444 Identity Manager Roles Based Provisioning Module 3.7 User Application: Administration Guide VI Web Service Reference VI These sections describe the Web Service endpoints provided for the User Application. Chapter 18, “Provisioning Web Service,” on page 447 Chapter 19, “Metrics Web Service,” on page 517 Chapter 20, “Notification Web Service,” on page 535 Chapter 21, “Directory Abstraction Layer (VDX) Web Service,” on page 545 Chapter 22, “Role Web Service,” on page 569 Chapter 23, “Resource Web Service,” on page 659 Chapter 24, “Forgot Password Web Service,” on page 669 Web Service Reference 445 446 Identity Manager Roles Based Provisioning Module 3.7 User Application: Administration Guide 18 Provisioning Web Service 18 This section describes the Provisioning Web Service, which allows SOAP clients to access Provisioning functionality. Topics include: Section 18.1, “About the Provisioning Web Service,” on page 447 Section 18.2, “Developing Clients for the Provisioning Web Service,” on page 449 Section 18.3, “Provisioning Web Service API,” on page 460 18.1 About the Provisioning Web Service The Identity Manager User Application includes a workflow system that executes approval flows. A workflow process is based on a provisioning request definition, which is an XML document stored in the Identity Vault. The provisioning request definition describes an arbitrary topology using activities and links. For example, a provisioning request to grant an entitlement might have a workflow that collects approvals from relevant users and writes the entitlement to the directory. To support access by third-party software applications, the provisioning workflow system includes a Web service endpoint. The endpoint offers all provisioning functionality (for example, allowing SOAP clients to start a new approval flow, or list currently executing flows). The Web service is built using the Novell Web Service SDK (WSSDK), which supports the WS-I Basic Profile, thus guaranteeing interoperability with other standards based SOAP implementations. This Appendix describes the provisioning Web service in detail and shows how to access it using the Web or by writing a Java or C# client. We provide an overview of the operations in the SOAP endpoint and describe how to use the Web interface. We show how to develop a Java client using the SOAP toolkit included with Identity Manager provisioning, followed by how to write a C# client using Mono. The sample source code a the Java client and associated ANT build file is provided. 18.1.1 Provisioning Web Service Overview Identity Manager is composed of two main systems: the Identity Vault and the workflow application. The Identity Vault is capable of connecting to a large number of different systems such as databases, financial systems, and other enterprise applications, and keep these systems synchronized. The rules for synchronizing the remote systems can be very complex and the Identity Vault engine supports a sophisticated scripting language for expressing the rules. The workflow application is composed of several subsystems. The User Application provides a user-interface for workflows. The User Application is a Web application for requesting and managing approval flows. The Web application runs in a portal, which also includes administration portlets. The workflow application contains a security layer, a directory abstraction layer and a logging subsystem, which can send log events to Novell Audit and Novell Sentinel. The workflow subsystem is responsible for executing approval flows. The User Application runs on an application server (for example, JBoss) and uses a database (for example, Oracle, MySQL) for persistence. The Web service for the workflow system is only used by the User Application driver, which is capable of listening to certain events emitted by the Identity Vault engine and convert these events into an appropriate SOAP message. For example, when a specific attribute in the Identity Vault Provisioning Web Service 447 changes, the Identity Vault engine emits an event, which the User Application picks up from the subscriber channel. The User Application driver then sends a SOAP message to the provisioning Web service to start a new approval flow. 18.1.2 Removing Administrator Credential Restrictions By default, the requirement for invoking the public interfaces for the SOAP services is that the HTTP session logged in user must have administrator credentials. The Provisioning and Directory Services require Provisioning Administrator credentials. The Role Service and Resource Service require Role Administrator and Resource Administrator credentials respectively. The restrictions can be removed to allow a session with a logged in user who does not have administrator credentials to invoke the methods for the services by changing the configuration settings for the service. In order to do this, you must extract the configuration files from the User Application war, make the appropriate changes, and import the files back into the User Application WAR. The details for changing the Provisioning Service follow. Instructions for the other SOAP services are provided with the documentation for these services. To remove the administrator credential restriction for the Provisioning Service: 1 Extract the the WorkflowService-conf/config.xml file from the User Application WAR file's IDMfw.jar file. 2 Change the WorkflowService/SOAP-End-Points-Accessible-By-ProvisioningAdminOnly property from: <property> <key>WorkflowService/SOAP-End-Points-Accessible-ByProvisioningAdminOnly</key> <value>true</value> </property> To the following: <property> <key>WorkflowService/SOAP-End-Points-Accessible-ByProvisioningAdminOnly</key> <value>false</value> </property> 3 Import the changes back into the WAR file. These are the methods that can be invoked by users without Provisioning Administrator credentials if the WorkflowService/SOAP-End-Points-Accessible-By-ProvisioningAdminOnly property is set to false: getAllProvisioningRequests(String) getDataItems(String workId) getDefinitionByID(String definitionID, String recipient) getProvisioningCategories() getProvisioningRequests(String recipient, String category, String operation) getWork(String workId) getWorkEntries(T_WorkEntryQuery query, int maxRecords) start(String processId, String recipient, DataItemArray items) startAsProxy(String processId, String recipient, DataItemArray items, String proxyUser) 448 Identity Manager Roles Based Provisioning Module 3.7 User Application: Administration Guide startAsProxyWithDigitalSignature(String processId, String recipient, DataItemArray items, String digitalSignature, SignaturePropertyArray digitalSignaturePropertyArray, String proxyUser) startWithCorrelationId(String processId, String recipient, DataItemArray items, String digitalSignature, SignaturePropertyArray digitalSignaturePropertyArray, String proxyUser, String correlationId) startWithDigitalSignature(String processId, String recipient, DataItemArray items, String digitalSignature, SignaturePropertyArray digitalSignaturePropertyArray) All other methods for this service always require Provisioning Administrator credentials independent of whether the WorkflowService/SOAP-End-Points-Accessible-ByProvisioningAdminOnly property is set to false. 18.1.3 Provisioning Web Service Method Categories The methods provided by the provisioning Web service endpoint are divided into six categories: Table 18-1 Provisioning Web Service Operation Categories Category Description Comments Methods for retrieving comments and for adding a comment to a pending user activity Configuration Methods for getting and setting configuration parameters for the workflow system (for example, timeouts, thread pool settings). Miscellaneous Several unrelated methods (for example, for getting a JPG with a provisioning request's topology, for getting the XML definition of a provisioning request, and for getting the XML for the request form). Processes Methods for getting information about running and completed workflow processes. Provisioning Requests Methods for working with provisioning requests (for example, listing available provisioning requests, listing provisioning categories) Work Entries Methods for retrieving and manipulating work entries (items awaiting approval). The methods provided by the provisioning Web service are described in detail in Section 18.3, “Provisioning Web Service API,” on page 460. 18.2 Developing Clients for the Provisioning Web Service This section includes the following topics: Section 18.2.1, “Web Access to the Provisioning Web Service,” on page 450 Section 18.2.2, “A Java Client for the Provisioning Web Service,” on page 452 Provisioning Web Service 449 Section 18.2.3, “Developing a Mono Client,” on page 457 Section 18.2.4, “Sample Ant File,” on page 459 Section 18.2.5, “Sample Log4J File,” on page 460 18.2.1 Web Access to the Provisioning Web Service A SOAP-based Web service is usually accessed by inserting a SOAP message in the body of an HTTP Post request.The Web service toolkit used to build the provisioning Web service also supports access using HTTP GET. In other words, you can open the URL of the Web service endpoint in a browser and interact with the Web service. In particular, the provisioning Web service lets you invoke each of its operations. Accessing the Test Page You can access the provisioning Web Service endpoint using a URL similar to the following: http://server:port/warcontext/provisioning/service?test For example, if your server is named “myserver”, your User Application is listening on port 8080, and your User Application war file is named “IDMPROV”, the URL would be: http://myserver:8080/IDMPROV/provisioning/service?test The following page is displayed: Figure 18-1 Web Service Test Page You can also access the SOAP endpoint by going to the Administration within the User Application. To do this, you need to select the Application Configuration tab, then select Web Services from the left-navigation menu. After selecting Web Services, pick the Web Service endpoint you want from the list. 450 Identity Manager Roles Based Provisioning Module 3.7 User Application: Administration Guide WARNING: The test page is disabled by default. Since some of the methods allow data to be updated, the test page presents a potential security vulnerability and should not be allowed in a production environment. For details on enabling the test page, see the instructions provided for the Role Service in “Enabling the Test Page” on page 571. Entering Arguments for Operations To see an example of an operation that is particularly useful to invoke from the browser, scroll down to the Miscellaneous section and click getGraph. NOTE: The Graphviz program must be installed on the computer where the application server and the IDM User Application is running. For more information about Graphviz, see Graphviz (http:// www.graphviz.org). A page is displayed that allows you to enter the parameters for the getGraph method. Figure 18-2 Parameters for getGraph Method The method takes one argument, which is the distinguished name of a provisioning request. Enter the DN, and the underlying workflow is displayed as a JPG file.. Provisioning Web Service 451 Figure 18-3 Output of getGraph 18.2.2 A Java Client for the Provisioning Web Service This section describes how to develop a simple Java client for the provisioning Web service, which lists all the processes in the workflow system. For complete source code for the client, see “Sample Code for the Java Client” on page 456. Prerequisites To develop a Java client you must install a supported Java Developer’s Kit. Also, a client program needs the following JAR files: activation.jar commons-httpclient.jar IDMfw.jar log4j.jar saaj-api.jar wssdk.jar commons-codec-1.3.jar commons-logging.jar jaxrpc-api.jar mail.jar workflow.jar xpp3.jar 452 Identity Manager Roles Based Provisioning Module 3.7 User Application: Administration Guide Developing a Java Client Developing a client that accesses a Web service consists of two steps: Get the stub, which is the object that represents the remote service Invoke one or more of the operations available in the remote service The Java programming model for Web services is very similar to RMI. The first step is to lookup the stub using JNDI: InitialContext ctx = new InitialContext(); ProvisioningService service = (ProvisioningService) ctx.lookup("xmlrpc:soap:com.novell.soa.af.impl.soap.ProvisioningService"); Provisioning prov = service.getProvisioningPort(); The first line of code creates the initial context for JNDI lookups. The second line looks up the service object, which is a kind of factory that can be used to retrieve the stub for the provisioning Web service. The last line gets the provisioning stub from the service. Before invoking an operation on the provisioning stub, it is necessary to set some properties, including the credentials used for authentication on the service, as well as the endpoint URL. Stub stub = (Stub) prov; // set username and password stub._setProperty(Stub.USERNAME_PROPERTY, USERNAME); stub._setProperty(Stub.PASSWORD_PROPERTY, PASSWORD); // set the endpoint URL stub._setProperty(Stub.ENDPOINT_ADDRESS_PROPERTY, url); These and other stub properties are described in more detail in “Frequently Used Stub Constants” on page 454. Now that we have a fully configured stub, we can invoke the getAllProcesses operation and dump information about each of the processes returned on the console: // invoke the getAllProcesses method ProcessArray array = prov.getAllProcesses(); Process[] procs = array.getProcess(); // print process array System.out.println("list of all processes:"); if (procs != null) { for (int i = 0; i < procs.length; i++) { System.out.println(" process with request identifier " + procs[i].getRequestId()); System.out.println(" initiator = " + procs[i].getInitiator()); System.out.println(" recipient = " + procs[i].getRecipient()); System.out.println(" processId = " + procs[i].getProcessId()); System.out.println(" created = " + 8 9 procs[i].getCreationTime().getTime()); if (null != procs[i].getCompletionTime()) { System.out.println(" completed = " + procs[i].getCompletionTime().getTime()); } System.out.println(" approval status = " + Provisioning Web Service 453 procs[i].getApprovalStatus()); System.out.println(" process status = " + procs[i].getProcessStatus()); if (i != procs.length - 1) System.out.println(); } } A method invocation on the stub results in a SOAP message being sent using the HTTP transport to the provisioning Web service. For operations that have arguments, the stub takes care of marshaling those Java objects into XML. The Web service returns a SOAP message, and the stub unmarshals the XML, in this case converting it into a ProcessArray Java object. Running the Client The sample ANT build file has a target for running the client (see “Sample Ant File” on page 459). The client needs the JAR files described in “Prerequisites” on page 452 to be in the CLASSPATH. You can change the code to have a different default address for the provisioning Web service SOAP endpoint, or simply specify it as a command line argument. For example: ant -Durl=http://www.company.com:80/IDMProv/provisioning/service run Frequently Used Stub Constants The com.novell.soa.ws.portable.Stub class (which is part of WSSDK) supports several properties that can be used to configure a stub instance (for example, to fine-tune aspects of the HTTP communication). The following table lists a small subset of these properties, which are frequently used: Table 18-2 Provisioning Web Service Stub Constants Property Type ENDPOINT_ADDRESS_PROPERTY java.lang.String Description The URL of the Web service. The URL protocol scheme can be HTTP or HTTPS depending on the requirements of the server. The path portion should be: /IDMProv/provisioning/service HTTP_HEADERS java.util.Map Additional HTTP headers as String name/ value pairs. HTTP_TIME_OUT java.lang.Integer The number of seconds to wait to establish a connection to the host before timing out. HTTP_MAX_TOTAL_CONNECTION S java.lang.Integer The number of concurrent connections that this client program can establish to all server hosts it accesses. The default limit is 20. 454 Identity Manager Roles Based Provisioning Module 3.7 User Application: Administration Guide Property Type Description HTTP_MAX_HOST_CONNECTIONS java.lang.Integer The number of concurrent connections this client program can establish to an individual server host. The default limit is 2. This value may not exceed that of HTTP_MAX_TOTAL_CONNECTIONS, so if a client requires more than 20 connections to the server, it must also set HTTP_MAX_TOTAL_CONNECTIONS to the desired value. USERNAME java.lang.String The user ID for HTTP authentication. PASSWORD java.lang.String The password for HTTP authentication. HTTP_PROXY_HOST java.lang.String The host DNS name of a proxy. Setting this property requires setting HTTP_PROXY_PORT as well. HTTP_PROXY_PORT java.lang.Integer The port to use on a proxy. Setting this property requires setting HTTP_PROXY_HOST as well. HTTP_PROXY_AUTH_SCHEME java.lang.Integer The authentication scheme (Basic or Digest) to use for a proxy. HTTP_PROXY_USERNAME java.lang.String The user ID for HTTP authentication using a proxy. HTTP_PROXY_PASSWORD java.lang.String The password for HTTP authentication via proxy. The TCP Tunnel The TCP Tunnel is a useful tool for looking at the SOAP messages that are exchanged between a client and a server. The ANT build file (see “Sample Ant File” on page 459) has a target for starting the tunnel. Once the tunnel starts you need to enter the port on which the tunnel will listen, and the host/port of the remote Web service. The default settings cause the tunnel to listen on port 9999 and connect to a service running on localhost port 8080. The client program (see “Developing a Java Client” on page 453) uses the first command line parameter to set the ENDPOINT_ADDRESS_PROPERTY. Using the default values, you can run the client using the following command, after starting the tunnel: ant -Durl=http://localhost:9999/IDMProv/provisioning/service run Figure 18-4 shows the TCP tunnel with a request SOAP message in the left panel and the message in the right panel. Provisioning Web Service 455 Figure 18-4 TCP Tunnel Sample Code for the Java Client The following is the code for the Java client for listing all processes in the workflow system package com.novell.examples; import javax.naming.InitialContext; import com.novell.soa.af.impl.soap.AdminException; import com.novell.soa.af.impl.soap.Process; import com.novell.soa.af.impl.soap.ProcessArray; import com.novell.soa.af.impl.soap.Provisioning; import com.novell.soa.af.impl.soap.ProvisioningService; import com.novell.soa.ws.portable.Stub; public class Client { private static final String USERNAME = "admin"; private static final String PASSWORD = "test"; public static void main(String[] args) { try { String url = args.length > 0 ? args[0] : "http://localhost:8080/IDMProv/provisioning/service"; listProcesses(url); } catch (AdminException ex) { System.out.println("command failed: " + ex.getReason()); } catch (Exception ex) { ex.printStackTrace(); } } private static void listProcesses(String url) throws Exception { // get the stub InitialContext ctx = new InitialContext(); ProvisioningService service = (ProvisioningService) ctx.lookup("xmlrpc:soap:com.novell.soa.af.impl.soap.ProvisioningService"); 456 Identity Manager Roles Based Provisioning Module 3.7 User Application: Administration Guide Provisioning prov = service.getProvisioningPort(); Stub stub = (Stub) prov; // set username and password stub._setProperty(Stub.USERNAME_PROPERTY, USERNAME); stub._setProperty(Stub.PASSWORD_PROPERTY, PASSWORD); // set the endpoint URL stub._setProperty(Stub.ENDPOINT_ADDRESS_PROPERTY, url); // invoke the getAllProcesses method ProcessArray array = prov.getAllProcesses(); Process[] procs = array.getProcess(); // print process array System.out.println("list of all processes:"); if (procs != null) { for (int i = 0; i < procs.length; i++) { System.out.println(" process with request identifier " + procs[i].getRequestId()); System.out.println(" initiator = " + procs[i].getInitiator()); System.out.println(" recipient = " + procs[i].getRecipient()); System.out.println(" processId = " + procs[i].getProcessId()); System.out.println(" created = " + procs[i].getCreationTime().getTime()); if (null != procs[i].getCompletionTime()) { System.out.println(" completed = " + procs[i].getCompletionTime().getTime()); } 17 18 System.out.println(" approval status = " + procs[i].getApprovalStatus()); System.out.println(" process status = " + procs[i].getProcessStatus()); if (i != procs.length - 1) System.out.println(); } } } } 18.2.3 Developing a Mono Client The previous section described how to create a Java client using the Web service toolkit and the precompiled stub code included with Identity Manager. This section describes how to develop a client using just the WSDL for the provisioning Web service. This example uses Mono and creates a C# client that changes the default retention time of 120 days for completed workflows to 30. Prerequisites To get started, you need to download Mono and install it on your system (see the Mono Project Website (http://www.mono-project.com/)). The version of Mono available at the time this document was written did not support complex schema types in which an element has the nillable attribute set to true. Because this construct is used in the provisioning WSDL, you must manually edit the Provisioning.WSDL file and remove the three places where nillable="true" is used. Provisioning Web Service 457 Generating the Stub Compared to the Java client developed in “Developing a Java Client” on page 453, there is one additional step required when building the C# client. Since the stub for accessing the Web service SOAP endpoint is not provided, you must generate the stub from the WSDL document. Mono includes a compiler called wsdl that processes the WSDL file and creates the stub. You can download the WSDL file from your User Application server by accessing the following URL: http://myserver:8080/IDMProv/provisioning/service?wsdl Replace “myserver” with the name of your server, and “IDMProv” with the name of your User Application war file. Compile the WSDL file using the following command: wsdl Provisioning.wsdl This will generate a C# file called ProvisioningService.cs, which you need to compile into a DLL using the following Mono C# compiler command: mcs /target:library /r:System.Web.Services.dll ProvisioningService.cs Compared to the Java client, the resulting ProvisioningService.dll file is the equivalent of workflow.jar, which contains the stub code and supporting classes for accessing the provisioning Web service. The following is the source code for the simple C# client that sets the flow retention time and displays the new value on the console: using System; using System.Net; class provclient { public static void Main(string [] args) { // create the provisioning service proxy ProvisioningService service = new ProvisioningService(); // set the credentials for basic authentication service.Credentials = new NetworkCredential("admin", "test"); service.PreAuthenticate = true; // set the value for completed request retention to 30 days setCompletedProcessTimeoutRequest req = new setCompletedProcessTimeoutRequest(); 11 12 req.arg0 = 30; service.setCompletedProcessTimeout(req); // display the new value on the console getCompletedProcessTimeoutResponse res = service.getCompletedProcessTimeout(new getCompletedProcessTimeoutRequest()); Console.WriteLine(res.result); } } You need to edit the file using the administrator credentials on your deployed Identity Manager system. Compile the client using the following command: mcs /r:ProvisioningService.dll /r:System.Web provclient.cs This generates the provclient.exe file. 458 Identity Manager Roles Based Provisioning Module 3.7 User Application: Administration Guide Running the Client Use the following command to run the client: mono provclient.exe 18.2.4 Sample Ant File The sample Ant file includes useful targets for extracting the necessary JAR files from the Identity Manager installation, compiling and running the Java client, and for launching the TCP Tunnel. <?xml version="1.0"?> <project name="client" default="all" basedir="."> <target name="all" depends="clean, extract, compile"></target> <!-- main clean target --> <target name="clean"> <delete quiet="true" dir="classes"/> <delete quiet="true" dir="lib"/> </target> <!-- init sets up the build environment --> <target name="init"> <mkdir dir="classes"/> <copy todir="${basedir}/lib"> <fileset dir="${basedir}" includes="log4j.properties"/> </copy> <!-- classpath --> <path id="CLASSPATH"> <pathelement location="${basedir}/classes"/> <fileset dir="${basedir}/lib" includes="*.jar"/> </path> </target> <!-- extract --> <target name="extract"> <property name="idm.home" value="/opt/novell/idm3"/> <property name="jboss.lib" value="${idm.home}/jboss-4.0.3/server/IDMProv/ lib"/> <mkdir dir="lib"/> <unzip src="${idm.home}/IDMProv.war" dest="${basedir}/lib"> <patternset> <include name="WEB-INF/lib/commons-codec-1.3.jar"/> <include name="WEB-INF/lib/commons-httpclient.jar"/> <include name="WEB-INF/lib/commons-logging.jar"/> <include name="WEB-INF/lib/jaxrpc-api.jar"/> <include name="WEB-INF/lib/saaj-api.jar"/> <include name="WEB-INF/lib/xpp3.jar"/> <include name="WEB-INF/lib/workflow.jar"/> <include name="WEB-INF/lib/wssdk.jar"/> <include name="WEB-INF/lib/IDMfw.jar"/> </patternset> </unzip> <move todir="${basedir}/lib"> <fileset dir="${basedir}/lib/WEB-INF/lib" includes="*.jar"/> </move> <delete quiet="true" dir="${basedir}/lib/WEB-INF"/> <copy todir="${basedir}/lib"> <fileset dir="${jboss.lib}" includes="activation.jar, mail.jar, log4j.jar"/> </copy> Provisioning Web Service 459 </target> 18 19 <!-- tunnel --> <target name="tunnel" depends="init"> <java classname="com.novell.soa.ws.impl.tools.tcptunnel.Tunnel" fork="true" spawn="true"> <classpath refid="CLASSPATH"/> </java> </target> <!-- compile --> <target name="compile" depends="init"> <javac srcdir="${basedir}" destdir="classes" includes="Client.java"> <classpath refid="CLASSPATH"/> </javac> </target> <!-- run --> <target name="run" depends="init"> <property name="url" value="http://localhost:8080/IDMProv/provisioning/ service"/> <java classname="com.novell.examples.Client" fork="true"> <arg line="${url}"/> <classpath refid="CLASSPATH"/> </java> </target> </project> 18.2.5 Sample Log4J File The following log4j file sets the default log level to “error”: log4j.rootCategory=ERROR, R log4j.appender.R=org.apache.log4j.ConsoleAppender log4j.appender.R.layout=org.apache.log4j.PatternLayout log4j.appender.R.layout.ConversionPattern=%-5p: %m%n 18.3 Provisioning Web Service API This section provides details about the Provisioning Web service methods. All of the methods throw com.novell.soa.af.impl.soap.AdminException and java.rmi.RemoteException. To improve readability, the throws clause has been omitted from the method signatures. This section includes the following topics: Section 18.3.1, “Processes,” on page 461 Section 18.3.2, “Provisioning,” on page 471 Section 18.3.3, “Work Entries,” on page 483 Section 18.3.4, “Comments,” on page 499 Section 18.3.5, “Configuration,” on page 505 Section 18.3.6, “Miscellaneous,” on page 509 Section 18.3.7, “Cluster,” on page 512 460 Identity Manager Roles Based Provisioning Module 3.7 User Application: Administration Guide 18.3.1 Processes This section provides reference information for each Processes method. The methods include: “getProcessesByQuery” on page 461 “getProcessesByStatus” on page 462 “getProcesses” on page 462 “getAllProcesses” on page 463 “getProcessesArray” on page 464 “getProcessesById” on page 465 “terminate” on page 465 “getProcess” on page 466 “getProcessesByCreationTime” on page 467 “getProcessesByApprovalStatus” on page 468 “getProcessesByRecipient” on page 468 “getProcessesByInitiator” on page 468 “setResult” on page 469 “getProcessesByCreationInterval” on page 470 getProcessesByQuery Used to get information about processes. Method Signature com.novell.soa.af.impl.soap.ProcessArray getProcessesByQuery(com.novell.soa.af.impl.soap.T_ProcessInfoQuery query, int maxRecords) Example // // Query information about processes for a user that are running and // have not been approved yet. String logic = "AND"; T_ProcessInfoOrder order = T_ProcessInfoOrder.APPROVAL_STATUS; int CHOICE_SIZE = 4; Integer approvalStatusInteger = new Integer(ProcessConstants.PROCESSING); Integer processStatusInteger = new Integer(ProcessConstants.RUNNING); // // Setup the query with the above params T_ProcessInfoQueryChoice [] choice = new T_ProcessInfoQueryChoice[CHOICE_SIZE]; choice[0] = new T_ProcessInfoQueryChoice(); choice[0].setApprovalStatus(approvalStatusInteger); choice[1] = new T_ProcessInfoQueryChoice(); choice[1].setProcessStatus(processStatusInteger); choice[2] = new T_ProcessInfoQueryChoice(); choice[2].setRecipient(recipient); Provisioning Web Service 461 choice[3] = new T_ProcessInfoQueryChoice(); choice[3].setRequestId(requestId); int maxRecords = -1; T_ProcessInfoQuery processInfoQuery = new T_ProcessInfoQuery(T_Logic.fromString(logic), order, choice); ProcessArray processArray = stub.getProcessesByQuery(processInfoQuery, maxRecords); getProcessesByStatus Used to get information about processes with a specified status (for example, running processes). Method Signature public com.novell.soa.af.impl.soap.ProcessArray getProcessesByStatus(com.novell.soa.af.impl.soap.T_ProcessStatus status) Example T_ProcessStatus processStatus = T_ProcessStatus.Running; // // Get processes by status ProcessArray processArray = stub.getProcessesByStatus(processStatus); Process [] process = processArray.getProcess(); getProcesses Used to get information about processes, specified by processID. Method Signature com.novell.soa.af.impl.soap.ProcessArray getProcesses(java.lang.String id, long time,com.novell.soa.af.impl.soap.T_Operator op, java.lang.String initiator, java.lang.String recipient) Parameters Parameter Description processId The process Id (java.lang.String). creationTime The time at which the process was started (long). op The operator to use. The operators are: EQ - equals LT - less than LE - less than or equal to GT - greater than GE - greater than or equal to initiator The initiator of the workflow. recipient The recipient of the approval activity. 462 Identity Manager Roles Based Provisioning Module 3.7 User Application: Administration Guide Example int processMatchCount = 0; T_Operator operator = T_Operator.GT; long currentTimeInMillis = System.currentTimeMillis(); String [] requestIds = requestIdArray.getString(); // // Initialize and start a provisioning request HashMap provMap = new HashMap(); provMap.put(Helper.RECIPIENT, recipient); provMap.put(I"Provisioning_Request_To_Start_Key", "Enable Active Directory Account (Mgr Approve-No Timeout)"); // // Start request // Calls method startProvisioningRequest on the provUtils // utility object which refers to a utility class that does not // ship with the Identity Manager User Application. String requestId = provUtils.startProvisioningRequest(provMap, null); sleep(5); Process process = stub.getProcess(requestId); if(process != null) { String processId = process.getProcessId(); String initiator = process.getInitiator(); ProcessArray processArray = stub.getProcesses(processId, currentTimeInMillis, operator, initiator, recipient); } getAllProcesses Used to get information about all running and completed provisioning requests. Method Signature com.novell.soa.af.impl.soap.ProcessArray getAllProcesses() Example ProcessArray array = stub.getAllProcesses(); Process [] processes = array.getProcess(); if(_process != null) { sb = new StringBuffer(); sb.append("\nProcess List:"); for(int index = 0; index < _process.length; index++) { String processId = _process[index].getProcessId(); String approvalStatus = _process[index].getApprovalStatus(); Calendar completionTime = _process[index].getCompletionTime(); Calendar creationTime = _process[index].getCreationTime(); String engineId = _process[index].getEngineId(); String proxy = _process[index].getProxy(); String initiator = _process[index].getInitiator(); String processName = _process[index].getProcessName(); String processStatus = _process[index].getProcessStatus(); String p_recipient = _process[index].getRecipient(); Provisioning Web Service 463 String p_requestId = _process[index].getRequestId(); int valueOfapprovalStatus = _process[index].getValueOfApprovalStatus(); int valueOfprocessStatus = _process[index].getValueOfProcessStatus(); String version = _process[index].getVersion(); } getProcessesArray Used to limit the number of processes returned. If the limit you specify is less than the system limit, the number you specify is returned. If you exceed the system limit, the Workflow Engine returns the system limit. If the limit you specify is less than or equal to 0, the Workflow Engine returns all processes. Method Signature com.novell.soa.af.impl.soap.ProcessArray getProcessesArray(int maxRecords); Example /** * Method to augment the getAllProcesses() method that impose limits * on the number of processes returned. * @throws TestProgramException */ public void adding_Limits_To_getProcessArray_TestCase() throws TestProgramException { String recipient = ServiceUtils.getInstance().getLoginData().getUsername(LoginData.RECIPIENT_TYP E); String requestNameToStart = provUtils.getProvisioningResourceNameForRecipient(recipient, "Enable Active Directory"); // // Get the stub Provisioning stub = ServiceUtils.getInstance().getProvisioningStub(); try { // // Start multiple requests final int NUMBER_OF_REQUESTS_TO_START = 2; Map map = MapUtils.createAndSetMap(new Object[] { Helper.RECIPIENT, recipient, IProvisioningConstants.PROVISIONING_REQUEST_TO_START, requestNameToStart}); // // Start request(s) StringArray requestIdArray = provUtils.startMultipleProvisioningRequests(map, null, NUMBER_OF_REQUESTS_TO_START); LoggerUtils.sleep(3); LoggerUtils.sendToLogAndConsole("Started " + NUMBER_OF_REQUESTS_TO_START + " provisioning requests"); // // New method to limit the number of processes returned 464 Identity Manager Roles Based Provisioning Module 3.7 User Application: Administration Guide // // Test Results : maxProcesses <= 0 returns all processes // maxProcesses up to system limit returns maxProcess count // maxProcesses > system limit returns system limit int maxProcesses = 10; ProcessArray processArray = stub.getProcessesArray(maxProcesses); Process [] processes = processArray.getProcess(); if(processes != null) { LoggerUtils.sendToLogAndConsole("Process count returned: " + processes.length); Assert.assertEquals("Error: Processes returned shouldn't exceed max count.", maxProcesses, processes.length); } } catch(AdminException error) { RationalTestScript.logError(error.getReason() ); throw new TestProgramException(error.getReason() ); } catch(RemoteException error) { RationalTestScript.logError(error.getMessage() ); throw new TestProgramException(error.getMessage() ); } } getProcessesById Used to get information about a specific process, specified by the Process Id. Method Signature com.novell.soa.af.impl.soap.ProcessArray getProcessesById(java.lang.String id) Example Process [] allProcesses = stub.getAllProcesses().getProcess(); if(allProcesses != null) { String processId = allProcesses[0].getProcessId; ProcessArray array = stub.getProcessesById(processId); Process [] processes = array.getProcess(); } terminate Used to terminate a running provisioning request. Method Signature void terminate(java.lang.String requestId, com.novell.soa.af.impl.soap.T_TerminationType state, java.lang.String comment) Provisioning Web Service 465 Parameters Parametere Description requestId The Id of the provisioning request. state The reason for terminating the process. The choices are: RETRACT ERROR comment Adds a comment about the terminate action. Example // // Initialize and start a provisioning request HashMap provMap = new HashMap(); provMap.put(Helper.RECIPIENT, recipient); provMap.put(I"Provisioning_Request_To_Start_Key", "Enable Active Directory Account (Mgr Approve-No Timeout)"); // // Start request // Calls method startProvisioningRequest on the provUtils // utility object which refers to a utility class that does not // ship with the Identity Manager User Application. String requestId = provUtils.startProvisioningRequest(provMap, null); sleep(5); // // Now retract the request T_TerminationType terminationType = T_TerminationType.RETRACT; stub.terminate(requestId, terminationType, terminationType.getValue() + " the request"); getProcess Used to get information about a running or completed provisioning request, specified by Request ID. Method Signature com.novell.soa.af.impl.soap.Process getProcess(java.lang.String requestId) Example // // Initialize and start a provisioning request HashMap provMap = new HashMap(); provMap.put(Helper.RECIPIENT, recipient); provMap.put(I"Provisioning_Request_To_Start_Key", "Enable Active Directory Account (Mgr Approve-No Timeout)"); // // Start request 466 Identity Manager Roles Based Provisioning Module 3.7 User Application: Administration Guide // Calls method startProvisioningRequest on the provUtils // utility object which refers to a utility class that does not // ship with the Identity Manager User Application. String requestId = provUtils.startProvisioningRequest(provMap, null); sleep(5); Process process = stub.getProcess(requestId); if(process != null) { boolean bMatchProcess = false; if( (recipient.compareTo(process.getRecipient()) == 0) && (requestId.compareTo(process.getRequestId()) == 0) ) { bMatchProcess = true; } if(bMatchProcess) { String msg = "Found process with requestId : " + requestId; LoggerUtils.sendToLogAndConsole(msg); } // // Assert if we could not find a match Assert.assertTrue("Could not find process with request id: " + requestId, bMatchProcess); } getProcessesByCreationTime Used to get information about processes created between the current time and the time at which the workflow process was created. Method Signature com.novell.soa.af.impl.soap.ProcessArray getProcessesByCreationTime(long time, com.novell.soa.af.impl.soap.T_Operator op) Parameters Parameter Description creationTime The time at which the process was started. op The operator to use. The operators are: EQ - equals LT - less than LE - less than or equal to GT - greater than GE - greater than or equal to Provisioning Web Service 467 Example T_Operator operator = T_Operator.GT; // // Get processes with operator relative to the current time long currentTime = System.currentTimeMillis();//currentDateTime.getTime(); ProcessArray processArray = stub.getProcessesByCreationTime(currentTime, operator); getProcessesByApprovalStatus Used to get information about processes with a specified approval status (Approved, Denied, or Retracted). Method Signature com.novell.soa.af.impl.soap.ProcessArray getProcessesByApprovalStatus(com.novell.soa.af.impl.soap.T_ApprovalStatus status) Example T_ApprovalStatus approvalStatus = T_ApprovalStatus.Approved; // // Get all the processes based upon approval status above ProcessArray processArray = stub.getProcessesByApprovalStatus(approvalStatus); Process [] processes = processArray.getProcess(); getProcessesByRecipient Used to get information about processes that have a specific recipient Id. Method Signature com.novell.soa.af.impl.soap.ProcessArray getProcessesByRecipient(java.lang.String recipient) Example String recipient = "cn=ablake,ou=users,ou=idmsample-komodo,o=novell"; // // Get processes by recipient ProcessArray processArray = stub.getProcessesByRecipient(recipient); Process [] process = processArray.getProcess(); getProcessesByInitiator Used to get information about processes that have a specific initiator Id. Method Signature com.novell.soa.af.impl.soap.ProcessArray getProcessesByInitiator(java.lang.String initiator) 468 Identity Manager Roles Based Provisioning Module 3.7 User Application: Administration Guide Example String initiator = "cn=admin,ou=idmsample-komodo,o=novell"; // // Get processes by initiator ProcessArray processArray = stub.getProcessesByInitiator(initiator); Process [] process = processArray.getProcess(); setResult Used to set the entitlement result (approval status) of a previously completed provisioning request. Method Signature void setResult(java.lang.String requestId, com.novell.soa.af.impl.soap.T_EntitlementState state, com.novell.soa.af.impl.soap.T_EntitlementStatus status, java.lang.String message) Parameters Parameter Description requestId The Id of the provisioning request. state The state of the provisioning request. The possible values are: Unknown Granted Revoked status The status of the provisioning request. The possible values are: Unknown Success Warning Error Fatal Submitted message A message about the entitlement result. Example // // Initialize and start a provisioning request HashMap provMap = new HashMap(); provMap.put(Helper.RECIPIENT, recipient); provMap.put(I"Provisioning_Request_To_Start_Key", "Enable Active Directory Account (Mgr Approve-No Timeout)"); // // Start request // Calls method startProvisioningRequest on the provUtils // utility object which refers to a utility class that does not Provisioning Web Service 469 // ship with the Identity Manager User Application. String requestId = provUtils.startProvisioningRequest(provMap, null); sleep(5); // // Get the process id for this running process Process process = stub.getProcess(requestId); String processId = null; if (process != null) processId = process.getProcessId(); // // Reset the state of the provisioning request T_EntitlementState newEntitlementState = T_EntitlementState.Revoked; T_EntitlementStatus newEntitlementStatus = T_EntitlementStatus.Success; String comment = "Revoked the provisioning request"; stub.setResult(processId, newEntitlementState, newEntitlementStatus, comment); getProcessesByCreationInterval Used to get information about processes started between two specified times. Method Signature com.novell.soa.af.impl.soap.ProcessArray getProcessesByCreationInterval(long start, long end) Parameters Parameter Description startTime The start time (YYYY/MM/DD). endTime The end time (YYYY/MM/DD). Example long startTime = System.currentTimeMillis(); // // Initialize and start a provisioning request HashMap provMap = new HashMap(); provMap.put(Helper.RECIPIENT, recipient); provMap.put(I"Provisioning_Request_To_Start_Key", "Enable Active Directory Account (Mgr Approve-No Timeout)"); // // Start request // Calls method startProvisioningRequest on the provUtils // utility object which refers to a utility class that does not // ship with the Identity Manager User Application. String requestId = provUtils.startProvisioningRequest(provMap, null); 470 Identity Manager Roles Based Provisioning Module 3.7 User Application: Administration Guide sleep(5); long endTime = System.currentTimeMillis(); // // Get all the processes between the start and end time ProcessArray processArray = stub.getProcessesByCreationInterval(startTime, endTime); Process [] processes = processArray.getProcess(); 18.3.2 Provisioning This section provides reference information for each Provisioning method. The Provisioning methods include: “multiStart” on page 471 “start” on page 472 “getAllProvisioningRequests” on page 475 “getProvisioningRequests” on page 475 “getProvisioningCategories” on page 476 “startAsProxy” on page 476 “getProvisioningStatuses” on page 477 “startWithDigitalSignature” on page 479 “startAsProxyWithDigitalSignature” on page 480 “startWithCorrelationId” on page 482 multiStart Used to start a workflow request for each specified recipient. Method Signature com.novell.soa.af.impl.soap.StringArray multiStart(java.lang.String processId, com.novell.soa.af.impl.soap.StringArray recipients, com.novell.soa.af.impl.soap.DataItemArray items) Parameters Parameter Description processId The Id of the provisioning request to start. recipients The DN of each recipient. dataItem The list of data items for the provisioning request. Provisioning Web Service 471 Example ProvisioningRequestArray requestArray = stub.getAllProvisioningRequests(recipient); // // If there are some then, if(requestArray != null) { String Id = " "; StringArray requestIdStringArray = null; String [] listOfRecipients = {recipient, addressee}; // // Select a provisioning resource String requestNameToStart = "Enable Active Directory Account (Mgr Approve-No Timeout)"; // // Loop thru and find the request that we want to start ProvisioningRequest [] requests = requestArray.getProvisioningrequest(); for(int index = 0; index < requests.length; index++) { // // Is this the name of the request to start? if(requests[index].getName().compareTo(requestNameToStart) == 0) { // // Get the current associated data items. Replicate a new // dataitem array excluding the null values. Id = requests[index].getId(); DataItem [] dataItem = requests[index].getItems().getDataitem(); if(dataItem != null) // Call method replicateDataItemArray on the // provUtils utility object, which refers to a // utility class that does not ship with the // Identity Manager User Application. { DataItemArray newDataItemArray = provUtils.replicateDataItemArray(dataItem); // // Create a string array initializing with multiple recipients StringArray listOfRecipientsStringArray = new StringArray(listOfRecipients); // // Start the request for multiple recipients logStep("Calling stub.multiStart(" + Id + ",listOfRecipientsStringArray,newDataItemArray)"); requestIdStringArray = stub.multiStart(Id, listOfRecipientsStringArray, newDataItemArray); } } } start Used to start a provisioning request. 472 Identity Manager Roles Based Provisioning Module 3.7 User Application: Administration Guide Method Signature java.lang.String start(java.lang.String processId, java.lang.String recipient, com.novell.soa.af.impl.soap.DataItemArray items) Parameters Parameter Description processId The Id of the provisioning request to start. recipient The DN of each recipient. dataItem The list of data items for the provisioning request. Example // // Initialize and start a provisioning request HashMap provMap = new HashMap(); provMap.put(Helper.RECIPIENT, recipient); provMap.put(I"Provisioning_Request_To_Start_Key", "Enable Active Directory Account (Mgr Approve-No Timeout)"); // // Start request // Calls method startProvisioningRequest on the provUtils // utility object which refers to a utility class that does not // ship with the Identity Manager User Application. String requestId = provUtils.startProvisioningRequest(provMap, null); sleep(5); The example above calls the startProvisioningRequest method. This method is not part of the IDM User Application. We show it here to finish illustrating the example: /** *Method to start a provisioning request using the supplied *Map and dataitem object. Handling of digital certificate *resources is also handled. * @param _map * @param _in_dataItem * @return String * @throws TestProgrammException */ public String startProvisioningRequest(Map _map, DataItem [] _in_dataItem) throws TestProgramException { String requestId = null; try { String recipient =(String)_map.get(Helper.RECIPIENT); String requestToStart = (String)_map.get(IProvisioningConstants.PROVISIONING_REQUEST_TO_START); String proxyUser =(String)_map.get(IWorkFlowConstants.PROXY_USER); String digitalSignature = String)_map.get(IDigitalSignatureConstants.DIGITAL_SIGNATURE); RationalTestScript.logInfo("Step: Calling startProvisioningRequest(_map)"); Provisioning Web Service 473 // //Get the stub Provisioning stub = ServiceUtils.getInstance().getProvisioningStub(); // //Get all the available resource requests for the recipient RationalTestScript.logInfo("Step: Calling stub.getAllProvisioningRequests(" + recipient + ")"); ProvisioningRequestArray requestArray = stub.getAllProvisioningRequests(recipient); if(requestArray != null) { // //Get the provisioning request from the array ProvisioningRequest request = getProvisioningRequestFromArray(requestArray, requestToStart); if(request != null) { DataItem [] dataItem = null; DataItemArray newDataItemArray = null; // // If the supplied data item is null then just replicate // what currently exists with the request. if(_in_dataItem == null) { // // Use the current data item associated with the request dataItem = request.getItems().getDataitem(); if(dataItem != null) { newDataItemArray = replicateDataItemArray(dataItem); } } else { // // Set the incoming data item array newDataItemArray = new DataItemArray(); newDataItemArray.setDataitem(_in_dataItem); } // // Start the Provisioning request for the recipient if(proxyUser == null && digitalSignature == null) { RationalTestScript.logInfo("Step: Calling stub.start(" + request.getId() + "," + recipient + "dataItemArray)"); requestId = stub.start( request.getId(), recipient, newDataItemArray); } else if(proxyUser != null && digitalSignature == null) } . . . 474 Identity Manager Roles Based Provisioning Module 3.7 User Application: Administration Guide getAllProvisioningRequests Used to return an array of available provisioning requests. Method Signature com.novell.soa.af.impl.soap.ProvisioningRequestArray getAllProvisioningRequests(java.lang.String recipient) Example // // Get all the provisioning requests for this recipient ProvisioningRequestArray provReqArray = stub.getAllProvisioningRequests(recipient); ProvisioningRequest [] provRequest = provReqArray.getProvisioningrequest(); if(provRequest != null) { String description = provRequest[0].getDescription(); String category = provRequest[0].getCategory(); String digitialSignatureType = provRequest[0].getDigitalSignatureType(); String requestId = provRequest[0].getId(); DataItemArray itemArray = provRequest[0].getItems(); String legalDisclaimer = provRequest[0].getLegalDisclaimer(); String name = provRequest[0].getName(); String operation = provRequest[0].getOperation(); } getProvisioningRequests Used to return an array of provisioning requests for a specified category and operation. Method Signature com.novell.soa.af.impl.soap.ProvisioningRequestArray getProvisioningRequests(java.lang.String recipient, java.lang.String category, java.lang.String operation) Parameters Parameter Description recipient The recipient of the provisioning request. category The category of the provisioning request. operation The provisioning request operation (0=Grant,1=Revoke, 2=Both) Provisioning Web Service 475 Example String operation = IProvisioningRequest.GRANT; try { // // Get the stub Provisioning stub = ServiceUtils.getInstance().getProvisioningStub(); logStep("Calling stub.getProvisioningCategories()"); StringArray categoriesStringArray = stub.getProvisioningCategories(); String [] categories = categoriesStringArray.getString(); // // Loop thru and get the provisioning requests for each category for(int index = 0; index < categories.length; index++) { // // Get the provisioning request based upon recipient logStep("Calling stub.getProvisioningRequests(" + recipient + "," + categories[index] + "," + operation + ")"); ProvisioningRequestArray provRequestArray = stub.getProvisioningRequests(recipient, categories[index], operation); ProvisioningRequest [] provRequests = provRequestArray.getProvisioningrequest(); } getProvisioningCategories Used to get the list of available provisioning categories. Method Signature com.novell.soa.af.impl.soap.StringArray getProvisioningCategories() Example StringArray categoriesStringArray = stub.getProvisioningCategories(); String [] categories = categoriesStringArray.getString(); startAsProxy Used to start a workflow as a proxy. Method Signature java.lang.String startAsProxy(java.lang.String processId, java.lang.String recipient, com.novell.soa.af.impl.soap.DataItemArray items, java.lang.String proxyUser) Parameters Parameter Description processId The Id of the provisioning request. recipient The recipient of the provisioning request. Items The data items for the provisioning request. 476 Identity Manager Roles Based Provisioning Module 3.7 User Application: Administration Guide Parameter Description proxyUser The DN of the proxy user. Example ProvisioningRequestArray requestArray = stub.getAllProvisioningRequests(recipient); // // If there are some then, if(requestArray != null) { String Id = " "; String requestId = " "; String requestNameToStart = "Enable Active Directory Account (Mgr Approve-No Timeout)"; // // Loop thru and find the request that we want to start ProvisioningRequest [] requests = requestArray.getProvisioningrequest(); for(int index = 0; index < requests.length; index++) { // // Is this the name of the request to start? if(requests[index].getName().compareTo(requestNameToStart) == 0) { // // Get the current associated data items. Replicate a new // dataitem array excluding the null values. Id = requests[index].getId(); DataItem [] dataItem = requests[index].getItems().getDataitem(); if(dataItem != null) { // Call method replicateDataItemArray on the // provUtils utility object, which refers to a // utility class that does not ship with the // Identity Manager User Application. DataItemArray newDataItemArray = provUtils.replicateDataItemArray(dataItem); // // Start the Provisioning request for the recipient logStep("Calling stub.startAsProxy(" + Id + "," + recipient + ",newDataItemArray," + proxyUser + ")"); requestId = stub.startAsProxy(Id, recipient, newDataItemArray, proxyUser); } } } } getProvisioningStatuses Used to get the status of provisioning requests. Provisioning Web Service 477 Method Signature com.novell.soa.af.impl.soap.ProvisioningStatusArray getProvisioningStatuses(com.novell.soa.af.impl.soap.T_ProvisioningStatusQuery query, int maxRecords) Parameters Parameter Description query Used to specify the provisioning status query. The query has the following components: choice - the parameters used to filter the results. You can specify multiple parameters. The possible parameters are: Recipient - a DN RequestID ActivityID Status (an integer) State (an integer) ProvisioningTime (YYYY/MM/DD) ResultTime (YYYY/MM/DD) logic - AND or OR order - the order in which to sort the results. Possible values for order are: ACTIVITY_ID RECIPIENT PROVISIONING_TIME RESULT_TIME STATE STATUS REQUEST_ID MESSAGE maxRecords Used to specify maximum number of records to retrieve. A value of -1 returns unlimited records. Example // // Initialize and start a provisioning request HashMap provMap = new HashMap(); provMap.put(Helper.RECIPIENT, recipient); provMap.put(I"Provisioning_Request_To_Start_Key", "Enable Active Directory Account (Mgr Approve-No Timeout)"); // // Start request // Calls method startProvisioningRequest on the provUtils // utility object which refers to a utility class that does not // ship with the Identity Manager User Application. String requestId = provUtils.startProvisioningRequest(provMap, null); sleep(5); 478 Identity Manager Roles Based Provisioning Module 3.7 User Application: Administration Guide // // T_ProvisioningStatusQueryChoice [] choice = new T_ProvisioningStatusQueryChoice[3]; choice[0] = new T_ProvisioningStatusQueryChoice(); choice[0].setRecipient(recipient); choice[1] = new T_ProvisioningStatusQueryChoice(); choice[1].setRequestId(requestId); choice[2] = new T_ProvisioningStatusQueryChoice(); choice[2].setStatus(new Integer(ProcessConstants.PROCESSING) ); // // Initialize the query T_ProvisioningStatusQuery query = new T_ProvisioningStatusQuery(T_Logic.AND, T_ProvisioningStatusOrder.STATUS, choice); // // Make the query StringBuffer sb = new StringBuffer(); int maxRecords = -1; ProvisioningStatusArray provStatusArray = stub.getProvisioningStatuses(query, maxRecords); startWithDigitalSignature Used to start a workflow and specify that a digital signature is required. Method Signature java.lang.String startWithDigitalSignature(java.lang.String processId, java.lang.String recipient, com.novell.soa.af.impl.soap.DataItemArray items, java.lang.String digitalSignature, com.novell.soa.af.impl.soap.SignaturePropertyArray digitalSignaturePropertyArray) Parameters Parameter Description processId The request identifier. recipient The request recipient. items The data items for the provisioning request. digital signature The digital signature. digitalSignaturePropertyArray. The digital signature property map. Example String recipient = ServiceUtils.getInstance().getLoginData().getUsername(LoginData.RECIPIENT_TYP E); // // Get the digital signature string for admin String digitalSignature = DigitalSignatureUtils.getDigitalSignatureFromFile(IDigitalSignatureConstants. Provisioning Web Service 479 ADMIN_DIGITAL_SIGNATURE_FILENAME); ProvisioningRequestArray requestArray = stub.getAllProvisioningRequests(recipient); // // If there are some then, if(requestArray != null) { String Id = " "; String requestId = " "; String requestNameToStart = "Enable Active Directory Account (Mgr Approve-No Timeout)"; // // Loop thru and find the request that we want to start ProvisioningRequest [] requests = requestArray.getProvisioningrequest(); for(int index = 0; index < requests.length; index++) { // // Is this the name of the request to start? if(requests[index].getName().compareTo(requestNameToStart) == 0) { // // Get the current associated data items. Replicate a new // dataitem array excluding the null values. Id = requests[index].getId(); DataItem [] dataItem = requests[index].getItems().getDataitem(); if(dataItem != null) { // Call method replicateDataItemArray on the // provUtils utility object, which refers to a // utility class that does not ship with the // Identity Manager User Application. DataItemArray newDataItemArray = provUtils.replicateDataItemArray(dataItem); // // Start a digitally signed provisioning resource for the recipient requestId = stub.startWithDigitalSignature(request.getId(), recipient, newDataItemArray, digitalSignature, null); // Don't get any property values (optional) } } } } startAsProxyWithDigitalSignature Used to start a workflow using a proxy for the initiator, and specify that a digital signature is required. 480 Identity Manager Roles Based Provisioning Module 3.7 User Application: Administration Guide Method Signature java.lang.String startAsProxyWithDigitalSignature(java.lang.String processId, java.lang.String recipient, com.novell.soa.af.impl.soap.DataItemArray items, java.lang.String digitalSignature, com.novell.soa.af.impl.soap.SignaturePropertyArray digitalSignaturePropertyArray, java.lang.String proxyUser) Parameters Parameter Description processId The request identifier. recipient The request recipient. items The data items for the provisioning request. digital signature The digital signature. digitalSignaturePropertyArray. The digital signature property map. proxyUser The DN of the proxy user. Example // // Get the digital signature string for admin String digitalSignature = DigitalSignatureUtils.getDigitalSignatureFromFile(IDigitalSignatureConstants. ADMIN_DIGITAL_SIGNATURE_FILENAME); ProvisioningRequestArray requestArray = stub.getAllProvisioningRequests(recipient); // // If there are some then, if(requestArray != null) { String Id = " "; String requestId = " "; String requestNameToStart = "Enable Active Directory Account (Mgr Approve-No Timeout)"; // // Loop thru and find the request that we want to start ProvisioningRequest [] requests = requestArray.getProvisioningrequest(); for(int index = 0; index < requests.length; index++) { // // Is this the name of the request to start? if(requests[index].getName().compareTo(requestNameToStart) == 0) { // // Get the current associated data items. Replicate a new // dataitem array excluding the null values. Id = requests[index].getId(); DataItem [] dataItem = requests[index].getItems().getDataitem(); Provisioning Web Service 481 if(dataItem != null) { // Call method replicateDataItemArray on the // provUtils utility object, which refers to a // utility class that does not ship with the // Identity Manager User Application. DataItemArray newDataItemArray = provUtils.replicateDataItemArray(dataItem); // // Start a digitally signed provisioning resource as for the recipient proxy requestId = stub.startAsProxyWithDigitalSignature(request.getId(), recipient, newDataItemArray, digitalSignature, null, proxyUser); } } } } startWithCorrelationId Used to start a workflow with a correlation ID. The correlation ID provides a way to track a set of related workflow processes. When started with this method, workflow processes can be queried and sorted by correlation ID. Method Signature java.lang.String startWithCorrelationId(java.lang.String processId, java.lang.String recipient, com.novell.soa.af.impl.soap.DataItemArray items, java.lang.String signature, com.novell.soa.af.impl.soap.SignaturePropertyArray props, java.lang.String proxyUser, java.lang.String correlationId) throws com.novell.soa.af.impl.soap.AdminException, java.rmi.RemoteException; Parameters Parameter Description processId The request identifier. recipient The request recipient. items The data items for the provisioning request. digital signature The digital signature. digitalSignaturePropertyArray The digital signature property map. proxyUser The DN of the proxy user. correlationID The string that identities the correlation ID. The correlation ID cannot be longer than 32 characters. 482 Identity Manager Roles Based Provisioning Module 3.7 User Application: Administration Guide 18.3.3 Work Entries This section provides reference information for each Work Entries method. The Work Entries methods include: “forward” on page 483 “reassignWorkTask” on page 485 “getWork” on page 486 “forwardWithDigitalSignature” on page 487 “forwardAsProxy” on page 489 “unclaim” on page 491 “forwardAsProxyWithDigitalSignature” on page 492 “reassign” on page 494 “getWorkEntries” on page 495 “getQuorumForWorkTask” on page 497 “resetPriorityForWorkTask” on page 498 forward Used to forward a task to the next activity in the workflow with the appropriate action (approve, deny, refuse). Method Signature void forward(java.lang.String wid, com.novell.soa.af.impl.soap.T_Action action, com.novell.soa.af.impl.soap.DataItemArray items, java.lang.String comment) Parameters Parameter Description wid The work Id. action The action to take (approve, deny, refuse). items The data items required by the workflow. comment The comment. Example // // Initialize and start a provisioning request HashMap provMap = new HashMap(); provMap.put(Helper.RECIPIENT, recipient); provMap.put(I"Provisioning_Request_To_Start_Key", "Enable Active Directory Account (Mgr Approve-No Timeout)"); // // Start request // Calls method startProvisioningRequest on the provUtils // utility object which refers to a utility class that does not Provisioning Web Service 483 // ship with the Identity Manager User Application. String requestId = provUtils.startProvisioningRequest(provMap, null); sleep(5); // // Get the process id for this running process Process process = stub.getProcess(requestId); String processId = null; if(process != null) processId = process.getProcessId(); T_Action action = T_Action.APPROVE; T_Logic logic = T_Logic.AND; T_WorkEntryOrder workEntryOrder = T_WorkEntryOrder.REQUEST_ID; T_WorkEntryQueryChoice [] workEntryqueryChoice = new T_WorkEntryQueryChoice[3]; workEntryqueryChoice[0] = new T_WorkEntryQueryChoice(); workEntryqueryChoice[0].setRecipient(recipient); workEntryqueryChoice[1] = new T_WorkEntryQueryChoice(); workEntryqueryChoice[1].setRequestId(requestId); workEntryqueryChoice[2] = new T_WorkEntryQueryChoice(); workEntryqueryChoice[2].setProcessId(processId); // // Create work entry query T_WorkEntryQuery query = new T_WorkEntryQuery(logic, _workEntryOrder, workEntryqueryChoice); // // Get all work entries (max records) WorkEntryArray workEntryArray = stub.getWorkEntries(query, -1); WorkEntry [] workEntry = workEntryArray.getWorkentry(); if(workEntry != null { for(int wIndex = 0; wIndex < workEntry.length; wIndex++) { String workId = workEntry[wIndex].getId(); // // LoggerUtils.sendToLogAndConsole("Forwarding : " + workEntry[wIndex].getActivityName() + " work id: " + workId); // // Get the dataitem for this item of work DataItemArray dataItemArray = stub.getWork(workId); DataItem [] dataItem = dataItemArray.getDataitem(); DataItemArray newDataItemArray = null; if(dataItem != null) // Call method replicateDataItemArray on the // provUtils utility object, which refers to a // utility class that does not ship with the // Identity Manager User Application. newDataItemArray = provUtils.replicateDataItemArray(dataItem); else throw new TestProgramException("DataItem is null."); // 484 Identity Manager Roles Based Provisioning Module 3.7 User Application: Administration Guide // Claim request for recipient String comment = _action.toString() + " this request: " + requestId + " for " + recipient; stub.forward(workId, _action, newDataItemArray, comment); } } reassignWorkTask Used to reassign a task from one user to another. Method Signature void reassignWorkTask(java.lang.String wid, java.lang.String addressee, java.lang.String comment) Parameters Parameter Description wid The Id of the task. addressee The addressee of the task. comment A comment about the task. Example // // Initialize and start a provisioning request HashMap provMap = new HashMap(); provMap.put(Helper.RECIPIENT, recipient); provMap.put(I"Provisioning_Request_To_Start_Key", "Enable Active Directory Account (Mgr Approve-No Timeout)"); // // Start request // Calls method startProvisioningRequest on the provUtils // utility object which refers to a utility class that does not // ship with the Identity Manager User Application. String requestId = provUtils.startProvisioningRequest(provMap, null); sleep(5); // // Get the process id for this running process Process process = stub.getProcess(requestId); if(process != null) { String processId = process.getProcessId(); String initiator = process.getInitiator(); // // Setup for the query HashMap map = new HashMap(); map.put(Helper.REQUESTID, requestId); map.put(Helper.RECIPIENT, recipient); map.put(Helper.PROCESSID, processId); map.put(Helper.INITIATOR, initiator); WorkEntry [] workEntry = workEntryUtils.getWorkEntriesUsingQuery(map, T_WorkEntryOrder.REQUEST_ID, Provisioning Web Service 485 T_Logic.AND); if(workEntry == null) throw new TestProgramException("Work list is empty."); // // Reassign the work entry from recipient to the addressee // // Should only be one item String reassignComment = null; String workId = workEntry[0].getId(); if(workId != null) { // // Reassign work entry(s) to addressee reassignComment = "Reassigning work entry " + workId + " from " + recipient + " to " + addressee; stub.reassign(workId, addressee, reassignComment); LoggerUtils.sendToLogAndConsole("Reassign work entry " + workId + " from " + recipient + " to " + addressee); } } getWork Used to retrieve data items for a work entry identified by the Id (UUID) of a task. Method Signature com.novell.soa.af.impl.soap.DataItemArray getWork(java.lang.String workId) Example // // Initialize and start a provisioning request HashMap provMap = new HashMap(); provMap.put(Helper.RECIPIENT, recipient); provMap.put(I"Provisioning_Request_To_Start_Key", "Enable Active Directory Account (Mgr Approve-No Timeout)"); // // Start request // Calls method startProvisioningRequest on the provUtils // utility object which refers to a utility class that does not // ship with the Identity Manager User Application. String requestId = provUtils.startProvisioningRequest(provMap, null); sleep(5); // // Get the process id for this running process Process process = stub.getProcess(requestId); if(process != null) { String processId = process.getProcessId(); String initiator = process.getInitiator(); // // Setup for the query HashMap map = new HashMap(); map.put(Helper.REQUESTID, requestId); map.put(Helper.RECIPIENT, recipient); map.put(Helper.PROCESSID, processId); 486 Identity Manager Roles Based Provisioning Module 3.7 User Application: Administration Guide map.put(Helper.INITIATOR, initiator); WorkEntry [] workEntry = workEntryUtils.getWorkEntriesUsingQuery(map, T_WorkEntryOrder.REQUEST_ID, T_Logic.AND); // // Do assertion here Assert.assertNotNull("WorkEntry is null for recipient : " + recipient + " with request id : " + requestId, workEntry); DataItemArray dataItemArray = stub.getWork(workEntry[0].getId() ); DataItem [] dataItem = dataItemArray.getDataitem(); if(dataItem != null) LoggerUtils.sendToLogAndConsole(dataItem[0].getName()); } forwardWithDigitalSignature Used to forward a provisioning request with a digital signature and optional digital signature properties. For example, this can be used by an administrator to force a user-facing activity to be approved, denied or refused. Method Signature void forwardWithDigitalSignature(java.lang.String wid, com.novell.soa.af.impl.soap.T_Action action, com.novell.soa.af.impl.soap.DataItemArray items, java.lang.String comment, java.lang.String digitalSignature, com.novell.soa.af.impl.soap.SignaturePropertyArray digitalSignaturePropertyArray) Parameters Parameter Description wid The workId. action The action to take (approve, deny, refuse). items The data items required by the workflow. comment A comment about the action. digitalSignature The digital signature. digitalSignaturePropertyArray The digital signature property map. Example // // Initialize and start a provisioning request HashMap provMap = new HashMap(); provMap.put(Helper.RECIPIENT, recipient); provMap.put(I"Provisioning_Request_To_Start_Key", "Enable Active Directory Account (Mgr Approve-No Timeout)"); // // Start request // Calls method startProvisioningRequest on the provUtils // utility object which refers to a utility class that does not // ship with the Identity Manager User Application. Provisioning Web Service 487 String requestId = provUtils.startProvisioningRequest(provMap, null); sleep(5); // // Get the process id for this running process Process process = stub.getProcess(requestId); String processId = null; if(process != null) processId = process.getProcessId(); T_Action action = T_Action.APPROVE; T_Logic logic = T_Logic.AND; T_WorkEntryOrder workEntryOrder = T_WorkEntryOrder.REQUEST_ID; // Get the digital signature string for admin String digitalSignature = DigitalSignatureUtils.getDigitalSignatureFromFile(IDigitalSignatureConstants. ADMIN_DIGITAL_SIGNATURE_FILENAME); T_WorkEntryQueryChoice [] workEntryqueryChoice = new T_WorkEntryQueryChoice[3]; workEntryqueryChoice[0] = new T_WorkEntryQueryChoice(); workEntryqueryChoice[0].setRecipient(recipient); workEntryqueryChoice[1] = new T_WorkEntryQueryChoice(); workEntryqueryChoice[1].setRequestId(requestId); workEntryqueryChoice[2] = new T_WorkEntryQueryChoice(); workEntryqueryChoice[2].setProcessId(processId); // // Create work entry query T_WorkEntryQuery query = new T_WorkEntryQuery(logic, _workEntryOrder, workEntryqueryChoice); // // Get all work entries (max records) WorkEntryArray workEntryArray = stub.getWorkEntries(query, -1); WorkEntry [] workEntry = workEntryArray.getWorkentry(); if(workEntry != null { for(int wIndex = 0; wIndex < workEntry.length; wIndex++) { String workId = workEntry[wIndex].getId(); // // LoggerUtils.sendToLogAndConsole("Forwarding : " + workEntry[wIndex].getActivityName() + " work id: " + workId); // // Get the dataitem for this item of work DataItemArray dataItemArray = stub.getWork(workId); DataItem [] dataItem = dataItemArray.getDataitem(); DataItemArray newDataItemArray = null; if(dataItem != null) // Call method replicateDataItemArray on the // provUtils utility object, which refers to a // utility class that does not ship with the // Identity Manager User Application. 488 Identity Manager Roles Based Provisioning Module 3.7 User Application: Administration Guide newDataItemArray = provUtils.replicateDataItemArray(dataItem); else throw new TestProgramException("DataItem is null."); // // Claim request for recipient String comment = _action.toString() + " this request: " + requestId + " for " + recipient; stub.forwardWithDigitalSignature(workId, _action, newDataItemArray, comment, digitalSignature, null); } } forwardAsProxy Used to forward a provisioning request. For example, this can be used by an administrator to force a user-facing activity to be approved, denied or refused. Method Signature void forwardAsProxy(java.lang.String wid, com.novell.soa.af.impl.soap.T_Action action, com.novell.soa.af.impl.soap.DataItemArray items, java.lang.String comment, java.lang.String proxyUser) Parameters Parameter Description wid The workId (activity Id). action The action to take (approve, deny, refuse). items The data items required by the workflow. comment The comment to add to the activity. proxyUser The DN of the proxy user. Example // // Initialize and start a provisioning request HashMap provMap = new HashMap(); provMap.put(Helper.RECIPIENT, recipient); provMap.put(I"Provisioning_Request_To_Start_Key", "Enable Active Directory Account (Mgr Approve-No Timeout)"); // // Start request // Calls method startProvisioningRequest on the provUtils // utility object which refers to a utility class that does not // ship with the Identity Manager User Application. String requestId = provUtils.startProvisioningRequest(provMap, null); sleep(5); // // Get the process id for this running process Process process = stub.getProcess(requestId); String processId = null; if(process != null) Provisioning Web Service 489 processId = process.getProcessId(); T_Action action = T_Action.APPROVE; T_Logic logic = T_Logic.AND; T_WorkEntryOrder workEntryOrder = T_WorkEntryOrder.REQUEST_ID; T_WorkEntryQueryChoice [] workEntryqueryChoice = new T_WorkEntryQueryChoice[3]; workEntryqueryChoice[0] = new T_WorkEntryQueryChoice(); workEntryqueryChoice[0].setRecipient(recipient); workEntryqueryChoice[1] = new T_WorkEntryQueryChoice(); workEntryqueryChoice[1].setRequestId(requestId); workEntryqueryChoice[2] = new T_WorkEntryQueryChoice(); workEntryqueryChoice[2].setProcessId(processId); // // Create work entry query T_WorkEntryQuery query = new T_WorkEntryQuery(logic, _workEntryOrder, workEntryqueryChoice); // // Get all work entries (max records) WorkEntryArray workEntryArray = stub.getWorkEntries(query, -1); WorkEntry [] workEntry = workEntryArray.getWorkentry(); if(workEntry != null { for(int wIndex = 0; wIndex < workEntry.length; wIndex++) { String workId = workEntry[wIndex].getId(); // // LoggerUtils.sendToLogAndConsole("Forwarding : " + workEntry[wIndex].getActivityName() + " work id: " + workId); // // Get the dataitem for this item of work DataItemArray dataItemArray = stub.getWork(workId); DataItem [] dataItem = dataItemArray.getDataitem(); DataItemArray newDataItemArray = null; if(dataItem != null) // Call method replicateDataItemArray on the // provUtils utility object, which refers to a // utility class that does not ship with the // Identity Manager User Application. newDataItemArray = provUtils.replicateDataItemArray(dataItem); else throw new TestProgramException("DataItem is null."); // // Claim request for recipient String comment = _action.toString() + " this request: " + requestId 490 Identity Manager Roles Based Provisioning Module 3.7 User Application: Administration Guide + " for " + recipient; String proxyUser = ServiceUtils.getInstance().getLoginData().getUsername(LoginData.PROXY_TYPE); stub.forwardAsProxy(workId, _action, newDataItemArray, comment, proxyUser); } } unclaim Used to unclaim a provisioning request. This method only works if the request was claimed in the User Application. You cannot unclaim a request once it has been forwarded using the SOAP interface, because the forward API method (see “forward” on page 483) claims and forwards in one operation. Method Signature void unclaim(java.lang.String wid, java.lang.String comment) Parameters Parameter Description workId The Id of the activity to unclaim. comment A comment about the action. Example // Action and Approval Types final int SELECTED_ACTION = 0; final int CLAIMED_SELECTED_ACTION = 0; T_Action [] action = {T_Action.APPROVE, T_Action.REFUSE, T_Action.DENY}; T_ApprovalStatus [] claimedAction = {T_ApprovalStatus.Approved, T_ApprovalStatus.Retracted, T_ApprovalStatus.Denied}; // // Get the process id for this running process Process process = stub.getProcess(requestId); String processId = null; if(process != null) processId = process.getProcessId(); HashMap map = new HashMap(); map.put(Helper.REQUESTID, requestId); map.put(Helper.RECIPIENT, recipient); map.put(Helper.PROCESSID, processId); // // Claim the request WorkEntry workEntry = workEntryUtils.claimWorkEntry(map, action[SELECTED_ACTION]); if(workEntry != null) { // // Now unclaim the entry String workId = workEntry.getId(); stub.unclaim(workId, "Unclaiming this work item : " + workId + " for request id : " + requestId); } Provisioning Web Service 491 forwardAsProxyWithDigitalSignature Used to forward a provisioning request with a digital signature and digital signature properties. For example, this can be used by an administrator to force a user-facing activity to be approved, denied or refused. Method Signature void forwardAsProxyWithDigitalSignature(java.lang.String wid, com.novell.soa.af.impl.soap.T_Action action, com.novell.soa.af.impl.soap.DataItemArray items, java.lang.String comment, java.lang.String digitalSignature, com.novell.soa.af.impl.soap.SignaturePropertyArray digitalSignaturePropertyArray, java.lang.String proxyUser) Parameters Parameter Description wid The workId (activity Id). action The action to take (approve, deny, refuse). items The data items required by the workflow. comment The comment to add to the activity. digitalSignature The digital signature. digitalSignaturePropertyArray The digital signature property map. proxyUser The DN of the proxy user. Example // // Initialize and start a provisioning request HashMap provMap = new HashMap(); provMap.put(Helper.RECIPIENT, recipient); provMap.put(I"Provisioning_Request_To_Start_Key", "Enable Active Directory Account (Mgr Approve-No Timeout)"); // // Start request // Calls method startProvisioningRequest on the provUtils // utility object which refers to a utility class that does not // ship with the Identity Manager User Application. String requestId = provUtils.startProvisioningRequest(provMap, null); sleep(5); // // Get the process id for this running process Process process = stub.getProcess(requestId); String processId = null; if(process != null) processId = process.getProcessId(); T_Action action = T_Action.APPROVE; T_Logic logic = T_Logic.AND; 492 Identity Manager Roles Based Provisioning Module 3.7 User Application: Administration Guide T_WorkEntryOrder workEntryOrder = T_WorkEntryOrder.REQUEST_ID; T_WorkEntryQueryChoice [] workEntryqueryChoice = new T_WorkEntryQueryChoice[3]; workEntryqueryChoice[0] = new T_WorkEntryQueryChoice(); workEntryqueryChoice[0].setRecipient(recipient); workEntryqueryChoice[1] = new T_WorkEntryQueryChoice(); workEntryqueryChoice[1].setRequestId(requestId); workEntryqueryChoice[2] = new T_WorkEntryQueryChoice(); workEntryqueryChoice[2].setProcessId(processId); // // Create work entry query T_WorkEntryQuery query = new T_WorkEntryQuery(logic, _workEntryOrder, workEntryqueryChoice); // // Get all work entries (max records) WorkEntryArray workEntryArray = stub.getWorkEntries(query, -1); WorkEntry [] workEntry = workEntryArray.getWorkentry(); if(workEntry != null { for(int wIndex = 0; wIndex < workEntry.length; wIndex++) { String workId = workEntry[wIndex].getId(); // // LoggerUtils.sendToLogAndConsole("Forwarding : " + workEntry[wIndex].getActivityName() + " work id: " + workId); // // Get the dataitem for this item of work DataItemArray dataItemArray = stub.getWork(workId); DataItem [] dataItem = dataItemArray.getDataitem(); DataItemArray newDataItemArray = null; if(dataItem != null) // Call method replicateDataItemArray on the // provUtils utility object, which refers to a // utility class that does not ship with the // Identity Manager User Application. newDataItemArray = provUtils.replicateDataItemArray(dataItem); else throw new TestProgramException("DataItem is null."); // // Claim request for recipient String comment = _action.toString() + " this request: " + requestId + " for " + recipient; String digitalSignature = DigitalSignatureUtils.getDigitalSignatureFromFile(IDigitalSignatureConstants. MMACKENZIE_DIGITAL_SIGNATURE_FILENAME); String proxyUser = ServiceUtils.getInstance().getLoginData().getUsername(LoginData.PROXY_TYPE); stub.forwardAsProxyWithDigitalSignature(workId, _action, newDataItemArray, comment, digitalSignature, null, proxyUser); } } Provisioning Web Service 493 reassign Used to reassign a task from one user to another. Method Signature void reassign(java.lang.String wid, java.lang.String addressee, java.lang.String comment) Parameters Parameter Description wid The Id of the activity to be reassigned. addressee The addressee of the activity. comment A comment about the action. Example // // Initialize and start a provisioning request HashMap provMap = new HashMap(); provMap.put(Helper.RECIPIENT, recipient); provMap.put(I"Provisioning_Request_To_Start_Key", "Enable Active Directory Account (Mgr Approve-No Timeout)"); // // Start request // Calls method startProvisioningRequest on the provUtils // utility object which refers to a utility class that does not // ship with the Identity Manager User Application. String requestId = provUtils.startProvisioningRequest(provMap, null); sleep(5); // // Get the process id for this running process Process process = stub.getProcess(requestId); if(process != null) { String processId = process.getProcessId(); String initiator = process.getInitiator(); // // Setup for the query HashMap map = new HashMap(); map.put(Helper.REQUESTID, requestId); map.put(Helper.RECIPIENT, recipient); map.put(Helper.PROCESSID, processId); map.put(Helper.INITIATOR, initiator); WorkEntry [] workEntry = workEntryUtils.getWorkEntriesUsingQuery(map, T_WorkEntryOrder.REQUEST_ID, T_Logic.AND); if(workEntry == null) throw new TestProgramException("Work list is empty."); // // Reassign the work entry from recipient to the addressee // // Should only be one work item 494 Identity Manager Roles Based Provisioning Module 3.7 User Application: Administration Guide String reassignComment = null; String workId = workEntry[0].getId(); if(workId != null) { // // Reassign work entry(s) to addressee reassignComment = "Reassigning work entry " + workId + " from " + recipient + " to " + addressee; stub.reassign(workId, addressee, reassignComment); LoggerUtils.sendToLogAndConsole("Reassign work entry " + workId + " from " + recipient + " to " + addressee); } } getWorkEntries Used to query the work entries (activities) and returns a list of WorkEntry objects that satisfy the query. Method Signature com.novell.soa.af.impl.soap.WorkEntryArray getWorkEntries(com.novell.soa.af.impl.soap.T_WorkEntryQuery query, int maxRecords) Provisioning Web Service 495 Parameters Parameter Description query Used to specify the query used to retrieve the list of activities. The query has the following components: choice - the parameters used to filter the results. You can specify multiple parameters. The possible parameters are: Addresse - a DN ProcessId RequestId ActivityId Status (an integer) Owner Priority CreationTime (YYYY/MM/DD) ExpTime (YYYY/MM/DD) CompletionTime (YYYY/MM/DD) Recipient Initiator ProxyFor logic - AND or OR order - the order in which to sort the results. Possible values for order are: ACTIVITY_ID RECIPIENT PROVISIONING_TIME RESULT_TIME STATE STATUS REQUEST_ID MESSAGE maxRecords Used to specify maximum number of records to retrieve. A value of -1 returns unlimited records. Example T_Action action = T_Action.APPROVE; T_Logic logic = T_Logic.AND; T_WorkEntryOrder workEntryOrder = T_WorkEntryOrder.REQUEST_ID; T_WorkEntryQueryChoice [] workEntryqueryChoice = new T_WorkEntryQueryChoice[3]; workEntryqueryChoice[0] = new T_WorkEntryQueryChoice(); workEntryqueryChoice[0].setRecipient(recipient); workEntryqueryChoice[1] = new T_WorkEntryQueryChoice(); workEntryqueryChoice[1].setRequestId(requestId); 496 Identity Manager Roles Based Provisioning Module 3.7 User Application: Administration Guide workEntryqueryChoice[2] = new T_WorkEntryQueryChoice(); workEntryqueryChoice[2].setProcessId(processId); // // Create work entry query T_WorkEntryQuery query = new T_WorkEntryQuery(logic, _workEntryOrder, workEntryqueryChoice); // // Get all work entries (max records) WorkEntryArray workEntryArray = stub.getWorkEntries(query, -1); WorkEntry [] workEntry = workEntryArray.getWorkentry(); getQuorumForWorkTask Used to get information about the quorum for a workflow activity. A quorum must have actually been specified for the workflow activity by the workflow designer for this method to work. Method Signature com.novell.soa.af.impl.soap.Quorum getQuorumForWorkTask((java.lang.String workId) Example // // Note: Provisioning resource must contain a quorum in the flow for this api method to work // // Action and Approval Types final int SELECTED_ACTION = 0; final int CLAIMED_SELECTED_ACTION = 0; T_Action [] action = {T_Action.APPROVE, T_Action.REFUSE, T_Action.DENY}; T_ApprovalStatus [] claimedAction = {T_ApprovalStatus.Approved, T_ApprovalStatus.Retracted, T_ApprovalStatus.Denied}; // // Get the process id for this running process Process process = stub.getProcess(requestId); String processId = null; if(process != null) processId = process.getProcessId(); // // Setup for the query HashMap map = new HashMap(); map.put(Helper.REQUESTID, requestId); map.put(Helper.RECIPIENT, recipient); map.put(Helper.PROCESSID, processId); map.put(Helper.INITIATOR, process.getInitiator() ); WorkEntry [] workEntry = workEntryUtils.getWorkEntriesUsingQuery(map, T_WorkEntryOrder.REQUEST_ID, T_Logic.AND); Assert.assertNotNull("WorkEntry is null for recipient : " + recipient + " with request id : " + requestId, workEntry); // // String workId = workEntry[0].getId(); Provisioning Web Service 497 Quorum quorum = stub.getQuorumForWorkTask(workId); Assert.assertNotNull("Quorum for work task is null for recipient : " + recipient + " with request id : " + requestId, quorum); // // Extract some data int approvalCondition = quorum.getApprovalCondition(); int status = quorum.getStatus(); int approveCount = quorum.getApproveCount(); int participantCount = quorum.getParticipantCount(); int refuseCount = quorum.getRefuseCount(); resetPriorityForWorkTask Used to reset the priority for a task. You should only use this method on provisioning requests that have a single approval branch. Method Signature void resetPriorityForWorkTask(java.lang.String workId, int priority, java.lang.String comment) Parameters Parameter Description workId The Id of the activity. priority The priority to set for the activity. comment A comment about the action. Example // Calls method getProvisioningResourceNameForRecipient // on the provUtils utility object, which refers to a utility class // that does not ship with the Identity Manager User Application. String requestNameToStart = provUtils.getProvisioningResourceNameForRecipient(recipient, "Enable Active Directory Account"); Map map = MapUtils.createAndSetMap(new Object[] { Helper.RECIPIENT, recipient, IProvisioningConstants.PROVISIONING_REQUEST_TO_START, requestNameToStart}); // // Try and start the provisioning request String requestId = provWrapper.startProvisioningRequest(recipient, requestNameToStart); RationalTestScript.sleep(5); // // Get the process id for this running process Process process = stub.getProcess(requestId); if(process != null) { // // Setup for the query 498 Identity Manager Roles Based Provisioning Module 3.7 User Application: Administration Guide HashMap map = new HashMap(); map.put(Helper.REQUESTID, requestId); map.put(Helper.RECIPIENT, recipient); map.put(Helper.PROCESSID, process.getProcessId()); map.put(Helper.INITIATOR, process.getInitiator()); WorkEntry [] workEntry = workEntryUtils.getWorkEntriesUsingQuery(map, T_WorkEntryOrder.REQUEST_ID, T_Logic.AND); // // Now reset the priority for this work item. String workId = workEntry[0].getId(); String comment = "Resetting priority for this work item."; int priority = 0; stub.resetPriorityForWorkTask(workId, priority, comment); } 18.3.4 Comments This section provides reference information for each Comments method. The Comments methods include: “getCommentsByType” on page 499 “getCommentsByActivity” on page 500 “getCommentsByUser” on page 501 “getCommentsByCreationTime” on page 502 “addComment” on page 503 “getComments” on page 504 getCommentsByType Used to get workflow comments that are of a specific type (for example, user, system). Method Signature com.novell.soa.af.impl.soap.CommentArray getCommentsByType(java.lang.String requestId, com.novell.soa.af.impl.soap.T_CommentType type) Parameters Parameter Description requestId The process identifier. type The comment type (USER or SYSTEM) Example // // Initialize and start a provisioning request HashMap provMap = new HashMap(); provMap.put(Helper.RECIPIENT, recipient); provMap.put(I"Provisioning_Request_To_Start_Key", "Enable Active Directory Account (Mgr Approve-No Timeout)"); // Provisioning Web Service 499 // Start request // Calls method startProvisioningRequest on the provUtils // utility object which refers to a utility class that does not // ship with the Identity Manager User Application. String requestId = provUtils.startProvisioningRequest(provMap, null); sleep(5); // // Get the comments by type : either User or System T_CommentType [] commentTypes = {T_CommentType.User, T_CommentType.System}; for(int types = 0; types < commentTypes.length; types++) { CommentArray commentArray = stub.getCommentsByType(requestId, commentTypes[types]); Comment [] comments = commentArray.getComment(); if(comments != null) { for(int index = 0; index < comments.length; index++) { LoggerUtils.sendToLogAndConsole(" \nComment Type = " + commentTypes[types].getValue() + "\n" + "Activity Id: " + comments[index].getActivityId() + "\n" + "Comment : " + comments[index].getComment() + "\n" + "User : " + comments[index].getUser() + "\n" + "System comment : " + comments[index].getSystemComment() + "\n" + "Time stamp : " + comments[index].getTimestamp().getTime().toString() ); } } } getCommentsByActivity Used to get the comments for a specific activity. Method Signature com.novell.soa.af.impl.soap.CommentArray getCommentsByActivity(java.lang.String requestId, java.lang.String aid) Parameters Parameter Description requestId The process identifier. aid The activity identifier. 500 Identity Manager Roles Based Provisioning Module 3.7 User Application: Administration Guide Example // // Initialize and start a provisioning request HashMap provMap = new HashMap(); provMap.put(Helper.RECIPIENT, recipient); provMap.put(I"Provisioning_Request_To_Start_Key", "Enable Active Directory Account (Mgr Approve-No Timeout)"); // // Start request // Calls method startProvisioningRequest on the provUtils // utility object which refers to a utility class that does not // ship with the Identity Manager User Application. String requestId = provUtils.startProvisioningRequest(provMap, null); sleep(5); // // Get the process id for this running process Process process = stub.getProcess(requestId); if(process != null) { String processId = process.getProcessId(); String initiator = process.getInitiator(); // // Setup for the query HashMap map = new HashMap(); map.put(Helper.REQUESTID, requestId); map.put(Helper.RECIPIENT, recipient); map.put(Helper.PROCESSID, processId); map.put(Helper.INITIATOR, initiator); WorkEntry [] workEntry = workEntryUtils.getWorkEntriesUsingQuery(map, T_WorkEntryOrder.REQUEST_ID, T_Logic.AND); // // Get the activity id associated with the item of work String activityId = workEntry[0].getActivityId(); // // Get the comments based on activity if(activityId != null) { CommentArray commentArray = stub.getCommentsByActivity(requestId, activityId); Comment [] comments = commentArray.getComment(); } } getCommentsByUser Used to get the comments made by a specific user. Method Signature com.novell.soa.af.impl.soap.CommentArray getCommentsByUser(java.lang.String requestId, java.lang.String user) Provisioning Web Service 501 Parameters Parameter Description requestId The process identifier. user The the DN of the user (recipient) who created the comments Example // // Initialize and start a provisioning request HashMap provMap = new HashMap(); provMap.put(Helper.RECIPIENT, recipient); provMap.put(I"Provisioning_Request_To_Start_Key", "Enable Active Directory Account (Mgr Approve-No Timeout)"); // // Start request // Calls method startProvisioningRequest on the provUtils // utility object which refers to a utility class that does not // ship with the Identity Manager User Application. String requestId = provUtils.startProvisioningRequest(provMap,\ null); sleep(5); // // Get the comments by recipient (should be the same as user) CommentArray commentArray = stub.getCommentsByUser(requestId, recipient); Comment [] comments = commentArray.getComment(); getCommentsByCreationTime Used to get comments made at a specific time. Method Signature com.novell.soa.af.impl.soap.CommentArray getCommentsByCreationTime(java.lang.String requestId, long time, com.novell.soa.af.impl.soap.T_Operator op) Parameters Parameter Description requestId The process identifier. time The time stamp. 502 Identity Manager Roles Based Provisioning Module 3.7 User Application: Administration Guide Parameter Description op The query operator to use. Possible values for operator are: EQ - equals LT - less than LE - less than or equal to GT - greater than GE - greater than or equal to Example // // Initialize and start a provisioning request HashMap provMap = new HashMap(); provMap.put(Helper.RECIPIENT, recipient); provMap.put(I"Provisioning_Request_To_Start_Key", "Enable Active Directory Account (Mgr Approve-No Timeout)"); // // Start request // Calls method startProvisioningRequest on the provUtils // utility object which refers to a utility class that does not // ship with the Identity Manager User Application. String requestId = provUtils.startProvisioningRequest(provMap, null); sleep(5); // // Get comments by creation time for the provisioning request started above. long currentTime = System.currentTimeMillis(); LoggerUtils.sendToLogAndConsole("-->Current date = " + new java.util.Date(currentTime).toString() ); // // T_Operator operator = T_Operator.GT; CommentArray commentArray = stub.getCommentsByCreationTime(requestId, currentTime, operator); Comment [] comments = commentArray.getComment(); addComment Used to add a comment to a workflow activity. Method Signature void addComment(java.lang.String workId, java.lang.String comment) Parameters Parameter Description workId The activity identifier (UUID). comment A comment about the activity. Provisioning Web Service 503 Example // // Initialize and start a provisioning request HashMap provMap = new HashMap(); provMap.put(Helper.RECIPIENT, recipient); provMap.put(I"Provisioning_Request_To_Start_Key", "Enable Active Directory Account (Mgr Approve-No Timeout)"); // // Start request // Calls method startProvisioningRequest on the provUtils // utility object which refers to a utility class that does not // ship with the Identity Manager User Application. String requestId = provUtils.startProvisioningRequest(provMap, null); sleep(5); // // Setup for the query HashMap map = new HashMap(); map.put(Helper.REQUESTID, requestId); map.put(Helper.RECIPIENT, recipient); WorkEntry [] workEntry = workEntryUtils.getWorkEntriesUsingQuery(map, T_WorkEntryOrder.REQUEST_ID, T_Logic.AND); // // Add comment to the work entry String workId = workEntry[0].getId(); String processId = workEntry[0].getProcessId(); String addComment = "Test comment for work id " + workId; stub.addComment(workId, addComment); sleep(2); getComments Used to get comments from a workflow. Method Signature com.novell.soa.af.impl.soap.CommentArray getComments(java.lang.String workId, int maxRecords) Parameters Parameter Description workId The activity Id (UUID). maxRecords An integer specifying the maximum number of records to retrieve. 504 Identity Manager Roles Based Provisioning Module 3.7 User Application: Administration Guide Example // // Setup for the query HashMap map = new HashMap(); map.put(Helper.RECIPIENT, addressee); WorkEntry [] workEntry = workEntryUtils.getWorkEntriesUsingQuery(map, T_WorkEntryOrder.ADDRESSEE, T_Logic.OR); // // Get all the comment records for this workId int maxRecords = -1; CommentArray commentArray = stub.getComments(workId, maxRecords); Comment [] comment = commentArray.getComment(); 18.3.5 Configuration This section provides reference information for each Configuration method. The Configuration methods include: “setCompletedProcessTimeout” on page 505 “setEngineConfiguration” on page 505 “getCompletedProcessTimeout” on page 506 “setEmailNotifications” on page 507 “clearNIMCaches” on page 507 “setWebServiceActivityTimeout” on page 507 “getUserActivityTimeout” on page 507 “getEmailNotifications” on page 508 “setUserActivityTimeout” on page 508 “getEngineConfiguration” on page 508 “getWebServiceActivityTimeout” on page 508 setCompletedProcessTimeout Used to set the timeout for completed processes. Processes that were completed more than timeout days ago are removed from the system. The default value is 120 days. The valid range is 0 days to 365 days. Method Signature void setCompletedProcessTimeout(int time) Example accessConfigurationSettings(SET_COMPLETED_PROCESS_TIMEOUT, new Integer(212) ); setEngineConfiguration Used to set workflow engine configuration parameters. Provisioning Web Service 505 Method Signature void setEngineConfiguration(com.novell.soa.af.impl.soap.Configuration config) Parameters Parameter Description minPoolSize The minumum thread pool size. maxnPoolSize The maximum thread pool size. initialPoolSize The initial thread pool size. keepAliveTime Thread pool keep live time. pendingInterval The cluster synchronization time. cleanupInterval The interval between purging processes from databases. retryQueueInterval The interval between retrying failed processes. maxShutdownTime The maximum time to let threads complete work before engine shutdown. userActivityTimeout The default user activity timeout. completedProcessTimeout The default completed process timeout. webServiceActivityTimeout The default Web service activity timeout. emailNotification Turns email notification on or off. processCacheInitialCapacity The process cache initial capacity. processCacheMaxCapacity The process cache maximum capacity. processCacheLoadFactor The process cache load factor. heartbeatInterval The heartbeat interval. heartbeatFactor The heartbeat factor. Example accessConfigurationSettings(SET_ENGINE_CONFIGURATION, new Integer(313) ); getCompletedProcessTimeout Used to get the timeout for completed processes. Method Signature int getCompletedProcessTimeout() Example accessConfigurationSettings(GET_COMPLETED_PROCESS_TIMEOUT, new Integer(121) ); 506 Identity Manager Roles Based Provisioning Module 3.7 User Application: Administration Guide setEmailNotifications Used to globally enable or disable e-mail notifications. Method Signature void setEmailNotifications(boolean enable) Parameters Parameter Description enable E-mail notifications are enabled if true; otherwise they are disabled. Example accessConfigurationSettings(SET_EMAIL_NOTIFICATIONS, new Boolean(false) ); clearNIMCaches Clear the Novell Integration Manager (previously named exteNd Composer) caches. Method Signature void clearNIMCaches() Example accessConfigurationSettings(CLEAR_NIM_CACHES, new Object() ); setWebServiceActivityTimeout Used to set the timeout for Web service activities. The default value is 50 minutes. The valid range is 1 minute to 7 days. Method Signature void setWebServiceActivityTimeout(int time) Parameters Parameter Description time The timeout value in minutes. Example accessConfigurationSettings(SET_WEBSERVICE_ACTIVITY_TIMEOUT, new Integer(767) ); getUserActivityTimeout Used to get the timeout for user-facing activities. Provisioning Web Service 507 Method Signature int getUserActivityTimeout() Example accessConfigurationSettings(GET_USER_ACTIVITY_TIMEOUT, new Integer(3767) ); getEmailNotifications Used to determine if global e-mail notifications are enabled or disabled. Method Signature boolean getEmailNotifications() Example accessConfigurationSettings(GET_EMAIL_NOTIFICATIONS, new Boolean(true) ); setUserActivityTimeout Used to set the timeout for user-facing activities. The default value is no timeout (a value of zero). The valid range is 1 hour to 365 days. Method Signature void setUserActivityTimeout(int time) Parameters Parameter Description time The timeout value in hours. Example accessConfigurationSettings(SET_USER_ACTIVITY_TIMEOUT, new Integer(1767) ); getEngineConfiguration Used to get the workflow engine configuration parameters. Method Signature com.novell.soa.af.impl.soap.Configuration getEngineConfiguration() Example accessConfigurationSettings(GET_ENGINE_CONFIGURATION, new Integer(141) ); getWebServiceActivityTimeout Used to get the timeout for Web service activities. 508 Identity Manager Roles Based Provisioning Module 3.7 User Application: Administration Guide Method Signature int getWebServiceActivityTimeout() Example accessConfigurationSettings(GET_WEBSERVICE_ACTIVITY_TIMEOUT, new Integer(808) ); 18.3.6 Miscellaneous This section provides reference information for each Miscellaneous method. The Miscellaneous methods include: “getGraph” on page 509 “getFlowDefinition” on page 510 “getFormDefinition” on page 511 “getVersion” on page 512 getGraph Used to get a JPG image of the workflow. The Graphviz program must be installed on the computer where the application server and the IDM User Application is running. For more information about Graphviz, see Graphviz (http://www.graphviz.org). Method Signature byte[] getGraph(java.lang.String processId) Parameters Parameters Description processId The request Id. Example // // Initialize and start a provisioning request HashMap provMap = new HashMap(); provMap.put(Helper.RECIPIENT, recipient); provMap.put(I"Provisioning_Request_To_Start_Key", "Enable Active Directory Account (Mgr Approve-No Timeout)"); // // Start request // Calls method startProvisioningRequest on the provUtils // utility object which refers to a utility class that does not // ship with the Identity Manager User Application. String requestId = provUtils.startProvisioningRequest(provMap, null); sleep(5); // // Provisioning Web Service 509 Process process = stub.getProcess(requestId); if(process != null) { byte [] graph = null; if( (recipient.compareTo(process.getRecipient()) == 0) && (requestId.compareTo(process.getRequestId()) == 0) ) { graph = stub.getGraph(process.getProcessId() ); } // // Do assert Assert.assertNotNull("Graph is null.", graph); } getFlowDefinition Used to get the XML for a provisioning request. Method Signature java.lang.String getFlowDefinition(java.lang.String processId) Parameters Parameters Description processId The request Id. Example // // Initialize and start a provisioning request HashMap provMap = new HashMap(); provMap.put(Helper.RECIPIENT, recipient); provMap.put(I"Provisioning_Request_To_Start_Key", "Enable Active Directory Account (Mgr Approve-No Timeout)"); // // Start request // Calls method startProvisioningRequest on the provUtils // utility object which refers to a utility class that does not // ship with the Identity Manager User Application. String requestId = provUtils.startProvisioningRequest(provMap, null); sleep(5); // // Process process = stub.getProcess(requestId); if(process != null) { String XMLFlowDefinition = null; if( (recipient.compareTo(process.getRecipient()) == 0) && (requestId.compareTo(process.getRequestId()) == 0) ) { 510 Identity Manager Roles Based Provisioning Module 3.7 User Application: Administration Guide XMLFlowDefinition = stub.getFlowDefinition(process.getProcessId() ); } // // Do assert Assert.assertNotNull("Flow Definition is null.", XMLFlowDefinition); } getFormDefinition Used to get the XML for a form for a provisioning request. Method Signature java.lang.String getFormDefinition(java.lang.String processId) Parameters Parameters Description processId The request Id. Example // // Initialize and start a provisioning request HashMap provMap = new HashMap(); provMap.put(Helper.RECIPIENT, recipient); provMap.put(I"Provisioning_Request_To_Start_Key", "Enable Active Directory Account (Mgr Approve-No Timeout)"); // // Start request // Calls method startProvisioningRequest on the provUtils // utility object which refers to a utility class that does not // ship with the Identity Manager User Application. String requestId = provUtils.startProvisioningRequest(provMap, null); sleep(5); // // Process process = stub.getProcess(requestId); if(process != null) { String XMLFormDefinition = null; if( (recipient.compareTo(process.getRecipient()) == 0) && (requestId.compareTo(process.getRequestId()) == 0) ) { XMLFormDefinition = stub.getFormDefinition(process.getProcessId() ); } // // Do assert Assert.assertNotNull("Form Definition is null.", XMLFormDefinition); } Provisioning Web Service 511 getVersion Used to get the version of the workflow system. Method Signature com.novell.soa.af.impl.soap.T_Version getVersion() Example StringBuffer result = new StringBuffer(); T_Version version = stub.getVersion(); if (version != null) { result.append(" Major = " + version.getMajor() ); result.append(" Minor = " + version.getMinor() ); result.append(" Revision = " + version.getRevision() ); System.out.println("Version Information " + result.toString()); } 18.3.7 Cluster This section provides reference information for each Cluster method. The Cluster methods include: “getEngineState” on page 512 “reassignAllProcesses” on page 513 “getEngineState” on page 513 “reassignPercentageProcesses” on page 514 “reassignProcesses” on page 514 “removeEngine” on page 515 getEngineState Used to get the IEngineState for a workflow engine, specified by engine Id. Method Signature com.novell.soa.af.impl.soap.EngineState getEngineState(java.lang.String engineId) Parameters Parameter Description engineId The Id of the workfow engine. 512 Identity Manager Roles Based Provisioning Module 3.7 User Application: Administration Guide Example EngineStateArray engineStateArray = stub.getClusterState(); EngineState [] engineState = engineStateArray.getEngineStates(); if(engineState != null) { LoggerUtils.sendToLogAndConsole("EngineCount in cluster:" + engineState.length); for(int index = 0; index < engineState.length; index++) { EngineState engine = stub.getEngineState(engineState[index].getEngineId() ); LoggerUtils.sendToLogAndConsole( "Engine Id: " + engine.getEngineId() + "\n" + "Engine status: " + engine.getEngineStatus() + "\n" + "Value of engine status: " + engine.getValueOfEngineStatus() + "\n" + "Heartbeat: " + ( (engine.getHeartbeat() != null) ? engine.getHeartbeat().getTime().toString() : "null") + "\n" + "Shutdown time: " + ((engine.getShutdownTime()!= null) ? engine.getShutdownTime().getTime().toString() : "null") + "\n" + "Start time: " + ((engine.getStartTime() != null) ? engine.getStartTime().getTime().toString() : "null") ); } } reassignAllProcesses Used to reassign all processes from the source engine to a list of target engines. Method Signature int reassignAllProcesses(java.lang.String sourceEngineId, com.novell.soa.af.impl.soap.StringArray targetEngineIds) Parameters Parameter Description sourceEngineId The Id of the source workflow engine. targetEngineIds The Ids of the target workflow engines. getEngineState Used to get a list that contains an IEngineState object for each engine in the cluster. Method Signature public com.novell.soa.af.impl.soap.EngineState getEngineState(java.lang.String engineId) Provisioning Web Service 513 Parameters Parameter Description engineId The Id of the workfow engine. Example EngineStateArray engineStateArray = stub.getClusterState(); EngineState [] engineState = engineStateArray.getEngineStates(); if(engineState != null) { LoggerUtils.sendToLogAndConsole("EngineCount in cluster:" + engineState.length); for(int index = 0; index < engineState.length; index++) { EngineState engine = stub.getEngineState(engineState[index].getEngineId() ); LoggerUtils.sendToLogAndConsole( "Engine Id: " + engine.getEngineId() + "\n" + "Engine status: " + engine.getEngineStatus() + "\n" + "Value of engine status: " + engine.getValueOfEngineStatus() + "\n" + "Heartbeat: " + ( (engine.getHeartbeat() != null) ? engine.getHeartbeat().getTime().toString() : "null") + "\n" + "Shutdown time: " + ((engine.getShutdownTime()!= null) ? engine.getShutdownTime().getTime().toString() : "null") + "\n" + "Start time: " + ((engine.getStartTime() != null) ? engine.getStartTime().getTime().toString() : "null") ); } } reassignPercentageProcesses Used to reassign a percentage of processes from the source engine to the target engine. Method Signature int reassignPercentageProcesses(int percent, java.lang.String sourceEngineId, java.lang.String targetEngineId) Parameters Parameter Description percent An integer representing the percentage of processes to be reassigned. sourceEngineId The Id of the source workflow engine. targetEngineIds The Id of the target workflow engine. reassignProcesses Used to reassign one or more processes from the source engine to the target engine. 514 Identity Manager Roles Based Provisioning Module 3.7 User Application: Administration Guide Method Signature int reassignProcesses(com.novell.soa.af.impl.soap.StringArray requestIds, java.lang.String sourceEngineId, java.lang.String targetEngineId) Parameters Parameter Description requestIds A list of requestIds of the processes to be reassigned. sourceEngineId The Id of the source workflow engine. targetEngineIds The Id of the target workflow engine. removeEngine Used to remove an engine from the cluster state table. The engine must be in the SHUTDOWN or TIMEDOUT state. Method Signature void removeEngine(java.lang.String engineId) Parameters Parameter Description engineId The Id of the workflow engine to be removed. Provisioning Web Service 515 516 Identity Manager Roles Based Provisioning Module 3.7 User Application: Administration Guide 19 Metrics Web Service 19 This section describes the Metrics Web Service, which provides metrics for provisioning workflows. Topics include: Section 19.1, “About the Metrics Web Service,” on page 517 Section 19.2, “Metrics Web Service API,” on page 526 Section 19.3, “Metrics Web Service Examples,” on page 531 19.1 About the Metrics Web Service The workflow engine includes a Web Service for gathering workflow metrics. The addition of the Metrics Web Service to the workflow engine lets you monitor an approval flow process. In addition, it provides indicators the business manager can use to modify the process for optimal performance. The metrics are based on traditional business process flow management principles, which emphasize the need for metrics to be actionable. This ensures that the metrics provided match what an operations manager usually looks for when analyzing and optimizing business flows. Therefore, the metrics identify bottlenecks and provide other capacity indicators. The Metrics Web Service allows you to narrow down the metrics to a common and established set of data, instead of trying to anticipate the myriad of metrics and reports that can be created for a business process flow. When working with the Metrics Web Service, you should keep in mind that the service is not intended to be an all-purpose metrics system: The Metrics Web Service is not a reporting tool or reporting engine. Consequently it does not use a complex query language. The Metrics Web Service is not designed as an all-purpose performance management system. This helps to limit the impact of the needed queries against the live system being monitored. Operations management stresses three key internal process performance measures that together capture the essence of process flow. These three measures can serve as leading indicators of customer satisfaction: flow time, flow rate, and inventory. With these measures, an operations manager can answer the following questions: On average, how much time does a provisioning request spend within the process boundaries? (Flow time) On average, how many provisioning requests pass through the process per unit of time? (Flow rate) On average, how many provisioning requests are within the process boundaries at any point in time? (Inventory) These three measures are related by Little's law: Inventory=Flow Rate*Flow Time Metrics Web Service 517 19.1.1 Web Service Semantics The following semantics apply to the use of the Metrics Web Service: Activities in the Metrics Web Service refer only to user-facing activities (Approval Activities). Negligible running time and the impossibility of controlling the other activities make collecting metrics for these inappropriate. The Metrics Web Service distinguishes between Working Days and Calendar Days. Calendar Days refer to all days between two dates. Working Days refer only to working days between two dates. Since working days may be specified differently in different environments, all Working Days methods return a raw data set that can be used to compute what is appropriate. If no such detail is required, the Calendar Days method will readily return the appropriate metric. 19.1.2 Accessing the Test Page The Metrics Web Service endpoint can be accessed at the following URL: http://server:port/warcontext/metrics/service You can also access the SOAP endpoint by going to the Administration within the User Application. To do this, you need to select the Application Configuration tab, then select Web Services from the left-navigation menu. After selecting Web Services, pick the Web Service endpoint you want from the list. WARNING: The test page is disabled by default. Since some of the methods allow data to be updated, the test page presents a potential security vulnerability and should not be allowed in a production environment. For details on enabling the test page, see the instructions provided for the Role Service in “Enabling the Test Page” on page 571. 19.1.3 Web Service Methods Grouped by Security Permissions The service is secured using Basic Authentication. Therefore, you should use SSL to connect to the service. The service uses the same security layer as the User Application and consequently not all service operations are allowed to all users. Only a Provisioning Administrator will have unconditional access to all the methods. On the other hand team managers will only have access to metrics that pertain to their team and team members. Hence the Metrics Web Service operations are divided into 3 categories according to role and security permissions: Team manager operations Provisioning Application Administrator operations Utility operations Team Metrics Team managers can only retrieve metrics on a team for which they are managers. These are the methods are available to team managers: 518 Identity Manager Roles Based Provisioning Module 3.7 User Application: Administration Guide Table 19-1 Team Metrics Methods Method Description getClaimedFlowTimeCalendarDays Returns the average time in hours the provisioning request was claimed for within the specified time interval getClaimedFlowTimeWorkingDays Returns the result set required to compute the average time the provisioning request was claimed for the specified time interval getToClaimedFlowTimeCalendarDays Returns the average time in hours it took the provisioning request to be claimed from the moment it was available to addressees getToClaimedFlowTimeWorkingDays Returns the average time it took the provisioning request to be claimed from the moment it was available to addresses, within the specified time interval getClaimedInventory Returns the average number of provisioning requests claimed within the specified interval getClaimedThroughputWorkingDays Returns the average number of provisioning requests claimed within the specified interval getTeamLongestRunning Returns a result set of the longest running request in seconds for which members of the team acted as addressees getTeamFlowHistory Returns a result set of the activity outcomes, addressee and addressee messages for the specified list of provisioning requests getTeamHistoryForInitiators Returns a result set of the provisioning request and their status for which members of the team acted as initiators getTeamHistoryForRecipients Returns a result set of the provisioning request and their status for which members of the team acted as recipients getTeamRunningTime Returns the average time in seconds the specified provisioning requests have been running getTeamDecisionCount Returns the number of decisions the team made as addressees for the specified provisioning request getTeamInitiatedCount Returns the number of provisioning requests initiated by the team getTeamRecipientCount Returns the provisioning requests for which a member of the team acts as a recipient Provisioning Administrator Metrics This role is unrestricted and may perform any of the service's operations. These are the methods that are only available to Provisioning Administrators. Metrics Web Service 519 Table 19-2 Provisioning Administrator Metrics Methods Method Description getActivityFlowTimeCalendarDays Returns the average time in hours the user activity took to complete getActivityFlowTimeWorkingDays Returns the result set required to compute the average time the user activity took to complete getActivityInventory Returns the average number of provisioning requests at any one time for the specified user activity getActivityThroughputCalendarDays Returns the average number of provisioning requests per hours that exited the specified user activity within the specified time interval getActivityThroughputWorkingDays Returns the result set required to compute average time it takes a provisioning request to complete for the specified time interval getFlowTimeCalendarDays Returns average time in hours it takes a provisioning request to complete for the specified time interval getFlowTimeWorkingDays Returns the result set required to compute average time it takes a provisioning request to complete for the specified time interval getInventory Returns the average number of provisioning requests in the system at any one time for the specified time interval getLongestClaimed Returns a result set of the provisioning requests that have been claimed but not acted upon (time in seconds) getLongestRunning Returns a result set of the longest running provisioning requests (time in seconds) getFlowCount Returns the number of provisioning requests getFlowHistory Returns a result set of the activity outcomes, addressee and addressee messages for the specified list of provisioning requests getFlowHistoryForInitiators Returns the list of provisioning requests and their status for the specified initiators getFlowHistoryForRecipients Returns the list of provisioning requests and their status for the specified recipients getRunningTime Returns the average running time in seconds for the provisioning requests that are currently running getThroughputCalendarDays Returns the average number of provisioning requests per hour that completed within the specified interval 520 Identity Manager Roles Based Provisioning Module 3.7 User Application: Administration Guide Method Description getThroughputWorkingDays Returns the result set required to compute the average number per hour of provisioning requests that completed within the specified interval Utility Operations Both team managers and administrators may perform these operations: Table 19-3 Utility Operations Method Description getVersion Returns the server version of the Web service. This should always used to ensure version matching between client and server code. getAllProvisioningFlows Returns the list of provisioning flows that the logged in user can see getUserActivityOnlyFlow Returns a GraphViz DOT (http://www.graphviz.org/) representation of the provisioning workflow getTeams Returns the list of teams the logged in user manages getTeamMembers Returns the list of team members for the specified team 19.1.4 Specifying Filters As mentioned above, the Metrics Webservice does not use a complex query language. Instead filters can be use to narrow results by criteria such as date ranges or approval statuses. These are the filters you can specify (see type FilterConstants in service’s WSDL): Table 19-4 Filters for Narrowing Metric Results Filter Description KEY_ACTIVITY_ID A User Activity Id as defined in the provisioning request definition KEY_APPROVAL_STATUS The approval status for the provisioning request. Possible values are: ApprovalStatusProcessing ApprovalStatusDenied ApprovalStatusRefused ApprovalStatusApproved ApprovalStatusRetract ApprovalStatusError Metrics Web Service 521 Filter Description KEY_ENTITLEMENT_STATE The state of the entitlement associated with the provisioning request. Possible value are: EntitlementUnknown EntitlementGranted EntitlementRevoked KEY_ENTITLEMENT_STATUS The status of the entitlement associated with the provisioning request. Possible values are: EntitlementSuccess EntitlementWarning EntitlementError EntitlementFatal KEY_INITIATOR The user DN of the workflow initiator KEY_L_COMPLETION_TIME The date indicating the start of the interval for workflow completion KEY_S_COMPLETION_TIME The date indicating the end of the interval for workflow completion KEY_L_ENTITLEMENT_TIME The date indicating the start of the interval for entitlement time KEY_S_ENTITLEMENT_TIME The date indicating the end of the interval for entitlement time KEY_S_START_TIME The date indicating the start of the interval for workflow start KEY_L_START_TIME The date indicating the end of the interval for workflow start KEY_PROCESS_ID The DN of the provisioning request KEY_PROCESS_STATUS The status of the provisioning request. Possible values are: ProcessStatusRunning ProcessStatusStopped ProcessStatusTerminated ProcessStatusCompleted KEY_PROCESS_VERSION The process version associated with the workflow version KEY_RECIPIENT The user DN of the workflow recipient KEY_REQUEST_ID The unique id associated with the workflow instance Here is a Java example. Note that your code will obviously differ depending on the platform you use for your Web Service client: HashMap map=new HashMap(); 522 Identity Manager Roles Based Provisioning Module 3.7 User Application: Administration Guide map.put(MetricsFilter.KEY_PROCESS_STATUS, MetricsFilter.ProcessStatusRunning); double flowtime = metrics.getFlowTimeCalendarDays(processId, processVer, activity, 5, calendar1.getTime(), calendar2.getTime(), MetricsFilter.ACTIVITY_CLAIMED, MetricsFilter.ACTIVITY_FORWARDED, map); ... Please consult the WebService WSDL for more information: http://server:port/warcontext/metrics/service?WSDL 19.1.5 Generating the Stub Classes Before using the Web Service, you need to use the WSSDK tool or another SOAP tool kit to generate the stub classes. To allow your code to find the stub classes, you also need to add the JAR that contains the stub classes to your classpath. If you want to use the Novell WSSDK tool, you can generate the client stubs by extracting the WSDL and running the wsdl2java utility. For example, you could run this command to generate the stubs in a package called com.novell.soa.af.metrics.soap.impl: "C:\Program Files\Java\jdk1.5.0_14\bin\java" -cp "../lib/wssdk.jar;../lib/ jaxrpc-api.jar";"../lib/mail.jar";"../lib/activation.jar";"c:\Program Files\Java\jdk1.5.0_14\lib\tools.jar"; com.novell.soa.ws.impl.tools.wsdl2java.Main -verbose -ds gensrc -d C:\ -noskel -notie -genclient -keep -package com.novell.soa.af.metrics.soap.impl -javadoc metrics.wsdl You can change the wsdl2java parameters to suit your requirements. 19.1.6 Obtaining the Remote Interface Before you can begin calling methods on the Metrics Web Service, you need to have a reference to the remote interface. The code below shows how to obtain the remote interface. import import import import import import import import import import import import import import java.util.Locale; java.util.Properties; javax.naming.Context; javax.naming.InitialContext; javax.xml.rpc.Stub; com.novell.qa.soap.common.util.LoggerUtils; com.novell.qa.soap.common.util.LoginData; com.novell.qa.soap.common.util.ServiceUtils; com.novell.soa.af.ClusterException; com.novell.soa.af.impl.soap.Provisioning; com.novell.soa.af.impl.soap.ProvisioningService; com.novell.test.automator.framework.TestProgramException; com.rational.test.ft.script.RationalTestScript; com.novell.soa.af.metrics.soap.MetricsClientHelper; Metrics Web Service 523 import import import import com.novell.soa.af.metrics.soap.MetricsStubWrapper; com.novell.soa.af.metrics.soap.impl.MetricsService; com.novell.soa.af.metrics.soap.impl.MetricsServiceException; com.novell.soa.af.metrics.soap.impl.IRemoteMetrics; /** * Method to obtain the remote interface to the Metrics endpoint * @param _url * @param _username * @param _password * @return IRemoteMetrics interface * @throws Exception */ private IRemoteMetrics getStub(String _url, String _username, String _password) throws Exception { Properties properties = new Properties(); properties.put(Context.INITIAL_CONTEXT_FACTORY, "org.jnp.interfaces.NamingContextFactory"); String lookup = "xmlrpc:soap:com.novell.soa.af.metrics.soap.impl.MetricsService"; InitialContext ctx = new InitialContext(); MetricsService svc = (MetricsService) ctx.lookup(lookup); Stub stub = (Stub)svc.getIRemoteMetricsPort(); stub._setProperty(Stub.USERNAME_PROPERTY, _username); stub._setProperty(Stub.PASSWORD_PROPERTY, _password); stub._setProperty(Stub.SESSION_MAINTAIN_PROPERTY, Boolean.TRUE); stub._setProperty(Stub.ENDPOINT_ADDRESS_PROPERTY, _url); return (IRemoteMetrics) stub; } Here’s the code to call the method defined above: IRemoteMetrics stub = null; try { // // Get the stub String url = m_loginData.getURL(); stub = getStub(url,_username,_password); } catch(Exception e) { String msg = e.getMessage(); LoggerUtils.logError(msg); throw new TestProgramException(msg); } return stub; In order for this code to work, the URL passed to the getStub() method would need to point to the SOAP endpoint, as shown below: 524 Identity Manager Roles Based Provisioning Module 3.7 User Application: Administration Guide http://myserver:8080/IDMProv/metrics/service The user name needs to be a fully qualified DN such as the following: "cn=admin,ou=idmsample,o=novell" 19.1.7 Metrics Configuration Settings The Metrics Web Service impact on the live system is limited by 4 settings that may be modified in the IDMfw.jar/WorkflowService-conf/config.xml file: Table 19-5 Metrics Configuration Settings Key in config.xml Description <key>Metrics/TimeRequiredBetweenClientRequests</key> Required time between client requests in ms (default is 250 ms) <key>Metrics/MaxClients</key> Maximum number of concurrent client sessions (default is 10) <key>Metrics/MaxRows</key> Maximum number of rows any query can return <key>Metrics/MaxTeamMembers</key> Maximum Number of Team Members <key>Metrics/SecondsToAnythingDivider</key> The divider used in all throughput computations (default 3600). Original values are in seconds so all throughputs are consequently per hour. When the limit has been reached for any of these settings a Web Service fault is generated indicating the problem. In addition, for settings 1 and 2, the fault includes an error code. If the fault is caused by a TimeRequiredBetweenClientRequests error, the error code is 100. If the fault is caused by a MaxClients errors, the error code is 200. If the fault is caused by a closed client connection error, the error code is 300. Client consumers of the Metrics Web Service will have to include in their code provisions for retrying a request. Here is a simple Java listing that shows how this can be achieved: try { for (int i = 0; i < retries; i++) { try { return metrics.getFlowCount(strDN, strId, new HashMap()); } catch (MetricsServiceException e) { if (e.getErrorCode() == 100 //subsequent call error || e.getErrorCode() == 200) { //too many clients try { Thread.sleep(retryPause); } catch (Exception ex) { Metrics Web Service 525 // to nothing } } else { throw e2; } } else { throw new RuntimeException(e); } } catch (Exception e) { throw e; } } throw new RuntimeException("Did not succeed making webservice call"); } catch (Exception e) { throw e; } } ... 19.2 Metrics Web Service API This section provides details about the methods available with the Metrics web service. All of the methods throw MetricsServiceException and RemoteException. To improve readability, the throws clause has been omitted from the method signatures. 19.2.1 Team Manager Methods This section provides reference information for each method available to team managers. getClaimedFlowTimeCalendarDays Syntax: Here’s the method signature: double getClaimedFlowTimeCalendarDays(String processId, String processVersion, Date startCompletionTime, Date endCompletionTime, String teamDN,Map filters) getClaimedFlowTimeWorkingDays Syntax: Here is the method signature: MetricsResultset getClaimedFlowTimeWorkingDays(String processId, String processVersion, Date startCompletionTime, Date endCompletionTime,String teamDN, Map filters) getToClaimedFlowTimeCalendarDays Syntax: Here is the method signature: double getToClaimFlowTimeCalendarDays(String processId, String processVersion, Date startCompletionTime, Date endCompletionTime, String teamDN,Map filters) 526 Identity Manager Roles Based Provisioning Module 3.7 User Application: Administration Guide getToClaimedFlowTimeWorkingDays Syntax: Here is the method signature: MetricsResultset getToClaimFlowTimeWorkingDays(String processId, String processVersion, Date startCompletionTime, Date endCompletionTime,String teamDN, Map filters) getClaimedInventory Syntax: Here is the method signature: double getClaimedInventory(String processId, String processVersion, Date startCompletionTime, Date endCompletionTime, String teamDN, Map filters) getClaimedThroughputCalendarDays Syntax: Here is the method signature: double getClaimedThroughputCalendarDays(String processId, String processVersion, Date startCompletionTime, Date endCompletionTime, String teamDN Map filters) getClaimedThroughputWorkingDays Syntax: Here is the method signature: MetricsResultset getClaimedThroughputWorkingDays(String processId, String processVersion, Date startCompletionTime, Date endCompletionTime, String teamDN, Map filters) getTeamLongestRunning Syntax: Here is the method signature: MetricsResultset getTeamLongestRunning(String processId, String processVersion, String teamDN, Map filters) getTeamLongestClaimed Syntax: Here is the method signature: MetricsResultset getTeamLongestClaimed(String processId, String processVersion, String teamDN, Map filters) getTeamFlowHistory Syntax: Here is the method signature: MetricsResultset getTeamFlowHistory(List requestIds) getTeamHistoryForInitiators Syntax: Here is the method signature: MetricsResultset getTeamHistoryForInitiators(String teamDN, Map filters) Metrics Web Service 527 getTeamHistoryForRecipients Syntax: Here is the method signature: MetricsResultset getTeamHistoryForRecipients(String teamDN, Map filters) getTeamRunningTime Syntax: Here is the method signature: double getTeamRunningTime(String processId, String processVersion, String teamDN, Map filters) getTeamDecisionCount Syntax: Here is the method signature: int getTeamDecisionCount(String processId, String processVersion, String teamDN, Map filters) getTeamInitiatedCount Syntax: Here is the method signature: int getTeamInitiatedCount(String processId, String processVersion, String teamDN, Map filters) getTeamRecipientCount Syntax: Here is the method signature: int getTeamRecipientCount(String processId, String processVersion, String teamDN, Map filters) 19.2.2 Provisioning Application Administrator Methods This section provides reference information for each method available to the Provisioning Application Administrator. getActivityFlowTimeCalendarDays Syntax: Here is the method signature: double getActivityFlowTimeCalendarDays(String processId, String processVer, String activityId, Date startTime, Date completeTime, Map filters) getActivityFlowTimeWorkingDays Syntax: Here is the method signature: MetricsResultset getActivityFlowTimeWorkingDays(String processId, String processVer, String activityId, Date startTime, Date completeTime, Map filters) getActivityInventory Syntax: Here is the method signature: 528 Identity Manager Roles Based Provisioning Module 3.7 User Application: Administration Guide double getActivityInventory(String processId, String processVersion, String activityId, Date startTime, Date completeTime, Map filters) getActivityThroughputCalendarDays Syntax: Here is the method signature: double getActivityThroughputCalendarDays(String processId, String processVersion, String activityId, Date startTime, Date completiontime, Map filters) getActivityThroughputWorkingDays Syntax: Here is the method signature: MetricsResultset getActivityThroughputWorkingDays(String processId, String processVersion, String activityId, Date startTime, Date completiontime, Map filters) getInventory Syntax: Here is the method signature: double getInventory(String processId, String processVersion, Date startTime, Date completeTime, Map filters) getLongestClaimed Syntax: Here is the method signature: MetricsResultset getLongestClaimed(String processId, String processVersion, Map filters) getLongestRunning Syntax: Here is the method signature: MetricsResultset getLongestRunning(String processId, String processVersion, Map filters) getFlowCount Syntax: Here is the method signature: int getFlowCount(String processId, String processVersion, Map filters) getFlowHistory Syntax: Here is the method signature: MetricsResultset getFlowHistory(List requestIds) getFlowHistoryForInitiators Syntax: Here is the method signature: MetricsResultset getFlowHistoryForInitiators(List initiators, Map filters) Metrics Web Service 529 getFlowHistoryForRecipients Syntax: Here is the method signature: MetricsResultset getFlowHistoryForRecipients(List recipients, Map filters) getRunningTime Syntax: Here is the method signature: double getRunningTime(String processId, String processVersion, Map filters) getThroughputCalendarDays Syntax: Here is the method signature: double getThroughputCalendarDays(String processId, String processVersion, Date startTime, Date completiontime, Map filters) getThroughputWorkingDays Syntax: Here is the method signature: MetricsResultset getActivityThroughputWorkingDays(String processId, String processVersion, String activityId, Date startTime, Date completiontime, Map filters) 19.2.3 Utility Methods This section provides reference information for each utility method. Both team managers and administrators can call these methods. getVersion Syntax: Here is the method signature: VersionVO getVersion() getAllProvisioningFlows Syntax: Here is the method signature: MetricsResultset getAllProvisioningFlows() getUserActivityOnlyFlow Syntax: Here is the method signature: BasicModelVO getUserActivityOnlyFlow(String processId, String processVer) getTeams Syntax: Here is the method signature: MetricsResultset getTeams() 530 Identity Manager Roles Based Provisioning Module 3.7 User Application: Administration Guide getTeamMembers Syntax: Here is the method signature: MetricsResultset getTeamMembers(String teamDN) 19.3 Metrics Web Service Examples This section provides examples that show how to use the Metrics Web Service to gather workflow metrics. The examples assume that you have obtained a stub, as shown in Section 19.1.6, “Obtaining the Remote Interface,” on page 523, and potentially wrapped it in an object that handles the potential error conditions, as described in Section 19.1.7, “Metrics Configuration Settings,” on page 525. 19.3.1 General Examples This example uses the KEY_APPROVAL_STATUS filter to compare the decision outcomes for a provisioning request type. This could be used to generate a pie chart for example. FilterConstants constants=new FilterConstants(); Map<MetricsFilter, Object> map = new HashMap<MetricsFilter, Object>(); map.put(MetricsFilter.KEY_APPROVAL_STATUS,constants.getApprovalStatusApproved ()); double accepted=stubWrapper.getFlowCount(processId,processVersion,map); map.put(MetricsFilter.KEY_APPROVAL_STATUS,constants.getApprovalStatusDenied() ); double denied=stubWrapper.getFlowCount(processId,processVersion,map); map.put(MetricsFilter.KEY_APPROVAL_STATUS,constants.getApprovalStatusError()) ; double error=stubWrapper.getFlowCount(processId,processVersion,map); map.put(MetricsFilter.KEY_APPROVAL_STATUS,constants.getApprovalStatusRetract( )); double retracted=stubWrapper.getFlowCount(processId,processVersion,map); map.put(MetricsFilter.KEY_APPROVAL_STATUS, constants.getApprovalStatusRefused()); double refused = stubWrapper.getFlowCount(processId, processVersion, map); Additional filters may be specified by adding appropriate entries to the filter map. The following examples illustrate how you might add various types of filters. Adding a start date filter To add a start date filter (01/01/2006 < date < 02/01/2006): Calendar startDate=Calendar.getInstance(); startDate.set(2006,0,1); Calendar endDate=Calendar.getInstance(); endDate.set(2006,1,1); map.put(MetricsFilter.KEY_L_START_TIME,startDate); map.put(MetricsFilter.KEY_S_START_TIME,endDate) Adding a completion date filter To add a completion date filter (02/01/2005 < date <03/01/2005) Metrics Web Service 531 Calendar startDate=Calendar.getInstance(); startDate.set(2006,0,1); Calendar endDate=Calendar.getInstance(); endDate.set(2006,1,1); map.put(MetricsFilter.KEY_L_COMPLETION_TIME,startDate); map.put(MetricsFilter.KEY_S_COMPLETION_TIME,endDate) Narrowing requests to a specific initiator To narrow down counted requests to a specific initiator map.put(MetricsFilter.KEY_INITIATOR,"cn=admin,ou=idmsample,o=novell"); Narrowing requests to a specific recipient To narrow down counted requests to a specific recipient map.put(MetricsFilter.KEY_RECIPIENT,"cn=admin,ou=idmsample,o=novell"); 19.3.2 Other Examples The following examples illustrate the use of various methods for retrieving workflow counts. Retrieving decision counts for a team This example describes how to retrieve the various decision outcomes of a team. The team's DN is required and can be obtained by using the getTeams() method: FilterConstants constants=new FilterConstants(); Map<MetricsFilter, Object> map = new HashMap<MetricsFilter, Object>(); map.put(MetricsFilter.KEY_ACTIVITY_END, constants.getActivityApproved()); double accepted = stubWrapper.getTeamDecisionCount(processId, processVersion, teamDN, map); map.put(MetricsFilter.KEY_ACTIVITY_END, constants.getActivityDenied()); double denied = stubWrapper.getTeamDecisionCount(processId, processVersion, teamDN, map); map.put(MetricsFilter.KEY_ACTIVITY_END, constants.getActivityReassigned()); double reassigned = stubWrapper.getTeamDecisionCount(processId, processVersion, teamDN, map); map.put(MetricsFilter.KEY_ACTIVITY_END, constants.getActivityRefused()); double refused = stubWrapper.getTeamDecisionCount(processId, processVersion, teamDN, map); Retrieving decision counts for requests where team members are recipients This example describes how to retrieve the various decisions outcomes for requests for which members of the team act as recipients 532 Identity Manager Roles Based Provisioning Module 3.7 User Application: Administration Guide FilterConstants constants = new FilterConstants(); Map<MetricsFilter, Object> map = new HashMap<MetricsFilter, Object>(); map.put(MetricsFilter.KEY_APPROVAL_STATUS, constants.getActivityApproved()); double accepted = stubWrapper.getTeamRecipientCount(processId, processVersion, teamDN, map); map.put(MetricsFilter.KEY_APPROVAL_STATUS, constants.getApprovalStatusDenied()); double denied = stubWrapper.getTeamRecipientCount(processId, processVersion, teamDN, map); map.put(MetricsFilter.KEY_APPROVAL_STATUS, constants.getApprovalStatusError()); double error = stubWrapper.getTeamRecipientCount(processId, processVersion, teamDN, map); map.put(MetricsFilter.KEY_APPROVAL_STATUS, constants.getApprovalStatusError()); double retracted = stubWrapper.getTeamRecipientCount(processId, processVersion, teamDN, map); map.put(MetricsFilter.KEY_APPROVAL_STATUS, constants.getApprovalStatusRefused()); double refused = stubWrapper.getTeamRecipientCount(processId, processVersion, teamDN, map); Retrieving requests that have been claimed but not acted on This example describes how to retrieve the requests started after 03/01/2006 that have been claimed but not acted upon. Map<MetricsFilter, Object> map = new HashMap<MetricsFilter, Object>(); Calendar startDate=Calendar.getInstance(); startDate.set(2006,2,1); map.put(MetricsFilter.KEY_L_START_TIME,startDate); MetricsResultset rset = stubWrapper.getLongestClaimed(processId, processVersion, map); Retrieving the longest running requests started by a particular user This example describes how to retrieve the longest running requests that have been started by initiator "cn=admin,ou=idmsample,o=novell"; Map<MetricsFilter, Object> map = new HashMap<MetricsFilter, Object>(); map.put(MetricsFilter.KEY_INITIATOR,""cn=admin,ou=idmsample,o=novell"); MetricsResultset rset = stubWrapper.getLongestRunning(processId, processVersion, map); Retrieving activity inventory This example describes the average inventory for users handling decision with activity id "managerApproval" between 01/01/2006 and 02/01/2006 Map<MetricsFilter, Object> map = new HashMap<MetricsFilter, Object>(); Calendar startDate=Calendar.getInstance(); startDate.set(2006,0,1); Calendar endDate=Calendar.getInstance(); endDate.set(2006,1,1); MetricsResultset rset = stubWrapper.getActivityInventory(processId, processVersion,"managerApproval", startDate, endDate, map ); Metrics Web Service 533 Retrieving the Claimed Throughput and Inventory for a Team This example describes the team's throughput and inventory over the time interval between 01/01/ 2006 and 02/01/2006 Map<MetricsFilter, Object> map = new HashMap<MetricsFilter, Object>(); Calendar startDate=Calendar.getInstance(); startDate.set(2006,0,1); Calendar endDate=Calendar.getInstance(); endDate.set(2006,1,1); double throughput = stubWrapper.getClaimedThroughputCalendarDays(processId, processVersion, startDate, endDate,teamDN, map); double inventory = stubWrapper.getClaimedInventory(processId, processVersion, startDate, endDate, teamDN, map) 534 Identity Manager Roles Based Provisioning Module 3.7 User Application: Administration Guide 20 Notification Web Service 20 This section describes the Notification Web Service, which allows SOAP clients to use the e-mail notification facility. Topics include: Section 20.1, “About the Notification Web Service,” on page 535 Section 20.2, “Notification Web Service API,” on page 536 Section 20.3, “Notification Example,” on page 542 20.1 About the Notification Web Service The Identity Manager User Application includes an e-mail notification facility that lets you send email messages to notify users of changes in the state of the provisioning system, as well as tasks that they need to perform. To support access by third-party software applications, the notification facility includes a Web service endpoint. The endpoint lets you send an e-mail message to one or more users. When you send an e-mail, you include parameters that specify the target e-mail address, the email template to use, and the replacement values for tokens in the e-mail template. This Appendix describes the programming interface for the Notification Web Service. 20.1.1 Accessing the Test Page You can access the Notification Web Service endpoint using a URL similar to the following: http://server:port/warcontext/notification/service?test For example, if your server is named “myserver”, your User Application is listening on port 8080, and your User Application war file is named “IDMPROV”, the URL would be: http://myserver:8080/IDMPROV/notification/service?test You can also access the SOAP endpoint by going to the Administration within the User Application. To do this, you need to select the Application Configuration tab, then select Web Services from the left-navigation menu. After selecting Web Services, pick the Web Service endpoint you want from the list. WARNING: The test page is disabled by default. Since some of the methods allow data to be updated, the test page presents a potential security vulnerability and should not be allowed in a production environment. For details on enabling the test page, see the instructions provided for the Role Service in “Enabling the Test Page” on page 571. 20.1.2 Accessing the WSDL You can access the WSDL for the Notification Web Service using a URL similar to the following: http://server:port/warcontext/notification/service?wsdl For example, if your server is named “myserver”, your User Application is listening on port 8080, and your User Application war file is named “IDMPROV”, the URL would be: Notification Web Service 535 http://myserver:8080/IDMPROV/notification/service?wsdl 20.1.3 Generating the Stub Classes Before using the Web Service, you need to use the WSSDK tool or another SOAP tool kit to generate the stub classes. To allow your code to find the stub classes, you also need to add the JAR that contains the stub classes to your classpath. If you want to use the Novell WSSDK tool, you can generate the client stubs by extracting the WSDL and running the wsdl2java utility. For example, you could run this command to generate the stubs in a package called com.novell.ws.client.notification: "C:\Program Files\Java\jdk1.5.0_14\bin\java" -cp "../lib/wssdk.jar;../lib/ jaxrpc-api.jar";"../lib/mail.jar";"../lib/activation.jar";"c:\Program Files\Java\jdk1.5.0_14\lib\tools.jar"; com.novell.soa.ws.impl.tools.wsdl2java.Main -verbose -ds gensrc -d C:\ -noskel -notie -genclient -keep -package com.novell.ws.client.notification -javadoc notification.wsdl You can change the wsdl2java parameters to suit your requirements. 20.2 Notification Web Service API This section provides details about the methods available with the Notification Web service. This API presumes you’re using Java code generated by the WSSDK toolkit. The API will be different if you’re using another Web Service toolkit. All of the methods throw RemoteException. To improve readability, the throws clause has been omitted from the method signatures. 20.2.1 iRemoteNotification This section provides reference information for each method associated with the iRemoteNotification interface. getVersion Returns the version number of the notification facility you’re running. Syntax: Here is the method signature: VersionVO getVersion() sendNotification Sends an e-mail notification. Syntax: Here is the method signature: void sendNotification(NotificationMap arg0) 536 Identity Manager Roles Based Provisioning Module 3.7 User Application: Administration Guide 20.2.2 BuiltInTokens This section provides reference information for each method associated with the BuiltInTokens class. BuiltInTokens constructor The BuiltInTokens class has a single constructor. Syntax: Here is the constructor for the BuiltInTokens class: BuiltInTokens() getTO Returns the fixed string TO, which can be used as a key to identify the value for the TO system token. Syntax: Here is the method signature: public java.lang.String getTO() getCC Returns the fixed string CC, which can be used as a key to identify the value for the CC system token. Syntax: Here is the method signature: public java.lang.String getCC() getBCC Returns the fixed string BCC, which can be used as a key to identify the value for the BCC system token. Syntax: Here is the method signature: public java.lang.String getBCC() getTO_DN Returns the fixed string TO_DN, which can be used as a key to identify the value for the TO_DN system token. Syntax Here is the method signature: public java.lang.String getTO_DN() getCC_DN Returns the fixed string CC_DN, which can be used as a key to identify the value for the CC_DN system token. Syntax: Here is the method signature: public java.lang.String getCC_DN() Notification Web Service 537 getBCC_DN Returns the fixed string BCC_DN, which can be used as a key to identify the value for the BCC_DN system token. Syntax: Here is the method signature: public java.lang.String getBCC_DN() getREPLYTO Returns the fixed string REPLYTO, which can be used as a key to identify the value for the REPLYTO system token. Syntax: Here is the method signature: public java.lang.String getREPLYTO() getREPLYTO_DN Returns the fixed string REPLYTO_DN, which can be used as a key to identify the value for the REPLYTO_DN system token. Syntax: Here is the method signature: public java.lang.String getREPLYTO_DN() getLOCALE Returns the fixed string LOCALE, which can be used as a key to identify the value for the LOCALE system token. Syntax: Here is the method signature: public java.lang.String getLOCALE() getNOTIFICATION_TEMPLATE_DN Returns the fixed string NOTIFICATION_TEMPLATE, which can be used as a key to identify the value for the NOTIFICATION_TEMPLATE system token. Syntax: Here is the method signature: public java.lang.String getNOTIFICATION_TEMPLATE_DN() 20.2.3 Entry The Entry class represents an entry in an EntryArray object. It is used to specify a token in an e-mail template. This section provides reference information for each method associated with the Entry class. Entry constructors The Entry class has two constructors. Syntax 1: Here is the syntax for a constructor that takes no parameters: 538 Identity Manager Roles Based Provisioning Module 3.7 User Application: Administration Guide Entry() Syntax 2: Here is the syntax for a constructor that takes two parameters, the key value and an array of values: Entry(java.lang.String KeyVal, StringArray ValuesVal) getKey Returns the key defined for the Entry object. The key identifies the token. Syntax: Here is the method signature: java.lang.String getKey() setKey Sets the key for the Entry object. The key identifies the token. If the object represents a built-in token, you can use the BuiltInTokens class to set the key. Otherwise, you can pass a string to the setKey method that specifies the key. Syntax: Here is the method signature: void setKey(java.lang.String KeyVal) getValues Returns a StringArray object representing the values for the Entry object. Syntax: Here is the method signature: StringArray getValues() setValues Sets the values for the Entry object. Syntax: Here is the method signature: void setValues(StringArray ValuesVal) 20.2.4 EntryArray The EntryArray class is a container for an array of Entry objects. It is contained by the NotificationMap object. This section provides reference information on the methods associated with the EntryArray class. EntryArray constructors The EntryArray class has two constructors. Syntax 1: Here is the syntax for a constructor that takes no parameters: EntryArray() Syntax 2: Here is the syntax for a constructor that takes an array of Entry objects as a parameter: Notification Web Service 539 EntryArray(Entry[] EntryVal) getEntry Returns the Entry object contained within this EntryArray object. Syntax: Here is the method signature: Entry[] getEntry() setEntry Sets the Entry object for this EntryArray object. Syntax: Here is the method signature: void setEntry(Entry[] EntryVal) 20.2.5 NotificationMap The NotificationMap object is a map that contains an EntryArray object. It is passed to the sendNotification method on the stub. This section provides reference information for the methods associated with the NotificationMap class. NotificationMap constructors The NotificationMap class has two constructors. Syntax 1: Here is the syntax for a constructor that takes no parameters: NotificationMap() Syntax 2: Here is the syntax for a constructor that takes an EntryArray object as a parameter: NotificationMap(EntryArray EntriesVal) getEntries Returns the EntryArray object contained by this NotificationMap object. Syntax: Here is the method signature: EntryArray getEntries() setEntries Sets the EntryArray object for this NotificationMap object. Syntax: Here is the method signature: void setEntries(EntryArray EntriesVal) 20.2.6 NotificationService This section provides reference information for the NotificationService interface. 540 Identity Manager Roles Based Provisioning Module 3.7 User Application: Administration Guide getIRemoteNotificationPort Gets the stub for the remote service. The stub is a port of type IRemoteNotification. Syntax: Here is the method signature: IRemoteNotification getIRemoteNotificationPort() throws javax.xml.rpc.ServiceException 20.2.7 StringArray This section provides reference information for the StringArray class. StringArray constructors The StringArray class has two constructors. Syntax 1: Here is the syntax for a constructor that takes no parameters: StringArray() Syntax 2: Here is the syntax for a constructor that takes a String array as a parameter: StringArray(java.lang.String[] StringVal) getString Returns the array of strings defined for this StringArray object. Syntax: Here is the method signature: java.lang.String[] getString() setString Sets the array of strings for this StringArray object. This method is called by the second constructor, which takes a String array as a parameter. Syntax: Here is the method signature: void setString(java.lang.String[] StringVal) 20.2.8 VersionVO This section provides reference information on the VersionVO class. getValue Returns the version number of the service. Syntax: Here is the method signature: java.lang.String getValue() Notification Web Service 541 20.3 Notification Example The following code example shows how one might use the Notification service to send an e-mail message using a pre-defined system template. To get a reference to the SOAP endpoint for the Notification service, a call is made to the getNotificationStub() method. After acquiring the stub interface, the code sets the e-mail notification template as well as values for the built-in tokens in the template. In addition, the code specifies values for the requestTitle and initiatorFullName tokens. For each token, the code creates an Entry object. Once all of the entries have been created, it packages the entry array into a map of type NotificationMap, which is then passed to the sendNotification method on the stub. import java.util.Properties; import javax.naming.Context; import javax.naming.InitialContext; import javax.xml.rpc.Stub; import java.rmi.RemoteException; // // Notification imports import com.novell.ws.client.notification.IRemoteNotification; import com.novell.ws.client.notification.BuiltInTokens; import com.novell.ws.client.notification.Entry; import com.novell.ws.client.notification.EntryArray; import com.novell.ws.client.notification.StringArray; import com.novell.ws.client.notification.NotificationMap; import com.novell.ws.client.notification.IRemoteNotification; import com.novell.ws.client.notification.NotificationService; public class NotificationTest { private static final int LOCALHOST = 0; // localhost private static final int TESTSERVER = 1; // testserver private static final int SELECTED_URL = TESTSERVER; private String [] SERVER_URLS = { "http://localhost:8080/IDMProv/notification/service", "http://testserver:8080/IDMProv/notification/service" }; private String url = SERVER_URLS[SELECTED_URL]; private String username = "cn=admin,ou=idmsample,o=novell"; private String password = "test"; public void emailNotificationTestCase() throws Exception { System.out.println("\nCalling emailNotificationTestCase() test case"); try { String targetEmailAddress = "[email protected]"; // // Get the notification stub IRemoteNotification notificationStub = getNotificationStub(url, username, password); 542 Identity Manager Roles Based Provisioning Module 3.7 User Application: Administration Guide BuiltInTokens builtInTokens = new BuiltInTokens(); // // Set the To: entry Entry to = new Entry(); to.setKey(builtInTokens.getTO()); StringArray arr = new StringArray(new String[]{targetEmailAddress} ); to.setValues(arr); // // Set which email template to use : list in iManager (Workflow Admin->Email Templates) Entry notificationTemplate = new Entry(); notificationTemplate.setKey(builtInTokens.getNOTIFICATION_TEMPLATE_DN()); // // Use one of the email templates specifying DN String EMAIL_TEMPLATE_NAME = "Provisioning Notification"; String templateDN = "cn=" + EMAIL_TEMPLATE_NAME + ",cn=Default Notification Collection,cn=Security"; arr = new StringArray(new String[]{templateDN} ); notificationTemplate.setValues(arr); // // Substitute key values defined in email templates Entry token1 = new Entry(); token1.setKey("requestTitle"); // key is %requestTitle% arr = new StringArray(new String[]{"Sample Email using Notification Web Service"} ); token1.setValues(arr); Entry token2 = new Entry(); token2.setKey("initiatorFullName"); arr = new StringArray(new String[]{username} ); token2.setValues(arr); // // Setup the notification map NotificationMap map = new NotificationMap(); Entry[] entries = new Entry[]{to,notificationTemplate,token1,token2}; EntryArray entryArray = new EntryArray(); entryArray.setEntry(entries); map.setEntries(entryArray); // // Make the notification endpoint call notificationStub.sendNotification(map); } catch(RemoteException error) { System.out.println(error.getMessage() ); throw new Exception(error.getMessage() ); } } /** * Method to obtain the remote interface to the Notification endpoint * @param _url * @param _username * @param _password * @return IRemoteNotification interface Notification Web Service 543 * @throws Exception */ private IRemoteNotification getNotificationStub(String _url, String _username, String _password) throws Exception { Properties properties = new Properties(); properties.put(Context.INITIAL_CONTEXT_FACTORY, "org.jnp.interfaces.NamingContextFactory"); String lookup = "xmlrpc:soap:com.novell.ws.client.notification.NotificationService"; InitialContext ctx = new InitialContext(); NotificationService svc = (NotificationService) ctx.lookup(lookup); Stub stub = (Stub)svc.getIRemoteNotificationPort(); stub._setProperty(Stub.USERNAME_PROPERTY, _username); stub._setProperty(Stub.PASSWORD_PROPERTY, _password); stub._setProperty(Stub.SESSION_MAINTAIN_PROPERTY, Boolean.TRUE); stub._setProperty(Stub.ENDPOINT_ADDRESS_PROPERTY, _url); return (IRemoteNotification) stub; } } 544 Identity Manager Roles Based Provisioning Module 3.7 User Application: Administration Guide Directory Abstraction Layer (VDX) Web Service 21 21 This section describes the VDX Web Service, which allows SOAP clients to access the directory abstraction layer. Topics include: Section 21.1, “About the Directory Abstraction Layer (VDX) Web Service,” on page 545 Section 21.2, “VDX Web Service API,” on page 547 Section 21.3, “VDX Example,” on page 559 21.1 About the Directory Abstraction Layer (VDX) Web Service The directory abstraction layer provides a logical view of the Identity Vault data. To support access by third-party software applications, the directory abstraction layer includes a Web service endpoint called the VDX Web Service. This endpoint lets you access the attributes associated with entities defined in the directory abstraction layer. It also lets you perform ad hoc searches for entities and execute predefined searches called global queries. You can think of global queries as stored procedures for LDAP. This Appendix describes the programming interface for the VDX Web Service. 21.1.1 Accessing the Test Page You can access the VDX Web Service endpoint using a URL similar to the following: http://server:port/warcontext/vdx/service?test For example, if your server is named “myserver”, your User Application is listening on port 8080, and your User Application war file is named “IDMPROV”, the URL would be: http://myserver:8080/IDMPROV/vdx/service?test You can also access the SOAP endpoint by going to the Administration within the User Application. To do this, you need to select the Application Configuration tab, then select Web Services from the left-navigation menu. After selecting Web Services, pick the Web Service endpoint you want from the list. WARNING: The test page is disabled by default. Since some of the methods allow data to be updated, the test page presents a potential security vulnerability and should not be allowed in a production environment. For details on enabling the test page, see the instructions provided for the Role Service in “Enabling the Test Page” on page 571. 21.1.2 Accessing the WSDL You can access the WSDL for the VDX Web Service using a URL similar to the following: http://server:port/warcontext/vdx/service?wsdl Directory Abstraction Layer (VDX) Web Service 545 For example, if your server is named “myserver”, your User Application is listening on port 8080, and your User Application war file is named “IDMPROV”, the URL would be: http://myserver:8080/IDMPROV/vdx/service?wsdl 21.1.3 Generating the Stub Classes Before using the Web Service, you need to use the WSSDK tool or another SOAP tool kit to generate the stub classes. To allow your code to find the stub classes, you also need to add the JAR that contains the stub classes to your classpath. If you want to use the Novell WSSDK tool, you can generate the client stubs by extracting the WSDL and running the wsdl2java utility. For example, you could run this command to generate the stubs in a package called com.novell.ws.client.vdx: "C:\Program Files\Java\jdk1.5.0_14\bin\java" -cp "../lib/wssdk.jar;../lib/ jaxrpc-api.jar";"../lib/mail.jar";"../lib/activation.jar";"c:\Program Files\Java\jdk1.5.0_14\lib\tools.jar"; com.novell.soa.ws.impl.tools.wsdl2java.Main -verbose -ds gensrc -d C:\ -noskel -notie -genclient -keep -package com.novell.ws.client.vdx -javadoc vdx.wsdl You can change the wsdl2java parameters to suit your requirements. 21.1.4 Removing Administrator Credential Restrictions The VDX Web Service supports two levels of security, one that restricts access to Provisioning Administrators, and another that restricts access to the authenticated user. The default setting restricts access to all operations to the Provisioning Administrator. You can modify the security configuration by extracting the /VirtualDataService-conf/ config.xml file from the IDMfw.jar file in the IDMProv.war file, and editing the property settings. Each property can be set to true or false. A value of true locks down the operation, whereas a value of false opens up the operation. After making your changes, you need to import the file back into the WAR file and redeploy. You can open up the VDX Web Service to authenticated users by setting the VirtualDataService/ soap property to false. To open up a particular operation to authenticated users, you need to set the property for that operation (VirtualDataService/soap/operation) to false as well. If you set all of the properties to false, you can open up all operations to authenticated users. The operation names are the same as the names of the methods supported by the service. Example The following example shows a security configuration that would open up all operations within the VDX Web Service: <property> <key>VirtualDataService/soap</key> <value>false</value> </property> If you wanted to restrict globalQuery you would add the following property to the service's config.xml settings: 546 Identity Manager Roles Based Provisioning Module 3.7 User Application: Administration Guide <property> <key>VirtualDataService/soap/globalQuery</key> <value>true</value> </property> Even though the service does not require the Administrator credentials since you set the VirtualDataService/soap property to false, the globalQuery operation will still require the Administrator credentials since you set a property for the operation to true. 21.2 VDX Web Service API This section provides details about the methods available with the VDX Web service. This API presumes you’re using Java code generated by the WSSDK toolkit. The API will be different if you’re using another Web Service toolkit. All of the methods throw VdxServiceException. To improve readability, the throws clause has been omitted from the method signatures. 21.2.1 IRemoteVdx This section provides reference information for each method associated with the IRemoteVdx interface. getVersion Returns the version number of the VDX service you’re running. Syntax: Here is the method signature: VersionVO getVersion() throws java.rmi.RemoteException; globalQuery Allows you to execute predefined searches called global queries. Global queries are saved searches for LDAP. They provide some of the capabilities of stored procedures. To define a global query, you need to use the directory abstraction layer editor. For details, see the chapter on the directory abstraction layer editor in the Identity Manager User Application: Design Guide. Syntax: Here is the method signature: java.lang.String[] globalQuery(java.lang.String queryDN, StringMap queryParameterValues) throws VdxServiceException, java.rmi.RemoteException; query Allows you to perform ad hoc queries by specifying an entity, a set of attributes, and a query expression that filters the data returned. Syntax: Here is the method signature: EntityAttributeMap query(java.lang.String entityDefinition, java.lang.String[] attributeKeys, java.lang.String queryFilter) throws VdxServiceException, java.rmi.RemoteException; Directory Abstraction Layer (VDX) Web Service 547 Query Grammar The queryFilter parameter of the query() method lets you pass in search criteria expressions that filter the data returned. This section describes the grammar for these expressions. Query syntax 1: The simplest form of a query is the following: RelationalExpression1 Query syntax 2: A query can also combine relational expressions with a logical operator: RelationalExpession1 logicalOperator RelationalExpression2 Query syntax 3: Alternatively, a query can use parentheses to set off the expressions: (RelationalExpession1) logicalOperator (RelationalExpression2) Query syntax 4: A query can also use parentheses to set off sub queries: RelationalExpession1 logicalOperator RelationalExpression3) (RelationalExpression2 logicalOperator1 Relational expressions must be separated by a logical operator which must remain the same. In other words, the following query is valid: expression1 AND expression2 AND expression3 However, this query is not valid: expression1 AND expression2 OR expression3 You can use parentheses to create a condition group, as in the following example: expression1 AND (expression2 OR expression3) Grammar for Relational Expressions Relational expression syntax: A relational expression must conform to this syntax: attribute relationalOperator value Grammar for Operators and Values Relational operators: The relational operator must be one of the following: > , < , >= , <= , = , != , !< , !> , !<= , !>= , STARTWITH, !STARTWITH, IN , !IN , PRESENT, !PRESENT Logical operators: The logical operator must be one of the following: AND, OR Value: The value side of an expression must be one of the following: 'foo',"foo", 1-9, true, false The PRESENT and !PRESENT relational operators require no value. 548 Identity Manager Roles Based Provisioning Module 3.7 User Application: Administration Guide getAttribute Returns a single Attribute object that can be used to retrieve and examine data for an attribute in the directory abstraction layer. Syntax: Here is the method signature: Attribute getAttribute(java.lang.String objectDN, java.lang.String entityDefinition, java.lang.String attributeKey) throws VdxServiceException, java.rmi.RemoteException; getAttributes Returns an array of Attribute objects that can be used to retrieve and examine data in the directory abstraction layer. Syntax: Here is the method signature: Attribute[] getAttributes(java.lang.String objectDN, java.lang.String entityDefinition, java.lang.String[] attributeKeys) throws VdxServiceException, java.rmi.RemoteException; 21.2.2 Attribute The Attribute class represents an attribute in the directory abstraction layer. This section provides reference information for the Attribute class. Attribute constructors The Attribute class has two constructors. Syntax 1: Here is the syntax for a constructor that takes no arguments: Attribute() Syntax 2: Here is the syntax for a constructor that takes arrays of all the supported data types as arguments: Attribute(ByteArrayArray BinariesVal, BooleanArray BooleansVal, DateArray DatesVal, IntegerArray IntegersVal, StringArray StringsVal, AttributeType TypeVal) getBinaries Returns the ByteArrayArray object for the attribute. Syntax: Here is the method signature: ByteArrayArray getBinaries() setBinaries Sets the ByteArrayArray object for the attribute. Syntax: Here is the method signature: void setBinaries(ByteArrayArray BinariesVal) Directory Abstraction Layer (VDX) Web Service 549 getBooleans Returns the BooleanArray object for the attribute. Syntax: Here is the method signature: BooleanArray getBooleans() setBooleans Sets the BooleanArray object for the attribute. Syntax: Here is the method signature: void setBooleans(BooleanArray BooleansVal) getDates Returns the DateArray object for the attribute. Syntax: Here is the method signature: DateArray getDates() setDates Sets the DateArray object for the attribute. Syntax: Here is the method signature: void setDates(DateArray DatesVal) getIntegers Returns the IntegerArray object for the attribute. Syntax: Here is the method signature: IntegerArray getIntegers() setIntegers Sets the IntegerArray object for the attribute. Syntax: Here is the method signature: void setIntegers(IntegerArray IntegersVal) getStrings Returns the StringArray object for the attribute. Syntax: Here is the method signature: StringArray getStrings() 550 Identity Manager Roles Based Provisioning Module 3.7 User Application: Administration Guide setStrings Set the StringArray object for the attribute. Syntax: Here is the method signature: void setStrings(StringArray StringsVal) getType Returns the AttributeType object for the attribute. Syntax: Here is the method signature: AttributeType getType() setType Sets the AttributeType object for the attribute. Syntax: Here is the method signature: void setType(AttributeType TypeVal) 21.2.3 AttributeArray This section provides reference information on the AttributeArray class. AttributeArray constructors The AttributeArray class has two constructors. Syntax 1: Here is the syntax for a constructor that takes no parameters: AttributeArray() Syntax 2: Here is the syntax for a constructor that takes an array of Attribute objects as a parameter: AttributeArray(Attribute[] AttributeVal) getAttribute Returns an array of Attribute objects. Syntax: Here is the method signature: Attribute[] getAttribute() setAttribute Sets the array of Attribute objects associated with the AttributeArray class. Syntax: Here is the method signature: void setAttribute(Attribute[] AttributeVal) Directory Abstraction Layer (VDX) Web Service 551 21.2.4 AttributeType This section provides reference information on the AttributeType class. AttributeType constructors The AttributeType class supports a single constructor. Syntax: Here is the syntax for the constructor: protected AttributeType(java.lang.String value) getValue Returns a String that indicates the attribute type. Syntax: Here is the method signature: java.lang.String getValue() 21.2.5 BooleanArray This section provides reference information for the BooleanArray class. BooleanArray constructors The BooleanArray class has two constructors. Syntax 1: Here is the syntax for a constructor that takes no parameters: BooleanArray() Syntax 2: Here is the syntax for a constructor that takes a boolean value as a parameter: BooleanArray(boolean[] BooleanVal) getBoolean Returns an array of boolean values for an attribute. Syntax: Here is the method signature: boolean[] getBoolean() setBoolean Sets an array of boolean values for an attribute. Syntax: Here is the method signature: void setBoolean(boolean[] BooleanVal) 21.2.6 ByteArrayArray This section provides reference information on the ByteArrayArray class. 552 Identity Manager Roles Based Provisioning Module 3.7 User Application: Administration Guide ByteArrayArray constructors The ByteArrayArray class has two constructors. Syntax 1: Here is the syntax for a constructor that takes no parameters: ByteArrayArray() Syntax 2: Here is the syntax for a constructor that takes a Base 64 binary value as a parameter: ByteArrayArray(byte[][] Base64BinaryVal) getBase64Binary Returns a two-dimensional array of bytes for an attribute. Syntax: Here is the method signature: byte[][] getBase64Binary() setBase64Binary Sets a two-dimensional array of bytes for an attribute. Syntax: Here is the method signature: void setBase64Binary(byte[][] Base64BinaryVal) 21.2.7 DateArray This section provides reference information for the DateArray class. DateArray constructors The DateArray class has two constructors. Syntax 1: Here is the syntax for a constructor that takes no parameters: DateArray() Syntax 2: Here is the syntax for a constructor that takes a Calendar array as a parameter: DateArray(java.util.Calendar[] DatetimeVal) getDatetime Returns an array of Calendar objects for an attribute. Syntax: Here is the method signature: java.util.Calendar[] getDatetime() setDatetime Sets an array of Calendar objects for an attribute. Syntax: Here is the method signature: Directory Abstraction Layer (VDX) Web Service 553 void setDatetime(java.util.Calendar[] DatetimeVal) 21.2.8 EntryAttributeMap The EntryAttributeMap class is a container for an EntryArray object. It is returned by the query method on the stub. This section provides reference information on the methods associated with the EntryAttributeMap class. EntryAttributeMap constructors The EntryAttributeMap class has two constructors. Syntax 1: Here is the syntax for a constructor that takes no parameters: EntryAttributeMap() Syntax 2: Here is the syntax for a constructor that takes an EntryArray object as a parameter: EntityAttributeMap(EntryArray EntriesVal) getEntries Returns the EntryArray object contained within this EntryAttributeMap object. Syntax: Here is the method signature: EntryArray getEntries() setEntries Sets the EntryArray object for this EntryAttributeMap object. Syntax: Here is the method signature: void setEntry(EntryArray EntriesVal) 21.2.9 Entry The Entry class represents an entry in an EntryArray object. This section provides reference information for each method associated with the Entry class. Entry constructors The Entry class has two constructors. Syntax 1: Here is the syntax for a constructor that takes no parameters: Entry() Syntax 2: Here is the syntax for a constructor that takes two parameters, the key value and an array of attribute values: Entry(java.lang.String KeyVal, AttributeArray ValuesVal) 554 Identity Manager Roles Based Provisioning Module 3.7 User Application: Administration Guide getKey Returns the key defined for the Entry object. The key identifies the attribute. Syntax: Here is the method signature: java.lang.String getKey() setKey Sets the key for the Entry object. The key identifies the attribute. Syntax: Here is the method signature: void setKey(java.lang.String KeyVal) getValues Returns a AttributeArray object representing the values for the Entry object. Syntax: Here is the method signature: AttributeArray getValues() setValues Sets the values for the Entry object. Syntax: Here is the method signature: void setValues(AttributeArray ValuesVal) 21.2.10 EntryArray The EntryArray class is a container for an array of Entry objects. It is contained by the EntryAttributeMap object. This section provides reference information on the methods associated with the EntryArray class. EntryArray constructors The EntryArray class has two constructors. Syntax 1: Here is the syntax for a constructor that takes no parameters: EntryArray() Syntax 2: Here is the syntax for a constructor that takes an array of Entry objects as a parameter: EntryArray(Entry[] EntryVal) getEntry Returns the Entry object contained within this EntryArray object. Syntax: Here is the method signature: Entry[] getEntry() Directory Abstraction Layer (VDX) Web Service 555 setEntry Sets the Entry object for this EntryArray object. Syntax: Here is the method signature: void setEntry(Entry[] EntryVal) 21.2.11 IntegerArray This section provides reference information for the IntegerArray class. IntegerArray constructors The IntegerArray class has two constructors. Syntax 1: Here is the syntax for a constructor that takes no parameters: IntegerArray() Syntax 2: Here is the syntax for a constructor that takes an int array as a parameter: IntegerArray(int[] IntVal) getInt Returns an array of integers for an attribute. Syntax: Here is the method signature: int[] getInt() setInt Sets an array of integers for an attribute. Syntax: Here is the method signature: void setInt(int[] IntVal) 21.2.12 StringArray The StringArray class is a container for an array of String objects. When you call the query() and getAttributes() methods, you pass in a StringArray object to specify which attributes you want to retrieve values for. This section provides reference information for the StringArray class. StringArray constructors The StringArray class has two constructors. Syntax 1: Here is the syntax for a constructor that takes no parameters: StringArray() Syntax 2: Here is the syntax for a constructor that takes an String array as a parameter: 556 Identity Manager Roles Based Provisioning Module 3.7 User Application: Administration Guide StringArray(java.lang.String[] StringVal) getString Returns the array of String objects associated with the StringArray object. Syntax: Here is the method signature: java.lang.String[] getString() setString Sets the array of String objects associated with the StringArray object. Syntax: Here is the method signature: void setString(java.lang.String[] StringVal) 21.2.13 StringEntry The StringEntry class is contained by the the StringEntryArray class. This section provides reference information for the StringEntry class. StringEntry constructors The StringEntry class has two constructors. Syntax 1: Here is the syntax for a constructor that takes no parameters: StringEntry() Syntax 2: Here is the syntax for a constructor that takes a key and a String value as parameters: StringEntry(java.lang.String KeyVal, java.lang.String ValuesVal) getKey Returns the key defined for the StringEntry object. Syntax: Here is the method signature: java.lang.String getKey() setKey Sets the key for the StringEntry object. Syntax: Here is the method signature: void setKey(java.lang.String KeyVal) 21.2.14 StringEntryArray The StringEntryArray class is a container for an array of StringEntry objects. It is contained by the StringMap object. Directory Abstraction Layer (VDX) Web Service 557 This section provides reference information for the StringEntryArray class. StringEntryArray constructors The StringEntryArray class has two constructors. Syntax 1: Here is the syntax for a constructor that takes no parameters: StringEntryArray() Syntax 2: Here is the syntax for a constructor that takes a StringEntry array as a parameter: StringEntryArray(StringEntry[] StringentryVal) getStringentry Returns the key for the StringEntryArray object. Syntax: Here is the method signature: StringEntry[] getStringentry() setStringentry Sets the key for the StringEntryArray object. Syntax: Here is the method signature: void setStringentry(StringEntry[] StringentryVal) 21.2.15 StringMap The StringMap is a container for a StringEntryArray object. This section provides reference information on the StringMap class. StringMap constructors The StringMap class has two constructors. Syntax 1: Here is the syntax for a constructor that takes no parameters: StringMap() Syntax 2: Here is the syntax for a constructor that takes a StringEntryArray as a parameter: StringMap(StringEntryArray EntriesVal) getEntries Returns the StringEntryArray object contained by this StringMap object. Syntax: Here is the method signature: StringEntryArray getEntries() 558 Identity Manager Roles Based Provisioning Module 3.7 User Application: Administration Guide setEntries Sets the StringEntryArray object for this StringMap object. Syntax: Here is the method signature: void setEntries(StringEntryArray EntriesVal) 21.2.16 VdxService This section provides reference information for the VdxService interface. getIRemoteVdxPort Gets the stub for the remote service. The stub is a port of type IRemoteVdx. Syntax: Here is the method signature: IRemoteVdx getIRemoteVdxPort() throws javax.xml.rpc.ServiceException; 21.2.17 VersionVO This section provides reference information on the VersionVO class. getValue Returns the version number of the service. Syntax: Here is the method signature: java.lang.String getValue() 21.3 VDX Example The following code example shows how one might use the VDX service to access the attributes associated with entities defined in the directory abstraction layer. It demonstrates the use of ad hoc searches, as well as predefined searches called global queries. This code listing includes examples that use the getAttribute(), getAttributes(), query(), and globalQuery() methods on the service. To get a reference to the SOAP endpoint for the VDX service, it calls a method called getVdxStub(). The implementation for this method is shown at the end of the listing: import java.util.Properties; import import import import import import import import import import import import javax.naming.Context; javax.naming.InitialContext; javax.xml.rpc.Stub; java.rmi.RemoteException; java.io.File; java.io.FileNotFoundException; java.io.FileOutputStream; java.io.IOException; java.rmi.RemoteException; java.util.Calendar; java.util.Date; java.util.Hashtable; Directory Abstraction Layer (VDX) Web Service 559 import // // Vdx import import import import import import import import import import import import import import import java.util.Map; imports com.novell.ws.client.vdx.IRemoteVdx; com.novell.ws.client.vdx.VdxService; com.novell.ws.client.vdx.VdxServiceException; com.novell.ws.client.vdx.VersionVO; com.novell.ws.client.vdx.Attribute; com.novell.ws.client.vdx.AttributeArray; com.novell.ws.client.vdx.AttributeType; com.novell.ws.client.vdx.ByteArrayArray; com.novell.ws.client.vdx.BooleanArray; com.novell.ws.client.vdx.DateArray; com.novell.ws.client.vdx.StringArray; com.novell.ws.client.vdx.IntegerArray; com.novell.ws.client.vdx.EntryArray; com.novell.ws.client.vdx.Entry; com.novell.ws.client.vdx.EntityAttributeMap; public class ServiceTest { public static final int public static final int public static final int public static final int VDX = 0; NOTIFICATION = 1; RESOURCE = 2; ENDPOINT_SERVICE = VDX; private static final int LOCALHOST = 0; // localhost private static final int TESTSERVER = 1; // testserver private static final int SELECTED_URL = TESTSERVER; private String [] SERVER_URLS = { "http://localhost:8080/IDMProv/vdx/service", "http://testserver:8080/IDMProv/vdx/service" }; private String url = SERVER_URLS[SELECTED_URL]; private String username = "cn=admin,ou=idmsample,o=novell"; private String password = "test"; private String [] userAttributes = { //"passwordAllowChange", "UserPhoto", //"loginTime", "Department", "Title", "Email", "manager", "TelephoneNumber", "directReports", "FirstName", //"surname", "group", "srvprvHideAttributes", "NotificationPrefs", "srvprvQueryList", "Location", }; // boolean // binary // time // string // dn = string 560 Identity Manager Roles Based Provisioning Module 3.7 User Application: Administration Guide public ServiceTest() { }; public static void main(String [] args) { ServiceTest serviceTest = new ServiceTest(); // // Set default if no params are given int wService = ENDPOINT_SERVICE; if(args.length == 1) wService = Integer.parseInt(args[0]); try { serviceTest.run(wService); } catch(Exception e) { System.exit(-1); } } private void waitHere(long _time) { try { Thread.sleep(_time * 1000); } catch(InterruptedException ie) {} } public void run(int _service) throws Exception { if(_service == VDX) { System.out.println("Calling VDX endpoint"); // // Get the version number getVersionTestCase(); waitHere(2); // // Get attribute data for entity user getAttributeTestCase(); waitHere(2); // // Get attributes getAttributesTestCase(); waitHere(2); // // Query attributes queryAttributesTestCase(); waitHere(2); // // Global query // Global query MUST be associated with a defined and deployed query. // This can be done via the Designer. globalQueryTestCase(); } else if(_service == NOTIFICATION) { System.out.println("Calling Notification endpoint"); Directory Abstraction Layer (VDX) Web Service 561 NotificationTest notificationTest = new NotificationTest(); // // Email Notification notificationTest.emailNotificationTestCase(); } else if(_service == RESOURCE) { System.out.println("Calling Resource endpoint"); } else { System.out.println("Unrecognized service selection"); } } public void globalQueryTestCase() throws Exception { System.out.println("\n<=========queryAttributesTestCase=========>"); try { // // Get the vdx stub IRemoteVdx vdxStub = getVdxStub(url, username, password); // // Create entry items corresponding to param key in DAL StringEntry [] entry = { new StringEntry("titleattribute", "Chief Operating Officer"), new StringEntry("managerattribute", "cn=jmiller,ou=users,ou=idmsample-pproto,o=novell") }; // // Create and set the array of entries (key,value pairs) StringEntryArray entryArr = new StringEntryArray(); entryArr.setStringentry(entry); // // Create and set the map using the entries StringMap map = new StringMap(); map.setEntries(entryArr); // // Define and execute the global query int QUERY_KEY_INDEX = 0; String [] queryKeyName = {"TestVdxGlobalQuery2", "TestVdxGlobalQuery"}; // // Results from global query TestVdxGlobalQuery2 -----> cn=apalani,ou=users,OU=idmsample-pproto,O=novell // // Make the vdx endpoint call StringArray array = vdxStub.globalQuery(queryKeyName[QUERY_KEY_INDEX], map); String [] str = array.getString(); if(str == null) 562 Identity Manager Roles Based Provisioning Module 3.7 User Application: Administration Guide throw new Exception("Global query returns null for key name " + queryKeyName); else { System.out.println("Results for global query : " + queryKeyName[QUERY_KEY_INDEX]); System.out.println("================================================= ==="); for(int index = 0; index < str.length; index++) { System.out.println(str[index]); } } } catch(VdxServiceException error) { System.out.println(error.getReason() ); throw new Exception(error.getReason() ); } catch(RemoteException error) { System.out.println(error.getMessage() ); throw new Exception(error.getMessage() ); } } public void queryAttributesTestCase() throws Exception { System.out.println("\nCalling queryAttributesTestCase() test case"); try { IRemoteVdx vdxStub = getVdxStub(url, username, password); StringArray attributes = new StringArray(); attributes.setString(new String[]{"FirstName", "Title", "UserPhoto", "Department"}); String expression1 = "FirstName STARTWITH 'J'"; String expression2 = "Title = 'Controller'"; String expression3 = "vdxInteger > 0"; String expression4 = "TelephoneNumber != '(555) 555-1201'"; // // Test Cases // expression1 --> Should yield all users whose firstname starts with J // expression1 AND expression2 --> Should yield jkelley who is the Controller // expression1 AND expression3 --> Should yield only jmiller // expression1 AND expression4 --> Should yield all users starting with J EXCEPT jmiller String finalExpression = expression1 + " AND " + expression2; // // Make the vdx endpoint call EntityAttributeMap map = vdxStub.query("user", attributes, finalExpression); Directory Abstraction Layer (VDX) Web Service 563 EntryArray entryArray = map.getEntries(); Entry [] entries = entryArray.getEntry(); if(entries != null) { for(int index = 0; index < entries.length; index++) { String dnKey = entries[index].getKey(); System.out.println("DN Key = " + dnKey); AttributeArray attributeArray = entries[index].getValues(); Attribute [] attributeData = attributeArray.getAttribute(); for(int attrIndex = 0; attrIndex < attributeData.length; attrIndex++) { // // Determine how to handle the return data examineAttributeData(attributeData[attrIndex], " "); } } } } catch(VdxServiceException error) { System.out.println(error.getReason() ); throw new Exception(error.getReason() ); } catch(RemoteException error) { System.out.println(error.getMessage() ); throw new Exception(error.getMessage() ); } } public void getVersionTestCase() throws Exception { System.out.println("\nCalling getVersionTestCase() test case"); try { IRemoteVdx vdxStub = getVdxStub(url, username, password); VersionVO version = vdxStub.getVersion(); System.out.println("Version : " + version.getValue() ); } catch(RemoteException error) { System.out.println(error.getMessage() ); throw new Exception(error.getMessage() ); } } public void getAttributeTestCase() throws Exception 564 Identity Manager Roles Based Provisioning Module 3.7 User Application: Administration Guide { System.out.println("\nCalling getAttributeTestCase() test case"); try { IRemoteVdx vdxStub = getVdxStub(url, username, password); String recipient = "cn=jmiller,ou=users,ou=idmsample,o=novell"; String entity = "user"; for(int attributeIndex = 0; attributeIndex < userAttributes.length; attributeIndex++) { // // Now, get the values for each attribute from the VDX layer Attribute attributeData = vdxStub.getAttribute(recipient, entity, userAttributes[attributeIndex]); // // Determine how to handle the return data examineAttributeData(attributeData, userAttributes[attributeIndex]); } } catch(VdxServiceException error) { System.out.println(error.getReason() ); throw new Exception(error.getReason() ); } catch(RemoteException error) { System.out.println(error.getMessage() ); throw new Exception(error.getMessage() ); } } public void getAttributesTestCase() throws Exception { System.out.println("\nCalling getAttributesTestCase() test case"); try { IRemoteVdx vdxStub = getVdxStub(url, username, password); String recipient = "cn=jmiller,ou=users,ou=idmsample,o=novell"; String entity = "user"; StringArray userAttributesArray = new StringArray(userAttributes); AttributeArray attributeArray = vdxStub.getAttributes(recipient, entity, userAttributesArray); Attribute [] attributeData = attributeArray.getAttribute(); for(int index = 0; index < attributeData.length; index++) { Directory Abstraction Layer (VDX) Web Service 565 // // Determine how to handle the return data examineAttributeData(attributeData[index], userAttributes[index]); } } catch(VdxServiceException error) { System.out.println(error.getReason() ); throw new Exception(error.getReason() ); } catch(RemoteException error) { System.out.println(error.getMessage() ); throw new Exception(error.getMessage() ); } } private void examineAttributeData(Attribute _attribute, String _attributeName) throws Exception { AttributeType type = _attribute.getType(); System.out.println("Attribute type : " + type); // // What type are we dealing with? if(type.getValue().compareTo(AttributeType._Integer) == 0) { IntegerArray intArray = _attribute.getIntegers(); int [] intData = intArray.getInt(); if(intData == null) System.out.println(_attributeName + " attribute : " + "null because no attribute value exists."); else { for(int intIndex = 0; intIndex < intData.length; intIndex++) { System.out.println(_attributeName + " attribute : " + intData[intIndex]); } } } else if(type.getValue().compareTo(AttributeType._Boolean) == 0) { BooleanArray boolArray = _attribute.getBooleans(); boolean [] booleanData = boolArray.getBoolean(); if(booleanData == null) System.out.println(_attributeName + " attribute : " + "null because no attribute value exists."); else { for(int boolIndex = 0; boolIndex < booleanData.length; boolIndex++) { System.out.println(_attributeName + " attribute : " + booleanData[boolIndex]); } 566 Identity Manager Roles Based Provisioning Module 3.7 User Application: Administration Guide } } else if( (type.getValue().compareTo(AttributeType._String) == 0) || (type.getValue().compareTo(AttributeType._DN) == 0) ) { StringArray dataArray = _attribute.getStrings(); String [] stringData = dataArray.getString(); if(stringData == null) System.out.println(_attributeName + " attribute : " + "null because no attribute value exists."); else { for(int strIndex = 0; strIndex < stringData.length; strIndex++) { System.out.println(_attributeName + " attribute : " + stringData[strIndex]); } } } else if(type.getValue().compareTo(AttributeType._Binary) == 0) { ByteArrayArray byteArray = _attribute.getBinaries(); byte [][] byteData = byteArray.getBase64Binary(); if(byteData == null) System.out.println(_attributeName + " attribute : " + "null because no attribute value exists."); else { for(int byteIndex = 0; byteIndex < byteData.length; byteIndex++) { byte [] data = byteData[byteIndex]; // // Save the data to a gif file and view it to // make sure the binary return data is correct. try { File fileObj = new File("C:\\temp\\photo.gif"); if(fileObj.exists()) fileObj.delete(); FileOutputStream fout = new FileOutputStream(fileObj); fout.write(data); fout.flush(); } catch(FileNotFoundException fne) { throw new Exception(fne.getMessage()); } catch(IOException ioe) { throw new Exception(ioe.getMessage()); } } } } else if(type.getValue().compareTo(AttributeType._Time) == 0) Directory Abstraction Layer (VDX) Web Service 567 { DateArray dateArray = _attribute.getDates(); Calendar [] calendar = dateArray.getDatetime(); if(calendar == null) System.out.println(_attributeName + " attribute : " + "null because no attribute value exists."); else { for(int calIndex = 0; calIndex < calendar.length; calIndex++) { System.out.println(_attributeName + " attribute : " + calendar[calIndex].getTime().toString()); } } } } /** * Method to obtain the remote interface to the Vdx endpoint * @param _url * @param _username * @param _password * @return IRemoteMetrics interface * @throws Exception */ private IRemoteVdx getVdxStub(String _url, String _username, String _password) throws Exception { Properties properties = new Properties(); properties.put(Context.INITIAL_CONTEXT_FACTORY, "org.jnp.interfaces.NamingContextFactory"); String lookup = "xmlrpc:soap:com.novell.ws.client.vdx.VdxService"; InitialContext ctx = new InitialContext(); VdxService svc = (VdxService) ctx.lookup(lookup); Stub stub = (Stub)svc.getIRemoteVdxPort(); stub._setProperty(Stub.USERNAME_PROPERTY, _username); stub._setProperty(Stub.PASSWORD_PROPERTY, _password); stub._setProperty(Stub.SESSION_MAINTAIN_PROPERTY, Boolean.TRUE); stub._setProperty(Stub.ENDPOINT_ADDRESS_PROPERTY, _url); return (IRemoteVdx) stub; } } 568 Identity Manager Roles Based Provisioning Module 3.7 User Application: Administration Guide 22 Role Web Service 2 This section describes the Role Web Service, which allows SOAP clients to access the role management and SoD management functions. Topics include: Section 22.1, “About the Role Web Service,” on page 569 Section 22.2, “Role API,” on page 573 Section 22.3, “Role Web Service Example,” on page 652 22.1 About the Role Web Service To support access by third-party software applications, the Role subsystem includes a Web service endpoint called the Role Web Service. It supports a wide range of role management and SoD management functions. This Appendix describes the programming interface for the Role Web Service. 22.1.1 Accessing the Test Page You can access the Role Web Service endpoint using a URL similar to the following: http://server:port/warcontext/role/service?test For example, if your server is named “myserver”, your User Application is listening on port 8080, and your User Application war file is named “IDMPROV”, the URL would be: http://myserver:8080/IDMPROV/role/service?test You can also access the SOAP endpoint by going to the Administration within the User Application. To do this, you need to select the Application Configuration tab, then select Web Services from the left-navigation menu. After selecting Web Services, pick the Web Service endpoint you want from the list. WARNING: The test page is disabled by default. Since some of the methods allow data to be updated, the test page presents a potential security vulnerability and should not be allowed in a production environment. Servlet Declaration for the Test Page A SOAP service using WSSDK is deployed by adding the following declarations in the deployment descriptor (i.e. WEB-INF/web.xml): <servlet> <servlet-name>Role</servlet-name> <servletclass>com.novell.idm.nrf.soap.ws.role.impl.RoleServiceSkeletonImpl</servletclass> Role Web Service 569 <servlet-mapping> <servlet-name>Role</servlet-name> <url-pattern>/role/service</url-pattern> </servlet-mapping> </servlet> This follows the normal servlet declaration pattern. It indicates that the servlet com.novell.idm.nrf.soap.ws.role.impl.RoleServiceSkeletonImpl is deployed at /role/service. When a user reaches this servlet using a HTTP GET by entering http://server-name/context/role/ service (for example, http://localhost:8080/IDMProv/role/service) in their browser, the WSSDK provides a page that exposes some information about the deployed service. By default the page looks like this: Figure 22-1 SOAP Service with Test Page Disabled After you enable the test page, the Test Service link is available: 570 Identity Manager Roles Based Provisioning Module 3.7 User Application: Administration Guide Figure 22-2 SOAP Servlet with Test Page Enabled On the test page, the user can retrieve the WSDL document that describes the Web Service, see the Java Remote Interface that represents the service, and also see the type mappings from XML to Java. In addition, the user can test the service by invoking individual methods. Enabling the Test Page WARNING: The test page is disabled by default. Since some of the methods allow data to be updated, the test page presents a potential security vulnerability and should not be allowed in a production environment. To enable the test page, you need to update the web.xml file. Before you make your changes, the web.xml should look like this: <servlet> <servlet-name>Role</servlet-name> <servletclass>com.novell.idm.nrf.soap.ws.role.impl.RoleServiceSkeletonImpl</servletclass> <init-param> <param-name>com.novell.soa.ws.test.disable</param-name> <param-value>true</param-value> </init-param> </servlet> Change the servlet declaration, as follows: Role Web Service 571 <servlet> <servlet-name>Role</servlet-name> <servletclass>com.novell.idm.nrf.soap.ws.role.impl.RoleServiceSkeletonImpl</servletclass> </servlet> 22.1.2 Accessing the WSDL You can access the WSDL for the Role Web Service using a URL similar to the following: http://server:port/warcontext/role/service?wsdl For example, if your server is named “myserver”, your User Application is listening on port 8080, and your User Application war file is named “IDMPROV”, the URL would be: http://myserver:8080/IDMPROV/role/service?wsdl 22.1.3 Generating the Stub Classes Before using the Web Service, you need to use the WSSDK tool or another SOAP tool kit to generate the stub classes. To allow your code to find the stub classes, you also need to add the JAR that contains the stub classes to your classpath. If you want to use the Novell WSSDK tool, you can generate the client stubs by extracting the WSDL and running the wsdl2java utility. For example, you could run this command to generate the stubs in a package called com.novell.soa.af.role.soap.impl: "C:\Program Files\Java\jdk1.5.0_14\bin\java" -cp "../lib/wssdk.jar;../lib/ jaxrpc-api.jar";"../lib/mail.jar";"../lib/activation.jar";"c:\Program Files\Java\jdk1.5.0_14\lib\tools.jar"; com.novell.soa.ws.impl.tools.wsdl2java.Main -verbose -ds gensrc -d C:\ -noskel -notie -genclient -keep -package com.novell.soa.af.role.soap.impl -javadoc role.wsdl You can change the wsdl2java parameters to suit your requirements. 22.1.4 Removing Administrator Credential Restrictions The Role Web Service supports two levels of security, one that restricts access to Role Administrators, and another that restricts access to the authenticated user. The default setting restricts access to all operations to the Role Administrator. You can modify the security configuration by extracting the /RoleService-conf/config.xml file from the IDMfw.jar file in the IDMProv.war file, and editing the property settings. Each property can be set to true or false. A value of true locks down the operation, whereas a value of false opens up the operation. After making your changes, you need to import the file back into the WAR file and redeploy. You can open up the Role Web Service to authenticated users by setting the RoleService/Role/soap property to false. To open up a particular operation to authenticated users, you need to set the property for that operation (RoleService/Role/soap/operation) to false as well. If you set all of the properties to false, you can open up all operations to authenticated users. The operation names are the same as the names of the methods supported by the service. 572 Identity Manager Roles Based Provisioning Module 3.7 User Application: Administration Guide Example The following example shows a security configuration that would open up all operations within the Role Web Service: <property> <key>RoleService/Role/soap</key> <value>false</value> </property> 22.2 Role API This section provides details about the methods available with the Role Web service. This API presumes you’re using Java code generated by the WSSDK toolkit. The API will be different if you’re using another Web Service toolkit. 22.2.1 IRemoteRole This section provides reference information for each method associated with the IRemoteRole interface. createRole Creates a new role according to the specified parameters and returns the DN of the created role. Syntax: Here is the method signature: public DNString createRole(RoleRequest role) throws NrfServiceException, RemoteException; findRoleByExampleWithOperator Finds an array of Role objects based on the search criteria specified in the given Role object. This method also lets you specify whether to use AND as the operator for multi-value searches. Syntax: Here is the method signature: RoleArray findRoleByExampleWithOperator(Role searchCriteria, boolean useAndForMultiValueSearch) throws NrfServiceException, java.rmi.RemoteException This method follows a query by example approach. It allows you to populate a Role object to specify the desired search criteria. An AND operation is always used across multiple attributes within the Role search object. For example, you might provide a value for the name and description attributes, which indicates that the criteria for both attributes must be satisfied for a successful search. The second parameter (useAndForMultiValueSearch) allows you to specify which operator should be used for multi-valued attributes (such as when multiple child roles are provided). A value of true indicates that AND should be used for these operations, whereas a value of false indicates that OR should be used. Not all attributes in the Role object can be used for the search expression. Values found in the nonsupported search attributes are ignored. Role Web Service 573 Table 22-1 Guidelines for Defining Search Criteria in the Role Object Attribute Supported? Description approvers Yes Uses a standard LDAP equal operator for the search. You can enter multiple approvers and use the operator parameter to determine whether an AND or an OR is used for the multi-valued search. You need to provide valid Dns for the approvers. Note that an approver is made up of multiple parts. It is of type TypedNameSyntax. You need to specify the sequence number of the approver to execute a successful search. This is a limitation in LDAP. Sample SOAP Request: <ser:findRoleByExampleWithOperatorRequest> <ser:role> <ser:approvers> <!--Zero or more repetitions:--> <ser:approver> <ser:approverDN>cn=ablake,ou=users,ou=medical -idmsample,o=novell</ser:approverDN> <ser:sequence>1</ser:sequence> </ser:approver> </ser:approvers> </ser:role> <ser:operator>false</ser:operator> </ser:findRoleByExampleWithOperatorRequest> The example above shows how to find roles that have the specified approver associated with them. An OR search is used since the operator parameter is set to false. 574 Identity Manager Roles Based Provisioning Module 3.7 User Application: Administration Guide Attribute Supported? Description childRoles Yes Uses a standard LDAP equal operator for the search. You can enter multiple child roles and use the operator parameter to determine whether an AND or an OR is used for the multi-valued search. You need to provide valid Dns for the child roles. Sample SOAP Request: <ser:findRoleByExampleWithOperatorRequest> <ser:role> <ser:childRoles> <!--Zero or more repetitions:--> <ser:dnstring> <ser:dn>cn=Doctor,cn=Level20,cn=RoleDefs,cn=R oleConfig,cn=AppConfig,cn=PicassoDriver,cn=TestDr ivers,o=novell</ser:dn> </ser:dnstring> <ser:dnstring> <ser:dn>cn=Nurse,cn=Level20,cn=RoleDefs,cn=Ro leConfig,cn=AppConfig,cn=PicassoDriver,cn=TestDri vers,o=novell</ser:dn> </ser:dnstring> </ser:childRoles> </ser:role> <ser:operator>false</ser:operator> </ser:findRoleByExampleWithOperatorRequest> The example above shows how to find roles with a child role of “Doctor” or “Nurse. An OR search is used since the operator parameter is set to false. description Yes Uses an LDAP contains search. All entries are prefixed and suffixed with the * (wild card character). Therefore, a search for “Doctor” translates to “*Doctor*”. This is to accommodate searches across any localized language. Sample SOAP Request: <ser:findRoleByExampleWithOperatorRequest> <ser:role> <ser:description>Doctor</ser:description> </ser:role> <ser:operator>false</ser:operator> </ser:findRoleByExampleWithOperatorRequest> The example above shows how to find roles with a description of “Doctor”. This description string results in a search string of “*Doctor*”. Role Web Service 575 Attribute Supported? Description entityKey Yes If entered, this attribute causes a getRole operation to be performed. All other search criteria are ignored in this case. Sample SOAP Request: <ser:findRoleByExampleWithOperatorRequest> <ser:role> <ser:entityKey>cn=Doctor,cn=Level20,cn=RoleDefs ,cn=RoleConfig,cn=AppConfig,cn=PicassoDriver,cn=T estDrivers,o=novell</ser:entityKey> </ser:role> <ser:operator>false</ser:operator> </ser:findRoleByExampleWithOperatorRequest> The example above shows how to retrieve a role with a specific entity key. implicitContainers Yes Uses a standard LDAP equal operator for the search. You can enter multiple implicit containers and use the operator parameter to determine whether an AND or an OR will be used for the multivalued search. You need to provide valid Dns for the implicit containers. Sample SOAP Request: <ser:findRoleByExampleWithOperatorRequest> <ser:role> <ser:implicitContainers> <!--Zero or more repetitions:--> <ser:dnstring> <ser:dn>ou=medical-idmsample,o=novell</ ser:dn> </ser:dnstring> </ser:implicitContainers> </ser:role> <ser:operator>false</ser:operator> </ser:findRoleByExampleWithOperatorRequest> The example above shows how to find roles that have the specified implicit container associated with them. An OR search is used since the operator parameter is set to false. 576 Identity Manager Roles Based Provisioning Module 3.7 User Application: Administration Guide Attribute Supported? Description implicitGroups Yes Uses a standard LDAP equal operator for the search. You can enter multiple implicit groups and use the operator parameter to determine whether an AND or an OR will be used for the multivalued search. You need to provide valid Dns for the implicit groups. Sample SOAP Request: <ser:findRoleByExampleWithOperatorRequest> <ser:role> <ser:implicitGroups> <!--Zero or more repetitions:--> <ser:dnstring> <ser:dn>cn=HR,ou=groups,ou=medicalidmsample,o=novell</ser:dn> </ser:dnstring> </ser:implicitGroups> </ser:role> <ser:operator>false</ser:operator> </ser:findRoleByExampleWithOperatorRequest> The example above shows how to find roles that have the specified implicit group associated with them. An OR search is used since the operator parameter is set to false. name Yes Uses an LDAP contains search. All entries will be prefixed and suffixed with the * (wild card character). Therefore, a search for “Doctor” translates to “*Doctor*”. This is to accommodate searches across any localized language. Sample SOAP Request: <ser:findRoleByExampleWithOperatorRequest> <ser:role> <ser:name>Doctor</ser:name> </ser:role> <ser:operator>false</ser:operator> </ser:findRoleByExampleWithOperatorRequest> The above example shows how to find roles with a name of “Doctor”. The name string results in a search string of “*Doctor*”. Role Web Service 577 Attribute Supported? Description owners Yes Uses a standard LDAP equal operator for the search. You can enter multiple owners and use the operator parameter to determine whether an AND or an OR is used for the multi-valued search. You must provide valid Dns for the owners. SoapUI Example Request: <ser:findRoleByExampleWithOperatorRequest> <ser:role> <ser:owners> <!--Zero or more repetitions:--> <ser:dnstring> <ser:dn>cn=ablake,ou=users,ou=medicalidmsample,o=novell</ser:dn> </ser:dnstring> <ser:dnstring> <ser:dn>cn=mmackenzie,ou=users,ou=medicalidmsample,o=novell</ser:dn> </ser:dnstring> </ser:owners> </ser:role> <ser:operator>true</ser:operator> </ser:findRoleByExampleWithOperatorRequest> The example above shows how to find roles that have the specified owners. An AND search is used since the operator parameter is set to true. 578 Identity Manager Roles Based Provisioning Module 3.7 User Application: Administration Guide Attribute Supported? Description parentRoles Yes Uses a standard LDAP equal operator for the search. You can enter multiple parent roles and use the operator parameter to determine whether an AND or an OR is used for the multi-valued search. You must provide valid Dns for the parent roles. Sample SOAP Request: <ser:findRoleByExampleWithOperatorRequest> <ser:role> <ser:parentRoles> <!--Zero or more repetitions:--> <ser:dnstring> <ser:dn>cn=DoctorEast,cn=Level30,cn=RoleDefs,cn=RoleConfig,cn=AppC onfig,cn=PicassoDriver,cn=TestDrivers,o=novell</ ser:dn> </ser:dnstring> <ser:dnstring> <ser:dn>cn=DoctorWest,cn=Level30,cn=RoleDefs,cn=RoleConfig,cn=AppC onfig,cn=PicassoDriver,cn=TestDrivers,o=novell</ ser:dn> </ser:dnstring> </ser:parentRoles> </ser:role> <ser:operator>true</ser:operator> </ser:findRoleByExampleWithOperatorRequest> The example above shows how to find roles that have the specified parent roles. An AND search is used since the operator parameter is set to true. quorum Yes Uses a standard LDAP equal operator for the search. Sample SOAP Request: <ser:findRoleByExampleWithOperatorRequest> <ser:role> <ser:quorum>50%</ser:quorum> </ser:role> <ser:operator>false</ser:operator> </ser:findRoleByExampleWithOperatorRequest> The example above shows how to find roles with the specified quorum search string. The search string can include the wild card character (“*”). Role Web Service 579 Attribute Supported? Description requestDef Yes Uses a standard LDAP equal operator for the search. You must provide a valid DN for the request definition. Sample SOAP Request: <ser:findRoleByExampleWithOperatorRequest> <ser:role> <ser:requestDef>cn=Role Approval,cn=RequestDefs,cn=AppConfig,cn=PicassoDr iver,cn=TestDrivers,o=novell</ser:requestDef> </ser:role> <ser:operator>false</ser:operator> </ser:findRoleByExampleWithOperatorRequest> The example above shows how to find roles with the specified request definition DN. roleCategoryKeys Yes Uses a standard LDAP equal operator for the search. You can enter multiple category keys and use the operator parameter to determine whether an AND or an OR is used for the multi-valued search. Sample SOAP Request: <ser:findRoleByExampleWithOperatorRequest> <ser:role> <ser:roleCategoryKeys> <!--Zero or more repetitions:--> <ser:categorykey> <ser:categoryKey>doctor</ser:categoryKey> </ser:categorykey> <ser:categorykey> <ser:categoryKey>nurse</ser:categoryKey> </ser:categorykey> </ser:roleCategoryKeys> </ser:role> <ser:operator>false</ser:operator> </ser:findRoleByExampleWithOperatorRequest> The example above shows how to find roles with a category of “doctor” or “nurse. An OR search is used since the operator parameter is set to false. roleLevel Yes Uses a standard LDAP equal operator for the search. You can only enter one level at a time. Sample SOAP Request: <ser:findRoleByExampleWithOperatorRequest> <ser:role> <ser:roleLevel> <ser:level>10</ser:level> </ser:roleLevel> </ser:role> <ser:operator>false</ser:operator> </ser:findRoleByExampleWithOperatorRequest> The example above shows how to find all level 10 roles. associatedRoles No Not supported. 580 Identity Manager Roles Based Provisioning Module 3.7 User Application: Administration Guide Attribute Supported? Description entitlementRef No Not supported. roleAssignments No Not supported. systemRole No Not supported. findSodByExample Finds all SoD objects based on the search criteria in the given SOD object. Syntax: Here is the method signature: SodArray findSodByExample(Sod sod) throws NrfServiceException, java.rmi.RemoteException findSodByExampleWithOperator Finds all SoD objects based on the search criteria found in the given SOD object. This method also lets you specify whether to use And as the operator for multi-value searches. Syntax: Here is the method signature: SodArray findSodByExampleWithOperator(Sod searchCriteria, boolean useAndForMultiValueSearch) throws NrfServiceException, java.rmi.RemoteException findSodById Find by key. Syntax: Here is the method signature: Sod findSodById(java.lang.String entityKey) throws NrfServiceException, java.rmi.RemoteException getAssignedIdentities Returns a list of role assignments for a specified identity. Syntax: Here is the method signature: RoleAssignmentArray getAssignedIdentities(java.lang.String identityDn, IdentityType type, boolean direct) throws NrfServiceException, java.rmi.RemoteException getConfigProperty Retrieves configuration properties stored in the User Application configuration XML files by passing in a configuration property key or macro name. Syntax: Here is the method signature: public ConfigProperty getConfigProperty(String configPropertyKey) throws NrfServiceException, RemoteException; Role Web Service 581 The configPropertyKey parameter can accept a fully qualified configuration key name from any of the configuration XML files, such as the following: DirectoryService/realms/jndi/params/USER_ROOT_CONTAINER Alternativelly, the configPropertyKey parameter can accept a macro name that references a fully qualified configuration key name. The following macro names are allowed: Table 22-2 Macro Names Allowed Configuration Macro Name Configuration Key Value USER_CONTAINER DirectoryService/realms/jndi/params/ USER_ROOT_CONTAINER GROUP_CONTAINER DirectoryService/realms/jndi/params/ GROUP_ROOT_CONTAINER ROOT_CONTAINER DirectoryService/realms/jndi/params/ ROOT_NAME PROVISIONING_DRIVER DirectoryService/realms/jndi/params/ PROVISIONING_ROOT getConfiguration Returns the role system configuration defined in the Role Catalog root (nrfConfiguration). Syntax: Here is the method signature: Configuration getConfiguration() throws NrfServiceException, java.rmi.RemoteException getContainer Gets container and role information for a given container DN. Syntax: Here is the method signature: Container getContainer(java.lang.String containerDn) throws NrfServiceException, java.rmi.RemoteException getExceptionList Returns a list of Sod instances for all SOD violations found for a specific identity and type. Syntax: Here is the method signature: SodArray getExceptionsList(java.lang.String identity, IdentityType identityType) throws NrfServiceException, java.rmi.RemoteException getGroup Gets group and role information for a given group DN. Syntax: Here is the method signature: 582 Identity Manager Roles Based Provisioning Module 3.7 User Application: Administration Guide Group getGroup(java.lang.String groupDn) throws NrfServiceException, java.rmi.RemoteException getIdentitiesInViolation Returns a map of identities which are in violation of a given SoD. Syntax: Here is the method signature: IdentityTypeDnMapArray getIdentitiesInViolation(java.lang.String sodDn) throws NrfServiceException, java.rmi.RemoteException getIdentityRoleConflicts Returns a list of Sod instances for all SOD conflicts found for a given list of roles for a given identity. Syntax: Here is the method signature: SodArray getIdentityRoleConflicts(java.lang.String identity, IdentityType identityType, DNStringArray requestedRoles) throws NrfServiceException, java.rmi.RemoteException getRole Retrieves a role object defined by a role DN. Syntax: Here is the method signature: Role getRole(java.lang.String roleDn) throws NrfServiceException, java.rmi.RemoteException getRoleAssignmentRequestStatus Returns a list of role assignment request status instances given a correlation ID. Syntax: Here is the method signature: RoleAssignmentRequestStatusArray getRoleAssignmentRequestStatus(java.lang.String correlationId) throws NrfServiceException, java.rmi.RemoteException getRoleAssignmentRequestStatusByIdentityType Returns a list of role assignment request status instances given an identity and an identity type. Syntax: Here is the method signature: RoleAssignmentRequestStatusArray getRoleAssignmentRequestStatusByIdentityType(java.lang.String identityDn, IdentityType identityType) throws NrfServiceException, java.rmi.RemoteException getRoleAssignmentTypeInfo Retrieves details about a RoleAssignmentType. Syntax: Here is the method signature: Role Web Service 583 RoleAssignmentTypeInfo getRoleAssignmentTypeInfo(RoleAssignmentType type) throws NrfServiceException, java.rmi.RemoteException getRoleCategories Gets role categories. Syntax: Here is the method signature: CategoryArray getRoleCategories() throws NrfServiceException, java.rmi.RemoteException getRoleConflicts Returns a list of Sod instances found for all given roles. This method always returns a list. Syntax: Here is the method signature: SodArray getRoleConflicts(DNStringArray roles) throws NrfServiceException, java.rmi.RemoteException getRoleLevels Gets the role levels. Syntax: Here is the method signature: RoleLevelArray getRoleLevels() throws NrfServiceException, java.rmi.RemoteException getRoleLocalizedStrings Gets role localized strings, such as names and descriptions. The method takes an integer parameter that allows you to specify the type of the string. The number 1 indicates names; the number 2 indicates descriptions. Syntax: Here is the method signature: public LocalizedValue[] getRoleLocalizedStrings(DNString roleDn, int type) throws NrfServiceException, RemoteException; getRolesInfo Returns a list of RoleInfo instances given a list of role DNs. Syntax: Here is the method signature: RoleInfoArray getRolesInfo(DNStringArray roleDns) throws NrfServiceException, java.rmi.RemoteException getRolesInfoByCategory Returns a list of RoleInfo instances given a list of role category keys. Syntax: Here is the method signature: RoleInfoArray getRolesInfoByCategory(CategoryKeyArray roleCategoryKeys) throws NrfServiceException, java.rmi.RemoteException 584 Identity Manager Roles Based Provisioning Module 3.7 User Application: Administration Guide getRolesInfoByLevel Returns a list of RoleInfo instances given a list of role levels. Syntax: Here is the method signature: RoleInfoArray getRolesInfoByLevel(LongArray roleLevels) throws NrfServiceException, java.rmi.RemoteException getTargetSourceConflicts Returns a list of Sod instances for all SOD conflicts defined between the target role DN and the source role DN. Syntax: Here is the method signature: SodArray getTargetSourceConflicts(java.lang.String targetName, java.lang.String sourceName) throws NrfServiceException, java.rmi.RemoteException getUser Gets user info including all role assignments for a given user DN stored in a UserIdentity object. Syntax: Here is the method signature: User getUser(java.lang.String userDn) throws NrfServiceException, java.rmi.RemoteException getVersion Returns the version of this Web Service. Syntax: Here is the method signature: VersionVO getVersion() throws java.rmi.RemoteException isUserInRole Returns boolean flag; true if role has been assigned to a User identity. Syntax: Here is the method signature: boolean isUserInRole(java.lang.String userDn, java.lang.String roleDn) modifyRole Modifies a role definition. This method does not update localized strings. Use the getRoleLocalizedStrings(DNString roleDn, LocalizedString[] locStrings, int strType) method to update localized names or descriptions for a role. Syntax: Here is the method signature: public Role modifyRole(Role role) throws NrfServiceException, RemoteException; Role Web Service 585 removeRoles Deletes specified roles from the Role Catalog and returns an array of DNs for the deleted roles as a confirmation. Syntax: Here is the method signature: public DNString[] removeRoles(DNString[] roleDns) throws NrfServiceException, RemoteException; requestRoleAssignment Returns a list of request DNs created by the role assignment. Syntax: Here is the method signature: DNStringArray requestRolesAssignment(RoleAssignmentRequest roleAssignmentRequest) throws NrfServiceException, java.rmi.RemoteException setRoleLocalizedStrings Sets role localized strings, such as names and descriptions. Syntax: Here is the method signature: public LocalizedValue[] setRoleLocalizedStrings(DNString roleDn, LocalizedValue[] locStrings, int type) throws NrfServiceException, RemoteException; 22.2.2 Approver Class to hold the approver information for SOD or normal request approvals. Approver constructors The Approver class supports a single constructor. Syntax: Here is the syntax for the constructor: Approver() getApproverDN Gets the approver DN. Syntax: Here is the method signature: public java.lang.String getApproverDN() getSequence Gets the approver sequence. Syntax: Here is the method signature: public long getSequence() 586 Identity Manager Roles Based Provisioning Module 3.7 User Application: Administration Guide setApproverDN Sets the approver DN. Syntax: Here is the method signature: public void setApproverDN(java.lang.String approverDN) setSequence Sets the approver sequence. Syntax: Here is the method signature: public void setSequence(long sequence) 22.2.3 ApproverArray This section provides reference information on the ApproverArray class. ApproverArray constructors The ApproverArray class has two constructors. Syntax 1: Here is the syntax for a constructor that takes no parameters: ApproverArray() Syntax 2: Here is the syntax for a constructor that takes an array of Attribute objects as a parameter: ApproverArray(Approver[] ApproverVal) getApprover Returns an array of Approver objects. Syntax: Here is the method signature: Approver[] getApprover() setApprover Sets the array of Approver objects associated with the ApproverArray class. Syntax: Here is the method signature: void setApprover (Approver[] ApproverVal) 22.2.4 Category Class to represent a role category. Category constructors The Category class supports a single constructor. Syntax: Here is the syntax for the constructor: Role Web Service 587 Category() getCategoryKey Gets the category key. Syntax: Here is the method signature: public java.lang.String getCategoryKey() getCategoryLabel Gets the category label. Syntax: Here is the method signature: public java.lang.String getCategoryLabel() setCategoryKey Sets the category key. Syntax: Here is the method signature: public void setCategoryKey(java.lang.String categoryKey) setCategoryLabel Sets the category label. Syntax: Here is the method signature: public void setCategoryLabel(java.lang.String categoryLabel) 22.2.5 CategoryArray This section provides reference information on the CategoryArray class. CategoryArray constructors The CategoryArray class has two constructors. Syntax 1: Here is the syntax for a constructor that takes no parameters: CategoryArray() Syntax 2: Here is the syntax for a constructor that takes an array of Category objects as a parameter: CategoryArray(Category[] CategoryVal) getCategory Returns an array of Category objects. Syntax: Here is the method signature: Category[] getCategory() 588 Identity Manager Roles Based Provisioning Module 3.7 User Application: Administration Guide setCategory Sets the array of Category objects associated with the CategoryArray class. Syntax: Here is the method signature: void setCategory(Category[] CategoryVal) 22.2.6 CategoryKey Class to hold a Category Key. CategoryKey constructors The CategoryKey class has two constructors. Syntax 1: Here is the syntax for a constructor that takes no parameters: CategoryKey() Syntax 2: Here is the syntax for a constructor that takes a String as a parameter: CategoryKey(java.lang.String categoryKey) getCategoryKey() Gets the categoryKey. Syntax: Here is the method signature: public java.lang.String getCategoryKey() setCategoryKey Sets the category key. Syntax: Here is the method signature: public void setCategoryKey(java.lang.String categoryKey) 22.2.7 CategoryKeyArray This section provides reference information on the CategoryKeyArray class. CategoryKeyArray constructors The CategoryKeyArray class has two constructors. Syntax 1: Here is the syntax for a constructor that takes no parameters: CategoryKeyArray() Syntax 2: Here is the syntax for a constructor that takes an array of CategoryKey objects as a parameter: CategoryKeyArray(CategoryKey[] CategoryVal) Role Web Service 589 getCategorykey Returns an array of Category objects. Syntax: Here is the method signature: CategoryKey[] getCategorykey() setCategorykey Sets the array of CategoryKey objects associated with the CategoryKeyArray class. Syntax: Here is the method signature: void setCategorykey(CategoryKey[] CategoryKeyVal) 22.2.8 Configuration Class to represent the configuration object. Configuration constructors The Configuration class supports a single constructor. Syntax: Here is the syntax for the constructor: Configuration() getDefaultRequestDef Gets the default request definition. Syntax: Here is the method signature: public java.lang.String getDefaultRequestDef() getDefaultSODRequestDef Gets the default SOD request definition. Syntax: Here is the method signature: public java.lang.String getDefaultSODRequestDef() getRemovalGracePeriod Gets the removal grace period. Syntax: Here is the method signature: public int getRemovalGracePeriod() getReportContainer Gets the report container. Syntax: Here is the method signature: 590 Identity Manager Roles Based Provisioning Module 3.7 User Application: Administration Guide public java.lang.String getReportContainer() getRoleLevels Gets the role levels. Syntax: Here is the method signature: public RoleLevelArray getRoleLevels() getRoleRequestContainer Gets the role request container. Syntax: Here is the method signature: public java.lang.String getRoleRequestContainer() getRolesContainer Gets the role container. Syntax: Here is the method signature: public java.lang.String getRolesContainer() getSODApprovers Gets SOD approvers. Syntax: Here is the method signature: public ApproverArray getSODApprovers() getSODContainer Gets the SOD container. Syntax: Here is the method signature: public java.lang.String getSODContainer() getSODQuorum Gets the SOD quorum amount. Syntax: Here is the method signature: public java.lang.String getSODContainer() getSODRequestDef Gets the SOD request definition. Syntax: Here is the method signature: public java.lang.String getSODRequestDef() Role Web Service 591 setDefaultRequestDef Sets the default request definition. Syntax: Here is the method signature: public void setDefaultRequestDef(java.lang.String defaultRequestDef) setDefaultSODRequestDef Sets the default SOD request definition. Syntax: Here is the method signature: public void setDefaultSODRequestDef(java.lang.String defaultSODRequestDef) setRemovalGracePeriod Sets the removal grace period. Syntax: Here is the method signature: public void setRemovalGracePeriod(int removalGracePeriod) setReportContainer Sets the report container. Syntax: Here is the method signature: public void setReportContainer(java.lang.String reportContainer) setRoleLevels Sets the role levels. Syntax: Here is the method signature: public void setRoleLevels(RoleLevelArray roleLevels) setRoleRequestContainer Sets the role request container. Syntax: Here is the method signature: public void setRoleRequestContainer(java.lang.String roleRequestContainer) setRolesContainer Sets the role container. Syntax: Here is the method signature: public void setRolesContainer(java.lang.String rolesContainer) 592 Identity Manager Roles Based Provisioning Module 3.7 User Application: Administration Guide setSODApprovers Sets the SoD approvers. Syntax: Here is the method signature: public void setSODApprovers(ApproverArray sODApprovers) setSODContainer Sets the SoD container. Syntax: Here is the method signature: public void setSODContainer(java.lang.String sODContainer) 22.2.9 Container Class to represent a Container object. Container constructors The Container class supports a single constructor. Syntax: Here is the syntax for the constructor: Container() getAssociatedRoles Gets associated roles for this identity. Syntax: Here is the method signature: public DNStringArray getAssociatedRoles() getEntityKey Gets identity entity key. Syntax: Here is the method signature: public java.lang.String getEntityKey() getIdentityType Gets identity type. Syntax: Here is the method signature: public IdentityType getIdentityType() getRoleAssignments Gets role assignments for this identity. Syntax: Here is the method signature: Role Web Service 593 public RoleAssignmentArray getRoleAssignments() setAssociatedRoles Sets the associated roles for this identity. Syntax: Here is the method signature: public void setAssociatedRoles(DNStringArray associatedRoles) setEntityKey Sets the identity entity key. Syntax: Here is the method signature: public void setEntityKey(java.lang.String entityKey) setIdentityType Sets the identity type. Syntax: Here is the method signature: public void setIdentityType(IdentityType identityType) setRoleAssignments Sets the role assignments for this identity. Syntax: Here is the method signature: public void setRoleAssignments(RoleAssignmentArray roleAssignments) 22.2.10 DNString Class to hold a DN. DNString constructors The DNString class has two constructors. Syntax 1: Here is the syntax for a constructor that takes no parameters: DNString() Syntax 2: Here is the syntax for a constructor that takes a String as a parameter: DNString(java.lang.String dn) getDn Gets the DN. Syntax: Here is the method signature: public java.lang.String getDn() 594 Identity Manager Roles Based Provisioning Module 3.7 User Application: Administration Guide setDn Sets the DN. Syntax: Here is the method signature: public void setDn(java.lang.String dn) 22.2.11 DNStringArray This section provides reference information on the DNStringArray class. DNStringArray constructors The DNStringArray class has two constructors. Syntax 1: Here is the syntax for a constructor that takes no parameters: DNStringArray() Syntax 2: Here is the syntax for a constructor that takes an array of DNString objects as a parameter: DNStringArray(DNString[] DNStringVal) getDnstring Returns an array of DNString objects. Syntax: Here is the method signature: DNString[] getDnstring() setDnstring Sets the array of DNString objects associated with the DNStringArray class. Syntax: Here is the method signature: void setDnstring(DNString[] DnstringVal) 22.2.12 Entitlement Class to hold Entitlement information. Entitlement constructors The Entitlement class supports a single constructor. Syntax: Here is the syntax for the constructor: Entitlement() getEntitlementDn Gets the entitlement DN. Role Web Service 595 Syntax: Here is the method signature: public java.lang.String getEntitlementDn() getEntitlementParameters Gets the entitlement parameters. Syntax: Here is the method signature: public java.lang.String getEntitlementParameters() setEntitlementDn Sets the entitlement DN. Syntax: Here is the method signature: public void setEntitlementDn(java.lang.String entitlementDn) setEntitlementParameters Sets the entitlement parameters. Syntax: Here is the method signature: public void setEntitlementParameters(java.lang.String entitlementParameters) 22.2.13 EntitlementArray This section provides reference information on the EntitlementArray class. EntitlementArray constructors The EntitlementArray class has two constructors. Syntax 1: Here is the syntax for a constructor that takes no parameters: EntitlementArray() Syntax 2: Here is the syntax for a constructor that takes an array of Entitlement objects as a parameter: EntitlementArray(Entitlement[] EntitlementVal) getEntitlement Returns an array of Entitlement objects. Syntax: Here is the method signature: Entitlement[] getEntitlement() setEntitlement Sets the array of Entitlement objects associated with the EntitlementArray class. 596 Identity Manager Roles Based Provisioning Module 3.7 User Application: Administration Guide Syntax: Here is the method signature: void setEntitlement(EntitlementArray EntitlementVal) 22.2.14 Group Class to represent a Group object. Group constructors The Group class supports a single constructor. Syntax: Here is the syntax for the constructor: Group() getAssociatedRoles Gets associated roles for this identity. Syntax: Here is the method signature: public DNStringArray getAssociatedRoles() getDescription Gets group description. Syntax: Here is the method signature: public java.lang.String getDescription() getEntityKey Gets identity entity key. Syntax: Here is the method signature: public java.lang.String getEntityKey() getIdentityType Gets identity type. Syntax: Here is the method signature: public IdentityType getIdentityType() getRoleAssignments Gets role assignments for this identity. Syntax: Here is the method signature: public RoleAssignmentArray getRoleAssignments() Role Web Service 597 setAssociatedRoles Sets the associated roles for this identity. Syntax: Here is the method signature: public void setAssociatedRoles(DNStringArray associatedRoles) setDescription Sets the group description. Syntax: Here is the method signature: public void setDescription(java.lang.String description) setEntityKey Sets the identity entity key. Syntax: Here is the method signature: public void setEntityKey(java.lang.String entityKey) setIdentityType Sets the identity type. Syntax: Here is the method signature: public void setIdentityType(IdentityType identityType) setRoleAssignments Sets the role assignments for this identity. Syntax: Here is the method signature: public void setRoleAssignments(RoleAssignmentArray roleAssignments) 22.2.15 IdentityType An JAX-RPC friendly representation of com.novell.idm.nrf.api.IdentityType. Table 22-3 Field summary Type Name static IdentityType CONTAINER static IdentityType GROUP static IdentityType ROLE static IdentityType USER 598 Identity Manager Roles Based Provisioning Module 3.7 User Application: Administration Guide IdentityType constructors The IdentityType class has two constructors. Syntax 1: Here is the syntax for a constructor that takes no parameters: IdentityType() Syntax 2: Here is the syntax for a constructor that takes a String as a parameter: IdentityType(java.lang.String value) convertToAPI Reconstructs an API representation object from an RPC representation. Syntax: Here is the method signature: public com.novell.idm.nrf.api.IdentityType convertToAPI() convertToRPC Contructs an RPC friendly representation from an API object. Syntax: Here is the method signature: public static IdentityType convertToRPC(com.novell.idm.nrf.api.IdentityType type) equals This is an implementation of equals(). This implementation overrides the equals() method in java.lang.Object. Syntax: Here is the method signature: public boolean equals(java.lang.Object obj) fromValue This method is for WSSDK serialization. Syntax: Here is the method signature: public static IdentityType fromValue(java.lang.String value) getValue Gets the type. Syntax: Here is the method signature: public java.lang.String getValue() hashCode This is an implementation of hashCode(). This implementation overrides the hashCode() method in java.lang.Object. Role Web Service 599 Syntax: Here is the method signature: public int hashCode() setValue Sets the type. Syntax: Here is the method signature: public void setValue(java.lang.String type) toString Implementation of toString() that returns a string representation of the class. Syntax: Here is the method signature: public java.lang.String toString() 22.2.16 IdentityTypeDnMap Class to represent DNs grouped by identity type. Used for SOD violations. IdentityTypeDnMap The IdentityTypeDnMap class has two constructors. Syntax 1: Here is the syntax for a constructor that takes no parameters: IdentityTypeDnMap() Syntax 2: Here is the syntax for a constructor that takes a String as a parameter: IdentityTypeDnMap(IdentityType identityType, DNStringArray dns) getDns Gets the DNs associated with the identity type. Syntax: Here is the method signature: public DNStringArray getDns() getIdentityType Gets identity type (USER, ROLE, GROUP, CONTAINER). Syntax: Here is the method signature: public IdentityType getIdentityType() setDns Sets the DNs to associate with the identity type. Syntax: Here is the method signature: 600 Identity Manager Roles Based Provisioning Module 3.7 User Application: Administration Guide public void setDns(DNStringArray dns) setIdentityType Sets the identity type (USER, ROLE, GROUP, or CONTAINER). Syntax: Here is the method signature: public void setIdentityType(IdentityType identityType) 22.2.17 IdentityTypeDnMapArray This section provides reference information on the IdentityTypeDnMapArray class. IdentityTypeDnMapArray constructors The IdentityTypeDnMapArray class has two constructors. Syntax 1: Here is the syntax for a constructor that takes no parameters: IdentityTypeDnMapArray() Syntax 2: Here is the syntax for a constructor that takes an array of IdentityTypeDnMap objects as a parameter: IdentityTypeDnMapArray(IdentityTypeDnMap[] IdentityTypeDnMapVal) getIdentitytypednmap Returns an array of IdentityTypeDnMap objects. Syntax: Here is the method signature: IdentityTypeDnMap[] getIdentitytypednmap() setIdentitytypednmap Sets the array of IdentityTypeDnMap objects associated with the IdentityTypeDnMapArray class. Syntax: Here is the method signature: void setIdentitytypednmap(IdentityTypeDnMap[] IdentityTypeDnMapVal) 22.2.18 LocalizedValue The LocalizedValue class has been added to support management of localized strings for role definitions. getValue Returns a localized string value. Syntax: Here is the method signature: public String getValue() Role Web Service 601 setValue Sets a localized string value. Syntax: Here is the method signature: public void setValue(final String value) getLocale Returns a string representaton of the Locale object. Syntax: Here is the method signature: public String getLocale() setLocale Sets a string representation of the Locale object. Syntax: Here is the method signature: public void setLocale() 22.2.19 LongArray This section provides reference information on the LongArray class. LongArray constructors The LongArray class has two constructors. Syntax 1: Here is the syntax for a constructor that takes no parameters: LongArray() Syntax 2: Here is the syntax for a constructor that takes an array of Long objects as a parameter: LongArray(long[] LongVal) getLong Returns an array of Long objects. Syntax: Here is the method signature: long[] getLong() setLong Sets the array of long objects associated with the LongArray class. Syntax: Here is the method signature: void setLong(LongArray LongVal) 602 Identity Manager Roles Based Provisioning Module 3.7 User Application: Administration Guide 22.2.20 NrfServiceException This is the exception thrown by the remote Roles Web Service. NrfServiceException constructors The NrfServiceException class has two constructors. Syntax 1: Here is the syntax for a constructor that takes no parameters: NrfServiceException() Syntax 2: Here is the syntax for a constructor that takes a String as a parameter: NrfServiceException(java.lang.String reason) getReason Returns the reason for the exception. Syntax: Here is the method signature: public java.lang.String getReason() setReason Sets the reason for the exception. Syntax: Here is the method signature: public void setReason(java.lang.String reason) 22.2.21 RequestCategoryType An JAX-RPC friendly representation of com.novell.idm.nrf.persist.RequestCategoryType. Table 22-4 Field Summary Type Name static RequestCategoryType ROLE_TO_CONTAINER_ADD static RequestCategoryType ROLE_TO_CONTAINER_ADD_SUBTREE static RequestCategoryType ROLE_TO_CONTAINER_REMOVE static RequestCategoryType ROLE_TO_GROUP_ADD static RequestCategoryType ROLE_TO_GROUP_REMOVE static RequestCategoryType ROLE_TO_ROLE_ADD static RequestCategoryType ROLE_TO_ROLE_REMOVE static RequestCategoryType ROLE_TO_USER_ADD static RequestCategoryType ROLE_TO_USER_REMOVE Role Web Service 603 RequestCategoryType constructors The RequestCategoryType class has two constructors. Syntax 1: Here is the syntax for a constructor that takes no parameters: RequestCategoryType() Syntax 2: Here is the syntax for a constructor that takes a String as a parameter: RequestCategoryType(java.lang.String value) equals Implementation of equals(). This implementation overrides the equals() method in java.lang.Object. Syntax: Here is the method signature: public boolean equals(java.lang.Object obj) fromRPC Reconstructs an API representation object from an RPC representation. Syntax: Here is the method signature: public com.novell.idm.nrf.persist.RequestCategoryType fromRPC() throws com.novell.idm.nrf.exception.NrfException fromValue This method is for WSSDK serialization. Syntax: Here is the method signature: public static RequestCategoryType fromValue(java.lang.String value) getValue Gets the type. Syntax: Here is the method signature: public java.lang.String getValue() hashCode This implementation overrides the hashCode() method in java.lang.Object. Syntax: Here is the method signature: public int hashCode() setValue Sets the type. Syntax: Here is the method signature: 604 Identity Manager Roles Based Provisioning Module 3.7 User Application: Administration Guide public void setValue(java.lang.String type) toRPC Constructs an RPC friendly representation off of an API object. Syntax: Here is the method signature: public static RequestCategoryType toRPC(com.novell.idm.nrf.persist.RequestCategoryType type) toString Implementation of toString() that returns a string representation of the class. Syntax: Here is the method signature: public java.lang.String toString() 22.2.22 RequestStatus An JAX-RPC friendly representation of com.novell.idm.nrf.persist.RequestStatus. Table 22-5 Field Summary Type Name static RequestStatus ACTIVATION_TIME_PENDING static RequestStatus APPROVAL_PENDING static RequestStatus APPROVAL_START_PENDING static RequestStatus APPROVAL_START_SUSPENDED static RequestStatus APPROVED static RequestStatus CLEANUP static RequestStatus DENIED static RequestStatus NEW_REQUEST static RequestStatus PROVISION static RequestStatus PROVISIONED static RequestStatus PROVISIONING_ERROR static RequestStatus SOD_APPROVAL_START_PENDING static RequestStatus SOD_APPROVAL_START_SUSPENDED static RequestStatus SOD_EXCEPTION_APPROVAL_PENDING static RequestStatus SOD_EXCEPTION_APPROVED static RequestStatus SOD_EXCEPTION_DENIED Role Web Service 605 RequestStatus constructors The RequestStatus class has two constructors. Syntax 1: Here is the syntax for a constructor that takes no parameters: RequestStatus() Syntax 2: Here is the syntax for a constructor that takes a String as a parameter: RequestStatus(java.lang.String value) equals Implementation of equals(). Syntax: Here is the method signature: public boolean equals(java.lang.Object obj) fromRPC Reconstructs an API representation object from an RPC representation. Syntax: Here is the method signature: public com.novell.idm.nrf.persist.RequestStatus fromRPC() throws com.novell.idm.nrf.exception.NrfException fromValue This method is for WSSDK serialization. Syntax: Here is the method signature: public static RequestStatus fromValue(java.lang.String value) getValue Gets the type. Syntax: Here is the method signature: public java.lang.String getValue() hashCode This implementation overrides the hashCode() method in java.lang.Object. Syntax: Here is the method signature: public int hashCode() setValue Sets the type. Syntax: Here is the method signature: 606 Identity Manager Roles Based Provisioning Module 3.7 User Application: Administration Guide public void setValue(java.lang.String type) toRPC Constructs an RPC friendly representation off of an API object. Syntax: Here is the method signature: public static RequestStatus toRPC(com.novell.idm.nrf.persist.RequestStatus type) toString Implementation of toString() that returns a string representation of the class. Syntax: Here is the method signature: public java.lang.String toString() 22.2.23 Role Value class to hold the role information. Role constructors The Role class supports a single constructor. Syntax: Here is the syntax for the constructor: Role() getApprovers Gets the approvers of the role approval. Syntax: Here is the method signature: public ApproverArray getApprovers() getAssociatedRoles Gets the associated roles. Syntax: Here is the method signature: public DNStringArray getAssociatedRoles() getChildRoles Gets the children roles. Syntax: Here is the method signature: public DNStringArray getChildRoles() Role Web Service 607 getDescription Gets the role description. Syntax: Here is the method signature: public java.lang.String getDescription() getEntitlementRef Gets the entitlement references. Syntax: Here is the method signature: public EntitlementArray getEntitlementRef() getEntityKey Gets the role entity key. Syntax: Here is the method signature: public java.lang.String getEntityKey() getImplicitContainers Gets the implicit container DNs. Syntax: Here is the method signature: public DNStringArray getImplicitContainers() getImplicitGroups Gets implicit group DNs. Syntax: Here is the method signature: public DNStringArray getImplicitGroups() getName Gets the role name. Syntax: Here is the method signature: public java.lang.String getName() getOwners Gets the owner DNs. Syntax: Here is the method signature: public DNStringArray getOwners() 608 Identity Manager Roles Based Provisioning Module 3.7 User Application: Administration Guide getParentRoles Gets the parent roles. Syntax: Here is the method signature: public DNStringArray getParentRoles() getQuorum Gets the quorum amount. Syntax: Here is the method signature: public java.lang.String getQuorum() getRequestDef Gets the request definition for approval processing. Syntax: Here is the method signature: public java.lang.String getRequestDef() getRoleAssignments Gets the role assignments. Syntax: Here is the method signature: public RoleAssignmentArray getRoleAssignments() getRoleCategoryKeys Gets the role category keys. Syntax: Here is the method signature: public CategoryKeyArray getRoleCategoryKeys() getRoleLevel Gets the role level object. Syntax: Here is the method signature: public RoleLevel getRoleLevel() getSystemRole Gets the system role flag. Syntax: Here is the method signature: public boolean getSystemRole() Role Web Service 609 setApprovers Sets the approvers for role approval processing. Syntax: Here is the method signature: public void setApprovers(ApproverArray approvers) setAssociatedRoles Sets the associated roles. Syntax: Here is the method signature: public void setAssociatedRoles(DNStringArray associatedRoles) setChildRoles Sets the children roles. Syntax: Here is the method signature: public void setChildRoles(DNStringArray childRoles) setDescription Sets the role description. Syntax: Here is the method signature: public void setDescription(java.lang.String description) setEntitlementRef Sets the entitlement references. Syntax: Here is the method signature: public void setEntitlementRef(EntitlementArray entitlementRef) setEntityKey Sets the role entity key. Syntax: Here is the method signature: public void setEntityKey(java.lang.String entityKey) setImplicitContainers Sets the implicit container DNs. Syntax: Here is the method signature: public void setImplicitContainers(DNStringArray implicitContainers) 610 Identity Manager Roles Based Provisioning Module 3.7 User Application: Administration Guide setImplicitGroups Sets the implicit group DNs. Syntax: Here is the method signature: public void setImplicitGroups(DNStringArray implicitGroups) setName Sets the role name. Syntax: Here is the method signature: public void setName(java.lang.String name) setOwners Sets the owner DNs. Syntax: Here is the method signature: public void setOwners(DNStringArray owners) setParentRoles Sets the parent roles. Syntax: Here is the method signature: public void setParentRoles(DNStringArray parentRoles) setQuorum Sets the quorum amount. Syntax: Here is the method signature: public void setQuorum(java.lang.String quorum) setRequestDef Sets the request definition for approval processing. Syntax: Here is the method signature: public void setRequestDef(java.lang.String requestDef) setRoleAssignments Sets the role assignments. Syntax: Here is the method signature: public void setRoleAssignments(RoleAssignmentArray roleAssignments) Role Web Service 611 setRoleCategoryKeys Sets the role category keys. Syntax: Here is the method signature: public void setRoleCategoryKeys(CategoryKeyArray roleCategoryKeys) setRoleLevel Sets the role level object. Syntax: Here is the method signature: public void setRoleLevel(RoleLevel roleLevel) setSystemRole Sets the system role flag. Syntax: Here is the method signature: public void setSystemRole(boolean systemRole) 22.2.24 RoleAssignment Value class to hold role assignment information. RoleAssignment The RoleAssignment class supports a single constructor. Syntax: Here is the syntax for the constructor: RoleAssignment() getAssignmentType Gets the role assignment type. Syntax: Here is the method signature: public RoleAssignmentType getAssignmentType() getCauseIdentities Gets the cause identities DNs. Syntax: Here is the method signature: public IdentityTypeDnMapArray getCauseIdentities() getEffectiveDate Gets the effective date. Syntax: Here is the method signature: 612 Identity Manager Roles Based Provisioning Module 3.7 User Application: Administration Guide public java.util.Date getEffectiveDate() getExpirationDate Gets the expiration date. Syntax: Here is the method signature: public java.util.Date getExpirationDate() getExplicitIdentities Gets the explicit identities DNs. Syntax: Here is the method signature: public DNStringArray getExplicitIdentities() getRole Gets the role associated with the assignment. Syntax: Here is the method signature: public java.lang.String getRole() setAssignmentType Sets the role assignment type. Syntax: Here is the method signature: public void setAssignmentType(RoleAssignmentType assignmentType) setCauseIdentities Sets the cause identities DNs. Syntax: Here is the method signature: public void setCauseIdentities(IdentityTypeDnMapArray causeIdentities) setEffectiveDate Sets the effective date. Syntax: Here is the method signature: public void setEffectiveDate(java.util.Date effectiveDate) setExpirationDate Sets the expiration date. Syntax: Here is the method signature: public void setExpirationDate(java.util.Date expirationDate) Role Web Service 613 setExplicitIdentities Sets the explicit identities DNs. Syntax: Here is the method signature: public void setExplicitIdentities(DNStringArray explicitIdentities) setRole Sets role associated with this assignment. Syntax: Here is the method signature: public void setRole(java.lang.String role) 22.2.25 RoleAssignmentArray This section provides reference information on the RoleAssignmentArray class. RoleAssignmentArray constructors The RoleAssignmentArray class has two constructors. Syntax 1: Here is the syntax for a constructor that takes no parameters: RoleAssignmentArray() Syntax 2: Here is the syntax for a constructor that takes an array of Attribute objects as a parameter: RoleAssignmentArray(RoleAssignment[] RoleAssignmentVal) getRoleassignment Returns an array of RoleAssignment objects. Syntax: Here is the method signature: RoleAssignment[] getRoleassignment() setRoleassignment Sets the array of RoleAssignment objects associated with the RoleAssignmentArray class. Syntax: Here is the method signature: void setRoleassignment (RoleAssignment[] RoleAssignmentVal) 22.2.26 RoleAssignmentActionType An JAX-RPC friendly representation of com.novell.idm.nrf.RoleAssignmentActionType. 614 Identity Manager Roles Based Provisioning Module 3.7 User Application: Administration Guide Table 22-6 Field Summary Type Name static RoleAssignmentActionType EXTEND static RoleAssignmentActionType GRANT static RoleAssignmentActionType REVOKE RoleAssignmentActionType constructors The RoleAssignmentActionType class has two constructors. Syntax 1: Here is the syntax for a constructor that takes no parameters: RoleAssignmentActionType() Syntax 2: Here is the syntax for a constructor that takes a String as a parameter: RoleAssignmentActionType(java.lang.String value) equals Implementation of equals(). Syntax: Here is the method signature: public boolean equals(java.lang.Object obj) fromRPC Reconstructs an API representation object from an RPC representation. Syntax: Here is the method signature: public com.novell.idm.nrf.RoleAssignmentActionType fromRPC() fromValue This method is for WSSDK serialization. Syntax: Here is the method signature: public static RoleAssignmentActionType fromValue(java.lang.String value) getValue Gets the type. Syntax: Here is the method signature: public java.lang.String getValue() hashCode This is an implementation of hashCode(). This implementation overrides the hashCode() method in java.lang.Object. Role Web Service 615 Syntax: Here is the method signature: public int hashCode() setValue Sets the type. Syntax: Here is the method signature: public void setValue(java.lang.String type) toRPC Constructs an RPC friendly representation off of an API object. Syntax: Here is the method signature: public static RoleAssignmentActionType toRPC(com.novell.idm.nrf.RoleAssignmentActionType type) toString Implementation of toString() that returns a string representation of the class. Syntax: Here is the method signature: public java.lang.String toString() 22.2.27 RoleAssignmentRequest Class to represent a role assignment request. RoleAssignmentRequest The RoleAssignmentRequest class supports a single constructor. Syntax: Here is the syntax for the constructor: RoleAssignmentRequest() getActionType Gets role assignment type (grant, revoke, extend). Syntax: Here is the method signature: public RoleAssignmentActionType getActionType() getAssignmentType Gets the role assignment type. Syntax: Here is the method signature: public RoleAssignmentType getAssignmentType() 616 Identity Manager Roles Based Provisioning Module 3.7 User Application: Administration Guide getCorrelationID Gets the correlation ID. Syntax: Here is the method signature: public java.lang.String getCorrelationID() getEffectiveDate Gets the effective date. Syntax: Here is the method signature: public java.util.Date getEffectiveDate() getExpirationDate Gets the expiration date. Syntax: Here is the method signature: public java.util.Date getExpirationDate() getIdentity Gets the identity to assign roles to. Syntax: Here is the method signature: public java.lang.String getIdentity() getReason Gets the reason for the role assignment. Syntax: Here is the method signature: public java.lang.String getReason() getRoles Gets the roles to assign to the identity. Syntax: Here is the method signature: public DNStringArray getRoles() getSodOveridesRequested Gets the SOD DNs and justification to override. Syntax: Here is the method signature: public SodJustificationArray getSodOveridesRequested() Role Web Service 617 setActionType Sets the action type (grant, revoke, extend). Syntax: Here is the method signature: public void setActionType(RoleAssignmentActionType actionType) setAssignmentType Sets the role assignment type. Syntax: Here is the method signature: public void setAssignmentType(RoleAssignmentType assignmentType) setCorrelationID Sets the correlation ID. Syntax: Here is the method signature: public void setCorrelationID(java.lang.String correlationID) setEffectiveDate Sets the effective date. Syntax: Here is the method signature: public void setEffectiveDate(java.util.Date effectiveDate) setExpirationDate Sets the expiration date. Syntax: Here is the method signature: public void setExpirationDate(java.util.Date expirationDate) setIdentity Sets the identity to assign roles to. Syntax: Here is the method signature: public void setIdentity(java.lang.String identity) setReason Sets the reason for the role assignment. Syntax: Here is the method signature: public void setReason(java.lang.String reason) 618 Identity Manager Roles Based Provisioning Module 3.7 User Application: Administration Guide setRoles Sets the roles to assign to the identity. Syntax: Here is the method signature: public void setRoles(DNStringArray roles) setSodOveridesRequested Sets the SOD DNs and justification to override. Syntax: Here is the method signature: public void setSodOveridesRequested(SodJustificationArray sodOveridesRequested) 22.2.28 RoleAssignmentRequestStatus This class represents the status of a role assignment. RoleAssignmentRequestStatus The RoleAssignmentRequestStatus class supports a single constructor. Syntax: Here is the syntax for the constructor: RoleAssignmentRequestStatus() getCategory Gets the request category. Syntax: Here is the method signature: public RequestCategoryType getCategory() getCorrelationId Gets the correlation ID. Syntax: Here is the method signature: public java.lang.String getCorrelationId() getEffectiveDate Gets the effective date. Syntax: Here is the method signature: public java.util.Date getEffectiveDate() getEntityKey Gets the entity key. Role Web Service 619 Syntax: Here is the method signature: public java.lang.String getEntityKey() getExpirationDate Gets the expiration date. Syntax: Here is the method signature: public java.util.Date getExpirationDate() getReason Gets the reason for the role assignment. Syntax: Here is the method signature: public java.lang.String getReason() getRequestDate Gets the request date. Syntax: Here is the method signature: public java.util.Date getRequestDate() getRequester Gets the request DN. Syntax: Here is the method signature: public java.lang.String getRequester() getSource Gets the source Role DN. Syntax: Here is the method signature: public java.lang.String getSource() getStatus Gets the request status. Syntax: Here is the method signature: public RequestStatus getStatus() getTarget Gets the targeted identity DN. Syntax: Here is the method signature: 620 Identity Manager Roles Based Provisioning Module 3.7 User Application: Administration Guide public java.lang.String getTarget() setCategory Sets the request category. Syntax: Here is the method signature: public void setCategory(RequestCategoryType category) setCorrelationId Sets the correlation ID. Syntax: Here is the method signature: public void setCorrelationId(java.lang.String correlationId) setEffectiveDate Sets the effective date. Syntax: Here is the method signature: public void setEffectiveDate(java.util.Date effectiveDate) setEntityKey Sets the entity key. Syntax: Here is the method signature: public void setEntityKey(java.lang.String entityKey) setExpirationDate Sets the expiration date. Syntax: Here is the method signature: public void setExpirationDate(java.util.Date expirationDate) setReason Sets the reason for the role assignment. Syntax: Here is the method signature: public void setReason(java.lang.String reason) setRequestDate Sets the request date. Syntax: Here is the method signature: public void setRequestDate(java.util.Date requestDate) Role Web Service 621 setRequester Sets the requester DN. Syntax: Here is the method signature: public void setRequester(java.lang.String requester) setSource Sets the source Role DN. Syntax: Here is the method signature: public void setSource(java.lang.String source) setStatus Sets the request status. Syntax: Here is the method signature: public void setStatus(RequestStatus status) setTarget Sets the identity targeted DN. Syntax: Here is the method signature: public void setTarget(java.lang.String target) 22.2.29 RoleAssignmentType An JAX-RPC friendly representation of com.novell.idm.nrf.RoleAssignmentType. Table 22-7 Field Summary Type Name static RoleAssignmentType CONTAINER_TO_ROLE static RoleAssignmentType CONTAINER_WITH_SUBTREE_TO_ROLE static RoleAssignmentType GROUP_TO_ROLE static RoleAssignmentType ROLE_TO_ROLE static RoleAssignmentType USER_TO_ROLE RoleAssignmentType constructors The CategoryKey class has two constructors. Syntax 1: Here is the syntax for a constructor that takes no parameters: CategoryKey() 622 Identity Manager Roles Based Provisioning Module 3.7 User Application: Administration Guide Syntax 2: Here is the syntax for a constructor that takes a String as a parameter: CategoryKey(java.lang.String categoryKey) convertToAPI Reconstructs an API representation object from an RPC representation. Syntax: Here is the method signature: public com.novell.idm.nrf.RoleAssignmentType convertToAPI() convertToRPC Constructs an RPC friendly representation off of an API object. Syntax: Here is the method signature: public static RoleAssignmentType convertToRPC(com.novell.idm.nrf.RoleAssignmentType type) equals Implementation of equals(). Syntax: Here is the method signature: public boolean equals(java.lang.Object obj) fromValue This method is for WSSDK serialization. Syntax: Here is the method signature: public static RoleAssignmentType fromValue(java.lang.String value) getValue Gets the type. Syntax: Here is the method signature: public java.lang.String getValue() hashCode This is an implementation of hashCode(). This implementation overrides the hashCode() method in java.lang.Object. Syntax: Here is the method signature: public int hashCode() setValue Sets the type. Role Web Service 623 Syntax: Here is the method signature: public void setValue(java.lang.String type) toString Implementation of toString() that returns a string representation of the class. Syntax: Here is the method signature: public java.lang.String toString() 22.2.30 RoleAssignmentTypeInfo An JAX-RPC friendly representation of the details of the com.novell.idm.nrf.RoleAssignmentType enumeration. RoleAssignmentTypeInfo The RoleAssignmentTypeInfo class supports a single constructor. Syntax: Here is the syntax for the constructor: RoleAssignmentTypeInfo() convertToRPC Constructs an RPC friendly representation from an API object. Syntax: Here is the method signature: public static RoleAssignmentTypeInfo convertToRPC(com.novell.idm.nrf.RoleAssignmentType type) getIdentityType Returns the JAX-RPC friendly identity type. Syntax: Here is the method signature: public IdentityType getIdentityType() getSubtreeIncluded Determines whether the sub tree is included. Syntax: Here is the method signature: public boolean getSubtreeIncluded() getSupportsApproval Determines whether the assignment supports approval. Syntax: Here is the method signature: public boolean getSupportsApproval() 624 Identity Manager Roles Based Provisioning Module 3.7 User Application: Administration Guide getSupportsEffectiveDate Determines whether the assignment supports an effective date. Syntax: Here is the method signature: public boolean getSupportsEffectiveDate() getSupportsExpiration Determines whether the assignment supports expiration. Syntax: Here is the method signature: public boolean getSupportsExpiration() getSupportsSODApproval Determines whether the assignment supports SOD approval. Syntax: Here is the method signature: public boolean getSupportsSODApproval() setIdentityType Sets the JAX-RPC friendly identity type. Syntax: Here is the method signature: public void setIdentityType(IdentityType type) setSubtreeIncluded Sets whether the sub tree is included. Syntax: Here is the method signature: public void setSubtreeIncluded(boolean bool) setSupportsApproval Sets whether the assignment supports approval. Syntax: Here is the method signature: public void setSupportsApproval(boolean bool) setSupportsEffectiveDate Sets whether the assignment supports effective date. Syntax: Here is the method signature: public void setSupportsEffectiveDate(boolean bool) Role Web Service 625 setSupportsExpiration Sets whethers the assignment supports expiration. Syntax: Here is the method signature: public void setSupportsExpiration(boolean bool) setSupportsSODApproval Sets whether the assignment supports SOD approval. Syntax: Here is the method signature: public void setSupportsSODApproval(boolean bool) 22.2.31 RoleInfo Value class to hold main role information. This is a small subset of the role value class. RoleInfo constructors The RoleInfo class supports a single constructor. Syntax: Here is the syntax for the constructor: RoleInfo() getDescription Gets the role description. Syntax: Here is the method signature: public java.lang.String getDescription() getEntityKey Gets the role entity key. Syntax: Here is the method signature: public java.lang.String getEntityKey() getName Gets the role name. Syntax: Here is the method signature: public java.lang.String getName() getRoleCategoryKeys Gets the role category keys. Syntax: Here is the method signature: 626 Identity Manager Roles Based Provisioning Module 3.7 User Application: Administration Guide public CategoryKeyArray getRoleCategoryKeys() getRoleLevel Gets the role level object. Syntax: Here is the method signature: public RoleLevel getRoleLevel() setDescription Sets the role description. Syntax: Here is the method signature: public void setDescription(java.lang.String description) setEntityKey Sets the role entity key. Syntax: Here is the method signature: public void setEntityKey(java.lang.String entityKey) setName Sets the role name. Syntax: Here is the method signature: public void setName(java.lang.String name) setRoleCategoryKeys Sets the role category keys. Syntax: Here is the method signature: public void setRoleCategoryKeys(CategoryKeyArray roleCategoryKeys) setRoleLevel Sets role level object. Syntax: Here is the method signature: public void setRoleLevel(RoleLevel roleLevel) 22.2.32 RoleInfoArray This section provides reference information on the RoleInfoArray class. RoleInfoArray constructors The RoleInfoArray class has two constructors. Role Web Service 627 Syntax 1: Here is the syntax for a constructor that takes no parameters: RoleInfoArray() Syntax 2: Here is the syntax for a constructor that takes an array of Attribute objects as a parameter: RoleInfoArray(RoleInfo[] RoleInfoVal) getRoleinfo Returns an array of RoleInfo objects. Syntax: Here is the method signature: RoleInfo[] getRoleinfo() setRoleinfo Sets the array of RoleInfo objects associated with the RoleInfoArray class. Syntax: Here is the method signature: void setRoleinfo (RoleInfo[] RoleInfoVal) 22.2.33 RoleLevel This class represent a role level. RoleLevel constructors The RoleLevel class supports a single constructor. Syntax: Here is the syntax for the constructor: RoleLevel() getContainer Gets the role level container. Syntax: Here is the method signature: public java.lang.String getContainer() getDescription Gets the role level description. Syntax: Here is the method signature: public java.lang.String getDescription() getLevel Gets the role level. Syntax: Here is the method signature: 628 Identity Manager Roles Based Provisioning Module 3.7 User Application: Administration Guide public long getLevel() getName Gets the role level name. Syntax: Here is the method signature: public java.lang.String getName() setContainer Sets the role level container. Syntax: Here is the method signature: public void setContainer(java.lang.String container) setDescription Sets the role level description. Syntax: Here is the method signature: public void setDescription(java.lang.String description) setLevel Sets the role level. Syntax: Here is the method signature: public void setLevel(long level) setName Sets the role level name. Syntax: Here is the method signature: public void setName(java.lang.String name) 22.2.34 RoleLevelArray This section provides reference information on the RoleLevelArray class. RoleLevelArray constructors The RoleLevelArray class has two constructors. Syntax 1: Here is the syntax for a constructor that takes no parameters: RoleLevelArray() Syntax 2: Here is the syntax for a constructor that takes an array of Attribute objects as a parameter: RoleLevelArray(RoleLevel[] RoleLevelVal) Role Web Service 629 getRolelevel Returns an array of RoleLevel objects. Syntax: Here is the method signature: RoleLevel[] getRolelevel() setRolelevel Sets the array of RoleLevel objects associated with the RoleLevelArray class. Syntax: Here is the method signature: void setRolelevel (RoleLevel[] RoleLevelVal) 22.2.35 RoleRequest The Role Request class has been added to support the creation of roles. The Role Request class is a value class used to hold information about a request to create a role. getName Gets the role name. Syntax: Here is the method signature: public String getName() getDescription Gets the role description. Syntax: Here is the method signature: public String getDescription() getEntityKey Gets the entity key for the role. Syntax: Here is the method signature: public String getEntityKey() getRoleLevel Gets the role level object. Syntax: Here is the method signature: public long getRoleLevel() getRoleCategoryKeys Gets the role category keys. 630 Identity Manager Roles Based Provisioning Module 3.7 User Application: Administration Guide Syntax: Here is the method signature: public CategoryKey[] getRoleCategoryKeys() getQuorum Gets the quorum amount. Syntax: Here is the method signature: public String getQuorum() getRequestDef Gets the provisioning request definition for approval processing. Syntax: Here is the method signature: public String getRequestDef() getApprovers Gets the approvers for the role definition. Syntax: Here is the method signature: public Approver[] getApprovers() getOwners Gets the owner DNs. Syntax: Here is the method signature: public DNString[] getOwners() getRoleAssignments Gets the associated roles. Syntax: Here is the method signature: public String getRoleAssignments() getSystemRole Gets the system role flag, which indicates whether this is a system role. Syntax: Here is the method signature: public boolean getSystemRole() getContainer Gets the name of the role container. Syntax: Here is the method signature: Role Web Service 631 public String getContainer() setName Sets the role name. Syntax: Here is the method signature: public void setName() setDescription Sets the role description. Syntax: Here is the method signature: public void setDescription() setEntityKey Sets the entity key for the role. Syntax: Here is the method signature: public void setEntityKey() setRoleLevel Sets the role level object. Syntax: Here is the method signature: public void setRoleLevel() setRoleCategoryKeys Sets the role category keys. Syntax: Here is the method signature: public void setRoleCategoryKeys() setQuorum Sets the quorum amount. Syntax: Here is the method signature: public void setQuorum() setRequestDef Sets the provisioning request definition for approval processing. Syntax: Here is the method signature: public void setRequestDef() 632 Identity Manager Roles Based Provisioning Module 3.7 User Application: Administration Guide setApprovers Sets the approvers for role approval processing. Syntax: Here is the method signature: public void setApprovers() setOwners Sets the owner DNs. Syntax: Here is the method signature: public void setOwners() setSystemRole Sets the system role flag, which determines whether this is a system role. Syntax: Here is the method signature: public void setSystemRole() setContainer Sets the role container. Syntax: Here is the method signature: public void setContainer() 22.2.36 RoleServiceDelegate Delegate class to perform the actual call to the API layer. Should be used by all skeleton classes. RoleServiceDelegate constructors The RoleServiceDelegate class supports a single constructor. Syntax: Here is the syntax for the constructor: RoleServiceDelegate(com.novell.srvprv.spi.security.ISecurityContext ctx, java.util.Locale locale) findSodByExample Finds all SoD objects based on the search criteria in the given SOD object. Syntax: Here is the method signature: SodArray findSodByExample(Sod sod) throws NrfServiceException, java.rmi.RemoteException findSodByExampleWithOperator Finds all SoD objects based on the search criteria found in the given SOD object Role Web Service 633 Syntax: Here is the method signature: SodArray findSodByExampleWithOperator(Sod searchCriteria, boolean useAndForMultiValueSearch) throws NrfServiceException, java.rmi.RemoteException findSodById Find by key. Syntax: Here is the method signature: Sod findSodById(java.lang.String entityKey) throws NrfServiceException, java.rmi.RemoteException getAssignedIdentities Returns a list of role assignments for a specified identity. Syntax: Here is the method signature: RoleAssignmentArray getAssignedIdentities(java.lang.String identityDn, IdentityType type, boolean direct) throws NrfServiceException, java.rmi.RemoteException getConfiguration Returns the role system configuration defined in the role vault root (nrfConfiguration) Syntax: Here is the method signature: Configuration getConfiguration() throws NrfServiceException, java.rmi.RemoteException getContainer Gets container and role information for a given container DN. Syntax: Here is the method signature: Container getContainer(java.lang.String containerDn) throws NrfServiceException, java.rmi.RemoteException getExceptionList Returns a list of Sod instances for all SOD violations found for a specific identity and type. Syntax: Here is the method signature: SodArray getExceptionsList(java.lang.String identity, IdentityType identityType) throws NrfServiceException, java.rmi.RemoteException getGroup Gets group and role information for a given group DN. Syntax: Here is the method signature: 634 Identity Manager Roles Based Provisioning Module 3.7 User Application: Administration Guide Group getGroup(java.lang.String groupDn) throws NrfServiceException, java.rmi.RemoteException getIdentitiesInViolation Returns a map of identities which are in violation of a given SoD. Syntax: Here is the method signature: IdentityTypeDnMapArray getIdentitiesInViolation(java.lang.String sodDn) throws NrfServiceException, java.rmi.RemoteException getIdentityRoleConflicts Returns a list of Sod instances for all SOD conflicts found for a given list of roles for a given identity. Syntax: Here is the method signature: SodArray getIdentityRoleConflicts(java.lang.String identity, IdentityType identityType, DNStringArray requestedRoles) throws NrfServiceException, java.rmi.RemoteException getRole Retrieves a role object defined by a role DN Syntax: Here is the method signature: Role getRole(java.lang.String roleDn) throws NrfServiceException, java.rmi.RemoteException getRoleAssignmentRequestStatus Returns a list of role assignment request status instances given a correlation ID. Syntax: Here is the method signature: RoleAssignmentRequestStatusArray getRoleAssignmentRequestStatus(java.lang.String correlationId) throws NrfServiceException, java.rmi.RemoteException getRoleAssignmentRequestStatusByIdentityType Returns a list of role assignment request status instances given an identity and an identity type. Syntax: Here is the method signature: RoleAssignmentRequestStatusArray getRoleAssignmentRequestStatusByIdentityType(java.lang.String identityDn, IdentityType identityType) throws NrfServiceException, java.rmi.RemoteException getRoleAssignmentTypeInfo Retrieves details about a RoleAssignmentType. Syntax: Here is the method signature: Role Web Service 635 RoleAssignmentTypeInfo getRoleAssignmentTypeInfo(RoleAssignmentType type) throws NrfServiceException, java.rmi.RemoteException getRoleCategories Gets role categories. Syntax: Here is the method signature: CategoryArray getRoleCategories() throws NrfServiceException, java.rmi.RemoteException getRoleConflicts Returns a list of Sod instances found for all given roles. This method always returns a list. Syntax: Here is the method signature: SodArray getRoleConflicts(DNStringArray roles) throws NrfServiceException, java.rmi.RemoteException getRoleLevels Gets role levels. Syntax: Here is the method signature: RoleLevelArray getRoleLevels() throws NrfServiceException, java.rmi.RemoteException getRolesInfo Returns a list of RoleInfo instances given a list of role DNs. Syntax: Here is the method signature: RoleInfoArray getRolesInfo(DNStringArray roleDns) throws NrfServiceException, java.rmi.RemoteException getRolesInfoByCategory Returns a list of RoleInfo instances given a list of role category keys. Syntax: Here is the method signature: RoleInfoArray getRolesInfoByCategory(CategoryKeyArray roleCategoryKeys) throws NrfServiceException, java.rmi.RemoteException getRolesInfoByLevel Returns a list of RoleInfo instances given a list of role levels. Syntax: Here is the method signature: RoleInfoArray getRolesInfoByLevel(LongArray roleLevels) throws NrfServiceException, java.rmi.RemoteException 636 Identity Manager Roles Based Provisioning Module 3.7 User Application: Administration Guide getTargetSourceConflicts Returns a list of Sod instances for all SOD conflicts defined between the target role DN and the source role DN. Syntax: Here is the method signature: SodArray getTargetSourceConflicts(java.lang.String targetName, java.lang.String sourceName) throws NrfServiceException, java.rmi.RemoteException getUser Gets user info including all role assignments for a given user DN stored in a UserIdentity object. Syntax: Here is the method signature: User getUser(java.lang.String userDn) throws NrfServiceException, java.rmi.RemoteException getVersion Returns the version of this Web Service. Syntax: Here is the method signature: VersionVO getVersion() throws java.rmi.RemoteException isUserInRole Returns boolean flag; true if role has been assigned to a User identity Syntax: Here is the method signature: boolean isUserInRole(java.lang.String userDn, java.lang.String roleDn) requestRoleAssignment Returns a list of request DNs created by the role assignment Syntax: Here is the method signature: DNStringArray requestRolesAssignment(RoleAssignmentRequest roleAssignmentRequest) throws NrfServiceException, java.rmi.RemoteException 22.2.37 RoleServiceSkeletonImpl Class to represent the skeleton server side implementation of the Role Based offered services. RoleServiceSkeletonImpl The RoleServiceSkeletonImpl class supports a single constructor. Syntax: Here is the syntax for the constructor: RoleServiceSkeletonImpl() Role Web Service 637 findSodByExample Finds all SoD objects based on the search criteria in the given SOD object. Syntax: Here is the method signature: SodArray findSodByExample(Sod sod) throws NrfServiceException, java.rmi.RemoteException findSodByExampleWithOperator Finds all SoD objects based on the search criteria found in the given SOD object Syntax: Here is the method signature: SodArray findSodByExampleWithOperator(Sod searchCriteria, boolean useAndForMultiValueSearch) throws NrfServiceException, java.rmi.RemoteException findSodById Find by key. Syntax: Here is the method signature: Sod findSodById(java.lang.String entityKey) throws NrfServiceException, java.rmi.RemoteException getAssignedIdentities Returns a list of role assignments for a specified identity. Syntax: Here is the method signature: RoleAssignmentArray getAssignedIdentities(java.lang.String identityDn, IdentityType type, boolean direct) throws NrfServiceException, java.rmi.RemoteException getConfiguration Returns the role system configuration defined in the role vault root (nrfConfiguration) Syntax: Here is the method signature: Configuration getConfiguration() throws NrfServiceException, java.rmi.RemoteException getContainer Gets container and role information for a given container DN. Syntax: Here is the method signature: Container getContainer(java.lang.String containerDn) throws NrfServiceException, java.rmi.RemoteException 638 Identity Manager Roles Based Provisioning Module 3.7 User Application: Administration Guide getExceptionList Returns a list of Sod instances for all SOD violations found for a specific identity and type. Syntax: Here is the method signature: SodArray getExceptionsList(java.lang.String identity, IdentityType identityType) throws NrfServiceException, java.rmi.RemoteException getGroup Gets group and role information for a given group DN. Syntax: Here is the method signature: Group getGroup(java.lang.String groupDn) throws NrfServiceException, java.rmi.RemoteException getIdentitiesInViolation Returns a map of identities which are in violation of a given SoD. Syntax: Here is the method signature: IdentityTypeDnMapArray getIdentitiesInViolation(java.lang.String sodDn) throws NrfServiceException, java.rmi.RemoteException getIdentityRoleConflicts Returns a list of Sod instances for all SOD conflicts found for a given list of roles for a given identity. Syntax: Here is the method signature: SodArray getIdentityRoleConflicts(java.lang.String identity, IdentityType identityType, DNStringArray requestedRoles) throws NrfServiceException, java.rmi.RemoteException getRole Retrieves a role object defined by a role DN Syntax: Here is the method signature: Role getRole(java.lang.String roleDn) throws NrfServiceException, java.rmi.RemoteException getRoleAssignmentRequestStatus Returns a list of role assignment request status instances given a correlation ID. Syntax: Here is the method signature: RoleAssignmentRequestStatusArray getRoleAssignmentRequestStatus(java.lang.String correlationId) throws NrfServiceException, java.rmi.RemoteException Role Web Service 639 getRoleAssignmentRequestStatusByIdentityType Returns a list of role assignment request status instances given an identity and an identity type. Syntax: Here is the method signature: RoleAssignmentRequestStatusArray getRoleAssignmentRequestStatusByIdentityType(java.lang.String identityDn, IdentityType identityType) throws NrfServiceException, java.rmi.RemoteException getRoleAssignmentTypeInfo Retrieves details about a RoleAssignmentType. Syntax: Here is the method signature: RoleAssignmentTypeInfo getRoleAssignmentTypeInfo(RoleAssignmentType type) throws NrfServiceException, java.rmi.RemoteException getRoleCategories Gets role categories. Syntax: Here is the method signature: CategoryArray getRoleCategories() throws NrfServiceException, java.rmi.RemoteException getRoleConflicts Returns a list of Sod instances found for all given roles. This method always returns a list. Syntax: Here is the method signature: SodArray getRoleConflicts(DNStringArray roles) throws NrfServiceException, java.rmi.RemoteException getRoleLevels Gets role levels. Syntax: Here is the method signature: RoleLevelArray getRoleLevels() throws NrfServiceException, java.rmi.RemoteException getRolesInfo Returns a list of RoleInfo instances given a list of role DNs. Syntax: Here is the method signature: RoleInfoArray getRolesInfo(DNStringArray roleDns) throws NrfServiceException, java.rmi.RemoteException 640 Identity Manager Roles Based Provisioning Module 3.7 User Application: Administration Guide getRolesInfoByCategory Returns a list of RoleInfo instances given a list of role category keys. Syntax: Here is the method signature: RoleInfoArray getRolesInfoByCategory(CategoryKeyArray roleCategoryKeys) throws NrfServiceException, java.rmi.RemoteException getRolesInfoByLevel Returns a list of RoleInfo instances given a list of role levels. Syntax: Here is the method signature: RoleInfoArray getRolesInfoByLevel(LongArray roleLevels) throws NrfServiceException, java.rmi.RemoteException getTargetSourceConflicts Returns a list of Sod instances for all SOD conflicts defined between the target role DN and the source role DN. Syntax: Here is the method signature: SodArray getTargetSourceConflicts(java.lang.String targetName, java.lang.String sourceName) throws NrfServiceException, java.rmi.RemoteException getUser Gets user info including all role assignments for a given user DN stored in a UserIdentity object. Syntax: Here is the method signature: User getUser(java.lang.String userDn) throws NrfServiceException, java.rmi.RemoteException getVersion Returns the version of this Web Service. Syntax: Here is the method signature: VersionVO getVersion() throws java.rmi.RemoteException isUserInRole Returns boolean flag; true if role has been assigned to a User identity Syntax: Here is the method signature: boolean isUserInRole(java.lang.String userDn, java.lang.String roleDn) requestRoleAssignment Returns a list of request DNs created by the role assignment Role Web Service 641 Syntax: Here is the method signature: DNStringArray requestRolesAssignment(RoleAssignmentRequest roleAssignmentRequest) throws NrfServiceException, java.rmi.RemoteException 22.2.38 Sod Value object to hold SOD information. Sod constructors The Sod class supports a single constructor. Syntax: Here is the syntax for the constructor: Sod() getApprovalType Gets the SOD approval type. Syntax: Here is the method signature: public SodApprovalType getApprovalType() getApprovers Gets SOD approvers. Syntax: Here is the method signature: public ApproverArray getApprovers() getDescription Gets the SOD description. Syntax: Here is the method signature: public java.lang.String getDescription() getEntityKey Gets the SOD entity key. Syntax: Here is the method signature: public java.lang.String getEntityKey() getName Gets the SOD name. Syntax: Here is the method signature: public java.lang.String getName() 642 Identity Manager Roles Based Provisioning Module 3.7 User Application: Administration Guide getQuorum Gets the SOD quorum amount. Syntax: Here is the method signature: public java.lang.String getQuorum() getRequestDef Gets the request definition for approval processing. Syntax: Here is the method signature: public java.lang.String getRequestDef() getRoles Gets the SOD roles. Syntax: Here is the method signature: public DNStringArray getRoles() setApprovalType Sets the SOD approval type. Syntax: Here is the method signature: public void setApprovalType(SodApprovalType approvalType) setApprovers Sets the SOD approvers. Syntax: Here is the method signature: public void setApprovers(ApproverArray approvers) setDescription Sets the SOD description. Syntax: Here is the method signature: public void setDescription(java.lang.String description) setEntityKey Sets the SOD entity key. Syntax: Here is the method signature: public void setEntityKey(java.lang.String entityKey) Role Web Service 643 setName Sets the SOD name. Syntax: Here is the method signature: public void setName(java.lang.String name) setQuorum Sets the SOD quorum amount. Syntax: Here is the method signature: public void setQuorum(java.lang.String quorum) setRequestDef Sets the request definition for approval processing. Syntax: Here is the method signature: public void setRequestDef(java.lang.String requestDef) setRoles Sets the SOD roles. Syntax: Here is the method signature: public void setRoles(DNStringArray roles) 22.2.39 SodArray This section provides reference information on the SodArray class. SodArray constructors The SodArray class has two constructors. Syntax 1: Here is the syntax for a constructor that takes no parameters: SodArray() Syntax 2: Here is the syntax for a constructor that takes an array of Attribute objects as a parameter: SodArray(Sod[] SodVal) getSod Returns an array of Sod objects. Syntax: Here is the method signature: Sod[] getSod() 644 Identity Manager Roles Based Provisioning Module 3.7 User Application: Administration Guide setSod Sets the array of Sod objects associated with the SodArray class. Syntax: Here is the method signature: void setSod (Sod[] SodVal) 22.2.40 SodApprovalType An JAX-RPC friendly representation of com.novell.idm.nrf.api.SodApprovalType. Table 22-8 Field Summary Type Name static SodApprovalType ALLOW_WITH_WORKFLOW static SodApprovalType ALWAYS_ALLOW SodApprovalType constructors The SodApprovalType class has two constructors. Syntax 1: Here is the syntax for a constructor that takes no parameters: SodApprovalType() Syntax 2: Here is the syntax for a constructor that takes a String as a parameter: SodApprovalType(java.lang.String value) equals Implementation of equals(). Syntax: Here is the method signature: public boolean equals(java.lang.Object obj) fromRPC Reconstructs an API representation object from an RPC representation. Syntax: Here is the method signature: public com.novell.idm.nrf.api.SodApprovalType fromRPC() throws com.novell.idm.nrf.exception.NrfException fromValue This method is for WSSDK serialization. Syntax: Here is the method signature: public static SodApprovalType fromValue(java.lang.String value) Role Web Service 645 getValue Gets the type. Syntax: Here is the method signature: public java.lang.String getValue() hashCode This is an implementation of hashCode(). This implementation overrides the hashCode() method in java.lang.Object. Syntax: Here is the method signature: public int hashCode() setValue Sets the type. Syntax: Here is the method signature: public void setValue(java.lang.String type) toRPC Reconstructs an API representation object from an RPC representation. Syntax: Here is the method signature: public com.novell.idm.nrf.api.SodApprovalType fromRPC() throws com.novell.idm.nrf.exception.NrfException toString Implementation of toString() that returns a string representation of the class. Syntax: Here is the method signature: public java.lang.String toString() 22.2.41 SodJustification Class to represent an SOD DN to override with a justification. Used for assignment of roles to be able to pass in a justification for overrides of SODs. SodJustification constructors The SodJustification class has two constructors. Syntax 1: Here is the syntax for a constructor that takes no parameters: SodJustification() Syntax 2: Here is the syntax for a constructor that takes two String values as parameters: SodJustification(java.lang.String sodDN, java.lang.String justification) 646 Identity Manager Roles Based Provisioning Module 3.7 User Application: Administration Guide getJustification Gets the SOD justification for override. Syntax: Here is the method signature: public java.lang.String getJustification() getSodDN Gets the SOD DN for override. Syntax: Here is the method signature: public java.lang.String getSodDN() setJustification Sets the justification for override. Syntax: Here is the method signature: public void setJustification(java.lang.String justification) setSodDN Sets the SOD DN for override. Syntax: Here is the method signature: public void setSodDN(java.lang.String sodDN) 22.2.42 SodJustificationArray This section provides reference information on the SodJustificationArray class. SodJustificationArray constructors The SodJustificationArray class has two constructors. Syntax 1: Here is the syntax for a constructor that takes no parameters: SodJustificationArray() Syntax 2: Here is the syntax for a constructor that takes an array of Attribute objects as a parameter: SodJustificationArray(SodJustification[] SodJustificationVal) getSodjustification Returns an array of SodJustification objects. Syntax: Here is the method signature: SodJustification[] getSodjustification() Role Web Service 647 setSodjustification Sets the array of SodJustification objects associated with the SodJustificationArray class. Syntax: Here is the method signature: void setSodjustification (SodJustification[] SodJustificationVal) 22.2.43 User Value class to hold user identity information. User constructors The User class supports a single constructor. Syntax: Here is the syntax for the constructor: User() getAssociatedRoles Gets the associated roles for this identity. Syntax: Here is the method signature: public DNStringArray getAssociatedRoles() getCn Gets the cn. Syntax: Here is the method signature: public java.lang.String getCn() getContainerRoles Gets the container roles. Syntax: Here is the method signature: public DNStringArray getContainerRoles() getEmail Gets the email address. Syntax: Here is the method signature: public java.lang.String getEmail() getEntityKey Gets the identity entity key. Syntax: Here is the method signature: 648 Identity Manager Roles Based Provisioning Module 3.7 User Application: Administration Guide public java.lang.String getEntityKey() getExplicitAssignments Gets the explicit role assignments. Syntax: Here is the method signature: public RoleAssignmentArray getExplicitAssignments() getFirstName Gets the first name. Syntax: Here is the method signature: public java.lang.String getFirstName() getGroupRoles Gets the group roles. Syntax: Here is the method signature: public DNStringArray getGroupRoles() getIdentityType Gets identity type. Syntax: Here is the method signature: public IdentityType getIdentityType() getImplicitAssignments Gets the implicit role assignments. Syntax: Here is the method signature: public RoleAssignmentArray getImplicitAssignments() getInheritedAssignments Gets the inherited role assignments. Syntax: Here is the method signature: public RoleAssignmentArray getInheritedAssignments() getInheritedRoles Gets the inherited roles. Syntax: Here is the method signature: public DNStringArray getInheritedRoles() Role Web Service 649 getLastName Gets the last name. Syntax: Here is the method signature: public java.lang.String getLastName() getRoleAssignments Gets the role assignments for this identity. Syntax: Here is the method signature: public RoleAssignmentArray getRoleAssignments() setAssociatedRoles Sets the associated roles for this identity. Syntax: Here is the method signature: public void setAssociatedRoles(DNStringArray associatedRoles) setCn Sets the CN. Syntax: Here is the method signature: public void setCn(java.lang.String cn) setContainerRoles Sets the container roles. Syntax: Here is the method signature: public void setContainerRoles(DNStringArray containerRoles) setEmail Sets the email address. Syntax: Here is the method signature: public void setEmail(java.lang.String email) setEntityKey Sets the identity entity key. Syntax: Here is the method signature: public void setEntityKey(java.lang.String entityKey) 650 Identity Manager Roles Based Provisioning Module 3.7 User Application: Administration Guide setExplicitAssignments Sets the explicit role assignments. Syntax: Here is the method signature: public void setExplicitAssignments(RoleAssignmentArray explicitAssignments) setFirstName Sets the first name. Syntax: Here is the method signature: public void setFirstName(java.lang.String firstName) setGroupRoles Sets the group roles. Syntax: Here is the method signature: public void setGroupRoles(DNStringArray groupRoles) setIdentityType Sets the identity type. Syntax: Here is the method signature: public void setIdentityType(IdentityType identityType) setImplicitAssignments Sets the implicit role assignments. Syntax: Here is the method signature: public void setImplicitAssignments(RoleAssignmentArray implicitAssignments) setInheritedAssignments Sets the inherited role assignments. Syntax: Here is the method signature: public void setInheritedAssignments(RoleAssignmentArray inheritedAssignments) setInheritedRoles Sets the inherited roles. Syntax: Here is the method signature: public void setInheritedRoles(DNStringArray inheritedRoles) Role Web Service 651 setLastName Sets the last name. Syntax: Here is the method signature: public void setLastName(java.lang.String lastName) setRoleAssignments Sets the role assignments for this identity. Syntax: Here is the method signature: public void setRoleAssignments(RoleAssignmentArray roleAssignments) 22.2.44 VersionVO A value object for Version. VersionVO constructors The VersionVO class has two constructors. Syntax 1: Here is the syntax for a constructor that takes no parameters: VersionVO() Syntax 2: Here is the syntax for a constructor that takes a String as a parameter: VersionVO(java.lang.String version) getValue Gets the version. Syntax: Here is the method signature: public java.lang.String getValue() setValue Sets the version. Syntax: Here is the method signature: public void setValue(java.lang.String version) 22.3 Role Web Service Example This section provides examples that demonstrate how you might use the Role service. 22.3.1 Retrieving Roles for a Group This example shows how to retrieve the role assignments for a given group: 652 Identity Manager Roles Based Provisioning Module 3.7 User Application: Administration Guide public void getGroupTestCase() throws Exception { System.out.println("\n****************Calling getGroupTestCase()********************************"); String groupDN = "cn=HR,ou=groups,ou=medical-idmsample,o=novell"; try { IRemoteRole stub = getRoleStub(url, username, password); Group group = stub.getGroup(groupDN); //Assert.assertNotNull("Group not found", group); if (group != null) { System.out.println("Group Found:"); System.out.println(" entityKey : " + group.getEntityKey()); System.out.println(" identityType : " + group.getIdentityType().getValue()); System.out.println(" description : " + group.getDescription()); DNString[] roles = group.getAssociatedRoles().getDnstring(); if (roles != null) { System.out.println("no of associated roles: " + roles.length); for (int rIndex = 0; rIndex < roles.length; rIndex++) { System.out.println(" role: " + rIndex); } } else { System.out.println("no of associated roles:0"); } RoleAssignment[] assignments = group.getRoleAssignments().getRoleassignment(); PrintRoleUtils.getAssignments(assignments); } else System.out.println("Group not found"); } catch (NrfServiceException nrf) { throw new Exception(nrf.getMessage()); } catch (RemoteException re) { throw new Exception(re.getMessage()); } } 22.3.2 Retrieving Role Assignment Request Status Returns a list of role assignment request status instances given a correlation ID Role Web Service 653 public void getRoleAssignmentRequestStatusTestCase() throws Exception { System.out.println("\n****************Calling getRoleAssignmentRequestStatusTestCase()********************************"); String correlationId = "9a5feec728864b55ac443724a915e831"; try { IRemoteRole stub = getRoleStub(url, username, password); RoleAssignmentRequestStatusArray reqArray = stub.getRoleAssignmentRequestStatus(correlationId); RoleAssignmentRequestStatus[] reqStatus = reqArray.getRoleassignmentrequeststatus(); //Assert.assertNotNull("RoleAssignmentRequestStatus object is null for getRoleAssignmentRequestStatus", reqStatus); if (reqStatus != null) System.out.println(PrintRoleUtils.getRequestStatus(reqStatus)); else System.out.println("RoleAssignmentRequestStatus object is null for getRoleAssignmentRequestStatus"); //result += Util.getRequestStatus(reqStatus); } catch (NrfServiceException nrf) { throw new Exception(nrf.getMessage()); } catch (RemoteException re) { throw new Exception(re.getMessage()); } } 22.3.3 Retrieving Type Information for a Role Assignment This example shows how to retrieve the type for a role assignment: public void getRoleAssignmentTypeInfoTestCase() throws Exception { System.out.println("\n****************Calling getRoleAssignmentTypeInfoTestCase()********************************"); try { IRemoteRole stub = getRoleStub(url, username, password); RoleAssignmentTypeInfo info = stub.getRoleAssignmentTypeInfo(RoleAssignmentType.fromValue("ROLE_TO_ROLE")); 654 Identity Manager Roles Based Provisioning Module 3.7 User Application: Administration Guide //Assert.assertNotNull("Role Assignment Type Info Not Found for getRoleAssignmentTypeInfo", info); if (info != null) { System.out.println("Role Assignment Type Info:"); System.out.println(" identity type: " + info.getIdentityType().getValue()); System.out.println(" subtree included: " + info.getSubtreeIncluded()); System.out.println(" suports approvals: " + info.getSupportsApproval()); System.out.println(" supports effective date: " + info.getSupportsEffectiveDate()); System.out.println(" supports expiration: " + info.getSupportsExpiration()); System.out.println(" supports SOD Approval: " + info.getSupportsSODApproval()); } else System.out.println("Role Assignment Type Info Not Found for getRoleAssignmentTypeInfo"); } catch (NrfServiceException nrf) { throw new Exception(nrf.getMessage()); } catch (RemoteException re) { throw new Exception(re.getMessage()); } } 22.3.4 Retrieving Role Categories This example shows how to retrieve the defined role categories: public void getRoleCategoriesTestCase() throws Exception { System.out.println("\n****************Calling getRoleCategoriesTestCase()********************************"); try { IRemoteRole stub = getRoleStub(url, username, password); CategoryArray entriesArray = stub.getRoleCategories(); Category[] entries = entriesArray.getCategory(); Assert.assertNotNull("No categories found.", entries); if (entries != null) { System.out.println("no of categories:" + entries.length); for (int i = 0; i < entries.length; i++) { System.out.println(" category key : " + entries[i].getCategoryKey()); System.out.println(" category label: " + entries[i].getCategoryLabel()); Role Web Service 655 } } else System.out.println("No categories found."); } catch (NrfServiceException nrf) { throw new Exception(nrf.getMessage()); } catch (RemoteException re) { throw new Exception(re.getMessage()); } } 22.3.5 Retrieving Role Levels This example shows how to retrieve the defined role levels: public void getRoleLevelsTestCase() throws Exception { System.out.println("\n****************Calling getRoleLevelsTestCase()********************************"); try { IRemoteRole stub = getRoleStub(url, username, password); RoleLevelArray roleLevelArray = stub.getRoleLevels(); RoleLevel[] entries = roleLevelArray.getRolelevel(); //Assert.assertNotNull("No role levels found.", entries); if (entries != null) { System.out.println("no of levels:" + entries.length); for (int index = 0; index < entries.length; index++) { System.out.println(" Level : " + entries[index].getLevel()); System.out.println(" Name : " + entries[index].getName()); System.out.println(" Description: " + entries[index].getDescription()); System.out.println(" Container : " + entries[index].getContainer()); } } else System.out.println("No role levels found."); } catch (NrfServiceException nrf) { throw new Exception(nrf.getMessage()); } catch (RemoteException re) { throw new Exception(re.getMessage()); } } 656 Identity Manager Roles Based Provisioning Module 3.7 User Application: Administration Guide 22.3.6 Verifying Whether a User Is In a ROle This example shows how to determine whether a user has been assigned to a role: public void isUserInRoleTestCase() throws Exception { System.out.println("\n****************Calling isUserInRoleTestCase()********************************"); String[] DNs = { "cn=ablake,ou=users,ou=medical-idmsample,o=novell", "cn=Doctor,cn=Level20,cn=RoleDefs,cn=RoleConfig,cn=AppConfig,cn=HajenDriver,c n=TestDrivers,o=novell" }; try { IRemoteRole stub = getRoleStub(url, username, password); boolean inRole = stub.isUserInRole(DNs[0], DNs[1]); String sInRole = "User Not In Role"; if (inRole) sInRole = new String("User In Role"); System.out.println(sInRole); } catch (NrfServiceException nrf) { throw new Exception(nrf.getMessage()); } catch (RemoteException re) { throw new Exception(re.getMessage()); } } Role Web Service 657 658 Identity Manager Roles Based Provisioning Module 3.7 User Application: Administration Guide 23 Resource Web Service 23 This section describes the Resource Web Service, which allows SOAP clients to invoke a subset of actions that apply to resources. Topics include: Section 23.1, “About the Resource Web Service,” on page 659 Section 23.2, “Resource Web Service Interface,” on page 662 23.1 About the Resource Web Service The Resource Web Service exposes a small set of actions for the resource model. The service allows remote clients to request that a resource be granted or revoked, and also to check on the status of resource requests. By exposing these actions, the service makes it possible for a provisioning workflow to invoke resource requests through the Integration activity. Calls to the Resource Web Service calls require HTTP authentication. By default, access to the resource service methods is restricted to Resource Module Administrators. 23.1.1 Accessing the Test Page You can access the Resource Web Service endpoint using a URL similar to the following: http://server:port/warcontext/resource/service?test For example, if your server is named “myserver”, your User Application is listening on port 8080, and your User Application war file is named “IDMPROV”, the URL would be: http://myserver:8080/IDMPROV/resource/service?test WARNING: The test page is disabled by default. Since some of the methods allow data to be updated, the test page presents a potential security vulnerability and should not be allowed in a production environment. Servlet declaration for the Resource Service A SOAP service using WSSDK is deployed by adding the following declarations in the deployment descriptor (i.e. WEB-INF/web.xml): <servlet> <servlet-name>Role</servlet-name> <servletclass>com.novell.idm.nrf.soap.ws.role.impl.RoleServiceSkeletonImpl</servletclass> <servlet-mapping> <servlet-name>Role</servlet-name> <url-pattern>/role/service</url-pattern> </servlet-mapping> </servlet> Resource Web Service 659 This follows the normal servlet declaration pattern. It indicates that the servlet com.novell.idm.nrf.soap.ws.resource.impl.ResourceServiceSkeletonImpl is deployed at /resource/ service. When a user reaches this servlet using a HTTP GET by entering http://server-name/context/ resource/service (for example, http://localhost:8080/IDMProv/resource/service) in their browser, the WSSDK provides a page that exposes some information about the deployed service. Enabling the Test Page WARNING: The test page is disabled by default. Since some of the methods allow data to be updated, the test page presents a potential security vulnerability and should not be allowed in a production environment. To enable the test page, you need to update the web.xml file. Before you make your changes, the web.xml should look like this: <servlet> <servlet-name>Resource</servlet-name> <servletclass>com.novell.idm.nrf.soap.ws.resource.impl.ResourceServiceSkeletonImpl</ servlet-class> <init-param> <param-name>com.novell.soa.ws.test.disable</param-name> <param-value>true</param-value> </init-param> </servlet> Change the servlet declaration, as follows: <servlet> <servlet-name>Resource</servlet-name> <servletclass>com.novell.idm.nrf.soap.ws.resource.impl.ResourceServiceSkeletonImpl</ servlet-class> <init-param> <param-name>com.novell.soa.ws.test.disable</param-name> <param-value>false</param-value> </init-param> </servlet> 23.1.2 Accessing the WSDL You can access the WSDL for the Resource Web Service using a URL similar to the following: http://server:port/warcontext/resource/service?wsdl For example, if your server is named “myserver”, your User Application is listening on port 8080, and your User Application war file is named “IDMPROV”, the URL would be: http://myserver:8080/IDMPROV/resource/service?wsdl 660 Identity Manager Roles Based Provisioning Module 3.7 User Application: Administration Guide 23.1.3 Removing Administrator Credential Restrictions The Resource Web Service supports two levels of security, one that restricts access to Resource Module Administrators, and another that restricts access to the authenticated user. The default setting restricts access to all operations to the Resource Module Administrator. You can modify the security configuration by extracting the /RoleService-con/config.xml file from the IDMfw.jar file in the IDMProv.war file, and editing the property settings. Each property can be set to true or false. A value of true locks down the operation, whereas a value of false opens up the operation. After making your changes, you need to import the file back into the WAR file and redeploy. You can open up the Resource Web Service to authenticated users by setting the ResourceService/ Resource/soap property to false. To open up a particular operation to authenticated users, you need to set the property for that operation (ResourceService/Resource/soap/operation) to false as well. If you set all of the properties to false, you can open up all operations to authenticated users. The operation names are the same as the names of the methods supported by the service. The following methods can be invoked by users without Resource Administrator credentials if the property ResourceService/Resource/soap property is set to false: requestResourceGrant requestResourceRevoke getResourceRequestStatusByCorrelationId getResourceRequestStatusForCurrentUser getResourceAssignmentsForCurrentUser If you wish to change the restriction for a particular operation, you can modify the property ResourceService/Resource/soap/operation for the method, setting its value to true to restrict access to administrators for the operation and false to remove the restriction. If the ResourceService/ Resource/soap property is true, all methods are restricted to Resource Administrator credentials. Example The following example shows a security configuration that would open up all operations within the Resource Web Service, except for the getResourceRequestStatusByIdentity operation, which would only be accessible to the Resource Administrator: <property> <key>ResourceService/Resource/soap</key> <value>false</value> </property> <property> <key>ResourceService/Resource/soap/requestResourceGrant</key> <value>false</value> </property> <property> <key>ResourceService/Resource/soap/requestResourceRevoke</key> <value>false</value> </property> <property> <key>ResourceService/Resource/soap/ getResourceRequestStatusByCorrelationId</key> <value>false</value> </property> <property> <key>ResourceService/Resource/soap/ Resource Web Service 661 getResourceRequestStatusForCurrentUser</key> <value>false</value> </property> <property> <key>ResourceService/Resource/soap/ getResourceRequestStatusByIdentity</key> <value>true</value> </property> 23.2 Resource Web Service Interface This section provides details about the methods available with the Resource Web service. This programming interface presumes you’re using Java code generated by the WSSDK toolkit. The interface will be different if you’re using another Web Service toolkit. 23.2.1 IRemoteResource This section provides reference information for each method associated with the IRemoteResource interface. requestResourceGrant Makes a grant resource request and returns a resource request correlation ID. Syntax: Here is the method signature: public String requestResourceGrant(String resourceTarget, String requester, String userTarget, String reasonForRequest, ResourceRequestParam[] requestParams, String correlationId) throws NrfServiceException, RemoteException; The parameters are described below: resourceTarget specifies the target resource DN. requester supplies an identifier for the remote client application making the request to grant the resource. userTarget specifies the DN for the being granted the resource. reasonForRequest provides a reason for the request. requestParams provides the parameter values for the request. correlationId specifies a resource assignment request correlation ID; if the parameter is null, a correlation ID is generated. The requester parameter is a client-supplied identifier for the agent making the request. For example, an identifier such as IRemote-MyApplicationName might be used to identify a request from MyApplicationName. The requestParams are the dynamic parameter values required by the resource to make a request. If no values are required, the parameter value can be null or an empty array. The correlationId allows a client to group request for the purpose of checking the staus. If the parameter value is null, the service generates a unique correlation id. The correlation id is returned to the caller. 662 Identity Manager Roles Based Provisioning Module 3.7 User Application: Administration Guide requestResourceRevoke Makes a revoke resource request and returns a resource request correlation ID. The revoke invocation behavior mirrors the behavior for a grant opeation, except that a revoke request for the resource is posted on the server. Syntax: Here is the method signature: public String requestResourceRevoke(String resourceTarget, String requester, String userTarget, String reasonForRequest, ResourceRequestParam[] requestParams, String correlationId) throws NrfServiceException, RemoteException; The parameters are described below: resourceTarget specifies the target resource DN. requester supplies an identifier for the remote client application making the request to revoke the resource. userTarget specifies the DN for the being granted the resource. reasonForRequest provides a reason for the request. requestParams provides the parameter values for the request. correlationId specifies a resource assignment request correlation ID; if the parameter is null, a correlation ID is generated. getResourceRequestStatusByCorrelationId Returns all resource request status items for a given correlation ID. Syntax: Here is the method signature: public ResourceAssignmentRequestStatus[] getResourceRequestStatusByCorrelationId (String correlationId, String locale) throws NrfServiceException, RemoteException; The parameters are described below: correlationId specifies a resource assignment request correlation ID. locale supplies an iso639 language code to format localized string values; if the parameter is null, the language defaults to the servlet request locale. This method returns all resource request status instances for the specified correlationId parameter value. For more information on the ResourceAssignmentRequestStatus class, see Section 23.2.3, “ResourceAssignmentRequestStatus,” on page 665. getResourceRequestsStatusForCurrentUser Returns all resource request status items for the authenticated user. Syntax: Here is the method signature: public ResourceAssignmentRequestStatus[] getResourceRequestStatusForCurrentUser(String locale) throws NrfServiceException, RemoteException; Resource Web Service 663 The parameters are described below: locale supplies an iso639 language code to format localized string values; if the parameter is null, the language defaults to the servlet request locale. This method returns all resource request status instances for the specified correlationId parameter value. For more information on the ResourceAssignmentRequestStatus class, see Section 23.2.3, “ResourceAssignmentRequestStatus,” on page 665. getResourceRequestStatusByIdentity Returns all resource assignment request status items for a particular user identity. Syntax: Here is the method signature: public ResourceAssignmentRequestStatus[] getResourceRequestStatusByIdentity(String identity, String locale) throws NrfServiceException, RemoteException; The parameters are described below: identity specifies the DN for a user. locale supplies an iso639 language code to format localized string values; if the parameter is null, the language defaults to the servlet request locale. This method returns all resource request status instances for the specified correlationId parameter value. For more information on the ResourceAssignmentRequestStatus class, see Section 23.2.3, “ResourceAssignmentRequestStatus,” on page 665. 23.2.2 ResourceRequestParam Supporting class that holds the name and value for a resource request parameter value. ResourceRequestParam Constructors The ResourceRequestParam class has two constructors. Syntax 1: Here is the syntax for a constructor that takes no parameters: public ResourceRequestParam() { } Syntax 2: Here is the syntax for a constructor that takes two String parameters: public ResourceRequestParam(String name, String value) { m_name = name; m_value = value; } setName Sets a parameter name. Syntax: Here is the method signature: 664 Identity Manager Roles Based Provisioning Module 3.7 User Application: Administration Guide public void setName(String name) getName Returns a parameter name. Syntax: Here is the method signature: public String getName() setValue Sets the value of a parameter. Syntax: Here is the method signature: public void setValue(String value) getValue Returns the value of a parameter. Syntax: Here is the method signature: public String getValue() 23.2.3 ResourceAssignmentRequestStatus Supporting class that holds a resource request status item. The interface includes methods for getting and setting various request status properties. However, you will not need to call the methods for setting property values, since you are using this class to retrieve information about the request status. After calling the requestResourceGrant() or the requestResourceRevoke() methods, you can use the get methods to get the properties for each status object returned in the ResourceAssignmentRequestStatus array. setEntityKey Sets the entity key. Syntax: Here is the method signature: public void setEntityKey(String entityKey) getEntityKey Gets the entity key. Syntax: Here is the method signature: public String getEntityKey() setReason Sets the reason for the role assignment. Syntax: Here is the method signature: Resource Web Service 665 public void setReason(String reason) getReason Gets the reason for the role assignment. Syntax: Here is the method signature: public String getReason() setStatusValue Sets the status value for the request. Syntax: Here is the method signature: public void setStatusValue(int value) setStatusDescription Sets the status description for the request. Syntax: Here is the method signature: public void setStatusDescription(String description) getStatusValue Gets the status value for the request. Syntax: Here is the method signature: public int getStatusValue() getStatusDescription Gets the localized description for the request. Syntax: Here is the method signature: public String getStatusDescription() setCorrelationId Sets the correlation ID. Syntax: Here is the method signature: public void setCorrelationId(String correlationId) getCorrelationId Gets the correlation ID. Syntax: Here is the method signature: public String getCorrelationId() 666 Identity Manager Roles Based Provisioning Module 3.7 User Application: Administration Guide setRequester Sets the requester DN. Syntax: Here is the method signature: public void setRequester(String requester) getRequester Gets the requester DN. Syntax: Here is the method signature: public String getRequester() setRequestDate Sets the request date. Syntax: Here is the method signature: public void setRequestDate(Date requestDate) getRequestDate Gets the request date. Syntax: Here is the method signature: public Date getRequestDate() setSource Sets the source resource DN. Syntax: Here is the method signature: public void setSource(String source) getSource Gets the source resource DN. Syntax: Here is the method signature: public String getSource() setTarget Sets the DN for the target identity. Syntax: Here is the method signature: public void setTarget(String target) Resource Web Service 667 getTarget Gets the DN for the target identity. Syntax: Here is the method signature: public String getTarget() setRequestParams Sets the dynamic request parameters. Syntax: Here is the method signature: public void setRequestParams(ResourceRequestParam[] params) getRequestParams Gets the dynamic request parameters. Syntax: Here is the method signature: public ResourceRequestParam[] getRequestParams() 668 Identity Manager Roles Based Provisioning Module 3.7 User Application: Administration Guide Forgot Password Web Service 24 24 This section describes the Forgot Password Web Service, which allows SOAP clients to invoke a subset of the actions available through the Password Management system. Topics include: Section 24.1, “About the Forgot Password Web Service,” on page 669 Section 24.2, “Password Management Web Service Interface,” on page 670 Section 24.3, “ForgotPasswordWSBean,” on page 672 24.1 About the Forgot Password Web Service The Forgot Password Web Service exposes a small set of actions from the Password Management system. The service allows remote clients to retrieve information about the forgot password configuration. In addition, it allows clients to retrieve information about the forgot password settings for a particular user, and perform challenge response and change password operations for a user. The Forgot Password Web Service does not support the full range of password self-service operations. The Forgot Password Web Service is only for forgot password operations. If you want to create a custom user interface for performing password self service functions, such as answering or updating the user’s hint or answer, or updating the challenge response questions, or checking on the password policy status, you need to use the new REST endpoints that have been added to RBPM 3.7. Calls to the Forgot Password Web Service require HTTP authentication. 24.1.1 Accessing the Service You can access the Forgot Password Web Service endpoint using a URL similar to the following: http://server:port/warcontext/pwdmgt/service For example, if your server is named “myserver”, your User Application is listening on port 8080, and your User Application war file is named “IDMPROV”, the URL would be: http://myserver:8080/IDMPROV/pwdmgmt/service NOTE: The URL for the Forgot Password Web Service can be changed on the Forgot Password Settings page on the Administration tab in the User Application. To change the URL, enter the new URL in the Forgot Password Web Service URL field at the bottom of the page. 24.1.2 Accessing the WSDL You can access the WSDL for the Forgot Password Web Service using a URL similar to the following: http://server:port/warcontext/pwdmgt/service?wsdl For example, if your server is named “myserver”, your User Application is listening on port 8080, and your User Application war file is named “IDMPROV”, the URL would be: Forgot Password Web Service 669 http://myserver:8080/IDMPROV/pwdmgt/service?wsdl 24.2 Password Management Web Service Interface This section provides reference information for each forgot password operation available through the Password Management interface. 24.2.1 processForgotConf Gets the forgot password configuration parameters. This method returns an object of type ForgotPasswordConfWSBean. This object contains the following information about the configuration: Table 24-1 ForgotPasswordConfWSBean Data Field Description Configured Return Link Provides the forgot password return link. Show Return Link Indicates whether to show the forgot password return link. Syntax: Here is the method signature: public ForgotPasswordConfWSBean processForgotConf() throws RemoteException; 24.2.2 processUser Retrieves forgot password configuration information for a user. This method returns an object of type ForgotPasswordWSBean. If no match is found for the the user name specified, an error message is returned in the getUsers() method of ForgotPasswordWSBean. If multiple matches are found, the getUsers() method is returned with a String array of users. If a single match is found, the getUsers() method has a length of 1, and the following methods in ForgotPasswordWSBean are set: getConfiguredRtnLink() getShowReturnLink() getShowHint() getHint() getShowFullDN() getUserDisplayDN() getUserDN() getUser() getMessage() 670 Identity Manager Roles Based Provisioning Module 3.7 User Application: Administration Guide getAction() getChallengeQuestions() getChaResInUser() getMessage() When a single user match is found, the user should be presented with the Challenge Response screen. If getChaResInUse() returns false, then call processChaRes() and show the Forgot Success screen directly without presenting the Challenge Response screen. Syntax: Here is the method signature: public ForgotPasswordWSBean processUser(final String userName) throws RemoteException; The parameters are described below: userName specifies the name of a user. 24.2.3 processChaRes Processes one or more challenge response answers for a particular user. If the challenge response operation is authenticated, the following events may occur: If the password policy action is EmailHint, the operation will send an email with the hint to the user, and set the message to indicate that the operation succeeded. Therefore, the caller of this method should go to the Forgot Password Change Success screen, and display the message. If the password policy action is ShowHint, the operation will set the message to the user’s hint. Therefore, the caller of this method should go to the Forgot Password Change Success screen, and display the message with the hint on the page. If the password policy action is EmailPassword, the operation will set send the password to the user. Therefore, the caller of this method should go to the Forgot Password Change Success screen, and display the message. If the password policy action is ChangePassword, the operation will set the password rules and the password hint. Therefore, the caller of this method should go to the Forgot Password Change screen. This method returns an object of type ForgotPasswordWSBean. After the processCharRes operation is called, the following methods are populated with values: getTimeout() getRules() getLocked() getError() getMessage() If the getAction() method returned by the processUser() operation is ChangePassword, then present the user with the Password Change screen. Otherwise, go to the Forgot Success screen and present the user with the message returned from the getMessage() method. Syntax: Here is the method signature: Forgot Password Web Service 671 public ForgotPasswordWSBean processChaRes(final String userDN, final String[] chaAnswers) throws RemoteException; The parameters are described below: userDN specifies the DN for a particular user. chaAnswers provides an array of challenge response answers. The answers are processed in the order in which they are presented. 24.2.4 processChgPwd Resets the password for a particular user. After the processChgPwd operation is called, the following events may occur: If the change password operation succeeds, the caller of this method should go to the Forgot Password Success screen, and display the success message. If the change password operation fails, the error field on the ForgotPasswordWSBean object is set to true, and the message field is populated with the corresponding error message. Therefore, the caller of this method should stay on the password screen and display the error message. This method returns an object of type ForgotPasswordWSBean. After the processChgPwd operation is called, the following methods are populated with values: getTimeout() getError() If the getError() method returns false, you need to present the user with the Password Change Success screen. Syntax: Here is the method signature: public ForgotPasswordWSBean processChgPwd(final String userDN, final String newPassword, final String confirmPassword ) throws RemoteException; The parameters are described below: userDN specifies the DN for a particular user. newPassword supplies a password for the user. confirmPassword repeats the password for confirmation. 24.3 ForgotPasswordWSBean Here is the complete structure of the ForgotPasswordWSBean object: Table 24-2 ForgotPasswordWSBean Structure Field Description Users Provides a list of the users that match the search criteria specified. When the wildcard feature is enabled, multiple matches may be found. 672 Identity Manager Roles Based Provisioning Module 3.7 User Application: Administration Guide Field Description Challenge Questions Supplies the challenge questions associated with the user. Configured Return Link Shows the Return link to be used after the user performs a forgot password operation. Show Return Link Indicates whether to show the Return link after the user performs a forgot password operation. Show Hint Indicates whether to show the user's password hint on the Forgot Password Change screen. Show Full DN Indicates whether to show the user's full DN or just the CN name after the user performs a forgot password operation. User DN Shows the user's DN. User Display DN Shows the user's display DN. For example, cn=ablake,ou=users,o=novell or workforceID=ablake,ou=users,o=novell. User Provides the user's display name. Error Returns true if an error occurs. Message Returns a message in the event that there is an application-specific error. Action Specifies the policy action, which is one of the following values: ShowHint, EmailHint, EmailPassword, ChangePassword. Hint Specifies the user's password hint. Rules Lists the password policy rules. Is Challenge Response in User Indicates whether the challenge response feature is enabled for this user. If challenge response in use is false, then the user can only perform the email hint and show hint functions. Locked Indicates whether the user account is locked. Timeout Indicates whether a session timeout occurred. Login Attribute Specifies the user's Login Attribute. Forgot Password Web Service 673 674 Identity Manager Roles Based Provisioning Module 3.7 User Application: Administration Guide REST Services VI VII These sections tell you how to use the REST services. Topics include: Chapter 25, “Introduction to Resource Information Services,” on page 677 Chapter 26, “Identities Service,” on page 697 Chapter 27, “Password Management and SSO Services,” on page 703 Chapter 28, “Roles Service,” on page 713 Chapter 29, “Work Items Service,” on page 723 Chapter 30, “Workflow Process and Definition Service,” on page 737 REST Services 675 676 Identity Manager Roles Based Provisioning Module 3.7 User Application: Administration Guide Introduction to Resource Information Services 25 25 This section describes the Work Items Service. Topics include: Section 25.1, “About RIS,” on page 677 Section 25.2, “Security,” on page 681 Section 25.3, “WADL Document,” on page 692 25.1 About RIS This section describes the Resource Information Services (RIS) facility, which is a standalone component that interacts with the Identity Manager User Application. RIS is built on a Rest Oriented Architecture (ROA). The RIS implementation resides in a WAR file called RIS.WAR, where RIS refers to Resource Information Services. The REST resources exposed through RIS make SOAP calls to gather information from the Workflow system. The methodology used to define these ROA services is based on the steps described by Leonard Richardson & Sam Ruby in the RESTful Web Services by O'Reilly. 25.1.1 How it Works The code for RIS is contained in a WAR outside of the User Application. This is a standalone WAR (RIS.war) that uses SOAP calls to extract the necessary work item data. Language support is determined by the “Accept-Language” header parameter. The media type is determined by the “Accept” header parameter and must be equal to “application/ json”. The implementation does not support the use of extensions. It does not support the ability to enter a language or media extension at the end of a URI. This implementation is based on the JSR-311 specification implemented by Sun's Jersey product. You may see this error on the console: 09:52:52,684 ERROR [STDERR] Sep 30, 2008 9:52:52 AM com.sun.jersey.api.core.ClasspathResourceConfig init INFO: Root resource classes found: class com.novell.ris.spi.impl.Root This is a Jersey message that is simply informational. The application should function normally. You can ignore the message. NOTE: During the deployment of the RIS.war on WebSphere, you might see the following error message in the server log: Introduction to Resource Information Services 677 WebApp W Error while adding servlet mapping --> /* Please set fileServingEnabled=false in the ibm-web-ext.xmi file which is under WEB-INF folder. This message does not affect the functions of RIS. Caching the SOAP stubs The web.xml file in the RIS.war includes an element that allows you to control the size of the stub connection pool. <init-param> <param-name>STUB_CONNECTION_POOL</param-name> <param-value>100</param-value> </init-param> The STUB_CONNECTION_POOL element defines the size of a pool for caching the SOAP stubs created by each user. The cache uses a Least Recently Used (LRU) eviction policy and defaults to a size of 10 if the element is not defined in web.xml. Removing the administrator credential restrictions By default, the requirement for invoking the REST and SOAP services is that the HTTP session logged in user must have administrator credentials. The Provisioning and Directory Web Services require Provisioning Administrator credentials. The Roles Web Service requires Role Administrator credentials. The restrictions can be removed to allow a session with a logged in user who does not have administrator credentials to invoke the methods for the services by changing the configuration settings for the service. In order to do this, you must extract the configuration files from the User Application war, make the appropriate changes, and import the files back into the User Application WAR. The details for removing the restrictions is included with the documentation for each of the underlying SOAP services. For example, to remove the credential restriction for the Role Service, see Sectio