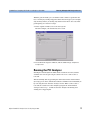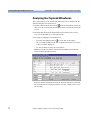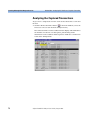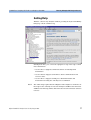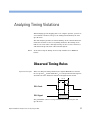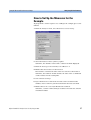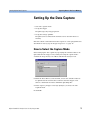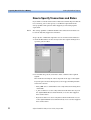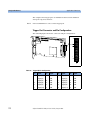
1
Agilent E2925B PCI Analyzer
User’s Guide
S1
Important Notice
This document contains propriety information that is
protected by copyright. All rights are reserved. Neither the
documentation nor software may be copied, photocopied,
reproduced, translated, or reduced to any electronic
medium or machine-readable form, in whole or in part,
without the prior written consent of Agilent Technologies.
© Copyright 1998, 2000 by:
Agilent Technologies
Herrenberger Straße 130
D-71034 Böblingen
Germany
The information in this manual is subject to change
without notice. Agilent Technologies makes no warranty
of any kind with regard to this manual, including but not
limited to the implied warranties of merchantability and
fitness for a particular purpose.
Agilent Technologies shall not be liable for errors
contained herein or direct, indirect, special, incidental, or
consequential damages in connection with the furnishing,
performance, or use of this manual.
Brand or product names are trademarks or registered
trademarks of their respective companies or
organizations.
Authors: Stephan Greisinger and Stefan Kunzi, t3 medien
GmbH
2
Agilent E2925B PCI Analyzer User’s Guide, August 2002
Contents
Contents
System Overview
7
A Window To The System
User Interface
8
10
Test Setup Overview
Analyzer Overview
Exerciser Overview
11
Hardware and Interfaces
14
Running A Sample PCI Analyzer Session
PCI Analyzer Scenarios
Preparing for the Guided Tour
Guided Tour: Analyzing PCI Traffic to a Graphics
Controller
Setting Up the Trigger
Setting Up the Storage Qualifier
Running the PCI Analyzer
Analyzing the Captured Waveforms
Analyzing the Captured Bus Cycles
Analyzing the Captured Transactions
Getting Help
Guided Tour: Analyzing Protocol and Timing Violations
Setting Up the Protocol Observer
Triggering on Protocol Errors
Analyzing the Captured Waveforms
Detecting Setup/Hold Timing Violations
Guided Tour: Using the State Sequencer
Changing to Sequencer Mode
Setting Up the Trigger Sequencer
Guided Tour: PCI Performance Analysis
Identifying Overall System Performance
Agilent E2925B PCI Analyzer User’s Guide, August 2002
11
13
17
18
18
20
20
22
23
24
25
26
27
28
28
29
30
31
33
33
34
36
37
3
Contents
Setting Up a PCI Analyzer Test
Possible PCI Analyzer Configurations
Dedicated Control PC
Software Running on System Under Test
Concealing the Card from the System
Connecting to the Testcard
How to Select the Connection
Connection Troubleshooting
Analyzing Protocol Violations
Protocol Observation
How to Set Up the Protocol Observer
Watching the Protocol Observer
How to Upload Protocol Observer Results
How to Reset the Protocol Observer
Analyzing Timing Violations
Observed Timing Rules
Timing Check Limitations
Adapting the Timing Checker
How to Set Up the Timing Checker
How to Modify Timing Limits
Watching the Timing Checker
How to Upload Timing Checker Results
How to Reset the Timing Checker
How to Debug Timing Violations
Analyzing PCI Performance
Predefined Performance Measures
How to Select Predefined Performance Measures
How to Run a Performance Measurement
Advanced Performance Measures
Sample Advanced Performance Setup
How to Set Up the Measures for the Example
How to Program the Counter Sequencer for the Example
4
Agilent E2925B PCI Analyzer User’s Guide, August 2002
39
39
40
41
42
43
44
45
47
47
48
49
49
50
51
51
52
53
54
55
56
56
56
57
59
60
61
62
64
66
67
68
Contents
Capturing Data In The Trace Memory
Data Stored In The Trace Memory
Capture Mode
Setting Up the Data Capture
How to Select the Capture Mode
How to Set Up the Trigger
How to Specify a Trigger Pattern
How to Set Up the Storage Qualifier
How to Specify Transactions and States
Setting Up the Trigger Sequencer
Sample Sequencer Setup
How to Set Up the Trigger Sequencer
Running the Data Capture
Viewing And Processing The Trace Memory Capture
Using the Waveform Lister
How to Arrange the Signal Display
Adjusting Range and Resolution
Using the Markers
How to Synchronize the Listers
Using the Bus Cycle Lister
Browsing Through the Cycles
Using the Transaction Lister
Processing the Captured Data
Saving and Re-Using the Setups
Re-Using Test Setups
How to Overwrite the Power Up Defaults
Upgrading the PCI Analyzer
How to Install Software Options
Upgrading the Testcard Hardware
Agilent E2925B PCI Analyzer User’s Guide, August 2002
71
72
74
75
75
76
77
79
80
81
83
85
87
89
90
91
92
92
94
94
95
96
97
99
99
100
101
101
102
5
Contents
Updating the Testcard
How to Check the Hardware
How to Update the Testcard Hardware
Analyzer Reference
103
103
105
List of Rules Observed by the PCI Analyzer
Sample Timing Diagrams
Application Interfaces
Static I/O Port
Trigger I/O Connector
LEDs on the Testcard
Glossary
6
103
105
112
115
115
117
119
121
Agilent E2925B PCI Analyzer User’s Guide, August 2002
System Overview
Before going into the details of the PCI Analyzer, take a look at the
features and interfaces of the Agilent E2925B testcard and its options:
• “A Window To The System” on page 8 describes the use models and
scenarios in which the testcard and its options are intended to be
used.
• “User Interface” on page 10 provides an overview of the user interface
software coming with the testcard, and, thus, lists the card’s basic
features.
• “Hardware and Interfaces” on page 14 identifies the most important
elements on the testcard.
Agilent E2925B PCI Analyzer User’s Guide, August 2002
7
System Overview
A Window To The System
A Window To The System
The Agilent E2925B testcard is your window on the system during
product development, giving you access to almost all of the system
components located on the PCI bus, as well as devices and adapters on
secondary buses such as ISA.
The options available for the testcard support you in all phases of the
design cycle—and all along the value chain of the computer industry.
This is how you can use the card in the individual phases:
• When bringing up and debugging a PCI-based system, device, or
firmware, the PCI Analyzer coming with the card lets you evaluate
its behavior on the PCI bus.
While tools like oscilloscopes and logic analyzers focus on problems
on your device (for example, timings, signal integrity), the PCI
Analyzer allows you to examine the device’s behavior on the bus, as
well as to perform functional tests like data compares.
For example, when testing LAN interface cards, you can sample the
data packages and compare incoming and outgoing data.
8
Agilent E2925B PCI Analyzer User’s Guide, August 2002
A Window To The System
System Overview
The PCI Analyzer also features real-time performance measurement,
using predefined, standardized measures like efficiency, throughput,
and utilization. It also allows to set up user-defined measures.
• When optimizing a system or a device to improve its performance, the
Performance Optimizer (option #200) gives you in-depth postprocessed performance analysis and hints for performance
optimization.
• The PCI Exerciser (option #300) allows you to overcome the passive
role in monitoring the PCI bus. With the PCI Exerciser, the testcard
can be programmed to behave as a master and/or target device.
With the PCI Exerciser you can set up complex PCI scenarios and
worst case test patterns quickly and in a repeatable way.
Using these features, you can optimize for reliability, by ensuring
that your system or device will handle even worst PCI conditions.
You can also run functional tests, directing the PCI Exerciser to
generate and transmit large blocks of data in specified time intervals,
thus testing how much PCI traffic your device can handle.
• To proceed even further and validate that your PCI design works
under all real-life conditions, the System Validation Pack (option
#310) provides a sophisticated user interface and pre-defined tests.
• Finally, the C-API / PPR (option #320) programming interface
provides full flexibility for integrating the testcard into existing test
environments and controlling all details on the testcard.
Agilent’s unique PCI Protocol Permutator and Randomizer (PPR)
prepares the PCI Exerciser to transfer a single block of data with as
many protocol variations as possible, giving you the optimum test
coverage in the minimum amount of time.
Agilent E2925B PCI Analyzer User’s Guide, August 2002
9
System Overview
User Interface
User Interface
The Agilent E2925B testcard comes with a graphical user interface
software providing a basic framework and the controls for the PCI
Analyzer. The options available for the testcard also use this framework,
expanding it by their own specific features.
Buttons
Menus
Overview Windows
10
The most important features are available via the framework buttons.
For example, for the PCI Analyzer you can set up the data capture and
display the results in different formats—all by means of the buttons.
All these features and more are available via the menus of the framework
window, as well.
As a third possibility, there are the overview windows provided by the
user interface. These windows provide process-oriented access to the
individual features.
Agilent E2925B PCI Analyzer User’s Guide, August 2002
User Interface
System Overview
Test Setup Overview
The test setup overview shows the basic test configuration.
The test setup is described by the following aspects:
• The Host group identifies the type of connection between the user
interface software and the testcard. Clicking the button allows you to
change the current settings in the Testcard Configuration dialog box.
• To the right, there is a group showing the detected testcard and its
capabilities. The Exerciser and Analyzer buttons open the respective
overview windows (if registered).
• The System group describes the properties of the detected PCI bus.
Analyzer Overview
Clicking the Analyzer button in the Test Setup window shows the
Analyzer Overview window.
}
}
Agilent E2925B PCI Analyzer User’s Guide, August 2002
Performance
Optimizer
PCI
Analyzer
11
System Overview
User Interface
The Analyzer Overview window shows the individual components of the
PCI Analyzer (and the Performance Optimizer), how they interact, and
how they act on the bus. Clicking the buttons brings up the respective
setup or result windows.
For the PCI Analyzer, there is
• the Timing Check
The timing checker continuously monitors the PCI bus to detect
timing violations.
• the Protocol Check
The protocol observer continuously monitors the PCI bus to detect
protocol errors.
• the Capture control
The PCI Analyzer allows you to specify exactly when and which data
is to be captured from the PCI bus, thus making optimum use of the
available trace memory.
• the result windows: waveform lister, bus cycle lister, and transaction
lister
The result windows interpret and display the captured data using
different levels of abstraction (from signal level to transaction level).
Additionally, the PCI Analyzer provides features for real-time
performance measurements.
If the Performance Optimizer option has been installed and enabled,
there are additional features available for post-processed performance
analysis and optimization:
• the Performance Setup
For the Performance Optimizer you can set up the structure of the
report to be generated, identify master and target devices to be
considered, and control the capture for performance analysis.
• the Performance Chart
The performance charts show graphical representations of the
performance-relevant aspects found in the captured PCI traffic.
• the Performance Report
The performance report summarizes the results in a hierarchical way,
so you can focus on your level of detail.
• the Bus Activity Lister
The bus activity lister summarizes all transactions found in the
captured data. However, for each bus activity, only those properties
are displayed that are of interest in a performance analysis.
12
Agilent E2925B PCI Analyzer User’s Guide, August 2002
User Interface
System Overview
Exerciser Overview
Clicking the Exerciser button in the Test Setup window shows the
Exerciser Overview window. Both button and window are only available
if the PCI Exerciser option has been installed.
The Exerciser Overview window shows the individual components of the
PCI Exerciser, how they interact, and how they act on the bus. Clicking
the buttons brings up the respective setup windows.
The Agilent E2925B testcard can act as a master or a target device on the
PCI bus. You have full control over the testcard’s configuration space.
For the master you can specify,
• transactions to be performed,
• protocol attributes to be used with the transactions,
• data to be used for the transactions,
• conditions to be fulfilled before the transactions are started.
For the target you can specify
• which addresses are to be decoded (target decode and configuration
space),
• how received data is to be handled,
• the data to be transferred on request,
• the protocol attributes to be used during transactions.
Furthermore, the Agilent E2925B testcard is able to generate any PCI
interrupt INTA# ... INTD#.
Agilent E2925B PCI Analyzer User’s Guide, August 2002
13
System Overview
Hardware and Interfaces
Hardware and Interfaces
The following figure shows an overview of the interfaces provided by the
Agilent E2925B testcard.
Connector for
Deep Trace Memory (Agilent E2995A)
Exception and
Run Indicator LEDs
Trigger Ports
Restart Button
Serial Port
Static I/O Ports
Parallel Port
Standard PCI Connector
The following list roughly describes the most important interfaces of the
card. For information on the other connectors to be found on the card,
please refer to your supplementary information.
• The restart button allows you to restart the current test. For
example, if your test is to trigger on a certain event after power up, but
the event has already occurred during power up, you can easily restart
the test with the restart button. The card will then be ready to trigger
on the event again.
The restart button restarts the trace memory and performance
counters, the protocol observer and the timing checker (and master
and target if the PCI Exerciser option has been installed).
• The exception and run indicator LEDs show the card’s status and
are visible even if the card is plugged into a closed system. For more
details, refer to “LEDs on the Testcard” on page 119.
• The parallel and serial ports are the control interfaces used to
connect the card to the user interface software running on a host PC.
The parallel port is the preferred interface, used in combination with
the Fast Host Interface card plugged into the host PC. For more
details, refer to “Connecting to the Testcard” on page 43.
14
Agilent E2925B PCI Analyzer User’s Guide, August 2002
Hardware and Interfaces
System Overview
• The trigger ports provide access to the card’s trigger I/O lines. For
more details, refer to “Trigger I/O Connector” on page 117.
• The static I/O ports can be used to transfer data (for example, status
information) between the testcard and the test environment during
execution of a test provide. For more details, refer to “Static I/O Port”
on page 115.
• The PCI connector is used to plug the card into the system under
test. If the user interface software is running on the system under test,
this connector can also be used as control interface.
Agilent E2925B PCI Analyzer User’s Guide, August 2002
15
System Overview
16
Hardware and Interfaces
Agilent E2925B PCI Analyzer User’s Guide, August 2002
Running A Sample PCI Analyzer Session
The following application examples explain how the testcard can be
used in various analyzing tasks. After introducing the major scenarios for
the PCI Analyzer and showing how to prepare for the sample sessions,
you will find guided tours covering the following topics:
• Guided Tour: Analyzing PCI Traffic to a Graphics Controller
• Guided Tour: Analyzing Protocol and Timing Violations
• Guided Tour: Using the State Sequencer
• Guided Tour: PCI Performance Analysis
NOTE
The examples given here are also part of the Agilent E2920 Software
Demo guide. If you have already worked through this guide, you may
skip these guided tours.
Agilent E2925B PCI Analyzer User’s Guide, August 2002
17
Running A Sample PCI Analyzer Session
PCI Analyzer Scenarios
PCI Analyzer Scenarios
If you are
• designing a PCI chip and you need to do bring-up or debugging,
• using a third party PCI chip on your motherboard or adapter card that
you need to evaluate,
• trying to find the root cause of a failure that occurred during your chip
or system level validation,
• writing and debugging low level software (for example, BIOS code,
device drivers),
you probably need to monitor the PCI bus to find out whether your
software generates the correct PCI transactions, and also whether your
device under test reacts correctly, both at the protocol and the data level.
Monitoring the PCI transactions of your device also allows you to judge
its performance in relation to other devices.
The built-in 64k state PCI logic analyzer (optional 4M state) allows you to
capture PCI traffic and view it as a state waveform, a bus cycle listing or
as a transaction listing. The following examples show you how to set up
the PCI Analyzer and how to interpret the results.
Preparing for the Guided Tour
The examples described in the guided tours are designed to be
performed in Offline/Demo Mode—without hardware. All the setup files
(*.bst) and logic analyzer trace files (*.wfm) that are mentioned in the
following text can be found under
<your_installation_directory>\samples\demo. If you did not change the
default setting during installation, <your_installation_directory> will be
C:\Program Files\Agilent\E2920 PCI Series <release_number>.
To prepare for the guided tour:
1 Launch the Agilent E2920 software.
2 From the Setup menu, choose Testcard Configuration.
18
Agilent E2925B PCI Analyzer User’s Guide, August 2002
Preparing for the Guided Tour
Running A Sample PCI Analyzer Session
3 In the Testcard Configuration window, select the Offline/Demo Mode
radio button.
4 Now choose E2926B (64 bit, 33 MHz) from the User Selected
Testcard listbox, and check all license boxes in the Support/Licensing
group.
Your display should look like the window shown above.
5 Click OK and the main window should look like this.
You are now ready to start the guided tours.
NOTE
The examples in the guided tours use an Agilent E2926B (64 bit, 33 MHz)
testcard, but also apply to all other testcards of the Agilent E2920 series.
Agilent E2925B PCI Analyzer User’s Guide, August 2002
19
Running A Sample PCI Analyzer Session
Guided Tour: Analyzing PCI Traffic to a Graphics Controller
Guided Tour: Analyzing PCI
Traffic to a Graphics Controller
This example shows how to set up the testcard to trigger on a particular
address range and capture PCI traffic that occurs around this
triggerpoint. Afterwards, the captured data can be viewed at various
levels of abstraction to analyze the PCI behavior of the participating
devices (in this case a Host-PCI bridge and a PCI graphics controller).
For this example, the built-in logic analyzer will be set up to trigger on a
PCI address phase with an address in the range between 0xFB000000 and
0xFBFFFFFF, which corresponds to the video frame buffer. All PCI
cycles will be stored, including idle cycles.
Setting Up the Trigger
To set up a trigger and storage qualifier for the built-in logic analyzer:
1 Use the Capture button
in the icon bar of the main window, or
choose Capture from the Analyzer menu.
2 In the Capture dialog box, select the Trigger tab, choose trigger on
Pattern, and select the Occurred Once radio button.
3 Click the Edit button next to the pattern term and set the AD32 field
to FBxxxxxx\h.
4 Now click on the text field to the right of the signal b_state to open a
Selection List dialog box.
20
Agilent E2925B PCI Analyzer User’s Guide, August 2002
Guided Tour: Analyzing PCI Traffic to a Graphics Controller
Running A Sample PCI Analyzer Session
5 Highlight Addr and click the right-arrow button to place it in the right
(Selected) box and press OK. You can use the left-arrow button to
remove the “DON’T CARE” entry from the Selected list.
The b_state signal is internally generated by the testcard to provide
easy trigger setup for the multiplexed PCI bus.
The Pattern editor window should now look like this.
Agilent E2925B PCI Analyzer User’s Guide, August 2002
21
Running A Sample PCI Analyzer Session
Guided Tour: Analyzing PCI Traffic to a Graphics Controller
6 Click OK.
The Capture window should now look like this.
Setting Up the Storage Qualifier
Now, take a look at the Storage tab of the Capture window. On this tab,
you can define the storage qualifier. The default is All, which instructs
the built-in logic analyzer to unconditionally capture one sample per PCI
clock. Alternatively, you can choose Selected Transactions/States, which
allows you, for example, to suppress idle cycles between transactions
and/or wait states during a transaction (that is, PCI transactions are
stored back-to-back).
22
Agilent E2925B PCI Analyzer User’s Guide, August 2002
Guided Tour: Analyzing PCI Traffic to a Graphics Controller
Running A Sample PCI Analyzer Session
With the pattern fields, you can further restrict what is captured in the
trace memory by storing only particular transaction types (for example,
only memory writes) or storing only transactions where the testcard is
participating as a master or target.
1 In the Capture window, select the Storage tab.
For this example, the default All can be used.
2 Press OK in the Capture window, and the built-in logic analyzer is
ready to run.
Running the PCI Analyzer
Starting the PCI Analyzer in offline mode results in an error, but this
would be the next step in our procedure if we were connected to a
testcard.
This is normally done by pressing the Run button in the main window
(the large green arrow, which also starts the PCI Exerciser if installed) or
by selecting the Run from the Analyzer menu. When connected to a
testcard, the status bar of the Analyzer group in the main window
changes to Running... to indicate that the Analyzer is running and
waiting for a trigger signal.
Agilent E2925B PCI Analyzer User’s Guide, August 2002
23
Running A Sample PCI Analyzer Session
Guided Tour: Analyzing PCI Traffic to a Graphics Controller
Analyzing the Captured Waveforms
The captured data can be analyzed at different levels of abstraction. We
start by using the waveform viewer:
1 Click the Waveform Viewer button
in the main window (or use the
Waveform Lister item from the Analyzer menu) to open the waveform
viewer.
2 From the File menu in the Waveform Viewer window select Load
from file and load the trace file video1.wfm.
3 To navigate within the waveform viewer,
– press the Goto Trigger button
to view data at the trigger,
– enter a sample number in the left or right boxes below each corner
of the waveform display, or
– use the scroll bar to move the viewed data.
Markers A and B can also be moved just by grabbing them with the
mouse or through numeric entry.
If you need more information about the buttons and other controls in
the waveform viewer, drag your mouse over the control icons to view
the tool tips.
24
Agilent E2925B PCI Analyzer User’s Guide, August 2002
Guided Tour: Analyzing PCI Traffic to a Graphics Controller
Running A Sample PCI Analyzer Session
Analyzing the Captured Bus Cycles
Although the waveform viewer is appropriate for analyzing single
transactions or when you need to check the state of individual control
signals, it is tedious to “read” PCI transactions by looking at the
waveform viewer. This is where the bus cycle lister helps.
1 Click the Bus Cycle Lister button
in the main window (or use the
Bus Cycle Lister item from the Analyzer menu) to open the bus cycle
lister.
2 In the Bus Cycle Lister window, press the Goto Trigger button
to the triggerpoint. Scroll around to see how it works.
to go
3 If you want to view the waveform for a given set of lines in the bus
cycle lister, highlight the desired lines in the bus cycle lister and press
the Cross Reference button
(make sure that the waveform viewer
is still open or minimized).
Agilent E2925B PCI Analyzer User’s Guide, August 2002
25
Running A Sample PCI Analyzer Session
Guided Tour: Analyzing PCI Traffic to a Graphics Controller
Analyzing the Captured Transactions
To get a more compressed overview of the transactions that occurred on
the bus:
1 Click the Transaction Lister button
in the main window (or use the
Transaction Lister item from the Analyzer menu).
The transaction lister removes idles from the display and summarizes
the number of waits for each data phase, just showing useful
information such as address and data phases. Address reconstruction
is also done during bursts.
26
Agilent E2925B PCI Analyzer User’s Guide, August 2002
Guided Tour: Analyzing PCI Traffic to a Graphics Controller
Running A Sample PCI Analyzer Session
Getting Help
With the cursor in any Analyzer window, pressing the keyboard’s F1 key
brings up context sensitive help.
Starting from here, you can use the signposts on top of the topic to find
more information:
• Use the Basics signpost to find related basic and background
information.
• Use the Details signpost to find more advanced information and
reference data.
• Use the How to signpost to find procedural information and
instructions for using the currently selected window.
NOTE
The online help requires Internet Explorer 4.0 or higher to work. The online help is also currently focussed on Analyzer and Exerciser functions.
Additional on-line help will be added for other features in future software
releases.
Agilent E2925B PCI Analyzer User’s Guide, August 2002
27
Running A Sample PCI Analyzer Session
Guided Tour: Analyzing Protocol and Timing Violations
Guided Tour: Analyzing Protocol
and Timing Violations
In this example, the protocol observer of the testcard is used in
conjunction with the built-in logic analyzer to trigger on a protocol
violation that occurred during an access to a device’s I/O space. You can
load the setup for this example from video2.bst, and the trace data from
video2.wfm (load video2.bst with Load from the File menu in the main
window, and video2.wfm with Load from the File menu in the waveform
viewer).
The protocol observer of the Agilent PCI Analyzer monitors 53 protocol
rules from Appendix C of the PCI Spec. 2.1 in real time and flags the
violation of an error with an LED on the rear panel of the board.
At the end of this tour, we will also take a glance at the timing checker.
Setting Up the Protocol Observer
From the user interface, the status of the protocol observer can be
checked by opening the protocol check window:
1 From the Analyzer menu select Protocol Check.
The Protocol Check window indicates the first rule that was violated,
as well as the total number of violated rules. Each rule can be
individually enabled or disabled to prevent flagging of known errors.
In demo mode, the software displays random errors to give you an
idea of how it works.
28
Agilent E2925B PCI Analyzer User’s Guide, August 2002
Guided Tour: Analyzing Protocol and Timing Violations
Running A Sample PCI Analyzer Session
You can double-click on any rule name field to get an explanation of
what that rule checks.
Triggering on Protocol Errors
In order to analyze a protocol violation and find out which PCI device
caused the violation, you can use the protocol observer’s output berr to
trigger the built-in logic analyzer. The berr signal is asserted when any
one of the enabled protocol rules has been violated.
1 Open the Capture window, select Pattern, and press the Edit button
next to the pattern term.
2 In the Pattern Editor window press the Clear button to reset all
pattern terms to “x” (= don’t care), then set the berr field to 1.
3 Run the analyzer to trigger on protocol errors.
Agilent E2925B PCI Analyzer User’s Guide, August 2002
29
Running A Sample PCI Analyzer Session
Guided Tour: Analyzing Protocol and Timing Violations
Analyzing the Captured Waveforms
When the analyzer is started and the above mentioned device is
accessed, the analyzer triggers when the violation occurs. To view the
results, proceed as follows:
1 Open the waveform viewer.
Your display will look different than that shown, but you can add and
move signals within the display using the Arrange item from the
Signals menu.
Note that the berr signal is labeled prot_rule in the waveform viewer
and is asserted at the triggerpoint. The error in this particular case is
that the target did not respond with the first word of data within 16
clocks (LAT0).
30
Agilent E2925B PCI Analyzer User’s Guide, August 2002
Guided Tour: Analyzing Protocol and Timing Violations
Running A Sample PCI Analyzer Session
The bus cycle lister shows the associated transaction, along with the
protocol error message.
Detecting Setup/Hold Timing Violations
Independent of the Protocol Check, the Agilent PCI testcard’s Timing
Check can also examine all relevant 32/64-bit PCI signals for setup/hold
time violations.
The Timing Check window is invoked by selecting Timing Check from
the Analyzer menu. In this window, each signal that violates timing is
marked separately, making it very quick and easy to identify those
signals to probe first with an oscilloscope.
Once a bad signal has been identified, the timing check can be used to
trigger the oscilloscope from the testcard’s trigger I/O signals when the
violation occurs. An adjustable measurement window allows up to 2 ns
variation from the PCI timing specification to check timing margins.
Agilent E2925B PCI Analyzer User’s Guide, August 2002
31
Running A Sample PCI Analyzer Session
Guided Tour: Analyzing Protocol and Timing Violations
The timing check feature currently operates at speeds from 26 MHz to
35 MHz.
32
Agilent E2925B PCI Analyzer User’s Guide, August 2002
Guided Tour: Using the State Sequencer
Running A Sample PCI Analyzer Session
Guided Tour: Using the State
Sequencer
For some analysis tasks, a single level trigger is not sufficient. The
Agilent PCI testcard provides very sophisticated trigger capabilities for
advanced triggering needs.
• The Performance mode is used to capture traces for post-processed
performance measurements. It allows you to set up an arbitrary
trigger pattern but has a fixed storage qualifier that is optimized to
capture performance-related information.
• The Sequencer mode allows you to set up a sophisticated trigger
sequence that can consist of up to 8 sequence states and
255 transitions. The transition, trigger, and storage qualifier conditions
can be specified individually for each transition.
The conditions are specified as boolean expressions built with up to 4
pattern terms. In addition, a counter is available that can be loaded
and decremented under sequencer control. The terminal count signal
of this counter is available in the conditions.
NOTE
When the testcard is used through the Command Line Interface or with
the C-API, up to 8 pattern terms are available, depending on the number
of states used.
Changing to Sequencer Mode
The PCI Analyzer can be changed to sequencer mode using the Mode
command from the Setup menu to get a list of analyzer options. The trace
memory depth can also be decreased from the actual size on the
hardware to optimize the size and speed for uploaded trace files.
Agilent E2925B PCI Analyzer User’s Guide, August 2002
33
Running A Sample PCI Analyzer Session
Guided Tour: Using the State Sequencer
Setting Up the Trigger Sequencer
After you have set the trigger mode to Sequencer, open the Capture
window to set up a trigger sequence. You can find the sample sequencer
setup file shown below in seq.bst and the sample data in seq.wfm.
This example shows how to set up the trigger sequencer to trigger on 16
consecutive I/O transfers that are terminated with Target Retry before a
successful one completes. The storage qualifier is set to store all cycles
within transactions and ignore IDLE cycles.
The trigger sequencer is a user-programmable state-machine. In order to
fill out the fields in the trigger sequencer window, it is helpful to draw a
bubble diagram of the states and transitions first. The preload value of
the feedback counter is set to 15 because the terminal count is –1.
0
waiting for
idle
pt3
preload counter
pt0
!pt0
if counter is expired,
trigger
1
waiting for
I/O
2
found I/O
pt1
reload the counter
pt2 && !pt1
decrement the counter
where: pt0 = the address phase of an I/O cycle
pt1 = a data transfer
pt2 = a target indicating Retry
pt3 = IDLE state
34
Agilent E2925B PCI Analyzer User’s Guide, August 2002
!pt1 && !pt2
Guided Tour: Using the State Sequencer
Running A Sample PCI Analyzer Session
And this is how the bubble diagram is implemented in the trigger
sequencer:
Agilent E2925B PCI Analyzer User’s Guide, August 2002
35
Running A Sample PCI Analyzer Session
Guided Tour: PCI Performance Analysis
Guided Tour: PCI Performance
Analysis
When PCI was initially used in the PC, it was a lot faster than previous
buses (ISA, EISA) and there was no need to optimize PCI performance.
This has changed. Now PCI is often the performance bottleneck,
especially in high-performance servers that deal with lots of disk and
network traffic. Due to the complex protocol there are many ways to
improve PCI performance both on a component level as well as on a
system level.
If you are:
• designing a chip or an add-in card,
• integrating a system and you need to select between different add-in
cards on the market,
• tuning system parameters in order to optimize overall performance,
you need a powerful, yet easy-to-use way to analyze the PCI performance
to find out bottlenecks in your system and isolate the “bad guy” that
potentially ruins the overall system performance.
There are two different approaches to PCI performance analysis and it
depends on the application which one to use.
• Real-Time Analysis
Real-time analysis is based on programmable counters and provides
long term average measurements of performance numbers, latencies,
etc. This method provides valuable information over long time periods
about what the performance of your system is. It is limited, however,
in its ability to provide meaningful insight to track down the root
cause of performance issues.
The real-time analysis capabilities are available with the PCI Analyzer.
• Post-Processed Analysis
Post-processed analysis is based on 1 or more captured traces in the
64K/4M trace memory and provides detailed analysis of all
performance aspects like bus utilization, command usage, burst
efficiency, wait histograms for the whole bus as well as for a specific
master/target pair. This information helps you to quickly determine
why your performance problems may exist by allowing you to identify
poorly performing PCI devices, drivers, or mismatched master/target
pairs.
36
Agilent E2925B PCI Analyzer User’s Guide, August 2002
Guided Tour: PCI Performance Analysis
Running A Sample PCI Analyzer Session
The post-processed analysis capabilities are available with the PCI
Performance Optimizer (option 200).
This guided tour introduces the real-time analysis features provided by
the PCI Analyzer.
Identifying Overall System Performance
Using the real-time performance measures of the Agilent PCI testcard
provides very quick insight into what your overall system performance
is.
1 From the Analyzer menu select Real Time Counter Result.
2 Click the Start button.
Now you should see a simulation that shows a PCI Utilization and
Efficiency measurement varying over time.
– The Momentary tab shows the actual measurement values
calculated from the performance counters after each update
interval.
Agilent E2925B PCI Analyzer User’s Guide, August 2002
37
Running A Sample PCI Analyzer Session
Guided Tour: PCI Performance Analysis
– The Time History tab shows a running history of the counter
values. Both performance measures can be set up with pre-defined
measures or custom measures using a programmable sequencer.
NOTE
The performance sequencers (one for each performance measure) have
the same capabilities as the trigger sequencer, except that its outputs
control the three counters that are available for each measure.
The graphical user interface provides access to two of the eight
performance measures. The others can be accessed through the C-API.
38
Agilent E2925B PCI Analyzer User’s Guide, August 2002
Setting Up a PCI Analyzer Test
Setting up a PCI Analyzer test includes the following steps:
• According to your test requirements you need to decide for one of the
basic PCI Analyzer configurations (see “Possible PCI Analyzer
Configurations” on page 39).
• To debug any problems in the power up phase of a system, you can
completely hide the testcard from the system (see “Concealing the
Card from the System” on page 42).
• You need to establish the connection between the user interface
software and the testcard (see “Connecting to the Testcard” on
page 43).
NOTE
For information on how to insert the testcard into the system under test,
please refer to the installation instructions shipped with the testcard.
Possible PCI Analyzer
Configurations
The Agilent E2925B PCI Analyzer basically consists of two components:
• the testcard
• the graphical user interface software
The testcard plugs into the PCI bus of the system to be tested—or of the
system hosting the device to be tested. The software can be run either on
a remote system (a dedicated Control PC) connected via a fast host
interface, or directly on the system under test.
Agilent E2925B PCI Analyzer User’s Guide, August 2002
39
Setting Up a PCI Analyzer Test
Possible PCI Analyzer Configurations
The former configuration provides the following benefits:
• The user interface software does not interfere with the traffic
generated to examine the system or device behavior.
• You can easily switch between different systems under test by just
moving the testcard from one system to another.
• Different devices under test can easily be exchanged without changing
the setup of the Control PC.
Dedicated Control PC
The following figure shows a typical configuration where the user
interface software is running on the Control PC and controls the testcard
plugged into the system under test.
Host System
Control Software
Graphical User Interface
(or C Program)
Fast Host Interface Card
Control PC
Control Interface Cable
System Under Test
PCI Analyzer
Testcard
Device(s) Under Test
PCI Bus
When running extensive tests using more than one testcard, you only
need one Control PC, which can be connected to the individual cards one
after the other. There is no need for a permanent connection between
testcard and user interface software. While the test on one testcard is
still running, the Control PC can get connected to another testcard.
40
Agilent E2925B PCI Analyzer User’s Guide, August 2002
Possible PCI Analyzer Configurations
Setting Up a PCI Analyzer Test
Software Running on System Under Test
The following figure shows a configuration where the user interface
software is running on the system under test itself. Thus, there is no
extra Control PC required.
The PCI Analyzer software usually connects to the testcard directly via
the PCI bus. However, you can also use the fast host interface—or the
serial interface—for connection.
Control PC
System Under Test
Control Interface Cable
(optional)
PCI Analyzer
Testcard
Device(s) Under Test
PCI Bus
If there is more than one testcard installed in the system, all cards can be
reached directly via the PCI bus.
Agilent E2925B PCI Analyzer User’s Guide, August 2002
41
Setting Up a PCI Analyzer Test
Concealing the Card from the System
Concealing the Card from the
System
Concealing the card is useful, for example, for debugging a system that
does not boot properly. You can run the PCI Analyzer to see what is
happening on the PCI bus.
A jumper allows you to conceal the Agilent E2925B testcard from the
system under test before you run your test. The card will not reply to any
configuration access from BIOS and will, therefore, be completely
invisible for the system.
External
Power
Socket
Card is
visible
invisible
NOTE
42
If the card is invisible for the PCI system, you cannot control the card via
the PCI port.
Agilent E2925B PCI Analyzer User’s Guide, August 2002
Connecting to the Testcard
Setting Up a PCI Analyzer Test
Connecting to the Testcard
To transfer control information between control software and card, the
card’s control interfaces are used. The Agilent E2925B testcard features
the following control interfaces:
• Fast Host Interface
This is the fastest connection to a testcard plugged into a remote
system under test. The Fast Host Interface card coming with the PCI
Analyzer must be plugged into the Control PC and connected to the
parallel port on the testcard using the included bi-directional
Centronics cable.
• PCI Port
The PCI port can be used for in-system analysis (when the software is
running on the system under test). No cable or hardware required.
• RS-232 Port
The RS-232 port of the testcard can be connected to the serial
interface of the Control PC using the included RS-232 cable.
The Agilent E2925B testcard supports baud rates up to 57600 Bit/s.
The actual value depends on the maximum baud rate supported by the
serial interface of the Control PC.
RS-232
Parallel
Port
Different testcards can be connected to the control software
simultaneously using different control interfaces, and be activated
alternately.
Agilent E2925B PCI Analyzer User’s Guide, August 2002
43
Setting Up a PCI Analyzer Test
Connecting to the Testcard
NOTE
The user interface software also provides an Offline/Demo Mode. In this
mode, all features of the software can be used without hardware, for
example, for analysis of previously stored data or test preparation
without hardware. No connection is established in this case.
How to Select the Connection
After the hardware connection has been established, the user interface
software supports you in identifying the available testcards and selecting
the connection.
To connect to a testcard:
1 From the Setup menu, select Testcard Configuration.
2 Click the Scan Ports button.
The software scans all available control interfaces and lists the
testcards available at the associated ports.
44
Agilent E2925B PCI Analyzer User’s Guide, August 2002
Connecting to the Testcard
Setting Up a PCI Analyzer Test
3 Select one of the listed ports by double-clicking the entry in the list.
If no error messages occur, the connection has been established
successfully, and your selection will be displayed in the Testcard
Configuration dialog box.
In case of any problem, refer to “Connection Troubleshooting” on
page 45.
NOTE
Using the PCI Browse button in the Testcard Configuration dialog box,
you can select from a list of devices found on the PCI bus of the Control
PC.
Using the Ping button, you can check the connection between the user
interface software and the testcard on the selected port.
Connection Troubleshooting
If the selected connection cannot be established, an error message is
displayed. Read the error message carefully and follow the steps
described in the error message to eliminate the problem.
The following table provides additional information:
Table 1
Troubleshooting Tips
Error Message
Reason
Help
Version
mismatch ...
Version conflict.
Refer to “Updating the
Testcard” on page 103.
Port is not
connected ...
Cable loose or disconnected. Ensure that the cable is properly connected.
Wrong type of RS-232 cable
or adapter.
Use a adapter shipped with the
testcard.
Wrong bi-directional
centronics cable.
Use the cable shipped with the
testcard.
Wrong port settings.
Correct the port settings in the
Testcard Configuration dialog
box.
Wrong setting of user jumper. Correct the setting of the user
jumper, refer to Agilent E2925B
User’s Manual, “Concealing
the Card from the System”.
You can check the connection at any time while tracking down the error
by selecting Check Connection from the Setup menu.
Agilent E2925B PCI Analyzer User’s Guide, August 2002
45
Setting Up a PCI Analyzer Test
46
Connecting to the Testcard
Agilent E2925B PCI Analyzer User’s Guide, August 2002
Analyzing Protocol Violations
When bringing up or debugging devices or complete systems, you have to
check whether all devices keep to the protocol rules defined by the PCI
Specification.
The PCI Analyzer provides an onboard protocol observer that monitors
the PCI bus in real time to detect any protocol violations.
Protocol Observation
The Agilent E2925B testcard provides an hardware-implemented
protocol observer that monitors the PCI bus to detect protocol
violations.
Operation Principles
The protocol observer monitors the PCI bus in real time with 100 %
observation time. The PCI bus is monitored continuously while the
testcard is powered.
The protocol observer monitors 53 protocol rules simultaneously. These
rules refer to the rules of the PCI specification. Each rule can be
individually masked to disable its observation (for a list of monitored
protocol rules, refer to “List of Rules Observed by the PCI Analyzer” on
page 105).
Multiple violations may occur in a sequence because a protocol violation
of a PCI device will often cause malfunctions of other devices. Therefore,
the protocol observer stores the first protocol violation and also counts
and lists subsequent violations.
Processing Protocol Violations
A detected protocol violation can be used as input for pattern terms (berr
signal), for example, to trigger a data capture.
Agilent E2925B PCI Analyzer User’s Guide, August 2002
47
Analyzing Protocol Violations
How to Set Up the Protocol Observer
How to Set Up the Protocol
Observer
The protocol observer is controlled from the Protocol Check window.
This window allows you to mask and unmask rules, and displays the
contents of the error register.
To set up the protocol observer:
1 From the Analyzer menu, select Protocol Check.
The current observation settings and results are uploaded from the
testcard and displayed in the window.
The Status group provides a result summary, showing the number of
rules that have been violated and identifying the rule that has been
violated first. The Status column in the Rule table shows error flags
for each individual rule.
2 Select the rules to be monitored for your test by masking those rules
that are not relevant.
The current status for the individual rules is shown in the Mask
column. To modify the mask:
– Click an entry in the Mask column to toggle its state
(enabled/disabled).
– From the Rule menu, select Enable All or Disable All to set the state
for all rules at once.
48
Agilent E2925B PCI Analyzer User’s Guide, August 2002
Watching the Protocol Observer
Analyzing Protocol Violations
3 After changing the rule mask, click the Clear button to reset the
protocol observer.
NOTE
Double-clicking an entry in the Rule column pops up a description of that
rule.
Watching the Protocol Observer
The protocol observer monitors the PCI bus continuously while the
testcard is powered. The results displayed in the Protocol Observer
window, however, are only updated on demand. Therefore, there is the
need to upload the result data from the testcard, and maybe to reset the
observer (this is, to clear the results).
How to Upload Protocol Observer Results
The results of the protocol observer are not automatically uploaded to be
displayed in the Protocol Observer window.
To upload the current state of the testcard registers to the display:
1 If the Protocol Check window is not displayed yet, select
Protocol Check... from the Analyzer menu.
2 Click the Read from card button.
The current data will be uploaded from the testcard and be displayed in
the window.
Agilent E2925B PCI Analyzer User’s Guide, August 2002
49
Analyzing Protocol Violations
Watching the Protocol Observer
How to Reset the Protocol Observer
To restart a test, for example after changing the masking of protocol
rules or for detecting the repeated occurrence of a protocol violation,
you can reset the protocol observer.
To reset the protocol observer:
1 If the Protocol Check window is not displayed yet, select
Protocol Check... from the Analyzer menu.
2 Click the Clear button.
This sets all rule states to OK, the total of Rules violated to 0, and the
First violated rule to none. The protocol observer continues
immediately. If a protocol violation cannot be cleared, this indicates that
the violation still is present on the bus.
NOTE
50
You can set the run options to clear the protocol check results with each
start of a data capture.
Agilent E2925B PCI Analyzer User’s Guide, August 2002
Analyzing Timing Violations
When bringing up or debugging devices or complete systems, you have to
check whether all devices keep to the timing rules defined by the PCI
Specification.
The PCI Analyzer provides an onboard timing checker that monitors the
PCI bus in real time to detect any timing violations. The timing check
indicates an error when a PCI signal change is detected at a moment at
which the PCI Specification calls for stable signals.
NOTE
At the time being the timing check is only available for 33 MHz PCI
busses.
Observed Timing Rules
Operation Principles
When checking for timing violations, the Agilent E2925B testcard uses
the set-up time tsu and the hold time th of each synchronous bus signal to
determine the time window in which a PCI signal must be stable.
> 2 ns
tsu
th
PCI Clock
PCI Signal
Signal Stable
The permissible values of set-up and hold time are given by the PCI
Specification.
Agilent E2925B PCI Analyzer User’s Guide, August 2002
51
Analyzing Timing Violations
Observed Timing Rules
The timing check automatically measures the bus clock frequency and
checks against the permissible values. This is the default behavior.
However, you can also adapt the timing checkerto special requirements
by changing the range of permissible values.
Processing Timing Violations
A detected timing violation can be used as input for pattern terms
(timing_err signal), for example, to trigger a data capture.
Timing Check Limitations
Keep the following in mind when checking for timing violations:
• List of checked signals
Some signals are excluded from timing checks due to their particular
timing behavior. For a list of checked signals refer to “b_signaltype
(for Timing Check)” in the C-API/PPR Reference.
• Typical measurement accuracy
The typical measurement accuracy is below 250 ps.
However, the measurement accuracy can be guaranteed only if both
setup and hold time values are set to the default values given by the
PCI Specification.
The measurement accuracy also depends on the clock frequency and
the environmental temperature.
• Clock frequency
The PCI clock must be lower or equal than 33 MHz and is not allowed
to vary more than 0.5 %. Note that “Green PCs” may switch down
clock frequency to decrease power consumption. When this happens
during a timing check, it will result in a timing error.
The best measurement accuracy can be guaranteed only if the clock
frequency is 33 (calibration point).
• Environmental temperature
The environmental temperature must be between 20 and 30 oC,
otherwise the typical measurement accuracy cannot be guaranteed.
52
Agilent E2925B PCI Analyzer User’s Guide, August 2002
Observed Timing Rules
Analyzing Timing Violations
Adapting the Timing Checker
You can adapt the timing check to your test requirements by adjusting
the permissible values, thus relaxing or tightening the measurement
constraints.
The following table shows the PCI Specification values and the value
ranges of the timing check:
Table 2
Timing Parameter Values
Timing
Parameter
33 MHz PCI Bus (29 ... 35 MHz)
[ns]
PCI Spec
Timing Check Range
tsu
7
5 ... 9
th
0
–2 ... +2
The following expression must apply:
2 ns <
tsu + th
<
1
– 2 ns
2×f
(f = frequency in Hz)
Within the timing check ranges, you can vary the values in steps of
250 ps.
Agilent E2925B PCI Analyzer User’s Guide, August 2002
53
Analyzing Timing Violations
How to Set Up the Timing Checker
How to Set Up the Timing
Checker
The timing checker is controlled from the Timing Check window. This
window allows you to mask and unmask signals, and displays timing
check results.
To set up the timing checker:
1 From the Analyzer menu, select Timing Check.
The current settings and results are uploaded from the testcard and
displayed in the window.
The Status group provides a result summary, showing the number of
signals that have violated timing rules. The Status column in the
Signal table shows error flags for each individual signal.
2 Select the signals to be checked for your test by masking those signals
that are not relevant.
The current status for the individual signals is shown in the Mask
column. To modify the mask:
– click an entry in the Mask column to toggle its state
(enabled/disabled), or
– from the Signal menu, select Enable All or Disable All to set the
state for all signals at once.
54
Agilent E2925B PCI Analyzer User’s Guide, August 2002
How to Modify Timing Limits
Analyzing Timing Violations
3 After changing the signal mask, click the Clear button to reset the
timing checker.
NOTE
The mask only affects the trigger—the status of a disabled signal is still
displayed.
How to Modify Timing Limits
By default, the timing checker checks against the permissible values of
set-up and hold time as given by the PCI Specification. These values can
be adapted to meet custom testing requirements.
The current values and the measured PCI bus clock are displayed in the
Timing Check window (see “How to Set Up the Timing Checker” on
page 54).
To modify the timing limits:
1 In the Timing Check window click the Edit button.
2 In the Adjustment group, select Manual and edit the parameter
values,
or
select Auto to select the default values defined in the PCI
Specification (depending on the PCI bus speed).
3 Click OK.
The accumulated error registers of the timing checker are cleared
automatically, and the timing check continues with the new values.
Agilent E2925B PCI Analyzer User’s Guide, August 2002
55
Analyzing Timing Violations
Watching the Timing Checker
Watching the Timing Checker
The timing checker monitors the PCI bus continuously while the testcard
is powered. The results displayed in the Timing Check window, however,
are only updated on demand. Therefore, there is the need to upload the
result data from the testcard, and maybe to reset the checker (this is, to
clear the results).
How to Upload Timing Checker Results
The results of the timing checker are not automatically uploaded to be
displayed in the Timing Check window.
To upload the testcard registers to the display:
1 If the Timing Check window is not displayed yet, select
Timing Check... from the Analyzer menu.
2 Click the Read from card button.
The current data will be uploaded from the testcard and displayed in the
window.
How to Reset the Timing Checker
To restart a test, for example after changing the signal mask, you can
reset the timing checker by clearing the results.
To reset the timing checker:
1 If the Timing Check window is not displayed yet, select
Timing Check... from the Analyzer menu.
2 Click the Clear button.
This sets the results for all signals to OK and the total of Signals violated
to 0.
The timing check is restarted immediately. Therefore, a displayed timing
error will not disappear by clicking the Clear button, if the error is still
present.
NOTE
56
You can set the run options to clear the timing check results with each
start of a data capture.
Agilent E2925B PCI Analyzer User’s Guide, August 2002
How to Debug Timing Violations
Analyzing Timing Violations
How to Debug Timing Violations
If a timing violation has been detected, you can use the trigger I/O on the
Agilent E2925B testcard and an oscilloscope for in-depth analysis:
1 Select a signal
Use the Timing Check window to set the focus on a signal line on
which a timing violation has been detected. Enable this signal and
disable all remaining signals.
2 Set up the trigger I/O sequencer
A command line script shipped with the Agilent E2925B testcard
software sets up the trigger I/O sequencer. When the script runs, a
positive pulse is issued on trigger I/O 0 after a timing error.
To run the script, enter the following in the command line interface:
do ..\samples\gui\tmgchktr.cli
3 Connect an oscilloscope
Connect an oscilloscope’s trigger input to the Agilent E2925B
testcard’s trigger I/O line 0, and connect the oscilloscope’s inputs to
the PCI signal of interest and to the PCI clock.
4 Run the Timing Check
Generate traffic and run the PCI Analyzer of the Agilent E2925B
testcard.
5 Analyze the waveform
Watch the oscilloscope. Look for glitch, overshoot, undershoot,
ringing, marginal voltage levels, and so on. Try also various locations
on the signal’s PCI trace, such as locations close to the driver or to the
receiver of the signal.
Agilent E2925B PCI Analyzer User’s Guide, August 2002
57
Analyzing Timing Violations
58
How to Debug Timing Violations
Agilent E2925B PCI Analyzer User’s Guide, August 2002
Analyzing PCI Performance
In the bring-up and debug phase of a PCI device or a system (containing
PCI bus and PCI devices), you need to evaluate the performance of the
device or system under test.
The PCI Analyzer supports real-time performance measurement by
providing predefined, standardized performance measures, such as PCI
efficiency and PCI utilization.
These measures can be set up easily. The results are shown in graphical
charts.
Performance measurement is based on counting certain events on the
PCI bus. For the predefined measures, the counters are set up
automatically.
For more advanced measurements, you can program the counters by
yourself, providing full flexibility.
The Performance Optimizer (option #200) expands the possibilities of
real-time performance measurements, by providing means for detailed
post-processed analysis.
Generating PCI Traffic
The PCI Analyzer can measure any kind of PCI traffic, regardless of how
it was generated. However, it is useful to generate traffic in a controlled
way for reproducibility in case of troubleshooting or root cause analysis.
Typically, you will use benchmark tests to generate traffic for this
purpose.
Agilent E2925B PCI Analyzer User’s Guide, August 2002
59
Analyzing PCI Performance
Predefined Performance Measures
Predefined Performance
Measures
For real-time performance measurements, the PCI Analyzer counts
occurrences of predefined events or sequences of events on the PCI bus.
The results are derived and displayed in real time.
Available Measures
The following predefined measures are provided by the PCI Analyzer:
• Throughput
Throughput is the amount of transferred data per time. It is measured
in Mbyte per second. When running a real-time measurement, this
value is displayed in percent of the maximum value (for 33 MHz
systems: 132 Mbyte per second in a 32-bit system, 264 Mbyte per
second in a 64-bit system).
• Utilization
Utilization measures the relation between busy bus time and total bus
time during a transfer.
• Efficiency
Efficiency is a measure of how well the bus is used. It is the most
important value when considering PCI performance.
The efficiency of a transfer is the relation between the amount of data
that was really transferred and the amount of data that could have
been transferred by the used cycles of that transfer (busy clocks).
Efficiency is derived from throughput and utilization. An efficiency
near 100 % means that a device made best use of the time it occupied
the bus (utilization) by transferring as much data as possible during
that time frame (high throughput).
• Retry Rate
This is the ratio between retry transactions and all transactions.
60
Agilent E2925B PCI Analyzer User’s Guide, August 2002
Predefined Performance Measures
Analyzing PCI Performance
How to Select Predefined Performance
Measures
The PCI Analyzer can calculate two real-time measures simultaneously.
The test results are displayed side by side on screen.
To select the predefined performance measures to be used:
1 From the Analyzer menu, select Real Time Counter Setup.
2 Check the Relative Values (Ratio) option (this is the default).
When selecting Absolute Values (Event Count), the pure counter
values will be displayed instead of the predefined measures.
3 From the Setting for selection list, select Measure 1.
4 From the Predefined Measures selection list, choose the predefined
measure to be calculated and displayed for measure 1.
5 Make sure Accumulative is not checked.
The measured values will be reset after each measurement time
interval. This allows you to better observe peaks. Otherwise the values
will be accumulated over time.
6 Repeat steps 3 to 5 for Measure 2.
7 Click OK.
The new settings will be used the next time you start a performance
measurement.
Agilent E2925B PCI Analyzer User’s Guide, August 2002
61
Analyzing PCI Performance
Predefined Performance Measures
How to Run a Performance Measurement
After completing the setup the real-time performance measurement can
be started.
To run a real-time performance measurement:
1 From the Analyzer menu select Real Time Counter Result.
2 To set the time interval in which the display is to be updated, enter an
Update Rate between 1 and 60 seconds.
3 Click the Start button.
This shows the results of the selected measures per time interval. If
you have selected Accumulative in the Real Time Measurement Setup,
the results will be accumulated.
The diagram on the Momentary tab shows the current values of the
selected measures.
62
Agilent E2925B PCI Analyzer User’s Guide, August 2002
Predefined Performance Measures
Analyzing PCI Performance
4 To see the result history over time, select the Time History tab.
You can toggle between both tabs while the measurement is running.
5 To stop the measurement, click the Stop button and close the window.
Agilent E2925B PCI Analyzer User’s Guide, August 2002
63
Analyzing PCI Performance
Advanced Performance Measures
Advanced Performance
Measures
The PCI Analyzer can calculate and display two performance measures
simultaneously. Each measure can either show one of the predefined
measures or be programmed manually for advanced performance
measurements.
Operation Principles
The performance measures of the Agilent E2925B testcard employ
programmable counters, which are controlled by sequencers to count
signal states or sequences of signal states. For an advanced real-time
measurement, you can manually specify the events to be counted and
program the sequencers. For an example, refer to “Sample Advanced
Performance Setup” on page 66.
For each performance measure there are two programmable counters.
The following figure shows—for one performance measure—how the
counters are controlled by the sequencer. Additionally, there is a
reference counter counting the bus cycles.
Upload
To Control PC
Counter A
Counter B
Counter A
Enable
Counter B
Enable
From PCI Bus
Number of
Byte Enables
From
Sequencer
Sequencer
64
Agilent E2925B PCI Analyzer User’s Guide, August 2002
Advanced Performance Measures
Incrementing the Counters
Analyzing PCI Performance
By means of programmable conditions, the sequencer enables the
counters to be incremented:
• If enabled, counter B is incremented by 1 per bus cycle.
• If enabled, counter A is either incremented by 1 per bus cycle, or by
the number of byte enables currently set (0...4 for 32-bit, 0 ... 8 for 64bit accesses).
This feature is controlled by the Ctr A counts Byte Enable check box
in the Real Time Measurement Setup dialog box. Counting byte
enables allows you to count actually transferred data (and not only
data phases).
Counter Sequencers
The behavior of the counter sequencers is determined by a sequencer
description table and pattern terms in the same way as the data capture
is controlled by the trace memory trigger sequencer.
However, the sequencer’s outputs are the count enables for the counters
A and B. The count enables are changed while the sequencer switches
through its states as described by the transitions. Its output conditions
determine whether or not the referenced counter is incremented.
If Relative Values is selected in the Real Time Measurement dialog box,
the performance measure is calculated as the ratio of counter A and B,
using counter A as nominator counter and counter B as denominator
counter.
NOTE
PCI Clock Reference Counter
The counter C in the Transitions table in the Performance Counter
Sequencer dialog box is a feedback counter, which can be used for
programming sequencer loops.
The testcard also provides a 64-bit wide PCI clock reference counter. It
counts PCI clocks only, and is started, stopped and updated together
with the other counters. It is used as a time reference for the
performance measures and is displayed only if Absolute Values (Event
Count) is selected in the Real Time Measurement Setup dialog box.
Agilent E2925B PCI Analyzer User’s Guide, August 2002
65
Analyzing PCI Performance
Sample Advanced Performance Setup
Sample Advanced Performance
Setup
To explain how to program an advanced performance measure, an
example shows how to measure the proportion of non-idle cycles in PCI
traffic.
The required sequencer setup is quite simple. It uses the pattern term
pt4 as follows:
• pt4: b_state=Idle
This makes pattern term pt4 sensitive to idle cycles.
The sequencer of performance measure 1 is programmed to remain in
state 0 only, incrementing counter A and B if their enable conditions are
true:
• Counter A must be incremented with each non-idle cycle. Therefore,
pattern term pt4 must be inverted.
• Counter B must be incremented with each clock cycle.
The sequencer description table must be set up as follows:
Table 3
NOTE
66
Sample Sequencer Description Table
State
Next State
Transition
Condition
Counter A
Enable
Condition
(Output)
0
0
1
!pt4
Counter B
Enable
Condition
(Output)
1
In the table above, only those columns are shown that need to be
programmed for the example.
Agilent E2925B PCI Analyzer User’s Guide, August 2002
Sample Advanced Performance Setup
Analyzing PCI Performance
How to Set Up the Measures for the
Example
To program the counter sequencer according to the example,proceed as
follows:
1 From the Analyzer menu, select Real Time Counter Setup.
2 Check the Relative Values (Ratios) option.
Otherwise, the absolute values of the counters would be displayed.
3 From the Setting for selection list, select Measure 1.
4 Ensure that Accumulative is deactivated.
The software calculates the ratio of the two current counter values.
Otherwise, the software would calculate the ratio of the accumulated
counter values over the testing time.
5 Select Advanced Setup.
6 If you wish to have a title for the measure on the Counter Result
window, enter a name for your measurement in the Title text field.
7 Ensure that Ctr A counts Byte Enable is deactivated.
Otherwise, counter A will count byte enables to measure the amount
of transferred data.
Agilent E2925B PCI Analyzer User’s Guide, August 2002
67
Analyzing PCI Performance
Sample Advanced Performance Setup
How to Program the Counter Sequencer for
the Example
After basically setting up the measures for the example, go on to
program the counter sequencer as required:
1 In the Real Time Measurement Setup dialog box, click the Edit
Sequencer button.
The Performance Counter Sequencer dialog box will be opened.
Now edit the sequencer description table and the pattern term:
1 Enter the required conditions and terms in the Transitions table.
You can scroll horizontally and vertically through the sequencer table.
2 Leave the Preload Value at its default value.
The preload value allows you to specify an initial value for the
feedback counter C. This is used to wait for a certain number of events
before transition output.
3 Click the Edit... button of pattern term pt4 to edit the pattern.
The Pattern Editor dialog box will be opened (see “How to Specify a
Trigger Pattern” on page 77).
For the example, set b_state=Idle for pattern term pt4.
NOTE
pt4 to pt7 are associated with Measure 1.
pt8 to pt11 are associated with Measure 2.
68
Agilent E2925B PCI Analyzer User’s Guide, August 2002
Sample Advanced Performance Setup
Analyzing PCI Performance
4 Click OK to close the Performance Counter Sequencer dialog box.
5 Click OK to close the Real Time Measurement Setup dialog box.
Now you can start the real-time measurement using your counter setup
as described in “How to Run a Performance Measurement” on page 62.
Agilent E2925B PCI Analyzer User’s Guide, August 2002
69
Analyzing PCI Performance
70
Sample Advanced Performance Setup
Agilent E2925B PCI Analyzer User’s Guide, August 2002
Capturing Data In The Trace Memory
The PCI Analyzer records information like PCI signals and bus states in
its trace memory. The information is stored in one trace memory line per
PCI clock cycle. By default, the Agilent E2925B testcard stores 64 k lines.
With the option #100, you can expand the trace memory to 4 M lines.
Controlling the Data Capture
The PCI Analyzer provides all features required to make optimum use of
the available memory depth.
• The trigger allows you to start capturing data when a programmable
trigger event has occurred. Furthermore, by specifying the
triggerpoint you can additionally control the number of bus cycles
stored before and after the trigger event.
• Storage qualification allows you to selectively capture only certain
types of data. For example, you can focus on accesses to a particular
device, or on data transfers only.
• A heartbeat function allows you to implement a watchdog by
triggering on a particular event that does not occur after a
programmable time.
• Trigger and storage qualifier can be controlled by a programmable
sequencer.
Using the Data Capture
Data stored in the trace memory can be displayed at different levels of
abstraction: as waveforms, bus cycles, or transactions.
You can not only analyze the data in terms of PCI behavior, but also
implement functional tests like data compares. For example, if you are
debugging a LAN interface, you could capture all of the blocks of data
going into and coming out of the card. Once this data has been captured,
you can analyze it further for debugging.
Agilent E2925B PCI Analyzer User’s Guide, August 2002
71
Capturing Data In The Trace Memory
Data Stored In The Trace Memory
Data Stored In The Trace
Memory
The trace memory on the Agilent E2925B testcard stores all PCI signals
and bus states, the Exerciser states, and additional information. The
trace data is stored in one trace memory line for each PCI clock cycle
and can be used for low-level debugging and understanding of bus traffic.
Trace Memory Components
The capture is controlled by the trace memory trigger and the storage
qualifier.
These are in turn controlled by the programmable trace memory trigger
sequencer. This sequencer implements a state machine, allowing to
define individual trigger and storage qualifier conditions for each state.
The sequencer is only available if the capture mode Sequencer has been
selected.
The figure below gives an overview of the components building the trace
memory.
Upload
to Control PC
Trace Memory
Memory Control Logic
Trigger
Position
Trigger
Storage
Qualifier
From PCI Bus
Data
Address
Signals
From Exerciser
Master/Target
active
Transaction
complete
Lock
From
Sequencer
Sequencer
72
Agilent E2925B PCI Analyzer User’s Guide, August 2002
From Observer
Bus States
Transaction
Attributes
Protocol Check
Timing Check
External
Trigger Lines
Static I/O
Data Stored In The Trace Memory
Recording Data
Capturing Data In The Trace Memory
The trace memory is a circular memory that is filled continuously while
the Analyzer is running. The storage qualifier controls which bus states
are recorded. If one or more lines are filtered, a gap information is stored
instead.
Recording is stopped after the trigger event has occurred. The trigger
position specifies the amount of pre-trigger and post-trigger data to be
kept in the data capture.
The following figure illustrates these mechanisms:
Gap Info
Gap Info
Gap Info
Trigger
Memory Contents
Bus Events
Storage
Qualification
Run Start
Storage
Qualification
Trigger Event
Storage
Qualification
End of Measurement
(Controlled by Trigger Position)
The lower bar in the figure represents events on the bus. Some of them
do not meet the storage qualifier condition and are therefore filtered
(gray areas). Gap information is stored instead of the events.
After the Analyzer has been started, the memory is filled. Because the
trace memory is a circular memory, previously captured states will be
overwritten until the trigger event occurs.
Stored data is represented by the upper bar in the figure: not suppressed
bus events and gap information. When the trigger event occurs, the trace
memory continues to be filled until the specified amount of post-trigger
information is stored.
Uploading Data
At this time, the measurement is complete, and the trace memory
contents are uploaded. They can be displayed in the waveform viewer,
the bus cycle lister, and the transaction lister.
To reduce the upload time you can specify the size of the trace memory
to be uploaded. This does not reduce the amount of data that is recorded.
Agilent E2925B PCI Analyzer User’s Guide, August 2002
73
Capturing Data In The Trace Memory
Capture Mode
NOTE
If the Analyzer is set up to fill the trace memory after a trigger event and
the event does not occur, stopping the Analyzer sets an artificial
triggerpoint. The trace memory will then contain 100 % pre-trigger
history. The last captured state is the state before the Analyzer has been
stopped.
Nevertheless, the trace memory can still be empty if no samples were
taken because of the storage qualification.
Capture Mode
The availability of the sequencer depends on the selected capture mode.
The Agilent E2925B testcard provides the following modes for capture
control:
• Standard
In the standard mode, the trace memory trigger and storage qualifier
are directly controlled by pattern terms. Pattern terms are
programmable pattern recognizes. If the programmed pattern is found
on the bus, the pattern term signals
– the trigger to initiate the sampling, or
– the storage qualifier to capture the current sample.
• Sequencer
In the sequencer mode, the trigger sequencer controls the trace
memory’s trigger and storage qualifier. The sequencer detects
sequences of patterns. To detect the patterns, it uses pattern terms as
input. Each state of the sequence can be used to control the
sequencer’s output, trigger and storage qualifier.
• Performance
The performance mode is only available if the PCI Optimizer (option
#200) has been installed.
In the performance mode, the storage qualifier is automatically
programmed as required for performance measurements. A trigger
can be set up to start the measurement.
74
Agilent E2925B PCI Analyzer User’s Guide, August 2002
Setting Up the Data Capture
Capturing Data In The Trace Memory
Setting Up the Data Capture
• Select the capture mode.
• Set up the trigger.
If required, specify a trigger pattern.
• Set up the storage qualifier.
If required, select transactions and states to be stored in the trace
memory.
For more advanced measurements the sequencer can be programmed as
described in “Setting Up the Trigger Sequencer” on page 81.
How to Select the Capture Mode
Start setting up the data capture by specifying the amount of data to be
uploaded after the trigger event, and by selecting the capture mode:
1 From the Setup menu, select Mode and then the Analyzer tab.
2 From the Trace Memory selection list, choose the amount of data to
be uploaded to the user interface software after the trigger event.
Choose a small size in order to minimize uploading time.
3 In the Capture (Trigger & Storage Qualifier) section, select the
required mode.
4 Click OK.
Agilent E2925B PCI Analyzer User’s Guide, August 2002
75
Capturing Data In The Trace Memory
Setting Up the Data Capture
How to Set Up the Trigger
To set up the trigger in standard capture mode, program the pattern for
the trace memory trigger. The sequencer is not available in this mode.
By default, the trigger is set to immediate. The data capture will be
started as soon as the Analyzer is started.
To specify a trigger event:
1 In the main window, click the Capture button
.
2 Select Pattern to start setting up the trigger event.
3 Click the Edit button to specify the pattern term describing the event.
This opens the Pattern Editor dialog box where you can set up the
pattern as described in “How to Specify a Trigger Pattern” on
page 77. On return, the pattern term will be displayed in the text field.
By default, the trigger will be fired after the first occurrence of the
trigger event. However, you can also implement a kind of watchdog by
triggering on the absence of the trigger event.
4 To trigger on the absence of the trigger event over a number of clock
cycles, select Did not repeat within ... cycles and enter a number of
clock cycles.
The number of clock cycles must be a decimal value in the 32-bit
range, being a multiple of 256 minus 1 (the software automatically
adjusts your value).
76
Agilent E2925B PCI Analyzer User’s Guide, August 2002
Setting Up the Data Capture
Capturing Data In The Trace Memory
5 Move the slider to specify a Triggerpoint:
– 0 % means: no pre-trigger history is stored
– 100 % means: only pre-trigger history is stored
6 Now the trigger is set up. Click OK to store your settings or change to
the Storage tab to set up the storage qualifier (see “How to Set Up the
Storage Qualifier” on page 79).
How to Specify a Trigger Pattern
The Pattern Editor window supports you in setting up the conditional
expressions describing, for example, the trigger event.
Specifying a pattern means selecting the signals and values of interest.
Your selections will be AND-combined to build the pattern term.
To specify the trigger pattern:
1 Click the Edit button on the Trigger tab in the Capture dialog box to
open the pattern editor.
Agilent E2925B PCI Analyzer User’s Guide, August 2002
77
Capturing Data In The Trace Memory
Setting Up the Data Capture
2 To assemble the pattern, click in the Value column of the required
signals.
The method of entering the values depends on the type of the signal:
– If the signal is a bit vector, for example, the address and data bus
signal AD32, you can enter the value directly into the value field.
Possible formats are hexadecimal (entry ends with \h), decimal
(\d) and binary (\b).
– If the signal is a single bit, for example the protocol violation
signal berr, clicking on the value field will display a selection list
containing 0, 1, and x (don’t care).
– If the signal is of any other type that can take several different
values, as for example the bus state b_state or the transaction
command x_act, clicking the value field opens the Selection List
dialog box presenting the possible options.
Select from the list of available states and use the arrow buttons to
move them between both lists. If you select more than one state, the
states will be OR-combined.
To return to the pattern editor, click OK.
3 After you have included all required signals, click OK.
The signals of the pattern will be AND-combined automatically to build
the conditional expression. For example, setting the FRAME and IRDY
values to 1, will result in this logical expression: “FRAME=1 &&
IRDY=1”.
78
Agilent E2925B PCI Analyzer User’s Guide, August 2002
Setting Up the Data Capture
Capturing Data In The Trace Memory
How to Set Up the Storage Qualifier
To set up the storage qualifier in standard capture mode, program a
pattern to specify the transactions and states to be stored. Furthermore,
you can select to suppress certain cycles if they are irrelevant for your
test. By default, all cycles will be captured.
To specify the storage qualifier:
1 From the Analyzer menu, select Capture and change to the Storage
tab.
2 Select Selected Transactions/States to start setting up the storage
qualifier.
3 Click the Edit button to specify the pattern term describing the
storage qualifier condition.
This opens the Pattern Editor dialog box where you can set up the
pattern as described in “How to Specify Transactions and States” on
page 80. On return, the pattern term will be displayed in the text field.
4 In the Selected Bus States section, check the bus states you wish to
suppress from being stored (idle and/or wait cycles).
5 Click OK.
Agilent E2925B PCI Analyzer User’s Guide, August 2002
79
Capturing Data In The Trace Memory
Setting Up the Data Capture
How to Specify Transactions and States
If you wish to exclude transactions or bus states from being stored in the
trace memory, you need to specify a conditional expression for the
storage qualifier. The pattern editor supports you in setting up this
expression.
NOTE
The storage qualifier condition identifies the transactions and states to
be stored and, thus, suppresses all others.
To specify the conditional expression to select transactions and states:
1 Click the Edit button on the Storage tab in the Capture dialog box to
open the pattern editor.
2 To assemble the pattern, click in the Value column of the required
signals.
The method of entering the values depends on the type of the signal:
If you keep the mouse button pressed, a box appears listing suitable
values for selection.
– xact_cmd: select commands to store only transactions using these
commands
– t_act: set this to 1 to store only transactions in which the target of
the Agilent E2925B testcard is involved, or set it to 0 to suppress
these transactions
– m_act: set this to 1 to store only transactions in which the master
of the Agilent E2925B testcard is involved, or set it to 0 to suppress
these transactions
80
Agilent E2925B PCI Analyzer User’s Guide, August 2002
Setting Up the Trigger Sequencer
Capturing Data In The Trace Memory
– xact_rq64: set this to 1 to store only transactions with a 64-bit
request, or set it to 0 to suppress these transactions
3 After you have included all the required signals, click OK.
The assembled transactions and state settings are automatically ANDcombined to build the storage qualifier condition.
NOTE
The signals t_act and m_act are only valid if the PCI Exerciser option has
been installed.
Setting Up the Trigger
Sequencer
For more advanced measurements you can program the Agilent E2925B
testcard’s trigger sequencer to implement sophisticated trigger and
storage qualifier conditions.
Goals of the Sequencer
The sequencer is designed to detect sequences of bus states. It is
implemented with a state machine that compares bus states with
programmable pattern terms to recognize these sequences.
The trigger sequencer controls the trigger and the storage qualifier for
the trace memory. The trigger is fired after a specified sequence of bus
states has been detected. After the trigger has been fired, the trace
memory is filled with sampled states under the control of the storage
qualifier.
Agilent E2925B PCI Analyzer User’s Guide, August 2002
81
Capturing Data In The Trace Memory
Setting Up the Trigger Sequencer
The following figure details the trace memory trigger sequencer.
To
Trace Memory Trigger
and
Storage Qualifier
Preload
Value
Sequencer Memory
&
State Machine
State
Terminal Count
Feedback
Counter
...
From Pattern Terms
Sequencer Internals
The sequencer provides an internal memory, a state machine, and a 32-bit
feedback counter. The state machine controls the operation of the
sequencer.
For each state, transition conditions specify when to switch to the next
state. The transition conditions can be built from pattern terms and the
terminal count of the sequencer’s feedback counter.
82
Feedback Counter
A feedback condition is used to decrement a loop variable that starts
counting at the preload value. The preload value is set if a specified
preload condition is met. If the loop variable reaches zero, the terminal
count signal (tc) is set, which can be used within a pattern term.
Sequencer Description Table
The sequencer is controlled by a sequencer description table consisting
of a number of transitions. Each transition is defined by a table row,
holding a state number, the number of the next state, and the condition
defining when to switch to the next state.
Agilent E2925B PCI Analyzer User’s Guide, August 2002
Setting Up the Trigger Sequencer
Capturing Data In The Trace Memory
In addition, each transition defines output conditions:
• the feedback counter enable
• the feedback counter preload condition
• the trigger signal
• the storage qualifier
NOTE
All actions take place on a state transition. There are no inherent actions
by being in any state.
Sample Sequencer Setup
Example Task
To show the basic principles of programming the trigger sequencer let us
consider an example. The following sequence is to be detected:
1. Wait for the address phase of an access to video memory.
2. When the address phase is detected, trigger and store all the
transfers.
3. Stop storing if an idle cycle occurs.
4. Wait for the next access to video memory.
Pattern Terms
For this sequence, the following patterns need to be detected and are
therefore assigned to pattern terms:
• pt1 = AD32==b8xxx && b_state=Addr
This programs pattern term pt1 to detect address phases of video
memory accesses.
• pt2 = b_state==Transfer
This programs pattern term pt2 to detect transfers.
• pt3 = b_state==Idle
This programs pattern term pt3 to detect idle cycles.
Agilent E2925B PCI Analyzer User’s Guide, August 2002
83
Capturing Data In The Trace Memory
Building a State Diagram
Setting Up the Trigger Sequencer
The next step is to determine the sequence in which the patterns are to
be detected and what is to happen to the trigger and storage qualifier.
Especially when planning for long and difficult sequences, it is
recommended that you use a state diagram like the following:
This state diagram can easily be translated into a sequencer description
table.
Each transition (arrow) in the state diagram requires a row in the table.
The sequencer description table for the example is as follows:
Table 4
84
Example Sequencer Description Table
Trigger
Condition
Storage
Qualifier
Condition
State
Next State
Transition
Condition
0
0
!pt1
0
0
0
1
pt1
1
1
1
1
!pt3
0
pt2
1
0
pt3
0
1
Agilent E2925B PCI Analyzer User’s Guide, August 2002
Setting Up the Trigger Sequencer
Capturing Data In The Trace Memory
How to Set Up the Trigger Sequencer
Setting up the trigger sequencer can be quite complicated, depending on
the test requirements. The following instructions only outline the basic
steps. Use this sample sequencer setup to make yourself familiar with
the principles of sequencer programming.
To set up the trigger sequencer:
1 From the Setup menu, select Mode and then the Analyzer tab.
2 In the Capture (Trigger & Storage Qualifier) section, select the
Sequencer mode.
3 Click OK.
4 From the Analyzer menu, select Capture.
Agilent E2925B PCI Analyzer User’s Guide, August 2002
85
Capturing Data In The Trace Memory
Setting Up the Trigger Sequencer
To load the sequencer description table for the sample sequencer setup,
you may simply click the Example button, and the values will be filled in
automatically.
In general, proceed as follows to enter the sequencer setup you have
developed on your own:
1 Enter your sequencer description table into the Transitions table.
2 Set the Preload Value of the sequencers’s feedback counter (not used
in the example).
The preload value of the sequencer’s feedback counter determines
how often a sequence must occur before an output signal is set or a
transition is made.
3 Assemble the patterns pt0 to pt3 as described for the trigger patterns
in “How to Specify a Trigger Pattern” on page 77.
To detect signal changes instead of signal states, set up pt0 as a
Transitional pattern term. It then detects any signal change.
4 Move the slider to specify a Triggerpoint:
– 0 % means: no pre-trigger history is stored
– 100 % means: only pre-trigger history is stored
5 Now the trigger sequencer is set up. Click OK to store your settings.
NOTE
86
All transition conditions of one state must be exclusive. This means, that
one—and only one— transition condition of a state must turn true at a
time. Otherwise, the software will not accept the table because the table
does not uniquely define the sequencer’s behavior.
Agilent E2925B PCI Analyzer User’s Guide, August 2002
Running the Data Capture
Capturing Data In The Trace Memory
Running the Data Capture
After setting up the trigger and storage qualifier or programming the
sequencer, the testcard is ready to run the data capture.
Starting the PCI Analyzer enables the pattern terms and the trigger or
trigger sequencer to recognize patterns and to react according to your
setup.
The analysis requires traffic on the PCI bus under examination.
Therefore, load traffic onto the bus when running the PCI Analyzer. This
traffic can be generated by application-level test programs (benchmarks
etc.) or by means of one or more Agilent PCI Exercisers.
Running the Analyzer
There is more than one way to start the PCI Analyzer:
• The Run button
and the Start item from the Run menu start the
testcard. The components to be started can be specified in the Run
Options window (select Options from the Run menu):
The number of available options depends on the installed software
and hardware options.
Note that you can direct the software to clear all pending protocol and
timing errors when the testcard is started.
• To start the PCI Analyzer only, select Run from the Analyzer menu.
Monitoring the Test
While the test is running, messages appear in the PCI Analyzer status bar
displaying its current status.
Analyzer Status Bar
Agilent E2925B PCI Analyzer User’s Guide, August 2002
87
Capturing Data In The Trace Memory
Stopping the Analyzer
Running the Data Capture
When the trigger event occurs, the Analyzer continues to write posttrigger history to the trace memory as specified by the triggerpoint and
then stops.
You can stop the PCI Analyzer manually as well, for example, if the
trigger pattern does not occur or if the test runs over an unexpectedly
long time.
Stop the PCI Analyzer by
• selecting Stop from the Analyzer menu to stop only the PCI Analyzer,
or
• clicking the Stop button
88
to stop both, Exerciser and Analyzer.
Agilent E2925B PCI Analyzer User’s Guide, August 2002
Viewing And Processing The Trace
Memory Capture
The Three Listers
The PCI Analyzer provides three tools to view and evaluate the captured
PCI traffic at different levels of abstraction:
• Waveform Lister
At the lowest abstraction level the waveform lister displays the state
of each signal (0 or 1) and the bus conditions (addresses and data on
address/data lines, byte enables, and commands on the C/BE lines) at
each clock cycle of the capture.
• Bus Cycle Lister
The bus cycle lister derives information on the type of each bus cycle
and displays a list of the detected signals and states per bus cycle. For
example, the state of the C/BE lines during an address phase is
evaluated to display the referring command.
• Transaction Lister
At the highest abstraction level the transaction lister shows a list of
the transactions found in the captured data. It summarizes the clocks
of each transaction in one line and lists certain attributes or
parameters that are detected during the transaction (for example,
address, waits, retries).
Synchronizing the Listers
The listers can be used in parallel and be synchronized to view the same
range of samples of the capture at the same time.
Processing the Information
The information shown in the listers can be saved and restored for later
analysis (see “Processing the Captured Data” on page 97).
NOTE
If the captured data is not uploaded from trace memory after the trigger
event has occurred (for example, if the testcard has been run in standalone mode), click the Reload button
to upload the current capture.
Agilent E2925B PCI Analyzer User’s Guide, August 2002
89
Viewing And Processing The Trace Memory Capture
Using the Waveform Lister
Using the Waveform Lister
The waveform lister displays the state of each signal (0 or 1) and the bus
conditions (addresses and data on address/data lines, byte enables, and
commands on the C/BE lines) at each clock cycle of the capture.
To call the waveform lister:
1 In the main window, click the Waveform Viewer button
.
The waveform lister supports you in analyzing the captured data by
allowing you to
• restrict the display to show only the signals and bus states relevant for
your test (see “How to Arrange the Signal Display” on page 91),
• improve the view by specifying the range and resolution of the
displayed clock cycles (see “Adjusting Range and Resolution” on
page 92),
• set markers, for example, to toggle between two locations within the
sample in order to compare them (see “Using the Markers” on
page 92).
To analyze the captured data at the different abstraction levels at the
same time, you can synchronize the currently displayed listers (see “How
to Synchronize the Listers” on page 94).
90
Agilent E2925B PCI Analyzer User’s Guide, August 2002
Using the Waveform Lister
Viewing And Processing The Trace Memory Capture
How to Arrange the Signal Display
To optimize the signal display in the waveform lister to show only signals
relevant for your test, you can exclude all irrelevant signals and arrange
the order in which the signals are displayed. Proceed as follows:
1 From the Signals menu of the waveform lister, select Arrange.
2 Click on the horizontal arrow buttons to exclude or include signals
(the signals shown in the left area will not be displayed in the lister).
3 Click on the vertical arrow buttons to move up and down the signals
to arrange them as they should appear in the lister.
4 For the address/data and byte enable signals, determine whether they
are displayed in decimal or hexadecimal format.
5 Click OK.
NOTE
Using the Signals menu of the waveform lister, you can also adjust the
height of the displayed signals.
Agilent E2925B PCI Analyzer User’s Guide, August 2002
91
Viewing And Processing The Trace Memory Capture
Using the Waveform Lister
Adjusting Range and Resolution
Below the signal display the waveform lister provides information on the
currently selected view: first and last displayed sample and zoom factor
(resolution). The slider bar represents the complete capture and shows
the location of the triggerpoint and of the markers (if set). The samples
are always numbered so that the triggerpoint is located at sample 0.
First Displayed Sample
Resolution
Triggerpoint (Sample 0)
Last Displayed Sample
Slider Bar
The waveform lister provides full flexibility to adjust the view to your
needs:
• To enlarge the display, resize the Waveform Viewer window.
• Scroll horizontally so that the area you wish to focus on is in the
center of the view.
• Click the Goto Trigger button
to move the view to the triggerpoint.
• Click the Goto Marker A and B buttons
respective marker.
• Click the Zoom buttons
to move the view to the
to zoom in or out.
• The resolution tells the number of samples between two division
marks (top row of diagram).
• Click the Redraw button
to refresh the display.
Using the Markers
The waveform lister provides two markers A and B. With these markers
you can
• mark two particular samples of your interest
• set the visible range in the lister’s display
• set a begin and end marker when using the cross reference function.
92
Agilent E2925B PCI Analyzer User’s Guide, August 2002
Using the Waveform Lister
Viewing And Processing The Trace Memory Capture
The following buttons allow you to control the markers:
Move Marker B near to Marker A
View Range between Marker A and B
Move Marker B into View
Move Marker A into View
Goto Marker B
Goto Marker A
Placing the Markers
To place the markers, proceed as follows:
1 Scroll horizontally so that the location where to place marker A is in
the center of the view.
2 Click the Move Marker A into View button.
Marker A is set in the center of the lister’s display.
3 Repeat these steps for marker B.
Moving the Markers
To move the markers, you can
• use the sliders A and B on the slider bar
• drag and drop the marker symbols in the header of the lister’s display
• enter values in the Marker A, Marker B, or A to B text fields
• click on the Move Marker B near to Marker A button
Using the Markers
When you have finished placing the markers A and B, you can
• move the view to A or B by clicking the Goto Marker A or Goto Marker
B button
• set the visible range between A and B by clicking the View Range
between Marker A and B button.
The markers A and B of the waveform lister are also used by the crossreference function (see “How to Synchronize the Listers” on page 94).
Agilent E2925B PCI Analyzer User’s Guide, August 2002
93
Viewing And Processing The Trace Memory Capture
Using the Bus Cycle Lister
How to Synchronize the Listers
The displays of all three listers—waveform lister, bus cycle lister, and
transaction lister—can be synchronized by means of the cross-reference
function. This function is available in any lister. It allows you to view the
same samples in all open listers for examination on different abstraction
levels.
To synchronize the listers:
1 Open the desired listers.
2 If no capture is loaded, upload the trace memory (after an Analyzer
run) or load a file.
3 In one of the listers, select the range to be viewed:
– in the transaction lister and bus cycle lister: keep the left mouse
button pressed while moving the mouse cursor over the samples
– in the waveform lister: set marker A and B. The samples between
them are considered as “selected”.
4 Click the Cross Reference button
to synchronize all open listers.
Using the Bus Cycle Lister
The bus cycle lister derives and displays information on the type of each
bus cycle, for example:
• If it is an address cycle: which is the transferred address and which
command is in use?
• If it is a cycle of a data phase within a burst: what is the data and
which byte enable signals are set?
• Is it a wait cycle?
• Is it an idle cycle?
The lister provides a search feature allowing you to search for errors and
strings in the list and an export feature to store the textual list or parts of
it as a text file.
94
Agilent E2925B PCI Analyzer User’s Guide, August 2002
Using the Bus Cycle Lister
Viewing And Processing The Trace Memory Capture
To call the bus cycle lister:
1 In the main window, click the Bus Cycle Lister button
.
Each line in the list represents one bus cycle. For each cycle, its type
(transaction, idle, etc.) and detected attributes are stated.
Browsing Through the Cycles
The bus cycle lister supports several methods of browsing through the
cycles:
• You can move in the capture using the scroll bars.
• You can move to the triggerpoint by clicking the Goto Trigger button
.
• You can move to a particular sample by entering a sample number in
the Goto text field and pressing return.
• You can use the Search menu items to search for strings or errors.
Agilent E2925B PCI Analyzer User’s Guide, August 2002
95
Viewing And Processing The Trace Memory Capture
Using the Transaction Lister
Using the Transaction Lister
The transaction lister shows a list of the transactions found in the
captured data. It summarizes the clocks of each transaction in one line
and lists certain attributes or parameters that are detected during the
transaction.
The lister provides a search feature allowing you to search for errors and
strings in the list and an export feature to store the textual list as a text
file.
To call the transaction lister:
1 In the main window, click the Transaction Lister button
.
Each line in the list represents a complete transaction and states
information about the transaction:
• start sample number
• bus command
• bus address
• data (if any)
• detected attributes
96
Agilent E2925B PCI Analyzer User’s Guide, August 2002
Processing the Captured Data
Viewing And Processing The Trace Memory Capture
The transaction lister provides the same scrolling, moving, searching,
and storing features as the bus cycle lister. Please refer to “Browsing
Through the Cycles” on page 95.
Processing the Captured Data
Normally, the data captured in the trace memory is uploaded
automatically after the trigger event has occurred so that you can view it
directly in the listers. You can analyze the data, save them to disk and
load them again for later analysis.
However, if the PCI Analyzer has been run in stand-alone mode or under
control of a C program (without using the graphical user interface), you
will have to upload the captured data.
The listers provide the following functions for processing the captured
data:
• The Reload button
allows you to upload the current capture from
the card’s trace memory into the user interface software.
• The Print button
allows you to print the captured data as currently
displayed by the respective lister.
• The File menu in each lister provides menu items to save the contents
of the trace memory to a waveform file (.wfm) and to load data from a
file.
• The File menu in the Bus Cycle Lister and in the Transaction Lister
provides the Export to File item, allowing you to save the lists as a
text file.
• The File menu in the Bus Cycle Lister provides the Export selected
Range item, allowing you to save only the selected range of bus cycles
as a text file.
Agilent E2925B PCI Analyzer User’s Guide, August 2002
97
Viewing And Processing The Trace Memory Capture
98
Processing the Captured Data
Agilent E2925B PCI Analyzer User’s Guide, August 2002
Saving and Re-Using the Setups
The setups entered during a session can be saved to disk when exiting
the program.
Because you might need different settings for different tests, you can
also store the settings in separate test setup files.
When testing the power up behavior of your device or system under test,
you can save your setups as power up defaults on the Agilent E2925B
testcard.
Re-Using Test Setups
The test setup files (.bst) contain all information required to repeat a test
later-on, for example,
• the trigger sequencer programming,
• the performance counter setup,
• the run options,
• the testcard configuration,
• and the setups for the PCI Exerciser’s master and target devices if the
PCI Exerciser option has been installed.
The functions for handling setup files can quickly be accessed via the
icon buttons in the File section.
Save
Open
New
Agilent E2925B PCI Analyzer User’s Guide, August 2002
99
Saving and Re-Using the Setups
How to Overwrite the Power Up Defaults
How to Overwrite the Power Up
Defaults
If you wish to test the power up behavior of a device or system under
test, you can save your test setups and additional properties as power up
defaults on the Agilent E2925B testcard. These settings will then affect
the testcard’s behavior on restart.
To save the current setups as power up defaults:
1 From the File menu, select Save as Power Up Defaults.
2 Select the additional power up properties as required. Possible
choices are:
– Start Trace Memory at Power Up. This option will start the trace
memory after a reset of the testcard is made. Here the PCI bus
traffic can be recorded and evaluated. Protocol rule violations and
timing errors can be used to trigger the trace memory.
– Restore only Fixed Bits at Power Up (recommended). This option
causes only the fixed bits in the configuration space header to be
reset on restart. Fixed bits are the ones that BIOS has no access to.
All other bits will be set by the BIOS in the configuration phase after
a restart.
3 Click OK.
100
Agilent E2925B PCI Analyzer User’s Guide, August 2002
Upgrading the PCI Analyzer
If you have purchased software options for your PCI Analyzer, they need
to be enabled after installation.
If you have added the PCI Exerciser option and/or the C-API/PPR option
subsequently, the testcard hardware needs to be upgraded.
How to Install Software Options
To enable software options for the PCI Analyzer:
1 From the Setup menu, select Testcard Configuration.
2 From the HW Config menu, select Register Product Options.
Repeat the following steps for each software add-on to be enabled:
1 Select the software option from the list.
2 Enter the license key printed on the software certificate in the Key
text field.
Agilent E2925B PCI Analyzer User’s Guide, August 2002
101
Upgrading the PCI Analyzer
Upgrading the Testcard Hardware
3 Click OK.
The software options providing additional user interface features will
become visible in the main window:
NOTE
Store the software certificates in a safe place.
Upgrading the Testcard
Hardware
If you have added the PCI Exerciser option and/or the C-API/PPR option
subsequently, the testcard hardware needs to be upgraded.
For upgrading the testcard hardware, send the testcard to the address
specified in the papers shipped with your testcard.
After upgrading the hardware you need to enable the new software
options as described in “How to Install Software Options” on page 101.
102
Agilent E2925B PCI Analyzer User’s Guide, August 2002
Updating the Testcard
After a software update, a version conflict with the onboard firmware
can occur. In this case, the hardware must be updated.
How to Check the Hardware
When connecting to the card and during program start, the hardware
check is performed automatically. You can also start the hardware check
on your own (for example, if you changed to another card without
restarting the software):
♦ From the Setup menu, select Check Hardware.
A message shows whether or not a hardware update is required.
How to Update the Testcard
Hardware
To perform the hardware update:
1 From the Setup menu, select Update HW.
2 In the Port section, select the control interface to be used and enter
the required parameters for that control interface.
3 Click OK.
The flashing red/green indicator will show the progress of the update.
A message will appear after the hardware update has been completed
successfully.
4 From the Setup menu, select Check Hardware to verify that hardware
and software are compatible now.
Agilent E2925B PCI Analyzer User’s Guide, August 2002
103
Updating the Testcard
104
How to Update the Testcard Hardware
Agilent E2925B PCI Analyzer User’s Guide, August 2002
Analyzer Reference
This reference provides bus states, protocol rules, etc. and briefly
defines the predefined performance measures.
List of Rules Observed by the
PCI Analyzer
The following tables shortly describe all the rules that are observed by
the PCI Analyzer’s protocol observer. The rules are defined by the PCI
specification, where you may find more details.
The provided links refer to PCI specification, Revision 2.1, June 1, 1995.
The rules are assorted as follows:
• “FRAME# Usage Rules” on page 106
• “IRDY# Usage Rules” on page 106
• “DEVSEL# Usage Rules” on page 107
• “TRDY# Usage Rules” on page 107
• “STOP# Usage Rules” on page 108
• “LOCK# Usage Rules” on page 108
• “64-Bit Handling Rules” on page 108
• “Arbitration Handling Rules” on page 109
• “Parity and Parity Error Handling Rules” on page 109
• “Cache Handling Rules” on page 110
• “Semantic Rules” on page 110
• “Latency Rules” on page 111
Agilent E2925B PCI Analyzer User’s Guide, August 2002
105
Analyzer Reference
List of Rules Observed by the PCI Analyzer
Table 5
Table 6
106
FRAME# Usage Rules
Abbrev.
Description
PCI Specification Section
FRAME_0
Whenever STOP# is asserted,
the master must deassert
FRAME# as soon as IRDY# can
be asserted.
Appendix C, Rule 12 e
FRAME_1
Fast Back-To-Back is only allowed after a write transaction
or a master abort.
3.4.2.
Fast Back-to-Back Transaction
IRDY# Usage Rules
Abbrev.
Description
PCI Specification Section
IRDY_0
IRDY# must not be asserted on 3.3.1.
Read Transaction
the same clock edge that
FRAME# is asserted, but one or (see timing diagram)
more clocks later.
IRDY_1
FRAME# cannot be deasserted Appendix C, Rule 8 c
unless IRDY# is asserted. IRDY#
must always be asserted on the
first clock edge that FRAME# is
deasserted.
IRDY_2
IRDY# must be deasserted after 3.3.3.1. and 3.3.3.2.1, Rule 1
last transfer or when FRAME# is
high and STOP was asserted.
IRDY_3
Appendix C, Rule 7
A transaction starts when
FRAME# is sampled asserted for
the first time—IRDY# must not
go low when FRAME# is high.
IRDY_4
Once a master has asserted
IRDY#, it cannot change IRDY#
or FRAME# until the current
data phase is completed.
Especially when FRAME# has
been deasserted, it cannot be
reasserted during the same
transaction.
IRDY_5
IRDY# must not be asserted
3.10.1
during the second address
64-bit Addressing
phase of a Dual Address Cycle.
Appendix C,
Rules 8 b and 8 d
Agilent E2925B PCI Analyzer User’s Guide, August 2002
List of Rules Observed by the PCI Analyzer
Table 7
Analyzer Reference
DEVSEL# Usage Rules
Abbrev.
Description
DEVSEL_0 DEVSEL# must not be asserted
during a special cycle or if a
reserved command has been
used.
PCI Specification Section
3.7.2.
Special Cycle
3.1.1.
Command Definition
DEVSEL_1 DEVSEL# must not be asserted 3.3.1.
Read Transaction
when FRAME# is high or was
sampled high on last clock edge (timing diagram)
(for DAC, DEVSEL# must be
delayed by one cycle).
Appendix C, Rule 15
DEVSEL_2 Once DEVSEL# has been
asserted, it cannot be
deasserted until the last data
phase has completed, except to
signal target abort.
Appendix C, Rule 12 f
DEVSEL_3 If not already deasserted,
TRDY#, STOP# and DEVSEL#
must be deasserted with the
clock following the completion
of the last data phase and must
be tri-stated at the next clock.
Table 8
TRDY# Usage Rules
Abbrev.
Description
TRDY_0
DEVSEL# must be asserted with Appendix C, Rule 14
or prior to the edge at which the
target enables its outputs.
(TRDY#).
TRDY_1
3.3.1.
TRDY# must not go low at the
Read Transaction (timing
first clock after assertion of
FRAME# in a read transaction (a diagram)
turnaround cycle is necessary).
TRDY_2
Once a target has asserted
TRDY#, it cannot change
DEVSEL#, TRDY#, STOP# until
the current data phase
completes.
Agilent E2925B PCI Analyzer User’s Guide, August 2002
PCI Specification Section
Appendix C,
Rule 12 d
107
Analyzer Reference
List of Rules Observed by the PCI Analyzer
Table 9
Table 10
Table 11
108
STOP# Usage Rules
Abbrev.
Description
PCI Specification Section
STOP_0
DEVSEL# must be asserted with Appendix C, Rule 14
or prior to the edge at which the
target enables its outputs
(STOP#).
STOP_1
Appendix C, Rule 12 c
Once asserted, STOP# must
remain asserted until FRAME# is
deasserted; whereupon, STOP#
must be deasserted.
STOP_2
Once a target has asserted
STOP#, it cannot change
DEVSEL#, TRDY#, STOP# until
the current data phase is
completed.
Appendix C,
Rule 12 d
LOCK# Usage Rules
Abbrev.
Description
PCI Specification Section
LOCK_0
LOCK# must be asserted at the
clock following the (first)
address phase and kept
asserted to maintain control.
Appendix C, Rule 32 e
LOCK_1
The first transaction of a locked Appendix C,
access must be a READ.
Rule 32 d
LOCK_2
Appendix C,
LOCK# must be released if
RETRY is signaled before a data Rules 32 f and 32 g
phase has completed and lock
has not been established, or
whenever an access is
terminated by target abort or
master abort.
64-Bit Handling Rules
Abbrev.
Description
PCI Specification Section
W64_0
3.10.
REQ64# mirrors FRAME# in a
64-bit transaction. REQ64# may 64-Bit Bus Extension
only be asserted when FRAME#
is asserted. Once asserted, it
must stay low as long as
FRAME#.
W64_1
3.10.
ACK64# mirrors DEVSEL# in a
64-bit transaction. ACK64# may 64-Bit Bus Extension
only be asserted when DEVSEL#
is asserted. Once asserted, it
must stay low as long as
DEVSEL#.
Agilent E2925B PCI Analyzer User’s Guide, August 2002
List of Rules Observed by the PCI Analyzer
Table 11
Table 12
Table 13
Analyzer Reference
64-Bit Handling Rules
Abbrev.
Description
PCI Specification Section
W64_2
REQ64# must not be used with
special cycle or interrupt
acknowledge command. Only
memory commands support
64-bit data transfers (no config
commands, no I/O commands).
3.10.
64-Bit Bus Extension
W64_3
ACK64# may only be asserted,
when REQ64# was asserted
before (ACK64 is a response to
REQ64#).
3.10.
64-Bit Bus Extension
Arbitration Handling Rules
Abbrev.
Description
PCI Specification Section
ARB_0
When the current transaction is Appendix C, Rule 10
terminated by the target either
by Retry or Disconnect, the
master must deassert its REQ#
signal for a minimum of two
clocks.
ARB_1
Appendix C,
One GNT# can be deasserted
coincidently with another GNT# Rule 23 b
being asserted only if the bus is
not in idle state.
ARB_2
Only one GNT# must be
asserted on any rising clock.
3.4. Arbitration
Parity and Parity Error Handling Rules
Abbrev.
Description
PARITY_0
PERR# may never be asserted 3.8.2.
Error Reporting
two clocks after the address
phase (or earlier in a
transaction) or during a special
cycle.
During WRITE, PERR# may be
asserted two clocks after
IRDY#, during READ, PERR# may
be asserted two clocks after
TRDY#.
PARITY_1
AD[31::0] address parity error.
Appendix C,
Rule 37 b
PARITY_4
AD[63::32] address parity error.
Appendix C,
Rule 37 c
PARITY_2
AD [31::0] data parity error
Appendix C,
occurred but was not signaled. Rule 37 b
Agilent E2925B PCI Analyzer User’s Guide, August 2002
PCI Specification Section
109
Analyzer Reference
List of Rules Observed by the PCI Analyzer
Table 13
Table 14
Table 15
110
Parity and Parity Error Handling Rules
Abbrev.
Description
PCI Specification Section
PARITY_5
AD[63::32] data parity error
Appendix C,
occurred but was not signaled. Rule 37 c
PARITY_3
AD[31::0] data parity error
occurred.
Appendix C,
Rule 37 b
PARITY_6
AD[63::32] data parity error
occurred.
Appendix C,
Rule 37 c
Cache Handling Rules
Abbrev.
Description
PCI Specification Section
CACHE_0
After HITM, CLEAN must be
signaled before STANDBY.
3.9.2 Cache State Transitions
CACHE_1
HITM must only be signaled
after STANDBY.
3.9.2 Cache State Transitions
Semantic Rules
Abbrev.
Description
PCI Specification Section
SEM_0
A master can terminate a
transaction with master abort
but not until 4 clocks after an
entire address phase.
3.3.3.1.
Master Initiated Termination
3.10.1.
64-bit Addressing on PCI
SEM_1
Only certain combinations of
AD[1:0] and C/BE#[3:0] are
allowed during I/O transfers.
3.2.2. Addressing
SEM_2
3.10.1.
A master that supports 64-bit
64-bit addressing on PCI
addressing must generate a
SAC instead of a DAC, when the
upper 32 bits of the address are
zero.
SEM_3
Reserved commands are
reserved for future use.
SEM_4
DAC is not allowed immediately 3.10.1
after a DAC.
64-bit Addressing on PCI
SEM_5
A master must keep the byte
enables stable during the
complete data phase.
SEM_6
3.7.5 Interrupt Acknowledge
An INTx signal has been
asserted and deasserted before
an Interrupt Acknowledge cycle
has occurred.
3.1.1.
Command Definition
Appendix C, Rule 3 b
Agilent E2925B PCI Analyzer User’s Guide, August 2002
List of Rules Observed by the PCI Analyzer
Table 15
Table 16
Analyzer Reference
Semantic Rules
Abbrev.
Description
PCI Specification Section
SEM_7
Targets must signal disconnect 3.2.2 Addressing
with or after completion of the
first data phase, when a
reserved burst mode is used
during memory command
transactions.
SEM_8
(default =
off)
A delayed transaction (retries)
has not been repeated within
214 clocks.
Agilent Rule to detect potential
deadlocks.
SEM_9
(default =
off)
A delayed transaction has not
terminated within 215 clocks.
Agilent Rule to detect potential
deadlocks.
SEM_10
During a Dual Address Cycle, a
64-bit master has to drive the
high address on AD[63::32] in
the initial and in the second
address phase.
3.10.1
64-bit Addressing on PCI
SEM_11
During a Dual Address Cycle, a
64-bit master has to drive the
bus command on C/BE[7::4]# in
the initial and the second
address phase.
3.10.1
64-bit Addressing on PCI
SEM_12
The Memory Write and
Invalidate command can only
use the linear incrementing
burst mode.
Part 2.1,
3.2.2 Addressing
SEM_13
When using the Memory write
and invalidate command, the
transaction must begin at the
start of a cacheline.
Part 2.1,
3.2.2 Addressing
Latency Rules
Abbrev.
Description
LAT_0
Appendix C,
Targets are required to
complete the initial data phase Rules 25 and 26
of a transaction within 16
clocks, subsequent data phases
within 8 clocks.
LAT_1
A master must complete all
cycles within 8 clocks.
Agilent E2925B PCI Analyzer User’s Guide, August 2002
PCI Specification Section
Appendix C, Rules 27
111
Analyzer Reference
Sample Timing Diagrams
Sample Timing Diagrams
The following figures show examples of some events on the PCI bus, and
which states are detected by the PCI Analyzer in the various phases of
the event.
In the figures, the following abbreviations are used to identify the signals:
Table 17
Abbreviations used in Sample Timing Diagrams
Signal
Abbreviation
Meaning
b_state[]
i
Idle
A
Single address cycle
A1
First of a dual address cycle
A2
Second of a dual address cycle
d
Decoding
w
Wait
T
Transfer
S
Single phase
F
First data phase of the burst
M
Data phase within the burst
L
Last data phase of the burst
-
Invalid
n
No termination in this phase
MA
Master abort
C
Master completion
A
Target disconnectA
B
Target disconnectB
1
Target disconnect1
2
Target disconnect2
TA
Target abort.
burst[]
term[]
112
Agilent E2925B PCI Analyzer User’s Guide, August 2002
Sample Timing Diagrams
Analyzer Reference
Figure 1
Master Completion of Single Transfer and Burst
FRAME#
IRDY#
DEVSEL#
TRDY#
STOP#
b_state[]
burst[]
term[]
Figure 2
i A d w T i i i i A w T T w w T i
- - - - - S - - - - - - F M - - L n n n n n C n n n n n n n n n n C n
Master Completion with STOP# asserted
FRAME#
IRDY#
DEVSEL#
TRDY#
STOP#
b_state[]
burst[]
term[]
Figure 3
i
i
i i i A T i i A w T w T i i i i i
- - - - - S - - - - F - L - - - - n n n n n C n n n n n n C n n n n n
Target Disconnect A (with data transfer)
FRAME#
IRDY#
DEVSEL#
TRDY#
STOP#
b_state[]
burst[]
term[]
Agilent E2925B PCI Analyzer User’s Guide, August 2002
i i
- n n
i i i A w T i i A T w T i i i i
- - - - - S - - - F - L - - - n n n n n A n n n n n A n n n n
113
Analyzer Reference
Sample Timing Diagrams
Figure 4
Target Disconnect B (with data transfer)
FRAME#
IRDY#
DEVSEL#
TRDY#
STOP#
b_state[]
burst[]
term[]
i i i i A T w i i i i A T T w i i
- - - - - F - - - - - - F M - - n n n n n B n n n n n n n B n n n
i
This is not considered a data phase
Note that the last cycle of a disconnect B is not considered as a
meaningful data phase, although IRDY# and STOP# are low, because this
is just a MUST signal toggling due to burst termination protocol rules.
Figure 5
Target Retry 1 and 2 (without data transfer)
FRAME#
IRDY#
DEVSEL#
TRDY#
STOP#
b_state[]
burst[]
term[]
i A w w w i i A d w w i A d w w i i
- - - - S - - - - - S - - - F - - n
n n
n 1
n n n
n
n 2
n n n 2
n n
n
This is not considered as a data phase
114
Agilent E2925B PCI Analyzer User’s Guide, August 2002
Application Interfaces
Analyzer Reference
Figure 6
Target Disconnect 1 and 2 (without data transfer)
FRAME#
IRDY#
DEVSEL#
TRDY#
STOP#
b_state[]
burst[]
term[]
A d T w w i A T w w w w A T T w i i
- - F - L - - F - M - - - F M L - n n n n 1 n n n n 2 n n n n n 2 n n
This is not considered as a data phase
Application Interfaces
The application interfaces can be used to exchange data between the
Agilent E2925B testcard and external devices.
The testcard provides the following application interfaces:
• Static I/O Port
• Trigger I/O Connector
• LEDs on the Testcard
Static I/O Port
The static I/O port can transfer data (for example, status information)
between the testcard and the test environment during execution of a test.
The static I/O port features the following:
• 8 data lines
• 3.3V CMOS outputs driven by 74LVT (can also drive 5V TTL inputs)
• 3.3V CMOS inputs connected to 74LVT (can also understand 5V TTL
outputs)
The outputs of the static I/O port can withstand a short.
Agilent E2925B PCI Analyzer User’s Guide, August 2002
115
Analyzer Reference
Application Interfaces
Static I/O Port Connector and Pin Configuration
The following figure shows the connector and pin configuration:
16
15
2.54 mm
1
2.54 mm
2
Table 18
116
Static I/O Port Pin Configuration
Pin
Signal
Pin
Signal
1
Static[0]
2
GND
3
Static[1]
4
GND
5
Static[2]
6
GND
7
Static[3]
8
GND
9
Static[4]
10
GND
11
Static[5]
12
GND
13
Static[6]
14
GND
15
Static[7]
16
GND
Agilent E2925B PCI Analyzer User’s Guide, August 2002
Application Interfaces
Analyzer Reference
Static I/O Port Block Diagram
The following figure shows the block diagram of the static I/O port:
totem-pole or open-drain
Output Enable
&
StaticOut[0:7]
Static I/O[0:7]
74LVTxxx
StaticIn[0:7]
Trigger I/O Connector
The Agilent E2925B testcard provides a connector with 12 external
trigger lines (trigger port). The trigger lines can be used to synchronize
the card and other parts of the test environment on the basis of the PCI
clock, for example:
• observing and influencing the REQ# and GNT# lines of other devices:
– generate REQ# for other devices
– observe the GNT# of other devices
– sweep other REQ# with respect to own transactions
• generating and observing signals within or outside the system under
test
• cross triggering between PCI test cards
• triggering oscilloscope or logic analyzer
• triggering functions of the testcard by means of a logic analyzer
The trigger port features the following:
• 3.3V CMOS outputs driven by 74LVT (can also drive 5V TTL inputs)
• 3.3V CMOS inputs connected to 74LVT (can also understand 5V TTL
outputs)
Agilent E2925B PCI Analyzer User’s Guide, August 2002
117
Analyzer Reference
Application Interfaces
The outputs of the trigger port can withstand a short and are disabled
after power up or board reset.
NOTE
PCI reset RST# has no effect on the trigger port.
Trigger Port Connector and Pin Configuration
The following figure shows the connector and pin configuration:
24
23
2.54 mm
1
2.54 mm
2
Table 19
118
Trigger I/O Pin Configuration
Pin
Signal
Pin
Signal
Pin
Signal
Pin
Signal
1
Trigger[0]
2
GND
3
Trigger[1]
4
GND
5
Trigger[2]
6
GND
7
Trigger[3]
8
GND
9
Trigger[4]
10
GND
11
Trigger[5]
12
GND
13
Trigger[6]
14
GND
15
Trigger[7]
16
GND
17
Trigger[8]
18
GND
19
Trigger[9]
20
GND
21
Trigger[10]
22
GND
23
Trigger[11]
24
GND
Agilent E2925B PCI Analyzer User’s Guide, August 2002
Application Interfaces
Analyzer Reference
Trigger Port Block Diagram
The figure below shows the block diagram of the trigger port.
Totem-pole or open-drain Output Enable
&
D Q
TriggerOut[11::0]
D Q
PCI I/O Buffer
Trigger[11::0]
TriggerIn[11::0]
To Pattern Recognizer
PCI-CLK
D Q
LEDs on the Testcard
The LEDs on the Agilent E2925B testcard show the card’s status and are
visible even if the card is plugged into a closed system.
The following figure shows the position of the LEDs on the card:
LEDs
Agilent E2925B PCI Analyzer User’s Guide, August 2002
119
Analyzer Reference
Application Interfaces
The following table shows the meaning of the LEDs:
Table 20
Meaning of the LEDs
LED
State
Information
Exception LED
(red)
off
No violation, no test failed.
on
Protocol violation found.
slowly flashing (1 Hz) Test failed.
Run Indicator
LED (green)
off
No power.
on
Power good.
slowly flashing (1 Hz) Master/test running.
fast flashing (3 Hz)
Trace memory triggered.
If the red LED and the green LED are alternatingly flashing with 3 Hz, a
fatal error has occurred. Both LEDs also flash after use of the Ping
button in the Testcard Configuration dialog box (simultaneously, 1 Hz).
120
Agilent E2925B PCI Analyzer User’s Guide, August 2002
Glossary
This glossary contains terms used to describe and explain the functions
and capabilities of the testcard—not only the PCI Exerciser. It contains a
short explanation of each term, and in many cases, a reference to more
information.
If you do not find a term in this glossary, look up the term in the index of
this manual, or in the glossary of the PCI Specification.
A
Alignment
Alignment occurs in multiple contexts:
• Sample alignment in the trace memory
The samples in the trace memory are aligned to ensure that
information that occurred simultaneously (that is: in the same PCI
clock) is aligned timewise. For example, command and address are
latched, and aligned to data.
• PCI bus address alignment
When transferring data via the PCI bus, the address alignment must
often meet certain requirements for certain transfers. For example,
when using cacheable resources, data must be aligned to cache line
size.
When accessing the testcard’s data memory via the PCI bus for fast
transfers, the internal address and the PCI bus address are to be
aligned equally.
Application Interface
The application interfaces are used by applications (external software or
hardware) for exchanging information with the testcard.
Attribute
See Protocol Attribute.
B
Block Transfer
See Master Block Transfer.
Agilent E2925B PCI Analyzer User’s Guide, August 2002
121
Glossary
C
Clock Cycle
A PCI clock cycle is the smallest granularity in the PCI protocol.
Control Interfaces
These are the card’s interfaces for transferring control data and test
results between the software and the testcard. The card can be
controlled via the parallel port (using the Fast Host Interface card), RS232, or by programming registers from PCI, which can be mapped into
user configuration space or into another PCI address space.
See “Connecting to the Testcard” on page 43.
Control PC
This PC runs the software controlling the testcard.
D
Data Memory
See Memory.
Data Transfer
See Transfer.
Decoder
The decoders of the testcard determine whether or not the card’s target
should claim a transaction on the bus. The decoders recognize
programmed address ranges, translate them into an internal address
range of an internal resource (such as data memory) and call the card’s
target unit to process the transaction.
E
Exerciser
The PCI Exerciser functions enable the testcard to emulate a PCI master
or target:
• As a master, it initiates data transfers on the PCI bus, allowing it to
test target devices by exposing them to the master’s attempts to
transfer data to or from them.
• As a target device, it reacts to a master’s attempts to transfer data to
or from it.
H
Host
Same as Control PC.
122
Agilent E2925B PCI Analyzer User’s Guide, August 2002
Glossary
I
Interrupt
The PCI bus provides dedicated PCI interrupt lines. The testcard both
recognizes and issues PCI interrupts.
M
Master Block Transfer
A master block transfer specifies a master operation for the testcard’s
Exerciser. The Exerciser needs the following information to execute a
master operation:
• bus command
• bus address
• internal address
• some optional data, such as block length, and references to an
attribute page or to a series of byte enables
A block transfer may need one or more transactions to complete,
depending on the specified master and target attributes, for example,
disconnect or retry.
The block transfer settings are stored in the master block transfer
memory, which contains a linear series of block transfers for the master.
Memory
The testcard provides different types of memory:
• Data Memory
The data memory holds received test data, and data to be transferred
by the testcard. It is shared between the PCI master and target, and it
can be setup or read out with host access functions. It also provides a
data compare unit to compare incoming data with previously stored
reference data.
• Trace Memory
The trace memory is part of the testcard’s Analyzer. It stores all PCI
signals along with extensive bus state and Exerciser state information.
All this information is aligned to each other.
See “Data Stored In The Trace Memory” on page 72.
Furthermore, the card provides memory to store test setups,
programming parameters, etc. (for example, attribute memories and
block transfer memory).
Agilent E2925B PCI Analyzer User’s Guide, August 2002
123
Glossary
P
Pattern Term
The pattern terms are programmable for recognizing bus events (signal
patterns on the bus). They are part of the testcard’s Analyzer. They can,
for example, detect an access using the Memory Write & Invalidate
command with a Disconnect.
The output of pattern terms (always 1 or 0) can be used in Analyzer
functions, for example, to trigger trace memory or to count bus events.
PCI Analyzer
The testcard’s Analyzer queries for information on the PCI bus, the state
of the Exerciser, or the external trigger inputs, so that it can check timing
and protocol rules, capture traffic and measure performance.
PCI Status
The testcard queries the status of the PCI bus and provides registers to
request information about the life status, reset, clock frequency, bus
activity, the involvement of the card’s Exerciser, and error states.
Performance Measure
The performance measures are circuits consisting of sequencercontrolled counters. They count different bus events and calculate
specified ratios. For example, busy cycles of transfers can be counted
and divided by all cycles thereby calculating the bus utilization.
See “Predefined Performance Measures” on page 60.
Protocol Attribute
The PCI transfers performed by the testcard can be equipped with
protocol attributes, for example, parity errors. This allows you to see
whether the system under test can handle these attributes. How the
attributes are to be applied is stored in the attribute memories of the
testcard.
The attributes are programmed per intended data transfer or per data
phase. There are address phase attributes and data phase attributes.
Whenever a new transaction must be started to complete the intended
master block transfer, an address phase is generated with the command
and address of the block transfer, and with the (address phase) attributes
of the next pending data transfer.
The attribute memories contain a series of attributes for the address
phases and data phases of the card’s master and target. The attributes
are used sequentially, and can be programmed to contain random
protocol variations (only with C-API/PPR option).
124
Agilent E2925B PCI Analyzer User’s Guide, August 2002
Glossary
S
Sequencer
The sequencers of the testcard recognize sequences of patterns on the
PCI bus. They are used by the testcard’s Analyzer.
A sequencer can be programmed to change between internal states with
the occurrence of certain patterns. On each state change it can issue
certain output signals. To recognize these patterns, pattern terms are
used.
Storage Qualifier
Storage qualifiers are used by the Analyzer when storing samples in the
trace memory. The trace memory stores samples of bus states for postprocessed analysis. To exclude unnecessary samples from being stored,
the Analyzer provides storage qualifiers.
See “Setting Up the Trigger Sequencer” on page 81.
System under Test
The system under test is the PCI system into which the testcard is
plugged.
T
Transaction
A transaction consists of an address phase and a series of one or more
data phases (burst).
Transfer
Data transfers are those clocks within a data phase in which data is
actually transferred: when IRDY# and TRDY# are both asserted.
Trigger
The testcard provides different types of triggers:
• Trace Memory Trigger
The trace memory trigger is part of the Analyzer. The trace memory
stores samples of bus states for post-processed analysis. To control
the start of the sampling, the Analyzer provides the trace memory
trigger.
See “Setting Up the Data Capture” on page 75.
Agilent E2925B PCI Analyzer User’s Guide, August 2002
125
Glossary
• External Trigger (Trigger Input and Output)
The testcard provides input lines to be used as trigger input and
output.
As input, they can be used in pattern terms just like PCI signals. The
trigger I/O sequencer enables them to detect trigger pattern
sequences.
As output they can be used to trigger other devices. Again, the trigger
I/O sequencer allows you to build sequences.
126
Agilent E2925B PCI Analyzer User’s Guide, August 2002
Index
Index
#
DEVSEL# Usage Rules 107
M
Did not repeat in ... cycles (trigger setup) 76
64-Bit Handling Rules 108
A
m_act 80
E
Efficiency 60
Advanced Performance Setup 66
Alignment 121
Examples. See Guided Tours
Exception and Run Indicator LEDs 14
Arbitration Handling Rules 109
B
F
Markers
Waveform Lister 92
Master Block Transfer 123
Memory 123
Menus 10
Modifications of the Timing Limits 55
Momentary (tab) 62
Fast Host Interface 43
berr Signal 30
Bus Cycle Lister 94
button 95
window 31
Feedback Counter 82
Format (hex/decimal) in Waveform Lister 91
FRAME# Usage Rules 106
Buttons 10
G
C
Goto Trigger (button) 24
Cache Handling Rules 110
C-API / PPR 9
Capture
Button 76
Window 76
Captured Data, processing 97
Capturing Data, Setup 75
Checking the Hardware 103
Clock Cycle 122
Guided Tours
Analyzing PCI Traffic to a Graphics
Controller 20
PCI Performance Analysis 36
Using the State Sequencer 33
Hardware Check 103
Hardware Update 103
Hold Time 51
Host 122
Configurations of the PCI Analyzer 39
I
"How to" signpost (help) 27
Control Interfaces 43
Control PC Configurations 39
Incrementing the Counters 65
Counter Increment 65
Installation of Software Options 101
Counter Sequencer 65
Programming 68
Interfaces
Control Interfaces 43
Hardware 14
User Interface 10
D
Data Capture
Processing 97
Setup 75
Uploading 73
Overview Windows 10
Analyzer Overview 11
Exerciser Overview 13
Test Setup Overview 11
Overwriting the Power Up Defaults 100
P
Parity and Parity Error Handling Rules 109
Pattern Editor (window) 77
Pattern Term 86
PCI Analyzer 124
Configurations 39
List of Rules Observed 105
Overview 7
Status Bar 87
Test Setup 39
PCI Analyzer, Components 39
PCI Clock Reference Counter 65
PCI Connector 15
PCI Exerciser 9
PCI Performance
Running a Measurement 62
PCI Port 43
IRDY# Usage Rules 106
PCI Protocol Permutator and Randomizer
(PPR) 9
L
PCI Status 124
Latency Rules 111
Performance Counter Sequencer
(window) 68
LEDs 119
Exception and Run Indicators 14
Data Recording 73
"Details" signpost (help) 27
Listers
Bus Cycle 94
Transaction 96
Types 89
Waveform 90
Detecting Signal Changes 86
LOCK# Usage Rules 108
Decoder 122
Overview of the PCI Analyzer 7
Interrupt 123
Data Memory
Definition 123
Debugging of Timing Violations 57
Offline/Demo Mode (radio button) 19
Parallel Ports 14
H
Components
of the PCI Analyzer 39
of the Trace Memory 72
Cross Reference (button) 94
O
Agilent E2925B PCI Analyzer User’s Guide, August 2002
Performance Measures 124
Predefined 60
Performance Optimizer 12
Performance Setup 66
127
Index
Selection List (dialog box) 78
Time History (tab) 63
Semantic Rules 110
Timing Check (window) 54
Preload Value 86
Sequencer
Description Table 82
Internal 82
Mode 74
Mode (State Sequencer) 33
Timing Checker
Adaptation 53
Reset 56
Setup 54
Uploading Results 56
Programming the Counter Sequencer 68
Serial Ports 14
Timing Diagrams 112
Protocol Attribute 124
Setup 81
of the Protocol Observer 48
of the Sample Sequencer 83
of the Storage Qualifier 79
of the Timing Checker 54
of the Trigger 76
of the Trigger Sequencer 81
Timing Limits, Modifications 55
Ports
Parallel/Serial 14
Static I/O 15
Trigger 15
Post-Processed Analysis 36
Power Up Defaults, Overwriting 100
Protocol Check (window) 48
Protocol Errors 29
Protocol Observer
Reset 50
Setup 48
Uploading of Results 49
Watching Results 49
Protocol Violations 47
R
Setup Time 51
Signal Display 91
Signals
Changes 86
Software Options, Installation 101
Range 92
Real Time Counter Setup (window) 61
Specifying
Transactions and States 80
Trigger Patterns 77
Real-Time Analysis 36
State Diagram 84
Recording Data 73
State Sequencer 33
Reference Counter 65
States, Specifying 80
Register Product Options (window) 101
Static I/O
Port Block Diagram 117
Ports 15
Real Time Counter Result (window) 62
Relative Values (ratio) 67
Reset
Protocol Observer 50
Timing Checker 56
Resolution 92
Restart (button) 14
Retry Rate 60
RS-232 Port 43
Rules
64-Bit Handling 108
Arbitration Handling 109
Cache Handling 110
DEVSEL# Usage 107
FRAME# Usage 106
IRDY# Usage 106
Latency 111
LOCK# Usage 108
Parity and Parity Error Handling 109
Semantic 110
STOP# Usage 108
TRDY# Usage 107
Run (button) 87
S
Scan Ports (button) 44
Selected Transactions/States (Storage
Qualifier Setup) 79
Selecting
Connection 44
Predefined Performance Measures 61
128
Status Bar 87
Status group
Protocol Check 48
Timing Check 54
Stop (button) 88
Timing Parameter Values 53
Timing Rules 51
Timing Violations 51
Debugging 57
Trace Memory 123
Components 72
Stored Data 72
Trigger 125
Trigger Sequencer 82
Transaction Lister
Button 96
Window 96
Transactions, Specifying 80
Transfer 125
Transitional Pattern Term 86
Transitions 86
TRDY# Usage Rules 107
Trigger 125
I/O 57
Pattern Specification 77
Point 77
Ports 15
Setup 76
Trigger (tab) 20
STOP# Usage Rules 108
Trigger Sequencer 81
Window 35
Stopping the Analyzer 88
Troubleshooting 45
Storage (tab) 79
Storage Qualifier Setup 79
U
Synchronizing the Listers 94
Update Rate (performance measure) 62
System Performance 37
Updating the Testcard Hardware 103
System Validation Package 9
Uploading
Captured Data 73
Protocol Observer Results 49
Timing Checker Results 56
T
t_act 80
Test Setup
Re-Use 99
Testcard 8
Concealed from the System 42
Control Interfaces 43
Hardware Interfaces 14
Hardware Update 103
Hardware Upgrade 102
LEDs 119
Software Connection 44
Utilization 60
W
Waveform Lister 90
Waveform Viewer
Button 90
Window 24
Testcard Configuration (window) 44
Throughput 60
Agilent E2925B PCI Analyzer User’s Guide, August 2002
Index
X
xact_cmd 80
xact_rq64 81
Z
Zoom 92
Agilent E2925B PCI Analyzer User’s Guide, August 2002
129
Publication Number: 5988-5041EN