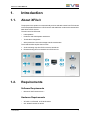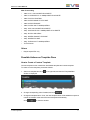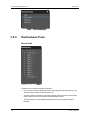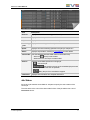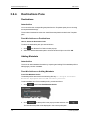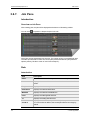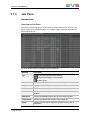
1
USER MANUAL
XFILE3
Version 4.07 - March 2015
XFile3-4.07-USER MANUAL
Copyright
EVS Broadcast Equipment S.A.– Copyright © 2003-2015. All rights reserved.
Disclaimer
The information in this manual is furnished for informational use only and subject to
change without notice. While every effort has been made to ensure that the information
contained in this user manual is accurate, up-to-date and reliable, EVS Broadcast
Equipment cannot be held responsible for inaccuracies or errors that may appear in this
publication.
Improvement Requests
Your comments will help us improve the quality of the user documentation. Do not
hesitate to send improvement requests, or report any error or inaccuracy on this user
manual by e-mail to [email protected].
Regional Contacts
The address and phone number of the EVS headquarters are usually mentioned in the
Help > About menu in the user interface.
You will find the full list of addresses and phone numbers of local offices either at the end
of this user manual (for manuals on hardware products) or at the following page on the
EVS website: http://www.evs.com/contacts.
User Manuals on EVS Website
The latest version of the user manual, if any, and other user manuals on EVS products
can be found on the EVS download center, on the following webpage:
http://www.evs.com/downloadcenter.
I
EVS Broadcast Equipment S.A.
March 2015
Table of Contents
TABLE OF CONTENTS
WHAT'S NEW?
1.
INTRODUCTION
IV
1
1.1. About XFile3
1
1.2. Requirements
1
1.3. Compatibility
2
2.
3
INSTALLATION AND LICENSING
2.1. Software Installation
3
2.2. Licensing
9
3.
XFILE3 APPLICATION
3.1. Startup and Shutdown
11
11
3.1.1. Startup
11
3.1.2. Shutdown
12
3.2. Auto Archive Tab
12
3.2.1. Auto Archive Overview
12
3.2.2. Sources Pane
14
3.2.3. Templates Pane
15
3.2.4. Destinations Pane
22
3.2.5. Filters Pane
26
3.2.6. How to Create an AutoArchive Rule
31
3.2.7. Job Pane
32
3.3. Archive Tab
II
II
41
3.3.1. Archive Overview
41
3.3.2. Source Pane
42
3.3.3. Templates Pane
45
3.3.4. Destinations Pane
45
3.3.5. How to Create Archive Jobs
45
3.3.6. Job Pane
47
3.4. Auto Restore Tab
50
3.4.1. Auto Restore Overview
50
3.4.2. Sources Pane
51
3.4.3. Destinations Pane
53
3.4.4. Options Pane
54
3.4.5. How to Create Auto Restore Folder
54
3.4.6. Job Pane
55
Table of Contents
XFile3-4.07-USER MANUAL
3.5. Restore Tab
3.5.1. Restore Overview
58
3.5.2. Sources Pane
59
3.5.3. Destinations Pane
66
3.5.4. Options Pane
68
3.5.5. How to Create Restore Jobs
70
3.5.6. Job Pane
70
3.6. Streaming Tab
74
3.6.1. Streaming Overview
74
3.6.2. Sources Pane
75
3.6.3. Templates Pane
75
3.6.4. Destinations Pane
76
3.6.5. Options Pane
78
3.6.6. How to Create Streaming Jobs
81
3.6.7. Job Pane
82
3.7. Monitoring Tab
87
3.7.1. Monitoring Overview
87
3.7.2. Hard Drive Pane
88
3.7.3. Job Pane
91
3.8. About Window
Table of Contents
58
97
III
EVS Broadcast Equipment S.A.
March 2015
What's New?
In the user manual, the icon
has been added on the left margin to highlight
information on new and updated features.
The changes linked to new features in version 4 are listed below.
New/Updated functionality
IV
•
Keywords can be uploaded to the EVS server. See section "Keywords" on page 28.
•
Multi-destination template can be created in AutoArchive, Archive and Streaming.See
section "How to Create Multi-destination Template" on page 20.
•
SuperMotion parameters can be defined in each destination. See section
"Destinations Pane" on page 22.
•
The rule can be exported in AutoArchive. See section "How to Export a Rule" on page
36
•
The rule can be imported into XFile3. See section "How to Import a Rule" on page 38
•
Index function is updated. See section "Introduction" on page 59
•
The user can trim a clip with Xviewer. See section "How to Trim a Clip with Xviewer"
on page 63
•
The user can set the shortcut folder of drives and folders. See section"Shortcut
Folder" on page 64
•
Keeping Original IDs function is added. See section "Keep Original IDs" on page 68
•
Auto Grab is added. See section "Auto Grab" on page 80
•
StartAll function is updated. See section "StartAll" on page 83.
What's New?
XFile3-4.07-USER MANUAL
1.
Introduction
1.1.
About XFile3
The purpose of this product is to automatically archive selected content from EVS servers
to the transportable hard drives or EVS servers and enable the content to be restored from
hard drives to EVS servers.
The main users for XFile3 are:
•
LSM operators.
•
Producers and LSM Operator assistants.
•
Technical truck engineers.
•
Other production users who manage to archive and restore.
The overall workflow implies the two roles:
1. Archive existing clips from EVS servers to hard drives.
2. Restore existing files from hard drives to EVS servers.
1.2.
Requirements
Software Requirements
•
Microsoft .Net Framework 4.5.1
Hardware Requirements
1. Introduction
•
XF2-HP 2.5, XF23-2D, or XF32-2D series
•
OS: Window7 64-bits or 32-bits
1
EVS Broadcast Equipment S.A.
March 2015
Workflow Requirements
•
1.3.
2
It is advised to verify that the Xsquare services are fully running before launching
XFile3 software.
Compatibility
•
XSecure V1.02.01
•
Xsquare V3.2.19
•
Xviewer V3.2.14
•
Multicam V11.02 onwards
•
TruckManager FtpService V1.0.6
•
DiscoveryClient V01.00.17
1. Introduction
XFile3-4.07-USER MANUAL
2.
Installation and Licensing
2.1.
Software Installation
Microsoft .NET Framework Installation
When starting XFile3 installation package,
•
If the computer has been installed with Microsoft .NET Framework 4.5, the procedure
directly goes to XFile3 Installation
•
It the computer hasn't been installed with Microsoft .NET Framework 4.5, Microsoft
.NET Framework 4.5 will be installed prior to installing XFile3 application.
Microsoft .NET Framework 4.5 installation process:
a. Click Install to proceed installation, or click Cancel to exit installation.
b. Wait a couple of seconds until installation is completed.
2. Installation and Licensing
3
EVS Broadcast Equipment S.A.
March 2015
c. Manually restart the computer and proceed to XFile3 installation
XFile3 Installation
To install XFile3, proceed as follows:
Run XFile3 installation package and then follow the steps of the Setup wizard。
1. Click Next.
4
2. Installation and Licensing
XFile3-4.07-USER MANUAL
2. Select I accept the agreement and click Next.
3. Select the destination directory to install the new software application and then click
Next. The installer proposes a default path for the installation. i.e.: C:\Program
Files(x86)\EVS Broadcast Equipment\XFile3.
2. Installation and Licensing
5
EVS Broadcast Equipment S.A.
March 2015
4. Select either mode to install. Two modes are available: Full install mode and
Advanced install mode.
◦
Select Full install mode, then all the components will be installed in Silent mode
automatically.
◦
Select Advanced install mode, then you can customize the components to be
installed.
The following steps are the installation process after selecting Advanced install
mode.
5. Select the components to install, and then click Next. If you need to update XFile3
only, you can unselect the other three components and click Next.
6
2. Installation and Licensing
XFile3-4.07-USER MANUAL
6. Click Browse to select a folder where XFile3 shortcuts to be saved, and then click
Next.
7. Select Create a desktop icon to create a shortcut on the desktop. If unselect, the
shortcut won’t display on the desktop.
Click Next.
2. Installation and Licensing
7
EVS Broadcast Equipment S.A.
March 2015
8. Click Install and wait until the installation is completed. This can last a couple of
seconds. After that, install Xsquare Suite.
9. Select the first option to restart your computer now or select the second option to
restart your computer later. The first option is highly recommended.
And then click Finish to finish the installation.
8
2. Installation and Licensing
XFile3-4.07-USER MANUAL
All applications are installed successfully.
2.2.
Licensing
The XFile3 software is managed by way of license codes managed with the XSecure
application. The required license codes for XFile3 are presented below:
Application
Module
Summary
10 XFile
10 Base Module
XFile3 User Application
60 XTAccess
10 Base Package
Background XTAccess transfer agent
60 XTAccess
20 Transcoding
Background XTAccess transcoding engine
170 Xviewer
10 Base Package
File Viewer Application Module
170 Xviewer
20 Edit
File Editor Application Module
When you need to add a new license code, or extend the validity of a temporary license
code, you must use the XSecure Manager application.
To add a new license code, proceed as follows:
1. Run the XSecure Manager application by double-clicking the XSecure Manager
shortcut on your desktop.
2. Request license codes.
a. Fill in the Customer information.
b. Click on the Request button in the lower left corner of the window. This will
generate an XML file that you must send to your EVS support representative.
c. Select the location where you would like to save that file, and click on the Save
button.
d. Send this file to your support representative at EVS support contact , specifying
which new license codes or license code extensions you require.
3. Add License codes.
2. Installation and Licensing
9
EVS Broadcast Equipment S.A.
March 2015
a. After received another XML file containing the license codes or code extensions
that you have requested. Copy that XML file in a directory that is visible to the
computer where XSecure was installed (using a USB key for instance, or your
LAN network)
b. Click on the Import Key File button in XSecure window. The license codes will
be automatically imported, and a dialog box is for you to confirm how many
license codes have been successfully imported.
10
2. Installation and Licensing
XFile3-4.07-USER MANUAL
3.
XFile3 Application
3.1.
Startup and Shutdown
3.1.1.
Startup
Double click the XFile3 icon
window.
to open the application. This opens the initialization
The startup sequence will check the status of the background Xsquare services and
discover the available EVS XT and EVS XS Servers on the same network as the XFile3
host computer as well.
The Auto Archive tab is selected by default at startup.
If you re-launch XFile3 after auto-archive rules have been created, you will be asked to
make a choice to continue using the previous rules or clear them and start without any
rule:
Do you want to carry on using the same auto archive rules?
•
Click Yes to use the same auto archive rules, and the old rules are retained.
•
Click No to remove the existing auto archive rules.
3. XFile3 Application
11
EVS Broadcast Equipment S.A.
March 2015
If no jobs are running or scheduled in the rules, the existing auto archive rules will be
removed.
If some jobs are running or scheduled in the rules, a window will pop up and ask: The
jobs in rule will be cancelled, do you want to proceed?
3.1.2.
◦
Select Yes to cancel all the existing jobs and rules and open XFile3.
◦
Select No to open XFile3, the old rules and jobs still exist.
Shutdown
Click
to shut down the XFile3 application. There will be a window popping up.
•
Yes: All the jobs will be cancelled.
•
No: Jobs in scheduled and running statuses are still processed in the background
after shutdown.
3.2.
Auto Archive Tab
3.2.1.
Auto Archive Overview
Auto Archive tab is the default page after startup.
Auto Archive tab is used to automatically archive the source clips from the requested
servers to archive hard drives based on rules.
12
3. XFile3 Application
XFile3-4.07-USER MANUAL
Click
to enter Auto Archive tab.
The screenshot below shows various areas of the Auto Archive main window.
Area
Name
Description
1
Sources pane
Area that displays all the detected servers and their clip
structures, including pages and banks.
2
Templates pane
Area that displays the available templates from the
background running Xsquare service manager.
3
Destinations
pane
Area that displays all the destinations related to the selected
template, supermotion clips and metadata modification.
4
Filters pane
Area that displays all the filter options that can be added in
the autoarchive rule.
5
Create
Autoarchive Rule
button
Button to create the autoarchive rule.
6
Job pane
Area that displays all the created rules and jobs.
3. XFile3 Application
13
EVS Broadcast Equipment S.A.
3.2.2.
March 2015
Sources Pane
The Sources pane includes the following elements:
•
When selecting or unselecting the parent level, all child nodes will be selected or
unselected.
•
Select the check box next to the individual servers, pages and banks. You can select
to select all servers or
14
to cancel the selection.
•
The server name on XFile3 UI is the SDTI network name of the server. But if the
server name is blank, the server serial number will be displayed instead.
•
The total number of clip is displayed beside each server name, page or banks in
brackets.
3. XFile3 Application
XFile3-4.07-USER MANUAL
Note
XFile3 monitors the connection with the EVS servers’ GBE ports. A server
could indeed be visible through the Management PC Lan port on XFile3 UI , but
file transfers may be impossible to be visible through the GBE media ports.
Two degraded modes are possible:
• The server’s GBE ports are not reachable, file transfer is impossible in
such circumstances. If both servers' GBE connections can't be pinged at
all, all controls for that server will be disabled.
• The server’s GBE ports are not reachable in jumbo frames. An
orange network icon appears beside the EVS server. File transfer is
possible but not at the fastest speed.
To solve those problems, please check your network settings to ensure that
Jumbo Frames is enabled on the local XFile3 NIC, or on the switch
infrastructure between the XFile3 and the servers.
3.2.3.
Templates Pane
Introduction
Area Description
Two kinds of templates exist in Template pane: default templates and custom templates.
Custom templates are at the bottom of Templates pane which are separated with default
templates by a single line.
Custom templates are editable, but default templates can't be edited. The user can
proceed on the following actions in custom templates.
•
Creating custom templates
•
Editing custom templates
•
Deleting custom templates
•
Importing custom templates
•
Exporting custom templates
3. XFile3 Application
15
EVS Broadcast Equipment S.A.
March 2015
Field
Name
Description
1
Default
template
Default templates are generated from Xsquare, which can't
be edited and deleted.
2
Custom
template
Custom templates are created from default templates by
users, which can be edited, imported, exported and deleted.
Area
Type of Templates
The templates pane displays all the templates that can be used while archiving clips.
Without Transcoding
16
•
- Avid MXF OPAtom
•
- EVS MXF
•
- MXF OP1a SMPTE
•
- QuickTime Movie
3. XFile3 Application
XFile3-4.07-USER MANUAL
With Transcoding
•
1080i - AVC - Intra 100 MXF OP1a SMPTE
•
1080i - Avid DNxHD VC -3 100Mbps MXF OP1a SMPTE
•
1080i - DVCPro HD QTMov
•
1080i - MJPEG 4Band XT1 EVS MXF
•
1080i - MJPEG EVS MXF
•
1080i - ProRes 422 LT100 Mbps QTMov
•
720p - AVC-Intra 100 MXF OP1a SMPTE
•
720p - Avid DNxHD VC-3 100Mbps MXF OP1a SMPTE
•
720p - DVCPro HD QTMov
•
720p - MJPEG 4Band XT1 EVS MXF
•
720p - MJPEG EVS MXF
•
720p - ProRes 422 LT 100 Mbps QTMov
•
To EVS Server
Others
•
Playlist export-EDL only
Possible Actions on Template Pane
How to Create a Custom Template
Custom template can be created from both default template and custom template.
To create a custom template, proceed as follows:
1. Select one template and click
window is displayed.
on its right side, and then the TemplateEditor
2. Change corresponding value if needed, and click
.
3. Change the template name. If not, the new template name will be added the sequence
number in brackets at the end of the source template automatically.
Click
3. XFile3 Application
to close the window.
17
EVS Broadcast Equipment S.A.
March 2015
4. The newly created custom template is displayed on Template pane.
How to Edit a Custom Template
To edit a custom template, proceed as follows:
1. Select one custom template and click
window is displayed.
on its right side, then the TemplateEditor
2. Change the corresponding values.
3. Click
to save the edition and close the window.
How to Delete a Custom Template
To delete a custom template, proceed as follows:
1. Click
at the top-right corner of Templates pane to display the editable area and
select the custom templates to be deleted by ticking the check box.
18
3. XFile3 Application
XFile3-4.07-USER MANUAL
2. Click
.
The selected custom template will be deleted.
How to Export a Custom Template
To export a custom template, proceed as follows:
1. Click
at the top-right corner of Templates pane to display the editable area and
select the custom templates to be exported by ticking the check box.
2. Click
.
3. Select a path where you want to export in Custom Template Export window.
3. XFile3 Application
19
EVS Broadcast Equipment S.A.
March 2015
4. Click
successful.
, then a message box will pop up to remind that the export is
All the custom templates are exported to only one xml file at one time, and the file is
named by the format: Customize export template_date hour minute
second.xml
For example: Customize export template_2013-11-20 15.00.19.xml
How to Import a Custom Template
To import a custom template, proceed as follows:
1. Click
at the top-right of Templates pane to display the editable area.
2. Click
3. Click
.
to select the xml file to be imported.
4. Select the custom templates to be imported by ticking the check box.
5. Click
successful.
, and a message box will pop up to remind that the import is
All the imported custom templates are displayed at the bottom of Templates pane.
How to Create Multi-destination Template
Creating multi-destination template is creating a template which supports archiving clips
to multiple destinations.
To create multi-destination template, proceed as follows:
20
3. XFile3 Application
XFile3-4.07-USER MANUAL
1. Click
on the right side of the template to be created from.
A TemplateEditor window pops up.
2. Click
and select the required destinations in the list.
3. Modify corresponding values in the pane at right side of the selected destination.
3. XFile3 Application
21
EVS Broadcast Equipment S.A.
4. Click
3.2.4.
March 2015
or
to save the modifications.
◦
Click
if the modified template is default template or the user wants to
save the modified template as a new custom template.
◦
Click
if the modified template is custom template or the user wants to save
modifications to the current template.
Destinations Pane
Destinations
Introduction
You must select the corresponding template from Templates pane prior to choosing the
required destination(s).
The number of destination fields varies from the different formats included in the Template
pane.
If a template has been selected since last archive, the template can still be applied in the
next archive as long as it has not been changed yet.
Possible Actions on Destinations
How to Select the Destination Path
To select the destination path, proceed as follows:
22
3. XFile3 Application
XFile3-4.07-USER MANUAL
1. Click
, then the window named Browse For Folder will pop up.
2. Select the desired destination path to write the archived clips to and click OK.
Adding Metadata
Introduction
The user can add metadata information by importing and editing EVS metadata profile or
editing legacy session metadata.
Possible Actions on Adding Metadata
From EVS Metadata Profile
The default profiles are stored in the following directory: C:\Program Files\EVS
Broadcast Equipment\XFile3\XML metadata profiles.
To add metadata from EVS metadata profile, proceed as follows:
1. Click
2. Click
below From EVS Metadata Profile.
to add a profile in the pop-up window and then click
.
The last selected profile will be displayed in the current profile path.
3. Select the Current profile to be used in the drop-down list.
3. XFile3 Application
23
EVS Broadcast Equipment S.A.
March 2015
4. Modify corresponding items in EVS XML Metadata window.
5. Click
after modification.
Then the metadata from EVS metadata profile is able to be used for all backups. The
user can edit this profile at any time to update the metadata.
The metadata profile is added in the XML of the destination files.
From Legacy Session Metadata
To add metadata from Legacy Session Metadata, proceed as follows:
1. Click
below From legacy session metadata.
2. Modify the corresponding items in Legacy Session Metadata window.
24
3. XFile3 Application
XFile3-4.07-USER MANUAL
3. Click
after modification.
The user can edit this profile at any time to update the metadata.
The metadata profile is added in the XML of the destination files.
Supermotion Clips
The Supermotion Clips option makes it possible for the user to archive clips with All
frames or Real time.
All frames and Real time options are chosen respectively while archiving clips. By default,
All frames is selected.
•
All frames: The entire frame of the Super Motion Clip is kept asynchronous or without
audio.
•
Real time: Only 1 frame over 2, 3, 6 or 10 (following the Super Motion Rec mode) and
audio are kept. Audio TC will be consistent.
Users are allowed to define the Supermotion parameters respectively in every destination.
3. XFile3 Application
25
EVS Broadcast Equipment S.A.
March 2015
Warning
If archiving the contents from one server to another, Supermotion Clips function
will be unavailable.
3.2.5.
Filters Pane
Introduction
XFile3 allows users to define different filters in Auto Archive tab. These filters are
additional rule criteria to facilitate complex jobs if desired.
The Filters pane includes six filters and one Filters Logical Relation.
26
•
Pref Cam
•
Date & Time
•
Camera
•
Rating
•
Archive
•
Keywords
•
Filters Logical Relation
3. XFile3 Application
XFile3-4.07-USER MANUAL
Pref Cam
The Pref Cams filter makes it possible to only include the clips in the autobackup rule
which are recorded from the camera defined as the first preferential camera (*) or the
second preferential camera (=). By default, no pref cam is selected and all cameras are
included.
Filter
Description
All cameras are included in autoarchive rule.
Only the first and second preferential cameras are included in
autoarchive rule.
Only the first preferential camera is included in autoarchive rule.
Only the second preferential camera is included in autoarchive rule.
Date & Time
The filter makes it possible to include the clips that are created between the required date
and time in the autoarchive rule . By default, no date or time is selected.
Filter
Description
The required date is selected with the format:
month/date/year.
The required time is selected with the format:
hour:minute:second.
To set the date, select
day of the month.
to activate the calendar, and then select the month and the
To set the time, select the time area and type the desired time.
You can click
to clear the defined date and time.
You can click
to load the current server time.
Note
Date & Time filter is based on Primary TC.
3. XFile3 Application
27
EVS Broadcast Equipment S.A.
March 2015
Camera
The camera filter makes it possible to select the clips to be included in the autoarchive
rule. By default, no camera is selected, and all cameras are included.
The different cameras are shown as following:
Camera
Description
A
Archive only clips stored as A clips
B
Archive only clips stored as B clips
C
Archive only clips stored as C clips
D
Archive only clips stored as D clips
E
Archive only clips stored as E clips
F
Archive only clips stored as F clips
Rating
The Rating filter makes it possible to include the clips in the autoarchive rule which are in
the required rating level. By default, no rating is selected, and all ratings are included.
Rating
Description
Clips with no rating
Clips with rating one
Clips with rating two
Clips with rating three
Archive
The Archive Flag filter makes it possible to include the clips in the autoarchive which are
flagged for archive or not flagged for archive by the LSM or Multicam user. By default, no
archive flag is selected.
Not Archived: Includes the clips which are not flagged for archive.
Marked for archive (Alt-Z): Includes the clips which have been flagged for archive.
Keywords
28
3. XFile3 Application
XFile3-4.07-USER MANUAL
Introduction
The keywords filter makes it possible to include the clips in the autoarchive rule. The
keywords are affixed with the selected keywords. By default, no keyword is selected.
Click
to activate Keyword window.
All the keywords listed in this window are from the keywords folders of the detected
servers, which reflects all keywords currently assigned to the clips.
Possible Actions on Keywords
All keywords are stored in the keyword folders of the discovered servers. The user can
upload a keywords grid to a server as a keyword folder. If the name of the folder to be
uploaded is the same as the one in the same server, the existing keyword folder in the
server will be overlapped by the uploaded keyword folder.
3. XFile3 Application
29
EVS Broadcast Equipment S.A.
March 2015
Area
Description
1
Enables the user to select an exact discovered server.
2
Enables the user to select an exact keyword folder in the discovered server.
3
Enables the user to upload an keyword grid to a server.
To upload a keyword grid to a server, proceed as follows:
1. Click
to open Keywords Import window.
2. Click Browse to select the keyword file to be imported.
3. Click Import to import the keywords file and close Keywords Import window.
The imported keywords are stored in an independent folder.
Filters Logical Relation
The Filters Logical Relation option makes it possible to specify the logical relations among
all selected filters.
•
AND: The clips matching ALL of the selected filters will be archived.
Example
When selecting Camera A and Rating
both Camera A and Rating
•
, XFile3 only archives the clips containing
.
OR: The clips matching ANY of all the selected filters will be archived.
Example
When selecting Camera A and Rating
Camera A, or Rating
30
, XFile3 archives the clips containing
or both.
3. XFile3 Application
XFile3-4.07-USER MANUAL
3.2.6.
How to Create an AutoArchive Rule
How to Create an AutoArchive Rule
To create an autoarchive rule, proceed as follows:
1. Select the source EVS Server and/or Page/Bank to autoarchive.
2. Select a template in the Templates pane to specify the file format.
3. Select a destinations in the Destinations pane to specify where clips will be archived.
It is optional to select adding metadata.
4. Select different filters if requested. You can define the filters logical relation in Filters
pane.
5. Click
Job pane.
. A new rule will be created and displayed in the
Note
All the clips in the original destination within the defined filters will
automatically be archived into the object destination.
All the previously selected sources will be unselected automatically after the
rule is created.
How to Archive Sources from One Server to Another
To archive sources from one server to another, proceed as follows:
1. Select the source EVS Server and/or Page/Bank to autoarchive.
2. Select the template named To EVS Server in Template pane.
3. Select the position in EVS server by clicking the radio button, and click
3. XFile3 Application
.
◦
If a defined position is selected, all the sources will be archived and the selected
position will be taken as the starting point.
◦
If the user selects
, all the sources will be archived and the first
available position in the EVS server will be taken as the starting point.
31
EVS Broadcast Equipment S.A.
March 2015
4. Click
. A new rule will be created and all the selected
sources will be archived from one server to another.
3.2.7.
Job Pane
Introduction
Overview on Job Pane
After creating a new rule, the rule and jobs will be displayed at the bottom of Auto Archive
tab.
You can click
to expand or collapse the jobs in the rule.
Rule
Every rule includes the information you have defined before creating the rule.
32
3. XFile3 Application
XFile3-4.07-USER MANUAL
Column
Description
Rules
The name of the rule is defined by a number automatically
incremented.
Source
Displays the name of the selected server(s). The tooltip for each
source displays the detailed information.
TemplateName Displays the name of the chosen template.
Destination
Displays the selected destination.
Metadata
Displays the selected metadata item.
From
Displays the starting date and time.
To
Displays the ending date and time.
Pref Cam
Displays the selected pref cam.
Camera
Displays the selected cameras.
Rating
Displays the selected ratings.
Archive
Displays the selected archive flags.
Keywords
Displays the selected keywords in the keywords grid.
Logical
relation
Displays the logical relation of all the selected filters.
Actions
Displays the available operations on the rule.
•
Stop: Stop the rule and cancel all the jobs based on the rule.
•
Start: Start the rule.
•
Remove: Remove the rule and cancel all the jobs.
•
Edit: Edit the rule.
Status
Displays the number of completed jobs and matching jobs with the
format: n completed jobs/n matching jobs.
Export rule
Enables the user to export the selected rules to the requested local
destination.
Import rule
Enables the user to import the rule to XFile3.
3. XFile3 Application
33
EVS Broadcast Equipment S.A.
March 2015
Tip
Note that all the columns in XFile3 can be specified via right clicking on the grid.
Show all columns option is used to select all the columns.
Job
All the jobs that meet the criteria of the specific rule will be displayed under the rule.
34
Column
Description
Source
Displays the LSM ID and server name of each job.
ClipName
Displays the name of the current archived clip.
Format
Displays the format which has been defined in the
Template pane.
Destination
Displays the destination where the archived clips
are stored.
Remaining _time
Displays the remaining time of each job.
Speed
Displays the current archiving speed of each job by
a multiple of x.
Status
Displays the job status, referring to "Job Status" for
more details.
3. XFile3 Application
XFile3-4.07-USER MANUAL
Column
Description
Actions
Displays the available operations on the single job.
•
Comments
: Cancel the job.
•
: Put the job on the top of the
scheduled job queue and it will be processed as
soon as possible.
•
: Retry the job if it is cancelled or
stopped.
Displays the information from Xsquare and XFile3.
Job Status
Six kinds of job statuses are available in Job pane to specify the exact status of the
current job.
The color refers to the color of the column label in front of the job and the font color of
Comments column.
Job Status
Color of
Head Row
Waiting
White
The job has been created and stored in the
XFile3Database.
Scheduled
Orange
The job has been sent to Xsquare and is scheduled to
be proceeded.
Running
Blue
The job is running.
Completed
Green
The job is completed successfully.
Failed
Red
The job is unsuccessful.
Cancelled
No Color
The job has been cancelled.
Description
Note
When a job is completed, the job will disappear from Job pane, but you can also
see all the completed jobs in Monitoring tab.
The following diagram specifies the conversion between different statuses.
3. XFile3 Application
35
EVS Broadcast Equipment S.A.
March 2015
Clip Metadata Updating
XFile3 updates all clip metadata backed up in Autoarchive pane.
The prerequisite to update clip metadata is that the rule must be started and running. If
not, the metadata of the clip included in the rule won't be updated.
Clips' metadata are updated automatically. If one clip hasn't been archived yet, its
metadata will be updated automatically as soon as its archiving job is finished.
Possible Actions on Job Pane
How to Start and Stop a Rule
To stop a rule, click
in Job pane, then all the jobs in waiting, scheduled and running
statuses in the rule will be cancelled.
To start a rule, click
or scheduled.
in Job pane, then all the cancelled jobs in the rule will be running
How to Remove a Rule
To remove a rule, you only need to click
will be removed.
in Job pane, then the rule and all the jobs in it
How to Edit an Existing Rule
Instead of deleting a rule and creating a new one, users can edit an existing rule.
To edit a rule, proceed as follows:
1. Click
, the rule is loaded into the Rule Editing field (the area in Auto Archive tab
except Job pane), which is available to be edited.
2. Edit corresponding items.
3. Click
to save the changes or
to discard them.
How to Export a Rule
36
3. XFile3 Application
XFile3-4.07-USER MANUAL
Exporting a rule is exporting the created rule in Job Zone to the local computer. The user
can export multiple rules at one time.
To export the rule, proceed as follows:
1. Select the rule to be exported.
2. Click
to open Auto Archive Rule Export window.
3. Click Browse to open the Browse For Folder window to select the required
destination.
Click OK to close the window.
4. Click Export to export the rule.
3. XFile3 Application
37
EVS Broadcast Equipment S.A.
March 2015
One rule exclusively corresponds to one exported file. If multiple rules are selected, the
corresponding number of files will be exported.
How to Import a Rule
Importing a rule is importing the rule in the local computer to XFile3. The user can import
only one rule at one time.
To import the rule, proceed as follows:
1. Click
to open Auto Archive Rule Import window.
2. Click Browse to select the rule to be imported.
38
3. XFile3 Application
XFile3-4.07-USER MANUAL
3. Click Import to import the selected rule.
How to Select Jobs
All the selected jobs are highlighted in blue.
There are several ways to select jobs:
•
Click on one job, and the job will be selected.
•
Click on one job, then press CTRL from keyboard, and simultaneously click other jobs
one by one to add to the selection. With this method, all the clicked jobs will be
selected.
•
Click on one job, then press SHIFT from keyboard, and click any other job, then all the
jobs between those two selected jobs will be selected.
•
Press CTRL+A to select all the jobs.
How to Sort Jobs
To sort a column in alphabetical or numerical order, unfold the jobs and click on the
column, or click it again to invert the sorting.
Note
Destination and Action columns can't be sorted.
3. XFile3 Application
39
EVS Broadcast Equipment S.A.
March 2015
How to Cancel and Retry Jobs
To cancel jobs, proceed as follows:
1. Select the jobs to be cancelled.
2. Right click on the selected jobs and select Cancel.
OR
Click
in Actions column to cancel the single job.
3. The statuses of the cancelled job will be cancelled.
To retry the job, click
in Actions column.
Note
Only the jobs with Waiting, Scheduled or Running statuses can be cancelled.
Only the jobs with Cancelled or Failed statuses can be retried.
How to Change Job Priority
Changing job priority means moving the selected job to the top of the scheduled job queue
to be processed in top priority.
To change job priority, proceed as follows:
1. Select the requested jobs.
2. Right click on the selected jobs and select Process ASAP.
OR
Click
in Actions column.
3. The job will be processed soon with high priority.
Note
Only the priority of jobs with the Scheduled status can be changed.
40
3. XFile3 Application
XFile3-4.07-USER MANUAL
3.3.
Archive Tab
3.3.1.
Archive Overview
Archive tab is used to manually archive the source clips and playlists from the requested
EVS video servers to the predefined destinations with the requested formats.
Click
to enter Archive tab.
The screenshot below shows various areas of Archive main window.
Area
Name
Description
1
Sources pane
Area that displays all the detected servers and their content
structures, including the pages, banks and PL banks.
2
Templates pane
Area that displays the templates available from Xsquare.
3
Destinations
pane
Area that displays all the destinations matching the selected
template, supermotion clips and metadata modification.
4
Archive button
Button to create archive job.
5
Job pane
Area that displays all the created jobs.
3. XFile3 Application
41
EVS Broadcast Equipment S.A.
3.3.2.
March 2015
Source Pane
Server List
The Server list includes the following elements:
•
When selecting or unselecting the parent level, all child nodes will be selected or
unselected.
•
Select the check box next to the individual servers, pages, banks and PL banks (used
to store all the playlists in the corresponding page). You can just click
select all servers or click
42
to
to cancel the selection.
•
The server name on XFile3 UI is the SDTI network name of the server. But if server
name is blank, the server serial number will be displayed instead.
•
The total number of clip and playlist is displayed beside each server name, pages,
banks or PL blanks in brackets.
3. XFile3 Application
XFile3-4.07-USER MANUAL
Sources List
Sources list only displays the clips from the specific banks or pages in the selected
servers. It includes the following elements:
•
Select the check box next to the individual LSMID label to select all the clips in the
specific banks or pages of the selected servers.
•
Each clip includes some metadata: LSMID, Name, TC IN, Keywords (from1-5), and
Archive Destinations.
•
Preview a clip via double clicking on the clip through EVS Xviewer.
Metadata
Description
ServerName
Displays the name of the server.
LSM ID
Displays ID assigned to the clips using its page, bank, row and
camera number and assigned to the playlists by using playlist
ID.
Name
Displays the name assigned to the clip.
TC IN
Displays the TC IN assigned to the clip.
Duration
Displays the clip or playlist duration.
Keyword1
Displays the first keyword assigned to the clip.
Keyword2
Displays the second keyword assigned to the clip.
Keyword3
Displays the third keyword assigned to the clip.
Keyword4
Displays the fourth keyword assigned to the clip.
Keyword5
Displays the fifth keyword assigned to the clip.
Archive Status
Displays the archive status assigned to the clip by the three
statuses: Archived, Waiting for archive, Not archived.
3. XFile3 Application
43
EVS Broadcast Equipment S.A.
March 2015
Metadata
Description
Destinations
Displays the path where the archived file is located on local
disks, if has been archived previously.
PL Clip Count
Displays the number of clips in the playlist.
Note
XFile3 doesn't support clip or trains in Twin Rec mode on the server.
The following table explains three different colors on the row header in front of every
source.
Color of Head Row
Archive Status
No Color
Not archived
Orange
Waiting for archive
Green
Archived
Operations on Sources List
How to Sort Clips
To sort a column in alphabetical or numerical order, click on the column label to display the
arrow button
. Click it again to invert the sorting.
How to Search Clips
To search clips, you only need to type the character string in the Quick Search Tool,
then all the clips include the character string will be displayed on Sources List field.
Two possibilities to search clips: ordinary search and global search.
Ordinary Search
To search clips in an ordinary way, you only need to type the character string in the
corresponding Quick Search Tool under each item.
To clear the search filter, you can click
44
in the Quick Search Tool.
3. XFile3 Application
XFile3-4.07-USER MANUAL
Global Search
To search clips in a global way, you only need to type the character string in Quick
Search Tool. There are two kinds of character strings available:
•
Input a character string, such as 123, abc, then the result will be the clip whose
metadata includes the character string.
•
Input multiple character strings with space, such as 123 456 78, then the result will be
the clips whose metadata includes those character strings.
To clear the search filter, you can click
in the Quick Search Tool.
Note
Global Search and Ordinary Search can be used in combination.
How to Search Playlists
To search for a playlist, you only need to type its LSMID in the Quick Search Tool.
The LSMID of every playlist is named by a PL sequential number, such as PL 11.
3.3.3.
Templates Pane
See "3.2.3 Templates Pane" for more information about Templates pane.
Noted that Playlist export-EDL only is exclusively available in Restore tab.
3.3.4.
Destinations Pane
See "3.2.4 Destinations Pane" for more information about Destinations, Add metadata
and Supermotion clips in Destinations pane.
3.3.5.
How to Create Archive Jobs
How to Archive Clips
To archive clips, proceed as follows:
1. Select the source clips to archive.
2. Select the template in the Templates pane to archive the clips with the selected
format.
3. Select the destinations in the Destinations pane to store the archived clips in local
destinations.
4. Click
3. XFile3 Application
. All the jobs will be created and displayed in Job pane.
45
EVS Broadcast Equipment S.A.
March 2015
How to Archive Playlists
Introduction
XFile3 can archive playlists that contain both local clips and network clips. Playlist
export-EDLonly is used to only export the playlist's edit list (EDL) without the video and
audio content.
Operations on Playlists
To archive playlists, proceed as follows:
1. Select the source playlists to archive.
2. Select the template in the Templates pane to archive the playlists with the selected
format.
Note
The four templates without transcoding can't be used for playlist archiving.
Those templates are disabled while archiving playlists. See "3.2.3 Templates
Pane" for detailed templates introduction.
3. Select the destinations in the Destinations pane to store the archived playlists in the
local destinations.
It is optional to select adding metadata.
4. Click
. All the jobs will be created and displayed in Job pane.
How to Archive Sources from One Server to Another
To archive sources from one server to another, proceed as follows:
1. Select the source EVS Server and/or Page/Bank to autoarchive. The check boxes of
the pages in the Sources pane will be selected.
2. Select the template named To EVS Server in Template pane.
3. Select the position in EVS server by clicking the radio button, and click
46
.
◦
If the user selects a position, all the sources will be archived and the selected
position will be taken as the starting point.
◦
If the user selects
, all the sources will be archived and the first
available position in the EVS server will be taken as the starting point.
3. XFile3 Application
XFile3-4.07-USER MANUAL
4. Click
another.
3.3.6.
. All the selected sources will be archived from one server to
Job Pane
Overview on Job Pane
After creating jobs, all the jobs will be displayed at the bottom of Archive tab.
Job
All the jobs created manually are displayed in Job pane.
3. XFile3 Application
47
EVS Broadcast Equipment S.A.
March 2015
Area
Description
Source
Displays the LSMID of each job.
Name
Displays the name of the current archived clip.
Format
Displays the format which has been selected in the Template pane.
Destination Displays the destination where the archived clips will be stored.
Metadata
Displays the selected metadata item.
Remaining
_time
Displays the remaining time of each job.
Speed
Displays the current archiving speed of each job by a multiple of x.
Status
Displays the job status, referring to "Job Status" for more details.
Actions
Displays the available operations on a single job.
•
•
: Cancel the job.
: Put the job on the top of the scheduled job queue and
it will be processed as soon as possible.
•
Comments
: Retry the job if it is cancelled or stopped.
Displays the information from Xsquare and XFile3.
Job Status
Six kinds of job status are available in Job pane to specify the exact status of the current
job.
The color refers to the color of the column label in front of the job and the font color of
Comments column.
48
Job Status
Color of
Head Row
Waiting
White
Description
The job has been created and stored in the XFile3
Database.
Scheduled Orange
The job has been sent to Xsquare and is scheduled to be
proceeded.
Running
The job is running.
Blue
Completed Green
The job is completed successfully.
Failed
Red
The job is unsuccessful.
Cancelled
No Color
The job has been cancelled.
3. XFile3 Application
XFile3-4.07-USER MANUAL
Note
When a job is completed, the job will disappear from Job pane, but you can see
all the completed jobs in Monitoring tab.
The following diagram specifies the conversion between different statuses.
Possible Actions on Job Pane
How to Select Jobs
All the selected jobs are highlighted in blue.
There are several ways to select jobs:
•
Click on one job, then the job will be selected.
•
Click on one job, then press CTRL from keyboard, and simultaneously click other jobs
one by one to add to the selection. With this method, all the clicked jobs will be
selected.
•
Click on one job, then press SHIFT from keyboard, and click any other job, then all the
jobs between those two selected jobs will be selected.
•
Press CTRL+A to select all the jobs.
How to Sort Jobs
To sort a column in alphabetical or numerical order, click on the column label or click it
again to invert the sorting.
Note
Destination and Action columns can't be sorted.
How to Cancel and Retry Jobs
To cancel jobs, proceed as follows:
1. Select the requested jobs.
2. Right click on the selected jobs and select Cancel.
3. XFile3 Application
49
EVS Broadcast Equipment S.A.
March 2015
OR
Click
in Actions column.
3. The status of the job will be cancelled.
To retry the job, click
in Actions column.
Note
Only the jobs with Waiting, Scheduled and Running statuses can be
cancelled.
Only the jobs with Cancelled and Failed statuses can be retried.
How to Change Job Priority
Changing job priority means moving the selected job to the first position in the scheduled
job queue for the job to be processed in priority.
To change the job priority, proceed as follows:
1. Select the requested jobs.
2. Right click on the selected jobs and select Process ASAP.
OR
Click
in Actions column.
3. The job will be processed soon with high priority.
Note
Only the priority of jobs with the Scheduled status can be changed.
3.4.
Auto Restore Tab
3.4.1.
Auto Restore Overview
Auto Restore tab is used to automatically restore all source clips from the defined folder
path to the EVS video servers based on the predefined rules.
50
3. XFile3 Application
XFile3-4.07-USER MANUAL
Click
to enter Auto Restore tab.
The screenshot below shows various areas of Auto Restore main window.
3.4.2.
Area Name
Description
1
Sources pane
Area that displays all the detected hard drives, including
the local path, folders and subfolders.
2
Destinations pane
Area that displays all the detected servers, their structures,
including the pages and banks.
3
Option pane
Area that displays the cameras or network drive
credentials if a network drive is selected.
4
Create auto restore
folder button
Button to create auto restore folder.
5
Job pane
Area that displays all the created jobs and statuses.
Sources Pane
Sources pane displays all the detected source folders in the hard drives.
3. XFile3 Application
51
EVS Broadcast Equipment S.A.
March 2015
Source pane includes the following elements:
52
•
Select the check box before the folders to select the clips in the selected hard drive.
•
Only one folder can be selected to be used as the restore folder.
•
The mapped drives are supported by XFile3.
•
Mobile hard drives are supported by XFile3.
•
Right click on either hard drive or folder and do the following operations:
◦
Click Refresh button to refresh the detected hard drives.
◦
Click Open in new window to open the local path.
3. XFile3 Application
XFile3-4.07-USER MANUAL
3.4.3.
Destinations Pane
The Destinations pane includes the following elements:
•
Every server includes 10 pages (from 0-9), every page includes 9 banks (from 1-9),
and each bank includes 10 columns (from 0-9).
•
The server name on XFile3 UI is the SDTI network name of the server. But if server
name is blank, the server ID number will be displayed instead.
•
The total number of clip is displayed beside each server name, page or bank in
brackets.
Note
More than one position can be selected, but those selected positions must be in
different EVS video servers.
3. XFile3 Application
53
EVS Broadcast Equipment S.A.
3.4.4.
March 2015
Options Pane
Camera Filter
You can choose to restore the clips with specific camera positions. Only the clips with the
selected cameras will be restored. By default, no camera is selected.
Camera
Description
A
Restore camera A clips only.
B
Restore camera B clips only.
C
Restore camera C clips only.
D
Restore camera D clips only.
E
Restore camera E clips only.
F
Restore camera F clips only.
Network Drive Credentials
If the clips to be restored are on a network drive, a Network Drive Credential pane will be
displayed for validation.
To validate network drive credentials, proceed as follows:
1. Map network drive to the local computer.
2. Select the network drive to display the Network Drive Credential pane.
3. Type the correct user name and password.
Note
If user name or password is incorrect, the auto restore folder cannot be started.
3.4.5.
How to Create Auto Restore Folder
To create auto restore folder, proceed as follows:
1. Select the source clips to restore. The check boxes before the required folders in
Sources pane will be selected.
2. Select one position in Destinations pane to store the restored clips in the EVS video
server.
54
3. XFile3 Application
XFile3-4.07-USER MANUAL
3. Select Camera Filter if needed.
4. Click
3.4.6.
. All the jobs will be displayed in Job pane.
Job Pane
Introduction
Overview on Job Pane
After creating jobs, the jobs will be displayed at the bottom of Auto Restore window.
You can click
to expand or collapse the jobs in the rule.
All the jobs are processed based on the rule.
Rule
Area
Description
Rule Name
The name of rule is defined by a number automatically incremented.
Source
Displays the path of the restored clip.
Destination
Displays the restore position on the EVS video server.
Camera
Displays the selected cameras.
Actions
Displays the available operations to the rule.
3. XFile3 Application
•
Stop: Stop the auto-restore folder
•
Start: Start the auto-restore folder.
•
Remove: Remove the auto-restore folder.
•
Edit: Edit the autorestore folder.
55
EVS Broadcast Equipment S.A.
March 2015
Area
Description
Status
Displays the number of completed jobs and matching jobs.
Comments
Displays the information from Xsquare and XFile3.
Jobs
Area
Description
Source
Displays the path and folder name of the restored clip.
Destination Displays the restore position on the EVS video server.
Remaining
Time
Displays the remaining time of each job.
Speed
Displays the current restoring speed of each job by a multiple of x.
Status
Displays the job status, referring to "Job Status" for more details.
Transcoded Displays the transcoded status of the restored clip.
•
•
Actions
With icon
: the clip is transcoded.
Without the icon: the clip is not transcoded.
Displays the available operations on single job.
•
•
Comments
: Cancel the job.
: Put the job on the top of the scheduled job queue and
it will be processed as soon as possible.
Displays the information from Xsquare and XFile3.
Job Status
Six kinds of job statuses are available in Job pane to specify the exact status of the
current job.
The color refers to the color of the column label in front of the job and the font color of
Comments column.
56
Job Status
Color of
Head Row
Waiting
White
The job has been created and stored in the
XFile3Database.
Scheduled
Orange
The job has been sent to Xsquare and is scheduled to be
proceeded.
Running
Blue
The job is running
Completed
Green
The job is completed successfully.
Description
3. XFile3 Application
XFile3-4.07-USER MANUAL
Job Status
Color of
Head Row
Description
Failed
Red
The job is unsuccessful.
Cancelled
No Color
The job has been cancelled.
Note
When a job is completed, the job will disappear from Job pane, but you can see
all the completed jobs in Monitoring tab.
The following diagram specifies the conversion between different statuses.
Possible Actions on Job Pane
How to Start and Stop a Rule
To stop a rule, click
in Job pane, then all the jobs in waiting, scheduled and running
statuses in the rule will be cancelled.
To start a rule, click
or scheduled.
in Job pane, then all the cancelled jobs in the rule will be running
How to Select Jobs
All the selected jobs are highlighted in blue.
There are several ways to select jobs:
•
Click on one job, then the job will be selected.
•
Click on one job, then press CTRL from keyboard, and simultaneously click other jobs
one by one to add to the selection. With this method, all the clicked jobs will be
selected.
•
Click on one job, then press SHIFT from keyboard, and click any other job, then all the
jobs between those two selected jobs will be selected.
•
Press CTRL+A to select all the jobs.
3. XFile3 Application
57
EVS Broadcast Equipment S.A.
March 2015
How to Sort Jobs
To sort a column in alphabetical or numerical order, unfold the jobs and click on the
column label or click it again to invert the sorting.
Note
Destination and Action columns can't be sorted.
How to Cancel Jobs
To cancel jobs, proceed as follows:
1. Select the requested jobs.
2. Right click on the selected jobs and select Cancel.
OR
Click
in Actions column.
3. The status of the job will be cancelled.
Note
Only the jobs with Waiting, Scheduled and Running statuses can be
cancelled.
How to Change Job Priority
Changing job priority means moving the selected job to the top of the scheduled job queue
to be processed in high priority.
To change job priority, click
priority.
, and the job will be processed soon with high
Note
Only the priority of jobs with the Scheduled status can be changed.
3.5.
Restore Tab
3.5.1.
Restore Overview
Click
to enter Restore tab.
Clips can be restored from a hard drive to any EVS video server on the network.
The screenshot below shows various areas of Restore main window.
58
3. XFile3 Application
XFile3-4.07-USER MANUAL
3.5.2.
Area
Name
Description
1
Sources
pane
Area that displays all the clips in the detected hard drives,
including the path, folders, subfolders and clips' metadata in the
selected hard drive or folder and the shortcut folder.
2
Destinations Area that displays all the detected servers and their structures,
pane
including the pages, banks and some metadata of all the clips.
3
Option pane
Area that displays the copy type, camera, keep original IDs and
Limit to short-in/out
4
Restore
button
Button to create restore jobs.
5
Job pane
Area that displays all the created jobs and statuses.
Sources Pane
Introduction
Hard Drive list displays all the local drives and their folders. Hard Drive list displays the
clips in the selected folder.
If it is the first time to open XFile3, the Hard Drive list and Sources list may be disabled ,
since XFile3 is searching all the available hard drives.
3. XFile3 Application
59
EVS Broadcast Equipment S.A.
March 2015
Hard Drive List
Hard Drive list includes the following elements:
60
3. XFile3 Application
XFile3-4.07-USER MANUAL
•
Select the check box next to the folders or sub-folders to select the clips in the
selected hard drive.
•
Click on one folder, then press SHIFT from keyboard, and click any other folder, then
all the folders between those two selected folders will be selected.
•
The mapped drives are supported by XFile3.
•
Mobile hard drives are supported by XFile3.
•
Right click on either hard drive or folder and do the following operations:
•
◦
click Refresh button to refresh the detected hard drives.
◦
click Open in new window to open the local path.
Click
to release all the selections of hard drives.
Sources List
Sources list only displays the clips from the specific folders or subfolders in the selected
hard drives, which includes the following elements:
3. XFile3 Application
61
EVS Broadcast Equipment S.A.
62
March 2015
•
Select the check boxes before SDTI Nb label to select all the requested clips in the
specific hard drives.
•
Each clip includes some metadata: SDTI Nb, LSMID, Name, Keywords (from1-5),
Rating, TC IN, session metadata, path and Destinations.
•
Right click on either clip to open the path and the clip will be selected in the path.
•
Click a hard drive or a folder to display the clips in Sources list. While searching,
appears at the upper right side of the Sources list.
◦
The area before "/" displays the number of searched clips in the drive or folder.
XFile3 can only display up to 5400 clips. If the number of clip is over 5400, XFile3
displays the number by 5400+.
◦
The area after "/" displays the total number of clips in all the detected hard drives.
Clip Information
Description
SDTI Nb
Displays the SDTI number of the previous EVS server
assigned to the clips.
Camera_Label
Displays the camera of the clip.
LSM ID
Displays LSM ID assigned to the clips by using its page, bank,
row and camera letter.
Name
Displays the name assigned to the clip.
Keyword1
Displays the first keyword assigned to the clip.
Keyword2
Displays the second keyword assigned to the clip.
Keyword3
Displays the third keyword assigned to the clip.
Keyword4
Displays the fourth keyword assigned to the clip.
Keyword5
Displays the fifth keyword assigned to the clip.
Rating
Displays the rating level by a digital number.
•
0:
•
1:
•
2:
•
3:
TC IN
Displays the TC IN assigned to the clip.
Clip Duration
Displays the duration assigned to the clip.
Session Metadata
Session metadata includes eight kinds of metadata assigned to
the clip: SessionName, SessionDate, SessionSport,
SessionCompetition, SessionCompetitionLevel,
SessionLocation, SessionTeamA and SessionTeamB.
Path
Displays the file's path.
Destinations
Displays the path where the clip will be restored, or has been
restored previously.
3. XFile3 Application
XFile3-4.07-USER MANUAL
Please refer to 3.3.2 Sources Pane to see more information about the operations on
Sources list field.
Right click on the clip to open the path in Explorer.
Double click on the clip to open it by Xviewer. The updated metadata in Xviewer can be
displayed on its Metadata column.
The following table explains three different colors on the row header in front of every
source.
Color of Head Row
Restore Status
No Color
Not restored
Orange
Waiting for restore
Green
Restored
How to Trim a Clip with Xviewer
Shortening a clip with Xviewer is shortening the duration of the clip by Xviewer. The
prerequisite of this action is that the computer is installed Xviewer with valid Edit license.
To shorten a clip with Xviewer, proceed as follows:
1. Open the clip to be shortened by Xviewer.
Two ways are available to open the clip:
◦
Double click the clip to be shortened.
◦
Right click on the clip to be shortened, click
then double click the clip to be shortened.
2. Click
3. XFile3 Application
and
.
63
EVS Broadcast Equipment S.A.
March 2015
3. Edit the clip.
◦
Define ShortIn. Move
◦
Define ShortOut. Move
to the required position and click
to the required position and click
.
.
Warning
ShortIn must be smaller than ShortOut. It means
should be at the left side of
.
4. Click
to save the modification.
Note
To use the shortened clip during restore, the user must tick the check box of
Limit to short-in/short-out to only restore the clip duration from shortin to
shortout.
The user can define guardbands with specific value, but the value has to be
smaller then the duration of the clip.
Shortcut Folder
64
3. XFile3 Application
XFile3-4.07-USER MANUAL
Introduction
Shortcut Folder area enables the user to set the commonly used folders in this area to
avoid the difficulty in finding out the one in numerous folders or in the deep folder tree.
How to Set Shortcut Folder
To set shortcut folder, proceed as follows:
1. Right click on the drive or folder in Hard Drive list to be set as the shortcut folder
2. Select Set shortcut folder.
How to Release Shortcut Folder
To release shortcut folder, proceed as follows:
1. Select the folder to be released in Shortcut Folder list.
2. Click
3. XFile3 Application
.
65
EVS Broadcast Equipment S.A.
3.5.3.
March 2015
Destinations Pane
Server List
The Server List includes the following elements:
66
•
Every server includes 10 pages (from 0-9), every page includes 9 banks (from 1-9),
and each bank includes 10 columns (from 0-9).
•
The server name on XFile3 UI is the SDTI network name of the server, but if server
name is blank, the server ID number will be displayed instead.
•
The total number of clip is displayed beside each server name, page or bank in
brackets.
3. XFile3 Application
XFile3-4.07-USER MANUAL
Destination List
The Destination List only displays the positions from the specific banks or pages in the
selected servers, which includes the following elements:
•
•
3. XFile3 Application
Select the requested server, page or bank.
◦
If the selection is from one server, all the positions in the selected server will be
displayed at the right side of Destinations pane. And then you can select one of
the available positions by ticking the check box as the starting point to restore
clips. XFile3 restores from the first available position if you don't select a starting
point.
◦
If the selection is from more than one server, all the positions in the selected
servers will not be displayed out. And then you do not need to select a specific
starting point, all the clips from the EVS servers will restored from the first
available position and restore the others one by one. All the selected clips will be
restore respectively in all the selected servers.
Each position includes two kinds of metadata: LSMID and name.
67
EVS Broadcast Equipment S.A.
March 2015
•
A radio button is displayed in front of the empty position.
•
The color of the server destination corresponds to status of the clip to be restored.
The following table explains three different font colors of the server destination.
3.5.4.
Font
Color
Restore Status
No Color
The position is available. No clip has been restored in it.
Orange
The position is occupied. A clip is waiting or scheduled to be restored in this
position.
Green
The position is occupied. A clip has been restored in this position.
Options Pane
Copy Type
You can choose to select the copy types, the two copy types are available.
Copy Type
Description
Continuous
The clips to be restored will be restored to the available positions one by
one from the selected starting point, taking the filter options into
consideration.
Same
Location
The topology position of all the clips to be restored will keep the same
topology with that in EVS server. If the position for restoring is
unavailable, the clip will not be restored.
The first clip must correspond to the same location in EVS server, if not,
the clip will not be restored, and other clips will keep the same topology
as well.
Camera Filter
You can choose to restore clips to the specific camera positions only. By default, no
camera is selected.
Camera
Description
A
Restore only to camera A.
B
Restore only to camera B.
C
Restore only to camera C.
D
Restore only to camera D.
E
Restore only to camera E.
F
Restore only to camera F.
Keep Original IDs
68
3. XFile3 Application
XFile3-4.07-USER MANUAL
Keeping original IDs is keeping the IDs of the restored clips in EVS servers.
The kept original IDs includes UMID, VARID and MATERIAL ID.
The user can only select either Keep Original IDs or Limit to short-in/short-out.
Operation
Description
All the original IDs of the clips stored are kept and saved in
EVS video server.
All the original IDs of the clips stored are discarded.
New IDs will be assigned to the stored clips based on EVS
video server.
Limit to short-in/short-out
XFile3 allows restoring only a portion of a clip.
You can choose to restore the clip limited to its short in and short out.
In addition, you can add guardbands.
For Example
Clip Source
Short In: 11:00:00:00
Short Out: 12:00:00:00
Guardbands value: 1 second
Restore clip
Short In: 11:00:00:00
Short Out: 12:00:00:00
ProtectIn: 10:59:59:00
ProtectOut: 12:00:01:00
Guardbands: 1 second
3. XFile3 Application
69
EVS Broadcast Equipment S.A.
March 2015
XFile3 will add the guardbands defined by the user, provided there is enough footage. For
example, if the original guardbands of the clip to be restored are 5 seconds, the specified
guardbands by the user will be 10 seconds. XFile3 will take 5 seconds as the valid
guardbands value. If the initial guardbands of the clip to be restored are 15 seconds, the
specified guardbands by the user will be 10 seconds. XFile3 will take 10 seconds as the
valid guardbands value.
Note
The guardbands value is specified in seconds with the range from 1s to 60s.
3.5.5.
How to Create Restore Jobs
To create restore jobs, proceed as follows:
1. Select the source clips to restore.
2. Select one starting point in Destinations pane to store the restored clips in the EVS
video server if needed. If you have selected more than one server, you don't need to
select a specific starting point.
3. Select the Copy Type if needed. By default, Continuous is selected.
4. Select a Camera Filter if needed. By default, no camera filter is selected.
5. Define the short in/out and guardbands if needed.
6. Click
3.5.6.
. All the jobs will be displayed in Job pane.
Job Pane
Overview on Job Pane
After creating jobs, the jobs will be displayed at the bottom of Restore tab.
70
3. XFile3 Application
XFile3-4.07-USER MANUAL
Area
Description
Sources
Displays the LSMID and storing path of the clip.
Destination Displays the restore positions on the EVS video server.
ClipName
Displays the name of the current restored clip.
Remaining
_time
Displays the remaining time of each job.
Speed
Displays the current restoring speed of each job by a multiple of x.
Status
Displays the job status, referring to "Job Status" for more details.
Transcoded This area displays the transcoded status of the restored clip.
•
•
Actions
Displays the available operations on single job.
•
•
•
Comments
With icon
: the clip is transcoded.
Without the icon: the clip is not transcoded.
: Cancel the job.
: Put the job on the top of the scheduled job queue and
it will be processed as soon as possible.
: Retry the job if it is cancelled or stopped.
Displays the information from Xsquare and XFile3.
Job Status
Six kinds of job statuses are available in Job pane to specify the exact status of the
current job.
The color refers to the color of the column label in front of the job and the font color of
Comments column.
3. XFile3 Application
71
EVS Broadcast Equipment S.A.
March 2015
Job Status
Color of
Head Row
Waiting
White
The job has been created and stored in the XFile3
Database.
Scheduled
Orange
The job has been sent to Xsquare and is scheduled to be
proceeded.
Running
Blue
The job is running.
Completed
Green
The job is completed successfully.
Failed
Red
The job is unsuccessful.
Cancelled
No Color
The job has been cancelled.
Description
Note
When a job is completed, the job will disappear from Job pane, but you can see
all the completed jobs in Monitoring tab.
The following diagram specifies the conversion between different statuses.
Possible Actions on Job Pane
How to Select Jobs
All the selected jobs are highlighted in blue.
Four possible selection ways are available:
72
•
Click on one job, then the job will be selected.
•
Click on one job, then press CTRL from keyboard, and simultaneously click other jobs
one by one to add to the selection. With this method, all the clicked jobs will be
selected.
3. XFile3 Application
XFile3-4.07-USER MANUAL
•
Click on one job, then press SHIFT from keyboard, and click any other job, then all the
jobs between those two selected jobs will be selected.
•
Press CTRL+A to select all the jobs.
How to Sort Jobs
To sort a column in alphabetical or numerical order, unfold the jobs and click on the
column label, or click it again to invert the sorting.
Note
Transcode and Action columns can't be sorted.
How to Cancel and Retry Jobs
To cancel jobs, proceed as follows:
1. Select the requested jobs.
2. Right click on the selected jobs and select Cancel.
OR
Click
in Actions column.
3. The status of the job will be cancelled.
To retry the job, click
in Actions column.
Note
Only the jobs with Waiting, Scheduled and Running statuses can be
cancelled.
Only the jobs with Cancelled and Failed statuses can be retried.
How to Change Job Priority
Changing job priority means moving the selected job to the top of the scheduled job queue
to be processed in high priority.
To change job priority, proceed as follows:
1. Select the requested jobs.
2. Right click on the selected jobs and select Process ASAP.
OR
3. XFile3 Application
73
EVS Broadcast Equipment S.A.
Click
March 2015
in Actions column.
3. The job will be processed soon with high priority.
Note
Only the priority of jobs with the Scheduled status can be changed.
3.6.
Streaming Tab
3.6.1.
Streaming Overview
Streaming tab is used to archive the source record trains from the requested EVS video
servers in the requested formats based on predefined rules. The end result is the same as
backing up a clip, however this can be performed simultaneously to the LIVE ingest
process.
Click
to enter Streaming tab.
The screenshot below shows various areas of the Streaming window.
74
Area Name
Description
1
Sources
pane
Area that displays all the detected servers and their recorders.
2
Templates
pane
Area that displays the templates available from the background
running Xsquare service manager.
3
Destinations Area that displays all the destinations matching the selected
pane
template and metadata modification.
4
Option pane
Area that displays all the options to be added in the rule.
3. XFile3 Application
XFile3-4.07-USER MANUAL
3.6.2.
Area Name
Description
5
Create Job
button
Button to create the streaming rule.
6
Job pane
Area that displays all the created rules and all the job statuses.
Sources Pane
The Sources pane includes the following elements:
•
When selecting or unselecting the parent level, all child nodes will be selected or
unselected correspondingly.
•
Select the check box before servers and recorders, or just click
all recorders in all the available servers and click
selection.
3.6.3.
to select
to cancel the
•
The number of recorders varies from different configurations of EVS servers.
•
The server name on XFile3 UI is the SDTI network name of the server. But if server
name is blank, the server serial number will be displayed instead.
•
The total clip number is displayed besides each server name in brackets.
Templates Pane
See "3.2.3 Templates Pane" for more information about Templates pane.
Noted that To EVS Server is unavailable in Streaming tab.
3. XFile3 Application
75
EVS Broadcast Equipment S.A.
3.6.4.
March 2015
Destinations Pane
Destinations
Introduction
You must select the corresponding template from the Templates pane prior to choosing
the required destination(s).
The number of destination varies from the different templates included in the Template
pane.
Possible Actions on Destinations
How to Select the Destination Path
To select the destination path, proceed as follows:
1. Click
, then Browse For Folder window pops up.
2. Select the desired destination path to write the archived clips to and click OK.
Adding Metadata
Introduction
The user can add metadata information by importing and editing EVS metadata profile or
editing legacy session metadata.
Possible Actions on Adding Metadata
From EVS Metadata Profile
The default profiles are stored in the following directory: C:\Program Files\EVS
Broadcast Equipment\XFile3\XML metadata profiles.
To add metadata from EVS metadata profile, proceed as follows:
1. Click
2. Click
below From EVS Metadata Profile.
to add a profile in the pop-up window and then click
.
The last selected profile will be displayed in the current profile path.
76
3. XFile3 Application
XFile3-4.07-USER MANUAL
3. Select the Current profile to be used in the drop-down list.
4. Modify corresponding items in EVS XML Metadata window.
5. Click
after modification.
Then the metadata from EVS metadata profile is able to be used for all backups. The
user can edit this profile at any time to update the metadata.
The metadata profile is added in the XML of the destination files.
3. XFile3 Application
77
EVS Broadcast Equipment S.A.
March 2015
From Legacy Session Metadata
To add metadata from Legacy Session Metadata, proceed as follows:
1. Click
below From legacy session metadata.
2. Modify the corresponding items in Legacy Session Metadata window.
3. Click
after modification.
The user can edit this profile at any time to update the metadata.
The metadata profile is added in the XML of the destination files.
3.6.5.
Options Pane
Introduction
XFile3 allows users to define streaming options. These filters are additional rule criteria to
facilitate complex jobs if desired.
The Filters pane includes three kinds of options:
78
•
Date & Time
•
Chunk & Overlap
3. XFile3 Application
XFile3-4.07-USER MANUAL
•
Add a Streaming Job Name
Date & Time
The filter makes it possible to include the clips that are created from the record trains
between the required date and time in the streaming rule. By default, no date or time is
selected.
Filter
Description
The required date is selected with the format:
month/date/year.
The required time is selected with the format:
hour:minute:second.
To set the date, select
the month.
to activate the calendar, then select the month and the day of
To set the time, select the time area and type the desired time.
You can click
to clear the defined date and time.
You can click
to load the current server time.
Several possibilities about date and time:
•
Define From and To, and XFile3 will record contents between From and To.
•
Define From only, and XFile3 will record contents starting from From point to no end,
and each job is five-hour length.
•
Define To only.
◦
If To is earlier than the current server time, no job will be created.
◦
If To is later than the current server time, XFile3 will record contents from the
current server time to To point, and each job is five-hour length.
◦
Not define From and To, then XFile3 will record contents from current server time
to no end, and each job is five-hour length.
Note
Date & Time filter is based on Primary TC.
3. XFile3 Application
79
EVS Broadcast Equipment S.A.
March 2015
Chunk & Overlap
Jobs can be divided into some smaller jobs. By default, only one job is created.
•
Divide in chunk of: Allows users to have the streaming jobs divided in smaller jobs.
•
With overlap: Allows having some overlap between the smaller jobs.
All the jobs are displayed by the name job n (n is incremented automatically).
Example
From 10:00:00:00 to 14:00:00:00, the job is divided in chunk of one hour with overlap of 1
minute.
Job1 : 10:00:00:00 to 11:00:00:00
Job2 : 10:59:00:00 to 12:00:00:00
Job3 : 11:59:00:00 to 13:00:00:00
Job4 : 12:59:00:00 to 14:00:00:00
Adding a Streaming Job Name
Adding a streaming job name enables the user to add customized name before the default
name in local file.
To add a streaming job name, proceed as follows:
1. Tick the check box to enable the name field.
2. Type the streaming job name (the valid length is less than 100 characters).
The streaming job name is added in the front of the local file as soon as the job is
completed.
Auto Grab
Auto Grab function is automatically updating the thumbnail from the archived recorder and
displaying it in Thumbnail column in the particular period of time.
The default Auto Grab parameter is 5 seconds.
To display thumbnails during streaming, XFile3 grabs recorder frames at regular intervals.
This requires CPU.
To lower the CPU load and dramatically increase the performance in case of transcoding,
XDCam HD archive or 4K archive, the user can increase the auto grab interval to 60
seconds. The user can also disable the function but no thumbnail can be displayed in Job
Zone.
Four kinds of Auto Grab can be selected.
80
3. XFile3 Application
XFile3-4.07-USER MANUAL
When 5/10/60 seconds is selected in Auto Grab option and the check box of Thumbnail
column in Job Zone is ticked, the thumbnail from the streaming recorder will be updated
and displayed on the Thumbnail column in every 5/10/60 seconds.
3.6.6.
Option
Description
Disable Auto Grab
The Auto Grab function is disabled and the thumbnails won't be
updated.
5 seconds
The thumbnails will be displayed on Thumbnail column of Job
Zone every 5 seconds. It is selected by default
10 seconds
The thumbnails will be displayed on Thumbnail column of Job
Zone every 10 seconds.
60 seconds
The thumbnails will be displayed on Thumbnail column of Job
Zone every 60 seconds.
How to Create Streaming Jobs
To create streaming jobs, proceed as follows:
1. Select the source EVS server and/or recorder. The check boxes of the recorders in the
Sources pane will be selected.
2. Select a template in the Templates pane to specify the file format.
3. Select the destinations in the Destinations pane to specify where clips will be
archived.
4. Select different options if needed.
5. Click
. A new rule will be created and displayed in the Job pane.
All the trains in the selected cameras within the defined options will automatically be
archived into the specified destination.
All the previously selected sources will be unselected automatically upon the creation
of the rule.
3. XFile3 Application
81
EVS Broadcast Equipment S.A.
3.6.7.
March 2015
Job Pane
Introduction
Overview on Job Pane
After creating jobs, the jobs will be displayed at the bottom of Streaming window.
You can click
to expand or collapse the jobs in the rule.
All the jobs are processed based on the rules. The number of jobs is correlated with both
recorders (the selected recorders in Sources pane) and the divided sub-jobs (defined in
Options pane by "Divide in chunk of" and "with overlap of").
Rule
Introduction
Area
Description
Rules
The name of rule is defined by a number automatically incremented.
Source
Displays the name of the server where the trains to be archived is
stored.
TemplateName Displays the chosen template.
82
Destination
Displays the selected destination.
Metadata
Displays the selected metadata item.
From
Displays the starting date and time.
To
Displays the ending data and time.
Divide in
chunk of
Displays the divided value predefined in Options pane.
If no chunk value is defined, the created job will be 5-hour range by
default.
3. XFile3 Application
XFile3-4.07-USER MANUAL
Area
Description
With overlap
of
Displays the overlap value predefined in Options pane.
Actions
Displays the available operations on the rule.
•
Remove: Remove the rule and cancel all the jobs.
•
StartAll: Start all the jobs. See "StartAll" for more
information.
•
StopAll: Stop all the jobs. See "StopAll" for more
information.
•
StopAll at TC: Stop the jobs at the exact timecode
(TC). See "StopAll at TC" for more information.
StopAll
After clicking
, job status will be changed:
•
The running jobs will be stopped at the current server TC, and the status of the running
jobs will be completed.
•
The jobs in waiting and scheduled statuses are stopped immediately, and the status
of those jobs will be stopped.
StartAll
If the user clicks
and then clicks
current server TC based on the streaming rule.
, the jobs will be created from the
StopAll at TC
StopAll at TC button can be applied only once, for it is only available when the current
rule isn't predefined with To value. When StopAll at TC button is used, the input value
will be treated as the new To value for this rule.
To stop all jobs at TC, proceed as follows:
1. Click
and display a window.
2. Type the date and timecode, and then click OK.
3. Those input values will be displayed in To column, and all the jobs will be stopped at
that time.
3. XFile3 Application
83
EVS Broadcast Equipment S.A.
March 2015
Jobs
Introduction
Area
Description
Source
Displays the server name and recorder of trains to be archived.
Format
Displays the format of the archived clip based on the chosen template.
Destination Displays the selected destination.
From
Displays the starting date and time
To
Displays the ending data and time
Speed
Displays the current archiving speed of each job by a multiple of x.
Remaining
Time
Displays the number of completed jobs and matching jobs with the
format: n completed jobs/n matching jobs.
Status
Displays the job status, referring to "Job Status" for more details.
Thumbnail
The check box enables users to decide whether to see the thumbnail of
the archived clip or not.
• When the check box is ticked, the column length of all the jobs will be
adjusted based on the size of the thumbnails.
• If Auto Grad in Options of Streaming tab is defined, the thumbnail will
be refreshed based on the defined time.
Actions
Displays the available operations on the job.
•
Cancel: Cancel this job.
•
Process ASAP: Give the job top priority to be
processed.
•
•
•
Comments
Stop Record: Stop record the trains in the current
recorder, the current TC time will be displayed in To column as soon
as Stop Record button is clicked.
Retry: Retry the job if it is failed or canceled.
StopAtTcTime: Stop the job at the exact timecode (TC).
See "StopAll at TC" for more information.
Displays the information from Xsquare and XFile3.
Job Status
Six kinds of job statuses are available in Job pane to specify the exact status of the
current job.
The color refers to the color of the column label in front of the job and the font color of
Comments column.
84
3. XFile3 Application
XFile3-4.07-USER MANUAL
Job Status
Color of
Head Row
Description
Waiting
White
The job has been created and stored in XFile3Database.
Scheduled
Orange
The job has been sent to Xsquare and is scheduled to
be proceeded.
Running
Blue
The job is running.
Completed
Green
The job is completed successfully.
Failed
Red
The job is unsuccessful.
Cancelled
No Color
The job has been cancelled.
The following diagram specifies the conversion between different statuses.
StopAtTcTime
StopAllAtTCTime button can be applied only once, since it is only available when the
current job is running. When StopAllAtTCTime button is used, the newly input value will
be updated to the To column and treated as the new To value.
To stop all jobs at TC time, proceed as follows:
1. Click
and display a window.
2. Type the date and timecode, and then click OK.
3. Those input values will be updated in To column, and all the jobs will be stopped at
that time.
Note
When a job is completed, the job will disappear from Job pane, but you can see
all the completed jobs in Monitoring tab.
3. XFile3 Application
85
EVS Broadcast Equipment S.A.
March 2015
Possible Actions on Job Pane
How to Select Jobs
All the selected jobs are highlighted in blue.
There are several ways to select jobs:
•
Click on one job, then the job will be selected.
•
Click on one job, then press CTRL from keyboard, and simultaneously click other jobs
one by one to add to the selection. With this method, all the clicked jobs will be
selected.
•
Click on one job, then press SHIFT from keyboard, and click any other job, then all the
jobs between those two selected jobs will be selected.
•
Press CTRL+A to select all the jobs.
How to Sort Jobs
To sort a column in alphabetical or numerical order, unfold the jobs and click on the
column or click it again to invert the sorting.
Note
Destination and Action columns can't be sorted.
How to Cancel and Retry Jobs
To cancel jobs, proceed as follows:
1. Select the requested jobs.
2. Right click on the selected jobs and select Cancel.
OR
Click
in Actions column.
3. The status of the job will be cancelled.
To retry the job, click
in Actions column.
Note
Only the jobs with Waiting, Scheduled and Running statuses can be
cancelled.
Only the jobs with Cancelled and Failed statuses can be retried.
86
3. XFile3 Application
XFile3-4.07-USER MANUAL
How to Change Job Priority
Changing job priority means moving the selected job to the top of the scheduled job queue
to be processed in high priority.
To change job priority, proceed as follows:
1. Select the requested jobs.
2. Right click on the selected jobs and select Process ASAP.
OR
Click
in Actions column.
3. The job will be processed soon with high priority.
Note
Only the priority of jobs with Scheduled status can be changed.
3.7.
Monitoring Tab
3.7.1.
Monitoring Overview
Click
to enter monitoring tab.
In Monitoring tab, you can see all the available hard drives and all the jobs.
3. XFile3 Application
87
EVS Broadcast Equipment S.A.
3.7.2.
March 2015
Area
Name
Description
1
Hard Drive
pane
Area that displays all the detected hard drives.
2
Job pane
Area that displays all the jobs in Auto Archive, Archive, Auto
Restore, Restore and Streaming tabs.
Hard Drive Pane
Overview on Hard Drive Pane
Hard Drive Pane Introduction
Hard Drive pane displays all the hard drives detected by XFile3.
The mapped drives are supported by XFile3.
Mobile hard drives are supported and can be ejected manually.
88
3. XFile3 Application
XFile3-4.07-USER MANUAL
How to Eject a Hard Drive
To eject a hard drive, click
.
Storyboard
What Is a Storyboard
A storyboard is a list of clip's contents which are delivered with the current selected local
hard drive or its folders. When jobs are created, the user can create it as an HTML file and
store in the desirable local path.
How to Create Storyboard
To create storyboard, proceed as follows:
1. Select the source hard drive.
2. Click
, when StoryboardOption window pops up, then select
the target folder (one folder or multiple folders) and click Choose for a requested path
to store the storyboard.
3. Click
, the storyboard of the target folders will be stored in the specified path.
To open this storyboard, you only need to open the file named Storyboard_date
creation time.html (such as Storyboard_2014-01-27 15-30-44.html)
by a web browser.
3. XFile3 Application
89
EVS Broadcast Equipment S.A.
March 2015
Storyboard Field Description
The storyboard displays the following elements of each clip:
Clip Information
Description
Clip ID
Displays the ID assigned to the clip.
Clip Name
Displays the name assigned to the clip.
TC IN
Displays the IN point of the clip assigned to the clip.
Duration
Displays the duration of the clip from IN to OUT assigned to the
clip.
Keyword1
Displays the first keyword assigned to the clip.
Keyword2
Displays the second keyword assigned to the clip.
Keyword3
Displays the third keyword assigned to the clip.
Keyword4
Displays the fourth keyword assigned to the clip.
Keyword5
Displays the fifth keyword assigned to the clip.
Creation Date
Time
Displays the Date when the clip was created.
Backup Date Time
Displays the Date when the clip was archived.
Metadata Filename Displays the EVS XML file assigned to the clip.
File Size
90
Displays the file size assigned to the clip.
3. XFile3 Application
XFile3-4.07-USER MANUAL
3.7.3.
Job Pane
Introduction
Overview on Job Pane
All the jobs in Monitoring tab synchronize those in all tabs (Auto Archive, Archive, Auto
Restore, Restore and Streaming tabs). Any changes made in other tabs affect those in
Monitoring tab as well.
Job pane displays different metadata assigned to each job.
Metadata
Type
Description
: Archive jobs (Archive & Auto Archive)
: Restore jobs (Restore & Auto Restore)
: Streaming jobs.
Source
Displays the source information in corresponding tabs.
LSM_ID
Displays LSM ID assigned to the clips.
Name
Displays the name assigned to the clip.
Format
Displays the format assigned to the clip related to the selected
template.
Destination
Displays the destination where the clip is archived or restore.
CreationTime
Displays the creation date and time of the current job.
Speed
Displays the current archiving/restoring speed of each job by a
multiple of x.
3. XFile3 Application
91
EVS Broadcast Equipment S.A.
March 2015
Metadata
Description
Remaining_
time
Displays the remaining time of each job.
Status
Displays the job status, referring to "Job Status" for more details.
Actions
Displays the available operations to the rule.
•
Cancel: Cancel this job.
•
Process ASAP: Give the job top priority to be
processed.
•
•
Comments
: Retry the job if it is cancelled or stopped.
Refresh: Refresh the job status.
Displays the information from Xsquare and XFile3.
Job Status
Six kinds of job statuses are available in Job pane to specify the exact status of the
current job.
The color refers to the color of the column label in front of the job and the font color of
Comments column.
Job Status
Color of
Head Row
Waiting
White
The job has been created and stored in XFile3
Database.
Scheduled
Orange
The job has been sent to Xsquare and is scheduled to
be proceeded.
Running
Blue
The job is running.
Completed
Green
The job is completed successfully.
Failed
Red
The job is unsuccessful.
Cancelled
No Color
The job has been cancelled.
Description
The following diagram specifies the conversion between different statuses.
92
3. XFile3 Application
XFile3-4.07-USER MANUAL
Possible Actions on Job Pane
Introduction
The Job pane in Monitoring tab summarizes all the jobs from other tabs. All the jobs with
all kinds of statuses are synchronized. The user can do multiple operations on those jobs.
How to Select Jobs
All the selected jobs are highlighted in blue.
There are several ways to select jobs:
•
Click on one job, then the job will be selected.
•
Click on one job, then press CTRL from keyboard, and simultaneously click other jobs
one by one to add to the selection. With this method, all the clicked jobs will be
selected.
•
Click on one job, then press SHIFT from keyboard, and click any other job, then all the
jobs between those two selected jobs will be selected.
•
Press CTRL+A to select all the jobs.
How to Search Jobs
To search jobs, you only need to type the character string whose name includes the
character string in the Quick Search Tool, all the clips include the character string will
display on Job pane.
Two possibilities to search clips: ordinary search and global search.
Ordinary Search
To search jobs in an ordinary way, you only need to type the character string in the
corresponding Quick Search Tool under each item.
To clear the search filter, you can click
in the Quick Search Tool.
Global Search
To search jobs in a global way, you only need to type the character string in Quick Search
Tool, and two kinds of characters are possible:
•
Input a character string, such as 123, abc, the result will be the job whose metadata
includes the character.
•
Input multiple character strings with space, such as 123 456 78, the result will be the
jobs whose metadata includes those character strings.
To clear the search filter, you can click
in the Quick Search Tool.
Note
Global Search and Ordinary Search can be used in combination.
3. XFile3 Application
93
EVS Broadcast Equipment S.A.
March 2015
How to Sort Jobs
To sort a column in alphabetical or numerical order, click on the column label to display the
arrow button
and click it again to invert the sorting.
Note
Actions column can't be sorted.
How to Cancel and Retry Jobs
To cancel jobs, proceed as follows:
1. Select the requested jobs.
2. Right click on the selected jobs and select Cancel.
OR
Click
in Actions column.
3. The status of the job will be cancelled.
To retry the job, click
in Actions column.
Note
Only the jobs with Waiting, Scheduled and Running statuses can be
cancelled.
Only the jobs with Cancelled and Failed statuses can be retried.
How to Change Job Priority
Changing job priority means moving the selected job to the top of the scheduled job queue
to be processed in high priority.
To change job priority, proceed as follows:
1. Select the requested jobs.
2. Right click on the selected jobs and select Process ASAP.
OR
Click
94
in Actions column.
3. XFile3 Application
XFile3-4.07-USER MANUAL
3. The job will be processed soon with high priority.
Note
Only the priority of jobs with Scheduled status can be changed.
How to Refresh Job Status
To refresh job status, you only need to click
.
Only the statuses of Waiting, Scheduled and Running jobs can be refreshed.
Xsquare Configuration
Introduction
Xsquare Configuration is used to set the maximum destination value and maximum
transcoding value of Xsquare.
•
Maximum destination value is used to define the maximum number of running jobs
processed simultaneously by Xsquare.
•
Maximum transcoding value is used to define the maximum number of transcoding
jobs processed simultaneously by Xsquare.
Possible Actions on Xsquare Configuration
Click
after setting the requested values to validate this configuration.
Click
to abort this configuration.
Click
Click
to close XSquare configuration window.
to return to the original values.
•
Total Max.Dest: 6
•
Total Max. Transc: 6
3. XFile3 Application
95
EVS Broadcast Equipment S.A.
March 2015
Maintenance
Introduction
Click
to enter Maintenance window.
The window enables you to do the following operations:
Item
Functionality
The size of DB file
Displays the size of the DB file.
The number of all jobs
Displays the total number of jobs.
Delete obsolete jobs
Button to delete all the obsolete jobs.
Delete all jobs
Button to delete all the jobs.
Backup database and logs
Button to backup the database and logs.
Possible Actions on Maintenance
How to Delete Obsolete Jobs
What Are Obsolete Jobs
Obsolete jobs include:
•
Cancelled jobs
•
Failed jobs
•
The source clips related to the jobs have been deleted.
To delete obsolete jobs, click
.
How to Delete All Jobs
What Are All Jobs
All jobs include all the jobs created from both archive, restore and streaming tabs.
96
3. XFile3 Application
XFile3-4.07-USER MANUAL
To delete all jobs, click
.
XFile3 will restart after deleting all jobs.
XFile3 can't delete all the jobs when some rules in Auto Archive, Auto Restore or
Streaming tab are used. You have to manually stop all the rules in those three tabs before
deleting all the jobs.
How to Backup Database and Logs
To backup database and logs, proceed as follows:
1. Click
.
2. Select a path in local destination and click Save.
The
button is disabled when backing up database and logs.
Clear Finished Jobs
What Are Finished Jobs
Finished jobs include the jobs with the following statuses:
•
Completed
•
Failed
•
Cancelled
To clear all finished jobs, click
3.8.
.
About Window
To view product information of the current XFile3 version, you just need to click
then a message box pops up.
3. XFile3 Application
, and
97
EVS Broadcast Equipment S.A.
March 2015
Click on User manual which links to open the PDF file of the current XFile3 version.
98
3. XFile3 Application