1
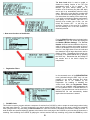
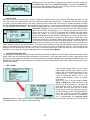
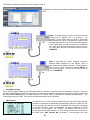
ADDENDUM TO MANUAL Release 4.0
¾ New Midifile Link Mode
From the contextual menu of the MIDIFILE section (which is activated using the Edit key) you can select one of the 4 Link
Modes available to define the transition mode between two consecutive midifiles. Manual mode is the normal operating mode of
the MIDJAY unit, in which the midifiles are played immediately when the Enter key
is pressed. In Sync Live Medley mode, the MIDJAY unit “links” the midifile that
you wish to play with the current midifile. In this way the midifile will never be
played immediately but will only start when the next beat of the current midifile
starts. In this way, you can also play synchronised Medleys produced in real time.
You can activate the Tempo Lock function to leave the BPM unaltered when
switching between the various midifiles. The function is also activated with the
Crossfade on. In this case, the temporal synchronisation between the two midifiles
remains, but the classic “fading out” effect will be executed, which is typical in this mode. Using the Tempo Cross function, the
BPM is automatically cross faded (metronomic velocity) between two consecutive midifiles. In this mode, the BPM of the current
midifile is gradually varied and adapted to the BPM of the next midifile. The
function is only activated when the Crossfade key is on and the transition time
depends on the length of the Crossfade. Marker Jump Preload mode is used to
select the starting marker of a midifile. In particular when it is activated, when you
press the Enter key, the midifile is not played but just analysed. At the end of the
scanning time, the display of the MIDJAY unit shows the markers within the midifile.
By pressing one of the function keys you can start and play the midifile from the
point desired. If the midifile does not have a marker, just one corresponding to the
beginning of the midifile will be shown. The function can only be used when the Crossfade key is off.
¾
Cross Fade curve Editor
From the menu used to select the CrossFade curves (Slow, Medium, Fast e Fade Out) press the Edit key to activate the
environment where you can edit and customise the fading curves available. The
parameters in the FALL section define how the outgoing song fades out its volume
while the parameters in the RAISE section refer to the incoming song.
Let’s
analyse the various parameters:
•
Time: This sets the transition time with a resolution in tenths of a second.
The total time of the Crossfade corresponds at the most between the two set
for the output curve and the input curve.
•
Curve : This defines the transition curve. You can choose between a linear
curve (LIN) or exponential curve (EXP)
•
Start : This indicates the starting volume of the transition
•
End: This indicates the final value of the volume after the transition.
The curves are independent for each section. For example, you can establish
different curves between the MIDIFILE and WAVE section. The settings of the
curves can be saved in the MACHINE.INI file so that it can be automatically loaded
again each time the machine is started.
¾
New menu function of the display
From the Mode/Function menu (activated
using the MENU key) you can access the
settings of the Display (Display Settings). Two
important functions have been added to this
menu:
Lyrics Zoom …which is used to double the
dimensions of the characters used to display the
texts and words of the songs on the display of
the MIDJAY unit.
When the Zoom function is activated, the
display shows 5 lines of words for each page
and it is no longer possible to display the
PlayBar and the initials of the chords within the
midifile.
1
Txt Auto Load which is used to enable or
disable the loading function of the TXT files
automatically when a file is started.
The
MIDJAY unit does indeed enable you to
combine a Txt file with any file (Wav, Mid, Mp3)
and to pull it up automatically when the song
starts. When the current directory contains lots
of files, the search and opening time of the TXT
files slows down the starting of the actual song.
If you wish to maintain the playing performance
and rapidity of the MIDJAY unit also in a
directory that contains lots of files, you can
switch this function OFF. In this way, the
searching function of the song file is inhibited
and the starting time of the files selected is
drastically reduced.
¾ New menu functions of the Monitor
From the Mode/Function menu (activated using
the MENU key) you can access the settings of
the Monitor (Monitor Settings). The Txt Line
Number function has been added to this menu,
which is used to choose the number of lines of
words to be displayed on the monitor. When the
value is 5, the page shows 5 lines of words and
the characters will be larger than those used to
display 10 lines. The settings of the monitor can
be saved in the MONITOR.INI file by pressing
the SAVE key. Remember that the settings of
the monitor and of the built-in display are
independent.
¾
Registration Filters
In the contextual menu of the REGISTRATION
menu (activated using the EDIT key) it is now
possible to set which functions and which
parameters are to be modified by the
Registration. By enabling or disabling the
various items within the Registration Filters
menu you can establish which parameters will
be left unaltered when a REGISTRATION is
loaded. The parameters set can be saved in the
MACHINE.INI file and automatically loaded
again when the instrument is started.
¾ DJLOOP Chain.
This function is used to program and save a sequence of sections for a DJLOOP in order to create an actual song produced using
the audio parts of the file. To record a sequence, you need to load a DJLOOP (Enter on the file name), activate the contextual
menu using the EDIT key and select the Record Chain item. Once the function is activated, the machine is ready to record. A
small R within two square brackets [R] appears at the bottom of the main page of the DJLOOP to point out that the instrument is
recording. Start recording the DJLOOP by playing the various sections and stop recording using either the STOP key or the
2
Ending function of the actual file. To play back the sequence recorded, activate the
Play Chain item or press key 0 (PLAYLIST section). By pressing the SAVE key,
you can save the sequence within the current DJLOOP so that it is then available
each time the actual DJLOOP is loaded again.
¾ Groove Remix
With release 4.0 you can synchronise a Groove (.GRV) with a midifile and use it as a rhythmic audio base with which you can
remix the midifile in the same way as for the Drum Remix procedure with internal Styles. To associate a Groove with a midifile
you need to play the midifile (Enter on the name), select the Groove section with the relative key, activate the Remix procedure
with key 9 (PLAYLIST section) (LED lit) and load the Groove required. At the end of the loading time, the Groove will be played
in synchronisation with the midifile. The rhythmic and percussion parts of the midifile will be muted. By then pressing key 9
(PLAYLIST section) you can re-activate the rhythmic parts of the midifile and play
them over the Groove. While playing, you can alternate the various sections of the
Groove (Arr A, Arr B, Arr C, Arr D) or add some fills or Breaks using the relative
buttons (Fill, Break). To save the combination of the two files and pull-up the
Groove automatically when the midifile is started again you need to go back to the
MIDIFILE section by pressing the relative key and press the SAVE key. In the
window that appears you can add the starting beat of the Groove and the End beat.
In this way you can activate the Remix on the beat specified. Press Enter after you
have completed the settings. In the Song Setup window that appears, select the mode desired (refer to the user manual for
further details on Song Set up) and press Enter. To play back the combination, simply select the midifile, press Enter, wait for the
Groove to be loaded and play everything. It takes a large amount of memory to manage the Grooves. If the HD supplied (20
GBytes) has been replaced with one with more memory, the internal RAM memory of the instrument may not be enough to load
these files. In such case, the machine would trigger the error message: Out of Memory.
¾ Drum Remix Start Stop Bars
The possibility of establishing the starting and end beat has also been extended to the Drum Remix functions that utilise internal
Styles (refer to the user manual for further information on Drum Remix). In this case again, when you save, a page similar to that
of the previous point appears in which you can set the parameters required to Start/Stop the rhythm associated with the song. For
Midifiles with Drum Remix produced with previous software releases, the Start beat is set on beat 0 while the Stop beat is set at
the end of the midifile.
¾
USB To MIDI
From the Midi settings menu you can set the
USB to MIDI operating mode, which is used to
transmit and receive MIDI information via the
USB connection. This function proves very
useful to connect the MIDJAY unit to a Pc
without a midi interface (usually all portable
computers).
When set in one of the two Modes available
(Mode 1, Mode 2) the USB connection of the
MIDJAY unit stops working as a removable HD
and configures itself to transmit and receive
MIDI data. Once you have set one of the two
Modes, simply connect the USB cable to the PC
and the operating system will acknowledge the
device and enable its use as a MDI peripheral
unit. In the case of Windows XP © the MIDJAY
unit is acknowledged as Composite Audio
Peripheral unit and installed with the name of USB Speakers. To utilise, receive and transmit midi data, you need to set the
corresponding device in the software of Midi Sequencing.
3
The illustration that follows shows the correct setting for Sonar ©
The MIDJAY unit avails of two different operating modes for the Midi
USB.
Mode 1 is suitable when you wish to record the midi data
produced by the MIDJAY unit on a sequencer. For
example, it proves useful when you wish to record MIDI
data generated by a style or played by the internal voices
and when the MIDJAY unit is set on Play Mode Keyboard.
In this configuration, the midi data are sent to the MIDJAY
unit, which processes them and sends them back to the
PC. In this case, the Soft Thru function of the PC must be
DISABLED.
Mode 2 reproduces the classic “cascade” connection
between Master Keyboard, Pc and MIDJAY, ideal for
playing and recording MIDI sequences. The Midi data are
sent to the Pc, which sends them towards MIDJAY or
other external devices. The Soft Thru function of the PC
must be ENABLED.
¾ Easy HD Recording
This is used to rapidly activate an HD Recording session in whichever contextual menu the instrument is working. By simply
pressing the RECORD and START keys together at the same time, the MIDJAY unit starts an HD recording session, generating a
file denominated Untitled_xxx in the main directory of the WAVE folder (C:\WAVE) and numbering it progressively. The
numbering goes from 0 to 999. The function can also be activated with the Footswitch.
¾
SD5 Interface
The MIDJAY unit can be controlled remotely from the new Ketron SD5 keyboard.
Release 4.0 implements a special MIDI communication protocol via which you can
view and activate all the files in the HD of the MIDJAY unit directly from the display
of the SD5 keyboard. Once communication has been established, the MIDI
connections of the MIDJAY unit (IN/OUT) are disabled and used just to
communicate with the SD5 keyboard. You can check the status of the connection in
the MIDI menu; SD5 Connect ON will appear if communication has been
4
established.To set the Midi connections of the MIDJAY unit back in their normal operating mode you need to manually set the
SD5 Connect parameter OFF.Consult the instruction manual of the SD5 keyboard for further information.
¾ Wave Song Setup
It is now possible to set-up the songs in Wave format. In particular, you can save the transposition set, the algorithm selected
(Wave Transpose Mode) and the setting of the Lead Mute in the file. In this way you can customise the key and the sound of a
wave file simply and immediately. To save a Setup, select the file and play it (Enter key), execute the transposition by activating
the relative box using the Transpose key. If you wish, you can modify the transposition Mode by activating the relative selection
menu using the Edit key.Save the Setup by pressing the SAVE key. The next time the Wave file is started, the transposition
value and the status of the Lead Mute will be set according to the information saved in the song Setup. It is important to
remember that the original file is not modified.
¾
Miscellaneous
•
The functions of the Power On Setup have been extended, which implement and saves the Audio Local, Format and
Sampling Rate parameters in the HD Recording menu.
•
Hold the arrow keys down to scroll the current directory forwards by pages and not by single files. The first time you
press the key, the current position of a single file is modified, then the position is modified by page in page.
•
The functions of the Footswitches have been extended by adding the following functions:
o
Bass&Drum and BassToLowest.
o
Easy Hd recording.
•
The possibility of saving the volume of the vocalizer in the Song Setup of a midi base has been added.
•
The midi reception of the volume on the channel of the automatic bass has been enabled.
•
It is now possible to save the Lower Off within the Registrations
•
The synchronisations of the Karaoke on Mp3 files have been optimised.
- R.Time to Wave and R.Time to Mp3
It is now possible to control the Starting and Stopping of a Wave file and/or Mp3 file using the midi real time controls (Real Time
Midi Events). You can control the starting and stopping when playing back a Wave file or an Mp3 file, from an external sequencer
or from a keyboard in which the Midi Clock Out function has been activated. The activation of the R.Time to Wave and R.Time to
Mp3 options of the Midi->Filter&Clock menu determines whether the Wave files or Mp3 files respectively are to be affected by this
type of event.
- Midifile Master Transpose
It is now possible to set a Global transposition value to be applied to all the midifiles played on the machine. The transposition
value set is added to that possibly saved within the midifiles (saved with the Song Setup procedure) or set manually on the control
panel of the MIDJAY unit.
- Midifile Kick&Bass Boost
This allows you to soften or enhance the audio levels of the percussion instruments belonging to the bass drum family (kick) and
of the sounds related to the family of electric guitars (freetles, finger etc.) by a preset quantity. The parameter affects all the
midifiles being played and can be saved in MACHINE.INI using the PowerOn setup procedure.
5