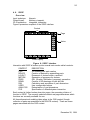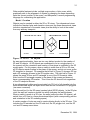
1
A Review and Analysis of Through-the-Window ComputerAided Modeling Systems
Mark R. Mine
Computer Science Department
University of North Carolina
Chapel Hill, NC
[email protected]
1. Introduction
This technical report presents the results of a review of through-the-window
computer-aided modeling systems conducted by the author at the University of
North Carolina at Chapel Hill. The term through-the-window is being used here
to denote modeling systems which use two-dimensional (2D) input devices and
displays. I reviewed the modeling systems in order to evaluate the current
state-of-the-art of computer-aided modeling and to perform a preliminary
analysis of the impact of using two-dimensional input devices and displays on
the modeling task.
Table 1 presents the packages that were investigated in detail for this review.
Package
Archicad
AutoCAD
DesignWorkshop
Designer's Workbench
Form-Z
IGRIP
Minicad+4
MultiGen
Sculpt 3D
Upfront
WalkThrough
Table 1:
Company
Version Platform
Graphisoft
4.0.2
Mac
Autodesk
12
Mac
Artifice Inc.
1.0.3
Mac
Coryphaeus Software
2.1
SGI
Auto-Des-Sys
2.6.1
Mac
Deneb Robotics
2.2.3
SGI
Graphsoft
4.0v3
Mac
Software Systems
14.0
SGI
Byte by Byte Corp.
2.06
Mac
Alias Research
2
Mac
Virtus Corporation
1.1.3
Mac
Modeling packages reviewed
Section 2.0 is a discussion of the modeling techniques and paradigms
identified during this review. Section 3.0 is a detailed comparison of the
capabilities of all the modeling systems reviewed. Presented in Section 4.0 are
the individual modeler reviews (highlighting the distinguishing characteristics of
each system).
2. Modeling Techniques and Paradigms
Though the most apparent difference between modeling systems is the type
and extent of modeling primitives provided to construct three-dimensional
shapes (see Section 3.0), modeling systems can also be classified according to
the interaction techniques used to perform the three-dimensional modeling task.
2
2 . 1 . Input for a Three-Dimensional Task
One of the primary input tasks in the generation of three-dimensional shapes is
the specification of three-dimensional positions, orientations and extents.
Several different techniques are used to specify these parameters. These
include:
1)
2)
3)
Numeric input.
Relative input.
2D interactive input.
Numeric Input.
Numeric input enables the specification of precise values by allowing the user
to input quantities directly using the numeric keys on the computer's keyboard.
By using numeric input, the user can specify the exact position, orientation and
extents of an object. Each component of a three-dimensional parameter is
controlled separately.
Relative Input.
Relative input is the specification of parameters based upon the state of existing
objects. Arrow keys, for example, can be used to modify an object relative to its
current state (e.g. larger, smaller, move left, move right). Alternately, alignment
commands can by used to position an object relative to other objects within the
modeling space (e.g. align left sides, align tops).
2D Interactive Input.
Two-dimensional interactive input involves the use of input devices such as the
mouse and the data tablet to interactively specify modeling parameters. For the
majority of modeling systems, this is one of the primary means of controlling the
modeling cursor (the point in the three-dimensional modeling space at which all
modeling actions occur). Using a 2D input device the user may interact directly
with the model or indirectly via control panels (using interactive controls such as
sliders and dials).
The use of a 2D input device necessitates some form of mapping between the
movements of the 2D input device and movements of the modeling cursor in the
three-dimensional modeling space. Two-dimensional input devices preclude
the direct specification of three-dimensional parameters; at least two separate
inputs are required to fully specify all three components. Though I observed
many different variations of the mapping of a three-dimensional task to a twodimensional input device, most modelers fall into two basic categories:
Working-Plane Plus Extrusion
In many cases the current elevation of the modeling cursor must be
prespecified. During subsequent modeling actions this component is held
constant and movements of the input device are mapped directly onto the
remaining two components of the cursor position. In many modeling systems
this prespecified component is what is known as the current working plane. All
movements of the input device are mapped directly onto the current working
plane. The elevation of the current working plane remains fixed until it is reset
using some separate form of specification such as numeric input, the movement
December 30, 1994
3
of a slider, or through movements of the input device that are differentiated from
normal device movements by the simultaneous pressing of a modifier key (see
for example DesignWorkshop [Artifice 93]).
Similarly for extents, all movements of the input device are used to specify the
extents of an object in two dimensions only. The third dimension, or extrusion
height, must be specified separately, again using techniques such as numeric
input, sliders, and modified input-device motions.
In systems using working-plane-plus-extrusion input device mapping, objects
are created by drawing a two-dimensional profile in the current working plane
that is then extruded to the specified extrusion height. All objects are at the
same elevation (the current working plane) and have the same height (the
extrusion height). To create an object at a different elevation (a shelf four feet
above the ground, for example), the user must reset the working plane to the
new desired elevation. To create an object with a different height, he must reset
the extrusion height.
Some systems, such as the Upfront program from Alias Research, allow the
user to quickly position the working plane relative to existing objects by
snapping the working plane to be coincident with any indicated object face.
This makes it easy to quickly create a vase on top of a table for example. It also
makes it necessary, however, to create construction surfaces, objects whose
sole purpose is to assist in the construction process. Thus to create a shelf four
feet off the ground you would first create an object that is 4 feet high, snap the
working plane to the top of the object, and then create the shelf at that height.
Arbitrary rotations are difficult to specify in a working-plane-plus extrusion
system; most rotations are generally limited to rotations about the normal of the
current working plane. More complex rotations often require the use of numeric
input (via separate dialog boxes) to be fully specified.
Orthogonal Input
As an alternative to the use of working planes, some systems allow the direct
specification of all three components of the current cursor position. In an
orthogonal-input system, the user is given three orthogonal views into the
modeling space (see Section 2.2 below). Associated with each view is a 2D
marker, which indicates the position of the 3D modeling cursor relative to that
view. The 3D modeling cursor can be directly positioned at any threedimensional coordinate in space (to perform some modeling action) by
specifying the position of the 2D marker in any pair of windows. This
determines all three coordinates of the 3D cursor with one coordinate specified
redundantly in both windows.
Rotations in an orthogonal-input system are typically about an axis
perpendicular to the currently active window.
2 . 2 . Output of a Three-Dimensional Space
Modeling system output can be classified according to the three following
characteristics:
December 30, 1994
4
1)
2)
3)
The format of the view provided into modeling space.
The visualization view: Is it separate from or integrated with the
modeling view?
The visualization view: Is it static or interactive?
Format of the Modeling View.
One of the most important characteristics of a modeling system is the format of
the views provided into the modeling space (the space in which the user
performs all modeling actions). Several different types of views are available
for the visualization of the three-dimensional modeling space:
1)
2)
3)
2D Plan
Orthogonal
Arbitrary Viewpoint
2D Plan
This is a straightforward extension of two-dimensional drafting. In a 2D-plan
system, the user is presented a two-dimensional parallel projection (plan view)
of the modeling space. The projection is typically along one of the principal
axes of the space with the default view being an overhead view - similar to an
architectural blueprint. Examples of modeling systems of this type include:
Archicad and Virtus WalkThrough.
Orthogonal
In an orthogonal-view system the user is given three orthogonal views into the
modeling space (see Sculpt 3D). Each view is typically a parallel projection
along one of the principal axes and can be thought of as the unfolded views into
a cube surrounding the modeling space (see Figure 1). The main drawback of
this type of system is the need to integrate three orthogonal views into a mental
picture of the three dimensional shape being created. Sculpt 3D is an
orthogonal-view system.
Figure 1: Orthogonal-View System
December 30, 1994
5
Arbitrary Viewpoint
In an arbitrary-viewpoint system the user is presented a two-dimensional
projection of the three-dimensional modeling space. The view is completely
arbitrary and the user can specify eye-point (center-of-projection) and focuspoint (center-of-interest). AutoCAD, DesignWorkshop, Designer’s Workbench,
Form-Z, IGRIP, Minicad+4, MultiGen, and Upfront are all arbitrary-viewpoint
systems.
3D Visualization: Separate or Integrated
Most modeling systems provide some form of visualization view, a threedimensional rendering of the modeling space. Projections in the visualization
view can be parallel or perspective and the renderings can range from wire
frame to fully textured and shaded. The visualization view can either be
separate from or integrated with the modeling view.
2D-plan-view and orthogonal-view systems, for example, typically include a
separate visualization view (not essential, but it can be difficult to infer the
shape of the modeled objects using only the modeling views provided in these
systems). In an arbitrary-viewpoint system, on the other hand, the modeling
view and the visualization view are integrated into one.
Separation of the modeling view and visualization view limits the impact of
rendering costs on modeling interaction. A separate visualization view, on the
other hand, must be mentally integrated by the user with the modeling space.
3D Visualization: Static or Interactive
The three-dimensional visualizations of modeling space may either be static (in
which the user must specify a new eye-point and focus-point for each new view
of the model) or interactive (in which the user can interactively navigate through
the model). Virtus WalkThrough [Virtus 93], for example, provides an interactive
walkthrough, a separate visualization window in which the user can move
through the model in near real-time. Interactive visualization helps to provide a
better understanding of the shapes being created.
Complications of Two-Dimensional Output
The use of two-dimensional (non-stereoscopic) displays for output inherently
injects ambiguity in the interpretation of the displayed information [Gregory 73],
this complicates the modeling task.
3D Perspective View
Figure 2a: Perspective projection ambiguity
December 30, 1994
6
In a perspective projection system, for example, equal lengths have different
projections depending upon their distance from the viewer. This complicates
the interpretation of the modeling space as shown in Figure 2a. When viewed
in the perspective projection, the smaller cube appears to lie in the center of the
face of the larger cube. The three orthogonal views (Figure 2b), however, show
that this is not actually the case.
Top View
Figure 2b:
Front View
Side View
Three orthogonal views of the object in Figure 2a
Though the cube position is presented unambiguously in the three orthogonal
views, interaction in these type of systems may be more complicated since the
user must correlate the position of a two-dimensional marker in multiple
windows in order to determine the three-dimensional position of the modeling
cursor.
3. Modeling System Capability Comparison
Presented in Table 2 (included at the end of the document) is a detailed
comparison of the capabilities of the modeling systems reviewed. Note that
only three-dimensional modeling capabilities are included in this comparison;
two-dimensional drafting and text layout tools are not reviewed. The categories
used for comparison include:
•
•
•
•
•
•
•
•
3D Object Generation. Techniques used to create threedimensional objects.
Derivative Object Generation. Advanced techniques used to
create three-dimensional objects.
Object Selection. Techniques used to select objects or groups of
objects.
Object Information Functions. Techniques used to determine
information about selected objects and/or the modeling
environment.
Object Transformation. Techniques used to modify an object's
shape and position.
Surface Attribute Control. Techniques used to specify object
surface characteristics (such as color and texture).
View Manipulation. Techniques used to manipulate viewpoint in
the modeling views and visualization views.
Cursor Controls. Techniques used to control the modeling cursor.
The cursor-controls section of Table 2 is divided into three sub-sections: snaps,
constraints, and construction assists. Snaps completely define all three
components of a three-dimensional coordinate (in effect overriding the current
modeling cursor position). Constraints define only one or two components of
December 30, 1994
7
the three-dimensional coordinate (confining the cursor to a line or a plane). The
user interactively specifies the remaining components. Construction assists are
temporary geometric objects used (in conjunction with the snaps and
constraints) for the placement of the cursor and model objects.
4. Modeler Reviews
Modeler reviews are broken down into the following main categories:
1) Overview: A high level description of the modeler interface and any
special features that make the program unique.
2) Model Creation: A description of the techniques used in creating
model objects. Note that the focus is on three-dimensional rather
than two-dimensional modeling techniques.
3) Model Modification: A description of the functions provided by the
program for altering existing model objects (move, rotate, scale).
4) Model Interaction/Visualization: The types of features provided for
interaction with the modeling and visualization views.
5) Manual: A description of the quality, completeness, and usefulness of
the manuals/tutorials provided with each package.
6) General Impressions: Observations/opinions about the utility of each
package as a three-dimensional modeling tool. Descriptions of
outstanding/useful features and of limitations/problems
encountered.
Table 3 is a summary of the input and output paradigms (defined in section 2.0)
used by each modeling system.
Modeler
Input
Technique
Archicad
Working Plane
AutoCAD
Working Plane
Designer's Workbench Working Plane
DesignWorkshop
Working Plane
Form-Z
Working Plane
IGRIP
Numeric
Minicad+4
Working Plane
MultiGen
Working Plane
Sculpt 3D
Orthogonal
Upfront
Working Plane
WalkThrough
Working Plane
Table 3:
Output Format 3D Visualization
2D Plan
Arbitrary
Arbitrary
Arbitrary
Arbitrary
Arbitrary
Arbitrary
Arbitrary
Orthogonal
Arbitrary
2D Plan
Separate, Static
Integrated, Interactive
Integrated, Interactive
Integrated, Interactive
Integrated, Interactive
Integrated, Interactive
Integrated, Interactive
Integrated, Interactive
Separate, Static
Integrated, Interactive
Separate, Interactive
Modeling system paradigms
December 30, 1994
8
4 . 1 . Archicad
Overview
Input technique:
Output format:
3D Visualization:
Working-plane plus extrusion.
2D Plan view.
Separate, static.
The main components of the Archicad interface include:
•
•
•
•
•
•
Archicad plan worksheet. 2D plan view used to interact with the
model.
3D view. The visualization view used to view a three-dimensional
projection of the current model.
Menu bar. Provides access to the various commands and dialog
boxes used to interact with Archicad.
Toolbox. The graphical toolbox used to switch between the
various modes of interaction and modeling tools.
Control box. Used to turn snap-to-grid on and off and control
placement of walls relative to the specified lines.
Coordinate box. Used for direct numerical input of positions,
angles and distances (can be specified in either relative or
absolute coordinates).
Figure 3 presents a snapshot of the Archicad interface.
Figure 3: Archicad Interface
Most tools have a related dialog box which can be used to adjust the default
behavior of each tool. Included in each dialog box are settings such as heights
of walls, and widths of doors. Object settings can also be copied from object to
object (e.g. to make two doors look identical).
Archicad is a three-dimensional modeler which has been optimized for
architectural design. Special tools are included for creating walls, roofs, doors
and windows. Also included is a large library (with third party libraries also
available) of default three-dimensional objects (such as cabinets, tables, and
chairs) that can be used to populate the model. The library also includes
sample window and door types which can be used to fill door and window
December 30, 1994
9
openings. Each of these library objects can be placed with a click of the mouse
button and are parametric so that you can adjust characteristics such as the
width of a door, or the height of a window above the floor. New library objects
can be created using GDL, Archicad's graphics description language.
Model Creation
Using Archicad's specialized set of architectural building tools, a user can
quickly create a fairly complex building shell, with doors and windows cut out of
the walls and a fairly complicated roof. Sample doors and windows can be
added with just a few additional clicks of the mouse button.
Object positions and sizes can be specified interactively or directly using the
numerical input feature. The multiple modes of numeric input (combinations of
absolute and relative coordinates) are somewhat awkward to use but it is easy
to transition between mouse mode and numeric input (it is not necessary to
move the mouse cursor into a numeric input window to switch between the two
modes).
To aid in model creation, Archicad provides the standard aids such as snap to
vertex, and snap to grid. Archicad also provides the capability of specifying a
hot spot which can act as an additional snap location. Two grids are provided:
the standard snap grid and a more complicated construction grid (which is used
to specify both the spacing and width of regularly placed objects).
Model Modification
Model components can be moved, rotated and resized. Since most objects
(except the roof segments) are assumed to be perpendicular to the floor,
Archicad does not include a means of specifying arbitrary 3D orientation. A
diagonal coal chute, for example, would be difficult to model. Instead, objects
are rotated around a vertical axis perpendicular to the floor. Objects are
repositioned using the drag feature. Archicad also includes a drag-with-repeat
and a rotate-with-repeat feature to create regular structures (such as a
colonnade) where objects have regular spacing or rotation angles.
Model Interaction/Visualization
The user can pan, zoom and scroll in the modeling view.
Archicad uses special cursor shapes to convey information to the user about the
type of object being pointed at by the mouse. These are used to help in the
selection of objects such as vertices, wall edges, and doors.
Archicad utilizes static three-dimensional visualizations which are displayed in
a separate 3D visualization view. Using the view control dialog box, the user
can specify parameters such as view direction, observer location, field-of-view
(where applicable), and lighting direction. There are several different projection
options: top view, elevation, isometric, oblique, plan oblique, axonometric,
perspective. The user can also specify a path for generating a walkthrough of
the model. The quality of the images can be quite high, but Archicad suffers
from the lack of an interactive visualization. This hampers the interactive design
process since the user must wait to see the results of a design change.
December 30, 1994
10
The 3D view by default only renders the items currently selected on the plan
worksheet. This is useful for rendering a subpart of a complex model but it is
easy to forget to deselect the last item you were working on. It can be frustrating
to end up with a rendering of only a portion of your model when you intended to
render the entire thing.
Manual
Archicad provides a complete set of reference manuals that describe each
function in detail. Though comprehensive, the manuals suffer from the lack of
an introductory tutorial. Important details on how to use the tools are often
buried in the tool descriptions. To get a good understanding of how to use
Archicad you would have to read all the manuals in detail.
Archicad also includes a hypercard tutorial stack, however it adds little beyond
what is found in the reference manuals.
Comments/Impressions
Archicad is a well thought-out product for exploring the preliminary stages of
architectural design (i.e. the basic shape and spaces of a building). I was very
impressed at how easy it was to build the basic shell of a house. Within a half
an hour I could place all the walls in a building and specify holes for the doors
and windows. If you require a tool for preliminary design exploration, Archicad
is an excellent choice.
Archicad is not as effective when it comes time to add additional detail such as
specific doors and windows, or furniture to a model ( to add realism or to lend a
sense of scale). Archicad particularly suffers from the lack of an interactive 3D
visualization. This makes it difficult to explore design alternatives such as the
exact placement of a window.
Archicad is also not well suited for the creation of arbitrary three-dimensional
shapes. The 3D object creation tools are optimized for doors and windows and
are not general modeling tools. Objects can be created from scratch using the
Graphics Description Language (GDL) and saved as library items, but GDL is
more easily used for making modifications to existing objects (changing an
existing window for example). It would be difficult to use GDL for complex
modeling tasks.
Archicad's plan notes and materials computation options are useful features.
The plan notes are used to attach general notes and the material computation
keeps a running estimate on the amounts of materials required for the specified
model. There is a large variety of material types (such as brick, concrete, and
wood) to choose from for each component of the model.
December 30, 1994
11
4 . 2 . AutoCAD
Overview
Input technique:
Output format:
3D Visualization:
Numeric input, Working-plane plus extrusion.
Arbitrary viewpoint.
Integrated, Interactive.
The main components of the AutoCAD interface include:
•
•
•
•
•
•
Command line. Text window used to enter commands from the
keyboard and to display prompts and messages.
Graphics area. Graphics window used for interactive editing and
model display.
Menu bar. Pull-down menus which provide access to the various
commands and dialog boxes used in AutoCAD.
Screen menu. Text based set of menus and submenus used for
interaction with the AutoCAD commands.
Icon menus. Iconic tear-off menus used for object creation,
modification and dimensioning commands.
Status line. Text line displaying current information about the
model (such as the active layer and cursor coordinates)
Figure 4 presents a snapshot of the AutoCAD interface.
Figure 4: AutoCAD Interface
AutoCAD, one of the oldest and most widely available CAD programs, is a
general purpose modeling tool for the preparation of two-dimensional drawings
and three-dimensional models.
AutoCAD is a professional drafting program which includes numerous
construction assists, drafting tools and utilities (such as the geometry calculator
described below) designed to help in the generation of detailed drawings.
AutoCAD is highly configurable; users can control the layout and placement of
menus, create scripts to automate complex tasks, and generate add-on
applications using AutoCAD programming tools (AutoLISP and the AutoCAD
Development System). AutoCAD also supports numerous extensions such as
December 30, 1994
12
the Advanced Modeling Extension (reviewed with this package) which help to
augment AutoCAD's capabilities.
Model Creation
AutoCAD is a working-plane-plus-extrusion system (see Section 2.1). The
working plane can be: aligned with the XY, YZ, and ZX planes, moved to any
point (maintaining its current orientation), aligned with any three vertices,
aligned with any selected entity, or oriented to be perpendicular to the current
viewing direction. The working plane can also be moved to any arbitrary
position and orientation using numeric input.
AutoCAD provides tools for creating several different types of graphical objects
(called entities): points, lines, arcs, circles, rectangles, 3D polygons, polygonal
meshes, and curved surfaces. Three-dimensional entities (such as spheres,
cones, and cylinders) can be created using the Advanced Modeling Extension
(discussed below) or can be extruded from existing two-dimensional objects.
Several different curved surface and polygonal mesh types are available
including ruled surfaces, tabulated surfaces, surfaces of revolution, and Coons
surface patches. The various AutoCAD entities can be grouped to create
blocks, which can in turn be stored in separate files and used as library objects.
To help in the creation of accurate drawings, AutoCAD includes numerous
cursor snap modes that allow the user to create objects relative to existing
geometry (such as the endpoint of a line or the center of a circle). AutoCAD
also includes a geometry calculator which can be used to evaluate vector, real
or integer expressions. For example, the expression (mid + cen)/2 can be used
to locate the point halfway between the midpoint of a line and the center of a
circle (using the cursor to indicate the appropriate entities).
AutoCAD is heavily biased toward numerical input. Coordinates can be
specified using absolute or relative values, can be specified relative to world or
user defined coordinate systems, and can be given in cartesian, polar (2D),
spherical (3D), and cylindrical formats. Filters can be used to specify coordinate
components separately (for example setting the X coordinate of a point
interactively with the mouse and the Y and Z components using numeric input).
AutoCAD includes extensive dimensioning capability useful in the generation of
presentation drawings. AutoCAD will determine linear, radial, angular, and
ordinate dimensions of selected entities.
AutoCAD includes an isometric drawing mode for creating two-dimensional
isometric drawings. Though useful it is less flexible than the isometric viewing
modes provided by many other applications.
The default AutoCAD environment can be augmented with several extension
packages such as the Advanced Modeling Extension (AME) and the AutoCAD
SQL Extension (ASE). The AME is a constructive solid geometry package
which enables you to perform boolean operations on two and threedimensional entities and includes many analysis functions for determining
properties of a solid such as the mass, centroid and moments of inertia. The
ASE makes it possible to link your AutoCAD drawings with external database
management systems (such as dBASE, Oracle, or Paradox).
December 30, 1994
13
AutoCAD also provides several different programming tools: Scripts (a textbased scripting language), AutoLISP (an implementation of the LISP
programming language) and ADS the AutoCAD Development System (a Clanguage programming environment). These allow the user to create macro
programs and functions to perform complex tasks which can be executed at the
AutoCAD command prompt.
Model Modification
Objects can be positioned, oriented, scaled, mirrored and duplicated. AutoCAD
includes circular and rectangular array commands which enable the creation of
repeating structures. Two-dimensional entities can be extruded into threedimensions by modifying their thickness. An adjustable taper can also be
specified for solids created using the AME. A grips mode is included which
allows you to select objects and modify them directly (i.e. move or rotate) using
the mouse.
AutoCAD includes functions for editing polygonal meshes and curved surface
entities (including functions for fitting smooth surfaces to polygonal meshes).
Model Interaction/Visualization
The user can pan and zoom on the model and can specify camera location and
center-of-focus. To help in the visualization of complex models, AutoCAD
enables a user to hide selected layers of model (this also enhances rendering
performance). AutoCAD models are typically presented as wireframe
renderings though shaded versions of the model can be generated. AutoCAD
does not have an interactive visualization mode.
Manual
AutoCAD has extensive documentation (13 lbs worth) including a user's guide,
command reference, installation guide and several programming guides. Also
include is a detailed tutorial which introduces the user to most of the AutoCAD
commands. The manuals are well written and the step-by-step instructions in
the tutorial are easy to follow. The main drawback of the manuals is that they
concentrate on the command line interface of AutoCAD (which is consistent
across the many platforms on which AutoCAD is supported). It can be difficult to
find the menu or icon command for your specific platform which corresponds to
the command line function discussed in the manual.
Comments/Impressions
Key advantages of AutoCAD include the highly customizable interface, the
various analysis tools (for the calculation of areas, mass properties, geometric
calculations, etc.), the ability to extend the AutoCAD application with Autodesk
or third party extensions and the ability to enhance the AutoCAD environment
with command scripts, AutoLISP and ADS applications (the programming
languages available with AutoCAD).
The disadvantages of AutoCAD are closely related to this wealth of options and
flexibility. The AutoCAD interface is complex and somewhat cumbersome to
use. There are many different menu types (some redundant), many different
ways to do the same thing and an overall feeling of a graphical user interface
that was tacked on top of a command line application. Models can be created
December 30, 1994
14
interactively in the graphics window, but AutoCAD is heavily biased towards
keyboard input (as is reflected in its manuals). It is typically faster to use the
AutoCAD commands than it is to go through the menu interface.
December 30, 1994
15
4 . 3 . DesignWorkshop
Overview
Input technique:
Output format:
3D Visualization:
Working-plane plus extrusion.
Arbitrary viewpoint.
Integrated, interactive.
The main components of the DesignWorkshop interface include:
•
•
•
•
Modeling toolbox. The graphical toolbox used to switch between
the various modes of interaction and modeling tools.
Modeling window. Arbitrary viewpoint of modeling space. Used to
interact with the model.
Location bar. Dialog box used to display information about the
current cursor location.
Object Info. Dialog box displaying information about the currently
selected object.
Figure 5 presents a snapshot of the DesignWorkshop interface.
Figure 5: DesignWorkshop Interface
DesignWorkshop is a "three-dimensional modeling package for conceptual
design and design development" (from the front cover of the manual). Though
still a little rough at edges (this is one of the first releases), the program
incorporates some interesting solutions to the problem of modeling in a twodimensional projection of three-dimensional space.
Most actions such as extrude, translate, resize, reshape are all done with the
default cursor, with no additional tools required.
An outline of the currently selected object is projected onto the working plane to
help in the interpretation of the three-dimensional shapes and relationships of
the model under construction.
There is support for architectural modeling such as the ability to construct walls
directly or to derive them from existing forms, also openings can be cut into any
surface to form doors and windows.
December 30, 1994
16
Model Creation
DesignWorkshop is a working-plane-plus-extrusion system where the working
plane elevation and extrusion height are specified interactively by modified
movements of the input device (moving the mouse while holding down the
option key). This means that the working plane can be quickly positioned at any
elevation and objects of different extrusion heights can be created easily.
DesignWorkshop includes cues to aid in the determination of the current threedimensional position of the cursor. Three grids are drawn (one perpendicular to
each of the 3 main axes) which are used to show the point of intersection of 3D
crosshairs which extend from the current position of the modeling cursor to the
grid surface. Also, during creation and modification of objects, a twodimensional profile is projected onto the grid parallel to the current working
plane. This is used as an aid in the alignment of the 3D objects.
DesignWorkshop provides additional feedback on the current cursor location
with the location bar. This shows the X, Y, and Z location of the cursor in
absolute coordinates and the relative East, South and Vertical coordinates of
the cursor relative to the location of last reset (the relative cursor location is
reset to zero at the beginning and end of all cursor drag operations). The
location bar may also be used for direct numeric input (in specifying positions
and sizes) by typing the letter of the coordinate you wish to specify (X,Y,Z,E,S,V)
or hitting the tab key to start directly with the East relative coordinate.
To aid in the direct creation of Architectural shapes, DesignWorkshop includes
a block tool (for creating building masses to show the shape of a building, for
example), a poly-wall tool (for creating walls that define the inner spaces of a
building), and tools to cut openings in walls (for doors and windows).
Model Modification
All objects can be translated, rotated, reshaped and scaled. Many operations
(extrusion, translation, resizing and reshaping) are done with the default cursor.
Rotation of objects is accomplished by selecting the special rotation tool.
Objects are rotated around either their center or an edge depending upon
where the object is grabbed. The trim operator slices objects in two. The slice
is perpendicular to a line drawn across one of the object faces. A faces mode is
included which allows you to manipulate individual faces of blocks. Duplicatelinear and duplicate-circular are two menu items which allow you to create
repeating arrays of objects. By selecting a special dialog box item (miter edges)
the duplicate-circular becomes, in effect, an object of revolution tool.
A special Object Info floating palette is included which displays information
about the currently selected object. The Object Info palette can also be used to
modify the characteristics of the selected object by typing into the appropriate
field. Characteristics which can be modified include: position, orientation and
extents.
Model Interaction/Visualization
DesignWorkshop has an integrated, interactive visualization view, all model
interaction is done in a three-dimensional perspective view. Design workshop
includes the standard ability to pan and zoom the current working view.
December 30, 1994
17
Two main tools, the Eye and Look tool are provided for changing the threedimensional view into the modeling world. The eye tool is used to move the
current eye-point around the center-of-interest. By pressing the option key the
eye-point can be moved in and out along the view vector. The look tool is used
to move the center-of-interest around in model space. The center-of-interest
can be quickly set to the center of the model (by double clicking on the look tool)
or to any specific three-dimensional location by using the standard
DesignWorkshop cursor positioning methods.
Shadows can be generated to aid in the understanding of the threedimensional relationships between objects. A sun position can be chosen by
selecting a latitude and a time and date. QuickTime Sun study movies can be
generated.
Manual
DesignWorkshop includes a fairly brief manual and a quick reference guide.
The manual includes a quick start tutorial which explains the basics of using
DesignWorkshop and more detailed DesignWorkshop techniques section
(covering site modeling, roofs, surfaces of revolution, walls and stairs).
DesignWorkshop can be learned fairly quickly, due to its simple interface.
Comments/Impressions
DesignWorkshop shares the advantages and disadvantages common to all the
modelers that allow you to work directly in a 3D perspective view (see Section
2.2).
DesignWorkshop does include several aids to assist in the proper placement of
the cursor. This includes: 3D crosshairs which extend to and intersect with 3
orthogonal modeling grids, shadows that show the relationships of models in
the working space, and DesignWorkshop's Space-Jump, a method of
instantaneously moving the cursor to the three-dimensional position of any
vertex in the model (the desired vertex is selected by placing the image of the
cursor over the image of the vertex and then tapping the space bar).
The ability to move the modeling cursor in all three directions makes it easier to
create objects at different elevations and with different extrusion heights than in
systems where the working plane and extrusion height are manipulated
separately.
The main problem with DesignWorkshop at this time is the fact that it is such an
early release. This is quite evident in the number of features which are not
completely implemented and the number of bugs encountered during program
execution. This leads to an overall impression of the program as still being
somewhat rough around the edges.
December 30, 1994
18
4 . 4 . Designer's Workbench
Overview
Input technique:
Output format:
3D Visualization:
Working-plane plus extrusion.
Arbitrary viewpoint.
Integrated, Interactive.
The main components of the Designer's Workbench (DWB) interface include:
•
•
•
•
Database window. The window used to display and edit
information in a single database file. The database window can
display an arbitrary viewpoint of modeling space or a hierarchical
representation of the model. The graphics view can be split to
include three orthogonal views of the modeling space.
Menu bar. Provides access to the various commands and dialog
boxes used to interact with Designer's Workbench.
Icon Menus. The graphical toolbox used to switch between the
various modes of interaction and modeling tools.
Coordinate Window. Used for direct numerical input of positions,
and extents (can be specified in either relative or absolute
coordinates).
Figure 6 presents a snapshot of the DWB interface.
Figure 6: Designer's Workbench Interface
Designer's Workbench is a three-dimensional modeler which runs on a Silicon
Graphics workstation. Notable features in Designer's Workbench include:
•
The hierarchy view, a graphical representation of the model's hierarchical
structure (showing all parent-child relationships) which greatly simplifies
interaction with complex models. The hierarchy view can be used to quickly
select portions of the model with a single mouse click.
December 30, 1994
19
•
Construction vertices: temporary vertices which can be used to help in the
construction and positioning of objects.
In addition to general-purpose modeling tools, DWB incorporates features
useful in the generation of flight simulator databases. Links, for example, are
used to specify the relationship between geometry and state variables making it
possible to create animated cockpit displays that are driven by dynamic data
(such as simulated airspeed).
Model Creation
Designer's Workbench is a working-plane-plus-extrusion system (see Section
2.1). The working plane can be: aligned with the XY, YZ, and ZX planes, moved
to any vertex (maintaining its current orientation), aligned with any object face,
or aligned with any three vertices. The working plane can be moved to any
arbitrary position and orientation using numeric input and the working plane
offset (translation along the normal of the working plane) can also be set
interactively using the mouse.
Designer's Workbench provides tools for the creation of irregular and regular
polygons, rectangles, spheres, cylinders, cones and strips (fixed width polygons
along a path which can be used for roads). Polygons may also be created from
B-spline construction curves (see below) using a B-spline to Poly tool. All
objects are created interactively (using the mouse) or with numeric input (to
specify absolute or relative positions of vertices). Two-dimensional faces can
be extruded into three-dimensional objects using the extrude tool. Unlike vertex
positions, extrusion heights must be specified in a separate numeric input
window and can not be set interactively using the mouse in the graphics
window. Designer's Workbench also includes advanced tools for the creation
of surfaces of revolution and lofted objects (objects defined by a sequence of
two-dimensional profiles).
Designer's Workbench includes several types of construction assists. A
rectangular grid can be used during construction to constrain the cursor position
to regular, adjustable spacings. Grid spacing can be specified using numeric
input or set interactively using the mouse. The cursor can also be snapped to
any vertex, edge or face using special modifier keys. Construction vertices can
be created: along a B-spline curve, at the midpoint of selected vertices, at even
intervals along a line, at the point on a plane or a line closest to a selected
vertex and at the intersection of any plane and line.
All objects created in Designer's Workbench are inserted into an object
hierarchy which encapsulates the relationship between objects, groups of
objects, faces, edges and vertices. The user can view a graphical
representation of the hierarchy in which he can reorganize structural
relationships using commands or interactive drag and drop editing to detach
and attach nodes in the hierarchy.
Model Modification
The user can interact with the model at many different topological levels; the
user can select and manipulate vertices, edges, faces, objects, and groups of
objects.
December 30, 1994
20
Designer's Workbench includes several techniques for object selection which
facilitate interaction with complex models. Objects can be selected: in the
graphics view, using the object hierarchy, and by attribute.
When selecting objects in the graphics view a topological level is used to
control the level of selection (vertices, edges, faces, objects, and groups of
objects). The user can choose between overlapping objects by cycling through
a pick hit list, a list of all elements within the vicinity of the cursor during the last
selection. The Imploded View command is used to aid in the selection of
coincident vertices by causing faces to temporarily contract about their center
(separating coincident vertices).
The hierarchical view is useful when the model has grown complex enough that
it is difficult to select objects in the graphics view. Related segments of a model
can be selected using a single mouse click by selecting the appropriate node in
the object hierarchy. An excellent feature of Designer's Workbench is the
inclusion of a thumbnail sketch in the hierarchical view which displays the
currently selected item. This avoids the need to toggle between the hierarchy
view and graphics view to verify object selection.
Finally, objects can be selected by attributes (such as color) or boolean
combinations of attributes.
Objects can be positioned, oriented and scaled. Designer's Workbench
includes several more advanced scaling modes including scale to size and
scale along a vector.
Model Interaction/Visualization
One of the key advantages of Designer's Workbench is that it runs on a Silicon
Graphics workstation; this provides the graphics power required for smooth
interaction with complex models. Designer's Workbench is an integrated
system, the modeling view and visualization view are combined into one.
Designer's Workbench allows you to rotate the viewpoint about the model,
zoom in and out and pan your view. Up to ten different eyepoint locations can
be saved and then immediately recalled using eyepoint controls. The fit
command centers the selected database items in the window and moves the
eyepoint so the selected items fill the window. Using the isolate command will
result in the selected items appearing alone in the graphics window. Several
isolate views can be defined and DWB automatically generates buttons that can
be used to quickly switch between the available views.
Manual
The DWB documentation is divided into a user's manual, which gives an
overview of the basic operation of Designer's Workbench, and a reference
manual, a detailed description of all DWB features. Though fairly well written it
is sometimes difficult to find a description of a specific function. For example the
eyepoint controls discussed above are described in both the user's manual and
the reference manual but the reference manual lacks an appropriate index entry
to help locate the description. Designer's Workbench includes a context
sensitive help mode which displays information about each icon and menu
command.
December 30, 1994
21
Comments/Impressions
Designer's Workbench is a good choice for the generation of complex models.
Running on a Silicon Graphics workstation, the user has the necessary power
to work with large complex models. The ability to interact with a hierarchical
representation of the model is invaluable in the selection and isolation of
segments in complex models. Learning to use to hierarchy effectively, however,
does take some time.
The disadvantages of Designer's Workbench include a complex interface, a
limited set of modeling primitives (no curved surface and Constructive Solid
Geometry operators), and a high price.
December 30, 1994
22
4 . 5 . Form-Z
Overview
Input technique:
Output format:
3D Visualization:
Working-plane plus extrusion.
2D plan & Arbitrary viewpoint.
Integrated, interactive.
The main components of the Form-Z interface include:
•
•
•
•
Modeling/Drafting window. 2D plan view or 3D arbitrary viewpoint
used to interact with the model.
Menu Bar. Provides access to the various commands and dialog
boxes used to interact with Form-Z
Modeling Tools toolbox. The graphical toolbox used to switch
between the various modes of interaction and modeling tools.
Window Tools toolbox. Tools to control working plane orientation,
cursor movement (including snaps), viewpoint on modeling space
and error and memory information.
Figure 7 presents a snapshot of the Form-Z interface.
Figure 7 Form-Z Interface
Form-Z is a general purpose solid and surface modeler. Surface objects are
simple open and closed lines and meshed surfaces. Solid objects are threedimensional shapes enclosing volumes (cubes, spheres, cylinders etc.). Inbetween these two are surface solids which are two sided surfaces that are
completely enclosed but contain no volume (for example the simple surface of
revolution resulting from rotating a line about an axis).
Form-Z objects are primarily two-dimensional outlines which either remain twodimensional (surface objects) or get extruded into the third dimension (solid
objects). Extrusion height is either: chosen from a (customizable) menu of
object heights, set interactively using the mouse, or specified using numeric
input.
Form-Z provides both 2D plan view and arbitrary viewpoint visualizations of
modeling space. Objects can be created in any of the 6 orthogonal views or in
any arbitrary three-dimensional view.
December 30, 1994
23
In addition to providing the standard types of objects such as circles, rectangles,
and polygons (all of which can be in 2D or 3D form), Form-Z includes many
advanced features: terrain models, derivative objects (objects of revolution,
sweeps along paths, sections of solids), controlled meshes, and Boolean
operations (union, intersection, difference).
Form-Z has made an interesting attempt to divide the modeling task up into its
orthogonal components. Included in the toolbox are several orthogonal tool
modifiers which control:
•
•
•
The type of object (e.g. 2D or 3D)
The topological level you are working at (point, edge, face, object)
Whether or not you are working on the original object (self) or on a
copy (or multiple copies). This only applies to the geometric
transformations (translate, rotate, scale)
This provides a large range of function without the introduction of a large
number of specialized tools.
Model Creation
Form-Z is a working-plane-plus-extrusion system (see Section 2.1). Model
generation takes place in a three-dimensional view that allows you to look at
the model from any arbitrary viewpoint. Models can also be created in
something similar to a 2D plan view system since axial views are also included
(front, back, top, bottom, left, right). The default interaction, however, is in the 3D
view which may be either a perspective or axonometric projection.
Objects are created in Form-Z by drawing a two-dimensional outline on the
working plane. The type toolbox-modifier is used to select the desired object
that will result from this 2D outline (such as 2D outline, 2D enclosure, or 3D
object). If the object is one of the 3D types, the extrusion height is controlled by
a menu (with a user configurable selection of heights) or via mouse input with
the user moving the mouse until the object is at the desired extrusion height.
Since all objects are created on the current working plane, Form-Z has several
tools dedicated to positioning, orienting, and defining new working planes and
a dialog box for naming, saving and selecting working planes. There are three
default working planes (aligned with the XY, YZ, or ZX planes). A new plane
can be defined relative to 3 points, two edges, an object face, or via numeric
input).
All objects in Form-Z can be specified interactively in the modeling window or
numerically using the numeric input window.
Form-Z has a wide array of higher level tools such as derivative objects (objects
of revolution, sweeps along paths), and curves and meshes. This enables the
generation of quite complex shapes.
Model Modification
Form-Z provides both the standard geometric transformations (rotate, scale,
translate, mirror) and some more advanced features not available in most
packages: primarily Boolean functions to take the union/intersection/difference
of model objects.
December 30, 1994
24
Based upon the self/copy modifier, the transformation will either operate on the
original object (self) or will result in the generation of a new or multiple new
copies of the original which are positioned based upon the transformation that
was performed. This provides a means of rapidly generating regular groups of
objects (a colonnade for example) by transforming a single copy of the base
component (e.g. the single column).
The Boolean operations provide a means of generating interesting shapes by
combining objects with the different modifiers.
Model Interaction/Visualization
The view into the modeling world can panned, rotated and zoomed. It is
important to remember that the selected center of rotation is on the working
plane and not in the middle of the indicated object (as you might think from
looking at the three-dimensional view). The three-dimensional view, however,
helps in the interpretation of the 3D structure of the model under construction.
Manual
Form Z includes a detailed user manual and an introductory tutorial. The user
manual is divided up into three volumes: an introduction, a detailed modeling
tools reference and a detailed drafting tools reference. The tutorial is very
extensive and covers the vast majority of the FormZ tools. FormZ also includes
a quick reference guide which highlights the location of all tools and menu
items and lists all hot key accelerators. It is some indication of the complexity of
the program that the quick reference guide is 24 pages long.
Comments/Impressions
The two most notable aspects of Form-Z are the many advanced features
included in the package and the ability to work directly in a three-dimensional
view. Very complex shapes can be generated using tools such as the Boolean
operators, sweeps along paths, round edges, curves, and meshes. The 3D
view is a more satisfying way to interact with three dimensional models and also
frees the user from having to mentally integrate separate visualization views
and modeling views. As described in Section 2.2, however, working in twodimensional projection of three-dimensional space can lead to some confusion.
These advantages, however, come with a price. Form-Z is not a simple
program to learn how to use. There are many different tools and each tool has
an extensive array of modifiers and options. Learning to use the full power of
Form-Z takes time.
The tool modifiers described above, (type, topological level, self/copy) are an
interesting attempt to decompose the modeling functions into orthogonal
components. As with the other benefits there is an associated cost in that each
action requires more levels of specification (e.g. instead of selecting a box tool
you must select both the polygon tool and the 3D extruded object modifier).
Finally, Form-Z shares a problem that is common to most of the packages that
create objects using a working plane: the need to explicitly re-position the
working plane to create objects at different elevations and orientations. Form-Z,
however, provides many options for the positioning of the working plane
including techniques that allow the generation of objects relative to existing
December 30, 1994
25
objects (for example at the level of this face, or aligned with 3 specific corners of
a cube).
December 30, 1994
26
4 . 6 . IGRIP
Overview
Input technique:
Output format:
3D Visualization:
Numeric.
Arbitrary viewpoint.
Integrated, interactive.
Figure 8 presents a snapshot of the IGRIP interface.
Context
Page
Action
World Display
Figure 8: IGRIP Interface
Interaction with IGRIP is broken up into several main modes called contexts:
CONTEXT
DESCRIPTION
CAD
DEVICE
LAYOUT
MOTION
PROG
DRAW
DIM
USER
ANALYSIS
SYS
3D modeling and part creation
Creation of devices by assembling parts
Placement of devices within a workcell
Generation of programs for devices
GSL (Graphic Simulation Language) generation
Creation of 2D drawings of lines and text
Calculation and annotation of part dimensions
User configurable buttons
Determination of part dimensions
Specification of defaults/system interaction
Each context is further broken down into pages, the secondary division of
function in IGRIP. The currently selected context and page determines which
functions are currently available for use.
All three-dimensional modeling takes place in the CAD context (though
collection of parts are assembled in the DEVICE context). There are seven
pages associated with the CAD context:
December 30, 1994
27
PAGE
DESCRIPTION
CREATE
MODIFY
CURV
SURF
IGES+
APP
AUX
Creation/manipulation of standard 3D objects
Translate, rotate, merge, split, Boolean functions
Generation of connected sets of lines
Generation of polygons or NURBS surfaces
File translation
Application specific buttons
Coordinate system functions/collision detection
All objects are created by specifying the desired object type (such as block,
cylinder, or sphere) and then filling out a dialog box specifying the location and
dimensions of the object and any additional required information (e.g.
eccentricity for cylinders).
IGRIP is a high-end modeling system designed to be run on a Silicon Graphics
workstation. Much more than just a three-dimensional modeler, IGRIP has
many specialized features beyond the standard modeling tools. These
additional features are primarily in support of IGRIP's simulation modules.
Designed to be used in the simulation of robotic devices, IGRIP allows you to
model parts which are assembled into devices (collections of parts which have
specifiable kinematic relationships), which are then arranged in workcells (a
collection of devices positioned in arbitrary locations and orientations).
Simulations are run on the workcells to determine the operating behavior of the
modeled devices. Included in the simulations are functions such as: calculation
of kinematic constraints (e.g. reach), simulation of joint dynamics, collision
detection and many other programmable constraints.
IGRIP is geared towards the very precise modeling of objects rather than to
more generic modeling (e.g. the preliminary design and the exploration of
shapes and spaces). Though it is possible to interact with models graphically,
IGRIP is heavily oriented towards numeric input. Most objects are created by
specifying exact numerical values in dialog boxes rather than via direct mouse
input. All modeling is done directly in a three-dimensional perspective view.
One of the main advantages of IGRIP stems from the fact that it runs on a Silicon
Graphics workstation and thus can take advantage of the graphical power of the
SGI.
Model Creation
All parts created in the CAD context are made up of objects and each object is
made up of sub-objects. All objects consist of polygons.
As was mentioned above, the position, orientation and size of an objects is
specified using numeric input rather than interactively. To create a cylinder for
example, you would:
1)
2)
Select the cylinder tool
Fill out a dialog box specifying the cylinder's characteristics: X,Y,Z
origin, diameter, eccentricity, height, start angle, end angle,
number of facets, axis, circumference (inscribed or circumscribed),
and if you want an upper and lower cap and a center point
December 30, 1994
28
3)
The object will show up at the specified location where it can then
be snapped to a surface, or translated and or rotated into its final
location (either through direct numeric input or interactively using
a mouse with numeric feedback).
Each object has its own coordinate system which is used for the positioning of
objects both in absolute world coordinates and relative to each other.
More advanced features included in IGRIP are: extrusion, surface of revolutions,
lofting (the creation of a surface blending one polygon to another), fillets and
NURBS based surfaces.
IGRIP does not include modeling primitives that are directly related to
architectural design. It is geared more towards the creation of models of
mechanical parts.
Model Modification
All objects can be translated, rotated and scaled by amounts specified
numerically (via dialog boxes) or graphically (via mouse input). Associated with
each object is a default coordinate system, and any object can be reset to its
default orientation via simple mouse clicks.
The types of model modification allowed in IGRIP include the ability to split and
merge objects, Boolean functions (such as union and difference), cloning,
mirroring and the ability to reverse the normals of individual polygons (a back
facing polygon indicated by semi-transparency).
One feature included in IGRIP that is not found in many other modelers is a tool
for the determination of object collisions. This can be useful in determining if
separate objects are interpenetrating.
Polygon color may also be specified.
Model Interaction/Visualization
All model creation in IGRIP is done in a three-dimensional perspective view.
Common to all of the IGRIP contexts is a collection of WORLD control buttons
which allow you to zoom in and out of the current view, and to translate and
rotate the viewpoint to a new location. When using mouse input to control the
viewpoint, all actions (such as rotation and translation) are broken down into the
three main orthogonal components. Each component is controlled by pressing
the appropriate mouse button. Thus to translate the view in the Y direction you
would press the middle mouse button before moving the cursor.
Since it is running on an SGI, sufficient graphics power exists to work directly
with a 3D perspective rendering of a shaded object (vs. 2D plan or wireframe
model). Included in the WORLD controls are tools for changing lighting
direction interactively.
Manual
A large collection of manuals accompany the IGRIP program. Only a small
portion of these, however, are devoted to a description of the CAD tools. The
manuals are primarily arranged in the form of tutorials which take you through
December 30, 1994
29
the basic steps of object creation. Use of each of the basic tools is described,
though it is difficult to find a description of many features
On-line help is available and can be useful in determining a tool function.
The majority of the documentation is devoted to a description of the simulation
portion of the IGRIP package including a description of GSL (the Graphical
Simulation Language used in controlling/animating the kinematic devices) and
many of the other modules available with IGRIP (such as tools for translating
to/from other robotic programming languages, and modules for performing
calibration of robotic devices and positioners, device dynamics simulations, and
other specialized applications).
Comments/Impressions
IGRIP is an excellent tool for the creation of detailed models. The heavy
emphasis on numeric input, however, makes it difficult to use in design
exploration (given only a vague notion of the size and shapes of the spaces you
wish to create).
IGRIP includes many functions not directly related to 3D modeling, the CAD
context (mode) is only one of many different program modes (e.g. DEVICE,
LAYOUT, MOTION etc.). The majority of the IGRIP package is devoted to the
specification, simulation and control of the kinematic and dynamic relationships
between parts.
IGRIP does demonstrate the advantages of increased graphical power in the 3D
modeling task. Since you are free to interactively view you model from any
direction and with any level of zoom it is easy to get a better understanding of
the 3-dimensional shape of the objects being created. This graphics power,
however, is not taken advantage of during object creation since all objects are
specified numerically and not interactively.
December 30, 1994
30
4 . 7 . Minicad+4
Overview
Input technique:
Output format:
3D Visualization:
Working-plane plus extrusion.
2D plan & arbitrary viewpoint
Integrated, interactive
The main components of the Minicad interface include:
•
•
•
•
•
•
•
Drawing window. 2D plan view or arbitrary viewpoint used to
interact with the model.
2D/3DToolbox. The graphical toolbox used to switch between the
various modes of interaction and modeling tools.
Menu bar. Provides access to the various commands and dialog
boxes used to interact with Minicad+.
Data display bar. Displays current mouse position and is used for
numeric input.
Mode bar. Used to control tool specific modes.
2D/3D Constraints Palette. Controls cursor snaps and constraints.
Attribute Panel. Control attributes such as fill and pen color, line
type, and arrowhead style.
Figure 9 presents a snapshot of the Minicad+ interface.
Figure 9: Minicad+ Interface
Minicad+ is a general purpose CAD/modeling package for both twodimensional and three-dimensional CAD design. Minicad+ has a complete
complement of two-dimensional modeling tools and a slightly more limited set
of three-dimensional tools. In Minicad+ there is a clear distinction between
operating in a 2D or a 3D mode. Each mode has an entirely different set of
tools.
Included in Minicad+ are some specialized tools used in support of architectural
modeling. This includes tools for building walls, roofs, and slabs directly; the
ability to create hybrid 2D/3D symbols such as doors and windows which can
be placed in the model with a single mouse click; and a layer management
scheme for organizing the different floors in a building.
December 30, 1994
31
Other notable features include: multiple snap modes; a hints cursor which
graphically aids in the alignment of objects by changing its shape depending
upon the current position of the cursor; and Minipascal, a macro programming
language for customizing the application.
Model Creation
Objects may be created in either the 2D or 3D views. Two-dimensional views
include the standard plan and elevation views and the three-dimensional views
include a standard set of isometric views plus the ability to look at the model
from any arbitrary viewpoint.
2D TOP/PLAN VIEW
3D box
Figure 10: 2D vs.
2D rectangle
3D ISOMETRIC VIEW
3D box
2D rectangle
3D objects
As was mentioned earlier, there are two very distinct modes for the creation of
2D and 3D objects. All 2D objects are considered to lie in a single plane (i.e.
the screen) and the orientation and location of that plane is undefined in the 3D
model space. For this reason, when a switch is made from a 2D to a 3D view,
all 2D objects remain floating in the plane of the screen, and do not move as the
3D viewpoint is changed. For example the left half of Figure 10 shows a 3D box
and a 2D rectangle as seen in the 2D top/plan view. The right half of Figure 10
shows the same 3D box and 2D rectangle in one of the 3D isometric views.
Note how the 2D rectangle remains in the plane of the screen and does not
have a corresponding 3D location. This is how the 2D box will look regardless
of the 3D viewpoint chosen.
A two-dimensional outline may be extruded into 3D, but to fully transfer into the
three-dimensional world the object must then also be converted to 3D polygons
(via menu command).
Only the wall tool (in the 2D menu) creates hybrid 2D/3D objects. In the 2D plan
view, the wall tool creates a double line which indicates the wall thickness.
When a switch is made to a 3D view, the walls (unlike the other 2D objects), will
switch from a 2D line to a three-dimensional object (with corresponding position
and orientation in the 3D modeling space).
A certain number of tools are used to create objects directly in the 3D view. This
includes the 3D extrude tool, the 3D slab tool, the 3D polygon tool, and the 3D
roof and 3D sweep menu items.
December 30, 1994
32
The 3D extrude tool is used to create a multi-sided polyhedra with sides
perpendicular to the working plane. This is similar to using a 2D polygon tool
except that the polygon has an extrusion height set (via dialog box) by the user.
The 3D slab tool creates a three-dimensional box which can be used as the
slab for the currently selected floor. A 3D polygon is a two-dimensional shape
which has position and orientation.
All objects created in the 3D view are created relative to the currently selected
working plane and there are assorted tools used for moving the working plane
around to the desired position and orientation (e.g. for creating 3D objects at
different heights and orientations)
Model Modification
Both the 2D and 3D modes allow for the standard types of model modifications.
Objects may be translated (using the selection pointer), rotated and scaled. In
the 3D mode, the rotation of objects may either be around the working plane
normals or around some secondary (user defined) vector. 3D objects can also
be reflected about an axis and reshaped (by moving selected vertices). For all
of the modification operators, the operation can be performed on either the
original object or a new object (a clone) can be created in the new target
location.
Model Interaction/Visualization
Both the 2D and 3D modes provide the ability to pan and zoom around the
current view-plane.
Almost half of the available three-dimensional tools in Minicad+ are used for
changing the view into the 3D modeling space. In addition to the pan and zoom
tools discussed above, Minicad+ also provides: 3D translate, view rotate,
walkthrough, flyover, translate along working plane normal, and rotate about
working plane normal. Though a large set of options, most of these view
manipulation tools just represent a slightly different way of moving around the
three-dimensional world (each with a different set of constraints on how you can
move).
3D translate moves the eye-point in and out along the direction of view. View
rotate changes the angle at which the user is viewing the model (either around
the direction of view or around the X and Y axis of the screen). To quote the
manual: view rotate "can be so flexible that it is awkward to use". Walkthrough
allows user centered motion and all rotations are about the user viewpoint.
Flythrough rotates the user view with the additional restriction that the user view
up is always constrained to an upright position. Working-plane normal rotation
and translation change the viewpoint relative to the currently defined working
plane.
Manual
Overall, the Minicad+ manuals are comprehensive and are fairly well written.
There is a complete user manual (plus index) and a separate tutorial manual
(which focuses on the creation of architectural models). Also included in the
package is a separate manual describing programming in Minipascal, a macro
December 30, 1994
33
programming package for customizing the application; and an introductory
video which demonstrates the basic use of the package.
Comments/Impressions
Minicad's strengths lie primarily in the two-dimensional domain. Overall it
seems to be a sophisticated 2D CAD package that allows you to create complex
two-dimensional drawings. Minicad has several useful features such as a
context-sensitive help bar and a screen hints mode which helps you during
drawing creation. The screen hints mode is a particularly useful feature which
changes the cursor into a smart cursor which can indicate snap points and
alignment information. I also liked features such as the inclusion of a rotated
rectangle tool which allows you to draw non-axial rectangles.
Minicad+ is less strong as you move into the 3D domain. In fact, the 3D tools
feel more like something tacked onto a 2D package rather than an integral part
of a unified system for 2D/3D design. The strong division between the 2D and
3D worlds, though useful in creating presentation drawings that include both 2D
and 3D views, takes some getting used to.
Minicad+ is also somewhat limited in terms of three-dimensional object creation
tools, only two tools on the 3D tool pallet are devoted to creating 3D objects and
both of these are limited to creating multi-sided objects with sides perpendicular
to the working plane. Though more complicated objects can be created using
the menu items for 3D extrusion and 3D surfaces of revolution, these features
are not directly integrated as 3D tools.
The majority of the Minicad+ 3D mode seems devoted to means of changing
your viewpoint in the 3D model space. 9 tools (when pan and zoom are
included) are devoted to changing your viewpoint relative to the model. Most of
these, however, represent different ways of doing the same thing. This part of
the Minicad interface could be simplified and reduced.
Minicad has the potential to be a very powerful modeler, however, this will
require some redesign and a more careful integration of the 2D and 3D modes.
December 30, 1994
34
4 . 8 . MultiGen
Overview
Input technique:
Output format:
3D Visualization:
Working-plane plus extrusion.
Arbitrary viewpoint.
Integrated, Interactive.
The main components of the MultiGen interface include:
•
•
•
•
Database window. Window used to display and edit information in
a single database file. Can display an arbitrary viewpoint of
modeling space or a hierarchical representation of the model.
Menu bar. Provides access to the various commands and dialog
boxes used to interact with MultiGen.
Icon Menus. The graphical toolbox used to switch between the
various modes of interaction and modeling tools.
Coordinate Window. Used for direct numerical input of positions,
and extents (can be specified in either relative or absolute
coordinates).
Figure 11 presents a snapshot of the MultiGen interface.
Figure 11: MultiGen Interface
MultiGen is a high-end modeling system designed to run on Silicon Graphics
workstations. MultiGen is a general purpose modeler though its roots are in the
flight simulator industry (it still includes tools for generating runway lights for
example).
The most notable features of MultiGen include multiple techniques for object
selection (including a hierarchical representation of the model) and a large
number of construction assists to help in the construction and positioning of
models. The hierarchical view allows the user to see a representation of the
December 30, 1994
35
models hierarchical structure (showing all parent-child relationships) and can
be used to quickly select portions of the model for later manipulation.
MultiGen allows the user to interact with the model at many different topological
levels; the user can select and manipulate vertices, edges, faces, objects, and
groups of objects.
MultiGen includes an extensive set of tools for applying and editing textures.
Model Creation
MultiGen is a working-plane-plus-extrusion system (see Section 2.1). The
working plane can be: aligned with the XY, YZ, and ZX planes, moved to any
vertex (maintaining its current orientation), aligned with any object face, or
aligned with any three vertices. The working plane can also be moved to any
arbitrary position and orientation using numeric input.
MultiGen provides tools for the creation of irregular and regular polygons,
rectangles, spheres and strip faces (fixed width polygons along a path - ideal for
roads). All objects are created interactively (using the mouse) or with numeric
input (to specify absolute or relative positions of vertices). Two-dimensional
faces can be extruded into three-dimensional objects which have either walled
(perpendicular) or peaked (converging) sides. MultiGen also includes
advanced tools for the creation of surfaces of revolution and lofted objects
(objects defined by a sequence of two-dimensional profiles). The default
behavior of most tools is controlled using a related preferences page.
All objects created in MultiGen are inserted into an object hierarchy which
encapsulates the relationship between objects, groups of objects, faces, edges
and vertices. The user can view a graphical representation of the hierarchy in
which he can reorganize structural relationships using commands or interactive
drag and drop editing to detach and attach nodes in the hierarchy (see below).
MultiGen has a large variety of construction assists. A rectangular or radial grid
can be used during construction to constrain the cursor position to regular,
adjustable spacings. The cursor can also be snapped to any vertex or edge
using coordinate referencing techniques. The referenced edge and vertex can
be a part of the existing model or they can be construction objects, temporary
objects used solely as points of reference. MultiGen includes many types of
construction objects. Construction edges are used to generate points parallel to
edges, perpendicular to an edge or face, along a curve, along the line
connecting the midpoints of any two existing edges, or at the intersection of two
planes. Construction vertices are used to define points at the average value of
a set of vertices, at the intersection of two edges, at the point on a line or a plane
closest to a selected vertex, or at even intervals along a line.
Model Modification
MultiGen includes several techniques for object selection which facilitate
interaction with complex models. Objects can be selected: in the graphics view,
in the hierarchy view, and by attribute.
When selecting objects in the graphics view a topological level is used to
control the level of selection (vertices, edges, faces, objects, and groups of
objects). The shrink faces command is used to aid in the selection of coincident
December 30, 1994
36
vertices by causing faces to temporarily contract about their center (separating
coincident vertices).
The hierarchical view is very useful when the model has grown complex
enough that it is difficult to select objects in the graphics view. Related
segments of a model can be selected using a single mouse click by selecting
the appropriate node in the object hierarchy.
Finally, objects may be selected by attributes (such as color) or boolean
combinations of attributes.
In MultiGen the standard tools to position, orient and scale an object are
enhanced by the numerous construction assists mentioned above. This makes
it very easy to quickly position objects relative to one another in the database.
Other transformation functions in MultiGen include: automatic level of detail
generation, a slice operator (to split an object along the working plane), tools to
split faces, and to add and position vertices.
Model Interaction/Visualization
One of the key advantages of MultiGen is that it runs on a Silicon Graphics
workstation; this provides the graphics power required for smooth interaction
with complex models. MultiGen is an integrated system, the modeling view and
visualization view are combined into one.
MultiGen allows you to rotate the viewpoint about the model, zoom in and out
and flythrough the model. It can sometimes be difficult to get a desired
viewpoint using the interactive controls. This is somewhat compensated for by
the ability to save and recall viewpoints. MultiGen also includes commands to
automatically zoom in on the selected portion of the model. To assist in
interaction with complex models, MultiGen enables the user to open a separate
window in which he can work on a subset of model. All changes in the new
window will be reflected in the original model. Interaction with complex models
is also helped by the ability to turn off the display of selected portions of the
model using the hierarchical view.
Manual
The MultiGen manual is fairly well written and organized. A significant portion
of the manual is dedicated to MultiGen's texture mapping and editing features.
Included in the manual is a tutorial section which steps you through the creation
of a typical scene. Though useful, the tutorial is sometimes ambiguous in its
description of the desired operations.
MultiGen also includes a context sensitive help mode which can be used to
display information about each icon and menu command.
Comments/Impressions
Several features help to make MultiGen a good choice for working with complex
models. The graphics power of Silicon Graphics Workstations enable an
interactive visualization which helps in the understanding of the model and in
the specification of positions, orientations, and extents. Numerous techniques
for object selection make it easy to isolate desired portions of the model for
further manipulation. A large number of construction assists help in the
December 30, 1994
37
construction and positioning of objects relative to each other. MultiGen also
includes many tools for model cleanup not found in lower-end modeling
systems (including tools to check for non-coplanar vertices, duplicate vertices,
concave faces and objects, and to simplify faces sharing common edges).
MultiGen also has an extensive set of tools for dealing with texture maps
(including a full texture editor).
The ability to interact with a hierarchical representation of the model is one of
the key advantages of MultiGen. It is very helpful in the selection and isolation
of segments of the model and it is a good practice to set up a structural
hierarchy during, rather than after model generation. Learning to use to
hierarchy effectively, however, does take some time.
The disadvantages of MultiGen include a complex interface, a fairly limited set
of modeling primitives (limited to polygonal objects with no support for curved
surfaces and CSG operators), and a high price.
December 30, 1994
38
4 . 9 . Sculpt 3D
Overview
Input Technique:
Output format:
3D Visualization:
Orthogonal input
Orthogonal
Separate, static
The main components of the Sculpt 3D interface include:
•
•
•
•
•
Tri-View window. 3 orthogonal views used to interact with the
model.
Tri-View Palette. The graphical toolbox region of the Tri-View
used to switch between the various modes of interaction and
modeling tools.
Menu bar. Provides access to the various commands and dialog
boxes used to interact with Sculpt 3D
Coordinate dialog. Displays current mouse position and is used
for numeric input.
Scene dialog. Contains information about number of vertices,
edges, and faces in the current scene plus memory information.
Figure 12 presents a snapshot of the Sculpt 3D interface.
Figure 12: Sculpt 3D Interface
Sculpt 3D is a general purpose three-dimensional modeling tool. (Sculpt 4D is
the same 3D modeling package with the addition of animation tools).
Sculpt 3D is an orthogonal view system. In Sculpt 3D, the user directly
specifies the three-dimensional shape of all objects created. This is
accomplished through the specification of the X, Y and Z position of all the
vertices and edges (and thus the faces) that make up an object.
December 30, 1994
39
Visualization of Sculpt objects is either done directly in the modeling window
(which is in essence an orthographic wire frame view) or via higher quality ray
traced images displayed in a separate visualization window.
Model Creation
In Sculpt 3D, objects are entirely made up of triangular faces, each face made
up of vertices and edges. Objects are created in Sculpt using the Tri-View
windows, three orthogonal views into the three-dimensional modeling space.
The creation of objects in Sculpt requires the specification of:
1)
the X, Y, and Z coordinate of each defining vertex in 3 space
(either defined by the position of the cursor in any two orthogonal
views or by numeric input in a coordinate dialog box).
2)
the connectivity of the vertices by edges.
3)
the grouping of vertices and edges into triangular faces ( using the
create face tool.
To facilitate the specification of all this information, Sculpt provides many means
of creating vertices (both connected and unconnected by edges) and Sculpt
automatically creates faces whenever three edges are connected together into
a triangle.
To support the creation of complex three-dimensional shapes (which would
nearly be impossible if you had to explicitly specify the location of every vertex),
Sculpt provides a set of default objects (such as spheres, hemispheres, blocks,
prisms, disks, and circles) which can be incorporated into the model and then
modified as desired. Sculpt also provides several more advanced methods of
creating objects such as reflections, and surfaces of revolution (spin and twist).
A coordinate dialog box relays information to the user about the current cursor
location. Cursor position can be reported in absolute or relative coordinates. A
temporary origin can be defined for relative modes. The coordinate dialog box
can also be used for direct numeric input of cursor coordinates.
Model Modification
Sculpt provides many different means of vertex selection and deselection which
is often one of the most time-consuming modeling actions in an orthogonal
input modeling system. The basic goals of each of these methods is to provide
a different method of isolating and specifying the desired vertices.
Since many models tend to be quite regular and axis-aligned, selection of a
single vertex can often be quite confusing. Vertices that lie along a line
orthogonal to one of the view planes, for example, will all project to same point
in that view. To disambiguate this, vertex selection depends on specifying
cursor position in multiple Sculpt windows, since vertices in different locations
in 3 space will have different positions in the three orthogonal views. Even with
three separate views, however, it still may be difficult to select a particular vertex
since it may be obscured by different vertices in each of the orthogonal views.
In order to simplify the current view, Sculpt only renders the vertices that are
enclosed in the cube defined by the Tri-View windows, thus simplifying vertex
selection. By resizing each window or changing the level of zoom, you can
December 30, 1994
40
change the portion of modeling space that is enclosed by the Tri-View, thus
isolating vertices of interest.
Vertex selection in more complex models is greatly helped by a hierarchy
dialog. This can be used to selectively name parts of a model. Once named,
entire segments of a model can be selected, deselected, deleted, and hidden.
As the name implies, models can also be arranged hierarchically (e.g. a door
could be further broken down into door knobs, hinges etc.)
Once selected, vertices may be moved, rotated, scaled (uniformly or along any
combination of individual axes), mirrored, duplicated, deleted, snapped to a grid
(or a plane or sphere), spun around an axis or twisted along a path. Magnet
tools can be used to apply a force to all selected vertices, moving them a
distance proportional to the inverse of the distance from the cursor.
Model Interaction/Visualization
Conventional scroll bars are provided for panning through the current model.
Movement can also be accomplished by grabbing the Tri-View rulers and
moving them over the desired amount. Tools are provided for zooming in and
out from the current view, with amount of zoom controlled by various
combinations of key specified modifiers (e.g. zoom in 2X,4X, 1/2X etc.). TriViews can also be quickly centered around the current modeling cursor location
using the Center on Cursor button.
Sculpt 3D visualizations are static ray traced images that are displayed in a
separate window. Image quality can be enhanced using textures and bump
maps and selectable levels of anti-aliasing, and dithering. Multiple lights can
be placed in the scene and the observer and target position can be specified
using the Tri-View window. The speed of rendering, however, is too slow for
interactive viewing. Sculpt renderings are more useful for final analysis of the
modeled object and for final presentation. Most other times, the user must use
the three Tri-View windows as a wire-frame representation of the model. This,
however, is not optimum, since this requires the user to combine the information
from the three Tri-View windows in his head into a three-dimensional
representation. It is likely that some confusion will exist about the actual shape
of the modeled object (due to the ambiguity in the three views described
above).
Manual
Overall, the manual is well written, with a good description of how to use the
modeler, a good index and a detailed functional reference. In addition to giving
a description of what each tool does, the Sculpt manual demonstrates how
each tool would be used, and gives examples of how to create sample objects.
Each section of the manual clearly lists the functions to be described, has a
detailed description of those functions and ends with a summary of what was
learned.
Sculpt 3D comes with sample files and a straightforward tutorial that steps the
user through the basics of modeling using Sculpt 3D.
December 30, 1994
41
Comments/Impressions
Overall, Sculpt 3D is a consistently written, relatively powerful 3D modeler. All
tools have a predictable behavior with modifiers that exhibit consistent behavior
across related tools. Sculpt enables the user to create very complex threedimensional shapes by using low level primitives such as vertices and edges,
combined with a complete set of default objects and powerful modifying actions
(such as spin, and reflect).
The use of low level primitives, however, is also one of the primary source of
difficulties when using Sculpt. Dealing directly with vertices and edges (instead
of with some higher level primitive) means that a considerable amount of
Sculpt's resources must be spent in providing ways of selecting, deselecting,
and modifying vertices. This can be a hindrance since there are times when the
user does not want to think in terms of vertices but would rather think at a higher
level (such as faces or objects). This is complicated by the fact that, as models
get more complex, the resulting views in the Tri-View windows can become
quite confusing. Vertices can become doubled (tripled, quadrupled.....) where a
single vertex in a view actually represents many vertices lying in a row. Though
Sculpt provides many means of selecting/disambiguating vertices, it sometimes
can become quite a chore isolating the desired vertices in a model.
Another difficulty with Sculpt is that it forces the user to think of a models in
terms of its three orthogonal projections. This makes it difficult to obtain the
desired shape since it is hard to determine how the desired shape decomposes
into the three orthogonal components.
December 30, 1994
42
4.10.
Upfront
Overview
Input Technique:
Output format:
3D Visualization:
Working-plane plus extrusion.
Arbitrary viewpoint
Integrated, interactive
The main components of the Alias Upfront interface include:
•
•
•
•
Workspace. 3D arbitrary viewpoint used to interact with the model.
Main toolbox The graphical toolbox used to switch between the
various modes of interaction and modeling tools.
View toolbox. Used for changing the user's viewpoint on the
modeling space.
Message box. Used to prompt the user with information about the
current operation.
Figure 13 presents a snapshot of the Upfront interface.
Figure 13: Upfront Interface
Alias Upfront is a three-dimensional design package which is targeted for the
preliminary stages of architectural design. This means that the main objective
of Upfront is the exploration of spaces and shapes rather than the detailed
design of a particular item. As a result, the interface in Upfront is geared
towards allowing the user to quickly create three-dimensional shapes with
minimal user interaction.
Alias Upfront is a member of the class of modelers in which the user creates
objects directly in a 3D perspective view. Unlike other modelers, however,
object creation in Upfront is solely done in a 3D view. Even though it is possible
to view an object using what looks like the standard plan and elevation views
(orthogonal parallel projections), these views are in fact 3D perspective views
and not really parallel projections. Contrast this with most other modelers that
model in a 3D view which also provide model interaction in two-dimensional
parallel projection windows (plan views).
December 30, 1994
43
Notable features of Alias Upfront include: modeling in fully shaded scenes, tools
to directly create walls with thickness, shadow calculations, and full floating
point arithmetic.
Model Creation
Objects are created in Alias Upfront as follows:
•
•
•
•
Select a tool (box, sphere cylinder etc.)
Click to set base point
Rubberband up and down to set object height (or use numeric
input)
Move cursor to define shape (e.g. click on each vertex for a wall or
define the angle of revolution for a section of a sphere)
All objects in Upfront are created relative to a working plane. In Upfront, the
working plane is quickly moved to any surface by clicking on that surface with
the mouse cursor (unlike other modeling packages which have separate
working-plane positioning modes). This makes it easy to build objects relative
to other objects (a vase on a table for example). Selection of faces (for
snapping of the working plane) is facilitated by several factors. First, all objects
in Upfront are fully shaded and not wireframe models. This makes it easier to
identify component faces. Second, the Upfront cursor changes shape and
orientation depending upon its current position in the model. Based upon the
shape of the cursor, the user can identify when the cursor is over a vertex, line
or face. Furthermore, the orientation of a face is indicated by displaying a line
indicating the direction of the surface normal.
Several constraint modifiers control the shape and orientation of the resulting
object. The direction tool determines if the extrusion direction is vertical,
horizontal (e.g. for creating an object coming off of a slanted face), or
perpendicular to the current working surface. The height tool determines the
means of specifying the extrusion height of an object. Heights can either be
specified by rubber-banding, set to match the length on any line in the scene, or
set to match the height of any existing point or surface in the scene.
For all steps requiring specification of dimensions it is possible to alternate
between mouse input and numeric input. Numbers can be input directly and
the cursor will move appropriately. If however, you move the mouse again (after
numeric input), then mouse cursor control resumes.
In Upfront, objects are created in terms of surfaces (vs. specifying individual
vertices). By default, objects are single sided (to speed up rendering) but can
be promoted to 2 sided (to enable seeing the insides of a box, for example.
Upfront is clearly a preliminary design package (as advertised), consequently it
is somewhat limited in terms of the types of objects it can create directly. The
main primitives are box, cylinder, sphere, multi-sided polyhedra and wall. More
complex objects can created by performing intersection operations on objects
but Upfront does not directly include operators such as: surfaces of revolution
and sweeps along paths (though surfaces of revolution can be created by a
modified use of the cylinder tool).
December 30, 1994
44
Model Modification
Entire objects or subsets of objects (e.g. a single line or face) can be moved,
rotated (around specified points), scaled and reshaped (by moving individual
vertices, lines or faces). The topological level of the selection (vertex, line, face,
or object) depends on the cursor location (and shape) at the time of selection.
Position the cursor over a single edge of the object and only that edge is
selected.
During all modeling actions the cursor movement can be constrained to a
surface, an object edge, a line between any two points in the model, a surface
defined by any three points in the model or on an object edge with distance
measured relative to an intersecting surface.
Model Interaction/Visualization
All model interaction is done in the 3D perspective view. Interaction can be
performed from any viewpoint. The standard means of changing the view (pan,
zoom) are included.
Since all interaction with the model is done in the 3D view, it is important to be
able to change the viewpoint relative to the model in order to aid in the
understanding of the 3D shape of the object being created. There are several
ways to change the viewpoint and view direction in Alias Upfront.
The view toolbox provides several modes for changing the viewpoint. These
roughly correspond to: changing the eye-point, changing the center-of-interest,
changing the distance between the eye-point and the center-of-interest, and
changing the field-of-view (FOV). All of these can be controlled by moving the
mouse in the main window or by clicking on control buttons in the view toolbox.
All of these parameters can be changed simultaneously by selecting the view
tool. One of the most complex tools to use, the view tool sets the position and
height of the center-of-interest, the position and height of the eye-point (and
thus the distance between the two), and the field-of-view. This involves several
clicks, rubberbandings and mouse movements; the end result of which is a new
viewpoint on the scene.
Several default views may be chosen from via menu selection including plan
view and elevation view (the direction of view being set by drawing a line in the
model specifying the look vector).
One nice feature which aids in the interpretation of the 3D shapes shown in the
3D perspective projection is the ability to calculate and display shadows. This
helps the user understand the three dimensional relationship between objects.
The shadows help immeasurably in letting the user determine if an object is
resting on the ground plane or floating several units above.
Manual
Upfront includes a detailed user manual (plus index) and a tutorial which walks
you through the basics of model creation. Since Upfront is a fairly simple
package (in terms of the number of features) the tutorial quickly gives the user a
fairly complete understanding of the package in just a few hours. Alias also
December 30, 1994
45
includes a quick reference card, something essential in helping the user
remember the function of the various tools.
Comments/Impressions
Alias Upfront has attempted to deal with some of the difficulty in working directly
in a three-dimensional projection. Having fully shaded objects and shadows
helps in understanding the 3D shape of the objects being created. It is easier to
create an object where you want in Upfront because of the ease moving the
working plane to the surfaces and edges of existing objects (though in some
cases this necessitates the creation of construction surfaces - see Section 2.1).
The changing cursor shape and orientation also help in interpreting the current
cursor position which is complicated by working in a perspective projection (see
Section 2.2).
Upfront suffers from the lack of more complex operators (such as sweeps along
paths), though the inclusion of such operators would naturally complicate the
user interface.
Though the ability to quickly change viewpoints is nice (and helps in 3D shape
understanding), Upfront would benefit from a more interactive 3D visualization.
December 30, 1994
46
4.11.
WalkThrough
Overview
Input Technique:
Output format:
3D Visualization:
Working-plane plus extrusion.
2D plan view
Separate, interactive
The main components of the Virtus WalkThrough interface include:
•
•
•
•
•
Design view. 2D plan views used to interact with the model.
Walk View. An interactive visualization of the model.
Tools Window The graphical toolbox used to switch between the
various modes of interaction and modeling tools.
Surface Editor. Used to add surface features (such as window
and door openings).
Tumble Editor. Used to add a surface to a selected object by
slicing off a piece of the object.
Figure 14 presents a snapshot of the WalkThrough interface.
Figure 14: WalkThrough Interface
Virtus WalkThrough is a general purpose modeler with an emphasis on
architectural design. Virtus can be used to create and manipulate threedimensional models. Objects are generated in Virtus using 2D plan views in
which (convex) polygonal outlines are created which are extruded into the third
dimension based upon separate depth controls. One of the most notable
features of Virtus is that it provides an interactive walkthrough of the current
model in which the user can move freely and observe the model from all
directions.
Another notable feature of Virtus is the ability to add features (primarily holes) to
the faces of polygonal objects.
Model Creation
Models are created using the working-plane plus extrusion method. The
elevation of the current working plane and the extrusion height are controlled
using a depth slider (which is in a separate window or in a view orthogonal to
December 30, 1994
47
the current working plane). The depth slider can also be used to change the
extrusion height of an existing object.
Virtus provides modeling aids such as a ruler for determining current cursor
position and a modeling grid. Also included are movable alignment guides
which can be used in the alignment of objects. Note that the spacing of the
modeling grid is dependent upon the current level of zoom in the active window
(which determines the spacing of the tic marks on the ruler). To get a particular
spacing, you must zoom your view in or out.
Some of the primary requirements of all Virtus models (which somewhat restrict
the flexibility of the program) are: 1) Virtus can only create convex outlines, 2)
polyhedra must not intersect (they can either be contained or entirely nonintersecting).
Model Modification
Virtus allows the standard operations such as rotation, skewing, and scaling.
Some difficulty results from the fact that the three-dimensional objects are
treated as two-dimensional outlines extruded along an orthogonal axis. This
means that objects have a direction associated with them and are not truly
general 3D shapes. Thus it is not possible to modify all aspects of the shape of
a 3D object in a view that is orthogonal to view in which the two-dimensional
outline was created. You can modify the extrusion depth, for example, but not
the shape of the outline. Objects can be rotated, skewed and scaled in the
orthogonal view but if the two-dimensional outline is rotated out of the plane of
creation, the object must be unrotated if the polygonal outline needs to be
modified.
An important feature of Virtus is that it allows the modification and editing of
specific faces of an object. This means that properties of an object (such as
color, and opacity) can be set on a face by face basis. It is also possible to add
features to the individual faces of an object. These features can range from
opaque to transparent which will have corresponding results ranging from
colored features to holes in the face.
Model Interaction/Visualization
All modifications of the model are performed in the 2D plan view (Design View).
User can select any one of 6 orthogonal views to work in (and multiple
orthogonal views may be open at any one time).
Virtus uses scroll bars to pan around the Design view and zoom in/out buttons
to move in/out in predetermined size steps. There is also a zoom-in selection
marquee where the desired portion of the Design view is framed in a marquee
and it is expanded to fill the design view.
Also provided are menu options for recentering the modeling space on the
location of the virtual observer (the eye-point in the Walk View) and to recenter
the Design view at origin.
The primary 3D visualization in Virtus is in the Walk mode. In this mode, the
user moves around the Virtus model through interaction in the Walk view.
Using a mouse (with different modifier keys available) the user can change
position relative to the model, view direction, and view orientation. By restricting
December 30, 1994
48
the allowable type of objects to be convex non-intersecting polyhedra, Virtus
has achieved a relatively fast rendering speed. Renderings in Virtus, however,
are often inaccurate, with the depth ordering of objects in error and/or their
shapes grossly distorted.
Manual
The manual is well written and easy to understand. It includes a detailed
tutorial which steps you through the creation of a basic object and explains the
manipulation of and interaction with that object. A new user could sit down and
learn Virtus in a few short hours. This is facilitated by the fact that Virtus is a
fairly straightforward program with relatively few tools to learn how to use.
Comments/Impressions
The most significant feature of Virtus is its interactive, three-dimensional walk
view. The ability to interactively move through a model and change views in
real time is a very powerful feature. Unfortunately, Virtus is hampered by the
day-to-day frustrations of bugs (e.g. the incorrect computation of containment of
small objects) and other shortcomings (in particular the lack of numeric input).
Also, dealing with the constraint that objects must be convex and non
interpenetrating makes it difficult to create arbitrary complex shapes in Virtus.
December 30, 1994
49
5. References
Alias. Alias Upfront. Alias Research Inc., Toronto, Canada.
Artifice. DesignWorkshop. Artifice Inc., Eugene, Oregon.
Autodesk. AutoCAD. Autodesk, Sausalito, California.
Auto-Des-Sys. Form-Z. Auto-Des-Sys, Columbus, Ohio.
Byte by Byte. Sculpt 3D. Byte by Byte Corp., Austin, Texas
Coryphaeus. Designer’s Workbench. Coryphaeus Software Inc., Los Gatos,
California.
Deneb. IGRIP. Deneb Robotics, Auburn Hills, Michigan.
Graphisoft. Archicad. Graphisoft San Francisco, California
Graphsoft. Minicad+4 . Graphsoft, Ellicott City, Maryland.
Gregory, R. L. (1973). Eye and Brain: the Psychology of Seeing. World
University Library, London England. 131-163
Software Systems. MultiGen. Software Systems, San Jose, California.
Virtus. Virtus WalkThrough: 3D Drawing and Visualization.. Virtus Corporation,
Cary, North Carolina.
December 30, 1994