1
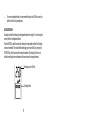
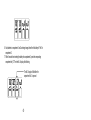
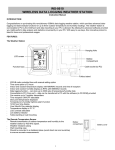
Contents Language English Page 1 TABLE OF CONTENT Topic Features Inventory Of Contents Function Keys Operating Modes Charge Mode Discharge Mode Refresh Mode Test Mode Trickle Charge Display Mode Information The Size C and D Battery Adapter Care and Maintenance Specification Warranty Information Troubleshooting Page 4 5 5 8 16 18 19 22 22 29 30 31 32 42 1 BATTERY CHARGER BC-1000U Instruction Manual INTRODUCTION: Congratulations on purchasing this intelligent charging unit which enables quick and optimum charging to ―AA‖ and ―AAA‖ rechargeable batteries. With charging, discharging, refreshing and capacity test functions as well as individual LCD displays for charging compartments; this charging unit is reliable, user-friendly and ideal for use in the home, office or on a journey. The Charging unit 2 CAUTIONS: 1. The charger is restricted to charging NiCd and NiMH rechargeable batteries only. Never use this charger for other types of batteries such as alkaline, lithium, carbon zinc or other types that are not specified. 2. The charging unit should only be used at normal indoor room conditions. 3. Place charger on a hard flat surface. 4. Always follow the charging instructions for the rechargeable battery. Observe the recommended charging current of the rechargeable batteries. Never use a charging current higher than recommended in the charging process. 5. Never use any power cable and transformer other than those originally supplied with the charging unit. 6. The rechargeable batteries may become hot during charging (especially when a high charging current is chosen). User should take extra care when taking out the batteries after charging. 7. Unplug the charging unit from the power source when not in use. 3 FEATURES: The Charging unit Charging rechargeable batteries in various currents (200, 500, 700 or 1000 mA). The charging current can be set up to 1500 or 1800 mAh when two batteries are charged. Fast charging – 70 mins to charge up 2000 mAh batteries Individual LCD display for all compartments Charging both ―AA‖ and ―AAA‖ rechargeable batteries simultaneously Overheat detection to protect rechargeable batteries from over-charging Minus delta voltage (-dV) detection for charge termination Damaged batteries detection Discharge mode (first discharging and then charging) to remove memory effect of rechargeable batteries Refreshing old rechargeable batteries by discharging/ charging cycles Test function to check the capacities of rechargeable batteries Charging/ Discharging functions can be launched independently and simultaneously to each rechargeable battery in the compartments Various display modes during charging/ discharging – the charging current (in mA), time elapsed (in hh:mm), the terminal voltage (in V) and accumulated capacities (in mAh or Ah) 4 INVENTORY OF CONTENTS 1. Charging unit 2. Transformer 3. Size ―C‖ battery adapter & Size ―D‖ battery adapter (Total of 4 Adapters) 4. Holding Bag 5. ―AA‖ rechargeable battery (4) & ―AAA‖ rechargeable battery (4) 6. Instruction Manual FUNCTION KEYS: There are three easy-to-use function keys and four number keys on the charging unit: Compartment Number keys MODE key CURRENT key DISPLAY key 5 Compartment Number key Press and release the Number key to select a particular battery compartment for charge modes and/or display mode adjustment. MODE key Hold the MODE key for about 1 second to activate the mode change. Press and release the MODE key to toggle between the ―Charge‖, ―Discharge‖, ―Test‖ and ―Refresh‖ mode. To change the operating mode for an individual rechargeable battery, first press the corresponding NUMBER key then press the MODE key. DISPLAY key Press and release the DISPLAY key to view: Charging current (in mA), Time elapsed (in hh:mm), the Terminal voltage (in V) and Accumulated capacities (in mAh or Ah) during the charging or discharging process. To change the display content of an individual rechargeable battery, first press the corresponding NUMBER key then press the DISPLAY key. CURRENT key Press and release the CURRENT key to select the amount of current to be applied (within the first 8 seconds after batteries are inserted) in different operating modes (also see ―Start 6 charging the rechargeable batteries‖ below). To change the charging current of an individual rechargeable battery, first press the corresponding NUMBER key then press the CURRENT key (within the first 8 seconds after batteries are inserted). OPERATING MODES OF THE CHARGING UNIT This powerful charging unit provides the following operating modes: a. Charge the rechargeable battery (CHARGE) – to charge the rechargeable battery, automatically switches to trickle charge after the rechargeable battery is full. b. Discharge then charge the rechargeable battery (DISCHARGE) – to discharge the rechargeable battery then charge it to minimize the memory effect. c. Refresh the rechargeable battery (REFRESH) – to refresh the rechargeable battery to its maximum capacity by charging and discharging the rechargeable battery repeatedly until no further increase in the capacity is estimated. For old rechargeable batteries or those have not been used for a long time, refreshing may bring the rechargeable battery back to the optimum condition. d. Check the rechargeable battery capacity in mAh/ Ah (TEST) 7 CHARGE MODE Charging at 200 mA is the default-operating mode of the charging unit. A charging current up to 1500 or 1800 mA may be set by the pressing the CURRENT key when only one or two rechargeable batteries are charged, using only compartment 1 and compartment 4. When charging three or four rechargeable batteries at the same time, user may select a charging current of 200, 500, 700 or 1000 mA. NOTE: The highest charging current will be in compartment 1. The other compartments cannot be higher. When charging two batteries at compartment 1 & 4 – max. charging current: 1800 mA When charging two batteries at compartment 1 & 2 – max. charging current: 1000 mA 8 When charging four batteries – max. charging current: 1000 mA When charging two batteries at compartment 2 & 3 – max. charging current: 1000 mA The estimated time of charging by various charging current is tabulated in Table 1. NOTE: It is acceptable to charge AA and AAA batteries at the same time. 9 Table 1. Charging Time with various charging current Size of battery Battery Capacity Charging current selected (mA) 1800 1500 1000 AA 2600 mAh 700 500 200 1800 1500 1000 AA 2000 mAh 700 500 200 700 AAA 1000 mAh 500 200 10 Estimated charging time ~80 min ~100 min ~2 hr 30 min ~3 hr 30 min ~5 hr ~12 hr ~70 min ~80 min ~2 hr ~3 hr ~4 hr ~10 hr ~70 min ~1 hr 40 min ~4 hr NOTE: Always observe the recommended maximum charging current of the rechargeable batteries. In general, 200 mA is a recommended charging current if rapid charging is not necessary. It is definitely safe and optimum to the life of the rechargeable batteries. It may be necessary to charge and discharge new rechargeable batteries several times in the beginning before the optimum capacity of the rechargeable batteries can be obtained. Use the "Refresh" mode after new rechargeable batteries have been used under load and charged several times in order to achieve the optimum battery capacity. When the transformer has been plugged into the power source, the version number of the charger (for example ―37‖) will be displayed first. Then all the segments will light up momentarily and the ―null‖ sign will be shown before batteries are placed. If damaged batteries or batteries below 0.9V, are placed into the charging unit, the charger will also show ―null‖ on LCD. “null” displayed - No battery or damaged battery is placed to the charging unit 11 START CHARGING THE RECHARGEABLE BATTERIES Once a rechargeable battery is inserted after the transformer has been plugged into the power source, the battery voltage (for example, ―1.39V‖) will be displayed for 4 seconds. Then ―200 mA Charge‖ (default mode) will be shown on LCD for another 4 seconds, indicating that charging with 200 mA is to be started if no alteration in setting is made. Select the operating mode by the MODE key. “Charge”, “Discharge”, “Refresh” and “Test” mode may be chosen within this 8-second time after inserting the batteries. Then within 8 seconds from pressing the last key, select the charging/discharging current by pressing the CURRENT key. NOTE: Hold the MODE key for about 1 second to activate the mode change. Press and release the MODE key to select between the ―Charge‖, ―Discharge‖, ―Test‖ and ―Refresh‖ mode. There is an 8-second time allowed for choosing further functions after each key pressing. If no keys are pressed, the LCD will blink one time to indicate the end of setting. The current can no longer be changed during the process and the selected mode will begin. 12 Charging current: 200 mA After 8 seconds from the last key press, the LCD will blink once to indicate the setting is confirmed and the selected mode is activated Charge Mode During charging, the different displays- Charging current (in mA), Time elapsed (in hh:mm), Terminal voltage (in V) and Accumulated capacities (in mAh or Ah) may be toggled and selected by pressing the DISPLAY key (refer Table 4). After the rechargeable battery is fully charged, ―Full‖ will be shown on the display and the user may take out them at this time. If the rechargeable batteries are left in place in the compartments, trickle charging will start. The trickle charging current is around 5% of the selected charging current to keep the rechargeable batteries full. 13 “Full” sign is shown -The battery is fully charged NOTE: The current cannot be altered once the setting has been confirmed in the initial stage. This prevents the user from changing the current setting accidentally while setting other rechargeable batteries. If one wants to change the applied current afterward, the rechargeable batteries must be taken out and inserted again. The current setting of the first charging compartment restricts the maximum charging current of the other rechargeable batteries. For instance, if the first compartment rechargeable battery is set to charge at 700 mA, then the second, third and fourth rechargeable batteries can be only set to charging at a maximum current of 700 mA. 14 Therefore, place the battery with the highest expected charging current in Compartment 1 first. To release the restriction of setting charging current, user must take out all four rechargeable batteries from the charging unit. To change the operating mode during charging, one can press the MODE key (for selecting all rechargeable batteries) or NUMBER key then MODE key (for selecting individual rechargeable battery). 8 seconds after the last key press the LCD will blink one time to indicate the end of changing. When overheating conditions occur (over about 127°F (53°C)), usually due to too a high charging current selected), the charging will be stopped immediately and the display will read ―000 mA‖, the charging process will only resume once the temperature of the rechargeable batteries drops to a safe level. If overheating conditions continue to occur, the rechargeable batteries must be taken out to cool down and then charge at a lower current. When the battery is overheated the charging will cease automatically. “000 mA” will be displayed. 15 For a new rechargeable battery it is recommended to charge it with 200 mA current to recondition it from the long storage status. DISCHARGE MODE Discharge mode will first discharge the rechargeable battery then charge it. It is for removing the memory effects of rechargeable batteries. Press the MODE key within 8 seconds after inserting the rechargeable batteries; the Discharge mode can be selected. Then select different discharging current (see Table 2) by pressing the CURRENT key, within 8 seconds after inserting the batteries. (The display will blink once to indicate the setting has been confirmed and the current cannot be changed afterward.) Discharging current: 250 mA Discharge Mode 16 NOTE: The discharging current is always set to be half of the charging current whose upper limit is 1000 mA (see Table 2). Therefore the user is recommended to carefully select the discharging current so that the charging current afterward will not be too high. Hold the MODE key for about 1 second to activate the mode change. Press and release the MODE key to select the ―Charge‖, ―Discharge‖, ―Test‖ and ―Refresh‖ mode. Table 2. DISCHARGE MODE Current User-selected Discharging 100 mA current Thereafter Charging current 200 mA 250 mA 350 mA 500 mA 500 mA 700 mA 1000 mA Finally, batteries will be fully charged in discharge mode and ―Full‖ will be displayed. If the user presses the DISPLAY key at this time, "charge" icon instead of "discharge" icon will be displayed. 17 REFRESH MODE Old rechargeable batteries and those that have not been used for a long time require refreshing. This process will recover the optimum capacity of the rechargeable batteries. Press the MODE key within 8 seconds after inserting the rechargeable batteries; the Refresh mode can be selected. Refresh mode will start with discharging the rechargeable battery, then charging it. The repeated discharging and charging cycles will be launched until no further increase in the measured capacities is estimated or 20 cycles, whichever comes first. Discharging current: 250 mA Refresh mode (the battery is being discharged) 18 NOTE: Press the MODE key within 8 seconds after inserting the rechargeable batteries; the Refresh mode can be selected. (Hold the MODE key for about 1 second to activate the mode change. Press and release the MODE key to select the ―Charge‖, ―Discharge‖, ―Test‖ and ―Refresh‖ mode.) Select different discharging current by pressing the CURRENT key (see ―Note‖ in Discharge mode and Table 2), within 8 seconds after inserting the batteries. (Or the display will blink once to indicate the end of setting and the current cannot be changed afterward.). It may take up to several days to finish the refreshing process, depending on the selected discharging current. The maximum refresh current is 1000 mA and is not affected by the number of rechargeable batteries inserted. TEST MODE In the Test mode the rechargeable batteries will first be fully charged and then discharged to determine the capacities. Finally, the rechargeable batteries are charged up again and the capacity in (mAh) or (Ah) will alternate every 3 seconds with the FULL sign. 19 Press the MODE key within 8 seconds after inserting the rechargeable batteries; the Test mode can be selected. (Hold the MODE key for about 1 second to activate the mode change. Press and release the MODE key to select the ―Charge‖, ―Discharge‖, ―Test‖ and ―Refresh‖ mode) The Charging current in (mA) Test mode NOTE: After selecting the Test mode the user may select different charging currents in the Test mode by pressing the CURRENT key, within 8 seconds after the batteries are inserted. The discharging current will be half of the selected charging current (see Table 3). 20 Table 3. TEST MODE Current User-selected Charging 200 mA current Thereafter Discharging 100 mA current 500 mA 700 mA 1000 mA 250 mA 350 mA 500 mA The maximum charging current is 1000 mA and is not affected by the number of rechargeable batteries inserted. After the test mode is finished, the display will shift between the ―Full‖ sign and the battery capacity (in mAh or Ah) automatically in 3-second intervals until the rechargeable batteries are removed. The user can switch to other displays by pressing the DISPLAY key. Battery capacity displayed in (mAh) as the checking is finished in Test mode. 21 TRICKLE CHARGING After the rechargeable battery is fully charged in any of the operating modes, the charger will give a small amount of current to the rechargeable batteries to maintain the fully charged level. This mode is automatically launched after rechargeable batteries are fully charged and kept in the charging unit. The signal ―Full‖ will be displayed on the LCD. DISPLAY MODE INFORMATION The user can use different display modes to monitor the rechargeable battery condition during the different operations (see below figure and Table 4 to 7). 22 Different display modes are exhibited: Charging current, Time, Voltage and Capacity Different operating modes 23 Table 4. Various displays in Charge Mode Various displays (toggled by pressing DISPLAY key) Stage in *Time Capacity Charge mode Voltage (V) Current (mA) (hh:mm) (mAh/ Ah) During Charging charging current Instantaneous Charging time Accumulated Full stage Trickle Battery voltage elapsed capacity charging current Capacity: Milliamp hours: mAh is the capacity of the battery or the amount of charge added to a battery. If a 2600mAh capacity battery is already half full when you charge it you will not add 2600mAh of capacity to the battery. Amp hours: Ah is the capacity of the battery or the amount of charge added to a battery. When the battery charger shows values above 1999mAh, it changes to Amp hours. Due to the limited space on the four displays the charger cannot display over 1999mAh. When the mAh 24 (Milliampere hour) reaches 2000 the display switches to Ah (Ampere hour) by moving the decimal point. A mAh is 1/1000 of an Ah. Example: 2.29Ah and 2.34 Ah would be 2290mAh and 2340 mAh. Table 5. Various displays in Discharge Mode Various displays (toggled by pressing DISPLAY key) Stage in Capacity Discharge mode Voltage (V) Current (mA) *Time (hh:mm) (mAh/ Ah) During Discharging Discharging time Capacity during discharging current elapsed discharging Instantaneous During charging Battery voltage Charging current Charging time Accumulated elapsed capacity Trickle charging Full stage current 25 Table 6. Various displays in Refresh Mode Various displays (toggled by pressing DISPLAY key) Stage in Refresh Capacity mode Voltage (V) Current (mA) *Time (hh:mm) (mAh/ Ah) During Instantaneous Discharging Discharging time Capacity during discharging Battery voltage current elapsed discharging processes During charging processes Instantaneous Battery voltage Charging current Charging time elapsed Full stage Instantaneous Battery voltage Trickle charging current Elapsed time of last discharging 26 Capacity determined in last time discharging Maximum battery capacity determined in discharging Table 7. Various displays in Test Mode Various displays (toggled by pressing DISPLAY key) Stage in Test Capacity mode Voltage (V) Current (mA) *Time (hh:mm) (mAh/ Ah) Charging time During charging Charging current ―--- mAh‖ elapsed During discharging During 2nd charging Full stage Discharging current Instantaneous Battery voltage Discharging time elapsed Charging current 2nd charging time elapsed Trickle charging current Discharging time elapsed 27 ―--- mAh‖ Capacity of the battery determined in discharging Capacity of the battery determined in discharging NOTE: *The timer will be resumed and counted from 00:00 again after the time elapsed is longer than 20 hours. (For example, 1:45 will be shown after the battery has been refreshed for 21 hr and 45 min.) In case the power source is interrupted or terminated when the charger is being operated, the operational mode will automatically be set to ―Charge mode at 200 mA‖ to charge up the battery once the power source is back to normal, regardless the operating mode (Charge, Discharge, Refresh or Test) which has been selected by user before. THE SIZE C AND SIZE D BATTERY ADAPTERS (FREE ACCESSORY) The battery adapters are used for connecting the AA battery to devices requiring Size C or D batteries. To apply the adapter: 1. Install the AA battery into the Size C or Size D adapter as below. 28 The AA battery used with the Size C adapter 2. The AA battery used with the Size D adapter (it is required to place the battery into the “C” adapter first and then the “D” adapter) Ensure the polarity is correct and the assembling condition is good. 29 NOTE: Stop using the adaptor when there are any cracks or damages observed in the adaptor, and in case an undesired smell comes out while applying the adapter in certain kinds of battery operated devices. CARE AND MAINTENANCE: Extreme temperatures, vibration and shock should be avoided as these may cause damage to the unit Place charger on a hard flat surface. When cleaning the displays and casings, use a soft damp cloth only. Do not wet the exposed metal part of the charging unit. Do not use solvents or scouring agents as they may mark the LCD and casing. Do not spill water to the charging unit. Do not make any repair attempts to the units. Return it to its original point of purchase for repair by a qualified engineer. Opening and tampering with the units may invalidate its guarantee. Do not expose the unit to extreme and sudden temperature changes, this may lead to damage to the electronic parts in the unit. 30 SPECIFICATIONS: Input voltage for AC/DC adapter: Charging current range: Max charging capacity (capacity of rechargeable batteries): Dimensions (H x W x D): 100-240 VAC but MUST have the proper adapter. Twisting prongs on a/c cord will only damage the unit. 200 mA - 1800 mA 3000 mAh 5 x 3 x 1.5‖ (129 x 75 x 37.2 mm) LIABILITY DISCLAIMER: The manufacturer and supplier cannot accept any responsibility for any improper or incorrect use and any consequences occur. Any performance of repairs or alternations by someone other than the original supplier will invalidate the warranty. This product is designed to be used only by people who have read and understood this instruction manual. The specifications of this product may change without prior notice. This product is not a toy. Keep out of the reach of children. No part of this manual may be reproduced without written consent of the manufacturer. 31 WARRANTY INFORMATION La Crosse Technology, Ltd provides a 1-year limited warranty on this product against manufacturing defects in materials and workmanship. This limited warranty begins on the original date of purchase, is valid only on products purchased and used in North America and only to the original purchaser of this product. To receive warranty service, the purchaser must contact La Crosse Technology, Ltd for problem determination and service procedures. Warranty service can only be performed by a La Crosse Technology, Ltd authorized service center. The original dated bill of sale must be presented upon request as proof of purchase to La Crosse Technology, Ltd or La Crosse Technology, Ltd’s authorized service center. La Crosse Technology, Ltd will repair or replace this product, at our option and at no charge as stipulated herein, with new or reconditioned parts or products if found to be defective during the limited warranty period specified above. All replaced parts and products become the property of La Crosse Technology, Ltd and must be returned to La Crosse Technology, Ltd. Replacement parts and products assume the remaining original warranty, or ninety (90) days, whichever is longer. La Crosse Technology, Ltd will pay all expenses for labor and materials for all repairs covered by this warranty. If necessary repairs are not covered by this warranty, or if a product is 32 examined which is not in need or repair, you will be charged for the repairs or examination. The owner must pay any shipping charges incurred in getting your La Crosse Technology, Ltd product to a La Crosse Technology, Ltd authorized service center. La Crosse Technology, Ltd will pay ground return shipping charges to the owner of the product to a USA address only. Your La Crosse Technology, Ltd warranty covers all defects in material and workmanship with the following specified exceptions: (1) damage caused by accident, unreasonable use or neglect (including the lack of reasonable and necessary maintenance); (2) damage occurring during shipment (claims must be presented to the carrier); (3) damage to, or deterioration of, any accessory or decorative surface; (4) damage resulting from failure to follow instructions contained in your owner’s manual; (5) damage resulting from the performance of repairs or alterations by someone other than an authorized La Crosse Technology, Ltd authorized service center; (6) units used for other than home use (7) applications and uses that this product was not intended or (8) the products inability to receive a signal due to any source of interference. This warranty covers only actual defects within the product itself, and does not cover the cost of installation or removal from a fixed installation, normal set-up or adjustments, claims based on misrepresentation by the seller or performance variations resulting from installation-related circumstances. 33 LA CROSSE TECHNOLOGY, LTD WILL NOT ASSUME LIABILITY FOR INCIDENTAL, CONSEQUENTIAL, PUNITIVE, OR OTHER SIMILAR DAMAGES ASSOCIATED WITH THE OPERATION OR MALFUNCTION OF THIS PRODUCT. THIS PRODUCT IS NOT TO BE USED FOR MEDICAL PURPOSES OR FOR PUBLIC INFORMATION. THIS PRODUCT IS NOT A TOY. KEEP OUT OF CHILDREN’S REACH. This warranty gives you specific legal rights. You may also have other rights specific to your State. Some States do no allow the exclusion of consequential or incidental damages therefore the above exclusion of limitation may not apply to you. For warranty work, technical support, or information contact: La Crosse Technology, Ltd 2817 Losey Blvd. S. La Crosse, WI 54601 Phone: 608.782.1610 Fax: 608.796.1020 Question? Instructions? Please visit: 34 http://www.lacrossetechnology.com/support/home.php (Warranty work) [email protected] (information on other products) web: www.lacrossetechnology.com/bc1000 35 Quick Start for charging battery Place battery in charger, plug it in, and let it sit for 10 hours. Note: The charger has many features like ―conditioning‖ batteries, which means discharging and charging. It is not recommended to condition batteries until after they have been charged and used 10 times. Overview of Using Modes and Current Options ***Follow these steps left to right Steps Plug in Place Select batteries in mode… charger Hold for 5-10 seconds to activate Select Display To change Charge Blinks or mode to select during current charging level 36 To Change amount of charge or current repeat all steps from beginning notes Select: Charge Discharge Refresh Test You have 8 seconds to select mode Current 200 to 1000, varies by number and type Indicate no more chance to change You have 4 seconds Press de MODE key (for all) or NUMBER key then MODE key for individual battery You have 4 seconds Charge 2 batteries at charging current of 1500 or 1800 mA 1. Plug the transformer into the power source. 2. Insert the two batteries within 8 seconds to compartments 1 & 4 only: 37 Charging current can be set at 1500 or 1800mA when only two batteries are charged at compartment 1 and 4. 3. ―Charge‖ will be displayed in the LCD as Charge mode is the default mode. 4. Within 8 seconds after inserting the batteries, select the charging current at 1500 or 1800 mA by pressing the CURRENT key. 5. 8 seconds after the last key press, the display will blink once to indicate that the time allowed for setting is over and the charging will start: This display will blink once and charging starts 38 Once charging has started, the current can no longer be changed. The user can then change the current only by taking out all the batteries out and repeating the above steps. 6. ―Full‖ sign (or trickle charge current) will be displayed once the battery is fully charged. Charge four batteries at different modes at the same time Example: Two batteries at charge mode, one at discharge mode and one at test mode. 1. 2. 3. 4. Plug the transformer into the power source. Insert the two batteries for charging within 8 seconds to compartments 1 and 2. ―Charge‖ will be displayed in the LCD as Charge mode is the default mode. Within 8 seconds after inserting the two batteries, select the charging current at 200, 500, 700 or 1000 mA by pressing the CURRENT key. 5. 8 seconds after the last key press, the display will blink once to indicate that the time allowed for setting is over and the charging will start. Once charging has started, the current can no longer be changed. 39 6. Now, batteries in compartment 1 and 2 are being charged. Insert the third battery for ―Test‖ in compartment 3. 7. Within 8 seconds from inserting the battery into compartment 3, press the corresponding compartment key ―3‖. Then the No. 3 display will be flashing. The No. 3 display will flash after the compartment No. 3 is pressed 40 Within 8 seconds from pressing the compartment key, press and hold the MODE key for 2 seconds then press and release the MODE key to select the ―Test‖ mode for compartment 3. NOTE: Press the compartment key to select a particular compartment before pressing the MODE key, otherwise, the mode of all the compartments will be changed at the same time. 8. Within the 8 seconds after the last key press, select the charging current in the test mode: 200, 500 or 700 mA NOTE: Although the individual bays are operated in different modes, the charging current of the second, third and fourth battery placed into the charger cannot be set higher than that of the first placed battery. 9. 8 seconds after the last key press, the display will blink once to indicate that the time allowed for setting is over and the Test mode will start. Once charging has started, the current can no longer be changed. 10. Now the batteries in compartments 1 and 2 are being charged, while the battery at compartment 3 is undergoing Test mode. Insert the fourth battery for ―Refresh‖ into compartment 4. 11. Within 8 seconds of placing a battery into compartment 4, press the corresponding compartment key ―4‖. Then the No. 4 display will be flashing. 41 The No. 4 display will flash after the compartment No. 4 is pressed 12. 13. 14. 15. 16. Within 8 seconds, press and hold the MODE key for 2 seconds then press and release the MODE key to select the ―Refresh‖ mode. Within 8 seconds from the last key press, select the refreshing current in the test mode: 100, 250 or 350 mA. 8 seconds after the last key press, the display will blink once to indicate that the time allowed for setting is over and the Refresh mode in compartment 4 will start. Once charging has started, the current can no longer be changed. Now, batteries in compartment 1 and 2 are being charged, while batteries in compartment 3 and 4 are undergoing Test and Refresh mode respectively: During the operation, press and release the DISPLAY key, to view various display modes. ―Full‖ sign (or trickle charge current) will be displayed once the battery is fully charged. 42 Different display modes are exhibited: Charging current, Time, Voltage and Capacity Different operating modes If you must switch batteries in your product before they die what mode would you use to charge? --Refresh and charge…if you have several days --in a hurry just regular charge mode How do you check battery condition? 43 Mode—test charge… Display—Use battery rating…re-chargeable never go whole way so for Voltage check for a 1.5 you are looking at 1.2 to 1.4 For capacity on 2400 looking for about 1900 to 2100 (first time the capacity will be less like about 1700 to 1800). Why after I charge the battery to Full, remove, and test is not longer says Full? When you replace a charged battery it goes to trickle, and it can take from 1 to several hours to get back to a full charge depending on the condition of your battery. What is the charger capacity? Maximum charging capacity is 3000 mAh My batteries are getting warm. It is common for batteries to get warm will charging. The charger has a built in temperature sensor which will stop the charging cycle if it has become too hot. Charging may resume when the battery has cooled. Allow batteries to cool before placing into a product to be used. 44 I cannot change modes. Within 8 seconds of installing a battery, press and hold the MODE button for 5-10 seconds to change modes. Why does my display flash a number? Your station will flash when first plugged in. If it continues to flash your a/c cord may be defective. What type of batteries can I charge? NiMH (Nickel Metal Hydride) or NiCd (Nickel Cadium) rechargeable batteries only may be used in this product. Charging other types of batteries may result in failure of the charger. My battery reads “Null”. This charger requires at least .9v in the battery in order to charge it. If the battery is depleted below that point, you will not be able to charge it on this battery charger. You may want to invest in a small charger/holder that will bring the battery back above .9v when attached for 20-30 seconds. The battery can then be charged in our charger. 45 Why do my new batteries not show full capacity? Due to storage and shipping times, you should charge your batteries fresh out of the package. All rechargeable batteries need to be used in a product ―under load‖, then charged, used, charged, at least 5 times or more to reach full capacity. Batteries sitting in storage may lose some charge over time. It is not recommended to ―condition‖ batteries until after they have been charged and used 10 times. As you use your batteries they will gain greater capacity and last longer. It is common for your batteries to run down quickly at first. Storing batteries Store between 40 and 80 degrees F. Do not refrigerate. Batteries will self-discharge if left unused. If unused for 30-60 days they may completely deplete of power after long storage. 46 NiMh batteries should be stored fully charged and recharged every 30 days to keep in peak capacity. NiCd batteries should be stored fully discharged. Do not ―store‖ batteries in the charger. How do you charge the smaller AAA battery? Just place it in the smaller tabs in the charger. All rights reserved. This handbook must not be reproduced in any form, even in excerpts, or duplicated or processed using electronic, mechanical or chemical procedures without written permission of the publisher. This handbook may contain mistakes and printing errors. The information in this handbook is regularly checked and corrections made in the next issue. We accept no liability for technical mistakes or printing errors, or their consequences. All trademarks and patents are acknowledged. 47