1
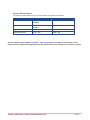
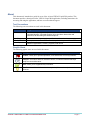
VISUAL Liquid Web Commonwealth of Virginia Named User User Manual Document Version: 3 Software Version: 2.2.0 Published: October 2009 5000 Bradenton Ave ● Dublin, OH 43017 USA Voice: 800-777-4283 ● Fax: 614-791-7695 Email: [email protected] Avizent © 2008 Avizent © 2009 ●800-777-4283 ● www.AvizentRisk.com Page 1 Contents Contents.............................................................................................................................................................. 2 VISUAL Liquid Web COV Named User User Manual ................................................................................. 3 Disclaimer of Warranty .................................................................................................................................................3 Trademarks ....................................................................................................................................................................3 Copyrights .....................................................................................................................................................................3 System Requirements ....................................................................................................................................................4 About .................................................................................................................................................................. 5 Text Conventions...........................................................................................................................................................5 Graphic Alerts ...............................................................................................................................................................5 Getting Started................................................................................................................................................... 6 Accessing VISUAL Liquid Web ...................................................................................................................................7 Closing the VISUAL Liquid Web Application .............................................................................................................9 Accessing Technical Support ........................................................................................................................................9 Navigating VISUAL Liquid Web................................................................................................................... 10 Menus ..........................................................................................................................................................................11 File........................................................................................................................................................................11 Edit .......................................................................................................................................................................11 View .....................................................................................................................................................................11 Toolbar ........................................................................................................................................................................12 Standard Buttons .........................................................................................................................................................12 Content Pane................................................................................................................................................................13 Left Pane......................................................................................................................................................................13 Example Document Cycle Workflow............................................................................................................. 14 Using VISUAL Liquid Web............................................................................................................................ 15 Viewing/Updating the EARs you have to Review ......................................................................................................15 Open the EAR ......................................................................................................................................................16 Named User – Reviewer Ownership ...........................................................................................................................17 Data Entry Features .....................................................................................................................................................17 Required Fields............................................................................................................................................................19 Submitting an EAR......................................................................................................................................................20 Closing an EAR ...........................................................................................................................................................21 Printer Troubleshooting........................................................................................................................................24 Closing Adobe Reader window............................................................................................................................24 Deleting an EAR..........................................................................................................................................................25 Entering a New EAR ...................................................................................................................................................26 Entering a New EAR ...................................................................................................................................................26 .....................................................................................................................................................................................30 Agency Control and assignment..................................................................................................................................31 Automatic emails to Named Users ..............................................................................................................................33 Refreshing your Folder Contents.................................................................................................................................34 Index............................................................................................................................................................................35 Avizent © 2009 ●800-777-4283 ● www.AvizentRisk.com Page 2 VISUAL Liquid Web COV Named User User ManualDisclaimer of Warranty Avizent™ and its affiliates are committed to providing the best quality product possible, but specifically disclaim warranty of any kind and shall not be liable for loss of profit or any other damages. The Avizent software, its modules and the contents of this manual are provided as is and are subject to change without prior notice. The information contained in this document represents the current views of Avizent on the issues discussed as of the date of publication. This manual describes available modules and subapplications for Avizent products, including items which may not be included in the base delivery model, which may be optional or which may be separately priced. Because Avizent must respond to changing market conditions, it should not be interpreted to be a commitment on the part of Avizent, and Avizent cannot guarantee the accuracy of any information presented after the date of publication. Trademarks The VISUAL Liquid Web software product and the VISUAL Liquid Web logo are trademarks of Avizent in the United States and/or other countries. All rights reserved. All other product names and services used throughout this manual are trademarks of their respective companies. Copyrights Complying with all applicable copyright laws is the responsibility of the user. Without limiting the rights under copyright, no part of this document may be reproduced, stored in, or introduced into a retrieval system, or transmitted in any form or by any means (electronic, mechanical, photocopying, recording, or otherwise), or for any purpose, without the express written permission of Avizent. Avizent may have patents, patent applications, trademarks, copyrights, or other intellectual property rights covering subject matter in this document. Except as expressly provided in any written license agreement from Avizent, the furnishing of this document does not give you any license to these patents, trademarks, copyrights, or other intellectual property. © 2009 Avizent. All rights reserved. Any example companies or persons depicted herein are fictitious. No association with any real company or persons is intended or should be inferred. Avizent © 2009 ●800-777-4283 ● www.AvizentRisk.com Page 3 System Requirements The following table outlines the system requirements for optimal performance. Item Minimum Recommended Software * Citrix ICA client for Windows Citrix ICA client for Windows Internet Browser IE 6 SP2, SSL 2 and 3 enabled IE 6 SP2, SSL 2 and 3 enabled Connection 56 KB Broadband Screen Resolution 1024 x 768 1024 x 768 *See the companion guide “VISUAL Liquid Web - Citrix client Installation” for details on installing Citrix. Citrix allows you to use complex hosted applciations over the internet with only your computer and an internet connection Avizent © 2009 ●800-777-4283 ● www.AvizentRisk.com Page 4 About This document is intended as a guide for users of the Avizent VISUAL Liquid Web product. This document provides a description of the VISUAL Liquid Web application, including instructions for accessing and using the application, and how to reach technical support. Text Conventions The following text conventions are used in this document. Element bold text Usage Characters that you type exactly as shown; menus and menu commands, command buttons, command prompts; list or drop-down boxes titles and selections; tab and dialog box titles and options Italic Font Variables for which you supply a specific value; information that you supply ALL CAPITALS Acronyms, names of certain commands, keys on the keyboard Initial Capitals Names of applications, screens, programs, field names Graphic Alerts The following graphic alerts are used in this document. Element Description Caution—Alerts you to potential problems, such as data loss or security breaches. Example—Provides a hands-on interactive lesson, or indicates material that helps clarify the current discussion. Note—Alerts you to supplementary information. Tip—Provides additional information that may be helpful to task completion such as shortcuts. Avizent © 2009 ●800-777-4283 ● www.AvizentRisk.com Page 5 Getting Started VISUAL Liquid Web is an electronic forms processing and data capture system. VISUAL Liquid Web ensures that all the information necessary to submit a COV Employer’s Accident Report (EAR) is captured on its easy-to-use screens. This feature ensures that all EARs submitted have the minimum state required information completed. VISUAL Liquid Web 2.2 integrates directly with the VISUAL Claims Studio™ software suite, so there is never a need to re-key information. Field and document level validation ensures that documents adhere to the configured document specific rules. As an early innovator in the design of web site submission of electronic event and first reporting we formed EFROI.COM™. This online hosted service allows clients to electronically capture Event and State First Reports of Injury data over the web. EFROI.COM is the simple, fast, and cost-effective way to file events. VISUAL Liquid Web users will also enjoy the ability to generate and print forms. Avizent © 2009 ●800-777-4283 ● www.AvizentRisk.com Page 6 Accessing VISUAL Liquid Web 1. In your Internet browser’s address field, type https://apps.frankgates.com/vaear-hr and press Enter. Result: The Visual Liquid Web Intake home page displays. 2. Enter the User name and Password supplied to you, then click the Log In button in the box on the upper left of the screen Result: The Applications box displays Avizent © 2009 ●800-777-4283 ● www.AvizentRisk.com Page 7 3. Click Employee Accident Report in the Applications box. Result: The Citrix logon script will run, followed by the appearance of the VISUAL Liquid Web log in screen. 4. Click Login on the Login Screen. Note: You do not need to fill the “Password” field. Skip this prompt and click on the Login button. Avizent © 2009 ●800-777-4283 ● www.AvizentRisk.com Page 8 Result: VISUAL Liquid Web appears. If you have problems logging in, contact [email protected] or 800-727-4283 for assistance. Closing the VISUAL Liquid Web Application To exit the application, on the File menu, select Exit. The application will close. If you have open EARs with unsaved changes, the system will prompt you to save the changes before closing. Accessing Technical Support Technical support for this Avizent product is available through the Help Desk ([email protected] or 800-727-4283). Avizent © 2009 ●800-777-4283 ● www.AvizentRisk.com Page 9 Navigating VISUAL Liquid Web Once you are logged in, VISUAL Liquid Web’s home screen displays. The primary navigation for VISUAL Liquid Web is found in the toolbar and in the left pane. The larger Content pane is on the right. You can also navigate using the menus. Avizent © 2009 ●800-777-4283 ● www.AvizentRisk.com Page 10 Menus VISUAL Liquid Web contains four menus: File, Edit, View, and Help. Each menu’s options are explained below. File The File menu contains the following options: ■ New Document—Enables you to open a new COV EAR. ■ Preferences—Enables you to view and adjust reviewer alert preferences. ■ Exit—Closes the VISUAL Liquid Web application. Edit The Edit menu contains the following options. These options are only available when an EAR is open. ■ Cut—Deletes the highlighted text and saves a copy of it on the clipboard. ■ Copy—Copies the highlighted text to the clipboard. ■ Paste—Pastes the text previously cut or copied to the clipboard. ■ Find—Searches the open EAR for the text you specify. View The View menu contains the following options: ■ Document Folders—Enables you to view the following folder’s contents. ■ Draft—Displays a summary of the EARs that you have saved to the Draft folder. ■ For Review—Displays a summary of the EARs that are pending review. ■ View Open Documents—Displays a listing of the EARs that you currently have open. Avizent © 2009 ●800-777-4283 ● www.AvizentRisk.com Page 11 Toolbar The toolbar contains buttons which are shortcuts to various commands. The table below lists the standard toolbar buttons in VISUAL Liquid Web. Button Description New Document—Enables you to enter a new EAR into the system. View Open—Displays the tabs for all the open EARs. The most recently viewed EAR is displayed on screen. Home—Takes you back to the initial startup screen History—Enables you to review prior claim submissions completed with your account. Standard Buttons In addition to the toolbar buttons, other buttons are available throughout the application. Not all buttons are available on all screens. The following table contains a listing of all of the buttons available in the application. Button Description Delete—Deletes the EAR file. Details—Displays EAR details, such as submission date, subject, claim number, and submitted by. Edit—Enables you to update the information displayed on the EAR. Print—Generates an electronic copy (.PDF) of the EAR which can be printed. Refresh—Retrieves the latest information from the database and forces a refresh of the data being viewed. Save—Saves the information entered on the EAR. You will be prompted to enter a Subject Name for the document. Submit—Submits the completed EAR to the system designated reviewer. Support—Sends a support inquiry email to product support. View—Displays requested item. Avizent © 2009 ●800-777-4283 ● www.AvizentRisk.com Page 12 Content Pane The Content Pane will display the Employer’s Accident Report. Left Pane The left pane contains the following areas. ■ User Information—Displays the current day’s date and your application user name. ■ Folders—Contains the Draft and For Review folders and displays the number of EARs in each folder. ■ ■ Draft—Contains those EARs that are “in process.” These are EARs which have been created by the Named User and saved without being “Submitted.” ■ For Review—Contains EARs that have passed initial validation requirements, but may need some further information or oversight before final submission. Anonymous users will submit drafts to Named Users for review. Named Users will then review the draft and submit it for claims processing. If a Named User enters a new EAR and submits it, it will display in his/her “For Review” folder. Validation Results—Contains a listing of the data fields which are required for the COV EAR. This list is updated as you enter information, so that you can see ata-glance which required fields still need to be completed. Tip—You can also double-click on an item in the Validation Results field’s list to jump to its entry field in the EAR. Avizent © 2009 ●800-777-4283 ● www.AvizentRisk.com Page 13 Example Document Cycle Workflow Anonymous user enters claim into VISUAL Liquid Web using COV EAR. Email notification is sent to the Agency HR contact(s) ( Named Users) Email also sent to email addresses entered by the anonymous user in the “Email address” field on the EAR. The submitted report will display in the named user’s “For Review” folder. Anonymous user can print form submitted. Named user reviews and completes EAR, performs initial investigation, and submits claim. Email sent to Named User(s) with new Avizent claim number and copy of the Accident EAR report. Claim received by MCI staff and assigned to the appropriate claims team member. Avizent © 2009 ●800-777-4283 ● www.AvizentRisk.com Page 14 Using VISUAL Liquid Web Viewing/Updating the EARs you have to Review You will be notified that you have an EAR to review in several ways: ■ You may also notice that you have EARs to review when the number of documents in your For Review folder increases. You can access an EAR in one of two ways: 1. From the View menu, select Document Folders, and then select For Review. OR 2. Click the For Review folder icon in the left pane. Result: The Documents for you to review table displays in the Content pane. Avizent © 2009 ●800-777-4283 ● www.AvizentRisk.com Page 15 The Documents for you to review table contains the following information: ■ Creation Date—The date the EAR was created. ■ Subject—The name given to the EAR when it was saved. ■ Document Version Id—The unique system-generated identification number. ■ Document Name—The state EAR form that was used for data entry. Always “COV EAR”. Open the EAR 1. Select the EAR that you wish to open from the list. 2. Click the Edit button at the bottom of the Content pane to open the EAR. OR 3. Double Click the EAR row you have selected in the list. You can now review the data entered and complete additional information as needed. Tip —You can move from field-to-field on the form by pressing the TAB key. Note: Tabbing to a “Yes/No” type button field will automatically select the first choice. You may then change your choice, or if you want to keep it empty, press the “ENTER” button on your keyboard to unselect. Avizent © 2009 ●800-777-4283 ● www.AvizentRisk.com Page 16 Named User – Reviewer Ownership If an employer has multiple Named users for the Agency/subagency combination chosen during form creation, each of these named users will be able to see the forms submitted for this location. * If an eligible reviewer opens and updates/saves the form, this user then is the sole assigned reviewer and other users will not be able to see and edit the form. This allows the reviewers to open a report to view without taking exclusive ownership unless they update it.. Data Entry Features The following features are available to ease your data entry: ■ Required Fields—The required fields have a pink border. They are also listed in the Validation Results area. The Validation Results area acts as a checklist for required information. As the required fields are completed, they are removed from the Validation Results area. ■ Pre-Formatted Numeric Fields—Information that is normally displayed with formatting, such as dashes in phone numbers or social security numbers, can be entered with or without the dashes. ■ Drop-down Selections—Enter the first character to move directly to that point in the selection list. Up and down arrows can be used to navigate further. ■ Radio buttons - Allow toggle selection of one of several choices ( Yes/No, Male/Female, etc.) Type of Field Sample 1. Free Form Text You can type freely within these fields. * You can copy and Paste in these fields. 2. Dates With drop down calendars You can use the arrows to navigate by Month and by Year. ** Type over to replace elements such as year after picking via calendar. ** Type over to replace elements such as yer after picking via calendar. 3. Time with up and down arrows Avizent © 2009 ●800-777-4283 ● www.AvizentRisk.com Page 17 4. Yes / No radio buttons Note—When in a field which contains radio buttons, to select neither button, press Enter, instead of tab to exit the field. To Unselect all choices 1 . Avizent © 2009 ●800-777-4283 ● www.AvizentRisk.com Page 18 Required Fields REQUIRED FIELDS : Based on data processing needs, these are subject to change. Fields are listed in the Validation Results area on the left pane are system required. They must be completed to be accepted by the claim administrator. Other fields may also be required. In all cases, you should complete all of the information known to you at the time. Avizent © 2009 ●800-777-4283 ● www.AvizentRisk.com Page 19 Submitting an EAR Submitting an EAR “promotes”, or forwards, the document to claims processing. To submit an EAR, click the Submit button on the EFROI toolbar. If you have previously saved the document, it is submitted to the system specified reviewer or to the system as a claim. If you have not saved the document, you are prompted to enter a subject name. Note—It is suggested that the subject include the claimant’s last name, first name and date of injury as shown above. After you have clicked Submit, the system validates the data entered. ■ If all the required information is complete and valid, the claim is submitted to claims processing. A window displays containing the claim number assigned to the new claim, such as the one shown below. Click OK to close the window. ■ If all the required information is not complete or if the EAR contains invalid information, the system will prompt you to correct the validation errors before submitting. Avizent © 2009 ●800-777-4283 ● www.AvizentRisk.com Page 20 After all the required information is successfully validated, the EAR is sent to MCI claims processing. Note—If the claim is a duplicate claim, the system will recognize this and not allow you to Submit it. The system will display a message such as the following: If this occurs, contact the Technical Support service listed below for further instructions. Caution—Once you successfully submit an EAR you cannot make any changes to it in VISUAL Liquid Web. See Viewing EAR History for more information. Closing an EAR If you need to close an open EAR, click on the X in the upper right corner of the EFROI toolbar. The EAR will close. Caution—If you close a new EAR without saving or submitting it, all of the data entered will be lost. Note—See the Saving an EAR section for more information. Avizent © 2009 ●800-777-4283 ● www.AvizentRisk.com Page 21 Printing an EAR Printing produces an electronic copy of the EAR which can then be printed in hard copy. You can print EARs from several different areas. ■ Open EAR—When you are reviewing an EAR, a Print button is available in the EFROI toolbar. ■ For Review Folder—In the Documents for you to review table, a Print button is available at the bottom of the Content pane. Avizent © 2009 ●800-777-4283 ● www.AvizentRisk.com Page 22 To print the EAR, follow the steps below: 1. Click the Print button. Result: A PDF version of the EAR is generated. Adobe Acrobat launches and displays the PDF on your screen. Avizent © 2009 ●800-777-4283 ● www.AvizentRisk.com Page 23 2. Click the Print Form button on the Acrobat toolbar. Specify the desired settings and click OK. Result: The EAR is printed to the specified printer. Printer Troubleshooting Note: Printing within the remotely hosted Adobe Reader application may sometimes fail. If this occurs, you have a couple of options. 1. With the current document safely saved within the Draft or Review queue, close the application to log off of the system. Log back in, re-open the document and reattempt the print request. 2. Make sure your email address is one of the addresses within the Contacts list or add your address to the Email address box in the upper left hand corner of the form. Once the second submission is complete and a claim has been created, a copy of the form will be emailed back to your account. Closing Adobe Reader window Be careful when closing the Adobe Reader window so that you do not close the entire VLW application in the process. If you see multiple check boxes :, be careful to only click on the inner most box, or use the Adobe Reader Menu to select File – Exit to close. Avizent © 2009 ●800-777-4283 ● www.AvizentRisk.com Page 24 Deleting an EAR Caution—The application will prompt you to confirm deletion. However, once you have clicked Yes to confirm the deletion the EAR is not retrievable. * You cannot delete EARs that have been completely submitted and have a claim #. These are contained within the History list and are permanent. To delete the EAR, follow the steps below: 1.Click the For Review folder icon in the left pane. Result: The Documents for you to review table displays in the Content pane. 2. Select the EAR to be deleted. 3. Click the Delete button. Result: A Confirm Deletion dialog box displays. 4. Click Yes to confirm the deletion. Result: The EAR is deleted. Avizent © 2009 ●800-777-4283 ● www.AvizentRisk.com Page 25 Entering a New EAR COV EARs can be entered by Generic Users or Named Users. If a Named User enters a new COV EAR, then the EAR will display in his/her “For Review” folder. The Named User will then have to open the AR, and submit it again to complete the transmission to VCS. Entering a New EAR EARs can be entered by Generic Users or Named Users. If a Named User enters a new EAR, the EAR will display in the “For Review” folder. The Named User must re-open the EAR, and submit it again to complete the transmission to MCI. You may also see EARs “For Review” submitted by Generic Users. (See For Review EARs below) 4. Click the New Document toolbar button, select eFROI, and then select COV EAR. 5. Click Show Selection in the Agency Control in the Employer area. Scroll down the list and pick your Agency. 6. If applicable, also pick your Sub-Agency. 7. You must click Show Display and verify the identity and email address of the HR personnel who will complete the second submission. An initial submission email and a second final submission notice with form attached will be sent to the address(s) 8. In the Name of Employer field, search for the employer by name. From the Select Org dropdown list, select Find by Name. Double-click 4024 Commonwealth of Virginia. 9. Select the injured worker’s place of employment from the list. Tips - You know that an employer is available for selection when there is a green check mark. - Click “Display Number” to see the Agency Code #s - Right Click on the employer location tree to collapse, or expand the location tree. - Use the “Find” box to search for location numbers or names. 10. In the Email Addresses field (top left), enter additional email addresses (in addition to those of the HR personnel displayed in # 4 above), separated by commas, but no spaces. Initial submission email and a 2nd submission notice with form attached will be sent to the address(s). 11. It is possible to use your “Tab” button to move through the form. Note: Tabbing to a “Yes/No” type button field will automatically select the first choice. You may then change your choice, or if you want to keep it empty, press the “ENTER” button on your keyboard to unselect. In the Validation Results area on the left side; double-clicking an item will take you to the item on the form. 12. The following items must be completed if possible by the Named or Generic User: #11 #12 #13 #14 #16 #18 Postal zip code where injury occurred. Date of Injury Tip-Click the drop-down arrow to select the date with the calendar. Hour of Injury Date of Incapacity (1st day missed work) Was employee paid in full for day of injury. Date Injury or Illness Reported Avizent © 2009 ●800-777-4283 ● www.AvizentRisk.com Page 26 #22 #23 #24 #25 #26 #27 #28 #29 #42 #43 #31 #47 #48 Employee First Name Employee Last Name Phone Number of Injured Worker Sex Address of Injured Worker Date of Birth Marital Status Social Security Number Occupation at time of Injury Describe fully how injury occurred. Select Cause Code Describe Nature of Injury or Illness Select Part of body affected Number of Dependent Children Has employee returned to work? If yes, On what date? Note: As a Named User, you should also ensure the following is completed prior to submission to VCS: # Type of Claim Indemnity: You expect lost time greater than 7 days. Medical Only: Not Indemnity, but Hospital or Physician treatment is expected. Record Only: Incident Only, first aid only. #2 Fed Tax Id No.: Your Agency’s FEIN. #33 Date of Hire #36 NCCI Occupational Classification Avizent © 2009 ●800-777-4283 ● www.AvizentRisk.com Page 27 Sample Blank Form Avizent © 2009 ●800-777-4283 ● www.AvizentRisk.com Page 28 Avizent © 2009 ●800-777-4283 ● www.AvizentRisk.com Page 29 Avizent © 2009 ●800-777-4283 ● www.AvizentRisk.com Page 30 Agency Control and assignment The Agency control must be completed prior to the intial submission. Any user completing an initial submission for review must complete this field before it will be accepted. Requiring this selection before any submission provides assurance the report will be assigned to a valid HR reviewer for final submission. *Error Message: “Could not submit: Agency control has not been filled in.” This error will prevent you from submitting. Ensure you have selected “Show Display” and can see the Contacts. You may have to reselect the Agency again if you continue to have trouble. The button label switches between “Show Selection” and “Show Display” as you use it Postal Zip Code Field Requires the 5 or 9 digit postal zip code for the location where the injury occurred. If unknown, enter the location where the employee works. Note— Use the 5 or 9 digits. No Hyphens or dashes Avizent © 2009 ●800-777-4283 ● www.AvizentRisk.com Page 31 Example: Injury occurred in Zip Code 24201 ( Bristol, VA): Enter: 24201 Injury Occurred at 2300 Plank Road in Fredericksburg: 22401-4902 Enter: 22401 or 224014902 Tip—The US Postal Service provides an easy to use Zip Code lookup page. http://zip4.usps.com/zip4/ Below is an example of this lookup service in use: Avizent © 2009 ●800-777-4283 ● www.AvizentRisk.com Page 32 Automatic emails to Named Users Upon choosing an Agency with the Agency Selection tool, the Agency Contacts (Named Users) are shown in the “Contacts” list below the selection. Upon submission of the form, notification emails will be sent automatically to these addresses. The email field is still available on the form. Addresses may still be added to send notices to additional addresses that do not appear in the Contacts list. Avizent © 2009 ●800-777-4283 ● www.AvizentRisk.com Page 33 Refreshing your Folder Contents To ensure that you have the most recent information in your For Review folder or the Draft folder, you can click the blue label text. The system will update your display. Viewing EAR History Click on the “History” button to view prior complete submissions. You may review your past EAR submissions after final submission. Only EARs submitted by your personal account can be viewed. You cannot change or edit these Historical documents, but they can be viewed to verify the data you submitted. Avizent © 2009 ●800-777-4283 ● www.AvizentRisk.com Page 34 Index About, 5 Accessing Technical Support, 9 Accessing VISUAL Liquid Web, 7 Agency Control and Assignment, 31 Closing an EAR, 21 Closing the VISUAL Liquid Web Application, 9 Content Pane, 14 Copyrights, 3 Data Entry Features, 18 Deleting an EAR Draft, 25 Disclaimer of Warranty, 3 Edit, 11 Emails to Named Users, 32 Entering a New EAR, 26 Example Document Cycle Workflow, 15 File, 11 Getting Started, 6 Graphic Alerts, 5 Index, 34 Left Pane, 14 Menus, 11 Navigating VISUAL Liquid Web, 10 Ownership by Named user, 18 Printing an EAR, 22 Refreshing your Folder Contents, 33 Sample Blank Form, 28 Standard Buttons, 13 Submitting an EAR, 20 System Requirements, 4 Text Conventions, 5 Toolbar, 13 Trademarks, 3 Using VISUAL Liquid Web, 16 View, 11 Viewing EAR History, 33 Viewing/Updating the EARs you have to Review, 16 Avizent © 2009 ●800-777-4283 ● www.AvizentRisk.com Page 35