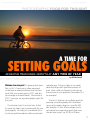
1
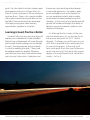
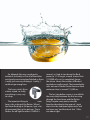
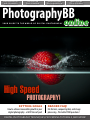
Photography Tips
and Techniques
Spotlight On
Photographer
Improving Your
Digital Workflow
Image Editing
Tips & Tutorials
PhotographyBB
online
Vol #48 - Jan. 2012
YO U R G U I D E T O T H E W O R L D O F D I G I TA L P H O T O G R A P H Y
High Speed
Photography!
Setting Goals
How to achieve measurable growth in your
digital photography - at ANY time of year!
READER FAQ!
File formats, conquering blur, and image
processing... We tackle YOUR questions!
Digital Photography Techniques, processing Tutorials, and More!
PhotographyBB
photographybb.com
online
Credits
Editorial:
27
Dave Seeram, Editor in Chief
[email protected]
Web Team:
Dave Seeram, Web Design & Publishing, Admin
Chris Styles, Forum Super-Moderator
Greg McComsey, Forum Super-Moderator
Publishing:
14
Dave Seeram, Publisher & Author
Patricia Seeram, Copy Editor
Art & Design:
17
Priscilla Ko, Creative Design
Dave Seeram, Publishing & Layout
On the Cover:
Dave Seeram, Cover Layout and Design
Cover Image: Courtesy of Peter Dorr
Marketing:
All marketing inquiries may be sent to:
Dave Seeram, Editor in Chief
[email protected]
Contact
If you would like to contact PhotographyBB Online,
email: [email protected]
or write:
PhotographyBB
#331 - 6540 Hastings St.
Burnaby, B.C. V5B 4Z5
CANADA
Article Submission:
To request an article submission, please email
[email protected] with your name,
email address, and a brief description of your article
and ideas. We look forward to hearing from you.
36
8 Photographic Food For Thought
A Time for Setting Goals
14 Impressionist Photography
The Art of Abstraction
17 Photographic Tips & Techniques
Sports Photography
23 Reader FAQ
We Answer YOUR Questions
27 Photographic Tips & Techniques
High Speed Photography
35 Post-Processing in Photoshop
Let it Snow... in Photoshop!
2
PhotographyBB Online Magazine
www.PhotographyBB.com
From The Editor’s Desk
PhotographyBB Online Magazine Issue Forty-EIGHT
A New Beginning, an Ending, and a New Beginning - Again!
Welcome to the 48th edition of the PhotographyBB Magazine. January
is always an interesting month for me... It’s the start of a brand new year,
and the time where I contemplate my goals for the year ahead. For me,
setting goals is such an important part of growth, both personally and
professionally. Working towards achievements encourages measurable
progress, and when not attainable, there’s always something valuable to be
learned. This month, our friend and author Bill McCarroll gives us some tips
on how to set goals for the year, and how to best achieve them.
In addition to being the beginning of a fresh year, January also marks the end of our yearly
publication cycle. Since PhotographyBB Magazine initially launched our first edition in February, this
is our official “year-end” for the magazine - and what a year it’s been!
January is also the time where I plan for our upcoming Anniversary Edition, with next month being
the launch of our 4 Year Anniversary Special. I do think of each yearly cycle as starting something
new. Many of my resolutions include plans, changes, updates, and innovations for the magazines to
come. Let me be the first to tell you, I believe we’re going to knock your lens caps off with what’s in
store for 2012!
In addition to our extremely talented team of column authors, I would also like to give thanks to Jay
Livens, Heather Bashow, and Peter Dorr for their guest contributions this month. They have each done
uniquely outstanding jobs, covering a variety of topics I’m privileged to share.
Lastly, one of the most important factors that contributes to the growth of our magazine, is your
feedback. If there are any topics that you would like to see in our magazine, send me an email and I
will take each and every suggestion into consideration. If you would like to contribute an article, my
door is open to you too.
My sincerest thanks to our seriously talented team of writers who tirelessly and selflessly contribute
articles every month. My appreciation also goes out to our readers for your encouragement and
support in reading our publication. Grab the hot beverages - it’s time for #48!
Dave Seeram
Editor and Publisher
3
www.PhotographyBB.com
The Contributing Authors
Connect with the writers of PhotographyBB
Dave Seeram is the Editor of the PhotographyBB Online Website, PhotographyBB
Forums, and Editor/Publisher of the PhotographyBB Online Magazine. Dave is also
a digital photography and Photoshop enthusiast.
Eva POLAK is one of New Zealand’s leading
fine art photographers. With her specialty
in impressionist photography, Eva is
the author of two books and provides
workshops on teaching creativity in fine
art photography.
PhotographyBB | Twitter | Facebook
Website | Books
Jon Ayres is a digital photographer from the
United States, now living in Moscow. He
enjoys photography, writing, and history.
Jon has been involved in writing, digital art
and photography for over 30 years and is a
published photographer and author.
John Rae teaches digital photography,
Photoshop and Lightroom in the UK.
Published author and award winning
photographer, John is also an Adobe
products beta tester and member of the
UKs Royal Photographic Society
Blog | Flickr | RedBubble
Portfolio | Books
Mike Frye is a talented photographer as
well as avid blogger, flickrite, and social
networking guru. Mike loves sharing
knowledge, and showcasing talented
photographers through his photography
blog.
JAY LIVENS is a computer guy a heart who
loves digital photography, working with
Linux, and running his own personal
blog. Jay is our go-to guy for all things
technical relating to digital photography
and computers.
Blog | Twitter | Flickr
Blog | Gallery | Blipfoto
Bill McCarroll is a passionate Nikon photographer, web developer, and a technology and camera gear addict pursuing his
love for photography while supporting
community activities as a volunteer.
Jason Anderson is an active photographer, shooting primarily with Canon
gear. His philosophy about photography is learning through the sharing of
knowledge, and enjoys both the art
of photography as well as his written
pursuits.
Blog | Twitter | Flickr
The Authors
PhotographyBB Online Magazine
Blog | Twitter | Podcast
Chris Styles (aka “Nobby”) is our forum
moderator. Two years off retirement &
proud grandfather to 2 boys, 4 girls, his
interest in photography stretches back
over 40 years, and really took off with a
renewed passion since buying one of the
first Hewlett Packard’s digital cameras.
Chris now shoots with a Nikon D700.
Greg McComsey is our forum moderator.
Born and raised in Pennsylvania, he now
resides in Ohio after serving 20 years in
the US Air Force. Greg enjoys photography as a hobby and the continuing learning process that goes along with it.
Gallery | Flickr
Guest Contributors in this Edition:
Heather Bashow - Sports Photography Techniques
Peter Dorr - High Speed Photography Techniques
4
Bring all 48 Editions
out into the field
PhotographyBB Magazine
can now be read in
Apple’s iBooks Application!
Now you can download the PhotographyBB Online Magazine and take it with you on the go!
Thanks to the latest update in iTunes and the iBooks app for the Apple iPad, iPhone, and iPod
Touch, now PDF documents can be imported into your iBooks application.
If you are an Apple iPad, iPhone or iPod Touch owner, here’s how you can
access the PhotographyBB Online Magazine library in your iBooks application:
1) On your iPhone/iPad’s Safari browser, go to the magazine
download page URL:
http://www.photographybb.com/magazine/download/
2) Click the PDF download link for the magazine edition you
would like to import to iBooks.
3) Safari will start to load the magazine in the browser window...
This may take a few moments...
4) Once the magazine has loaded into Safari, tap the center of
the screen to see an “Open In...” button in the top left corner.
5) Click “Open in iBooks...” and your download will immediately
transfer over to your iBooks Library!
PhotographyBB Online Magazine
www.PhotographyBB.com
NEWS
CRAFT & VISION
MAKING THE PRINT:
PRINTING TECHNIQUES FOR
THE DIGITAL PHOTOGRPHER
Making The Print: Printing Techniques for the
Digital Photographer – A MASTERCLASS by Martin
Bailey is the 2nd eBook in the Craft & Vision
Masterclass Series, and as expected, it’s packed
with the good stuff when it comes to photoeducation. This eBook is a primer on printing and
image preparation (for print), & includes excellent
step-by-step instructions with plenty of visuals to
help make the printing process exciting.
Buy Now $5
NEW DROBO CONTEST WINNER!
For the month of December 2011, we ran our second Drobo draw after giving away not one,
but two Drobos in the month prior. PhotographyBB Magazine and Drobo are pleased to
announce the winner of the December 2011 Drobo is: Walter Spears. Congratulations Walter!
Disappointed you didn’t win?
We’re doing it (YET) AGAIN!
Next month’s magazine edition will be our special 4 Year
Anniversary Edition, and to celebrate, Drobo is shelling
out another prize for us to give away! Stay tuned in next
month’s edition for details on how you could win.
To purchase a Drobo, or to learn more about the world’s
best and easiest-to-use storage array, visit: Drobo
6
PhotographyBB Online Magazine
www.PhotographyBB.com
UPDATES
LEADING YOUR OWN PHOTO SAFARI
A FREE EBOOK
Leading Your Own Photo Safari: A Guide for Ensuring
Success in Creating, Planning, and Leading a Photo
Safari by Dr. Larry S. Anderson is the perfect primer for
any photographer interested in organizing a group
photo walk. Everything from planning, logistics,
location selection, expenses, and communication
are covered in-depth to give the reader more than
enough information to successfully run their own
photo walk. Perfect for photography clubs of all sizes,
Dr. Anderson is offering this eBook as a free download
to everyone. Enjoy!
Download Now
READER FAQS
LYTRO LIGHT FIELD CAMERA
Since the dawn of photography, the principals
of lenses, optics, and camera functions haven’t
changed - until now. Enter the Lytro, which
captures the entire field of light, with one
press of a single button. The Lytro makes
photos like never before, giving users the
ability to focus (and re-focus) after the fact through the entire depth of the shot.
For more info: https://www.lytro.com/
Do you have a specific photography question
for us? Our mission at PhotographyBB is to
provide a positive and supportive community
where beginners can get the answers they
need to learn about the craft of photography.
If you have a photography question, feel free
to ask in our “No Stupid Questions” room in
the bulletin boards. Or email your questions
to [email protected] and we’ll
add them to our growing list of questions that
will be tackled in our recurring “Reader FAQ”
column throughout the year.
We look forward to hearing from you!
7
PhotographyBB Online Magazine
www.PhotographyBB.com
PhotographIC FOOD FOR THOUGHT
AN EDITORIAL BY BILL MCCARROLL
A TIME FOR
SETTING GOALS
Achieving Measurable Growth At Any Time of Year
by Bill McCarroll
Welcome to a new year! It’s amazing how time
flies, isn’t it? A new year is often perceived
as the time to make resolutions and set new
goals. Did you set any goals in 2011, and did
you manage to achieve them? How about in
2012 - have you set any photography goals for
this year?
If you haven’t yet, it’s not too late. In fact,
it’s never too late to set concrete goals for your
photography. It’s really just convenient for us
to choose goal boundaries within a particular
calendar year. Doing so helps us to create
dates that align with significant periods of
time. How could you forget to look back on
the past year as you approach December 31st
for example?
The fact is that we can set finite goals for
growing our photography skills that don’t
necessarily need to align to a specific 365
day timeline. In fact, I’d encourage you to
set interim but supporting goals that have
shorter time spans; say 30, 60 or 90 days.
8
PhotographyBB Online Magazine
These shorter term tactical goals may even
support something bigger that’s more
strategic and longer term. Keep focused on
a broader vision for what you’re hoping to
achieve. By setting shorter time intervals, you
can focus and take satisfaction from meeting
interim targets or achievements. This will
help keep you encouraged.
Setting Your Goals
So, how might this work? Perhaps you’ve
committed to a Project 366 this year. It’s a
project many photographers have taken
on given it’s a leap year in 2012. Others
have accepted the personal challenge of a
Project 52 where the goal is one meaningful
photograph every week for a year. Whatever
project you’ve defined, it can be thought
of within the context of an overall strategic
www.PhotographyBB.com
goal for the year. It’s a significant personal
challenge, one that demands your attention,
resources and time.
Taking on long term projects like
these focuses your photography in a way
that nothing else can. It commits one
to a pattern of activity that requires your
continual attention focusing your passion
for photography in discrete and targeted
ways. Many who take on a challenge like
this find they can’t maintain the energy
required for such a long term. It’s like
making a commitment to lose weight in
the new year, only to succumb to life’s daily
pressures and fall off the wagon after your
focus gradually is lost and everyone around
you has forgotten your commitment, if
you even announced it at all. Have you
noticed all the advertising around weight
9
PhotographyBB Online Magazine
loss this time of year? The media is really
heavy on helping us focus on losing weight
and transforming our bodies. Wouldn’t it
be cool to see Nikon or Canon commercials
encouraging us to grow our photography
skills at the beginning of the new year.
Might be a good idea for the camera
manufacturers as many of us just received
new cameras as gifts.
It can be helpful to announce your new
goals to others whom are close to you. A
spouse or close friend can bring friendly
support and pressure to keep going. They
don’t even have to say much to you, but
sharing a commitment can be a powerful
personal incentive not to give it up.
So, now you’ve set your goal and you’ve
shared it with a few who are close. Again
the timeline need not be a full year, it could
be much longer or perhaps even shorter.
The most important thing is you’ve set a
target that is meaningful to you and that’s
measurable. In other words, your personal
goal is associated with something that you
can recognize as being complete. It can
be a date or an achievement that’s not as
discrete, but perhaps measured by a degree
of quality in your work that you can stand
back with some satisfaction and know
you’ve met your goal. In other words make
it meaningful for you with the knowledge
that you’ll know it when you see it. Keep
this genuine and you’ll be fine.
www.PhotographyBB.com
How to Stay Focussed
A good approach is to create milestones
within the timeline of your overall project. These
can be quantitative or qualitative. How many
milestones do you need? Well it’s all up to you
and the nature of your milestone goals and
how they support your overall project goals.
Quantity is fairly easy. If you want to create 366
photographs your unstated milestones may
include 90 photographs at a time.
If your overall strategic goal includes more
more subjective qualities, perhaps you could
split your project into complementary subjects
or styles that will support your overall goal. If for
example, you want to embark a Project 366 you
could attach some qualifications to your project.
Perhaps you’re going to shoot with a particular
camera or you’re going to break your project
into sections with different cameras supporting
each milestone you set. Perhaps instead or in
addition, you decide to shoot in black & white
all year but you break your project into separate
black & white styles to include sepia, grainy, HDR,
or some other black & white style.
You can also set goals that are more
focused on the qualitative side. I like this
particular emphasis because it forces one to
think not only about consistent shooting over
time but also requires the creation of work
that continually challenges the quality of the
work generated.
10
PhotographyBB Online Magazine
There is also substantial tension created
when we try to increase quantity and quality
in tandem. It’s the age old challenge and
a significant strategic goal. Again, the
quantity is easy to measure and recognize as
achieved. How then do we assess quality. Is
the quality something we’ll decide on, or will
we allow others to make the assessment? I
think that we’re generally our own worst
critics and are usually able to make good and
fair judgements of how good our work is,
if we’re brutally honest with ourselves. But
sometimes the work we feel good about isn’t
what attracts our colleagues’ interest and
admiration. One potential way to go about
the fight for meaningful and useful feedback is
to share our work online and hope for critique
that will allow us to grow in our photography.
www.PhotographyBB.com
Hopefully the feedback becomes even more
confirming over time. The question is, where
do we get consistent and valuable feedback?
The common photography social forums
might work under certain conditions.
Generally work posted to sites like Flickr®
or 500px® gets lost with lots of competing
work. Your photographs may be good
and generate passing comments that are
generally complementary. But what you’re
looking for are a few trusted critics that you
can rely on for substantive feedback that will
help you grow in your work.
My suggestion is to find a few photographers
whose work you admire and ask them to
be online mentors. One thing about our
11
PhotographyBB Online Magazine
photography community is the general
willingness of skilled artisans that are willing to
share their knowledge and time to help others.
What I don’t suggest is asking someone whose
time is likely to be pulled to the extreme. For
example, I’d love to have Joe McNally as my
mentor, but I’m realistic enough to know
that I still have a lot to learn about lighting
before asking someone like Joe to spend time
looking at my work. Additionally, I know the
demands on Joe’s time are substantial and it’s
not likely I’d be able to frame a relationship like
that anytime soon. But there are others on
social media that I interact with consistently
and I know they’d be more than willing to
give me honest feedback if I asked nicely. I
also admire their work and skills and can see
qualities that I’d like to work towards. Note
that I’m not interested in copying their style. I
trust their experience and knowledge to help
www.PhotographyBB.com
advance my skills and style improving the
overall quality of my own original work.
Having a trusted mentor can help with
feedback and keep us focused on quality
of our work. How then can we grow in
knowledge to learn the skills we’ll need to
meet our qualitative goals? The answer I’d
suggest is to invest in learning. Take some
photography classes at a local college or
university that align with your needs. If this
kind of continuing education isn’t available
to you, go online. There are a ton of video
tutorials online that are usually free for specific
snippets of knowledge. Subscribe to a
photography blog and/or podcast. Again, the
willingness of accomplished photographers
to share means that we can gain significant
understanding of photography concepts and
techniques that can help meet our qualitative
12
PhotographyBB Online Magazine
goals. I’m subscribed to at least a dozen great
photography podcasts via iTunes that I can
listen to on my computer or iPhone whenever
my time allows. There is also some incredible
subscription based training available via sites
like Kelby Training that have the advantage
of bringing many great video learning
opportunities together in one place.
Learning is Good, Practice is Better
However lofty your new year goals, they will
require your commitment in time and effort.
Many of your achievements will come through
practice and actually putting your knowledge
to work. Shooting regularly and consistently
is critical to meeting your goals. Theory and
knowledge need to be applied. Whatever
you think you know may come undone when
you try to put it into action. Great plans and
www.PhotographyBB.com
theories are consistently upset by attempts
in real world application. You need to apply
your knowledge to real world situations so
you can understand what it takes to adapt
your theoretical understanding to practical
situations. In fact, much of your quality and skill
growth will be derived through your ability to
adapt to new environmental conditions and
situational challenges.
So, although the first weeks of the new
year are already past, it’s not too late to set
and pursue new goals for 2012. Think it
through. Challenge yourself to grow in your
skills with a renewed and increased passion
for your photography. In the end, you’ll
have some great shots that you’d otherwise
never have and you’ll look back with a great
degree of accomplishment and satisfaction.
Simply - Go for it!
This article and images contained are Copyright © and courtesy of Bill McCarroll. Please contact the author directly with any questions.
13
PhotographyBB Online Magazine
www.PhotographyBB.com
impressions
of
abstraction
by Eva Polak
Photography is an expressive and versatile medium.
Photography allows us to capture the world with incredible
detail or create interesting and ambiguous abstraction
by concentrating just on its overall impact to achieve an
impressionistic image. It is surprising how little visual
information is required to convey enough for the viewer to
understand and appreciate the image.
An abstract photograph, stripped bare of unessential details,
is capable of generating impact, simplicity and spontaneity. It
is also a source of endless possibilities and creativity.
14
PhotographyBB Online Magazine
A simple way to describe the term
“abstract” would be to use words like essence,
summary, extract or distillation. Creating
abstract images is like a two-way dialogue in
which a photographer gives the viewers just a
hint of information and they respond by filling
in the details using their imagination and
power of association.
The abstract process begins
with an idea and how it can
best be expressed.
Consider making abstraction to be a
form of communication with the choice
of subject matter, composition and
mood all being vital components of this
communication process. Think of the scene
www.PhotographyBB.com
in front of you in terms of basic geometric
shapes, lines and colour and how all those
elements can help you to convey your
message. Imagination is what starts you on
this journey. Let your imagination find a way
to express itself. This eventually will end up
in an image that captures the essence of the
subject you choose.
Colour is a very powerful element of the
abstract work, because it has the ability to
stimulate emotion, and to make statements
about shapes and space. It will also set the
atmosphere of the image giving it a sense of
time and mood.
The key issue in creating a strong
abstract image is to concentrate on the focal
point, the single element that tells the story.
15
PhotographyBB Online Magazine
Key Points to
Remember:
- Keep it simple
- Establish a focal point
- Extract the essence
through form and colour
- Have a strong vision
for your message
- Decide on the degree
of abstraction
www.PhotographyBB.com
Once you establish a strong impacting focal point, the rest
of the image will look quite appropriate in its place.
It is important to handle a technical aspect of photography
with confidence, because it will give you freedom to create. But
remember, technique without inspiration means nothing. When
we begin to photograph, technique is usually our only or main
concern. However, as we grow, we realize that pure technique is
just like having a good tool and that is about all it is good for. It
will never make a good photograph by itself.
Remember, the creation and appreciation of art is a personal
and subjective process. You are free to photograph and interpret
the world as you see it.
It is also worth mentioning that as an artist you need a lot
of practice and consistency. Getting desired results depends
upon your hard work and benefiting from your mistakes. It
never hurts to try something new. Even your mistakes are
invaluable. Failure leads to success and learning what not to do
is as important as learning what to do.
This article and images contained are Copyright © and courtesy of Eva Polak. Please contact the author directly with any questions.
16
PhotographyBB Online Magazine
www.PhotographyBB.com
Tips & Techniques
Photography
SPORTS
PHOTOGRAPHY
HOW TO TAKE BETTER ACTION AND SPORTS PHOTOGRAPHS
by Heather Bashow
Sports may be the most fun category in photography because there are so many varieties
of venues and ways in which you can capture your subjects. From children to adults, high
school to pro sports, close-up to wide-angle, winning or losing - the possibilities are
endless. This month, we’ll explore some techniques for better sports photography through
examples taken at BMX, triathalon, and horseshow events
S
o what separates the buckwheat from
the chaff in sports photography? A
number of things contribute to a great
shot, but top on my list is getting in close
to the subject. A common fault of photos
that fall into the snapshot category is that
they are taken from too far away. Detail and
expression are extremely important in sports
photography. Along with those, we will
explore some other important components
as well.
The Gear
I’d like to tell you that a point &
shoot camera will do the job, but sports
photography is one genre where the DSLR
has the advantage. The reason that most
DSLR lenses cost substantially more than a
point & shoot camera is the superior quality
of the glass. Furthermore, a DSLR will allow
you to select modes and settings to achieve
the results you want.
17
PhotographyBB Online Magazine
An excellent zoom lens and a fast burst
mode are essential in sports photography.
The zoom allows you to get in close from
the sidelines and to isolate your subject, and
the fast burst will give you a better chance of
capturing the optimal action moment. A tripod
with a smooth panning ability or a monopod
can also be useful. I tend to prefer hand-held
with image stability for many sports shots since
the action is usually happening all over the
place. The exceptions are in venues like horse
jumping where I can predict exactly where the
best action will take place, and set up a tripod
accordingly. Also, if I am using a tripod, I am
using a remote shutter release.
There are many excellent sports cameras
available. My personal camera choice is a
Canon 7D, which has an 8 frame-per-second
www.PhotographyBB.com
max burst rate. I have three fine lenses for
sports shooting. The first is a Canon 70200mm f/2.8 L IS USM. This lens produces
beautiful shots with fantastic bokeh, and it is
the best for low light. Although renowned
as a portrait lens, it isn’t the sharpest glass
when wide open. I also have fine results with
a Tamron 18-270 mm f/4.5. It’s not as good
for light gathering as the Canon, but it gives
me the options of both longer reach and
wider-angle capabilities when I need them,
and the price makes it a viable option for bad
weather or dirty conditions. My third lens is a
Canon 300mm L, which works well to pull in
distance shots, particularly with a 2x extender.
However, because I lose 2 f-stops with the
extender, this combination isn’t effective
unless the venue is very bright. The triathlon
cycling shots in this article were taken with
18
PhotographyBB Online Magazine
the Canon lenses; the horseshows and BMX
photos were shot with the Tamron.
So, once you have the most capable
equipment, how do you capture the best
shots? This is where the fun starts because
you have so many choices!
Expressions
I would bet that if you watched Wide World
of Sports in the early 70s, the one thing you
remember is the hapless ski jumper being
flung sideways into the air - the “agony of
defeat” shot! Capturing the joy of victory is
fine, yet the shots with the most impact can
be of those who have tried, and failed. In most
cases you are viewing the culmination of many
years of work and conditioning, and you are
in a position to see the athletes as it all comes
together in competition. Whether you capture
joy, disappointment, frustration or actual tears,
there is intense emotion in any of these shots.
www.PhotographyBB.com
widest aperture, so you may have to go a bit
less wide to get the sharpest shots. Monitor
your ISO and try to keep it at 100 or 200 for the
cleanest shots. If possible, anything that is not
part of the sport should not be in the photo.
Details
Detail shots are also very effective, but they
must be well-composed and the detail must
be integral to the sport. So doing a middle
area crop that shows this dressage rider’s
saddle, boots, reins, hands and so on… all of
this emphasizes the sport. A long shot of the
rider will not focus attention on these details.
Your zoom lens will help you get in close
to show the world the concentration on the
athlete’s face. The result may, in essence, be
a portrait of the athlete. If that is the case,
be sure to include some of the equipment
or a recognizable part of their uniform
so that the sport is obvious. Remember,
where glamour shots are not enhanced by
mud, blood and sweat are great contextual
elements in sports photography.
Composition
This is where so many shots fail. The focus
of your shot must be the athlete. No matter
how stunning the background, you are doing
a sports shoot, so negate the background.
This means getting in close, and using as wide
an aperture as possible. Many zoom lenses
are sharpest one or two stops up from their
19
PhotographyBB Online Magazine
Capturing Movement
Moving subjects can be shot two ways.
You can freeze the motion, or you can pan
with the subject, which will keep the athlete
in focus while causing the background to
blur in streaks.
To freeze motion, such as a horse and rider
clearing a jump, you will want a fairly quick
shutter speed of around 1/250, and a wide
aperture to blur the background. These shots
are best when framed close to the subject,
capturing both the action and expression of
the athlete. Using a burst mode to capture
two or three shots will ensure that you have a
number of shots from which to choose.
www.PhotographyBB.com
If however, you want to emphasize
speed, pan with the moving athlete. If
you set your camera to AI Focus mode (or
your camera’s equivalent continuous focus
mode), your camera will keep the person in
focus as long as you have your focus point
consistently on the subject. Put the camera
in Shutter Priority at 1/30 second, and that
will do the trick for a moving subject such
as a cyclist. Using a wide aperture while
panning will blur the background and
illustrate the sense of motion. Keep your
focus point on the athlete, press the shutter
half way as you pan along with the athlete,
and shoot when the composition is best.
20
PhotographyBB Online Magazine
www.PhotographyBB.com
Color
Color can make sports imagery pop,
and happily these days sports clothing is
often vibrantly colored. If you look at the
compression photo of the three cyclists, it is
the middle cyclist that draws your eye with all
the red, and that is where I placed my focus
point. If all the cyclists had been in gray, the
shot would not be as pleasing.
Telling a Story
Sometimes you can find a shot that tells
a complete story, such as the one with the
young BMXers paying rapt attention to one
of their heroes. No caption is needed – the
body language of the boy in the green
shorts says it all.
Compression
Compression can be very effective in races,
and is easily achieved with a telephoto lens.
Compression shots are taken from a bit of
distance, with an aperture in the range of f/8
or so. This provides enough depth of field to
keep one or two subjects in focus, while still
throwing the background out of focus enough
to emphasize the attention onto the athletes.
Taken from about a 7 o’clock position to the
subjects, this compresses the focused subjects,
making them look closer to each other
than they are, and heightening the sense of
competition and excitement in the shot. For
example, the cyclists in this shot were not as
close to each other (or me) as they look.
21
PhotographyBB Online Magazine
www.PhotographyBB.com
Software
Even a reasonably
priced program like
Photoshop Elements
can vastly improve
your photos. With
cropping, levels and
other tools as your
disposal, what has
come out of the
camera need not be
your final result. For
example, this shot was
cropped to pull the
cyclists up to the front
edge of the photo. I
then tweaked the
levels to pop the
contrast and color.
Finally, I used the
Photoshop Elements
“expressionist brush”
at 1% opacity to
blur the background
slightly since even at
only f/6.3 the far riders
were a bit too focused
for my liking; and then
I ran the brush twice
more over the lamp poles and stop lights to further blur them. It is to your advantage to
explore what your editing software can do for you.
Pulling it all Together
When you understand the sport you are covering, you will know where to be for the best
shots. Better yet, if you happen to love the sport, that love along with your respect for the
athletes will shine through.
Know what your camera and lenses are capable of in different situations. Try various
apertures and shutter speeds, shoot from different angles, pay attention to the details, find
the color, and get in close. By keeping all these elements in mind, you’ll find your sports
photography lives up to your expectations.
This article and images contained are Copyright © and courtesy of Heather Bashow. Please contact the author directly with any questions.
22
?
PhotographyBB Online Magazine
www.PhotographyBB.com
Q: I’ve spent so much on a great DSLR
and lenses... Why do I need to buy
expensive software and spend time
processing my digital images after
the fact? Shouldn’t my images look
brilliant straight from the camera?
reader
FAQ
by Jay Livens
In a candid interview-style
format, Jay Livens shares his
personal insights and answers
the top most commonly
asked questions - submitted
by you - our readers.
Yes and no. I believe in the old adage
that “less is more.” My personal
feeling is that excessive processing of
images often leads to poorer results,
not better. However, if you do shoot
RAW images then you will need a tool
to convert the RAW files to JPEG, and
for that I use the software that came
with my camera. This tool allows for
some basic tweaking such as color
saturation, contrast and sharpness.
About 95% of the time, those minor
tweaks are enough to get the image
I want, so I do not need fancy image
editing.
Advanced image editing software
like Photoshop or GIMP can provide
significant benefits in the 5% of
time where more involved editing is
required. A perfect example is one
of our family’s Christmas photos
where everyone looked great except
the dog. In another shot, everyone
looked terrible except for the puppy.
I used GIMP to insert the dog from
the second image into the first
and thus created a picture where
everyone looked great. The process
to achieve this was time intensive
and while the result was good, I
would hesitate to do this on a large
number of images because of the
amount of effort involved.
23
PhotographyBB Online Magazine
Remember
that back in the
days before there
was Photoshop,
photographers carried
all kinds of interesting lens
filters to achieve desired
image effects. Today, these
are less important because we
can often create the same effects
digitally in Photoshop. Thus some
photographers may use Photoshop
to create new effects or views on
their images that would not have
been possible given the camera or
environmental limitations.
www.PhotographyBB.com
One final note, if you are interested in
advanced image editing software and are on
a tight budget, I suggest that you check out
GIMP. It is an open source solution that is free
and has many of the features of Photoshop.
Q: My photos look great on my camera’s LCD,
but when I load them on my computer they
come out all blurry. What am I doing wrong?
In short, basic editing such as
sharpening and white balance tweaks
is almost always required; however,
these modifications do not require
the advanced features or complexity
of a Photoshop type solution. The
power of most RAW converters is that
they enable these tweaks in a fast and
efficient manner and can help accelerate
photographic workflow. These tools
essentially enable brilliant images
straight from the camera.
Advanced editing tools have their place
as well, but add complexity and time
to a photographer’s workflow. They
can create significant photographic
benefits; however, I believe that a
properly exposed and composed
image in the first place can
reduce the need for complex
post-processing operations.
Thus for me, I find advanced
image editing to be
an exception to the
process rather than
the norm.
As I see it, there are two questions here. The
first is “why does the image look sharp on my
LCD and soft on my monitor?” The second
question is a much larger one which asks “why
are my resulting images soft?” There are many
reasons for this second question and I could
devote an entire article to the question, maybe
I will in the future!
24
PhotographyBB Online Magazine
The biggest reason that images look sharper
on the LCD is the size of the display. Today’s
LCD’s are high resolution, but are still small
in size compared to your monitor. When
images are shrunk as they are on the LCD, the
size reduction also reduces the visibility of
aberrations or issues like softness. Thus, the
smaller images will always look sharper as
compared to the image on your screen. You
can see a similar effect if you view a sharp
image on your computer screen and then
zoom in the view. The sharpness will rapidly
disappear and the image will turn into a blurry
mess. One thing you can do to address this
in-camera is to zoom in on the camera LCD to
get a sense of general image sharpness. It also
helps to compare two images in-camera that
you have identified as representing opposite
spectrums of sharpness to get an idea how
they look on the LCD.
The other consideration is that most of today’s
cameras use anti-aliasing filters to reduce
some forms of aberration. The result of AA
filters is that images can come out a bit softer
and so minor sharpness enhancement can
benefit many images. This is typically done
in post-processing, so the benefit may not be
applied in-camera.
Finally, it is important to remember what
format you will be outputting images to. For
example, zooming 100%+ into an image
will make any picture look soft. However, in
practice, most people output common sizes
like 4x6, 5x7 or 8x10. All of these image sizes
are significantly smaller than 150% view and
will always look sharper than that level of
magnification.
Q: What is the best file format for shooting
and for archiving my photos? RAW or JPEG?
www.PhotographyBB.com
This is a great
question and is one
that I have thought
about frequently in the
past. Let me explain why
you would consider the two
different formats and then
provide perspectives
JPEG – This is an industry
standard file format that is readable
by virtually every application that
handles images from your basic
web browser to your most advanced
image editing software. This great
flexibility is highly beneficial. However,
JPEG files are 8-bit which means that
they have a lower color depth (aka
image resolution) than RAW files and
you cannot non-destructively tweak
them as you can RAW images.
RAW – RAW images contain data
directly from the camera’s sensor
and typically have a much great
color depth. (12-bits or more) This
means that there is more image
data contained in the file. However,
RAW files are also proprietary and
thus every camera has a different
format. The specialized nature of
RAW files means that only certain
applications can read them such
as RAW converters and image
editing software.
The question of archiving
becomes a tradeoff. JPEGs are lower
resolution, smaller in
size and universal,
while RAW files
25
PhotographyBB Online Magazine
www.PhotographyBB.com
contain the most
image data, but are
proprietary.
I personally rely on RAW.
While I understand that the
files are proprietary, there
are many RAW converters
available, including opensource ones. Typically these
programs maintain backwards
compatibility and so people with
older cameras can still convert
their images. (For example, UFRaw,
an open source converter, still
maintains support for the Canon
D30 [http://ufraw.sourceforge.net/
Cameras.html] which was released in
2000.) Going forward, I would expect
UFRaw and other equivalent programs
to maintain support for these older
cameras since there is no real work
required to maintain compatibility.
Thus, I am less concerned about the
future compatibility and I choose RAW
because I prefer the highest resolution
version of the image.
Q: Is it better to set my white balance
in-camera, or leave my camera on
auto and let my post processing
software handle it instead?
In my experience, cameras do a
relatively poor job with whitebalance and thus images
can appear with colors that
don’t match expectations.
I have the same issue
across a huge range
of cameras from
extremely
expensive dSLRs and entry-level point
and shoot cameras. For whatever reason,
manufacturers have still not completely
solved this issue. One exception is when you
are shooting in a consistently lit environment
such as a studio. In this case you can set a
custom white balance in advance and know
that it is accurate.
My general recommendation is to shoot RAW
images whenever possible because they allow
non-destructive white-balance adjustments in
post-processing. All modern RAW converters
allow you to click to set white balance and
also apply that same white-balance setting
across multiple images. It is a very powerful
and easy process. You could fix white
balance in a JPEG image as well, but it is
typically a more complex process, destructive
to the image data, and will result in a
permanent change to the image.
This article is Copyright © and courtesy of Jay Livens.
Please contact the author directly with any questions.
26
Tips & Techniques
Photography
HIGH-SPEED PHOTOGRAPHY
by Peter Dorr
It was just before the Christmas holidays when I received my Stopshot Electronic Flash
Trigger set. I took a few full days to master this device and have a proper play with it, but first
I’ll explain what it is and what you can do with it.
A device like this is used in High Speed Photography (HSP). The only way to get this type
of HSP to work is to shoot in a pitch-dark set, open the shutter, fire a short quick flash at
the right time, and close the shutter again. Oh, and preferably flash at the precise moment
a small bullet hits a glass, or when a drop of water hits the surface of some liquid, or even
27
when you throw a strawberry into a big bowl
of water. While the results are pretty nice, it
is rather impossible to perfectly time this all
manually. That’s why you need an electronic
device to help you time it correctly.
The setup I create was fairly straight
forward. The aquarium halfway filled
with water on a white table with a white
background. On each side of the aquarium,
about half a meter above it, I had aligned
the laser transmitter and receiver of the
Stopshot and connected to the main unit.
I put two flashes in front of the aquarium;
one flashing from above and one lightning
the back (which was switched off for black
backgrounds of course). All flashes were
connected to the Stopshot.
In this article I will describe the three
different shoots mentioned above. All were
first-time attempts, so I am excited to see
where I can go with these after a bit more
experience. Lastly, this is not a sponsored
article and I have absolutely no connection
with the company nor do I receive any
compensation whatsoever. It’s just my honest
user experience, and since I am a happy user,
I feel comfortable in sharing my experiences
and recommending the equipment.
Splash Photography (Fruit Drops)
Equipment:
• A small aquarium filled with water
• Some colored fruits and roses to throw in
• A splash-proof, plastic white background
• Canon EOS 5D MkII
• Canon EF-180 f/3.5 macro lens
• A tripod
• A remote trigger
• 4 identical Canon 580EX II’s (no studio
flashes!)
• And, of course, the Stopshot
28
An although this may sound pretty
technical, the reality is that all of the cables
are cleverly constructed and labeled so there
is really just one way of doing it. Luckily, I
could not go wrong here.
The lasers nicely fit on
a basic tripod, so really,
everything is very easy
to setup.
The important thing to
note
here is the setting of the flashes. When I
had them flashing at full power, I got a lot
of movement blur in the pictures. These
flashes fire off light for about 1/800 of a
second, so I had to turn down the flash
power to 1/128 to get a much shorter flash
(1/35,000 of a sec) to completely freeze
the action. Hence the number of flashes I
needed was really crucial. That immediately
rules out most Studio Flashes because their
minimum time is around 1/1,000 sec.
The last step before succes is to establish
the exact delay between the fruit crossing
through the laser beam and the flashes
firing. Despite some pretty scientific
formulas described in the manual, I went
about it in the traditional alpha-male “trial
and error way” and found out that 110ms
was about right.
29
So there we go! Lights
off, press the shutter, drop
the fruit through the laser
beam, and release the
shutter again. Click – my first
real picture was there, but
it wasn’t yet perfect. Tons of
things were still wrong and
needed some adjustment:
1. Focussing. Since I was
shooting with a 180 mm
Macro lens on f/4 my aperture
gave me very limited depth
of field. I spent serious time
on focussing only to find out
that you never throw the fruit
in exactly the same place. So
closing down your aperture
as much as possible to get
a bigger DOF is required. I
was able to get to f/11 when
bumping my ISO to 200.
2. The aquarium. Of course,
I forgot to dry the glass after
every shot, so I ended up with
a nice splash behind a very
wet and already fully sprayed
glass window. Too much
clutter to even think of fixing
in Photoshop. Hence, I had to
clean the windows manually
after each shot.
3. My flashes. They are not really designed
to cope with continuously throwing big
splashes of water over them. So within
5 minutes they were soaking wet which
caused 2 of them to temporarely stop. I fixed
that by drying them and putting transparant
plastic bags over them.
4. Reflection. Flashes reflect strongly on the
glass, so I had to carefully reposition them so
as not to see their reflection.
5. Timing of the fruit. For my first shot I
dropped it just above the laserbeam and got
a nice soft splash, well timed on the picture.
However, I wanted a BIG splash, so I then
tried dropping it from a higher position.
30
That worked very well, although the timing
on the Stopshot needed some adjusting
to 85ms because the fruit accelerated to
a higher speed when crossing the beam.
Hence, the flashes needed to fire sooner.
All of these adjustments made the results
much better and pretty consistent. Now all I
needed was the strawberry to strike a good
pose when dropped into the water. It took me
about 20 shots to get one or two decent ones,
but it was great fun to experiment. I tried
different colored and fading backgrounds as
well, which also worked nicely.
On average my camera was set to 2 sec,
at f/8 - f/11 and ISO 100 or 200.
Water Drop Photography
Equipment:
• The water tube with electronic valve
• The mini sensor that goes with it
• Water and some dye for colored effects
• A plastic white background, splash proof
• Canon EOS 5D MkII
• Canon EF-180 f/3.5 macro lens
• A tripod
• 2 identical Canon 580EX II’s
• And, of course, the Stopshot
Before I could get this working I needed
to mechanically setup the tube with the
electronic precision valve and the mini
sensor. Unfortunately this part may not
be the best designed. The lack of a clear
instruction on how to put it together did
not help either. I ended up designing my
own installation, which worked out for
these shots. Although to be fair, after a more
thorough study, I found the correct way of
setting it up as intended.
31
Shooting these images was extremely
straightforward. The user manual describes
what the height of the tube and the sensor
should be. For once, I followed a user
manual’s advice. There is a simple preset you
can select in the Stopshot that works like a
charm, and within 5 minutes I had my first
good pictures taken already.
It appears that there are two presets with
a few more for yourself to add: “One Drop”
and “Two Drops”. When I selected the One
Drop preset I was able to create nice clean
drops. It wasn’t very exciting, but the real
fun started with the Two Drops setting. The
valve leaves 2 drops falling, just milliseconds
apart. The first drops falls and creates a little
volcano, then the second one drops on top
of that right when it is at it’s peak to create
a nice “umbrella” of water. I played a lot
with different colors of liquid and different
viscosity. However, in the end I found that
this does not really change a lot.
One of the best effects I got was
when I shot a clear glass of water with
some colored drops falling into it, having
different colored paper laying at the
bottom of the glass. That provided a nice
color tint to the liquid as you can see.
32
Once I had this set up, it was a piece of cake to shoot these pictures over and over again.
Ballistics Photography
Equipment:
• A white background
• Canon EOS 5D MkII
• Canon EF-24-105mm f/4L IS USM
• A tripod
• 4 identical Canon 580EX II’s
• The Stopshot microphone
• The Stopshot unit
• An air rifle with holder base
• SEVERAL bulbs, glasses and bottles
This was by far the most difficult set
to setup, not so much for the Stopshot
equipment (that was easy), but the actual
shooting in the dark allowed for a few
serious misses.
The Stopshot microphone is positioned
next to the gun. The sound of the gun firing
is captured and that triggers the Stopshot
to fire the flashes. I had 4 flashes next to
33
each other, all at 1/128 (1/35.000 sec) and
that proved to freeze the motion sufficiently.
I again needed all 4 flashes to ensure I was
able to get a decent DOF.
I first shot with an old air riffle causing
the flash delay to be set at around
120ms, but after upgrading to a more
sophisticated and stronger riffle, I was able
to turn it down to 25ms. The new gun had
much more power and I was able to shoot
through thicker glasses.
It should be noted that the instruction
manual suggests using the laser beam
instead of the microphone. I have not tried
that yet - again I always read user manuals
AFTER the event. *grin*
The most important thing here is to make
sure nothing gets damaged by the flying
glass, most importantly - yourself.
I protected myself and had protected my
gear with some plastic sheets to prevent
the glass from damaging my camera, my
lens or my flashes.
With everything setup as described, the
only thing left to do was take photos. Here
are some of the results I achieved.
This concludes my first week with the
Stopshot... almost! By New Years Eve, I found
out that the device is very capable of timelapse photography as well. So, I quickly set
it up to shoot an image of the fireworks
every 15 seconds, at midnight. That worked
very well, although I had pointed my
camera to the area where I expected the
most fireworks… So an incidental piece is
shown, and for the rest I have 240 pictures
34
of my neighbor’s house with a dark sky.
Hands-on experimenting is a fun process in
photography, so I will definitely explore the
time-lapse capability more.
What’s next?
First, I plan to optimize the existing
set by making it more water resistant,
extending the cables and taking out some
unneeded cable connectors to reduce risk.
I am also creating a simple RCA splitter box
to flash six identical flashes at the same
time (we have tried 8 identical flashes on
one output port of the dropbox already
and that works as well).
In the future I plan to extend my set by
buying the Stackshot for full-length, sharp
macro images. It looks supercool, but it will
cost at least another $600. I am also looking
at buying a Flash Sequencer to allow for
multiple flashes in a sequence. This is really
fun stuff, so maybe you’ll see more from me
in the near future!
For more info on the Stopshot, visit their
website at: http://www.cognisys-inc.com
This article and images contained are Copyright © and courtesy of Peter Dorr. Please contact the author directly with any questions.
35
www.PhotographyBB.com
Photographer
to
HDR Artist
by Jon D. Ayres
The Digital Artis
PhotographyBB Online Magazine
This was an oil rendering is did using Painter to which I applied an HDR effect to bring out some
detail and give the work something of a 3D effect.
The Art of High Dynamic Range Simulation
If I were asked, “What is the most
popular style of image-based art
beyond photography?”, I would have
to say, HDR (High Dynamic Range)
photographic art. It is so popular
that almost all of the major postprocessing programs now include
it, and there are a large number
of high dynamic range software
packages available, numerous books,
videos and web pages like http://
www.stuckincustoms.com. Many
cameras now have either an HDR
mode or will auto bracket a series
36
PhotographyBB Online Magazine
www.PhotographyBB.com
of photos at different exposure levels for
blending into HDR photos later using software.
Just as with all types of art, HDR also has
many different styles. There are also plenty
of biased opinions on whether or not HDR
is really art, the use of multi-exposures vs. a
single photo when creating an HDR image,
and even which software is best for HDR. In
the world of HDR photography, these are all
hotly debated.
Now, before I upset some of the HDR
purists, let me say with certainty that blending
several photos at different exposures does
create the best HDR image, and I gladly will
admit that. However, that does not mean that
some very good HDR art can be created from
a single photo. It can and I hope to prove it.
In this month’s article, I will mainly focus on
single exposure, image-based HDR art.
The image-based artist does not always
have the opportunity to take multiple
exposures of a subject, let alone carry a
tripod, remote shutter release and other
goodies often used in HDR photography. I
frequently go on tours and if you have ever
been on a tour, you know how some can
rush to cover a lot of ground in a short time.
Situations such as these can be limiting
when trying to capture multiple exposures,
so as an artistic decision, a single exposure
HDR conversion can work beautifully for
creating digital art.
Blending multiple exposures together
does offer the HDR artist more options with
their work and sometimes much better
quality, but for the image-based artist willing
to put forth some effort into creating their
work, some pretty good HDR work can be
Photomatix Pro HDR is the most popular HDR program,
and the one all the others are judged by.
created from a single image. To demonstrate
the effectiveness of only using a single
exposure, all of the work in this article has
been created from a single image, so judge
for yourself. I think it is best to let the socalled intellectuals argue about just what art
is and leave the artists to create their work for
the viewers to enjoy it.
Just what makes High Dynamic Range
photography special?
I suppose that depends on the viewer, since
in reality it is the viewer that determines what
the art means to them. So, this section contains
only my thoughts and nothing more, about the
types of HDR artwork I like. My opinions are just
that, only my opinions. To create good HDR
artwork depends on the contrast and saturation
adjustments of the HDR photo. Many HDR
artists go too far in my opinion, but then again,
just because I do not care for that type of art
does not invalidate it as an art form in any way.
I just do not care for the “cartoonish” look that
some HDR artwork has.
37
PhotographyBB Online Magazine
There are many HDR artworks that are
works of beauty. I have always admired
much of Trey Ratcliff’s StuckInCustoms.com
art. I like HDR photos that appear realistic,
and I also enjoy some that look like actual
paintings. Just like all image-based art, I
feel that it’s important to note that it is the
strength of the original photo that will make
or break the artwork.
I’ve never been much of a purist when it
comes to photography and art. As far as I’m
concerned, anything is fair game if it results
in a visually appealing end product. There
is a time to follow rules and a time to break
the rules. Most people tend to overdo the
tone-mapping process, which often leads
to ugly halo in the resulting image. It’s ugly
(to me) and completely defeats the purpose
of the high dynamic range such photos
are supposed to have. Yet I also often see
www.PhotographyBB.com
people asking about the technique on how
to reproduce halo effects. So, while I do not
prefer it, I respect that some people have
differing opinions, and that is what makes
art great.
I feel that HDR works better with certain
photos and subjects; just as certain digital
paint styles work better with some photos
rather than others. It is just like any other
photography technique - It can be done
very well by those with artistic vision who
use it to create, rather than the masses
who choose use it to “fix” or “save” photos
that were terrible from the start. The artist
(photographer) uses the tools in his or her
palette to achieve the results they seek.
Sometimes it is to create something unreal,
sometimes it’s to try and capture things
exactly as they appear, or sometimes it is to
create an image-based digital painting.
I think ‘light
painting’ is similar
in that you can use
it to make things
appear more real,
or more unreal.
Both are perfectly
acceptable. That
being said, I
sometimes find
the unreal HDRs
to be exciting
and enticing
because of how
different they feel,
especially some of
the HDR artwork
that appears to
have been painted.
The NIK EFEX HDR PRO plugin for Photoshop is really for the “HDR artist”, and
is just so much fun to use. I used the grain setting to create something of a
pointiest style of art.
38
PhotographyBB Online Magazine
www.PhotographyBB.com
Dynamic-Photo HDR by MediaChange is another HDR favorite of mine, and was able to clean up a color cast in this
image. In my opinion, Dynamic-Photo HDR gives the HDR artist more options than other programs.
I think what matters most is whether or
not the person creating the photo likes it.
After all, most of us who create image-based
art do it because we want to, and I seriously
doubt that few of us create because we
have to. Isn’t this what art is really about thoughts and ideas? If we all liked the same
thing, life would be extremely boring and
drab. If you like shooting HDR images and
sharing them with your friends, then I say go
for it. If you don’t, then don’t create them.
Beauty is in the eye of the beholder after all.
For those who don’t like image-based
art including HDR photography, that is their
opinion and they are welcome to express
themselves how they see fit. Over time
things evolve, but they never remain pure to
the original. The best way to illustrate this
is with music. The first music made by man
was banging on a hollow log with a stick.
To say that all other forms of music are fake
is to deny the genius of Beethoven, Mozart,
Wagner, Hank Williams or even the Ramones
or Blondie; some of the many musicians I like.
39
PhotographyBB Online Magazine
www.PhotographyBB.com
HDR Software
There is a lot of HDR software available for both the Mac and Windows systems. I currently
own and use: PhotomatixPro, Fhotoroom HDR, Dynamic-Photo HDR 5, Photoshop CS5 with Nik
HDR Efex Pro and Topaz Adjust. There is no post-processing program that can do it all. They
all have their own strengths and weaknesses so I usually have more than one program for my
image-based art creation. Be forewarned, for some reason all of the HDR software companies
seem to like using examples of HDR created with their software at full strength. Many of the
examples are not very good and do not do justice to the true HDR art that can be achieved using
the software.
PhotomatixPro seems to be the most popular, and the program others are judged by. This
also seems to be Trey Ratcliff’s favorite HDR program and he does create some fantastic HDR
artwork. For anybody considering purchasing this program, remember that you can save 15%
by using the coupon code “photographybb.com” at http://www.hdrsoft.com
Fhotoroom HDR is the newest version of Artisan HDR, one of the
first HDR programs I enjoyed using. This is my favorite HDR style good detail, a subtle 3D look, and slightly painted while retaining
a realistic look.
Fhotoroom HDR is one
of my favorite HDR programs.
This program can almost do
it all as far as I am concerned.
There even is a free version if
you do not care to use RAW
files for creating your HDR
artwork. Plus, if you register
with Fhotoroom HDR, there
are a few free Photoshop and
Lightroom plugins you can
download. There are many
art color styles and templates,
you can correct white balance,
color saturation, sharpness,
and even halos can be
corrected in Fhotoroom HDR.
If I were to recommend a
good HDR program, especially
a free one, this would be it.
http://www.fhotoroom.com/
Dynamic-Photo HDR is another program I like using. I just fell in love with Dynamic
Auto Painter, and Mediachance’s DCE Autoenhance is one of the best white-balance and
image distortion correcting programs for Photoshop. Dynamic-Photo HDR is great if you’re
working with a single photo that you want to convert into HDR. There are plenty of options
for conversion and adjustments. Dynamic Auto Painter has a pretty active user forum, but
40
PhotographyBB Online Magazine
www.PhotographyBB.com
Dynamic-Photo HDR’s forum is
not as active.
http://www.mediachance.
com/hdri/
I have played around with
Nik’s HDR Efex Pro, and
without a doubt it is one of the
better Photoshop HDR plugins
there is. What makes Nik
plugins so strong are the extra
presets you can download
and install. Nik HDR Efex Pro
has a multitude of conversion
options that are available in
the software, and options to
force alignment checks on the
images (yes, you can do hand
This example is an image-based oil painting I completed by running
held HDR), and an option for
a Dynamic-Photo HDR effect after doing the digital paint conversion.
I used just enough strength to bring out the brush strokes.
‘Ghost reduction’. If you have
things changing from one shot
to another (people at night
Two of the best books in my opinion
for example) then the software will attempt
are Fine Art Photography High Dynamic
to remove them. If, like me, you prefer a
Range: Realism, Superrealism, and Image
more natural look and believe that shadows
Optimization for Serious Novices to Advanced
sometimes need to look like real shadows,
Digital Photographers by Tony Sweet, and The
then this plugin has all the fine controls
HDR Book: Unlocking the Pros’ Hottest Postneeded to get the very best from your source Processing Techniques by Rafael Concepcion.
materials.
These two books will show you how to create
http://www.niksoftware.com/hdrefexpro/
some good HDR art.
I tend to use Topaz Adjust frequently;
not so much for HDR work, but to bring back
a little detail in my image based work. The
Topaz Adjust user interface is very intuitive,
and the software comes with a ton of presets.
You can add to the 23 provided presets by
saving your own settings or importing others
from the Topaz online community, which
makes Topaz Adjust a powerful plugin.
http://www.topazlabs.com/adjust/
Regardless of your personal views on
HDR photography and/or HDR image-based
art, nobody can deny its popularity. It stirs
emotions in the viewers, just like any other art
form, and as such, one should never be afraid
to experiment and try something new. True art
has no rules, and your number one critic should
always be yourself. Listen to yourself honestly
because if you do, you will be creating some
great HDR image-based artwork.
This article and images contained are Copyright © and courtesy of Jon D. Ayres. Please contact the author directly with any questions.
41
PhotographyBB Online Magazine
www.PhotographyBB.com
in Photoshop
Post-Processing
LEADING THE
EYE
USING CUSTOM VIGNETTES TO DRAW ATTENTION TO A SUBJECT
by Dave Seeram
Vignettes are a great way to draw both focus and attention to a subject in a photo.
They help to draw your viewer’s eye to the main focal point of the image, while also
serving as an effective way to minimize distractions in the background. Previously, we’ve
examined Photoshop’s built-in vignetting
lens correction tools, but this time around
we’ll look at creating custom vignettes that
allow for more control in both size, shape,
placement, and strength. Not only is this
method more versatile - it’s extremely easy.
Let’s get down to it!
Step 1
Open your image in Photoshop.
42
PhotographyBB Online Magazine
www.PhotographyBB.com
Step 2
The first thing we need to do is duplicate the
background layer by pressing Command-J
(Mac) or Control-J (PC). Change the blend
mode of this layer to Multiply. At this point,
your whole image will look much more dark.
Next, click on the “Add Layer Mask” icon at the
bottom of the Layers Palette. A white layer
mask should appear next to your duplicated
layer, as seen here:
Lastly, press the “D” key to return your colour
swatches to their default (black/white).
Step 3
Press “B” to select the brush tool. At the top of
your window, click the drop-down arrow on
the brush size indicator, and choose a roundshaped brush.
Increase the size fairly high, and reduce the
Hardness of the brush all the way down to 0%.
Click the brush size indicator (up top) again to
close the brush options window.
Lastly, press “3” to reduce the opacity of the
brush down to 30%.
Step 4
Choosing a brush size from the options
window in the previous step can be tricky,
depending on the resolution of your
photo and size of your subject within the
composition. Use the square bracket keys
“ [ “ or “ ] “ to decrease/increase the brush
size as necessary. Start with a brush size that
approximately covers the full width of your
subject, as seen here:
43
PhotographyBB Online Magazine
www.PhotographyBB.com
Step 5
Now it’s time to bring some light back onto
the subject. Paint over your subject with a
black brush, ensuring that you are painting
on the layer mask and not the image itself.
Since the brush opacity is set to 30%, you
can make multiple passes over certain parts
of the image that you wish to shed more
light on. Feel free to adjust the brush size
to bring back more brightness to key areas
such as faces.
The Layer Mask in Detail
This is what our layer mask wound up
looking like for this particular image. You
can clearly see the multiple passes that were
done over the face of our subject.
As a side note, to view your layer mask in the
main window, hold down the option key
(Mac) or Alt key (PC) while clicking on the
layer mask icon in the Layers Palette. Option/
Alt - click again to return to the main view.
Complete!
The advantage to using custom vignettes is that it offers far more control and flexibility. Often
our main subject is not positioned in the centre of our photo, so this technique can be applied
to add further depth between your subject and the background, while drawing your viewer’s
attention deeper into your photograph. Have fun and experiment with this technique!
This article and screenshots contained are Copyright © and courtesy of Dave Seeram. Please contact the author directly with any questions.
44
PhotographyBB Forums Photo Assignments
The challenge with this photo assignment was to take a picture that mentally
evokes a sound associated with the main subject. These were our top selections, but
make sure to visit the forums to see more great entries!
Photo Assignment
Photo Assignment: “Sound”
(Top) Photo by Shane (Bottom left) Photo by “m--cube.” (Bottom right) Photo by “rene52.”
Thanks to all participating members. We look forward to all of your submissions in our upcoming challenges!
45
Step into the Spotlight!
Would you like to be featured in the
PhotographyBB Online Spotlight on Member
section? If so, please let us know at:
[email protected]
We’ll feature your photos, a small biography
and write-up about you, as well as links to your
web gallery or photography related business.
We all love photography and image editing, so
let’s get to know each other!
Been Around the World?
We are looking for talented writers who would
like to share their experiences in visiting far away
places, or even your home town for that matter.
In our Photography Around the World column,
we take our readers on a photographic journey,
and we would like you to be our tour guide.
If you would like to share your story and
photography of a city you have visited, please
contact us and share your idea with our team.
We’d love to hear from you!
Discounts for Readers:
For those of you who are interested in getting
into HDR photography, there simply is no better
HDR software then HDRsoft’s Photomatix Pro,
available as a stand alone software and as a
Photoshop Plugin. Visit:
http://www.photographybb.com/hdr/
and use the coupon code: photographybb.com
for a special discount. Also, check out the Shop
PhotographyBB site for links to some great
deals on cameras and accessories. Best deals on
the web!
Thank you for reading the PhotographyBB
Online Magazine. We hope you enjoyed it,
and we’d love to see you again next month. If
you have any questions or comments for us
regarding this magazine, please feel free to
email us at: [email protected]
Do You Have a
Great Idea for
a Photography
Article?
We are looking for
talented individuals
who would like to
expand their portfolios
by volunteering to
contribute articles to this
e-magazine! If you are
interested, we’d love to
hear from you.
Topics of Interest are:
- Photography Techniques
- Photography on Location
- Photoshop Tutorials
- Hardware / Software Reviews
- Camera Equipment
- Member Spotlight
- Plus we’re open to new ideas!
To become either a regular
contributing author, or even just for
a one-time article, please email us at:
[email protected]
Introduce yourself, share your
idea, and maybe we’ll see you in
next month’s issue!