1
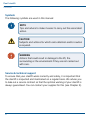
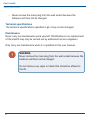
Flow2 stairlift
User Manual
A ThyssenKrupp
Elevator company
ThyssenKrupp Accessibility
TK
Flow2 stairlift
User Manual
ATTENTION:
READ THIS USER MANUAL CAREFULLY BEFORE USING
THE STAIRLIFT
PAY SPECIAL ATTENTION TO THE CHAPTER ‘SAFETY
INSTRUCTIONS’
KEEP THIS MANUAL IN THE VICINITY OF THE STAIRLIFT
SO THAT YOU WILL ALWAYS HAVE THE INFORMATION
YOU NEED AVAILABLE
© 2007 ThyssenKrupp Accessibility B.V.
All rights reserved.
Nothing in this document may be reproduced and/or published by means of printing,
photocopy, microfilm or any other means whatsoever without the prior written permission
of ThyssenKrupp Accessibility B.V.
Flow2 stairlift
Table of contents
Foreword
3
Safety instructions
6
1. Introduction
1.1 General description
1.2 Stairlift components
9
9
10
2. Controls
2.1 Controls
2.1.1 Call and park units 2.1.2 Control unit in armrest
2.1.3 Main switch
2.1.4 Optional attendant control unit
2.2 Using the stairlift
2.2.1 Charging contacts
2.2.2 Folding out the seat and sitting down
2.2.3 Optional: manual or automatic swivel seat
2.2.4 Traveling in the stairlift 2.2.5 Standing up and folding up the seat
2.2.6 Using the call and park units
11
11
12
13
13
15
15
16
16
18
20
22
24
3. Recognizing and resolving signals
3.1 Signals during normal operation of the stairlift
3.2 Signals on the motor cover
3.3 Warning signals while operating the stairlift
25
25
25
26
A ThyssenKrupp
Elevator company
ThyssenKrupp Accessibility
TK
Flow2 stairlift
Table of contents
4. Maintenance
4.1 Cleaning
4.2 Replacing the batteries
4.3 Preventive maintenance
4.4 Technical data
27
27
27
28
29
5. Contact
30
6. EC Certificate
31
Flow2 stairlift
Foreword
Congratulations!
You have chosen a ThyssenKrupp Accessibility stairlift. A modern, userfriendly and safe product that will give you years of pleasure. We will do
everything to justify the confidence that you have placed in us. In order to
make the best possible use of the stairlift, it is extremely important that you
read this user manual carefully before you actually use the stairlift.
This manual
The instructions in this user manual are intended for you, the user of the
Flow2 stairlift. The instructions contain all the information needed for
a correct and safe use of the stairlift. All sections and subsections are
numbered. The page number is shown at the bottom of each page. In this
manual, the terms “left”, “right”, “front” and “rear” are used to identify
specific parts of the lift. The reference point for this is always your position
as user, sitting on the stairlift.
Flow2 stairlift
Foreword
Symbols
The following symbols are used in this manual:
NOTE
Tips and advice to make it easier to carry out the associated
action.
CAUTION
Subjects and actions for which extra attention and/or caution
is required.
WARNING
Actions that could result in damage to the lift, the
surrounding or the environment if they are not carried out
with care.
Service & technical support
To ensure that your stairlift works correctly and safely, it is important that
the stairlift is inspected and maintained on a regular basis. We advise you
to take out a service contract so that the optimal working of your stairlift is
always guaranteed. You can contact your supplier for this (see Chapter 5).
Flow2 stairlift
Stairlifts and the environment
Batteries
The stairlift contains two batteries, each 12 V (7 Ah), to provide
the motor with power. These batteries may only be replaced
by authorized maintenance technicians. There are also 'C' cell
batteries in the call and park units and the armrest control. You
may replace these batteries yourself (see Chapter 4).
Do not dispose of old batteries with domestic refuse, but hand
them in when you buy the new batteries. If this is not possible,
contact your local municipality to find out where you can hand in
the used batteries.
Disposal of the stairlift
Stairlifts that are no longer used can generally, after
consultation with the dealer, be taken back. If this is not
possible, find out from your local government administration
what the possibilities are for return, re-use or environmentallyfriendly disposal of the materials.
Flow2 stairlift
Safety instructions
Safety instructions
General
Your Flow2 stairlift has been designed for maximum user-friendliness in
domestic households. To ensure that the stairlift is operated correctly, it is
important that every user is aware of the instructions in this user manual.
You, as end user of the stairlift, are always completely responsible for
compliance with local safety requirements and directives.
ThyssenKrupp Accessibility is therefore not responsible for damage or
injury caused by failure to correctly observe the safety requirements and
directives as described in the user manual, of improper use during the use
or maintenance of the stairlift.
Warning stickers on the stairlift
The warning stickers on the Flow2 stairlift are an important part of our
safety measures. The stickers may therefore not be covered or removed and
must always be visible and legible. If the warning stickers are unreadable
or damaged, they must be replaced immediately. You can contact your
supplier for this (see Chapter 5).
Users
- Only adults who are aware of the contents of this user manual may
use the stairlift.
- Under-aged and mentally disadvantaged persons may only use the
stairlift under supervision.
- Never exceed the maximum permissible weight (125 kg).
- The stairlift is exclusively intended for the transportation of one person
per journey.
- Never use the stairlift for transporting animals or goods.
- Never change the sequence of the actions to be performed.
Flow2 stairlift
- Keep children away from the stairlift; do not allow them to play with
the stairlift.
Use
- Before use, inspect both the stairway and the stairlift. Only use the
stairlift if the stairway and rail are completely free of any obstacles.
- Practice using the stairlift until you have completely mastered all the
actions.
- Be careful of loose clothing (scarves, belts, jackets, wide skirts, etc.).
Ensure that they cannot become trapped in the moving parts of the
stairlift.
- Never stand on the stairlift and always use the safety belt supplied.
- While moving, keep sitting upright and do not lean forwards,
backwards or to the side. Do not make any unnecessary movements,
such as rocking.
- While moving, keep your hands on the armrests and your feet on the
footplate. Do not allow your hands and feet to dangle outside the
stairlift.
- Do not force the parts of the stairlift open or closed. Do not try to
physically force the stairlift to start moving.
- Never use the stairlift if there is a fire or in the vicinity of an explosion
hazard.
- Report unusual noises and vibration to your dealer immediately.
- Protect the stairlift from water and moisture. Never spray or squirt the
stairlift with water.
- Keep the armrest control and the call and park unit free of dirt and
grease.
- Remove the joysticks as necessary from the controls when the stairlift
is not in use and keep them in a safe place.
Flow2 stairlift
Safety instructions
- Never remove the main plug from the wall socket because the
batteries will then not be charged.
Technical specifications
The technical specifications specified in §4.4 may not be changed.
Maintenance
Never carry out maintenance work yourself. Modifications to or replacement
of the stairlift may only be carried out by authorised service engineers.
Only carry out maintenance when it is specified in this user manual.
WARNING
Never remove the main plug from the wall socket because the
batteries will then not be charged.
Do not remove any signs or labels that should be affixed to
the lift.
Flow2 stairlift
1. Introduction
1.1 General description
Flow2 is a custom-made stairlift with which you can safely, comfortably and
ascend and descend the stairs without any physical exertion. The stairlift is
suitable for the transportation of a maximum of one person per journey.
The stairlift is driven by an electric motor and is equipped with rechargeable
batteries. The batteries are recharged at the stopping positions (at the top
and bottom of the stairs) and at any extra parking positions and intermediate
floors.
The stairlift can be controlled in two ways:
- Seated on the stairlift, the stairlift can be controlled with the joystick in
the control unit in the right or left armrest.
- To fetch or park at or from another position on the rail, you can use the
call and park unit. The call and park units are located at the top and
bottom of the stairs and possibly at (optional) intermediate stopping
positions. The call and park unit can be operated with the joystick.
Flow2 stairlift
Introduction
1.2 Stairlift components
NOTE
In figure 1 the standard assembly is shown for a left-handed
user, where the joystick is positioned on the left.
A
B
C
C
J
D
D
E
H
F
G
I
Fig. 1/1: Most important components
a. backrest
b. armrest control with joystick
c. armrests (folding)
d. safety belt
e. seat (folding)
10
f. footplate handle
g. motor + status lamp
h. main switch (rear side)
i . footplate (folding)
j. call and park unit
Flow2 stairlift
2. Controls
This chapter first gives a description of the most important controls.
Secondly, it describes the operation of the stairlift, whereby all the
procedures are dealt with that are part of the daily use.
2.1 Controls
The most important controls of the Flow2 stairlift are:
- The call and park units.
- The control unit in one of the armrests.
The lamp on these controls indicates the status of the stairlift (see Chapter
3). The stairlift is also equipped with a main switch and optionally with an
attendant control unit.
NOTE
The joystick works like a "dead man's handle". This means
that the joystick must be held in the required direction of
movement throughout the whole of the journey. When the
joystick is released, the stairlift will stop. The stairlift emits an
audio signal for every movement.
11
Flow2 stairlift
Controls
2.1.1Call and park units
The call and park units are located at the
top and bottom of the stairs and possibly
at each intermediate floor with a stopping
position. With the call and park units you
can bring the stairlift to you or sent it to a
parking position.
If you have chosen to be able to put the lift
"out of the way" somewhere halfway down
the stairs, your stairlift will go to this parking
position. This preset parking position (with
charging contact) has been chosen so that
other stairway users are obstructed as little
as possible by the stairlift.
a.
b
C
D
Fig. 2/1: Call and park unit
a. joystick
b. status lamp
c. calling the stairlift
d. parking the stairlift
You operate the call and park units by pressing the joystick. Press the
joystick at the side with the ‘P’ to park the stairlift (see fig. 2/1d). The stairlift
will then go to a pre-programmed parking position and stop there. Press the
joystick at the side with the ‘stairlift symbol’ to bring the stairlift to you (see
fig. 2/1c).
NOTE
To operate the stairlift with the call and park units, the joystick
needs to be inserted in the armrest control. Otherwise, the
stairlift will not work.
12
Flow2 stairlift
2.1.2 Control unit in armrest
As soon as you insert the joystick in the hole in the control unit, you can,
while sitting on the seat, control the stairlift with a single hand movement.
The control unit is mounted on the left or right armrest, depending on which
is the lower side of the stairs.
Fig. 2/2: Armrest control with
various joysticks
Fig. 2/3: Inserting the joystick
2.1.3 Main switch
Switching off the power:
The stairlift can be switched on and off with the main switch, for example when
you go on holiday or during a period when you are not home for an extended
period. An illuminated lamp on the drive unit cover indicates that the stairlift is
switched on and ready for use.The stairlift is switched off when this lamp is not lit.
Fig.2/2: Control unit with various
joysticks
Fig. 2/4: Main switch
on: pull out off: push in
Fig. 2/5: Status lamp on the motor
cover
13
Flow2 stairlift
Controls
Descent system for emergencies:
With the main switch you can also let the stairlift descend in the unlikely
even that a malfunction occurs and the stairlift stops halfway along the rail.
Pull out the main switch on the rear
of the motor cover as far as possible
to activate the descent system. Keep
the main switch in this position until
the stairlift has arrived at the desired
location. If you release the main switch,
the stairlift will stop.
As a safety precaution, the emergency
descent system will not work after the
stairlift has stopped for a short time at a
charging contact.
Fig. 2/6: Making the lift descend in an
emergency
WARNING
The descent system is not intended for everyday use.
14
Flow2 stairlift
2.1.4 Optional attendant control unit
With the optional attendant control unit,
an attendant can easily send the stairlift
upwards and downwards while the user sits
on the stairlift (fig. 2/7).
Fig. 2/7: Attendant control unit
NOTE
For operation, the control unit in the armrest always has
priority over the other controls.
2.2 Using the stairlift
CAUTION
Read the safety instructions carefully before using the
stairlift.
NOTE
Remember that all of the controls act like "dead man's
handles". As soon as you release the joystick, the stairlift will
stop immediately.
Starting point: the stairlift is at one of the stopping positions where you are
going to step on.
15
Flow2 stairlift
Controls
2.2.1 Charging contacts
Your stairlift works on batteries. Therefore,
always park the stairlift on a charging
contact. The stairlift stops automatically
when it arrives at a charging contact. If
you do not park the stairlift on a charging
contact, the batteries can become empty
and you cannot move the stairlift. In this
case, the stairlift will emit a continuous
audio signal.
Fig. 2/8: Charging contact
CAUTION
Never remove the transformer plug from the wall socket. Use
the main switch to turn the stairlift on and off.
2.2.2 Folding out the seat and sitting down
1. Fold down the seat (fig. 2/9).
2. Sit on the seat with your back against the backrest (fig. 2/10).
3. Fold the footplate out by pushing the handle on the frame downwards
and put you feet on the footplate (fig. 2/11). Throughout the journey,
keep your feet on the footplate and your hands away from moving
parts.
4. Fasten the safety belt (fig. 2/12).
5. Fold the two armrests down (fig. 2/13).
16
Flow2 stairlift
Fig. 2/9: Fold up the seat
Fig. 2/11: Fold out the footplate
Fig. 2/10: Sit down
Fig. 2/12: Fasten the safety belt
Fig. 2/13: Fold down the armrests
17
Flow2 stairlift
Controls
2.2.3 Optional: manual or automatic swivel seat
To be able to sit down safely and comfortably, you may have opted for a
manual or an automatic swivel seat.
Option 1: Manual swivel seat:
Before you sit down or stand up, you can
turn the seat in the required direction.
1. Unlock the seat by pulling the swivel
seat handle (fig. 2/14) up.
2. You can now turn the seat in the
required direction.
3. Ensure that you always lock the swivel Fig. 2/14: Manual seat swivel
seat again before you sit down. You lock handle.
the swivel seat by pushing the handle
downwards.
NOTE
The seat can only be turned in one direction, about a quarter
of a turn. The stairlift will not work when the seat is turned.
CAUTION
Ensure that you always lock the swivel seat again before you
sit down or stand up. You lock the swivel seat by pushing the
handle downwards.
18
Flow2 stairlift
Option 2: Automatic swivel seat:
Before sitting down and standing up, the
seat will automatically turn in the required
direction when you control the stairlift with
the call and park unit or the armrest control.
It is also possible for your stairlift to go up
the stairs rotated backwards, and go down
the stairs rotated forwards (see fig. 2/15).
Examples of automatic seat swiveling:
Arriving at the top of the stairs with an
automatic swivel seat:
1. Keep holding the joystick in the
direction of travel until you have
arrived at the top of the stairs. The
stairlift will turn automatically. When
you hear an audio signal, you can
release the joystick and stand up
safely.
2. Folding up the seat.
Fig. 2/15: The stairlift can move
forwards or backwards.
Parking the stairlift.
Calling the stairlift.
Fig. 2/16: Call and park unit
options.
3. Turn the seat back, out of the way, by pressing the joystick on the call
and park unit in the ‘P’ direction (see fig. 2/16).
Sitting down safely with the automatic swivel seat:
1. To be able to sit down comfortably and safely, you can turn the seat
automatically by pressing the button on the call and park unit in the
direction of the stairlift symbol (see fig. 2/16).
2. Then sit down on the seat and push the joystick in the armrest in the
required direction of movement. The stairlift will turn back first and
then start moving.
19
Flow2 stairlift
Controls
2.2.4 Traveling in the stairlift
1. Check that the stairs are free of any obstacles.
2. Place the joystick in the hole in the armrest control (fig. 2/17).
3. Push the joystick to the left or right to move the stairlift upwards or
downwards (fig. 2/18).
4. The lamp on the armrest control indicates the status of the stairlift,
see Chapter 3 for a description of the signals.
5.The stairlift will stop at any intermediate floors. To carry on moving
immediately, release the joystick and then press it again in the required
direction of movement.
Fig. 2/17: Inserting the joystick.
20
Fig. 2/18: Hold the joystick in the
required direction.
Flow2 stairlift
NOTE
The stairlift keeps moving until you release the joystick, or
until the end of the rail is reached.
NOTE
When you have arrived at a stopping position, the stairlift
always stops automatically. Release the joystick only after the
lift has come to a stop.
NOTE
As soon as you release the joystick, the stairlift stops and
the lamp on the armrest control goes out. An inbuilt safety
mechanism ensures that you cannot keep changing the
direction of movement. After each change, the stairlift waits
for a short time interval. Even after a stop, for example
halfway down the stairs, the stairlift will only start after a short
delay.
CAUTION
Always park the stairlift on a charging contact. If you do not
park the stairlift on a charging contact, the batteries can
become empty and you cannot move the stairlift any longer.
21
Flow2 stairlift
Controls
2.2.5 Standing up and folding up the seat
If your stairlift is equipped with a manual or automatic swivel seat, you can
stand up easily and safely by first turning the seat in the required direction
(see § 2.2.3).
1. If you want to remove the joystick, push it forwards (fig. 2/19).
2. Fold up the armrests (fig. 2/20).
3. Unfasten the safety belt (fig. 2/21).
4. Fold up the footplate by pulling the handle on the frame upwards (fig.
2/22).
5. Stand up and step off the seat (fig. 2/23).
6. Fold up the seat by pulling it upwards (fig. 2/24).
22
Flow2 stairlift
Fig. 2/19: Remove the joystick, if
required
Fig. 2/20: Fold up the armrests
Fig. 2/21: Unfasten the safety belt
Fig. 2/22: Fold up the footrest
Fig. 2/23: Stand up
Fig. 2/24: Fold up the seat
23
Flow2 stairlift
Controls
2.2.6 Using the call and park units
1. Check that the stairs are free of any objects that could cause an
obstruction.
2. Place the joystick in the hole in the call and park unit (fig. 2/25).
3. Push the joystick in the direction of the stairlift symbol to bring the lift
to you (fig. 2/26 A).
4. Fold up the seat and press the joystick at the side with the ‘P’ to send
the stairlift to the nearest parking position (fig. 2/26 B).
a.
b
Fig. 2/25: Insert the joystick in the
call and park unit.
Fig. 2/26: Symbols on the call and
park unit.
a. Calling the stairlift.
b. Parking the stairlift.
NOTE
As soon as you release the joystick, the stairlift will stop
immediately.
WARNING
Ensure that you do not obstruct anyone. Therefore, always
call or park the stairlift with the seat folded.
24
Flow2 stairlift
3. Recognizing and resolving signals
When you move the joystick in the call and park unit or the armrest control,
the lamp on these controls, in combination with an audio signal from the
stairlift, indicate the status of the stairlift. The following table gives an
overview of the possible signals.
3.1 Signals during normal operation of the stairlift
Signal on control
Constant green lamp.
Constant green lamp
+ audio signal from
motor.
Meaning
The joystick has been operated and the stairlift
is moving or will move.
After the stairlift has been operated, the stairlift
is operated again with a different control. The
stairlift will start moving within 10 seconds.
3.2 Signals on the motor cover
Signal on the motor
Constant blue lamp.
No lamp.
Meaning
The stairlift is on. The stairlift can be switched
off with the main switch.
The stairlift is off and will not work. The stairlift
can be switched on with the main switch.
25
Flow2 stairlift
Recognizing and resolving signals
3.3 Warning signals while operating the stairlift
Signal on control
Meaning
Flashing green lamp The batteries of this
control are (almost)
empty and must be
replaced.
Flashing red lamp
1. The stairlift
+ audio signal from
is not parked
motor.
on a charging
contact.
Constant red lamp.
26
Or:
2.The stairlift has
encountered an
obstacle and will
not move any
further.
There is a
malfunction in the
stairlift.
Action
Replace the batteries (see §4.2)
of the control concerned.
1. Drive the stairlift to a charging
contact. If this is not possible,
you can turn the audio signal
off by switching the stairlift
off with the main switch (see
§2.1.3). Then contact your
supplier.
2. Move the stairlift in the
opposite direction and remove
the obstacle.
Switch the stairlift off and then
on again (see §2.1.3). Try to
operate the stairlift. If the stairlift
does not work contact your
supplier. If this situation occurs
while moving, you can always
descend with the emergency
descent system (see §2.1.3).
Flow2 stairlift
4. Maintenance
4.1 Cleaning
- Clean the stairlift regularly with a clean, slightly moist cloth and
possibly a light cleaning agent.
- You can remove the dust particles that collect under the rail during the
running-in period of your stairlift with a vacuum cleaner.
CAUTION
Do not use any caustic or abrasive cleaning agents, and do
not use too much water.
4.2 Replacing the batteries
When the 'C' cell batteries in a control are about to become empty, the lamp
- with joystick operation - on the control concerned will flash green. In that
case, replace the batteries.
1. Remove the cover by lifting it, or by placing the joystick in the cutout
under the cover and turning it towards the front of the armrest (see fig.
4/1).
2. Remove the batteries from the armrest control (see fig. 4/2).
Fig. 4/1: Removing the cover.
Fig. 4/2: Armrest control batteries.
27
Flow2 stairlift
Maintenance
3. Replace the batteries with the spare
batteries located in the other armrest.
4. Refit the cover by pushing it forwards
and clicking it into place (see fig. 4/3 ).
Fig. 4/3: Refit the cover
NOTE
The armrest opposite the armrest in which the control unit
is mounted contains spare batteries that you can use to
replace empty batteries. Ensure that you fit new batteries
when you use the spare batteries.
4.3 Preventive maintenance
In addition to cleaning the stairlift, regular maintenance is needed to
guarantee that your stairlift will keep working as it should and without
any problems. This maintenance should be carried out by authorized
maintenance technicians. We therefore advise you to take out a maintenance
contract so that you can always be certain that your stairlift will stay in
optimal condition. Contact your supplier for more information about the
maintenance contract.
28
Flow2 stairlift
4.4 Technical data
General
Permissible weight
Driving speed (max.)
Decibel (max.)
Fire resistance
Charging time 12 V batteries
Capacity 12 V batteries
125 kg
0.15 meter per second
67 dBA
according to EN81-40
24 hours (less is possible for 1
journey)
10 journeys (1 floor, vertical landing,
horizontal run-out at the top, 125
kg)
Electrical system
Supply voltage
Mains supply
24 VDC, 2.5 A
230 VAC, 0.35 A
Environmental conditions
Surrounding temperature
Relative humidity
5 - 40 °C
20 - 80%
29
Flow2 stairlift
Contact
5. Contact
For information about settings, service or other matters not dealt with in this
manual, you can contact your dealer. The telephone number is:
[ENTER THE SERVICE TELEPHONE NUMBER HERE]
To be able to help you as quickly as possible, please have the following
details available when you contact one of our service department staff:
End user name:
Installation number:
Telephone number:
Type of stairlift: Description of the problem:
[YOUR INSTALLATION NUMBER]
30
Flow2 stairlift
6. EC Certificate
31
Product Management
ThyssenKrupp Accessibility B.V.
Van Utrechtweg 99
2921 LN Krimpen aan den IJssel
T: +31 (0)180 – 530 990
F: +31 (0)180 – 530 998
www.ThyssenKruppAccessibility.nl
[email protected]
Flow2/Tab03/UK/V2007.12.06
LIMITED WARRANTY
Limited Warranty: Subject to the limitations set forth below, THYSSENKRUPP ACCESS MANUFACTURING LLC, 4001 East 138th Street, Grandview, Missouri 64030,
warrants to the ORIGINAL PURCHASER ONLY that the Levant stair lift (the “Lift”) drive train parts used in the Lift shall be free of defects in material and workmanship for
a five year period and other component parts used in the Lift shall be free of all defects and workmanship for a two year period commencing on the date of purchase.
The self-addressed Limited Warranty card must be completed and returned to THYSSENKRUPP ACCESS MANUFACTURING LLC within 30 days from the date of purchase in
order for this Limited Warranty to be activated. IF THE LIMITED WARRANTY CARD PROVIDED BY THE DEALER IS NOT RETURNED WITHIN THE FOREGOING TIME PERIOD,
THIS LIMITED WARRANTY WILL BE NULL AND VOID.
Warranty Limitations: THE FOREGOING LIMITED WARRANTY IS THE SOLE AND EXCLUSIVE WARRANTY PROVIDED BY THYSSENKRUPP ACCESS MANUFACTURING LLC,
AND IS IN LIEU OF ALL OTHER WARRANTIES, WRITTEN OR ORAL, EXPRESS OR IMPLIED, ARISING BY OPERATION OF LAW OR OTHERWISE, BY THYSSENKRUPP ACCESS
MANUFACTURING LLC OR ANY OTHER PARTY, INCLUDING, BUT NOT LIMITED TO, WARRANTIES OF MERCHANTABILITY AND FITNESS FOR A PARTICULAR PURPOSE,
WHETHER OR NOT THE PURPOSE HAS BEEN DISCLOSED AND WHETHER OR NOT THE LIFT HAS BEEN SPECIFICALLY DESIGNED OR MANUFACTURED FOR BUYER’S USE
OR PURPOSE. No person has been authorized to provide any other warranty or to assume any other liability with respect to the Lift except by written statement from an
authorized officer of THYSSENKRUPP ACCESS MANUFACTURING LLC. This Limited Warranty does not extend to any losses or damages incurred as a result of any of the
following: misuse, neglect, accident, abuse, user’s negligence, improper operation (operation not in accordance with Owner’s Manual), fire, flood, acts of God, ordinary
wear and tear, and damage during shipment, improper assembly, care or maintenance if performed by any individual other than an authorized Dealer of THYSSENKRUPP
ACCESS MANUFACTURING LLC. The remedies provided under this Limited Warranty do not extend to minor mechanical adjustments (such as tightening of nuts, bolts
and screws).
Limitation of Liability: UNDER NO CIRCUMSTANCES SHALL THYSSENKRUPP ACCESS MANUFACTURING LLC OR ANY OF ITS AUTHORIZED DEALERS BE LIABLE FOR
LOSSES OR DAMAGES ARISING FROM DELAY IN PERFORMANCE, OR USE OR INABILITY TO USE THE LIFT, REGARDLESS OF THE FORM OF THE CLAIM OR CAUSE OF
ACTION (WHETHER BASED IN CONTRACT, INFRINGEMENT, NEGLIGENCE, STRICT LIABILITY, OTHER TORT OR OTHERWISE), AND IN NO EVENT SHALL THYSSENKRUPP
ACCESS MANUFACTURING LLC' LIABILITY TO BUYER EXCEED THE PRICE PAID BY BUYER FOR THE LIFT. BUYER AGREES THAT IN NO EVENT SHALL SELLER’S LIABILITY
TO BUYER EXTEND TO INCLUDE INCIDENTAL, CONSEQUENTIAL, SPECIAL OR PUNITIVE DAMAGES. The term “consequential damages” shall include, but not be limited
to, loss of use and loss or damage to property. Some states do not allow limitations on how long an implied warranty lasts or the exclusion or limitation of incidental or
consequential damages, or legal remedies, so these above limitations may not apply to you.
Claims: THE SOLE AND EXCLUSIVE REMEDY FOR BREACH OF THE LIMITED WARRANTY HEREUNDER SHALL BE LIMITED TO REPAIR OF THE DEFECT OR REPLACEMENT
OF THE LIFT WITHOUT CHARGE. Claims for defects in material and workmanship under this Limited Warranty must be made within the warranty period set forth above
by written notification to the authorized THYSSENKRUPP ACCESS MANUFACTURING LLC Dealer from which the Lift was purchased. The written notice must include a
description of the defect complained of, along with a copy of the invoice or other proof of purchase and the serial number of the Lift. The authorized Dealer will notify
THYSSENKRUPP ACCESS MANUFACTURING LLC of the claim, and either the Dealer or an authorized THYSSENKRUPP ACCESS MANUFACTURING LLC technician will, at
THYSSENKRUPP ACCESS MANUFACTURING LLC' option, repair or replace the Lift at Buyer’s premises without charge for materials. Buyer may engage a third party other
than THYSSENKRUPP ACCESS MANUFACTURING LLC or an authorized THYSSENKRUPP ACCESS MANUFACTURING LLC Dealer or technician to repair or replace the Lift or
to cure any defects in material and workmanship that would otherwise be covered under this Limited Warranty. HOWEVER, THIS LIMITED WARRANTY DOES NOT COVER
ANY CHARGES OR EXPENSES ASSESSED BY ANY SUCH THIRD PARTY OR COMPANY PERFORMING SUCH REPAIRS OR REPLACEMENT WORK. COSTS FOR PARTS THAT
ARE NOT GENUINE THYSSENKRUPP ACCESS MANUFACTURING LLC PARTS, AND/OR DAMAGES TO THE LIFT CAUSED BY THE USE OF NON-GENUINE THYSSENKRUPP
ACCESS MANUFACTURING LLC PARTS OR BY THE PERFORMANCE OF A NON-THYSSENKRUPP DEALER OR AUTHORIZED TECHNICIAN, ARE NOT COVERED UNDER THIS
LIMITED WARRANTY.
This Limited Warranty gives you specific legal rights, and you may have other rights which vary from state to state.
THYSSENKRUPP ACCESS MANUFACTURING LLC • 4001 East 138th Street • Grandview, MO 64030
www.tkaccess.com