1
®
DOMA IN
PowerSCSIJ™ Multi-lingu al
Quick Reference Manual
•English
•French
•German
•Italian
•Spanish
•Japanese
PowerSCSI!™ Multi-lingual
Quick Reference Manual
•English
•French
•German
•Italian
•Spanish
•Japanese
TRADEMARKS
Future Domain and the Future Domain Logo are registered
trademarks and PowerSCSI ! is a trademark of Future Domain
Corporation. IBM, PC-DOS and Micro Channel are registered
trademarks of the International Business Machines
Corporation. MS, MS-DOS and Microsoft are registered
trademarks of Microsoft Corporation.
All other brands and product names are trademarks or
registered trademarks of their respective companies.
COPYRIGHT
© 1994 Future Domain Corporation
All Rights Reserved.
Under the copyright laws, this manual cannot be copied in
whole or in part without written permission from Future
Domain Corporation except for normal use by original
buyer(s). This exception does not allow copies to be made for
sale to others. Under the law, copying includes translating into
another language or format. For written permission, contact:
Future Domain Corporation
2801 McGaw Avenue
Irvine, CA 92714
Voice: (714) 253-0400
Fax: (714) 253-0913
\Vhile every precaution has been taken in the preparation of
this guide, Future Domain assumes no responsibility for errors
or omissions. Neither is any liability assumed for damages
resulting from the use of the information contained herein.
Contents
English
1.0
PowerSCSI! for DOS, Windows and NetWare 386 ...
1
1.1
PowerSCSI! for DOS/Windows..................................
1
1.1.1 Before You Begin.......................................................
1
1.1.2 Express Installation ...................................................
2
Installation Tips..........................................................
3
1.1.3 Custom Installation ....................................................
4
French
1.0
PowerSCSI! pour DOS, Windows et NetWare 386 ...
7
1.1
PowerSCSI! pour DOS/Windows...............................
7
1.1.1 Etape preliminaire ......................................................
7
1.1.2 Installation express....................................................
8
Conseils pratiques pour l'installation ......................
9
1.1.3 Installation personnalisee .........................................
1o
German
1.0
PowerSCSI! flir DOS, Windows und NetWare 386 ...
13
1.1
PowerSCSI! flir DOS/Windows..................................
13
1.1.1 lnstallationsvoraussetzungen ...................................
13
1.1.2 ExpreB-lnstallation .....................................................
14
Tips zur Installation....................................................
15
1.1.3 Benutzerdefinierte Installation ..................................
17
Contents
Italian
1.0
PowerSCSI! per DOS, Windows e NetWare 386 ......
19
1.1
PowerSCSI! per DOS/Windows .................................
19
1.1.1 Preliminari .................................................................... 19
1.1.2 lnstallazione rapida ....................................................
20
Suggerimenti per l'installazione ...............................
21
1.1.3 lnstallazione personalizzata ......................................
22
Spanish
1.0
PowerSCSI! para DOS, Windows y NetWare 386 .....
25
1.1
PowerSCSI! para DOS/Windows...............................
25
1.1.1 Antes de comenzar ....................................................
25
1.1.2 lnstalaci6n rapida ..... ..................................................
26
Sugerencias para la instalaci6n ................................
27
1.1.3 lnstalaci6n personalizada ..........................................
28
Japanese
1.0
DOS I Windows I Netware 386 ffl PowerSCSI! ..........
31
1.1
DOS/Window sffl PowerSCSI! .................................
31
1.1.1
'j: l5 '15/),:. ,......................................................................
31
1.1.3
?
v .A
1 /.A I--
v-
~ 3 / ....... ..... ..... .........
32
1:...-.Ai-.v-~3:..-a~O)m~~rw ..........................
33
1.1.2 I
.A 7°
n .A 9 b.
·
· 1 / .A I--
v-
~ 3 /
...... ...... ..... .... ......... 34
1.0 PowerSCSI! for DOS, Windows
and NetWare 386
PowerSCSI! for DOS/Windows/NetWare 386 provides support
for most SCSI peripherals.
1.1
PowerSCSI! for DOS/Windows
PowerSCSI ! for DOS/Windows is easy to install for either
DOS or Windows. You may choose one of two installation
procedures: express or custom installation.
Express installation scans the SCSI bus and installs the
appropriate drivers for the SCSI peripherals if finds. For
express installation instructions, see Section 1.1.2, Express
Installation.
Custom installation allows you to modify and install just the
drivers you want. For custom installation instructions, see
Section 1.1.3, Custom Installation.
1.1.1 Before You Begin
PowerSCSI ! for DOS/Windows requires that you have
properly installed your SCSI controller, cables and SCSI
peripherals, and that you are able to boot DOS. PowerSCSI! for
Windows requires that you have Windows 3 .1 running. If you
are having difficulty installing your SCSI hardware, refer to the
user's manual that came with your SCSI controller or
peripheral for help.
Be sure to create backup copies of the Future Domain diskettes
before you install PowerSCSI ! for DOS/Windows.
PowerSCSI! for DOS/Windows/NetWare 386
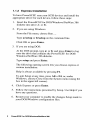
1.1.2 Express Installation
To have PowerSCSI! scan your SCSI devices and install the
appropriate driver for each device, follow these steps:
1. Insert the PowerSCSI! for DOS/Windows/NetWare 386
diskette into drive A: or B:.
2. If you are using Windows:
From the File menu, choose Run ....
Type a:\setup or b:\setup on the command line.
Click OK or press Enter.
3. If you are using DOS:
At the DOS prompt, type a: orb: and press Enter to log
onto the drive that contains the PowerSCSI! for DOS/
Windows/NetWare 386 diskette.
Type setup and press Enter.
The following opening screen lets you choose express or
custom installation:
Help is always available by pressing Fl.
To quit Setup at any time, press Alt+ F4, or, under
Windows, choose Close from the System menu (using the
box in the upper left comer).
4. Click Express or press Enter.
5. Follow the instructions presented by Setup. Use Help if you
have any questions.
6. Restart your computer to enable the changes Setup made to
your DOS/Windows configuration files.
2
PowerSCSI! for DOS/Windows/NetWare 386
Installation Tips
1. After running PowerSCSI ! Setup, reboot your computer so
all drivers are installed.
2. After the successful setup of PowerSCSI!, optimize your
memory. PowerSCSI ! components require memory. If you
have MS-DOS or PC-DOS 6.0 or above, use the
"memmaker" or "ramboost" commands provided with your
DOS to optimize your memory automatically (consult the
documentation that came with your version of DOS). If you
have an earlier version of DOS, you must optimize your
memory manually. See your DOS documentation for more
information.
3. IF YOU USE 6.0 "MULTI-CONFIG" - DOS 6.0 and
above support a new feature called "multi-config" that
allows experienced users to develop multiple boot
configurations in their config.sys and autoexec.bat files.
PowerSCSI! and the memory optimizers that come with
DOS are not capable of handling all possible configurations
that can be created with "multi-config". If you use "multiconfig" features of DOS 6.0, you will need to optimize
your config.sys and autoexec.bat by yourself. Future
Domain suggests you ALWAYS end your config.sys with a
(common) statement as that is where PowerSCSI! Setup
will place statements in your "multi-config" file (this is
also true of Setup programs from other vendors).
4. Order counts for the statements that are added by
PowerSCSI ! Setup. If you decide to move or copy
statements in your config.sys, autoexec.bat or system.ini,
see sections 1.1.3-4 and 1.3 before doing so.
NOTE: If you add or remove any SCSI peripherals from
your system, you must reinstall PowerSCSI! for
DOS/Windows.
PowerSCSI! for DOS/Windows/NetWare 386
3
1.1.3 Custom Installation
To successfully install PowerSCSI! on your PC using the
Custom installation requires an understanding of the internal
structure of PowerSCSI! and where to install the various
drivers into your CONFIG.SYS, AUTOEXE C.BAT and
SYSTEM.I N! system configuration files.
To custom install PowerSCS I ! for DOS/Windows, follow these
steps:
1. Insert the PowerSCSI! for DOS/Wind ows/NetW are 386
diskette into drive A: or B:.
2. If you are using Windows:
From the File menu, choose Run ...
Type a:\setup or b:\setup on the command line.
Click OK or press Enter.
3. If you are using DOS:
At the DOS prompt, type a: orb: and press Enter to log
onto the drive which contains the PowerSCS I ! for DOS/
Windows/NetWare 386 diskette.
Type setup and press Enter.
Help is always available by pressing Fl.
To quit Setup at any time, press Alt+ F4, or, under
Windows, choose Close from the System menu (using the
box in the upper left comer).
4. Click Custom to modify the installation of PowerSCS I ! for
DOS/Windows.
For DOS, press ALT + C to highlight Custom and press
ENTER.
4
PowerSCSI! for DOS/Windows /NetWare 386
5. Setup displays the default settings, based upon the SCSI
peripherals found. You may change the settings to suit your
requirements by clicking inside the box next to the
corresponding driver. An "X" in the box tells Setup to
install the driver. A black box indicates the driver will not
be installed. The More ... button beside several of the
options provides access to additional options.
For an explanation of these options, click on the Help
button.
6. When you are finished making changes, click OK or press
Enter. Follow the instructions presented by Setup.
7. Restart your computer to enable the changes Setup made to
your PowerSCSI ! for DOS/Windows configuration files.
NOTE: If you add or remove any SCSI peripherals from
your system, you must reinstall PowerSCSI! for
DOS/Windows.
PowerSCSI! for DOS/Windows/NetWare 386
5
6
PowerSCSI! for DOS/Windows/NetWar e 386
1.0 PowerSC,SI! pour DOS,
Windows et NetWare 386
PowerSCSI! pour DOS/Windows/NetWare 386 offre un
support pour la plupart des peripheriques SCSI.
1.1
PowerSCSI! pour DOS/Windows
PowerSCSI! pour DOS/Windows est facile ainstaller pour
DOS et pour Windows. Yous avez le choix entre deux
methodes d'installation: express OU personnalisee.
L'installation express analyse le bus SCSI et installe les pilotes
appropries pour les peripheriques SCSI trouves. Pour
!'installation express, consultez les instructions dans
Installation express, ala section 1.1.2.
L'installation personnalisee vous permet de modifier et
d'installer seulement les pilotes que vous souhaitez. Pour
!'Installation personnalisee, consultez les instructions dans
Installation personnalisee, ala section 1.1.3.
1.1.1 Etape preliminaire
Pour utiliser PowerSCSI! pour DOS/Windows, il est necessaire
d'avoir installe avec succes votre contr6leur SCSI, vos cables
et peripheriques SCSI, et de pouvoir initialiser DOS. Votre
Windows 3 .1 do it aussi etre en fonctionnement. Si vous avez
des difficultes a installer le materiel SCSI, consultez le guide
de l'utilisateur livre avec votre contr6leur ou avec votre
peripherique SCSI.
Veillez a faire une copie de sauvegarde des disquettes Future
Domain avant d'installer PowerSCSI! pour DOS/Windows.
PowerSCSI! for DOS/Windows/NetWare 386
7
1.1.2 Installation express
Pour analyser vos unites SCSI et installer le pilote approprie
dans chacune d'elles a l'aide de PowerSCSI!, procedez comme
suit:
1. Inserez la disquette PowerSCSI! pour
DOS/Windows/NetWare 386 dans le lecteur A: ou B:.
2. Si vous travaillez sous Windows :
A partir du menu Fichier, choisissez Executer.
Tapez a:\setup ou b:\setup sur la ligne de commande.
Cliquez sur OK ou appuyez sur la touche Entree.
3. Si vous travaillez sous DOS :
A !'invite du DOS, tapez a: ou b: et appuyez sur la touche
Entree pour acceder au lecteur ou se trouve la disquette
PowerSCSI! pour DOS/Windows/NetWare 386.
Tapez setup et appuyez sur la touche Entree.
L' affichage suivant vous permet de choisir l' installation
express ou personnalisee :
Si necessaire, vous pouvez obtenir de I' aide en appuyant
sur Fl.
Pour quitter !'installation a tout moment, appuyez sur
Alt+F4, OU sous Windows, choisissez Fenner a partir du
Menu Systeme (en utilisant la case en haut agauche).
4. Cliquez sur Express ou appuyez sur la touche Entree.
5. Suivez les instructions presentees dans Setup. Consultez
l'aide si necessaire.
6. Redemarrez votre ordinateur afin de valider les
changements introduits dans vos fichiers de configuration
DOS/Windows par le programme d'installation.
8
PowerSCSI! for DOS/Windows/NetWare 386
Conseils pratiques pour l'installation
1. Apres avoir effectue !'installation PowerSCSI!,
reinitialisez votre ordinateur pour installer tous les
pilotes.
2. Apres avoir installe PowerSCSI! avec succes, optimisez
votre memoire. Les composants de PowerSCSI !
requierent de la memoire. Si vous possedez MS-DOS OU
PC-DOS 6.0 ou une version ulterieure, utilisez les
commandes "memmaker" ou "ramboost" foumies avec
votre DOS pour optimiser automatiquement votre
memoire (rfferez-vous ala documentation livree avec
votre version du DOS). Si vous possedez une version plus
ancienne, vous devez optimiser votre memoire
manuellement. Consultez la documentation de votre DOS
pour plus de renseignements.
3. Si vous utilisez "MULTI-CONFIG 6.0" - DOS 6.p et les
versions ulterieures supportent une nouvelle fonction
appelee "multi-config"' grace alaquelle les utilisateurs
chevronnes peuvent developper des configurations a
initialisations multiples dans leurs fichiers config.sys et
votre autoexec.bat. PowerSCSI! et les optimiseurs de
memoire livres avec DOS ne sont pas capables de
supporter tous les types de configuration que l' on peut
creer a l' aide de "multi-config". Si vous utilisez les
fonctions "multi-config" de DOS 6.0, vous devez
optimiser vous-meme votre config.sys et autoexec.bat.
Future Domain vous recommande de TOUJOURS
terminer votre conjig.sys avec un message {common}, car
c'est a cet endroit que !'installation PowerSCSI! place les
instructions dans votre fichier "multi-config" (cela
s'applique aussi aux programmes d'installation d'autres
vendeurs).
4. L'ordre est important pour les instructions de saisie
ajoutees par PowerSCSI!. Si vous decidez de deplacer ou
de copier des instructions dans votre con.fig.sys,
autoexec.bat ou system.ini, consultez d'abord les sections
1.1.3-4 et 1.3.
PowerSCSI! for DOS/Windows/NetWare 386
9
REMARQUE :
Si vous ajoutez des peripheriques SCSI ou si
vous en retirez, vous devez reinstaller
PowerSCSI! pour DOS/Windows.
1.1.3 Installation personnalisee
Pour pouvoir installer avec succes PowerSCSI ! sur votre PC en
utilisant !'Installation personnalisee, vous devez d'abord vous
familiariser avec la structure inteme de PowerSCSI! et
1'emplacement des differents programmes de commande dans
vos fichiers de configuration CONFIG.SYS,
AUTOEXEC.BAT et SYSTEM.IN!.
Pour !'installation personnalisee de PowerSCSI! pour
DOS/Windows, procedez comme suit :
1. Inserez la disquette PowerSCSI! pour
DOS/Windows/NetWare 386 dans le lecteur A: ou B:
2. Si vous travaillez sous Windows :
A partir du menu Fichier, choisissez Executer...
Tapez a:\setup ou b:\setup sur la ligne de commande.
Cliquez sur OK ou appuyez sur la touche Entree.
3. Si vous travaillez sous DOS :
A partir de l'invite du DOS, tapez a: ou b: et appuyez sur
la touche Entree pour vous connecter au lecteur ou se
trouve la disquette PowerSCSii pour
DOS/Windows/NetWare 386.
Tapez setup et appuyez sur la touche Entree.
Si necessaire, vous pouvez obtenir de l' aide en appuyant
sur Fl.
10
PowerSCSI! for DOS/Windows/NetWare 386
Pour quitter I' installation atout moment, appuyez sur
Alt+F4, ou, si vous travaillez sous Windows, choisissez
Fenner a partir du menu Systeme (en utilisant la case en
haut a gauche).
4. Cliquez sur Custom pour modifier !'installation de
PowerSCSI! pour DOS/Windows.
Si vous travaillez sous DOS, appuyez sur Alt+C pour
mettre !'Installation personnalisee en surbrillance, puis
appuyez sur la touche Entree.
5. Le programme d'installation affiche les parametres par
defaut, selon les peripheriques SCSI trouves. Vous
pouvez changer ces parametres pour les adapter aVOS
besoins en cliquant a l'interieur de la case correspondant
au pilote voulu. Si la case est cochee, le programme
d'installation met en place le pilote. Si elle n'est pas
cochee, le programme ne sera pas installe. Le bouton
More ... (Suite) qui se trouve a cote de nombreuses options
vous permet d'autres choix.
Vous obtiendrez des explications de ces options en
cliquant sur Aide.
6. Lorsque vous avez termine d' effectuer les changements,
cliquez sur OK ou appuyez sur la touche Entree.
Procedez selon les instructions foumies dans le
programme d'installation.
7. Redemarrez votre ordinateur pour valider les changements
que Setup a apportes aux fichiers de configuration de
votre PowerSCSI! pour DOS/Windows.
REMARQUE: Si vous ajoutez des peripheriques SCSI a
votre systeme ou si vous en retirez, vous
devez reinstaller PowerSCSI ! pour
DOS/Windows.
PowerSCSI! for DOS/Windows/NetWare 386
11
12
PowerSCSI! for DOS/Windows/NetWare 386
1.0 PowerSCSI! fur DOS, Windows
und NetWare 386
PowerSCSI! filr DOS/Windows/NetWare 386 unterstiitzt die
meisten SCSI-Peripheriegerate.
1.1
PowerSCSI! fur DOS/Windows
PowerSCSI! filr DOS/Windows kann sowohl filr DOS als auch
filr Windows einfach installiert werden. Dafilr stehen zwei
Installationsverfahren zur Wahl: ExpreB- oder
benutzerdefinierte Installation.
Bei der ExpreB-Installation wird der SCSI-Bus gepriift, und es
werden die den vorhandenen Peripheriegeraten entsprechenden
Treiber installiert. Anleitungen zur ExpreB-Installation finden
Sie in Abschnitt 1.1.2, Exprefi-Installation.
Bei der benutzerdefinierten Installation haben Sie die
Moglichkeit, nur die gewiinschten Treiber zu installieren
und zu modifizieren. Anleitungen zur benutzerdefinierten
Installation finden Sie in Abschnitt 1.1.3, Benutzerdefinierte
Installation.
1.1.1 lnstallationsvoraussetzungen
PowerSCSI! filr DOS/Windows setzt voraus, daB das SCSISteuerteil, ·Kabel und die SCSI-Peripheriegerate sachgemaB
installiert sind und DOS gestartet werden kann. Fiir
PowerSCSI! filr Windows ist auBerdem erforderlich, daB
Windows bereits 3 .1 Iauft. Sollten Sie bei der Installation der
SCSI-Hardware Schwierigkeiten haben, lesen Sie bitte im
Benutzerhandbuch, das mit dem SCSI-Steuerteil oder dem
PowerSCSI! for DOS/Windows/NetWare 386
13
-Peripheriegerat geliefert wurde, die entsprechenden Kapitel
durch.
Vergessen Sie nicht, von den Future Domain-Disketten
Sicherungskopien anzulegen, bevor Sie PowerSCSI! filr
DOS/Windows installieren.
1.1.2 ExpreB-lnstallation
Gehen Sie folgendermaBen vor, damit PowerSCSI! Ihre SCSIGerate priift und filr j edes Gerat den entsprechenden Treiber
installiert:
1. Legen Sie die Diskette PowerSCSI! filr
DOS/Windows/NetWare 386 in Laufwerk A: oder B: ein.
2. W enn Sie in Windows arbeiten:
Wahlen Sie im Menii Datei Ausfilhren ...
Geben Sie a:\setup oder b:\setup in die Befehlszeile ein.
Klicken Sie auf OK, oder driicken Sie die Eingabetaste.
14
PowerSCSI! for DOS/Windows/NetWare 386
3. Wenn Sie in DOS arbeiten:
Geben Sie an der DOS-Eingabeaufforderung a: oder b:
ein, und driicken Sie die Eingabetaste, um auf das
Laufwerk zuzugreifen, in dem sich die Diskette
PowerSCSI! fiir DOS/Windows/NetWare 386 befindet.
Geben Sie setup ein, und driicken Sie die Eingabetaste.
-Ober den folgenden Eroffnungsbildschirm konnen Sie
zwischen ExpreB- und benutzerdefinierter Installation
wahlen:
Die Hilfe ist jederzeit <lurch Driicken von Fl verfiigbar.
Sie konnen die Installation jederzeit beenden, indem Sie
Alt+F4 driicken bzw. in Windows vom Systemmenii
(iiber das Kastchen in der oberen linken Ecke) SchlieBen
wahlen.
4. Klicken Sie auf Express, oder driicken Sie die
Eingabetaste.
5. Folgen Sie den Installationsanweisungen, und rufen Sie
die Hilfe auf, wenn Sie Fragen haben.
6. Starten Sie Ihren Computer emeut, damit die wahrend der
Installation an den DOS/Windows-Konfigurationsdateien
vorgenommenen V eranderungen aktiviert werden.
Tips zur Installation
1. Starten Sie Ihren Computer nach der Installation von
PowerSCSI! emeut, damit alle Treiber installiert sind.
PowerSCSI! for DOS/Windows/NetWare 386
15
2. Fiihren Sie nach der erfolgreichen Installation von
PowerSCSI! eine Speicheroptimierung <lurch, da die
Komponenten von PowerSCSI! Speicherplatz benotigen.
Falls Sie mit MS-DOS oder PC-DOS 6.0 oder neuerer
Version arbeiten, setzen Sie die in DOS vorhandenen
Befehle "memmaker" oder "ramboost" ein, damit Ihr
Speicher automatisch optimiert wird. Falls Sie mit einer
alteren DOS-Version arbeiten, muB die Speicheroptimierung manuell vorgenommen werden. Nahere
Informationen zu diesen beiden V erfahren finden Sie in
den Unterlagen zu Ihrer jeweiligen DOS-Version.
3. Falls Sie mit 6.0 "MULTI-CO NFIG" arbeiten: DOS 6.0
und neuere Versionen unterstiitzen eine neue Funktion
mit der Bezeichnung "multi-config", die es erfahrenen
Anwendem ermoglicht, in den Dateien CONFIG.SYS und
AUTOEXEC .BAT mehrfache Urladekonfigurationen zu
entwickeln. Power SCSI! und die mit DOS gelieferten
Speicheroptimierungsprogramme konnen nicht alle
Konfigurationen, die moglicherweise mit "multi-config"
erstellt werden, handhaben. Zurn Einsatz der "multiconfig"-Funktionen von DOS 6.0 miissen Sie die Dateien
CONFIG.SYS und AUTOEXEC.BAT selbst optimieren.
Future Domain schlagt vor, daB Sie CONFIG.SYS
IMMER mit einer {common}-Anweisung beenden, da
PowerSCSI! an dieser Stelle die Anweisungen in der
Datei "multi-config" einfiigt (dies gilt auch fiir die
Installationsprogramme anderer Hersteller).
4. Fur die bei der PowerSCSI!-Installation hinzuge:mgten
Anweisungen ist die Reihenfolge sehr wichtig. Falls
Sie Anweisungen in der Datei CONFIG.SYS,
AUTOEXEC .BAT oder SYSTEM.IN! verschieben oder
kopieren mochten, lesen Sie sich zuvor Abschnitte 1.1.3-4
und 1.3 <lurch.
HINWEIS: Falls Sie ein SCSI-Peripheriegerat zu Ihrem
System hinzufiigen oder daraus entfemen, muB
PowerSCSI! fiir DOS/Windows emeut installiert
werden.
16
PowerSCSI! for DOS/Windows/NetWare 386
1.1.3
Benutzerdefinierte Installation
Fiir die erfolgreiche benutzerdefinierte Installation von
PowerSCSI! auf Ihrem PC miissen Sie die inteme Struktur von
PowerSCSI! kennen und wissen, wo die verschiedenen Treiber
in die Systemkonfigurationsdateien CONFIG.SYS,
AUTOEXEC.BAT und SYSTEM.IN! installiert werden
miissen.
Gehen Sie bei der benutzerdefinierten Installation von
PowerSCSI! fiir DOS/Windows folgendermaBen vor:
l. Legen Sie die Diskette PowerSCSI ! fiir
DOS/Windows/NetWare 386 in Laufwerk A: oder B: ein.
2. W enn Sie in Windows arbeiten:
Wahlen Sie im Menu Datei Ausfilhren ...
Geben Sie a:\setup oder b:\setup in die Befehlszeile ein.
Klicken Sie auf OK, oder driicken Sie die Eingabetaste.
3. Wenn Sie in DOS arbeiten:
Geben Sie an der DOS-Eingabeaufforderung a: oder b:
ein, und driicken Sie die Eingabetaste, um auf <las
Laufwerk zuzugreifen, in dem sich die Diskette
PowerSCSI! fiir DOS/Windows/NetWare 386 befindet.
Geben Sie setup ein, und driicken Sie die Eingabetaste.
Die Hilfe ist jederzeit <lurch Driicken von Fl verfiigbar.
Sie konnen die Installationjederzeit beenden, indem Sie
Alt+F4 driicken bzw. in Windows vom Systemmenii
(iiber das Kastchen in der oberen linken Ecke) SchlieBen
wahlen.
PowerSCSI! for DOS/Windows/NetWare 386
17
4. Klicken Sie auf Custom, um die Installation von
PowerSCSI! fiir DOS/Windows zu modifizieren.
Falls Sie in DOS arbeiten, driicken Sie ALT+C, um
Custom zu markieren und driicken dann die
Eingabetaste.
5. Die Installation zeigt die Standardeinstellungen gemaB
der erkannten SCSI-Peripheriegerate an. Diese
Einstellungen konnen Ihren Anforderungen entsprechend
geandert werden, indem Sie in das Kastchen neben dem
jeweiligen Treiber klicken. Ein mit "X" markiertes
Kastchen weist das Installationsprogramm darauf hin, daB
der Treiber installiert werden soll. Ist das Kastchen leer,
wird der Treiber nicht installiert. Die Schaltflache
More ... , die neben einigen der Optionen zu sehen ist,
weist auf weitere verfiigbare Optionen hin.
Erklarungen zu diesen Optionen konnen Sie <lurch
Klicken auf die Schaltflache Hilfe aufrufen.
6. W enn Sie alle gewiinschten Anderungen vorgenommen
haben, klicken Sie auf OK, oder driicken Sie die
Eingabetaste und befolgen dann die Installationsanwe1sungen.
7. Starten Sie den Computer emeut, damit die wahrend
der Installation in den Konfigurationsdateien von
PowerSCSI! fiir DOS/Windows durchgefiihrten
Anderungen aktiviert werden.
HIN\VEIS:
18
Falls Sie ein SCSI-Peripheriegerat zu Ihrem
System hinzufiigen oder daraus entfemen, muB
PowerSCSI! fiir DOS/Windows emeut installiert
werden.
PowerSCSI! for DOS/Windows/NetWare 386
1.0 PowerSCSI! per DOS, Windows
e NetWare 386
Power SCSI! per DOS/Windows/NetWare 386 consente la
comunicazione tra la maggior parte delle periferiche SCSI.
1.1
PowerSCSI! per DOS/Windows
PowerSCSI! per DOS/Windows e di facile installazione sia SU
un sistema DOS che Windows. Vi sono due tipi di
installazione tra cui scegliere: rapida o personalizzata.
L'installazione rapida analizza il bus SCSI e installa i driver
adatti alle periferiche SCSI che vi reperisce·. Le istruzioni per
l'installazione rapida sono fomite nella sezione 1.1.2,
Installazione rapida.
Con l' installazione personalizzata, l 'utente puo modificare
e installare soltanto i driver desiderati. Le istruzioni per
l' installazione personalizzata sono fomite nella sezione 1.1. 3,
Installazione personalizzata.
1.1.1 Preliminari
Per installare PowerSCSI! per DOS/Windows, e necessario
aver installato l 'unita di controllo SCSI, i cavi e le periferiche
SCSI e si deve poter caricare DOS. Per installare PowerSCSI!
per Windows, occorre prima avviare Windows 3.1. In caso di
difficolta durante l'installazione dell'hardware SCSI,
consultare il manuale dell 'utente fomito con l 'unita di
controllo o la periferica SCSI.
Prima di procedere all'installazione di PowerSCSI! per
DOS/Windows, e consigliabile effettuare delle copie di riserva
dei dischetti Future Domain.
PowerSCSI! for DOS/Windows/NetWare 386
19
1.1.2 lnstallazione rapida
Per effettuare la scansione dei dispositivi SCSI e installare il
driver adatto a ciascun dispositivo, attenersi alle seguenti
istruzioni.
1. Inserire il dischetto PowerSCSI! per
DOS/Windows/Ne tWare 386 nell'unita A: o B:.
2. In Windows:
dal menu File, selezionare la voce Esegui...
Digitare a:\setup o b:\setup alla riga di comando.
Fare clic su OK o premere il tasto Invio.
3. In DOS:
al prompt di DOS, digitare a: o b: e premere Invio per
collegarsi all 'unita in cui estato inserito il dischetto
PowerSCSI! per DOS/Windows/N etWare 386.
Digitare setup e premere Invio.
La prima schermata consente all'utente di scegliere il tipo
di installazione desiderato, rapida o personalizzata.
Per visualizzare la guida in linea in qualsiasi momento
sufficiente premere Fl.
e
Per uscire dal setup in qualsiasi momento, premere Alt+
F4, oppure, in Windows, selezionare Chiudi dal menu di
controllo (visualizzato facendo clic nella casella in alto a
sinistra).
4. Fare clic su Express (Rapida) o premere il tasto Invio.
5. Attenersi atle tstruzioni visualizzate stilro ·schermo dal programma di setup. Per qualsiasi chiarimento,
richiamare la guida in linea.
6. Riavviare il computer per attivare le modifiche effettuate
ai file di configurazione DOS/Windows durante la
procedura di setup.
20
PowerSCSI! for DOS/Windows/NetWare 386
-
~
Suggerimenti per l'installazione
1. Una volta eseguito il programma Setup di PowerSCSI!,
riavviare il computer affinche tutti i driver vengano
installati.
2. Una volta completato il setup, ottimizzare la memoria del
sistema. I componenti di PowerSCSI! richiedono una
certa quantita di memoria. Se sul computer e installato
MS-DOS o PC-DOS 6.0 o una versione piu recente,
utilizzare i comandi "memmaker" o "ramboost" di DOS
per ottimizzare automaticamente la memoria del sistema
(consultare la documentazione che accompagna la
versione di DOS in dotazione ). Se sul sistema e installata
una versione precedente di DOS, la memoria deve essere
ottimizzata manualmente. La documentazione fornita con
DOS contiene ulteriori informazioni su questa procedura.
3. Se si utilizza 6.0 "MULTI-CONFIG", la versione 6.0 di
DOS e quelle piu recenti sono dotate di una funzione
detta "multi-config" che consente agli utenti esperti di
DOS di creare piu di una configurazione di avvio nei file
config.sys e autoexec.bat. PowerSCSI! e le funzioni di
ottimizzazione della memoria fornite con DOS non sono
in grado di elaborare tutte le configurazioni che possono
essere create per mezzo di "multi-config". Se si utilizzano
le funzioni "multi-config" di DOS 6.0, l'utente dovra
ottimizzare i file config.sys e autoexec.bat. Future
Domain consiglia di concludere SEMPRE il file
config.sys con un enunciato {common} poiche in quel
punto PowerSCSI! inserisce gli enunciati nel file
"multi-config" (cio evalido anche per i programmi di
setup di altri fornitori).
4. Chiedere al sistema di effettuare dei conteggi per gli
enunciati che sono aggiunti dal Setup di PowerSCSI!.
Qualora si desideri spostare o copiare alcuni degli
enunciati contenuti nei file config.sys, autoexec.bat. o
system.ini, consultare prima le sezioni 1.1.3-4 e 1.3.
PowerSCSI! for DOS/Windows/NetWare 386
21
NOTA: se si aggiungono o rimuovono una o piu periferiche
dal sistema, occorre installare nuovamente
PowerSCSI! per DOS/Windows.
1.1.3 lnstallazione personalizzata
Per eseguire una corretta installazione personalizzata di
PowerSCSI! sul PC, occorre avere una buona conoscenza della
struttura intema di PowerSCSI! e delle esatte ubicazioni nei
file CONFIG.SYS, AUTOEXEC.BAT e SYSTEM.IN! in cui
vanno installati i driver.
Per effettuare l'installazione personalizzata di PowerSCSI! per
DOS/Windows, attenersi alle istruzioni fomite qui di seguito.
1. Inserire il dischetto PowerSCSI ! per
DOS/Windows/NetWare 386 nell'unita A: o B:
2. In Windows:
dal menu File, selezionare la voce Esegui ...
Digitare a:\setup o b:\setup alla riga di comando.
Fare clic su OK o premere il tasto Invio.
3. In DOS:
al prompt di DOS, digitare a: ob: e premere il tasto Invio
per collegarsi all 'unita in cui e stato inserito il dischetto
PowerSCSI! per DOS/Windows/NetWare 386.
Digitare setup e premere Invio.
Per visualizzare la guida in linea in qualsiasi momenta
sufficiente premere Fl.
e
Per uscire dal setup in qualsiasi momenta, premere Alt +
F4, oppure, in Windows, selezionare Chiudi dal menu di
controllo (visualizzato facendo clic nella casella in alto a
sinistra).
22
PowerSCSI! for DOS/Windows/NetWare 386
4. Fare clic su Custom (Personalizzata) per modificare
l'installazione di PowerSCSI! per DOS/Windows.
Per DOS, premere Alt+ C per evidenziare Custom
(Personalizzata) e premere Invio.
5. 11 programma di setup visualizza le impostazioni
predefinite in base alle periferiche SCSI reperite. Per
modificare le impostazioni secondo le necessita, e
sufficiente selezionare un driver facendo clic con il mouse
nella casella accanto ad esso. La "X" che compare nella
casella del driver selezionato indica al programma di
setup di installare tale driver. Se la Casella e vuota, il
driver corrispondente non verra installato. 11 pulsante
More ... (Altro) che compare accanto ad alcune delle
opzioni consente di visualizzare ulteriori opzioni.
Per ulteriori informazioni su queste opzioni, fare clic sul
pulsante Help (Guida).
6. Una volta ultimate le modifiche, fare clic su OK o
premere Invio. Attenersi alle istruzioni del programma
Setup visualizzate sullo schermo.
7. Riavviare il computer per attivare le modifiche effettuate
ai file di configurazione DOS/Windows durante la
procedura di setup.
NOTA: se si aggiunge o rimuove una o piu periferiche dal
sistema, occorre installare nuovamente PowerSCSI!
per DOS/Windows.
PowerSCSI! for DOS/Windows/NetWare 386
23
24
PowerSCSI! for DOS/Windows/NetWare 386
1.0 PowerSCSI! para DOS,
Windows y NetWare 386
PowerSCSI! para DOS/Windows/NetWare 386 proporciona
soporte para la mayorfa de los perifericos SCSI.
1.1
PowerSCSI! para DOS/Windows
PowerSCSI! para DOS/Windows es fa.cil de instalar tanto
para Dos como para Windows. Puede elegirse uno de dos
procedimientos de instalaci6n: instalaci6n nipida (Express)
o instalaci6n personalizada (Custom).
La instalaci6n rapida examina el bus SCSI e instala los
controladores apropiados para los perifericos SCSI que
encuentra. Para obtener instmcciones para la instalaci6n rapida,
vea la Secci6n 1.1.2, Instalaci6n rapida.
La instalaci6n personalizada le permite modificar e instalar
solamente los controladores que desea. Para obtener
instmcciones para la instalaci6n personalizada, vea la Secci6n
1.1.3, Instalaci6n personalizada.
1.1.1 Antes de comenzar
PowerSCSI! para DOS/Windows requiere la correcta
instalaci6n del controlador SCSI, cables y perifericos SCSI y la
capacidad de iniciar DOS. PowerSCSI! para Windows requiere
que se este ejecutando Windows 3.1. Si tiene dificultades para
instalar el hardware SCSI, consulte el manual del usuario que
viene con el controlador o periferico SCSI para obtener ayuda.
Asegurese de crear copias de seguridad de los disquetes Future
Domain antes de instalar PowerSCSI! para DOS/Windows.
PowerSCSI! for DOS/Windows/NetWare 386
25
1.1.2 lnstalaci6n rapida
Para que PowerSCSI! examine los dispositivos SCSI e instale el
controlador adecuado para cada dispositivo, siga los siguientes
pasos:
1. Inserte el disquete de PowerSCSI! para
DOS/Windows/NetWare 386 en la unidad de disco A: o B:.
2. Siesta usando Windows:
Desde el menu Archivo, elija Ejecutar....
Escriba a:\setup o b:\setup en la linea de comando.
Haga clic en Aceptar o presione Entrar.
3. Siesta usando DOS:
En el simbolo del sistema DOS, escriba a: o b: y presione
Entrar para comunicarse con la unidad de disco que
contiene el disquete PowerSCSI! para
DOS/Windows/NetWare 386.
Escriba setup y presione Entrar.
Las pantallas siguientes le permitiran elegir la instalaci6n
rapida 0 personalizada:
La ayuda esta siempre disponible presionando Fl.
Para abandonar Setup en cualquier momento, presione
Alt+F4 o, desde Windows, elija Cerrar en el menu Control
(usando el bot6n de la esquina superior izquierda).
4. Haga clic en Express o presione Entrar.
5. Siga las instrucciones presentadas por Setup. Use la ayuda si
tiene dudas.
6. Reinicie la computadora para activar los cambios que Setup
hizo a los archivos de configuraci6n de DOS/Windows.
26
PowerSCSI! for DOS/Windows/NetWare 386
Sugerencias para la instalaci6n
1. Despues de ejecutar el Setup de PowerSCSI!, reinicie la
computadora para que se instalen todos los controladores.
2. Despues de haber instalado correctamente PowerSCSI!,
optimice la memoria de la computadora. Los componentes
de PowerSCSI! necesitan memoria. Si dispone de MS-DOS,
ode PC-DOS 6.0 o una version posterior, use los comandos
"memmaker" o "ramboost" proporcionados con DOS para
optimizar automaticamente la memoria (consulte la
documentacion que vino con su version de DOS). Si tiene
una version anterior de DOS, debera optimizar la memoria
manualmente. Vea la documentacion de DOS para obtener
mayor informacion.
3. SI UTILIZA "MULTI-CONFIG" 6.0 - DOS 6.0 y
posteriores soportan una nueva funcion Hamada "multiconfig" que permite a los usuarios expertos desarrollar
configuraciones de iniciacion multiples en los archivos
config.sys y autoexec.bat. PowerSCSI! y los optimizadores
de memoria que vienen con DOS no pueden manejar todas
las configuraciones posibles que pueden crearse con "multiconfig". Si utiliza las funciones "multi-config" de DOS 6.0,
debera optimizar los archivos config.sys y autoexec.bat por
cuenta propia. Future Domain sugiere que SIEMPRE
termine su config.sys con una declaracion {common} ya
que ahi es donde PowerSCSI! Setup colocara las
declaraciones en el archivo "multi-config" (esto tambien se
aplica a los programas Setup de otros fabricantes ).
4. El orden de las declaraciones agregadas por PowerSCSI!
Setup tiene importancia. Si usted decide cambiar la
ubicacion o copiar las declaraciones de los archivos
config.sys, autoexec.bat o system.ini, vea las secciones
1.1.3-4 y 1.3 antes de hacerlo.
NOTE: Si afiade o retira alglin periferico SCSI del sistema,
debera reinstalar PowerSCSI! para DOS/Windows.
PowerSCSI! for DOS/Windows/NetWare 386
27
1.1.3 lnstalaci6n personalizada
Para instalar PowerSCSI! correctamente en una PC mediante la
instalaci6n personalizada es necesario entender la estructura
interna de PowerSCSI! y saber d6nde instalar los diferentes
controladores en los archivos de configuraci6n del sistema
CONFIG.SYS, AUTOEXEC.BAT y SYSTEM.IN!.
Para efectuar la instalaci6n personalizada de PowerSCSI! para
DOS/Windows, siga estos pasos:
1. Inserte el disquete PowerSCSI! para
DOS/Windows/NetWare 386 en la unidad de disco A: o B:.
2. Si esta usando Windows:
Desde el menu Archivo, elija Ejecutar....
Escriba a:\setup o b:\setup en la linea de comando.
Haga clic en Aceptar o presione Entrar.
3. Si esta usando DOS:
En el simbolo del sistema DOS, escriba a: ob: y presione
Entrar para comunicarse con la unidad de disco que
contiene el disquete PowerSCSI! para
DOS/Windows/NetWare 386.
Escriba setup y presione Entrar.
La ayuda esta siempre disponible presionando Fl.
Para abandonar Setup en cualquier momento, presione
Alt+F4 o, desde Windows, elija Cerrar en el menu Control
(usando el bot6n en la esquina superior izquierda).
4. Haga clic en Custom para modificar la instalaci6n de
PowerSCSI! para DOS/Windows.
En DOS, presione ALT+C para realzar Custom y luego
ENTRAR.
28
PowerSCSI! for DOS/Windows/NetWare 386
5. El Setup mostrara las configuraciones predeterminadas
segun los perifericos SCSI encontrados. Usted podra
cambiar las configuraciones para que se ajusten a sus
necesidades haciendo clic dentro de la casilla pr6xima al
controlador correspondiente. Una X en la casilla hace que
Setup instale el controlador. Una casilla en blanco indica
que el controlador no sera instalado. El bot6n More ... junto
a varias de las opciones proporciona acceso a opciones
adicionales.
Para obtener una explicaci6n de estas opciones, haga clic en
el bot6n Help.
6. Cuando termine de hacer estos cambios, haga clic en OK o
presione Entrar. Siga las instrucciones de Setup.
7. Reinicie la computadora para activar los cambios que Setup
hizo a los archivos de configuraci6n de PowerSCSI! para
DOS/Windows.
NOTA: Si afiade o retira algun periferico SCSI del sistema,
debera reinstalar PowerSCSI! para DOS/Windows.
PowerSCSI! for DOS/Windows/NetWare 386
29
30
PowerSCSI! for DOS/Windows/NetWare 386
1.0 DOS/ Windows/ NetWare386 ffl
PowerSCSI!
DOS /Windows/ NetWare386ffl PowerSCSI! ti, if C: Iv c"(J) SCSimJ:ill 7';\ 1
:A.~-lt~-
1.1
r Li-to
DOS/ Windows FF.I PowerSCSI !
r-
DOS/ Windows ffl PowerSCSI! ti, DOS i t:. t± Windows ': ~£ ': 1 /:A.
Jv-t~.::bj{-C:2'iTo .:C(J)~, .:r..7:A.7°v:A. · 1/:A. 1--v-y:::r/it:.t±
n:A.7A·1/:A.t-v-y:::r/(J)~tG~-n(J)1/:A.t--~n~~~~~
< f:!. 2 'v)o
r
.:r..7 :A. 7°v :A. · 1 /:A. v- Y 3 YZ"t±, SCSIJ\;A. ~ :A.-t- -tr/ L-C, ~t±:\ L
t:.SCSI)ff];ill7';\1 :A. ':~Lt:. r71 ;\iJ~1 /:A. r-Jv2hiTo .:r..7 :A. 7°v
A. 1/Arv-y3 /(J)niid:"'.)v)-Ct±, ll.1.2 x.7 A 7°VA. 1 /A
rv-
Y
:::r /
J
~ *P.~
L 'l
< t:!. 2 v) o
n :A. 7 A · 1 /:A. r- v- y :::r /-C:t±, 1-1f'(J)~>Jt,=inb-tt-c
r 71 J'~M
~2-lt1/:A.r-~-t~.::t#-c:2'i-9o n:A.7A·1/:A.rv-y:::r/(J )
nit'="'.)v)-ct±,
li.u
n A 7 A . 1 /Ar- v-y :::r /
J
~*P.~
L -c
< t:!.
2 'v)o
DOS /Windowsffl PowerSCSI!(J)f~ffl ':~ L -C ti, ~-=ft~t (J) SCSI :i / r D
- 7 ' 7 - 7" Jv' ~ J:: cf SCSI )ff] :ill 7'! '\'-1 A iJ{lE L 1 / A r - Jv 2 tL 'l 'v) ~
.:: C:, ~ G ~':1--!f': J:: ~DOS (J)7"- r il{PJfj~-C:ifJ ~.:: C: il{:IZ,~-C:T o
Windowsffl PowerSCSI!(J):l:~ifti, Windows3.l il{£,~-c'T o SCSI/'\- r '7 :r..
7(J)1 /A r - Jv-C: ~I!! VJ (J);l:~ift±, SCSI :J / r D - 7 it:. t±OO:ill T ;\ 1 A
1-t~ (J) 1 - -If- 7-:' • 7:::.. :i 7 Jv ~ *P.~ L -c < t:!. 2 v) o
<
r-
DOS/Windowsffl PowerSCSI! ~ 1 /:A.
JvT ~ lW ,:, :iz,fFuture Domain
T 1:A.7-;; r (!)!'\'-;; 7 7-;; 7° · :i 1!- ~1tnlt L -C < t:!.2 'v)o
PowerSCSI! for DOS/Windows/NetWare 386
31
PowerSCSI! l: : i - -If (J) SCSI T'; \ 1 :A 1i:- :A ;\"- -\' / L ~ ~ T'; \ 1 :A i::@ Lt::.
71 ;''1i:-1/:A1'-Jv-t~i:t±~ jj_T(J)-=f-J!IJl1i:-~1TLiTo
1.
DOS/ Windows/ NetWare386 ffl PowerSCSI! (J) T 1 :A 7
A:i t::.t±B:t:1*A L iTo
File ;J. :::.. :i - /p ~ Run
:i 7 /
32
1i:- ~1R L i Ta
rfri: a:\setup it::. t± b:\setup c 717° Li Ta
PowerSCSI! for DOS/Windows/NetWare 386
'J
r 1i:- r 7
F
1 7"
r
c
DOS 7°D / 7° -C- a: it::.!± b: 71 7° L, Enter -t- - ~1Etl L -C DOS/
Windows/ NetWare386 ffl PowerSCSI! T' 1 'A 1T '/ rJ) A-? -C v• ib F 7 1 7''
setup
c7 1
Setup~
7° L -C Enter -t- - ~ 1lfl L i
To
$11:: Lt::. v•:f:~13-t±, Alt+ F4 ~11f1TiP, it::.!± Windows (J):f:~13-!±,
7 'A ~ 1tffl L -C Y 'A 7 A · :J. ::::.. .:i - ip G Close ~ ~1.R
®OO:trJ:.ftJ rJ)
Li To
*' '/
4.
Express ~ 7
5.
Setup !::: J:: -? -C ff 2 h ib ;j:§'ff !::: 1Jt-:::i -C
Help ~ ~'{~ffl t!. 2 v >o
1
)
7 T ib iJ» Enter -t- -
'/
<
~ 1lfl L i
<t!. 2 v >o
To
~Fp~ ,¢.( rJ) JtJ ~ :f:~,g. !±,
~ :13} J@t}J L -C, ~'1tffl rJ) DOS /Windows :J / 7 1 :f' .:i
/ · 7Y1 J1d:=~1JD?ht::.Setup(J)~J!l*J?£:t:~~J:J]i::: L iTo
6.
I\ 'J :i /
1.
PowerSCSI! rJ) Setup ~ ~1-T:fk,
J:: -7 i:::, ~'1~ffl rJ) :i
2.
r
Li To
~:t§-7£
/
~ .:i -
;f,- i"
/
/A
Y
3
r - Jv 2 nib
7
r i::: !± :J. -::C
PowerSCSI! rJ) :i
/
;6{~T
1~fflPJ§~ ~ :J.
Lt::. G,
T""" -c rJ) F 7 1I\iJ'f1
~ :13}/@tJJ L i To
v-
1)
;6{£,~"C'T o PowerSCSI! rJ) Setup
-::c J ~llij(~JH:::*U~T ib t::. 66 MS-DOS it::.
!±PC DOS 6.0 J.-:L~i ~1fil!J1~ffl (J):f:~13-!± "memmaker" JtJ ib v> !± "ramboost" :J
7 / r- Hfilll 1tm r 2 v• W-=F-1~ t rJ) Dos rJ) 7 =- .:i r Jv ~~mo o r f:V:
- :J 3 / rJ) DOS~ Et~t (J):f:~13-t±, 7::::.. .:i 7 Jvi*{1F-C- :J. -::C 1) ~lli:if!i1~ L
-C <t!. 2 v • o ~t L < t± DOS rJ) 7 ::::.. .:i 7 Jv ~ ~ ~~ L -C < t!. 2 v • o
1
1"
PowerSCSI! for DOS/Windows/NetWare 386
33
DOS 6.0"MULTI-CONFIG" ~ .::'19!ffl O)j:~if, DOS6.0 .12Ui0);\- y 3 /-C!±, "multi-config" t v• .:HJT L v•t~.U~ ~ .::'fiJffl v• td! it i To .::. i: J:: ~ ,
r~U§{.:!:~~::r..--if!±config.sys 7 71Jv-?autoexec.bat7 71 JH:flfjcO)
7·- Hfffflt Hft~T ~.::. C: iJ1'-C- ~ i To L ii) L, PowerSCSI! !±, "multiconfig" i: J:: 0-C11Ffflt-C- ~ ~T-"Z-CO) 7 71Jvt:fffflt-C-7- -:C 1) O)Jli:@1t~ !±
iJ) ~.::. t iJ1'-c' ~ i-tt" lvo DOS6.0 0) "multi-config" mfi~ ~ .::'19!ffl O)j:~if!±,
.::' § 51--C- config.sys 13 J:: lf autoexec.batO)Jli:@1t ~ ~ ~ £,~iJ1'lliJ ~ i To
--(- 0) ~~Future Domain -c' !±, PowerSCSI! Setup i,)1' "multi-config" i: ~[.:®, ~ 110
3.
n
iZ. ~ ~~J[-C-, 11ti:{common}-c'conf ig.sys ~*~TT~.::. t ~ 13TT&I) Li
To (1fil:ffO)Setup7°D 7"7A b .::.O)J::-) i:~0-Cv•iTo)
5i :
~'11£ffl V')J\ / : I /
:l:JJrfr ~±,
i:: SCSI!m.lill T j\ 1 A~ J!!:JJO LJ:: ~
DOS/ Windows ffl PowerSCSI! ~ .¥},& 1 / 7-
£,~iJ{cb ~
7J /.. 7 A · 1 / /..
¥Jrni LJ-::
r - Jv T ~
i Ta
r v- y 3
/
~19! -J
-C PowerSCSI! ~-) i
< 1 / /.. r - JvT
~ i: !±, PowerSCSI! 0) i*J:&~ffffflt ~ JJ.1§~ L
t..:-1.-C-, CONFIG.SYS,
AUTO EXEC.BAT, J3 J:: lf SYSTEM.IN! Y /..TA · :I / 7 1 .:¥' : i v - Y 3 / ·
7 71 JvO) t,,.::. i:4Hl r71;\~1 / /.. -Jv Lt.: G J:: v•iJ)~9;0-J-CJ3 <£,
r
~iJ1'&iJ ~it" o
DOS/ Windows ffl PowerSCSI! 0) 7J /.. 7 A · 1 / /..
rv-
Y
3 /
!±, J2L T
O)-'f-
JllJ[-C-1T v' i To
1.
DOS/ Windows/ NetWare386fflPowerS CSI!0)T'1 /.. 7 '/
A: it..= t± B: i:t:fJ.,. Li To
2.
Windows~
.::'19!ffl O)j:~if!±,
File 7- :::. : i - iJ) GRun ~ ~1R L i To
:i? /
34
r1T 1: a:\setup i t..= !± b:\setup t
PowerSCSI! for DOS/Windows/NetWare 386
71
7° Li To
r ~ r 7 1 7''
DOS 7°D / 7° }- "f'a:i t::t±b:c 717°L, Enter+- ~:tffl VCDOS/
Windows/ NetWare386 ffl PowerSCSI! 7' 1 :A 7 '/ r 0) A 0 --C \;) ~ F 71
7''~:t§'5E Li Ta
setup c 7 1 7° L --C Enter+- ~:tffl Li Ta
9=111: L t.::1.t)tJ}j,g-t±, Alt+ F4 ~:tffJTiP, it:: t± Windows O)tJ}j,g-t±,
@Hfiltil:ftJ 0) *' '/ 7 :A ~ 1~ffl L --C Y :A 7 .A · :/- :::.. :i - -/p G Close ~ ~:tR
Setup~
Li Ta
4.
Custom ~ 7
DOS
1)
'/
7 L i Ta
Hjpf~ffl O)tJ}j_,g-t;±,
Custom ( 7J :A 7 .b.) ~ 717 :A "C" 7 1) ' / 7 T ~ -/p,
&0~1.t)t±, TAB-:t----C-Cusrom (717'7.b.) ~J\171 r L--CEnter+~:fffl L -CT 2 l.t)a Windows O)tJ}j,g-t;±, Alt+- ~:fffl L t::~:f\.:l~"f'C ~:tffl L --C
Enter +- ~:fffl L -CT 2 v)o
5.
:f§tlli?tLt::SCSI$Jil l71\1 :A~~ c i:, 7'7 :t Jv r~5E1@:iJ1'£VF2hi
Ta MMS-9~ 1"711\0)~~0)*'-y 7 7'~7 1) -Y 7-9~ c, :'.fff~i:,g-t:Ht
--C~~5E1l ~~J!T ~.:: c iJ1'"f' 2- i Ta
7 :A l*J 0) "X" t±, Setup i:M L
--C :C 0) F 7 1 ; \;()1' 1 /:A r - Jv 2 tL ~ .:: c ~ /F L i Ta 7'' 7 / 7 0)
*' '/
77'1±, f:O)P'711\iJ1'1/:A
:t 7°Y
O):fjt i:&tJ ~More ...
7--t:A--C-2' iTa
3 /
*' '/
1'-Jv?tL~1.t).::c~/FLiTa -1}~0)
*' 7 /
~1~fflT ~
c,
~1JO:t 7°Y 3 /
i: 7
\;)o
6.
~:tR~*~-TLt::G, OK~7 1 J -Y7T~iP, Enter~:tffILiTa
J: "'.) --C/F 2 nt.::1§'/F i:11t "'.) --c
7.
; '\ '/ =i / ~ :13} ~tJJ
/
51 :
· 7 7
Setupi:
<t!. 2 \;)o
L --C , .::'f~ffl 0) DOS /Windows =i / 7 1 .:¥' :i
1 Jv i:~1JD 2 ht:: Setup 0)~}!$rj ~ :fl9:'1J i: Li Ta
.?:'1~ffl 0) Y' 7-
7 A i:: SCSI! mi ill 7 FC{ 7- ~ i!HJO
t~ir ti-. DOS /Windows ffl PowerSCSI! ~:fl} &
;~d~,~7J1'zb ~
v-
Y
3
l t.:: ~ glj ~~ l t.::
7- 1' - Jv T
1 /
i To
PowerSCSI! for DOS/Windows/NetWare 386
35
36
PowerSCSI! for DOS/Windows/NetWare 386
DOMAIN
Corporate Headquarters:
28Q1 McGaw Avenue + Irvine, California 92714
Tel: (714) 253-0400 + FAX: (714) 253-0913
European Office:
Royal Albert House, Sheet Street, Windsor
Berkshire SL4 1 BE United Kingdom
Tel: 44 753 831 262 + FAX: 44 753 620 184
Asian Office:
Room 111, 4th Floor, No. 200, Sec. 1, Keelung Road
Taipei, Taiwan, Republic of China
Tel: 886-2-722 7222, Ext. 111, 211 or 311 + FAX: 886-2-345 1896
P/N 55-00072-000-00
Printed in U.S.A.