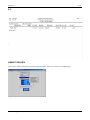
1
Essential*HR Human Resource Information System User’s Manual By Essential Integrated Data, Ltd. The solution to your Human Resource needs! P.O. Box 260568 Plano, Tx 75026-0568 Voice 972-985-8704 Fax 972-985-9491 email [email protected] www.eidl.net Copyright I COPYRIGHT NOTICE: Copyright© Essential Integrated Data, Ltd. All rights reserved. An unpublished work. Printed in the U.S.A. PROPRIETARY RIGHTS NOTICE: This material contains proprietary information created and owned by Essential Integrated Data, Ltd., Plano, TX, U.S.A., the possession, use and/or disclosure of which is subject to a license agreement duly authorized by Essential Integrated Data, Ltd. and/or written permission of Essential Integrated Data, Ltd. This manual and the software described in this manual are furnished under a license agreement and may only be used or copied in accordance with the terms of that license agreement. Essential*HR® is a registered trademark of Essential Integrated Data, Ltd. Information in this manual is subject to change without notice. Essential Integrated Data, Ltd. Essential*HR Installation I Installation and Using HR Installation: Installation is quick and simple. Insert the Essential*HR CD-ROM in the appropriate drive. Click on START/RUN and enter the CD-ROM drive letter and type HROBJ1301.EXE or click on the browse pushbutton and select the file listed. Depending on the drive letter, you should have something similar to “E:\HROBJ1301.EXE” in the Run dialog box. Click OK and follow the instructions on the screen. When finished, remove the CD-ROM and store it in a safe place. That’s all there is to it! If you want to create a windows shortcut from which to launch HR, do the following: a. Right click on START and select EXPLORE. The right side of the screen should display the contents on the “Start Menu.” b. Click on FILE, on the menu bar, then click on NEW/SHORTCUT. c. In the first dialog box, for command, enter the path to Essential*HR and the file name MAINMENU.EXE, i.e. C:\EIDLHR\HROBJ\MAINMENU.EXE. d. Click NEXT and enter the name you want to use to identify the application then click on FINISH. Close the EXPLORE window. Now, when you click on START, you should see the demo listed in the portion of the start menu. Using HR: To launch HR, click on START/PROGRAMS and select Essential*HR on the menu. The first thing to display will be the main menu, then the company selection screen. Enter company number “00” (zero, zero) and press the enter key or click on the OK pushbutton. The user logon and password dialog box will display. Enter any initials and press the enter key or click on the OK pushbutton. A password is not required. You should now have the main menu displayed with the real-time clock running under the Essential*HR logo in he center of the menu screen. To select an item, click on it with the mouse or press the F10 key to activate the menu bar and traverse the menus with the arrow keys. The main driving program to HR is the Employee Demographics function. Employees have to be set up in the demographic file before their other records can be added. To get there, select Employee/Employee Records/Employee Demographics. Essential Integrated Data, Ltd. Essential*HR Getting Started I Getting Started Start Up and Login: Essential*HR is a table driven application, which means that many of the fields in the data entry screens are filled and based on options predefined or set-up by the user. Therefore, designing and setting up the table information is key to the system functioning in a manner best suited to the user’s business and operations. Before starting with the tables set up, we need to cover the basic functions for starting the system. If you followed the installation instructions for creating a startup icon or added it to the Windows START menu, you should start HR by clicking on the HR icon or selecting it from the START menu. The system is shipped with the default company ‘00’ (zero, zero). The first screen will ask for a company number, and ’00’ should be entered. After entering the number, press the ENTER key or click on the OK pushbutton. The next screen will ask for a user ID. Since Passwords is turned off by default, any initials can be entered, then press the ENTER key or click on the OK pushbutton. At the menu, select FILE/COMPANY INFO. Fill in the company information screen. Note: It would be a good idea to leave Passwords and Auditing turned off until you are ready to start entering employee information. Next, select FILE/MULTI COMPANY MAINTENANCE, and enter the name of company ‘00’ and the ID’s and names of any other companies that will be used. Tables Set Up: The tables consist of codes, 2-4 characters in length, and description for the various choices users will have for each data item represented by a table. When users are in a field represented by a choice of codes, they can popup the list of choices by clicking the right mouse button or clicking on the list popup icon, when the cursor is positioned in the code field. Code tables are used to speed data entry and add uniformity to descriptions. There is no limit to the number of codes available for any data field. On-line help explains each of the codes and codes can be added at any time. A good place to start is the company organization codes for Division and Department. Neither of these are required, but at least one default code is needed. If you have no divisions for example, ‘00’ or ‘HO’ could be used for Home Office. If you do not want to use Departments, ‘CORP’ could be used for Corporate. Most of the reports print by Division and Department, so these codes should represent a company’s structure. Positions: Grade tables are part of the position administration. These need to be set up prior to entering position, since a grade and range is established for each position. If grade tables are not desired or needed, either do nothing or establish one grade with a range large enough to accommodate the entire division or company can be entered After the tables have been created, the next thing to set up are the master position records. To access position maintenance, select ADMIN from the menu bar, the POSITION MAINTENANCE. This function maintains the company’s position master file. The employee position record reflects the employee’s current position as well as the position of the person to whom they report. Therefore, the position master file should reflect the organization structure of the company. It is best to start with the highest level position and work down the organization chart. Positions are established by Division and Department because many positions have the same title, but have different skill requirements and pay ranges. For example, the position of Programmer, may be in the Data Processing Department and the Engineering Department, but they have different skill requirements and pay. Alternatively, one position could be created with a broad enough pay range or grade to accommodate both. The choice is up to the user. Essential Integrated Data, Ltd. Essential*HR I Table of Contents TABLE OF CONTENTS Chapter 1: User Guide Introduction 1-1 Chapter 2: System Overview 2-1 Audit Trail Employee Records Labor Relations Absentee Tracking Applicant Tracking Asset Tracking Benefit Administration Position Administration Grade Table Maintenance and Pay Updates Regulatory Reporting 2-1 2-1 2-1 2-2 2-2 2-2 2-2 2-3 2-3 2-4 Chapter 3: Initialize Package Data Files User Start-Up Procedure 3-1 3-1 Table Maintenance 3-2 Chapter 4: Icons List 4-1 Chapter 5: Employee Records 5-1 Getting Started Employee Demographics Hire Data/Current Status Current Job Position Payroll Information Benefit Selection Medical History Relation/Cobra Tuition Reimbursement Company Service Record Company Equipment Record Employee Data Checklist Chapter 6: Labor Relations Getting Started Absentee Tracking Grievance Processing Disciplinary Actions Accident/Injury Counseling Programs Chapter 7: Employee Asset Tracking Getting Started Skills Inventory Formal Education Essential Integrated Data, Ltd. 5-1 5-2 5-6 5-9 5-12 5-15 5-30 5-33 5-36 5-39 5-41 5-43 6-1 6-1 6-1 6-3 6-5 6-7 6-9 7-1 7-1 7-1 7-3 Essential*HR II Table of Contents Additional Training/Education License/Cert./Permits Employee Testing Chapter 8: Pay-Rate/Performance Reviews Getting Started Pay-Rate Review Entry/Maintenance Pay-Rate Review Schedule Performance Review Entry/Maintenance Performance Review Schedule 7-5 7-7 7-9 8-1 8-1 8-1 8-4 8-7 8-9 Chapter 9: Benefit Administration 9-1 Getting Started Plan Maintenance Automatic Benefit Update 9-1 9-1 ** Chapter 10: Position Maintenance Getting Started Position Maintenance Screen 1 Position Maintenance Screen 2 Grade Table Maintenance Chapter 11: Reporting Getting Started General Report Pay and Performance Applicant Selection Criteria Position Employee Company Reports Benefit Reports Code List Chapter 12: Image Maintenance Getting Started Employee Identification Maintenance Employee Document Maintenance Chapter 13: System Management Getting Started Open Company Company Info Multi-Company Maint. System Administration File Utilities Exit 10-1 10-1 10-2 10-3 10-6 11-1 11-1 11-1 11-5 11-9** 11-10 11-16 11-30 11-38 11-45 12-1 12-1 12-1 12-3 13-1 13-1 13-1 13-1 13-2 13-3** 13-7 13-14 Index ** Means that section is not complete; page numbering is continuous. Essential Integrated Data, Ltd. Essential*HR Chapter 1 1-1 USER GUIDE INTRODUCTION This user guide includes a detailed table of contents which lists page numbers for chapters and primary sections within each chapter. Also included in the back of the user guide is a comprehensive index. The index alphabetically lists subjects along with the numbers of pages on which the subject is referenced. Both the table of contents and the index will assist the user in locating instructions quickly. INTRODUCTORY AND PROCEDURAL CHAPTERS The first few chapters of this user guide will familiarize the user with system operations. Review these chapters before establishing operating criteria and personnel records. MENU-ORGANIZED CHAPTERS Menu-organized chapters follow the introductory and procedural chapters. Each chapter represents a Master Menu selection. Secondary and third-level menu options are detailed by headings within each chapter. After the user has installed ESSENTIAL*HR, use the instructions included in the System Management chapter to establish operating prerequisites. Subsequently, we suggest that the user uses instructions in the Benefit Administration and Position Maintenance chapters as well. Essential Integrated Data, Ltd. Essential*HR Chapter 2 2-1 SYSTEM OVERVIEW People are the most important asset of the organization. And, they affect every facet of the organization's operations. The role of ESSENTIAL*HR is to support and manage the need to maximize application of human resources within the organization. ESSENTIAL*HR will help increase efficiency and productivity by optimizing and automating the performance of human resource management activities. AUDIT TRAIL ESSENTIAL*HR allows the user to enable an audit trail option that details all updates made to employee, applicant, benefit and position records. The user can also print an audit report that shows all updates and changes made to these records. EMPLOYEE RECORDS ESSENTIAL*HR maintains demographic information such as social security number, birth date, marital status, sex, race, handicap status, and veteran status. Employee records also maintain hire data, current status data, benefit selection, medical history, relation information, COBRA compliance information, tuition reimbursement information, and company service data including the memo function. EMPLOYEE/COMPANY REPORTS • Employee Demographics • Emergency Contact Listing • Home Address/Phone List • Birthday/Age Listing • Employee Profile • Data Checklist • Anniversary Listing • Telephone Directory • Seniority Listing • New Hire Report • Termination Report • Dependent Listing LABOR RELATIONS RECORDS ESSENTIAL*HR documents labor information such as absentee events, grievance circumstances, disciplinary actions, accident/injury events, employee vacation and sick leave accrual, and counseling programs participation. The Labor Relations chronological and comprehensive automated record keeping will increase productivity by assisting in the identification of problems, projecting manpower availability, promoting employee-employer interaction, improving departmental functions, and rewarding employees who maintain outstanding attendance and safety records. Essential Integrated Data, Ltd. Essential*HR Chapter 2 2-2 ABSENTEE INFORMATION Absentee information may be quickly recorded by type and reason; absentee information includes the number of days for each absence, the number of hours for each absence, the dates, and whether or not the employee was paid for the duration of the absence. ESSENTIAL*HR allows absentee time to be differentiated -- for example, the user may establish categories for vacation, sick leave, comp time, maternity leave, unexcused time, funeral leave, and accident leave. These categories may be used for management analyses. APPLICANT TRACKING Applicant tracking allows the user to record and manage the following information: • Demographic/personal data • Prior employment history • Assets (education, skills, licenses) • References • Pre-employment tests • Interview and disposition results If an applicant is hired by the user’s organization, the data contained in the applicant record can be automatically transferred to an employee record so that existing demographic, personal, education and skills information will not have to be re-entered. A reporting feature allows the user to specify search criteria in efforts to identify applicants with specific qualifications. ASSET TRACKING ESSENTIAL*HR tracks employee and applicant assets. Skills, formal education, additional training, license and permits acquisition, and test results may be recorded. This comprehensive inventory allows the user to increase productivity by effectively employing skills, education, and training within the user’s organization. Asset Tracking allows the user to identify the best-suited employees for promotions and transfer placements. Additionally, this feature ensures that qualified and skilled applicants can be quickly identified. Asset Tracking ensures that positions will be filled with either internal or external candidates who are best suited to meet position requirements. BENEFIT ADMINISTRATION ESSENTIAL*HR assists in tracking and reporting the administration of benefits. Benefits may be classified by type and plan. For example, medical-type benefits may include plans for group health, major medical, and dental coverage. For each benefit (type/plan combination), associated information may be tracked. Such information includes provider identification, plan status, employee eligibility, associated pay code, deduction number, and maximum benefit amount. ESSENTIAL*HR allows the user to offer employees flexible benefit packages. When the user establishes employee records, the user may establish benefit data for employee-selected benefits. Employees’ records are not required to include uniform benefit assignments. UPDATING BENEFIT INFORMATION When benefit data changes, Benefit Plan Maintenance can be used to update information for future processing. For existing employee records, a benefit update may be simultaneously applied to multiple records via the Automatic Benefit Update function. Essential Integrated Data, Ltd. Essential*HR Chapter 2 2-3 BENEFIT REPORTS The Employee Benefit Selection will clearly define employee benefits on an individual basis and additionally emphasize the dollar value of company-paid benefits. This feature helps to encourage retention of valuable employees since benefits are often overlooked but remain a very valuable consideration for each employee in evaluating his or her level of compensation. Other benefit reports include the following: • Coverage By Employee Report • Enrollment By Plan Report • Premium Totals Report • Employee Statements These reporting features allow management to perform benefit cost analyses and make cost projections. Also, they assist in managing flexible benefit programs. POSITION ADMINISTRATION ESSENTIAL*HR implements position control by ensuring that all positions assigned to employees are authorized. Positions are authorized as part of human resource administration activities. Each position within the user’s organization is assigned a title and pay-rate range. The status of a position (number authorized, filled, vacant, and budgeting information) can be quickly reviewed. For each position, job requirements (skills, education, licenses) may be established. A company, division, and/or department code may also define each position. Since both employee assets and position requirements are tracked, internal transfers and promotions are easily accomplished. Furthermore, position requirements may be easily compared to assets recorded for applicants. Applicant Tracking combined with Position Control facilitates placement. Thus, placement costs are reduced through efficient tracking of asset and positionrequirement information. POSITION REPORTS Position Reports may be generated which detail current position information, budget information, position availability, and position requirements: • Current Position Report • Budget Analysis Report • Headcount Report • Position Requirements Report GRADE TABLE MAINTENANCE AND PAY UPDATES The Grade Table is used to manage salary and wage levels. Using Grade Table Maintenance, the user may establish or update pay grades. Each grade may be broken down into steps. For each step, the user may establish a low and a high pay-rate for both salaried and hourly employees. The user may additionally record the number of employment months necessary to advance an employee from step to step. Also, pay grades, including steps within each grade, may be automatically updated by an indicated amount or percentage (increment or decrement). The Automatic Grade Update function allows the user to select pay grades and steps to be Essential Integrated Data, Ltd. Essential*HR Chapter 2 2-4 simultaneously updated. The user may also choose to concurrently update employee pay-rate records. If the user chooses to update employee pay rates, those pay-rate records that have corresponding grades and steps (to those entered on the update screen) will also be updated along with the grade table. REGULATORY REPORTING ESSENTIAL*HR generates several regulatory reports. Those reports include: • EEOC Report -- positions are detailed by gender and race classifications. • OSHA -- Summary of Occupational Injuries and Illnesses Report 'work-related illnesses and injuries are reported by date, employee name, employee occupation, department, description of injury or illness cause, date of death if applicable, and lost days. • COBRA Notification Report -- employees or dependents who qualify for COBRA coverage are listed along with qualifying date, qualifying event, date notified, response date, insurance plan type, and whether or not coverage was accepted. • Section 89 Compliance Report -- this report lists employee name, resident state, citizenship status, birth date, hire date, termination date, marital status, union status, hours worked per week, months worked per year, number of dependents, Section 89 status, yearly compensation, benefit plan membership, and benefit contribution information. • I-9 Verification Report – this report contains citizenship information, document types submitted, and expiration dates of documents. These regulatory reports are automatically generated. Thus, the labor previously required to generate such data is greatly reduced. Essential Integrated Data, Ltd. Essential*HR Chapter 3 3-1 INITIALIZE PACKAGE DATA FILES Initializing a file sets it up in its initial state. If the file has never existed, initialization will create it. If the file previously existed and contained data, initialization will delete the file and then recreate it with no data. To initialize data files for the company, which is currently being processed: Initialize Data Files: 1. From the master menu select FILE/FILE UTILITIES/CREATE. 2. Select the files by clicking the box next to each desired file. Then click the EXECUTE icon (check mark.) USER START-UP PROCEDURE This section contains instructions on the initial loading of company data files. After completing these steps the user will be ready to assume normal daily operations. It is assumed that the executable code has been fully installed and all the previous steps of the INSTALLATION PROCEDURE have been carried out. • Establish System Management: Under the FILE application, many “sub-programs” are used to establish COMPANY INFORMATION and SYSTEM ADMINISTRATION. COMPANY INFORMATION allows the user to enter basic information, select settings such as the use of passwords, and establish directories. MULTI-COMPANY MAINT. allows the user to keep and track all HR information for several different companies within the organization. OPEN COMPANY simply allows the user to select which company’s HR information is to be pulled-up. SYSTEM ADMINISTRATION allows the user to establish/change passwords, purge records, and print audit tables. • Establish Code Maintenance: Certain base data must be established before attempting routine HR processing. The first step in establishing this data is to build the CODES TABLES. Values must be entered for all codes. By establishing these codes, the user defines operating criteria based on the company's needs and ensures that common information is stored by the system in a standard fashion. To establish the codes, simply select TABLES from the menu bar, then enter the codes for each table, by selecting each one individually. Each code screen displays the number of characters for the code and the description of the code. • Build the Grade Table File: This is done through the ADMINISTRATION application on the HR main menu. Here, the user decides how many steps will be contained in each grade (maximum of ten). Additionally, a low and high salary or wage may be defined for each step for both salaried and hourly employees. Additional information can be found in the Position Administration chapter. • Build the Position File: After establishing PAY GRADES, the user must define authorized positions. Information for this is found under the Position Maintenance chapter. Each position is associated with a specific division within the company. The same position may exist within multiple divisions. By associating position with a division, the user may establish different pay scales. Positions contain budgetary, funding, work force, pay rate, accounting regulatory, and job requirement information. • Build the Benefit Administration File: This is done through the BENEFIT ADMINISTRATION application on the main menu. Information such as benefit amount, beneficiary, deduction number, and employee contribution should be entered here. However, in order for this detailed information to be entered, the benefit Plan, Benefit Type, and Benefit Status codes need to be entered first into Essential Integrated Data, Ltd. Essential*HR Chapter 3 3-2 the CODES TABLE. After the codes for these three categories have been entered into the CODES TABLE, the user may proceed with entering the rest of the benefits data. • Build the Employee Demographics File: This program is located under the EMPLOYEE RECORDS section on the main menu. Residence, personal data, and emergency information must be entered for all employees before adding any additional information on an employee. • Build the Applicant Demographics File: The program is located under the APPLICANT DEMOGRAPHICS application, which is on the main menu. In essence, this program serves the same purpose for applicants as the EMPLOYEE DEMOGRAPHICS program does for employees. It contains demographic information which must be entered for all applicants before adding any additional information on an applicant. TABLE MAINTENANCE Many of the fields in Essential HR are designed to accept code entries. Codes function as a means to reduce the amount of data that a system stores, which would otherwise be overrun by long and repetitive entries. Figure 3.1 displays the CODE MAINTENANCE TABLE. To access the following table, simply click on TABLES from the menu bar of Essential HR. Note, however that the entire table does not display all at once; only ABSENCE through ELIGIBILITY displays first (figure 3.2.) In order to access the other two remaining CODE LISTS, simply click the mouse on MORE. Repeat the same steps to access the remaining codes list--REHIRE to WORKMAN’S COMP. (Figure 3.1) Essential Integrated Data, Ltd. Essential*HR Chapter 3 3-3 (Figure 3.2) A standard table-maintenance function is used which allows the user to establish table entries for common types of information. By selecting one of the above tables such as ACCIDENT CODE MAINTENANCE, Figure 3.3 appears. The user enters an abbreviated form of the description, according to the number of alphanumeric characters displayed at the bottom of the table. Next, the user enters the elongated form of the code, in the DESCRIPTION field. When entering codes, it is very important to specifically define the codes, as this helps to tailor Essential HR to the organization’s needs. To keep track of the codes previously entered, or to view the list of codes once finished, users can simply click the VIEW/LIST icon to display the entire list of entered codes (figure 3.4) for the specific table; Figure 3.3 displays an example entry screen for the ACCIDENT CODE MAINTENANCE TABLE. See the ICON EXPLANATION LIST to review functions of the icon menu bar. (Figure 3.3) Essential Integrated Data, Ltd. Essential*HR Chapter 3 3-4 (Figure 3.4) In this manual, the CODES are divided into four sections so that a function and an explanation of a code may be more easily accessed in the manual. Note, however that in the HR program, the codes are not divided into these tables, but listed in alphabetical order on the CODES MAINTENANCE TABLE. EMPLOYEE RECORDS TABLE MAINTENANCE Annuity Options Benefit Status Benefit Type Business Type Category Cessation Citizenship Deduction Frequency Department Division EEOC Eligibility Hire Source I-9 Status Investment Options Job Job Reason Location Location Reason Pay Change Reason Plan Program Provider Property Race Rating Re-hire Review Status Status Change Termination Union Worker’s Comp Annuity Options 2 alphanumeric characters. Represents the various annuity plans the employees can choose from. Examples: 15 Year, 30 Year. • Entered in the ANNUITY OPTIONS field on the INVESTMENT BENEFITS ADMINISTRATION screen, under Plan Maintenance. Essential Integrated Data, Ltd. Essential*HR Chapter 3 3-5 Benefit Status 4 alphanumeric characters. Represents the status of the plan. Examples: Active Plan, Open Enrolling. • Entered in the PLAN STATUS field on the PLAN MAINTENANCE screen, under Benefit Admin. Benefit Type 4 alphanumeric characters. Represents codes which correspond to subcategories of predefined benefit types. Examples: Insurance plans, Medical plans, Cafeteria plans. • Entered in the BENEFIT TYPE field on the Relationship/COBRA screen. • Entered in the PLAN TYPE field on the PLAN MAINTENANCE screen, under Benefit Admin. Business Type 4 alphanumeric characters. Represents the type of business that the applicant was previously employed at. • Not in operation. Category 4 alphanumeric characters. Represents the purpose of the employee’s evaluation. Examples: Performance, management ability, Attendance. • Entered in the CATEGORY fields on the PERFORMANCE REVIEW ENTRY screen along with corresponding rating codes. This will become part of an employee’s history. Corresponding descriptions will automatically be entered. Cessation 2 alphanumeric characters. Represents the reason why COBRA was ended. Examples: Time expired, Voluntary Stop. • Entered in the CESSATION EVENT field on the RELATIONSHIP/COBRA screen. Citizenship 4 alphanumeric characters. Represents the individual's country citizenship. Examples: USA, Mexico. • Entered in the NATIONALITY field on the EMPLOYEE DEMOGRAPHICS screen. Deduction Frequency 4 alphanumeric characters. Essential Integrated Data, Ltd. Essential*HR Chapter 3 3-6 Represents the code corresponding to how frequently money is deducted from the employee’s check to pay for benefit coverage (if the company does not cover it.) • Entered in the DEDUCTION CODE field on the Plan Maintenance screen, under Benefit Admin. Department 4 alphanumeric characters. Represents department descriptions. Maybe used to define sections within a specific division. Examples: Shipping, Receiving. • Entered in the DEPARTMENT field on the POSITION MAINTENANCE screen. • Entered in the DEPARTMENT field on the SERVICE record screen. Division 2 alphanumeric characters. Represents the division where the employee works or where the applicant wishes to work. Examples: Accounting, Marketing, Finance. • Entered in the DIVISION field on the POSITION MAINTENANCE screen. • Entered in the DIVISION field on the POSITION MAINTENANCE screen. EEOC 4 alphanumeric characters. The EEOC manages codes, which correspond to EEOC position descriptions. Examples: OFFICERS & MANAGERS PROFESSIONALS TECHNICIANS SALES & MARKETING OFFICE & CLERICAL SERVICE WORKERS • Entered in the EEOC CODE field on the POSITION MAINTENANCE screen to become part of a position record. Eligibility 2 alphanumeric characters. The Benefit Eligibility code represents the reason why the person is eligible to receive the benefit. Examples: Employee, Spouse, Dependent. • Entered in the ELIGIBILITY CD field on the BENEFIT PLAN MAINTENANCE screen to become part of a benefit record. Essential Integrated Data, Ltd. Essential*HR Chapter 3 3-7 Exam Results 2 alphanumeric characters. Manages codes which correspond to findings in a medical exam or screening procedure. Examples: Heart condition, Drug use, Passed, Re-examine, etc. • Entered in the EXAM RESULTS field on the EMPLOYEE MEDICAL MAINTENANCE screen to become part of the employee’s record. Events 4 alphanumeric characters. Represents descriptions of events which qualify employees and/or relatives to continue insurance coverage (COBRA.) Examples: Loss of dep. Status, Terminated, Resigned. • Entered in the QUALIFY EVENT field on the RELATIONSHIP/COBRA screen. Hire Source 4 alphanumeric characters. Represents to the way in which an employee was recruited. Examples: Referral, Newspaper dd. • Entered in the HIRE SOURCE field on the EMPLOYMENT DEMOGRAPHICS screen to become part of an employee’s record. • Entered in the RECRUITMENT SOURCE field on the APPLICANT POSITION PREFERENCE screen to become part of an applicant’s record. I-9 Status 2 alphanumeric characters. Represents the type of personal identification the employee showed the employer. Examples: Birth certificate, Drivers license. • Entered in the I-9 DOCUMENTATION fields #1 and #2 on the EMPLOYEE DEMOGRAPHICS screen. Investment Options 2 alphanumeric characters. Represents the employee investment options. Examples: Stock, Bond. • Entered in the INVESTMENT OPTIONS field on the INVESTMENT BENEFITS ADMINISTRATION screen, under Plan Maintenance. • Entered in the INVESTMENT OPTIONS field on the BENEFIT SELECTION SCREEN. Job 4 alphanumeric characters. Corresponds to the current position an employee holds. Examples: Engineer, Accountant, Maintenance. • Entered in the POSITION field on the POSITION MAINTENANCE SCREEN. Essential Integrated Data, Ltd. Essential*HR Chapter 3 3-8 Job Change Reason 4 alphanumeric characters. Represents the reason for the employee’s current position. Examples: Promotion. • Entered in the STATUS CHANGE REASON field on the EMPLOYEE DEMOGRAPHICS screen to be included in the employee’s record. Location 2 alphanumeric characters. Represents codes which correspond to different locations within a primary organization. Examples: Corporate, Dallas office, Atlanta location. The LOCATION REASON CODE can be entered into the following • LOCATION NAME field on the EMPLOYEE POSITION screen to become part of an employee’s record. • LOCATION field on the COMPANY SERVICE RECORD screen to become part of an employee’s record. • LOCATION field on the EMPLOYEE SERVICE CRITERIA screen. The code will be checked as a criterion used to generate the EMPLOYEE SEARCH REPORT. The report will identify employees whose records match specified search results. • DESIRED LOCATION field on the APPLICANT’S POSITION PREFERENCE field to become part of an applicant’s record. • LOCATION field on the APPLICANT INTERVIEW RESULTS screen to become part of an applicant’s record. • LOCATION field on the APPLICANT SEARCH CRITERIA screen. The code entry will be checked as a criterion used to generate an APPLICANT SEARCH REPORT. The report will identify applicants whose records match specified search criteria. Location Reason 4 alphanumeric characters. Represents the reason the employee changes job locations. Examples: Department transfer, Inner-departmental transfer. • Entered in the EMPLOYEE CURRENT POSITION screen. Pay Changer Reason 4 alphanumeric characters. Represents the reason an employee’s salary changed. Examples: Promotion, Full-time, Part-time. • Entered in the REASON field on the PAY RATE HISTORY INQUIRY screen. Plan 4 alphanumeric characters. The Benefit Plan code corresponds to each of the benefits that your company supports. Examples: Universal Life, Term. Essential Integrated Data, Ltd. Essential*HR Chapter 3 • Entered in the PLAN CODE field on the PLAN MAINTENANCE screen, under Benefit Admin. • Entered in the INVESTMENT PLAN field on the INVESTMENT BENEFIT MAINTENANCE screen. 3-9 Program 4 alphanumeric characters. Represents a specific venture or undertaking for the division. Examples: Fund raising, Atlantis, Convention plan. • Entered in the PROGRAM CD field on the AUTHORIZED POSITION MAIN screen to be included in a part of the position record. Provider 4 alphanumeric characters. Represents the name benefit plan’s name: Examples: Fidelity, Prudential, Mutual. • Entered in the INS PROVIDER field on the RELATIONSHIP/COBRA screen. Property 4 alphanumeric characters. Represents descriptions of properties issued to employees that are owned by the company. Examples: Computer terminal, Door key. • Entered in the PROPERTY CODE field on the POSITION MAINTENANCE screen for each employee. Rating 4 alphanumeric characters. Represents performance levels. Examples: Excellent, Satisfactory, Qualified. • Entered in the OVERALL RATING field on the PERFORMANCE REVIEW screen to become part of an employee’s performance history. • Entered in the RATING field on the PERFORMANCE REVIEW screen. Rehire 2 alphanumeric characters. Represents the eligibility of a re-hire. Examples: Eligible, Approved, Caution. • Entered in the REHIRE CODE field on the EMPLOYEE DEMOGRAPHICS screen to become part of an employee’s record. Review 4 alphanumeric characters. Represents the type of review the employee received Examples: Annual, Reassignment, Probationary, Monthly. • Entered in the REVIEW TYPE field on the PERFORMANCE REVIEW screen to become part of the employee’s performance history. Essential Integrated Data, Ltd. Essential*HR Chapter 3 3-10 Status 4 alphanumeric characters. Represents the employee's status within the company. Examples: Full time, Temporary, Part time. • Entered in the STATUS field on the APPLICANT DEMOGRAPHICS screen to become part of an applicant’s record. Status Change 4 alphanumeric characters. Represents the reason an employee changes job status such as from full-time to part-time or vice versa.. Examples: School, Illness, Cutbacks. • Entered in the STATUS CHANGE field on the HIRE DATA/CURRENT STATUS screen. Termination 4 alphanumeric characters. Represents the reason that an individual left the company. Examples: Voluntary, Layoff, Fired. • Entered in the TERM REASON field on the EMPLOYEE DEMOGRAPHICS screen to become part of an employee’s record. • Entered in the LEAVE REASON field on the APPLICANT PRIOR EMPLOYMENT screen to become part of the applicant’s record. Union 2 alphanumeric characters. Represents the employee’s union name. Examples: Teamsters, AFL/CIO, Teachers Association. • Entered in the UNION NAME field on the EMPLOYEE DEMOGRAPHICS screen to become part of an employee’s record. Worker’s Comp 3 alphanumeric characters. Represents the employee’s classification for insurance purposes; employees are classified by the nature of work they perform and the corresponding risks associated with their job. The worker’s comp code can be classifications used by the state or private agency. Examples: Clerical, Assembler, Executive. • Entered in WORKMAN’S COMP CODE field on the EMPLOYEE PAYROLL INFORMATION screen. EMPLOYEE LABOR RELATIONS TABLE MAINTENANCE Absence Absence Reason Accident Accident Location Action Disability Discipline Grievance Grievance Reason Program Resolution Essential Integrated Data, Ltd. Essential*HR Chapter 3 3-11 Absence 4 alphanumeric characters. Represents type of absence. Examples: Family emergency, Sick leave, Extended leave. • Entered in the ABSENCE CODE field on the EMPLOYEE ABSENCES screen to become part of the employee’s record. Absence Reason 4 alphanumeric characters. Represents the reason behind the absence--a more specific categorization. Examples: Flu/Cold, Sick leave, Surgery, Auto accident • Entered in the REASON CODE field on the EMPLOYEE ABSENCES screen to become part of the employee’s record. Accident 4 alphanumeric characters. Represents the type of accident an employee was involved in. Examples: Shock, Driving, Machine related, Peer related • Entered in the DESCRIPTION field on the EMPLOYEE ACCIDENT/INJURY REPORT screen. Accident Location 4 alphanumeric characters. Represents the place that the employee accident occurred, or places that which accidents may occur. • Entered in the LOCATION field on the EMPLOYEE ACCIDENT/INJURY report screen. Action 4 alphanumeric characters. Represents the various discipline actions taken. Examples: Written-up, Terminated, under review. • Entered in the ACTION CODE field on the EMPLOYEE DISCIPLINE screen. Disability 2 alphanumeric characters. Represents further detail of the accident; effects/injuries from accident. Examples: Partial vision loss, Short term, Long term, Hearing loss. • Entered in the DISB/ILLNESS field on the EMPLOYEE ACCIDENT/INJURY REPORT screen to be included in the employee’s accident/injury history. Discipline 2 alphanumeric characters. Represents the reason for discipline. Examples: Tardiness, Alcohol violation, Theft. Essential Integrated Data, Ltd. Essential*HR Chapter 3 • 3-12 Entered in the DISCIPLINE CODE field on the DISCIPLINARY ACTIONS screen to become part of the employee’s history. Grievance 4 alphanumeric characters. Reason the grievance was filed. Examples: Harassment, Discrimination, Working conditions. • Entered in the GRIEVANCE CODE field on the GRIEVANCE PROCESSING screen to be included as a part of the employee’s history. Grievance Reason 4 alphanumeric characters. Represents the secondary reason the employee filed the grievance. Examples: Inadequate Lighting represents the secondary reason, while working conditions represents the primary reason. • Entered in the REASON CODE field on the GRIEVANCE PROCESSING screen to be included as a part of the employee’s history. Program 4 alphanumeric characters. Represents the program in which the employee participated. Examples: Stress management, Peer relations, Drug rehabilitation. • Entered in the COUNSELING PROGRAM field on the COUNSELING PROGRAMS screen to be included in the employee’s record. Resolution 4 alphanumeric characters. Represents the status of the grievance: Resolved, Referred to committee, Investigation. • Entered in the RESOLUTION CODE field on the EMPLOYEE GRIEVANCE PROCESSING screen to be included in the employee’s record. EMPLOYEE ASSET TRACKING TABLE MAINTENANCE Certification Course Degree Level License Type License Code Major Record Results School Skill Subject Test Certification 4 alphanumeric characters. Essential Integrated Data, Ltd. Essential*HR Chapter 3 3-13 Represents special certification the employee has for a specific skill or a job. • Entered in the CERTIFICATION CODE field on the SKILL INVENTORY screen. Course 4 alphanumeric characters. The COURSE CODE is a code for the name of the academic course, which the employee or applicant took: Business Law, Typing. In addition, this manages codes, which relate to specific coursework done outside of a degree program. Examples: Word processing II. • Entered in the COURSE NAME field on the TUITION REIMBURSEMENT screen to become part of an employee. • Entered in the SUBJECT CODE fields on the EMPLOYEE ADDITIONAL TRAIN/EDUCATION screen to be included in the employee’s record. • Entered in the SUBJECT CODE fields on the APPLICANT ADDITIONAL TRAIN/EDUCATION screen to be included in the applicant’s record. Degree 3 alphanumeric characters. Represents an academic degree that the employee holds. Examples: High School, BA, MBA. • Entered in the DEGREE field on the TUITION REIMBURSEMENT screen. • Entered in the EDUCATION/DEGREE field on the EMPLOYEE SEARCH CRITERIA screen. The code entry will be checked as criterion used to produce an EMPLOYEE SEARCH REPORT. The report will identify all employees whose records match specified search criteria. • Entered in the DEGREE field on the POSITION MAINTENANCE screen. • Entered in the DEGREE CODE fields on the EMPLOYEE FORMAL EDUCATION screen. • Several codes from this table Entered in the DEGREE CODE fields on the APPLICANT FORMAL EDUCATION screen. • Entered in the EDUCATION/DEGREE field on the APPLICANT SEARCH CRITERIA. The code entry will be checked as criterion used to produce an EMPLOYEE SEARCH REPORT. The report will identify all employees whose records match specified search criteria. Level 4 alphanumeric characters. Represents the proficiency level the employee or applicant has with a specific skill. Examples: High, Moderate, etc. • Entered in the SKILL LEVEL field on the EMPLOYEE SEARCH CRITERIA screen. The code entry will be checked as criterion used to produce an EMPLOYEE SEARCH REPORT. The report will identify all employees whose records match specified search criteria. • Entered in the LEVEL CODE fields on the SKILL MAINTENANCE screen. • Entered in the LEVEL CODE field on the APPLICANT’S SKILLS ENTRY screen to be included in the Applicant’s files. Essential Integrated Data, Ltd. Essential*HR Chapter 3 • 3-14 Entered in the SKILL LEVEL field on the APPLICANT’S SEARCH CRITERIA. The code entry will be checked as criterion used to produce an APPLICANT SEARCH REPORT. The report will identify all employees whose records match specified search criteria. License Type 4 alphanumeric characters. Represents the specific name of the license. Example: Registered Nurse • Entered in the TYPE field on the LICENSE, CERT., PERMITS screen. • Entered in the LICENSE, CERT., PERMITS field on the APPLICANT LICENSE CODE screen. License Code 4 alphanumeric characters. Represents if the employee retains a license for a specialty within a given license type. Examples: Specific license code for a Registered nurse- -OR specialty, ICU, Neonatal unit. • Entered in the CODE FIELD on the LICENSE, CERT., PERMITS screen. Major Record 4 alphanumeric characters. Represents the employee's academic major in. Examples: Engineering, Biology , etc. • Entered in the MAJOR CODE AND MINOR fields on the FORMAL EDUCATION screen. • Entered in the MAJOR CODE AND MINOR CODE field on the APPLICANT FORMAL EDUCATION screen **** (For both of the above entries:) Entry of a major code may be made in conjunction with entry of a degree code, thereby associating the major with the degree. Results 4 alphanumeric characters. Represents the scores/results of the employee’s test. Examples: Passed, 90-100 Percentile, Failed, etc. • Entered in the RESULT CODE field on the EMPLOYEE TESTING screen. • Entered in the RESULT CODE fields on the APPLICANT TESTING screen. **** (For both of the above entries:) Entry of a test result code is made in conjunction with a test name code. School 4 alphanumeric characters. Represents the schools or training facilities the employee attended. • Entered in the SCHOOL field on the TUITION REIMBURSEMENT screen to become part of an employee’s record. • Entered in the SCHOOL CODE field on the FORMAL EDUCATION screen. Essential Integrated Data, Ltd. Essential*HR Chapter 3 • Entered on the EMPLOYEE’S ADDITIONAL TRAINING/EDUCATION screen. • Entered in the SCHOOL CODE field on the APPLICANT FORMAL EDUCATION screen • Entered on the APPLICANT’S ADDITIONAL TRAINING/EDUCATION screen. 3-15 Skill 4 alphanumeric characters. Represents the type of skill the employee or applicant has. Examples: Word Processing, Programming. • Entered in the SKILL LEVEL field on the EMPLOYEE SEARCH CRITERIA screen. The code entry will be checked as criterion used to produce an Employee Search Report. The report will identify all employees whose records match specified search criteria. • Entered in the SKILL CODE field on the SKILL INVENTORY screen. • Entered in the SKILL CODE field on the APPLICANT’S SKILL INVENTORY screen to be included in the Applicant’s files. • Entered in the SKILL CODE field on the APPLICANT’S SEARCH CRITERIA. The code entry will be checked as criterion used to produce an Applicant Search Report. The report will identify all employees whose records match specified search criteria. Subject 4 alphanumeric character. Represents codes, which corresponds to coursework the employee took. Examples: Business law, Accounting. • Entered in the COURSE NAME field on the TUITION REIMBURSEMENT screen to become part of an employee. • Entered in the SUBJECT CODE fields on the EMPLOYEE ADDITIONAL TRAIN/EDUCATION screen to be included in the employee’s record. • Entered in the SUBJECT CODE fields on the APPLICANT ADDITIONAL TRAIN/EDUCATION screen to be included in the applicant’s record. Test 2 alphanumeric characters. Represents the name of the test that the applicant or employee took. Examples: Typing, Bookkeeping. • Entered in the TEST CODE field on the EMPLOYEE TESTING screen. • Entered in the TEST CODE field on the APPLICANT TESTING screen. APPLICANT TRACKING TABLE MAINTENANCE Interview Offer Response Essential Integrated Data, Ltd. Essential*HR Chapter 3 3-16 Interview 2 alphanumeric characters. Represents the result of the applicant's interview. Examples: Highly favorable, Average. • Entered in the RATING field on the APPLICANT INTERVIEW RESULTS screen. Offer 4 alphanumeric characters. Represents the status of a job offer to an applicant. Examples: Extended, Pending on 2nd interview, etc. • Entered in the OFFER STATUS field In the APPLICANT DISPOSITION screen. Response 2 alphanumeric characters. Represents the applicant’s response once an offer was extended. Examples: Accepted, Pending, Rejected. • Entered in the APPLICANT RESPONSE field on the APPLICANT DISPOSITION screen. Essential Integrated Data, Ltd. Essential*HR 4-1 Chapter 4 ICONS LIST RESTART icon. Clears the screen so user can restart data input. SAVE icon. Allows user to save information to the file being processed. DELETE icon. Allows user to delete the record displayed on the screen. PRINT icon. Allows user to print reports, lists, or forms. EXIT/CANCEL icon. Allows user to exit from the HR program. HELP icon. Allows user to search for help on a particular topic or command. EMPLOYEE MASTER FILE icon. Allows user to pull-up the master list of all employees. PREVIOUS icon. Allows user to browse to the previous record. NEXT icon. Allows user to browse to the next record. CALENDAR icon. Allows user to pull-up a calendar, select a date, and have the selected date inserted in the screen fill. Essential Integrated Data, Ltd. Essential*HR 4-2 Chapter 4 SCREEN icon. Allows user to change to the desired screen; will have screen icons that function with multiple screens. NOTE icon. Allows user to attach a note/additional information. LIST icon. Allows user to view and keep track of codes entered for a particular table. In addition, allows user to see a list of employees whose information has been previously entered in the particular screen. PICTURE icon. Allows user to view the employee’s picture, in the employee demographic screen. SEARCH icon. Allows user to search the file of employee images and documents. EXECUTE icon. Allows user to “insert” information from a table/list. PASSWORD TYPE icon. Allows user to enter the password type and save it for an employee. MULTIPLE KEY LIST icon. When a record has multiple key fields, the regular list icon will popup a list of choices for the individual field. The Multiple Key List icon will popup a list of all records. Examples are position records, work history records, benefit plans. Essential Integrated Data, Ltd. Essential*HR Chapter 5 5-1 EMPLOYEE RECORDS The EMPLOYEE RECORDS feature groups together records concerning demographics, hire data, employee status, employee position, employee benefit selection, medical history, relation names, COBRA information, tuition reimbursement, and company service information. Other employee records (such as Labor Relations, Employee Assets, and Pay-Rate/Performance records) are handled by separate applications. The EMPLOYEE RECORDS feature allows the user to perform the following tasks: • Establish demographic information when an individual is employed by the organization. • Document and manage employment events and entry of pertinent dates (hire date, termination date, etc.). • Maintain current employee status. • Document issuance of company property. • Assign and update employee benefits • Establish company-service records for an employee. Note: To maintain the most accurate and up-to-date employee records, process HR information daily whenever a change occurs with an employee's record. Examples: Marital status, Termination, Change in benefits, Address change, etc. Prior to routine processing, the user must enter information into the CODES MAINTENANCE TABLE, GRADE TABLE MAINTENANCE, POSITION ADMINISTRATION, and BENEFIT ADMINISTRATION files. The user must enter EMPLOYEE DEMOGRAPHIC information before the user can enter any additional information for an employee. GETTING STARTED From the MASTER MENU, select EMPLOYEE, then select EMPLOYEE RECORDS to see Figure 5.1. A list of the various features used to maintain employee records appears. To view the EMPLOYEE DEMOGRAPHICS screen, select EMPLOYEE DEMOGRAPHICS and the screen appears (figure 5.2). To see SCREEN 2 click the SCREEN 2 ICON; to review the functions of the toolbar, refer to the ICONS LIST. Many fields such as CITIZENSHIP require no entry because the information has been previously entered into the CODES MAINTENANCE TABLE. To select the appropriate information for a field such as CITIZENSHIP, click on the LIST icon to view the list of information previously entered for that particular code. Further explanation is in the USER START-UP PROCEDURE chapter, under CODES MAINTENANCE. (Figure 5.1) Essential Integrated Data, Ltd. Essential*HR Chapter 5 5-2 EMPLOYEE DEMOGRAPHICS The EMPLOYEE DEMOGRAPHICS feature allows the user to enter basic data about the employee in order to establish the employee's relationship with the organization. (Figure 5.2) The screen will appear as figure 5.2 appears until information is entered. To display previously entered records, perform one of the following tasks: 1. Type the employee number in the EMPLOYEE NO. field and press the ENTER or the TAB key. The corresponding name will appear. 2. The user, with the cursor in the EMPLOYEE NO. field, can click the EMPLOYEE MASTER FILE ICON and, if employees have been previously entered, than the list of the entered employees will appear, but if no records have been entered, than all the employees’ numbers and names will appear, and the user needs to simply highlight which employee is to be entered, click the EXECUTE ICON, and the EMPLOYEE NO. and NAME will appear in the appropriate fields. EMPLOYEE DEMOGRAPHICS SCREEN 1: STANDARD INFORMATION: Address 19 alphanumeric characters each. • Enter the employee's street address. Age No entry required. Program will automatically calculate AGE, based on DATE OF BIRTH. Beeper # 12 numeric characters. • Enter the employee’s beeper number. City 20 alphanumeric characters. Entry required. • Enter the employee's city of residence. County 14 alphanumeric characters. Essential Integrated Data, Ltd. Essential*HR Chapter 5 • 5-3 Enter the county in which the employee lives. Country 14 alphanumeric characters. • Enter the country in which the employee lives. Date of Birth Standard date format. • Enter the employee's date of birth. E-mail Address 30 alphanumeric characters. • Enter the employee’s address. First Name 11 alphanumeric characters. • Enter the employee’s first name. Home Phone 12 numeric characters. • Enter the employee's home phone number. Last Name 16 alphanumeric characters. • Enter the employee’s last name. Mobile Phone # 12 numeric characters. • Enter the employee’s mobile phone number. Middle Initial 1 alphanumeric character. • Enter the first letter of the employee’s middle name. Nickname 9 alphanumeric characters. • Enter the employee’s nickname, if applicable. Essential Integrated Data, Ltd. Essential*HR Chapter 5 5-4 Pin # 12 numeric characters. • Enter the employee’s pin number/password. Salutation 14 alphanumeric characters. • Enter the salutation the employee goes by. Examples: Mrs., Dr., Miss. Social See No 9 numeric characters. The SOCIAL SECURITY NUMBER cannot be all zeros. If the employee currently has no social security number, enter a dummy number, such as all 9's, and change this as soon as the employee receives a valid number. • Enter the employee's social security number. State No entry required. Select the appropriate choice by clicking on the DOWN ARROW next to the field. Work Phone 10 alphanumeric characters. • Enter the employee's work phone number or extension. Zip Code 11 alphanumeric characters. • Enter the zip code. In the case of an extended zip code, you may enter the number with a dash to format out to ten characters. PERSONAL INFORMATION: Disability No entry required. Simply check the box if the employee has a disability. Ethnic Origin No entry required. Select the appropriate choice by clicking on the DOWN ARROW next to the field. Gender No entry required. Simply select the appropriate gender. Marital Status No entry required. Select the appropriate choice by clicking on the DOWN ARROW next to the field. Veteran No entry required. Select the appropriate choice by clicking on the DOWN ARROW next to the field. Essential Integrated Data, Ltd. Essential*HR Chapter 5 5-5 EMPLOYEE DEMOGRAPHICS SCREEN 2: (Figure 5.3) The EMPLOYEE NO. and NAME from SCREEN 1 will automatically carry over into SCREEN 2. CITIZENSHIP: I-9 Documentation--1 • Enter an alphanumeric code (maximum of 2 characters) OR choose a code from the CODES TABLE by browsing with the toolbar browse keys or displaying and selecting from the I-9 STATUS CODE POPUP LIST. Exp. Date 8 numeric characters. • Enter the date in the MM-DD-YYYY format. I-9 Documentation--2 • Enter an alphanumeric code (maximum of 2 characters) OR choose a code from the CODES TABLE by browsing with the toolbar browse keys or displaying and selecting from the I-9 STATUS CODE POPUP LIST. Nationality • Enter an alphanumeric code (maximum of 4 characters) OR choose a code from the CODES TABLE by browsing with the toolbar browse keys or displaying and selecting from the CITIZENSHIP CODE POPUP LIST. Exp. Date Standard date format. • Enter the date the corresponding document expires. MISCELLANEOUS: Maiden Name 25 alphanumeric characters. • Enter the name of the employee’s maiden name if applicable. Essential Integrated Data, Ltd. Essential*HR Chapter 5 5-6 Spouse’s Name 25 alphanumeric characters. • Enter the name of the employee’s spouse if applicable. EMERGENCY INFO: Address 25 alphanumeric characters each. • Enter the address for the emergency contact. City, State, Zip 25 alphanumeric characters. • Enter the CITY, STATE, & ZIP of the employee’s emergency contact. Commas can separate the information or be left out. Name 25 alphanumeric characters. • Enter the name of a person the employee wishes to be contacted in the event of an emergency involving the employee. Phone 10 alphanumeric characters. • Enter the emergency contact's phone number. Relationship 15 alphanumeric characters. • Enter the emergency contact’s relationship to the employee. Examples: Mother, Brother, Niece. HIRE DATA/CURRENT STATUS The HIRE DATA/CURRENT STATUS feature allows the user to keep track of employees’ hiring information, such as hiring date, seniority date, and termination information. To view the HIRE DATA/CURRENT STATUS screen, select EMPLOYEE on the menu bar, then select EMPLOYEE RECORDS, and finally select HIRE DATA/CURRENT STATUS. Note: The user must enter an employee's DEMOGRAPHIC INFORMATION before any information can be entered in this feature. Essential Integrated Data, Ltd. Essential*HR Chapter 5 5-7 (Figure 5.4) (Figure 5.5) The screen will appear as figure 5.5 appears until information is entered. To display previously entered records, perform one of the following tasks: 1. Type the employee number in the EMPLOYEE NO. field and press the ENTER or the TAB key. The corresponding name will appear. 2. The user, with the cursor in the EMPLOYEE NO. field, can click the EMPLOYEE MASTER FILE ICON and, if employees have been previously entered, than the list of the entered employees will appear, but if no records have been entered, than all the employees’ numbers and names will appear, and the user needs to simply highlight which employee is to be entered, click the EXECUTE ICON, and the EMPLOYEE NO. and NAME will appear in the appropriate fields. HIRE DATA: Exit Interview 15 alphanumeric characters. • Enter the name of the interviewer or comments regarding the exit interview with the employee. Hire Source • Enter an alphanumeric code (maximum of 4 characters) OR choose a code from the CODES TABLE by browsing with the toolbar browse keys or displaying and selecting from the HIRE SOURCE CODE POPUP LIST. Essential Integrated Data, Ltd. Essential*HR Chapter 5 5-8 Last Hire Date Standard date format. • If an employee's employment has been interrupted, enter the date that the employee was last hired by your organization. Original Hire Date Standard date format. • Enter the date that the employee was originally hired by your organization. Rehire Code • Enter an alphanumeric code (maximum of 2 characters) OR choose a code from the CODES TABLE by browsing with the toolbar browse keys or displaying and selecting from the RE-HIRE CODE POPUP LIST. Termination Date Standard date format. • Entry required if entered a termination reason. Termination Reason • Enter an alphanumeric code (maximum of 4 characters) OR choose a code from the CODES TABLE by browsing with the toolbar browse keys or displaying and selecting from the TERMINATION CODE POPUP LIST. EMPLOYEE STATUS: Change Reason • Enter an alphanumeric code (maximum of 2 characters) OR choose a code from the CODES TABLE by browsing with the toolbar browse keys or displaying and selecting from the STATUS CHANGE CODE POPUP LIST. Employee Status • Enter an alphanumeric code (maximum of 4 characters) OR choose a code from the CODES TABLE by browsing with toolbar browse keys or displaying and selecting from the EMPLOYEE STATUS CODE POPUP LIST. The code PURG for ‘purge’ will automatically be in the program; this code does not need to be entered when entering codes in the code tables. If you choose this code, the next time you purge employee records, the employee records (in which you selected this code) will be purged. Last Change Date Standard date format. • Enter the date that the employee's current status became effective. Last Date Worked Standard date format. • If the employee is on leave or has been terminated, enter the date on which the employee last worked. Leave Return Date Standard date format. Essential Integrated Data, Ltd. Essential*HR Chapter 5 • 5-9 Enter the date that the employee will be returning to work after a leave of absence. UNION MEMBERSHIP: Seniority Date Standard date format. • Enter the date from which HR is to calculate an employee's union seniority. The SENIORITY LISTING REPORT displays the number of years that the employee has been in the union. Union Name • Enter an alphanumeric code (maximum of 2 characters) OR choose a code from the CODES TABLE by browsing with the toolbar browse keys or displaying and selecting from the UNION CODE POPUP LIST. CURRENT JOB POSITION The CURRENT JOB POSITION feature allows the user to assign an employee's position, division and department. It also allows the user to enter location, salary, and shift, information. Other fields provide a means to record dates for significant events that relate to an employee's position assignment. Note: The user must enter an employee's DEMOGRAPHIC INFORMATION before any information can be entered. To view the CURRENT JOB POSITION screen, select EMPLOYEE on the menu bar, then select EMPLOYEE RECORDS, and finally select CURRENT JOB POSITION. (Figure 5.6) (Figure 5.7) Essential Integrated Data, Ltd. Essential*HR Chapter 5 5-10 The screen will appear as figure 5.7 appears until information is entered. To display previously entered records, perform one of the following tasks: 1. Type the employee number in the EMPLOYEE NO. field and press the ENTER or the TAB key. The corresponding name will appear. 2. The user, with the cursor in the EMPLOYEE NO. field, can click the EMPLOYEE MASTER FILE ICON and, if employees have been previously entered, than the list of the entered employees will appear, but if no records have been entered, than all the employees’ numbers and names will appear, and the user needs to simply highlight which employee is to be entered, click the EXECUTE ICON, and the EMPLOYEE NO. and NAME will appear in the appropriate fields. POSITION DATA: Civil Service Code 4 alphanumeric characters. • If applicable, enter a civil service code for the employee. Grade 3 alphanumeric characters. • This is the salary grade for the position assigned to the employee. The POSITION ADMINISTRATION feature allows the user to assign salary grades to each position. Hourly Rate 9 numeric characters with 2 decimal places. The hourly rate range for the employee's step display at the bottom of the panel when the cursor is on the HOURLY RATE field. The HOURLY RATE entered must fall within this range. • If the pay grade for the employee's position is hourly, the user may use this field to enter the employee's hourly rate of pay. Next Pay Review Standard date format. • Enter the date on which the employee is due a salary or wage review. Next Performance Review Standard date format. • Enter the date on which the employee is due a performance review. Pay Frequency No entry required. Select the appropriate choice by clicking on the DOWN ARROW next to the field. Pay Method No entry required. Select the appropriate choice by clicking on the DOWN ARROW next to the field. Essential Integrated Data, Ltd. Essential*HR Chapter 5 5-11 Per Pay Prd. No entry required. This field will automatically be calculated. Position 15 alphanumeric characters. • Enter the position assigned to the employee. Examples: Programmer, Accountant. Salary Amount 11 numeric characters with 2 decimal places. ** If the pay grade for the employee's position, identifies as being compensated at as amount per year, the user may use this field to enter the employee's annual salary. The salary range for the employee' s pay step displays at the bottom of the panel when the cursor is on the salary amount field. The annual salary amount entered must fall within this range. Shift Code 1 alphanumeric character. • Enter the code/symbol for the shift the employee works. Shift Premium 4 numeric characters with 2 decimal places. • If applicable, enter the amount or premium assigned to the employee’s shift. Start Date Standard date format. • Enter the date on which the employee will begin work in his/her currently assigned position. Step 2 alphanumeric characters. Low and high salary steps are established for each position in THE POSITION ADMINISTRATION FILE. Each salary step defines a range of compensation amounts. The steps taken together represent a "line of progression" in compensation associated with the position. Supervisor 15 alphanumeric characters. • Enter the name of the employee's supervisor. ORGANIZATION: Date Assigned Standard date format. • Enter the date on which the employee was assigned to work in the division Essential Integrated Data, Ltd. Essential*HR Chapter 5 5-12 Division • Enter an alphanumeric code (maximum of 2 characters) OR choose a code from the CODES TABLE by browsing with the toolbar browse keys or displaying and selecting from the DIVISION CODE POPUP LIST. Job Reason • Enter an alphanumeric code (maximum of 4 characters) OR choose a code from the CODES TABLE by browsing with the toolbar browse keys or displaying and selecting from the JOB REASON CODE POPUP LIST. LOCATION: Department The DEPARTMENT CODE is a way of further defining the employee's organizational entity for reporting purposes. • Enter an alphanumeric code (maximum of 4 characters) OR choose a code from the CODES TABLE by browsing with the toolbar browse keys or displaying and selecting from the DEPARTMENT CODE POPUP LIST. Location • Enter an alphanumeric code (maximum of 2 characters) OR choose a code from the CODES TABLE by browsing with the toolbar browse keys or displaying and selecting from the LOCATION CODE POPUP LIST. Loc. Reason • Enter an alphanumeric code (maximum of 4 characters) OR choose a code from the CODES TABLE by browsing with the toolbar browse keys or displaying and selecting from the LOCATION REASON CODE POPUP LIST. SMSA Code 4 alphanumeric characters. ** The user may use this field to enter a code for THE STANDARD METROPOLITAN STATISTICAL AREA (SMSA) in which the employee is located. This code is NOT like the codes previously entered. It is more like an abbreviation for the SMSA. For example, the user would NOT enter 01 DALLAS-FT. WORTH. Instead the user would enter DSFW which could stand for the DALLAS-FT. WORTH SMSA if the employee was located there. PAYROLL INFORMATION The PAYROLL INFORMATION feature allows the user to establish and maintain financial records of employees. This feature keeps track of withholdings, deposit information, and amount of direct deposits. Note: The user must enter an employee's DEMOGRAPHIC INFORMATION before any other data can be entered. To view the PAYROLL INFORMATION screen, select EMPLOYEE on the menu bar, then select EMPLOYEE RECORDS, and finally select PAYROLL INFORMATION. Essential Integrated Data, Ltd. Essential*HR Chapter 5 5-13 (Figure 5.8) (Figure 5.9) The screen will appear as figure 5.9 appears until information is entered. To display previously entered records, perform one of the following tasks: 1. Type the employee number in the EMPLOYEE NO. field and press the ENTER or the TAB key. The corresponding name will appear. 2. The user, with the cursor in the EMPLOYEE NO. field, can click the EMPLOYEE MASTER FILE ICON and, if employees have been previously entered, than the list of the entered employees will appear, but if no records have been entered, than all the employees’ numbers and names will appear, and the user needs to simply highlight which employee is to be entered, click the EXECUTE ICON, and the EMPLOYEE NO. and NAME will appear in the appropriate fields. GENERAL INFORMATION: Additional City Withholding 4 numeric characters with 2 decimal places. Click the mouse on either $ or %, which ever the user chooses to use. • Enter the amount in the field. Additional Federal Withholding 4 numeric characters with 2 decimal places. Essential Integrated Data, Ltd. Essential*HR Chapter 5 5-14 Click the mouse on either $ or %, which ever the user chooses to use. • Enter the amount in the field. Additional State Withholding 4 numeric characters with 2 decimal places. Click the mouse on either $ or %, which ever the user chooses to use. • Enter the amount in the field. Filing Status No entry required. Select the appropriate choice by clicking on the DOWN ARROW next to the field. Number of Exemptions FWT= 1 numeric character. SWT= 2 numeric characters. CWT= 1 numeric character. • Enter the amount of the employee’s exemptions. Workman’s Comp Code 4 numeric characters. • Enter the workman’s comp code. DEPOSIT/BANK INFORMATION: *****Only if employee chooses to use direct deposit. Account Type Select the appropriate type. Amount Code No entry required. Select the appropriate choice by clicking on the DOWN ARROW next to the field. Bank Abbreviation 6 alphanumeric characters. • Enter the bank’s abbreviation. Bank Account # 15 numeric characters. • Enter the employee’s account number for the appropriate account. Bank Name 20 alphanumeric characters. • Enter the name of the bank for the appropriate account. Essential Integrated Data, Ltd. Essential*HR Chapter 5 5-15 Bank Transit # 6 numeric characters. • Enter the bank’s transit number for the appropriate account. Deposit Amount 4 numeric characters with decimal places. • Enter the amount to be deposited in the appropriate account. Use Direct Deposit No entry required. Simply check the box if the employee chooses to use direct deposit. BENEFIT SELECTION The BENEFIT SELECTION feature allows the user to set up benefit profiles for employees. This is where the organization records the employee's benefit choices, beneficiary, and contribution amounts. Note: The user must enter an employee's DEMOGRAPHIC INFORMATION and establish benefit records in BENEFIT ADMINISTRATION under PLAN MAINTENANCE before any information can be entered in this feature. To view the BENEFIT SELECTION screen, select EMPLOYEE on the menu bar, then select EMPLOYEE RECORDS, and finally select BENEFIT SELECTION. (Figure 5.10) Essential Integrated Data, Ltd. Essential*HR Chapter 5 5-16 INSURANCE (Figure 5.11) (Figure 5.12) The screen will appear as figure 5.12 appears until information is entered. To display previously entered records, perform one of the following tasks: 1. Type the employee number in the EMPLOYEE NO. field and the corresponding name will appear. Enter the PLAN TYPE and press return. After entering the PLAN CODE and pressing return, if the employee has an existing record for the entered benefit type and code, the other data will display and changes can be made to the data. If there is not an existing record on file, a new record can be created by entering data in the remaining fields and saving the record. 2. With the cursor in the EMPLOYEE NO. field, the user can click the BENEFITS MASTER FILE ICON, and if an employee number has been entered, the record (s) on file for that employee will appear in a popup list box. If no records are on file for the entered employee number, all employees on file will appear in the list box. Highlight the desired employee in the list box, click the EXECUTE ICON, and the EMPLOYEE NO. and NAME will appear in the appropriate fields in the employee benefit screen. To select a PLAN TYPE and PLAN CODE combination, click on the INSURANCE LIST ICON on the toolbar when the cursor is in the PLAN TYPE field and a popup box will appear, listing all valid PLAN TYPES and CODES. After selecting the TYPE and CODE combination, press return. If a record is on file matching the employee number, the PLAN TYPE, and the PLAN CODE, the data for the remaining fields will display. 3. To see a list of all employee insurance benefit records on file, click on the BENEFITS MASTER FILE ICON. Select the desired record by highlighting the appropriate row and clicking on the EXECUTE ICON or double click on the Essential Integrated Data, Ltd. Essential*HR Chapter 5 5-17 desired row. After the popup box disappears, the cursor will be positioned in the emp loyee number field. Press return until the cursor exits the PLAN CODE field to display the data for the remaining fields. DEFAULT FIELDS: The Provider, Deduction Code, Basic Coverage, and Plan Status fields will display the data entered from the BENEFIT MASTER RECORD for the plan selected. Data CANNOT be changed on this screen. OPTIONS: If plan options have been set up in the BENEFIT MASTER RECORD, they will appear in the EMPLOYEE BENEFIT SCREEN. Even if the employer no longer offers a cafeteria plan with a certain option (such as dental or a medical HMO), all options that are and were once available will appear. The employer simply checks which ones are still currently available, which will automatically be defaulted to the employee application. The employer may simply want each cafeteria plan to offer one type of benefit, in which all the types of benefits will appear in the BENEFIT ADMINISTRATION application, and be defaulted to the EMPLOYEE BENEFITS application. Here, the employee does not have the option of selecting benefit types, for the only types listed are those that the employee will have. Or, the employer may want to offer a variety of benefit types under one benefit, in which all benefits and types are entered in the ADMINISTRATION application, and defaulted to the EMPLOYEE application. Here, the employee selects which types (such as HMO and universal), and the employer checks those selected. The total employee contribution will be incremented for each option selected. COVERAGE: All information under the heading of BASIC COVERAGE comes from the BENEFIT MASTER RECORD. If the BENEFIT MASTER RECORD indicates that premiums vary by employee, view is allowed to these fields. A dialogue box will appear, stating that the user selected premiums to vary by employee, and asking the user if the default values are to be carried over . (Figure 5.13) The following information--until the dashed line--applies ONLY if premiums vary by employee. Calc. Method • Enter an alphanumeric code (maximum of 2 characters) OR choose a code from the CODES TABLE by browsing with the toolbar browse keys or displaying and selecting from the CALCULATION METHOD CODE POPUP LIST. Coverage No entry allowed. This field will automatically be calculated. Monthly Contributions: Employee 4 numeric characters with 2 decimal places • Enter the contribution that the dependent or the company pays. Dependent 4 numeric characters with 2 decimal places • Enter the contribution which the dependent or the company pays Essential Integrated Data, Ltd. Essential*HR Chapter 5 5-18 Monthly Premiums: Employee 4 numeric characters with 2 decimal places • Enter the premium applicable to the employee. Dependent 4 numeric characters with 2 decimal places • Enter the premium applicable to the dependent. Total Contributions No entry allowed. This field will automatically be calculated --------------------------------------------------------------------------------------------------------------------------------------------------------INSURANCE PLANS: Beneficiary Effective Date Standard date format. • Enter the effective date beneficiary coverage becomes effective. Beneficiary Name 25 alphanumeric characters. • Enter the name of insurance plans beneficiary. Enter "None" if there is no beneficiary. Beneficiary Relationship 10 alphanumeric characters. • Enter the beneficiary’s relationship to the employee. Deduction Frequency No entry required. Select the appropriate choice by clicking on the DOWN ARROW next to the field. Eligible Date Standard date format. • Enter the date on which the employee becomes eligible for plan coverage. No. of Dependents 2 numeric characters. • Enter the number of dependents that are covered under the plan. Essential Integrated Data, Ltd. Essential*HR Chapter 5 5-19 MEDICAL (Figure 5.14) The MEDICAL feature follows the same format as the INSURANCE feature. For reference, simply look to the above section. RETIREMENT (Figure 5.15) (Figure 5.16) Essential Integrated Data, Ltd. Essential*HR Chapter 5 5-20 The screen will appear as figure 5.16 appears until information is entered. To display previously entered records, perform one of the following tasks: 1. Type the employee numb er in the EMPLOYEE NO. field and the corresponding name will appear. Enter the PLAN TYPE and press return. After entering the PLAN CODE and pressing return, if the employee has an existing record for the entered benefit type and code, the other data will display and changes can be made to the data. If there is not an existing record on file, a new record can be created by entering data in the remaining fields and saving the record. 2. With the cursor in the EMPLOYEE NO. field, the user can click the BENEFITS MASTER FILE ICON, and if an employee number has been entered, the record (s) on file for that employee will appear in a popup list box. If no records are on file for the entered employee number, all employees on file will appear in the list box. Highlight the desired employee in the list box, click the EXECUTE ICON, and the EMPLOYEE NO. and NAME will appear in the appropriate fields in the employee benefit screen. To select a PLAN TYPE and PLAN CODE combination, click on the INSURANCE LIST ICON on the toolbar when the cursor is in the PLAN TYPE field and a popup box will appear, listing all valid PLAN TYPES and CODES. After selecting the TYPE and CODE combination, press return. If a record is on file matching the employee number, the PLAN TYPE, and the PLAN CODE, the data for the remaining fields will display. 3. To see a list of all employee insurance benefit records on file, click on the BENEFITS MASTER FILE ICON. Select the desired record by highlighting the appropriate row and clicking on the EXECUTE ICON or double click on the desired row. After the popup box disappears, the cursor will be positioned in the employee number field. Press return until the cursor exits the PLAN CODE field to display the data for the remaining fields. DEFAULT FIELDS: The Provider, Deduction Code, and Plan Status fields will display the data entered from the BENEFIT MASTER RECORD for the plan selected. Data CANNOT be changed on this screen. OPTIONS: If investment options have been set up in the BENEFIT MASTER RECORD, they will appear in the EMPLOYEE BENEFIT SCREEN. The user may enter the allocation percentage, if the employee chooses to invest. Eligible Age 2 numeric characters • Enter the age at which the employee becomes eligible for retirement benefits. Enrollment Date Standard date format. • Enter the date on which the employee enrolled for benefits. Freq. No entry required. Simply select the appropriate choice by clicking on the DOWN ARROW next to the field. Retirement Age 2 numeric characters. • Enter the age at which the employee retired. Retirement Date Standard date format. • Enter the date on which retirement benefits became effective. Essential Integrated Data, Ltd. Essential*HR Chapter 5 5-21 Required Service Hours 6 numeric characters. • Enter the number of hours an employee must work for the company, before becoming eligible for retirement benefits. Service Hours 6 numeric characters. • Enter the number of hours the employee accumulated when benefits became effective. Vesting Percentage 3 numeric characters with 2 decimal places. • Enter the rate at which ownership (or value) of benefit is transferred to employee. For example, if the vesting percentage is 10% per year, and the employee leaves the company after two years, then the employee will receive 20% of the amount in the retirement fund. BENEFICIARY INFORMATION: Effective Date Standard date format. • Enter the dates on which the primary and secondary beneficiaries became eligible for benefits. Name 24 alphanumeric characters. • Enter the names of beneficiaries. Relationship 10 alphanumeric characters. • Enter the relationship to the eligible employee. CAFETERIA (Figure 5.17) Essential Integrated Data, Ltd. Essential*HR Chapter 5 5-22 The employer may wish to put together several (or just one) benefit packages, containing different options, types, and codes. The employee may pick one of these packages, called a CAFETERIA PLAN, instead of individually selecting coverage. (Figure 5.18) The screen will appear as figure 5.18 appears until information is entered. To display previously entered records, perform one of the following tasks: 1. Type the employee number in the EMPLOYEE NO. field and the corresponding name will appear. Enter the CAFETERIA CODE and press return. After entering the PLAN CODE and pressing return, if the employee has an existing record for the entered benefit type and code, the other data will display and changes can be made to the data. If there is not an existing record on file a new record can be created by entering data in the remaining fields and saving the record. 2. With the cursor in the EMPLOYEE NO. field, the user can click the BENEFITS MASTER FILE ICON, and if an employee number has been entered, the record (s) on file for that employee will appear in a popup list box. If no records are on file for the entered employee number, all employees on file will appear in the list box. Highlight the desired employee in the list box, click the EXECUTE ICON, and the EMPLOYEE NO. and NAME will appear in the appropriate fields in the employee benefit screen. To select a CAFETERIA CODE and PLAN CODE combination, click on the INSURANCE LIST ICON on the toolbar when the cursor is in the PLAN TYPE field and a popup box will appear, listing all valid CAFETERIA CODES and PLAN CODES. After selecting the TYPE and CODE combination, press return. If a record is on file matching the employee number, the CAFETERIA CODE and the PLAN CODE, the data for the remaining fields will display. 3. To see a list of all employee insurance benefit records on file, click on the BENEFITS MASTER FILE ICON. Select the desired record by highlighting the appropriate row and clicking on the EXECUTE ICON or double click on the desired row. After the popup box disappears, the cursor will be positioned in the employee number field. Press return until the cursor exits the PLAN CODE field to display the data for the remaining fields. DEFAULT FIELDS: The Plan Status field will display the data entered from the BENEFIT MASTER RECORD for the plan selected. Data CANNOT be changed on this screen. OPTIONS: If plan option/packages have been set up in the BENEFIT ADMINISTRATION, they will appear in the EMPLOYEE BENEFIT SCREEN. The options box simply displays the various benefits covered under the cafeteria plan that the employee has selected. In this screen, the user will not be able to check the boxes; only the boxes checked under the ADMINISTRATION application will be defaulted to the employee feature. Enrollment Date No entry required. Date will automatically be inserted when benefits are selected. Essential Integrated Data, Ltd. Essential*HR Chapter 5 5-23 DENTAL (Figure 5.19) The DENTAL feature follows the same format as the INSURANCE feature. For reference, simply look to the INSURANCE section. VISION (Figure 5.20) (Figure 5.21) The screen will appear as figure 5.21 appears until information is entered. To display previously entered records, perform one Essential Integrated Data, Ltd. Essential*HR Chapter 5 5-24 of the following tasks: 1. Type the employee number in the EMPLOYEE NO. field and the corresponding name will appear. Enter the PLAN TYPE and press return. After entering the PLAN CODE and pressing return, if the employee has an existing record for the entered benefit type and code, the other data will display and changes can be made to the data. If there is not an existing record on file, a new record can be created by entering data in the remaining fields and saving the record. 2. With the cursor in the EMPLOYEE NO. field, the user can click the BENEFITS MASTER FILE ICON, and if an employee number has been entered, the record (s) on file for that employee will appear in a popup list box. If no records are on file for the entered employee number, all employees on file will appear in the list box. Highlight the desired employee in the list box, click the EXECUTE ICON, and the EMPLOYEE NO. and NAME will appear in the appropriate fields in the employee benefit screen. To select a PLAN TYPE and PLAN CODE combination, click on the INSURANCE LIST ICON on the toolbar when the cursor is in the PLAN TYPE field and a popup box will appear, listing all valid PLAN TYPES and CODES. After selecting the TYPE and CODE combination, press return. If a record is on file matching the employee number, the PLAN TYPE and the PLAN CODE, the data for the remaining fields will display. 3. To see a list of all employee insurance benefit records on file, click on the BENEFITS MASTER FILE ICON. Select the desired record by highlighting the appropriate row and clicking on the EXECUTE ICON or double click on the desired row. After the popup box disappears, the cursor will be positioned in the employee number field. Press return until the cursor exits the PLAN CODE field to display the data for the remaining fields. DEFAULT FIELDS: The Provider, Deduction Code, Calculation Method, and Plan Status fields will display the data entered from the BENEFIT MASTER RECORD for the plan selected. Data CANNOT be changed on this screen. COVERAGE: All information under the heading of BASIC COVERAGE comes from the BENEFIT MASTER RECORD. If the BENEFIT MASTER RECORD indicates that premiums vary by employee, view is allowed to these fields. The following information--until the dashed line--applies ONLY if premiums vary by employee. Coverage No entry allowed. This field will automatically be calculated. Monthly Contributions: Employee 4 numeric characters with 2 decimal places • Dependent Enter the contribution that the dependent or the company pays. 4 numeric characters with 2 decimal places • Enter the contribution which the dependent or the company pays Monthly Premiums: Employee 4 numeric characters with 2 decimal places • Enter the premium applicable to the employee. Dependent 4 numeric characters with 2 decimal places • Enter the premium applicable to the dependent. Essential Integrated Data, Ltd. Essential*HR Chapter 5 5-25 Total Contributions No entry allowed. This field will automatically be calculated --------------------------------------------------------------------------------------------------------------------------------------------------------Date of Enrollment Standard date format. • Enter the date on which the employee enrolled for benefits. Frequency No entry required. Simply select the appropriate choice by clicking on the DOWN ARROW next to the field. No. of Dependents 2 numeric characters. • Enter the number of dependents covered under plan. Single Coverage No entry required. Simply check the box, if single coverage is desired. PRE-PAID LEGAL (Figure 5.22) The PRE-PAID LEGAL feature follows the same format as the VISION feature. For reference, simply look to the above section. Essential Integrated Data, Ltd. Essential*HR Chapter 5 5-26 INVESTMENTS (Figure 5.23) (Figure 5.24) The screen will appear as figure 5.24 appears until information is entered. To display previously entered records, perform one of the following tasks: 1. Type the employee number in the EMPLOYEE NO. field and the corresponding name will appear. Enter the PLAN TYPE and press return. After entering the PLAN CODE and pressing return, if the employee has an existing record for the entered benefit type and code, the other data will display and changes can be made to the data. If there is not an existing record on file, a new record can be created by entering data in the remaining fields and saving the record. 2. With the cursor in the EMPLOYEE NO. field, the user can click the BENEFITS MASTER FILE ICON, and if an employee number has been entered, the record (s) on file for that employee will appear in a popup list box. If no records are on file for the entered employee number, all employees on file will appear in the list box. Highlight the desired employee in the list box, click the EXECUTE ICON, and the EMPLOYEE NO. and NAME will appear in the appropriate fields in the employee benefit screen. Essential Integrated Data, Ltd. Essential*HR Chapter 5 5-27 To select a PLAN TYPE and PLAN CODE combination, click on the INSURANCE LIST ICON on the toolbar when the cursor is in the PLAN TYPE field and a popup box will appear, listing all valid PLAN TYPES and CODES. After selecting the TYPE and CODE combination, press return. If a record is on file matching the emp loyee number, the PLAN TYPE, and the PLAN CODE, the data for the remaining fields will display. 3. To see a list of all employee insurance benefit records on file, click on the BENEFITS MASTER FILE ICON. Select the desired record by highlighting the appropriate row and clicking on the EXECUTE ICON or double click on the desired row. After the popup box disappears, the cursor will be positioned in the employee number field. Press return until the cursor exits the PLAN CODE field to display the data for the remaining fields. DEFAULT FIELDS: The Payroll Deduction Code, Provider, and Plan Status, fields will display the data entered from the BENEFIT MASTER RECORD for the plan selected. Data CANNOT be changed on this screen. To select INVERSTMENT OPTIONS, simply select the CODES TABLE icon, type in the code (only codes defined in the BENEFIT ADMINISTRATION maybe entered), right click the mouse, or press F9. Enrollment Date Standard date format. • Enter the date the employee enrolls for investment benefits. Participation End Date Standard date format. • Enter the date the employee’s participation/enrollment in this benefit ends. FOR THE FOLLOWING SECTION ONLY: THE FIELD EXPLANATIONS ARE NOT IN ALPHABETICAL ORDER, BUT IN ORDER BY APPEARANCE ON SCREEN. Deduction Method No entry required. Simply select the appropriate choice by clicking on the DOWN ARROW next to the field. Select AMOUNT if the employee is a regular, salaried employee. Select RATE if the employee is hourly, and PERCENT if the employee works on commission or salary varies. Deduction Frequency No entry required. Simply select the appropriate choice by clicking on the DOWN ARROW next to the field. Deduction Amount 4 numeric characters with 2 decimal places. • If the method selected is AMOUNT, the a fixed amount is deducted from the employee’s check, and therefore the CALCULATED DEDUCTION field is automatically filled in with this figure. This field is fixed for rate/hourly employees (see deduction method) because if the employee works overtime, the overtime pay will not be included in the calculation for deduction. For commissioned employees (see deduction method), the user enters the percent to be deducted from every pay period; thus, no matter how much money the employee does or does not earn for the period, a proportioned amount will be deducted. Calculated Deduction No entry required. This field will automatically be calculated based on employee’s pay (for position), deduction method, deduction frequency, and deduction amount. Essential Integrated Data, Ltd. Essential*HR Chapter 5 5-28 Deduction Limit 4 numeric characters with 2 decimal places. • Set the maximum amount of wages to be deducted per pay period. For salaried employees, this amount has to be the same amount in the DEDUCTION AMOUNT and CALCULATION DEDUCTION fields. For hourly and commissioned employees, this amount will never vary no matter how many overtime hours worked or how much commission is earned. BENEFICARY INFORMATION information the same for primary and secondary: Effective Date Standard date format. • Enter the dates on which the primary and secondary beneficiaries became eligible for benefits. Name 24 alphanumeric characters. • Enter the names of beneficiaries. Relationship 10 alphanumeric characters. • Enter the relationship to the eligible employee. EMPLOYEE LOANS (Figure 5.25) Essential Integrated Data, Ltd. Essential*HR Chapter 5 5-29 (Figure 5.26) The screen will appear as figure 5.26 appears until information is entered. To display previously entered records, perform one of the following tasks: 1. Type the employee number in the EMPLOYEE NO. field and the corresponding name will appear. Enter the PLAN TYPE and press return. After entering the PLAN CODE and pressing return, if the employee has an existing record for the entered benefit type and code, the other data will display and changes can be made to the data. If there is not an existing record on file, a new record can be created by entering data in the remaining fields and saving the record. 2. With the cursor in the EMPLOYEE NO. field, the user can click the BENEFITS MASTER FILE ICON, and if an employee numb er has been entered, the record (s) on file for that employee will appear in a popup list box. If no records are on file for the entered employee number, all employees on file will appear in the list box. Highlight the desired employee in the list box, click the EXECUTE ICON, and the EMPLOYEE NO. and NAME will appear in the appropriate fields in the employee benefit screen. To select a PLAN TYPE and PLAN CODE combination, click on the INSURANCE LIST ICON on the toolbar when the cursor is in the PLAN TYPE field and a popup box will appear, listing all valid PLAN TYPES and CODES. After selecting the TYPE and CODE combination, press return. If a record is on file matching the employee number, the PLAN TYPE, and the PLAN CODE, the data for the remaining fields will display. 3. To see a list of all employee insurance benefit records on file, click on the BENEFITS MASTER FILE ICON. Select the desired record by highlighting the appropriate row and clicking on the EXECUTE ICON or double click on the desired row. After the popup box disappears, the cursor will be positioned in the employee number field. Press return until the cursor exits the PLAN CODE field to display the data for the remaining fields. DEFAULT FIELDS: The Provider, Deduction Code, Loan Purpose, and Plan Status fields will display the data entered from the BENEFIT MASTER RECORD for the plan selected. Data CANNOT be changed on this screen. Date of Loan No entry required. Date that employee enrolls for benefits, will be inserted. Deduction Amount 4 numeric characters with two decimal places. • The amount deducted from employee’s paycheck until loan is paid off. Frequency No entry required. Simply select the appropriate choice by clicking on the DOWN ARROW next to the field. Loan Amount 7 numeric characters with 2 decimal places. Essential Integrated Data, Ltd. Essential*HR Chapter 5 • 5-30 Enter the amount of money loaned to employee. SAVINGS (Figure 5.27) (Figure 5.28) The screen will appear as figure 5.28 appears until information is entered. To display previously entered records, perform one of the following tasks: 1. Type the employee number in the EMPLOYEE NO. field and the corresponding name will appear. Enter the PLAN TYPE and press return. After entering the PLAN CODE and pressing return, if the employee has an existing record for the entered benefit type and code, the other data will display and changes can be made to the data. If there is not an existing record on file, a new record can be created by entering data in the remaining fields and saving the record. 2. With the cursor in the EMPLOYEE NO. field, the user can click the BENEFITS MASTER FILE LIST ICON, and if an employee number has been entered, the record (s) on file for that employee will appear in a popup list box. If no records are on file for the entered employee number, all employees on file will appear in the list box. Highlight the desired employee in the list box, click the EXECUTE ICON, and the EMPLOYEE NO. and NAME will appear in the appropriate fields in the employee benefit screen. To select a PLAN TYPE and PLAN CODE combination, click on the INSURANCE LIST ICON on the toolbar when the cursor is in the PLAN TYPE field and a popup box will appear, listing all valid PLAN TYPES and CODES. After selecting the TYPE and CODE combination, press return. If a record is on file matching the employee number, the PLAN TYPE, and the PLAN CODE, the data for the remaining fields will display. 3. To see a list of all employee insurance benefit records on file, click on the BENEFITS MASTER FILE ICON. Select the desired record by highlighting the appropriate row and clicking on the EXECUTE ICON or double click on the Essential Integrated Data, Ltd. Essential*HR Chapter 5 5-31 desired row. After the popup box disappears, the cursor will be positioned in the employee number field. Press return until the cursor exits the PLAN CODE field to display the data for the remaining fields. DEFAULT FIELDS: The Provider, Deduction Method, and Plan Status fields will display the data entered from the BENEFIT MASTER RECORD for the plan selected. Data CANNOT be changed on this screen. Calculated Deduction 4 numeric characters with two decimal places • Enter the amount to be deducted from the employee’s paycheck. Deduction Amount 4 numeric characters with two decimal places. • The amount deducted from employee’s paycheck until loan is paid off. Deduction Frequency No entry required. Simply select the appropriate choice by clicking on the DOWN ARROW next to the field. Enrollment Date Standard date format. • Enter the date on which the employee enrolled for benefits. Freq. No entry required. Simply select the appropriate choice by clicking on the DOWN ARROW next to the field. Participation End Date Standard date format. • Enter the date on which the employee no longer accepted benefits. BENEFICIARY INFORMATION: Effective Date Standard date format. • Enter the dates on which the primary and secondary beneficiaries became eligible for benefits. Name 24 alphanumeric characters. • Enter the names of beneficiaries. Relationship 10 alphanumeric characters. • Enter the relationship to the eligible employee. Essential Integrated Data, Ltd. Essential*HR Chapter 5 5-32 CHILD CARE (Figure 5.29) (Figure 5.30) The screen will appear as figure 5.30 appears until information is entered. To display previously entered records, perform one of the following tasks: 1. Type the employee number in the EMPLOYEE NO. field and the corresponding name will appear. Enter the PLAN TYPE and press return. After entering the PLAN CODE and pressing return, if the employee has an existing record for the entered benefit type and code, the other data will display and changes can be made to the data. If there is not an existing record on file, a new record can be created by entering data in the remaining fields and saving the record. 2. With the cursor in the EMPLOYEE NO. field, the user can click the BENEFITS MASTER FILE ICON, and if an employee number has been entered, the record (s) on file for that employee will appear in a popup list box. If no records are on file for the entered employee number, all employees on file will appear in the list box. Highlight the desired employee in the list box, click the EXECUTE ICON, and the EMPLOYEE NO. and NAME will appear in the appropriate fields in the employee benefit screen. To select a PLAN TYPE and PLAN CODE combination, click on the INSURANCE LIST ICON on the toolbar when the cursor is in the PLAN TYPE field and a popup box will appear, listing all valid PLAN TYPES and CODES. After selecting the TYPE and CODE combination, press return. If a record is on file matching the employee number, the PLAN TYPE, and the PLAN CODE, the data for the remaining fields will display. Essential Integrated Data, Ltd. Essential*HR Chapter 5 3. 5-33 To see a list of all employee insurance benefit records on file, click on the BENEFITS MASTER FILE ICON. Select the desired record by highlighting the appropriate row and clicking on the EXECUTE ICON or double click on the desired row. After the popup box disappears, the cursor will be positioned in the employee number field. Press return until the cursor exits the PLAN CODE field to display the data for the remaining fields. DEFAULT FIELDS: The Payroll Code and Plan Status fields will display the data entered from the BENEFIT MASTER RECORD for the plan selected. Data CANNOT be changed on this screen. Annual Reimbursement Amount 7 numeric character with 2 decimal places. • Enter the amount the company reimburses the employee each year. Date of Enrollment Standard date format. • Enter the date on which the employee enrolled for benefits. Number of Dependents 2 numeric characters. • Enter the number of dependents in childcare. Period Reimbursement Amount 4 numeric characters with two decimal places. • Enter the amount, corresponding to the applicable period, with which the company reimburses the employee for childcare Reim. Frequency No entry required. Simply select the appropriate choice by clicking on the DOWN ARROW next to the field. MEDICAL HISTORY The MEDICAL DATA feature allows the user to enter and maintain health and medical information for the employees. Note: The user must enter an employee's DEMOGRAPHIC INFORMATION before any information can be entered in this feature. To view the MEDICAL HISTORY screen, simply select EMPLOYEE on the menu bar, then select EMPLOYEE RECORDS, and finally select MEDICAL HISTORY. Essential Integrated Data, Ltd. Essential*HR Chapter 5 5-34 (Figure 5.31) (Figure 5.32) The screen will appear as figure 5.32 appears until information is entered. To display previously entered records, perform one of the following tasks: 1. Type the employee number in the EMPLOYEE NO. field and press the ENTER or the TAB key. The corresponding name will appear. 2. The user, with the cursor in the EMPLOYEE NO. field, can click the EMPLOYEE MASTER FILE ICON and, if employees have been previously entered than the list of the entered employees will appear, but if no records have been entered, than all the employees’ numbers and names will appear, and the user needs to simply highlight which employee is to be entered, click the EXECUTE ICON, and the EMPLOYEE NO. and NAME will appear in the appropriate fields. Blood Factor No entry required. Select the appropriate choice by clicking on the DOWN arrow next to the field. Blood Type 2 alphanumeric characters. • Enter the correct BLOOD TYPE. Examples: AB, A, B. Disabilities 19 alphanumeric characters. • Enter any disabilities the employee has. Essential Integrated Data, Ltd. Essential*HR Chapter 5 5-35 Exam Results • Enter an alphanumeric code (maximum of 2 characters) OR choose a code from the CODES TABLE by browsing with the toolbar browse keys or highlighting and selecting from the EXAM RESULTS CODE POPUP LIST. General Health No entry required. Select the appropriate choice by clicking on the DOWN ARROW next to the field. HBV Vaccine Standard date format • Enter the date the employee received his/her HBV VACCINE. Height Feet: 1 numeric character. Inches: 2 numeric characters. • Enter the height in each field of FEET and INCHES. Hospital Phone # 10 numeric characters. • Enter the hospital’s phone number that the employee wishes to be taken to in case of emergency OR the phone number where the employee’s doctor maintains practice. Last Exam Standard date format. • Enter the date of the employee's last physical exam. Last Hearing Exam Standard date format. • Enter the date of the employee's last heating exam. Last Vision Exam Standard date format. • Enter the date of the employee’s last vision exam. Next Exam Standard date format. • Enter the date the employee should OR plans to take his/her next exam. Next HBV Test Standard date format. Essential Integrated Data, Ltd. Essential*HR Chapter 5 • 5-36 Enter the date employee should OR plans to take his/her next HBV test. Next TB Test Date Standard date format. • Enter the date employee should OR plans to take his/her next TB test. Physician Name 25 alphanumeric characters. • Enter the name of the physician the employee wishes to be contacted. Physician Phone # 10 numeric characters. • Enter the listed physician’s phone number. Preferred Hospital 20 alphanumeric characters. • Enter the name of the hospital the employee wishes to be taken to. 2-Step TB Skin Test Date Standard date format. • Enter the date the employee had his/her TB test. Results No entry required. Simply select, for either test, the appropriate result. Weight 3 numeric characters. • Enter the employee's weight. RELATIONSHIP/COBRA The RELATIONSHIP/COBRA feature allows the user to enter and maintain the information required to demonstrate that the organization is in compliance with COBRA regulations. COBRA regulations require that employers offer employees and their dependents an extension of medical benefits for a period of time following their separation from the organization. When an employee accepts COBRA coverage, he/she pays the total COBRA premiums for the duration of the COBRA period. To demonstrate compliance with COBRA, the organization must record the employee's relation to be covered under COBRA, along with data concerning the circumstances by which the employee became eligible for coverage. When COBRA coverage is terminated, the user must indicate the date and reason for termination. Note: The user must enter an employee's DEMOGRAPHIC INFORMATION before any information can be entered in this feature. To view the RELATIONSHIP/COBRA screen, simply select EMPLOYEE on the menu bar, then select EMPLOYEE RECORDS, and finally select RELATIONSHIP/COBRA. Essential Integrated Data, Ltd. Essential*HR Chapter 5 5-37 (Figure 5.33) (Figure 5.34) The screen will appear as figure 5.34 appears until information is entered. To display previously entered records, perform one of the following tasks: 1. Type the employee number in the EMPLOYEE NO. field and press the ENTER or the TAB key. The corresponding name will appear. To pull-up previously entered information, highlight the desired record in the list box, and press the ENTER key or double click with the mouse. 2. The user, with the cursor in the EMPLOYEE NO. field, can click the EMPLOYEE MASTER FILE ICON and, if employees have been previously entered, than the list of the entered employees will appear, but if no records have been entered, than all the employees’ numbers and names will appear, and the user needs to simply highlight which employee is to be entered, click the EXECUTE ICON, and the EMPLOYEE NO. and NAME will appear in the appropriate fields. RELATIONSHIP DATA: Birth Date Standard date format. • Enter the birth date of the employer’s relationship. Date Emp. Notified Standard date format. Essential Integrated Data, Ltd. Essential*HR Chapter 5 • 5-38 Enter the date that the employee or relation was notified of his/her eligibility for COBRA coverage. Employer 30 alphanumeric characters. • Enter the name of the relationship’s employer if applicable. Name 30 alphanumeric characters. • Enter the name of the employee's relation who is eligible for COBRA coverage. Relationship 10 alphanumeric characters. • Enter a description of the relationship between the employee and the listed relation. Social Sec No 9 alphanumeric characters. • Enter the relation's social security number. QUALIFY: Coverage Accepted 1 alphanumeric character. • Enter a “Y” or a “N” for yes/no depending on acceptance. Date Standard date format. • Enter the date on which the relation became eligible for COBRA coverage. Date Responded Standard date format. • Enter the date the employee responded to the notification. Event • Enter an alphanumeric code (maximum of 2 characters) OR choose a code from the CODES TABLE by browsing with the toolbar browse keys or highlighting and selecting from the EVENT CODE POPUP LIST. CESSATION: Benefit Type • Enter an alphanumeric code (maximum of 3 characters) OR choose a code from the CODES TABLE by browsing with the toolbar browse keys or highlighting and selecting from the BENEFIT TYPE CODE POPUP LIST. Essential Integrated Data, Ltd. Essential*HR Chapter 5 5-39 COBRA Premium 5 numeric characters with 2 decimal places. • Enter the total amount of premium due for the previously defined insurance provider if COBRA coverage is accepted. Date Standard date format. • Enter the date that COBRA coverage stopped. Dependent Premium 5 numeric characters with 2 decimal places. • Enter the amount of premium to be paid by the relation/dependent if COBRA coverage is accepted. Event • Enter an alphanumeric code (maximum of 2 characters) OR choose a code from the CODES TABLE by browsing with the toolbar browse keys or highlighting and selecting from the EVENT CODES POPUP LIST. Ins Provider • Enter an alphanumeric code (maximum of 4 characters) OR choose a code from the CODES TABLE by browsing with the toolbar browse keys or highlighting and selecting from the INS PROVIDER CODE POPUP LIST. Date Ins Notify Standard date format. • Enter the date that the insurance provider was notified that regular coverage would be converted to COBRA coverage. ****** After entering all the fields, save the information, and then the information will move to the record list box at the bottom of the screen so the user can see a brief history of previously entered information and a brief description of the employee’s relations. Each relation entered under the same employee will appear in the record list box. To pull-up all COBRA information for a relation, simply highlight the name in the record list box and double click the left mouse button. The information will appear in corresponding fields. TUITION REIMBURSEMENT The TUITION REIMBURSEMENT feature allows the user to record and maintain information regarding classes that employees take at the company's expense. Note: The user must enter an employee's DEMOGRAPHIC INFORMATION before any information can be entered in this feature. To view the TUITION REIMBURSEMENT screen, simply click EMPLOYEE on the menu bar, then select EMPLOYEE RECORDS, and finally select TUITION REIMBURSEMENT. Essential Integrated Data, Ltd. Essential*HR Chapter 5 5-40 (Figure 5.35) (Figure 5.36) The screen will appear as figure 5.36 appears until information is entered. To display previously entered records, perform one of the following tasks: 1. Type the employee number in the EMPLOYEE NO. field, and press the ENTER key or TAB key. The corresponding name will appear. To pull-up previously entered information, highlight the desired record in the list box, and press the ENTER key or double with the mouse. 2. The user, with the cursor in the EMPLOYEE NO. field, can click the EMPLOYEE MASTER FILE ICON and, if employees have been previously entered, than the list of the entered employees will appear, but if no records have been entered, than all the employees’ numbers and names will appear, and the user needs to simply highlight which employee is to be entered, click the EXECUTE ICON, and the EMPLOYEE NO. and NAME will appear in the appropriate fields. Book Amount 5 numeric characters with 2 decimal places. • Enter the total cost of books for this course. Book Factor 3 numeric characters with two decimal places. • Enter the percent that the employee should be reimbursed for the book cost. Examples: 100, 75. No need to enter the percent sign. Book Reimb. No entry required. The total will automatically appear once the BOOK AMOUNT and BOOK FACTOR are entered. Example: If the BOOK AMOUNT is $20.00 and the BOOK FACTOR is 100.00, then the figure 20.00 will Essential Integrated Data, Ltd. Essential*HR Chapter 5 5-41 automatically appear in the BOOK REIMB. field. Comments 5 lines of 50 alphanumeric characters each. • Enter any additional information on the employee, course, or performance. Course Name • Enter an alphanumeric code (maximum of 4 characters) OR choose a code from the CODES TABLE by browsing with the toolbar browse keys or highlighting and selecting from the COURSE CODE POPUP LIST. Date Completed Standard date format. Enter the date on which the previously identified course was completed. Degree • Enter an alphanumeric code (maximum of 3 characters) OR choose a code from the CODES TABLE by browsing with the toolbar browse keys or highlighting and selecting from the DEGREE CODE POPUP LIST. G.P.A. 6 numeric characters. • Enter the employee's grade for the course in numeric form. School • Enter an alphanumeric code (maximum of 4 characters) OR choose a code from the CODES TABLE by browsing with the toolbar browse keys or highlighting ad selecting from the SCHOOL CODE POPUP LIST. Sem/Qtr 1 numeric character. • Enter the semester or quarter the employee took this course. Example: enter 1 for the first semester. Tuition Amount 5 numeric characters with 2 decimal places. • Enter the total cost of fees and tuition for the designated course. Tuition Factor 3 numeric characters with 2 decimal places. • Enter the tuition reimbursement factor. Example: 100.00, 50.00. Tuition Reimb. No entry required. The total will automatically appear once the TUITION AMOUNT and TUITION FACTOR are entered. Example: If the TUITION AMOUNT is $500.00 and the TUITION FACTOR is 100.00, then the figure 500.00 will automatically appear in the TUITION REIMB. field. Essential Integrated Data, Ltd. Essential*HR Chapter 5 5-42 Year 4 numeric characters. • Enter the academic year in which the employee took this course. ****** After entering all the fields, save the information, and then the information will move to the record list box at the bottom of the screen so the user can see a brief history of previously entered information and a brief description of the employee’s reimbursement. Each record entered under the same employee will appear in the record list box. To pull-up all TUITION REIMBURSEMENT information for an employee, simply highlight the name in the record list box and double click the left mouse button. The information will appear in corresponding fields. COMPANY SERVICE RECORD The COMPANY SERVICE RECORD feature allows the user to capture and maintain a history of an employee's service with the company. Note: The user must enter the employee's DEMOGRAPHIC INFORMATION before any other data for that employee can be entered. To view the COMPANY SERVICE RECORD screen, simply select EMPLOYEE on the menu bar, then select EMPLOYEE RECORDS, and finally select COMPANY SERVICE RECORD. (Figure 5.37) (Figure 5.38) The screen will appear as figure 5.38 appears until information is entered. To display previously entered records, perform one of the following tasks: 1. Type the employee number in the EMPLOYEE NO. field and press the ENTER or the TAB key. The corresponding name will appear. To pull-up previously entered information, highlight the desired record in the list box, and press the Essential Integrated Data, Ltd. Essential*HR Chapter 5 5-43 ENTER key or double click with the mouse. 2. The user, with the cursor in the EMPLOYEE NO. field, can click the EMPLOYEE MASTER FILE ICON and, if employees have been previously entered, than the list of the entered employees will appear, but if no records have been entered, than all the employees’ numbers and names will appear, and the user needs to simply highlight which employee is to be entered, click the EXECUTE ICON, and the EMPLOYEE NO. and NAME will appear in the appropriate fields. Comments 5 lines 50 alphanumeric characters. • Enter any additional comments that relate to this record. Department • Enter an alphanumeric code (maximum of 4 characters) OR choose a code from the CODES TABLE by browsing with the toolbar browse keys or highlighting and selecting from the DEPARTMENT CODE POPUP LIST. Division • Enter an alphanumeric code (maximum of 2 characters) OR choose a code from the CODES TABLE by browsing with the toolbar browse keys or highlighting and selecting from the DIVISION CODE POPUP LIST. End Date Standard date format. • Enter the date on which the employee changed to another position or terminated employment, if applicable. Position 25 alphanumeric characters. • Enter the employee's position title. Examples: Recruiter, Sales Manger, Foreman. Primary Duties 30 alphanumeric characters. • Use this field to note the employee's primary responsibilities. Secondary Duties 30 alphanumeric characters. • Use this field to note additional secondary duties of the employee. Start Date Standard date format. • Enter the date on which the employee was hired into this position. Supervisor 20 alphanumeric characters. • Enter the title of the person to whom the employee reported. Essential Integrated Data, Ltd. Essential*HR Chapter 5 5-44 Title 15 alphanumeric characters. • Enter the employee’s official title. ****** After entering all the fields, save the information, and then the information will move to the record list box at the bottom of the screen so the user can see a brief history of previously entered information and a brief description of the employee’s record. Each record entered under the same employee will appear in the record list box. To pull-up all SERVICE information for an employee, simply highlight the name in the record list box and double click the left mouse button. The information will appear in corresponding fields. COMPANY EQUIPMENT RECORD The COMPANY EQUIPMENT RECORD feature allows the user to keep track of company property that has been issued to employees. Note: The user must enter an employee's DEMOGRAPHIC INFORMATION before any information can be entered in this feature. To view the COMPANY EQUIPMENT RECORD screen, simply select EMPLOYEE on the menu bar, then select EMPLOYEE RECORDS, and finally select COMPANY EQUIPMENT RECORD. (Figure 5.39) (Figure 5.40) The screen will appear as figure 5.40 appears until information is entered. To display previously entered records, perform one of the following tasks: 1. Type the employee number in the EMPLOYEE NO. field and press the ENTER or the TAB key. The corresponding name will appear. To pull-up previously entered information, highlight the desired record in the list box, and press the Essential Integrated Data, Ltd. Essential*HR Chapter 5 5-45 ENTER key or double click with the mouse. 2. The user, with the cursor in the EMPLOYEE NO. field, can click the EMPLOYEE MASTER FILE ICON and, if employees have been previously entered, than the list of the entered employees will appear, but if no records have been entered, than all the employees’ numbers and names will appear, and the user needs to simply highlight which employee is to be entered, click the EXECUTE ICON, and the EMPLOYEE NO. and NAME will appear in the appropriate fields. Condition 15 alphanumeric characters. • Enter a comment on the condition that the company property was returned. I.D. # 10 numeric characters. • Enter the I.D. # of the issued property if applicable. Issue Date Standard date format. • Enter the date that the company issued this property to the employee. Model 15 alphanumeric characters. • Enter the model of the issued property if applicable. Property Code • Enter an alphanumeric code (maximum of 4 characters) OR choose a code from the CODES TABLE by browsing with the toolbar browse keys or highlighting and selecting from the PROPERTY CODE POPUP LIST. Return Date Standard date format. • Enter the date that the employee returned the company property. Serial Number 15 numeric characters. • Enter the serial number of the issued property if applicable. Value 7 numeric characters with 2 decimal places. • Enter the monetary value of the company property on loan to the employee. ****** After entering all the fields, save the information, and then the information will move to the record list box at the bottom of the screen so the user can see a brief history of previously entered information and a brief description of the employee’s equipment record. Each record entered under the same employee will appear in the record list box. To pull-up all EQUIPMENT information for an employee, simply highlight the name in the record list box and double click the left mouse Essential Integrated Data, Ltd. Essential*HR Chapter 5 5-46 button. The information will appear in corresponding fields. EMPLOYEE DATA CHECKLIST The EMPLOYEE DATA CHECKLIST feature allows the user to keep track of all the necessary information for employee records. The user can use this feature as means of checking-off each piece of required information as the employee submits it and/or the organization approves it. To view the EMPLOYEE DATA CHECKLIST screen, simply select EMPLOYEE on the menu bar, then select EMPLOYEE RECORDS, and finally select EMPLOYEE DATA CHECKLIST. (Figure 5.41) (Figure 5.42) The screen will appear as figure 5.42 appears until information is entered. To display previously entered records perform, one of the following tasks: 1. Type the employee number in the EMPLOYEE NO. field, and press the ENTER or TAB key. The corresponding name will appear. 2. The user, with the cursor in the EMPLOYEE NO. field, can click the EMPLOYEE MASTER FILE ICON and, if employees have been previously entered, than the list of the entered employees will appear, but if no records have been entered, than all the employees’ numbers and names will appear, and the user needs to simply highlight which employee is to be entered, click the EXECUTE ICON, and the EMPLOYEE NO. and NAME will appear in the appropriate fields. No entry to this record is required. Simply check the box to the left of the field. To UNCHECK a field, simply repeat the same step. Essential Integrated Data, Ltd. Essential*HR Chapter 6 6-1 EMPLOYEE LABOR RELATIONS The EMPLOYEE LABOR RELATIONS feature allows the user to record and maintain information regarding labor relations events. The EMPLOYEE LABOR RELATIONS file allows the user to perform the following tasks: • Employee Absences • Employee Grievances • Disciplinary Actions • Accidents/illnesses • Employee Counseling GETTING STARTED From the MASTER MENU, select EMPLOYEE, then select EMPLOYEE LABOR RELATIONS to see Figure 6.1. A list of the various features used to maintain employee labor records appears. To view the ABSENTEE TRACKING screen, select ABSENTEE TRACKING and the screen appears (figure 6.2). To review the functions of the toolbar, refer to the ICONS LIST. (Figure 6.1) ABSENTEE TRACKING The ABSENTEE TRACKING feature allows the user to record and track employee absences. With it, the organization records absentee information by type and reason. The user includes information for each absence such as the length of absence, the dates, and whether or not the employee was paid. HR allows you to differentiate absentee time period. For example, the user may establish categories for vacation, sick leave. comp time, maternity leave, unexcused time, funeral leave, and accident leave. These categories may be used for management analyses. Note: The user must enter an employee's DEMOGRAPHIC INFORMATION before any other information can be entered. Essential Integrated Data, Ltd. Essential*HR Chapter 6 6-2 (Figure 6.2) The screen will appear as figure 6.2 appears until information is entered. To display previously entered records, perform one of the following tasks: 1. Type the employee number in the EMPLOYEE NO. field and press the ENTER or the TAB key. The corresponding name will appear. To pull-up previously entered information, highlight the desired record in the list box, and press the ENTER key or double click with the mouse. 2. The user, with the cursor in the EMPLOYEE NO. field, can click on the EMPLOYEE MASTER FILE ICON and, if employees have been previously entered, than the list of the entered employees will appear, but if no records have been entered, than all the employees’ number and names will appear, and the user needs to simply highlight which employee is to be entered, click the EXECUTE ICON and the EMPLOYEE NO. and NAME will appear in the appropriate fields. Absence Code • Enter an alphanumeric code (maximum of 4 characters) OR choose a code from the CODES TABLE by browsing with the toolbar browse keys or displaying and selecting from the ABSENCE CODE POPUP LIST. From Date Standard date format. • Enter the date of the first day of the absence. Hours 3 numeric characters with 2 decimal places. • If an absence is for a partial day, enter the hours and minutes the employee was absent. Example: "400" indicates the employee was absent four hours and zero minutes--(4.00). "30" records as thirty minutes--(00.30). No of Days 3 numeric characters. • Enter the number of days the employee was absent from work. Essential Integrated Data, Ltd. Essential*HR Chapter 6 6-3 Paid/Unpaid No entry required. Simply click the left mouse button the appropriate choice. Reason Code • Enter an alphanumeric code (maximum of 4 characters) OR choose a code from the CODES TABLE by browsing with the toolbar browse keys or displaying and selecting from the ABSENCE REASON CODE POPUP LIST. To Date Standard date format. • Enter the date of the last day of the absence. ****** After entering all the fields, save the information, and then the information will move to the record list box at the bottom of the screen so the user can see a brief history of previously entered information and a brief description of the employee’s record. Each record entered under the same employee will appear in the record list box. To pull-up all ABSENCE information for an employee, simply highlight the name in the record list box and double click the left mouse button. The information will appear in corresponding fields. GRIEVANCE PROCESSING The GRIEVANCE PROCESSING feature documents grievances and helps the organization manage grievance resolution. Note: The user must enter an employee's DEMOGRAPHIC INFORMATION before any other information can be entered. To view the GRIEVANCE PROCESSING screen, select EMLOYEE from the menu bar, then click on EMPLOYEE LABOR RELATIONS, and finally select GRIEVANCE PROCESSING. (Figure 6.3) Essential Integrated Data, Ltd. Essential*HR Chapter 6 6-4 (Figure 6.4) The screen will appear as figure 6.4 appears until information is entered. To display previously entered records, perform one of the following tasks: 1. Type the employee number in the EMPLOYEE NO. field and press the ENTER or the TAB key. The corresponding name will appear. 2. The user, with the cursor in the EMPLOYEE NO. field, can click on the EMPLOYEE MASTER FILE ICON and, if employees have been previously entered, than the list of the entered employees will appear, but if no records have been entered, than all the employees’ number and names will appear, and the user needs to simply highlight which employee is to be entered, click the EXECUTE ICON and the EMPLOYEE NO. and NAME will appear in the appropriate fields. Date Filed Standard date format. • Enter the date the grievance was filed. Date Resolved Standard date format. • Enter the date that the grievance was resolved. Grievance Code • Enter an alphanumeric code (maximum of 4 characters) OR choose a code from the CODES TABLE by browsing with the toolbar browse keys or displaying and selecting from the GRIEVANCE CODE POPUP LIST. Reason Code • Enter an alphanumeric code (maximum of 4 characters) OR choose a code from the CODES TABLE by browsing with the toolbar browse keys or displaying and selecting from the GRIEVANCE REASON CODE POPUP LIST. Resolution Code • Enter an alphanumeric code (maximum of 4 characters) OR choose a code from the CODES TABLE by browsing with the toolbar browse keys or displaying and selecting from the RESOLUTION CODE POPUP LIST. Essential Integrated Data, Ltd. Essential*HR Chapter 6 6-5 ****** After entering all the fields, save the information, and then the information will move to the record list box at the bottom of the screen so the user can see a brief history of previously entered information and a brief description of the grievance record. Each record entered under the same employee will appear in the record list box. To pull-up all GRIEVANCE information for an employee, simply highlight the name in the record list box and double click the left mouse button. The information will appear in corresponding fields. DISCIPLINARY ACTIONS The DISCIPLINARY ACTIONS feature allows the user to record and track disciplinary actions. For each disciplinary action, the user may record the date the action was taken, set up a probationary period, and enter the name of the supervisor responsible for the action. Note: The user must enter an employee's DEMOGRAPHIC INFORMATION before any other information can be entered. To view the DISCIPLINARY ACTIONS screen, select EMPLOYEE from the menu bar, then click on EMPLOYEE LABOR RELATIONS, and finally select DISCIPLINARY ACTIONS. (Figure 6.5) (Figure 6.6) The screen will appear as figure 6.6 appears until information is entered. To display previously entered records, perform one of the following tasks: 1. Type the employee number in the EMPLOYEE NO. field and press the ENTER or the TAB key. The corresponding name will appear. Essential Integrated Data, Ltd. Essential*HR Chapter 6 2. 6-6 The user, with the cursor in the EMPLOYEE NO. field, can click on the EMPLOYEE MASTER FILE ICON and, if employees have been previously entered, than the list of the entered employees will appear, but if no records have been entered, than all the employees’ number and names will appear, and the user needs to simply highlight which employee is to be entered, click the EXECUTE ICON and the EMPLOYEE NO. and NAME will appear in the appropriate fields. Action Code • Enter an alphanumeric code (maximum of 4 characters) OR choose a code from the CODES TABLE by browsing with the toolbar browse keys or displaying and selecting from the ACTION CODE POPUP LIST. Action Date Standard date format. • Enter the date on which the disciplinary action was taken. Discipline Code • Enter an alphanumeric code (maximum of 2 characters) OR choose a code from the CODES TABLE by browsing with the toolbar browse keys or displaying and selecting from the DISCIPLINE CODE POPUP LIST. Occurred Date Standard date format. • Enter the date that the action occurred for which the employee was disciplined for. Probation End Date Standard date format. • Enter the date on which the employee’s probation will end. Probation Start Date Standard date format. • Enter the date on which the employee's probation will begin. Supervisor 9 alphanumeric characters. • Enter the supervisor's number that was responsible for the disciplinary action and the name, taken from the EMPLOYEE MASTER FILE will automatically appear in the next field.. ****** After entering all the fields, save the information, and then the information will move to the record list box at the bottom of the screen so the user can see a brief history of previously entered information and a brief description of the discipline record. Each record entered under the same employee will appear in the record list box. To pull-up all DISCIPLINE information for an employee, simply highlight the name in the record list box and double click the left mouse button. The information will appear in corresponding fields. Essential Integrated Data, Ltd. Essential*HR Chapter 6 6-7 ACCIDENT/INJURY HR allows the user to record and track accidents and injuries by type of event such as an OSHA injury, OSHA illness, workmen's compensation, etc. Along with the type of accident the user may also specify a description, accident date, location of the accident and other related information. OSHA reports use this information. Note: The user must enter an EMPLOYEE'S DEMOGRAPHIC information before any other information can be entered. To view the ACCIDENT/INJURY screen, select EMPLOYEE from the menu bar, then click on EMPLOYEE LABOR RELATIONS, and finally select ACCIDENT/INJURY. (Figure 6.7) (Figure 6.8) The screen will appear as figure 6.8 appears until information is entered. To display previously entered records, perform one of the following tasks: 1. Type the employee number in the EMPLOYEE NO. field and press the ENTER or the TAB key. The corresponding name will appear. 2. The user, with the cursor in the EMPLOYEE NO. field, can click on the EMPLOYEE MASTER FILE ICON and, if employees have been previously entered, than the list of the entered employees will appear, but if no records have been entered, than all the employees’ number and names will appear, and the user needs to simply highlight which employee is to be entered, click the EXECUTE ICON and the EMPLOYEE NO. and NAME will appear in the appropriate fields. Essential Integrated Data, Ltd. Essential*HR Chapter 6 6-8 Accident • Enter an alphanumeric code (maximum of 4 characters) OR choose a code from the CODES TABLE by browsing with the toolbar browse keys or displaying and selecting from the ACCIDENT CODE POPUP LIST. Category • Enter an alphanumeric code (maximum of 4 characters) OR choose a code from the CODES TABLE by browsing with the toolbar browse keys or displaying and selecting from the CATEGORY CODE POPUP LIST. Claim Number 10 numeric characters. • Enter the claim number of the worker's compensation or other claim filed for this accident Comments 5 lines of 50 alphanumeric characters each. • Enter any additional comments about accident and/or employee. Date Standard date format. • Enter the date that the accident occurred. Date of Death Standard date format. • Enter the date of death, if the employee died as a result of this illness/accident. Disb/Illness • Enter an alphanumeric code (maximum of 2 characters) OR choose a code from the CODES TABLE by browsing with the toolbar browse keys or displaying and selecting from the DISABILITY CODE POPUP LIST. Location • Enter an alphanumeric code (maximum of 4 characters) OR choose a code from the CODES TABLE by browsing with the toolbar browse keys or displaying and selecting from the LOCATION CODE POPUP LIST. Lost Work Days 4 numeric characters. • Enter the number of days the employee was not able to work due to this accident/illness. Restrict Days 2 numeric characters. Essential Integrated Data, Ltd. Essential*HR Chapter 6 • 6-9 Enter the number of days the employee might be restricted from performing regular work duties. ****** After entering all the fields, save the information, and then the information will move to the record list box at the bottom of the screen so the user can see a brief history of previously entered information and a brief description of the accident report. Each record entered under the same employee will appear in the record list box. To pull-up all ACCIDENT information for an employee, simply highlight the name in the record list box and double click the left mouse button. The information will appear in corresponding fields. COUNSELING PROGRAMS The COUNSELING PROGRAMS feature allows the user to record information about the counseling features in which employees participate. The user may record the program's date, counselor and various comments concerning the counseling program. Note: The user must enter an employee's DEMOGRAPHIC INFORMATION before any other information is entered. To view the COUNSELING PROGRAMS screen, select EMPLOYEE from the menu bar, then click on EMPLOYEE LABOR RELATIONS, and finally select COUNSELING PROGRAMS. (Figure 6.9) Essential Integrated Data, Ltd. Essential*HR Chapter 6 6-10 (Figure 6.10) The screen will appear as figure 6.10 appears until information is entered. To display previously entered records, perform one of the following tasks: 1. Type the employee number in the EMPLOYEE NO. field and press the ENTER or the TAB key. The corresponding name will appear. 2. The user, with the cursor in the EMPLOYEE NO. field, can click on the EMPLOYEE MASTER FILE ICON and, if employees have been previously entered, than the list of the entered employees will appear, but if no records have been entered, than all the employees’ number and names will appear, and the user needs to simply highlight which employee is to be entered, click the EXECUTE ICON and the EMPLOYEE NO. and NAME will appear in the appropriate fields. By Organization 20 alphanumeric characters. • Enter the name of the organization who heads the counseling program. Comments 5 lines of 50 alphanumeric characters each. • Enter any additional information the counseling program. Counseling Program • Enter an alphanumeric code (maximum of 4 characters) OR choose a code from the CODES TABLE by browsing with the toolbar browse keys or displaying and selecting from the PROGRAM CODE POPUP LIST. Counselor 14 alphanumeric characters. • Enter the name of the counselor in charge of the counseling program. Essential Integrated Data, Ltd. Essential*HR Chapter 6 6-11 End Date Standard date format. • Enter the date that the employee completed the counseling program. Frequency 4 alphanumeric characters. • Enter how often the employee attended counseling. Example: WKLY=WEEKLY. Start Date Standard date format • Enter the date that the employee started the counseling program. ****** After entering all the fields, save the information, and then the information will move to the record list box at the bottom of the screen so the user can see a brief history of previously entered information and a brief description of the counseling record. Each record entered under the same employee will appear in the record list box. To pull-up all PROGRAM information for an employee, simply highlight the name in the record list box and double click the left mouse button. The information will appear in corresponding fields. Essential Integrated Data, Ltd. Essential*HR Chapter 7 7-1 EMPLOYEE ASSET TRACKING The EMPLOYEE ASSET TRACKING feature allows the user to perform the following tasks: • Create a skills inventory for each employee. • Document each employee's formal education. • Detail each employee's additional training or education • Record and track the issuance of licenses and permits each employee has. • Record the status and results of tests administered to employee. GETTING STARTED From the MASTER MENU, select EMPLOYEE, then select EMPLOYEE ASSETS TRACKING. A list of the various features used to maintain employee asset records appears (figure 7.1). To view the SKILLS INVENTORY screen, select SKILLS INVENTORY and the screen appears (figure 7.2). To review the functions of the toolbar, refer to the ICONS LIST. (Figure 7.1) SKILLS INVENTORY The SKILLS INVENTORY SECTION allows the user to record information about the skills in which employees are proficient. Note: The user must enter an employee's DEMOGRAPHIC INFORMATION before any information can be entered in this feature. Essential Integrated Data, Ltd. Essential*HR Chapter 7 7-2 (Figure 7.2) The screen will appear as figure 7.2 appears until information is entered. To display previously entered records, perform one of the following tasks: 1. 2. Type the employee number in the EMPLOYEE NO. field and press the ENTER or the TAB key. The corresponding name will appear. To pull-up previously entered information, highlight the desired record in the list box, and press the ENTER key or double click with the mouse. The user, with the cursor in the EMPLOYEE NO. field, can click the EMPLOYEE MASTER FILE ICON and, if employees have been previously entered than the list of the entered employees will appear, but if no records have been entered, than all the employees’ numbers and names will appear, and the user needs to simply highlight which employee is to be entered, click the EXECUTE ICON and the EMPLOYEE NO. and NAME will appear in the appropriate fields. Certification • Enter an alphanumeric code (maximum of 4 characters) OR choose a code from the CODES TABLE by browsing with the toolbar browse keys or highlighting and selecting from the CERTIFICATION CODE POPUP LIST. Date Last Used Standard date format. • Enter the date that the employee last used this skill. Level Code • Enter an alphanumeric code (maximum of 2 characters) OR choose a code from the CODES TABLE by browsing with the toolbar browse keys or highlighting and selecting from the LEVEL CODE POPUP LIST. Skill Code • Enter an alphanumeric code (maximum of 4 characters) OR choose a code from the CODES TABLE by browsing with the toolbar browse keys or highlighting and selecting from the SKILL CODE POPUP LIST. Years Experience 4 alphanumeric characters. • Enter the number of years of experience the employee has in this skill. Essential Integrated Data, Ltd. Essential*HR Chapter 7 7-3 ****** After entering all the fields, save the information, and then the information will move to the record list box at the bottom of the screen so the user can see a brief history of previously entered information and a brief description of the employee’s skills. Each record entered under the same employee will appear in the record list box. To pull-up all SKILLS INVENTORY information for an employee, simply highlight the name in the record list box and double click the left mouse button. The information will appear in corresponding fields. FORMAL EDUCATION The FORMAL EDUCATION feature allows the user to document an employee's formal education. Note: The user must enter an employee's DEMOGRAPHIC INFORMATION before any information can be entered in this feature. To view the FORMAL EDUCATION screen, select EMPLOYEE on the menu bar, then select EMPLOYEE ASSET TRACKING, and finally select FORMAL EDUCATION. (Figure 7.3) (Figure 7.4) Essential Integrated Data, Ltd. Essential*HR Chapter 7 7-4 The screen will appear as figure 7.4 appears until information is entered. To display previously entered records, perform one of the following tasks: 1. 2. Type the employee number in the EMPLOYEE NO. field and press the ENTER or the TAB key. The corresponding name will appear. To pull-up previously entered information, highlight the desired record in the list box, and press the ENTER key or double click with the mouse. The user, with the cursor in the EMPLOYEE NO. field, can click the EMPLOYEE MASTER FILE ICON and, if employees have been previously entered than the list of the entered employees will appear, but if no records have been entered, than all the employees’ numbers and names will appear, and the user needs to simply highlight which employee is to be entered, click the EXECUTE ICON and the EMPLOYEE NO. and NAME will appear in the appropriate fields. Attended From Date Standard date format • Enter the date that the employee started at the listed school/ Attended To Date Standard date format. • Enter the date that the employee completed/left the listed school. Completion Date Standard date format. • Enter the date the employee completed the course of study. Credit Earned to Date 3 numeric digits. • Enter the number of credits that the employee has earned towards the previously mentioned degree/certificate. Credit Required 3 numeric digits. • Enter the number of credits that are required in order for the employee to receive his/her degree. Degree Code • Enter an alphanumeric code (maximum of 3 characters) OR choose a code from the CODES TABLE by browsing with the toolbar browse keys or highlighting and selecting from the DEGREE CODE POPUP LIST. Est Completion Date Standard date format. • Enter the date that the employee believes he/she will complete all required courses and receive his/her degree. Essential Integrated Data, Ltd. Essential*HR Chapter 7 7-5 Grade Point Average 1 numeric digit with 2 decimal places • Enter the employee's grade point average. Major Code • Enter an alphanumeric code (maximum of 4 characters) OR choose a code from the CODES TABLE by browsing with the toolbar browse keys or highlighting and selecting from the MAJOR CODE POPUP LIST. Minor Code • Enter an alphanumeric code (maximum of 4 characters) OR choose a code from the CODES TABLE by browsing with the toolbar browse keys or highlighting and selecting from the MAJOR CODE POPUP LIST. School Code • Enter an alphanumeric code (maximum of 4 characters) OR choose a code from the CODES TABLE by browsing with the toolbar browse keys or highlighting and selecting from the SCHOOL CODE POPUP LIST. Status 6 alphanumeric characters. • Enter the status of the employee’s degree pursuit. ****** After entering all the fields, save the information, and then the information will move to the record list box at the bottom of the screen so the user can see a brief history of previously entered information and a brief description of the employee’s education. Each record entered under the same employee will appear in the record list box. To pull-up all EDUCATION information for an employee, simply highlight the name in the record list box and double click the left mouse button. The information will appear in corresponding fields. ADDITIONAL TRAINING The ADDITIONAL TRAINING feature allows the user to detail an employee's additional training or education. Note: The user must enter an employee's DEMOGRAPHIC INFORMATION before any information can be entered in this feature. To view the ADDITIONAL TRAINING screen, select EMPLOYEE on the menu bar, then select EMPLOYEE ASSET TRACKING, and finally select ADDITIONAL TRAINING. (Figure 7.5) Essential Integrated Data, Ltd. Essential*HR Chapter 7 7-6 (Figure 7.6) The screen will appear as figure 7.6 appears until information is entered. To display previously entered records, perform one of the following tasks: 1. 2. Type the employee number in the EMPLOYEE NO. field and press the ENTER or the TAB key. The corresponding name will appear. To pull-up previously entered information, highlight the desired record in the list box, and press the ENTER key or double click with the mouse. The user, with the cursor in the EMPLOYEE NO. field, can click the EMPLOYEE MASTER FILE ICON and, if employees have been previously entered than the list of the entered employees will appear, but if no records have been entered, than all the employees’ numbers and names will appear, and the user needs to simply highlight which employee is to be entered, click the EXECUTE ICON and the EMPLOYEE NO. and NAME will appear in the appropriate fields. Attended To Date Standard date format. • Enter the date the employee exited/left the listed school. Attended From Date Standard date format. • Enter the date the employee entered the listed school. Credit 3 numeric characters. • Enter the number of credit hours the employee has earned. Grade 1 numeric digit and 2 decimal places OR 6 alphanumeric characters. • Enter the grade that the employee earned in the education/training course. Examples: 3.50, Passed, “B”, 4.00. Results 10 alphanumeric characters. Essential Integrated Data, Ltd. Essential*HR Chapter 7 • 7-7 Enter the outcome of the course. Examples: Passed, Failed. School Code • Enter an alphanumeric code (maximum of 4 characters) OR choose a code from the CODES TABLE by browsing with the toolbar browse keys or highlighting and selecting from the SCHOOL CODE POPUP LIST. Subject Code • Enter an alphanumeric code (maximum of 4 characters) OR choose a code from the CODES TABLE by browsing with the toolbar browse keys or highlighting and selecting from the SUBJECT CODE POPUP LIST. ****** After entering all the fields, save the information, and then the information will move to the record list box at the bottom of the screen so the user can see a brief history of previously entered information and a brief description of the employee’s training. Each record entered under the same employee will appear in the record list box. To pull-up all TRAINING information for an employee, simply highlight the name in the record list box and double click the left mouse button. The information will appear in corresponding fields. LICENSE/CERT./PERMITS The LICENSE/ CERT./PERMITS feature allows the user to record and track issuance of licenses and permits to employees. Note: The user must enter an employee's DEMOGRAPHIC INFORMATION before any information can be entered in this feature. To view the LICENSE/ CERT./PERMITS screen, select EMPLOYEE on the menu bar, then select EMPLOYEE ASSET TRACKING, and finally select LICENSE/ CERT./PERMITS. (Figure 7.7) Essential Integrated Data, Ltd. Essential*HR Chapter 7 7-8 (Figure 7.8) The screen will appear as figure 7.8 appears until information is entered. To display previously entered records, perform one of the following tasks: 1. 2. Type the employee number in the EMPLOYEE NO. field and press the ENTER or the TAB key. The corresponding name will appear. To pull-up previously entered information, highlight the desired record in the list box, and press the ENTER key or double click with the mouse. The user, with the cursor in the EMPLOYEE NO. field, can click the EMPLOYEE MASTER FILE ICON and, if employees have been previously entered than the list of the entered employees will appear, but if no records have been entered, than all the employees’ numbers and names will appear, and the user needs to simply highlight which employee is to be entered, click the EXECUTE ICON and the EMPLOYEE NO. and NAME will appear in the appropriate fields. Code • Enter an alphanumeric code (maximum of 4 characters) OR choose a code from the CODES TABLE by browsing with the toolbar browse keys or highlighting and selecting from the LICENSE CODE POPUP LIST. Date Received Standard date format • Enter the date that the employee received the license or permit. Expiration Date Standard date format. • Enter the date that the employee's license or permit will expire. Insurance Company 30 alphanumeric character. • Enter the name of the employee’s insurance company. Insurance Expiration Date Essential Integrated Data, Ltd. Essential*HR Chapter 7 7-9 Standard date format. • Enter the date the insurance coverage expires. Issuing State No entry required. Simp ly click the DOWN ARROW next to the field and select the appropriate choice. Liability Insurance No entry required. Simply check the box if the employee is covered by liability insurance. Number 21 numeric characters. • Enter the number of the certificate, permit, or license, if applicable. Type • Enter an alphanumeric code (maximum of 4 characters) OR choose a code from the CODES TABLE by browsing with the toolbar browse keys or highlighting and selecting from the TYPE CODE POPUP LIST. ****** After entering all the fields, save the information, and then the information will move to the record list box at the bottom of the screen so the user can see a brief history of previously entered information and a brief description of the employee’s information Each record entered under the same employee will appear in the record list box. To pull-up all CERTIFICATION information for an employee, simply highlight the name in the record list box and double click the left mouse button. The information will appear in corresponding fields. EMPLOYEE TESTING The HR EMPLOYEE TESTING feature allows the user to record the status and results of tests administered to an employee. Note: The user must enter an employee's DEMOGRAPHIC INFORMATION before any information can be entered in this feature. To view the EMPLOYEE TESTING screen, select EMPLOYEE on the menu bar, then select EMPLOYEE ASSET TRACKING, and finally select EMPLOYEE TESTING. (Figure 7.9) Essential Integrated Data, Ltd. Essential*HR Chapter 7 7-10 (Figure 7.10) The screen will appear as figure 7.10 appears until information is entered. To display previously entered records, perform one of the following tasks: 1. Type the employee number in the EMPLOYEE NO. field and press the ENTER or the TAB key. The corresponding name will appear. To pull-up previously entered information, highlight the desired record in the list box, and press the ENTER key or double click with the mouse. 2. The user, with the cursor in the EMPLOYEE NO. field, can click the EMPLOYEE MASTER FILE ICON and, if employees have been previously entered than the list of the entered employees will appear, but if no records have been entered, than all the employees’ numbers and names will appear, and the user needs to simply highlight which employee is to be entered, click the EXECUTE ICON and the EMPLOYEE NO. and NAME will appear in the appropriate fields. Administered By 33 alphanumeric characters. • Enter the name of the individual, or company, or school who administered test. Date Taken Standard date format. • Enter the date that the employee took the test. Location • Enter an alphanumeric code (maximum of 2 characters) OR choose a code from the CODES TABLE by browsing with the toolbar browse keys or highlighting and selecting from the LOCATION CODE POPUP LIST. Result Code • Enter an alphanumeric code (maximum of 4 characters) OR choose a code from the CODES TABLE by browsing with the toolbar browse keys or highlighting and selecting from the RESULT CODE POPUP LIST. Test Code • Enter an alphanumeric code (maximum of 4 characters) OR choose a code from the CODES TABLE by browsing with the toolbar browse keys or highlighting and selecting from the TEST CODE POPUP LIST. Essential Integrated Data, Ltd. Essential*HR Chapter 7 7-11 ****** After entering all the fields, save the information, and then the information will move to the record list box at the bottom of the screen so the user can see a brief history of previously entered information and a brief description of the employee’s information Each record entered under the same employee will appear in the record list box. To pull-up all TESTING information for an employee, simply highlight the name in the record list box and double click the left mouse button. The information will appear in corresponding fields. Essential Integrated Data, Ltd. Essential*HR Chapter 8 8-1 PAY RATE/PERFORM REVIEW The PAY RATE/PERFORM REVIEW feature provides a means for streamlining an enterprise's pay rate/salary administration activities. These features allow the user to: • Record pay rate (salary or wage), review results, along with pertinent dates, pay grade/step information, review circumstances, and reviewer identification. • Keep a pay rate history for each employee • Generate pay raises for selected groups of employees GETTING STARTED From the MASTER MENU, select EMPLOYEE, then select PAY RATE/PERFORM REVIEW to see Figure 8.1. A list of the various features used to maintain pay rate/performance records appears. To view the PAY RATE REVIEW ENTRY/MAINT. screen, select PAY RATE REVIEW ENTRY/MAINT and the screen appears (figure 8.2). To review the functions of the toolbar, refer to the ICONS LIST. (Figure 8.1) PAY RATE REVIEW ENTRY MAINTENANCE The PAY RATE REVIEW ENTRY MAINTENANCE feature allows the user to create and maintain a pay rate history for each employee. This feature holds multiple records per employee. Each record is a "snapshot" of an employee's pay rate review information as it existed at a particular point in time. Note: The user must enter an employee's DEMOGRAPHIC INFORMATION before any information can be entered in this feature. Essential Integrated Data, Ltd. Essential*HR Chapter 8 8-2 (Figure 8.2) The screen will appear as figure 8.2 until information is entered. To display previously entered records, perform one of the following tasks: 1. Type the employee number in the EMPLOYEE NO. field and press the ENTER or the TAB key. The corresponding name will appear. To pull-up previously entered information, highlight the desired record in the list box, and press the ENTER key or double click with the mouse. 2. The user, with the cursor in the EMPLOYEE NO. field, can click the EMPLOYEE MASTER FILE ICON and, if employees have been previously entered, than the list of the entered employees will appear, but if no records have been entered, than all the employees’ number and names will appear, and the user needs to simply highlight which employee is to be entered, click the CHECK ICON and the EMPLOYEE NO. and NAME will appear in the appropriate fields. CURRENT DATA: Grade 2 numeric characters. • Enter the grade established for this employee. Next Review Date Standard date format. • Enter the date of the employee’s next pay rate review. Pay Rate 6 numeric characters with two decimal places. • Enter the employee’s salary. Position 8 alphanumeric characters. • Enter the employee’s position within the company. Essential Integrated Data, Ltd. Essential*HR Chapter 8 8-3 Step 1 numeric character. • Enter the employee’s established step. LAST CHANGE: Amount 6 numeric characters with two decimal places. • Enter the amount of the employee’s last pay change. Last Review Standard date format. • Enter the last date the employee had a pay-rate review. Percent 3 numeric characters with two decimal places. • Enter the percentage factor by which the referenced employee’s pay rate was last changed. Reason • Enter an alphanumeric code (maximum of 4 characters) OR choose a code from the CODES TABLE by browsing with the toolbar browse keys or displaying and selecting from the PAY CHANGE REASON CODE POPUP LIST. NEW DATA: Effective Standard date format. • Enter the date the employee’s new pay rate, grade, and step take effect. Grade 2 numeric characters. • Enter the new grade established for this employee. Next Review Standard date format. • Enter the date of the employee’s next pay rate review. Pay Rate 6 numeric characters with two decimal places. Essential Integrated Data, Ltd. Essential*HR Chapter 8 • 8-4 Enter the employee’s new salary. Reason • Enter an alphanumeric code (maximum of 4 characters) OR choose a code from the CODES TABLE by browsing with the toolbar browse keys or displaying and selecting from the PAY CHANGE REASON CODE POPUP LIST. Review Date Standard date format. • Enter the date of the review from which these changes occurred. Reviewer 15 alphanumeric characters. • Enter the name of the reviewer. PAY RATE REVIEW SCHEDULE The PAY RATE REVIEW SCHEDULE allows the user to view an employee’s pay-rate history, including reasons, changes, and dates. Note: The user must enter an employee's DEMOGRAPHIC INFORMATION before any information can be entered in this feature. To view the PAY RATE REVIEW SCHEDULE screen, click EMPLOYEE on the menu bar, then click PAY RATE/ PERFORM REVIEW , and finally select PAY RATE REVIEW SCHEDULE. (Figure 8.3) Essential Integrated Data, Ltd. Essential*HR Chapter 8 8-5 (Figure 8.4) The user has the option to view and/or print the record in order of EMPLOYEE NUMBER or in order of EMPLOYEE NAME; thus the record can either be in numerical or alphabetical order. NUMERICAL ORDER: If the user chooses this option, the user also has the option to display/print the record by division/department numbers. If the user chooses to view/print the record by division/departments, the user must select the field to the right of the EMPLOYEE NUMBER field called OUTPUT BY DIVISION/DEPARTMENT ORDER. Once and if the user chooses this option, the user then has the option to have a page break (or have each department on a separate page) between each department. If so desired, simply select the appropriate field, directly under the OUTPUT field. ONLY if the user chooses EMPLOYEE NUMBER and OUTPUT BY DIVISION/DEPARTMENT ORDER, will the user be allowed to enter information in the STARTING/ENDING DIVISION # and the STARTING/ENDING DEPARTMENT # fields. ***If the user wishes to only view/print one DIVISION, the user simply enters the number “1” in the STARTING and ENDING DIVISION # fields. If the user wishes to view/print only certain departments within a division, the user simply enters the appropriate numbers in the corresponding, DEPARTMENT fields. ***If the user does not choose the two options, the user will not have view to the corresponding fields. Regardless of choices of division/department and page break options, the user will automatically have view to the STARTING/ENDING EMPLOYEE # fields. The user simply chooses and enters which employee numbers the record is to start and end with. If the user is unsure about which number corresponds to which employee, the user can simply select the LIST icon, and from that, select the appropriate employee number; the corresponding employee name will automatically appear in the NAME field, but the user cannot manually enter the employee name because the record is not in order by employee names. If the user manually enters employee NUMBER, the corresponding name will automatically appear, as it does if the user selects the number from the list box. Again, the user does not have view to the EMPLOYEE NAME fields. ALPHABETICAL ORDER: If the user chooses this option, the record can be viewed/printed in order of employee NAMES. If the user chooses this option, the user has no view to any fields except the two NAME fields and those fields below. The user simply enters which names the record is to start and end with, and the corresponding employee numbers appear. As similar with NUMERICAL ORDER, the user may select an employee name from the LIST BOX. The user may enter any part of an employee’s name such as half of the first, middle, or last name, and the full name and number will appear. However, if more than one employee shares a first, middle, or last name, than the name that appears, may not be the desired name, but one similar or the same. To avoid such confusion, simply enter as much of the employee’s name as possible OR use the LIST BOX. Essential Integrated Data, Ltd. Essential*HR Chapter 8 8-6 Again, because the user has selected EMPLOYEE NAME order, the user does not have view to any number fields or any fields pertaining to such. The user also has the option to DISPLAY or PRINT the record, however, the user may do both, or simp ly choose one or the other. DISPLAY: If the user wishes to choose this option, simply select the field. Although the user chooses this option, the user must select the PRINTER ICON. Automatically, a PRINTER DIALOGUE BOX appears, so that if the user wishes to display and then print the record, the user can do so. In this case, the DIALOGUE BOX is available for the user to simply select a printer, just in case the record is printed after viewing. (Figure 8.5) The user simply needs to select the desired printer, and click OK. The record then appears as it would be printed. To VIEW previous and next pages, the user can: 1. Select FILE/NEXT or PREVIOUS PAGE from the menu bar. OR 2. Press CTRL and PAGE UP/DOWN. To EXIT from display mode, the user can: 1. Select FILE/EXIT PREVIEW. OR 2. Hit CLOSE (the “x” icon on the right side of the menu bar). OR 3. Only applies to the first time the user scrolls through the record, on the last page; Select CTRL and PAGE DOWN. OR 4. Select FILE/CANCEL PRINT. To PRINT from display mode: After each of the above “processes,” (except #4) a DIALOGUE BOX appears (Figure 8.6), allowing the user the option to PRINT the record. If the user chooses to do so, the user Essential Integrated Data, Ltd. Essential*HR Chapter 8 8-7 only needs to click YES. With the LAST step, a box appears simply asking the user, if he/she is sure (Figure 8.7). (Figure 8.6) ONLY APPLIES TO STEP #4: (Figure 8.7) PRINT: If the user wishes to choose this option, simply select the field. The user then selects the PRINT ICON. Automatically, the PRINTER DIALOGUE BOX appears, so that the user can select a printer. The user then selects OK, and the record prints. If the user wishes to CANCEL the print job, simply select the CANCEL pushbutton (Figure 8.8) PERFORMANCE REVIEW ENTRY/MAINT. The PERFORMANCE REVIEW ENTRY/MAINT. feature allows the user to enter and review categories and the ratings there of, past review ratings, and review dates. Note: The user must enter an employee's DEMOGRAPHIC INFORMATION before any information can be entered in this feature. Essential Integrated Data, Ltd. Essential*HR Chapter 8 8-8 To view the PERFORMANCE REVIEW ENTRY/MAINT. screen, click EMPLOYEE on the menu bar, then click PAY RATE/PERFORM REVIEW, and finally select PERFORMANCE REVIEW ENTRY/MAINT. (Figure 8.9) (Figure 8.10) The screen will appear as figure 8.10 appears until information is entered. To display previously entered records, perform one of the following tasks: 1. Type the employee number in the EMPLOYEE NO. field and press the ENTER or the TAB key. The corresponding name will appear. To pull-up previously entered information, highlight the desired record in the list box, and press the ENTER key or double click with the mouse. 2. The user, with the cursor in the EMPLOYEE NO. field, can click the EMPLOYEE MASTER FILE ICON and, if employees have been previously entered, than the list of the entered employees will appear, but if no records have been entered, than all the employees’ number and names will appear, and the user needs to simply highlight which employee is to be entered, click the CHECK ICON and the EMPLOYEE NO. and NAME will appear in the appropriate fields. Category • Enter an alphanumeric code (maximum of 4 characters) OR choose a code from the CODES TABLE by browsing with the toolbar browse keys or displaying and selecting from the CATEGORY CODE POPUP LIST. Essential Integrated Data, Ltd. Essential*HR Chapter 8 8-9 Employee Signed No entry required. Simply click the check the box if the employee signed the review. Next Review Date Standard date format. • Enter the date of the employee’s next review. Overall Rating • Enter an alphanumeric code (maximum of 4 characters) OR choose a code from the CODES TABLE by browsing with the toolbar browse keys or displaying and selecting from the RATING CODE POPUP LIST. Rated By 32 alphanumeric characters. • Enter the name of the employee who conducted the review. Rating • Enter an alphanumeric code (maximum of 4 characters) OR choose a code from the CODES TABLE by browsing with the toolbar browse keys or displaying and selecting from the RATING CODE POPUP LIST. Review Date Standard date format. • Enter the date of the review. Review Type • Enter an alphanumeric code (maximum of 4 characters) OR choose a code from the CODES TABLE by browsing with the toolbar browse keys or displaying and selecting from the REVIEW CODE POPUP LIST. ****** After entering all the fields, save the information, and then the information will move to the record list box at the bottom of the screen so the user can see a brief history of previously entered information and a brief description of the employee’s review history. Each record entered under the same employee will appear in the record list box. To pull-up all REVIEW information for an employee, simply highlight the name in the record list box and double click the left mouse button. The information will appear in corresponding fields. PERFORMANCE REVIEW SCHEDULE The PERFORMANCE REVIEW SCHEDULE feature allows the user to view the employee’s last review date, the assigned supervisor, and the reviewer’s position. Note: The user must enter an employee's DEMOGRAPHIC INFORMATION before any information can be entered in this feature. To view the PERFORMANCE REVIEW SCHEDULE screen, click EMPLOYEE on the menu bar, then click PERFORMANCE REVIEW SCHEDULE, and finally select PERFORMANCE REVIEW SCHEDULE. Essential Integrated Data, Ltd. Essential*HR Chapter 8 8-10 (Figure 8.11) (Figure 8.12) This feature follows the same format as the PAY-RATE REVIEW SCHEDULE. Essential Integrated Data, Ltd. Essential*HR Chapter 9 9-1 BENEFIT ADMINISTRATION The BENEFIT ADMINISTRATION feature allows the user to establish and manage the assignment of a wide range of benefit plans. ONLY those benefits established via the Benefit Administration feature, may be assigned to employees. In addition, Essential*HR allows the user to generate practical and informative benefit reports. The BENEFIT ADMINISTRATION feature allows the user to perform the following tasks: • Establish and revise a benefit record including provider, status, and eligibility information along with coverage amount and premium contributions to be made. • Report enrollment information for each benefit including statistical and financial information. • Report premium amounts for each benefit. GETTING STARTED From the MASTER MENU, select ADMIN then select BENEFIT ADMINISTRATION to see figure 9.1. A list of the various files used to maintain benefit records appears. To view the PLAN MAINTENANCE screen, simply select PLAN MAINTENANCE (Figure 9.2) and the screen appears. To review the functions of the toolbar, refer to the ICONS LIST. ******All code information/table maintenance must be completed before any information can be entered into this feature. All Benefit Administration information must be entered before any EMPLOYEE BENEFIT information can be entered. (Figure 9.1) PLAN MAINTENANCE The user can have various records under the same benefit such as INSURANCE or DENTAL. The user may choose to set up records within these categories varying by TYPE and/or CODE. For example, under the INSURANCE benefits, the employer may offer disability coverage (type), available to the employee’s family (code). Or, the employer may offer disability coverage, available only to the employee. Another TYPE of coverage under INSURANCE, maybe life (type), available to the employee’s family. Furthermore, the employer may offer just one TYPE of insurance coverage, which may be available with several different codes. Within each benefit (INSURANCE, MEDICAL, DENTAL, Etc…), the employer can offer varying TYPES with the same CODES for each TYPE. Or, the employer can offer varying TYPES with varying CODES as well. The following information describes common fields that most of the benefit screens have: Essential Integrated Data, Ltd. Essential*HR Chapter 9 9-2 Calculation Method Percentage No entry required. Simp ly check the box if the amounts are to be calculated by percentage. COBRA Coverage No entry required. Simply check the box if COBRA coverage is included. Coverage 7 numeric characters with 2 decimal places. • Enter the amount of basic coverage: can be the maximum, fixed, or vary by employee (in which case the user would leave blank, and enter coverage amounts in the employee’s record). Deduction Code • Enter an alphanumeric code (maximum of 4 characters) OR choose a code from the CODES TABLE by browsing with the toolbar browse keys or displaying and selecting from the DEDUCTION FREQUENCY CODE POPUP LIST. Deduction Uses Pre-tax Dollars No entry required. Simply check the box if the deduction uses pre-tax dollars. Employee Status No entry required. Select the appropriate choice by clicking on the DOWN ARROW next to the field. Months before Coverage Starts 2 numeric characters. • Enter the number of months until the employees’ coverage begins. Monthly Contributions: Employee 4 numeric characters with 2 decimal places • Enter the contribution that the dependent or the company pays, if it is fixed. Dependent 4 numeric characters with 2 decimal places • Enter the contribution, which the dependent or the company pays, if it is fixed. Monthly Premiums: Employee 4 numeric characters with 2 decimal places • Enter the premium applicable to the employee, if it is fixed. Essential Integrated Data, Ltd. Essential*HR Chapter 9 9-3 Dependent 4 numeric characters with 2 decimal places • Enter the premium applicable to the dependent, if it is fixed. Next Enrollment Date Standard date format. • Enter the date of the next coverage enrollment. Options Only if the user checks the option box, is access allowed to the corresponding fields. This function works in order to compress and roll all information to the top of the list box, so that the record does not have empty fields and spaces. The option description fields allow 10 numeric characters. Pay Type No entry required. Simply check the box the appropriate type. Percentage 4 numeric characters with 2 decimal places. • If not a percentage, than the amount is fixed. With percentages, the user can vary premiums and contributions by employee. *******Premium (Amounts) Varies by Employee No entry required. Simply check the box if premiums are to vary among employees. If premiums VARY by employee, the user will enter the appropriate premiums in the EMPLOYEE BENEFIT SELECTION and leave the fields in the administration empty. If premiums DO NOT vary by employee, the user will simply enter the fixed amount in the appropriate fields. Single Coverage No entry required. Simply check the box if desired. This is a Cafeteria Plan No entry required. Simply check the box if the plan is a cafeteria plan. This Plan uses Pre-Tax Dollars No entry required. Simply check the box if the plan uses pre-tax dollars. Essential Integrated Data, Ltd. Essential*HR Chapter 9 9-4 INSURANCE (Figure 9.2) The INSURANCE feature allows the user to enter, view, and change basic insurance information. Examples of INSURANCE PLAN CODES are life or disability. Examples of INSURANCE PLAN TYPES are family or employee. The INSURANCE BENEFIT feature contains most of the fields in the GENERAL FIELDS section. (Figure 9.3) The screen will appear as figure 9.3 appears until information is entered. To display previously entered records, perform the following tasks: 1. Enter the PLAN TYPE and press return, then enter the PLAN CODE and press return. If there is an existing record for the entered benefit type and code, the remaining data will display, can be made to the data. If there is not an existing record on file, a new record can be created by entering data in the remaining fields and saving the record. 2. With the cursor in the PLAN TYPE field, the user can click the BENEFITS MASTER FILE ICON, and if there is an existing record, the record (s) will appear in a popup list box. Highlight the desired plan/type in the list box, click the EXECUTE ICON and the PLAN TYPE and CODE will appear in the appropriate fields. Essential Integrated Data, Ltd. Essential*HR Chapter 9 9-5 MEDICAL (Figure 9.4) The MEDICAL feature allows the user to enter, view, and change basic medical insurance information. The MEDICAL feature follows the same format as the INSURANCE feature. For reference, see the above section. RETIREMENT (Figure 9.5) The RETIREMENT feature allows the user to enter, view, and change basic retirement benefit information such as eligibility and investment options. Essential Integrated Data, Ltd. Essential*HR Chapter 9 9-6 (Figure 9.6) The screen will appear as figure 9.6 appears until information is entered. To display previously entered records, perform one of the following tasks: 1. Enter the RETIREMENT TYPE and press return, then enter the RETIREMENT PLAN and press return. If there is an existing record for the entered benefit type and code, the remaining data will display, can be made to the data. If there is not an existing record on file, a new record can be created by entering data in the remaining fields and saving the record. 2. With the cursor in the RETIREMENT TYPE field, the user can click the BENEFITS MASTER FILE ICON, and if there is an existing record, the record (s) will appear in a popup list box. Highlight the desired plan/type in the list box, click the EXECUTE ICON and the RETIREMENT TYPE and PLAN will appear in the appropriate fields. The following fields apply to this screen only, and therefore are not included in the GENERAL FIELDS section: Minimum Age 2 numeric characters • Enter the age at which the employee becomes eligible for retirement benefits. Minimum Service Hours 6 numeric characters. • Enter the number of hours an employee must work for the company, before becoming eligible for retirement’s benefits. Retirement Age 2 numeric characters. • Enter the age at which the employee retired. Vesting Percentage 3 numeric characters with 2 decimal places. • Enter the rate at which ownership (or value) of benefit is transferred to the employee. For example, if the vesting percentage is 10% per year, and the employee leaves the company after two years, then the employee will receive 20% of the amount in the retirement fund. Essential Integrated Data, Ltd. Essential*HR Chapter 9 9-7 Investment Options 1. Enter an alphanumeric code (maximum of 2 characters) OR choose a code from the CODES TABLE by browsing with the toolbar browse keys or displaying and selecting from the INVESTMENT OPTIONS CODE POPUP LIST. EMPLOYEE CONTRIBUTION: Maximum 4 numeric characters with 2 decimal places. • Enter the maximum amount that the employee can invest. Method • No entry required. Simply check the box the appropriate choice by clicking on the DOWN ARROW next to the field. Select AMOUNT if the employee is a regular, salaried employee. Select RATE if the employee is hourly, and PERCENT if the employee works on commission or if salary varies. Minimum 4 numeric characters with 2 decimal places. • Enter the minimum amount that the employee can invest. EMPLOYER CONTRIBUTION: Matching #1 4 numeric characters with 2 decimal places. • Enter the amount that the company will match. Matching #2 4 numeric characters with 2 decimal places. • Enter the amount that the company will match, if it differs from the first matching amount. Method • No entry required. Simply check the box the appropriate choice by clicking on the DOWN ARROW next to the field. Select AMOUNT if the employee is a regular, salaried employee. Select RATE if the employee is hourly, and PERCENT if the employee works on commission or if salary varies. Up to Limit 4 numeric characters with 2 decimal places. • Enter the amount, to the corresponding matching amount, that the company will pay up to. Essential Integrated Data, Ltd. Essential*HR Chapter 9 9-8 CAFETERIA (Figure 9.7) The employer may wish to put together several (or just one) benefit packages, containing different options, types, and codes. The employee may pick one of these packages, called a CAFETERIA PLAN, instead of individually selecting every type of coverage. Only the benefit plans in which the THIS IS A CAFETERIA PLAN checkbox has been checked, maybe included in the options. Varying PLAN CODES might be packages available only to executives, salaried, or hourly employees. Examples of different CAFETERIA TYPES or CODES CAFETERIA PLAN #1 Medical PPO HMO direct CAFETERIA PLAN #2 CAFETERIA PLAN #3 X X X Life universal whole term X Dental preventive standard X Essential Integrated Data, Ltd. X X X X Essential*HR Chapter 9 9-9 (Figure 9.8) The screen will appear as figure 9.8 appears until information is entered. To display previously entered records, perform one of the following tasks: 1. Enter the CAFETERIA CODE and press return, then enter the PLAN CODE and press return. If there is an existing record for the entered benefit type and code, the remaining data will display, can be made to the data. If there is not an existing record on file, a new record can be created by entering data in the remaining fields and saving the record. 2. With the cursor in the CAFETERIA CODE field, the user can click the BENEFITS MASTER FILE ICON, and if there is an existing record, the record (s) will appear in a popup list box. Highlight the desired plan/type in the list box, click the EXECUTE ICON and the CAFETERIA CODE and CODE will appear in the appropriate fields. In the LIST BOX at the bottom of the screen, the various options available under the CAFETERIA CODE/PLAN appear. The employer can also enter the amount of coverage, available for each option under the plan. Even if the employer no longer offers a cafeteria plan with a certain option (such as dental or a medical HMO), all options that are and were once available will appear. The employer simply checks which ones are still currently available, which will automatically be defaulted to the employee feature. DENTAL (Figure 9.9) Essential Integrated Data, Ltd. Essential*HR Chapter 9 9-10 The DENTAL feature allows the user to enter, view, and change basic insurance information such as various plans and benefits. The DENTAL feature follows the same format as the INSURANCE feature. For reference, see the GENERAL FIELDS section. VISION (Figure 9.10) The VISION feature allows the user to enter, view, and change basic insurance information such as provider and employee status. The VISION PLAN contains many of the same fields as covered in the GENERAL FIELDS section. (Figure 9.11) Essential Integrated Data, Ltd. Essential*HR Chapter 9 9-11 PRE-PAID LEGAL (Figure 9.12) The PRE-PAID LEGAL feature allows the user to enter, view, and change basic information such as premium information. The PRE-PAID LEGAL feature follows the same format as the VISION feature. INVESTMENTS (Figure 9.14) The INVESTMENTS feature allows the user to enter, view, and change basic information such as options and allocation. Essential Integrated Data, Ltd. Essential*HR Chapter 9 9-12 (Figure 9.15) The INVESTMENTS feature is similar to the RETIREMENT feature, except that another field is added. The following information applies to these added fields. Allocation % 3 numeric characters. • Enter the percentage of funds that are to be allocated to the corresponding investment. These fields are used for the maximum amount that an employee can allocate to this option. • Example: The user offers two investments options--Option A and Option B. Option A is considered a high risk investment, thus the user my want to limit the amount that employees can invest to 20%. However, Option B is considered a “safe” investment, thus the user may allow the amount to be 100%. EMPLOYEE LOANS (Figure 9.16) The EMPLOYEE LOANS feature allows the user to enter, view, and change basic information such as amount and deduction. Essential Integrated Data, Ltd. Essential*HR Chapter 9 9-13 (Figure 9.17) The screen will appear as figure 9.17 appears until information is entered. To display previously entered records, perform one of the following tasks: 1. Enter the COMPANY LOAN TYPE and press return, then enter the COMPANY LOAN PLAN and press return. If there is an existing record for the entered benefit type and code, the remaining data will display, can be made to the data. If there is not an existing record on file, a new record can be created by entering data in the remaining fields and saving the record. 2. With the cursor in the COMPANY LOAN TYPE field, the user can click the BENEFITS MASTER FILE ICON, and if there is an existing record, the record (s) will appear in a popup list box. Highlight the desired plan/type in the list box, click the EXECUTE ICON and the COMPANY LOAN TYPE and COMPANY LOAN PLAN will appear in the appropriate fields. The following are fields not in the GENERAL FIELDS section, which are in this screen. Deduction Uses Pre-tax Dollars No entry required. Simply check the box if the deduction uses pre-tax dollars. Loan Purpose 24 alphanumeric characters. • Enter the purpose for which the employee borrows money. Maximum Loan Amount 7 numeric characters with 2 decimal places. • Enter the maximum amount of money that can be loaned to employee. Monthly Deduction Amount 7 numeric characters with two decimal places. • Enter the amount of wages to be deducted from the employee’s paycheck. Number of Months Employed before Benefit Available 2 numeric characters. Essential Integrated Data, Ltd. Essential*HR Chapter 9 • 9-14 Enter the number of months an employee has to be employed before eligible to receive benefits. STOCK OPTIONS (Figure 9.18) (Figure 9.19) The screen will appear as figure 9.19 appears until information is entered. To display previously entered records, perform one of the following tasks: 1. Enter the STOCK OPTION TYPE and press return, then enter the STOCK OPTION CODE and press return. If there is an existing record for the entered benefit type and code, the remaining data will display, can be made to the data. If there is not an existing record on file, a new record can be created by entering data in the remaining fields and saving the record. 2. With the cursor in the STOCK OPTION TYPE field, the user can click the BENEFITS MASTER FILE ICON, and if there is an existing record, the record (s) will appear in a popup list box. Highlight the desired plan/type in the list box, click the EXECUTE ICON and the STOCK OPTION TYPE and STOCK OPTION CODE will appear in the appropriate fields. The following is a field that is not in the GENERAL FIELDS section, which is in this screen. Stock Status • Enter an alphanumeric code (maximum of 4 characters) OR choose a code from the CODES TABLE by Essential Integrated Data, Ltd. Essential*HR Chapter 9 9-15 browsing with the toolbar browse keys or displaying and selecting from the STATUS CODE POPUP LIST. SAVINGS (Figure 9.20) The SAVINGS feature allows the user to enter, view, and change basic information such as contributions and limits. (Figure 9.21) The SAVINGS feature is similar to the RETIREMENT feature and the GENERAL FIELDS section. Essential Integrated Data, Ltd. Essential*HR Chapter 9 9-16 CHILD CARE (Figure 9.22) The CHILD CARE feature allows the user to enter, view, and change basic information such as number of dependents and reimbursement. (Figure 9.23) The screen will appear as figure 9.23 appears until information is entered. To display previously entered records, perform one of the following tasks: 1. Enter the CHILD CARE TYPE and press return, then enter the CHILD CARE PLAN and press return. If there is an existing record for the entered benefit type and code, the remaining data will display, can be made to the data. If there is not an existing record on file, a new record can be created by entering data in the remaining fields and saving the record. 2. With the cursor in the CHILD CARE TYPE field, the user can click the BENEFITS MASTER FILE ICON, and if there is an existing record, the record (s) will appear in a popup list box. Highlight the desired plan/type in the list box, click the EXECUTE ICON and the CHILD CARE TYPE and CHILD CARE PLAN will appear in the appropriate fields. Dependent Reimbursement 7 numeric character with 2 decimal places. • Enter the amount the company reimburses the employee each year. Essential Integrated Data, Ltd. Essential*HR Chapter 9 9-17 Reimbursement Amount (monthly) 7 numeric characters with 2 decimal places. • Enter the amount the company reimburses the employee each month. Number of Months Employed before Benefit Available 2 numeric characters. • Enter the number of months an employee has to be employed, before eligible to receive benefits. Reimbursements Vary be Employee No entry required. Simply check the box if reimbursement amounts/forms vary among employees. Essential Integrated Data, Ltd. Essential*HR Chapter 10 10-1 POSITION MAINTENANCE Essential*HR assists in establishing position control within the organization. The POSITION MAINTENANCE feature allows the user to do so, by assigning a position to an employee and then associating a pay grade with each authorized position. Only pay rates with established ranges may be assigned to employees. The POSITION MAINTENANCE feature performs the following tasks: • Establish authorized positions including organization, project, supervisor, and funding source assignments. • Establish and maintain the number of authorized assignments for each position. • Record annual cost projections, budgeted amounts, and expenditures for each position. • Assign a pay grade and pay step range to each position and designate a position as either salaried or hourly. • Establish information used in a payroll system interface and designate general-ledger account numbers and associated accounting information related to each position. • Establish requirements for each position in terms of necessary skills, education, and licenses. GETTING STARTED From the MASTER MENU, select ADMIN, then select POSITION MANINTENANCE to see Figure 10.1. A list of the various features used to maintain position records appears. To view the POSITION MAINTENANCE screen, simply select ADMIN from the menu bar, then select POSITION MAINTENANCE (figure 10.1) , and finally, select POSITION MAINTENANCE again. To review the functions of the toolbar, refer to the ICONS LIST. POSITION MAINTENANCE SCREEN 1: (Figure 10.1) Essential Integrated Data, Ltd. Essential*HR Chapter 10 10-2 (Figure 10.2) Civil Service Code 4 alphanumeric characters. • If applicable, enter a civil service code for the position. Degrees • Enter an alphanumeric code (maximum of 3 characters) OR choose a code from the CODES TABLE by browsing with the toolbar browse keys or displaying and selection from the DEGREE CODE POPUP LIST. Department • Enter an alphanumeric code (maximum of 4 characters) OR choose a code from the CODES TABLE by browsing with the toolbar browse keys or displaying and selection from the DEPARTMENT CODE POPUP LIST. Division • Enter an alphanumeric code (maximum of 2 characters) OR choose a code from the CODES TABLE by browsing with the toolbar browse keys or displaying and selection from the DIVISION CODE POPUP LIST. EEOC Code • Enter an alphanumeric code (maximum of 4 characters) OR choose a code from the CODES TABLE by browsing with the toolbar browse keys or displaying and selection from the EEOC CODE POPUP LIST. FLSA Code No entry required; simply select the appropriate choice. Job Description 25 alphanumeric characters. • Enter a brief job description for the position. Licenses • Enter an alphanumeric code (maximum of 4 characters) OR choose a code from the CODES TABLE by browsing with the toolbar browse keys or displaying and selection from the LICENSE CODE POPUP LIST. Essential Integrated Data, Ltd. Essential*HR Chapter 10 10-3 Primary Duty 30 alphanumeric characters. • Enter the primary duties Position 10 alphanumeric characters. • Enter the unique identifier for this position. Secondary Duty 30 alphanumeric characters. • Enter the secondary duties/responsibilities required for the position. Skills • Enter an alphanumeric code (maximum of 4 characters) OR choose a code from the CODES TABLE by browsing with the toolbar browse keys or displaying and selection from the SKILL CODE POPUP LIST. State Position Equivalency 4 alphanumeric characters. • Enter the state position that is considered to be equivalent to this position. Supervisor’s Position 10 alphanumeric characters. • Enter the name of the supervisor who is responsible for the employee's assignment. Worker’s Comp • Enter an alphanumeric code (maximum of 3 characters) OR choose a code from the CODES TABLE by browsing with the toolbar browse keys or displaying and selection from the WORKER’S COMP CODE POPUP LIST. POSITION MAINTENANCE SCREEN 2: (Figure 10.3) Essential Integrated Data, Ltd. Essential*HR Chapter 10 10-4 The POSITION and JOB DESCIRPTION fields will automatically default to screen 2. Authorized to Fill 3 numeric characters. • Enter the number of employees that may be assigned to the position. Budgeted Annual Cost 9 numeric characters with 2 decimal places. • Enter the amount budgeted for the position. Cost YTD 9 numeric characters with 2 decimal places. • Enter the amount expended year-to-date for the position. Currently Filled: 3 numeric characters. • If the user is establis hing this position for the first time, enter the number of employees currently assigned to this position. When an employee is assigned to this position in the EMPLOYEE RECORDS feature, this number will be automatically incremented. Likewise, when an employee is assigned to a different position or is terminated, this number will be automatically decremented. Filled YTD 3 numeric characters. • Enter the number of vacancies for the position that have been filled year-to-date. Grade 3 numeric characters. This value references the pay grade table that defines minimum and maximum pay rates. • Enter the three characters pay grade that is assigned to the position. Level 3 numeric characters. • Enter the employee’s salary level. Max Projected Annual Cost 9 numeric characters with 2 decimal places. • Enter the maximum projected annual labor cost associated with this position. No need to enter a comma. Note: In recording projected costs, be sure to include the number of employees that may be assigned to the position as part of the projected, budgeted, and expended costs. The "Currently Filled" value for each position will provide additional assistance in calculating costs. Essential Integrated Data, Ltd. Essential*HR Chapter 10 10-5 Min Projected Annual Cost 9 numeric characters with 2 decimal places. • Enter the minimum projected annual labor cost associated with this position. Note: In recording projected costs, be sure to include the number of employees that may be assigned to the position as part of the projected, budgeted, and expended costs. The "Currently Filled" value for each position will provide additional assistance in calculating costs. Pay Method No entry required. Simply select the appropriate choice by clicking on the DOWN arrow next to the field. Pay Frequency No entry required. Simply select the appropriate choice by clicking on the DOWN arrow next to the field. Status • Enter an alphanumeric code (maximum of 4 characters) OR choose a code from the CODES TABLE by browsing with the toolbar browse keys or displaying and selection from the STATUS CODE POPUP LIST. Std Work Week 2 numeric characters. • Enter the number of hours that will comprise the standard workweek for the position. Steps: Low 2 alphanumeric characters. • Enter the low step for the position. High 2 alphanumeric characters. • Enter the high step for the position. Vacancies YTD 3 numeric characters. • Enter the number of vacancies for this position year-to-date that have been created. Vacancies Last Year 3 numeric characters. • Enter the number of vacancies the organization had the previous year. Essential Integrated Data, Ltd. Essential*HR Chapter 10 10-6 GRADE TABLE MAINTENANCE The GRADE TABLE feature allows the user to set up a pay structure for the organization by standardizing salary and wage ranges. Pay structures are made up of pay grades, and within each pay grade, a set up of pay steps. Each step is associated with a minimum and maximum pay rate. When the user assigns an employee to a position, the user enters the employee's pay step and rate, and the system checks to see that the pay rate is within the range for the step the user entered. For each grade, the user must establish 10 sets of low and high values (steps) for both salary and hourly rates. To view the GRADE TABLE screen, simply select ADMIN from the menu bar, then select POSITION MAINTENANCE, and finally select GRADE TABLE MAINTENANCE. To review the functions of the toolbar, refer to the ICONS LIST. (Figure 10.4) Note: The user must set up GRADE TABLES before assigning employees to positions and entering pay rate information. Furthermore, steps should be established so that values are incremented as the next number is incremented; grades should also be established sequentially. (Figure 10.5) Annual Salary: Low 6 numeric characters with 2 decimal places each. • Enter a low annual salary for the step. Essential Integrated Data, Ltd. Essential*HR Chapter 10 10-7 High 6 numeric characters with 2 decimal places each. • Enter a high annual salary for the step. Date Last Changed Standard date format. • Enter the date on which the grade table was changed last. Effective Date Standard date format. • Enter the date on which this grade table will take effect. Grade 3 alphanumeric characters. Displays the grade that serves as the record key. All data entered on the corresponding work screen will be written to the record identified by the grade number. Grade numbers are specified via the Record Access/Selection process. • Enter the grade identifier. Hourly: Low 6 numeric characters with 4 decimal places each. • Enter a low wage rate for the step. The user do not need to enter a comma. If necessary, Essential*HR will input one for the user. A/so, only enter a decimal point if the user is entering a cents value. High 6 numeric characters with 4 decimal places each. • Enter a high wage rate for the step. The user does not need to enter a comma. If necessary, Essential*HR will input one for the user. Also, only enter a decimal point if the user is entering a cents value. Next Step in Months 3 numeric characters. • Enter the number of months that an employee must serve at that step before his/her salary or wage may be rais ed to a higher step. Essential Integrated Data, Ltd. Essential*HR Chapter 11 11-1 REPORTING This chapter outlines general and specific information on reporting, such as what information is included in every and in each specific report, how to enter the information, how to view the reports, and/or how to print the reports. GETTING STARTED From the MASTER MENU, select REPORTS, and then select the desired report. Note, however that many reports have individual menu boxes that contain more specific reports that can be viewed and/or printed. This chapter begins with a general explanation of instructions and of information that is contained in every report; more specific information (for each report) is explained in further detail. To review the functions of the toolbar, refer to the ICONS LIST. (Figure 11.1) GENERAL REPORT The following information applies to every report. Essential Integrated Data, Ltd. Essential*HR Chapter 11 11-2 (Figure 11.2) The user has the option to view and/or print the report in order of EMPLOYEE NUMBER or in order of EMPLOYEE NAME; thus the report can either be in numerical or alphabetical order. NUMERICAL ORDER: If the user chooses this option, the user also has the option to display/print the report by division/department numbers. If the user chooses to view/print the report by division/departments, the user must select the field to the right of the EMPLOYEE NUMBER field called OUTPUT BY DIVISION/DEPARTMENT ORDER. Once and if the user chooses this option, the user then has the option to have a page break (or have each department on a separate page) between each department. If so desired, simp ly select the appropriate field, directly under the OUTPUT field. ONLY if the user chooses EMPLOYEE NUMBER and OUTPUT BY DIVISION/DEPARTMENT ORDER, will the user be allowed to enter information in the STARTING/ENDING DIVISION # and the STARTING/ENDING DEPARTMENT # fields. ***If the user wishes to only view/print one DIVISION, the user simply enters the number “1” in the STARTING and ENDING DIVISION # fields. If the user wishes to view/print only certain departments within a division, the user simply enters the appropriate numbers in the corresponding, DEPARTMENT fields. ***If the user does not choose the two options, the user will not have access to the corresponding fields. Regardless of choices of division/department and page break options, the user will automatically have access to the STARTING/ENDING EMPLOYEE # fields. The user simply chooses and enters which employee numbers the report is to start and end with. If the user is unsure about which number corresponds to which employee, the user can simply select the LIST icon, and from that, select the appropriate employee number; the corresponding employee name will automatically appear in the NAME field, but the user cannot manually enter the employee name because the report is not in order by employee names. If the user manually enters employee NUMBER, the corresponding name will automatically appear, as it does if the user selects the number from the list box. Again, the user does not have access to the EMPLOYEE NAME fields. ALPHABETICAL ORDER: If the user chooses this option, the report can be viewed/printed in order of employee NAMES. If the user does choose this option, the user has no access to any fields except the two NAME fields and those fields below. The user simply enters which names the report is to start and end with, and the corresponding employee numbers appear. As similar with NUMERICAL ORDER, the user may select an employee name from the LIST BOX. Essential Integrated Data, Ltd. Essential*HR Chapter 11 11-3 The user may enter any part of an employee’s name such as half of the first, middle, or last name, and the full name and number will appear. However, if more than one employee shares a first, middle, or last name, than the name that appears, may not be the desired name, but one similar or the same. To avoid such confusion, simply enter as mu ch of the employee’s name as possible OR use the LIST BOX. Again, because the user has selected EMPLOYEE NAME order, the user does not have access to any number fields or any fields pertaining to such. With some reports, the user has the option to include SALARY information and/or terminated employees. In the example screen shown, the DISPLAY SALARY INFORMATION field is grayed out, because salary information does not apply to the report. But, if salary information does apply, the field will resemble other fields, and the user has the option to include salary information. The user also has the option to DISPLAY or PRINT the report, however, the user may do both, or simply choose one or the other. DISPLAY: If the user wishes to choose this option, simply select the field. Although the user chooses this option, the user must select the PRINT ICON. Automatically, a PRINTER DIALOGUE BOX appears, so that if the user wishes to display and then print the report, the user can do so. In this case, the DIALOGUE BOX is available for the user to simply select a printer, just in case the report is printed after viewing. (Figure 11.3) The user simply needs to select the desired printer, and click OK. The report then appears as it would be printed. To VIEW previous and next pages, the user can: 1. Select FILE/NEXT or PREVIOUS PAGE from the menu bar. Essential Integrated Data, Ltd. Essential*HR Chapter 11 11-4 OR 2. Press CTRL and PAGE UP/DOWN. (Figure 11.4) To EXIT from display mode, the user can: 1. Select FILE/EXIT PREVIEW. OR 2. Hit CLOSE (the “x” icon on the right side of the menu bar). OR 3. Only applies to the first time the user scrolls through the report, on the last page: Select CTRL and PAGE DOWN. OR 4. Select FILE/CANCEL PRINT. To PRINT from display mode: After each of the above “processes,” (except #4) a DIALOGUE BOX appears (Figure 11.5), allowing the user the option to PRINT the report. If the user chooses to do so, the user only needs to click YES. With the LAST step, a box appears simply asking the user, if he/she is sure (Figure 11.6). (Figure 11.5) ONLY APPLIES TO STEP #4: Essential Integrated Data, Ltd. Essential*HR Chapter 11 11-5 (Figure 11.6) PRINT: If the user wishes to choose this option, simply select the field. The user then selects the PRINTICON. Automatically, the PRINTER DIALOGUE BOX appears, so that the user can select a printer. The user then selects OK, and the report prints. If the user wishes to CANCEL the print job, simply select the appropriate field. (Figure 11.7) PAY AND PERFORMANCE These reports contain information concerning salary and performance information. (Figure 11.8) Essential Integrated Data, Ltd. Essential*HR Chapter 11 11-6 PAY RATE HISTORY REPORT (A-1) (Figure 11.9) This report follows the same format as the General report. This report contains salary information such as raises, grades, steps, effective dates, review dates, and salary reason information. Essential Integrated Data, Ltd. Essential*HR Chapter 11 11-7 A-1 PERFORMANCE HISTORY REPORT (A-2) (Figure 11.10 ) Essential Integrated Data, Ltd. Essential*HR Chapter 11 11-8 (Figure 11.11) This report follows the same format as the General Report. This report contains review information concerning review date, reviewer, signatures, review reason, review rating, review category, and next review date. Essential Integrated Data, Ltd. Essential*HR Chapter 11 11-9 A-2 APPLICANT SELECTION CRITERIA (not complete) (Figure 11.12) Essential Integrated Data, Ltd. Essential*HR Chapter 11 11-10 POSITION These reports contain information concerning various positions within the organization such as salary information, duties, and number of employees per position. (Figure 11.14) CURRENT POSITION (C-1) (Figure 11.15 ) This report follows the same format as the General report. This report contains information concerning salary such as start date, pay date, pay rate, step, and grade. Essential Integrated Data, Ltd. Essential*HR Chapter 11 11-11 C-1 BUDGET ANALYSIS (C-2) (Figure 11.16) Essential Integrated Data, Ltd. Essential*HR Chapter 11 11-12 (Figure 11.17) This report follows the same format as the General report, except that the report is printed by POSITION CODE and DIVISION instead of employee name and number. If the user chooses POSITION CODE, the report is printed in order of position code instead of employee name. If the user chooses POSITION DIVISION, the report is printed in order of divisions. HOWEVER, with the POSITION CODE option, the user is only allowed to enter information in the POSITION CODE fields. The choices between DIVISION and CODE only exist to allow for the order of the report---either by code or division. PAGE BREA K, DEPARTMENT, DISPLAY, and VIEW settings work in the same manner as the general report. This report contains budget and position information such as division, department, position, grade, step range, status, specific position information, budget information, actual cost information, various, pay type, pay frequency, EEOC code, and FLSA code information. Essential Integrated Data, Ltd. Essential*HR Chapter 11 11-13 C-2 HEADCOUNT (C-3) (Figure 11.18) Essential Integrated Data, Ltd. Essential*HR Chapter 11 11-14 (Figure 11.19) This report works in the same manner as the previous report. This report contains information concerning employee information such as number of employees that work full-time, parttime, and temporary. C-3 Essential Integrated Data, Ltd. Essential*HR Chapter 11 11-15 POSITION REQUIREMENTS C-1 (Figure 11.20) (Figure 11.21) This report works in the same manner as the previous report, except that the user has department and page-break options. This report contains information concerning requirements for a position such as position description, grade, step, work week, civil code, state code, number of positions authorizes & filled, skills, education, and licenses. Essential Integrated Data, Ltd. Essential*HR Chapter 11 11-16 C-4 EMPLOYEE These reports contain various information relating to employees such as personal information and information that the organization has received from and/or on each employee. (Figure 11.22 ) Essential Integrated Data, Ltd. Essential*HR Chapter 11 11-17 DEMOGRAPHICS (D-1) (Figure 11.23) This report follows the same format as the General report. This report contains information concerning employee “personal information” such as social security #, address, spouse’s name, employee’s maiden name, age, birth date, phone and ext. #, citizenship, sex, marital status, division, and department. Essential Integrated Data, Ltd. Essential*HR Chapter 11 11-18 D-1 EMERGENCY CONTACT LISTING (D-2) (Figure 11.24) Essential Integrated Data, Ltd. Essential*HR Chapter 11 11-19 (Figure 11.25) This report follows the same format as the General report. This report contains information concerning emergency contact information such as address #1, 2, 3, contact name, relationship, and phone number. Essential Integrated Data, Ltd. Essential*HR Chapter 11 11-20 D-2 HOME ADDRESS/PHONE LIST (D-3) (Figure 11.26 ) Essential Integrated Data, Ltd. Essential*HR Chapter 11 11-21 (Figure 11.27) This report follows the same format as the General report. This report contains information concerning employee, personal address information such as spouse, address #1, 2, 3, and phone number. department and division information are optional. Essential Integrated Data, Ltd. Essential*HR Chapter 11 11-22 D-3 BIRTHDAY/AGE LISTING (D-4) (Figure 11.28) Essential Integrated Data, Ltd. Essential*HR Chapter 11 11-23 (Figure 11.29) This report follows the same format as the General report. This report contains employee age information such as birthday and age. Essential Integrated Data, Ltd. Essential*HR Chapter 11 11-24 D-4 PROFILE (D-5) (Figure 11.30) Essential Integrated Data, Ltd. Essential*HR Chapter 11 11-25 (Figure 11.31) This report follows the same format as the General report. This report contains all employee information such as all employee demographic/personal information (such as citizenship and i-9 documentation), current position, current salary information, medical information, payroll information, company property, disciplinary action, employee absences, accident reports, counseling sessions, education, grievances, licenses, testing, company service, skills, training, and tuition reimbursement. Essential Integrated Data, Ltd. Essential*HR Chapter 11 11-26 D-5 Essential Integrated Data, Ltd. Essential*HR Chapter 11 11-27 D-5 Essential Integrated Data, Ltd. Essential*HR Chapter 11 11-28 D-5 Essential Integrated Data, Ltd. Essential*HR Chapter 11 11-29 DATA CHECKLIST (D-6) (Figure 11.32) (Figure 11.33) This report follows the same format as the General report. This report contains information concerning what documentation the employee has submitted such as termination information and lists of various data & documents with ones marked that employee has submitted Essential Integrated Data, Ltd. Essential*HR Chapter 11 11-30 D-6 COMPANY REPORTS These reports contain information concerning employees’ telephone numbers, rank, status within the company, hirings, terminations, and dependents. (Figure 11.34) Essential Integrated Data, Ltd. Essential*HR Chapter 11 11-31 ANNIVERSARY LISTING (E-1) (Figure 11.35) This report follows the same format as the General report. This report contains information concerning important employee dates such as hire date, termination date, pay rate review date, and performance review date. E-1 Essential Integrated Data, Ltd. Essential*HR Chapter 11 11-32 TELEPHONE DIRECTORY E-2 (Figure 11.36) (Figure 11.37) This report follows the same format as the General report. This report contains employee office phone information such as telephone number and extension. Essential Integrated Data, Ltd. Essential*HR Chapter 11 11-33 E-2 SENIORITY LISTING (E-3) (Figure 11.38) Essential Integrated Data, Ltd. Essential*HR Chapter 11 11-34 (Figure 11.39) This report follows the same format as the General report. This report contains information concerning employees’ service such as years worked, hire date, and union information. E-3 Essential Integrated Data, Ltd. Essential*HR Chapter 11 11-35 NEW HIRES (E-4) (Figure 11.40) (Figure 11.41) This report follows the same format as the General report. The user simply selects what order he/she wants the report by (NAME or NUMBER) and then enters the dates of new hires that the report is to start and end with. This report contains information concerning the dates that new employees were hired. Essential Integrated Data, Ltd. Essential*HR Chapter 11 11-36 E-4 TERMINATIONS (E-5) (Figure 11.42) Essential Integrated Data, Ltd. Essential*HR Chapter 11 11-37 (Figure 11.43) This feature works in the exact manner as the NEW HIRE REPORT. This report contains information concerning the termination dates of employees such as hire date, termination date, termination reason, and position. Essential Integrated Data, Ltd. Essential*HR Chapter 11 11-38 E-5 BENEFIT REPORTS These reports contain information concerning employee benefits, selections, coverage, and reimbursement. (Figure 11.44) Essential Integrated Data, Ltd. Essential*HR Chapter 11 11-39 COVERAGE BY EMPLOYEE (F-1) (Figure 11.45) This report follows the same format as the General report. This report contains information concerning all benefit plans for which employees are enrolled. F-1 Essential Integrated Data, Ltd. Essential*HR Chapter 11 11-40 F-1 ENROLLMENT BY PLAN (F-2) (Figure 11.46) Essential Integrated Data, Ltd. Essential*HR Chapter 11 11-41 (Figure 11.47) (Figure 11.48) This report follows the same format as the General report. For each benefit, the user can print a report that follows the GENERAL REPORT format. Each report contains employee benefit information, specific to the benefit selected from Figure 11.47. Essential Integrated Data, Ltd. Essential*HR Chapter 11 11-42 F-2 PREMIUM TOTALS (F-3) (Figure 11.49) Essential Integrated Data, Ltd. Essential*HR Chapter 11 11-43 (Figure 11.50) Select the benefit plans for which you wish to display/print the premium totals or select “All” to display/print all. F-3 EMPLOYEE STATEMENTS (F-4) NOT COMPLETE Essential Integrated Data, Ltd. Essential*HR Chapter 11 11-44 (Figure 11.51) TUITION REIMBURSEMENT F-5 (Figure 11.53) (Figure 11.54) This report follows the same format as the General report. Essential Integrated Data, Ltd. Essential*HR Chapter 11 11-45 F-5 CODE LIST (G-1) This report contains information concerning the codes and their corresponding descriptions entered in the TABLES. (Figure 11.55) Essential Integrated Data, Ltd. Essential*HR Chapter 11 11-46 (Figure 11.56) This report prints all the codes entered under each name; the user can select and view/print individual codes, or select PRINT ALL to print all the codes entered. When selecting individual codes, a CODE RANGE box for each selected code will appear. (Figure 11.57) The user then enters the beginning and ending code, by either manually entering the codes, or selecting them from the dropdown list box (appearing when you click on the LIST icon). The VIEW and PRINT functions work in the same manner as the other reports; simply refer to the GENERAL REPORT for more specific directions. Essential Integrated Data, Ltd. Essential*HR Chapter 11 11-47 G-1 Essential Integrated Data, Ltd. Essential*HR Chapter 12 12- 1 IMAGE MAINTENANCE The IMAGE feature allows the user to maintain records of important documents and maintain pictures of employees. Employee pictures, inputted into the program, can be pulled-up in the EMPLOYEE DEMOGRAPHICS screen, or in the EMPLOYEE IDENTIFICATION MAINTENANCE screen, so the user can see a picture of the corresponding employee. Documents such as I-9 forms, resumes, and transcripts can be pulled-up in the DOCUMENT IMAGE MAINTENANCE screen so the user can see a list of the documentation the employee submitted. GETTING STARTED From the MASTER MENU, select IMAGES. A list of the two programs used to maintain the image record appears (figure 13.1). To view the EMPLOYEE IDENTIFICATION MAINTENANCE screen, select EMPLOYEE IDENTIFICATION MAINTENANCE and the screen appear (figure 13.2). To review the functions of the toolbar, refer to the ICONS LIST. (Figure 13.1) EMPLOYEE IDENTIFICATION MAINTENANCE (Figure 13.2) This feature associates employees with their pictures and numbers. Steps to ENTER and PULL-UP an employee’s picture: Essential Integrated Data, Ltd. Essential*HR Chapter 12 12- 2 ENTER: 1. An image can be entered by using a digital camera OR scanning the image using Win95 scan program. To access Win95 scan, go START/PROGRAMS/ACCESSORIES/IMAGING. Any TWAIN compliant scanner will work. 2. After scanning the file, it will save as .BMP, but it is recommended to save it as .JPG as this takes up less room. Use a separate file for images. 3. To set the directory for the images, simply click, from the Essential*HR menu, FILE, then select COMPANY INFO., and enter the directory in this screen. (Figure 13.3) PULL-UP IMAGES 1. Type the employee number in the EMPLOYEE NUMBER field and click the SEARCH icon next to the FILE NAME field and select the appropriate file (figure 13.3). OR 2. Click the EMPLOYEE MASTER FILE icon and select the employee whose picture the user wishes to pull-up, next perform the above step, and select the appropriate file. OR 3. Select the LIST icon, and a list of the image file names, that have been inputted, will appear. Simply select the appropriate image, and the image along with the EMPLOYEE NUMBER, EMPLOYER NAME, and FILE NAME will appear. OR 4. Leaving all fields blank, simply use the PREVIOUS and NEXT icons to scan the entered images and all relating employee information. Essential Integrated Data, Ltd. Essential*HR Chapter 12 12- 3 EMPLOYEE DOCUMENT MAINTENANCE (Figure 13.4) (Figure 13.5) The EMPLOYEE DOCUMENT MAINTENANCE feature works similar to the IMAGE feature. Steps to ENTER and PULL-UP an employee’s picture: ENTER: 1. Documents can be entered by using a digital camera OR scanning the image using Win95 scan program. To access Win95 scan, go START/PROGRAMS/ACCESSORIES/IMAGING. Any TWAIN compliant scanner will work. 2. After scanning the document (s), they will save as .BMP, but it is recommended to save them as .JPG as this takes up less room. Use a separate file for images. 3. To set the directory for documents, simply click, from the Essential*HR menu, FILE, then select COMPANY INFO., and enter the directory in this screen. PULL-UP IMAGES 1. Click the SEARCH icon and select the appropriate file. All the corresponding information will appear. Essential Integrated Data, Ltd. Essential*HR Chapter 12 12- 4 OR 2. Click the EMPLOYEE MASTER FILE icon and select the employee whose documents the user wishes to pull-up, next perform the above step, and select the appropriate file. OR 3. Select the LIST icon, and a list of the document file names, that have been inputted, will appear. Simply select the appropriate document, and the image along with the EMPLOYEE NUMBER, EMPLOYER NAME, and FILE NAME, DOCUMENT TYPE, and DESCRIPTION will appear. OR 4. Leaving all fields blank, simply use the PREVIOUS and NEXT icons to scan the entered documents and all relating employee information. Essential Integrated Data, Ltd. Essential*HR Chapter 13 13-1 SYSTEM MANAGEMENT This chapter is composed of various features that are used to maintain the HR system and “perform” basic functions. GETTING STARTED From the MASTER MENU, select FILE, and then select the appropriate feature. To review the functions of the toolbar, refer to the ICONS LIST. (Figure 13.1) OPEN COMPANY The SWITCH COMPANIES feature allows the user to switch between different companies within the organization. The user can: 1. Enter the companies manually. 2. Use the LIST icon and select the appropriate company. 3. User the PREVIOUS and NEXT icons to scroll through the lists of entered companies. (Figure 13.2) Essential Integrated Data, Ltd. Essential*HR Chapter 13 13-2 COMPANY INFO. The COMPANY INFORMATION feature allows the user to enter basic company information, select different HR features, and establish directories for the program. (Figure 13.3) (Figure 13.4) Enter the appropriate information in the top half of the screen. Be sure to enter the COMPANY NAME and COMPANY INFORMATION and not employee information. Simply check the boxes if you want to “use”: AUDIT TRAIL JOURNAL, PASSWORDS, and AUTOMATIC NUMBERING for employees and/or applicants. Simply enter the appropriate information in the corresponding fields and pathways. MULTI-COMPANY MAINT. The MULTIPLE COMPANY feature allows the user to enter the company ids that are used in the SWITCH COMPANY feature. The user sets-up multiple companies in this feature. Essential Integrated Data, Ltd. Essential*HR Chapter 13 13-3 (Figure 13.5) (Figure 13.6) The user simply enters the two character COMPANY IDENTIFIER and the COMPANY NAME that matches the identifier and is used in any other related features. SYSTEM ADMINISTRATION (Figure 13.7) The SYSTEM ADMINISTRATION feature allows the user establish, delete, and control password information, purge records, and print audit reports. Essential Integrated Data, Ltd. Essential*HR Chapter 13 13-4 PASSWORD MAINTENANCE (Figure 13.8) LOOK UP FORGOTTEN PASSWORDS (Figure 13.9) Simply enter the user’s ID # and the password appears. PASSWORD ASSIGN (Figure 13.10) Essential Integrated Data, Ltd. Essential*HR Chapter 13 13-5 (Figure 13.11) This feature allows the user to establish employee access to HR material. • PASSWORD TYPE The user may choose to establish IDs by position, using initials, or using first names. Any type of ID will work. The user enters the TYPE such as a first name and then looks to the MENU OPTION display to see the various HR features. If the user chooses not to establish access on the basis of position, than the TYPE and USER ID will be the same. • LEGEND By looking at the legend, the user can decide access levels for each feature. • MENU OPTION This display lets the user see every HR feature and define access based on these features. The legend displays the various types of access. To assign access, simply click the menu option to be assigned and type a code from the legend in the ACCESS LEVEL field. The feature furthest to the left is the main heading/title on the menu bar. Whichever code is entered for the above features will automatically appear for each option under that particular heading’s feature. To specifically enter each menu option, simply hit the DELETE key for that field and the access code disappears. USER LEVEL MAINTENANCE (Figure 13.12) Essential Integrated Data, Ltd. Essential*HR Chapter 13 13-6 (Figure 13.13) This feature allows the user to enter the User Ids for each employee and associate each employee with a Password Type. For example: If the user chooses to base Ids on the employee’s three initials, then the user would enter each employee’s initials, then enter the type appropriate to that employee such as CLERK or MANAGER. By establishing TYPES on position, the user does not have to enter every employee in the PASSWORD ASSIGN screen and in this screen; the user simply enters the TYPE in the PASSWORD ASSIGN screen and then moves to this feature. CHANGE YOUR PASSWORD (Figure 13.14) (Figure 13.15) This feature allows high-access only employees such as managers, directors, etc. to change an employee’s password. Simply enter the old password, then the new password, and verify the password to change it. Essential Integrated Data, Ltd. Essential*HR Chapter 13 13-7 Employee Record Purge (Figure 13.16) (Figure 13.17) The employee records (in which you selected this code in the HIRE DATA/CURRENT STATUS screen ) will be purged. ONLY employee records, which the user has selected to purge, will appear. When the user opens Employee Record Purge, a list appears of all the employees who are to be purged. The user can either choose to “Select Each” employee to purge, in which case the user selects each employee one-by-one. Or, the user may wish for all employees listed to be purged, in which case the user chooses “Select All.” If the user wishes to “unselect” the list of employees to be purged, simply select “Unselect All.” Employee/Applicant Name Change (Figure 13.18) Essential Integrated Data, Ltd. Essential*HR Chapter 13 13-8 (Figure 13.19) Use this feature to change the names of employees. Simply select the employee name and number, of the employee whose name is to be changed, from the Employee Master File. The name and number will appear, at which point the new name (s) is to be entered. First Name 11 alphanumeric characters. • Enter the first name (either old or new) of the employee. Middle Initial 1 alphanumeric character. • Enter the first letter of the employee’s middle name. Last Name 17 alphanumeric characters. • Enter the last name (new or old) of the employee. ****As the user enters information for these fields, the last field automatically displays the first name entered, middle initial, and last name entered. ****This feature also allows the user to keep track of how many names are changed per current “session.” Essential Integrated Data, Ltd. Essential*HR Chapter 13 13-9 PRINT SYSTEM AUDIT REPORT (Figure 13.20) (Figure 13.21) This feature allows the user (if the AUDIT TRAIL has been ENABLED when entering COMPANY INFORMATION) to generate a report each time employee records, applicant records, benefit records, and position records are updated. This report can be used to verify entry and updates to records; this report may also serve as a historical record of important changes to records. ***The Display/Print features work in the same manner as the other reports. See chapter 11 for instructions. BY DATE: If the user wishes to display/print a report of all records changed by date, the user can select to print the report by all dates, in which case the user will not have access to any other field except the salary information field and the output destination field. Or, if the user wishes to select the dates that are to be included in the report, simply enter the dates in standard date format. See the sample report shown below. Essential Integrated Data, Ltd. Essential*HR Chapter 13 13-10 BY USER/DATE: If the user wishes to select the user/date option, the report displays/prints records by dates and records/information that selected users (or all users that have access to E*HR) have changed. If the user wishes to track the changes that other users have made, select this option. The user will not have access to other fields that do not pertain to this option. BY EMPLOYEE/DATE: If the user wishes to display/print the report in order of date and specific or all employee records, select this option. Like the options for other reports, the user has the option to select employees by numbers or names. The user will not have access to other fields that do not pertain to this option. See the sample report shown below. Essential Integrated Data, Ltd. Essential*HR Chapter 13 13-11 ***File option not available. FILE UTILITIES (Figure 13.22) (Figure 13.23) Essential Integrated Data, Ltd. Essential*HR Chapter 13 13-12 • The EXPORT feature writes index files to text files; you use this feature to free-up space that deleted records occupy on your hard drive. • The file selection menu shows the name by which your computer recognizes your data file. An export file is a single disk file that has an .EXP extension. If the file you wish to export is not displayed in the list, this utility does not apply to that particular file. • As the file is processed, a record count displays in increments by one for each record processed. • When the export process is complete, press ESC. • Each data record is written to the export file on a separate line in ASCII format. If the last field is alphanumeric, trailing spaces are truncated. Each record ends with a carriage return and line feed. • To export any file or multiple files, simply click the radio buttons for the corresponding files, and click the EXECUTE icon (check mark) to execute the files. RESTORE (Figure 13.24) (Figure 13.25) • The RESTORE feature works in the same manner as the EXPORT feature; it copies records from an exported (text) file back to your original data (index) file. • As the file is processed, a record count displays in increments by one for each record processed. • When the RESTORE process is complete, press ESC. Essential Integrated Data, Ltd. Essential*HR Chapter 13 13-13 *** The EXPORT/RESTORE features are only used as file maintenance tools. REBUILD (Figure 13.26) (Figure 13.27) • Before rebuilding a file, it is recommended that you backup all data files. It is important to have a backup from which to restore in case any difficulties arise in rebuilding the files. • REBUILD performs similarly to the export and restore features. Only use the REBUILD feature to repair a corrupt file. • Select the files by clicking in the checkboxes buttons next to the corresponding fields, and click the EXECUTE button. • When the REBUILD process is complete, press ESC. Essential Integrated Data, Ltd. Essential*HR Chapter 13 13-14 CREATE (Figure 13.28) (Figure 13.29) • The CREATE feature works in a similar manner as the previous features; when you CREATE a file, you are creating a brand new file. Thus, if you have data stored in the file that you wish to create, you will lose all data/records. Only use this feature to set-up HR, to re-install the program, or to delete files/records. • Select the files by clicking in the checkboxes next to the corresponding fields, and click the EXECUTE button. EXIT (Figure 13.30) The EXIT feature allows the user to exit Essential*HR by selecting EXIT from the FILE menu bar. Essential Integrated Data, Ltd. Essential*HR Index I INDEX A ABSENTEE TRACKING ACCIDENT/INJURY ADDITIONAL TRAINING ANNIVERSARY LISTING REPORT ASSET AUDIT REPORT AUDIT TRAIL 6-1 6-7 7-5 11-31 7-1 13-9 2-1 BENEFIT ADMINISTRATION BENEFIT PLAN SELECTION BENEFIT REPORTS BUDGET ANALYSIS REPORT 9-1 5-15 11-38 11-15 CAFETERIA PLAN (benefit admin.) CAFETERIA (employee records) CHANGE PASSWORD CHILD CARE (benefit admin.) CHILD CARE (employee records) COBRA CODE MAINTENANCE CODES LIST REPORT COMPANY EQUIPMENT RECORD COMPANY INFORMATION COMPANY SERVICE RECORD COUNSELING PROGRAMS (benefit) COVERAGE BY EMPLOYEE REPORT CREATE (company) CURRENT POSITION CURRENT POSITION REPORT 9-7 5-21 13-6 9-14 5-32 5-33 3-2 11-45 5-44 12-2 5-42 6-9 11-39 13-13 5-9 11-10 DATA CHECKLIST DENTAL (benefit admin.) DENTAL (employee records) DISCIPLINARY ACTIONS 5-43 9-9 5-23 6-5 EMPLOYEE/APPLICANT NAME CHANGE EMPLOYEE DATA CHECKLIST EMPLOYEE DEMOGRAPHICS EMPLOYEE DOCUMENT MAINTENANCE EMPLOYEE IDENTIFICATION MAINTENANCE 13-7 5-46 5-1, 5-5 12-3 12-1 B C D E Essential Integrated Data, Ltd. Essential*HR Index II EMPLOYEE LOANS (benefit admin.) EMPLOYEE LOANS (employee records) EMPLOYEE REPORTS EMPLOYEE RECORD PURGE (benefit) ENROLLMENT BY PLAN REPORT EXIT 9-11 5-28 11-16 13-7 11-40 13-14 FILE UTILITIES FORGOTTEN PASSWORD FORMAL EDUCATION 13-11 13-4 7-3 GRADE TABLE MAINTENANCE GRIEVANCE PROCESSING 10-6 6-3 HEADCOUNT REPORT HIRE DATA/CURRENT STATUS HOME ADDRESS/PHONE REPORT 11-13 5-6 11-20 IMAGE MAINTENANCE INSURANCE (benefit admin.) INSURANCE (employee records) INTRODUCTION INVESTMENTS (benefit admin.) INVESTMENTS (employee records) 12-1 9-4 5-16 1-1 9-11 5-25 LABOR RELATIONS LICENSES/CERT./PERMITS 6-1 7-7 MEDICAL (benefit admin.) MEDICAL (employee records) MEDICAL HISTORY MULTI-COMPANY MAINT. 9-5 5-19 5-33 13-2 NEW HIRE REPORT 11-35 OPEN COMPANY 13-1 F G H I L M N O Essential Integrated Data, Ltd. Essential*HR Index III P PASSWORD ASSIGNMENT PASSWORD MAINTENANCE PAY-RATE HISTORY REPORT PAY-RATE REVIEW ENTRY MAINT. PAY-RATE REVIEW SCHEDULE PAYROLL PERFORMANCE REVIEW ENTRY MAINT. PERFORMANCE REVIEW SCHEDULE POSITION MAINTENANCE POSITION REQUIREMENTS REPORT PREMIUM TOTALS REPORT PRE-PAID LEGAL (benefit admin.) PRE-PAID LEGAL (employee records) 13-4 13-4 11-6 8-1 8-4 5-12 8-7 8-9 10-1 11-15 11-42 9-11 5-25 REBUILD RELATIONSHIP/COBAR (employee) REPORTS RESTORE RETIREMENT (benefit admin.) RETIREMENT (employee records) 13-12 5-36 11-1 13-11 9-5 5-19 SAVINGS (employee records) SENIORITY LISTING REPORT SKILLS INVENTORY STOCK OPTIONS (benefit admin.) SYSTEM ADMINISTRATION 5-30 11-33 7-1 9-14 13-1 TABLE MAINTENANCE TELEPHONE DIRECTORY REPORT TERMINATION REPORT TESTING TRAINING TUITION REIMBURSEMENT TUITION REIMBURSEMENT REPORT 3-2 11-32 11-36 7-9 7-5 5-39 11-44 USER LEVEL MAINTENANCE USER START-UP PROCEDURES 13-5 3-1 VISION (benefit admin.) VISION (employee records) 9-10 5-23 R S T U V Essential Integrated Data, Ltd. Essential*HR Appendix I Multi-Company Setup Procedures Essential*HR will handle multiple companies or a company ID other than the default ‘00’ (zero, zero). In order to accomplish that, perform the following steps. 1. The data files for each company are kept in a separate subdirectory under ‘EIDLHR’. Therefore the first step is to create a subdirectory. Change to the EIDLHR directory, “cd C:\EIDLHR” (use the appropriate drive and path for the location of EIDLHR) Create the directory “md HRxx (xx being the two character ID you want to use) 2. Change to the ‘HR00’ subdirectory and copy the company control file to the new company subdirectory and rename it, c:\EIDLHR\HR00> copy CMPCTL00 ..\HRxx\CMPCTLxx If you are using ISAM files, you will need to do the same thing for the CMPCTL00.idx file. 3. Invoke the HR application, login as company ‘00’, and select ‘Multi-Company Maintenance’ from the Main Menu. Enter the new company ID and Name, and save the record. 4. Exit HR and login using the new company ID. When you do, you will see two messages telling you that the PWUSER and PWTYPE files are corrupt and they are being rebuilt. Actually those files do not exit, therefore they are automatically being created. 5. Select ‘Company Info’ from the File Menu and change the company information to match the new company and paths to the payroll (if used) and image files for the new company. If payroll was used for the company from which the CMPCTL file was copied, but is not being used for the new company, be sure to turn payroll off in the ‘Company Info’ file. 6. Select ‘File Utilities/Create’ from the File Menu and select each file on screen 1 and click on the ‘Execute’ icon on the tool bar (the check mark icon). Repeat this step for screen 2 and 3, except on screen 3 do not select the Control (CMPCTL) file. This will create all the HR data files in the HRxx subdirectory. 7. If you want to use the same table codes that were created for company ‘00’ or another company, just copy the HRCODS00 data file to the HRxx subdirectory and rename it, Essential Integrated Data, Ltd. Essential*HR Appendix II c:\EIDLHR\HR00> copy HRCODS00 ..\HRxx\HRCODSxx 8. The new company is now ready for use. If you have any questions, please call for technical support. Essential Integrated Data, Ltd. Essential*HR