1
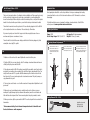
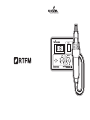
Hot Air Rework Station - 303D
Important Note
Information & Instructions
This is a hot-air rework station – the ultimate in hot air puffing tools. That means it gets really
hot. Be careful not to burn yourself, your friends, your neighbors, or melt anything that
doesn’t need melting. All the metal parts on the hot-air wand get hot, so only touch the plastic
handle. Do not bestow this upon children – power like this belongs in the hands of adults.
The unit will remain hot even after you turn it off. Leave the unit plugged in to let the 303D’s
self-cooling function take care of business. This can take up to 10 minutes.
If you are not going to use the unit for long periods of time, unplug it because it uses a
small-amount of power even when not in use.
The unit is built to last, but it has some fragile parts that don’t like being dropped or jolted
around (who does, right?). Be gentle!
Don’t unplug the unit until the self-cooling is finished – doing so can damage the heating
element and that is so not cool. Give the rework station a solid 5-10 minutes to cool down,
then unplug.
For further instructions on use, changing the heating element, and video of the 303D in
action, please visit www.sparkfun.com/reworkstation
Station Specifications
Power: 110V
Hot Air Temp. Range: 100° C to 480° C
Heating Element Replacement
1
Use
Unscrew the three screws on
handle, slide the rubber cord
housing from the handle then
separate the two halves of the
handle.
Air Capacity: 23L/min (maximum)
Weight: 0.5 stone (7 pounds)
Caution: The main switch must be OFF and the wand allowed to cool before attempting the following procedure.
2
Disconnect the grounding
wire, red and yellow leads
and main power connector.
3
Remove the heating element from
the metal tube, taking care not to
damage the ring of quartz glass or
mica insulation inside the tube.
1. Attach one of the nozzles to the wand. Tighten the screw to hold it in place.
2. Plug the 303D in to your very favorite outlet. The heating element and blower will remain
off until you flip the power switch to ON.
3. Flip said power switch to ON. The heating element will fire up and the air will get very hot,
very quickly, so aim the nozzle accordingly. The red LED will pulse, indicating that “Hey, I’m
ready to melt some stuff.” It’s possible that little whimsical puffs of white smoke will emit
from the nozzle. Those are just magical solder clouds and are normal. They will go away, so
enjoy them while they last.
4. There are two control knobs – one for airflow and one for temperature. Adjust them to suit
your needs.*
5. When you’ve got your settings honed in, carefully aim the nozzle at the area you are
working on. Saying the magic spell (meltum, meltum, meltum), move the nozzle back and
forth until the solder begins to flow. Then remove/reposition the part you want to rework.
5. When you are done, flip the power switch to OFF. The self-cooling will kick on and last for a
few minutes.
* We recommend setting the air flow and temperature knobs to the middle and
then test reflow on a small component.
Heating Element: TOL-11130
SparkFun replacement
heating element.
100-120V/250W