1
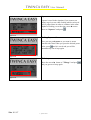
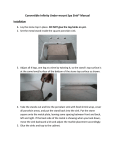
TWINCA EASY
User Manual
EASY User Maunal eng.doc Version 1.00
7. januar 2010
Translated by VL Madsen
TWINCA EASY User Manuel
Contents
Start and manuel feeding ....................................................................................... 4
Booting...........................................................................................................................................4
Entering numbers in the menu................................................................................................4
Automatic feeding .................................................................................................... 4
Entering the feed quantity ........................................................................................................4
Register ....................................................................................................................... 5
Subtotal and Total.......................................................................................................................5
Number of servings ....................................................................................................................5
Extra start portion .................................................................................................... 6
SP gram and SP time .................................................................................................................6
Help............................................................................................................................... 6
HELP ...............................................................................................................................................6
Input ............................................................................................................................. 7
Using the input foot pedal ........................................................................................................7
Using the input feed pump sensor .........................................................................................7
Sensor Check ............................................................................................................ 7
Access to the sensor check .....................................................................................................7
Feature Description ....................................................................................................................8
Calibrating .................................................................................................................. 8
Opening the calibration program............................................................................................8
Starting the calibration ..............................................................................................................8
Calibration in progress..............................................................................................................9
Entering weight............................................................................................................................9
Approval of the calibration .......................................................................................................9
Codes ......................................................................................................................... 10
Service Codes ............................................................................................................................10
Codes ...........................................................................................................................................10
Side 2 / 17
7. januar 2010
TWINCA EASY User Manuel
Calibration figure.......................................................................................................................10
Total feed consumption...........................................................................................................11
End the Code menu ..................................................................................................................11
Step............................................................................................................................. 11
Step Status..................................................................................................................................11
Tune............................................................................................................................ 12
Using Tune function .................................................................................................................12
Cleaning (REVERS)................................................................................................ 12
REVERSE.....................................................................................................................................12
Individual feeding with EASY (Step) ................................................................ 12
Go into Step................................................................................................................................12
Mode .............................................................................................................................................13
Pause............................................................................................................................................13
Quick regulating ........................................................................................................................13
Step menu ...................................................................................................................................13
IP (Individual Pause).................................................................................................................14
IP ”on”- ”off” ..............................................................................................................................14
Changing the IP .........................................................................................................................14
0-gram ..........................................................................................................................................14
Number of 0 servings...............................................................................................................15
Number of Gram to compensate after 0 Portions ...........................................................15
Number of Grams to compensate for after 0 Portions....................................................15
FDK ...............................................................................................................................................15
0-pause.........................................................................................................................................16
Setting 0-pause time.................................................................................................................16
Exit step menu ...........................................................................................................................16
End step.......................................................................................................................................17
Contact information toTwinca ............................................................................ 17
Side 3 / 17
7. januar 2010
TWINCA EASY User Manuel
Start and manuel feeding
Booting
The computer always starts up with this page. When
this page is shown it is in manually fed (program 0)
distribution of feed starts when feeding pedal is
activated. For automatic feeding, press on the desired
application, 1-30
Entering numbers in the menu
Next to each line in the main menu1 the symbol ►
arrow, which moves up and down with the arrow
keys on your keyboard
. Set the arrow in front
of the topic you want changed. Entering is started by
Figure 1
- key. By entering the new value, a
pressing the
new page is shown which is explanatory to the
desired topic.
Automatic feeding
Entering the feed quantity
Before automatic feeding, you must enter the desired
quantity (up to 5000 g) and the desired pause time (01999 mS). When the pedal is pressed down, the feed
occurs in pulses, of which the length is determined
by the entered values. Feed Quantity in any program
can be amended in 5g intervals directly from the
keyboard with the
keys as well as pausing
time with the
keys to 10mS range. The
modified values are automatically saved
Figure 2
1
The main menu is called a revolving menu, which means it is endless, you always come back where you started if you
keep scrolling
Side 4 / 17
7. januar 2010
TWINCA EASY User Manuel
Register
Subtotal and Total
There are two application titles which enumerates the
amount of feed that is fed, "Subtot" and "Total"
(Ton-Kg-Gram), each of these records can be reset.
Set the arrow ► before "Subtot" or "Total" and
press
for each of these records, a new page is
showing the quantity. Now you can choose to reset
the register, press
or press
to return to the
main menu. Note: Total also resets the subtot
register.
Figure 3
Number of servings
In this menu, it is shown in Figuree 4 the counted
number of fed portions. Set the ► in front of the
field "NUMBER OF P." and press
and the
menu opens, press
to reset the count or press
to return to main menu.
Figure 4
Side 5 / 17
7. januar 2010
TWINCA EASY User Manuel
Extra start portion
SP gram and SP time
SP gram and SP time gives an extra portion at the
start after a break. As shown in Figuree 5 "SP
gram" is set at 90 grams, and "SP time" is set to 3
sec. This means, that every time the foot pedal has
not been activated for 3 seconds there is an additional
amount of 90 grams in the next portion. These two
values can be changed by placing the ► arrow next
to the line you wish to change and press , so there
will be a new page up to change the selected value
with numbers on the keypad, the changed value is
Figure 5
saved by pressing
the menu may also be exited
unchanged by pressing
.
Help
HELP
As shown in Figuree 6 you can see it says 045 and it
is the version number of the software that is installed
in feed computer. Move the arrow ► to HELP and
press
the Twinca's telephone number which also
acts as a service telephone number.
Figure 6
Side 6 / 17
7. januar 2010
TWINCA EASY User Manuel
Input
Using the input foot pedal
As shown in Figuree 7 there are 5 lines that are
highlighted "Input: _ _ _ _ _" This function is a bit
like a self-help, press the foot pedal and a "F" will
appear on the first line which says that there is a
signal from foot pedal.
Using the input feed pump sensor
Figure 7
If the sensor is slightly off down to the pump and the
sensor lights yellow an "E" should appear on the next
line, if the sencor on the pump does not light up, you
can gently insert a thin piece of metal between the
sensor and sensor wheel on the feed pump, when the
sensor is covered an "E" must appear on the second
line.
Sensor Check
Access to the sensor check
To use the sensor checks the feed computer must be
in the feed program "0" (Manual). Sensor check is a
program which is built into the feed computer, so you
can see whether the sensor is set correctly in relation
to the wheel sensor on the feed pump. Move the
arrow ► with
until it reaches the "Sensor
Check" as in Figuree 8 and press
program.
Figure 8
Side 7 / 17
7. januar 2010
to enter into the
TWINCA EASY User Manuel
Feature Description
Figure 9
Sensor checks shall be carried out in the feed
program "0" So that you can run the feed pump
manually. (It does not matter whether the pump is
running forward or backward under the sensor check,
in case the feed tank is full of feed) in the first line
the says "Encoder pos: ?? "when the feed pump
starts it will be written that the sensor must " In ",or
" Out " or it is" Ok " with the question marks
"???". In the second line "Tacho RPM: 000"
indicates revolutions of the feed pump. The third line
writes the "On =?% Off =??%", when feed pump
is operating there is a figuree writtne where ”??” is
indicated, these two figure indicated must be as close
to 50% as possible, with a tolerance of ± 5%,
representing between 45% and 55% of On and Off.
Sensor check ends by pressing
.
Calibrating
Opening the calibration program
The calibration must be performed in program "0"
(manual), see Figuree 10. To calibrate the feed
computer, move the arrow ► to calibrate and press
. This will now show a new display picture, see
Figuree 10.1.
Figure 10
Starting the calibration
Before starting calibration, you must take a clean
bucket and weigh it to 0 on a scale. Start the
machine and adjust the rpm to the same speed as
when driving during feeding, hold the feed tube into
the bucket and start the calibration. To start the
Figure 10.1
calibration press
. If you have entered the
calibration program in error, the program may be
terminated by pressing any other key
See Figuree 10.1.
Side 8 / 17
7. januar 2010
than
.
TWINCA EASY User Manuel
Calibration in progress
When calibration is started, depending on the type of
machine, it will run either, 6 small servings or one
large unit into the bucket and then the pump stops
again.
Remember the bucket must be weighed at 0!!!!
Figure 10.2
Entering weight
Figure 10.3
Weigh the amount of feed in the bucket and enter the
weight in grams, but the numbers on the keypad, the
numbers will appear in the "Antal gram: XXXX"
XXXX = enter numbers. Number of pulses, the
machine will count and put themselves into the line
"Pulse (A): *(number of pulses) *" End of press.
NOTE:. If the information is incorrectly entered,
it will just continue over top.
Approval of the calibration
This window displays the value as a feed computer is
arrived at by the calibration, the value is an
expression of how many Gram provided per. pulse
from the sensor on the feed pump, a feed pump will
be around. 3.3 Gr / P, and a feed pump is worn and
soon to be replaced will be around. 1.8 Gr / p. To
accept the calibration, press
. To reject (not
accept) the calibration, press on any other key
Figure 11
than
. And you will return to the window as
shown in figure 10.1.
Side 9 / 17
7. januar 2010
TWINCA EASY User Manuel
Codes
Service Codes
This line is designed for our service men.
But here you can also go in and see what the
calibration number is by pressing
Figuree 12
Codes
When the
is pressed, it will ask for a code which
is ”1234567” press
again and it will open up
Figuree 12.1
Calibration figure
You can view last calibration figure, representing the
last feed the computer calibrated.
"Gr / P" can also be used to see how worn the feed
pump is, a new pump is around 3.30 and when the
pump reaches near 1.80 the machine may have
difficulty feeding just because there is so much
pressure loss in the pump.
Figure 12.2
Side 10 / 17
7. januar 2010
TWINCA EASY User Manuel
Total feed consumption
move the ► arrow down to "Total Fodermgd"
(total amount of feed)(see Figuree 12.2) and press
.and you enter into where you can see how much
the feed pump has pumped out since it was new. To
get out again pressed
.
Figure 12.3
End the Code menu
Move the arrow down to ”Tilbage” and press
now out into the main menu again.
and you have
Figure 12.4
Step
Step Status
This line indicates whether you have access to the
step program, if you have Step, there will be "Step
On" if you do not have Step it will read "Step off"
and this line has no function, you have individual
feeding read more under "Individual feeding EASY
(Step) See page 12
Figure 13
Side 11 / 17
7. januar 2010
TWINCA EASY User Manuel
Tune
Using Tune function
Before you can use the Tune feature, you must be in
a different program than 0. When you select "Tune"
run the feed pump as in the calibration, but this only
measures the machine's operating condition. Set the
arrow ► before "Tune", hold the feeding hose over
Figure 14
the feed tank, and press . The pump will now
pump out 6 servings. After tuning the computer will
create a new calculation, and will again precisely
dose I.H.T., according to the entered quantity and
feed consistency. Tune function is to be used when
the machine is started up for the first time every day,
and when changing the speed of feed pump and the
speed of the diesel engine.
Cleaning (REVERS)
REVERSE
This button is used to set the feed pump in
continuous mode, the
button must be held
down for 3 seconds to start this mode, the continuous
operation can be stopped by pressing any key or
press the feed foot pedal. This function may be used
during cleaning.
Figure 14.1
Individual feeding with EASY (Step)
Go into Step
position the ► arrow next to the step menu and press
and the step menu appears, or if the PDA is
connected, step will automatically enter the step
menu.
Figure 15
Side 12 / 17
7. januar 2010
TWINCA EASY User Manuel
Mode
arrow> is now next to "Mode = STEP" showing the
arrow ► if while feeding, something becomes lodged
and the
in the feed pump, so it is stuck, press
computer writes "Mode = MANUAL”, you can then
free the obstruction in the pump without continuing
wiht the numbers of the cages. When the pump is
Figure 16
running normal again, just press
to feeding individually ...
and you are back
Pause
The pause is the pause time between portions move
the arrow ► down to "Pause" and press
and the
pause times can be changed (see Figuree 17.1)the
pause time can be entered with numbers on the
keypad and exit by pressing
Figure 17
Quick regulating
There may also be quick regulatons made with the
two arrows which are located at the bottom of the
feed computers keyboard, respectively 10ms up or
down.
Figure 17.1
Step menu
Move the arrow ► down to Step Menu and press
and you enter into the Step Menu, a menu with more
funcitons to ease the job of feeding.
Figure 18
Side 13 / 17
7. januar 2010
TWINCA EASY User Manuel
IP (Individual Pause)
IP stands for individual pause time and this can be
activated by pressing
on the keyboard of the
EASY s where a ”+” will appear at the pause time
(See figuree 18.) in the blue frame.
Figure 19
IP ”on”- ”off”
If ”IP ikke valgt !” (se figure 19) is indicated press
and this screen view will appear. To make
changes to the IP mover the arrow ► up to ”IP” and
press
and the menue will open.
Figure 19.1
Changing the IP
This menu Individual pause. ”IP(gram)” or
”IP(msec)” Set the arrow ► beside the desired
Figure 19.2
change and press
this can be changed sot it will
fit better with the pause time between large and small
feed portions. ”IP(msec)” fits in as a rule with 10mS,
while ”IP(gram)” must be at about 400 gram under
the highest pumped out portion, if you wihs to
achieve the desired effect. To end the IP menue
move the arrow ► to the ”Tilbage” and press
.
0-gram
It is a feature which compensates for pressure loss in
the tube when there is an empty cage in the middle of
Figure 20
a row. Press
. When the ► arrow is next to "0g
antal" and the menun opens. As the menue is set
now, (figuree.20) it is set to yield 5 (0 servings) 100
g extra at first portion. The extra portion will not be,
or be seen in the feed registration at the next cages
receiving portions.
Side 14 / 17
7. januar 2010
TWINCA EASY User Manuel
Number of 0 servings
Here you can set how many 0 portions needed to to
give an extra dollop, to compensate for pressure loss
in the feed tube, 0 = off, therefore the feature is
turned off. If you want to change this, enter the
desired number of 0 portions, for example 5 as
shown in Figuree 20.1 then press
saved.
and change is
Figure 20.1
Number of Gram to compensate after 0 Portions
To change the amount of grams in 0 portions move
the arrow
► down to ”0g Xgram” and press
menu will open (See figuree 21.1)
and a new
Figuree 21
Number of Grams to compensate for after 0 Portions
Enter the number of extra grams to be given in the
first portion after 0 portions that will compensation
for the pressure loss arising in the feed tube for
example 100 Grams and end with
save.
in order to
Figuree 21.1
FDK
If FDK is "ON" pump out one whole feed portion,
this will mean that the portion cannot be split in half
in the case that you may not want tho feed a whole
portion on one cage. To put the function in the "ON"
Figuree 22
or "OFF" move the ► arrow to FDK and press
and it switches between "ON" or "OFF". If the
menu is "ON", it is visable in step next to the pause
time an "F" is visable (See Fig. 18) in the blue frame
Side 15 / 17
7. januar 2010
TWINCA EASY User Manuel
0-pause
0-pause is used in the situation if you come to an
empty cage in a row while feeding which can keyed
in as a paused time in order to continue in the same
rhythm of feeding, to set the time, move ► arrow
down to "0-pause" and press
.
Figuree 23
Setting 0-pause time
Here you can put 0-pause as you want it, menu
timesed with 10ms when you press the desired pause
value, press
and it is saved and you will be
automatically out of step again.
Figuree 24
Exit step menu
Move the arrow ► down to "Tilbage" and press
and you get out of step again.
Figuree 25
Side 16 / 17
7. januar 2010
TWINCA EASY User Manuel
End step
Move the arrow ► up to the top of the screen where it desplays
afslut step press
and now you are back to the main menu.
Figuree 26
Contact information toTwinca
TWINCA
A•S
Nr. Bjertvej 14 • DK-7830 Vinderup • Danmark
Tlf. +45 97 44 85 55 • Fax +45 97 44 84 55
Hjemmeside: www.twinca.dk • E-mail: [email protected]
Side 17 / 17
7. januar 2010