1
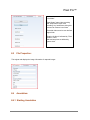
R
Pixel Pro™
User Manual
To ensure proper use of this instrument as well as to avoid injury while operating
instrument, understanding this manual completely before use is highly recommended.
Pixel Pro™
Contents
1.
LABOMED PixelPro Introduction
2.
System Requirement
3.
4.
5.
2.1
Computer Requirement
2.2
Operating System Compatibility
2.3
Language
2.4
Environment Conditions
2.5
Labomed 4D Microscope Package
2.6
Module Identification Number
2.7
Transport
Hardware Installation
3.1
Hardware Components
3.2
Hardware Setup
3.3
Image Capturing on SD Card
3.4
Video Capturing on SD Card
3.5
Other Connections
Preparation for Software Installation
4.1
Pixel Pro Components
4.2
Windows Update Requirement
Software Installation Overview
1
Labomed PixelPro User Manual
Pixel Pro™
6.
7.
8.
Pixel Pro Working Environment
6.1
With Camera
6.2
Without Camera
Operating Pixel Pro
7.1
Pixel Pro Desktop
7.2
File Menu
7.3
Icon Bar
7.4
Live or Captured Image Display Window
7.5
Image Gallery
7.6
Register Tabs
7.7
Capture
7.8
Live
7.9
Freeze
7.10
Open
7.11
Gallery
7.12
Deleting Images from Gallery
7.13
Reset
7.14
Save
7.15
Print
7.16
Zoom In \ Zoom Out
7.17
Rotate Left \ Rotate Right
7.18
Output Folder
Register tabs
8.1
Settings
8.2
Exposure
2
Labomed PixelPro User Manual
Pixel Pro™
8.3
Image Adjustment
8.4
Video
8.5
File Properties
8.6
Annotation
8.6.1 Starting Annotation
8.6.2 Back to Camera
8.6.3 Select
8.6.4 Line
8.6.5 Rectangle
8.6.6 Circle
8.6.7 Pencil
8.6.8 Polygon
8.6.9 Text
8.6.10 Arrow Style, Border and Fill
8.6.11 Open
8.6.12 Save
8.6.13 Undo\Redo
8.6.14 RGB Slider
8.7
3
Calibration
Labomed PixelPro User Manual
Pixel Pro™
1.0 LABOMED PixelPro™
PixelPro is a software interface of all LABOMED high resolution USB cameras. It provides a
common interface for a variety of applications in science and research applications. It allows live
image streaming and capturing. Following are the key features of PixelPro.
Captured image database
Live image settings
Exposure control
Image adjustment
Video Capture
Image Calibration
Image/File Annotation
Image/File properties
4
Labomed PixelPro User Manual
Pixel Pro™
2.0 System Requirements:
2.1
Computer Requirement:
3GHZ CPU, 2GB RAM or 1GB RAM with 128 MB graphics
USB Port: High Speed USB (USB 2.0) port.
CD Drive to install from Pixel Pro CD.
Computer monitor color depth must be set at 16 or 32-bit.
2.2
Operating System Compatibility:
Microsoft Windows(r) XP, Vista and 7
All Windows XP based systems should have the latest Service Pack 3 (SP3). Microsoft windows
2000 has some issues at their end which requires proper updates with latest service packs.
2.3
Language:
Pixel Pro is currently available in English language only.
2.4
Environment Conditions:
Camera Operation:
Temperature: +5 Degree Centigrade to + 35 Degree Centigrade
Humidity: 5% to 80%
2.5
Digital Package Contents:
Each package will consist of the following items
1 Installation CD
1 USB Cable
1 Composite Cable
5
Labomed PixelPro User Manual
Pixel Pro™
1 Power Cable
1 Dust Cover
2.6
Module Identification Number:
Every digital Microscope has a unique serial number. You can find this serial number on the bottom
of your microscope. Every digital microscope was in perfect working condition when leaving the
manufacturer premises. We performed all type of test and keep records of every digital microscope.
2.7
Transport:
All digital microscopes and iVu cameras have to be protected against any mechanical impact.
6
Labomed PixelPro User Manual
Pixel Pro™
3.0 Hardware Installation:
If you are connecting Luxeo 4D digital microscope or iVu digital camera module first time than make
sure that software has been installed properly and now you are ready to connect your digital
microscope with your computer.
3.1
Hardware Components:
1: Luxeo 4D Digital Microscope
2: Power Cable, Composite Cable and USB Cable for camera.
5: Pixel Pro Installation CD
7
Labomed PixelPro User Manual
Pixel Pro™
3.2
Hardware Setup:
1: Connect Power cable to microscope and check power indicator LED on the base of microscope
as well as near the SD card Slot. All LABOMED Digital Cameras can be power up through USB
cable as well as external power adapter. In Luxeo Digital Microscope, camera also received 5v/2A
from main Power supply which is placed on the bottom plate. Those users who will use the Luxeo
with TV, but without PC need to verify the indication of “Green” LED’s near SD card slot and base of
microscope.
Main Power Indicator
LED
Main ON/Off Button of
microscope
Camera Power Indicator
LED
8
Labomed PixelPro User Manual
Pixel Pro™
SD Card inserts position
Inserting SD Card in Luxeo
4D card socket
Standard Capacity SD Memory
card
512MB
1GB
2GB
High Capacity SD Memory Card
4GB
8GB
16GB
3.3
Image Capturing on SD Card:
Image capturing on SD card requires user to wait at least 2 to 3 minutes, after they are done
capturing images. When user capture an image using a “RED” button, SD card hardware generates
a print of image and than produce an actual JPEG file.
3.4
Video Capturing on SD Card:
Same “RED” button also capture a video on SD card. User need to press and hold that red button for
2 seconds to start a video and than press capture button again to stop video recording . We
recommend user to give same duration to SD card hardware to compile an AVI file.
9
Labomed PixelPro User Manual
Pixel Pro™
To avoid any error, user need to understand the time requirement of SD card hardware protocol. For
example, if user captures 30 seconds video on SD card, after pressing the capture button to stop
recording user must wait atleast 60 to 90 seconds to generate complete AVI file on SD card.
3.5
Other Connections:
To complete hardware setup, user needs to plug USB for PC interface and composite cable
connection for TV output.
Step 1:
Mini USB Connector
Step 2:
Before plugging the composite cable for TV output user needs to select the NTSC or PAL mode for
TV.
Composite Connector for
TV output
10
Labomed PixelPro User Manual
Pixel Pro™
Step 3:
NTSC/PAL Selection
toggle switch
Step 4:
Camera Reset Button
After completing hardware setup, user needs to click Pixel Pro icon
to run Pixel Pro application.
11
Labomed PixelPro User Manual
on desktop
Pixel Pro™
12
Labomed PixelPro User Manual
Pixel Pro™
4.0 Preparation for Software Installation:
Labomed Microscope cameras are operated using Pixel Pro application software. For safe
installation make sure that your computer fulfills all the requirements of hardware and software with
respect to you operating systems. During the installation, do not interrupt the installation process.
4.1
Pixel Pro Components
Pixel Pro installation will install the following components on your system.
Pixel Pro for camera and drivers
Microsoft .NET 3.5
DirectX Runtime
After the installation, .Net 3.5 and DirectX will be the part of your operating system and will not be
able to uninstall until you reinstall you Windows. Installation CD has all the required components to
run this application on customer’s PC but system Updates will always be the customer responsibility.
4.2
Windows Updates Requirement:
All versions of Windows XP should have their upgrades with Service Pack 3(SP3) other wise you will
be able to install the software through installation CD but Pixel Pro application will not run on your
PC. Below is the Pixel Pro service pack requirement chart.
Operating System
Latest Service Pack
Pixel Pro Requirement
Windows XP
Service Pack 3
SP 3 & .NET 3.5 SP1
Windows Vista
Service Pack 2
SP 1
Windows 7
Service Pack 1
None
A system with Windows XP operating systems requires service pack 3 before Pixel Pro Installation.
To check your windows update please follows these steps
Click on start Menu
Go to All Programs
Click on Windows Update Icon
13
Labomed PixelPro User Manual
Pixel Pro™
You will be able to see the list of updates which are required to install on you system.
To check you system Configuration please follows these steps
•
Click on Start Menu
•
Go to Control Panel
•
Click on System
You will be able to see the current configuration and updates installed on your computer.
14
Labomed PixelPro User Manual
Pixel Pro™
15
Labomed PixelPro User Manual
Pixel Pro™
5.0 Software Installation Overview:
1: Identify USB 2.0 high speed USB port of your PC. Make sure that USB port is not in use of any
other Imaging device.
2: If you already have Luxeo microscope, make sure that the camera is not connected to your
computer during the installation process of the software.
3: Install Pixel Pro software from Installation CD by clicking setup file.
4: Pixel Pro Setup wizard window will appear on your screen. To start installation, select “Next”
5: Define Installation folder on your PC and select “ Next”
16
Labomed PixelPro User Manual
Pixel Pro™
6: To confirm installation, select “Next”
7: Pixel Pro software is being installed on your hard disk
17
Labomed PixelPro User Manual
Pixel Pro™
8: Once Pixel Pro installation is completed, select “close to exit”
9: The icon shown below will appear on your desktop after installation is complete.
.
18
Labomed PixelPro User Manual
Pixel Pro™
6.0 Pixel Pro Working Environment:
By clicking Pixel Pro Icon on your desktop, user can open Pixel Pro application. Pixel Pro Application
provide two modes of working environment
6.1
Work with Digital camera using USB interface:
When you digital camera is connect through Micro USB interface, live image of your microscope
camera is displayed in Live image window as it shown below.
6.2
Work Without digital camera:
If camera is not connected to your computer, “Camera not detected” message will pop up
where user have the following options
19
Labomed PixelPro User Manual
Pixel Pro™
If camera is already connected than select “Connect device to PC and restart application” option
Before start an application again please verify that LABOMED device has been successfully installed
on your PC.
To verify the camera device is properly installed by your system please
20
Labomed PixelPro User Manual
Pixel Pro™
•
Click on Start Menu
•
Go to Control Panel
•
Click on System
•
Click on Device Manager
•
Click in Imaging devices
If drivers are not properly installed than you find the camera device in other devices sections
Please right click on LABOMED device and click uninstall, hardware has been conflicting with some
of the other imaging devices. To avoid this problem please unplugged the USB cable and reconnect
it and than press
“Scan for hardware changes” icon in Device Manger
System will properly install the drivers this time and you will be able to see the LABOMED devices in
Imaging Devices section
To verify the please take your cursor on
21
Labomed PixelPro User Manual
icon on the bottom right of your desktop screen
Pixel Pro™
By double clicking on this icon you will be able to see this window. Now you are ready to use Pixel
Pro application
If you decide to Work Without Camera, below is the Pixel Pro desktop window will appears on
your screen.
To avoid any errors, user needs to select “Setting” from Register Tabs
22
Labomed PixelPro User Manual
Pixel Pro™
Than Click “Change Folder”
By clicking on it, you would see an option “Make New Folder” or select the default directory
of “Images” from drive “C:\Images”
23
Labomed PixelPro User Manual
Pixel Pro™
7.0 Operating Pixel Pro:
7.1
Pixel Pro Desktop:
Pixel Pro desktop is divided in five main sections
1: Icon bar
2: File Menu
3: Live or Captured Image display window
4: Image Gallery
5: Register Tabs
7.2
File Menu:
24
Labomed PixelPro User Manual
Pixel Pro™
Help provides the information about software and user can also access the manual
7.3
Icon Bar:
Icon bar provides different processing functions on live image. When “Live image mode” is active,
except “Print” function all other functions are available for user. When user switch to Gallery from
Live image than images will be load from Target directory and some processing functions are
disabled.
7.4
Live or Captured Image Display Window:
Live and captured image is displayed in this section
7.5
Image Gallery:
25
Labomed PixelPro User Manual
Pixel Pro™
This sections display the captured images or images from gallery.
7.6
Register Tabs:
Register tabs is based on six segments of image processing tools which allow user
7.7
•
Change image resolutions
•
Set exposure on auto or manual
•
Set white balance on auto and manual
•
Brightness, contrast, saturation, and sharpness of live image
•
Display captured image properties
•
Allow user to capture videos
Capture:
Click on “Capture” the camera will capture an image. Captured image is
displayed in the gallery area and also save in output folder.
Before capturing the image, User needs to set the “Target Folder to Save Images” Where your
images will be stored for your current session
To avoid any errors, user needs to select “Setting” from Register Tabs
26
Labomed PixelPro User Manual
Pixel Pro™
Thank Click “Change Folder”
By clicking on it, you would see an option “Make New Folder”.
7.8
Live:
Click on “Live” button activate live image in display in live or captured image
window area. This button switches the mode of application from gallery to live image display.
7.9
Freeze:
Click On “Freeze” button will capture the live image in current image directory
without showing a gallery window under the live image section. When you switch to gallery mode ,
user will be able to see that captured image. Live image window will stop to save that image and will
continue live image session.
27
Labomed PixelPro User Manual
Pixel Pro™
7.10 Open:
Click on “Open” button will display the “Browse the Folder” window to select the target
folder for current session. All images will be save in selected folder.
In “Setting” Register Tab “Change folder”
will perform the same function.
7.11 Gallery:
Click on “Gallery” Button, the images will be opened in the “Image Gallery” section. All
images which were captured in current session or saved before will be displayed in gallery section.
Folder for current session or for gallery mode can be selected from “Setting” register tabs.
28
Labomed PixelPro User Manual
Pixel Pro™
When the folder is changed, the gallery section is updated automatically, and the images saved in
the selected folder are displayed.
7.12 Deleting Images from Gallery:
In “Live Mode” or “Gallery Mode” user can delete images which were captured in current session or
loaded from any folder except the system directory folders like a Pixel Pro Icon image saved on
C:\Program Files\Labomed\PixelPro
With “Right Click” on the image “Delete” appears that has to be clicked to delete the selected
image. “Double Click” on Image will take user to “Annotation Mode Window”
7.13 Reset:
Reset will reset all the parameters of camera.
7.14 Save:
Click on “Save” will save the current live image in selected folder and appear in gallery
section. If “Auto Save” in “File Option” is checked under “Setting” tab than the image will be
directly save to the target folder with default JPG extension
29
Labomed PixelPro User Manual
Pixel Pro™
If “Auto Save” is unchecked, click on “Save” button will popup the Save Image window where you
can define the name and extension of an image.
7.15 Print:
“Print” Option is available only for all captured images or those images which have been
loaded in gallery section. This option disable in “Live mode” . As you click on “Print” Button, Printer
selection window appears on your screen with other printing option for captured images
7.16 Zoom In \ Zoom Out:
The “Zoom In” and “Zoom Out” can be used to enlarge or reduce the display
of Live image. Both of these tools disable in “Gallery mode”. Both Tools display image with a factor
of 10.
30
Labomed PixelPro User Manual
Pixel Pro™
7.17 Rotate Left \ Rotate Right:
This tool rotates the “Live Image” on left and right side around the X and Y
axes. Bothe of these tools disable in “Gallery mode”
7.18 Output Folder:
This Folder provides user direct access to the current session folder in “Live mode” and
“Gallery mode”. User can not delete or add any image in this folder during “Gallery Mode”. To avoid
any error, we recommend user to not delete any of the images from “Output Folder” when this folder
has been loaded in gallery section. User can delete images from the “Gallery section” in both “Live
Mode” and “Gallery Mode”.
31
Labomed PixelPro User Manual
Pixel Pro™
8.0 Register Tabs:
There are six register tabs available on left side of Pixel Pro Desktop. Register tabs have been
placed in two rows to provide most of the area available for live image or captured images from
gallery. In these register tabs, File properties and Annotation work for captured images or with
“Gallery Mode” while Image Adjustment and exposure work for “Live Mode”. Setting Tab has three
different containers for Camera image resolution for live images, File options and Mirror/Rotate.
8.1
Settings Tab:
Settings Tab is the default Tab of Pixel Pro desktop. Camera Image resolution, File option, Image
format and Mirror/Rotate are the main options in settings tab.
32
Labomed PixelPro User Manual
Pixel Pro™
Captured format defines resolution for
the image which is going to be
captured and will be display in file
Properties.
Live Format defines resolution for live
image from the camera. User can
File Options define the path of folder
where images will capture from live
mode
“Change Folder” allow user to make a
new folder or load any folder from hard
drive.
By default Auto Save option is
checked, which save images
Image Format allow user to save
images in different format. User can
save images in JPEG, PNG and Tiff.
Mirror/Rotate function only use in Live
Mode.
8.2
Exposure Tab:
User can adjust exposure, gamma and white balance controls manually by moving the slider. By
default camera works with preset values until user move exposure, gamma and white balance slider
bar.
Exposure and white balance parameter will only work in “Auto Mode” for 3MP (Labomed iVu 3100)
camera.
33
Labomed PixelPro User Manual
Pixel Pro™
Gamma adjusts the contrast range of
an image between the ranges of
1milliseconds to 6 milliseconds.
Default value of gamma control is
Increase or decrease of exposure
control will make an image lighter or
darker or overexposed. Exposure
range is -10 milliseconds to 1milliseconds. Default value is 7millisecond. Manual adjustment of
is always better in good light
White balance is a process of
removing unrealistic color cast, so
the specimen appears white as it
appearing thorough Optics.
Our eyes are very good at judging
what is white under different light
source, but digital cameras are often
having great difficulty with Auto
White Balance.
In some light conditions, user can
get better results with Manual white
Balance by just switching from Auto
to Manual.
Below is the same image with Auto
and Manual mode without moving
the slider. Moving slider bar also
With Auto White balance
With Manual White balance
34
Labomed PixelPro User Manual
Pixel Pro™
8.3
Image Adjustment Tab:
User can adjust the appearance of image by using a slider of the following parameters in Image
adjustment tab.
1.
Brightness
2.
Contrast
3.
Hue ( Not available for 5MP camera)
4.
Sharpness
5.
Saturation
Sliding these bars will write values on camera hardware, which user can observe in “Live Mode”.
Two reset Buttons are available to switch to default values.
8.4 Video:
35
Labomed PixelPro User Manual
Pixel Pro™
In video tab user can record a video in
“Live Mode”.
“Start Button” starts video recording
and “Stop Button” stops video
recording. Any interference during this
process can cause a lost of data.
Recorded video saved on user defined
target folder
Duration of video is indicated by “Total
Duration” Field.
Start and stop time are defined by
system clock.
8.5
File Properties:
This register tab displays the image information of captured images
8.6
Annotation:
8.6.1 Starting Annotation
36
Labomed PixelPro User Manual
Pixel Pro™
Double click on any Image in gallery mode will switch Pixel Pro desktop to “Annotation Mode”
window where user can use annotation and image calibration tools for captured images.
Pixel Pro Annotation
8.6.2 Back To Camera:
will take user back to Pixel Pro desktop. Annotation tools: User can
draw Line, rectangle, and circle polygon on captured images and text tool open box for writing text.
8.6.3 Select:
This tool allow user to select the particular area or drawing tools.
8.6.4 Line:
37
Labomed PixelPro User Manual
Pixel Pro™
Drag this tool to draw a standard line. Arrow style and Border color can also be use with
line tool.
8.6.5 Rectangle:
Dragging this tool draws a standard rectangle. Border and Fill tool can also be use with
rectangle tool.
8.6.6 Circle:
Dragging this tool draw a circle. Border and Fill tool can also be use with rectangle tool.
Border and Fill tool can also use with
8.6.7 Pencil:
Dragging this tool draw any design on captured image. Only border tool also use with this
tool
8.6.8 Polygon:
Dragging this tool will allow user to draw a shape with as many sides required. Only
border tool can be use with this tool.
8.6.9 Text:
38
Labomed PixelPro User Manual
Pixel Pro™
Drag this tool to open a box for writing text. Border and font style
Also use with this tool.
8.6.10 Arrow Style, Border and Fill Tools:
Arrow style, border and fill are different properties of annotation
tools.
8.6.11 Open:
Click on “Open” button will display the “Open” window to select an image file for
annotation.
39
Labomed PixelPro User Manual
Pixel Pro™
8.6.12 Save:
Click on “Save” will save the current image with annotation. Annotated Image is saved
with the same name with .Cal extension. Image with .Cal file is always saved as XML file in the
same folder.
8.6.13 Undo/Redo:
Undo/Redo function reverse the last editing action, such as typing text in
Code window or deleting control. When you delete one or more controls, you can use the undo
command to restore the controls and their properties. In annotation mode, you can
use Undo and Redo to restore up to twenty edits.
8.6.14 RGB Slider:
40
Labomed PixelPro User Manual
Pixel Pro™
RGB slider is based on Red, Green and Blue filter. User can use these filter on captured images.
Each filter has different response but the value ranges from 0 to 255
Response of Red filter on our PCB image at maximum value (255) is below
Green Filter (255):
Blue Filter (255):
41
Labomed PixelPro User Manual
Pixel Pro™
8.7 Calibration:
In order to calibrate the captured image user need to follow few steps in sequence. Calibration tool is
available only for Annotation Mode only. User need to capture an image from “Live Mode” or load
captured images from predefined folder.
Step 1:
Double click on image from gallery or click on “Begin Annotation” in annotation register switch pixel
pro desktop in to “Annotation Mode”.
42
Labomed PixelPro User Manual
Pixel Pro™
Click on “Open Saved Annotation” open annotated images
from selected folder. If there is no image than current
image will open for annotation.
Click on “Begin Annotation” open current image for
annotation and Calibration
Drop down menu display the list of saved calibration.
43
Labomed PixelPro User Manual
Pixel Pro™
Step 2:
Click on Calibration
Step 3:
Click on Calibration open calibration tool for calibration.
44
Labomed PixelPro User Manual
Pixel Pro™
Step 4:
for new calibration or drop down list show saved calibration.
Press
Step 5:
Special cursor activates image calibration tool. By using this tool, all supported options will be
activated. Move your cursor towards the image and with the single click, you would be able to
calibrate the specimen.
For example we are going to calibrate the current image by defining the distance between two holes.
Calibration detail appears in terms of pixel, where user needs to define one unit of cm equal to 625
Pixels.
Transmitted light and incident light required different scales of calibration. Type of specimen will
define the Selection of cm, mm, um and nm.
Step 6:
Define name of calibration “PCB calibration” and than press save button.
45
Labomed PixelPro User Manual
Pixel Pro™
Press “Yes” to save or “No” to cancel and redo the whole process of calibration. To implement this
calibration in “Annotation Mode”, user needs to reset the calibration by selecting “None” form
calibration field. Select “PCB Calibration” to implement this calibration on application system level.
You can see this implementation by clicking back to Annotation tool. All saved calibrations can be
viewed through Annotation register in “Live Mode”. Xy coordinates and width/height values also
display according to the calibration.
Drawing Object Properties:
46
Labomed PixelPro User Manual
Pixel Pro™
Click right mouse button to copy this information and paste in text box to display with object. Before
pasting this information you have draw a text box and than paste an object information.
47
Labomed PixelPro User Manual
www.laboamerica.com
Our policy is one of continuous development. Labo America, Inc., reserves the right to change design and specifications without prior notice.
Labo America Inc.
920 Auburn Court
Fremont
CA 94538
U.S.A.
Telephone: 510 445 1257
Fax: 510 991 9862
[email protected]
LABOMED and Pixel Pro™ are registered trademarks of Labo America, Inc.
With a policy of continuous development, Labo America, Inc. reserves the right to change design and specifications without prior notice.
© 2011 Labo America, Inc.
ISO 9001 : 2008
File No. A9020