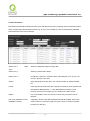
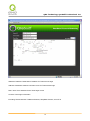
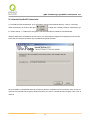
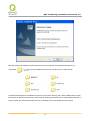
1
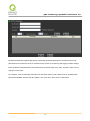
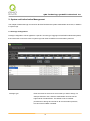
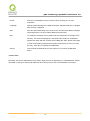
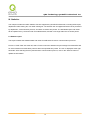
QnoSniff
Professional 2.0
English User’s Manual
QnoSniff Professional 2.0
Contents
I. Introduction ............................................................................................................................................... 4
II. QnoSniff Professional Installation and Configuration .................................................................. 6
2.1 Pre-installation preparations ............................................................................................................................... 6
2.2 Required components during QnoSniff Professional installation ....................................................................... 6
2.3 Example topology for system distribution .......................................................................................................... 7
2.4 Begin installation ................................................................................................................................................ 7
III. Using QnoSniff Professional ............................................................................................................ 25
3.1 Router settings before using QnoSniff .............................................................................................................. 25
3.2 Launching QnoSniff Professional ..................................................................................................................... 28
IV. Basic Setup ........................................................................................................................................... 37
V. System and Authorization Management ........................................................................................ 44
5.1 Privilege Configuration ..................................................................................................................................... 44
5.2 User Management ............................................................................................................................................. 47
5.3 User log............................................................................................................................................................. 49
VI. User Group Configuration ................................................................................................................. 50
6.1 Department Setup ............................................................................................................................................. 50
6.2 User List ........................................................................................................................................................... 52
VII. System Resource and Analysis ...................................................................................................... 56
7.1 CPU usage ........................................................................................................................................................ 56
7.2 Memory usage .................................................................................................................................................. 62
7.3 WAN Traffic ..................................................................................................................................................... 63
VIII. Summary.............................................................................................................................................. 65
8.1 Real-time Status ................................................................................................................................................ 66
8.2 Web information ............................................................................................................................................... 68
8.3 E-mail information ............................................................................................................................................ 71
8.4 FTP information................................................................................................................................................ 75
8.5 P2P information ................................................................................................................................................ 78
8.6 Telnet information ............................................................................................................................................ 80
8.7 IM information.................................................................................................................................................. 83
IX. Statistics ................................................................................................................................................ 86
9.1 Statistic report ................................................................................................................................................... 86
9.2 Department ranking .......................................................................................................................................... 89
9.3 User ranking...................................................................................................................................................... 90
I
QnoSniff Professional 2.0
X. Logout...................................................................................................................................................... 91
XI. Uninstall QnoSniff Professional ...................................................................................................... 93
II
QNO Technology QnoSniff Professional 2.0
Product Manual Using Permit Agreement
[Product Manual (hereafter the "Manual") Using Permit Agreement] hereafter the "Agreement" is the using
permit of the Manual, and the relevant rights and obligations between the users and Qno Technology Inc
(hereafter "Qno"), and is the exclusion to remit or limit the liability of Qno. The users who obtain the file of this
manual directly or indirectly, and users who use the relevant services, must obey this Agreement.
Important Notice: Qno would like to remind the users read the clauses of the "Agreement" before
downloading and reading this Manual. Unless you accept the clauses of this "Agreement", please return this
Manual and relevant services. The downloading or reading of this Manual is regarded as accepting this
"Agreement" and the restriction of clauses in this "Agreement".
【1】Statement of Intellectual Property
Any text and corresponding combination, diagram, interface design, printing materials or electronic file are
protected by copyright of our country, clauses of international copyright and other regulations of intellectual
property. When the user copies the "Manual", this statement of intellectual property must also be copied and
indicated. Otherwise, Qno regards it as tort and relevant duty will be prosecuted as well.
【2】Scope of Authority of "Manual"
The user may install, use, display and read this "Manual on the complete set of computer.
【3】User Notice
If users obey the law and this Agreement, they may use this "Manual" in accordance with "Agreement". If the
users violate the "Agreement", Qno will terminate the using authority and destroy the copy of this "Manual".
The "hardcopy or softcopy" of this Manual is restricted using for information, non-commercial and personal
purpose. Besides, it is not allowed to copy or announce on any network computer. Furthermore, it is not
allowed to disseminate on any media. It is not allowed to modify any part of the "file". Using for other purposes
is prohibited by law and it may cause serious civil and criminal punishment. The transgressor will receive the
accusation possibly.
【4】Legal Liability and Exclusion
【4-1】Qno will check the mistake of the texts and diagrams with all strength. However, Qno, distributors and
resellers do not bear any liability for direct or indirect economic loss, data loss or other corresponding
commercial loss to the user or relevant personnel due to the possible omission.
【4-2】In order to protect the autonomy of the business development and adjustment of Qno, Qno reserves
2
QNO Technology QnoSniff Professional 2.0
the right to adjust or terminate the software / Manual any time without informing the users. There will be no
further notice regarding the product upgrade or change of technical specification. If it is necessary, the
change or termination will be announced in the relevant block of the Qno website.
【4-3】All the set parameters are examples and they are for reference only. You may also purpose your
opinion or suggestion. We will take it as reference and they may be amended in the next version.
【4-4】This Manual explains the configuration of all functions for the products of the same series. The actual
functions of the product may vary with the model. Therefore, some functions may not be found on the product
you purchased.
【4-5】Qno reserves the right to change the file content of this Manual and the Manual content may not be
updated instantly. To know more about the updated information of the product, please visit Qno official
website.
【4-6】Qno (and / or) distributors hereby declares that no liability will be born for any guarantee and condition
of the corresponding information. The guarantee and condition include tacit guarantee and condition about
marketability, suitability for special purposes, ownership and non-infringement. The name of the companies
and products mentioned may be the trademark of the owners. Qno (and/or) the distributors do not provide the
product or software of any third party company. Under any circumstance, Qno and / or distributors bear no
liability for special, indirect, derivative loss or any type of loss in the lawsuit caused by usage or information on
the file, no matter the lawsuit is related to agreement, omission or other tort.
【5】Other Clauses
【5-1】The potency of this Agreement is over any other verbal or written record. The invalidation of part or
whole of any clause does not affect the potency of other clauses.
【5-2】The power of interpretation, potency and dispute are applicable for the law of Taiwan. If there is any
dissension or dispute between the users and Qno, it should be attempted to solve by consultation first. If it is
not solved by consultation, user agrees that the dissension or dispute is brought to trial in the jurisdiction of
the court in the location of Qno. In Mainland China, the "China International Economic and Trade Arbitration
Commission" is the arbitration organization.
3
QNO Technology QnoSniff Professional 2.0
I. Introduction
QnoSniff Professional 2.0 is a network monitoring PC software that can be integrated with QNO routers for
network data logging, filtering, and analyzing. Key information of concern to network administrators can be
presented in a format that is both easy to access and read. It can also output statistical charts and reports for
reference to the corporate or network administrators.
Subjects of interest to the corporate or network administrators: What are employees doing online?
Most of their time online is spent sending/receiving e-mail, browsing web pages, searching for information,
MSN/Skype instant messaging (IM) with friends, using Bittorrent and other P2P file sharing applications. Of
these, e-mail and IM are the main channels for information leaks and virus infections. P2P applications are
also bandwidth killers and breeding grounds for Trojan spyware. Furthermore, employees waste time on
instant messaging and are constantly interrupted during work. The amount of wasted productivity at work is
difficult to estimate. However, instant messaging can provide savings on communication costs and improve
efficiency, which has convinced corporations to open up their networks to IM applications.
Excessive use of chatting software at work results in reduced work efficiency, network bandwidth abuse
from downloads, network congestion affecting normal applications, and leaked confidential information.
QnoSniff Professional is specifically designed for corporate users with these concerns, and management
solution for the corporate network is of utmost priority. By monitoring and logging network data, QnoSniff
Professional can assist the administrator in resolving various issues within the corporate network. QnoSniff
Professional is capable of compiling all internet browsing history, e-mail records, chat logs, and even
downloaded files into a complete analysis report. Administrator can review the organized report easily.
It brings offers an innovative new concept of "Active Management" into the corporate infrastructure, and
replaces the traditional ways of managing for the sake of management. Passive management methods use
4
QNO Technology QnoSniff Professional 2.0
negative reinforcement to notify the employee after the fact, which can easily trigger a sense of rejection and
result in management issues.
QnoSniff Professional provides ranking of traffic flows that can be checked by everyone to review their
individual network usage, e.g. chatting and downloading etc. When the employee realizes that they are
currently being "ranked," it is easier to cut back through this concept of self-management.
Traffic ranking also applies to other types of services which the network administrator will be able to
identify user behaviors within the local network. With better design and planning of the network infrastructure
and management system, we will be able to maximize the efficiency of corporate operations.
QnoSniff Professional also supports PDF output and e-mail forwarding features for generating offline files
to be sent out for review.
5
QNO Technology QnoSniff Professional 2.0
II. QnoSniff Professional Installation and Configuration
This chapter includes pre-installation preparations, the installation process, and QnoSniff basic
configurations.
2.1 Pre-installation preparations
* Minimum hardware specifications for QnoSniff Professional
1.
Intel P4 2.0GHz and faster / AMD CPU in the same class
2.
Operating system: Windows platform (excluding Windows 2000 and older)
3.
At least 100G free hard drive space
4.
At least 2GB System RAM
* Required setup
1.
QNO router with mirror port support
2.
NIC and Ethernet cable on the QnoSniff host PC to connect to the mirror port on the QNO router
3.
Mirror port on the router "must" be enabled
4.
SNMP on the router "must" be enabled
5.
QnoSniff license key option on the router "must" be enabled (for both trial and official versions)
2.2 Required components during QnoSniff Professional installation
QnoSniff installation package includes all necessary components for proper operation of QnoSniff. However,
if these components are already installed on your computer, they may need to be uninstalled or
reinstalled/upgraded to the latest version.
* Apache Server
* WinPcap
* .Net Framework
* PHP
6
QNO Technology QnoSniff Professional 2.0
2.3 Example topology for system distribution
2.4 Begin installation
Please refer to the following steps when installing the software on your PC
1. Insert the QnoSniff Professional CD into the CD drive on your computer.
2. Click on Install Files
to begin installation. (Note: The system requires highest administrator
privileges for installation)
3. [Language Selection] To begin the installation procedure, first select the language to use at the language
selection page.
7
QNO Technology QnoSniff Professional 2.0
Click "Next" to continue with installation, or click "Cancel" to cancel the installation procedure.
4. [Welcome Page] On the welcome page, click "Next" to continue with installation, or click "Cancel" to cancel
the installation procedure.
8
QNO Technology QnoSniff Professional 2.0
5. [License Agreement] Please carefully read through the agreement and click "I accept the terms of the
license agreement", then click "Next" to continue with installation.
9
QNO Technology QnoSniff Professional 2.0
6. [Apache Setup] The Apache Server enables the web service for QnoSniff Professional on the PC for
remote monitoring and access by administrators and users. At the installation and setup page for Apache
Server, click "Next" to continue with installation.
"Web Server IP" is the IP address of the web server, the default is Localhost (127.0.0.1)
"Web Server Name" is the name of the web server
"Listen Port" is the communication port used by the Apache Server, default is port 80
"Administrator Email" is the e-mail with administrator privileges for notification of important user messages
Please click "Next" after setup to continue with installation
* Port 80 is also used by other applications, and therefore is the target of computer virus and worm attacks,
which may conflict with the web service. It is recommended to use another port (e.g. 8080).
7. [Customer Information] Please enter your user name and company name on the customer info page. Both
10
QNO Technology QnoSniff Professional 2.0
fields must be filled in to be able to click "Next" to continue with installation.
11
QNO Technology QnoSniff Professional 2.0
8. [Setup Type] Choose the installation type. Select "All" to install all programs; select "Custom" to choose
which programs to install. The screenshot below indicates the "All" installation type. Currently, there is no
difference between "All" and "Custom" installation types in QnoSniff Professional 2.0. Select one to continue.
12
QNO Technology QnoSniff Professional 2.0
9. [Destination Location] The system default is "C:\QnoSniff" or click "Change" to change the installation
directory. Click "Next" to continue to the begin installation page.
10. [Ready to Installation] Enter the procedure for the main program of QnoSniff Web version. Please click
"Install" to begin.
13
QNO Technology QnoSniff Professional 2.0
Installing
14
QNO Technology QnoSniff Professional 2.0
11. [WinPcap Setup] The WinPcap component will be installed next. If your PC already has WinPcap installed
and is newer than the version included with QnoSniff Professional package, the warning message will popup
to notify the user that WinPcap installation will be skipped.
If your PC does not have WinPcap installed, the installation will continue; if you have an older version installed
on your PC, the installation will first uninstall the existing WinPcap application before installing the newer
version.
15
QNO Technology QnoSniff Professional 2.0
Please click "Next" to continue with WinPcap installation.
16
QNO Technology QnoSniff Professional 2.0
Please carefully read through the WinPcap license agreement and then click "I Agree" to continue with
WinPcap installation.
17
QNO Technology QnoSniff Professional 2.0
After a few seconds the "Completing WinPcap (installation complete)" screen will be shown.
18
QNO Technology QnoSniff Professional 2.0
Click "Finish" to continue installing other components.
12. [Apache Successfully Registered] After WinPcap is installed, the Apache registration process will follow
with the successful message.
Please click OK to continue installing other components.
19
QNO Technology QnoSniff Professional 2.0
13. [Launch Apache Service]
After the component is registered, the Apache service will launch. If a built-in
or antivirus firewall is enabled on your PC, you will be asked to grant the service access through the firewall.
Please select "Allow" or "Unblock" for the service. If the service is already blocked by the antivirus software or
firewall, please add the service to the exception list.
14. [Install .Net Framework 2.0] If your PC already has .Net Framework installed, this step will be skipped; if
not, the .Net Framework 2.0 will be installed.
20
QNO Technology QnoSniff Professional 2.0
15. [Install QnoSniff Professional- Local] The location installation (main application) of QnoSniff Professional
will be installed next.
Click "Next" to continue with installation.
21
QNO Technology QnoSniff Professional 2.0
Confirm installation of QnoSniff Command Console, and click "Next" to continue.
22
QNO Technology QnoSniff Professional 2.0
16. [QnoSniff Local Install Complete] After all components and applications are installed, please click "Close"
at the Installation Complete page to exit.
23
QNO Technology QnoSniff Professional 2.0
Please click "Finish" to complete QnoSniff Professional installation.
24
QNO Technology QnoSniff Professional 2.0
III. Using QnoSniff Professional
This chapter includes steps on how to use QnoSniff Professional and the router settings.
3.1 Router settings before using QnoSniff
Before using QnoSniff Professional, QnoSniff license key option on the router "must" be enabled (for both trial
and official versions). Please login to the setup page of the router.
Go to "System Tool" => "License Key"
25
QNO Technology QnoSniff Professional 2.0
There are two options:
[1] Trial:
Click the "Trial" button to begin the 15-day trial period. After 15 days, QnoSniff Professional will stop
functioning and the service will not be available. Please purchase and register the product license key if you
would like to continue using QnoSniff Professional. Enter your license key and click "Submit" to resume using
QnoSniff Professional (registered).
[2] Purchase and register the license key:
If you do not require the trial period and wish to immediately activate QnoSniff Professional, please purchase
and register the product license key. Enter your correct license key and click "Submit" to immediately register
and activate QnoSniff Professional.
26
QNO Technology QnoSniff Professional 2.0
* Please note:
1. After activating the trial version of QnoSniff Professional, the trial period cannot be stopped and will
continue to count down.
2. If your product license key is entered incorrectly three times, the license key page will be locked down
completely and will not accept any further attempts. Please contact your distributor for related QNO services.
Enable mirror port:
Go to port management
Enable mirror port (port1) (make sure the port is not disabled) and then click "OK" to save the changes.
Check that the Ethernet cable is plugged into the mirror port on the router, and connected to the NIC of PC
with QnoSniff Professional installed.
27
QNO Technology QnoSniff Professional 2.0
3.2 Launching QnoSniff Professional
After the router is configured to support the QnoSniff Professional, please logon to the PC with QnoSniff
Professional installed. Click on the desktop icon to launch QnoSniff Professional
If your firewall or antivirus is enabled, please add the QnoSniff application to the exception list (unblock)
before activating QnoSniff Professional. This will ensure proper connection and operation for QnoSniff
Professional.
The login screen below will be shown.
28
QNO Technology QnoSniff Professional 2.0
Default account is administrator (lower case)
Default password is admin (lower case)
Language selection:
Traditional Chinese
Simplified Chinese
English
Click OK after selecting the language to go to the QnoSniff Professional AP control panel.
The system time, login IP, and login ID are shown at the top left corner; the language selection menu is at the
top right corner.
The main menu to the left side includes 7 items
29
QNO Technology QnoSniff Professional 2.0
To properly use QnoSniff functions, the basic configuration must be first setup.
[[
1] Monitoring target: The NIC for packet/traffic monitoring. QnoSniff Professional will capture the network
information from your PC; you may also select it from the pull-down menu. The NIC to be monitored must be
connected with Ethernet cable to the mirror port on the router.
30
QNO Technology QnoSniff Professional 2.0
[2] After selecting the correct monitoring target, the IP and MAC address will automatically be shown.
[3] Login account/password: Enter the router account/password with which you connected to the PC, and then
click "Save" to verify the connection.
[4] If you receive the "Action Failed" message after clicking "Save," check the following:
1. Incorrect router account/password: please enter again.
2. Connection issue between router and PC: confirm connection to mirror port.
3. Router support for QnoSniff Professional is not enabled: please follow the instructions in the previous
chapter.
[5] After saving the router account/password, the connection between QnoSniff Professional and the router
will be verified. The message will be shown if connection is successful as well as the trial/registered version of
QnoSniff Professional (as below).
[6] Remote access configuration: QnoSniff supports remote web access, and the communication port must be
first configured to enable this feature. System default is port 80 or you can change the port to match specific
requirements. Click "OK" to save the changes. In addition to the communication port used by the program, the
31
QNO Technology QnoSniff Professional 2.0
firewall and antivirus software on your PC must also be configured to open up the port for remote access to
take effect. The router must also be configured to recognize the remote access port, as shown below:
1. Go to the router setup page, select "Advanced setup" => "DMZ/Forwarding" => "Port Range Forwarding"
2. In the port range forwarding page, assign the communication port you configured for remote access in
QnoSniff Professional to the PC with QnoSniff Professional installed. For example, if the IP address of PC
with QnoSniff installation is 192.168.1.100 and the remote access port is 80, set the communication port as
HTTP [TCP/80 ~ 80], internal IP address as 192.168.1.100, port location to "Any" and add to the enabled list.
Click "OK" for the changes to take effect.
32
QNO Technology QnoSniff Professional 2.0
* Please note!
1. If your remote access port is not listed in the pull down menu of existing service ports on the router, it needs
to be added to the router “Service Port Management”.
2. If you need to assign a specific WAN IP for remote access and not from all WAN connections, choose the
WAN IP interface instead of "Any" for the port location.
3. If the remote access port for QnoSniff is already in use by another router (e.g. the remote management port
for the router is also port 80), these two ports can not be the same one and should be changed.
After configuring the remote access port in the program, PC firewall or antivirus software, and router, test the
remote access connection by logging into the web interface of QnoSniff Professional from a remote host.
Check the WAN IP address from the router homepage.
33
QNO Technology QnoSniff Professional 2.0
In the example above, enter "http://192.168.4.116:80" in the address bar of the browser (the port number is at
the end after the colon)
If the configuration and connection are both correct, the login page will be shown.
Default account is administrator (lower case)
Default password is admin (lower case)
Language selection:
Traditional Chinese
34
QNO Technology QnoSniff Professional 2.0
Simplified Chinese
English
Click OK after selecting the language to go to the QnoSniff Professional Web control panel.
* Please note!
1. If you enter a specific WAN interface in Qno router port range forwarding page, please use the IP address
of the WAN when entering the address link of remote login. If you selected "Any" for the interface, then any
WAN IP can be used for the connection.
2. Contents presented by QnoSniff Professional local installation and web (remote access version) are
identical; the only difference is in the basic configuration settings:
Local installation version can change the remote access port, and web version cannot.
Local installation version can change the database path on the hard drive, and web version cannot.
Local installation version can directly output a portion of data to PDF file, and web version cannot.
35
QNO Technology QnoSniff Professional 2.0
(However, the web version can send out e-mail with data directly converted into PDF file)
36
QNO Technology QnoSniff Professional 2.0
IV. Basic Setup
This chapter includes the basic software setup, such as database path directory, storage device, and
restrictions etc.
Basic configuration includes three sub-menus:
1. Interface configuration
2. Database management
3. Service configuration
The interface configuration is included in the previous chapter.
Database management
37
QNO Technology QnoSniff Professional 2.0
Item
Description
Database Storage Path
Default installation path is on the hard drive partition as the QnoSniff Professional
program. To change the database path directory, please click on the "Browse" button
at the lower right and browse to the desired directory in the popup window.
38
QNO Technology QnoSniff Professional 2.0
* Database size will increase along with time. Make sure there is sufficient hard drive
space to allow the database to grow.
Database reserved for
Database retention period can be set to 1-6 months. Two actions can be configured
for database entries past the retention period.
1.
New entry will overwrite the old entry. Old database entries will not be archived, and
therefore used hard drive space will not be increased.
2.
New entries will not be received nor saved, and old database entries will not be
deleted. The retention period must be reconfigured or reset in order to start
39
QNO Technology QnoSniff Professional 2.0
collecting and saving new data.
3.
If you do not want the database to be interrupted and do not wish to delete old
entries, please choose "0 months" for the retention period to indicate that the
database will not be stopped.
Remaining capacity
1. Size detection and warning for remaining hard drive space:
warning
When the remaining hard drive space for database storage is lower than ___ MB
(200-2048MB), notify the administrator.
2. E-mail file size limitation: To prevent excessive e-mail data quickly taking up and
wasting storage space, the e-mail record size can be restricted to 1-10 MB. If the total
e-mail data (including attachments) exceeds the size limitation, the e-mail will still be
recorded up to the configured data size. Therefore, attachments may be partially cut
away and cannot be properly opened, but the file name will be retained.
3. FTP file size limitation: To prevent excessive FTP data quickly taking up and
wasting storage space, the FTP file size can be restricted to 1-10 MB. If the FTP file
(both uploaded and downloaded) exceeds the size limitation, the FTP transaction will
still be saved up to the configured file size. Therefore, attachments may be partially
cut away and cannot be properly opened, but the file name will be retained.
Enable E-mail alert
After enabling this function, the system will send out an e-mail to notify the
administrator when the remaining storage space is lower than the designated
capacity. In addition, the e-mail report function on each page must also be forwarded
through this SMTP Server. If the SMTP Server is not correctly configured, the e-mail
report function cannot be used.
: Please enter the domain of the SMTP Server (e.g. ms12.hinet.net)
: Communication port for outgoing e-mail (e.g.
: E-mail account (e.g. tony.chen)
40
25)
QNO Technology QnoSniff Professional 2.0
: E-mail password
: E-mail address (e.g. [email protected])
: E-mail subject
41
QNO Technology QnoSniff Professional 2.0
Service Configuration: Configure the account for QQ IM monitoring based on the http (web visits) logging
mode.
HTTP specific website configuration requires detailed records of the website and IP address:
QnoSniff Professional by default only logs the main domain address for http/website/web page visits. For
example, the domain "http://tw.yahoo.com/" will be logged, but pages under the domain will not be shown and
will only be logged as "tw.yahoo.com"
Websites that you need to be assigned for full detailed logging must be included as "Website for detailed
logging / IP" to log the full link address. For example,
http://tw.news.yahoo.com/article/url/d/a/090911/17/1qwgx.html
Enter the main domain name for full detailed logging in the Website/IP field, click "Add " and then "Save" for
the changes to take effect.
IM QQ number:
42
QNO Technology QnoSniff Professional 2.0
QnoSniff Professional supports QQ specific monitoring among IM applications. The QQ accounts and
passwords to be monitored "must" be entered into the system for monitoring and logging of QQ message.
Enter the QQ account/password to be monitored into the blank fields, click "Add " and then "Save" for the
changes to take effect.
For example, enter the following information into the blank fields in order, QQ account is 12355639 with
password 34568989, and the user ID is Sales1, then click "Add " then "Save" to take effect.
43
QNO Technology QnoSniff Professional 2.0
V. System and Authorization Management
This chapter includes the login accounts for QnoSniff Professional system administrator and users, in addition
to system logs.
5.1 Privilege Configuration
Privilege configuration can be applied to a specific "account type" logging into QnoSniff Professional systems,
that restricts the account's access to system logs and charts for different communication protocols.
Privilege type:
Enter the name for the level of account that you wish to assign, for
example Common User, while the administrator account has the
highest level of authorization. The default is set to read/edit
permissions to all logs and charts for all communication protocols,
but cannot be modified or deleted.
44
QNO Technology QnoSniff Professional 2.0
Please note that there are 5 levels of system authorizations, from
high to low: administrator, admin, user, defineuser, and selfdefined. Newly added accounts are self- defined and have the lowest
authorization level compared to the other four types. When modifying
the account type, the user will only be able to change their own and
the lower authorization account levels.
Communication protocol:
As the logging data collected by QnoSniff Professional are mostly
based on communication protocols, access/edit permission and chart
outputs are based on the logging data of various protocols.
* Please note!
Access/edit permission for each communication protocol is as
specified in the Summary Info (communication protocol detailed list).
The chart outputs will also be sorted by the communication protocol,
but the individual access permissions cannot be set. They can only
be set to "All" for the data and charts for access/edit permission
settings.
Privilege configuration:
Access permission for each communication protocol and statistic
chart.
N/A - Cannot read and cannot edit, the user control options will not
be shown.
Read - The data can only be viewed and cannot be deleted/modified,
the e-mail/PDF buttons cannot be used.
Edit - The data can be viewed, deleted, and e-mail/PDF function can
be used.
Add:
Click this option after filling in the account info, the "New user added"
message will popup and the new entry will be added to the list below.
Edit:
To modify the existing account, please click the "Edit" button to the
right of the list entry. The contents will appear in the fields above
ready for modification. Please click "Edit" after the contents are
modified (the "Add" button will change to "Edit" under editing mode)
and the system will prompt if you wish to modify the entry. Click OK
45
QNO Technology QnoSniff Professional 2.0
to complete the modification.
Cancel:
This will clear the data fields you have entered, or cancel the
modification action.
46
QNO Technology QnoSniff Professional 2.0
5.2 User Management
After configuring the privilege level, you can add new accounts to each of the privilege levels as specified in
"Privilege Configuration". The "User Management" accounts are the account/password/language settings that
users use to login to the system. Similarly, based on the registered account level, the user will only be able to
modify their own account information as well as add new or modify accounts with lower authorization levels.
The highest level administrator can add other administrator level accounts, while non-administrator users
cannot use this function.
Account:
Enter the account name for login
Password:
Enter the login password for this account
Re-key password:
Enter the same password for confirmation
Privilege:
Choose the account level from the pull down menu. Default levels include
administrator, admin, user, and define user. Newly added or modified account
levels will also show up in this pull down menu for selection.
47
QNO Technology QnoSniff Professional 2.0
E-mail:
Enter the e-mail address for the account and for receiving the "e-mail"
notification.
Language:
Default system language as Traditional Chinese, Simplified Chinese, or English
after the user is logged in.
Add:
Click this option after filling in the account info, the "New user added" message
will popup and the new entry will be added to the list below.
Edit:
To modify the existing account, please click the "Edit" button to the right of the
list entry. The contents will appear in the fields above ready for modification.
Please click "Edit" after the contents are modified (the "Add " button will change
to "Edit" under editing mode) and the system will prompt if you wish to modify
the entry. Click OK to complete the modification.
Cancel:
This will clear the data fields you have entered, or cancel the modification
action.
* Please note!
By default, the preset "administrator" and "admin" login accounts include dummy e-mail addresses. Please
remember to change to valid e-mail addresses to be able to receive the e-mail notification and report.
48
QNO Technology QnoSniff Professional 2.0
5.3 User log
User logs will show all user login, logout, and modification information etc. Only the administrator and admin
level users on QnoSniff Professional will see the user log list after logging in. Other user levels will not be able
to see the user logs.
PDF:
Converts the logs into PDF file for archiving or reference. Please click the "PDF" button to export.
Clear:
If the logs are no longer needed, click the "Clear " button to delete all logs.
_/_ page, _ records/page: Customize the number of entries on each page and directly jump to another page.
49
QNO Technology QnoSniff Professional 2.0
VI. User Group Configuration
This chapter includes the group management in QnoSniff Professional. User groups are convenient in
centralized management as we would not need to set each user one-by-one, and changes can be applied to
all users within the group. You can also assign groups based on the network usage situations, and take
advantage of QnoSniff Professional to better match the behaviors of intranet users.
6.1 Department Setup
Department name:
Name for the specific department, e.g. Sales, RD.
Description:
Brief description and notes on the department for identification.
50
QNO Technology QnoSniff Professional 2.0
Monitor:
Monitoring and logging for the department.
Protocol:
Departments will be monitored and logged by QnoSniff Professional on the
specified communication protocols. To disable monitoring or if the department
uses confidential information, e.g. higher management e-mail or IM messages,
the exception items can be selected.
Add:
Click this option after filling in the account info, the "New user added" message
will popup and the new entry will be added to the list below.
Edit:
To modify the existing account, please click the "Edit" button to the right of the list
entry. The contents will appear in the fields above ready for modification. Please
click "Edit" after the contents are modified (the "Add " button will change to "Edit"
under editing mode) and the system will prompt if you wish to modify the entry.
Click OK to complete the modification.
Cancel:
This will clear the data fields you have entered, or cancel the modification action.
51
QNO Technology QnoSniff Professional 2.0
6.2 User List
The user list is for expanding the user groups and users. The users to be monitored by QnoSniff Professional
must be added into the user list.
Username:
Enter the name of the user, e.g. SalesPC1.
IP address: Enter the IP address of the user, e.g. 192.168.3.100
Either manually or from the pull down menu of automatically learned list of IP.
MAC:
Enter the MAC address of the user, e.g. 00-1A-B6-02-3F-9A (please note the
format with "-" spacing)
Department:
Select the preset group to add the user from the pull down menu.
52
QNO Technology QnoSniff Professional 2.0
Monitor:
Monitoring for this single user.
Please note that even if the user belongs to a group that is currently being
monitored, setting the monitoring option for this single user to "No" (no
monitoring) will exclude the user from monitoring. This setting is applied to a
single user only.
IP-MAC learning:
If the intranet user list is readily available then it can be manually entered into
the system, but will still require time and labor. QnoSniff Professional includes
the IP-MAC automatic learning tool that can easily do the job for you.
Click the IP-MAC learning button and another window will popup to display
the intranet user information QnoSniff Professional automatically obtained,
including the computer name (or the MAC address will be shown), IP address,
and MAC address. The username can be filled in and the department can be
selected from the pull down menu. Specify whether the user is to be
monitored and when all users have been configured, checkmark "All" and click
"Save" to finish. This completes the grouping, monitoring, username setup for
intranet users in one single process.
If any user information is missing in the window popup, click the "Refresh"
button to run the learning process again.
* Please note!
Users that have been setup and added to the user list will not appear in the
IP-MAC learning list. If the user IP address is changed after being added to
the list, the original MAC address will be used to automatically update the new
IP address for the existing user.
53
QNO Technology QnoSniff Professional 2.0
User list added
* Please note!
IP-MAC automatic learning process is based on the ARP inquiries sent to all user computers within the same
subnet of the intranet network. If your intranet PC is behind a firewall, the user information might not be
detectable by QnoSniff Professional.
54
QNO Technology QnoSniff Professional 2.0
* The first timestamp for monitoring is when the user is added to the list and the monitoring option is set to
"Yes".
55
QNO Technology QnoSniff Professional 2.0
VII. System Resource and Analysis
This chapter includes the router information as monitored by the QnoSniff Professional enabled PC, including
CPU usage, memory usage, and upstream/downstream data for each WAN interface on the router.
7.1 CPU usage
Regardless of the CPU usage, memory usage, or WAN traffic flow on the router, the SNMP function must be
enabled on the router in order for QnoSniff Professional to correctly capture the information. Go to the router
management page "System Tool" => "SNMP" and make sure that SNMP is enabled.
Return to the system resource page of QnoSniff Professional. The left hand side of the CPU usage page
56
QNO Technology QnoSniff Professional 2.0
shows the daily report, weekly report, monthly report and custom report. The calendar is shown on the right
and can be directly clicked on to show the line chart with the max, min,
average values within the time period shown under the chart. The calendar report is as described below:
[1] Select daily report: Select the date on the calendar to indicate the CPU usage for the day (0 ~ 24 hr). For
example, selecting 9/29/09 indicates the CPU usage record for the day on 9/29/09.
57
QNO Technology QnoSniff Professional 2.0
[2] Select weekly report: Select the date on the calendar to indicate the CPU usage for the week the date falls
within. For example, selecting 9/14/09 indicates the CPU usage record for the week between 9/14/09 and
9/20/09.
58
QNO Technology QnoSniff Professional 2.0
[3] Select monthly report: Select the date on the calendar to indicate the CPU usage for the month the date
falls within. For example, selecting 20099/29 indicates the CPU usage record for the month of September
2009.
59
QNO Technology QnoSniff Professional 2.0
[4] Select custom report: Select a period of time for data lookup between 2 two calendar months in 24-hr
format up to 32 days. The custom search criteria (non-default) will require longer processing time to present
the data.
60
QNO Technology QnoSniff Professional 2.0
Please note: Please click the "Search" button after selecting the time period from above. As the data will only
be updated when the page is first loaded, please click the "Search" button again if the time period has been
changed. The local installation version supports PDF and e-mail functions, and the web version supports
e-mail function only.
61
QNO Technology QnoSniff Professional 2.0
7.2 Memory usage
This indicates the system memory usage on the router presented in percentage.
Selection of time period is identical with the CPU usage and can be customized to review the router memory
62
QNO Technology QnoSniff Professional 2.0
usage within different time periods.
7.3 WAN Traffic
WAN traffic includes upstream and downstream data. You can select the specific WAN interface to monitor
and display the traffic flow.
63
QNO Technology QnoSniff Professional 2.0
The average, max, min traffic data (within the designated time period) for the selected WAN interface will be
shown at the bottom.
64
QNO Technology QnoSniff Professional 2.0
VIII. Summary
Core functions of QnoSniff Professional - Monitoring and logging of communication protocols.
Communication protocols supported by QnoSniff Professional include the following:
(1) Web browsing (HTTP)
(2) e-mail (SMTP and POP3)
(3) File transfer (FTP)
(4) Point to point downlad (P2P)
(5) TELNET
(6) Instant messaging (IM)
In the following section we will introduce the monitoring and logging features for various services and traffic
data.
65
QNO Technology QnoSniff Professional 2.0
8.1 Real-time Status
The real-time status includes network traffic for all users on the same day; therefore, the data will only be
accumulated for one single day. Logging into the page the next day will present you with the intranet user
traffic data for the next day.
This list contains the following traffic data for different communication protocol of each user, including instant
messaging logs, web page browsing, FTP, e-mail records, Telnet logs and traffic flow (bandwidth ratio). The
hyperlink is available for each communication protocol that links to the detailed records for the individual user
as shown below (using FTP as example).
66
QNO Technology QnoSniff Professional 2.0
67
QNO Technology QnoSniff Professional 2.0
8.2 Web information
Web browsing is the web page browsing history of the user, and the http communication protocol is being
monitored.
Search Rule 1
Select the date/time range to lookup data.
Date/Time:
Search Rule 2, Search
Select the search filters below
Rule 3:
IP address, user name, computer name/MAC address, website address
* Please note!
If all three of the search filters are specified for the real-time status and the
communication protocol lists, the search result must match all three filter
criteria; if only two are specified, both of the search filters must be matched;
if only one is specified, then only the single search filter must be matched.
Search:
After specifying the search filter, click "Search" button to update the data
list.
E-mail:
Each login account will come with a specific e-mail inbox (from "System and
authorization management" => "Privilege configuration") that the e-mail
function can send current page you are viewing in the PDF format.
68
QNO Technology QnoSniff Professional 2.0
Delete:
Put a checkmark in the box to the left of each entry in the list to set for
deletion.
PDF (only available on
If logging in from the PC with QnoSniff Professional installed, click on the
local installation version):
"PDF" button to convert the page into a PDF file to be saved on another
hard drive or directory.
Previous 10 pages:
Click this button to jump back 10 pages. For example, if you are at 201st
data entry with 10 entries shown on each page, click on the "Previous 10
pages" button to jump to the page with the 101st data entry.
Previous page:
Go to the previous page on the list.
Next page:
Go to the next page on the list.
Next 10 pages:
Click this button to jump forward 10 pages. For example, if you are at 1st
data entry with 10 entries shown on each page, click on the "Next 10
pages" button to jump to the page with the 101st data entry.
Go to page __
Specify the number of entries shown on each page for 10, 30, 50, 100
entries; or use the pull down menu to directly jump to the page number to
Every page _
records
view.
Data list columns
Date / time:
User access timestamp
IP address:
User IP
Username:
Name of user
Host name/ MAC:
Name or MAC address of the user's computer (the MAC address will be
shown if the computer name cannot be resolved)
Website:
Name of website the user visited
Website IP Address:
The IP address of the website the user visited
69
QNO Technology QnoSniff Professional 2.0
Record:
Number of times the website is visited (increments by 1 count every 15
minutes)
* Please note!
Even if the website domain name is the same (e.g. tw.yahoo.com), the
different corresponding IP address will count towards a separate data entry;
The user visit count for a single website will increment by 1 every 15
minutes. In other words, all visits to the same website (including the domain
name and full web address) within the 15 minutes will count as 1 visit.
70
QNO Technology QnoSniff Professional 2.0
8.3 E-mail information
The user e-mail records are monitored by the standard SMPT and POP3 communication protocols.
Search rule 1
Date/
Select the date/time range to lookup data.
Time:
Search rule 2,
Select the search filters below
Search rule 3:
IP address, username, computer name / MAC address, sender e-mail address,
recipient e-mail address, subject of e-mail
Search:
After specifying the search filter, click "Search" button to update the data list.
E-mail:
Each login account will come with a specific e-mail inbox (from "System and
Authorization Management" => "User Management") that the e-mail function can
send current page you are viewing in the PDF format.
Delete:
Put a checkmark in the box to the left of each entry in the list to set for deletion.
PDF (only available on
If logging in from the PC with QnoSniff Professional installed, click on the
local installation version):
"PDF" button to convert the page into a PDF file to be saved on another hard
drive or directory.
71
QNO Technology QnoSniff Professional 2.0
Previous 10 pages:
Click this button to jump back 10 pages. For example, if you are at 201st data
entry with 10 entries shown on each page, click on the "Previous 10 pages"
button to jump to the page with the 101st data entry.
Previous page:
Go to the previous page on the list.
Next page:
Go to the next page on the list.
Next 10 pages:
Click this button to jump forward 10 pages. For example, if you are at 1st data
entry with 10 entries shown on each page, click on the "Next 10 pages" button to
jump to the page with the 101st data entry.
Go to page ___
Specify the number of entries shown on each page for 10, 30, 50, 100 entries; or
use the pull down menu to directly jump to the page number to view.
Every page _ records
Data list columns
Date / time:
Timestamp for the e-mail
IP address:
Sender/recipient IP address for the e-mail
Username:
Sender/recipient username for the e-mail
Host name/ MAC:
Sender/recipient computer name or MAC address for the e-mail (the MAC
address will be shown if the computer name cannot be resolved)
Sender:
Sender of e-mail
Recipient:
Recipient of e-mail
Subject:
Subject of e-mail
Size:
Size of e-mail (including body and attachments)
Downloading:
"Outlook Open" button is used to open e-mail messages with Outlook or
Windows Mail. The e-mail can be first downloaded and saved to the local drive,
then opened in Outlook to open/save the attachment file.
* Please note!
If remotely logged in from the web or directly opening the e-mail by clicking
"Outlook Open", the mail will be displayed in the default html application. The
example below uses Firefox to directly open and display the e-mail message.
(Select the language encoding from the menu in the upper right side for English,
Traditional Chinese, Simplified Chinese)
72
QNO Technology QnoSniff Professional 2.0
Content:
"Content" button opens the e-mail with the built-in application of QnoSniff
Professional, and therefore can only be displayed in pure text format. The
attachment filename will only be shown and cannot be opened or saved. This
method is more suitable for quickly viewing e-mail messages with pure text
contents.
The upper right menu can be used to select between Traditional Chinese,
Simplified Chinese, and UTF-8 encoding to display the e-mail contents. If your
message is displayed in random characters due to a different character
encoding used, please switch to another language type.
73
QNO Technology QnoSniff Professional 2.0
74
QNO Technology QnoSniff Professional 2.0
8.4 FTP information
File transfer in QnoSniff Professional refers to the standard FTP protocol including active and passive modes.
Other encrypted type file transfer protocols (e.g. SFTP, FTPS, FTPES etc.) are not supported by QnoSniff
Professional and cannot be monitored.
Search rule 1
Date/
Select the date/time range to lookup data.
Time:
Search rule 2
Select the search filters below
Search rule 3:
IP address, username, computer name / MAC address, FTP server, FTP
account, direction, file name
Search:
After specifying the search filter, click "Search" button to update the data
list.
E-mail:
Each login account will come with a specific e-mail inbox (from "System and
Authorization Management" => "User Management") that the e-mail
function can send current page you are viewing in the PDF format.
Delete:
Put a checkmark in the box to the left of each entry in the list to set for
deletion.
PDF (only available on local
If logging in from the PC with QnoSniff Professional installed, click on the
installation version):
"PDF" button to convert the page into a PDF file to be saved on another
hard drive or directory.
75
QNO Technology QnoSniff Professional 2.0
Previous 10 pages:
Click this button to jump back 10 pages. For example, if you are at 201st
data entry with 10 entries shown on each page, click on the "Previous 10
pages" button to jump to the page with the 101st data entry.
Previous page:
Go to the previous page on the list.
Next page:
Go to the next page on the list.
Next 10 pages:
Click this button to jump forward 10 pages. For example, if you are at 1st
data entry with 10 entries shown on each page, click on the "Next 10
pages" button to jump to the page with the 101st data entry.
Go to page __
Specify the number of entries shown on each page for 10, 30, 50, 100
entries; or use the pull down menu to directly jump to the page number to
Every page _ records
view.
Data list columns
All:
Put a checkmark in this box to select all entries on this page to be marked
for deletion.
Date / time:
Time and date of the FTP upload/download record.
IP address:
Intranet IP address of the FTP upload/download record.
Username:
Intranet username of the FTP upload/download record.
Host name / MAC:
Intranet computer name or MAC address of the FTP upload/download
record.
FTP server:
FTP server IP address of the FTP upload/download record.
FTP account:
FTP login account of the FTP upload/download record.
Direction:
Direction (upload or download) of the FTP upload/download record.
File name:
Name of target file of the FTP upload/download record. Click on the
hyperlink to save or directly open the file with the designated program.
* Please note!
If the "Basic Setup" => "Database management" => "File size limit" has
been set (e.g. 10MB), target files for FTP upload/download larger than the
size limit cannot be completely archived to the database. The database will
only archive up to the preset size limit (the original file size will still be
displayed in the file size column) and therefore attempts to open the file
may fail due to this size limit resulting in an incomplete file.
76
QNO Technology QnoSniff Professional 2.0
File size (KB):
Size of target of the FTP upload/download record.
* Please note!
The database will only save the FTP files up to this size limit and discards
the excess data. However, the original file size will be saved for calculating
the actual bandwidth flow.
77
QNO Technology QnoSniff Professional 2.0
8.5 P2P information
QnoSniff Professional supports monitoring and logging for common P2P sharing programs, and can
determine the transmission protocol and bandwidth flow used by these P2P programs. QnoSniff Professional
may include further updates for identifying various P2P software and transmission protocols.
Search rule 1
Date/
Select the date/time range to lookup data.
time:
Search rule 2:
Select the search filters below
IP address, username, computer name / MAC address
Search:
After specifying the search filter, click "Search" button to update the data
list.
E-mail:
Each login account will come with a specific e-mail inbox (from "System and
Authorization Management" => "User Management") that the e-mail
function can send current page you are viewing in the PDF format.
Delete:
Put a checkmark in the box to the left of each entry in the list to set for
deletion.
PDF (only available on local
If logging in from the PC with QnoSniff Professional installed, click on the
installation version):
"PDF" button to convert the page into a PDF file to be saved on another
hard drive or directory.
78
QNO Technology QnoSniff Professional 2.0
Previous 10 pages:
Click this button to jump back 10 pages. For example, if you are at 201st
data entry with 10 entries shown on each page, click on the "Previous 10
pages" button to jump to the page with the 101st data entry.
Previous page:
Go to the previous page on the list.
Next page:
Go to the next page on the list.
Next 10 pages:
Click this button to jump forward 10 pages. For example, if you are at 1st
data entry with 10 entries shown on each page, click on the "Next 10
pages" button to jump to the page with the 101st data entry.
Go to page __
Specify the number of entries shown on each page for 10, 30, 50, 100
entries; or use the pull down menu to directly jump to the page number to
Every page _ records
view.
Data list columns
All:
Put a checkmark in this box to select all entries on this page to be marked
for deletion.
Date / time:
Time and date for the recorded action determined as P2P
upload/download.
IP address:
Intranet IP address for the recorded action determined as P2P
upload/download.
Username:
Intranet username for the recorded action determined as P2P
upload/download.
Host name / MAC:
Intranet computer name or MAC address for the recorded action
determined as P2P upload/download.
Upload speed (KB/S):
Average upload speed for the recorded action determined as P2P
upload/download.
Download speed (KB/S):
Average download speed for the recorded action determined as P2P
upload/download.
Uploaded size (KB):
Uploaded data size for the recorded action determined as P2P
upload/download.
Downloaded size (KB):
Downloaded data size for the recorded action determined as P2P
upload/download.
79
QNO Technology QnoSniff Professional 2.0
8.6 Telnet information
QnoSniff Professional supports the standard Telnet communication protocol. QnoSniff Professional currently
does not support non-standard nor encrypted protocols, e.g. Telnet connection through other communication
ports or SSH connections.
Search rule 1, Date/ time:
Select the date/time range to lookup data.
Search rule 2
Select the search filters below
Search rule 3:
IP address, username, computer name / MAC address, website
IP address, website name, Telnet account
Search:
After specifying the search filter, click "Search" button to update
the data list.
E-mail:
Each login account will come with a specific e-mail inbox (from
"System and Authorization Management" => "User
Management") that the e-mail function can send current page
you are viewing in the PDF format.
Delete:
Put a checkmark in the box to the left of each entry in the list to
set for deletion.
80
QNO Technology QnoSniff Professional 2.0
PDF (only available on local installation
If logging in from the PC with QnoSniff Professional installed,
version):
click on the "PDF" button to convert the page into a PDF file to be
saved on another hard drive or directory.
Previous 10 pages:
Click this button to jump back 10 pages. For example, if you are
at 201st data entry with 10 entries shown on each page, click on
the "Previous 10 pages" button to jump to the page with the
101st data entry.
Previous page:
Go to the previous page on the list.
Next page:
Go to the next page on the list.
Next 10 pages:
Click this button to jump forward 10 pages. For example, if you
are at 1st data entry with 10 entries shown on each page, click
on the "Next 10 pages" button to jump to the page with the 101st
data entry.
Go to page _
Specify the number of entries shown on each page for 10, 30, 50,
100 entries; or use the pull down menu to directly jump to the
Every page _ records
page number you wish to view.
Data list columns
All:
Put a checkmark in this box to select all entries on this page to be
marked for deletion.
Date / time:
Time of Telnet record
IP address:
Intranet IP address for the specific Telnet record
Username:
Intranet username for the specific Telnet record
Host name / MAC:
Intranet computer name or MAC address for the specific Telnet
record
Website IP address:
Destination IP address for the specific Telnet record
Address:
Destination address or domain name for the specific Telnet
record
Telnet account:
Login account for the specific Telnet record
Detailed contents for the specific Telnet record; click this button
Content
:
to show the information below
81
QNO Technology QnoSniff Professional 2.0
Website IP address: Destination IP address for Telnet remote login
Address: Destination address or domain name for Telnet remote login
Date / time: Time and date for the Telnet login record
Content: Telnet login information
Encoding: Switch between Traditional Chinese, Simplified Chinese, and UTF-8
82
QNO Technology QnoSniff Professional 2.0
8.7 IM information
QnoSniff Professional supports the following applications for monitoring and logging:
[1] MSN (Live Message / 8.5 / 8.0)
[2] QQ (the user QQ account/password must be entered into "Basic Setup" => "Service Setup" => "IM: QQ
number" to be able to monitor and log the chatting contents. However, not all "TM" versions of QQ can be
monitored)
[3] Yahoo Message
[4] Google Talk
Search rule 1
Date/
Select the date/time range to lookup data.
time:
Search rule 2
Select the search filters below
Search rule 3:
IP address, username, computer name / MAC address,user
account, peer account, IM type
83
QNO Technology QnoSniff Professional 2.0
Search:
After specifying the search filter, click "Search" button to update the
data list.
E-mail:
Each login account will come with a specific e-mail inbox (from
"System and Authorization Management" => "User Management")
that the e-mail function can send current page you are viewing in
the PDF format.
Delete:
Put a checkmark in the box to the left of each entry in the list to set
for deletion.
PDF (only available on local installation
If logging in from the PC with QnoSniff Professional installed, click
version):
on the "PDF" button to convert the page into a PDF file to be saved
on another hard drive or directory.
Previous 10 pages:
Click this button to jump back 10 pages. For example, if you are at
201st data entry with 10 entries shown on each page, click on the
"Previous 10 pages" button to jump to the page with the 101st data
entry.
Previous page:
Go to the previous page on the list.
Next page:
Go to the next page on the list.
Next 10 pages:
Click this button to jump forward 10 pages. For example, if you are
at 1st data entry with 10 entries shown on each page, click on the
"Next 10 pages" button to jump to the page with the 101st data
entry.
Go to page _
Specify the number of entries shown on each page for 10, 30, 50,
100 entries; or use the pull down menu to directly jump to the page
Every page _ records
number you wish to view.
Data list columns
Select All:
Put a checkmark in this box to select all entries on this page to be
marked for deletion.
Date / time:
Timestamp of the specific IM conversation
IP address:
Intranet IP address for the specific IM conversation
Username:
Username for the specific IM conversation
Host name / MAC:
Computer name for the specific IM conversation
Local Account:
User account on the IP / computer listed above for the specific IM
conversation
84
QNO Technology QnoSniff Professional 2.0
Peer account:
The peer account for the specific IM conversation
IM type:
IM type of either MSN, QQ, YahooMessage, or Google Talk.
Record:
The total number of messages to/from for the specific IM
conversation. Click on the number hyperlink and the detailed IM
conversation will popup (as shown below).
* The account info will be shown in the grayed out portion in the example above.
The data can be sorted by the individual columns of date/time, IP address, username, host name / MAC
address, IM type, or logs.
85
QNO Technology QnoSniff Professional 2.0
IX. Statistics
This chapter includes the traffic statistics function supported by QnoSniff Professional, including traffic report,
department traffic ranking list, user traffic ranking list. The intranet user and application data can be presented
by department, communication protocol, and within a custom time period. The bandwidth report and charts
will be updated every 15 minutes with new statistics data, and will not change within the 15-minute period.
9.1 Statistic report
This report includes the statistical data and charts for traffic data of various communication protocols.
From the "Traffic Flow" list at the left, select "Total" to show the statistics and percentage from total traffic flow
for each individual communication protocol within the specified time period. The icon is displayed at the right
hand side. After selecting the time period and the communication protocol, click on the "Search" button to
update the information.
86
QNO Technology QnoSniff Professional 2.0
If the single communication protocol is selected (e.g. e-mail) instead of "Total", the traffic flow list at the left will
change into the x-y chart with traffic flow vs. each time period. If daily report is selected, the chart is presented
in 1-hour increments between 0-23 hours; if weekly report is selected, the chart is presented in 6-hour
increments up to 7 days; if monthly report is selected, the chart is presented in daily increments from 1st to
30th or 31st.
87
QNO Technology QnoSniff Professional 2.0
E-mail, PDF (only available on local installation version) functions are applicable to the traffic flow statistic lists
for direct conversion of the report/chart into PDF file, or directly e-mailing the PDF file to the administrator.
88
QNO Technology QnoSniff Professional 2.0
9.2 Department ranking
The traffic by departments is mainly sorted by traffic flow and communication protocol, for example, instant
messaging traffic for all departments ranking from highest to lowest.
You can specify the time period, communication protocol types to display the traffic statistics for all
departments. To view the detailed traffic data for all users under the department for a specific communication
protocol, click on the hyperlink for the department name (e.g. Sales) to show all users. Specify the
communication protocol (e.g. E-mail) to show the traffic ranking, volume, and percentage etc. (as below).
89
QNO Technology QnoSniff Professional 2.0
9.3 User ranking
User ranking is sorted by traffic flow for intranet users. You can also choose time period, department, and
communication protocol to view different user ranking.
Access to the page for the first time will rank the traffic by users and for all communication protocols, including
the actual traffic flow (MB) and the percentage. To view another selection or another communication protocol,
use the pull down menu at the right to filter the results. Please remember to click the "Start Analysis" button to
update the results with the new search filter.
90
QNO Technology QnoSniff Professional 2.0
X. Logout
After using QnoSniff Professional, click "Logout" menu to quit the control panel main page.
Logging out from a remote session will quit the web page. However, logging out from the PC with QnoSniff
Professional local installation version will quit from the control panel main page, while the QnoSniff
Professional icon will still be running in the system tray at the lower right corner. QnoSniff Professional is
running in the background gathering data (green icon indicates connected to the router, gray icon indicates
disconnection with the router).
To completely shut down QnoSniff Professional including the data gathering function, right click on the system
tray icon and select "Exit Monitor" from the context menu. QnoSniff Professional will ask again if you wish to
shut down the entire QnoSniff Professional program, click OK and the shut down procedure will begin. The
system tray icon will go away after 10-15 seconds and the QnoSniff Professional program is terminated.
Please note: If QnoSniff Professional is completely shut down including the data gathering function, no data
will be accumulated during this time. QnoSniff Professional database will also not have any data, and
therefore the statistic data will not be available for during this time period.
Right click on the system tray icon to show the context menu:
1. Information: QnoSniff Professional copyright info, NIC being monitored, QnoSniff Professional software
version, and the current storage data size.
2. Login System: Click on this to successfully login to QnoSniff Professional control panel.
3. Enable/Disable Auto: Enable or disable automatic launch of QnoSniff Professional in the background with
system boot up. If this option is enabled for the first time, QnoSniff Professional will automatically launch at
the next system restart.
4. Exit Monitor: Quit and completely shut down QnoSniff Professional including the data gathering function.
91
QNO Technology QnoSniff Professional 2.0
QnoSniff Professional will ask again if you wish to shut down the entire QnoSniff Professional program, click
OK and the shut down procedure will begin. The system tray icon will go away after 10-15 seconds and the
QnoSniff Professional program is terminated.
92
QNO Technology QnoSniff Professional 2.0
XI. Uninstall QnoSniff Professional
To uninstall QnoSniff Professional, go to "Programs" and find the QnoSniff directory. Click on "Uninstall"
under the directory as shown to the right
to begin the uninstall procedure. Alternatively, go
to "Control Panel" => "Add/remove Programs" and select QnoSniff to initiate the uninstall shield.
WinPcap will first be uninstalled as shown below. This step might be skipped if uninstalling from the Control
Panel, but the components will be fully uninstalled using both methods.
Click "Uninstall" to uninstall the WinPcap component and the completed screen is as below. Click "Finish" to
continue with uninstall and the popup window will ask if you wish to uninstall the main program. Click "Yes" to
continue.
93
QNO Technology QnoSniff Professional 2.0
Collecting information for uninstallation process
The software maintenance screen will popup as below; please select the "Remove (R)" option and click
"Next".
94
QNO Technology QnoSniff Professional 2.0
Click "Yes" to confirm and begin the uninstall process for the main program.
After the uninstall process is finished, the popup window will ask if you want to restart the system. If there are
other incomplete tasks that are not saved, you can choose to restart later. Or the system can be restarted
immediately if there are no other concerns. Please note that the uninstall procedure will be complete after the
system has restarted.
95
QNO Technology QnoSniff Professional 2.0
After the system has restarted, please locate the previous install path for QnoSniff Professional (e.g.
C:\QnoSniff
) to view the database files saved in the directory, as shown below.
If QnoSniff Professional is reinstalled at a later time to the same directory path, these database files can still
be linked to the QnoSniff Professional control panel for viewing and filtered search. If the database files are no
longer needed, the entire QnoSniff directory can be deleted to free up available hard drive space.
96