1
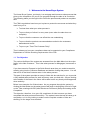
Home Buyer System
User Guide
Sections
1. Welcome to the Home Buyer System
1.1 The Objective
1.2 Navigation
2. The Main Menu
2.1
2.2 New Customer
2.3
2.4
2.5
2.6
2.7
1
1
2
3
Quick Search
2.2.1
2.2.2
2.2.3
2.2.4
2.2.5
2.2.6
2.2.7
2.2.8
2.2.9
2.2.10
2.2.11
2.2.12
Page
The Sales Process
Lenders KFI
Attach Files
Insurance
Aims & Views
Existing Policies
Income and Expenditure
Needs Analysis Family
Needs Analysis Mortgage
Ideal World
Accepted Solution
Summary
Budget Planner
Notes
Checklist
Product Confirmation
Progress Checklist
5
8
8
20
21
24
25
26
27
28
29
30
31
32
32
33
3
35
37
3. Customer Database
37
4. Repayment Calculator
39
5. Mortgage Easy Finder
41
6. Exit
44
7. Latest Schemes
44
8. Compliance Upload
45
9. Industry News
46
10. Tests
46
11. Message Board
47
12. Broadcast Messages
47
13. Return To Main Menu, Save and Notes
48
14. Conclusion of The Overview
49
APPENDIX
1. Setting Up or Altering Your System
1.1
1.2
1.3
1.4
1.5
1.6
1.7
General
Fixed Costs
Network/Locum Details
Advanced
IDD Default Wording Sections 4 & 5
Insurance
Access Codes
2. Adverse Credit
2.1
2.2
2.3
2.4
2.5
2.6
CCJ Details
Repossession Details
Arrears Details
Defaults Details and Credit Card/Loan Arrears
Bankruptcies
IVA’s
50
50
52
53
53
54
55
55
57
57
57
57
57
58
58
3. Cloning Customers
58
4. Product Missing From Search
61
5. Cost Details Screen Facilities
64
5.1 On Column
5.2 Add Mort
5.3 Fees
6. Accessories
6.1
6.2
6.3
6.4
6.5
6.6
6.7
6.8
Modify Loaded Scheme
Loan Calculator
Rate Loading
Rate Override
View Mortgage Information
Batch Print
Repayment Schedule
Attached Documentation
65
65
66
68
69
69
69
70
70
70
71
71
1. Welcome to the Home Buyer System
The Home Buyer System, put simply, is a mortgage and insurance sales process that
picks up the compliance for you as you progress through the sale to its conclusion.
The following takes you through how to follow the process and produce a compliant
sale.
The FSA’s regulations have been put in place to protect the consumer and what they
want from you is:
To show them what your sales process is
To prove that you follow it in every case (even when the sale does not
complete)
To prove that the customer can afford the new undertaking
To prove that the products recommended are suited to the customers
demands and needs
To prove you “Treat The Customer Fairly”
Then it shows you how your compliance data can be exported to your Compliance
Department to fulfil the checking requirements of the FSA.
1.1 The Objective
The various facilities of the system are accessed from the Main Menu but the major
facility is the New Customer. This is the sales process for Mortgages, Insurances or
both.
If you have saved a Prospect in the Quick Search area then you would access this
area by going into the Customer Database and double clicking that person. You will
then arrive in the New Customer area i.e the sales process.
This part of the system provides an easy to follow tick box solution for you to provide
a fully audited sales process for each and every case you deal with. Anyone looking
at the details of the case in the future will be able to see very clearly what happened,
when and why.
Below is an example of a finished case. As you progress through the system by
clicking the Next button so the sales process will begin to build going from left to right
on the Tabs, starting with IDD (Initial Disclosure Document) Setup and ending at the
Completion.
The objective, therefore, is to get a full compliment of ticks to ensure you have
completed the sales process successfully. The system knows that not all cases go to
completion, so it is only looking to make sure the requisite number of ticks are
showing, for the stage it has reached.
1
As you complete each stage of the sales process so you will get a tick on the boxes
(IDD to PC) at the top of the screen which provide three functions:
To show ticks if they have been done and crosses if they have not
To show you the dates they were produced
To show a history if you have printed the document more than once
The facility to Print or Re-Print them
To access this you click the grey arrow on the box and the facilities drop down for
you to click on.
1.2 Navigation
To progress through the system you click the Next button at the bottom of each page.
As you move forward so the next Tab will appear. So for example as you click next
after completing the IDD Setup, the Factfind Tab will appear.
Where the Tab has several sections, like the Factfind and Insurance then the
sections will be down the left hand side of the screen and when you click Next it will
go down the Tabs until it reaches the end. Then it will go across again on the top
Tabs.
If you want to go back a Tab you click the Back button. If you want to go to a Tab
then you just click the Tab you require.
2
2. The Main Menu
When you start the system this is what you will see – we have called it the “Main
Menu” and as the name suggests this is where all the main functions can be
accessed.
In the bottom left hand corner is a “Status” box which records the details of what
version you are running, when you last downloaded your compliance data, when you
last updated the mortgage information and so on.
Everything works from the Main Menu and once you go into any of the items on the
menu you will be returned here when you close that section. The buttons are:
1. Quick Search
2. New Customer
3. Customer Database
4. Repayment Calculator
5. Mortgage Easy Finder
6. Exit
7. Latest Schemes
8. Export Compliance
9. Professional Development
3
10. Tests
11. Message Board
12. Broadcast Messages
The following explains each of the functions of the “Main Menu” buttons:
4
2.1 Quick Search
When you click the Quick Search button you will see this screen:
You can enter whatever you want to and click the “Start Search” button. If you wish
to override some of the key costs or add them, you can enter them on the far right
hand side of the screen. These include, Valuation Fee, Advisor Fee etc.
Also if you know what the loan to value is going to be just click the Loan Calc button
above the input area and type it in.
NB - if you start a search and then realise you have forgotten something click
the “Abort” button. This will immediately stop the search and allow you to
make changes and start again.
The Search Results come up as shown in the next screenshot:
5
By clicking on a product in the search results you will be given the criteria on the
Tabs and the cost details on the right.
If you want to refine or change the search you can either click the Criteria Tab and go
back and make changes, or “Right Click” the details, which will give you this option to
make changes.
6
You can produce an IDD from this screen, print a Factfind, a Budget Planner,
Insurance sales process document and most importantly produce as many KFI’s as
you need.
NB All KFI’s produced in the Quick Search area will carry a warning to the
customer explaining that they are given on an illustrative basis only and
therefore, does not constitute advice being given
Also you have the opportunity to save the details either as a customer, which then
allows you to go into the Compliance, should you be in a position to do so, or save
them as a Prospect. This simply saves all you have entered and puts it in the
database for when you next need to work on it.
If you do not wish to save at all, you can click the Close button to go back to the Main
Menu.
7
2.2 New Customer
2.2.1 The Sales Process
This area gives you the option to enter a new customer if you have not saved them
through the Quick Quote.
It also allows you to set the customer up as being a mortgage only customer (i.e you
will not be doing insurances with them) by clicking the box next to Mortgage.
Alternatively, you can set them up as an Insurance only customer, by leaving
Mortgage unticked and ticking Insurance. Or of course tick both, to do both.
When you click the Continue button you will find that all subsequent screens are set
up in accordance with what you have selected here. So for example if you ticked
Insurance then the screens that follow will not have any reference to Mortgages.
If you have ticked both, which is likely to be the most common occurrence, then it will
take you straight into the next stage, which is the Factfind:
8
You will also find that instead of having to remember to print documents the system
asks you if you want to print them as you progress through the various stages.
Alternatively, if you choose not to print a Document, all you have to do when you do
want to print it, is click the name of it at the top of the screen and this will give you a
drop down menu. This has “Print Now” as an option if you click it you can print it or
batch it if you would prefer.
To progress through the Factfind you complete the details on the screen and then
click the Next button to continue. To go back a screen, click Previous and to go to a
specific screen, click on its Tab.
A very helpful feature here is that you can access the Quick Search facility from any
of the Factfind pages. We felt that during the course of conducting a factfind you
may want to see what effect information you have taken has on your customers’
options.
As you complete each screen of the Factfind there is a box titled “Section Complete”
if you have fully completed this screen you can click this. By doing this the name of
that section on its Tab becomes underlined to make it easy you to identify where
information may be missing from when you come back to the Factfind at a later date,
9
The final Tabs (Tenure onwards) take details that are key to proving your “Research”
for the customer. The system will use this information to produce you an analysis
providing the information necessary to prove the product being recommended best
meets the customers’ needs and circumstances.
If at this stage the customer is still undecided as to what type of product they want
etc. we recommend that you use the Quick Search facility to decide this before
proceeding further. From this point on we are no longer “sourcing” but preparing the
“research analysis” for products that meet their requirements.
The Tenure screen takes the details of how long the customer intends to stay at the
property “Anticipated Length of Tenure”. This information needs to be taken to
ensure such things as a product is not taken out with a penalty that exceeds this
period.
Also the screen takes details of any future plans they may have, again to take this in
to consideration.
10
The next screen is Select 1
11
This screen takes details of the customers needs regarding adding fees or not. It
takes their attitude towards products with penalties and any other features they may
want (if they are in a position to be able to choose).
The final screen relating to the product selection and research is Select 2
Here you need to indicate what type of product you and your customer have agreed
on best meets their needs and circumstances.
Then, in the bottom section, you get the customer to tell you what their definition of
cheapest is. This is because the FSA say that you must recommend the cheapest
product from your research. As there are potentially many different interpretations of
“cheapest” we feel it is vital that the customer is allowed to make the decision as to
what they regard as cheapest.
Behind each category of the cheapest definitions is an explanation. All you need to
do is click the text in red, which says “Click Here for an Explanation”.
NB – The FSA do also make the proviso that you can make a justification for a
product that is not the cheapest, if say for instance cheaper products, than the
one you are recommending, are with lenders with service issues.
The final section of the factfind is the Budget Planner. This takes the details of the
customer’s existing income and expenditure, which will be used to prove affordability.
Again this is a requirement that the FSA are looking for to be addressed.
12
At the end of the Factfind when you click Next it takes you to “Summary” Tab, which
reiterates the details you have entered, before going on to go into the product
selection process.
13
When you click Next you will be taken to the Criteria screen.
You can do a final check to ensure that you have the correct search criteria and then
click the Next or Start Search button.
NB - if you realise you have forgotten something then click Abort, make any
changes and then click Start Search again
14
When the results come up on the screen you can check the details in the bottom right
hand corner.
If you cannot find a product that you had expected to see come up, firstly you
can click the “Rejected” Tab and find out from there. Also and as well as this
you can Add products to the search. To learn how to do this, please go to the
Appendix area at the end of this guide where you will be shown the procedure
to follow.
You can then select the product that you will be recommending by double clicking it.
When you have done this you move on to the “proof of research” module, which will
come up when you click Next.
As you can see below it puts “SEL” (meaning Selected) next to the product you have
chosen.
15
You need to make your comments as to why you have selected the mortgage in the
area titled “Please enter in your own words why this product was chosen”. You can
control the number of products that your analysis will print out by entering the number
in “Number of Top Products to print”.
Then click the “Print” button and the analysis will be made available to print.
16
To continue you need to double click the product you have chosen from the Search
Results.
Then having done this you will have progressed to the Cost Details screen, as
shown.
17
You need to check the details of the scheme that has been chosen. Should you
need to make any changes you can do so by using the “On” column to switch off
costs. The “Add Mort” to add costs to the mortgage rather than pay them upfront or
use the facilities under “Fees” (option at the top of the screen) to change the fees or
the “Accessories” to do such things as modify the details of the mortgage.
For a full explanation of these facilities please see the Appendix at the end of this
User Manual.
On clicking Next you will be prompted to produce the KFI for the product that you
have chosen.
If you click Yes then you will be asked to confirm the Procuration Fee payments that
will be made. It is imperative that you check these figures as the information will be
included in the KFI. Where possible we do try to provide guideline figures but it is
essential that you know what the actual figures should be.
Having clicked the Continue button you will see the following screen:
18
This allows you to enter details about insurances that go into Section 9 of the KFI.
This requires you to let the customer know whether any insurances are compulsory
(either by you or the lender) or are a condition of taking out the mortgage i.e the
customer must have arranged for them to be in place before the lender will advance
the mortgage.
19
After clicking Continue your KFI will be produced:
2.2.2 Lenders KFI
It is important that when you have arrived at a product you are going to recommend
that you have the facility to check it against the Lenders’ own KFI.
To do this click on the Lenders KFI button and you will be taken to the Lenders
website. Where possible we have directed this to the area on their site where the
KFI’s can be generated from.
20
2.2.3 Attach Files
If you wish you can store copies of the KFI or any other document from the Lenders’
website. To do this click the Lenders KFI button and load the document (KFI,
product guide or whatever else you want).
For instance you may want to save copies of the lenders KFI to prove that you have
checked the details (the documents will be stored against the customer and
therefore, will be able to be seen by the Compliance Officer).
21
Once you have the document on the screen, click on File and then click Save A
Copy. Make a note of the name of the file and where you are saving it to. Then exit
the website.
This should take you back into the print preview area of the Home Buyer System,
where you need to click Attach Files button.
Then click the Add File button and you will be able to find the file you have saved.
22
Click Open and you will have saved your document under File Location in the Attach
Files window.
To view this at a later date either go into this area and double click the document or,
having loaded the customer from the database click on Accessories at the top of the
screen and then Attached Documentation and access the document from there.
Clicking “Next” moves you on to produce the Cost Explanations, which gives your
customer a description of what each of the costs are.
This is in keeping, as are many of the documents the system produces, with the FSA
requirements relating to “Treating Customers Fairly” (TCF).
23
Once this has been completed then by clicking “Next” you will progress to the
Insurance section.
2.2.4 Insurance
This takes you and your customer through the insurance sales process. There are
several stages:
1.
2.
3.
4.
5.
6.
7.
8.
9.
Introduction
Aims & Views
Existing Policies
Income and Expenditure
Needs Analysis Family
Needs Analysis Mortgage
Ideal World
Accepted Solution
Summary
Firstly, you need to let the system know whether you are going to be going through
protection for the family or only protecting the mortgage. Of course you may be
talking to them about both, if they are say, wanting life cover to cover their total
liability and income protection for the mortgage.
All you do at the out set is discuss this with your customer and tick the appropriate
box(es). If you tick both you will notice that Needs Analysis Family and Needs
Analysis Mortgage tabs titles appear in black. If you do not tick them they appear in
grey and you cannot get into them.
24
Then you click on the next tab “Aims and Views”. This takes you and your customer
through the insurance sales process.
2.2.5 Aims & Views
This gathers information on their attitude on all the various risks that they or their
home are at risk to.
25
2.2.6 Existing Policies
If you have completed the Factfind sections for the existing policies this information
will have fed through to here. If not then you will need to complete it.
26
2.2.7 Income and Expenditure
If you have already entered details in the Budget Planner section of the Factfind you
can click Auto Populate to bring them through.
This will calculate the amount of monthly disposable income the customer has
available to spend on the insurance products.
27
2.2.8 Needs Analysis Family
This section helps to analyse what cover is required and gives access to the sourcing
systems that we have links to. If yours is not here then at this stage you could go to
them and come back and enter the figures on the next screen (Ideal World). If you
do use the ones we have in place then you can click the button to go straight to them.
28
2.2.9 Needs Analysis Mortgage
If you have clicked the mortgage option on the Introduction screen then you will be
able to complete the sections relating to insuring your customer for the mortgage.
29
2.2.10 Ideal World
In here you would complete the details of costs of taking out cover to fully meet all
the risks.
You can click on each of the Tabs relating to the insurances you are recommending
for your customer. There are 2 large text boxes on each Tab. The top one allows
you to enter your comments and this is the text that will go into the final document
you provide to the customer.
The box below allows you to enter text that you can save to use with subsequent
customers. If you type the text and then click the Save button it will be saved to be
available for all subsequent cases. If you click Next you will get a blank screen and
you can type another explanation, which again you can save.
To add the text to the top box and therefore, your document, click the “Include”
button. If you have added more than one set of wordings then you can scroll through
them by clicking the “Next” button until you get to the one you want and then click
“Include” to add it to the top box.
30
2.2.11 Accepted Solution
Initially on this screen all the details from the "Ideal World" situation are carried
forward and then you can edit them, if need be to reflect what the customer has
committed to do.
At the bottom of the screen you can click on any products that are not being taken
out to amend the declaration the customer signs on the printed document.
These last 2 screens prove that you were able to assess their needs and therefore,
able to provide solutions to problems. If the customer then did not want to take out
the cover, or lesser cover, then you can reflect and comment upon this. A
Compliance Officer or a FSA inspector would be able to see clearly that the job had
been done properly.
These 2 sections will be included in the Product Confirmation as well, so that all
aspects are covered for both Mortgages and Insurance in the same document.
31
2.2.12 Summary
The summary is then used to populate the KFI with details of any insurances that the
customer must take out, either as a condition of yours or the Lender.
To print all of the Insurance sales process documentation (or e-mail it), click on Print
Needs Analysis at the bottom of the screen. Alternatively, click the grey downward
pointing arrow on the Insurance section at the top of the screen and click Print (or
Re-Print) option.
2.3 Budget Planner
Click Next and you will come to the Budget Planner. You will have already
completed the Before section, in the Factfind you now need to complete the After
section.
If you click Auto Populate this will repeat all the Before figures to After as many of
them will not change, this will save you re-entering them. To pull through the new
Mortgage payment click Load Mth Payments and it will take you through doing this.
32
When you click Next you will be prompted to print the Budget Planner. After you
have done that and clicked Next you will move to the Notes screen.
2.4 Notes
This will show any notes you have made by clicking the Notes button at the top left of
the screen or that you wish to add at this stage.
When you then click Next you will move on to the Checklist.
33
2.5 Checklist
This will produce the Checklist for the customer to sign to say that you have covered
all the areas of the sales process and that they want you to go ahead with arranging
the mortgage. It also gets the customer’s permission for you to pass their details to
3rd Parties such as Lenders and Insurance Companies.
Clicking “Next” will prompt you to print the Checklist. When you have completed this
and click “Next“ you will move on to the Product Confirmation.
34
2.6 Product Confirmation
We provide as much guidance as we can to help you with the essential part of the
sales process, which is the product confirmation (or suitability letter, if you prefer).
On the Product Confirmation screen you have a summary of the Factfind. To ensure
that for each case you deal with you address the major points we have identified the
areas that must be addressed and highlighted them in red.
Starting from the first topic highlighted in red, you click on the text and the question to
answer on the topic will appear above the top text box together with what was
entered against it in the Factfind e.g “Please state why this method of payment was
chosen for the client. Answer: Capital and Interest
You can either type what you want to appear on the Product Confirmation by typing
your comments into the top box, or you can select one of the suggested answers we
have pre-loaded for you. This is explained below.
Before typing anything in please read the text above the box that tells you how the
first sentence begins. You just type the follow on to this. When you click the “Save
Your Note To The Product Confirmation” your text will be added to the Product Confirmation.
To see what it looks like in the document you are building, click the “Preview” button and it will
bring it up.
Again as with the Insurance sales process the Product Conformation has 2 text
boxes. The top one being where you type in your response to the section of the
Factfind you are addressing and as mentioned above the lower box has some prepopulated text for some of the questions. These can be modified or new ones can be
added to save you typing the same thing over and over. The buttons at the bottom of
the screen do the following:
35
Next – We have entered some suggested wordings for most of the
compulsory questions. These appear in the bottom box. If the first one is not
appropriate then keep clicking this button until you find one you want to use
Save – You can either edit or input your suggestions and save them. When
you click this button the edited or added suggestion will be stored for future
use
Include - when you have found an explanation you are happy with from the
suggestions click this button to select it. When you click the button you will
see it appear in the top box. You then click the button titled “Save your note
to your Product Confirmation”
Below the items marked in Red are the other main areas from the factfind that you
may also wish to comment on. This gives you the opportunity to relate information
the customer has given to you, to the product you are recommending.
Of course it is important that the customer understands what features the product
has, that they wanted and if the product does not meet requirements, why not.
When you are ready to print out the Product Confirmation click the grey downward
pointing arrow on the PC section and click “Print Now”.
You should now have a screen showing all the Compliance Buttons with a tick on
each one.
36
2.7 Progress Checklist
To complete the sales process and to give peace of mind, the final Tab is
“Completion”. Firstly, this allows you to check that you have everything you need on
the file and where appropriate signatures. Secondly, it tracks the case right the way
through to the acceptance of the offer on the mortgage.
3. Customer Database
The customer database lists all of your customers with the most recently added one
at the top of the list.
Any cases that are highlighted in red have an outstanding error in the sales process.
In the “Errors” column it will tell you what the problem is. If you double click the client
it will load it and you can see immediately that the missing items are those that have
a red cross on them.
If now or at a later date you want to view documents you have produced for the
customer, you click on the customer and then click on the button for the document
you want to view, which are located at the bottom right of the screen.
This will show you every copy you have printed for that particular type of document.
If for instance you have printed more than one KFI you will see each one by clicking
the KFI/Cst Ill button.
37
When you re-print documents the system asks if you would like to comment on why
you are doing so. The comments you make will be shown at the beginning of the
document.
You can search for customers by typing in some information you know about the
customer and then click the Search button. This can be any aspect of the customers
details such as name, address and so on or any other aspect. For instance if you
could only remember the number of the house type it in and the system will find all
customers with that number in their address.
To delete a customer, click on them and then click the Delete key at the bottom left of
the screen.
There is a facility to keep records of when you are paid on a case. If you click on the
customer and then click paid Yes will appear in the Paid column.
If you want to check your pipeline you can click on the Accounts button to see the
information.
If you wan t to check your messages for that customer you can click the Messages
button.
You can print the full list of your customers by clicking the Print button. Or if you
want to print a copy of your New Business log click the check box and then click
Print.
38
4. Repayment Calculator
This gives you the ability to give a customer an idea of what a loan would cost at a
specific rate.
In this example “100000” has been typed into the “Mortgage” box then “6” in the Rate
box. Then to get the system to calculate you click on Yearly, Monthly, Daily or
Interest Only. This will then give you the monthly breakdown.
You can even do products with an initial rate such as Fixed or Discounted by putting
the period (years) of say the fixed rate in the “Initial” box and the rate in the box
below it.
You can also do Overpayment calculations by clicking on the Over/Under Payment
Entry Tab and entering the figures you want to use.
39
Then to calculate it click the Graphic Tab.
40
5. Mortgage Easy Finder
This makes finding a product that you are looking for very easy. Or looking at the
product ranges for each of the lenders simple too. When you couple this to the
facility to browse the lenders Website from within Easy Finder, it provides a
comprehensive and powerful tool to help you help your customers.
You can look at all the lenders product ranges by double clicking “Lenders” or if you
want to look at Packagers product ranges then do the same for “Packagers.
Having double clicked “Lenders” you will have a list of all the lenders. Click on a
Lender you are interested in and this will give you details about the lender on the
right hand side.
If you wish to go to the lenders Website click the link under Provider in the
Information. You can then browse the web site.
41
If you want the web page to display on your full screen click “Display as New Web
Page. When you have finished with this click the cross in the top right hand corner to
close it and return to Home Buyer.
42
To look at the product range for the lender click the “+” it will open up to show their
product range.
Click on the product you want to see the details of and they will appear again on the
right hand side.
If for any reason you want to make a change to a product, click “Edit Mortgage” at the
bottom of the screen.
43
You can then make the change/s you want to make. If you then use this product in
the sourcing and save it against a customer then the details will be saved as you
have amended them. When you next update the mortgages, in your system, the
changes you have made will be overwritten.
6. Exit
Click this button to leave the system.
7. Latest Schemes
Click on this to update the mortgage data. If you have not done this for a few days it
will turn red to warn you that your system has not been updated recently.
44
8. Compliance Upload
This is where you will now do your compliance export. You will be reminded to do
this in the rolling window and also if you exceed the allotted number of days between
downloads.
All you need to do is click Run and then follow the instructions on screen.
45
9. Industry News
To view the Training and Competence area of the system click on Industry News
10. Tests
To take the T&C tests click View Tests. Then click “Check Server for New Tests”.
This will update your system with the latest test and then click on the test you want to
take and click “Start a New Test”. Then complete the test.
46
11. Message Board
When you receive a message you will be alerted to the fact that you have one. To
read it or look at previous ones click on “Message Board”. In here not only can you
read your compliance messages from your Compliance Officer but you can also reply
to them or send one of your own.
When you reply to a message the system recognises that in future you would want to
read all of the correspondence together, so it sets up a Message Thread. If you click
on this you will be able to read the full details of the messages sent on a particular
subject or case.
12. Broadcast Messages
Again if you have a Broadcast Message you will be notified by the system. Click on
the Broadcast Message button to view it and any previous ones.
47
13. Return To Main Menu, Save and Notes
At any time you want to return to the Main Menu, save the details you are working on
or make/view your notes the 3 buttons in the top left hand corner do these jobs.
If you place your mouse over the first button it will tell you that by clicking it you will
be taken to the Main Menu. If you do the same for the second button it will tell you
that by clicking this you can save the case to the Database.
Similarly, if you do the same for the third button it will tell you that if you click it you
will bring up your notes for that customer.
48
14. Conclusion of The Overview
Much time and effort has gone into the building of the Home Buyer System. So
much of the system has been produced in collaboration with our customers.
After all it is your system and it will be as good as you want it to be. We therefore
always welcome your feedback – it is often the only way things get to be the way you
want and need them.
If you need any help with the system, as always, please do not hesitate to contact us.
We look forward to working with you and to continually provide you with the tools you
need to have a successful, prosperous business.
49
APPENDIX
1. Setting Up or Altering Your System
When you go into your system for the first time you will be taken through the set up
screens.
This area allows you to enter details that will be used in various situations as you use
the system allowing it to auto populate or calculate for you.
1.1 General
On this screen you can type in your details in the top left hand block of information.
The block on the right allows you to record other of your details. These are:
FSA number – this is your own personal number (not the networks/companies
if you are an Appointed Representative)
CCL No – Consumer Credit Licence number (not compulsory – it will appear
on the front page of your Information Pack with your other details)
Compliance Officer – the name of the person responsible for checking your
compliance
Name in TOB – this only needs to be completed if you use a Terms of
Business as well as the compulsory IDD (Initial Disclosure Document)
D Prot User No – If you do not have your own Data Protection Registration
Number and are covered by a company one enter your User Number here
D Prot Reg – This is the Data Protection Registration number for your
company
50
Adviser Number – You only need to enter this if you have a compliance officer
using our Compliance Officer System. This number is used to link you up.
Export Days – you do not need to enter anything here it is automatically
generated
To the right of that are:
BC Commission % - this is used to help calculate Buildings and Contents
insurance commissions owing to you but it is not necessary to enter anything
here it is simply an additional service
ASU Commission % - this is the same as BC but for Accident, Sickness and
Unemployment cover
In the lower section you have:
Click if you give Investment advice regulated by the FSA – this is fairly self
explanatory and triggers statements in the system regarding giving or seeking
advice that only Advisors regulated to give advice on pensions, investments,
savings etc can give
Do you advise from a panel of lenders – this will automatically tick the box in
your IDD if you click it to declare that you work fro a panel
Do you recommend mortgages – again if you click this it will tick the
statement in the IDD to say you do. If you leave it unclicked then the
assumption is that you do not give advice
Are you paid commission from the lender – if this is unticked, statements will
be made saying you do not get paid by the lender
Are you an Independent Advisor – If you are then click this (you may wish to
check the FSA’s definition of “independent” before doing so and if you are in a
network, whether they agree
Header Logo location – if you would like your logo to go on to the documents
then click the Browse button (the one with the dots on it) and find where the
graphic is on your computer
51
1.2 Fixed Costs
The costs entered here will be used to calculate the various estimated costs that
need to go into the KFI and Cost Explanation documents.
Estate Agents Costs – usually only need to put in a percentage that an Estate
Agent would typically charge to sell a property
Conveyancing (Buy and Sell) – you can enter this as a percentage of the
price of the property or a fixed amount. The system will work out that if the
customer is a first time buyer then only the Buy figure would be used
Legal Fees (Re) – this is for a typical cost for remortgaging
Local Search – this is used to provide a figure for this
Land Reg Search - this is used to provide a figure for this
Bankruptcy Search - this is used to provide a figure for this
Telegraphic Transfer - this is used to provide a figure for this if the lender
does not provide one in the mortgage data
52
1.3 Network/Locum Details
If you are a member of a network enter the details here. This is very important as it
carries the Network’s FSA number, which must appear in various places in the
documentation.
The FSA also require that you have a locum and you should record the details here
as well.
1.4 Advanced
53
The majority of this screen is used by exception as the title suggests. Should you
need to use them then it will usually be with our help. The sections are:
Basic Settings – If you are in a network or larger company the Lender Search
String ids the set up for the panel of lenders that are used
Footer Information – this allows test to be added to the footer of the
documents you produce in the system
Location Information – This links the Home Buyer Program to various things
notably the Document Directory is where you would put the “address” for
where you want any Word documents that you produce to be stored
Document Information – If you are going to use pre-printed documents rather
than printing from the system every time you tick the document here. When
you get to the document in the system instead of printing it will remind you
that you have your own document and have you given it to them. If you click
Yes then you will get your tick
Advanced Settings – If you are on a network and want to see all the
customer of all the sales people you click this.
If you are finding that the database is loading slowly then you can click Faster
Client Database
1.5 IDD Default Wording Sections 4 & 5
To save typing the same details each time you produce an IDD you can set up the
defaults area so that when you are in the IDD section of the system you can click
“Load Defaults Settings” and the details will automatically be pulled through.
54
1.6 Insurance
This allows you to enter the details for the Insurance section of the IDD so that it will
pre-populate this for you when producing your IDD.
1.7 Access Codes
To link your system to the various Insurance sourcing systems you need to enter
your codes for them in here.
55
If you need to come back into this area, after initially setting it up, click on System at
the top of the screen, then click Defaults, then Advisor Details/Fixed Costs.
56
2 Adverse Credit
If your customer has adverse credit you can click the Adverse Details button and the
following screen will allow you to enter the details:
Having clicked the Adverse Details button you will get the screen shown above. The
customer’s adverse history can then be entered.
2.1 CCJ Details
The first column allows for the dates that each CCJ was registered. The second
column is for the value of the CCJ. The third column allows you to enter the date it
was satisfied, if it has been.
2.2 Repossession Details
You put the date of the Repossession in the first column. If there is a shortfall then
you put that in the next column. If the shortfall has been cleared then you can put the
date in the next column.
Alternatively, if there has been an arrangement to settle the shortfall, then click the
box provided.
2.3 Arrears Details
The Number of Arrears column lets you record the number of arrears in the time
periods given. For instance, in the example above the customer has 2 arrears in the
last 3 months.
2.4 Defaults Details and Credit Card/Loan Arrears
This works in exactly the same way as the Arrears.
57
2.5 Bankruptcies
If they have been bankrupt you can click the button and if they have been discharged
you can enter the date
2.6 IVA’s
The same principle applies to IVA’s as Bankruptcies with the exception of “Are
Payments Being Met” which you would click if they are.
Click the Continue button to carry on.
3. Cloning Customers
The system has the facility to Clone customers. This saves you re-entering the
Factfind details. It is especially useful for Buy To Let cases and when you are doing
a further mortgage for an existing customer.
To get to the area where you can do the Cloning, click on System at the top of your
screen and then click on Admin. From that menu click on Export/Import/Clone
Clients
58
Next click on the Clone button and you will get the following screen:
Click the box next to the customer you wish to Clone and then click the Start Process
button.
You will be returned to the initial screen and you will see that the word “Done” will
appear in the Status box.
59
If you close this screen by clicking the cross in the top right hand corner and then go
into the customer database, you will see that you have duplicated the record. You
can now use this new record.
60
4. Product Missing From Search
There may be occasions when a product is missing from a search. Perhaps it is
slightly over its LTV but after you have spoken to the lender they are happy to accept
it. Obviously you need to get this product into your proof of research.
To do this you go back to the Criteria screen and click the “Click Here to Select and
Include Products in Search Results”
Then double click on the word “Lenders” then on the lender you want. This will bring
up the product range for the lender. All you need to do is click the box next to the
product you want to include in the research, so that a tick appears in the box. You
can do this for a single product or several products just find and click on the box next
to it to include it.
61
Then click on the button at the top of the screen marked “Click Here to Return To
Search For Products”.
You will now see that the product/s that you have selected show at the bottom of the
screen.
62
You then click the “Next” button to do a search. You will now find the product/s you
selected are in the research.
If you need to make an amendment to the product you can click the “Edit Mortgage”
button at the bottom of the screen that displays the products for that lender.
When you do that you will get the following screen that will allow you to edit the
mortgage.
63
5. Cost Details Screen Facilities
64
5.1 On Column
As shown on the screenshot of the Cost details screen, you can switch costs off if
you need to. When you first arrive at this screen all the items in the list will have
“Yes” in the “On Column”. If you wish to turn off the cost click “Yes” which will turn it
to “No” and turn it red. It does not remove the cost altogether otherwise you would
have no record of what you had done.
5.2 Add Mort
If you need to add a cost to the mortgage you can do so by clicking the cost in the
Add Mort column.
When you click it the cost is moved into the “Added to Mortgage” column.
65
If you need to put everything back to how it was before you made changes then all
you need to do is click the “Reset Add to Mortgage Settings” button at the head of the
costs.
5.3 Fees
The Fees menu gives you the opportunity to override fees stated on the Cost Details
screen and add new ones.
66
To override a fee click one of those that has override in the title, such as Valuation
Override. This will bring up a box that you can type the figure you want to use.
Then click the OK button and the amended fee will now appear in the costs.
If you need to go back to the original figure then repeat the process but enter “0”.
When you click OK you will find the cost has reverted to the original figure.
If you want to add a new fee such as “MPPI Premium” then again click on it and type
in the fee. Then click OK and you will find it has been added to the list of costs.
67
6. Accessories
68
The Accessories menu has a number of useful functions.
6.1 Modify Loaded Scheme
You need to be on the Cost Details screen to use this facility. When you click on it
you will see the details of the scheme.
If for instance you wanted to change the initial rate (4.45%) click on it and type in the
rate you want to change it to. Then click “Continue” and you will be asked to save
the change to the product to that customers record.
Similarly if you change the text, then this will be saved too when you click “Continue”.
6.2 Loan Calculator
If you need to let the system work out the deposit then you can type in the LTV
percentage here and when you click OK it will calculate it for you.
6.3 Rate Loading
If the rate needs to be loaded then click on “Rate Loading”, then type in the loading
(e,g if the loading is half a percent then 0.5). When you click on OK the monthly
costs will have been recalculated on this basis and the rate shown on the screen will
reflect the loading.
69
6.4 Rate Override
If you simply need to change the rate/s then click on “Rate Override” and enter the
rate or rates you want to change.
6.5 View Mortgage Information
If you want to check the details of the scheme you have chosen click this to view
them.
6.6 Batch Print
Previously in this Manual we have discussed the facility to do Batch printing. This
facility allows you to batch documents for printing rather than print them at that time.
When you want to print all the documents you have batched for that customer you go
into the customer from the Customer Database and on the Accessories menu click
Batch Print.
This will show you all the documents you have batched. To print them click the print
button and when you have finished printing click the “Done Batch” button.
This will then turn the graphic on the print progress to a tick and turn the status from
“Batched” to the date it was printed on.
70
6.7 Repayment Schedule
If you wish to give a schedule to your customer showing how the mortgage is paid off
in the case of a Capital and Interest mortgage (or not for an Interest Only mortgage).
Then click on this to produce it.
You can also do Over/Under Payment calculations here as well. An overview of this
is given in the Repayment Calculator section of this Manual.
6.8 Attached Documentation
If you click here you can view all the documents you have attached to this customer’s
record. To find out how to do this, please see the section titled “Attach Files” in the
early section of this Manual.
71