1
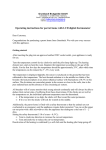
NO. 1590 ELECTRONIC THERMOSTAT HOVA-BATOR
INSTRUCTION MANUAL
ITEMS INCLUDED WITH THIS INCUBATOR
Hova-Bator top with electronic thermostat and fan
Wire Floor
Thermometer
Plastic liner with
humidity troughs
Hova-Bator Bottom
OPTIONAL ACCESSORIES
No. 1614 Goose Egg Turner provides
automatic turning for 12 to 16 eggs.
No. 1611 Automatic Turner with 6 Universal
egg racks turns the eggs so you don’t have to.
No. 1610 Automatic turner comes with 6
quail egg racks and 6 universal egg racks
Notice: The 1590’s preset thermostat normally has accuracy greater than the thermometer supplied. If the thermometer appears to be off the
desired setting at anytime, it is recommended that the thermostat’s presetting be used on the first setting of eggs. Only if the eggs do not hatch
well should the thermostat be adjusted (refer to poor hatch section on last page). It is suggested that a small number of inexpensive eggs be
used during the first setting to establish the operator’s procedure and the incubators desired operation.
1. CHOOSE A LOCATION:
An incubator or brooder is designed to bring normal room temperature to the desired temperature. Room temperature of 62oF or
below will reduce the temperature in the incubator. The location of the machine is important to successful operation.
- A room temperature from 68 to 78 F is ideal and fresh air without drafts
is necessary.
- Be sure no direct sunlight strikes the incubator and that it sits level.
- A consistent room temperature within a few degrees is best.
2. SETTING UP THE INCUBATOR
C
Unpack the incubator from the box and set aside the thermometer and wire floor.
Remove the top half from the bottom. The plastic liner should be in the bottom
half where it is to remain. Place the wire floor on top of the liner. Fill the trough
marked ‘C’ in diagram 1 (image at right) with clean water. Place the top over the
bottom. Plug the cord set into the appropriate wall socket. The fan should then
run and the red light on the incubator should be lit. Allow the incubator to warm
up and adjust its temperature for one hour. When the light begins blinking
regularly, the incubator is nearing its set point. The thermometer supplied
maybe used to check the room temperature and to indicate when the incubator
is nearing its operating temperature.
T
DIAGRAM 1
Caution: The thermometer may not be as accurate as the thermostat
and should not be trusted on the first couple of hatches.
3. SETTING THE EGGS
Warm eggs to room temperature. (If the optional automatic egg turner is to be used,
skip this paragraph and see section on AUTOMATIC EGG TURNER.) Do not set
eggs so that some will be hatching while others are still being turned unless a separate
hatching incubator is to be used. Place eggs on the wire floor in the incubator. Let
them lay in a natural manner, which is on their sides with the small end slightly
down. The thermometer may be used by allowing it to rest on top of the eggs so it
can be seen through the window. Eggs should be turned during incubation 2 to 3
times a day. With a pencil mark an “X” on one side and an “O” on the opposite side
of the egg. Turn all eggs so that “X”s appear face up. Next turning period turn all
“O”s face up. Do this until 3 days before eggs are due to hatch.
SETTING THE EGGS WITH AN AUTOMATIC EGG TURNER
(optional accessory)
Place the Automatic Egg Turner (optional) on the wire floor of the incubator and plug in its
motor to electric source. Do not set eggs so that some will be hatching while others are still
being turned unless a separate hatching incubator is to be used. Place eggs in the cups with
the pointed, small end of the egg down ward. Take care to notice if large eggs will hit any part
of the incubator’s top when eggs turn and move them elsewhere if necessary. The Automatic
Egg Turner turns one revolution every 4 hours so the eggs will not appear to have moved
except after many minutes. Eggs should be turned up to about 3 days before the hatch at
which time the Automatic Egg Turner will be removed from the incubator and the eggs are
placed on the wire floor for hatching. It is not recommended that the eggs be allowed to hatch
in the turner as some chicks could be injured and the hatching chicks will soil the turner.
4. OPERATION
This incubator is pre-set for the proper incubating temperature for bird eggs
requiring a temperature of about 100 F. (37.5C) (This is most of the known
species.) No temperature adjustment will be required. Because eggs, incubator
and water are cold, the incubator maybe slow to heat at first (up to 24 hours to
reach 100F) but will not over heat and damage the eggs. Should the indicator
light fail to cycle on and off after set temperature is reached, re-toggle the rocker
switch that sets the temperature as it may have come unlocked. If after completing
one or two hatches you feel it necessary to slightly change the temperature,
follow the instructions on the last page or call GQF for technical assistance.
Keep in mind that thermometers can be off or change over time and should not
be relied upon initially. The quality of hatch may be the best indicator as to the
temperature setting after considering other factors that can affect the hatch.
Thermostat adjustment
window. Adjust only
after reading instructions
5. MOISTURE
The purpose of supplying clean water in an incubator is to prevent excessive
drying of the natural moisture from within the eggs. The correct amount of
humidity can be determined by the size of the air sack when candled, or by
weighing the egg to gauge percent of weight loss. Both methods require
knowledge and experience that first time operators usually do not have. The
No. 1590 is designed for simplicity in this matter and usually works for most
species.
Fill the trough in the bottom marked ‘C’ in DIAGRAM 1 and keep it filled at all
times. The surface area of water will determine the level of humidity in the
incubator. Humidity may be reduced by partially covering the water trough with
tape or metal foil. To increase humidity, add water to the second trough. Poor
hatches are more often the result of too much humidity. For the first setting use
the completely filled ‘C’ trough only.
6. VENT PLUGS
A red vent plug is located on the top of the incubator. This should removed when
the incubator is used at altitudes greater than 6000 feet above sea level. It may
also be removed during or after the hatch if water drops appear on the window
due to high humidity. This will help to dry the chicks and the incubator. In this
case return the plug after the chicks are removed.
VENT
PLUG
7. PREPAIRING FOR THE HATCH
A day or two before the scheduled hatch date (see list of hatching times) stop
turning the eggs. If the Automatic Egg Turner is being used, remove it and place
the eggs on the wire floor. Add clean water to both troughs to raise the humidity.
Replace the top on to the incubator and do not remove it until after the hatch.
Frequent removal of the top will expel the warm humid air which can slow the
hatch process or possibly stop a hatch that is in progress.
8. AFTER THE HATCH
Once the chicks have pipped the shells allow about 24 hours for the hatch to
complete. Most eggs should hatch within this period but some weaker chicks
may hatch a day or two later. Chicks should be dry when removed. Remove
chicks quickly so that any late hatching eggs or wet chicks will not be chilled.
Move chicks to the brooder as soon as possible. Discard eggs after 4 days of
main hatch (or sooner if all fertile eggs have hatched) as any hatching after this
time usually do not survive.
9. BROODING
Brooders, like the No. 0534
Gamebird brooder shown
above, are the perfect
place to keep your newly
hatched chicks warm.
When chicks are removed from the incubator they must have a place that is warm and dry. Chicks can survive for 48 hours without
food or water; however, exposure to food and water as soon as possible will help to reduce any chick mortality. A brooder should have
one section that is heated, with a temperature of 100F (37C) for small birds like quail or 95F (34C) for larger birds like chickens.
Maintain this temperature for the first week and then lower it 5 degrees (F) each week there after down to normal room temperature.
If temperatures are a little too warm the chicks will move to the cooler parts of the brooder on their own. Place food on a flat surface
near the feeder. Avoid slick surfaces like cardboard, plastic or flat newspaper as young chicks have difficulty standing on them. Water
should be available in a proper drinker for the type chicks. Small birds such as quail can easily drown in large drinkers so rocks or
marbles may need to be used at first if the drinker is not made especially for them. The GQF catalog has suitable brooders, feeders
and drinkers. GQF Vitamins Plus is also recommended for the first seven days to improve survivability.
Note: The incubator top is not satisfactory as a brooder as there is not sufficient heat.
POOR HATCH OR NO HATCH
There are many factors involved with the hatching process and any one can hamper or stop chick development. Old eggs, infertile
eggs, damaged or dirty eggs, poor flock health, and eggs not properly turned during incubation are some of the factors. Some chicks
may only partially emerge from the shell. These chicks after time may be assisted out of the shell but due to their weak condition often
do not survive. It is not unusual in a large batch of eggs to have a few of these even with good hatches.
Check the unhatched eggs. Take note of the exact number of days it took to hatch any eggs or note the number of days for any
eggs to pip the shell. Check unhatched eggs for chick development and note the number of these eggs in the batch. If all or most of
the eggs have no development (clear inside) then the microscopic embryo had died before or at time of incubation or the egg was
never fertile. If 70% to 100% of the developed eggs hatched then there is little adjustment that can be done with humidity or
temperature to improve this. If many of the unhatched eggs are developed or partially developed into chicks and if eggs were of good
quality and properly handled then perhaps adjustments in temperature or humidity may be required.
If eggs hatched on time, then begin any adjustments with the humidity first. Review the section under MOISTURE for adjustments.
Make only one adjustment and then test it on a setting of eggs before making any other adjustments.
If eggs have been determined to hatch late or pip late (one day or more), first check for too much humidity then look for too low
of a temperature setting. If eggs pip or hatch early (one day or more) then look for too high of a temperature. Eggs hatching early or
late due to temperature are probably within one degree of the proper temperature setting.
The No. 1590 Hova-Bator incubator is preset at the factory for about 100F to 100.5F. If this setting must be changed, there are
switches located in the access hole in the thermostat. The diagram below shows which switches to change in order to adjust the
preset temperature. The maximum adjustment up or down from the preset temperature will be no more than ½ to 1 degree.
HIGH
LOW
1
2
3
4
5
6
ROCKER DOWN
7
8
To change temperature,
turn off preset setting, then
turn on the proper switch. 1
is the LOWEST, 8 is the
HIGHEST. In the example at
left, setting 3 is on.
OFF
In the event of a sudden temperature spike, re-toggle the current set switch
GENERAL INCUBATOR OPERATING INSTRUCTIONS FOR SEVERAL SPECIES OF BIRDS
Bobwhite Cotumix
Quail
Quail
Requirements
Ostrich
Emu
Rheas
Duck Muscovy Goose Guinea Pheasant Peafowl Chicken, Turkey Chukar
Duck
Incubation period (days)
23-24
17
42-48
Temperature (F)
99.5
99.9
96.5-97 96.5-97 96.5-97 99.5
Humidity (wet bulb, F)*
84-86
84-86
Final day of egg rotation
21
Temperature during final 3
days of incubation (F)
99
Humidity during final 3 days
90-94
of incubation (wet bulb, F)
43-50
35-40
28
Bantam
Grouse
Pigeon
Partridge
35-37
28-34
28
23-28
28-30
21
28
23-24
25
17
99.5
99
99.5
99.5
99.5
99.5
99
99.5
99.5
99.5
82-84
83-85
85-87
83-85
80-82
82-86
84-86
70
70
85-87
84-86
84-86
86-88
83-85
15
38-40
44-46
30-33
25
31
25
25
21
25
19
25
21
22
15
99
96-96.5 96-96.5
98.5
98.5
98.5
99
98.5
99
98.5
99
98.5
99
99
99
88-90
90-94
90-94
90-94
92-95
90-94
90-94
90-94
90-94
90-94
90-94
75
75
90-94
* % Weight loss: Total weight loss from beginning to end of Incubation should be 12%-16%.
% Weight Loss = Original wt. - Present wt. x 100%
Original wt.
90-94
Average Daily Wt. = Original wt. X .14 (Based on 14% total loss)
Loss Required
Incubation Period
LIMITED WARRANTY
GQF Mfg. Co.. Inc. guarantees against defect for a period of 1 year from date of purchase. Notify GQF Mfg. Co. of any defective Items, giving catalogue
number and name of Item and Just what is wrong with Item. Send copy of invoice showing date of purchase. GQF Mfg. Co. will send replacement or notify
regarding return. Returning of items without written permission will be at owner’s expense.
Whereas GQF Mfg. Co. has no control over usage of equipment supplied, It assumes no responsibility for losses or damage from their equipment other than
replacement of defective parts. No guarantee on hatchablilty of eggs. Do not expose electrical parts to water. Installation of electrical parts should be done by
qualified electrician.
For help or comments contact our technical support at:
Ph 912-236-0651 / Fax 912-234-9978 / e-mail: [email protected] or mail to:
GQF Mfg. Co., Inc.
PO Box 1552
Savannah, GA 31402-1552