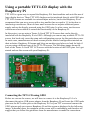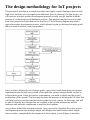
1
Python–uploadingdatatoXively
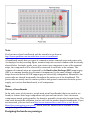
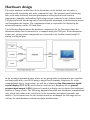
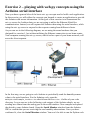
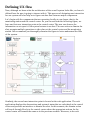
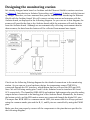
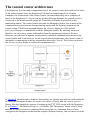
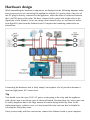
SimilartohowweinterfacedArduinotoXively,wewillnowexploremethodstoconnect
theXivelyplatformviaPythonandthuscompletetheloop.Inthissection,wewillfocus
ondifferentwaysofuploadingdatatoXivelyusingPython.Wewillstartwithabasic
methodofcommunicatingwithXivelyandextenditfurtherwithweb.pytoimplementthe
interfaceusingawebapplication.
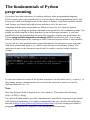
Tobeginwith,let’sfirstinstallXively’sPythonlibrary,xively-python,onyourcomputer
usingthefollowingcommand:
$sudopipinstallxively-python
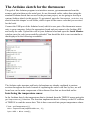
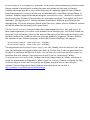
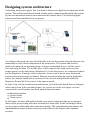
Thebasicmethodforsendingdata
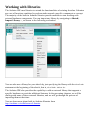
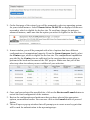
Onceagain,youwillneedtheAPIkeyandfeedIDofyourvirtualdevicethatyoucreated
ontheXivelyplatform.Python,assistedbythexively-pythonlibrary,providesvery
simplemethodstoestablishacommunicationchannelwiththeXivelyplatform.From
yourcodefolder,opentheuploadBasicXively.pyfile.Asspecifiedinthecode,replace
theFEED_IDandAPI_KEYvariableswiththeappropriatefeedIDandAPIkey:
FEED_ID="<Your-feed-ID>"
API_KEY="<Your-API-key>"
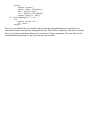
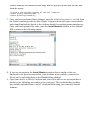
UsingtheXivelyAPIClientmethod,createanapiinstanceandcreatethefeedvariable
byusingtheapi.feeds.get()method:
api=xively.XivelyAPIClient(API_KEY)
feed=api.feeds.get(FEED_ID)
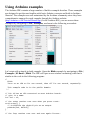
JustaswedidintheArduinoexercises,youwillneedtocreatedatastreamsforeach
channelfromthefeeds.Asspecifiedinthefollowingcodesnippet,trytogetthespecified
channelfromthefeedorcreateoneifitisnotpresentontheXivelyvirtualdevice.You
canalsospecifytagsandothervariableswhilecreatinganewchannel:
try:
datastream=feed.datastreams.get("Random")
exceptHTTPErrorase:
print"HTTPError({0}):{1}".format(e.errno,e.strerror)
datastream=feed.datastreams.create("Random",tags="python")
print"Creating'Random'datastream"
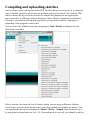
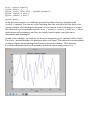
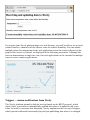
Onceyouhaveopenedthedatastreamforachannel,youcanspecifythecurrentvalue
usingthedatastream.cuurent_valuemethodandupdatethevalue,whichwillupload
thisvaluetothespecifiedchannel:
datastream.current_value=randomValue
datastream.at=datetime.datetime.utcnow()
datastream.update()
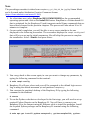
OnceyouhaveperformedthespecifiedmodificationstotheuploadBasicXively.pyfile,
executeitusingthefollowingcommand: