1
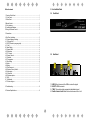
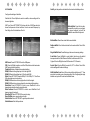
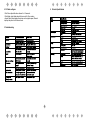
High Definition Digital Satellite Receiver
DefineSat VM55
Important Safety Instructions
1) Read these instructions.
2) Keep these instructions.
3) Heed all warnings.
4) Follow all instructions.
5) Do not use this apparatus near water.
6) Clean only with dry cloth.
7) Do not block any ventilation openings, install in accordance with the
instructions.
8) Do not install near any heat sources such as radiations, heat registers,
stoves, or other apparatus (including amplifiers) that produce heat.
9) Do not defeat the safety purpose of the polarized plug. If the provided
plug does not fit into your outlet, consult an electrician for replacement of the
obsolete outlet.
10) Protected the power cord from being walked on or pinched particularly
at plugs, convenience receptacles, and the point where they exit from the
apparatus.
11) Only use attachments/accessories specified by the manufacturer.
12) Unplug this apparatus during lighting storms or when unused for long
periods of time.
13) Refer all servicing to qualified service personnel. Servicing is required
when the apparatus has been damaged in any way, such as power-supply
cord or plug is damaged, liquid has been spilled or objects have fallen into
the apparatus, the apparatus has been exposed to rain or moisture, does
not operate normally, or has been dropped.
14) Mains plug is used as the disconnect device, the disconnect device
shall remain readily operable.
15) The ventilation should not be impeded by covering the ventilation
openings with items, such as newspapers, table-cloth, curtains, etc.
16) No naked flame sources, such as lighted candles, should be placed on
the apparatus.
17) Attention should be drawn to the environmental aspects of battery
disposal.
18) The use of apparatus in moderate climate.
19) The apparatus shall not be exposed to dripping or splashing and that no
objects filled with liquids, such as vases, shall be placed on the apparatus.
WARNING: To reduce the risk of fire or electric shock, do not expose this
apparatus to rain or moisture.
WARNING: The batteries shall not be exposed to excessive heat such as
sunshine, fire or the like.
The symbol indicates that dangerous voltages constituting a
risk of electric shock are present within this unit.
The symbol indicates that there are important operating and
maintenance instructions in the literature accompanying this
unit.
This symbol indicates that this product incorporates double
insulation between hazardous mains voltage and user
accessible parts. When servicing use only identical
replacement parts.
CAUTION: When the apparatus was in electrostatic
circumstance, it may be
malfunction and need to reset by user.
WARNING: The USB memory stick should be plugged in the
unit directly. USB extension cable should not be used to avoid
failing of data transferring and interference caused.
This marking indicates that this product should not be disposed
with other household wastes throughout the EU. To prevent
possible harm to the environment or human health from
uncontrolled waste disposal, recycle it responsibly to promote
the sustainable reuse of material resources. To return your
used device, please use the return and collection systems or
contact the retailer where the product was purchased. They
can take this product for environmental safe recycling.
Table of contents
1 Front and Rear Panel
1.1
1 Front and Rear Panel.........................................................................................1
1.1 Front Panel .....................................................................................................1
1.2 Rear Panel ......................................................................................................1
Front Panel
DefineSat VM55
2 Remote Control...................................................................................................2
2.1 Key introduce ..................................................................................................2
2.2 Installing the Batteries......................................................................................2
2.3Using the Remote Control.................................................................................2
TROPHY-ACCESS
embedded decoder
3 Connections........................................................................................................3
4 First Time Installation .........................................................................................3
4.1 Program Manage Settings ..............................................................................3
4.1.1 Program Edit ................................................................................................3
4.1.2 EPG (Electronic program guide)...................................................................4
4.1.3 Sort...............................................................................................................4
4.2 Video Setting ...................................................................................................4
4.2.1 Aspect Ratio .................................................................................................4
4.2.2 Resolution ....................................................................................................4
4.2.3 TV format......................................................................................................4
4.3 Channel Search...............................................................................................4
4.3.1 Satellite ........................................................................................................5
4.3.2 Transponder..................................................................................................6
4.4 Time Setting ....................................................................................................6
4.5 Option..............................................................................................................7
4.6 System.............................................................................................................7
4.6.1 Set Password ...............................................................................................7
4.6.2 Restore Factory Default ...............................................................................7
4.6.3 Information ...................................................................................................7
4.6.4 Recall List ....................................................................................................7
4.6.5 Software update............................................................................................7
4.7 USB..................................................................................................................7
4.7.1 Multimedia:....................................................................................................7
4.7.2 Photo configure:............................................................................................8
1.2
Rear Panel
1
1
2
3
4
5.Troubleshooting .................................................................................................8
6.Technical Specifications.....................................................................................9
1
2
3
4
LNB IN: Used to connect the LNB to receive the signal.
HD-OUT: HDMI connector .
CVBS: This socket outputs composite video&audio signal
Electrical source hole: Make the electrical source line cut in it.
2 Remote Control
2.1 Key introduce
15
1) MUTE: Mute or Restore Audio Output.
2) INFO: Displays additional channel information.
3) TTX: Displays Teletext Information.
4) SUBTITLE: Selects Subtitles Language.
5) EXIT: Exits the current Menu or returns to the previous Menu.
6) OK: Confirms an entry or selection. Displays the list of channels.
7) RIGHT / LEFT: Navigates through the Menus. Increases or decreases
volume.
8) TV/RADIO: Switches from TVfunction to Radio function and from Radio
to TV.
9) RECALL: Used to switch between the last two viewed channels.
10) GOTO: Selects the play time of media.
11) PREV: Skips to the previous track during playing media.
12) NEXT: Skips to the next track during playing media.
13) REPEAT: Selects Repeat or turn off Repeat mode.
14) STOP: Stops media play.
15) STANDBY: Switch the product to on or standby.
16) EPG: (Electronic Program Guide)Turns the program guide on.
17) AUDIO: Selects an Audio Language or Audio Mode.
18) UP / DOWN: Navigates through the Menus. Selects the next or previous
Channel.
19) MENU: Turns on Main Menu.
20) FAVOURITE: Turns on Favourite Menu.
21) 0-9 (Numeric Buttons): Selects a channel or setting.
22) FWD: Searches forwards during media play.
23) REV: Searches backwards during media play.
24) PLAY: Starts or resumes media play.
25) PAUSE: Pauses media play.
26) COLOUR BUTTONS:
RED: Find function;
GREEN: witch resolution;
YELLOW: Switch aspect ratio;
BLUE: Timer setting;
27) ASPECT: Installs Format of Video;
28) PAG+/- : Changes the page.
26
1
23
12
3
24
4
9
19
5
18
6
22
11
25
14
10
27
7
16
2
20
28
17
21
13
2.3
2.2 Installing the Batteries
Remove the battery cover from the Remote Control and put 2xAAA size
batteries inside the compartment. The diagram inside the Battery
Compartment shows the correct way to install the batteries.
2
8
Using the Remote Control
To use the Remote Control, point it towards the front of the Digital Set Top
Box. The Remote Control has a range of up to 7 metres from the Set Top
Box at an angle of up to 60 degrees. The Remote Control will not operate if
its path is blocked. Sunlight or very bright light will decrease the sensitivity of
the Remote Control.
3 Connections
(1) Select [OSD Language] and press
RIGHT/LEFT key to select an
language.
(2) Select [Dish Setup] and press
RIGHT/LEFT/OK to Dish Setup
menu.
(3) Once channel tuning is complete,
you are now ready to watch TV.
Caution: Make sure to check the voltage specification of the wall outlet is the
same rating with the receiver. To prevent the risk of electric shock, do not
open the cover or the back of the receiver.
LNB
4.1 Program Manage Settings
To access the Menu, press the MENU button and select [Program].The
Menu provides options to adjust the Program Manage Settings. Select an
option and press OK or RIGHT to adjust that setting. Press the EXIT button
to exit the Menu.
4.1.1 Program Edit
To edit your program preferences
(lock, skip, favourite, move or delete),
you will need to enter the Program
Edit Menu. This Menu requires a
password to access. Enter the default
password '000000'
Set Favourite Program
You can create a short list of favourite programs that you can easily access.
Set Favourite TV or Radio program:
1. Select the preferred program then press the FAVOURITE button. A heartshaped symbol will appear and the program is marked as a favourite.
2. Repeat the previous step to select more Favourite programs.
3. To confirm and exit the Menu, press the EXIT key. Disable favourite TV or
Radio Program; Press the FAVOURITE button on the Remote Control with
the heart-shaped symbol.
Note: When connecting the receiver to other equipment, e.g., TV, VCR and
amplifier, make sure to refer to relevant user manual for instruction. Also,
make sure you disconnect all the equipments from the mains supply before
the connection.
4 First Time Installation
After all connections have been made properly, switch on TV and make sure
the receiver is connected to the Main Power. Press Power button to switch
receiver on. If you are using the receiver for the first time or restored to
Factory Default, the Main Menu will appear on your TV screen.
3
View Favourite Program
1. Press the Favourite button and the
Favourite Menu will appear.
2. Press UP/DOWN to select your
Favourite Programs.
3. Press OK to select your favourite
program.
4.1.3 Sort
Delete a TV or Radio Program
1. Select the Program and then press the BLUE button, A message will
appear. Press OK to delete the program.
2. Repeat the previous step to select more programs to delete.
Sort your channels from the following options:[Default]- remain the original
order. [Encrypt]-Sort the channels in encrypt mode. [Service Name]-Sort
the channels in alphabetical order. [Service ID]-Sort the channels according
to the service id.
Skip TV or Radio Program
1. Select the program you would like to skip and press the GREEN button. A
skip symbol is displayed. The program is marked as a skip.
2. Repeat the previous step to select more programs.
3. To confirm and exit the menu, press EXIT key.
4.2 Video Setting
To access the Menu, press MENU then select [Picture]. The Menu provides
options to adjust the video settings. Press UP/DOWN to select an option
and press RIGHT/LEFT to adjust that setting. Press EXIT to exit the menu.
Disable a skip TV or Radio program
Press the GREEN button on the skip program with the skip symbol.
4.2.1 Aspect Ratio
Move a TV or Radio Program
1. Select the preferred program then press the RED button. A move symbol
will appear.
2. Press UP/DOWN to move the program.
3. Press OK to confirm.
4. Repeat the above steps to move more channels.
You must set the display format to either 4:3 Pan Scan, 4:3 Letter Box,16:9
Wide Screen or Auto to get the maximum display when watching TV.
4.2.2 Resolution
If the video does not appear correctly, change the setting. This setting is to
match the most common setting for HDMI. [480i]: for NTSC system TV.
[480P]: for NTSC system TV. [576i] for PAL system TV. [576P]: for PAL
system TV. [720P]: for NTSC or PAL system TV. [1080I]: for NTSC or PAL
system TV.
Lock Program
You can lock selected programs for restricted view.
Lock a TV or Radio Program:
1.Select the preferred program then press the YELLOW button. A lockshaped symbol is displayed. The program is now marked as locked.
2. Repeat the previous step to select more programs.
3. To confirm and exit the menu, press the EXIT button.
4. Press the YELLOW button to disable the locked program.
5. To view the locked program, you will be require to enter either the default
password '000000' or your last set password.
4.1.2 EPG (Electronic program
guide)
The EPG is an on-screen TV guide
that shows scheduled programs
seven days in advance for every
tuned channel. Press the EPG button
on the Remote Control to access
guide. You can use the UP/DOWN
key to select the preferred program. If
there is more than one page of
information, use the BLUE button for
page up and the YELLOW button for
page down
4.2.3 TV format
If the video does not appear correctly, you need to change the settings. This
should match the most common setting for TVs in your country.[NTSC]: for
NTSC system TV. [PAL]: for PAL system TV; [Auto] :set TV format according
to the stream automatically.
4.3 Channel Search
4
To access the menu, press MENU
and select [Search Channel]. The
Menu provides options to adjust the
Search Channel settings. Select an
option and press RIGHT/LEFT to
adjust the settings. Press EXIT to exit
the Menu.
Goto X: goto the position calculated from the local and satellite positions.
4.3.1 Satellite
Configure the settings of satellites.
Satellites' list: Press Up/Down to select a satellite, whose settings will be
shown at right side.
LNB Type: Press LEFT/RIGHT/OK to show the list of LNB Types which is
shown as frequencies of local oscillator. You also can enter frequency by
User Single, User Dual at bottom of the list.
Add satellites: Press Red to add a
new satellite, in which you must input
an unique longitude, and edit the
satellite's name with soft keyboard.
Edit satellites: Press Green to edit the focused satellite.
Delete satellite: Press Yellow to delete the focused satellite. Press OK to
confirm.
Single Satellite Scan: Press Blue to pop the menu of scanning settings.
Scan Mode: Press Left/Right to select default, which scan the default
transponders built in, Blind Scan and NetWork, which scan with NIT on.
Crytped: Press Left/Right to select All Channels or FTA Channels;
LNB Power: Press LEFT/RIGHT to set the LNB power.
22K: Press Left/Right to switch on or off the 22K,which is set with auto when
LNB Type is dual local oscillator.
Toneburst: Enable or Disable the toneburst switcher.
DiSEqC1.0: select the right port up to 4 for the right LNB.
DiSEqC1.1: select the right port up to 16 for the right LNB.
Motor: Press LEFT/RIGHT to select DiSEqC1.2 or DiSEqC1.3. Then Press
OK to show the menu to set position.
DiSEqC1.2: Move the motor to a right position to lock the signal.
DiSEqC1.3: Move the motor according to the local and satellite positions.
Move Auto: Press LEFT/RIGHT to start to move West/East. It will be
stopped automatically when the signal is locked.
Move Continue: Press LEFT/RIGHT to start to move West/East. It will
keep moving until you stop it.
Move Step[1]: Press LEFT/RIGHT to move just a step.
Store Position: store current position of motor.
Goto Position: Press LEFT/RIGHT to goto the position stored.
Goto Reference: Rest all the positions.
Service Type: Press Left/Right to select ALL, DTV or Radio. Press OK to
start scanning with the above settings.
Multi-Satellites Scan: Press OK to select satellites with the mark "V“, then
press blue to pop the menu of scanning setting. After Configuring like single
satellite scan, press OK to start multi-satellites scan.
5
Delete transponder: Press Yellow to delete the focused transponder.
Press OK to confirm.
Channel Search
Scan the satellites or Transponders according the configurations.
Single Transponder Scan: Press Blue to pop the menu of scanning
setting. After configuring the settings, Press OK to start scanning.
Multi-Transponder Scan: Press OK to select transponders with the mark
"V", then press blue to pop the menu of scanning setting. After Configuring
the settings, press OK to start multi-transponder scanning.
Blind Scan
First scan the band to get the transponders which can be locked. After
gathering all Transponders, Scan the transponders one by one to get the
programs.
4.4 Time Setting
To access the Menu, press MENU
then select [Time]. The Menu
provides options to adjust the time
settings.
4.3.2 Transponder
Press UP/DOWN to select an option and press RIGHT/LEFT to adjust the
settings. Press EXIT to exit the menu.
(1)Time Auto: update time with the stream time, or NOT.
(2)Time Zone: Select the Time Zone Offset.
(3)Date: show and set the system date.
(4)Time: show and set the system time.
Press GOTO to switch the list to show transponders of the focused satellite.
Also you can press GOTO to switch back to satellites' list.
(5)Sleep: If this setting is off, this function does not work. If this setting is not
off, a message will pop up after your preferred time to inform you, that the
device will go in to sleep mode. This message will appear under no any
operation. Auto-off function can be set in a time period at 0-12 hours.
Standard setting is off. Press STANDBY button to exit sleep/auto-off mode.
Add transponder: Press Red to add a new transponder. It can't save an
existing TP under the same satellite.
Edit transponder: Press Green to edit the focused transponder. It can't
save an existing TP under the same satellite
6
4.5 Option
4.6.3 Information
To access the Menu, press MENU
and select [Option]. The menu
provides options to adjust the OSD
Language, Subtitle Language and
Audio Language.
View model, hardware and software information.
4.6.4 Recall List
enable or disable Recall list function, which support multi-recall -program
switching.
Select an option and press RIGHT/LEFT to adjust the setting. Press EXIT to
exit the Menu.
4.6.5 Software update
select to start software update if USB is connecting and there's a upgrading
file.
(1) OSD Language: Select an OSD language.
(2) Audio Language: Select the preferred audio language for watching TV
channels. If the language is not available, the default program language will
be used.
(3) Subtitle Language: Select the preferred subtitle language.
(4)Digital Audio set output mode of Digital Audio
(5)Banner Time set the period of banner auto disappearing,
4.7 USB
To access the Menu, press the
MENU button and select [USB]. The
menu provides options to playback
Music and Photo files, it can support
WMA, JPEG, BMP files, The unit will only support USB device with FAT and
FAT32 file system. It will not support NTFS file system.
4.6 System
To access the Menu, press MENU and select [System].The menu provides
options to adjust the system settings. Press the UP/DOWN key to select an
option and press RIGHT/LEFT to adjust the setting. Press EXIT to exit the
Menu .
4.7.1 Multimedia:
if no USB device plugged into it, a warning message "No USB Device is
Found" displays, otherwise you can select the Music or Photo type in this
menu and press OK to enter the file browser and select the file to playback
4.6.1 Set Password
Set or change the password for
locked programs. Enter your old
password or the default password
'000000'. You will then be asked to
enter your new password.
To confirm re-enter your new password. Once it is confirmed, press EXIT to
exit the Menu.
4.6.2 Restore Factory Default
Reset your Set Top Box to the Default Factory Settings. In Main Menu select
[Restore Factory Default] and press OK or RIGHT to select. Enter your
password or the default password '888888' and press OK to confirm.
This option will delete all preset channels and settings.
7
4.7.2 Photo configure:
6
-Slide Time: adjust slide show interval to 1~8 seconds .
-Slide Mode: adjust slide show effect as mode 0~59 or random.
-Aspect Ratio: Keep displays the picture as its original aspect, Discard
displays the picture in full screen mode.
5.Troubleshooting
8
Technical Specifications