1
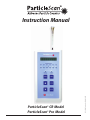
ParticleScan™ CR Model
ParticleScan™ Pro Model
IQAir North America, Inc., English, 2006/9
Instruction Manual
The IQAir Group reserves the right to change specifications contained in this document
at any time and without prior notice.
© Copyright The IQAir Group 2000-2006 - All rights reserved.
IQAir is a registered trademark of The IQAir Group.
Important Safety Information
Important Safety Information
Class 1 Laser Product
This product incorporates a Class 1 laser diode based sensor as defined in 21 CFR, Subchapter J, of the Health and
Saftey Act of 1998 and applies when the instrument is used under normal operating conditions and during
maintenance procedures.
Service procedures performed on the sensor can result in exposure to invisible radiation. Service must be
performed only by a factory authorized person.
The laser diode based sensor inside this instrument carries a warning label as shown below:
-WARNINGINVISIBLE LASER RADIATION WHEN OPEN
AVOID EXPOSURE TO BEAM
Warning
• Do not attempt to sample reactive gases (such as hydrogen or oxygen) with the particle counter.
Reactive gases create an explosion hazard within the counter.
• Water, solvents, or other liquids of any type should never be allowed to enter the instrument.
Table of Contents
Table of Contents
page
Important Safety Instructions
Chapter 1 – About Particle Counting
1.1
How Do Particle Counters Work?
1.2
The Two ParticleScan Models
1.3
Data Logging Options
6
6
6
6
Chapter 2 – The ParticleScan Kit
2.1
Unpacking and Initial Inspection
2.2
Packing List
7
7
7
Chapter 3 – Getting to Know the ParticleScan
3.1
The ParticleScan Unit
3.2
ParticleScan Features
8
8
9
Chapter 4 – Taking Measurements with the ParticleScan
4.1
Preparing the ParticleScan for Use
4.2
Switching the ParticleScan On and Off
4.3
Sampling Particles
4.4
Taking Samples at Different Size Channels
10
10
10
10
10
Chapter 5 – Adjusting Settings in the Menu
5.1
Location Menu [Loc]
5.2
Data Logging Menu [Log]
5.3
Delete Data Menu [data]
5.4
Full Memory Menu [FULL]
5.5
Concentration Units Menu [Con]
5.6
Sample Time Menu [SAti]
5.7
Sample Repeat Menu [SAr]
5.8
Geiger Counter Menu [GEIG]
5.9
Alarm Menu [A]
5.10
Time Menu [t]
5.11
Date Menu [MM:DD:YYYY]
5.12
Auto Timer Menu [auto]
IP Menu [IP]
5.13
11
11
11
11
11
11
12
12
12
12
13
13
13
13
Chapter 6 – Maintenance of the ParticleScan
6.1
The Battery
6.1.1
Low Battery Indicator
6.1.2
Recharging the Battery
Replacement of the Battery Pack
6.1.3
6.2
Sensor Testing & Cleaning
“Zero Count”Test
6.2.1
Sensor Cleaning
6.2.2
14
14
14
14
14
14
14
14
Table of Contents
Table of Contents
page
Chapter 7 – Computer Connectivity
Features
7.1
7.2
Computer Connectivity Options
7.2.1
Via a Network
7.2.2
Via a Crossover Connection
7.2.3
Via USB
7.2.4
USB Driver Installation
7.2.5
ParticleScan USB Software for PC Installation
7.2.6
Starting the ParticleScan USB Software for PC
7.3
Accessing the ParticleScan via the Web Browser
7.4
The ParticleScan Control Window
7.4.1
Start/Stop Measurements
7.4.2
Sample Time
7.4.3
Sample Repeat
7.4.4
Measurement Units
7.4.5
Count Type
7.4.6
ParticleScan Display On/Off
7.5
Setting the Time & Date
7.6
Using the Auto Timer
7.7
Scheduling Regular Measurements
7.8
Data Logging
7.8.1
Checklist Before Data Logging
7.8.2
Data Logging to Computer
7.8.3
Data Logging to ParticleScan Memory
7.8.4
Full Memory Options
7.8.5
Viewing Logged Data
7.8.6
Printing Logged Data
7.8.7
Saving Logged Data to a CSV File
7.8.8
Importing a ParticleScan Data File into Excel
15
15
15
15
15
16
16
17
18
19
20
20
20
20
20
20
20
21
21
22
23
23
23
24
24
24
25
25
26
Chapter 8 – Troubleshooting
8.1
Symptom, Cause and Corrective Action
28
28
Chapter 9 – Technical Specifications for ParticleScan Pro and CR
9.1
Technical Specifications
29
29
Chapter 1 – About Particle Counting
Chapter 1 – About Particle Counting
1.1
How Do Particle Counters Work ?
Most particle counters use a laser diode light source and collection optics for particle detection. Particles scatter the light
from the laser diode beam in the direction of the collection optics. The collection optics focus the light onto a photo
diode that converts the bursts of light into electrical impulses. The pulse height is proportional to the particle size.
Impulses are counted and their intensity is measured for particle sizing. The results are then displayed digitally for the
specific size channel(s) and set concentration unit.
1.2
The Two ParticleScan Models
The six channel ParticleScan particle counters are available in two configurations:
•
ParticleScan Pro
This model is designed for indoor air quality use, featuring a 0.025 cfm sampling rate.
The flow rate of 0.025 cfm of the ParticleScan Pro is more suitable for environments with normal to high particle counts
since the lower flow rate and smaller sampling diameter allow more accurate counting of elevated particle concentrations.
•
ParticleScan CR
This model is designed for cleanroom use, featuring a 0.1 cfm sampling rate and a HEPA filter for the exhaust air.
The higher flow rate of the ParticleScan CR permits statistically significant results even if the particle concentration is
low and the measurement time is short.
1.3
Data Logging Options
ParticleScan Pro and ParticleScan CR handheld counters allow the logging (recording) of measurement data onto the
ParticleScan’s internal memory from where it can be downloaded at a later time to a computer via the ParticleScan Utility
Software.
When the ParticleScan is connected to a computer or network, measurement data can also be logged in real time to the
computer via the ParticleScan Utility Software.
In both cases, the data can be viewed and saved to a text file that can be easily opened and formatted in any common
spreadsheet program. Logged data can also be printed directly from the logging window to a printer.
A printout of particle counting results can be used as a record whenever documentation of room cleanliness is required,
as in Fed-Std-209E cleanroom certification. A permanent record is also useful when tracking the particle concentration
trend at a workstation or other location.
6
Chapter 2 – The ParticleScan Kit
Chapter 2 – The ParticleScan Kit
2.1
Unpacking and Initial Inspection
Each ParticleScan instrument has been thoroughly inspected and tested by the manufacturer and is ready for use. Prior to
use, please read this instruction manual.
Upon receipt, inspect the shipping carton for damage. If the carton is damaged, notify the carrier and dealer and save the
carton for carrier inspection.
Note: You may wish to keep the outer carton for safe shipment when you send the counter for factory calibration. Always
store and ship ParticleScan in carrying case.
2.2
Packing List
Open the two latches of the carrying case and inspect the kit for completeness. Also check visually for broken parts,
scratches, dents, or other damage.
Your ParticleScan kit should consist of the following items (see Illustration 1.1):
•
•
•
•
•
•
•
•
•
•
•
•
ParticleScan particle counter (with
Red protection cap on intake nozzel)
Protective carrying case
Isokinetic probe with tubing
Power adaptor/battery recharger
Purge filter with tubing
Cat. 5 network patch cable
Cat. 5 crossover adapter
USB cable
ParticleScan CD with ParticleScan USB software, USB drivers
Java Runtime, Excel data import sheet, ParticleScan pdf manual
Instruction Manual
Calibration certificate
Warranty registration card
Illustration 1.1
7
Chapter 3 – Getting to Know the ParticleScan
Chapter 3 – Getting to Know the ParticleScan
3.1
The ParticleScan Unit
Isokinetic probe
Tygon tube
RJ-45 connector
Intake nozzle
Charging LEDs
DC Adapter Socket
USB connector
Display
Particle Size
Indicators
Cumulative Count Ranges
Differential Count
Ranges
Auto Timer
Indicator
Data Log Indicator
SAMPLE Key
UP Key
ENTER Key
DOWN Key
ON/OFF Key
Press and hold
2 sec.
8
Low Battery Indicator
When both Data Log and
Auto Timer flash
MENU Button
Press to display one of 13 menus:
1. Location Menu [Loc]
2. Data Logging Menu [Log]
3. Delete Data Menu [data]
4. Full Memory Menu [FULL]
5. Concentration Units Menu [Con]
6. Sample Time Menu [SAti]
7. Sample Repeat Menu [SAr]
8. “Geiger Counter” Menu [Geig]
9. Alarm Menu [A]
10. Timer Menu [t]
11. Date Menu [MM.DD.YYYY]
12. Auto Timer Menu [auto]
13. IP Menu [IP]
Chapter 3 – Getting to Know the ParticleScan
3.2
ParticleScan Features
Isokinetic probe The isokinetic probe with the Tygon tube piece allows uniform low turbulence sampling of ambient air.
It is also responsible for proportional sampling of particles of all sizes.
Intake nozzle The intake nozzle is covered during shipping with a protective red plastic cap, which is designed to keep
small objects from entering into the sampling chamber. The cap must be removed prior to taking a sample to prevent
possible damage to the internal pump.
Display When the device is off and not connected to the charger, the display will also be off. If the device is off and connected to the charger, it will show [charging] or [charged]. When the unit is sampling, the particle concentration measured
will be displayed. The displayed concentration can be shown for one particle size range at a time (see Particle Size
Indicators). When the Menu key is pressed, the display will show the user settings.
Particle Size Indicators The particle size indicators show which particle size range is currently displayed. When the Alarm
is set and the set particle concentration threshold is reached, the appropriate particle size indicator will flash and a beep
will sound when exceeded.
Cumulative Count Ranges There are six cumulative size channels (≥0.3 / ≥0.5 / ≥0.7 / ≥1.0 / ≥2.0 / ≥5.0) that can be
selected. When a cumulative size channel is selected, the ParticleScan will count particles which are equal to and larger
than the selected size channel.
Differential Count Ranges There are five differential size channels (0.3–0.5 / 0.5–0.7 / 0.7–1.0 / 1.0–2.0 / 2.0–5.0) that can
be selected. When a differential size channel is selected, the ParticleScan will count the particles whose size lies between
the selected two size channels.
Data Log Indicator This indicator lights up when data logging has been turned on. Whenever a measurement is taken, it
will be logged to the ParticleScan’s internal memory.
Timer On Indicator This indicator lights up when the auto timer is actively set. The Auto Timer is a feature that allows the
ParticleScan to take automatic measurements based on a timer schedule. The Auto Timer schedule is set via the
ParticleScan Utility Software.
Low Battery Indicator When the battery is running low, both the Data Log Indicator and the Timer On Indicator will
flash. The unit can operate for another 5–10 minutes from the time the Low Battery Indicator comes on.
ON/OFF Key Press and hold for 2 seconds to turn the device on or off.
SAMPLE Key Press once when the device is on to start a measurement. Press again to stop a measurement.
UP/DOWN Keys During a measurement use to select size channel displayed. It is also used to change a menu setting.
MENU Key Press 1 to 13 times to display one of thirteen user menus.
ENTER Key Press and hold for 2 seconds when in a menu to make a menu item changeable. Press once in certain menus
to progress. Press and hold for 2 seconds to save changes in a menu.
9
Chapter 4 – Taking Measurements with the ParticleScan
Chapter 4 – Taking Measurements with the ParticleScan
4.1
Preparing the ParticleScan for Use
To prepare your ParticleScan for use, simply follow these steps:
1.
Remove the red protective cap from the intake nozzle.
2.
Take the isokinetic probe and attach it with the tubing end to the intake nozzle.
4.2
Switching the ParticleScan On and Off
1.
To switch the ParticleScan on, press and hold down the ON/OFF key for 2 seconds. When the device is turned on, it
will sound a short beep and show [STANDBY] on the display.
2.
To turn off the device, press and hold down the ON/OFF key for 2 seconds. When the ParticleScan is turned off, it will
sound a short beep and the display will extinguish or show [Charging] when it is connected to the power adapter.
4.3
Sampling Particles
1.
To take a measurement, turn the unit on and press the SAMPLE key. The display will count down while the pump
gathers the first air sample and then display the first measurement. There will be a delay of a few seconds until the
countdown starts, during which the ParticleScan performs a routine check. The number in the display represents
the number of particles calculated to be present per cubic foot, liter or cubic meter (1000 liters) of air, depending on
the concentration unit selected (see Chapter 5.5).
2.
The display of the ParticleScan will update in regular intervals, as selected in the Measurement Update Menu.
3.
To stop taking measurements, press the SAMPLE key once. The last measurement result is now frozen on the display.
4.4
Taking Samples at Different Size Channels
The ParticleScan features six size channels which allows the user to take cumulative counts for six different particle size
ranges and differential counts for five different size ranges.
1.
When the counter is first switched on, it will display the particle concentration per cubic foot (cu. ft.) of air for the
default Cumulative Count Range (i.e. ≥0.3µm).
2.
To change the size channel to the next particle size range, simply press the UP key once. The Size Range Indicator
LED will shift from “≥0.3” to “≥0.5”.
3.
Repeated pressing of the UP key will scroll through all the different size ranges, first the Cumulative Count Ranges,
then the Differential Count Ranges. To reach the required count range, simply scroll through all the count ranges
until the desired Particle Size Indicator is lit.
10
Chapter 5 ChaChapter 5 – Adjusting Settings in the Menu
Chapter 5 – Adjusting Settings in the Menu
The ParticleScan Pro/CR has 13 menus which allow the user to set a range of parameters. To access these menus, press the
MENU key one to thirteen times. To fast exit a menu at any time and get back to the measurement screen, you may press
the SAMPLE key at any time.
5.1
Location Menu [Loc]
The Location Menu allows to assign a location number from 1–256 to any data that is logged.
To change the location number, press the MENU key once until the display shows [Loc]. Press and hold the ENTER key for
two seconds until the location number starts to flash. Then use the UP or DOWN key, to select the desired location number. To confirm the selection, press and hold the ENTER key for two seconds, until the location number stops flashing.
5.2
Data Logging Menu [Log]
The Data Logging menu allows the user to log to the ParticleScan’s internal memory. A user can set this function to be on
or off. Whether data logging is currently on or off is indicated by the status of the Data Log indicator. To turn the data logging on or off, press the MENU key until the display shows [Log].
Press and hold the ENTER key for two seconds until [on] or [off ] selection starts to flash. Use the UP or DOWN key to
select the desired setting. Confirm the selection by pressing and holding the ENTER key for two seconds, until the selection stops flashing.
5.3
Delete Data Menu [dAtA]
The Delete Data Menu shows how many data points have been logged in the ParticleScan memory and allows to erase
the logged data. The ParticleScan can log a maximum of 14,336 data points.
To view the number of data points logged to the ParticleScan internal memory, press the MENU key until the display
shows [dAtA]. To delete the logged data, press and hold the ENTER key for two seconds until [dEL_dAtA] flashes on the
display. Press and hold the ENTER key for two seconds to confirm the deletion of all logged data. After the deletion of
logged data the display will show [dAtA___0].
5.4
Full Memory Menu [FULL]
The Full Memory Menu allows the user to select what should happen when the ParticleScan’s data log memory is full.
[FULLstop] means that once the maximum number of data points have been logged, data logging will stop. [FULLcycl]
means that once the maximum number of data points has been logged, newly logged data will overwrite the oldest
ParticleScan data logged.
To change the Full Memory Setting, press and hold the ENTER key for two seconds until the [stop] or [cycl] selection starts
to flash. Use the UP or DOWN key to select the desired setting. Confirm your selection by pressing and holding the ENTER
key for two seconds until the selection stops flashing.
5.5
Concentration Units Menu [Con]
The Concentration Units Menu allows the user to select whether the particle concentration is displayed in particles per
cubic foot [Con__CF], particles per liter [Con__Lit] or particles per cubic meter (1000 liter) [Con1000L].
To change the concentration units, press and hold the ENTER key for two seconds until the [CF], [1000L] or [L] selection
starts to flash. Use the UP or DOWN key to select the desired setting. Confirm your selection by pressing and holding the
ENTER key for two seconds, until the selection stops flashing.
11
Chapter 5 – Adjusting Settings in the Menu
5.6
Sample Time Menu [SAti]
The Sample Time Menu allows the user to select the sampling period (in terms of seconds) for particle sampling. The
default setting is 6 seconds, which means that the ParticleScan will sample and display a new particle concentration
measurement after 6 seconds.The minimum time period that can be set is 1 second and the maximum update period is
600 seconds (10 minutes).
To change the sample time period, press and hold the ENTER key for two seconds until the currently set update number starts to flash. Use the UP or DOWN key to select the desired setting. Confirm your selection by pressing and holding
the ENTER key for two seconds until the selection stops flashing.
5.7
Sample Repeat Menu [SAr]
The Sample Repeat Menu allows the user to have the ParticleScan take just one sample [OncE] and hold the result or take
continuous samples [Cont] until the sampling is stopped. The default setting is continuous.
To change the Sample Repeat setting, press and hold the ENTER key for two seconds until the current setting starts to
flash. Use the UP or DOWN key to select the desired setting. Confirm your selection by pressing and holding the ENTER
key for two seconds until the selection stops flashing.
5.8
Geiger Counter Menu [GEIG]
The “Geiger Counter” function enables the ParticleScan to emit an audible signal at
intervals which are proportionate to the number of particles (≥0.3 µm) that are
detected in a period of one second. The “Geiger Counter” Menu allows the user to
choose from 10 sensitivity levels. The most sensitive setting is 1, which means that for
each particle counted in a period of one second, the ParticleScan will generate one
beep. The least sensitive setting is 10, which means that for every 500 particles counted in a one second period, one beep will be generated.
To change the “Geiger Counter” setting, press the Menu key until you reach the Menu
display starting with [GEIG]. Press and hold the ENTER key for two seconds until the
current setting starts to flash. Use the UP or DOWN key to select the desired setting.
[OFF] means that the ”Geiger Counter” function is disabled. 1 to 10 represent the
available sensitivity settings (see table). Confirm your selection by pressing and holding the ENTER key for two seconds until the selection stops flashing.
Setting
OFF
1
2
3
4
5
6
7
8
9
10
One beep per x
particles
N/A
1
5
10
20
40
60
80
100
200
500
Note: Whereas the ParticleScan display updates particle concentration after 6 seconds (default), the “Geiger Count” issues
a beep based on the number of particles sampled in one second. Due to the shorter sampling period, the “Geiger Counter”
reacts quicker to changes in particle concentrations than the display.
5.9
Alarm Menu [A]
The Alarm Menu allows the user to set audio alarm thresholds for every one of the six cumulative (≥0.3, ≥0.5, ≥0.7, ≥1.0,
≥2.0, ≥5.0) and five differential (0.3–0.5, 0.5–0.7, 0.7–1.0, 1.0–2.0, 2.0–5.0) size channels. When an alarm threshold is exceeded, a beep alarm will sound and the appropriate channel size LED will flash.
To set an alarm threshold for a channel, use the UP or DOWN key to select the size channel for which you would like to
activate the alarm. Then press the Menu key until you reach the Menu display starting with [A] for Alarm. Press and hold
the ENTER key for two seconds until [A0000000] appears. Use the UP or DOWN key to enter the first digit and/or press the
ENTER key to jump one decimal point to the right. Once the desired threshold is entered, press and hold the ENTER key for
2 seconds to confirm.
To turn off an alarm threshold, select the appropriate size channel LED with the UP or DOWN key, press the MENU key
until you reach the Menu starting with [A] , press and hold the ENTER key for two seconds until the display shows
[A0000000], with the first zero flashing. Press and hold the ENTER key for two seconds until the zero stops flashing and
switches to [A…OFF]. Your alarm threshold has now been turned off.
12
Chapter 5 – Adjusting Settings in the Menu
5.10
Time Menu [t]
The Time Menu allows the user to set the current time inside the ParticleScan. The ParticleScan uses a 24 hour clock format. The internal clock is used to time stamp logged measurements. It is also used for the automatic timer function.
To set the time, press the MENU key until the display menu that starts with [t] is shown. Press and hold the ENTER key
for two seconds until the hour block flashes. Use the UP or DOWN key to set the hours. Press the ENTER key to advance to
the minutes. Use the UP or DOWN key to set the minutes. Press the ENTER key to advance to the seconds. Use the UP or
DOWN key to set the seconds. Press and hold the ENTER key for two seconds until the flashing stops to save the selection.
5.11
Date Menu [MM:DD:YYYY]
The Date Menu allows to set the current date inside the ParticleScan. The date format used is MM:DD:YYYY. This date is
used to date stamp logged measurements. It is also used for the automatic timer function.
To set the date, press the MENU key until [MM’DD’YYYY ] is shown on the display. Press and hold the ENTER key for
two seconds until the month block starts flashing. Use the UP or DOWN key to set the current month. Press the ENTER key
to advance to the days. Use the UP or DOWN key to set the day. Press the ENTER key to advance to the year. Use the UP or
DOWN key to set the year. Press and hold the ENTER key for two seconds until the flashing stops to save the selection.
5.12
Auto Timer Menu [auto]
The Auto Timer Menu allows the user to turn off any auto timer programming that is active. The auto timer is a timer program which allows the ParticleScan to turn itself on to take measurements at regular intervals without being connected to
a computer. This timer can only be programmed, when the instrument is connected to a computer in the Control Window.
5.13
IP Menu [IP]
The IP Menu allows the user to view the IP address of the ParticleScan on a network and manually set the IP address, subnetmask and gateway. The IP address is a number with which the ParticleScan is identified on a network. When the IP
number is entered into a web browser such as Internet Explorer, the ParticleScan can be found and accessed via the network. The default setting of the IP menu is DHCP and means that the ParticleScan will automatically receive an IP number
automatically from the network router.
To view the current IP number that has been assigned to your ParticleScan by a network router, connect your ParticleScan
to a network with a patch cable, turn the ParticleScan off and unplug the DC power connector for at least 3 seconds. Turn
the ParticleScan on by pressing the ON/OFF key for two seconds and then press the MENU key until you reach the IP
Menu which at this time will flash the word “reading” on the display or show intermittently [DCHP] and [IP xxx’xxx’] and
[‘xxx’xxx] (The x stands for numbers). A valid IP address consists of four blocks separated by a period. The first two blocks
have the “IP” in front. Blocks three and four do not. A typical IP number could look like this on the ParticleScan display [IP
192’168], [ ‘ 0’ 79]. In this example the IP number would be 192.168.0.79. It is this number that together with the periods
must be entered into the address field of the web browser.
When the IP address is flashing on the display, this means the ParticleScan is not properly connected to a network and
has not received a valid IP address. Note: If the ParticleScan was disconnected from the network, it is necessary to reset the
IP address. This can be done by turning off the ParticleScan and disconnecting the DC plug for at least three seconds.
Alternatively, while in the IP Menu, the ENTER key can be pressed for three seconds until [-dHCP] appears on the display.
Then press the ENTER key once again until [dHCP] flashes on the display. Then press ENTER for two seconds until [-dHCP]
appears again followed by the MENU key. Now the word [Updating] flashes on the display for about 20 seconds, followed
by the updated IP address.
To set a static (fixed) IP address go to the IP menu, press enter for two seconds until [-dHCP] appears on the display. Then
press the ENTER key once again until [dhCP] flashes on the display. Then press an ARROW key to display a flashing [Static].
Press the ENTER key for two seconds until a constant [-Static] appears . Now you can adjust the IP address [-IP Addr], the
subnet mask [-Subnet] and the gateway [-Gate], by pressing an ARROW key to reach the item to be modified, followed by
press and hold ENTER. The ARROW and ENTER keys serve to modify the IP address, subnet mask and the gateway.
13
Chapter 6 – Maintenance of the ParticleScan
Chapter 6 – Maintenance of the ParticleScan
6.1
The Battery
Your ParticleScan is equipped with a 6 V internal Ni-MH (Nickel-Metal Hydride) rechargeable battery pack. Fully charged,
the ParticleScan Pro will run continuously for up to four hours and the ParticleScan CR will run continuously for up to
three hours.
6.1.1
Low Battery Indicator
When the battery is running low, both the Data Log Indicator and the Timer On Indicator will flash simultaneously. The
unit can operate for another 5-10 minutes from the moment the Low Battery Indicator comes on.
6.1.2
Recharging the Battery
To recharge the internal battery pack of the ParticleScan, simply connect the supplied power adaptor/charger to a power
outlet and the round connector to the DC inlet socket at the side of the ParticleScan. It takes about 3 hours to fully
recharge the internal battery pack. When the unit is turned off and the adapter/charger is connected, the display will
show [charging]. When the battery is fully charged, the display will show [charged].
Caution: Only use the supplied adaptor/charger to recharge the internal battery pack.
6.1.3
Replacement of the Battery Pack
The ParticleScan features one of the most sophisticated charging circuits available today, which ensures maximum battery life by monitoring voltage and temperature during charging. This means that the ParticleScan can be recharged over
1000 times before the battery pack may need replacement. To replace the battery, contact IQAir Technical Support at
877-715-4247.
6.2 Sensor Testing & Cleaning
After taking repeated readings in non-controlled environments, the highly sensitive particle sensor in your ParticleScan
may have accumulated contaminants. As a result, the particle count may become inaccurate. A special purge filter is supplied with the ParticleScan kit to test the sensor for contamination. The test should be undertaken as follows:
6.2.1 “Zero Count” Test
1. Remove the red protective cap or isokinetic probe from the ParticleScan’s intake nozzle.
2. Attach the tubing end of the purge filter to the intake nozzel.
3. Switch the ParticleScan on.
If the particle count reaches zero after a few readings, the sensor is clean.
If the particle count does not reach zero within a few minutes, this suggests sensor contamination. In such a case, follow
the below steps.
6.2.2 Sensor Cleaning
To clean the sensor, the ParticleScan must be fitted with the purge filter and left running for several hours. Should the
readout still not show a zero count after that, the ParticleScan should be returned to the manufacturer for professional
cleaning and re-calibration.
Note: In order to prevent the gradual accumulation of contaminants on the sensor, the purge filter ‘zero count’ test
should be performed regularly, especially after having used the ParticleScan in environments with elevated levels of airborne contamination.
14
Chapter 7 – Computer Connectivity
Chapter 7 – Computer Connectivity
7.1
Features
The ParticleScan Pro/CR features a built-in 10/100BASE-T Ethernet port (RJ-45 connector) and USB (USB Mini-B) port.
The connection of a ParticleScan to a computer or network allows to control the ParticleScan via a Java Interface on the
computer. The control and data transfer features allow the user to:
• Initiate manual or automated particle measurements
• Update important ParticleScan settings, such as date, time and measurement updates
• Download logged data from the ParticleScan memory to a computer
• Logging particle measurements in real-time from the ParticleScan to a computer (i.e. use as a remote sensor).
• Program the ParticleScan to take regular automated measurements, with or without being connected to a computer.
7.2
Computer Connectivity Options
There are three basic ways to connect a ParticleScan to a computer:
7.2.1
Via a Network
Connection: Patch cable from ParticleScan RJ-45 socket to network hub
System requirements: Windows 98/ME/NT/2000/XP, Mac OSX, Linux
Software requirements: Web browser, Java Runtime Environment
Other requirements: Network with router
If a network is available, connecting a ParticleScan to the network via a
network hub or switch, allows to access the ParticleScan from any computer in the network that has a web browser (e.g. Internet Explorer, Safari
etc.) and Java Runtime Environment installed. The ParticleScan CD
includes J2RE version 5.0 for PC. For other computers, the appropriate
J2RE version can be downloaded for free from www. java.com. On many
current computers these programs are pre-installed. The ParticleScan is
identified in the network by its IP address. The ParticleScan comes preconfigured to automatically receive this IP address from the network
(DHCP). This address is displayed in the IP Menu of the ParticleScan (see
5.13). To connect to the ParticleScan, the IP address of the ParticleScan is
entered into the address field of the browser (e.g. 192.168.0.79).
ParticleScan with patch cable for direct connection into the RJ-45 network connector of
a hub or switch.
7.2.2 Via a Crossover Connection
Connection: Patch cable with crossover adapter from ParticleScan
Ethernet port to computer Ethernet port
System requirements: Windows 98/2000/NT/XP, Mac OSX, Linux
Software requirements: Web browser, Java Runtime Environment
Other requirements: RJ-45 connector on computer, patchcable
with crossover connector (supplied)
If no network is available, but the computer has an Ethernet port, you
can connect to the ParticleScan with the supplied patch cable and the
crossover adapter. You connect to the ParticleScan via a normal web
browser by entering a valid IP address in the address window of the web
browser. It is recommended that a fixed IP address is assigned to the
ParticleScan and the computer, otherwise IP addresses are assigned randomly with each restart. An IP address can be assigned to the
ParticleScan in the IP Menu of the ParticleScan (see 5.13). To connect to
the ParticleScan, the IP address of the ParticleScan is entered into the
address field of the browser (e.g. 169.254.177.13).
ParticleScan with crossover adapter and
patch cable for direct connection into the
RJ-45 network connector of a computer.
15
Chapter 7 – Computer Connectivity
7.2.3 Via USB
1.
System requirements: Windows XP
Software requirements: ParticleScan USB Connection Software and
ParticleScan USB drivers (supplied on CD)
Hardware: Computer with USB port, USB cable (supplied)
The USB connection of the ParticleScan is only supported for Windows
XP computers. For USB connectivity, the installation of ParticleScan
USB drivers and of the ParticleScan USB Connectivity Software is necessary. These are included on the ParticleScan CD supplied with the
ParticleScan.
7.2.4 USB Driver Installation
Connect the ParticleScan and the computer
with the supplied USB cable.
To allow data communication via a USB connection to a Windows XP
computer, two drivers need to be installed. This installation process is
easy and automatic.
3.
2.
The New Hardware Wizard automatically appears.
Select <No, not this time> and click <Next>.
4.
5.
Click <Finish>. The first driver is now installed.
16
Insert the ParticleScan CD and leave the selection on <Install the software automatically>. If
the installation doesn’t start, click <Next>.
The New Hardware Wizard automatically appears
to install the second driver. Select <No, not this
time> and click <Next>.
Chapter 7 – Computer Connectivity
7.
6.
Click <Finish>. All required drivers are now installed.
Leave the selection on <Install the software automatically> and press <Next>.
7.2.5 ParticleScan USB Utility Software for PC
Installation
1.
To view and transfer data between the computer and the
ParticleScan, the ParticleScan USB Utility Software needs to be
installed. It is supplied on the ParticleScan CD.
2.
Double-click on the <PScan_USB_setup> which
is found on the ParticleScan CD.
3.
Click on <Next>.
Click on <Next> in the Setup Wizard window.
4.
5.
Click on <Next>.
Click on <Next> to finish the setup.
17
Chapter 7 – Computer Connectivity
7.2.6 Starting the ParticleScan USB Software
for PC
Ensure that the ParticleScan is connected to the computer
via a USB cable. Switch your ParticleScan on by pressing for
two seconds the ON/OFF key.
Start your ParticleScan USB Software for PC by a simple
double-click on the ParticleScan icon on your desktop.
After a few seconds, the <Connection Dialog> window
opens. If you are properly connected to the ParticleScan,
the unit’s name and serial number will appear in the USB
description field.
The ParticleScan Control window will appear. The
Connection Status should be <Connected>.
Note: If <Not Connected> appears the ParticleScan may
have been switched off. In this case you need to quit the
ParticleScan software, switch ParticleScan on and start
the ParticleScan USB Software again.
18
Chapter 7 – Computer Connectivity
7.3
Accessing the ParticleScan via the
Web Browser
Open your web browser and enter the IP address of your
ParticleScan (e.g. http://192.168.100.14).
The IP address of your ParticleScan can be determined by
going into the IP Menu (see Chapter 5.13).
When the Security Window appears, click <Always>.
If you are running under J2RE 5.0 select <Always trust content from this publisher> and click <Run>.
19
Chapter 7 – Computer Connectivity
7.4
The ParticleScan Control Window
The ParticleScan control window, which can be reached
via a web browser connection or a ParticleScan USB
software connection, has numerous remote control and
data logging features.
7.4.1 Start/Stop Measurement
To manually start or stop a measurement, click on the
<Start> and <Stop> button. The measurement data is
displayed in six current measurement fields, after every
measurement update.
7.4.2 Sample Time
The <Sample Time> selection allows to select the
update period (in terms of seconds) for particle sampling. If the setting is 6 seconds, the ParticleScan will
display a new particle concentration measurement
every 6 seconds. The time also coincides with the data
points logged.
7.4.3 Sample Repeat
The Once/Continuous selection allows the user to have
the ParticleScan take just one sample and hold the
result or take continuous samples until the sampling is
stopped.
7.4.4 Measurement Units
Select one of the three measurement units: particles
per cubic meter (1000 L), particles per liter or particles
per cubic foot (cu.ft.). This can be done during or after a
measurement.
7.4.5 Count Type
Select between <Cumulative> and <Differential>. The
cumulative selection shows all the particles equal to or
larger than the selected size channel. The differential
selection shows the particles whose size lies between
two size channels. Refer to 3.2.
7.4.6 ParticleScan Display On/Off
The ParticleScan Display option allows to turn off the
display and all indicators of the ParticleScan. This may
be useful when the ParticleScan is used as a remote
sensor. Turning off the display will also save battery life
when the ParticleScan is not connected to a power
adapter.
20
Chapter 7 – Computer Connectivity
7.5
Setting the Time & Date
The <Time & Date> section show the current time and
date as set in the ParticleScan.
To change the time, double-click on the hour, minutes
or seconds and use the arrows to adjust. To save your
selection to the ParticleScan, press the <Save> button.
To change the date, double-click on the <…> button.
This will open the <Date> window where the year,
month and day can be selected. Press <Select & Close>
to close the <Date> window. To save your selection to
the ParticleScan, press the <Save> button.
7.6
Using the Auto Timer
The Auto Timer Settings section allows to schedule the
ParticleScan to make automatic measurements.
To access the <Auto Timer Settings>, double-click on
the <…> button.
Note: When the Auto Timer schedules measurements,
these will automatically be logged to the internal
memory of the ParticleScan, whether or not <Log to
ParticleScan memory> is enabled.
21
Chapter 7 – Computer Connectivity
7.7
Scheduling Regular Measurements
To take measurements at regular intervals, choose the
interval and the sample time per interval. If you would
like to take a measurement every hour for 5 minutes,
for example, enter <1> and <hour> in the top row of
the window and <5> and <minutes> in the second row.
Next, select the time you would like this measurement
schedule to begin, designated with <Start time>. If
you would like to begin immediately, select <now>. If
you would like the measurement to start at a specific
time in the future, press on the <…> button and specify that time.
Next, select the desired <End time> of the measurement schedule. If you select <unlimited>, the measurement schedule will stay in effect until disabled.This can
be done by deselecting the <Timer Enabled> button.
Alternatively, the Auto Timer may be disabled directly
in the ParticleScan Menu starting with [auto].
You can also select a specific end time by clicking on
the button to the right of <unlimited> and clicking on
the <…> button.
The third option to define the end time is to select a
specified number of run times.
Once you made your selections, you can download
these to the ParticleScan with the <Save> button. To
enable the timer, you must select <Timer Enabled>.
Alternatively you can enable the Auto Timer in the
Auto Timer menu which is accessible from the
ParticleScan.
22
Chapter 7 – Computer Connectivity
7.8
Data Logging
The Data Logging window, allows to activate data logging to two different physical locations:
• <Log to Computer> will log the measurement data
of the ParticleScan automatically to the Log to
Computer window. The maximum number of measurements logged to computer is limited only by
the hard disk space on the computer.
• <Log to ParticleScan memory> will log the measurement data to the internal memory of the
ParticleScan. The internal memory of the
ParticleScan can log 14,336 measurements.
7.8.1 Checklist Before Data Logging
Before data logging either to a computer or to the ParticleScan memory is started, the following should be checked:
1. Is the correct date & time set? All measurement data will be date and time stamped based on the information in
the Time & Date window which is accessible from the Tools tab.
2. Does the Location Number need to be changed? The location number is not only a useful tool to identify measurements taken in different locations but also under different conditions.
3. Is there any redundant data that should be erased from ParticleScan memory or the Log to Computer window?
7.8.2 Data Logging to Computer
To log measurement data to a computer, select <Log to
computer>. This automatically opens the Log to
Computer window.
If a measurement is in progress, measurement data is
added with every measurement update.
To delete the logged data, click on the <Delete Data>
button. When the data is deleted, the Log to Computer
window will automatically be cleared.
To print logged data, click on the <Print> button. (see
Chapter 7.8.6 )
To save logged data to a CSV file, click on the <Save to
File> button. (see Chapter 7.8.7)
23
Chapter 7 – Computer Connectivity
7.8.3 Data Logging to ParticleScan Memory
To log measurement data to the ParticleScan’s internal
memory, select <Log to ParticleScan memory>.
If a measurement is in progress, the next measurement
update will be logged to the ParticleScan’s internal
memory.
7.8.4 Full Memory Options
The ParticleScan can log 14,336 measurements. When
this number is reached you have the option to stop data
logging or to overwrite the oldest data with the newest
logged data. Refer to Chapter 5.4 for more details.
7.8.5 Viewing Logged Data
To view data that was logged to the ParticleScan’s memory, click on the <Data Download> button in the Control
window. Then press the <Load Data> button. All the
logged data will now be loaded from the ParticleScan to
the window. Depending on the amount of data logged,
this may take several minutes.
Note: Loading data to the window leaves the data on
the ParticleScan memory unaffected.
• To delete the logged data on the ParticleScan, press
the <Delete Data> button and confirm this choice in
the pop-up confirmation window.
• The <Clear Window> button clears all data from the
window, but leaves the data logged in the memory
unaffected.
• To print logged data, click on the <Print> button.
(see Chapter 7.8.6 )
• To save logged data to a CSV file, click on the <Save
to File> button. (see Chapter 7.8.7)
24
Chapter 7 – Computer Connectivity
7.8.6 Printing Logged Data
To print logged data directly from the logged data window press the <Print> button.
Note: The data will be printed in exactly the format that you see in the logging window. Ensure before clicking <Print>
that the Measurement Units and the Count Type are set as desired.
For successful printing, ensure that you have selected the desired printer, the desired media size and orientation
7.8.7 Saving Logged Data to a CSV File
To save logged data to a file for import into a spreadsheet or other program, press the <Save to File> button.
Note: The data will be saved to file in exactly the format
that you see in the window. Ensure before saving to file
that the Measurement Units and the Count Type are set
as desired.
In the <Save> window select the desired location where
the file should be saved and enter the file name. The file
is saved in the CSV format for easy import into spreadsheets.
25
Chapter 7 – Computer Connectivity
7.8.8 Importing a ParticleScan Data File
into Excel
The CSV data file that can be saved from the data logging window can be opened and formatted in any
common spreadsheet program.
To make things easy, the ParticleScan CD contains an
Excel Data Import Sheet, that already contains convenient data import and formatting functions.
Double-click on the <Data_import_sheet> icon on the
ParticleScan CD.
Click on <Enable Macros>.
Click on <Import Data File>
Locate and select the desired logged data file. Click on
<Open>.
26
Chapter 7 – Computer Connectivity
Your data is now automatically imported into the
data sheet.
The Graph sheets give you a visual timeline for
your logged data.
The Alarm sheet allows you to set alarm particle
threshold levels. The values need to be selected
before data is imported. Data points that are above
the alarm threshold levels are then marked in red.
27
Chapter 8 – Troubleshooting
Chapter 8 – Troubleshooting
8.1
Symptom, Cause and Corrective Action
Symptom
Possible Cause
Corrective Action
Unit does not turn on, no display
a) Low battery
b) Defective adapter/charger
c) Defective battery
Charge battery for 3 hours
Contact service center
Contact service center
Sample result remains at zero after
sampling
a) Defective pump
b) Laser diode failure
Contact service center
Contact service center
Sample result is lower than normal
a) Isokinetic probe is missing
b) Flowrate is low
c) Something may be stuck in the
inlet nozzle and blocking the
beam
d) Contaminated optics in sensor
e) Calibration overdue
Attach isokinetic probe
Contact Service center
Clean intake nozzle with compressed air. (Do not push any object
down into nozzle)
Contact service center
Contact service center
Sample result is higher than normal
a) Contaminated optics in sensor
b) Internal noise
c) Calibration overdue
Perform zero count test
Contact service center
Contact service center
a) Defective or worn out
battery pack
b) Defective charger
Contact service center
Battery pack does not hold a charge
Test voltage of charger. Replace
charger
Warning:
Tampering or opening the ParticleScan Instrument may result in exposure to invisible laser radiation that can cause severe
eye injuries.
Service and repairs on the instrument must only be undertaken by IQAir.
28
Chapter 9 – Technical Specifications
Chapter 9 – Technical Specifications for ParticleScan Pro and CR
ParticleScan Pro
ParticleScan CR
Minimum sensitivity
0.3 µm
0.3 µm
Flow rate
0.025 cfm
0.1 cfm
Size channels (µm)
0.3, 0.5, 0.7, 1.0, 2.0, 5.0
0.3, 0.5, 0.7, 1.0, 2.0, 5.0
Sample time
1–600 seconds (user selectable)
1–600 seconds (user selectable)
Count displayed as
particles per cu. ft., particles per liter or
particles per cubic meter (1000L)
particles per cu. ft., particles per liter or
particles per cubic meter (1000L)
Display
8-digit LED
8-digit LED
Laser source
Laser diode, 680 nm
Laser diode, 680 nm
Audible alarm range
1–9’999’999 particles per channel
1–9’999’999 particles per channel
Power
115V, 60Hz or 230V, 50Hz
115V, 60Hz or 230V, 50Hz
Rechargeable Batteries
Nickel-Metal Hydride, up to 4 hours continuous operation
Nickel-Metal Hydride, up to 3 hours continuous operation
Dimensions & weight
7.75 x 4.0 x 2.25 inches (19.5 x 10.0 x 5.5
cm), 1.8 lbs (0.8 kg)
7.75 x 4.0 x 2.25 inches (19.5 x 10.0 x 5.5
cm), 1.8 lbs (0.8 kg)
Supplied accessories
carrying case, purge filter, isokinetic probe,
power adaptor/battery charger, cat. 5
patch cable, cat.5 crossover adapter, USB
cable, CD, calib. certificate, user manual
carrying case, purge filter, isokinetic probe,
power adaptor/battery charger, cat. 5
patch cable, cat.5 crossover adapter, USB
cable, CD, calib. certificate, user manual
Warranty
1 year on parts and labor
1 year on parts and labor
Data logging
• Internal memory for 14’366 data points
• Realtime logging to computer via USB
or network connection
• Data transfer via USB or network conn.
• Internal memory for 14’366 data points
• Realtime logging to computer via USB
or network connection
• Data transfer via USB or network conn.
System requirements
Network Connection:
• Windows 98/ME/NT/2000/XP, OSX, Linux
USB Connection:
• Windows XP
Network Connection:
• Windows 98/ME/NT/2000/XP, OSX, Linux
USB Connection:
• Windows XP
29