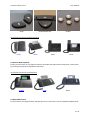
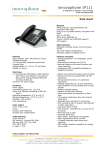
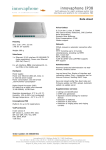
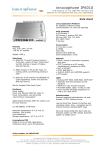
1
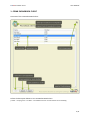
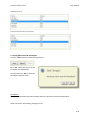
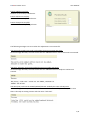
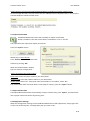
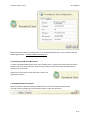
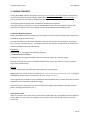
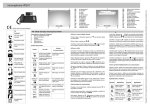
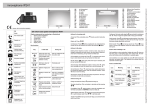
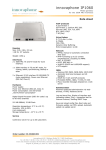
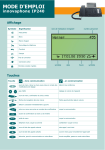
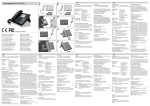
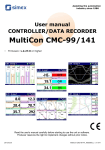
Com8 PhoneBook Client
User Manual
E. Lievens & J. Kater
Commissioned by
Com8 NV
V1.0 |April 2011
Com8 PhoneBook Client
User Manual
PRODUCT DESCRIPTION:
The application Com8 PhoneBook Client offers the possibility to manage a telephone register within a
innovaphone PBX environment on a proper and easy way.
MORE INFORMATION
The latest news concerning the Com8 PhoneBook Client can be found on the link below:
http://www.com8.eu/products/com8/phonebook/
TESTING ENVIRONMENT
This case is executed within a Com8 testing environment with the usage of the following products:
-
innovaphone IP302 (version 8 hotfix 11)
innovaphone IP110 (version 8 hotfix 11)
innovaphone IP200a (version 8 hotfix 11)
To use the Com8 PhoneBook Client, minimal requirement is the usage of innovaphone Version 7.
LICENSES
Using Com8 PhoneBook Client combined with an innovaphone PBX requires no extra licenses.
DISCLAIMER
The author, of this document accepts no responsibility for damages resulting from the use of the Com8 PhoneBook Client
and makes no warranty or representation, either expressed or implied, including but not limited to, any implied warranty of
merchantability or fitness for particular purpose. This document and the Com8 PhoneBook Client software is provided “AS
IS”, and you, its user, assume all risks when using it. Distribution of the Com8 PhoneBook Client software is not allowed
without any permission given by Com8 and Com8 only.
2 / 11
Com8 PhoneBook Client
User Manual
INDEX
1. COM8 PHONEBOOK CLIENT ................................................................................................................ 4
1.1 Telephone Register Contacts......................................................................................................... 5
1.2 Creating A New Contact ................................................................................................................ 5
1.3 Modifying Contacts ....................................................................................................................... 5
1.4 Removing Contacts ........................................................................................................................ 5
1.5 Saving Adjustments & Save Report ............................................................................................... 6
1.6 Import Contact-data ...................................................................................................................... 8
1.7 Export Contact-data ...................................................................................................................... 8
1.8 Configuration Settings ................................................................................................................... 8
1.9 Positioning Com8 PhoneBook Client ............................................................................................. 9
1.10 Com8 PhoneBook Disclaimer ...................................................................................................... 9
2. FINDING CONTACTS........................................................................................................................... 10
2.1 Devices Without Keyboard .......................................................................................................... 10
2.2 Devices With Keyboard ............................................................................................................... 11
2.3 DECT/WiFi Phones ....................................................................................................................... 11
3 / 11
Com8 PhoneBook Client
User Manual
1. COM8 PHONEBOOK CLIENT
Overview of the Com8 PhoneBook Client:
Follow the description below to start Com8 PhoneBook Client:
[ START -> All programs–> Com8eu -> PhoneBook Client or use the shortcut on our desktop ]
4 / 11
Com8 PhoneBook Client
User Manual
1.1 Telephone Register Contacts
The Com8 PhoneBook Client controls only telephone contact information. Therefore, only contactname and contact-telephone number can be entered.
By default, contacts will be sorted Alphabetically, ascending. Clicking the column name ´Name´ will
sort contacts Alphabetically, descending. By clicking column name ‘Number’, contacts will be sorted
Numerically ascending (clicked again, descending).
1.2 Creating A New Contact
Select the bottom line and provide it with the proper name and telephone number.
Pressing the “ENTER” key will create a new entry line.
1.3 Modifying Contacts
Double-click the entry field in need of modification. A blinking selector occurs and the contact data
can be modified.
1.4 Removing Contacts
To delete a contact, select the contact-line and press the “DELETE” key.
For the removal of multiple contact-lines, the “CTRL” or “SHIFT” key can be used.
By only removing contact-name or contact-number, followed by saving the adjustments, the selected
contact can also be removed.
5 / 11
Com8 PhoneBook Client
User Manual
Selected entry line
Previous selected entry line removed
1.5 Saving Adjustments & Save Report
Click the “Save”-button to make the adjustments.
Click “Yes” within the pop-up screen
to confirm the adjustments.
Click (if necessary) “OK” to close the
Save Report pop-up screen.
Save Report
The pop-up Save Report provides feedback about the previously executed adjustments.
When successful, the following message occurs:
6 / 11
Com8 PhoneBook Client
User Manual
Entries added successfully:
Number of successfully added items.
Entries deleted successfully:
Number of successfully deleted items.
Entries changed successfully:
Number of successfully changed items.
The following messages can occur when the adjustment is not successful:
The entry with number xxxx could not be added, because no name was given.
As the message describes, the new contact was not added because a contact-name was not entered.
The entry ‘John Doe’ could not be added, because no number was given.
As the message describes, the new contact was not added because no telephone number was
entered.
John Doe (213) could not be added/updated/deleted. Probably the name already exists.
As the message describes, the new contact was not added because of duplicate data, in this case
there is already an existing contact with the name “John Doe”.
7 / 11
Com8 PhoneBook Client
User Manual
Gerard Janssen () could not be added/updated/deleted. Probably the number already exists.
As the message describes, the new contact was not added because of duplicate data, in this case the
entered telephone number already exists.
1.6 Import Contact-data
Com8 PhoneBook Client offers the possibility to import contact-data.
Primary condition is that the contact data is saved within a .xls or .xlsx-file.
The steps below are required to import an Excel-file.
Press the “Import” button.
Within Step 1: Select Xls-File
Press “Browse” and select the Excel-file.
Confirm by pressing “OK”.
When the Excel-file data is loaded,
Step 2 is ready for configuration:
“Select the appropriate fields/headers”
Name-Field: select the name-column in your Excel-sheet
Number-Field: select the number-column in your Excel-sheet
Header-fields: Select “Yes” if the Excel-sheet uses headers, if no headers, select “No”.
The contact-data within the Excel-sheet is now ready for import, press the “import” button.
1.7 Export Contact-data
Com8 PhoneBook Client offers the possibility to export contact-data; press “Export”, provide the file
with a proper name and confirm by pressing save.
1.8 Configuration Settings
When the configuration settings of the Com8 PhoneBook Client need adjustments, simply right-click
on the icon located top left. A configuration pop-up screen occurs.
8 / 11
Com8 PhoneBook Client
User Manual
More Information about the configuration of the Com8 PhoneBook Client, can be found within the
following document: “Com8 PhoneBook Configureren”.
1.9 Positioning Com8 PhoneBook Client
To move Com8 PhoneBook Client within your desktop screen, simply press and hold the left mouse
button on the icon located left top. Keep the mouse button pressed and move the application to
wherever fits your needs.
Release the mouse button when the Client is within the
appropriate position.
1.10 Com8 PhoneBook Disclaimer
More information about the Com8 PhoneBook Client can be found within the disclaimer.
Just right-click the Com8-logo ,located bottom-right, to open the disclaimer.
9 / 11
Com8 PhoneBook Client
User Manual
2. FINDING CONTACTS
Finding PhoneBook contact data with the use of your innovaphone IP Phone requires configuration
of your innovaphone IP Phone settings. Consult the “Com8 PhoneBook Configuration Manual” on
how to provide your innovaphone telephone of the proper configuration settings.
innovaphone offers IP Phones with- and without alphanumeric keyboard.
Both type of devices are able to use the Com8 PhoneBook Client. An innovaphone IP Phone with
alphanumeric keyboard only eases finding contacts located within the PhoneBook Client.
2.1 Devices Without Keyboard
Finding PhoneBook contact data with your innovaphone IP Phone without alphanumeric keyboard, is
possible by using the numeric keys.
On each innovaphone IP Phone the alphabetic characters can be found printed above the numeric
keys. Pressing a numeric key ((+/- 2 seconds) will switch the IP Phone to alphanumeric modus which
makes it possible to look and find contacts.
Explanation
Numeric key “2” can display the following characters:
abcABCäàáâãȧᴂçÄÀÁÂÃǞÆÇ2
Clicking the key once again will display the next character within this character range.
Because retrieving data from the Com8 PhoneBook Client is not case-sensitive, in most situations
three clicks will be enough.
Example
To make a call to Elias, the following steps needs to be accomplished:
Click numeric key “3” for around 2 seconds (Phone is now in alphanumeric mode and carries value “d”) directly
followed by another click on numeric key “3” (value changes to value “e”).
Assuming that contact Elias Lievens is listed within the PhoneBook Client, contact Elias Lievens will be
showed on your innovaphone telephone display.
Once the contact is selected, it can now be called on the regular way (taking the handset of the IP
phone, pressing the OK-button, etc.).
more search results
When the situation occurs that more contacts are available than the innovaphone IP Phone display is
able to show, the arrow keys on the phone can be used to view other results lower in the search
results list.
10 / 11
User Manual
Com8 PhoneBook Client
IP110
IP230/IP240/IP241
IP200a
innovaphone IP Phones without keyboard:
IP110
IP230
IP222
IP232
2.2 Devices With Keyboard
Finding contacts with an innovaphone IP Phone provided with alphanumeric keyboard, is easily done
by pressing the keyboard’s alphabetic characters.
innovaphone IP Phones with keyboard:
IP200a
IP240
IP241
2.3 DECT/WiFi Phones
At this moment innovaphone DECT and WiFi phones are not able to use the Com8 PhoneBook Client.
11 / 11