1
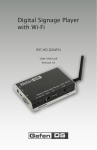
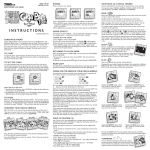
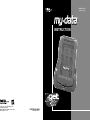
ITEM NO. 59914
Ages 9 and up
™
INSTRUCTION
A division of Hasbro, Inc.
®, TM, & © 2001 Tiger Electronics
All Rights Reserved.
980 Woodlands Parkway, Vernon Hills,
Illinois 60061, U.S.A.
PRINTED IN CHINA
200103840IWTI-01
Content
Chapter 1: INTRODUCTION
4
Important Suggestion
4
The MY.DATA Cradle and PC cable
- To Place The MY.DATA Into Its Cradle
- To Connect the MY.DATA Cradle and the PC
- cable To PC
4
4
4
System Requirements
4
Installing Personal Information Manager for MY.DATA Software
- Synchronization
4
5
Synchronizing the MY.DATA with the PC
5
Safety Tips
5
Chapter 2: WORKING WITH MY.DATA
5
Battery Installation
5
Reset Initialization
- LCD Alignment Routine
- Data Resetting Routine
6
6
7
Edit Record
- To Edit Memo attached in Expense Record
- Insert Mode
- Overwrite Mode
- Saving the changes
Chapter 5: Handwriting and Virtual Keyboard
Viewing And Entering Your Personal Information
10
Password
- To assign a password
- To Change Password
10
10
11
Chapter 3: GETTING TO KNOW YOUR MY.DATA
11
Part Names and Functions
- Opening An Application
- List View
- Edit View
- Data View
- Display Indicators
- Scrolling Status Indicator
- Control Button Icons
- Control Keys
11
12
12
12
12
12
12
12
13
To Search For A Record
13
Chapter 4: Tools
1
7
7
7
8
8
9
9
9
13
New Record
14
Delete Record
- To Delete A Memo attached in Expense Record
14
14
15
Handwriting
- Writing Alphabet/Number characters with Handwriting
- Writing Capital Letters with Handwriting
- Handwriting Tips
- Editing Techniques
15
15
15
15
16
On Screen Virtual Keyboard
- International Characters
16
16
Chapter 6: PHONE BOOK
Setting the Clock
- Setting DST First
- Setting HOME City
- User Define Home City
- Setting Date And Time
- Daylight Savings
- Daily Alarm
- Selecting World City
14
15
15
15
15
16
Phone List Mode
- To See the Phone List
- Finding Phone Records
- Edit Phone Record
16
16
17
17
Phone View Mode
17
Enter A New Record
17
Chapter 7: PLANNER AND TODO
18
7.1 Calendar
- Using Date Search
- Selecting Planner Function
18
18
18
7.2
Scheduler
To Enter Appointments in Scheduler
Viewing Scheduler Record
Schedule Alarm Time Actions
19
19
20
20
7.3
Anniversary
To Enter Anniversaries
Viewing Anniversary Record
Anniversary Alarm Actions
20
21
21
21
7.4
To Do
Record Structure
To Do List Mode
Status Tabs
To Do View Mode
- Marking An Item "Done"
To Enter A New Record
21
21
22
22
22
22
22
Chapter 8: NOTES
23
8.1
Memo List
To Enter A New Record
23
23
8.2
Sketch List
To Draw A Sketch
Drawing Tools
Control Tools
24
24
24
24
2
Chapter 9: CALCULATOR
Calculation Examples
Chapter 10: MENU
25
25
26
10.1 SmartSync
Synchronization Data
Check the Synchronization Result
26
26
26
Chapter 1: INTRODUCTION
Notice
We assume no responsibility for any damage or loss due to the use of this manual.
We strongly recommend that separate, permanent printed records of all important data be kept.
Under certain circumstances, such as exposure to an electrostatic discharge, data may be lost
or altered, or the unit may become inoperative after reset. Therefore, we assume no responsibility
for data lost or otherwise turn into unusable, whether as a result of improper use, repair battery
replacement, or use after the specified battery life has expired from similar causes.
10.2 Defrag
26
10.3 Find
27
10.4 Preference
10.4.1 Time, Display, Personal and Password
10.4.2 Memory
10.4.3 Sleep
10.4.4 Tone
10.4.5 Start up
10.4.6 Language
27
27
27
27
27
28
28
We assume no responsibility, directly or indirectly, for financial losses or claims from third persons
resulting from the use of this product and all of its functions, such as stolen credit card numbers,
the loss or adaptation of stored data, etc.
10.5 Expense Manager
28
MY.DATA Link is the Personal Information Manager PC software included with this unit It allows
you to synchronize information entered into the MY.DATA with information entered into a personal
computer.
Chapter 11: EXPENSE MANAGER
28
The information provided in this manual is subject to change without notice.
•
•
Important Suggestion
The MY.DATA Cradle and PC cable
Record Structure
28
Viewing In Expense List Mode
- Viewing Attached Memo
28
28
The MY.DATA cradle is designed to hold MY.DATA at a comfortable viewing angle on your desktop
and provide a way for connection to your personal computer.
Viewing in Expense Report Mode
- Setting Date Range
29
29
-
To Enter A New Record
- Setting Currency
- Setting Date
- Setting Payment
- Setting Expense Type
- Marking Receipt Indicator
- Attach Memo in Expense Record
29
29
29
29
30
30
30
To place the MY.DATA into its Cradle
Slide the MY.DATA into the cradle slot. Plug in the PC cable at either one connect port of the
back side of the cradle.
-
To connect the MY.DATA Cradle and the PC cable To PC
Turn off your computer and plug the cable from the MY.DATA cradle into the serial communication
port on PC.
Chapter 12: GAME
30
APPENDIX I - MY.DATA TROUBLESHOOTING
33
APPENDIX II - FINDING YOUR PC’S COMMUNICATION PORT
34
Setting the Correct Com Port
34
Checking Communication Conflicts
34
Check The System Bios Setting And Windows Configurations
34
APPENDIX III - SELECTING TIME DIFFERENCE FOR USER DEFINE CITY
35
APPENDIX IV - HANDWRITING RECOGNITION TABLE
36
Note: The MY.DATA organizer requires a dedicated serial port. It cannot share
a port with an internal modem or other device. If you are doubtful about the
exact location of the serial port on your conputer, refer to the user’s manual
supplied with the computer.
•
System Requirements
To install and operate the MY.DATA PC-based PIM SmartSync software, your computer system
must meet the minimum requirements as follows:
-
English Windows 95/98
IBM-compatible PC 486 computer or higher
8 MB memory minimum (16 MB recommended)
12 MB available hard disk space
VGA monitor or better
Mouse
One available dedicated serial port
CD ROM drive
•
Installing Personal Information Manager for MY.DATA Software
Place the MY.DATA CD into your CD drive and follow the instructions on the PC screen.
3
4
•
•
Synchronization
SmartSync for MY.DATA is the program allows you to synchronize data with your PC. The PC
can also modify such data and download to the MY.DATA. The synchronization process is bidirectional. When placed in the system tray it watches the selected com, port for the signal
to start the synchronization procedure.
Synchronizing the MY.DATA with the PC
• On the PC
1. Turn on the PC and run Personal Information Manager for MY.DATA.
2. Cick Data Synchronization > Start Data Sync. Message "Please wait for PDA to start
synchronization" will be prompted up.
-
INTERIOR BATTERY VIEW
3. Carefully re-install the battery cover back into position and then screw it on.
Note: Battery voltages are contstantly monitored; a low battery warning will
show when power level gets too low. Replace the batteries when this message
is displayed. Changing batteries does not cause any information to be lost. Do
not try to operate or synchronize the MY.DATA with a low battery. It can lead
to lost or corrupted data.
•
1.
2.
3.
On the MY.DATA
Place the MY.DATA into the cradle.
Press the ON key to turn the unit on.
Tap Menu > Sync., then tap OK.
Message "Synchronization in progress....” will be displayed and it will cleared when synchronization
is completed.
4. Remove the MY.DATA from its cradle.
•
Safety Tips
-
Be careful when using the touch screen. Do not to scratch it. When working with MY.DATA,
use only the supplied stylus or other plastic-tipped pens designed for the touch-sensitive screen.
Never use an actual pen or pencil, fingernails or other sharp objects on the surface of the
touch screen.
MY.DATA should be protected from rain and moisture. Treat MY.DATA as you would other
electronic devices.
Do not drop the MY.DATA or subject it to strong impacts.
Protect the MY.DATA from extreme temperatures.
The touch screen can be cleaned with a soft cloth lightly moistened with window cleaning
solution. Additional commercial cleaners are sold separately.
The unit does not allow to save record when battery is become flat.
-
Rechargeable batteries are only to be charged under adult supervision (if removable).
Only batteries of the same or equivalent type as recommended are to be used.
Batteries are to be inserted with the correct polarity, and follow the toy and battery
manufacturer's instructions.
Exhausted batteries are to be removed from the toy.
The supply terminals are not to be short - circuited.
Do not dispose of batteries in fire, batteries may explode or leak.
The data that has been synchronized to the computer can be restored to the
MY.DATA by synchronizing again.
•
1.
a)
b)
Reset Initialization
The unit will reset under the following conditions:
When the battery is replaced.
Press and release the reset button on the back of the unit by using the stylus. The calibration
screen is displayed.
Notice:
Single PC is support with single MY.DATA unit (Personal Information Manager).
The unit may become abnormal when the unit is exposed to strong ESD environment. Press
"reset" key to return to normal operation.
Chapter 2: WORKING WITH MY.DATA
•
2. Adjust the display contrast by turning the display contrast knob located on the left side of
the unit.
Battery Installation
Before you start using the MY.DATA, you must install two AAA alkaline batteries first.
The battery door, located on the back of the unit.
1 Use a small Philips screwdriver to loosen the screw that secures the battery cover.
2. Insert two new AAA batteries. A diagram in the interior of the battery
compartment shows the orientation of the + and - terminals.
To ensure proper function:
Do not mix old and new batteries.
Do not mix alkalina, standard (carbon-zinc), or
rechargeable ( nickel-cadmium) batteries.
Battery installation should be done by an adult.
Non-rechargeable batteries are not to be recharged.
Rechargeable batteries are to be removed from
the toy before being charged (if removable).
5
• LCD Alignment Routine
3. Do LCD alignment by tapping center of + sign at upper left corner carefully for precise
alignment. Then, the + sign will disappear. Repeat procedure for the lower right + sign.
This ensures accurate data entry. (LCD Alignment can also be done anytime by tapping
Menu > Prefer. > Display.)
COMM. PORT
6
• Data Resetting Routine
4. The system proceeds to data resetting routine after LCD alignment.
i) If data format is corrupted, the system will alert user with prompt. Tap
to reset and
clear flash memory
ii) If the data format is stored, it will prompt: "Initialization. Found data in memory!
Preserve it?". Tap , data will be retained.
2. The "Country + City" list is in alphabetic order of the country names. Tap the A-C, D-F, G-I,....
and Y-Z icon to make a quick access and display a city and country that is your home time
zone. You can use the up/down touch keys or push buttons to scroll through the list.
3. Double tap the selected city in the list to make it the Home City. Tap Cancel to abort the
selection and return to HOME time display.
OR
Tap cross will display the following prompt:
• User Define Home City
User can define "Country + City" name that is not listed:
1. Tap the "Country + City" name to enter the Home City selection list.
2. Tap USER DEFINE to highlight that line. Then tap Tools > Edit Record. The Virtual Keyboard
is default for input, drag across the USER DEFINE letters. User can start editing the new
"Country + City" name. The country and city names should be separated by a "space". After
edition of the "Country + City" name, user can edit the "Time Difference" field. The margin
of time difference is limited to 15 minutes. You can see APPENDIX III for instructions on how
to find your time difference.
Under the warning message, tap tick will clear stored data while tap cross will keep all memory
and return to the Initialization prompt.
When the initialization is completed, the display switches to the clock setting screen or the
pre-set start up screen.
•
Initializing settings
i) Highlight USER
DEFINE. Tap Tools
and select Edit Record
ii) User can start editing
the new Country and City
name and time difference
ii) Tap OK to save
the entry
3. Tap OK to save the entry and tap OK again to return to the Home time display.
This screen is used to select and set the Home City, Home Time and World City. This screen can
be displayed at anytime by tapping Menu > Prefer. > Time.
• Setting Date And Time
Tap the display clock to enter the editing time mode.
• Setting DST First
If the time you are setting is currently in "Daylight Savings Time". Tap DST to turn on DST before
continuing. The sun icon is displayed with DST on.
•
Setting HOME City
To select a country and city for home time:
1. Tap on the Country + City name -"USA New York" from the clock display as an entry to the
"Country + City" list selection.
Tap on the “Country
+ City” name to
enter the Home City
selection list.
1. Select the date display sequence.
The clock displays the date in the order of Month/Day/Year. Tap the DD/MM/YY to enable
Day/Month/Year format. Tap the MM/DD/YY to enable Month/Day/Year format.
2. Select 12 or 24 hour display format.
The clock displays the time in 12-hour format. To change to the 24 hour format, tap "24" to
enable 24-hour format. In this mode, "A" and "P" will not be shown. To return to the 12 hour
format, tap "12".
7
8
3. Input the correct date and time.
The cursor will be blinking on the first data entry point. You can also locate the cursor to the digit
being edited using the stylus.
i) Tap the numbers on the virtual 10 keypad to enter the correct date and time. The cursor
will automatically shift as numbers are entered.
ii) For 12 hour mode tap A for AM. Tap P for PM.
4. Save the date and time settings
Tap OK to save the setting. The message "Saving" prompted and the system return to HOME
time display.
•
Viewing And Entering Your Personal Information
It is imperative that you input your personal information into MY.DATA. This information is not
password protected.
1. Tap Menu.
2. Tap Prefer. > Personal.
When Personal Information record does not have any information stored, message "Tap Tools
and then New Record" prompted.
3. Tap Tools > New Record to input the Personal Information from the brand-new record. (To
edit the record, tap Tools > Edit Record)
• Daylight Savings
Tapping DST will turn Daylight Savings on or off. When turning DST on, the displayed time will
increase one hour.
•
To
1.
2.
Tap Tools
> New Record
Daily Alarm
set the daily alarm:
Tap ALM to enter the daily alarm setting screen.
Tap the alarm time desired on the virtual keypad. If the time setting is set for 12 hour display
tap A for AM or P for PM.
4. The cursor will be blinking at the Name entry point. The Virtual Keyboard is displayed.
i) Tap the letters to input your name or tap Done to write with handwriting or the external
keyboard. Hold the stylus in contact with the writing area for about 3 seconds to retrieve the
virtual keyboard.
ii) When finished with inputting information on each line just tap the next line for input.
5 When finished, tap OK to save the information.
•
3. Tap ON to activate the alarm.
4. Tap OFF to deactivate the alarm.
5. Tap OK to save the settings.
When home reaches the time set for the daily alarm, the alarm tone will beep for 60 seconds
and the Alarm reminder screen will be displayed.
1. Tap the screen to stop the sound.
2. Tap OK to clear the screen and return to current mode.
The alarm is activated no matter the MY.DATA is off or on. The reminder screen must be cleared
before other applications can be selected.
• Selecting World City
1. Double tap the category icon to pull up the selection bar.
Password
You can assign a password to the MY.DATA. For security purposes, when retrieving the Phone,
Notes, Expense, SmartSync and Planner mode, the unit can be locked from normal view unless
the proper password is entered. Write your password down and keep it in a safe, secure place.
IF YOU FORGET YOUR PASSWORD THERE IS NO WAY TO ACCESS HIDDEN RECORDS. There
is no "back door" into the system. You must reset the MY.DATA and clear all memory.
•
1.
2.
3.
4.
5.
6.
7.
8.
To assign a password
Tap Menu > Prefer. > Password.
Tap the "New Password" box.
The MY.DATA will ask you to enter a new password.
Use the Virtual Keyboard to enter the password. The inputting character or symbol will be
marked as *.
Tap OK.
The MY.DATA will ask you to confirm the password by entering the password again.
Use the Virtual Keyboard to enter the same password again. The inputting character will be
marked as *.
Tap OK.
2. Tap World to select a world city. Use the same procedure for selecting the HOME city. Set
DST on this screen correctly for the displayed WORLD city time to be correct.
9. The password is now shown as Assigned. The "Password at start up" indicator is ON and
password protection activates.
9
10
•
1.
2.
3.
4.
To Change Password
Tap Menu > Preference > Password.
Tap on the "Change Password" box.
The MY.DATA will ask you to enter the old password.
Use the Virtual Keyboard to enter the password. The inputting character and symbol will be
shown as *.
5. Tap OK.
6. The MY.DATA will ask you to enter the new password. Input the new password as the same
procedure of brand-new input.
Chapter 3: GETTING TO KNOW YOUR MY.DATA
•
Part Names and Functions
The MY.DATA has a variety of built-in applications that can be selected by using the stylus to tap
the application icon on the touch menu.
Phone is a database of contact information, including name, address, phone numbers,
etc. Information of each person will be stored as a record. Phone records can be grouped
into Business and Personal categories for easy access.
Planner includes Scheduler, Anniversary, To do and Calendar mode. It allows you to
plan your schedule and store it in memory. It provides the flexibility of planning a schedule
with reference to monthly calendars and daily times.
Note Pad includes Memo and Sketch. Memo stores alphanumeric notes with the Virtual
Keyboard or handwriting. Sketch is a simple graphic editor, which used to store handwritten
notes and sketches as bit map images. The tools include drawing freehand, straight
lines, circles, and rectangles.
Calculator is a full function 10-digit calculator.
Search can find any record in Phone, Scheduler, Anniversary, To do ,Memo and Sketch.
Type or write the characters that represent the information you need to find or to add
a date range to the search, tap the "Search by Date" button and add start-finish dates
to the search. All records that match the characters in the selected application will be
listed. Double tap any listed record to view that record data view screen.
Menu displays seven functions that can be used by tapping the icon that represents that
function. The current functions include: Applications, SmartSync., Preference, Defrag,
Find, Expense and Game.
• Opening An Application
To open an application, tap on its corresponding icon on the touch menu at the top of the screen.
The application selected will open showing the list of records stored for that application. Each
application has a LIST, EDIT and Record DATA view mode.
• List View
Whenever an application icon is tapped the index list of the records will be shown. The index
shows each record in list format.
• Edit View
After highlighting a record in list mode or viewing the data view for a record. Tapping Tools > New
Record, or Tools > Edit Record puts the screen in EDIT view.
• Data View
Tap a listed record twice to switch to the record data view screen showing the details of the
selected record.
• Display Indicators
Different symbols will appear on the screen to indicate a status and special actions that can be
taken.
• Scrolling Status Indicator
When using the full length of the screen the display will show up to 13 lines of data. If one or
both of the arrows appear in the top title section, it indicates there is more to see in the direction
of the arrow.
To see the data, use the stylus and tap the point of the up/down control buttons to move the
screen a page at a time or press the up/down hard buttons to move the screen information
one line at a time.
• Control Button Icons
The touch-sensitive area at the bottom of the screen provides control of the data input and
program operations.
11
12
-
Cancel button icon is used to cancel entries.
OK button icon is used to confirm entries and operation selections.
Up/Down button icon is used when the information in a record exceeds the screen length.
The icons are tapped at the point of each up/down arrow to move the display a page at
a time.
Tools button icon displays the commands New Record, Delete Record, Edit Record, View
Memo, Delete Memo, Edit Memo, Clear and Undo.
Writing Pad is used to input characters by using the stylus to write by handwriting (each
character, one character at a time on the pad). The left side of the pad is used to write
alphabet characters and the right side to write numbers and control commands.
-
•New Record
Puts the application selected into edit mode for creating a new entry. The following example shows
phone editing mode using the virtual keyboard. Tap Done key to remove the virtual keyboard and
input data with handwriting or the external keyboard. Hold the stylus in contact with the writing
pad for 3 seconds to obtain the virtual keyboard back.
• Control Keys
The control keys at the bottom of the unit are:
a) ON/OFF Key - Press to turn the unit on or off.
b) Up/Down Keys - Used to scroll a list in Phone, Planner, Note and Expense functions
•
To Search For A Record
1. Tap the Find icon from the menu page to enter the Search front-page.
2. Tap the indicators next to the application icon to search then tap OK.
Search
Tap OK
• To Create a New Record:
Select the application for the new record by tapping its icon.
1. Select the list mode for the application to make a new record.
2. Tap Tools.
3. Tap New Record.
4. A cursor is displayed in the first data field of your selected application, representing the
insertion point of your new text. Fill in the necessary information (either by using the virtual
keyboard or tapping done and writing the characters on the writing pad or the external
keyboard).
5. Confirm your entry by tapping OK when finished.
•
3. Type or write the characters that represent information being sought. To add a date range
to the search, tap the "Search by Date" button and add start-finish dates to the search.
4. Tap OK.
All records that match the characters in the selected application will be listed. Double tap
any listed record to view that record data view screen.
Chapter 4: TOOLS
Delete Record
Once a record has been highlighted in the applications list mode, and or in the records view mode,
you can delete it from memory.
•
1.
2.
3.
4.
5.
To Delete A Record in List Mode:
Select the list mode for the application to delete a record.
Tap on the record you wish to delete.
Tap the Tools icon.
Tap Delete Record.
The MY.DATA will prompt:
When viewing the list mode for phone, planner, to do, notes or expense application, tap
this icon to view the tools menu. The tools menu includes:
Tools
New Record
Delete Record
Edit Record
In Sketch editing mode, the tools menu includes:
Clear
Undo
In Expense editing mode, the tools menu includes:
New Record
Delete Record
Edit Record
View Memo
Delete Memo
Edit Memo
13
6. Tap
if you wish to delete the record, or tap
if you wish to cancel the deletion.
•
1.
2.
3.
4.
5.
To Delete A Memo attached in Expense Record:
In Expense List Mode, double tap the record which has attached a memo you want to delete.
Tap the Tools icon.
Tap Delete Memo.
The MY.DATA will prompt "Delete?" message.
if you wish to delete the record, or tap if you wish to cancel the deletion.
Tap
•
Edit Record
• To edit a record:
1. Select the list mode for the application to edit a record.
2. Tap on the specific record you wish to edit, then tap the Tools > Edit Record.
OR
1. When viewing a specific record’s view mode.
2. Tap the Tools > Edit Record.
14
• To Edit Memo attached in Expense Record:
1. In Expense list, double tab the record you want to edit its memo and go to Expense data view.
2. Tap Tools > Edit Memo.
To make the appropriate changes:
• Insert Mode
Use the stylus to tap and locate the cursor to the insert location. Characters will be entered and
displayed to the left of the blinking cursor.
• Overwrite Mode
Highlight the characters to be edited by dragging the stylus over the characters. Typing or
handwriting input replaces the highlighted characters.
• Saving the changes
Tap OK to save changes to the record. If any other application is selected before saving the unit
will automatically save the changes. Tapping
saves the changes. Tap to continue to the new
application without saving the record.
-
Write at natural speed. Writing too slowly or too quickly can cause recognition errors.
Do not write on a slant.
If accuracy decreases, re-calibrate the screen by tapping Menu > Prefer. > Display.
• Editing Techniques
The following tips are useful for making corrections:
Your stylus acts as a cursor control. Tap the screen at the point you want to make your
correction.
At the cursor, you may draw the backspace stroke (a line from right to left on the number
pad) to delete the preceding character.
You can drag your stylus over a word or a paragraph, highlighting the text, and then draw
the backspace stroke to delete it.
Handwriting Reference Guides
•
On Screen Virtual Keyboard
Clear and Undo - See Sketch
View Memo - See Expense
Chapter 5: Handwriting and Virtual Keyboard
•
Handwritidng
Note: Handwriting will not work when the virtual keyboard displayed.
The MY.DATA includes handwriting recognition. Writing strokes are designed to closely resemble
natural handwriting. This makes it easy to learn and remember. The MY.DATA Quick Reference
Guide is shown on the back of the unit and on the following pages.
-
When entering the edit mode of applications the virtual keyboard will appear on the button is the
touch-sensitive screen ready for instantaneous input. The virtual keyboard removed when Done
key is tapped and the unit will then accept both handwriting input or external keyboard input. Hold
the stylus in contact with the writing pad for about 3 seconds to display the virtual keyboard again.
1. Tap the character keys to input each character. Shift and Caps (lock) work the same as a
PC keyboard.
• International Characters
1. Touch the Int’s key to activate the international character keyboard.
2. Touch the abc key to return to the normal character keyboard.
Draw the character shapes exactly as shown in the script table (See Appendix lV). The heavy
dot represents the start of a stroke. Do not draw the dot itself.
Some characters are created with a single stroke.
• Writing Alphabet/Number characters with Handwriting
1. Go into edit mode and tap where you want to insert your text. At times the insertion point
may already be set. The cursor blinks at the insertion point.
2. Use the MY.DATA Quick Reference Guide to find the stroke shape for the character you wish
to enter.
3. Place your stylus inside the writing area (Left side for characters; Right side for numbers and
control commands).
4. Based on the Quick Reference Guide, start your stroke at the heavy dot and draw the stroke
as it appears on the table (the dot only indicates the starting point of the stroke, don’t
draw it)
5. Lift the stylus from the screen at the end of the stroke shape.
When you finish a character and lift the stylus, MY.DATA recognizes your stroke immediately and
prints the character at the insertion point of the screen. You can then begin the writing stoke
for the next character.
Chapter 6: PHONE BOOK
Tap this icon to activate the phone application. This application allows you to keep names,
addresses, phone numbers, email addresses and other information about your contacts.
Phone
• Phone List Mode
Phone list shows the list of names, sorted alphabetically according to each name stored in the
records name field.
• To See the Phone List
Tap the Phone icon on the touch menu located above the touch sensitive screen.
• Writing Capital Letters with Handwriting
Capital letters are written the same way as small letter with control command written first. See
the reference guide details.
•
15
Handwriting Tips
Large characters are more easily recognized
16
• Finding Phone Records
MY.DATA has several ways to find phone records. They are as follows:
a) Tap the alphabet tabs on the top of the list to quickly move to the beginning of that group
of letters.
b) Tap at the points of the direction arrows located under Cancel to scroll a long list.
c) Press the Up/Down hard button to scroll a long list.
d) Tap and select the category name Business or Personal to view only the records assigned
to that category.
iii) Use the Up/Down hard keys to move the cursor to a different line.
iv) Tap the tips of the Up/Down touch button (under Cancel) to see more fields.
3. Tap OK to save the information as a record and return to the phone list mode.
Chapter 7: PLANNER AND TODO
PLanner
Tap this icon to activate the Planner Calendar mode. Planner allows you to schedule and
view plans. Planner has four functions: Calendar, Scheduler, Anniversary and To Do.
7.1 Calendar
The calendar function is used to view a list of Schedules, Anniversaries and To do for the displayed
date.
Business List Mode
Personal List Mode
• Edit Phone Record
To edit a specific record tap the record than tap Tools > Edit Record.
•
Phone View Mode
Switch from any phone list mode to display the detailed information of a specific record in its
Phone View by double tapping the corresponding record.
Phone View
-
Tap the tips of the Up/Down touch button (Under Cancel) to see more fields.
While using external keyboard, press left / right keys to view the next or previous record.
-
Enter A New Record
-
Double tap any listed event to see the details of that event.
Icons indicate the type of events - Schedule, Anniversary or To Do.
Listed events correspond to the selected date shown above the calendar.
Tap any date on the displayed calendars to change the list to that date.
Date sequence is dependent on the clock setting DD_MM_YY or MM_DD_YY.
Dots at the right of any calendar date indicate an event has been scheduled for that date
Tap the arrows on either side of the DATE SEARCH box to scroll the calendar months viewed
Tap DATE SEARCH to input and find a date directly.
•
Using Date Search
1. Tap DATE SEARCH to view a virtual 10 keypad. The input cursor is blinking on the first digit
for the date input.
1. Tap Tools > New Record
2. Input the date by tapping the numbers on the 10 keypad.
3. Tap OK to view that date in the calendar function.
•
Selecting Planner Function
1. Tap
to pull up category box.
2. The cursor and virtual keyboard is ready for you to start entering characters in the
name field.
i) Use the stylus to tap a new input location.
ii) Tap the category box
to assign the record to the business or personal category.
17
18
Scheduler Alarm Setting
The scheduler alarm is set to ring once at the scheduled event start time.
The time can be changed to ring up to 23 hours before the event start time.
The alarm can be changed to ring weekly on the same day of the week, monthly by date or
not ring at all.
6. To alter the alarm setting, tap A to view the alarm settings screen.
2. Tap Planner, Anniversary, Scheduler or To do to enter that function.
7.2 Scheduler
Scheduler only shows the list of records (appointments) entered in the Scheduler mode.
i)
The cursor is blinking at the first digit of the alarm setting. Use virtual 10 keypad to enter a
new alarm time.
ii) Tap the circle on the right of the alarm sequence to add or remove the check mark. The
sequence is active when a check mark is shown in the circle.
iii) Tap OK when finished setting the alarm feature and return to the Scheduler edit mode.
7. Tap OK to save the record and return to the Scheduler daily list mode.
•
Viewing Scheduler Record
Scheduler
1. Tap any date on the displayed calendar to change the list to that date.
2. Double tap a listed Schedule to see the details.
•
To Enter Appointments in Scheduler
> Scheduler.
1. Tap Planner icon and tap
2. Double tap a date shown on the calendar or use "DATE SEARCH" to go to the Daily
Scheduler List.
• When Viewing The Scheduler Daily List
Double tap the listed Schedule to view the Scheduler Details View.
•
-
When Viewing The Scheduler Detail View
Hold the stylus in contact with the A icon to see the alarm mode.
Hold the stylus in contact with the
icon to see the alarm time setting
Tap Tools > Edit Record to edit the schedule.
•
Schedule Alarm Time Actions
When the scheduled alarm date and time equals the home date and time the alarm will sound
for 30 seconds. If the unit is off or running another application, the scheduler view with the 1st
page of the schedule details will be displayed.
-
Tap the screen to stop the sound.
Tap Cancel to clear the screen and return to the previous application.
7.3 Anniversary
Anniversary only shows the list of records entered in the anniversary function.
3. Tap Tools > New Record to enter the Scheduler edit mode.
Anniversary
The cursor is blinking on the event start time. The time shown is the current home time.
4. Input the start and finish time. For 12 Hour setting use A for AM and P for PM.
5. Input the event details. The first line of text is the title of the event displayed in the Planner
and Scheduler list modes.
19
1. Tap any date on the displayed calendar to change the list and date of the schedules shown.
2. Double tap a date shown on the calendar or use DATE SEARCH to go to the anniversary list.
3. Tap a listed Anniversary to see the details for the Anniversary.
20
•
•
To Enter Anniversaries
To Do List Mode
to get to Anniversary.
1. Tap Planner icon and tap >
2. Double tap the date on the displayed calendar or use DATE SEARCH to go to the anniversary
details view.
3. Tap Tools > New Record or Edit Record to enter the anniversary edit mode.
The to do list has two columns. The left column shows due dates and the right shows the to do
list titles. The sorting order for the to do item list can be changed as follows:
i. Tap P to sort list by job priority.
ii. Tap D to sort list by due date.
4. Type the details of the anniversary
5. The default anniversary alarm is set at 12:00PM on the day of the event. To change the alarm
date and time, tap
.
•
Status Tabs
The status of each item can be viewed in the list mode. There are three different tabs at the top
of the touch screen.
-
Tap ALL to display all the records (done / to be done).
Tap Done to display those records which have been marked as done.
Tap To Be Done to display those records that are not done.
•
To Do View Mode
Double tap the listed task to view the content of that record.
i)
The cursor is blinking at the first number of the Alarm setting. Use the virtual 10 keypad to
enter a new alarm time.
ii) Tap the circle on the right of the alarm sequence to add or remove the check mark. The
sequence is active when a check mark is shown in the circle.
iii) Tap OK when finished setting the alarm feature and return to the anniversary edit mode.
6. Tap OK to return to the anniversary list mode.
•
Viewing Anniversary Record
-
Double tap the listed Anniversary record to view the Anniversary Detail View.
icon to see the alarm setting.
Hold the stylus to contact with the
Tap Cancel to return to the anniversary list screen.
•
Anniversary Alarm Actions
When the scheduled alarm date and time equals the home date and time, the alarm will sound
for 30 seconds. If the unit is off or running another application, the anniversary view with the
1st page of the anniversary details will be displayed.
-
Tap the screen to stop the sound.
Tap Cancel to clear the screen and return to the previous screen.
• Marking An Item "Done"
The box on the right of the To Do View mode indicates the status of the item. When the item is
done, there is a check mark on the box.
the
icon to confirm the job being done or remove the mark.
The record is automatically placed into the Done folder when the box is marked or automatically
placed back into the To Be Done folder if it is removed.
•
To Enter A New Record
1. Tap the To do icon on the top menu or tap the Planner icon and tap
2. Tap Tools > New Record.
> To do.
7.4 To do
Tap Planner icon then tap
and choose the To do category.
• Record Structure
A record consists of:
1) Due Date.
2) The description or title of the task.
3) Priority ranking from 1 to 5.
4) Done / To Be Done.
21
22
•
Setting Priority
Select the priority by tapping the number.
•
1.
2.
3.
Enter the Due Date
Tap the beginning date in the Deadline field.
Enter the due date.
Locate the cursor in the To Do text field. Type the text for the item to do. The First line followed
by a return is the Title shown in the list mode.
4. Tap OK to save and return to the To do list mode.
Chapter 8: NOTES
Notes
8.2 Sketch List
Shows only the list of sketches.
Double tap a listed sketch to view the sketch.
•
To Draw A New Sketch
1.
2.
3.
4.
5.
6.
Tap Notes icon and tap
> Sketch.
Tap Tools > New Record.
Draw the sketch.
Tap OK when finished with the sketch.
Type the sketch title.
Tap OK to save the Sketch and return to the sketch list.
Tap this icon to activate Note Pad. This application provides two functions. Sketch for
jotting or drawing pictures, and Memo for storing text.
Note Pad shows a list of memo and sketch.
Note: The default tools are Free Hand Drawing and Fine Tip.
•
-
At the left on each line M indicates the record is Memo. S indicates the record is a Sketch.
Tap any listed record to view the details of the record.
Tap
to view the category box which shows the following:
All
Memo
Sketch
On the bottom of the touch screen is an editing bar for sketch. Tap to highlight one of the five
main drawing tools.
Note: Use Memo or Sketch to view the listing only for that function. Double
tap any listed record to see the details of that record.
8.1Memo List
Shows only the list of memos.
Double tap a listed memo to view the memo details.
•
To Enter A New Memo
1. Tap Notes icon and tap
> Memo.
2. Tap Tools > New Record.
Drawing Tools
•
“
” Free Hand Drawing
“
” Drawing Straight Lines
“
” Drawing Circles or ellipses
“
” Drawing rectangles
“
” Eraser
Control Tools
“
” Fill Pattern icon, with 4 patterns for selection:
,
,
,
“
” Pen Shape icon, with 3 pen sizes for selection:
,
3.
4.
5.
6.
23
Type the memo text.
Tap OK to enter the title of the memo.
Type the title of the memo (maximum one field).
Tap OK to save the memo. The screen returns to Memo List.
,
“
” Area Selection icon.
i. Tap the Area Selection icon to locate the area by dragging the stylus
across that area to be selected.
ii. Tap Tools > Clear to clears the located area.
iii. Tap Tools > Undo to undo the previous step.
“
” Reverse Screen icon
Tap and release icon can reverse the display on screen.
“
” Fill icon
Tap to fill up the entire screen with the selected filling pattern.
24
Chapter 9: CALCULATOR
Chapter 10: MENU
Tap this icon to activate a simple 10-digit calculator. The calculator display is shown below:
Calc.
Menu
),
Its functions include addition (+), subtraction (-), multiplication (x), division (÷), square root (
percentage (%) and reciprocal. Memory storage operations such as MR, MC, M+, M- are also
available.
Point to note:
The arithmetic calculations are processed in the order of the entry, not algebraic conversion.
"M" on the display indicates a number has been stored in Memory.
"E" on the display indicates an error: a number longer than 10 digits or when the answer is
infinite or undefined (e.g. division by 0). Tap CE to clear the error.
[CE] - Clears the last entered value. Tap twice to cancel a calculation
[AC] - All cancel by pressing once.
[M+] - Adds the currently displayed value to the current contents in memory.
[M-] - Subtracts the currently displayed value with the current contents in memory.
[MR] - Recalls the number stored in memory.
[MC] - Clear the number in memory after recall.
[+/-] - Switches the sign of an entry between positive and negative.
[ ] - Back space function to place cursor back one digit when press once.
[ ] - Gives the square root of the number entered.
[1/x] - Gives the reciprocal of the number entered.
•
Calculation Examples
10.1 SmartSync
Sync.
The data in the MY.DATA can be synchronized with PC. The PC can also modify such data
and download to MY.DATA. It is convenient to do the updating of the data automatically.
SmartSync provides this function for data backup.
The display of the SmartSync
•
Synchronization Data
1. Place the MY.DATA into its cradle.
2. Tap Menu > SmartSync > OK.
3. Once the data has been synchronized, the screen is updated to show the last synchronization
time and date. Touch any application icon for normal operation.
Calculation
Example
Operation
Display
(answer)
Arithmetic
4x7+8=
(-32) ÷ 2 – 5 =
4x7+8=
32 +/– ÷ 2 – 5 =
36.
-21
•
Percentage
What is 10% of 400?
What percentage is 8 of 72?
400 x 10%
8 ÷ 72 x 100
40.
11.11%
After synchronization, you can check the success of Phone, To do, Scheduler, Anniversary, Memo,
Sketch and Expense by tapping Log.
Add-on
What results from a 10%
increase of 400?
400 + 10 %
440.
Discount
What is 600 after 15%
discount?
600 - 15%
510.
25 – 9 =
4.
8÷ =
0.125
Square root
25
To activate the menu, tap the Menu icon on the touch menu located above the touch
sensitive screen. Menu is composed of sub-menus: SmartSync, Preference, Defrag, Find,
Expense and Game.
(25 – 9)
Reciprocal
1/8 =
Memory
Summation
MRC MRC
35 x 3 =
-) 96 ÷ 6 =
+) 53 + 87 =
-------------------------(Total) =
35 x 3 M+
96 ÷ 6 M53 + 87 M+
Temporary Memory
(22 - 4 x 8) x
(69 + 42) =
MRC MRC
22 M = 4 x 8 M69 + 42 x MRC =
Clears the
memory
229.
Check the Synchronization Result
10.2 Defrag
Defrag
This function provides the best approach to fully utilize the Flash Memory capacity. System
is required to perform the defragmentation regularly in order to improve the memory
usable capacities.
1. Tap Menu and then tap Defrag.
2. Tap Defragment NOW to proceed Defragmentation.
MRC
-1110
26
10.4.5 Start Up
Note: Once the prodcedure is started do not turn the unit OFF. The unit will
not accept any key while the memory defragmentation is processing. The
screen will auto-return to the Menu front-page after finishing the process.
The MY.DATA allows you to select the screen that is viewed at turn on everytime.
Start
10.3 Find
See Chapter 3: Getting To Know Your MY.DATA.
10.4 Preference
Preferences define the general settings of MY.DATA. These settings are Time, Display,
Personal, Password, Memory, Sleep, Tone, Start and Language.
Prefer.
10.4.1 Time, Display, Personal and Password
See Chapter 2: Working With MY.DATA.
10.4.2 Memory
This function allows you to check the file allocation and memory capacities in MY.DATA.
Below is the display screen of the memory of the main applications.
The system default is in OFF status. To select a start up screen, tap ON and then add the check
mark by tapping the selection circle. Tap OK to save the start up selection.
• To select a sketch
Tap Title to view a list of sketch records stored in the unit. Tap the title of the sketch to highlight
the title then tap OK.
10.4.6 Language
Memory
Language
MY.DATA provides the option of selecting screen prompts in seven languages as follows:
English, Italian, Spanish, French, Portuguese, German and Dutch. Go to menu preferences - language - Simply tap on the language you prefer and tap OK to confirm.
Chapter 11: Expense Manager
Enpense
-
Usable memory capacity is shown as percentage free.
10.4.3 Sleep
Sleep
MY.DATA provides the automatically power off (sleep) function when it is idle for a period
of time. The waiting time to go to the sleep function is set here. Battery power level is
displayed on this screen as well.
• To Change Sleep Time
1. Tap Menu > Prefer. > Sleep.
2. Tap the Timing Adjusting Key (up/down arrows) to increase and decrease the minutes to
wait and turn off the unit automatically after the last action.
3. Tap OK to confirm the change.
Expense Manager allows you to keep the expense detail. You can attach memos on expense
records.
•
Tap On Menu - Tap On Expense
•
Record Structure
An Expense Record consists of Currency, Receipt, Date, Payment, Type, Amounts, Payee and
Memo.
•
Viewing In Expense List Mode
Expense list has two columns. The left shows the list of expense types and amounts while the
right shows the date. If there is a memo attached to the record, will display next the to date.
Note: The system default is 3 minutes. Maximum is 10 minutes.
10.4.4 Tone
The system tone can selectively be turned on or off for the listed alarms.
Tone
-
The default is ALL alarms activated. Tap each circle to add or remove the check mark. Add the
check mark to activate the alarm.
27
Double tap the listed expense to view the content of the record.
Tap _ and select the category name Business, Personal, Cat1 or Cat2 to view only the
records assigned to that category.
• Viewing Attached Memo
1. In expense list, double tap the desire record and go to expense view mode.
2. Tap Tools > View Memo.
28
•
Viewing in Expense Report Mode
User can list the expense by a day range in report mode. The showing content can be sorting
by the "Expense type" or the "Currency used" in it related category.
-
To view report mode, tap Report at the top of the touch screen.
Tap Expense to view the report by expense types.
Tap Currency to view the report by currency used.
• Setting Expense Type
1. A set of expense type can be selected by tapping the type icon. This list contains "Airfare",
"Breakfast", "Bus", "Business meals", "Car rental", "Dinner", "Entertainment", "Fax",
"Gas", "Gifts", "Hotel", "Incidentals", "Laundry", "Lodging", "Lunch", "Mileage", "Others",
"Parking", "Postage", "Snack", "Subway", "Supplies", "Taxi", "Telephone", "Tips", "Tolls"
and "Train".
2. Double tap the desired expense type.
• Marking Receipt Indicator
If the associate receipt of the expense is available, you can tap the circle icon to check mark it.
•
i.
ii.
iii.
Attach Memo in the Expense Record
In expense edit mode, tap Tools > Attach Memo.
The cursor and the virtual keyboard are ready for input.
Tap OK to go back to expense editing screen.
3. Tap OK to save the record.
• Setting Date Range
The start and end day can be set individually.
1. Tap the Date field and a calendar will appear.
2. Tap the arrows on either side of the DATE SEARCH box to scroll the calendar months viewed.
OR tap DATE SEARCH to input and find a date directly.
3. Double tap the desire date on the displayed calendars.
•
To Enter A New Record
Chapter 12: Game
12.1 REVERSI
-
Touch the [Menu] icon on the inlay.
Touch the [Game] icon., the following display is shown.
-
Touch [Reversi] to select the game "Reversi".
The game setting display is shown as follows.
-
The default setting is highlighted as above.
Tap to select other settings.
Tap the [START] icon to start the game.
Tap the hot function icons on the inlay to go to corresponding function mode.
Two beeps sound are generated before the game started.
One beep sound is generated for each stroke.
Three beeps sound are generated while showing the winner.
1. Tap Menu > Expense.
2. Tap Tools > New Record.
3. The cursor and virtual keyboard is ready for you to start entering the "amounts" field.
-
Use the stylus to tap a new input location.
Tap to select category.
Use the Up/Down keys to move the cursor to a different line.
• Setting Currency
1. A set of currency can select by taping the Currency icon. This list contains "AU$", "S", "BF",
"R$", "CN$", "DKK", "EUR", "Mk", "FRF", "DM", "HK$", "IR£”, "L.", "¥”, "Flux", "MXP",
"NLG", "NZ$", "NOK", "Pts", "SEK", "CHF", "£”, "$" and "None".
2. Double tap the desired currency.
• Setting Date
1. Tap the displayed date to set another date. A calendar will appear.
2. Tap the arrows on either side of the DATE SEARCH box to scroll the calendar months viewed.
OR tap DATE SEARCH to input and find a date directly.
3. Double tap the desire date on the displayed calendars.
• Setting Payment
1. A set of payment can be selected by taping the payment icon. This list contains "American
Express", "Cash", "Check", "Credit Card", "Master Card", "Prepaid", "VISA" and "Other".
2. Double tap the desired payment.
29
One player mode
Two player mode
30
-
Tap the [NEW] icon at any time to start a new game.
-
Captures can be made horizontally, vertically or diagonally.
Player who cannot make a legal move must touch the icon [PASS] to pass his turn to his
opponent.
The game is over when the board is entirely filled.
Player with higher score wins the game.
12.2 BOXES
Tap the [Menu] icon on the inlay.
Tap the [Game] icon., the following display is shown.
-
-
Tap the (
) icon to start a new game. Tap [ ] to return to current game.
When the game is over, touch the [NEW] icon to start a new game.
Tap the [RULES] icon at any time to display the simplified game rules.
-
Tap [BOXES] to select the BOXES game.
The game setting display is shown as follows.
-
The default setting is highlighted as above.
Tap to select other settings.
Tap the [START] icon to start the game.
Tap the hot function icons on the inlay to go to corresponding function mode.
Two beeps sound are generated before the game started.
One beep sound is generated for each stroke.
Three beeps sound are generated while showing the winner.
Touch [ RETURN TO THE GAME ] to continue the game.
The meaning of the messages shown in the game..
(1) I WIN :
when the computer wins the game
(2) YOU WIN :
when player wins the game
(3) IT IS A TIE GAME:
when both players have the same score
(4) I PASS :
when the computer cannot make any legal move,
(5) YOUR TURN :
after the computer makes its move.
(6) NO LEGAL MOVE, PRESS [PASS]: when there is no legal move for the player.
(7) PLAYER 1 - TURN:
shown in two players mode when it is the turn for player 1.
(8) PLAYER 2 - TURN:
shown in two players mode when it is the turn for player 2.
(9) PLAYER 1 WIN THE GAME:
shown in two players mode when player 1 win the game.
(10) PLAYER 2 WIN THE GAME:
shown in two players mode when player 2 win the game.
Tap the [Cancel] icon on the inlay at bottom left corner at any time to go back to game setting
display or tap the hot function icon on the inlay to go to corresponding function mode.
Board size 5 x 5 (new game)
-
Tap the (
) icon to quit the game; touch [
-
Tap the icon [NEW] at any time to start a new game
-
Tap the (
) icon to start a new game. Touch [ ] to return to current game.
When the game is over, touch the [NEW] icon to start a new game.
] icon to continue the game.
Game rules
The computer always take Black disc
Player of white disc moves first
In Beginner level, legal moves are shown with blinking shaded square boxes.
A legal move can only be made if it captures one or more of the opponent’s discs.
Discs of the same color between two opposing color disc are captured
Captured discs are changed to the color of the capturing player’s disc.
31
Board size 5 x 5 (game over)
32
-
Tap the icon [RULES] at any time to display the simplified rules
(1)
(2)
(3)
(4)
(5)
(6)
(7)
-
Tap [RETURN TO THE GAME] to continue the game.
The meaning of the messages shown in the game..
I WIN :
when the computer wins the game
YOU WIN :
when player wins the game
YOUR TURN :
after the computer makes its move.
PLAYER 1’S TURN
shown in two players mode when it is the turn for player 1.
PLAYER 2’S TURN
shown in two players mode when it is the turn for player 2.
PLAYER 1 WIN THE GAME:
shown in two players mode when player 1 win the game.
PLAYER 2 WIN THE GAME:
shown in two players mode when player 2 win the game.
Tap the [Cancel] icon on the inlay at bottom left corner at any time to go back to game setting
display or touching the hot function icon on the inlay to go to corresponding function mode.
MY.DATA turns off unexpectedly.
i. The MY.DATA is set to turn off automatically
after a period of inactivity. You can adjust the
time before automatic turn off by tapping
Menu > Prefer. > Sleep.
MY.DATA does not recognize handwriting.
i. Make sure you are following the MY.DATA
strokes to input your text with the stylus pen.
ii. Make sure you are drawing the strokes in the
corresponding part of the drawing pad.
(Letters on the left and Numbers on the right).
Writing is not recognized in the touch screen
display area.
iii. Calibrate the touch screen buy tapping
Menu > Prefer. > Display.
I forgot the password, and the unit is
locked.
i. If you have assigned a password and MY.DATA
is locked, the only way to continue using the
organizer is to clear all memory by doing a reset.
Records seem to be missing.
i. Choose the category "ALL" to display all records
in the application.
ii. Check to see if password is set to show by
tapping Menu > Prefer. > Password.
Low Battery Warning
i. Replay both AAA alkaline batteries with new
batteries before synchronizing.
APPENDIX II •
FINDING YOUR PC• COMMUNICATION PORT
-
Touch the tick icon to quit the game Touch [X] to continue the game.
APPENDIX I •
MY.DATA TROUBLESHOOTING
When the unit is not functioning properly, refer to the following table for solutions.
33
Problems
Solutions
This display remains blank after tapping
on OK or ON.
i. Adjust the LCD contrast
ii. Install new batteries
iii. The battery door haven’t lock
Poor display contrast.
i. Adjust the LCD contrast
The unit is on, but pressing buttons and
tapping touch button has no effects.
i. Calibrate the touch screen by tapping
Menu > Prefer. > Display.
ii. Reset the unit, being careful not to clear
memory.
"Memory Full. Cannot Save." Displayed.
i. The memory in MY.DATA is full or nearly full.
Delete any unnecessary data. You can always
check the memory capacity by tapping
Menu > Defrag.
Tapping a touch button does not activate
the corresponding function
i. Calibrate the touch screen buy tapping
Menu > Prefer. > Display.
Follow these steps to locate and confirm the communication ports available.
1. From the desktop, select and double click My Computer > Control Panel > Modems.
2. Select and click the diagnostics tab. The information shown will be all communications ports
recognized by Windows.
3. Personal Information Manager for MY.DATA software sets Personal Information Manager for
MY.DATA program (it will be written in short form as PIM for MY.DATA in the following
paragraph) to use COM1. If COM1 is already in use, Personal Information Manager for
MY.DATA software must be used to change the port used by PIM for MY.DATA as shown in
Setting the Correct Com Port.
• Setting the Correct Com Port
During installation the program sets COM 2 as the default communication port for the PIM for
MY.DATA operation. If a modem or another device is using COM 2 the assigned communication
port for PIM for MY.DATA must be changed to an available port. If you do not know which
communication port to use, follow these steps to change this setting:
1. Click Start > Program files > Personal Information Manager for MY.DATA > Personal
Information Manager for MY.DATA.
2. Use the PIM for MY.DATA menu to change the com setting.
If you have selected the correct COM port the unit should sync. If you are still not synchronizing,
continue to Trouble Shooting.
• Checking Communication Conflicts
1. On the PC from the desktop, select and double click My Computer > Control panel > System.
2. Select and click the Device Manager tab.
This dialog lists the devices being used by Windows.
a. Click the + to the left of Port (COM & LPT). This will display the list of com ports recognized
by windows.
b. Click to highlight the com port being used by the PIM for MY.DATA software.
34
c. Click the Properties button.
The device status information area should say, "This device is working properly".
d. Click the Resources tab.
The conflicting resource list should say, "No Conflicts".
3. If all the above check as stated and the organizer still times out, check the system bios setting
and Windows configuration.
• Check The System Bios Setting And Windows Configurations
(Print and study this procedure before resetting the computer)
Note: Any device attached logically to your com port is going to be disconnected
by this action. If you have questions contact your PC manufacture.
1. From the desktop, select and double click My Computer > Control Panel > System.
2. Select and click the Device Manager tab.
This dialog lists the devices being used by Windows.
a. Click the + to the left of Ports (COM & LPT). This will display the list of com ports assigned
to windows.
b. Click over the com port not being used by the modem. (If the modem is using COM 2 right
click COM 1).
c. Click the remove button.
3. Reboot the computer by selecting Start > Shut down > Restart.
4. During the boot sequence (before window starts running) the screen prompts will show how
to access the System BIOS setup. (Example: "Press Delete to enter setup" or "Press control,
alt, enter to enter setup"). Each PC manufacture uses a different method, check your PC
operator’s manual or contact the manufacture for help with BIOS setup.
a. Find the menu that shows the COM port assignments.
If your modem is using COM 2 then your external COM port can be assigned to COM 1. Use
the cursor keys to move to the COM 1 setting, use the left right arrows or space bar to
change the setting values. Most machines allow values to be switch to disabled, enabled, or
automatic. Some allow additional setting. Make sure it is set to enable. Once the value is set
you normally touch the esc key to continue the boot process to start Windows.
b. When Windows starts loading it will show prompts stating that it has found an unknown device
and will load device drivers for the new COM port.
5. When Windows has completed its start-up routine run the "Personal Information Manager
for MY.DATA" and check to see if the same com port set in the bios is the same selected
for PIM for MY.DATA.
6. Start PIM for MY.DATA (make sure the PIM for MY.DATA icon is in the system tray).
7. Start the sync procedure on the MY.DATA organizer. Synchronization should continue normally.
35
APPENDIX IIISELECTING TIME DIFFERENCE FOR USER DEFINE CITY
Use the time difference for a city that is in your time zone.
Time
Difference
Country + City name
Time
Difference
Country + City name
+4.5
-3
+8
-3
-5
-4
-5
-4
-8
+8
+2
+1
0
+9
+3
+5.5
+2
+3
-7
+1
+1
+5
+8
-4
+3
+9
0
+1
+8
+2
0
-9
-6
-7
-6
-5
-7
-8
Afghanistan
Argentina - Buenos Aires
Australia - Perth
Brazil - Brasilia
Bahamas - Nassau
Canada - Halifax
Canada - Quebec
Chile - Santiago
Canada - Vancouver
China - Beijing
Fiji - Nadi
France - Paris
GMT - Universal Time
Japan - Tokyo
Kenya - Nairobi
India - Mumbai
Israel - Tel Aviv
Madagascar
Mexico - Mazatlan
Netherlands - Amsterdam
Norway - Oslo
Pakistan - Karachi
Philippines - Manila
Puerto Rico - San Juan
Russia - Moscow
South Korea - Seoul
Spain - Canary Is.
Sweden - Stockholm
Taiwan - Taipei
Turkey - Ankara
United Kingdom - London
USA - Anchorage
USA - Chicago
USA - Denver
USA - Houston
USA - Miami
USA - Phoenix
USA - Seattle
+1
+9.5
+10
-4
-7
-4.5
-11
-5
-6
+8
+2
+2
-3
+6
+2
+3.5
+1
+8
+5.75
+12
+4
-5
+1
+10
+3
+11
+1
+1
+7
+2
-7
-5
-6
-10
-8
-5
-6
-5
Algeria - Algiers
Australia - Adelaide
Australia - Sydney
Brazil - Manaus
Canada - Edmonton
Canada - New Brunswick
Cook Islands - Rarotonga
Canada - Toronto
Canada - Winnipeg
China - Hong Kong
Finland - Helsinki
Germany - Berlin
Greenland
Kazakhstan
Kuwait - Kuwait
Iran - Tehran
Italy - Rome
Malaysia - Singapore
Nepal
New Zealand - Auckland
Oman - Abu Dhabi
Peru - Lima
Portugal - Lisbon
Russia - Khabarovsk
Saudi Arabia - Jeddah
Solomon Is.
Spain - Madrid
Switzerland - Zurich
Thailand - Bangkok
Ukraine - Kiev
USA - Albuquerque
USA - Atlanta
USA - Dallas
USA - Honolulu
USA - Los Angles
USA - New York
USA - San Antonio
USA - Washington D.C.
36
APPENDIX IV HANDWRITING RECOGNITION TABLE
1. To activate handwriting recognition:
Tap on DONE to close virtual keyboard.
2. To activate virtual keyboard:
Tap on writing pad and hold for about 2 seconds.
CAUTION/DEFECT OR DAMAGE
High temperature will
destroy the unit.
Do not leave unit in
direct sunlight.
Do not press the liquid
crystal display and
avoid heavy shock or
the display may fail.
Do not use a pencil
or pin to press the
RESET switch. Use a
ball-point pen.
Clean only with a piece
of soft dry cloth.
If a part of your game is damaged or something has been left out, DO NOT RETURN THE GAME
TO THE STORE. The store doesn’t have replacement parts.
Instead, write to us at:
TIGER ELECTRONIC TOYS REPAIR CENTER
980 Woodlands Parkway, Vernon Hills,
Illinois 60061, U.S.A.
In your note, mention the name of your game, your game’s model number, and tell us briefly what
the problem is. Also include sales slip, date, place of purchase and price paid.
DEL
RETURN
Letter Window
•
SPACE
SHIFT
BACK
SPACE
CAPS
LOCK
Number Window
Heavy dot represents starting point.
FCC STATEMENT
This device complies with Part 15 of the FCC Rules. Operation is subject to the following two
conditions :
(1) this device may not cause harmful interference, and (2) this device must accept any interference
received, including interference that may cause undesired operation.
Warning: Changes or modifications to this unit not expressly approved by the party responsible
for compliance could void the user's authority to operate the equipment.
NOTE: This equipment has been tested and found to comply with the limits for a Class B digital
device, pursuant to Part 15 of the FCC Rules. These limits are designed to provide reasonable
protection against harmful interference in a residential installation. This equipment generates,
uses, and can radiate radio frequency energy and, if not installed and used in accordance with
the instructions, may cause harmful interference to radio communications. However, there is no
guarantee that interference will not occur in a particular installation. If this equipment does cause
harmful interference to radio or television reception, which can be determined by turning the
equipment off and on, the user is encouraged to try to correct the interference by one or more
of the following measures:
Reorient or relocate the receiving antenna.
Increase the separation between the equipment and receiver.
Connect the equipment into an outlet on a circuit different from that to which the receiver is
connected.
Consult the dealer or an experienced radio TV technician for help.
37
90-DAY LIMITED WARRANTY
Tiger Electronics (Tiger) warrants to the original consumer purchaser of this product that the
product will be free from defects in materials or workmanship for 90 days from the date of original
purchase. This warranty does not cover damages resulting from accident, negligence, improper
service or use or other causes not arising out of defects in materials or workmanship.
During this 90-day warranty period, the product will either be repaired or replaced (at Tiger’s
option) without charge to the purchaser, when returned with proof of the date of purchase to
either the dealer or to Tiger.
Product returned to Tiger without proof of the date of purchase or after the 90-day warranty
period has expired, but prior to one year from the original date of purchase, will be repaired or
replaced (at Tiger’s option) for a service fee of U.S.$65.00. Payments must be by check or money
order payable to Tiger Electronics.
The foregoing states the purchaser’s sole and exclusive remedy for any breach of warranty with
respect to the product.
All product returned must be shipped prepaid and insured for loss or damage to:
Tiger Repair Department
1000 N. Butterfield Road, Unit 1023
Vernon Hills, IL 60061, USA.
The product should be carefully packed in the original box or other packing materials sufficient
to avoid damage during shipment. Include a complete written description of the defect, a check
if product is beyond the 90-day warranty period, and your printed name, address and telephone
number.
THIS WARRANTY IS IN LIEU OF ALL OTHER WARRANTIES AND NO OTHER REPRESENTATIONS
OR CLAIMS OF ANY NATURE SHALL BE BINDING ON OR OBLIGATE TIGER IN ANY WAY.
ANY IMPLIED WARRANTIES APPLICABLE TO THIS PRODUCT, INCLUDING WARRANTIES OF
MERCHANTABILITY AND FITNESS FOR A PARTICULAR PURPOSE, ARE LIMITED TO THE
NINETY (90) DAY PERIOD DESCRIBED ABOVE. IN NO EVENT WILL TIGER BE LIABLE FOR
ANY SPECIAL, INCIDENTAL, OR CONSEQUENTIAL DAMAGES RESULTING FROM POSSESSION,
USE, OR MALFUNCTION OF THIS TIGER PRODUCT.
Some states do not allow limitations as to how long an implied warranty lasts and/or exclusions
or limitations of incidental or consequential damages, so the above limitations and/or exclusions
of liability may not apply to you. This warranty gives you specific rights, and you may also have
other rights which vary from state to state.
For more information about Tiger Electronics, our products and special promotions, please visit
our web site at: www.tigertoys.com
38