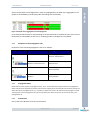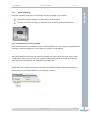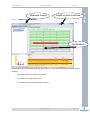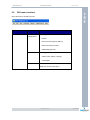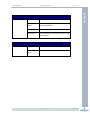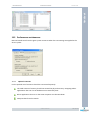
1
Handbook EPO - Introduction & overview - Installation - (First) use - Configuration - Administration - Business monitor Version All Handboek xEPO Elements Date : Jul 2012 Version : 5.X Author : Auxzenze Printdate : vrijdag 13 juli 2012; 10:38 Document : P:\EPO\Documentatie\Handboek-EPO\Handbook EPO v5.3 English.doc Copyright © 2003-2012 Auxzenze. All rights worldwide reserved. Nothing from this user-manual can be copied, distributed, transferred, stored in an automated fact file, translated in any human language or computer language, in some way or in an only manner, or electronically, mechanically, magnetically, manual or on any other manner, or published to third parties without the explicit written authorization of Auxzenze. © 2012 Auxzenze 2 van 124 Business monitor Version All Auxzenze has with regard to the contents of this user-manual possibly patents, patent applications, trademarks, copyrights and other intellectual property rights property rights. In possession do not have of this user-manual means that you a license is entitled or some other legal to the use of aforesaid without the explicit written authorization of Auxzenze. Auxzenze preserve themselves the right for the EPO software to adapt it for any reason whatsoever without the obligation for informing or compensating persons or organizations about this. © 2012 Auxzenze - the Netherlands. © 2012 Auxzenze 3 van 124 Handboek xEPO Elements Business monitor Version All Contents 1 2 3 Introduction 9 1.1 General description 9 1.2 Aim of the handbook EPO 10 1.3 Additional information 10 1.3.1 1.3.2 10 11 EPO-Website EPO-Forum EPO - Business Monitoring 12 2.1 General 12 2.2 Method 13 2.3 Services 13 2.4 Logging 15 2.5 Data transport (administration of the Postboxes) 15 2.6 EPO internet client 16 2.7 Probes (agents) 17 2.8 2.7.1 Agentless Business Views 17 18 2.9 System management/helpdesk CustomerCare 18 2.10 License points 19 2.11 2.10.1 License points in use 2.10.2 License overview Language 20 21 22 Installation 23 3.1 System requirements 23 3.2 System recommendations 23 3.3 Support for 64 bits 23 3.4 Database 23 3.5 Installation preparation 24 3.6 Installation 24 3.6.1 28 Upgrade © 2012 Auxzenze 4 van 124 Handboek xEPO Elements 4 5 6 7 Business monitor Version All 3.7 3.6.2 Automatic installation EPO Internet client 29 31 3.8 Post install points 31 3.9 3.8.1 Security Uninstall 31 31 3.10 Encryption 32 Use 32 4.1 First Use Wizard 32 4.2 Emergency Logon 33 4.3 License activation 33 4.4 4.3.1 Request a trial 4.3.2 Register a serial number 4.3.3 Reminder Basic information 34 34 34 35 4.5 4.4.1 EPO Status information 4.4.2 Propagation rules 4.4.3 Exceptions to the propagation rules 4.4.4 Propagation delay 4.4.5 SLA timeline 4.4.6 Measurements 4.4.7 Linked and leading nodes Base skills 35 35 36 36 36 37 37 38 4.6 First use of the Business Tree 38 4.6.1 4.6.2 38 40 CustomerCare (helpdesk) Room monitoring EPO-Functionality 41 5.1 Layout of the EPO User Interface 41 5.2 5.1.1 Layout of the EPO Windows EPO-menu structure 42 43 5.2.1 5.2.2 5.2.3 5.2.4 45 47 48 48 Maintenance Windows Service Window User Manager Escalation rules Arranging the Business Tree 52 6.1 53 Additional CustomerCare Query Visualizing monitored results into EPO Business Views 55 7.1 55 General © 2012 Auxzenze 5 van 124 Handboek xEPO Elements 7.2 8 9 Business monitor Version All How to make Business Views 55 7.2.1 7.2.2 7.2.3 7.2.4 7.2.5 7.2.6 55 56 56 57 57 57 First make the actual Business View Place the Business View into a Business Tree Editing an existing Business View EPO Business View Client EPO Business View Screensaver EPO Tray Icon EPO configuration editor 58 8.1 59 Finding a device EPO Probes 60 9.1 How to add new probes 60 9.2 Use a template for probe settings 61 9.3 Probes: General properties 61 9.4 9.3.1 Advanced schedule settings CPU Probe 61 62 9.5 Backup Probe 63 9.6 Disk Probe 66 9.7 Eventlog Probe 68 9.8 External Probe 69 9.9 ICMP (Ping) Probe 74 9.10 Memory Probe 75 9.11 Performance counters Probe 77 9.12 Process Probe 78 9.13 Service Probe 80 9.14 SNMP Probes 82 9.15 Task scheduler Probe 87 9.16 Virtual Email User (Email Probe) 88 Installation 88 9.16.1 Accounts Settings 88 88 9.17 90 Virtual web user (Web Probe) © 2012 Auxzenze 6 van 124 Handboek xEPO Elements Business monitor Version All 9.18 Webservice (SOAP) probe 93 9.19 Email To EPO probe 95 9.20 Virtual machine probe 97 9.21 Webcam probe 98 9.22 Reporting 100 10 EPO Procedures 103 10.1 How do I add a new server for remote monitoring? 103 10.2 How do I add a new router bandwidth monitor? 103 10.3 How to adjust threshold values? 103 10.4 How do I monitor the availability of my IP-components? 104 10.5 How can I add my own script to the EPO monitor? 105 11 EPO Configuration 106 11.1 Default thresholds 106 11.2 11.1.1 Scale of the graph Configuration files 106 106 11.3 Data storage 107 11.4 Memory usage 108 11.5 Probes by means of WAN, Internet by means of WAN, Internet 108 11.6 11.5.1 To establish EPO network for not automatically detected machines. 11.5.2 Device Configuration 11.5.3 To remove Devices 11.5.4 Connection test EPO Mail gateway 108 110 111 111 112 11.6.1 Receiving SMTP email 112 12 Backup and restore of the database 113 12.1 Backup 113 12.2 Restore 113 12.3 Disaster recovery 113 12.4 Migrate EPO Server 113 13 Maintenance 13.1 114 Database maintenance 114 © 2012 Auxzenze 7 van 124 Handboek xEPO Elements Business monitor Version All 13.2 13.1.1 Compress the measurement database Performance maintenance 114 115 13.3 13.2.1 Optimal resources 13.2.2 Optimal Database size 13.2.3 Optimal probe messages Problem solution 115 116 116 116 14 Diaspora 120 15 Frequently Asked Questions with the Answers 121 © 2012 Auxzenze 8 van 124 Handboek xEPO Elements Business monitor 1 Introduction 1.1 General description Version All EPO-Framework is intelligent software which monitors vital processes and warns at a very early stage for deviations of the Service Level thresholds. EPO is the suite of all business solutions which Auxzenze have produced the previous years as tailormade jobs. The red wire of all those business solutions has become the SLA-framework EPOElements. Direct use EPO-Elements is ready to use (out-of-the-box) still on the day of the installation for starting with: Monitoring service levels The helpdesk for supporting customer communication included with procedure monitoring and/or the guarding of servers with basic information as CPU, memory, disk space, services and eventlogs. and/or room monitoring (by means of the EPO-room monitor with eNose) Configuration EPO-Elements can be adapted simply by means of configuration for: applications or network services (contracts) to monitor to monitor for example VOIP-chains or monitor servers outside your own network (for example as service to customers) to monitor kpi’s or financial figures to escalate by means of e-mail, sms or application. © 2012 Auxzenze 9 van 124 Handboek xEPO Elements Business monitor Version All Scripting By means of configuration and small tailor-made scripts EPO Elements can be used: 1.2 for the planning of guarding of vital (services) chains directly to connect on individual communication needs to be connected on existing technical guarding resources enrich technical monitoring to couple it to the experience feeling of the users report templates to offer to own report generator to monitor agentless vital company processes Aim of the handbook EPO The aim of this user-manual is offer aid as sort 1e-line book of references. Thus are successively described: 1) The installation (of the server, client and probes) 2) The first use (how the helpdesk, chain monitoring or remote monitoring can be arranged) 3) EPO-functionality (enumerating descriptions of all EPO-functions) 4) Configuration (adapt settings of several EPO-items, such as: server, client and probes) 5) Administration (backup, restore and problem solution) 1.3 Additional information On the Auxzenze-website and EPO-Forum you can find additional information on EPO Elements. Please report “missing information” to us ([email protected]) 1.3.1 EPO-Website The most recent version of the product leaflets are available at the website www.theEarlyWarningCompany.nl. The Internet site contains among other things: Examples © 2012 Auxzenze 10 van 124 Handboek xEPO Elements Business monitor Leaflets with general information Product fact sheets with more technical specifications 1.3.2 Version All EPO-Forum The most recent version of the software is available on the EPO Elements Forum www.epoelements.nl. The EPO-forum contains (among other things): 1. Answers on frequently asked questions 2. A probe library with examples. 3. The most recent version of this handbook © 2012 Auxzenze 11 van 124 Handboek xEPO Elements xEPO Elements 2 EPO - Business Monitoring 2.1 General Version All Handboek Business monitor EPO has been built from the vision that monitoring from the interests of the organization will be more effective than simply monitor all technical system events. EPO has also been developed to offer “The strength of open source” but with the professionalism of Enterprise management… Therefore EPO contains the functionality which is necessary for: Business Monitoring Chain Monitoring Remote Monitoring Room Monitoring Early Financial Warning Helpdesk/CustomerCare including ITIL-process monitoring And use your own scripts Or every combination of the above mentioned functionalities. EPO has been developed for managers and ICT experts: General and financial manager who want to monitor their contracts with their customers. Process managers and controllers who want to monitor their internal processes. Service proposers who want to supply remote services. Central systems or building administrators who have ongoing sensual guarding necessary for (technical) spaces where they daily does not come anymore. © 2012 Auxzenze 12 van 124 2.2 Business monitor Version All Financial controllers who want real-time monitoring of the monthly key figures and who want to be able to react also real-time. Helpdesk employees and process managers who want to - on the base of Keep-IT-Simple - organize their customer contacts and get their helpdesk processes under control and keep it that way. Method Common used management software often gives an excess of data concerning systems and network components. Whereas only a small part of it is really relevant. Moreover this superabundance takes away the visibility on what is really important. For this reason Auxzenze states that successful monitoring does not start at technique, but starts from the view of the company processes and the thresholds defined by the management. That is how desired performances (service Levels) can be made measurable. EPO have been developed to measure only the important components that really matter for your organization. EPO focuses on the company processes. Thus EPO can verify continuously if orders are being rapidly enough processed or that computer systems are available within agreed uptimes. For the industry EPO can check production processes. In combination with Check-it’s eNose EPO can monitor exposures of gases. Thus EPO cooperates closely with every system that can collect and pass on information. Moreover there are plug-ins for functions such as time recording, helpdesk recording, monitoring of several processes and much more. 2.3 Services An EPO-Server typically contains the following components: A machine installed with only the EPO-Probes contains the following components: © 2012 Auxzenze 13 van 124 Handboek xEPO Elements xEPO Elements Business monitor Version All Handboek A Desktop with the EPO GUI will not contain any service components. A short description of the services: 1. EPO Diaspora (optional for server and probe installation) The software distribution layer. With EPO Diaspora you can update (already existing!) EPO probed machines. Distributed software updates travel through the EPO message transport layer. 2. EPO Mail Gateway (optional for server installation) With this option it is possible to send email by a relaying mail server 3. EPO Message Transport Forms the transport layer between agent and database. Remote probes (agents) communicate with the local EPO message transport layer, which ensures the expedition of information to the database. The communication goes by means of a Postbox mechanism. At down the messages are stored in the local postbox until information can be forwarded (store and forward). 4. EPO Probe (optional for server installation) Obtains basic Windows information (CPU, disk space, services) from the operating system and offers this to the transport layer (message service). Can be configured to retrieve additional information such as SNMP-information, scripts, SQL statements, windows performance counters, ping values, … At down: no information is gathered until service is started. Already existing probes will show blue in the EPO Business tree indicating the state “Unknown”. 5. EPO Server Ensures the communication with EPO-clients (EPOGui.exe). Ensures the processing of the data offered by the probes. Contains also the escalation manager functionality. At down: EPO-Clients cannot start because they can make no connection with the database. The probes will continue with their measurements. Measurements send by the probes by means of the EPO message transport layer will be stored locally on the server. When the EPO server service is started it will process the measurements retroactive. 6. EPO SMS Gateway (optional for server installation) With this option it is possible to send SMS-messages by GSM-modem or room monitoring unit (which has a local GSM-modem included). © 2012 Auxzenze 14 van 124 xEPO Elements Version All Logging Handboek 2.4 Business monitor The EPO-services log to the Windows Event Viewer (e.g. windows \ start \ run “eventvwr.exe”) More detailed log information (informationals and debug messages) can be found under: - …\ Program files\ the Early Warning Company \ EPO \ Logs Logs will be saved according the round robin method in default 10 files per component (server, transport layer and probe). Look for the latest date time stamp to find the newest log. 2.5 Data transport (administration of the Postboxes) Agents, or probes as we call them, (ntlog, probe and scheduled scripts) communicate their results by means of messages. These messages are forwarded by means of store-and-foreward-mechanism called the EPO transport layer. When the network connection is temporarily down or EPO services are not running messages are kept in local postboxes. To show the content of the local EPO-Postboxes on an EPO probed computer: (directory… \ EPO \ tools \): “EPOMsgcmd.exe list” Other commands will show when just starting epomsgcmd.exe with no parameters: EPO Message Command Tool version x.x revision y Copyright (c) 2002-2006 Auxzenze Usage: EPOMsgCmd [<options>] [-xsl <file>] locate [xml] © 2012 Auxzenze 15 van 124 xEPO Elements Business monitor Version All Handboek EPOMsgCmd [<options>] [-xsl <file>] debug [html] EPOMsgCmd [<options>] [-xsl <file>] list [xml] EPOMsgCmd [<options>] [-xsl <file>] extract <postboxname> EPOMsgCmd [<options>] [-xsl <file>] extractall <postboxname> EPOMsgCmd [<options>] store [<postboxname>] EPOMsgCmd [<options>] storelist <filename> [<postboxname>] EPOMsgCmd [<options>] flush! [/Y] [<postboxname>] EPOMsgCmd [<options>] flushall! [/Y] EPOMsgCmd [<options>] registerresolve <resolvename> <postboxname> EPOMsgCmd [<options>] info [routes] EPOMsgCmd [<options>] setnetworkkey EPOMsgCmd [<options>] createnetworkkeyfile <filename> EPOMsgCmd roundtriptest <target> [Alarm|High|Normal|Low] [<nr tests>] Options: -s <server>[:<port>[#<sourceport>]] to specify a server/port to connect to. -k <hex-key>|none -kp <passphrase> -kf <file> sets the connection encryption key. sets the connection encryption key. sets the connection encryption key. Default connection is: bin://127.0.0.1:7472 Encryption default setting is disabled NB this command can also be used to test the (EPO) connection by asking the postboxes of a remote EPO probed machine: E.g.: epomsgcmd –s <ipaddress of remote EPO probed server> list 2.6 EPO internet client THE EPO Windows client can be used from each network that has connection to the network with the EPO-server. For example by means of the Internet, VPN (or other closed networks). © 2012 Auxzenze 16 van 124 Business monitor Version All It is necessary for the client to be able to connect on tcp port 7471 to the EPOserver. 2.7 Probes (agents) EPO has the following standard probes (agent): Windows server (CPU, memory: (physical and logically), disk space, EventLogs, services, tasks and processes) SNMP (ip-address & ObjectID) Windows Performance Counters Ping (availability and response time) Interface (commandscripts, perl, SQLcommands, .net,…) HTTP (including automated substitution of parameters and variables for virtual user) ITIL proces monitoring (service levels for open incidents, problems, …) Backup job states Scripts (doscmd, perl, .net, visual basic, queries, …) Only valid for EPO room monitoring: e-Nose (fragrance of burned electronics, Scorching, Volatile Organic Compounds cigarette smoke, etc.); Temperature; air humidity; leak water (airco, roof, water piping,…); Voltage level (for or after the UPS); Optional devices: webcam, door contact, fingerprint unit. See chapter 9 “EPO Probes”, page 60 for how to configure the EPO probes. 2.7.1 Agentless By EPO monitored components (servers, applications, …) can also be monitored agentless (this means no separate agent/probe on the monitored server itself). As from the EPO-server (or a random other EPO probed machine) scripts can be scheduled (see the probe library for examples) which monitor the components on distance. EPO supports all known script languages by its external open interface. For example: doscommands, queries, visual basic, perl, … © 2012 Auxzenze 17 van 124 Handboek xEPO Elements Business monitor Version All See paragraph 9.8 “External Probe”, page 69 for how to use this open interface. 2.8 Business Views All measurements monitored by the EPO probes have their own service levels (norms or thresholds). Measurements are mapped upon the EPO Business tree with colors indicating the state of the measurement according the individual service levels. All individual or combined states can be visualized into any picture. Figure 1 EPO Business views examples The way it works is that you can import your own picture (png, jpg or bmp from paintbrush, Microsoft Visio, AutoCAD, …) and link the individual measurements with their state (and color) to a (fenced) part of the picture. EPO will real-time fill the corresponding state color into the linked part of the picture. These Business Views can be used for the EPO-slideshow or EPO-screensaver to visualize the state of your Business 24x7. These Business Views fit in to normal desktop monitors but also on large wall monitors. See paragraph … for how to use the EPO Business Views. 2.9 System management/helpdesk CustomerCare The build in helpdesk module CustomerCare can be used for: Registration of incidents, modification requests, problems, tasks, activities and other customer reports. Incident monitoring on Service-Level-Agreements. Automated import of automatic registrations of returning line tasks Administration of spend helpdesk time © 2012 Auxzenze 18 van 124 Handboek xEPO Elements Business monitor Version All SLA-reporting + invoice appendix spend helpdesk time 2.10 License points EPO element contains “in the box” sufficient license points (100 EPoints) to aim one of the key features: - CustomerCare – helpdesk - Chain monitoring - Or remote monitoring. EPO-license points (EPoints) are dynamically usable. EPoints can be used for enabling functionality, probes (agent) and clients. The quantity required license points is not stipulated by what is installed, but by what is monitored (= what is in the business tree) and the number of simultaneously started EPO User clients: 1) Every end node in the business tree (= simple Managed object) costs 1 license point. 2) Exceptions are: - the standard information of windows server: cpu, disk space, memory, eventlog and all services (max 5 EPoints per server) - SNMP-information of a router/switch (3 EPoints per router/switch) - the (process monitoring of the) helpdesk module CustomerCare (50 EPoints) Simple Managed objects cost 1 EPoint for every time the Managed object has been incorporated in the business tree: EPO ICMPPing/availability or latency monitoring of an IP-address EPO HTTP-monitoring of a web address EPO SNMP-monitoring of a simple object ID EPO openInterface monitoring with an external script EPO performance Counters © 2012 Auxzenze 19 van 124 Handboek xEPO Elements xEPO Elements Business monitor Version All EPO Administrator client EPO User client EPO Viewer client (read only) Handboek The license points for the use of the EPO business client, for example: : 20 – 29 EPoints* : 15 EPoints per concurrent user* : 5 EPoints per concurrent user* In EPO Elements (from 5.0 and higher) there is only 1 type of client. The defined role (with rights) will determine the number of used license points. The required license points for room monitoring: 2.10.1 EPO room monitoring : license by means of the hardware License points in use The standard node “License Overview” shows the total number of license points that is in use. In the graph is shown: - Total owned EPoints The line which reflects how many EPoints are bought and therefore how many EPoints can be used. - Business tree The quantity EPoints which is in use in business tree - Client The quantity EPoints which is in use by (concurrent) users. NB 15 EPoints have been reserved permanently for one user. - © 2012 Auxzenze 20 van 124 Business monitor Version All Handboek xEPO Elements Figure 2 License points in use The use of license points can be also be subject for proactive monitoring. 2.10.2 License overview The menu option “Help \Manage Licenses…” will show an overview over the obtained licenses. Figure 3 License overview NB every installation of EPO element contains in advance the first 15 EPoints that are needed for starting at least one EPO user client. License points in use Select “Epoints in use”, select a pool and select “Show detailed information” for specific EPoint calculation. © 2012 Auxzenze 21 van 124 Business monitor Version All Handboek xEPO Elements 2.11 Language In the logon window you can select a language (English and Dutch). The labels of the Business tree and dropdown menu's in the Helpdesk module can be set by the user in any language. For the Business Tree: build the tree (menu option: edit \ Business tree \ …) in your desired language. For the dropdown menu's in the Helpdesk module: define your own items (menu CustomerCare \ lookuptables \ …). © 2012 Auxzenze 22 van 124 Business monitor 3 Installation 3.1 System requirements Version All Handboek xEPO Elements Windows: version: XP, 2000, 2003 or Vista. CPU: minimum speed: as from 1 GHz Free disk space: minimum as from 10 Gbyte Memory: minimum as from 1 Gbyte Microsoft .Net Framework: version 2.0 sp1 3.2 System recommendations CPU: recommended speed: as from 2 GHz Free disk space: recommended as from 80 Gbyte Disks: SCSI or SAS Memory: recommended as from 2 Gbyte Optimal performance of EPO Elements is obtained by using EPO on a server without other applications. 3.3 Support for 64 bits The EPO probes can be used on 64bit systems. The EPOServer however cannot be used on a 64 bit Operating system because the open source database Firebird is not yet made available for 64 bit. 3.4 Database EPO Elements uses a file database for storing measurements. All other data items like tree definitions, thresholds and service windows are stored by default in a firebird database. EPO CustomerCare standard is installed with the database Firebird (http://firebird.sourceforge.net/). Advantages of this database: For free, compactly and simply in maintenance Commercially independent Supported platforms on Linux, Windows, and several Unix © 2012 Auxzenze 23 van 124 Business monitor Version All Organizations which want make themselves (further) reports of the helpdesk registrations with a report generator such as for example Crystal reports are recommended another database, for example Microsoft SQLServer. EPO CustomerCare can use also of other databases, for example: 3.5 Microsoft SQLServer Microsoft Desktop Edition (MSDE) Microsoft access Oracle Installation preparation 3.6 Use an installation account with administrator rights Backup up of EPO directory for safety reasons Installation 1. EPO start “EPO element v.v-bbbb Setup.exe”. Where v.v the version and bbbb the build number. 1. EPO start element v.v-bbbb Setup.exe. Click <Next>. © 2012 Auxzenze 24 van 124 Handboek xEPO Elements xEPO Elements Business monitor Version All Handboek 2. Click if you agree with the mentioned terms the checkbox “I accept …” Click<Next> 3. Select the required type of installation: - probes : for a device from which (or from where) you want to retrieve information - client : for the operators - or full : for the server or for a stand-alone demonstration. Click <Next> © 2012 Auxzenze 25 van 124 xEPO Elements Business monitor Version All Handboek 4. If wished, change the installation path. Click <Next> 5. If wished, change the path where the data must be stored. Click <Next> 6. If wished, modify the name under which the machine in the EPO network comes available. This is necessary for identifying the desired measurement when measurements are mapped upon the Business tree. Therefore the devicename © 2012 Auxzenze 26 van 124 xEPO Elements Business monitor Version All Handboek must be unique Click <Next> 7. Encryption Settings. The setting files and the data communication can be encrypted. Click <Install> to start the installation 8. If anti spy software is installed, these should allow the EPO installation to install de EPO services. The anti spy software will possibly ask for authorization. Examples: © 2012 Auxzenze 27 van 124 xEPO Elements Version All Handboek Business monitor 9. Click <Finish> to conclude the installation successfully. EPO Elements is now ready for use. See paragraph 2.3, “Services”, page 13, for an overview of which components are installed during the EPO installation. 3.6.1 Upgrade All EPO Elements 4.x versions can be upgraded during the 5.x installation with preservation of all probe data, the business trees, thresholds, service windows and helpdesk registrations. The installation detects which version is already installed. Changes in database or measurement structure can be applied during the installation process. Make a complete backup of the program AND data directories for failover purposes. © 2012 Auxzenze 28 van 124 Business monitor Version All Set-up detects which components are already installed and will reselect these checkboxes in the option list. Reapplying the setup.exe will first uninstall all already installed options and then install the selected options. Uninstall and reinstall an option will not harm the configuration for that item. 3.6.2 Automatic installation The installation wizard has been built with NSIS (Nullsoft Install system) EPO components can be installed without interaction (silent and unattended). The installation options can be supplied in an .ini file: [Settings] ;INSTDIR="C:\Program files\The Early Warning Company\EPO" ;INSTDATADIR="C:\Program files\The Early Warning Company\EPO\Data" ;DEVICENAME= ;LocalEncryption=1 ;NetworkKey=AFB5B8A65E25BB81AFB5B8A65E25BB81 ;NetworkKeyFile= ;DefaultConfigFile="Default.probeset" ;CustomEpoMsgSvcConfig= StartServices=1 [Components] EPOMsgSvc=1 EPODiasporaSvc=1 EPOProbeSvc=1 EPOProbeSvc_Windows=1 EPOProbeSvc_Common=1 EPOProbeSvc_Network=1 EPOProbeSvc_Security=0 ;EPOProbeSvc_Checkit=0 ;EPOProbeSvc_DemoData=0 ;EPOProbeSvc_Version3=0 ;EPOServerSvc=1 © 2012 Auxzenze 29 van 124 Handboek xEPO Elements xEPO Elements Business monitor Version All Handboek ;EPOMailGatewaySvc=1 ;Client_User=1 ;Client_Viewer=0 ;Client_Diaspora=0 ; Means ignore rest of the line and if item already installed leave it unchanged =0 means don’t install item and uninstall if installed =1 means install item and reinstall item if installed Use: Setup.exe [/S] /options =<complete ini path> For example: EPO element setup.exe /options=C:\Projects\EPO\Setup\Installoptions.ini An EPO.fdb premade database file located in the same directory as the setup.exe will automatically be installed when the setup is run. © 2012 Auxzenze 30 van 124 3.7 Business monitor Version All EPO Internet client The EPO client can also connect to the EPO server through the internet or other network connection types. Required configuration: Description Configuration By means of VPN No extra configuration is necessary. The EPO User client finds at starting automatically the EPO-server (by UDP broadcast). Optionally: specify the server address (by resolvable name or ip) By means of NAT (Native Address Translation) the concerned network components can be configured to make the connection possible. Direct Intermediate firewalls and routers/switches between the domains must be set open for: - EPO 3.8 3.8.1 : port 7471 TCP. Post install points Security The following configuration files contain accounts and passwords for the used database: Hint: Protect these configuration files by limiting access. 3.9 Uninstall Use the Uninstall-EPO-application in the standard EPO program files folder for removing the EPO components. Or use the standard Windows control panel for add/remove software. © 2012 Auxzenze 31 van 124 Handboek xEPO Elements Business monitor Version All 3.10 Encryption EPO can protect both the local settings files as well as the network communication by means of encryption. EPO uses 256 bit Rijndael encryption (AES). During the installation you can indicate what should be protected. You can specify a key yourself in hexadecimal. It is also possible to use a passphrase. This will be converted to a key. The third possibility is reading a key from a file. This file can be generated from the installation by specifying a filename in the bottom field. The file can be used then as an import at another installation to simplify the roll out. Another manner will generate the key file using the tool EPOMsgCmd.exe from the tools directory. With the option - kf you can specify a key file to modify the current security key. In the same a manner it is possible to specify a passphrase with - kp and – k. 4 Use The First Use Wizard will help you making the first definitions that are necessary. 4.1 First Use Wizard The First Use Wizard is started if an EPO client is started if there are no users defined in the EPO User manager. The following subjects will be handled: Introduction License activation Group definition with default security settings User administration with Active Directory import option Demonstration installation with live data Service Window definitions Business Tree selection © 2012 Auxzenze 32 van 124 Handboek xEPO Elements Business monitor Version All Which steps are already performed is kept in a server file called ‘ExecutedFirstUseSteps.txt’ in the …\EPO\data-directory (default c:\program files\the early warning company\epo\data). 4.2 Emergency Logon In case you lost access to EPO Elements there is a back door build into EPO. This option is only revealed if you start an EPO Client as an OS administrator on the EPO Server: Select the option “Emergency logon”. As a result the EPO User client is started with minimal menu options, just enough to make the necessary changes to the user base. 4.3 License activation The activation of the license can be carried out with a proper Internet connection within a couple of minutes. Step 1 Select Request trial in the License reminder…: or (if the User Client is already started) Select the menu “Help \ Manage licenses…” and click afterwards the button “Request license” The license can be activated in two ways: © 2012 Auxzenze 33 van 124 Handboek xEPO Elements xEPO Elements Business monitor Version All Handboek 1) Temporary activation by means of a trial trial-licentie. 2) By means of the serial number obtained at purchase of the software 4.3.1 Request a trial 4.3.2 Register a serial number Step 2a Step 2b Specify the name and the e-mail address of the applicant or choose to remain anonymous: Specify the serial number that you have obtained by means of your reseller. Click on Request license. The license has been now activated. 4.3.3 Reminder The trial license can be used for 14 days and can be renewed once. © 2012 Auxzenze 34 van 124 xEPO Elements 4.4.1 Version All Basic information Handboek 4.4 Business monitor EPO Status information Node color EPO State Meaning Green Normal The node and all underlying nodes meet their specified thresholds * Yellow Warning The node (or one of the underlying nodes) contains a value which exceeds the warning threshold * Red Critical The node (or one of the underlying nodes) contains a value which exceeds the critical threshold * Black Down The node (or one of the underlying nodes) contains a monitored component which does not react to the information requests from the EPO-probe * Unknown The status of the node (or of the underlying nodes) cannot be determined * None - The node is empty Blue White - or the node and all underlying nodes have no thresholds specified. * NB nodes can be specified explicitly not to propagate. 4.4.2 Propagation rules Nodes The worst status of a node in the business tree is propagated upward, from the “leafs” up the branches. The order of the EPO statuses, from worst to best, is: Down (black ), Critical (red ), Unknown (blue ), Warning (yellow ) Service levels (SLA) © 2012 Auxzenze 35 van 124 Business monitor Version All Service Levels (Service Level Agreement = SLA) are propagated on the base of the aggregation of all periods of unavailability of underlying nodes (according their thresholds). Figure 4 example of the aggregation of underlying SLA’s In the example above the first row (matching to the selected node in the business tree) is the sum of the periods of unavailability of the rows (= underlying nodes in the Business Tree) below. 4.4.3 Exceptions to the propagation rules Exceptions to the standard propagation rules are as follows: Node State Meaning Dark green Maintenance All underlying nodes have been placed in “Maintenance”. Blockade (because of “Maintenance”) The (in red) node has been placed “Maintenance”. Maintenance Window All underlying nodes fall outside the Service Windows Blockade (because of Service Window) The (in red) node falls outside the service Window Dark grey 4.4.4 Propagation delay Nodes also have the property “Propagation delay, Time”. A node with this property set will not propagate its status until the time specified has passed. If the status changes back to Normal before the time has passed, the status will not be propagated at all. E.g.: A node has a delay of 2 minutes. At 3.00 the status changes to critical. The status will not be propagated until 3:02. At 3:01 the status reverts to Normal, so the critical status isn’t propagated at all. 4.4.5 SLA timeline Every node in the Business Tree has a SLA-timeline. © 2012 Auxzenze 36 van 124 Handboek xEPO Elements Business monitor Version All Handboek xEPO Elements The SLA-timeline reflects the state information of a certain node on a certain day (the system date (=default) or a chosen day): - From time 0:00 to 24:00 the state of the node by means of an indicating color at a certain time or during a certain period - The color passages indicate the change of state. - If it concerns an end node the performance indicators in the time line (the diamonds) reflect the state of the actual test moments (every diamond is a measurement in the database) - The state of a node is stipulated by the established thresholds of the node. If it concerns not an end node the state is the aggregation of the underlying states. 4.4.6 Measurements The pattern in which the performance indicators (diamonds) are shown is stipulated by the configuration of the associated probe. It can be adjusted that measurements are passed on a fixed interval or that they passed on at sufficient deviation of the previous measurement. 4.4.7 Linked and leading nodes It is possible to add multiple nodes in a business tree that use the same data, when, for example, your company has two services using, among other things, the same database server. If a property of that node needs to be changed, both nodes need to be edited separately. To facilitate this, a linked node may be created. A linked node is a copy of an existing node that inherits all properties of its leading node and will automatically have its properties changed when the properties of the leading node are. A linked node can be created by choosing copy from the right click menu and pasting a node as a linked node. The properties of this linked node can’t be changed. A linked node has the following icon in front of it (edit mode only): . A leading node looks like this: © 2012 Auxzenze 37 van 124 xEPO Elements Business monitor Version All 4.5 Handboek An example of a tree that utilizes linked and leading nodes can look like this: Base skills Recommendations how to handle the EPO business tree: 1) Take care that the EPO business tree becomes green after an escalation solving the incident. 2) If a node is escalating state is different than normal) for a longer time, think of one of the following: - adjust the thresholds - place the node in an “Maintenance-group” - remove the node from the Business monitoring 4.6 First use of the Business Tree One of the most important first steps is arranging the Business Tree. The Business tree can be modified by: - choose in the menu Edit the sub-menu Edit business Tree - in the Business Tree with right mouse click “Enter edit mode” 4.6.1 CustomerCare (helpdesk) CustomerCare is the helpdesk support module. By means of simple recording and effective procedure monitoring appointments with customers can become complied with concerning the lead time of presented incidents, problems or questions. CustomerCare has been developed support the registration process on basis of simplicity. Example how CustomerCare can be used. Make a registration of an incident report of a customer: © 2012 Auxzenze 38 van 124 Business monitor choose from the menu helpdesk: New registration Fill the relevant fields in: summary, description,… E.g. the persons involved (click on…): Version All Handboek xEPO Elements - the affected end user - the colleague to whom the recording is granted Fill in the type of the recording: incident, change, problem,… Mark that: As the affected end user at a customer has been selected and it has been chosen as priority that then the “need by date” is filled in by means of the SLA which has been coupled to the concerning customer. The person to whom the registration has been granted can access the registration in its own “todo – bucket” under workflow… There are under the CustomerCare-node four approaches to the (same) registrations: 1) From the customers point of view - which registrations are open at a certain customer - the possibility to be rapidly warned for certain customers as too much are open 2) From the process: - which registrations are open - which registrations are over the agreed time - but especially which registrations will pass the due time stamp (according the SLA time). 3) From the registrations themselves: open, closed. 4) From the workflow/workload - who has which registrations on its name - who has too many registrations on its name © 2012 Auxzenze 39 van 124 4.6.2 Business monitor Version All Room monitoring The Room monitoring Unit can be connected in two ways through a TCP network: In the same network segment is an EPO Checkit probe installed. The Unit can connect through port 2000 with an EPO Checkit probe somewhere else. Figure 5 Checkit Room monitoring unit (RBU) The Checkit will retrieve a ipaddress by means of DHCP (default). You can supply a fixed ipaddress by starting the “RBU IP Configurator”. The ipaddress is visible in its LCD display. The Checkit probe can be activate by means of the EPO User client: select the menu “Edit \ Probe configuration”, Select a device in the same segment (where EPO-probes are installed), select the green probe icon and selected and enabled the “Checkit probe”. Afterwards (after a couple minutes) the newly discovered Checkit (RBU) is selectable by means of drag-and-drop in the Toolbox Window in the TAB page “Checkit”. © 2012 Auxzenze 40 van 124 Handboek xEPO Elements xEPO Elements Version All EPO-Functionality Handboek 5 Business monitor In this chapter EPO-functionality is listed by describing all menu items. 5.1 Layout of the EPO User Interface © 2012 Auxzenze 41 van 124 Business monitor Business tree(s). 5.1.1 Version All Graph or SLA-Overview. Layout of the EPO Windows All Handboek xEPO Elements Notifications. windows (Business tree, StatusTree Graph, Notifications, …) and separate tab pages can be drag-anddropped: - towards another place in the main window - or to another existing tab structure - or outside the main window (multiple screens) © 2012 Auxzenze 42 van 124 xEPO Elements Version All EPO-menu structure Handboek 5.2 Business monitor Short description of EPO functions. Menu Sub-menu Description Edit Probe configuration… To configure: - Probes - Room monitoring Units (RBU’s) - Network/communication - eMail/SMS-gateway Business trees To change a business tree: - Nodes (new, delete, change) - Thresholds Business Views Add your own pictures and let them be filled with actual state colors. © 2012 Auxzenze 43 van 124 Business monitor Menu Sub-menu Description View Business Trees Select Business Tree to view Status Tree Graph To show a diagram bar with number of actual notifications Task Panel <not used yet> Notification… List containing all notifications (state’s other than normal). Menu Sub-menu Description Options Layout Locked Prevent sub windows to be dragged Version All Handboek xEPO Elements Auto connect to Reuse connection settings next time server © 2012 Auxzenze 44 van 124 Business monitor Menu Sub-menu Description Administration Maintenance Windows… Lists of temporarily disabled tree nodes. Typically used when components are being serviced. Service window… Definitions of services windows. Can be applied to nodes (in edit business tree mode) to prevent propagation outside specified period. Users & Groups… Definitions of users, groups and (allowed) functionality. Measurement database… Archive the measurement database Version All Handboek xEPO Elements Business trees… Administration of the Business trees (add, remove and map to allowed groups) Escalation rules… 5.2.1 Definitions of escalation rules (trigger an escalation to email, SMS or application) Maintenance Windows When a node temporarily needs to be disabled because of, for example, maintenance, a maintenance window can be created. The easiest way to do this is by right clicking on a node and selecting “Set node in maintenance”. A new maintenance window is created starting now and containing the node. More nodes can be added by clicking and dragging them into the nodes list. © 2012 Auxzenze 45 van 124 Business monitor Version All Handboek xEPO Elements A maintenance window is closed when the “till” date is in the past. To close a maintenance window now, press the “Now” button. The maintenance window overview window contains a list of all maintenance windows. You can remove a maintenance window completely by clicking “remove”. This is not recommended, however, when you use SLA reporting. When a maintenance window is removed, the statuses the node(s) in the maintenance widow had will count towards the SLA calculation. Maintenance windows can be generated from a script. If for example a reboot is scheduled, a script can put the nodes affected in maintenance. Usage is as follows: EPOMsgCmd inmaintenance <full node path> EPOMsgCmd outofmaintenance <full node path> EPOMsgCmd ismaintenance <full node path> © 2012 Auxzenze 46 van 124 xEPO Elements Business monitor Version All 5.2.2 Handboek Ismaintenance can be used to check whether a node is in maintenance or not. Service Window Service windows are used to limit escalations to the service hours. Defined service windows can be applied to: a business tree node escalations will only be propagated within the service window See §4.4.3, “Exceptions to the propagation rules”, page 36. an escalation rule actions will only be activated within the service window Use the create-button to define a new service window. Drag a square with the mouse for the desired service window or click for individual time slots (smallest part is 15 minutes). © 2012 Auxzenze 47 van 124 xEPO Elements Version All User Manager Handboek 5.2.3 Business monitor Use the user manager to define users, groups and allowed functionality. Users can be imported from Microsoft’s Active Directory if the EPO Server is part of the domain. EPO can also manage an own user database. Password: choose whether the password should be managed by the Operating System (default) or by EPO. 5.2.4 Escalation rules A notification is raised after a threshold value is violated (all visible in the window Notifications). An escalation rule can be used to activate an action as follow-up. © 2012 Auxzenze 48 van 124 Business monitor Version All Handboek xEPO Elements Use the “New rule…”-button to define a new escalation rule. Choose the desired follow up action: E-mail (required is a mail server that allows relaying for the EPO server) SMS (additional hardware is needed) Execution of an process For configuring the email gateway see § 11.6, “EPO Mail gateway”, page 112 for specifying a smtp server. The most straightforward and therefore the simplest way of using an escalation rule is to specify only: - Description : title of the definition - Minimal Status : perform the escalation action for this state and worse © 2012 Auxzenze 49 van 124 - Business monitor Version All Description Filter : unique string identifying the notification (by example the (unique) node path from the business tree (right mouse click on node and choose “copy to clipboard” and paste over here)) All settings: Alarm delay (hh:mm:ss) : the alarm (action) will only be executed when the error status (minimal status) is raised for this entire period. This is typically used to prevent single measurements to escalate and also used in combination with “Reset delay” to prevent a burst of notifications lead to a burst of escalations (messages). Reset delay (hh:mm:ss) : amount of time the monitored item should be in “a not error state” before performing the reset (action). This means that after the monitored item is not any longer in an error state and after this amount of time has been elapsed the reset (action) is performed. New Alarm (actions) will only be performed after the reset delay. Typically used in combination with “Alarm delay” to prevent a burst of notifications lead to a burst of escalations (messages). Service Window: the escalations rule is only active in the defined service window (time frame) Minimal status: the escalations is only triggered for notifications that apply to the specified status AND worse (the list order is sorted from less to worse). Use None if the Status is already part of the description filter. User: the escalation is only triggered for this specified user or all users if nothing is specified. Category: <not used yet> Regular Expression Description filter: expression to define which notifications should escalate to the defined action. The filter can contain: © 2012 Auxzenze 50 van 124 Handboek xEPO Elements Business monitor Version All - A string defining one or more notifications to escalate on (by example the customer name to define one rule for all nodes for that particular customer or the text “CPU” to define one rule for all CPU escalations) - A more advanced (regular) expression (a regular expression (= a sort of advanced wildcard)) The description filter is applied to the description of the notifications. To build a description filter use the node path (or a part from it) from a Business Tree (right mouse click Business Tree – copy node path to clipboard) or use the notification description (right click on a notification – copy description to clipboard). Syntax of the description of a Notification: (Tree <name>, node <complete node path> is <status>). Use normal text for straight forward text compare and use the more advanced characters of regex to define patterns like: ^text : text should align start of the notification description text$ : text should align end of the notification description For more advanced definitions see one of the many tutorials on the web for regular expressions. © 2012 Auxzenze 51 van 124 Handboek xEPO Elements xEPO Elements Version All Arranging the Business Tree Handboek 6 Business monitor The Business Tree editor consists of three components: 1) Left window: The business tree(s) The Business Tree is the visualization of the measurements. Individual service levels (thresholds or norms) determine the state of the corresponding node. The Business tree can be modified, possible modifications are: - Add measurements - Specify individual thresholds. - Aggregate monitored components into a folder (drag the ‘new folder’ button) - Delete nodes or folders On “save” the modifications will be applied on the Business Tree (for all connected EPO User Clients). 2) Middle window: The node properties The properties determine the behavior of the node. For example: thresholds can be modified or propagation of its state can be blocked. 3) Right window: The toolbox The toolbox is the set of items with which the business tree can be extended. It contains templates, new folder structures but most of all: the measurement types monitored by the probes. © 2012 Auxzenze 52 van 124 Business monitor Version All The Toolbox consists of several categories (External, General, Network, RBU, Security and Windows). All components (and also compositions (folders) with components) can be drag-and-dropped to the editable business tree. The categories are: 1) Windows Results of the default windows probes (CPU, memory, disk, services, events) Drag-and-drop a complete windows server group to a place in the Business Tree. 2) General - Backup Monitoring - CustomerCare - Customer Care Query: can be used to make specific helpdesk views. - Folder: important element to make groups of monitored components that combine to one Service Level (SLA). - License Overview - Merge Folder 3) Network Results of the network probes: ping, SNMP and web 4) RBU (Room monitor) If you attached the Room Monitoring Unit from within this TAB you can drag-and-drop the measurements: temperature, voltage, humidity and from the eNose: scorching and Volatile Organic Compounds. 5) Security If you have connected a webcam it is possible to enable the photo function with the triggers from the room monitor (e.g.: door contact). 6) External Results of the open interface probes (external probes). 6.1 Additional CustomerCare Query The CustomerCare default tree can be extended with additional views. In the Tree editor a node called “CustomerCare Query” can be dragged to the desired spot in the editable Business Tree from the Managed object. © 2012 Auxzenze 53 van 124 Handboek xEPO Elements Business monitor Version All Adjust the query with the required variable from CustomerCare. Examples: Categorie.Symbol = “Network” for all registrations whereas the user selected “Network” as the category. Categorie.Symbol = “Citrix” RegistrationType.Symbol = “Incident” (NeedByDate >= Today()) AND (NeedByDate <= Today(timespan("23:59"))) CloseDate.Date <= Now(timespan(“-12:00”)) Other variables that can be used: RegisteredBy.Symbol Description.Symbol MonitorSLA.Symbol ExternalReference.Symbol Categorie.Symbol Solution.Symbol RegistrationType.Symbol Notes.Symbol Impact.Symbol Assignee.Symbol Priority.Symbol Requestor.Symbol Status.Symbol AffectedEndUser.Symbol Summary.Symbol Publish.Symbol © 2012 Auxzenze 54 van 124 Handboek xEPO Elements Business monitor 7 Visualizing monitored results into EPO Business Views 7.1 General Version All Handboek xEPO Elements The way EPO Business Views works is that you can import your own picture (png, jpg or bmp from paintbrush, Microsoft Visio, AutoCAD, …) and link actual state colors to a part of the picture. EPO will use the actual measurements with their norms (thresholds) and fill the corresponding state color into the linked part of the picture. Notice that clicking on the object will bring you to the linked EPO node for analyzing which service level is superseded. EPO Business Views are a fast way to real-time process visualization of your schemes, organization overview, process flows, KPI overviews and building maps. These Business Views can be used for the EPO-slideshow or EPO-screensaver to visualize the state of your Business 24x7. These Business Views fit in to normal desktop monitors but also on large wall monitors. 7.2 How to make Business Views Make sure that there are measurements and a business Tree and perform the next steps. 7.2.1 First make the actual Business View 1) Select menu option “Edit \ Business Views…” © 2012 Auxzenze 55 van 124 Business monitor Version All 2) Click the “Create”-button in Business View Window to create a new Business View. 3) Supply a profound name 4) Click the “Load image”-button to load a new picture (preferably .png, but also .bmp or .jpg) 5) Drag-and-drop a node from a Business Tree to a fenced part of the picture. As well endnodes (the actual measurements with their state determined by their thresholds) as intermediate nodes (representing an chain of linked states) can be used 6) Use the link properties if necessary: - FillOpacity : the “see through” percentage - Show normal state : should green be visible? - Status : actual state (for testing purposes) - Display As : display as an EPO status (color) or a number (if applicable) - BoundaryColor : color of the fence (default black) - Location : the drop-coordinates - Tolerance : penetrating capacity of the boundary (percentage) 7) Click the OK-button when you are finished linking 7.2.2 Place the Business View into a Business Tree 1) Select menu option “Edit \ Business Trees\ <Business Tree where you want the Business View to be visible> 2) Select the node where you want the Business View to be visible (normally one of the top nodes). 3) Select the node property “BusinessView” and select in the drop down box the name you have given to the Business View during the creation of it. 4) Click the save button on the left of the Business Tree 7.2.3 Editing an existing Business View 1) Select menu option “Edit \ Business Views…” 2) Double click an existing Business View for editing © 2012 Auxzenze 56 van 124 Handboek xEPO Elements Business monitor Version All 3) New picture: click the “Load image”-button. Pay attention to the fact that if objects in the picture are redrawn on another position the links should be applied again. 4) Check a Link: select with left mouse either the object or the link itself in the right corner above. As a result the link is visualized as a cross on the fill coordinates and the corresponding link in the right corner above is selected. 5) Remove link: select link in right corner above and right click mouse on it for deletion 6) Replace a link: select link in right corner above and right click mouse in picture for new fill point (this is an alternative for: delete link and drag-and-drop node again from Business Tree) 7) Additional nodes: drag-and-drop nodes from Business Tree 7.2.4 EPO Business View Client Use this client (if installed during the EPO Client installation) for a slide show of all or the selected Business Views. Use the menu option “File \ Options…” for selecting the properties like switch interval and zoom options. 7.2.5 EPO Business View Screensaver Select in your Display properties of your monitor the EPOBusinessView screensaver (if installed during the EPO Client installation). Use the settings for login account information, selection of Business Views and the zoom options. 7.2.6 EPO Tray Icon If installed during the EPO Client installation the tray icon presents overall states of the selected Business Views. - Connect…” : for the login settings for connecting to EPO”. - Options… : for settings like sound and selection. © 2012 Auxzenze the 57 van 124 Handboek xEPO Elements 8 Business monitor Version All EPO configuration editor The probe configuration editor also includes a general screen for managing the EPO network. This chapter will explain the visual settings. For details configuring (new) devices see chapter 11.5. The editor is used for managing the EPO-network. Each device on the EPO-network has a grey icon with its EPO name and one or more icons. The device name is given when running the EPO setup, defaulting to the NetBIOS name. The EPO server is displayed in slightly darker grey. Each device has lines running to and from it, signifying the connections between the various EPO devices. A grey line is an active connection, a red line an inactive one. The view as seen with the EPO is client is de the state of the network known to the EPO server and might not be what other devices see. Knowing this is important when troubleshooting EPO-network related problems. Devices can be organized automatically using the “Organize” button. Left clicking-and-dragging can be used to move a device. Devices can be pinned in place by clicking the pin icon in the top right corner of a device. The other icons on a device are, from left to right, configuration options for the EPO message transport layer, the probe service, the mail gateway service and the sms gateway service. These options are explained in their respective chapters. © 2012 Auxzenze 58 van 124 Handboek xEPO Elements Business monitor Version All Handboek xEPO Elements The “fit to screen” button tries to fit all devices into the currently visible section of a window. 8.1 Finding a device When the amount of devices increases, it can become hard to find a device you’re looking for. Typing a (part of a) device name will highlight all matching devices in green. So for example if you’re looking for the server named ThisServerName, you can find it by typing “server” when the network configuration editor window is active. If there are more devices with the same name the window will center and zoom to an area encompassing all matching devices. © 2012 Auxzenze 59 van 124 9 Business monitor Version All EPO Probes In the following paragraphs is described which information can be collected by the EPO probes. 9.1 How to add new probes By means of the menu “edit probe configuration” probes can be added or changed. EPO Probed computers have green icon (monitor-with-pulse-graph), Clicking this will lead to the probe settings for the selected computer. The listed probes in the next image belong to the default monitor settings of EPO. The probes marked with checkbox are actively (on that selected server) and collect therefore measurements. Figure 6 Standard EPO probes A probe can be added by: Activate a not yet activated probe (select checkbox and configure…) By means of the add-button to add additional probes. © 2012 Auxzenze 60 van 124 Handboek xEPO Elements Business monitor Version All Handboek xEPO Elements 9.2 Use a template for probe settings Probes and probe settings can be copied from one device (i.e. an example or template device) and be pasted to another device. To do so: - Select one or more probes in the probe settings list and right mouse click + copy - Open the probe settings of the target machine and choose right mouse click + paste. 9.3 Probes: General properties There are a number of properties which apply to all probes. Destination: Sets the destination of the measurements of the probe, default is EPOServer, which is the default name of the EPO Server. Enabled: switch the probe on or off. Comment: gives a short name to the probe. This will be shown in the general probe settings window. 9.3.1 Advanced schedule settings A number of probes has the possibility of advanced schedule settings. © 2012 Auxzenze 61 van 124 Business monitor Version All A schedule can be established with and without interval. Several schedules can also be established. In the example is a schedule defined for running the probe from Monday to Friday, between nine up to five o’clock with an interval of 10 minutes. 9.4 CPU Probe Functional The CPU probe reads the usage of the CPU from over the specified interval. The CPU-usage is the calculated average for this interval. The probe can cope with several logical or physical CPU's. Settings Interval: Time for which the average CPU-usage is calculated. With the advanced button more complicated schedules can be established. Gather by processor: The measurement is sent for each processor or only as a calculated total. Filter Maximum. Send interval: The maximum time whereupon a new measuring is always sent, independently of other filter settings. Don't filter errors: the filter is not applied for errors. Don't filter measurements: the filter is not applied on ordinary measurements. © 2012 Auxzenze 62 van 124 Handboek xEPO Elements Business monitor Version All Send if change greater then: Filters measurements on base of change. As a new measurement is less than the indicating % or number of bytes compared to the last sent measurement, these new measurement will not be sent. Send all if usage is above %: The percentage CPU usage above which measurements do not have be filtered. 9.5 Backup Probe Functional The backup probe retrieves jobs and their state from the backup tool itself. Unlike other EPO probes the backup probe is designed to automatically display new jobs automatically in a Business Tree. This backup probe is designed for Arcserve and BackupExec. Installation The backup probe should explicitly be selected during the installation. The installation steps for new EPO Users: 1. Full install on the server (EPO Server, probes and clients) 2. Probe install on the backup server. Select the Backup probe during the setup process. 3. Additional client install (if necessary) on client desktop(s) 4. The first Administrator logon to EPO will start the Setup wizard. During the setup: - choose to create a Business Tree - choose to include the "Backup Monitoring” in the Business Tree. 5. As a result the backup probe will recognize existing backup jobs and it will continuously monitor their state. The results are automatically forwarded to the EPOServer from where it is viewable by the EPO clients. The installation steps for updating EPO Users: Alternative 1 (automated update and manual install the Backup Probe) 1. Upgrade the EPO Server © 2012 Auxzenze 63 van 124 Handboek xEPO Elements Business monitor Version All 2. Use the EPO update manager Diaspora to update all probe machines As the default update only updates existing functionality the backup probe itself must be installed additionally: run the setup on the backup server(s) and during the setup fase where the functionality is selected choose to install the additional backup probe. (use alternative 2 if you want to automate the installation process) 3. Upgrade all EPO client desktops 4. Make the results available by editing the Business Tree and drag-and-drop from the toolbox (tab general) the item “Backup Monitoring”. EPO will dynamically present the jobs in that node. It is also possible, like other EPO data, to drag the individual jobs from out the Backup tab to normal EPO folders in the Business Tree. Alternative 2 (automated update including the backup probe) 1. Upgrade the EPO Server 2. Edit the file installoptions.ini (packed with the downloaded setup) Remove the “;” from the row “EPOProbeSvc_Backup” and specify “=1” ; means ignore rest of line and if item already installed leave it unchanged =0 means don’t install item and uninstall item if installed =1 means install item and reinstall item if installed An example you could use: ; usage: ; <setup exe> [/S] [/options=<full ini path>] [/log=<full logfile path>] ; e.g.: ; "EPO Elements x.x-xxx Setup.exe" /options="C:\Projects\EPO\Setup\InstallOptions.ini" /log="C:\LogFile.txt" [Settings] ;; INSTDIR="C:\Program files\The Early Warning Company\EPO" ;INSTDATADIR="C:\Program files\The Early Warning Company\EPO\Data" ;DEVICENAME= ;LocalEncryption=1 ;NetworkKey=AFB5B8A65E25BB81AFB5B8A65E25BB81 ;NetworkKeyFile= ;; StartServices=1 [Components] ;; EPOMsgSvc=1 ;; EPODiasporaSvc=1 ;; EPOProbeSvc=1 ;; EPOProbeSvc_Windows=1 ;; EPOProbeSvc_Common=1 ;; EPOProbeSvc_Network=1 © 2012 Auxzenze 64 van 124 Handboek xEPO Elements xEPO Elements Business monitor Version All Handboek ;EPOProbeSvc_Security=0 EPOProbeSvc_Backup=1 ;EPOProbeSvc_Checkit=1 ;EPOProbeSvc_DemoData=0 ;EPOProbeSvc_Version3=0 ;EPOServerSvc=1 ;EPOMailGatewaySvc=1 ;Client_User=1 ;Client_BusinessView=1 ;Client_TrayIcon=1 ;Client_Diaspora=0 NB This example is to be used for adding only the backup probe to existing probed machines. If you want to make install options that work also for new machines: remove from above mentioned example all double semicolons (;;) 3. Use the EPO update manager Diaspora to update the Probe machines - After installation in step 2 the default setting is that the backup probe is activated. If you don’t want to activate the Backup probe on al your servers you can uncheck that probe in their probe configuration and in case of a lot of servers it is easier to use Alternative 1 or you can make different Install options (a special one for Backup machines). 4. See last step from Alternative 1 © 2012 Auxzenze 65 van 124 xEPO Elements Business monitor Version All Handboek Settings Auto detect backup solution: the backup tool will be discovered using registry settings from the tool itself. Use Log filtering for status: if unchecked the backup tool will be asked for the states of the jobs. If checked you can specify filter settings (the triggers from the logfile that will result in normal, warning or critical) your self. Installation Directory: if auto detect doesn’t work the information can be specified manually. Job types to exclude: specify jobs that don’t need to be monitored. Filters: the triggers that are used to filter the backup log for success or fail messages. These settings will only be ised if “Use log filtering for status” is checked. The results can be included into the Business Trees in two ways: 1) Automatically: Use from Statustree toolbox (edit mode of the Business Tree) the folder “Backup Monitor” from within the TAB “General” and drag this container for all futurely discovered new backup nodes to the desired Business Tree. 2) Manually: this is the normal way the measurements are drag-and-dropped into the desired folder node. 9.6 Disk Probe Functional The Disk probe measures the space usage of a logical drive as a % of the total capacity. © 2012 Auxzenze 66 van 124 Business monitor Version All At the first activation of the probe, these will produce a list with the available drives on that particular machine. Network drives are not captured and drives for removable media are, however, incorporated in the list but are default not activated. Settings Interval: the probe will measure with this frequency. The specified interval is the amount of time between the end of the last measurement and the start of a new measurement. Filter The measurements are forwarded to the EPOSERVER according the filter settings. Maximum. Send interval: The maximum time whereupon a new measuring is always sent, independently of other filter settings. Don't filter errors: the filter is not applied for errors. Don't filter measurements: the filter is not applied on ordinary measurements. Send if change greater then: Filters measurements on base of change. As a new measurement is less than the indicating % or number of bytes compared to the last sent measurement, these new measurement will not be sent. Disks: With the Add and remove button new disks can be added which do not appear in the default list. © 2012 Auxzenze 67 van 124 Handboek xEPO Elements Business monitor Version All Disk Mounts Disk mounts need to be added by hand. Click the Add button and enter the path where the disk is mounted. This will make the disk appear in EPO and have all properties local disks have as well. 9.7 Eventlog Probe Functional This probe registers events which occur in the windows eventlog of the probed machine. It is possible by means of filtering to measure only a limited number of event types. Settings Eventlog Filter Max. History to read: Maximum period that the eventlog must be read in case of first activation or in case of restarting; 0 means the complete log. Datakey: Key under which the data from these eventlog probe must be stored. It is possible to activate several probes and give each a separate filter, with this Datakey the results can be distinguished. © 2012 Auxzenze 68 van 124 Handboek xEPO Elements xEPO Elements Business monitor Version All Handboek Filter The event log probe knows its own filter method. The filter has 4 options: Include, Exclude, OnceInATimeSpan and Time. Include: Use events which meets the conditions Exclude: Do not use events which meets the condition OnceInATimeSpan and Time: Events which meet the conditions will be passed once every specified time. Events will be distinguished by comparing the EventID, the Source, the type of entry and the text, where all numbers in the text are cleared. Each filter can be established by means of up to 5 criteria: Eventlog, Source, EventID, Message and type. Multiple filters can be set. Each new windows event will be evaluated according the list order. In the above mentioned example the first 5 filters define the type of messages that should be filtered out. The 6th filter defines that if the new event meets that settings it will only be passed to EPO once in the specified time. Notice: the last filter should be an include definition otherwise no events will be passed. 9.8 External Probe Functional The External probe is the interface to your own commands or scripts (or example probes you can find in the probe library on the EPO Elements forum). © 2012 Auxzenze 69 van 124 Business monitor Version All The script must result into an EPO state, a number or a piece of text. The EPO External probe can execute all type of scripts that can be executed on the windows machine. The only requirement for EPO to understand the result of the script is the way (a piece of) the output is written to the standard output: Syntax for a piece of the standard output Example [EPO: Status] [EPO: Status] Datakey=KEY Datakey=BackupCheck Status=STATUS Status=Normal Timestamp= Date Time (optionally) Timestamp=2007-01-15 08:00:00 [/EPO] [/EPO] Or Syntax for a piece of the standard output Example [EPO: Number] [EPO: Number] Datakey= KEY Datakey = NumberOfFiles Number= NUMBER Number = 5 [/EPO] [/EPO] Or Syntax for a piece of the standard output Example [EPO: Status] [EPO: Status] Datakey= KEY Datakey = FileExport Status = STATE Status = Warning Timestamp= date Time (optionally) Timestamp= 2007-01-15 08:00:00 © 2012 Auxzenze 70 van 124 Handboek xEPO Elements [/EPO] Business monitor Version All [/EPO] NB Other states are: none (will result in white), unknown (blue), down (black), warning (yellow) and critical (red). Or Syntax for a piece of the standard output Example [EPO: Text] [EPO: Text] Datakey= KEY Datakey= backup-summary Status = STATUS Status = Critical Text = TEXTROW1 Text = JOB Tuesday - Complete Text += TEXTROW2 Text += backup unsuccessful Timestamp= <date Time (optionally)> Timestamp= 2007-01-15 08:00:00 [/EPO] [/EPO] An external probe can opt to not send the result: just add a line with DontSend=true between [EPO: …] and [/EPO]. This may be useful when there is nothing to report. Running an EPO external probe without any return value will otherwise result in the EPO state Unknown. The “Text+=” row can be used as frequently as is necessary. The text appears in the EPO User client as a tool tip at the measurement (diamond) and in a separate tab called list. As an alternative for text output all text between two text blocks will be passed to EPO: [Text] Text which is passed to EPO Another row Etc… [/Text] © 2012 Auxzenze 71 van 124 Handboek xEPO Elements Business monitor Version All Datakey (a user defined label) is the key under which the measurements are stored in the EPO database. The state can contain of the following string values: Normal, Warning, Critical, Down, Unknown, None, Disabled or OutOfServiceWindow. Without a specified timestamp the measurement gets the timestamp on the moment of the processing of the measurement. Optionally the timestamp can be given in the output of the script. The format of the Timestamp is: yyyy-mm-dd hh:nn:ss. Settings Schedule Interval: the probe will measure with this frequency. The specified interval is the amount of time between the end of the last measurement and the start of a new measurement. Filter © 2012 Auxzenze 72 van 124 Handboek xEPO Elements Business monitor Version All Max. Send interval: The maximum time whereupon a new measuring is always sent, independently of other filter settings. Don't filter errors: the filter is not applied for errors. Don't filter measurements: the filter is not applied on ordinary measurements. Application Timeout: How long is waited for the result of the external script. Kill Process after timeout: if timeout occurs should the process be killed? Visible commandline window: should the output of the script be visible in the commandline window on the machine where the script runs. Executable: complete name (extention included) of the application Commandline arguments: optional arguments Work path: complete path to the executable Example Look for script examples in the probe library on www.epo-elements.com. Executable : cscript.exe Commandline arguments : yourVBscript.vbs param1 param2 Work path : c:\programfiles\the early warning company\epo\scripts © 2012 Auxzenze 73 van 124 Handboek xEPO Elements 9.9 Business monitor Version All ICMP (Ping) Probe Functional The ICMP probe pings from the probed machine to the specified other machines and measures the availability and the response time. Settings Schedule Interval: the probe will measure with this frequency. The specified interval is the amount of time between the end of the last measurement and the start of a new measurement. Ping Best of no. attempts: The number of pings that will be used to take the best result. The best time is used. No. to query ate the same time: Number of parallel pings for this probe. The total amount of pings is the result of (the number of devices x no. attemps). © 2012 Auxzenze 74 van 124 Handboek xEPO Elements Business monitor Version All Retry attempts: how many times will a ping be repeated if there is no reply from the pinged device. Timeout: Time whereupon 1 ping attempt is considered as failed. Time to wait after error: Time to wait after failure before a new ping. Time to wait after success: Time to wait after a successful attempt. Filter Max. Send interval: The maximum time whereupon a new measuring is always sent, independently of other filter settings. Don't filter errors: the filter is not applied for errors. Don't filter measurements: the filter is not applied on ordinary measurements. Send all if above: If the number of good/wrong answers or the responsetime comes above this value the measurements are not filtered. Send if change greater then: If the difference between the current measurement and the last which was not filtered, is larger than this value, the measurement will not be filtered. Devices Add: Add a New device to ping. If no ipaddress is specified the device name will be used to ping to (only use this if the device name is resolvable to an ipaddress). 9.10 Memory Probe Functional The probe reads the memory usage (totally, used/available) of a system by interval. The probe can be configured to measure physical memory, page and virtual memory. © 2012 Auxzenze 75 van 124 Handboek xEPO Elements Business monitor Version All Handboek xEPO Elements Settings Interval: the probe will measure with this frequency. The specified interval is the amount of time between the end of the last measurement and the start of a new measurement. Gather the following information: Which of the three types of memory must be measured. Filter The measurements are forwarded to the EPOSERVER according the filter settings. Maximum. Send interval: The maximum time whereupon a new measuring is always sent, independently of other filter settings. Don't filter errors: the filter is not applied for errors. Don't filter measurements: the filter is not applied on ordinary measurements. Send if change greater then: Filters measurements on base of change. As a new measurement is less than the indicating % or number of bytes compared to the last sent measurement, these new measurement will not be sent. © 2012 Auxzenze 76 van 124 Business monitor Version All 9.11 Performance counters Probe Functional With the performance counters probe is it possible to use the performance counters from the windows performance monitor (perfmon.exe). Settings Schedule Send Interval: the probe will measure with this frequency. The specified interval is the amount of time between the end of the last measurement and the start of a new measurement. Pol Interval: the probe will gather data with this frequency according the GatherHow property. Filter Max. Send interval: The maximum time whereupon a new measuring is always sent, independently of other filter settings. Don't filter errors: the filter is not applied for errors. Don't filter measurements: the filter is not applied on ordinary measurements. Send all if above: If the value of the performance measuring comes above this value, the measurement is not filtered. © 2012 Auxzenze 77 van 124 Handboek xEPO Elements Business monitor Version All Send if change greater then: If the difference between the current measurement and the last which was not filtered, is larger than this value, the measurement will not be filtered. Counters Category: Performance counter category Countername: Complete name of the performance counter. These must be entirely well spelled. Exact names of performance counters can be found using the perfmon tool (perfmon.exe). Enabled: to switch measuring on and off. GatherHow: Max/min: the largest or smallest number during the interval. Average: The average value measured during the interval. Instance: performance counters instance name (not always present) Scale: multiplying factor for the value of a measuring. The filter is applied afterwards. 9.12 Process Probe Functional The process probe passes information of the running processes on the probed machine to the EPO Server. © 2012 Auxzenze 78 van 124 Handboek xEPO Elements xEPO Elements Business monitor Version All Handboek Settings Schedule Performance measurement Interval: the probe will measure with this frequency. The specified interval is the amount of time between the end of the last measurement and the start of a new measurement. Filter Max. Send interval: The maximum time whereupon a new measuring is always sent, independently of other filter settings. Don't filter errors: the filter is not applied for errors. Don't filter measurements: the filter is not applied on ordinary measurements. Send all if above: If the number of active processes with the same name or the processor/memory usage raise above this level, the measurements are send to the EPOServer without considering the filter settings. © 2012 Auxzenze 79 van 124 Business monitor Version All Send if change greater then: If the difference between the current measurement and the last which was not filtered, is larger than this value, the measurement will not be filtered. Processes Add new processes automatically: If this option is selected running processes are added to the list automatically. This change must be saved before the results become available (save probe settings and press the refresh button in the Configuration Editor) EnablePerformance/EnableStartStop: Manages by process if performance and/or the number of running instances are measured. 9.13 Service Probe Functional The service probe passes on the name and state of the services of the probed system. The probe will also look for new services. By default only the services which are started automatically (at starting Windows), are passed on. At the first time to start the complete list with services is picked up. © 2012 Auxzenze 80 van 124 Handboek xEPO Elements xEPO Elements Business monitor Version All Handboek Settings Schedule Interval: the probe will measure with this frequency. The specified interval is the amount of time between the end of the last measurement and the start of a new measurement. Filter Max. Send interval: The maximum time whereupon a new measuring is always sent, independently of other filter settings. Don't filter errors: the filter is not applied for errors. Don't filter measurements: the filter is not applied on ordinary measurements. Services With the Add button new services can be added manually (normally this is not necessary because the probe will look periodically look for new services itself – new services are listed at the tail of the list). © 2012 Auxzenze 81 van 124 xEPO Elements Business monitor Version All Handboek 9.14 SNMP Probes Functioning There are three SNMP probes: one for measuring the bandwidth usage one for reading the Sysinfo and one generic SNMP probe. Settings SNMP Bandwidth probe Schedule Interval: the probe will measure with this frequency. The specified interval is the amount of time between the end of the last measurement and the start of a new measurement. Filter © 2012 Auxzenze 82 van 124 Business monitor Version All Max. Send interval: The maximum time whereupon a new measuring is always sent, independently of other filter settings. Don't filter errors: the filter is not applied for errors. Don't filter measurements: the filter is not applied on ordinary measurements. Send all if above: If the used bandwidth is more than this value, the measurements are not filtered. This can be either an absolute number or a percentage Send if change greater then: If the difference between the current measurement and the last which was not filtered, is larger than this value, the measurement will not be filtered. This can be either an absolute number or a percentage Interfaces Add: adds a new bandwidth measurement. The next window appears: Name: name for the device that will be queried. IP Address: the ipaddress of the device that will be queried. If no ipaddress is specified the name of the device will be used. The bandwidth is measured by interface. Interfaces can be added by means of their number or name. © 2012 Auxzenze 83 van 124 Handboek xEPO Elements Business monitor Version All Handboek xEPO Elements Enabled: Each device can be turned on or off separately. Override SpeedIn: for specifying the fixed maximum graph value instead of the dynamically calculated maximum. Override speed out: for specifying the fixed maximum graph value. SnmpTimeout: Time which is waited for the SNMP query to be answered SnmpVersion: The SNMP version to use. Settings SNMP SysInfo probe © 2012 Auxzenze 84 van 124 Business monitor Version All Schedule Interval: the probe will measure with this frequency. The specified interval is the amount of time between the end of the last measurement and the start of a new measurement. Filter Max. Send interval: The maximum time whereupon a new measuring is always sent, independently of other filter settings. Don't filter errors: the filter is not applied for errors. Don't filter measurements: the filter is not applied on ordinary measurements. Devices Enabled: Each device can be turned on or off separately. SnmpTimeout: Time which is waited for the SNMP query to be answered. SnmpVersion: The SNMP version to use. Settings Generic SNMP probe Schedule © 2012 Auxzenze 85 van 124 Handboek xEPO Elements Business monitor Version All Interval: the probe will measure with this frequency. The specified interval is the amount of time between the end of the last measurement and the start of a new measurement. The upper list shows the devices which must be measured. The bottom list shows the OID's. Each device is queried with each OID. OID can be queried to retrieve as number or as text. Filter Max. Send interval: The maximum time whereupon a new measuring is always sent, independently of other filter settings. Don't filter errors: the filter is not applied for errors. Don't filter measurements: the filter is not applied on ordinary measurements. Devices and OID’s Enabled: Each device can be turned on or off separately. SnmpTimeout: Time which is waited for the SNMP query to be answered. SnmpVersion: The SNMP version to use. © 2012 Auxzenze 86 van 124 Handboek xEPO Elements Business monitor Version All 9.15 Task scheduler Probe Functioning The task scheduler probe gives the list with tasks from the Task scheduler (planned tasks) and their associated state in Windows. Settings Schedule Interval: the probe will measure with this frequency. The specified interval is the amount of time between the end of the last measurement and the start of a new measurement. Filter Max. Send interval: The maximum time whereupon a new measuring is always sent, independently of other filter settings. Don't filter measurements: the filter is not applied on ordinary measurements. © 2012 Auxzenze 87 van 124 Handboek xEPO Elements Business monitor Version All With the Add button new tasks can be added manually (normally this is not necessary because the probe will look periodically look for new tasks itself). 9.16 Virtual Email User (Email Probe) General The email probe can connect to an email server and send and receive email test messages. Doing this the availability and performance of the mail process can be measured and monitored. This email probe is designed for Microsoft Exchange. Installation The email probe is automatically installed when the EPO probes are installed. It is part of the common probes. Important: The probe service must log on as a user which has an exchange account. Outlook must be installed on the same device Outlook must be configured with the above mentioned account to send and receive email. 9.16.1 Accounts To enable the email probe to send email through one account and to read email through an other account one of both accounts should be enabled as a shared mailbox. This is because outlook doesn’t support the use of two accounts at the same time. The mailboxes (accounts) have to be configured in that way that one account is used for reading mail and the other for sending. Settings Mail2Read: a list with mailboxes to read. Mailbox: Postbox/map from which to read the mail (default = inbox) Mailer: Type of the mailserver. Server: Address of the emailserver SharedMailedBox: Name of the shared mailbox if that is used to read the mail (optional) © 2012 Auxzenze 88 van 124 Handboek xEPO Elements xEPO Elements Business monitor Version All Handboek SourceID: Identifies the mail to collect. According settings in mail2Send. UserAccount: Name of the mailbox/account. Mail2Send: Destination: List with emailaddresses to send mail to.. Mailer: Type of the mailserver. Message: Subject of the email. Will be used by Mail2Read as SourceID. Optional, default=Devicename Sender: Originator of the mail. Important if a shared mailbox is used. Server: Address of the emailserver SharedMailBox: if a shared mailbox is used for sending the mail specify the name here. UserAccount: Name of the mailbox to connect to. © 2012 Auxzenze 89 van 124 Business monitor Version All 9.17 Virtual web user (Web Probe) General The virtual web user probe monitors the availability and the performance response of an internet site. It is possible to define a complete set of steps to simulate for example the complete action list of a virtual user for the monitored internet site. Settings Interval: the probe will measure with this frequency. The specified interval is the amount of time between the end of the last measurement and the start of a new measurement. Http User agent: The probe identifies himself. Username/Password/Domain: Possible http authorization (differently than by means of a form) Allow Http Redirect: accept http redirect answers. Filter © 2012 Auxzenze 90 van 124 Handboek xEPO Elements Business monitor Version All Max. Send interval: The maximum time whereupon a new measuring is always sent, independently of other filter settings. Don't filter errors: the filter is not applied for errors. Don't filter measurements: the filter is not applied on ordinary measurements. Send all if above: As the response time is above this value, the measurements are filtered. Send if change greater then: If the difference between the current measuring and the last which was not filtered, is larger than this value, the meeting will not be filtered. Proxy Proxy server: Optional, name or IP of the proxyserver. Proxy Username/Password/Domain: Possible authentication for the proxy server. © 2012 Auxzenze 91 van 124 Handboek xEPO Elements xEPO Elements Business monitor Version All Handboek Request Sequence This a list with HTTP requests for an Internet site. The requests will be executed in list order. Copy form To Next Request: (optional) the HTTP response (form data) of the request will be copied to the next request. The page number or the form name can be used. DataKey: (optional) name under which this result is stored. Result Cannot Contain: (optional) if this text occur the result of the request will be down. Result Must Contain: (optional) if this text doesn’t occur the result of the request will be down. Save Response To: (optional) file name where the HTTP response is stored. Sum data Key: (optional) name for the added response times for all steps. Timeout: (optional) time which is waited for HTTP response. Uri: (optional) address of the Internet site Parameters © 2012 Auxzenze 92 van 124 Business monitor Version All Each step can give a list of parameters. By means of this parameters the http-variables in the form data can be automatically filled in. This way it is possible to automate a virtual user performing the necessary steps to test complete the functional working of a web application. Name: Name of the parameter Value: Value of the parameter Type: How the parameter must be given: as a POST variable or HTTP header, in COOKIE or in the URL. 9.18 Webservice (SOAP) probe General The Webservice probe is used to monitor web services through sending and receiving (SOAP) requests. Settings Interval: the probe will measure with this frequency. The specified interval is the amount of time between the end of the last measurement and the start of a new measurement. HTTP settings User agent: The probe identifies himself. Username/Password/Domain: Possible http authorization (differently than by means of a form) Allow Http Redirect: accept http redirect answers. Filter © 2012 Auxzenze 93 van 124 Handboek xEPO Elements Business monitor Version All Handboek xEPO Elements Max. Send interval: The maximum time whereupon a new measuring is always sent, independently of other filter settings. Don't filter errors: the filter is not applied for errors. Don't filter measurements: the filter is not applied on ordinary measurements. Send all if above: As the response time is above this value, the measurements are filtered. Send if change greater then: If the difference between the current measurement and the last which was not filtered, is larger than this value, the meeting will not be filtered. Proxy Proxy server: Optional, name or IP of the proxyserver. Proxy Username/Password/Domain: Possible authentication for the proxy server. Request list © 2012 Auxzenze 94 van 124 Business monitor Version All Handboek xEPO Elements Store As: (optional) Save the response to this file. Sum Data Key: (optional) All response times of requests that are given the same data key will added and sent as a measurement with this data key. Data key: (optional) name under which this result is stored. If this is omitted the uri will be used as key. Time out: (optional) time which is waited for HTTP response. URI: uri or url of the service you wish to monitor. Request Body: The xml (SOAP) request to be sent to the web service Response: Matched against the answer received from the web service. The matching results in a good (“normal”) status if it matches and a “down” status when it doesn’t or the other way around when “should not” is selected. 9.19 Email To EPO probe General The email probe can receive and then parse SMTP (text) email sent through the EPO mail gateway service. Parsing can lead to an EPO status or number. It’s also able to build a datakey from the email text. Settings © 2012 Auxzenze 95 van 124 Business monitor Version All Handboek xEPO Elements Schedule Interval: Has no meaning with this probe. Email Use Time Out: When this is checked the email must be sent again before the time specified in the time out has passed. If it isn’t, the EPO status will be sent. Check Email body/subject: parse the text in the email body/subject. Default data key: If the datakey isn’t built from the email using the dataKey option, this property is used. Email Address: used as the “name” part of the email address (in [email protected]) that is used by this probe. Email sent to the EPO SMTP mail server is delivered using this name. The “domain” part is the name of the server on which the probe service runs. Email Filter: A list of filters which are run one-by-one against every line in the email. If the filter matches, through a regular expression or a simpler “contains”, the action (from the action property) © 2012 Auxzenze 96 van 124 xEPO Elements Business monitor Version All Handboek is performed. Properties: Actions - Present; if the text is matched, the EPO status from the Status property will be sent to EPO. NotPresent; if the text isn’t matched, the Status property will be sent to EPO. Ignore; if the text is matched the entire email is skipped and no status or number is sent. Datakey; the text matched will be a part of the datakey. Additional parts of the datakey, which will be separated by a forward slash, may be made by adding more filters with the datakey action. - Number; The matching text will be parsed as a number and sent to EPO. - Text; The text matched will be added as text to the EPO message. - Ignore; If this is matched the email will be skipped in its entirety. Enabled Enable or disable this filter rule. Status The EPO status the filter will return if this filter rule is matched Text The text against which the filter will be matched. The contents is dependent on the next property, TextType. TextType The text property is matched against a line of the email, in one of the following ways: - Contains; The line has to contain the text. - Startswith; The line has to start with the text. - Endswith; The line has to end with the text. - Regex; The line has the match the regex in text. 9.20 Virtual machine probe General The virtual machine probe can read several information elements of an ESX server. When the probe is connected to a Vcenter server all ESX servers known to that server will be monitored. Schedule Interval: the probe will measure with this frequency. The specified interval is the amount of time between the end of the last measurement and the start of a new measurement. ESX Servers © 2012 Auxzenze 97 van 124 Business monitor Version All Handboek xEPO Elements Add all ESX server you want monitored here. ESXServer is the name or IP address of the server. GetAutoCounters isn’t used anymore. The username and password are used to log on to the ESX server. Make sure the account has only the minimum of rights. When a vCenter server is added, all ESX server known to that server will be monitored. 9.21 Webcam probe General The webcam probe can actively take pictures through a IP based webcam as well as receive email sent by a motion detection enabled webcam. By triggering the probe to run when a signal is received from a Room monitoring Unit (RBU), it is possible to take pictures as well. This allows, for example, for pictures to be taken when a door is opened, showing the person entering. Schedule Interval: the probe will measure with this frequency. The specified interval is the amount of time between the end of the last measurement and the start of a new measurement. Webcam Webcam Address: the url of the webcam DataKey: the name that is used in the toolbox of the EPO client Interval: Time between two photos Numbers of photos: The number of photos that is taken when the probe runs. © 2012 Auxzenze 98 van 124 Business monitor Version All Handboek xEPO Elements Credentials Webcams often have a form of account management. Enter the credentials here if needed. Email Address With an email address, the probe can receive email from a webcam. Many webcams can send webcam pictures through SMTP email when certain events happen (e.g. motion detection). The webcam should be configured to send to our internal SMTP emailserver located at the EPOMailGateway Service. The email address to send to is the name entered above with the name of this server, as a valid email address. E.g. [email protected] © 2012 Auxzenze 99 van 124 Business monitor Version All 9.22 Reporting EPO reports are defined in an EPO report file (erf). Such a report file contains a number of essential components: Data generators Data processors Data Result viewers Data generators The data generators ensure the delivery of the data from the EPO database. This can happen in a lot of different manners. For example measurement-data from the Business tree or data from the database firebird query or SQL query. The produced data is always delivered as a xml-file. Data processors The processors process the data supplied by the generators to the desired document. Thus for example the data can be converted with a XSL processor to html, XSL-FO or CSV. A XSL-FO file itself can be transposed by means of a pdf processor to a pdf document. Data Result viewers When all previous steps successfully have been carried out and a html or pdf file has been produced, the result can be reflected in a result viewer. At the moment we use a web browser because it can reflect several file formats. If it is not necessary to show a report then no result viewer has to be defined. ERF is XML An erf file is actually a xml-document describing (in XML definitions) the way a report is build. Such a erf is build as follows: <?xml version="1.0" encoding="utf-8" ?> <report type="EPO.Interfaces-Report"> <DataGenerators></DataGenerators> © 2012 Auxzenze 100 van 124 Handboek xEPO Elements xEPO Elements Business monitor Version All Handboek <DataProcessors></DataProcessors> <DataResultViewers></DataResultViewers> <LeaveTempDirectory></LeaveTempDirectory> <TempDirectoryName></TempDirectoryName> <GeneratedDataFile></GeneratedDataFile> </report> <LeaveTempDirectory></<LeaveTempDirectory> This value ascertains whether the temporary directory, which is used to store temporary files must continue to stand after successful generating the report, or have to be deleted. During the developing of a new report it is useful to set this property on true, so that the generated temporary data.xml can be investigated. After successful delivery of the the report this value can be set to false, so that only the report remains and all temporary files are removed. <TempDirectoryName></TempDirectoryName> Here the temporary directory is set. When for example a pdf file is made a xsl-fo temporary file is necessary, which is actually the source code of the pdf. This file is placed in the temporary map, and can after successful making the report it is removed. This property is optional and is set default to the temp-directory of the pc. The report definition can also handle parameters. These are noted as $(nameparam1), $(nameparam2) etc. EPO reports EPO is provided with a few example reports which are installed on the server during the installation of EPO Elements 5.0. These reports become available in the client. With some knowledge of xml, xsl and xsl-fo (all standards itself) these reports can be adapted. To make EPO reports Start with adapting a working example report. A nice small example is the generating of a csv file (downloadable from the tools&add-on section on www.epo-elements.com (after logging in)). © 2012 Auxzenze 101 van 124 Business monitor Version All Handboek xEPO Elements Commandline option EPOGui.exe ActionFile “C:\My Reports\Example CSV\report.action”. In this action file the erf-file is linked and the report parameters (if present) are specified. Advanced Report options On the EPO elements forum we will discuss in the run to the next version of EPO advanced ways of using reports. Such as: parameter passing, batched reports, real-time graphs for linking into a live internet page and linking reports to the menu of the EPO GUI. © 2012 Auxzenze 102 van 124 xEPO Elements Version All EPO Procedures Handboek 10 Business monitor In this chapter regular used EPO-functionality is described. 10.1 How do I add a new server for remote monitoring? Step Description Implementation Result 1 Install the Windows probe on the server to monitor See § 3.6, “Installation”, page 24. - installed probe - working probe - measurements are inserted in to EPO-database 2 Add the new device to the Business Tree - In EPO business client: edit business tree - basic information of the windows probe is viewable and will be monitored according the (default) threshold values. 10.2 How do I add a new router bandwidth monitor? Step Description Implementation Result 1 Consider from which device the router will be monitored 2 If not yet present install the EPO probes See § 3.6, “Installation”, page 24. Installed probe 3 Activate the EPO SNMP probe See § 9.1, “How to add new probes”, page 60. Activated SNMP bandwidth probe 4 Configure the probe See §9.14, “SNMP Probes”, page 82. Working bandwidth measuring. 5 Add the new test information to the Business tree. - In EPO business client: edit business tree. Information is shown in EPO business tree - look at probed object 10.3 How to adjust threshold values? Step Description Implementation 1 Modify the properties of a node - select the node in the in the Business tree Business tree © 2012 Auxzenze Result Thresholds have been adapted. 103 van 124 xEPO Elements Business monitor Version All Handboek - right mouse button for edit this node - modify the desired property - save (and wait some moments) NB Modified thresholds will be used immediately but to see adapted thresholdlines you have to reselect the node. 10.4 How do I monitor the availability of my IP-components? Step Description Implementation 1 Consider from where the router will be pinged 2 If not yet present install the EPO probes on the machine from which the monitoring will take place See § 3.6, “Installation”, page 24. Installed probe 3 Activate the EPO (ICMP) ping probe See § 9.1, “How to add new probes”, page 60. Activated probe 4 Configure the probe See § 9.9, “ICMP (Ping) Working bandwidth measuring. Probe”, page 74. © 2012 Auxzenze Result 104 van 124 5 Add the new test information to the Business tree. Business monitor - In EPO business client: edit business tree. Version All Information is shown in EPO business tree Handboek xEPO Elements - look at probed object 10.5 How can I add my own script to the EPO monitor? Step Description Implementation Result 1 Adapt your script for sending the desired result (a status, a number or a piece of text.) to the standard output. See § 9.8 ,”External Probe”, EPO will understand the output and use it as an page 69 for the output interface between your syntax. script and EPO. 2 Consider from where your script will be carried out 3 If not yet present install the EPO probes See § 3.6, “Installation”, page 24. Installed probe 4 Activate the EPO external probe See § 9.1, “How to add new probes”, page 60. Activated probe 5 Configure the external probe See § 9.8, “External Probe”, Script is carried out on the specified interval. page 69. 6 Add the new test information to the Business tree. - In EPO business client: edit business tree. Information is shown in EPO business tree - look at probed object (External) © 2012 Auxzenze 105 van 124 xEPO Elements Version All EPO Configuration Handboek 11 Business monitor 11.1 Default thresholds To change the default thresholds edit the file …\epo\server\TreeExtenders.module. Remember to make, for safety reasons, a backup of this file first! New settings will only be applied for newly dragged-and-dropped devices to the Business tree. Example: to change the threshold “critical” for a CPU (default 95%) look for the item <Name>CPU.Critical</Name> and change the specified threshold to the desired value. Restart the service EPO Server (net stop/start eposerversvc) to apply the changes you’ve made. 11.1.1 Scale of the graph The scale of the graph is adapted automatically to be able reflect the highest value. It goes there at for: - the measurements - the threshold values NB. When the threshold values differ a factor hundred or more from the measurements, then the measurements are not or hardly visible in the graph. 11.2 Configuration files The following files contain configurable items for the several EPO components: NB. The configuration files have the name (+.config) of the service or executable where they belong to. © 2012 Auxzenze 106 van 124 Business monitor Version All 11.3 Data storage In the file EPOServerSvc.exe.config in the server directory the StorageType can be modified from Binary to Xml: <plugins> <PluginFactories> <item type= EPO.Plugin.SettingsManager > <SettingsPath>. \ Data \ SettingsManager</SettingsPath> </item> <item type= ePO.Interfaces MeasurementStoreFactories > <StoreFactories> <item type= ePO.Plugin.Measurements RawMeasurementStoreFactory > <BasePath>. \ Data \ ProbeData</BasePath> <Extention>edf</Extention> <StorageType>Binary</StorageType> </item> <item type= ePO.Plugin.Measurements TransformMeasurementStoreFactory > </item> <item type= ePO.Plugin.Measurements CombiningMeasurementStoreFactory > </item> </StoreFactories> </item> <item type= ePO.Plugin.Measurements RawMeasurementMessageReceiver > </item> <item type= EPO.Plugin.EPointManager > </item> <item type= EPO.Plugin.StatusTreeHost > </item> </PluginFactories> </plugins> © 2012 Auxzenze 107 van 124 Handboek xEPO Elements Business monitor Version All Handboek xEPO Elements 11.4 Memory usage EPO has been developed default to: - Use a large part of the usable memory - Release it if another application asks for it. Underlying idea: resources are there to be used, not to be not used. 11.5 Probes by means of WAN, Internet by means of WAN, Internet EPO-probes (and therefore connections) can be defined concerning: - VPN - Internet - ipforwarding - Proxy firewall 11.5.1 To establish EPO network for not automatically detected machines. EPO systems find each other automatically only within the same subnet/segment. If 2 EPO remote networks (minimum 1 probed machine on each side) have to be connected to each other: Start from the client which has one part of the network visible, the configuration editor (Edit->Edit probe Configuration) Click with the right mouse button somewhere in the white part and choose Add new device… The supplied Name should exact match the name which was supplied to the device during the installation of the EPO Probe (default the windows hostname). If at DNS name nothing is specified the name field will be used also as DNS name. © 2012 Auxzenze 108 van 124 Business monitor Version All Handboek xEPO Elements If “MachineVerWeg” is given as a Name then the result will be: Click afterwards with the right mouse button on MachineVerWeg and drag a connection line to the EPO-Server. The following window appears: The source port needs only be filled in if it is different than the destination port. © 2012 Auxzenze 109 van 124 Business monitor Version All The ipaddress or the resolvable name of the new device can be supplied as destination. The protocol determines if the data concerning this connection must be send encoded binary, ASCII or UTF-8. The Cost gives a virtual value to the connection. The chosen route is stipulated by the lowest total costs. Enabled: If not checked these route is not used also if it is available. Available: The route is available or not If is pressed on OK a connection line between both machines will appear after a few seconds (a red line indicates that there is no (or not yet a) connection.. The same have to be applied the other way around. Then the next situation arises and the connection is complete. The remaining probed machines on the remote network at MachineVerWeg will also appear after some seconds. 11.5.2 Device Configuration All EPO devices can be configured for the next items. © 2012 Auxzenze 110 van 124 Handboek xEPO Elements Business monitor Version All Handboek xEPO Elements Default Address Address will be used if specified. Otherwise the Name will be used if resolvable. Enable Automatically discovery The EPO transport layer can discover other EPO transport layers by UDP. Through this mechanism newly installed EPO systems can be connected to the EPO server automatically. Limit Disk space Amount of disk space used by all local postboxes (mainly used for measurements but also for configuration) will not exceed this specified amount. 11.5.3 To remove Devices With the right mouse button on a device it can be removed. The EPO server where the EPO-Client is linked (dark grey) cannot be removed. 11.5.4 Connection test To test the existence of a connection: Network connection (tcp/ip): Test this from within the EPO Server itself as well from the probed machine: © 2012 Auxzenze 111 van 124 Business monitor Version All telnet <”other” ipaddress> 7472 expect result: emptied command screen (=OK) Known Server connections on the EPO-Server: EPOmsgcmd.exe info EPO Connection (EPO transport layer on top of tcp/ip): on the EPO-Server: epomsgcmd info or epomsgcmd roundtriptest <device> start on the probe side: “epomsgcmd - s ipaddress_of_server: 7472 list” expected result: a list of Postboxes with numbers of messages for the specified devices. 11.6 EPO Mail gateway The EPO mail gateway makes it possible to send an e-mail from the escalation manager by offering the e-mail to your mail server. To configure choose menu “Edit \ Edit probe configuration“… Choose the yellow (most right) icon for the mail gateway configuration: The selected SMTP-server should be configured to relay mail for the EPOserver. 11.6.1 Receiving SMTP email The mail server is able to receive SMTP email as well. For this, enable the checkbox “Start internal SMTP server”. Devices/software capable of sending SMTP email should enter the EPO Mail gateway server address as the SMTP server. Mail received will be forwarded to an EPO probe. Currently there are two probes able to receive email. The webcam probe and the “email to epo” probe. Both have an © 2012 Auxzenze 112 van 124 Handboek xEPO Elements Business monitor Version All email address property which is used as the local-part of an email address. The domain-part should be the name of the device on which the probe resides. The TLD part can be any one word. (e.g.: [email protected]). For more details on the probes see their respective chapters in this manual. 12 Backup and restore of the database 12.1 Backup It is easy to make a backup of EPO: just make a copy of the complete EPO directory. Use a tape or other backup device. The EPO data files (EDF) can be copied during normal operation (no read locks). Tip: for best performance of the backup process it is advisable to perform the archive function (actually it is compressing) of the EPO data (see also 13.1.1). 12.2 Restore Stop all EPO services and place the files from the backup device to their original destination. Restart the EPO services. 12.3 Disaster recovery To recover after a clean windows installation: Run the standard setup with the same components and specified installation path as the original installation. EXCEPT: DON’T START the services (last option of the third installation step – See § 3.6 section 3 ) Just place the files from the backup device to their original destination Start the EPO services 12.4 Migrate EPO Server If you want (or are forced to because of a server crash) to move EPO (or the backup) to another computer then the easiest way of doing that is to give the new machine the same name and ipaddress as the old one. All other ways of migrating involve changing router configuration and rediscover EPO devices. © 2012 Auxzenze 113 van 124 Handboek xEPO Elements 13 Business monitor Version All Maintenance To ensure the proper working of EPO Elements and to keep an optimal performance it is advised to give monthly attention to the next items. 13.1 Database maintenance Information on the EPO database The EPO data exist from two separated kept data collections: 1) The measurements (probe results) The measurements are kept in a so called flat file database. Exhaustive testing has shown that this determines little difference for the performance, but that administration of the data will be much easier. The following directory order under “… \ EPO \ EPOServer \” data is apprehended: - for every month a separate directory (yyyy-mm) - below that for every probe a separate directory (DK_EPO_K<probe name>) - possibly below by sub-directory the different probe information components - below per day the information in a separate file Double click on an edf-file will start the data viewer (the same data viewer that can be invoked from within the EPO GUI by right clicking a data node in the Business Tree and selecting “View Measurements”). 2) The Business Tree and screen definitions This data is kept in an SQL-based database: (default) c:\program files\the early warning company\epo\data\epo.fdb 13.1.1 Compress the measurement database The EPO measurements files can be compressed to save disk space and to gain performance. Choose menu Administration \ Measurement database. Choose an archivable month and select the Archivebutton. As a result all files are compressed to one remaining file in the probe data directory with extension eda (EPO Data Archive). Tip: perform this action on every 1st of a new month on the end of the working day (because it will take a few hours to compress a whole month and it will use CPU power of the server). The archive process itself runs on the server so the client can be closed after initiating the archive process. © 2012 Auxzenze 114 van 124 Handboek xEPO Elements Business monitor Version All Handboek xEPO Elements 13.2 Performance maintenance EPO can benefit most from the given system resources when the next settings are applied to the server system: 13.2.1 Optimal resources For the optimal use of resources check the next items frequently: The used amount of memory should not exceed the physical memory. Swapping makes applications that use a lot of database access extremely slow. Other applications that run on the same computer can slow EPO down Compress data from last month © 2012 Auxzenze 115 van 124 13.2.2 Business monitor Version All Optimal Database size An enormous number of files in de database can slow the system, the full backup and EPO itself. If not necessary purge, move or delete data older than (+/-) 1 year. 13.2.3 Optimal probe messages Probes that produce enormous number of data can slow down the system and EPO. Check if such situations occur by searching edf-files (EPO Data File) greater than 512 kB in the directory c:\program files\the early warning company\epo\data\probedata\ (default). NB It is normal behavior when edafiles (EPO Archive File) are (much) larger than several 100 MB’s. Double click on such files to investigate the nature of the burst messages. Known situations are Windows eventlogs that can produce 100 of messages every second! To solve such unwanted situations check the corresponding probe on the specified device (named in the data path). For the EPO Windows eventlog probe: filter the unwanted messages by adding a filter to the probe. Or even better prevent the messages from occurring by resolving the cause or prevent the source application for logging those messages. 13.3 Problem solution In this paragraph a number of possible solutions have been incorporated for known error states. NB on EPO-Forum the <www.epo-forum>http://www.epo-forum/ stand the most recent versions of FAQ-list and known issues. © 2012 Auxzenze 116 van 124 Handboek xEPO Elements xEPO Elements Business monitor Version All Handboek 1. the EPO Client gives the Error message “No connection…” at start Situation EPO-Client can get no contact with EPO-Server, possible causes to be: 1. On EPO-Server the service EPO server is not started. 2. Network has been broken between EPO-Client and EPO-Server. 3. Firewalls prevent network contact between EPO-Client and EPOServer 4. EPO-Client and EPO-Server are not in the same LAN-netwerk. Possible solutions 1. Start the EPO server - service on the EPO-Server 2. Research the network connection. For example by ping EPO-server (ping.exe or tracert.exe) 3. Firewalls generally permit (default) within local network (LAN) all communication. The firewall should permit EPO communication for port 7472. © 2012 Auxzenze 117 van 124 Business monitor Version All 2. The Windows task manager indicates that the EPO Client is started twice Situation As the EPO-Client is started there are 2 processes (EPOGui.exe) visible in the Windows task manager: Explanation This is a normal situation. EPOGui.exe is started twice for standard. The first instance of the process EPOGui.exe is the actual client. The second instance only monitors the database connection and the active state of the first instance. If the first instance indicates an error state the second instance will ask for restarting the (first) client: © 2012 Auxzenze 118 van 124 Handboek xEPO Elements Business monitor Version All 3. There comes no information (anymore) from the Windows probe Situation 1. Node remains blue (=unknown) in the EPO business tree 2. Node turns into blue after another status. 3. The newly added probe does not become visible in “edit tree “ under probed object. Possible cause Measurements are not received by the EPO-server. Possible causes: 1) The EPO probe cannot link (temporarily) with the EPO-server 2) The network connection has been not yet permitted 3) If it is an remote probe the new device is not yet added to EPO Solution directions 1) Research the tcp network connection from the probed machine: telnet EPOserver 7472 clear screen = OK 2) Research EPO-connection with: epomsgcmd info or epomsgcmd - s <eposerver> roundtriptest <ip or name probed machine> 3) In case of missing device: Add the new device See § 11.5, “Probes by means of WAN, Internet by means of WAN, Internet”, page 108. 4. The whole Business View is colored Situation Possible cause The whole Business View is colored (instead of a single object) 1) The node is drag-and-dropped on a part that has no boundary 2) The boundary of the objects in the picture are not solid enough 3) The boundary has another color then the default color black Solution directions 1) Remove link or choose a place in the picture that has boundaries 2) Select he link and choose a higher tolerance for the boundary (max 100%) 3) Select the proper boundary color © 2012 Auxzenze 119 van 124 Handboek xEPO Elements 14 Business monitor Version All Diaspora EPO has the possibility of updating itself by means of the software delivery tool “Diaspora”. Diaspora exists from 2 parts, a part that resides on the server side and a client part. Diaspora sends the updates by means of the EPO transport layer. The Diaspora client shows all devices (not EPO Clients) that are connected with the Diaspora service to the EPO message transport layer together with the devices that were discovered last time. These devices are stored in the file C:\Program Files\The Early Warning Company\EPO\Diaspora Client\KnownDevices.txt (default): Remove the file KnownDevices.txt if device list is not accurate enough. By means of “File->Send Update” a .diaspora file can be selected. Such a file has the following options: [Transfer] DontUpdateSelf=true [Execute] Application=DoDiasporaUpdate.cmd [Files] © 2012 Auxzenze 120 van 124 Handboek xEPO Elements xEPO Elements Business monitor Version All Handboek Add=EPO-669 \ DoDiasporaUpdate.cmd Add=EPO-669 \ EPO element 4.2-669 Setup.exe AddMatch=EPO-669 \ NetworkKey.ekf AddMatch=EPO-669 \ InstallOptions.ini [Transfer]: certain options as DontUpdateSelf with which can be indicated if Diaspora itself can be updated. [Execute]: Applications which must be activated after the file transfer. [Files]: The files which must be sent. Add: The file with that exact name. AddMatch: Adds the files with matching Wildcards as * and ?. The update will be sent to all selected machines. As the update it is carried out the result of the implemented program will be given as feedback. 15 Frequently Asked Questions with the Answers See www.epo-elements.nl for the last version. © 2012 Auxzenze 121 van 124 xEPO Elements Business monitor Version All Handboek Index CPU probe · 38 A Critical · 23 Advanced · 38 CSV · 59 Agentless · 11 Alarm delay · 30 D Archive · 69 Data generators · 59 Automatic installation · 19 Data processors · 59 Data Result viewers · 59 B data viewer · 68 Backup · 68 Backup Probe · 39 Bandwidth probe · 51 Basic information · 23 Black · 23 Blue · 23 BoundaryColor · 35 Business tree · 27, 32 Database · 15 Database maintenance · 68 Destination · 38 Diaspora · 72 Disaster recovery · 68 Disk probe · 41 DontUpdateSelf · 72 Down · 23 Business View screensaver · 35 E Business View Client · 35 Email probe · 55 Business Views · 34 Encryption · 21 Edit · 35 EPO Business Views · 34 EPO State · 23 C Commandline option · 60 Compress measurement DB · 69 Configuration · 63 Configuration files · 63 Connection test · 67 EPO-Forum · 7 EPoints · 12 EPOMsgcmd · 10, 67 EPO-Website · 7 ERF · 59 Escalation rules · 30 Copyright · 2 © 2012 Auxzenze 122 van 124 Business monitor Eventlog probe · 43 Maintenance · 68 External probe · 44 Memory probe · 47 Version All Handboek xEPO Elements Memory usage · 64 F FillOpacity · 35 First Logon · 21 Method · 8 Microsoft Visio · 34 Migrate · 68 First use of the Business Tree · 25 N H How do I · 61 html · 59 I Network connection? · 67 new server · 61 None · 23 Normal · 23 Notifications · 27 ICMP (ping) probe · 46 image · 34 Installation · 15 Internet · 64, 71 Internet client · 11, 20 O Optimal Database size · 70 Optimal probe messages · 70 Optimal resources · 69 ipforwarding · 64 P L Language · 14 License activation · 22 License overview · 14 License points · 12 Log information · 10 Logging · 10 Logon · 21 M Password · 29 Performance · 69 Performance counters probe · 48 Postboxes · 10 Probe library · 7 Probes · 11, 37 Problem solution · 70 Process probe · 49 Propagation rules · 23, 24 Proxy firewall · 64 Mail gateway · 67 © 2012 Auxzenze 123 van 124 R Business monitor Version All threshold · 61 Handboek xEPO Elements Tolerance · 35 Red · 23 tray icon · 36 Regular expression · 31 remote networks · 64 Reporting · 59 Requirements · 15 Restore · 68 Room monitoring · 26 U Unattended · 19 Uninstall · 20 Unknown · 23 Upgrade · 19 S User Manager · 29 Schedule · 38 V screensaver · 35 Script · 62 Security · 20 Service levels · 23 Service probe · 50 View Measurements · 68 Virtual Email User · 55 Virtual web user · 57 Visualizing · 34 VPN · 64 Service Window · 24, 29 Services · 9 W Silent · 19 WAN · 64, 71 SLA · 23 Warning · 23 SLA timeline · 24 SNMP probes · 51 X StatusTree Graph · 27 XSL · 59 Storage · 63 XSL-FO · 59 T Y Task scheduler probe · 55 Yellow · 23 Template · 37 © 2012 Auxzenze 124 van 124