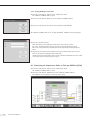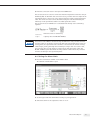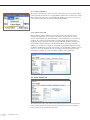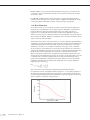
1
Operating Instructions
BioPAT ® ViaMass
85037-544-92
Vers. 10 | 2014
Contents
1. About this Document. . . . . . . . . . . . . . . . . . . . . . . . . . . . . . . . . . . . . . . . . . . . . . . . . . . . . . . . . . . . 5
1.1Function . . . . . . . . . . . . . . . . . . . . . . . . . . . . . . . . . . . . . . . . . . . . . . . . . . . . . . . . . . . . . . . . . . . . . 5
1.2 Target Group. . . . . . . . . . . . . . . . . . . . . . . . . . . . . . . . . . . . . . . . . . . . . . . . . . . . . . . . . . . . . . . . . 5
1.3 Notes on Using these Instructions. . . . . . . . . . . . . . . . . . . . . . . . . . . . . . . . . . . . . . . . . . . 5
1.4 Symbols Used. . . . . . . . . . . . . . . . . . . . . . . . . . . . . . . . . . . . . . . . . . . . . . . . . . . . . . . . . . . . . . . . 5
1.5 Structure of the Manual. . . . . . . . . . . . . . . . . . . . . . . . . . . . . . . . . . . . . . . . . . . . . . . . . . . . . 6
2. Safety Instructions. . . . . . . . . . . . . . . . . . . . . . . . . . . . . . . . . . . . . . . . . . . . . . . . . . . . . . . . . . . . . . . 7
2.1 General Information. . . . . . . . . . . . . . . . . . . . . . . . . . . . . . . . . . . . . . . . . . . . . . . . . . . . . . . . . 7
2.2 Authorized Personnel. . . . . . . . . . . . . . . . . . . . . . . . . . . . . . . . . . . . . . . . . . . . . . . . . . . . . . . . 7
2.3 Intended Usage. . . . . . . . . . . . . . . . . . . . . . . . . . . . . . . . . . . . . . . . . . . . . . . . . . . . . . . . . . . . . . 7
2.4 Limitations of Use and Misuse. . . . . . . . . . . . . . . . . . . . . . . . . . . . . . . . . . . . . . . . . . . . . . . 7
2.5 Electrical safety. . . . . . . . . . . . . . . . . . . . . . . . . . . . . . . . . . . . . . . . . . . . . . . . . . . . . . . . . . . . . . 7
3.Introduction. . . . . . . . . . . . . . . . . . . . . . . . . . . . . . . . . . . . . . . . . . . . . . . . . . . . . . . . . . . . . . . . . . . . . . 9
3.1Concepts. . . . . . . . . . . . . . . . . . . . . . . . . . . . . . . . . . . . . . . . . . . . . . . . . . . . . . . . . . . . . . . . . . . . . 9
3.2 System Components Overview . . . . . . . . . . . . . . . . . . . . . . . . . . . . . . . . . . . . . . . . . . . . . . 10
3.2.1Probe . . . . . . . . . . . . . . . . . . . . . . . . . . . . . . . . . . . . . . . . . . . . . . . . . . . . . . . . 10
® ViaMass Connect Hub. . . . . . . . . . . . . . . . . . . . . . . . . . . . . . . . . . . . . . . 10
3.2.2BioPAT 3.2.3Software . . . . . . . . . . . . . . . . . . . . . . . . . . . . . . . . . . . . . . . . . . . . . . . . . . . . . . . . . . . . . 10
3.2.3.1 Futura Tool . . . . . . . . . . . . . . . . . . . . . . . . . . . . . . . . . . . . . . . . . . . . . . . . . . 11
4. Quick Setup Guide. . . . . . . . . . . . . . . . . . . . . . . . . . . . . . . . . . . . . . . . . . . . . . . . . . . . . . . . . . . . . . . . 12
4.1 Typical System Checklist. . . . . . . . . . . . . . . . . . . . . . . . . . . . . . . . . . . . . . . . . . . . . . . . . . . . . 12
4.2 Getting Started. . . . . . . . . . . . . . . . . . . . . . . . . . . . . . . . . . . . . . . . . . . . . . . . . . . . . . . . . . . . . . 12
4.2.1Unpacking. . . . . . . . . . . . . . . . . . . . . . . . . . . . . . . . . . . . . . . . . . . . . . . . . . . . . . . . . . . . 12
4.2.2 Software Installation. . . . . . . . . . . . . . . . . . . . . . . . . . . . . . . . . . . . . . . . . . . . . . . . . 12
4.2.3 Connecting Probes and Cables. . . . . . . . . . . . . . . . . . . . . . . . . . . . . . . . . . . . . . . 13
4.2.4 Connecting the Single Use Sensor Patch . . . . . . . . . . . . . . . . . . . . . . . . . . . . 13
4.2.5Power → BioPAT ® ViaMass Connect Hub 1. . . . . . . . . . . . . . . . . . . . . . . . . . 14
4.2.6Probe → BioPAT ® ViaMass Electronics → BioPAT ® ViaMass
Connect Hub 1. . . . . . . . . . . . . . . . . . . . . . . . . . . . . . . . . . . . . . . . . . . . . . . . . . . . . . . 14
4.2.7 Connecting Your BioPAT ® ViaMass to a PC. . . . . . . . . . . . . . . . . . . . . . . . . . . 14
4.2.8 Assembly | Connection of BioPAT ® ViaMass Elektronics
to a BIOSTAT ® RM. . . . . . . . . . . . . . . . . . . . . . . . . . . . . . . . . . . . . . . . . . . . . . . . . . . . . 15
4.2.9 First start-up with control unit . . . . . . . . . . . . . . . . . . . . . . . . . . . . . . . . . . . . . . 16
5. System Check . . . . . . . . . . . . . . . . . . . . . . . . . . . . . . . . . . . . . . . . . . . . . . . . . . . . . . . . . . . . . . . . . . . . 17
5.1 Using Futura Tool. . . . . . . . . . . . . . . . . . . . . . . . . . . . . . . . . . . . . . . . . . . . . . . . . . . . . . . . . . . . 17
5.2 System Check with DCU Integration . . . . . . . . . . . . . . . . . . . . . . . . . . . . . . . . . . . . . . . . 18
5.3 Displaying System Information on the BioPAT ® ViaMass. . . . . . . . . . . . . . . . . . . . 20
6. Software Installation. . . . . . . . . . . . . . . . . . . . . . . . . . . . . . . . . . . . . . . . . . . . . . . . . . . . . . . . . . . . 21
6.1 Futura Tool. . . . . . . . . . . . . . . . . . . . . . . . . . . . . . . . . . . . . . . . . . . . . . . . . . . . . . . . . . . . . . . . . . 21
6.2 Minimum System Requirements. . . . . . . . . . . . . . . . . . . . . . . . . . . . . . . . . . . . . . . . . . . . . 21
6.3Installing. . . . . . . . . . . . . . . . . . . . . . . . . . . . . . . . . . . . . . . . . . . . . . . . . . . . . . . . . . . . . . . . . . . . . 21
6.3.1Microsoft®.Net Framework 4.0. . . . . . . . . . . . . . . . . . . . . . . . . . . . . . . . . . . . . . . 22
6.3.2 FTDI Drivers . . . . . . . . . . . . . . . . . . . . . . . . . . . . . . . . . . . . . . . . . . . . . . . . . . . . . . . . . . 22
Contents3
7. BioPAT ® ViaMass System Components. . . . . . . . . . . . . . . . . . . . . . . . . . . . . . . . . . . . . . . . . . . 24
® ViaMass Care and Maintenance . . . . . . . . . . . . . . . . . . . . . . . . . . . . . . . . . . . . 24
7.1BioPAT 7.2 How to Store Your BioPAT ® ViaMass. . . . . . . . . . . . . . . . . . . . . . . . . . . . . . . . . . . . . . . . . 25
7.3 How to Clean Your BioPAT ® ViaMass . . . . . . . . . . . . . . . . . . . . . . . . . . . . . . . . . . . . . . . . 25
7.4 Firmware Upgrades. . . . . . . . . . . . . . . . . . . . . . . . . . . . . . . . . . . . . . . . . . . . . . . . . . . . . . . . . . 25
7.4.1Prerequisites . . . . . . . . . . . . . . . . . . . . . . . . . . . . . . . . . . . . . . . . . . . . . . . . . . . . . . . . . 25
7.4.2 Firmware Upgrade Instructions. . . . . . . . . . . . . . . . . . . . . . . . . . . . . . . . . . . . . . 25
7.5 Earthing the BioPAT ® ViaMass. . . . . . . . . . . . . . . . . . . . . . . . . . . . . . . . . . . . . . . . . . . . . . . 26
7.6BioPAT® ViaMass Cables. . . . . . . . . . . . . . . . . . . . . . . . . . . . . . . . . . . . . . . . . . . . . . . . . . . . . . 27
8. Measurement Options. . . . . . . . . . . . . . . . . . . . . . . . . . . . . . . . . . . . . . . . . . . . . . . . . . . . . . . . . . . 28
8.1 Measurement Modes – Description. . . . . . . . . . . . . . . . . . . . . . . . . . . . . . . . . . . . . . . . . . 28
8.1.1 Measurement Modes Available . . . . . . . . . . . . . . . . . . . . . . . . . . . . . . . . . . . . . . 28
8.1.1.1 Cell Culture Mode . . . . . . . . . . . . . . . . . . . . . . . . . . . . . . . . . . . . . . . . . . . 28
8.1.1.2 Bacterial Mode . . . . . . . . . . . . . . . . . . . . . . . . . . . . . . . . . . . . . . . . . . . . . . 28
8.1.1.3 Microbial Mode. . . . . . . . . . . . . . . . . . . . . . . . . . . . . . . . . . . . . . . . . . . . . . 29
8.1.1.4 Custom Mode. . . . . . . . . . . . . . . . . . . . . . . . . . . . . . . . . . . . . . . . . . . . . . . . 29
8.1.1.5 Signal Simulator Mode . . . . . . . . . . . . . . . . . . . . . . . . . . . . . . . . . . . . . . 29
8.1.2 Selecting a Measurement Mode . . . . . . . . . . . . . . . . . . . . . . . . . . . . . . . . . . . . . 29
8.1.2.1 Futura Tool . . . . . . . . . . . . . . . . . . . . . . . . . . . . . . . . . . . . . . . . . . . . . . . . . . 30
8.1.2.2 Selecting the Measurement Mode via DCU. . . . . . . . . . . . . . . . . . 31
8.2Zeroing . . . . . . . . . . . . . . . . . . . . . . . . . . . . . . . . . . . . . . . . . . . . . . . . . . . . . . . . . . . . . . . . . . . . . . 33
8.2.1 Zeroing Using Futura Tool . . . . . . . . . . . . . . . . . . . . . . . . . . . . . . . . . . . . . . . . . . . 33
8.2.2 Zeroing Readings on the DCU. . . . . . . . . . . . . . . . . . . . . . . . . . . . . . . . . . . . . . . . 34
8.3 Converting the Capacitance Value to Cells per Milliliter (C/ml). . . . . . . . . . . . . 34
8.4 Settings for Alarm Limits. . . . . . . . . . . . . . . . . . . . . . . . . . . . . . . . . . . . . . . . . . . . . . . . . . . . 35
8.5 Polarization Correction. . . . . . . . . . . . . . . . . . . . . . . . . . . . . . . . . . . . . . . . . . . . . . . . . . . . . . 36
8.6Filters . . . . . . . . . . . . . . . . . . . . . . . . . . . . . . . . . . . . . . . . . . . . . . . . . . . . . . . . . . . . . . . . . . . . . . . . 36
8.6.1 Rocking Motion Monitoring . . . . . . . . . . . . . . . . . . . . . . . . . . . . . . . . . . . . . . . . . 36
9. Using Futura Tool. . . . . . . . . . . . . . . . . . . . . . . . . . . . . . . . . . . . . . . . . . . . . . . . . . . . . . . . . . . . . . . . 37
9.1 Connecting to BioPAT ® ViaMass. . . . . . . . . . . . . . . . . . . . . . . . . . . . . . . . . . . . . . . . . . . . . 37
9.1.1 “I know which COM Port my BioPAT ® ViaMass is connected to”. . . . . 37
9.1.2 “I am not sure which COM Port my BioPAT ® ViaMass
is connected to”. . . . . . . . . . . . . . . . . . . . . . . . . . . . . . . . . . . . . . . . . . . . . . . . . . . . . . 37
9.1.3 Futura Tool Menu. . . . . . . . . . . . . . . . . . . . . . . . . . . . . . . . . . . . . . . . . . . . . . . . . . . . 38
9.1.4 Futura Status Tab . . . . . . . . . . . . . . . . . . . . . . . . . . . . . . . . . . . . . . . . . . . . . . . . . . . . 38
9.2 Probe Status Tab. . . . . . . . . . . . . . . . . . . . . . . . . . . . . . . . . . . . . . . . . . . . . . . . . . . . . . . . . . . . . 38
9.3 Operating Modes Tab. . . . . . . . . . . . . . . . . . . . . . . . . . . . . . . . . . . . . . . . . . . . . . . . . . . . . . . . 39
9.3.1 Hardware Settings . . . . . . . . . . . . . . . . . . . . . . . . . . . . . . . . . . . . . . . . . . . . . . . . . . . 39
9.3.1.1 USB Only Mode. . . . . . . . . . . . . . . . . . . . . . . . . . . . . . . . . . . . . . . . . . . . . . 39
9.3.1.2 Futura Connect Mode . . . . . . . . . . . . . . . . . . . . . . . . . . . . . . . . . . . . . . . 40
9.3.1.3 Rocker Bag Mode. . . . . . . . . . . . . . . . . . . . . . . . . . . . . . . . . . . . . . . . . . . . 42
9.3.2 Measurement Settings. . . . . . . . . . . . . . . . . . . . . . . . . . . . . . . . . . . . . . . . . . . . . . . 42
9.3.3 Clean and Zero Functions. . . . . . . . . . . . . . . . . . . . . . . . . . . . . . . . . . . . . . . . . . . . 43
9.3.4 Live Readings. . . . . . . . . . . . . . . . . . . . . . . . . . . . . . . . . . . . . . . . . . . . . . . . . . . . . . . . . 44
9.4 Quick Readings Tab. . . . . . . . . . . . . . . . . . . . . . . . . . . . . . . . . . . . . . . . . . . . . . . . . . . . . . . . . . 44
9.5 Futura Updates Tab. . . . . . . . . . . . . . . . . . . . . . . . . . . . . . . . . . . . . . . . . . . . . . . . . . . . . . . . . . 46
10.Troubleshooting. . . . . . . . . . . . . . . . . . . . . . . . . . . . . . . . . . . . . . . . . . . . . . . . . . . . . . . . . . . . . . . . . . 47
10.1Noisy or Unexpected Readings . . . . . . . . . . . . . . . . . . . . . . . . . . . . . . . . . . . . . . . . . . . . . . 47
10.2Noisy Capacitance Readings. . . . . . . . . . . . . . . . . . . . . . . . . . . . . . . . . . . . . . . . . . . . . . . . . 47
10.3Lid Lock Warning (E10 Error) . . . . . . . . . . . . . . . . . . . . . . . . . . . . . . . . . . . . . . . . . . . . . . . . 47
10.4BioPAT ® ViaMass Busy (E02 Error) . . . . . . . . . . . . . . . . . . . . . . . . . . . . . . . . . . . . . . . . . . . 47
10.5BioPAT ® ViaMass Not Recognized by Computer. . . . . . . . . . . . . . . . . . . . . . . . . . . . . 48
11.Detailed Theory of Operation. . . . . . . . . . . . . . . . . . . . . . . . . . . . . . . . . . . . . . . . . . . . . . . . . . . 49
11.1The Electrical Properties of Living Systems . . . . . . . . . . . . . . . . . . . . . . . . . . . . . . . . . 49
11.2Beta Dispersion. . . . . . . . . . . . . . . . . . . . . . . . . . . . . . . . . . . . . . . . . . . . . . . . . . . . . . . . . . . . . . 50
11.3Conductivity. . . . . . . . . . . . . . . . . . . . . . . . . . . . . . . . . . . . . . . . . . . . . . . . . . . . . . . . . . . . . . . . . 52
4Contents
1. About this Document
1.1 Function
This operating manual describes the safe installation and use of the BioPAT ® ViaMass.
The operating personnel must read these instructions prior to operational startup.
These instructions should always be available at the workplace.
1.2 Target Group
These operating instructions are designed for qualified personnel. Only qualified
personnel may set up the BioPAT ® ViaMass, connect it to the bioreactor or perform
in-process operation or maintenance.
1.3 Notes on Using these Instructions
All information in these operating instructions considers the state of the art, the
applicable standards and guidelines, and our many years of experience and knowledge.
These operating instructions provide you with all the information necessary to install
and operate the BioPAT ® ViaMass.
The operating instructions must be read and used by all persons entrusted with the
operation, service, cleaning, and troubleshooting of the device. This applies particularly to the safety instructions listed.
−− Please read these operating instructions carefully and completely before using this
device.
−− These instructions are part of the product. Keep them in a safe and easily accessible place near the device’s site of installation.
−− If the instructions should be lost or misplaced, you can order new ones.
1.4 Symbols Used
As a means of instruction and direct warning against hazards, all text statements to
be particularly noted in these operating instructions will be marked as follows:
This symbol denotes a possible danger with risk that moderate or minor injury
may result if it is not avoided.
This symbol denotes a danger with low risk that could result in property damage
if the risk is not avoided.
This symbol
−− is an indication of a function or setting on the device.
−− that caution should be exercised while working.
−− identifies useful information.
About this Document5
The following presentations will also be used:
−− Texts that follow this mark are lists.
ttTexts that follow this mark describe activities that must be carried out in the
specified order.
yyTexts that follow this mark describe the result of an action.
” “ Texts in quotes are references to other chapters or sections.
1.5 Structure of the Manual
The aim of this manual is to provide both a practical guide to setting up your
BioPAT ® ViaMass system and a comprehensive reference for each element of the
BioPAT ® ViaMass system.
If you are familiar with our technology and general software installation, we
recommend that you read the rest of this introductory section, the „4 Quick Setup
Guide“, Seite 12 and System Check („5 System Check“, Seite 17) as a minimum,
referring to later chapters where necessary. Other chapters include more detailed
descriptions of the individual components in your BioPAT ® ViaMass system and the
various measurement options available to you. Comprehensive guides for setting up
your BioPAT ® ViaMass as a standalone system or as part of a larger control or measurement system are also included. Technical Specifications, Software Licence Agreements and EMC Regulatory Information sections can all be found towards the end of
this manual.
Please read this manual fully and carefully before starting to use this equipment.
Failure to comply with the appropriate safety guidelines may cause severe injury or
property damage.
This symbol on BioPAT ® ViaMass equipment warns the user to consult the
appropriate parts of the User Manual before making any connections.
Wrong connections, voltages or currents outside the specified operating ranges
could cause danger or permanent damage to the equipment.
6
About this Document
2. Safety Instructions
2.1 General Information
Sartorius Stedim Biotech GmbH supplies the BioPAT ® ViaMass after careful testing in
ready-for-operation condition. This manual contains instructions for the safe operation of the BioPAT®ViaMass. You may only operate the device under conditions that
comply with the specificationsstated in this manual and the information on the
manufacturer’s ID label.
2.2 Authorized Personnel
The following persons may carry out the actions described herein:
Operations
Persons
Montage und Anschluss am
Bioreaktor, function test
during servicing and maintenance
Trained and qualified personnel of the operator or
service technicians of Sartorius Stedim Biotech
GmbH
Operation
Personnel who has read this documentation and is
familiar with the operation of bioreactors
Factory maintenance and
service
Service Department of Sartorius Stedim Biotech
GmbH or the sensor manufacturer
2.3 Intended Usage
The BioPAT ® ViaMass is a compact system for determining the living biomass in the
concentration range and under the conditions as described in the technical data. It is
used for monitoring and evaluation of metabolic processes of biological processes,
e.g. cultivations.
2.4 Limitations of Use and Misuse
Possible damage to equipment!
The medium must not cause corrosion of the sensors. Otherwise the reliability and
lifetime of the sensors will be affected!
−− The BioPAT®ViaMass sensors are not allowed to connect to amplifiers of third party
vendors.
−− Sensors from other vendors are not allowed to connect to BioPAT ® ViaMass
amplifiers.
2.5 Electrical safety
If the device is not used in accordance with the instructions, this can affect the
product liability for the device.
−− Make sure that the voltage rating printed on the AC adapter is identical to your
local line voltage. The wall outlet must have a protective grounding conductor!
−− Do not switch on the equipment if the AC adapter or power cord are damaged.
−− If the BioPAT®ViaMass itself, the AC adapter or any cables of the system are damaged, disconnect the equipment from the power supply and secure it that it cannot
be turned on.
−− Chemicals (e.g. gases or liquids) that can corrode and damage the inside or outside
of the BioPAT®ViaMass, AC adapter or any cable or peripherals must be kept away
from the equipment.
Safety Instructions7
Installation Notes
The operator shall be solely responsible for any modifications to the equipment and
for connecting any cables or equipment not supplied by Sartorius. Information on
operational quality is available upon request from Sartorius.
You should only use peripherals and options supplied by Sartorius!
8
Safety Instructions
3. Introduction
One of the most requested parameter in industrial cell cultivation is the monitoring
of biomass. The knowledge of the biomass progress during a fermentation process
gives deeper process knowledge and understanding. Therefore it enables the control
of the biomass and helps to define feeding, harvesting or infection points. Offline
methods like visual cell counting or semi-automated systems still dominate the
biomass measurement in industrial cell cultivation. But these offline methods based
on taking a representative sample cannot monitor the process continuously.
The radio frequency (RF) impedance method for online in-situ detection of viable
biomass has already become well established in biopharmaceutical applications using
traditional reusable fermenter equipment. But, industrial cell cultivation tends more
and more to single-use (SU) fermentation solutions. In order to follow these, an easy
to use online biomass monitoring system is a basic necessity. BioPAT ® ViaMass is the
first standardized online biomass measurement solution for single use fermenter
systems which is fully integrated into the standard fermenter control system and
tailored to the single-use fermentation bags such as the Flexsafe RM and Flexsafe STR.
3.1 Concepts
The BioPAT ® ViaMass system measures an electrical property of cell suspensions
called Capacitance. Academic and industrial research has demonstrated a correlation
between this property and live biomass. A detailed theory of operation can be found
in chapter “11 Detailed Theory of Operation”, page 49.
Electrical capacitance is measured in the SI unit farads, although picofarads are
more common in practical use. For cell suspensions capacitance is usually quoted in
pF/cm and as a rule of thumb, one pF/cm equates to one gram per litre of dry weight
for microbial or 1+106 cells per milliliter of live cells for cell culture.
The BioPAT ® ViaMass’ patented technology converts capacitance into a live biomass
reading, normally cells/ml or g/l for spun solids dry weight. However, other units can
be derived from the raw capacitance measurements; these may be more relevant to
the chosen application and are covered later in the manual.
Your BioPAT ® ViaMass also measures the conductivity of the medium, in millisiemens
per centimeter (mS/cm). Conductivity is not used to measure biomass but is indicative
of the production or utilization of ions by the cell suspension, e.g. pH control and
other fermentation processes.
Introduction9
3.2 System Components Overview
The BioPAT ® ViaMass system consists of the electronics as the main measurement
and evaluation unit and the sensor connector which also has an amplifier on board.
In order to complete the measurement system, the electronics is connected to the
single use sensing patch.
Figure 1: BioPAT ® ViaMass sensor patch connected to the patch connector
Figure 2: BioPAT ® ViaMass electronics
3.2.1 Probe
The probe is the part of the instrument that is placed into the solution under test.
It can be physically separated from the rest of the system for cleaning or replacement.
3.2.2 BioPAT ® ViaMass Connect Hub
BioPAT ® ViaMass Connect Hub 1 allows the connection of a BioPAT ® ViaMass
probe | sensor patch in combination with the corresponding electronics. For the
connected BioPAT ® ViaMass the BioPAT ® ViaMass Connect Hub can simultaneously
output Current Loop and Modbus RTU signals for use with PLCs and other control
systems whilst optionally interfacing with a PC over a single USB cable, allowing
independent control, calibration, monitoring and logging of the BioPAT ® ViaMass
probe connected to the system using BioPAT ® ViaMass software.
Modbus and Current Loop signals from the BioPAT ® ViaMass Connect Hub provide
third party control systems (e.g. PLCs) with both capacitance and conductivity
readings for evaluation in control functions. Once configured using BioPAT ® ViaMass
software, the BioPAT ® ViaMass modules can be operated independently without needing to be connected to a PC.
In addition to capacitance and conductivity readings, Modbus also has the facility
to provide a viable biomass reading and offers control and configuration over the
system.
3.2.3 Software
You should have received a USB flash drive with your BioPAT ® ViaMass system.
This contains a copy of Futura Tool (for system configuration) and data recording.
If this is missing from your package, please contact Sartorius Stedim Biotech
or your authorized distributor for assistance.
10Introduction
3.2.3.1 Futura Tool
Futura Tool is required to configure your BioPAT ® ViaMass system for use. It provides
details on the BioPAT ® ViaMass system, calibration and operating mode options, a
quick readings mode for ascertaining operating status and other advanced functions.
For further details on Futura Tool, including system requirements and installation
instructions, please refer to section “6.1 Futura Tool”, page 21.
Introduction11
4. Quick Setup Guide
This section assumes the user is familiar with BioPAT ® ViaMass technology and is also
familiar with the installation of software within the Microsoft® windows framework.
Details on the workings of BioPAT ® ViaMass technology and the installation of software are expanded upon in following chapters.
The following is a description of a typical system and allows the user to unpack,
recognize each element, install the software onto a PC, connect it together and check
that it functions properly.
4.1 Typical System Checklist
A typical BioPAT ® ViaMass system consists of the following
−− SU Probe welded into a Flexsafe RM or Flexsafe STR bag
−− BioPAT ® ViaMass electronics
−− Two Signal Simulators (0 pF/cm, 0 mS/cm and 100 pF/cm, 40 mS/cm)
−− USB flash drive containing Futura Tool
−− BioPAT ® ViaMass System Manual (this document)
Accessory for service and retrofit versions only
−− BioPAT ® ViaMass Connect Hub 1
−− External Power Supply Unit
−− Mains power cable
−− Set of green phoenix connectors for Current Loop and Modbus
−− USB cable
4.2 Getting Started
4.2.1 Unpacking
It is recommended that you unpack all the items and lay them out in a clear space.
Check all items for signs of damage. If you suspect an item to be damaged, or if
anything appears to be missing, contact the shipper and Sartorius Stedim Biotech or
your local distributor within three days of receipt of the shipment.
The packaging in which the items were dispatched is specially designed to protect
them during transport. We recommend that the packaging be retained for use in the
unlikely event that any item needs to be.
4.2.2 Software Installation
Do not connect your BioPAT ® ViaMass system to a PC until all required software
has been installed.
The Futura Tool is required to configure your system and ascertain that it is
functioning correctly. It is also capable of data logging and real time measurement.
You may not need to install this if you are using our control system. The Futura
Tool installation also installs the drivers required to connect your BioPAT ® ViaMass
system to your PC.
The Futura Tool must be installed prior to connecting the BioPAT ® ViaMass system
to the PC as Futura Tool contains the drivers required to interface to the BioPAT ®
ViaMass hardware. If you are unsure about any steps in the installation process please
refer to Chapter “6 Software Installation”, page 21.
12
Quick Setup Guide
4.2.3 Connecting Probes and Cables
It is easy to connect BioPAT ® ViaMass cables and probes. Simply line up the colored
dot on the connector with the colored dot on the socket and push in. However, the
connectors feature a special ring lock device that will not allow them to be removed
unless the correct technique is used, as described below.
Plug collar
The plug collar indicated must be pulled out a short distance (the distance is almost
imperceptible; less than 1mm) from the socket to disengage the lock. Continue to pull
on the plug collar to uncouple the plug from the socket. For a cable, hold the collar as
shown and pull away from the socket.
4.2.4 Connecting the Single Use Sensor Patch
Each disposable sensor has four platinum electrodes and a pair of plastic ‘ears’ on
the reverse of the sensor which locate in the ‘front end’ sensor connector enclosure of
the BioPAT ® ViaMass. This enclosure features a locking ring which contains a guide
groove that, when rotated to the Lock position, grips the locating tabs on the ears to
hold the sensor patch securely onto the BioPAT ® ViaMass connector for a reliable
connection.
To connect a disposable sensor patch, first ensure that the locking ring on the
connector is in the Unlock position.
Next, line up the BioPAT ® ViaMass connector over the sensor. Ensure that the sensor’s
ears align with the slots in the locking ring. The probe can be fitted either way round.
Carefully place the BioPAT ® ViaMass connector squarely onto the sensor so that the
tabs on the sensor’s ears are just hidden by the connector’s locking ring.
There should be a gap of approximately 3 mm between the probe and the
BioPAT ® ViaMass connector.
Quick Setup Guide13
Twist the locking ring fully round to the Lock position. This will pull the probe
securely onto the connector ready for use. To release the disposable sensor, simply
rotate the locking ring to its Unlock position. This will release and push off the
disposable probe.
Always disconnect the sensor connector of the BioPAT®ViaMass from the bag
before it will be removed from the bag holder.
Ignoring this procedure may result in the destruction of the cables or the bag.
4.2.5 Power → BioPAT ® ViaMass Connect Hub 1
If you are using a BioPAT ® ViaMass Connect Hub 1, plug in the mains power cable
to the external power supply unit and then attach the power supply unit to the
BioPAT ® ViaMass Connect Hub 1. Tighten the locking ring on the power supply plug
by hand to ensure that it does not come dislodged from the unit when in use.
Ensure that the mains power supply is switched on.
The power indicator light on the front of your BioPAT ® ViaMass Connect Hub 1 will
flash when the unit is initially switched on. This should settle to a steady green light
to indicate that the unit is powered and operating correctly.
4.2.6 Probe → BioPAT ® ViaMass Electronics → BioPAT ® ViaMass Connect Hub 1
Connect a probe or Signal Simulator to your BioPAT ® ViaMass and connect the
BioPAT ® ViaMass electronics to a socket on the front of your BioPAT ® ViaMass
Connect Hub 1, ensuring that the colored dots on all plugs and sockets are aligned.
The status indicator light will display a steady green light once a connection
between the BioPAT ® ViaMass and BioPAT ® ViaMass Connect Hub 1 has been successfully established. Please note that it may take several seconds for a connection to
be establishhed. If the light does not come on or illuminates red, the BioPAT ® ViaMass
electronics is probably in the incorrect hardware mode. Use Futura Tool (Chapter “9
Using Futura Tool”, page 37) to change the Hardware Mode if required.
You are now ready to connect your BioPAT ® ViaMass system to a PC or system
controller.
4.2.7 Connecting Your BioPAT ® ViaMass to a PC
Once Futura Tool has been successfully installed (Software Installation section above),
take the USB cable provided and connect it between the orange USB socket on the
BioPAT ® ViaMass Connect Hub 1 and a spare USB port on your PC.
If connecting the BioPAT ® ViaMass Connect Hub 1 to your computer for the first time,
please allow up to a minute for it to be registered by the PC before attempting to
connect to the device using Futura software. This extended hardware discovery time
is only necessary when connecting your BioPAT ® ViaMass Connect Hub 1 to your PC
for the first time.
14
Quick Setup Guide
4.2.8 Assembly | Connection of BioPAT ® ViaMass Elektronics to a BIOSTAT ® RM
tt
Ensure that the equipotential bonding cable is connected to the electronics
bracket as pictured below.
tt
Connect the equipotential bonding cable to the equipotential bonding point at the
control unit or your local installation.
tt
Snap the electronics into the illustrated holder.
It should be retained as shown in the picture.
Connect the data cable to the electronics unit.
tt
Connect the other end of the cable to the control unit.
Quick Setup Guide15
4.2.9 First start-up with control unit
After the BioPAT ® ViaMass electronics is connected to the control unit and is supplied
with power, it requires a warm up time of about 30 minutes.
tt
Press the touch button “CAP-#“ in the “Calibration“ menu.
The submenu “ViaMass CAP-#“ opens.
While “Waiting for stable temperature” is displayed in the “ViaMass CAP-#” submenu,
the electronics is in the warm-up phase. The rotating clock indicates that the warmup phase is running.
16
Quick Setup Guide
5. System Check
This chapter outlines the steps required to check that your BioPAT ® ViaMass system
is functioning correctly and assumes the software mentioned is installed and working.
You can perform these tests using Futura or, if included in your system, our local
control unit. Tests using the supplied Signal Simulators in a standard conductivity
solution and with living biomass are detailed on the following pages.
5.1 Using Futura Tool
After the BioPAT ® ViaMass was connected, click on the “Quick Readings” tab. Set
the measuring frequency to 1000 kHz (single frequency) and the Probe Calibration
to “Factory Cal”. Check the “Continuous Readings” checkbox then press the “Get
Reading” button to start taking readings. You are now ready to perform the checks
detailed in the remainder of this chapter. Once you have finished checking the
system press the “Stop Timed Reading” button.
The two Signal Simulators supplied are used to check the system is functioning
correctly. A Signal Simulator pair consists of a high and zero value to test the full
range of the BioPAT ® ViaMass.
When using a BioPAT ® ViaMass system, the BioPAT ® ViaMass Signal Simulators
(Sartorius part number BPV0011) must be used. Plug these simulators in the BioPAT ®
ViaMass connector in the same way you do it with a sensor patch. The only difference
is that the locking procedure is not needed to establish the connection. However, the
BioPAT ® ViaMass Signal Simulators require a different calibration file to operate
correctly. Disposable probes do not contain the memory required for storing settings
and calibration files. This Signal Simulator calibration file is, instead, stored in the
BioPAT ® ViaMass electronics and is selected automatically when the BioPAT ® ViaMass
measures a conductivity of greater than 36 mS/cm and detects that a 2-terminal
device is connected (such as a Signal Simulator, but unlike a probe).
The high value Signal Simulator must, therefore, be inserted first in order to trigger
this mode change. The Signal Simulator mode will remain active for 90 seconds,
during which time a value using the zero value Signal Simulator must also be
recorded. The BioPAT ® ViaMass will then revert to its previous mode. Connecting the
BioPAT ® ViaMass to Futura Tool software will cause both BioPAT ® ViaMass and software will automatically switch to their respective Signal Simulator modes (BioPAT ®
ViaMass firmware 2335-07-118 onwards).
Note that the BioPAT ® ViaMass will remain in this mode regardless of what is
connected to it. You must therefore ensure that it is reverted to the standard
operational mode when finished with the Signal Simulators , since the Signal
Simulator calibration file will give incorrect readings with real disposable probes.
System Check17
BioPAT ® ViaMass Signal Simulators
Use with BioPAT ® ViaMass
Directions
−− Plug in, switch on the power and wait until the Capacitance reading is steady;
allow at least 20 minutes warm up time. BioPAT ® ViaMass run hot so do not be
alarmed!
−− Check that the Simulator settings give the correct display readings as below.
– First with the 100 pF/cm, 40 mS/cm simulator, followed by 0 pF/cm, 0 mS/cm
Signal Simulator
BioPAT ® ViaMass
Readings
Capacitance
Conductivity
Capacitance pF/cm
Conductivity mS/cm
100
40
100 ±3
40 ±1
0
0
0 ±1
0 ±0.5
5.2 System Check with DCU Integration
Both accompanying signal simulators can be used to check whether the system is
functioning correctly. A signal simulator pair consists of one very high value and a
zero value (or low value) for checking the entire BioPAT ® ViaMass measuring range.
When using a BioPAT ® ViaMass system, the BioPAT ® ViaMass Signal Simulators
(Sartorius part number BPV0011) must be used. Plug these simulators in the
BioPAT ® ViaMass connector in the same way you do it with a sensor patch. The only
difference is that the locking procedure is not needed to establish the connection
Once you have created the connection to your BioPAT ® ViaMass and the DCU is ready
for operation, switch to the calibration mode
tt
Press the touch button “CAP-#“ in the “Calibration“ menu.
The submenu “ViaMass CAP-#“ opens.
tt
Press the touch button “Measure“ in the submenu “ViaMass CAP-#“.
18
System Check
tt
Press the touch button ‚Signal Test‘ in the submenu “ViaMass CAP-# Mode“.
The submenu “ViaMass Signal Simulation CAP-#” for checking the BioPAT ® ViaMass
electronics opens.
tt
Connect the signal simulator for the high value to the electronics.
As soon as the electronics detect the high-simulator, the capacity reading appears in
the “Cap” field and conductivity in the “Cond” field.
If the expected measurement values are within the acceptable range (see the following table, then they are displayed in black.
tt
Confirm this check by pressing the “ok“ key.
If the measurement values are not within the acceptable range, the results are
displayed in red. In this case, check whether you have connected the right high simulator that matches your electronics unit. If the value is not within the acceptable
range despite the correct simulators, please contact your local Sartorius service partner.
Signal simulator
BioPAT ® ViaMass
Readings
Capacitance
Conductivity
Capacitance pF/cm
Conductivity mS/cm
100
40
100 ±3
40 ±1
0
0
0 ±1
0 ±0,5
tt
After confirming the high simulator value, repeat the procedure with the signal
simulator for the zero value (zero or low value).
As soon as the low simulator is detected by the electronics, the capacitance reading
appears in the field “Cap” and the conductivity reading in the field “Cond”.
If the readings are in the acceptable range, they are displayed in black.
tt
Confirm this check by pressing the “ok“ key.
If the measurement values are not within the acceptable range, the results are
displayed in red. In this case, check whether you have connected the right low simulator that matches your electronics unit. If the value is not within the acceptable
range despite the correct simulators, please contact your local Sartorius service partner.
System Check19
5.3 Displaying System Information on the BioPAT ® ViaMass
To display the system data of your BioPAT ® ViaMass, proceed as follows:
tt
Press the touch button “CAP-#“ in the “Calibration“ menu.
The submenu “ViaMass CAP-#“ opens.
tt
Press the touch button “Info“ in the submenu “ViaMass CAP-#“.
The submenu “Info CAP-#” is displayed.
20
System Check
Field
Function
Zero
Last-configured zero value
Temp.
System temperature of the electronics
Probe
Name of the probe
SN
Serial number of the electronics
FW
Firmware number
Bootl.
Bootloader number
6. Software Installation
This section contains the technical requirements and procedures for installing
the software Futura Tool.
6.1 Futura Tool
Futura Tool contains all of the configuration and calibration tools you will require
to set up your BioPAT ® ViaMass system. It includes functions for reading BioPAT ®
ViaMass status information, setting operating modes, taking real time readings for
system testing, a diagnostics function to aid problem solving and the facility to
upgrade BioPAT ® ViaMass firmware.
This section contains installation instructions for Futura Tool.
See Chapter “9 Using Futura Tool”, page 37 for usage instructions.
6.2 Minimum System Requirements
−− Microsoft® Windows XP Service Pack 3, Microsoft® Windows Vista or
Microsoft® Windows 7
−− 1 GB RAM or higher
−− 1.6 GHz Intel Atom or higher
−− At least 20% free hard drive space, 1 GB minimum
−− At least one free USB 2.0 port
6.3 Installing
To set up Futura Tool on your PC you need to install Futura Tool Installer, which is
provided as part of your BioPAT ® ViaMass order. Futura Tool requires Microsoft®.Net
and FTDI drivers to be installed for it to work properly. The installation software will
check if those are installed and if not, it will install them. The pre-requisite installation wizard will only be activated if the installation software cannot find previously
installed software or if the previous prerequisites are out of date. Follow the instructions on the installation software wizard.
Software Installation21
6.3.1 Microsoft®.Net Framework 4.0
Futura Tool requires Microsoft®.Net 4.0 framework. The installation software will
check if the correct version of the framework is installed and if it is not found, the
installation software will provide instructions on how to install it. The framework is
included in the installation software so an active internet connection is not required.
Tick the box when you have read the terms and conditions of the Microsoft® Software, click on “Install” and the installation process will begin. Once the installation is
complete click on “Finish” and Wizard FTDI + 32 Setup should appear, click “Next”.
It is highly recommended that you make sure that the latest .Net 4.0 framework
updates and service packs that Microsoft® provide are installed. Consult the Windows
manual on keeping the operating system and related applications up to date.
6.3.2 FTDI Drivers
The installation software will check if FTDI virtual COM port drivers supplied by
Sartorius Stedim Biotech have been installed and will not continue until they are
installed. No user information is required; simply follow the installation wizard to
install the drivers.
The installation software will add FTDI + 32 application entry on 32-bit Windows and
add FTDI + 64 application entry on 64-bit Windows systems. If it becomes necessary to
uninstall the drivers, find the application entry below in Control Panel > Add or
Remove Programs (or the equivalent) and uninstall that application.
See Windows help for more information on removing applications.
22
Software Installation
FTDI virtual COM port drivers are required in order for Futura Tool to recognize and
be able to connect to a BioPAT ® ViaMass through USB. The drivers supplied as part of
the installation software have been tested to ensure that they work with BioPAT ®
ViaMass hardware. Newer drivers may be available in future from Windows Update
but there is no guarantee that the newer drivers will be as stable and work as well as
the ones supplied.
The Setup Wizard will install Futura Tool on your PC once you have clicked “Next”,
accepted the terms and conditions and checked you have the right folder for
installation again. This will take several minutes, click on “Finish” to complete the
Futura Tool Setup Wizard. You may be prompted to restart your computer.
You must unplug all BioPAT ® ViaMass Connect Hubs from the computer
before installing Futura Tool.
Software Installation23
7. BioPAT ® ViaMass System Components
The BioPAT ® ViaMass is designed for use with Sartorius Stedim Biotech’s range
of disposable probes that are suited to be used with Flexsafe RM or Flexsafe STR.
BioPAT ® ViaMass comprises of a primary RFI shielded copolymer enclosure for the
main electronics and a second copolymer enclosure for the probe connector on a 1 m
umbilical cable, both enclosures being RFI shielded and rated to IP41. The ‘front end’
probe connector enclosure is a lightweight design to minimize stress on the probe
and bag.
Note that, as the BioPAT ® ViaMass is designed for use with disposable probes, BioPAT ®
ViaMass signal simulators must be used for system checks as the standard signal
simulators will not fit. See section “5 System Check”, page 17 for further details on
using signal simulators.
There is no Clean Pulse function present on the BioPAT ® ViaMass single use
system.
Care must be taken when handling the BioPAT ® ViaMass. The 1 m link cable
between the two enclosures should not be bent, kinked, coiled tightly or
repeatedly flexed as it may weaken the cable and cause it to fail. Nor should
any other BioPAT ® ViaMass cables be excessively bent or kinked. If placed into
a rocking system it is recommended that you use the provided holder for the
electronics so the movements have an effect on the replaceable extension cable.
7.1 BioPAT ® ViaMass Care and Maintenance
This section describes how to care for and maintain the BioPAT ® ViaMass system.
24
BioPAT ® ViaMass System Components
7.2 How to Store Your BioPAT ® ViaMass
If you need to store your BioPAT ® ViaMass for any significant time, place it in its
original protective packaging and store it in a cool, dry, dark place.
Do not drop any of the BioPAT ® ViaMass components, as an impact onto a hard
surface could damage them.
Keep all parts away from contamination.
7.3 How to Clean Your BioPAT ® ViaMass
Ensure items are completely disconnected before cleaning. It is very important
to disconnect all cables in order to reduce the risk of electric shock.
Use a soft slightly damp cloth to carefully clean any parts. Do not use any type of
abrasive pad, alkaline cleaner, scouring powder, solvent or other cleaning agents.
These may damage the enclosures.
Please refer to section “7.6 BioPAT® ViaMass Cables”, page 27 for cable care instructions.
7.4 Firmware Upgrades
Below are instructions to update the firmware in your BioPAT ® ViaMass. You should
only update the firmware in your BioPAT ® ViaMass if you have been instructed to do
so by Sartorius Stedim Biotech or your authorized distributor.
7.4.1 Prerequisites
1. New firmware file supplied by Sartorius Stedim Biotech or your authorised
distributor.
2. A PC with Futura Tool installed (see section “6.1 Futura Tool”, page 21, for installation instructions) and at least one free USB 2.0 port.
3. A BioPAT ® ViaMass Connect Hub 1 connected to the above computer.
4. The BioPAT ® ViaMass in need of new firmware.
5. Futura Bootloader version 234207p10 or higher (see Firmware Upgrade
Instructions below).
If the Futura Bootloader version is less than p10 you will need to return your BioPAT ®
ViaMass to Sartorius Stedim Biotech to perform the firmware upgrade.
7.4.2 Firmware Upgrade Instructions
1. Connect the BioPAT ® ViaMass you wish to upgrade to your computer via the
BioPAT ® ViaMass Connect Hub 1. You may have to wait for the hardware drivers to
be installed if this is the first time connecting the equipment to your PC.
2. Run the Futura Tool software. On the “Connect to Futura” dialog, choose search
and wait for the computer to find your connected BioPAT ® ViaMass. Select and
connect to it. Futura Tool will show you information about the BioPAT ® ViaMass.
BioPAT ® ViaMass System Components25
3. Choose the “Futura Updates” tab and then click the “Futura Firmware” button. This
will show you the Firmware currently inside the BioPAT ® ViaMass and the controls
needed to update it.
4. Check that the Boot Loader Version ends in p10 or higher. If the version number is
lower than p10, disregard the remainder of these instructions as you will need to
return the BioPAT ® ViaMass to Sartorius Stedim Biotech to perform the firmware
upgrade.
5. Click “Browse” and carefully choose the new firmware file (file extension .bin).
Then click “Update” and wait for the process to finish.
6. Close Futura Tool. Then unplug your BioPAT ® ViaMass from the hub, wait a few
seconds and plug it back in again. This power cycles the BioPAT ® ViaMass.
7. Start Futura Tool again and connect to the BioPAT ® ViaMass. The Firmware section
will show you that the BioPAT ® ViaMass has the new version inside it.
If you require assistance, please contact Sartorius Stedim Biotech or your authorized
distributor.
7.5 Earthing the BioPAT ® ViaMass
Electro-magnetic interference from nearby electrical machinery can manifest as
noise in the BioPAT ® ViaMass’ readings. The Capacitance measurement is especially
susceptible to this. In order to minimize measurement error, the BioPAT ® ViaMass’
casing has to be securely bonded to the dedicated plant ground using the supplied
earth strap cable.
The BioPAT ® ViaMass electronics and probes should be located as far away as possible
from any machinery likely to cause electrical interference, such as large motors.
The graph below shows the difference between a poorly and well earthed system:
As seen in the graph above, the Capacitance reading fluctuates by up to ±6 pF/cm
when the earth strap is removed in an electrically noisy environment, even though
the system has high filtering on it. The amount of fluctuation will vary depending on
the environment.
26
BioPAT ® ViaMass System Components
7.6 BioPAT® ViaMass Cables
Care must be taken when handling the BioPAT® ViaMass units. The 1m link cable
between the two enclosures should not be bent, kinked, coiled tightly or repeatedly flexed as it may weaken the cable and cause it to fail. If placed into a rocking system it is recommended that both enclosures are placed on the platform so
that a replaceable extension cable takes any repetitive flexing that may occur.
Please follow good layout practice and avoid tight bends in the cable, especially near
the BioPAT® ViaMass enclosure and connectors. During routine disconnection of the
BioPAT® ViaMass from the probe ensure that the BioPAT® ViaMass is stored in such a
way that the cables are not stretched or folded in any way.
If required, create a generous coil for the cabling.
The BioPAT® ViaMass cables must NEVER be cut. The connectors must not be removed.
The cables should be protected from mechanical damage. The connectors should be
protected from excessive water and corrosives. Sartorius cables should never be
excessively bent or kinked.
As a precaution, the BioPAT® ViaMass cabling should avoid close parallel proximity to
cables associated with electronic variable speed motor controllers or inverters. While
the BioPAT® ViaMass is immune to permissible levels of electrical interference, some
inverter installations radiate rather more than they should.
It is good practice to regularly check for cable integrity using the Signal Simulator for
capacitance and conductivity. If you see any significant deviation from the norm, you
should disconnect the BioPAT® ViaMass from your system completely and request
assistance from your distributor or Sartorius.
If, during normal operation, with the probe fully immersed in media and at operational temperature, any of the following issues are observed, immediately disconnect
the BioPAT® ViaMass from the probe and investigate:
−− The Conductivity is at a significantly different value than expected.
−− Any signs of galvanic corrosion are visible on the probe body or close to it.
Due to the electronic nature of the dielectrics measurement, it is possible to have a
fault condition where a small DC current is present on an electrode. This manifests
itself as bubbles forming on the electrode when a Clean Pulse is not in progress. In
the unlikely event that you see bubbles under these conditions, completely disconnect the BioPAT® ViaMass from your system immediately to prevent any possible
damage and request assistance from your distributor or Sartorius.
BioPAT ® ViaMass System Components27
8. Measurement Options
8.1 Measurement Modes – Description
The BioPAT ® ViaMass can be used with a variety of different cell suspensions and
Sartorius provides optimized preset measuring modes for common solutions.
A custom measurement mode is also provided for tailoring the BioPAT ® ViaMass to
your exact requirements.
8.1.1 Measurement Modes Available
This section describes in further detail what happens inside the BioPAT ® ViaMass
when each mode is being used.
Cells come in all shapes and sizes and respond differently when exposed to radio
frequencies. However, they always fit a model around the beta dispersion, explained
in the theory section of this manual (see Chapter “11 Detailed Theory of Operation”,
page 49).
There is also a set of filtering options that the BioPAT ® ViaMass system can be
configured to use. Some will suit highly aerated vessels; others suit very thick
suspensions, etc.
If you want to select your own settings, you can choose custom mode. There is
also a Signal Simulator mode which is used to test your BioPAT ® ViaMass system with
the supplied Signal Simulators. The operating modes are described below.
8.1.1.1 Cell Culture Mode
Cell Culture mode is optimized for larger cells such as animal or plant cells,
for example CHO cultivation with a diameter of approximately 10 micrometers.
All metal-liquid boundary probes (such as BioPAT ® ViaMass probes) are affected
by an unwanted electrochemical effect at low frequencies called “Polarization”.
Therefore this mode uses a technology called “Polarization Correction” (see section
“8.5 Polarization Correction”, page 36) for technical details regarding this
technology).
In this mode, the biomass is measured at 0.6 MHz with polarization correction.
Noise filtering is at a medium level of 30 in this mode by default; in some circumstances you can manually increase or reduce it as required.
Typically 0.1 pF/cm resolution on the instrument represents 105 Cells/ml.
8.1.1.2 Bacterial Mode
Bacterial Mode is optimized for bacteria cells (e.g. E.Coli which is around 3 micrometers in length).
In this mode, the biomass is measured in dual frequency at ~1.12 MHz and then
~15 MHz. Most cells are not polarized at 15 MHz so the 15 MHz reading is used as a
form of auto zero and subtracted from the 1.12 MHz figure. Therefore, the capacitance of background matter is automatically subtracted from the signal.
Noise filtering is at a high level of 90 in this mode by default, although in some
circumstances you can manually increase it or reduce it as required. 0.1 pF/cm
resolution on the instrument will typically represent 109 Cells/ml, or 2 grams per liter.
28
Measurement Options
8.1.1.3 Microbial Mode
Microbial Mode is optimized for microbe cells, for example yeasts and fungi, with
a typical cell diameter of around 6 micrometers.
In this mode the biomass is measured at ~0.6 MHz and then ~15 MHz. Cells like these
do not give much biomass reading at 15 MHz so the 15 MHz reading is used as a form
of auto zero and subtracted from the 0.6 MHz figure. Therefore, the capacitance of
background matter is automatically subtracted from the signal.
Noise filtering is at a high level of 90 in this mode by default, although in some
circumstances you can manually increase or reduce it as required.
All metal-liquid boundary probes (such as BioPAT ® ViaMass probes) are affected
by an unwanted electrochemical effect at low frequencies called “Polarization”.
Therefore this mode uses a technology called “Polarization Correction” (see section
“8.5 Polarization Correction”, page 36) for technical details regarding this
technology).
0.1 pF/cm resolution on the instrument typically represents 106 Cells/ml, or 0.5 grams
per litre.
8.1.1.4 Custom Mode
The default settings for Custom mode are: single frequency measurement at 1 MHz,
no polarization correction, no dual frequency and low filtering.
You can adjust any settings in this mode. It is mainly used for experimentation and
with guidance from Sartorius support staff.
8.1.1.5 Signal Simulator Mode
The signal simulator mode is only available in the Futura Tool software. For checking
the electronics with signal simulators during a DCU integration, please read section“5.2 System Check with DCU Integration”, page 18.
This mode should be used when you are checking the operation of your BioPAT ®
ViaMass system with a BioPAT ® ViaMass Signal Simulator.
The Signal Simulator measurements will only be valid when it is measured in this
mode. You cannot change any settings in this mode. Any zero that may be available is
temporarily bypassed and if possible the measurement speed is increased in order to
improve the response time.
8.1.2 Selecting a Measurement Mode
Modes can be selected using Futura Tool or a Sartorius control unit. Modes set using
Futura Tool or a control unit are stored in the BioPAT ® ViaMass and are used when
calculating the measurements for Modbus and Current Loop outputs. This allows two
different sets of measurement modes to be configured: one for the Modbus or
Current Loop outputs for PLC control and the other for monitoring of the system
using Futura Tool software.
Measurement Options29
8.1.2.1 Futura Tool
Start the Futura Tool software, connect to the BioPAT ® ViaMass-probe combination
desired in the usual manner and select the “Operating Modes” tab.
In order to change the Measurement Mode, the BioPAT ® ViaMass must be configured
to “Futura Connect” Hardware Mode. If it is not already, configure the BioPAT ®
ViaMass to this Hardware Mode (see section “9.3.1 Hardware Settings”, page 39 for
details ).
A Measurement Settings pane (highlighted in the red box) will now be displayed in
the “Operating Modes” tab:
Next, click on the “Edit Measurement Mode” button to display the Measurement
Modes dialog. You should see something like this:
Use the “Measurement Mode” drop-down list to select from the preset Measurement
Modes, Signal Simulator Mode or Custom Mode. The Measuring Frequency, Dual
Frequency, Polarization Correction and Filtering options will be initialized and
editable according to the chosen Measurement Mode (see section “8.1.1 Measurement Modes Available”, page 28).
These settings will be stored in the BioPAT ® ViaMass itself and used for both Modbus
and Current Loop output measurements when connected to a BioPAT ® ViaMass
Connect Hub (Current Loops only).
30
Measurement Options
8.1.2.2 Selecting the Measurement Mode via DCU
In the following, you will find recommendations for configuring the system
parameters as pre-configured settings. You can also adapt the system parameters to
your application via the Customer Mode.
Once you have created the connection to your BioPAT ® ViaMass and the DCU is ready
for operation, switch to the calibration mode.
tt
Press the touch button “CAP-#” in the “Calibration” menu.
The submenu “ViaMass CAP-#” opens.
tt
Press the touch button “Measure” in the submenu “ViaMass CAP-#”.
tt
Press the touch button “Measurement Mode” in the submenu “CAP-# Mode”.
The submenu “Mode” for selecting measurement modes opens (see section“8.1.1
Measurement Modes Available”, page 28).
tt
Select the measurement mode that suits your application.
Measurement Options31
Cell Culture Mode
The submenu “Cell Culture” Mode displays the configurations for the cell culture
mode.
To use the BioPAT ® ViaMass in a BIOSTAT ® RM, you must activate the rocker filter:
tt
Touch the button “Rocker Filter“.
The field now displays the value “ON”.
tt
Confirm these changes with “ok“.
Bacterial Mode
The submenu “Bacterial Mode” displays the configurations for the bacterial mode.
To use the BioPAT ® ViaMass in a BIOSTAT ® RM, you must activate the rocker filter:
tt
Touch the button “Rocker Filter“.
The field now displays the value “ON”.
tt
Confirm these changes with “ok“.
Microbial Mode
The submenu “Microbial Mode” displays the configurations for the microbial mode.
To use the BioPAT ® ViaMass in a BIOSTAT ® RM, you must activate the rocker filter:
tt
Touch the button “Rocker Filter“.
The field now displays the value “ON”.
tt
Confirm these changes with “ok“.
32
Measurement Options
Custom Mode
Only use the Custom Mode if you have received training from Sartorius or under the
supervision of a Sartorius expert. Wrong configuration of Custom Mode parameters
can lead to erroneous or imprecise measurements. Under normal circumstances, one
of the three modes is used for cultivation or fermentation.
The Custom Mode can by switching back to one of the factory-set modes, in case one
of these has been activated inadvertently.
The submenu “Custom Mode” displays the configurations for the user-defined mode.
To use the BioPAT ® ViaMass in a BIOSTAT ® RM, you must activate the rocker filter:
tt
Touch the button “Rocker Filter“.
The field now displays the value “ON”.
tt
Confirm these changes with “ok“.
8.2 Zeroing
The Zero function simply “tares” the capacitance output of the instrument. For example,
if you have a signal that is 7 pF/cm and, during the course of the experiment, it rises
to 12 pF/cm, then the total change is 5 pF/cm. This 5 pF/cm change equates to the
viable biomass measurement.
The Zero function allows you to remove the 7 pF/cm offset.
So if you zero the instrument in the initial 7 pF/cm solution, the output will rise from
0 pF/cm to 5 pF/cm during the course of the experiment.
The BioPAT ® ViaMass has a built-in Zero function which can be triggered over Modbus
or in the Futura Tool.
8.2.1 Zeroing Using Futura Tool
−− Connect to your BioPAT ® ViaMass using Futura Tool in the usual manner
−− Navigate to the “Operating Modes” tab
−− Press the “Set Zero” button in the “Clean and Zero Functions” section of the screen
Measurement Options33
8.2.2 Zeroing Readings on the DCU
tt
Press the touch button “CAP-#“ in the “Calibration“ menu.
The submenu “ViaMass CAP-#“ opens.
tt
Press the touch button “Measure“ in the submenu “ViaMass CAP-#“.
tt
Press the touch button “Zero Now“ in the submenu “CAP-# Mode“.
The submenu “ViaMass CAP-#” for zeroing the BioPAT ® ViaMass electronics appears.
tt
Press the “Set Zero“ button.
Next, the field for the capacitance value “Cap“ shows the zero value.
The “Zero“ field displays the current offset, also called the deduction value.
This offset is the value that is deducted from the respectively running measurement.
tt
Pressing the “Clear Zero“ button deletes the offset value and the current offset
value of the system is displayed in the field “Cap“.
Unlike when zeroing the Futura Tool software, the DCU remembers the offset value
so that the last pre-zeroing status is not lost.
8.3 Converting the Capacitance Value to Cells per Milliliter (C/ml)
tt
Press the touch button “CAP-#“ in the “Calibration“ menu.
The submenu “ViaMass CAP-#“ opens.
tt
Press the touch button “CPM Factor“ in the submenu “ViaMass CAP-#“.
The submenu for entering the conversion factor opens.
34
Measurement Options
tt
Enter the conversion factor in the input field “CPM Factor”.
The conversion factor is used to convert the measured capacitance value into cells per
milliliter (C/ml). To determine this conversion factor, you must draw one sample in the
exponential phase of the process to be monitored and record the related capacitance
value. The conversion factor can be determined using the value determined by the
laboratory in cells per milliliter and the recorded capacitance values.
The conversion factor “CPM Factor” is calculated with the help of the follwowing
equation:
CCell density
Cap-1
Reference value for cell density
Capacity value from BioPAT ®ViaMass
The biomass value “BMass” calculated using the CPM factor only correlates with the
reference value for the density of living cell during the exponential phase. In the stationary phase, the capacitance value continues to rise because the volume of living
cellular keeps growing, although the cell density no longer does. As a result of this,
the reference value for cell density no longer agrees with the biomass value. The
BioPAT ® ViaMass system determines the living cellular volume which only correlates
with the cell density in the exponential phase.
8.4 Settings for Alarm Limits
tt
Press the touch button “CAP-#“ in the “Main“ menu.
The submenu “Alarm CAP-#“ opens.
tt
Set the upper and lower alarm limit according to your application.
tt
Switch the alarm for the capacitance value on or off.
Measurement Options35
8.5 Polarization Correction
This correction is used to correct an electrochemical effect that occurs with all
metal-liquid boundary probes. This affects low frequency capacitance readings. The
capacitance versus frequency curve looks similar to a 1/+ 2 curve, almost asymptotic
at low frequency, settling to a horizontal straight line at high frequency.
In order to compensate for this, two additional biomass measurements are made
at low frequencies and from this, the shape of the curve can be estimated. The offset
added by this effect is then subtracted from the actual biomass measurement.
This removes the effect of changing polarization on the biomass signal.
8.6 Filters
BioPAT ® ViaMass includes the facility to output measurements based on the mean
average of a number of readings. This filter is accessible from Futura Tool software
and over Modbus from a control unit.
A filter value of 0 or 1 equates to no filtering, while a value of 180 (maximum) takes
the mean average of 180 readings.
Once the specified number of readings has been taken, the upper 5 % and lower
5 % magnitude readings are removed before the mean average is taken. This creates
an suppression of interfering signals.
8.6.1 Rocking Motion Monitoring
The rocking motion of the rocker causes signal fluctuations of the measurement
signal due to the variation of the liquid level over the sensor in the Flexsafe RM bag.
For this reason, appropriate optimization filters are implemented in the system’s
electronics including different rocking motion parameters. Using these filters enables
the biomass evolution monitoring continuously in rocking motion cell cultivation.
When in Rocker Bag Mode (Flexsafe RM Bag), the BioPAT ® ViaMass filters out the
variation in readings caused by the probe electrodes becoming uncovered due to the
bag rocking back and forth. Only use this filter if you are measuring in a situation
where the liquid level above the electrodes varies and is 3cm or less.
36
Measurement Options
9. Using Futura Tool
9.1 Connecting to BioPAT ® ViaMass
First plug in your BioPAT ® ViaMass to a BioPAT ® ViaMass Connect Hub and connect
this to your PC via USB. Click on the ‘Futura Tool’ icon on the desktop or launch the
program from the start menu: Start > Programs > Aber Instruments > FuturaTool >
FuturaTool.
The Connection screen is displayed automatically when Futura Tool is launched.
Use the Screen to connect to any single BioPAT ® ViaMass that is attached to your
computer. The channels on your BioPAT ® ViaMass Connect Hub will appear as
COM ports in Microsoft® Windows.
9.1.1 “I know which COM Port my BioPAT ® ViaMass is connected to”
If you already know which COM Port you have connected your BioPAT ® ViaMass to,
you can save time by selecting the port in the “Quick COM Port Selection” list. If you
connect your BioPAT ® ViaMass and | or hub to your computer after you have launched
this screen, click “Refresh Port List” for new COM Ports to be listed in the “Quick COM
Port Selection” list. After a selection is made, the “Connect” button becomes active;
click on it to connect to the BioPAT ® ViaMass.
9.1.2 “I am not sure which COM Port my BioPAT ® ViaMass is connected to”
The search facility can be used to find all BioPAT ® ViaMass connected to the PC but
not in use by other applications. The Connection screen above shows an example of
a completed search on a PC that had two BioPAT ® ViaMass devices connected through
a BioPAT ® ViaMass Connect Hub. The search facility’s speed varies depending on the
number of COM Ports available on the PC. A computer with more COM Ports (that are
connected but not in active use) will take longer to complete the search. Click on the
BioPAT ® ViaMass you want to use then click on the “Connect” button. Futura Tool will
only work with one BioPAT ® ViaMass at a time. After successful connection, the other
BioPAT ® ViaMass found in the search will be released for use by other applications.
Using Futura Tool37
9.1.3 Futura Tool Menu
The “Futura” menu has two entries. The first is “Disconnect | Connect” which enables
connection and disconnection of a single BioPAT ® ViaMass. The second item is “Futura
Reset” which reinitializes the connected BioPAT ® ViaMass by forcing the firmware to
reboot without physically disconnecting the BioPAT ® ViaMass.
9.1.4 Futura Status Tab
When a BioPAT ® ViaMass has been successfully connected to Futura Tool, the
software will display the “Futura Status” tab. Other accessible tabs are: “Probe
Status”, “Operating Modes”, “Quick Readings”, “Advanced Diagnostics” and “Futura
Updates”, all of which are explained later in further detail. The “Futura Status”
tab displays details about the currently connected BioPAT ® ViaMass, including the
Serial Number and Part Number of the BioPAT ® ViaMass, what type of BioPAT ®
ViaMass it is, the date it was made, the minimum and maximum temperatures that
the BioPAT ® ViaMass has internally experienced so far (your BioPAT ® ViaMass can run
very hot so do not be alarmed). This tab also displays other details which provide
information regarding the connected BioPAT ® ViaMass’ state and history.
9.2 Probe Status Tab
The “Probe Status” tab is very similar to the Futura Status but looks at information
taken from the probe instead. The only extra information shown is the number of
probe leak detections and calibration details.
38
Using Futura Tool
Each probe has an internal moisture sensor. If this senses any moisture inside the
probe casing, the Number of Probe Leakage Detections value will increment. If it
shows any value other than 0, the probe’s integrity may be compromised and should
be checked. Contact your distributor or Sartorius Stedim Biotech for advice.
9.3 Operating Modes Tab
The “Operating Modes” Tab is the main area for configuring your BioPAT ® ViaMass.
It is split into four sections: “Hardware Settings”, “Measurement Settings”, “Clean and
Zero Functions” (Futura Connect Hardware Mode only) and “Live Readings”.
9.3.1 Hardware Settings
The Hardware Settings area displays the current hardware mode of the connected
BioPAT ® ViaMass and any associated settings. Hardware modes available are:
−− USB Only Mode: Used when connected to a BioPAT ® ViaMass Hub when not using
the Modbus interface or Current Loop outputs.
−− Futura Connect Mode: Used when connecting to a Futura Connect when using
the Modbus interface and | or Current Loop outputs
−− Rocker Bag Mode: Used when connecting a BioPAT ® ViaMass and using
a rocker bag
To change hardware modes, click on the “Edit Hardware Mode” button in the Hardware Settings pane. This will bring up the Hardware Modes screen. The contents of
this screen will vary depending on the currently selected Hardware Mode and is
described in the following sections.
9.3.1.1 USB Only Mode
If selecting this mode, no additional settings are required.
Click the “Save Changes” button to confirm your selection.
Using Futura Tool39
Your selection will be displayed in the “Operating Modes” tab in the main Futura Tool.
The Measurements Settings will no longer be visible as the only way to obtain readings
from the BioPAT ® ViaMass is now through Futura Tool software which feature
software-based Measurement Settings, such “Quick Readings” tab in Futura Tool.
9.3.1.2 Futura Connect Mode
If selecting this mode, you may need to enter Current Loop and | or Modbus settings,
depending on your application.
To use Current Loops, enter the capacitance and conductivity values that will correspond to currents of 4 mA and 20 mA in the Current Loop Settings area. The current
through the Current Loop outputs will then vary linearly in proportion to the
measured capacitance and conductivity values.
40
Using Futura Tool
The Advanced Current Loop Settings will enable you to choose whether you wish to
allow currents less than 4 mA or greater than 20 mA. This will depend on whether the
control system reading the Current Loops is tolerant to currents outside of these
limits.
The Offset Trim and Gain Trim for both Capacitance and Conductivity are also
configurable in the Advanced Current Loop Settings area. These allow you to alter the
offset and gain of the Current Loop outputs in relation to the actual capacitance and
conductivity values in a ‘y=mx + c’ fashion, m being gain and c being the offset.
This is a useful feature if trying to adjust the outputs of two or more BioPAT ® ViaMass
to match one another. Although, in practice the Current Loop outputs of two
identical BioPAT ® ViaMass are typically within two decimal places of each other with
no correction applied.
To use the Modbus interface, enter the baud rate and parity settings that your system
controller uses. Set the Slave address to an unallocated address number.
Each BioPAT ® ViaMass must use a different Modbus address. If address conflicts
occur, the Futura Connect status lights of the conflicting channels will turn red.
The Biomass Factor is a scaling factor that is applied to the capacitance reading to
calculate a viable biomass figure. This viable biomass reading is calculated within the
BioPAT ® ViaMass and is available over Modbus and Futura Tool software.
Using Futura Tool41
Click the “Save Changes” button to confirm your selection. A summary of your
settings will be displayed in the “Operating Modes” tab in the main Futura Tool
window.
9.3.1.3 Rocker Bag Mode
The settings for this mode are the same as those available in Futura Connect Mode
(Current Loop, Advanced Current Loop, Modbus and Biomass Factor settings). Please
refer to the Futura Connect Mode section “9.3.1.2 Futura Connect Mode”, page 40.
When in Rocker Bag Mode, the BioPAT ® ViaMass attempts to filter out the variation
in readings caused by the probe electrodes becoming uncovered due to the bag rocking back and forth. Only use this filter if you are measuring in a situation where the
liquid level above the electrodes varies and is 3 cm or less.
9.3.2 Measurement Settings
If available in the selected hardware mode, the Measurement Settings pane in
the “Operating Modes” tab allows you to select a measurement mode based on your
application.
42
Using Futura Tool
To change the Measurement Mode used, press the “Edit Measurement Mode” button
in the Measurement Settings area of the “Operating Modes” tab in the main Futura
Tool window. You should now see the following screen:
The available measurement modes are:
−− Cell culture
−− Bacterial
−− Microbial
−− Signal simulator
−− Custom
These are described in detail in Chapter “8 Measurement Options”, page 28).
Click the “Save Changes” button to confirm your selection. A summary of your
settings will be displayed in the “Operating Modes” tab in the main Futura Tool
window.
9.3.3 Clean and Zero Functions
This section is only available when in Futura Connect Hardware Mode.
The “Set Zero” button sets the current capacitance value in BioPAT ® ViaMass as the
zero value. “Clear Zero” removes any zero value that was previously set. See section
“8.2 Zeroing”, page 33 for more details on zeroing your BioPAT ® ViaMass.
“Clean Pulse” is not available for the BioPAT ® ViaMass single use sensor.
Using Futura Tool43
9.3.4 Live Readings
The Live Reading panel shows the output of BioPAT ® ViaMass with all Hardware
and Measurement Settings applied. It is a useful tool when tuning Measuring Modes,
problem solving and matching values to a PLC.
To log readings taken with the Live Readings feature, select the data logging interval
using the Log Filter then click the “Start Logging” button in the Log Live Readings
area. This will ask you for a filename to store the readings. Logging will start as soon
as the “Save” button is pressed.
Logging produces a .CSV file with the following format:
Time Stamp, Run Time (Decimal Hours), Biomass, Capacitance (pF/cm), Conductivity
(mS/cm), , , Capacitance Zero Value (pF/cm), Messages, , , Dual Frequency, Polarization
Correction, Filter, Measuring Frequency (KHz), High Frequency (KHz)
It is also possible to recall previously logged data by clicking on the “View Log Data on
Graph” button in the Live Readings pane. Navigate to the previously saved .csv file
and click “Open” in the file dialog to view the data on a graph.
9.4 Quick Readings Tab
This tab enables you to get quick capacitance and conductivity readings from the
BioPAT ® ViaMass. This is typically used for system checking and problem solving and
may be used to generate log files to send to Sartorius Stedim Biotech. Both Single
Frequency and Dual Frequency Modes are supported. The Measurement Settings
stored in the BioPAT ® ViaMass itself (configured in the “Operating Modes” tab above)
are not used.
44
Using Futura Tool
Enable the “Continuous Readings” checkbox to make the application repeat readings
automatically.
Checking the “Enable Logging” checkbox will automatically prompt for a filename
under which to save the readings. Once you have selected a filename, start logging
by pressing the “Get Reading” button. Enable the “Continuous Readings” checkbox
before pressing the “Get Reading” button if you wish to log multiple readings.
Logging produces a .CSV file with the following format:
Time Stamp, Run Time (Decimal Hours), Capacitance (pF/cm), Conductivity (mS/cm),
Measuring Frequency (KHz), , , Dual Frequency, High Frequency (KHz), Capacitance at
Measure Frequency (pF/cm), Capacitance at High Frequency (pF/cm), Conductivity at
High Frequency (mS/cm)
Some fields are not populated depending on the settings used, e.g. High Frequency
is left blank when Dual Frequency is off.
Press the “Stop Timed Reading” button at any point to stop the readings (and logging,
if enabled).
Using Futura Tool45
9.5 Futura Updates Tab
The “Futura Updates” tab facilitates updating the firmware of a connected BioPAT ®
ViaMass. Click the “Futura Firmware” button to activate the update screen. Click the
“Browse” button and carefully select the upgrade file for the BioPAT ® ViaMass then
click “Update”. Futura Tool will then perform the update unaided.
In order to perform a firmware update, the existing Bootloader version must be
234207p10 or higher. If the Futura Bootloader version is less than p10 you will need
to return your Futura to Sartorius Stedim Biotech to perform the firmware upgrade.
Do not unplug the BioPAT ® ViaMass or any other BioPAT ® ViaMass hardware
during the update.
If, for any reason, the update fails, you can try again. A BioPAT ® ViaMass with no
firmware or which has a failed firmware update cannot be used. Before starting, it is
important to ensure that the update file is a valid BioPAT ® ViaMass firmware update.
If Futura Tool is started and connected to a BioPAT ® ViaMass that has no firmware
or has experienced a failed update, it will only display the “Futura Updates” tab.
The BioPAT ® ViaMass can then be updated using valid firmware. If this completes
successfully, the BioPAT ® ViaMass will be usable again; if it does not complete,
contact Sartorius Stedim Biotech for further information.
46
Using Futura Tool
10. Troubleshooting
This chapter covers some technical difficulties that you may encounter while using
your BioPAT ® ViaMass system.
10.1 Noisy or Unexpected Readings
If you are experiencing unusual readings you should try the following:
−− Check probe placement. Readings can be affected by obstructions in the probe’s
field of view.
−− Check the Measurement Options. One of several Measurement Modes may be
selected, depending on the application and cell type being measured. Ensure you
use the correct Measurement Mode (or settings, if using Custom Mode) for your
application. See Chapter “8 Measurement Options”, page 28 for further details.
−− Check that the BioPAT ® ViaMass is correctly earthed. See section “7.5 Earthing the
BioPAT ® ViaMass”, page 26 for further details.
−− Check probe calibration settings. It is possible to create custom probe calibrations
to cancel the effect of obstructions in the probe’s field of view. Check that the
correct calibration is being applied for the equipment being used.
10.2 Noisy Capacitance Readings
A high level of noise on the Capacitance measurement in particular is typical of
a poorly earthed BioPAT ® ViaMass. Check that the BioPAT ® ViaMass casing is properly
and securely earthed using the supplied earth strap (see section “7.5 Earthing the
BioPAT ® ViaMass”, page 26 and that the BioPAT ® ViaMass electronics and probe are
located as far as possible from any large electrical machinery.
10.3 Lid Lock Warning (E10 Error)
The BioPAT ® ViaMass features an anti-tamper feature that will disable the
BioPAT ® ViaMass if the lid is removed. Do not open or disassemble the BioPAT ®
ViaMass. Doing so will invalidate the warranty. There is a risk of electric shock and
there are no user serviceable parts inside.
If this error is observed under normal conditions, please upgrade to the latest
BioPAT ® ViaMass firmware (see section “7.4 Firmware Upgrades”, page 25). If the
problem persists, please contact Sartorius Stedim Biotech or your authorized distributor for assistance.
10.4 BioPAT ® ViaMass Busy (E02 Error)
The BioPAT ® ViaMass does many tasks internally in order to operate correctly.
Occasionally a task is being completed that means a measurement cannot be
completed at this instant. Under these circumstances the BioPAT ® ViaMass
will report that it is busy. The system will usually just deal with this situation and
you will not be aware of it.
It is possible to observe this error under normal conditions, if it does not clear within
a few seconds, please upgrade to the latest BioPAT ® ViaMass firmware (see section
“7.4 Firmware Upgrades”, page 25). If the problem persists, please contact Sartorius
Stedim Biotech or your authorized distributor for assistance.
Troubleshooting47
10.5 BioPAT ® ViaMass Not Recognized by Computer
If you are having difficulty connecting your BioPAT ® ViaMass to Futura tool
software, please check the following:
−− Ensure that the BioPAT ® ViaMass is securely connected to the BioPAT ® ViaMass
Connect Hub
−− Ensure that the BioPAT ® ViaMass Connect Hub is connected to its power
supply and that the mains supply is switched on
−− Ensure that the USB cable is correctly inserted into the BioPAT ® ViaMass Connect
Hub
−− Ensure that the USB cable is correctly inserted into a USB socket on your computer
−− Ensure that the drivers and Futura tool software are correctly installed on your
computer (see Chapter “6 Software Installation”, page 21)
−− Ensure that the probe is securely connected to the BioPAT ® ViaMass electronics
48Troubleshooting
11. Detailed Theory of Operation
The instrument works by measuring the electrical capacitance of the cell suspension
at various radio frequencies. The capacitance is strongly affected by the presence of
viable cells with an intact, electrically insulating outer membrane envelope. Cells with
leaky membranes and other non-cellular solids have a much smaller influence on the
capacitance of the suspension.
The illustrations above show a cell with an intact membrane (viable cells only) and the
BioPAT ® ViaMass’s electric field charging the membrane. The charge on the membrane
is similar to that found on an electrical capacitor and this principle is used to detect
and measure the presence of viable cells.
Provided that some measurement conditions are satisfied (conductivity in the normal
operating range of 3 mS/cm to 40 mS/cm), the BioPAT ® ViaMass gives readings in
proportion to the total volume of intact cells in the sample. The BioPAT ® ViaMass can
be calibrated to translate this into other measurement units such as grams per liter,
cells per ml, spun solids % or PMV.
11.1 The Electrical Properties of Living Systems
If anything is placed between two electrodes, with an alternating voltage applied
to the electrodes, one may characterise the so-called “passive” electrical properties
of the system by two variables: the electrical capacitance C and conductance G.
In SI units, capacitance is measured in farads (F) and conductance in siemens (S).
In biological work the values of interest are usually in the picofarad (pF) and milliSiemens (mS) ranges. The capacitance and conductance of typical ionic solutions are for
practical purposes independent of frequency between DC and ~1 GHz. If the electrodes are plane-parallel plates of area A separated by a distance d, the capacitance
and conductance measured will be a function of both A and d. The intrinsic properties
of interest which characterise the material are its relative permittivity ε’ and its
conductivity σ’, which are related to C and G by:
(1)
(2)
Where (d / A) has the units of cm–1 and is known as the cell constant (K), and ε0 is
known as the permittivity of free space and is equal to the capacitance of a 1 cm
cube containing a vacuum, which by experiment is found to have the value
8.854 + 10–14 F/cm. The units of σ’ are therefore mS/cm whilst ε’ is dimensionless.
The value of ε’ for water at 298 Kelvin is 78.4, so that it may be calculated from
equation (2) that a cell of unit dimensions (therefore K = 1 cm–1) has a capacitance
of some 6.94 pF.
Since the electrode geometry does not change during a fermentation, it is suitable
(for the purposes of estimating cellular biomass with the BioPAT ® ViaMass) to talk in
terms of C and G alone. However, for purposes of generality, what follows will be
described mainly in terms of σ’ and ε’. Of course the electrodes used with your
Detailed Theory of Operation49
BioPAT ® ViaMass are not plane-parallel. Nonetheless they possess an effective cell
constant (or “probe constant”) that may be used to relate the measured C and G to
the actual σ’ and ε’.
In all BioPAT ® ViaMass products, the probe type is recognized automatically and
software ensures that the correct probe constant is applied and readings are always
converted to pF/cm and mS/cm no matter what probe type is plugged in.
11.2 Beta Dispersion
In contrast to those of ionic solutions, the passive electrical properties (“dielectric
properties”) of cell suspensions are strongly frequency-dependent, a phenomenon
known as dielectric dispersion. All biological cells possess what is known as a
b-dispersion of a magnitude which is both pronounced and dependent upon the
amount of cells present. It is the measurement of the magnitude of this b-dispersion
which enables the BioPAT ® ViaMass to distinguish cells from other particulate matter,
aqueous solutions and gas bubbles.
All biological cells consist, in electrical terms, of a poorly conducting lipid membrane
separating a conducting cytoplasmic volume from the conducting extracellular bulk
volume (including any cell wall, if present). The electrical capacitance of this lipid
membrane is an order of 1 to 2 mF/cm2, dependent on the type of cell considered.
As the frequency of measurement is lowered, the electrical field is more efficient at
charging this membrane capacitance. This results in a measured capacitance between
the electrodes increasing greatly as the frequency of measurement is lowered.
Because the current carriers in the cytoplasm and extracellular fluid are ionic and
must reach the cell membrane before they can charge it up, the time taken to do this
is called the time constant (t) and depends on the internal cytoplasmic (s’i) and
external (s’o) conductivities, the (mean) cell radius r (taken across the cytoplasmic
membrane, excluding the cell wall) and the magnitude of the specific membrane
capacitance per unit area Cm:
(3)
After correction for the frequency-independent background permittivity
(or capacitance) of the suspending medium, a graph of ε’ vs. log f (the logarithm of
the measuring frequency in Hz) has the appearance of an inverted sigmoid, with a
strongly frequency-dependent region separating two plateau regions. The following
figure is typical for microbial cell suspensions:
1000
Permittivity
800
600
400
200
0
56
Log Frequency (Hz)
Graph Showing the Beta Dispersion Typical of Microbial Cell Suspensions
50
Detailed Theory of Operation
Measurement of ε’ or C in or near the lower-frequency plateau region therefore
provides a means of estimating the biomass present. The frequency at which this
effect (the b-dispersion) is half completed is known as the characteristic frequency ,
and:
(4)
Typical values of many fermentations have characteristic frequencies near ≈ 1 MHz
for the b-dispersion, as may be discerned from equations (3) and (4) or from the
monograph published in J. Bioelectricity 5, 139-144 (1985).
Some cells (especially Gram-positive bacteria) possess an additional dielectric
dispersion (the so-called a-dispersion), which occurs due to ionic processes in the cell
envelope. However, this dispersion is observed at frequencies lower than that of the
b-dispersion. Whilst this effect is also a function of the biomass content present, the
nature of the cell envelope can change more than the nature of the cytoplasmic
membrane, as a function of physiological state independently of the biomass content.
The frequencies of operation of the BioPAT ® ViaMass are therefore designed to exploit
the b-dispersion alone.
The relative density (mass per unit membrane-enclosed volume) of biological cells is
not thought to be greatly dependent upon physiological status, and since all cells
need an intact cytoplasmic membrane to divide, an operational definition of biomass
as bio-volume is appropriate. The BioPAT ® ViaMass effectively measures biovolume,
i.e. the volume fraction P of the suspension which is enclosed by the cytoplasmic
membrane of the cells.
P is therefore dimensionless, being ml enclosed by the cytoplasmic membrane per
ml of cell suspension. For spherical cells, the relationship between the permittivity ε’L
(at a frequency of measurement low with respect to ƒC) and the volume fraction P is:
(5)
Since r, Cm and ε’inf are constants for a given set of conditions, ε’L (and hence the
measured capacitance C) is linear with P and, after subtraction of the background
ε’inf, is directly proportional to P. At values of P above about 0.2 and up to about
0.5, electronic correction is necessary to maintain linearity. The dielectric increment
measured will also depend upon the mean radii of the cells under study. Typically
yeast cells will produce a capacitance of 3 to 6 times that of an equal number of
bacteria cells. Similarly, animal cells generate a capacitance of 8 to 16 times that of
bacteria cells due to their larger mean radius. For non-spherical cells, the factor 9/4
will differ and the appropriate radius to consider is that of a sphere of equivalent
volume.
Note that, in measuring or calculating the volume fraction, the relevant parameter is
that enclosed by the cytoplasmic membrane. The radius of this is typically 1.1 to 1.5
times less than the microscopically observed cell radius.
The BioPAT ® ViaMass therefore provides the means to:
−− Measure C at chosen frequencies in the range 0.05 – 20 MHz
−− Correct these for the background prior to inoculation or during the fermentation
−− Output the data in a user defined unit like mg/ml after calibration against the
method chosen by the user (e.g. cell dry weight)
Detailed Theory of Operation51
11.3 Conductivity
The energy in the exciting electrical field can only be stored (as C) or dissipated (as G).
For fundamental reasons therefore, any increase in C must be accompanied by a
decrease in G. The measuring principle exploited in the BioPAT ® ViaMass also provides
the user with a measurement of the electrical conductance of the cell suspension and
will be frequency-dependent, increasing with frequency. Because the cells take up a
certain volume fraction, the “low-frequency” conductivity s’L L of the suspension will
be lower than that of the suspending medium (s’o)by an amount that depends upon
the cellular volume fraction P, according to:
(6)
The conductivity of a fermenter medium may not be constant as it depends upon the
uptake, production and excretion of charged metabolites. The conductance signal
itself may provide useful information about the metabolic state of the fermenter, an
area of study that is at present relatively unexplored. Changes in s’o will also affect
the characteristic frequency but, under the conditions used, little effect is likely upon
the value of e’ (for constant biomass) as measured at a suitable constant frequency.
In some situations, using the ‘Dual Frequency’ measurement mode reduces undesirable variation in the derived biomass signal due to ƒC changes.
The BioPAT ® ViaMass will accurately measure capacitance in media with conductivity
up to 40 mS/cm. Values up to 80 mS/cm require a different probe (also providing up
to 800 pF/cm capacitance range) and this can be supplied if required.
52
Detailed Theory of Operation
Sartorius Stedim Biotech GmbH
August-Spindler-Strasse 11
37079 Goettingen
Phone +49.551.308.0
Fax +49.551.308.3289
www.sartorius-stedim.com
Copyright by
Sartorius Stedim Biotech GmbH,
Goettingen, Germany.
No part of this publication may be
reprinted or translated in any form or
by any means without prior written
permission from Sartorius.
All rights reserved by Sartorius in
accordance with copyright law.
The information and figures contained
in these instructions correspond to the
version date specified below.
Sartorius reserves the right to make
changes to the technology, features,
specifications, and design of the
equipment without notice.
Date:
October 2014,
Sartorius Stedim Biotech GmbH,
Goettingen, Germany
Printed in the EU on paper bleached
without chlorine. | W
Publication No.: SBI6015-e141001