1
User Manual
1.
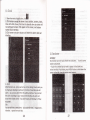
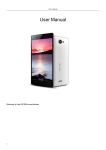
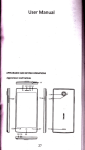
Appearance and Keypad 0perations
a Press this button to return
icatiof"or interface- |
a Press it to open recently
home
"fifi
fro,
"ry
.ppli""tt*
a
Press it to start the menu, which utfm
to perform actions in the current interface or
options' menu.
o Press it to return to tG
o*l*rlils-E*-
or to close dialog box . options,
notlfication panel or the
a
Press
it to open
rhe
ph;;-: *
menu.
th"n
)^
could choose to lock the screen. turn off the
or set it to the silent
O Press
a
Press
mode
it to increase thwnl,rr.
it to turn the phone to vibration
mode
down
P-Serson
front
camera
from the silent 0ode
o Press it to decrease the volume.
o Cover it, and then the phone' s backlight
will
turn off
a Entering the cmera interface, switched to
the front cilera can photo yourself.
'f*l,*ll rl*$e
Ur&
d*ei*&
airr:
$irt*re t!*
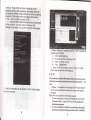
2.
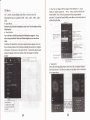
Using Memory Card as U Disk
r*al;:*t*6e;,,
atp€*r$* lia
dcdsfl6bthe ptm! msmyerd tom
themputer, )urstuldstmnuyerdau&kfirst
f
)or Mrttoend m6iq fidu6
right*x"
SetrenDrycrd6 u dlsk
1) ConrectdEphtretottEmprErwihUsBeHe.Ilerctifiotionionwill
appear in the status
bq
2) Use USB mobile transmission line will connected to the
computer
3) lntherctifictimpareltqJdlL.6BbmEH, thentoudr "OpentheUSB
1) cell phone connections media equipment (MTP)
2) In the Settings, developers in closed USB debugging
options.
3 ) Use USB mobile transmission line will connected to the
computer
In the notification panel, the choice of "media
equipment (MTP)" connection mode, can be in the
4)
card
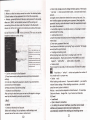
. Uninstall the U Disk from computer
The Methods as the same as connection, see the following
picture:
ru
5
PC
for SD
.
Notice: If you in the cell phone connections to the
computer playing media equipment, the mobile phone
will
not be abte to.identiry memory CARDS. you will
not be able to
usesome.of the mobile phone applications, like camera.
I he phone connection camera (pTp)
Using the USB mobile transmission line will connected
to the computer. you don,t have to shut down
USB
debugging, see below. Only under the ."r"ru ui"*
irug",
.
1)
.
Notice: different PC operating system to how to operate to
normal use the U disk.
1) WINT Can directly use
2) XP update windows media player to 11
3 ) lnstall wpdmtp.inf driver
4) Vista Unconfirmed
. Notice :On the PC operation assistant tool such as mobile
phone, Must be open the USB debugging.
3.
WI-FI
Wi-Fi
2
After the connection can be directly in the pC check images
captured on camera.
poidoafaro3&ftet(m[4) cngeofwireis retworkffi.
f ]ou
re
ellphoeto@nrEtwifi,loush@ldmrEttothewirelsaffipointor
ihot
spoEl.
. Notices: The availabilityand coverageof Wi-Fi signal depend
on the number, infrastructure and other objects penetrated by
the signal.
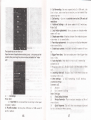
Open Wi-fi and to connect to the wireless network
1) Press home>menu, then touch settings>wifi and internet
2) Selecttrewi-fi bu, toopenWi-Fi. phsewillauurmatiGlv$nfor
Mihbhwirelsnehrcd6
3) TordlWi-Fisttings.Thena listof Wi-Fi netrcrkwill*rwthefrrrnded
network mme and
rurityrttirgs.
(open
netmrkorwEp. \,VpAAilpA2
wittpaMd),florimHetterct'6etim in
.
boxwillstrwthis icon ( EB)whs open MilaHe wirels retrcrkfounded.
4) Touch one ofthe WFFi choices to connect the network.
When you choose open network, phone will connect to it
automatically. lf you choose WEP. WPA,/WPA2 with paSsword,
you should type the password first, then touch to connect it
Notices, when the phone
is connected
network,nestatsburvillslwdrisWfFi'tr
*mlstmgttEn
(the
infornation and
lP
numbsof
Wr+i
add6
displaythe name of
f you
W'FFisnir$,Thestahs
fit
baE).f
toud
to the wireless
lI),andtheappuimate
oreded netrcrk, will
the
retmlk, statut speed,
Mntto deletethewirehs suings,
sigml, slleng0t,
plretord "rcterud'6
srity
in the
rLtt
to perfom additioml
r
step6 to
onrEct WrFl networls.
Notie:
Udslou
drc nottoffifenetmrkwih
pa$imrd, cdEMis,thereis
rc
Hnterthe @rcponding paMrd when rexttireonr€ctirEtothe
p@iosv eEypH wirels rehffik W-tsFiwillsrch automati6lv, that !s, phore
need to
mnet\ #Fi network.
ConnecttootherwrFi netrcric
1) lntEinterheof wirele$and netrcrk,touchWi-Fi sttings.Thefoundedwi-Fi
retrcrlG willshw on the Wi-Firetrc* lin
2) Tordrotherwi-Fi netrcrlc,andthen\pu@n@ntrttothisrehffik
l,totic6: in addition, you can surf the internet via GPRS. We default
n€€dn'tto perfom additimal stepsto
.
.
that the GPRS in SlMl is opened after started, users can select
manually,thespecificlocation is'!settings>wirelessand
internet>dataconnection", touch "slM1. slM2. nodata
connection . when lhe dot turns green, it's already opened.
4.
Bluetooth
Tum
m Blueboth tr9tthe phm en
be
detected
1) Prs horemnqthetildrettirBs.
2) Toudwirele$andintemet,thendreBlu€toothbqto@ntheBhMi
.
function.Afterslarted,thesbtEbuwillstwthisi-n l).rora, "=nto.
dqics" theitsErbtomnforalldwkmwfiin arge.
3) Touch Bluetooth settings, all the devices founded will display in
the list under the icon,
( select the box "can be detected", set it to be detected, the other
Bluetooth devices will be able to find the phone. )
important: the maximum detectinBtime ofthe phone is 2 minutes.
. Pairing and connection of Bluetooth headset
1) Press home>menu, then touch settings.
2)Touch wireless and internet>Bluetooth settings, then select
Bluetooth box, then your phone will scan for the Bluetooth devices
within range ,and show the founded devices in the Iist under the
Notices:
Unls\pudlrenottoerethe retworkottrwis,fEreisrcnedto
Hnterthe (repondrB paMrd when nqttire oonrElingtothe pBio6t
eEypH wirels netrcdc Wi-Fiwillsr$
autormtkalty, that
b, ptrcne
needn't
icon.
Tips:
a. lf the list can'tfind yourequipment, touch scanning equipmentto
r
re-scan it.
b. Make sure that the devices wanted are under the detected mode
3) Touch headset in the equipment list to finish the connection.
Noticesr generally Bluetooth devices need password to be paired,
often use l0ooo.l as the default password.4)The pairing and
.
connecting status will show under the headset in the Bluetooth
devices list. When the headset connected to your phone, the status
(!)
.""n. .onnected. Then you can use the
box will show this icon
headset to make or receive callings.
a. Select mail, Google account setting interface appears. Then touch
'next step' > create account>enter name, last name and e-mail
account.
b. Google servers determine whether the name can be used, if so,
new interface appears prompting enter password, then judge the
password' securit, users who doesn't meet the requirements need
to re-enter the password.
c. Successfully register a new Gmail account, a messenger created
automatically for testing.
Loading mail account
a. Open Gmail skip introduction screen>loading interface appears
>select load
b. Enter name, password then load
E-mail account initialization,prompting "login successful" All Google
.
accounts will be synchronized.
Creating and sending,mails
When creating mails, select mail > creating mails. Enter the
address(recipient). theme and contents Press MENU you could
.
'append'
,
'Add Cc/Bcc'
.
,
select send or discarded.
Receive mails
There is tone for new mails, in the status box will show this button
Ef,
.
Cut
the connection to the Bluetooth
1) Press home>menu>settings>wireless and internet>Bluetooth
settings,
2) ln the list of Bluetooth equipment, touch or tap and hold the
connected hand-free headset.
3) Press and select'tancel the pairing".
Bluetooth proximity sensor
After pairing the two device,you can test out the signal is strong oI
weak by the Bluetooth proximity sensor device
.
s.
hl,
Press Menu
> 'refresh' ,
refresh and update the number of
the unread mails in a proper way.
.
Delete mails
you needto
When loadinga mailaccount, if youwanttodelete
restore factory settings . When loading a second one, you could
press the menu button to delete it,
Noticesr manyfunctions depend on Gmail Account, forexample:
it'
Electronic Market. Google Talk. Sync Contact and Calendar
5.2 Email
Load Email.
.
Mail
5.1Gmail
.
Create an electronic mail account
Select mail> settings. You can activate or edit existing e-mail
accounts as well as create a new e-mail account.
10
a. Open network connection,
b. In setting the account interface, input the correct email
address and password and click next mobile phone
automatically complete the sending and receiving server
t7
Settings. Pop-up mail find frequency. and user Settings
interface, complete Settings, click next.
c. For account creation name, the editor of the law that email
user name, and click next. Complete set, synchronous mailbox.
.
.
Start dialing
Open application's main menu>dial You could choose SlMl or SlM2
to do the dialing.
Create and send Email
When creating mails, select mails > create mails. Enter the
address(recipient). theme and contents. press MENU you could
'append'. 'Add Cc/Bcc', select send or discarded or save as
draft.
.
the Email files
Click on the bottom folder
Check
i
,
folder options
-chlliiLbg{rrah.d
&
lnbox
$
orafis
*
oulbox
S!
sent
.
Dialting
Atthedialing Keboard, enlerthe phone number, andthen clickthe
dialing key, after that,you should choose one SIM card or internet
call. lf needed to call the extension,you could click the ,dial pad,, in
the bottom of the screen to open the interface or press menu key to
select "delay2 seconds". and then enterthe numberof the
extension,
6. Phone
When the icon of internet seruer appears in the screen, you could
dial or receive callings. The slgnal bar on the top right corner show
the strength of network signai (the maximum with 4 signal bars) .
12
The dialup keyboard input number, click Menu can Ip diaFup or
speed dial
. Video call: video call usually refers to the Internet and mobile
Internet based on (3 G Internet) end, through the phone
between the speech of the real-time transmission and image
(user of bust photographs, items, etc.) of a way to
communicate. Only 3 G to support this function. Input a number
13
click video diaFup, each other answers the phone after both can
through camera for video calls.
. Telephone calls in the call log
Every telephone number called and received in "SlM1. SlM2" will
reserved in phonet menu of call iog. On the top left of every call
rccord will show "slM'l or slM2 "
All numbers in the call log can be dialed by clicking the button "dial"
on the right side ofthe screen.
When number list appearing, click it to catch details; press it for long
you could dial via "51M1 orSlM 2", meanwhileyou can edit, delete,
save
.
the number or do other operations.
Receive callings
When callingcomes (top left will showfrom which SIM
card)
press
"Answer" and slide towards right until the middle button, then you
can receive callings.
.
Proximitysensor
According to the distance between phone and human body, it
will adjust automatically the switch of the backlight.
During the call, close the phone to the ear, the backlight will
lurn off automatically, which could save batteries and prevent
inadvertently touching.
. Refuse to answer the phone
a. When standby, callingcomes, press "refuse" button and slide
towards left side until the middle button, then you couid refuse the
calling.
b, When using,calling comes,click on the "refuse"button to refuse
the calling.
.
.
Two-way call/multiparty call(conference call)
Notices: this function needs that SIM card open multiparty call
features.
1) Already exist a call in the phone
2) Click"Add calls", dial anothercall (or receive another call, phone
default open "call waiting" (settings-dialing settings-other dialirig
3)
4)
select "combinecall" -you can combine two calls into one way.
after multiparty call connected , you could separate the calls or
hang upone of themvia "the small arrow of conference call" .
.
Telephone recording
During the call, more>start record, you could record the dialog of
the call.
1) settings>set other functions of the call in the dialing settings, for
example: CallTransfer-after all the settingsfinished and turned on,
you could transfer the call to a certain number.
2) ln settings>dialing settings >other dialing settings, open "call
wa iting " .After turned on, you ca n receive another call when a lready
exist
one,
The answering and rejecting functions are just like the
ordinary phone,
. Video call
When you use video call,ensure to install 3G SIM card. in the dialing
interface,enter numbers,then press the symbot
complete the video call.
settings), after both connected, could viewthe status of calling.
'1.4
15
Eil
,ro,n.,
3) Callforwarding: Can set respectively 2 a SIM card, the
line is busy, and no one has to receive, not be connect four
connecting vay
3) Call barring: Can set respectively two to the SIM card call
restrictions
4) AdditionalSettingsr
a.My phone number b.Ca1l
waittlng.
Video Ca1l
1)
Local video replacement: Set a
cmera of
I
picture to display
whetr
use.
2) Display peer video: Display picture for repLacing peer
video when it is unavailable.
3) Peer video replac€ment: Set a picture to display when peer
video unavailable.
4) Enable back camerar Available to switch caneras if turn
to use video call
Open the menu ofapplications>contacts, press one contact ofthe
contacts,then press long the phone number,and select the" video
call".
The second way
on.
5) Bigger
Peer
video, Turn on to
make peer video
bigger than
1oca1 video.
6) Autodropback, Drop bark to voice.all connecring
automatically
7)0utgoing video call: Display local video
whenmake a video
call.
8) Incoming videocall, Disp.lay ]ocal video
inconing video
9)
when accepl an
ca11.
Othersettings, a. Cal1 forwarding
b.Ca11 barring
c.Additional settings
Internet call
l)
2)
Use Internet calling
other Settings
.
Call settings
Voice CaII
1)
Voice Mail:The volce mailbox
voicemail
2)
Account
Setting the different of
Fixed Dialing Numbers
Minute Reminder, Turn on minute reninder
every minute.
3)
number.
IP prefix number:
prefix
in setting in the input
1)
2)
SIM
cards IP
Quick Response: Can edit the text
by the information when content.
numbers
16
t7
messages
at
50s
of
rejected
\:
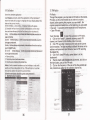
7. Messaging
.
lmportant: the
title of this phone is the phone number,
s similar for of dialog, instead of the usual
folder
message
will be reserved in
structure. Messages with blue background are those
received, and
messages with white background are those sent.
. Send SMSto certain phone number
L) Press home>messaging, touch ,.new
messages,,
2) ln the interface
a.
"append PPT" in the "append" interface.
b, You can append 10 pictures, with the form of GlF, lpEG.
c, Click "adding themes", the box of ,,theme,,
will appear
under the box of "recipient", meanwhile it is turned to MMS
automaticallV.
.
of,tdit,,:
Click "recipibnt,, box to start input method, you can also
click
"enter" box to start input method, in that way you can enter
characters.
b. Click the button of ,.send from SiMl or SlM2,,to
. Send MMstocertain phone number
".
a, lf you want send MMS with many pages, you should select
.
Send messagesto multiple numbers
Entermultiple numbers in the boxof entering, each number is
divided by the comma in English.
Click on the right side ofthe head with the receiver plus icon,
start sending.
When creating message, it was defaulted as SMS, it
will be turned to
MMS when following operations were done; you can
send MMS via
clicking "send" after editing.
1) ln the interface of,,edit,,, Click the button of,,Menu,,:
2) Click "append", you can spend the following attachments,
then
B*
1ri':.x11s:i!.
9. .31 .*
L! U {r,i
w
,
$"
*
Fl
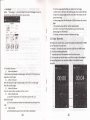
18
f-!
slide 2
t""?
U
!*1
stide 3
n
slide s
n
slide6
slid.4
n
sridE?
n
slides
ft
Mdsli&
.
Notices: Fornowthisphonecanmassmessagestoalmost
20 numbers, the correct number depends on the characters, you can
only enter 312 characters in the box of "recipient" .
When a message is sent or sent again, a little yellow letter will
appean The number 1 or 2 on the letter refers to StMl. or SlM2.
When message sending failed, a red triangle with exclamation will
appeaf,
when editing information other functions of Menu button
19
:.)
dd .ubrer
E.People
.
Open the menu of applications>contacts
Default display phone contacts and SIM card contacts, sort contacts
by first letter of alphabet.
:1.
.
:,
'.
b.If it were not so search to match of the contact, interface will
appear 'not find any contact,
3) Click "Add Contact" lcons,CancreateNewContacts
Select save contacts to phone or a a SIM card, into contact
editing interface.
You can edit contact head, name, telephone number, group,
save to
click "finish".
Xkrgi*r
2)Click Search tcons, you can enter the contact search interface.
a.To enter the Numbers or letters and the list of names of the
agreement, which will be shown in the search results.
20
21
4) In contact
a.
IEft
interffi;FEon
Menu >Delete contaats
'Alllcons
checked, click the delete button, delete all the
contact person, including cell phone and SIM card of contact.
Can separate check one or more contacts, click the delete,
delete the selected all contacts.
Menu> To display of the contact
You can choose all contact, one a SIM card of contact, the
mobile phone contacb
Can
;- -''
.*x'';
b.
-*_*,1:r. !. a. t
"..,":l1r:3!P.
,.:. I 5:6 l',',
c.
,:-:1 f
,.Sri
Choose from the definition, but also on a SIM card and
cell phone choice whether or not to show that all the lone
contacts.
Menu >lmport/export
In the mo.bile phone can local, SIM card.and SD card three
parties achieve contact information of the copy each other.
d.
First choose the "copy source" and then select the next step,
selecting copy contact to, can complete the contact's copy.
e.
Menu >Accounts
l JJ}:
-- : 0 r'.lql l,,
column input group name, in "type in
the contacts name" column input contact key word, can be in
Finally click
all of contact search, and added to the
2) In "the group name"
group.
"finish".
3) In a group, click on the Menu
a.
button,
Menu functions
Menu>Update
You can modiry the group name, delete or add group of
contacb
Accourt and synchronization set routinesynchronous Settings,
can choose backge. und data-and autoriatic synctironization.
-
f.
Menu>Sharevisiblecontacts
All contacts can be imported into the SD card, or through
bluetooth, email, text message or MMS share
Open the application interface >contici, change to the
.
group.
1) Click "Add Croup" lcons can create new group, Just to be saved
in a cell phone group
b.
Menu >Delete
You can delete the group, and will not delete the.contact itself.
c.
Menu >Send messaging by
group.
t\
Automatic new infoflnauon, and the group added to cdntact the
address b'ar recipients
Menu >Send Email bygroup
If contact group have the same email address, the automatic
new mail, and E:mail address in the address bar add to the
receiver
d.
9.
Brovser
lnternet explorer
1)ln the interface of internet explorer, touch address filed and enter
the URL.
2)Use keypad to enter URL. The appropriate web sites will appear on
the screen. You can touch it directly go to the page or continue to
enter IJRL.
22
23
.
re
b, Find on page,search what you need in current page.
c. Select text,in the text, click and drag to select a piece oftext.
d. Page info,d isplay page address and other information of the
current browsing.
e. Share page,select the Bluetooth or SMS to share the current
Homepage
Select "homepage", you could load
in
the set homepage lf you do
not set it, you will use the vendor's pre-set sites.
page.
fi6Cffi
r.!rli*
*t:E
f.
Downloads,show all the content downloaded.
B. History, Show your browsing history, and view the most
,,r..
I
I
I
I
.8S
fE iB
visited pages of information.
h. Settin&containts a variety of browser settings.
to.Sound Recorder
Recorder can record voice, and send it quickly via Bluetooth or MMS
as wellas make it as ringtone.
Notices: recorder can only save the audio fi les as AMR format.
L) Click the recorder application.
2) Keep the phone's microphone near the voice source.
6?
.
3) CIick recorder to record voices ,and click to stop or Recordinglist.
All recordings save in my recording folder in the default music
program.
.
Functionsofmenu
1)
Menu>Backward
After browsing through multiple pages, will return to the prevlous
page the current page.
2)
Menu>Faruard
After browsing through multiple pages, will move to a web page
after the current page.
3) Menu>Windows
You can view all open windows to the current.
4)
Menu>Bookmarks
a. Click the "Bookmarks"to make the current
URL as a
bookmark saved.
b. click the bookmark under the bookmarks list,will open the
URL.
5)
Menu>More
a. Add bookmarks,save the current URL as bookmark.
24
25
11.
Clock
ctictE
1) Open the menu of apptication,
2) Click screen except the alarm at any position, screens, blaclt
time with white shows, this time the standby time to screen will
not extinguish screen. Click again on the screen, and restore
normal clock interface.
3) Click screen set alarm button and enter the alarm clock set
interface
12.
Cacllator
calculator
this function can turn your phone into calculator, it can do some
simple calculations.
. Touch the number keys to make it appear in the blank box.
ln the interface of calculator, press MENU button or hold down the
screen to the left, then the senior panel appears
.
Alarm
fu nctions set, phone will a rrives i n the setting time to a lert you
by ringing or vibrating to achieve ifs function. Press Menu to add
alarm, you can also add it from the adding interface. You could set
After
the alarm according to your needs. ln the interface of alarm will
showthree closed alarms (two alarm clocks are Mondayto Friday
8:30,9:00).
Edit
the current alarm, you could edit time, ringing tones
vibration. repeat form and tabs.
You can edit
26
.
l
l
I
13.
o
Canera
13.1camera
. Prior preparation
lnstall memory card before using the camera or video camera. All
your photos or videos taken by the phone are stored
in memory
card.
.
Shared Settings of Camera
1) Flashmode: Auto. On. off.
and Vldeocamera
2) White balance, Auto. lncandescent. Daylight, Fluorescent.
Cloudy. Twilight. Shade. Warmfluorescent.
3) Color effect: None. Mono, Sepia. Negative. Aqua. Blackboard.
Whiteboard.
Scene mode, Auto. Night, Sunset. party . portrait, Landscape.
Night portrait. Theatre. Beach. snow. Steady photo. Fireworks.
Sport. Candle light.
Open camera
Press home, touch menu, select camera. Take pictures
1) Aim your object with the screen.
4)
Touch the "shutte/, button on the screen.
After taking, photos will save to the camerat galley folder with
the name oftakingtime.
5) other settings: store location
properties, anti flicker
2
)
3
)
4
)
5)
You can view
.
the photos by touching the preview box button.
the button of,,setting Menu,, in the interface of
camera to do the settings
Under camera viewfinder mode, press Menu, you can switch to
video or photos'gallery
On the top right of camera viewfinder mode, display the preview of
the previous picture. Touch preview box, the photo display on full
exposure, image
Cmera Settings
L) Capturemode: normal. HDR. Facebeauty. panorama
2)
3)
4)
Camera settings
You can touch
,
selftimer: off
,
2seconds
,
lOseconds
continuousshot: 40shots, gOshots
picture size: QVGA, VGA, 1M pixels, 1.3M pixels,2M pixels,
3M pixels, 5M pixels, 8M pixels, 12M pixels
13.2 Videocamera
.
Prior preparation
lnstall memory card before using the camera or video camera. All
your photos or videos taken by the phone are stored in memory
card.
.
1)
Take video
Aim your object with the screen.
2) Touch the "shutter" button on the screen.
3) Aftertaking, photos wiil save tothe camerat galleyfolderwith
the name of taking time.
4) You can view the videos by touching the preview box button.
5) Video camera settings
You can touch the button of "set" in the interface of camera to do
the settings
Under camera viewfinder mode, press Menu, you can switch to video
or photos'gallery
On the top right of camera viewfinder mode, display the prevlew of
the previous video. Touch preview box, the video will display on full
screen and you can touch the play button to view it.
o Shared Settings of Canera and Videocamera
1) Flash mode: Auto, on. off.
2) Whitebalance, Auto. lncandescent. Daylight.
Fluorescent.
Cloudy. Twilight, Shade. Warmfluorescent.
3) Color effect: None. Mono. Sepia. Negative' Aqua. Blackboard.
whiteboard.
4) Scene mode, Auto. Night. Sunset. Party . Portrait. Landscape.
Night portrait. Theatre. Beach. Snow. Steady Photo. Fireworks.
sport.
,,':*-'::'"X:-i
D Fites lnterface
a. In the library the interface, upper right a slide show the play
button, click on the way to the slide circulation play all image
files.
b. Click on the images, enter the picture to see interface.
c. Choose a long.press image files, pop-up corresponding
operation.
d.
Candle light.
.
Videos settings
1-) Microphone: off, on
2) audiomode: meeting, normal
3) timelapseinterual: off, 1s, 1.5s, 2s' 2.5s, 3s, 5s,
4) video quality: low, medium, high, fine
10s
14. Inages
.
open images
home, touch Iabel of applications, then touch photos' galley.
Press
ln theinterfaceof camera, Press menutoopen
operate.
30
it'
thentouchto
31
.
6)
Use images
After taking pictures, you can view them arid share them with your
friends.
a.Use E-mail to send pictures, choose Gmail or E-mail, pictures
will be automatically added to an E-mail. Write your
information, click send.
b.Use Messaging to send pictures: Select the information,
plctures will be additional to the MMS. Write your
information, click send.
c.Use Bluetooth: Bluetooth list, select already pairing of
bluetooth equipment, through bluetooth send a picture.
4)
check pictures
In the photo view interface, on the screen or so slip, can
forward or backward view photosEdit picture.
a. Editlight: FillLight Highliehts Shadows Auto-Fix.
b. Edit image effects
: Cross-process Posterize Lomo
Documentary and so on.
c. Color Effects: Warmth Saturation
Tint Duo-tone
B
&W Sepia
Negative
Crop pictures:
If you want to adjust the size of the clip, please hold the edge
ofthe cutting tools. The arrow appears clip, from the trim your
a.
fingers inside or outside the center to drag, can adjust its size.
b. If you want to adjust the big hours in the clip that keep
proportion, please hold down any of the four corners of the one.
c. If you move to the clip of the picture area of the other, please
hold cutting is internal, then move to drag the fingers to the
position.
.
images
'
View
1) ln the picture interface, touch photo album to view images.
2) Touch the thumbnail to view pictures on full screen.
to display small or large thumbnails. Hold down the
screen towards the left side to view the next photo or towards right
to view the previous one.
ln the photo album or list, press and hold down the picture towards
left to view the next picture, or towards right to view the previous
one.
You can choose
Doodle.
Red
Eye Straighten Rotate Flip
Sharpen.
alti.le sdedule .onrraMaFd .r FaE. bdtton
33
.
15. Music
The
phone can play digital audio files in memory card.The
followingformatsareavailable:AMR. M4A. MlDl. MP3. WAV.
OGG.
.
of
music
Tips: You can play all of the songs in the interface
media, in random sequence . Press Menu, and then touch the
Party 5huffle. Then will start playing the first song randomly
selected . To close the Pafi Shuffle, press Menu, then touch to turn
offthe Party Shuffle.
open Music
Prc
homg toudr
tln labelof appliGtirc, toudl
music lhen the inbrfa@ of
M6ic
Media appea6.
o
Music Media
YourmusicfilBaredasifu @dirEtothefdloMrEfrur@tegori6: Artisb,
album, engsand day lists Totd m oftle oegori6;yor cn viflthe list
iEide.
Continue the operations, until your wanted music appears. Such as,
if you choose Artists a list of artists sorted by the numbers in English
willappean Choose anyontoopenthe list, then allthealbumsand
songs will appear Select one album, then the songs in it will be
!b1d f.sr
I dir.!
!o *it.}
.o tk
tup.rrolre
a"rt
or roi.l
Eas lora play.a
Tild .ry eil<q. fien .Fe ri. I
11!d -:11e1:',.. ,..,. ,, .,1
lt.sr.s3
l.{.h
Ltr
.& stop pldy
the DoLiie to aY .f rL.
.
View lyrics
When the corresponding tracks have Iyrics file, the player displays
the lyrics sources. Click the up arrow you can play muslc, view lyrics
at the same time.
34
35
16 Calender
17. FM Radio
Enter the calender application
FM Radio
Through this program, you may listen to FM radio on the device,
FM radio use the wired headset as an antenna to receive
signals, before opening this program ,you can install the
original equipment-headphones, when listening, you can switch
it manually to speakers or the mode with wired headphones.
Open FM radio
Load Goggles accounts, enter the application, ln the interface of
month or week will use gray to highlight the day. Display default the
date on the current month.
lnthe interface, press menu, 4displaymodeswillappear:
1) Schedule lntrface shows a certain schedule(click on the initial
time and view forward,click the final time to vlew backwards )
2)day
page
lnterh@ displafs
@ing
3)reek
a
dayssdrcdule (lastdirJed date)Side arcundno tum
dala
lnteftedisplaFa wellssdreduh(lastdidcddate)Sidearoundto
tumpagemringwk
4)today lnterhcdisplalsaday'ss&edule,lntfEinterbeof
monthorwkus
gcyto highliehtthe day
5) month nterh@ displa\ a mnfils&edule (lastclicked date) Sidearcund
totum page amrir€ mnth.
New activities
1) Prcrenu, mre<toudr wactivitis.
2) Enbrthe nare ofaclivity in the activitie< bq
.
Noti6: Such as special occasions such as birthday or a daywith
events, set the allday option to Yes. lf the activity is at a certain
time period, select the start time and end time.
3)EntertE ffint bctim, d&iptjon, gu6b, repea! mind tire.
4)
Oid(finishto retumto@lendar
36
.
E
to open the application of FM radio.
Touch this label
Click on the "search", automatic scanning search FM
channel, and channel in list interface, list all channels
Click "FM recording", listening to the radio to the current
can be recorded. The tape recording to default file name can be
arbitrary welFpreserved input filename. Save to FM recording
the default file.
Click "exit" closed FM radio, cannot listen to in the
background.
Must be insert cable headphones as antenna, but click on
the horn button, can put the FM radio.
CIick on the frequency of the rear of the five-pointed star
1)
2)
3)
4)
5)
.
Listen to FM radio background
Click to return to key, the radio program moved to the
background, right now you can still continue to listen to the
show, and can also carry out any other program.
18. SIM
Tookit
edit it,
time oftodo you set come,it will alarm you
Use Todos,you can add todos and
The
20. NoteBook
The interface of notebook and adding note:
EIEE
The interface of SIM Toolkit:
. {oleed
/
@
l
Click one
of menus,you can sent message ,then you will receive
the information you want.
message for
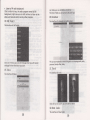
21. Torch
19. Todos
The interface ofTodos:
to note thing such as :uncategorized, work,
personal, family affair, study.
You can use notebook
The interface of torch:
tru
..**
=-ruiE
w
rantu
aic:e tdd
Click
I l,il1,l..i
l'l:
the icon of on/off , you can use it as torch.
22. Down
loads
The interface of down loads:
38
39
24.
Settings
Your serulce provider may default some device settings, so you may
not be able to change these settings.
It show yotl.the filesyou download.
23. Task
l{anager
The interfice oitask maniger:
Task managershow iou.the status of applications:
RUNNING: show you the running applications; click x, you can
stop the application
INSTALLED; showyou the applications you install, choose and click
one, you can force stop it,
Disable
or move to phone storage / sd card;
RAM: show you thestatusof
it,
.
SIM management
it to choose or to disable the 5lM card, the card is grey
when disabled, the flight mode displays on status bar
2) The default SIM card,you can choose Voice callJideo
1) Touch
call,Messaging,Data connection.
.
wireless and
internetE
1) Flightmode Touchtoopenorclose.
G
2)wi-Fiandwi-Fisettinss rouchwi-Fi
IE.
networks automatically, networks without password can be used
directly, others need to enter the password first.
Noticer Open Wi-Fithen the flight mode, wi-Fiwillclose
41
automaticallyr Open flight modethen connectWi-Fi, it can be used
c. Can choose the default memory.
normally.
. ,"*".r8
.
Boot time that use and each module to use power in general
Bluetooth
Bluetooth switch and setting up the touch bluetooth open, will
automatically be search nearby bluetooth open the equipment.
.
Or,"urrr"
E
l. Data usage set up mobile data traffic limit, flow more than
limit will be close mobile data services.
2. More
Wireless & networks
a. Airplane mode
.
apprication&Il
sources
Allow to install non-electronic market
applications
2) Manage applications Manage and delete the installed
applications.
3) Running seruices Touch any of the services listed in> pop up 'to
stop the seruice? 'two-button operation box, touch the 'Stop 'the
seruice is stopped, and disappear from the "running services" list.
you can view the program of downloaded,all,on
4)Storage
1) Unknown
use
b. VPN
running
how many memory space they occupy
you can see the using power situation of cell
standyby,Phone idle,Display and Browser.
sd card or
c. Tethering&portable hotspot
d. Mobile networks
e. GPRS transfer prefer mode
s)Battery
use
6)development
a. USB debug:. UlB de[ug only apply in the
develop process.,This fulctiqn allowscopy data in computer and
. audionprofilesl
This option gives the phone tones' settings under the status of
receiving calls or notification. lncluding: Vibration, volume, ring
tones, ring tones notification and feedback ( Button operation tone,
)
To adapt every environment.
select sound, screen lock tone, touch
1) Select " standard / Mute / conference / Outdoor, Touch the spot
on the right, when turns green ,it opens.
2)Volume: lncludingthe ringvolume andalarm clocksettings, you
mobiledevices.
. ,
-
7)Automatic synchronization turn on/off Automatic
synchronization, applications Automatically synchronize data or
asynchronous data
.
Location access
1) Access to my location let apps that have asked your permission
use
your location information.
can manually slide to select.
Touch it to open or close
2) GPS satellites list of settings:
. oispravla
GPS EPO
a. Brightness Adjust the brightness b. Auto rotating screen
Rotate phone to change direc'tion
c.Animation Choosetodisplayanimations d.ScreenTimeout
Adiust the delay before the screen automatically locks
o
Stora8e
a. Can view the SD card and cell phone memory usage.
b. Can Unnount SD cad or Erase SD card.
42
assistance: use GPS assistance data (EPO) to speed up GPS
positioning
:
EPO
settings
GPS
poditioning
A-GPS
:
Use
assistance,use GPS assistance data(EPo)to speed uo
auxiliarydata can acceleratethe process of
GPS
positioning.
open it and remind you " it produce
GPS,,,
43
GPRS
flows when using
A-
.
security
1)
E
Setupscreenlocks Useimages. ptNorpasswordtolockthe
screen.
Touch "images" , the first time there will be a simple unlock
instructions and examples, click "next step" to continue the step
a.
"make the unlocking image" .
b. Touch PIN Enter PIN numbers
c. Touch
password
d. Touch
"no"
E.
to unlock the screen.
Set password to unlock the screen.
Stop this application.
touch face unlock to set face unlock
2) SetupSlMcardlock
Enter (4-8numbers) plNtosetthelock
of SlM.
SIM card PIN (Personal ldentification Number) is to prevent
unauthorized use of SIM cards.PlN code provided with SlM. The
seruice provider gives the initial value.
Change a blocked PIN code, you need to open the "StM Lock',, then
go to Change Password screen, the phone will automatically prompt
enter the old PIN code and asked to enter a new plN code
twice,finally the phone will prompt that change the code
successfully. lf you enter the PIN with error for three times, SIM card
PIN codes will be automatically locked, PUK codes is usually supplied
with SIM card. lf no, you should go to the service provider for the
codes.
10 times
wrong PUK code, the SIM card will be
permanently locked.
visible
Password
Password visible when enter it
Select device administration Add or delete device manager.
Use security credentials Allow application visit security
credentials or other credentials.
lnstall from SD
lnstall the encrypted certificate from SD
card.
set password Set or change Certificate store password
ilear
Clear all the contents of the certificate store
and reset their passwords.
6)
7)
8)
Languages and keyboard
District
lnclude all the languages on the
phone and totally amount of 12 kinds.
Add words to custom dictionary or
2) Custom
delete.
3) Keyboard Settings Vibrating when buttons are pressed,
Playing sound when
buttons are pressed, Capitalizing automatically, Speech lnput(by
microphone on the
keyboard), lnputting words(speech can be altered by sliding finger
on space key), Displaying
tips(activate predictive function when you input words);
1) Selecting Language
Dictionary
Auto-Text(Auiomatically input certain
words when press space key or specified keys)
4) lnput method you can selectAndroid keyboard orgoogle
pinyin input method.
.
ACCOUNTS
You can add
corporate, email, google accounts
. ,""aup U r"r"Ell
1) Backup I data will application data, WLAN passiword and
other Settings backup to Google's servers
2) Resetting to Factory Settings, Clear all data stored on the phone.
lfyou enter
3)
4)
5)
.
card
storage
44
.
o"t""nari."
Automation
B
time provided by Network.
Touch "+" and'L" to set date.
Select Time Zone according to where
3) Selecting Time
you are. For China please select "GMT+O8:00, China Standard Time".
4) Setting
Touch "+" and '1" to set time.
5) Use 24 HourTime
ON/OFF
5) Select Date
There are 3 kinds offormats you can
choose from: Month-Day-Year, Day-Month-Year and Year-Month-Day,
among which Year-Month-Day is the default setting.
1)
2) Setting
Date
Use date and
Zone
Time
Format
Format
45
.
25.
Schedulepoweron/off
time of boot or shutdown by touching it. you may also
select to repeat it or a certain day during a week.
You can set
EI
tsI
o
Accessibility
1) Large text
2) Power button ends call: According to the ,,power,, button to end
the call to open, call, press the ,,power,'will end the call and not shut
down the screen
3) Auto-rotate screen
4) Speak passwords
5) Touch & hold delay
6) Install web scripts
7) Quick boot
.
Developer
1) PlmttennbihphmandfieirpartandmporHbortof
readrofffill
dlildH.
1) tceptlepimdry,Gin,humidityardalltyp6of lhui*wtrirrsrtainmilmb
will @rode
dtrf mic ciruits
2) Mtton&thephqEwihrettEn&wtHdErgirgitwillGEeldricshock
trdamage the phdE.
3) ArcidplrethedflieinhEhternpeGtucflimmntTmpeEtrEwill
ststen the lfu of ektodcd6/iet damage bEtEriB, ard rerptr reft ertain
pl6t cs.
4)
AwildretEdfliaeinbolilternpeEturemimrstWrenthe
tte ptmwillpodre Mterwporttst reydamage
tempeEture rbet
optionsE
a. USB Debugging: USB debugging only for development and UsB
disk.
b, Stay awake:Screen will never sleep while charging.
c. Alow mock locations
d. Desktop backup password
e. Strict mode enabled
f. Pointer location
g. Show touches
h. Show screen updates
i. Show CPU usage
j. Force GPU rendering
k, Window animation scale:
l. Transition animation scale
Dont keep activities
n. Background process limit
o. Show all APRS
eMonicci@il
5) Aw*rphetEptmind6ty,dirtypbc,othemisepartsrEybedameed.
6) TomidtheptwinalitdgaretE,mropenfareoarryheture.
7) Dorptopenthedeice, rc*profeimlapprmdwilldodamagetothe
ptme.
8) DorEtthwitnomheighq lcpckorslEkethepttre, o]ghhandlingcn
damage interrEl cjruit berds
9) Dorptpainttheplm,berethepairitwillblo*teadptnm,mirrcphoe
dc,tH l€i1mble parb, ard lead it rptwk
10)uedean, 4drydcffi tod@ntheGIlm,
srdtothe mrestqElifu
12)l f
rcry
sb
phonelf;l
You can check
Prohibitthee
6rErfu irspsfi$.
distldr ildwill amr€efdptw
SeNioe cenuestaff w:ll
H
About
lightwlens
lErnfu I dmkalsard d€ning€en6, deanirEf u'xjsto deantE phm
11)lf rtobile ptw, bafiery,dwget umt hpisEwiesaredefectire,
of
m.
o
Notices for the use of phone
Ydr phore isa productof uperiqdeign and rafurmGhipand stwld betreaH
wih cre.Thefulbfling$rg6tim Gn t€lp)& mptywih tiEtemof repair
kits, to qterdttE lib of mbile phm.
the information on status bar and remaining power.
46
47
repdE