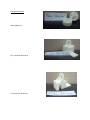
1
FINAL REPORT: AN OPEN SOURCE 6DOF ROBOTIC ARM Executive Summary This project is a collaboration between Engineering Physics 459 students and Marginally Clever Software with the goal of developing an open source six degree-of-freedom (DOF) robotic arm, and thereby creating an affordable solution to desktop automation. The initial objectives were to build a robotic arm that could carry 1kg at 50cm with a repeatability of less than 1mm. The arm was developed through the determination of mechanical and structural requirements, the selection of appropriate materials and motors, and the analysis of similar products available in the market, including a robotic arm that was developed by the sponsor. The final prototype is an arm consisting of two independent modules, each with two degreesof-freedom, interconnected to function as a 4DOF arm. The joints of the arm are actuated by servo motors, and are geared via belts and pulleys to provide the appropriate torque, angular speed, angular range, and angular precision. The assembly can be manufactured with standard off-the-shelf and 3D printed parts, making it easily accessible to the consumer and hobbyist. The control of the arm is performed by interfacing a BeagleBone Black microcontroller to the selected HerkuleX smart-servos on each module. The user may then choose to control the arm using control software such as MOVEIT! or ROS, but this is beyond the scope of this report. The completed arm can move at four joints, with the potential of adding an additional two in the future. Each joint has a repeatability measured to be less than 1mm and an ultimate torque of 8.1 ± 1 kg-cm. The arm, as delivered, can be produced at a cost of $506.63, which is well within the financial budget of $1500. Improvements to this module include the implementation of a stronger, concentric gear drivetrain system, to allow for an increased torque transmission that can satisfy the initial 50 kg-cm requirement. Final recommendations include a comparison of alternative drivetrain systems, a discussion on the appropriateness of 3D printed structures and standard parts, and research on the control and actuation using smart servomotors with ROS. Overall, our final prototype was able to achieve the repeatability requirement given by our sponsor. It is possible to improve on our design and achieve the torque requirement by considering the recommendations in this report. The final prototype will be delivered on Wednesday, April 8. Contents Executive Summary....................................................................................................................................... 2 List of Figures ................................................................................................................................................ 4 List of tables .................................................................................................................................................. 4 1.0 Introduction ............................................................................................................................................ 5 2.0 Discussion................................................................................................................................................ 7 2.1 Mechanical design overview ............................................................................................................... 7 2.2 Structure ............................................................................................................................................. 9 2.3 Tilt joint structure ............................................................................................................................. 11 2.4 Module interface .............................................................................................................................. 13 2.5 Drivetrain .......................................................................................................................................... 14 2.5 Software ............................................................................................................................................ 19 2.5.1 Sending commands to the servo................................................................................................ 23 2.5.2 Code ........................................................................................................................................... 25 2.6 Testing ............................................................................................................................................... 26 2.6.1 Belt testing ................................................................................................................................. 26 2.6.2 Repeatability testing .................................................................................................................. 28 2.6.3 Load testing ................................................................................................................................ 29 3. Conclusions ............................................................................................................................................. 31 4. Project Deliverables ................................................................................................................................ 32 4.1 List of Deliverables ............................................................................................................................ 32 4.2 Financial Summary ............................................................................................................................ 33 4.3 Ongoing commitments by team members ....................................................................................... 34 5. Recommendations .................................................................................................................................. 35 5.1 Timing Belts ....................................................................................................................................... 35 5.2 3D Printed Structure ......................................................................................................................... 37 5.3 Smart servo motors........................................................................................................................... 38 5.4 ROS .................................................................................................................................................... 39 Appendix A: module assembly instructions ................................................................................................ 41 Appendix B: Code ........................................................................................................................................ 60 References .................................................................................................................................................. 61 List of Figures Figure 1. Assembled 4DOF arm..................................................................................................................... 8 Figure 2. Old arm structures showing increase in modularity .................................................................... 10 Figure 3. Various laser cut parts, with slots and holes for mounting motors............................................. 11 Figure 4. New (left) and old structure designs, with addition of tower to support tilt shaft ..................... 12 Figure 5. Bottom half of 3D printed tapered bearing mounted to module baseplate ............................... 14 Figure 6. Tensioning mechanisms for pan joint. Servo is at bottom, and belt is tensioned by tightening bolts parallel to belt .................................................................................................................................... 16 Figure 7. Diagram showing forces and moments caused by tensioning belt ............................................. 17 Figure 8. Additional structure added to servo to support shaft against bending moment ........................ 18 Figure 9. Close-up of tilt joint showing two set screws and the shaft flat.................................................. 19 Figure 10. Interface diagram for electronics............................................................................................... 20 Figure 11. Wiring diagram for Sparkfun level converter ............................................................................ 20 Figure 12. Diagram of BeagleBone Black with useful pins labeled ............................................................. 23 Figure 13. Contents of command packet (from servo manual, p18) .......................................................... 24 Figure 14. List of commands (from servo manual, p41) ............................................................................. 24 Figure 15. Comparison between over tensioned belt (left) and new belt (right)....................................... 27 Figure 16. Close-up of worn belt, showing damaged to teeth and belt fibers ........................................... 27 Figure 17. Proper level of belt tension: it should just be possible to turn belt by 90 degrees ................... 28 Figure 18. Arm setup for testing load capabilities ...................................................................................... 30 List of tables Table 1. Components purchased by the Project Lab .................................................................................. 33 Table 2. Components purchased by project sponsor ................................................................................. 34 1.0 Introduction Background and Significance Robotic arms are commonly used in a variety of industries, as they provide the dexterity of a human along with the precision of an electromechanical system. These robotic arms are capable of perform tasks such as welding, assembly, pick and place, and the handling of dangerous materials. Typically, these robots are prohibitively large and expensive to everyday consumers, and the designs and control software are close source. However, in recent years with the increased popularity and affordability of rapid prototyping and manufacturing, open source designs of affordable robotic arms are now possible, yet at this time only simple open-source arms have been released. Alongside our project sponsor, Marginally Clever Software, our aim is to design an articulated six degrees-of-freedom (DOF) robotic arm and release it to the open source community. It is believed that an open-source arm with capabilities paralleling those of arms used in industry would open up a large range of new applications to hobbyists and educators, in the same way that 3D printers have done in recent years. Problem Objectives The objective of this project was to design and test a 2DOF module and the software required to actuate it, and then to fabricate and assemble three of these modules to form a six degree of freedom arm. The design was required to have a total component and manufacturing cost of less than $1500, and to use exclusively off-the-shelf parts, or parts that could be made using a 3D printer or laser cutter. As the design was intended to be open-source, the project would have to be well documented; this included appropriate documentation such as a bill of materials, build instructions, software and CAD files. The desired specifications of the arm were a 50cm reach, which is defined as the radial distance from the axis of the second joint to the interface of the sixth axis, and the capability of lifting 1kg at this distance. The arm was also required to have less than 1mm repeatability, which is defined as the error in position after moving all joints 50 degrees and then back to the original position. Scope and Limitations Although the objective of this project was to produce a fully functional 6DOF arm, accomplishing this was limited by the availability of the specific high torque motors, which had been previously selected to actuate the base joints of the arm. Because these servos were temporarily unavailable, the scope of the project was reduced to only construct a 4DOF arm. However, as the arm design is modular, the final design still meets the original project objective of building a 6DOF arm, and it is only necessary to fabricate another module and connect the high torque servos once they become available for the 6DOF arm to attain full functionality. However, because of this limitation, it was not possible to fully test the performance of the completed arm, as the arm’s base module used the lower torque servos, which were not specified to sustain the required loads. The software portion of this project was limited to interfacing with the servos and allowing the user to command a goal position and read the servo’s current position. The higher level control of the arm, which involves deciding which commands to send to the servos to move the arm to the desired location, is a project which Marginally Clever Software intended to undertake at a future time. Finally, as the specific application of the arm was to be left up to the end user, this project did not consider the design of the manipulator or end-effector, such as a gripper, which would be necessary for the arm to perform a given task. This report begins by describing the design of the robotic arm, with an emphasis on the reasoning behind the various design decisions. This section includes the mechanical design, which encompasses the structure of the arm and the belt system which transmits the torque from the servos to the joints, and the software design including the interface between the microcontroller and the servos. The tests performed on the completed modules, and the observations and results of these tests are then presented. This is followed by the conclusions that were drawn from the work, and a presentation of the deliverables which the project produced. Finally, a series of recommendations are included, that are intended to guide any future work done on this project. These recommendations include descriptions of the pros and cons from our experience with the use of timing belts, 3D printed structures, smart servomotors as well as our research in the use of ROS for robotic arm control. In addition, the assembly instructions for the robotic arm - one of the main deliverables of the project - and the servo control code are included as an appendix to this report. 2.0 Discussion At the beginning of this project, the design of the robotic arm was divided into two main branches: the mechanical design, which included the structure of the arm, the interfaces between modules and the torque transmission elements between the servo motors and the joints, and the software and electronics, which encompassed the communication between the servos and the microcontroller, and the software which provided the required level of control of the arm. The following sections will provide an overview of the final mechanical, electrical and software design, combined with an elaboration of the design choices made, in order to provide justification for the final design. The theoretical basis for certain design decisions will also be presented where appropriate. Finally, the procedures for various tests used to evaluate our design and the results of these tests will be presented and analysed. 2.1 Mechanical design overview Following multiple iterations of the initially proposed design for the robotic arm, a design was chosen which was best able to meet the project requirements under the constraints that presented themselves over the course of the project. Briefly, the design incorporates HerkuleX servo motors which drive the arm’s joints via toothed belts; these belts allow the motors to be mounted as near to the base of the arm as possible while the gear ratio allows adjustment of each joint’s available torque. The arm is made up of three repeated modules, each of which is made from 3D printed plastic, laser cut wood/acrylic and off-the-shelf fasteners. It should be noted that while the final outcome of this project was intended to be a 6DOF arm, due to the unavailability of the higher torque motor, which was selected to drive the lower joints of the arm, it was only possible to build a two-module arm (4DOF) that was capable of supporting itself. However, once these higher torque motors become available, it will be possible to fabricate a third module and quickly extend the design to meet the project requirement. A major design decision made early on in the planning of the project was the goal of modularity; this influenced the overall design significantly. There were two thoughts driving the desire for modularity: dividing the arm into smaller, repeated sections would reduce the amount of design and testing required, and on the user side, less effort would be needed to understand, fabricate, and assemble the arm. Our push for modularity will be pointed out wherever it appears in the following sections, however it is most obviously present in the overall configuration of the arm: the requisite six degrees-of-freedom (DOF) are divided into three 2DOF modules, each of which is almost identical. This meant that throughout this project, the majority of the design work and testing was put into creating a single functional module, with the understanding that once complete, this module could be replicated without additional design effort. Figure 1 shows an image of two completed modules connected in series to form a 4DOF arm, which can be referred to as the main components of the design are described. FIGURE 1. ASSEMBLED 4DOF ARM The mechanical design of the module involved the CAD drawing and fabrication of several iterations of complete two-joint modules. The joints are comprised of a motor which actuates a shaft via a belt and pulley system connected to a motor. The motor, bolts, pulleys, and belts are standard parts, and the design process consisted of making a 3D printed structure that would accommodate these standard parts. The 2DOF module is comprised of a structure made out of two large 3D printed piece and laser cut plates which supports two motors and two shafts. Each motor actuates a shaft via a timing belt and pulley system, and this mechanism acts as a revolute joint. The first motor-shaft mechanism is located at the base of the structure, and it rotates the module about the z axis. We will refer to this as the “pan” joint. The other motor actuates a shaft supported by two 3D printed towers, and the rotation is about an axis perpendicular to the z axis. We will refer to this as the “tilt” joint. The motors are coupled to the shafts by tensioning the timing belt against pulleys connected to the motors and the shaft. The gear ratio on these pulleys are calculated to provide the appropriate torque, as outlined in the project proposal. The belt tensioning is done by screwing the motors onto the structure, against the tensile force of the belts. The various design components outlined in the previous section will now be explored in more detail, in order to present the alternatives that were considered and to justify why this particular design was chosen. 2.2 Structure The structure of the arm is required to support all loads imposed by other arm modules and by the payload, to provide enough stiffness to prevent significant deflection of the arm under load, and to provide mounting points for the various components of the arm, such as the motors and shafts. It was initially decided to make the structure of each segment out of a single 3D printed part. The reason for this was that minimizing the total number of parts to be printed would reduce effort for the end user, both in term of assembly and fabrication time, and because a monolithic structure (one made from a single piece of material) has a higher strength and fewer potential points of failure than one made of many individual pieces. During the first iterations of the design of the structure, it was quickly realized that starting with a monolithic design had drawbacks that had not initially been considered. First of all, it had been initially assumed that the fabrication would be done on a printer with a 20cmx20cmx20cm print volume, which would accommodate the 16.5cm height of the largest segment; however, due to cost and availability constraints, the Up! Plus printer available in the project lab was used for prototyping during the design phase, and it is limited to a 13.5cm build height, which forced the design to be divided. Secondly, it was found that parts had to be reprinted often, especially during the initial iterations, when the design was evolving rapidly and the printer’s limitations were being discovered; having to reprint the entire structure each time the design changed wasted material and took a long time. For these reasons, a move was made from a one-piece design to a more modular design, where each segment of the arm was divided into its functional parts (the mounting for the shaft of the pan segment, for the tilt segment, and the mounting for the motor), so that the design of each of these parts required less effort to adjust. Figure 2 shows three old modules with different levels of modularity: the module on the left was one of the first produces, and it was one complete piece. The structure on the right had been broken down into its two main parts. The structure in the middle is more advanced, and is a recombined version of the structure on the right, with the addition of laser cut walls. FIGURE 2. OLD ARM STRUCTURES SHOWING INCREASE IN MODULARITY In addition, some parts of the structure were laser cut from sheets of plywood and acrylic instead of being printed. These parts of the structure were vertical walls intended to prevent the bending of the base of the module, as will be elaborated in the section on belt tensioning. This part required holes and multiple vertical slots for mounting and tensioning the motors, and because the locations of the motors was changing frequently, it was faster to laser cut the walls than to print them; some of these parts can be seen in Figure 3. The flat pieces also often warped on the print bed, which weakened them structurally. FIGURE 3. VARIOUS LASER CUT PARTS, WITH SLOTS AND HOLES FOR MOUNTING MOTORS As the design matured, the frequency of changes made to the main structure of the arm decreased. At this point, it was generally possible to recombine the previously modularized components into a single printed part. Overall this initial modularization and subsequent recombination was found to be a good strategy, as it allowed for rapid iteration of the initial design, while the final design still provided that main advantages of a monolithic structure, namely a decreasing in weight (less fasteners) and assembly time, and an increase in strength. In addition to providing structural strength to the robotic arm, the two other primary functions of the main structure were to provide mounting points for the motor (this will be discussed in the section on belt tensioning), and to support the shafts of the pan and tilt joints. The design of the pan joint will be discussed in a later section, while a description of the design of the tilt joint follows. 2.3 Tilt joint structure Two options were considered for the mounting of the tilt segment on top of the pan segment. The first option placed the attachment between the tilt segment and the shaft outside the body of the pan segment, while the second had the attachment point aligned with the pan segment’s axis of rotation. In both cases, the axis of the next pan module would be located directly above the current pan axis. This was for aesthetic reasons (so as not to have a zigzagging arm) and because any offsets between joints in the arm would increase the complexity of the inverse kinematics (the calculations used to determine which joint angles are required to move the end-effector of the arm to a desired location). The first option had the advantage of leaving more space inside the body of the arm for the belt and pulley system, while the second reduced the potential moment arm caused by the upper segments of the arm about the connection point between the shaft of the pan joint and the lower structure. An excessive moment about this point would have the potential to deform the material of the structure (especially in the module closest to the base), which was deemed unacceptable. Therefore, the configuration with the attachment point inside the envelope of the arm was chosen. After an initial prototype of this joint was assembled, it was realized that only having a single point of support for the shaft of the pan joint would place a large load on that section of the structure and the ball bearings. This concentrated load would potentially deform the plastic surrounding the bearings, leading to play in the arm, or could cause the shaft to bind, due to the close spacing between the ball bearings supporting the shaft. For this reason, a second vertical pillar was added to the main structure of the arm, which supported the far end of the shaft. This halved the load felt by each shaft-structure interface, and reduced the likelihood of binding by moving the bearing contact points further apart. Figure 4 shows a side-by-side comparison of the old and new designs. FIGURE 4. NEW (LEFT) AND OLD STRUCTURE DESIGNS, WITH ADDITION OF TOWER TO SUPPORT TILT SHAFT 2.4 Module interface In addition to designing the individual modules of the arm, the method of connecting these modules together – and fixing the bottom module to a surface – also had to be considered. This connection primarily consists of the bearing that allows for rotation of the module on the surface it is connected to, and the method of fastening these two faces together. Initially, many difficulties were encountered when attempting to solve the problem of how to allow the pan joint of a module to rotate smoothly, while resisting the loads imposed by gravity and by the following modules or the payload. Consider the base joint of the arm, where the pan joint of the first module interfaces with a fixed surface, such as a workbench or floor; if the arm is in a configuration where it is extended horizontally as far as possible, there is a large moment about the base joint. On the other hand, if the arm is extended vertically, there is a large downwards force on the joint. This means that the bearing (or combination of bearings) used at this joint must resist both axial and radial loads, while also minimizing deflection. The initial solution that was implemented was to combine both thrust bearings and standard ball bearings (which support a radial load). The idea was that the ball bearing would absorb the load transferred radially from the shaft to the bearing, caused by any moment caused by the arm being extended, while the thrust bearing would prevent any vertical load being transferred to the inner race of the ball bearing, which is not meant to support loads in the axial direction. During testing it was found that there was a large amount of deflection about this joint if any moment was applied. It was determined that the only way to eliminate this deflection was to increase the diameter of the bearings being used, so as to increase the perpendicular distance between the shaft and the point of contact between the bearing and the module being supported. Unfortunately, the cost of bearings increases significantly as their diameter increases, so the use of standard bearings had to be abandoned. An alternative which was briefly considered was to use a tapered roller bearing, which is a hybrid of a roller and thrust bearing, allowing it to support both axial and radial loads, but this was again quickly discarded due to their even higher cost. Learning from these lessons, a solution was found by designing a simplified tapered roller bearing which would be 3D printed (Figure 5). Although this bearing did not include rollers, it incorporated the tapered profile to constrain vertical and horizontal movement. It was also designed with a large diameter to eliminate the play that had been previously observed. Testing showed that the friction between the two 3D printed surfaces was minimal, and even under considerable compression load it was able to rotate freely. FIGURE 5. BOTTOM HALF OF 3D PRINTED TAPERED BEARING MOUNTED TO MODULE BASEPLATE One issue that was only discovered during the testing performed after the 4DOF arm was fully assembled was the vibration of the arm when it completed a movement. As the arm decelerated at the end of its commanded trajectory, it oscillated about its final position; however, this vibration was not caused by the servo control loop, as the motor shaft remained fixed. It was determined that the oscillation was caused by the belts (to be discussed in the drive train section) and the play in the 3D printed bearing at the arm’s base. The contact force between the two faces of this tapered bearing could be adjusted by tightening a bolt, and especially in cases where the arm was moving without a load, when the arm decelerated the play in the bearing caused a low frequency vibration. It was possible to significantly reduce the vibration by increasing the bearing contact force, however this also led to an increase in friction at the joint. Therefore there is a trade-off to be made when adjusting the force pushing the two faces of the bearing together. To fasten the modules together, the two surfaces were bolted together at four points. Warping of the flat surfaces being fixed together caused by the 3D printer presented some issues, as tightening one bolt would cause the opposite corner to separate from the surface it was to be attached to, but repeatedly tightening the bolts one after the other solved this problem and allowed for a solid connection between modules. 2.5 Drivetrain In the context of this robotic arm, the drivetrain is the system of belts, shafts and bearings which transmit the torque from the servos to the joints. The two biggest challenges encountered during this project were related to the tensioning of the belts, and the elimination of slippage at the shafts. The design features that were implemented in order to overcome these challenges are discussed in this section. Early in the design stage, the two possible methods of transmitting the torque from the servos to the joints were using a capstan or using toothed belts. Implementing a capstan system involves wrapping wire many times in between two shaft in a figure-eight pattern; the friction between the many loops of wire and the shaft is enough to transmit torque without slipping. A capstan would have performance advantages over toothed belts, however during initial experiments it became clear than a lot of work would have to be put into the design of the system to achieve adequate performance, so it was decided to pursue toothed belts instead. The reason for this was that toothed pulleys and belts can be easily purchased and are proven to work in similar applications, whereas there was little information available related to the design or fabrication of capstans. In addition, it was believed that a toothed belt system could be replaced with a capstan in the future, as they occupy a similar amount of space on the shafts. The Miniature Extra Large (MXL) timing belts and pulleys were chosen from McMaster Carr, and this choice drove much of the future design. These belts were selected mainly for their low cost, and because a spare belt from the project lab was manually tested before ordering and seemed to perform well. There is a lack of technical specs available for these belts, so it was only possible to make an estimate as to the acceptable tooth pitch and depth. The diameter of the toothed pulleys, which were connected to the servo and to the joint shaft, were selected based on the required gear ratios calculated in the project proposal. Only certain numbers of teeth (and by extension diameters) were available, so the final gear ratios were not exact. Choice was also limited because as the diameter of the toothed gear increased, at intervals the shaft diameter increased as well. Since it was necessary to use the same shaft diameter for each module, it was difficult to match all the chosen gear ratios while staying with pulleys that fit the same diameter shaft, however an acceptable solution was reached. At first the drivetrain was designed with the motors fixed to the arm structure, which meant the belts had to be exactly the correct length to fit over both pulleys. It was believed that if the dimensions of the belt and the pulley were known, it would be possible to locate the motors precisely enough to have a tight fit. Belts with a range of sizes were purchased in order to test this design, but it was found that it wasn’t possible to find all the correct dimensions required for the system to fit together well – the distance between the two pulleys never exactly matched any belt length, and even in the cases where the dimensions were close, it was difficult to assemble the whole system. To overcome these problems, it was decided to allow the motors to slide on a set of tracks, so that the belt could be placed around the two pulleys, and then the motors could be separated and bolted in place, allowing for variable tensioning of the belts (similar to in Figure 6). FIGURE 6. TENSIONING MECHANISMS FOR PAN JOINT. SERVO IS AT BOTTOM, AND BELT IS TENSIONED BY TIGHTENING BOLTS PARALLEL TO BELT The design of the belt tensioning system went through many iterations over the course of the project, and in order to justify the final design, the problems that had to be solved along the way will be discussed before describing the finalized design. Once it was decided that tensioning the belts was necessary, it was quickly found that there was a trade-off that had to be made between slippage of the belt and loads on the motors and structure. Initially, the belt was tensioned simply by sliding the servo until the belt was tight, and then fastening it in place. It was observed that when the actuated joint was under high loads, the teeth of the belt would jump on the toothed pulley; this could be heard, and resulted in an identical position command moving the arm to different positions over time (as the encoder is on the servo, not directly at the shaft). To eliminate this slippage, it was possible to increase the tension of the belt further, however this approached a tension which caused the belt to fail and resulted in unacceptable loads on the motor and structure. At one point the belt was tensioned to such an extent that it deformed plastically, which ruined the belt’s integrity, and another tensioning test caused the teeth to be partially destroyed as they were forced over the teeth of the pulley, which had not been allowed to rotate. In the case of the pan joint, where both the motor and the joint shaft are connected to the same base plate, increasing the belt tension cause this base to deform because of the applied bending moment. Finally, tensioning the belts also imposes a large radial force on the shaft of the servo itself (Figure 7); although there is an internal bearing, it is not designed for radial loads. The servo has a built-in force/torque sensor, and although the documentation does not make it clear exactly what it measures, there is a programmed maximum value, above which the servo will stop working and give an error. This behaviour was observed if the belt tension was too high, and the servo would have to be restarted and the load removed for it to function again. FIGURE 7. DIAGRAM SHOWING FORCES (RED) AND MOMENTS (BLUE) CAUSED BY TENSIONING BELT These problems caused by tensioning the belts were discovered over the course of multiple design iterations, each of which attempted to solve the problem. The final design had two main features which resolved the problems: additional structure was added to support the shaft as close to the belt as possible, and a more robust tensioning mechanism was used. An additional structure holding a bearing supporting the shaft was added on the drive shaft between the servo and the belt and pulley attachment point, so that the large load caused by tensioning was transferred directly to the structure instead of to the servo. This additional structure also increased the rigidity of the base plate, preventing it from deforming. The method for adjusting the tension was improved by supporting the shaft on multiple sides instead just at the base (Figure 8), so that the belt would produce less of a moment about the base of the motor (again, leading to deformation of the structure), and the tensioning was performed by using bolts which were aligned parallel to the direction of the belt tensioning (perpendicular to the drive shaft), and by tightening/loosening these bolts, the drive shaft was moved away from the driven shaft; in this way, the force was transferred to the bolts instead of to the motor. These solutions did not resolve the problem of the belts deforming, but this will be addressed in the recommendations section. FIGURE 8. ADDITIONAL STRUCTURE ADDED TO SERVO TO SUPPORT SHAFT AGAINST BENDING MOMENT. DIRECTION OF BELT TIGHTENING SHOWN IN GREEN The second major challenge that was encountered was the difficulty of fixing the toothed pulleys and 3D printed segments to the shafts (which were steel bolts). Each joint was fixed, on after the other, by filing a flat in the shaft at the appropriate location and adding one or multiple set screws to the part that was being fixed to the shaft (Figure 9). This solution worked well, though it meant the printed parts needed to be made with more infill, otherwise the set screws would tear out the material, as they were tightened quite tightly against the shaft flat. FIGURE 9. CLOSE-UP OF TILT JOINT SHOWING TWO SET SCREWS AND THE SHAFT FLAT As mentioned in the discussion of the 3D printed tapered bearing, when the arm decelerated it would vibrate somewhat about its final position. This can be partially attributed to the play in the bearing, however it is also caused by the slight flexibility of the belt, which act as a highstiffness spring. Increasing the belt tension reduced this effect, however it was not possible to eliminate the vibrations completely through tensioning with the currently used belts. 2.5 Software In order to control the movement of the robotic arm, electronics were required to power the servos and to transmit the command signals from the microcontroller, and code onboard the microcontroller was written to give the user access to the servo’s capabilities. An interface diagram of the overall system is shown in Figure 10, with the BeagleBone Black microcontroller (hereafter referred to as BBB) at its center. The BBB is connected to a computer via USB to provide a command line interface, and it is also connected to the arm’s servos via a level converter. FIGURE 10. INTERFACE DIAGRAM FOR ELECTRONICS The BBB’s USB connection provides power to the microcontroller and allows the user to input commands. One feature of the HerkuleX servos is that they can daisy chained together, because they all run on the same serial bus. This is advantageous as it requires only a single set of wires to run the length of the arm, and only one of the BBB’s serial ports needs to be used. The servos receive serial commands from the BBB over the serial bus, however the BBB is at a logic level of 3.3V, while the servos will only function with a 5V signal. For this reason a level converter must be used to boost the voltage of the output signal. The Sparkfun level converter was chosen to perform this task, as it was available from the Project Lab. The wiring diagram for connecting the BBB, the level converter and the first servo in the chain is shown in Figure 11. FIGURE 11. WIRING DIAGRAM FOR SPARKFUN LEVEL CONVERTER For all the testing performed over the course of this project, a benchtop power supply was used to power the servos. This allowed the current usage to be monitored during the tests, and allowed the servo input voltage to be varied. The power supply was used to provide a 5V reference to the level converter and between 7.4-9.5V to the servos. It was observed that a single servo would draw approximately 10mA while not in use and not under load (at 7.4V, the servo’s recommended input voltage). While under load but not moving, the servo would draw around 300mA, and this could reach up to 800mA when moving under heavy load. For this reason, when a custom power supply is designed or purchased to power the servos, the maximum current it can provide will be a main factor in its selection. The BeagleBone Black microcomputer was chosen because it is able to run various distributions of Linux, and because it has a command line interface. Running Linux was initial thought to be necessary as it had been planned to implement the Robotic Operating System (ROS) onboard, which is only able to run on Debian or Ubuntu. The command line interface meant that it was possible to edit files directly on the microcomputer, and to compile and run files onboard, without having to upload them manually as with the Arduino. The operating system that was installed on the BBB was Debian, as it would allow both ROS and the industrial robotics package MoveIt! to run, and it was easier to install than Ubuntu. To use the BBB, it should be connected to a computer using a USB cable. The blue LEDs on the board will initially all light up, then begin to flash, which indicates that it has booted up. To access the BBB from a computer running Ubuntu, use Terminal, and to access it from a Windows computer use MobaXterm. To ssh into the BBB, use the command ‘$ ssh 192.168.7.2 –l root’, where 192.168.7.2 is the BBB’s default address, and ‘-l root’ logs in as root. The password for the current account is 1515, which will need to be entered on login. Once this is done, it is possible to read and write files of the BBB, and interface with the board’s input and output pins. The files for this project are in the directory ~/six-dof-arm. Currently, commands are entered directly from the command line of the BBB, however in the future a different command flow might be used, especially if a motion planning software is put into use. Three options for implementing this with ROS were considered, each of which has its own advantages. The BBB is powerful enough that it is able to run the ROS Master node (an essential part of the ROS hierarchy), and it can also run as its own ROS node. A description of ROS is outside the scope of this report, but as a primer: ROS runs a master node and any number of other nodes. The master node routes commands and information requests between the different nodes, while the individual nodes represent either hardware (e.g. a servo motor) or a software functionality (e.g. a trajectory planning module). In the case of this project, the robotic arm would have its own associated node which would allow it to receive commands, and respond to requests for position information. Additional nodes would be implemented for the different motion planning and control components, such as inverse kinematics and trajectory planning. The potential options are: Run all the nodes on the BBB. In this case, all work could be done through the BBB, and only an external monitor and keyboard would have to be connected. This has the advantage of using less external hardware, however it would likely not work if motion planning software other than ROS was used. Run the ROS master node on another computer, and run a node on the BBB to control the arm. This would require another computer to be used, however there would be more flexibility in which software could be run in the external computer. The motion planning could be performed on an external computer, and the joint commands to execute the desired movements could be saved to a microSD card, which would then be inserted into the BBB, which would execute the commands. All of these setups are possible, and the choice of implementation will depend on the sponsor’s needs and the choice of motion planning software. As previously mentioned, the BBB sends and receives commands from the servos over a serial bus. As the servos are daisy chained together, only a single serial port on the BBB is required. Up to four serial ports are available, however because the BBBs pins are multiplexed to expand their functionality, only one of these is enabled by default. To increase ease of setup, this one (UART1) was used. UART1 uses pin 24 (TX) and 26 (RX) on header 9; these pins are shown in Figure 12, and more information regarding these pins and pin multiplexing can be found in the BBB System Reference Manual (SRM), which is available online. The HerkuleX servos can operate at a range of baud rates, however the default 115200 rate was used. In the future it may be desired to increase the baud rate if the control loop frequency needs to be very high. FIGURE 12. DIAGRAM OF BEAGLEBONE BLACK WITH USEFUL PINS LABELED To send commands over the serial port, C code was written to enable the port and to send commands; this code is included in Appendix B. 2.5.1 Sending commands to the servo In order to properly communicate with the arm’s servos, each command packet must have a specific structure, as shown in Figure 13. FIGURE 13. CONTENTS OF COMMAND PACKET (FROM SERVO MANUAL, P18) For more details on how each byte of the command is generated, page 18 of the HerkuleX User Manual can be referenced. Because the servos are daisy chained together, each command must be directed at an individual servo by specifying its id. Each servo has a default id of 253, and this can be changed by the user. There are a set of default commands which can be sent to the servo, which are listed in the following table extracted from the user manual. FIGURE 14. LIST OF COMMANDS (FROM SERVO MANUAL, P41) The primary commands that were used for this project were RAM_WRITE, RAM_READ and I_JOG. RAM_WRITE allows values to be written to the servo’s internal volatile memory, which is useful for temporarily changing a servo’s id, changing motion limits and setting the torque setting. RAM_READ can be used to read data values from memory, most importantly the servo’s position. I_JOG stands for individual jog, which allows a movement command to be sent to a number of servos. One issue that presented itself initially was that even when everything was set up correctly, and proper movement commands were sent to a servo, the servo would refuse to move. After much trial and error, it was discovered that these servos have a “torque policy” setting, which allows the motor torque to be turned on and off (it is off by default). This setting has to be modified in memory before it is possible to actuate the servo. 2.5.2 Code Two C++ classes were written to allow the user to control the robotic arm. The Servo class allow the user to control an individual servo, while the Manipulator class allows for commands to be sent to a set of servos simultaneously. A brief description of the functionality provided by these two classes follows; the full code is stored on Github, and is accessible at github.com/liamhodgson/six-dof-arm. The Servo class allows a Servo object to be created, which is initialized with the id of the servo it is associated with. The public member functions which can be called on this servo object are: - Move(float angle): the servo is rotated to the commanded angle - getPosition(): the servo position as measured by its built-in encoder is returned - readAddr(int addr, int nBytes): the values stored in the servo’s RAM at the specified address are read and returned - writeAddr(int addr, vector<int> data): the specified data is written to the specified address in the servo’s RAM The Manipulator class allows multiple Servo objects to be created; the class’s constructor is initialized with a list of the servo ids. The public member functions which can be called on this manipulator object are: - moveAll(vector<int> goals): all the servos associated with the manipulator object are simultaneously moved to the commanded positions. - readAll(): the measured positions of all of the servos are returned 2.6 Testing In order to verify that the arm design met the project requirements, various tests were performed throughout the course of the project. Belt tensioning tests were performed throughout the course of the design to see whether the tensioning mechanism and associated structures were satisfactory, and repeatability and load tests were performed on the final 2DOF and 4DOF arm assemblies. 2.6.1 Belt testing At each iteration of the design, the ability of the drivetrain to perform under load was tested; these tests were crucial as they often led to discoveries of points of failure within this system, which led to improvements of the tensioning mechanisms and arm structure. The initial verification test of the drivetrain involved actuating a joint over its full range of motion with no load, while adjusting the belt tension and the tightness of the set screws fixing the printed parts to the shafts. During these tests two phenomena were qualitatively measured to assess the performance of the system: the slipping of the belt, and the slipping of parts on the shaft. These were measured by observing the joint’s position as it was moved back and forth between its extreme positions: the servo was verified to be highly repeatable, so any discrepancy in measured final position after a sequence of movements was due to slip. Slipping of the belt occurred by two different means: by stretching of the belt and by sliding of the teeth of the belt over the pulley teeth. While not technically slipping, under high tension the belt was observed to stretch and plastically deform after a series of moves (as seen in Figure 15), which led to the measured joint position changing even though the servo commands were unchanged. This is believed to be caused by over-tensioning of the belt, and by the stress imposed on the belt as the joint accelerated and decelerated at the start and end of each movement. FIGURE 15. COMPARISON BETWEEN OVER TENSIONED BELT (LEFT) AND NEW BELT (RIGHT) When the belt was under-tensioned, it was possible for the teeth of the belt to jump over the pulley teeth, which was visible as a jerk during an otherwise smooth movement. Because the belts being used had shallow teeth, it was observed after several skips that the teeth became worn and that some of the fibers of the belt became frayed (Figure 16). FIGURE 16. CLOSE-UP OF WORN BELT, SHOWING DAMAGED TO TEETH AND BELT FIBERS As the observations were made, the tension of the belt was being monitored to determine what belt tension was optimal. The belt tension was measured by twisting the belt about its length at a point in between two pulleys and observing how far it could be twisted. It was determined that the best belt tension was reached once it was no longer possible to twist the belt more than 90 degrees (Figure 17) - this eliminated the belt from skipping teeth while not overly deforming it. FIGURE 17. PROPER LEVEL OF BELT TENSION: IT SHOULD JUST BE POSSIBLE TO TURN BELT BY 90 DEGREES During some of the tests it was observed that slipping occurred without the toothed belts or pulleys moving; it was eventually found that this was caused by various parts slipping on the steel shafts. This was eliminated by adding set screws to rest on flats added to the shafts, however this took many tests to remedy, because each time slipping was eliminated at one connection, it began to occur at the next shaft connection. This progression began at the shaft connection closest to the load and moved towards the connection between the servo and its shaft, demonstrating how fixing the weakest link in a system often exposes the next weakest link. 2.6.2 Repeatability testing The repeatability requirement of the complete arm was for the arm to return to a commanded position after a 50 degree movement with less than 1mm error. As it was not possible to construct a 6DOF arm, it was not possible to verify that this requirement was met, however the repeatability of a single module and of two modules connected in series was tested to check that the final requirement was on track to being met. To test the repeatability of the modules required actuating a given joint over its range of motion, from one end to the other and back, multiple times. At the start of the test, the home position of the joint was marked, and after the sequence of back and forth movements, the final position was marked and compared to the initial marking. Because the motions of the joints was rotational, the <1mm repeatability requirement was taken to be along the tangential direction. It was also not specified whether the requirement should be met with or without load, however it was observed that the repeatability was the same in both cases. The various test cases are listed below. For each test, the repeatability was found to be less than 1mm, however this result will have to be measured again once the 6DOF arm is completed. single module (2DOF), no load (repeatability of both first and second joint measured) single module, under load (second module mounted on top) - repeatability was measured at interface between first and second module (repeatability of both first and second joint measured) two modules (4DOF), no load - repeatability was measured at interface at end of second module (repeatability of only tilt joint was measured) 2.6.3 Load testing The maximum load that a single module was able to lift was measured; this measurement is assumed to be the same for all modules (as long as the same servos are used to actuate the joints), and thus this measurement can be combined with the known mass of each module to estimate the payload that any point along the arm could lift. The load was measured by suspending an empty container from a bolt fixed to the interface at the end of the tilt axis of the module. The tilt axis was used for this test as it is the joint which will experience the highest moments in the entire arm. The joint started off horizontal and was commanded to move against gravity by an angle of 45 degrees (it was not deemed useful to move over a larger range of motion, since the moment arm decreased as the joint approached vertical). The joint was then returned to the horizontal position, and mass was added to the container (see Figure 18 for the setup used). This process was repeated until the joint was no longer able to satisfactorily lift the load. The performance was said to be unsatisfactory if either the motor stalled or the joint slipped, which could be observed if the home position of the joint changed at the end of a movement. The motor was never observed to stall during this test, and so the max load rating is due to slippage at the joint or belt. After several tests, the lowest load at which the joint slipped was a mass of 507g suspended at a distance of 16cm from the axis of rotation, resulting in a max torque of 8.1kgcm. FIGURE 18. ARM SETUP FOR TESTING LOAD CAPABILITIES 3. Conclusions Over the course of this project, a modular 3D printed arm was designed, and shows promising results. The arm was designed to be made up of three identical modules which could be connected together in series, which proved to be a good design choice as it allowed for flexibility when it was not possible to procure all the servos needed to actuate all six joints. The 3D printed structure allowed for rapid iteration and convenience of mounting servos and other components; it also provided sufficient stiffness and strength for the intended application. Overall in designing a robotic arm to meet the particular specifications of our project, both using a modular design and using 3D printing as the primary means of fabrication were found to be very successful design choices. The current arm design uses HerkuleX servos connected via toothed belts to the joint shafts in order to increase the torque (via gear ratio) and to allow the servos to be located with more flexibility. Various tests showed that the belt would slip if not tensioned enough, and also had the potential of stretching or tearing if the tension was too high. A large amount of additional design effort was required to make the arm able to tension the belts properly and to withstand this tension force. While the particular toothed belts that were used in this design did allow the arm to function properly, they required what was seen as unnecessary effort. The repeatability and payload capability of the 4DOF arm were tested in order to determine if the design met the project specifications. The complete 6DOF arm was required to have less than 1mm repeatability error, and the repeatability of both a single module and of two modules connected in series was measured to be less than 1mm. Further tests will have to be performed if an additional module is constructed to see if the entire 6DOF meets this specification, but the results thus far are promising. With the two modules connected together, the lifting capability of the first module was tested. The payload capability of each module was measured at 8.1 ± 1 kg-cm. The complete 6DOF arm was required to lift 1kg at 50cm, however it was not possible to test whether this requirement was met because of the missing high torque motors. Using the servos that were available, the base module was shown to be able to lift another complete module over a full 90 degree range (horizontal to vertical), suggesting that with servo and belt upgrades the requirement could be met. 4. Project Deliverables 4.1 List of Deliverables As the project has reached a conclusion, there are particular elements of the project that must be handed over by our team to Marginally Clever Software. The original deliverables which were decided upon in the project proposal included: the final recommendation report a prototype arm, which was mechanically and electrically complete and able to move to any commanded location build instructions for the arm, specifically step-by-step instructions with photos a bill of materials mechanical CAD drawings software, including code on the microcontroller to interface with the servos and a computer program to command arm positions As has been mentioned earlier in this report, certain challenges were encountered which make it impossible to complete all of the required deliverables. Because the proper high torque servos weren’t available, it is was not possible to fully complete a prototype arm having six degrees of freedom, so the deliverable must be changed to a mechanically and electrically complete 4DOF prototype arm. The software deliverables also evolved as a result of our sponsor’s plans. Our project sponsor requested an interface between the microcontroller and the arm, as the sponsor will be writing the high-level kinematic control software at a future date. The updated list of deliverables that will be provided to the project sponsor are: the final recommendation report a prototype 4DOF arm, which is mechanically and electrically complete build instructions for a single module of the arm, specifically step-by-step instructions with photos a bill of materials mechanical CAD drawings code allowing the microcontroller to interface with the servos 4.2 Financial Summary Financing for this project was undertaken in part by Marginally Clever Software and in part by the Engineering Physics Project Lab at UBC. The breakdown of purchases has been outlined in the tables below. The following tables can be used as context for the cost-estimate of this project. TABLE 1. COMPONENTS PURCHASED BY THE PROJECT LAB TABLE 2. COMPONENTS PURCHASED BY PROJECT SPONSOR All components which were not used in the final design of the arm and were purchased by the project lab will be returned to the project lab. This is mainly the timing belts which were not the proper size; it is hoped that these belts will find a good home on a future ENPH 253 robot. 4.3 Ongoing commitments by team members To hand over the project deliverables by the end of the week of April 6th. No further commitments. 5. Recommendations Based on the work performed over the course of this project and the lessons learned from this work, there are a number of recommendations this group would like to make, which will benefit the design should work be continued on this project. In brief, these recommendations are to upgrade or eliminate the timing belts, keep and optimize the 3D printed structure, reevaluate which servos to use, and use ROS for the control of the arm. 5.1 Timing Belts The use of timing belts was initially seen as an affordable, accessible way to provide low backlash torque transmission while allowing for an adjustable gear ratio. However, tensioning the belts was found to present a significant challenge, as the moments exerted both on the motor shaft and the 3D printed structure, due to the belt tension, required some complex changes in the design. These changes included: 1. Adding localized reinforcements to the 3D printed structure, to reduce the deflection of the plastic. 2. Designing an adapter to reduce and absorb the moment acting on the shaft due to the tensioned belt, and prevent this moment from being felt by the servo. 3. Constraining plastic parts to metal shafts by fastening set screws onto flat surfaces that were filed on the bolts. 4. Designing a tensioning mechanism to tension the belts while forming a desirable load path through the structure. These design modifications took a lot of additional time, while adding mass to the structure, increasing the number of parts required and increasing the overall complexity of the design. Even with these modifications, the belts that were used were still barely able to sustain the required loads; as was previously described, the belts showed signs of plastic deformation, and the teeth were observed to tear under certain conditions. There are three possible solutions to this problem, which are described in increasing order of the amount of time required to implement and the level of redesign required. The first option is to replace the current toothed belts and pulleys with another model which is designed for higher torque. The current MXL belt has a fine tooth pitch and shallow teeth, which is definitely a major cause of the failure of the belt to perform. The belt also has a small cross-section, which means the tensile load is distributed across a small area, and is likely the reason for the plastic deformation. The ideal new belt would be wider and have larger teeth; there are multiple belts available from McMaster Carr that meet these specs. For example, there exist High Torque Drive belts, which have a tooth profile design to reduce the chance of slipping and have a larger cross-section. Some re-design would be required to accommodate the new pulleys, but they should take up approximately the same volume within the arm. Theoretically, with a larger tooth depth, the belt would have to be tensioned less, which would reduce many of the problems encountered with the MXL belts. The downside of using these belts is that their cost is almost an order of magnitude higher, increasing the overall cost of the arm. The second option is to replace the toothed belts with either gears or a gearbox. This method was initially rejected as it added too much mass to the arm, and because a gearbox will have more backlash than a toothed belt. Despite these limitations, successful implementation of this option is possible, especially with the work that the project sponsor is doing related to the development of a hypocycloidal gearbox. If this avenue were to be pursued, all the initial design work would have to be redone to estimate the mass of the arm and the required joint torques. If a gearbox were used, it should be driven with a DC motor; this is the combination used by almost every single industrial robotic arm, with the addition of an encoder on each arm joint. For these reasons, implementing a gearbox would likely result in a complete redesign of the arm, and should be seen more as a separate project than a continuation of the current project. The final option is to eliminate the need to transmit the torque between the servo and the joint shaft completely, by coupling the shaft of the motor directly to the joint shaft. This option is only possible with the use of higher torque servomotors, which by themselves can cost significantly more than the combination of regular servomotors and drivetrain systems. High torque DC motors can also be used and are significantly cheaper than most servomotor configurations, but they require external rotary encoders for position feedback, which can be difficult to implement since they require a controller (PID for example) to satisfy the repeatability requirements. Since the cost of the overall prototype is estimated at $506.63, well below the $1500 limit, the best alternative could be to implement the higher torque servomotors because of their in-built controller. Implementing higher torque servomotors would save research and assembly time, as well as reduce the number of parts in the robot, making the robot lighter and with a higher payload. 5.2 3D Printed Structure During the proposal phase of our design, we were skeptical as to whether a 3D printed structure would be able to withstand the loads experienced by the arm with minimal deflection and without failing. This was partly due to a lack of intuition about the performance of printed parts under load, and because estimating the material strength of a printed part is very difficult to do because the 3D printing process produces parts with non-uniform mechanical properties. After iterating through our design, we found that a 3D printed structure is suitable for this application because the 3D printing allows for complex structural reinforcements. While testing the arm, deflections on the material due to tensile loads were observed. It was possible to eliminate these deflections by reinforcing the structure by adding more material to a particular section, filleting and chamfering edges, and adding brackets. Further work could be done to reduce the weight of the structure by strategic removal of material from the areas of the structure which do not bear much of the load, and by adjusting the infill density and wall thickness of the print. As most of the loads experienced by the structure, particularly the vertical towers supporting the tilt joint, are in bending, it is best to place more material furthest from the neutral axis. It is believed that increasing the wall thickness while decreasing the infill density will maintain the strength of the structure while decreasing its weight. While 3D printing was mostly successful in terms of deflection and structural strength, the 3D printed thrust bearing, which serves as a contact interface between the pan joint and a stationary baseplate, exhibited a number of disadvantages. Because the main goal of this bearing was to bear the bending moments about the pan joint, it was necessary for the surfaces in the thrust bearing to sit flush against each other, preventing the joint from being displaced from its intended axis of rotation. Under load, we found that the moments about the pan joint require that the surfaces of these bearings be tight against each other. The downside to that is because the tighter we press the plastic surfaces against each other, the higher the friction, and more torque must be generated by the motor to actuate that joint. This would not be the case with a standard thrust bearing, which contains stainless steel balls and are rated to high loads. Therefore, for this application, the use of 3D printed plastic for bearings, especially thrust bearings, is not advised. 5.3 Smart servo motors Based on a trade-study performed in the proposal for this report, HerkuleX servo motors were selected to actuate the arm’s joints. The less expensive but lower torque HerkuleX DRS-101 servos would actuate the joints closer to the end-effect, while the HerkuleX DRS-201 servos would actuate the joints near the base of the arm. The competing servos, which were not selected, were the Dynamixel line of smart servos. In the proposal is was concluded that both brands offered similar performance, but for our particular application the HerkuleX servos offered two advantages: they were slightly less expensive in total, and the servos all had the same form factor, meaning it would not be necessary to modify the design to accommodate different mounting hole locations. After upgrading the belts to one which are able to withstand the imposed torques, the expected torques at each joint should be recalculated. In the project proposal, the joints torques were calculated based on estimated mass, gear ratios and transmission efficiencies, however now these values can be known with greater accuracy. The mass of a module was in fact estimated quite accurately: the estimated mass, excluding motors, was 350g, and the final measured mass of motorless module was 400g. However, because only certain gear ratios were possible, these are slightly different from those used for the initial calculation. Most significantly, the estimate of an 80% efficiency is likely a large overestimate, as the joints have much higher friction than was initially expected. This is especially true for the 3D printed pan joint bearing, which has plastic rubbing against plastic. It is likely that the actual efficiency is below 50%, and a way of measuring this should be devised. Based on these updated values, the expected torque at each joint should be recalculated. Based on these new torque values, a decision should be made as to whether to keep using the HerkuleX DRS-101/201 servos, or whether different (likely higher torque) servos should be used. As mentioned in an earlier recommendation, the complexity of the mechanical design could be simplified by eliminate the belt system and replacing it by higher torque servos coupled directly to the shaft. This would increase the overall cost of the arm, however this increase may be worthwhile given the results benefits. Firstly, the cost of the belts and pulleys purchased from McMaster Carr was much higher than expected; it was initially believed that this cost would be insignificant, but in fact the total cost for the parts used in the two module arm (not counting the belts which were not used because their dimensions were incorrect) was over $100. If the move is made to better belts which are better able to withstand the tensioning force and the external torques, this cost would likely increase as well. A further advantage of coupling the servo directly to the shaft is that the servo’s encoder is then connected directly to the shaft it is driving, instead of being separated from it by the drive train. This provides a truer position measurement, as currently belt slippage cannot be detected by the servo’s encoder, and thus if the belt slips the actual position of the joint and the position measured by the servo are in disagreement. Finally, the experience gained from working with the HerkuleX servos leads to some recommendations about the choice of servo brand. HerkuleX servos have been introduced more recently than the Dynamixel servos, and this shows in the quality of the documentation and the size of the community that can provide support. In many cases while reading through the user manual for the HerkuleX servo, commands or instructions were not clearly explained, or conflicting information was provided. This may be in part due to the fact that it appears the manual was translated from Chinese (?), and there are some table titles and other words which remain untranslated. A lot of time could have been saved in the programming of the servos if certain things had been better documented. On the other hand, Dynamixel provides extensive documentation for their servos, and they are also much more widely used, so there is an online community which is able to answer questions about their use. Because of this, an effort should be made to use Dynamixel servos unless the specifications their servos provide are incompatible with the new requirements. 5.4 ROS Although programming the higher level control of the arm was not within the scope of this project, research was done into how to implement the control of the arm using the Robotic Operating System (ROS), which was the method put forward in the project proposal. Based on this research and experience gained elsewhere, it is believed that ROS is a strong candidate for the arm control software, for the following reasons. ROS is widely used in the robotics research community; the reason for this is that it is open source and allows for the creation and sharing of software packages which provide diverse basic functionalities. This allows researchers to spend less time on implementing methods which have been implemented many times in the past, and to focus on the more novel parts of the research - basically, it reduces the need to re-write code from scratch. Because of this, most of the basic robotic arm control code has already been written, debugged and tested in already existing arms. Therefore, by implementing the arm control using ROS, this arm would be an attractive option for use by researchers, in addition to by hobbyists. Furthermore, the control of a six degree of freedom arm is quite complex, especially compared to a three degree of freedom arm. The inverse kinematic methods that much be used to determine joint angles for a given end-effector position are mathematically complex, but these complexities can be abstracted away by using the already existing inverse kinematics packages within ROS. ROS and its associated packages provide pre-existing visualization software, which allows the user to test out commands on a virtual arm before sending the commands to the actual arm. This can reduce debugging time and reduce the risk of damaging the arm through erroneous commands. One drawback is that ROS has a steep learning curve, and for simple control applications it may be preferable to write code from scratch, so that it is easier for the developer to understand the code in its entirety. Appendix A: module assembly instructions Two interconnected modules Assembling a Two-Axis Module Component List (For one Module) Hardware and Purchased Components: 1/4” bore radial bearing x6 1/4” bore thrust bearing x2 1/4” bore washer x4 M2x10mm bolt x 16 M2x5mm bolt x4 M3x30mm bolt- x4 M3x20mm bolt x4 M3x15mm x7 M3 nut x 3 M3 washers (Optional) x 8 M4x30mm bolt x2 M4 lock nut x2 1/4” x 80mm bolt x1 1/4” x 100mm bolt x1 1/4” bore lock nut x1 M5 washer x2 Herkulex DRS-0101 smart servo x2 Herkulex L-bracket for mounting x4 1/4” bore pulley (Various Diameter) x2 1/8” bore pulley (Various Diameter) x2 Timing Belt (Various diameters to fit pulley selection) x2 Printed Components Motor Adapter x2 Pan_Axis Motor Bracket x1 Tilt_Axis Motor Bracket x1 Pan Bearing (Top / Bottom) x1 Tilt_Axis Segment x1 Module Spine x1 Lasercut Components Base Plate x1 Step-by-Step Assembly 1. Print components and gather supplies Photo of all components for one module (Labeled) 2. Assemble HerkuleX motor interface a. File a 30mm M3 bolt on four sides b. Slide the filed M3 bolt through the motor adapter and secure the bolt in place with four M2 bolts. c. Secure the motor adapter to the Herkulex motor with four M2x10mm bolts d. Slide a bearing (1/4“ bore) onto the motor adapter. e. Secure an M5 washer onto the motor adapter and press onto the inner ring of the bearing. The washer should not be in contact with the outer ring of the bearing. f. Repeat this assembly for the second motor. 3. Assemble motor in ‘pan’ axis bracket a. Assemble Herkulex L-brackets onto the motor, as shown in the figure below. b. Place motor in pan axis motor bracket as shown in the image below, and fasten. c. Slide a pulley with 1/4” bore onto the motor axis bolt and secure side screw on the flattened face of the bolt. d. Insert M4 bolts and secure lock nuts into place . 4. Assemble motor in ‘tilt’ axis bracket a. Assemble Herkulex L-brackets onto the motor, as in the photo below. b. Place motor in ‘tilt bracket’ and fasten in place c. Slide a pulley with 1/4” bore onto the motor axis bolt and secure side screw on the flattened face of the bolt. 5. Assemble ‘Pan’ axis. a. Place pan bearing top section on base plate and line it up with the fastening holes. b. Place 1/4” bore bearing in pan bearing c. Place the module spine on the opposite side of the base plate, and fasten it in place with three M3 bolts (One 30mm and two 20mm) d. Insert bearing into the top of the pan axis of rotation on the module spine e. Take a 1/4-20, 100mm bolt and file four sides 15mm from the bottom of the bolt. Also file two sides of the bolt (90 degrees separated) 15mm from the head of the bolt. f. Fasten a 1/4” bore pulley against the bolt head, securing the set screws on the filed sides of the bolt. g. Slide washers and thrust bearing onto the bolt and insert the bolt into the pan axis position of the main printed module. h. Slide the bottom part of the pan bearing onto the end of the bolt and secure the bearing using four M3 bolts against the filed faces of the bold. i. Secure a lock nut on the end of the bolt. Make sure not to tension too much, as friction and stability have a tradeoff. 6. Select and tension the timing-belts for the pan axis a. Thread the pan axis tensioning clearance holes on the module spine b. Secure the pan motor assembly in the nearest possible position to the pan axis of rotation. c. Start with a small diameter belt (Perhaps 80mm). Note that the belt size may vary based on pulley diameter used. d. Place the timing-belt into position around the two pulleys. e. Tensioning is achieved by unscrewing the M4 bolts from in the tensioning holes. Be very careful not to over tension, as the belt can easily reach its limit. 7. Assemble ‘Tilt’ Axis a. File a 1/4” diameter, 80mm length bolt on three sides, as seen in the figure below. b. Insert 1/4” bore bearings into the tilt axis support structures c. Slide the bolt through the first bearing (The side with the curved support structure). Before the bolt reaches the second bearing, slide the thrust bearing and washers onto the bolt. Slide the tilt pulley and tilt axis timing belt onto the bolt. (Timing belt size may vary based on pulley diameter). d. Slide the tilt axis segment onto the bolt. e. Slide the bolt all the way through until the bolt head rests on the inner ring of the bearing. f. Line up the filed sides of the bolt with the set screws of the tilt axis segment and the tilt pulley. Secure the pulley and segment to the bolt using M3x15mm bolts. (The holes will need to be threaded on the tilt segment). g. Thread the tilt pulley tensioning holes on the module spine with an M3 bolt. h. line up the tilt axis motor assembly with the tensioning holes and insert two M3 x 30mm bolts for tensioning i. Place the timing belt around both pulleys and tension the belt by increasing the tension between the tilt axis motor assembly and the module spine. 8. Secure the module to a base plate (Only if this is the first module) a. Use four M3 bolts to secure the module to a work bench station Microcontroller set-up and wiring 1. Connect BeagleBone Black to the whatever 2. 3. Motors can be “daisy chained together”, as shown in the picture below. ○ Picture of daisy chained motors 4. Microcontroller can sit on a mounting platform, away from the robot’s workspace Assembling Two Modules Together Component list 1. Two-Axis Module x2 2. M3x20mm bolt x4 3. M3 nut x4 Step by Step 1. Two two-axis modules should be fully assembled. One module should be securely fastened to a base plate or workbench setup. 2. The pan segment (lower pan bearing) of the second module can then be securely fastened to the tilt segment of the first module using four M3 bolts. Microcontroller set-up and wiring 1. Similar to the motor assembly for a single two-axis module, the motors can be easily daisychained together to connect the additional two modules. Appendix B: Code To save space and paper, see github.com/liamhodgson/six-dof-arm for the most recent code. References HerkuleX DRS-0101/DRS-0201 User Manual. Version 1.0. Accessed October 12th 2014. www.robotshop.com/media/files/PDF/manual-drs-0101.pdf