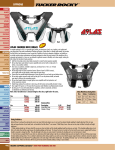
1
v1.0 September 12, 2005
AIRWIRE900Ô Wireless Throttle
Installing Batteries
Model T9000
Battery installation and Control locations. . . . . . . . . . . . . . . . . . . . . . . . . . . . . . . . 2
Running a train - easy as 1-2-3, Quick-Stop and function controls . . . . . . . . . . . 4
Using the display - the normal or run mode display . . . . . . . . . . . . . . . . . . . . . . . . 6
Showing speed values . . . . . . . . . . . . . . . . . . . . . . . . . . . . . . . . . . . . . . . . . . . . . . . 6
Changing the speed step setting (number of “notches” in throttle) . . . . . . . . . . . . 7
Restoring factory defaults and clearing memory . . . . . . . . . . . . . . . . . . . . . . . . . . 7
+
Working with Single Locomotives . . . . . . . . . . . . . . . . . . . . . . . . . . . . . . . . . . . . 8
Replace Battery Indicator . . . . . . . . . . . . . . . . . . . . . . . . . . . . . . . . . . . . . . . . . . . . 11
+
Changing Transmit Frequency . . . . . . . . . . . . . . . . . . . . . . . . . . . . . . . . . . . . . . . . 11
+
Working With Multi-Unit Consists . . . . . . . . . . . . . . . . . . . . . . . . . . . . . . . . . . . . . 13
Accessory Decoder Control . . . . . . . . . . . . . . . . . . . . . . . . . . . . . . . . . . . . . . . . . . 22
Service Programming . . . . . . . . . . . . . . . . . . . . . . . . . . . . . . . . . . . . . . . . . . . . . . . 25
Programming custom speed curves. . . . . . . . . . . . . . . . . . . . . . . . . . . . . . . . . . . . . 28
The internal circuit board is attached to the
faceplate. So, just like pulling your foot out of a
shoe, slip a fingernail into the opening at the face
plate’s bottom corner (the end nearest the power
switch) and pull the plate up and out of the box. If
the plate seems too tight, use a small screwdriver
to gently pry up the plate at the bottom corner,
between the plate and the box. .
The T9000 uses up to four AAA-size batteries. The throttle will operate on a single battery.
However, for longest life, use 4 batteries. The longest life comes from Alkaline-type
batteries.
Operations Programming . . . . . . . . . . . . . . . . . . . . . . . . . . . . . . . . . . . . . . . . . . . . 30
Bit programming example . . . . . . . . . . . . . . . . . . . . . . . . . . . . . . . . . . . . . . . . . . . 32
For best results, use batteries having a paper cover. Some inexpensive batteries are covered
with a very thin layer of paint. This paint is easily scratched when the battery is snapped
into the battery holder. If this occurs, the battery can be shorted out and the throttle will not
function properly. Shorted batteries become hot. Feel them before closing up the throttle.
The run-time environment and compatibility . . . . . . . . . . . . . . . . . . . . . . . . . . . . . 34
Troubleshooting notes. . . . . . . . . . . . . . . . . . . . . . . . . . . . . . . . . . . . . . . . . . . . . . . 35
T9000 Cheat sheet suitable for cutting out and laminating . . . . . . . . . . . . . . . . . . 37
The battery clips are staggered so the clips don’t touch. The clips are somewhat springy and
brittle. Squarely snap the batteries into the clips.
Command Summary and references . . . . . . . . . . . . . . . . . . . . . . . . . . . . . . . . . . . . 40
Index . . . . . . . . . . . . . . . . . . . . . . . . . . . . . . . . . . . . . . . . . . . . . . . . . . . . . . . . . . . . 42
. . . . . . . . . . . . . . Back
Slip the face plate back into the box and screw the antenna on finger tight. Do not over
tighten or you risk damaging the antenna connector. The shipping screw is not necessary.
The antenna holds everything together.
Removing Batteries Use a dull plastic or wooden object to gently pry the batteries up and
out of the holder starting from the outside and working towards the center. Do not use sharp
objects or there is risk of scratching and damaging the circuit board. Do not bend the
contact ends of the clips or they will break off.
WARNING - REMOVE BATTERIES
Remove all batteries from the throttle when not being used. Batteries
can leak and damage and or destroy the throttle. If the batteries leak
onto the throttle circuit board it can not be repaired.
AIRWIRE
900
TM
AirWire, AirWire900, the stylized AirWire name, T9000 and the logo are registered trademarks of CVP Products. © 2005
AAA Battery
First, unscrew the antenna and set it aside. If your
throttle has a shipping screw still attached at the
bottom, remove it.
The battery orientation is marked on the circuit board. Note the batteries all face the same
direction with the plus end towards the bottom.
CV29 Options . . . . . . . . . . . . . . . . . . . . . . . . . . . . . . . . . . . . . . . . . . . . . . . . . . . . . 27
1
AAA Battery
AAA Battery
+
Decoder Programming Introduction . . . . . . . . . . . . . . . . . . . . . . . . . . . . . . . . . . . . 24
Warranty Information, technical support, contact information
AAA Battery
Using Rechargeable Batteries Rechargeable Nicad batteries may be used along with an
external charger. The newer Nickel-metal Hydrides (NMH) cost a little more but have
none of the annoying characteristics of Nicad batteries. Be sure to use at least 2 AAA size
batteries. Most Nicad chargers will charge the Nickel-metal Hydride batteries. However,
for best results and the fastest recharge, always use a charger designed for the specific type
and chemistry of the rechargeable battery used.
2
Using The T9000 Throttle - Easy as 1-2-3
The T9000 Wireless Throttle
The liquid crystal display, LCD,
should not be pushed, pressed or
scratched. Excessive pushing on
keys or the rotary encoder may
result in image smearing.
Excessive heat can temporarily
cause the display to turn black. It
will return to normal appearance
in a few minutes after the heat
source is removed.
Rotary Encoder
Speed or Scroll Control
Push Down for Direction Key
All keys, including the direction key are
click style keys. Push and release
them”smartly” to avoid duplicate
entries. Always push and release a key
unless instructed otherwise.
Show Key
Service Programming Key
Operation Programming Key
The throttle comes preset for frequency 0 and locomotive address 3. Your AirWire decoder
also comes preset for frequency 0 and address 3. We suggest you use these settings and
follow the following steps to quickly get your locomotive running. At any time, you may
change the settings but for now, let’s use the factory settings and show you that using the
throttle is as easy as 1-2-3. Don’t forget to install the batteries.
1
Turn on the throttle and the decoder power
switches. The display shows the normal “run”
mode display. The active locomotive number, Ln,
(the decoder’s address) 3.The right arrow means the
forward direction is set. The remaining symbol is the
speed step setting which is set at 28 steps. This can be
changed and is described later.
2
Speed control is with the big knob. Turn the knob clockwise to increase the speed
of the active locomotive number. Turn the knob counter-clockwise to decrease the
speed. The speed control is a continuously turning rotary encoder. Unlike some
speed controllers, it does not use a center-off position. Turning the speed control
clockwise, increases speed until the maximum value. Turning the control
counterclockwise, decreases speed until the minimum value is reached, which is OFF.
3
Direction control is a push switch built into the
speed knob. Push down on the knob’s top and
release it to change directions. Notice the
direction arrow changes.
A right facing direction arrow indicates FORWARD relative to the locomotive’s cab. A left
facing direction arrow indicates REVERSE direction, relative to the cab. The direction
arrow does not indicate the physical direction of movement.
SEL DIR
Quick-Stop
You can instantly transmit the 0 speed command, to the locomotive independent of the
speed setting. This is called the “Quick-Stop” command. To activate the quick-stop
command, push the SEL and then the direction key. It may be activated at anytime and
works for a single locomotives or a consist. Although the speed command is now 0, the
locomotive may take a few moments to come to a stop. This form of emergency stop takes a
bit longer but is much less destructive to the gears and motors.
Select/Set Key
“Pound” or Enter Key
Star, Escape or Quit Key
The key or keys to implement the command or task in the black
banner are shown in the white rectangle. For example, quick
stop is invoked by pressing the SEL key and the Direction key.
This is abbreviated to SEL DIR.
SEL DIR
Power Switch - Slide Type
Left is off, right is on
3
4
Decoder Function Control
n or *n
The T9000 throttle supports all 13 functions, F0 - F12, as currently defined by the NMRADCC standard. It also supports F13 to F19 although these functions are not yet part of the
DCC standard. As a reminder, the AirWire decoder currently offers F0 and F6 for
controlling headlights and the smoke generator. Plus, any DCC-decoder connected to the
Auxiliary DCC output will also receive T9000 function control commands.
Note: It is the AirWire decoder and/or the optional external decoder that establish how
many functions are available and supported. Always read the decoder’s manual to
determine which functions are available as well as to their options.
Low Function Group - F0 to F9: Each of the T9000’s number keys are assigned to the
respective DCC function; the 0 key is F0, the 1 key is F1, the 2 key is assigned to F2, etc. To
active a low function, push the desired number key. When a function key is pressed, the
function number appears on the display and when the key is release, it stays on for a couple
more seconds and then the normal display reappears. Except for F2, all function controls
are latching. This means that the “activate” command is sent when the key is first pushed
and released. Pressing and releasing the key a second time sends the “deactivate”
command.
F2 is special and is usually assigned to a horn or whistle function. Pressing and holding the
F2 key activates the horn or whistle. Releasing F2 deactivates the horn or whistle.
High Function Group - F10 to F19: For function
numbers above F9, push the * key first. Notice that the
display shows F1_ with a blinking underscore. Push the
desired number to finish. If you didn’t mean to push the *
key, just push it again.
AirWire Decoder Uses F0 and F6
Function 0 and Function 6 are supported by the AirWire decoder. F0 turns headlights
on and off. F6 turns the smoke generator output on and off.
The “Normal” Or Run-Mode Display
Before jumping into lots of detail, take a look at what is called the normal run-mode display
which is abbreviated to simply “normal display.” Ln is the abbreviation for Locomotive
Number which is the decoder’s address. This is the current active locomotive decoder’s
address that is being controlled. The direction setting is shown by the black arrow. A right
arrow always meaning FORWARD, relative to the locomotive’s cab. A left arrow means
REVERSE, relative to the cab. The little apostrophe symbol has three segments that show
the current speed step setting and will be explained in a bit. The default upon first
application of power, or after a reset to factory defaults (explained later) is address 3, 28
speed steps (two of the 3 segments dark) and right arrow, forward direction.
Speed Step Setting
Direction Setting
The Active Number
or Decoder Address
Locomotive Number
Abbreviation
SHOW 0
Showing Speed Numbers
At any time, you can show the throttles present speed number being transmitted.
SHOW 0 is the command to bring up the Speed Number
display. On this display, you can see the current speed
number and direction and it updates anytime you change
the speed or direction.
Speed numbers are nothing more than a range of numbers
from 0 which is OFF, to either 14, 28, or 128 which
represent full speed. The highest speed number is
dependent on the number of speed steps you have
selected. For example, When set for 14 speed steps, the
highest number shown is 14 which represents maximum
speed.
Note: When set for 128 speed steps, the highest number shown is 126 (128 may appear
momentarily if you continue to turn the speed knob but will return to 126 when you stop
turning the knob).
Push * to return to the normal display. In almost all cases, the * key will cancel or terminate
a command.
Quick Stop While Showing Speed Numbers
T9000 Functions F13 to F19
These are not yet an officially sanctioned part of the DCC-NMRA standard. Most if
not all decoders do not support these at this time.
5
When in the SHOW SPEED mode, push the 0 key to instantly zero the transmitted speed
number. Although the speed is now 0, the locomotive may take a few moments to come to
a stop. This form of emergency stop takes a bit longer but is much less destructive to the
gears and motors.
6
Change Number of Speed Steps
# DIR
# nnnn #
Entering a Locomotive Address
It is important to match the throttle’s transmitted speed steps to what is programmed into
the decoder. There are 3 options: 14, 28 and 128 steps. For this example, the speed steps
will be changed to 128.
This is simple. Push the # key, the address numbers and then the # key again. Entering a
new address, or locomotive number always starts and ends with the # key. For the
following example, the locomotive number will be 4129.
Press and release # key. Now press and release the
direction key. The SS in the display indicates Speed
Steps. Push one of the 3 keys listed below for the desired
speed step selection. The # key does not have to be
pushed again. The selected step value is shown for about
3 seconds before the display returns to the active run
mode. The speed-step symbol changes to show the
current speed step setting.
1 = 14 speed steps
Start by pushing the # key. Notice the previous number
goes away and the small colon is now blinking. Because
of its small size, the blinking colon may be difficult to
see.
2 = 28 speed steps
Restore Defaults & Clear All
SEL 9
There are many settings of the throttle that are remembered, even if the power switch is
turned off and the batteries are removed. However, at any time, you may force the throttle
back to its original factory settings, just as you received it. When the command is issued, all
memory is erased and the defaults are reloaded.
To restore the factory defaults, first push and release the
SEL key and then push the 9 key. The display will be
blinking the dEF 3 command and a small envelope will
appear in the upper left corner. All of these symbols are
to remind you that you are about to perform a reset. To
abort the reset, with no changes, push the * key.
The Throttle’s Ln Memory
The T9000 throttle can store up to 15 locomotives in what is called a memory slot. A
memory slot is a shorthand word to mean a section of memory used to store a locomotive
number and its associated settings such as the speed value, the direction, the speed step
setting and the status of all functions. If all slots are used, the oldest entry will be
automatically overwritten.
When scrolling through the locomotive memory that does not have 15 stored locomotives,
the scroll starting point is the 15th memory slot which will be blank. This slot remains
blank until the 15 locomotive is entered. At that point, the starting point for all scrolling
becomes the 1st memory slot. Scrolling goes from 1st to last; it doesn’t wrap around.
Less than 15 locos
Ln
7
1 2 3
Each time a new and unused address is entered with # nnnn #, the former address is
automatically stored in one of the 15 memory slots. Once stored, you may recall any
address from memory and instantly restore the throttle and its associate settings to exactly
the same condition as when you last used the recalled address.
To complete restore and clear-all sequence, push the #
key. The display instantly reverts back to the original
default normal message of Ln 3, 28 steps and forward.
The other main item that is changed is the transmit
frequency which is set to 0. The table below shows the
complete set of factory reset values.
Default
Cleared
8 frequencies
3
0
1 2 3
Now push the # key to tell the throttle you are finished
entering numbers. The new address becomes effective
immediately and the direction is set to forward. If you
could see the flashing colon, you’ll notice it is off.
3 = 128 speed steps, direct drive
Item
Ln Memory Slots
Transmit Mode
Locomotive Number
Speed
ON
Now push the number keys, 4,1,2 and 9. The display will
show each number as it is pressed, with previous
numbers moving to the left. If an incorrect number is
entered, don’t start over. Just start the number again and
watch the display. Numbers may be entered
continuously and only the last 4 entries are used when
the # key is pushed.
Item
Con Memory Slots
Transmit Freq.
Speed Steps
Direction
Default
Cleared
0
28
Forward
Start
Scroll
Ln
Ln
Ln
Ln
Ln
Blank
Etc
52
1024
110
12
Blank
With 15 locos
14th and last entry
4th Entry
3rd Entry
2nd Entry
1st Entry
15th Entry
Ln
Ln
24
33
15th and last Entry
14th entry
Etc
Start
Scroll
Ln
Ln
Ln
Ln
52
1024
110
12
Note: the Locomotive numbers shown are for example only
4th Entry
3rd Entry
2nd Entry
1st Entry
8
Recalling A Locomotive From Memory
SHOW 1
The SHOW key is used for almost any action in which you wish to show and then select
something from memory.
To show the locomotive address memory, first push the SHOW key followed by the 1 key.
This is shortened to SHOW, 1. You may cancel the command at any time by pushing the *
key.
To scroll through the memory, use the speed knob. The starting point is always the bottom
of memory which was the 1st locomotive entered. Rotate the knob clockwise to step
through memory or counterclockwise to go to the bottom. You may scroll in either
direction through memory from bottom to top, or top to bottom. The 1st entry is always
empty and will remain so, as addresses are added. The 15th address entered will then
occupy the 1st entry.
For the step-by-step example, key in the following locomotives using # nnnn #: 100, 1024,
52. For this example, locomotive 1024 will be recalled.
This is the active address in the normal display.
SHOW 3
Deleting A Locomotive From Memory
If all 15 locomotive memory locations have been used, the T9000 automatically overwrites
the oldest entry upon entry of the 16th locomotive be entered. This is automatic and you do
not have to do anything to make more space.
If you have a desire to manually delete locomotives, a
command has been provided for this function. You may
scroll through memory and select any locomotive address
for deletion. You should not delete the active locomotive.
For the following example, 1024 is the active locomotive.
SHOW-3 is used to manually delete locomotives from
memory. Push the SHOW key followed by the 3 key.
Notice that the E above the M is now flashing. It is a
reminder that you are editing memory and all actions are
permanent. At any time you can cancel the command with
the * key.
For this example, lets delete locomotive 52. Use the speed
knob to scroll to the locomotive 52. When 52 is shown,
push the # key.
Push SHOW. The M reminds you that you are entering
into memory mode with the next key.
Push 1. The colon and the M will flash indicating you
are now viewing the 1st entry in the locomotive
memory which is blank.
Rotate the speed knob 1 click to the right to view the
2nd location in memory. It will be 100.
Rotate one more click to the right to see the 3rd location
which is the desired locomotive address, 1024.
SEL 3
Manual Update Of Locomotive Memory
The throttle’s locomotive memory contains a snapshot of the speed, direction, speed-step
setting and function status from the last time you either entered or recalled the locomotive
from memory. If there have been any changes that you want to save to memory, you may do
so at any time, using the SEL-3 command. The most common time you may want to
manually update the locomotive is when there has been a change in the speed steps or
function commands.
SEL-3 will update the throttle’s memory with the present settings of the active
locomotive. This command can be used at any time. To cancel this command push *.
Push # to select the displayed address and make it the
active address. Notice that the normal display has
returned and the M is gone.
Push SEL followed by the 3 key. The envelope icon plus
the SLn means Save-Locomotive-number 1024 status
and functions.
Note that 1024 is now the active address. Address 52
and all of its settings were automatically stored in
Push the # key to finish the command. The normal display
returns but now you have an updated copy of the current
function settings, speed and direction.
If the throttle’s power switch is cycled from ON to OFF and then ON again, all
speed values are automatically set to 0. The active number is the last locomotive
number used
9
Notice that the E and M are gone and that the normal
display has returned. If you have been following along
with this example, use SHOW 1 to confirm that 52 is
gone.
The locomotive memory for the present address is automatically updated
anytime you enter a new locomotive address.
10
Tips For Best Transmission Range
Replace Battery Indicator
When the batteries have reached their final few minutes
of charge, the low battery icon turns on. You only have a
few minutes remaining before the batteries are
completely exhausted and it is possible for the throttle to
cause unexpected operation during this time. To prevent
loss of control, bring all operating locomotives
controlled by this throttle to a stop as soon as possible.
Low Battery Icon
Once all locomotives have been stopped, turn off the throttle and replace the batteries.
Changing The Transmit Frequency
SEL 1
The T9000 transmit frequency must match the decoder’s frequency.And each throttle must
be on a unique frequency so as not to jam other throttles. Any unused frequency can be
used. There are 8 standard frequencies available for selection, number from 0 to 7. The
frequency can be changed at any time. Be sure that the selected transmit frequency must
match the decoder frequency or commands will not be heard
Push SEL and then 1. The antenna icon will start flashing
and the default frequency of 0 is shown. The table below
shows the 8 standard frequencies and their number.
Push any number from 0 to 7. For this example,
frequency 4 will be selected. To confirm the new
frequency, push #. The change takes effect immediately
Decoder
Throttle
7 0 1
2
6
5 4 3
Frequency 0 - 921.37MHz
Decoder
Throttle
7 0 1
2
6
5 4 3
Frequency 4 - 909.37MHz
7 0 1
2
6
5 4 3
Frequency 1 - 919.87MHz
7 0 1
2
6
5 4 3
Frequency 5 - 907.87MHz
7 0 1
2
6
5 4 3
Frequency 2 - 915.37MHz
7 0 1
2
6
5 4 3
Frequency 6 - 906.37MHz
7 0 1
2
6
5 4 3
7 0 1
2
6
5 4 3
Frequency 3 - 912.37MHz
11
Frequency 7 - 903.37MHz
The T9000 Throttle operates in an unlicenced band shared by many other transmitters.
These transmitters can and will create interference, intermittent throttle operation or
complete failure of one or more of your throttle’s 8 frequencies. The sources of these
external interfering signals can be from your own home or from adjacent homes and
businesses or noisy electrical motors including your locomotive.
Interfering Transmitters. Here's a list of devices known to have caused interference to
the AirWire throttle: wireless devices attached to computers, TV remote controls, cordless
telephones, alarm systems, baby monitors, unlicenced personal communication devices,
lawn sprinkler controllers, remote starter switches, cordless light switches, outdoor
lighting controllers, toys, wireless headphones, and games.
If you find a strong interfering signal on one or more of your frequencies, don’t use those
frequencies and elect another, different frequency.
Antenna Care. Antenna should be finger tight. It should never be loose. Never operate the
T9000 without the antenna. Keep the antenna away from metal objects. and don’t place
your hand around the antenna.
Use Fresh Batteries. Weak batteries can affect the transmission range. When the weak
battery warning indicator turns on, replace the batteries as soon as practical.
One Throttle per Frequency. Do not have two throttles on the same frequency. They will
jam each other and neither will work properly. Only one throttle may be on a frequency at
one time. The throttle should be labeled with its frequency number.
SHOW 9
Show Software Version Number
SHOW 9 causes the platform and software version
number to be displayed.
9000 is the AirWire platform and 1.0 is the software
version number. Your version number may be different.
Push * to return to the normal display.
The default locomotive address 3 is not automatically placed into
memory. If you have a real locomotive with address 3, enter it with
the usual # 3 # to make it active AND to store it in memory.
12
Multi-Unit Consists - Introduction
SEL 2, 1
Building A Consist
A Multi-Unit Consist is created when up to four locomotives are connected together and
operate as a single unit. There are no changes to the locomotive decoders. Any address
from 1 to 9999 may be used for the consist address. The T9000 throttle can have up to 4
unique consists having up to 4 locomotives each.
The starting point for building a consist is the lead locomotive. The lead locomotive must
be the active address and the direction must be set to forward. If the lead loco is not
active, recall it from memory or enter it using # nnnn # where nnnn is the locomotive
address.
Consists are created and stored in Consist Memory which is different than Locomotive
Memory. The T9000 has many built-in safeguards to prevent contradictory commands
from being sent. In almost all cases, these safeguards are invisible - you will not know they
are present and working. As a result of these safeguards, a set of rules govern how
locomotives are used in consists as well as how and when a consist can be deleted, and how
and when individual locomotives can be added to or removed from a consist.
You can build a consist with the lead unit’s direction initially set to reverse. However,
you will have to remember to change all secondary locomotives’ directions to be the
opposite of their physical orientation, which can become very confusing.
For the first example, the consist will have 3 locomotives and locomotive 12 will be the
lead locomotive. To follow the example, make 12 active by keying in # 12 #.
Forward
Important Rules And Guidelines For Multi-Unit Consists
. Locomotives should be reasonably matched in speed at the same throttle setting prior
to building a consist. Use the SHOW 0 command to pick a common running speed and
check the resulting locomotive speeds. Consider changing decoder configuration
variables (CVs) to slow down a fast locomotive to match a slower locomotive. See the
programming section for details on programming decoders.
. Consists are remembered if the throttle is turned off and batteries are removed.
. Consists must be recalled from memory when power is turned on. Speed is
automatically set to 0 and direction to forward. Functions are set as they were prior to
turning off the throttle.
. The active locomotive number, will become the Consist number when you initiate the
consist build command.
+ Always set the lead locomotive’s direction to forward before beginning consist
building
+ The lead locomotive receives all function commands.
+ A total of 4 locomotives can be in a consist - the lead locomotive plus up to three
additional locomotives, called secondary or consisted locomotives.
+ All locomotive must be on the same frequency.
+ Consisted locomotives can have different addresses, and speed step settings.
+ Consisted locomotives can not be recalled from locomotive (Ln) memory.
+ When added to a consist, a secondary locomotive will no longer respond to commands
sent to its own address. It will only respond to commands given to the consist address.
+ Secondary locomotives do not have to be in Locomotive Memory. In other words,
they need not have ever been used as an active locomotive.
+ Secondary locomotives may be in multiple consists.
110
45
12
Step 1: For this example, check that you have made 12
the active locomotive with # 12 #. Set the direction to
forward. Now is the time to change the speed steps if
desired.
Step 2: Push and release SEL and 2. Notice that the Ln
has changed to Con and the E is on. At this point, you have
built Consist 12 with a single locomotive which is the lead
unit, number 12 .
Step 3: Push and release 1 to ADD a locomotive to consist
12. Notice that the consist symbols are now on with the
lead unit represented by the right most symbol and the
second locomotive represented by the flashing second
symbol. Before entering the second locomotive, check its
direction orientation. Notice that it is also facing forward.
Step 4: Enter the secondary locomotive, 45 #. Do not start
with the # key. Enter only the number.
Once the number is entered, pushing the # key stores the
just entered number and the third symbol now starts
flashing. This is your cue that it is waiting for the 3rd
locomotive to be entered. Since the 3rd or last locomotive
is facing backwards, relative to the lead locomotive, its
direction will be changed.
continued on next page
+ Lead locomotive can not be in multiple consists.
+ Consists can be recalled from consist memory, at any time, with their previous speed,
direction and functions unchanged.
13
The lead locomotive must not already be assigned to another consist. But,
all secondary locomotives may be in multiple consists.
14
Step 5: Enter locomotive, 110. But, before hitting the #
key, first push the direction key. Do not push the
direction more than once. Now push the # key to store the
last locomotive in this example. The 4th consist symbol
will start flashing, but, for this example, only three
locomotives are in the consist.
Consist Memory
Consist memory is slightly different since each consist can contain as many as 4
locomotives. The T9000 will store up to 4 consists, each having one lead locomotive and
three consisted locomotives. Visualizing how the consist memory is laid out helps with
understanding what the various displays mean.
4th Consist
Step 6: Push the * key to exit the consist build mode.
Notice that Con 12 is now active, and the direction is set
for forward. All three locomotive will move when the
speed control is advanced.
Recalling A Consist From Memory
Start
Scroll
SHOW 2
SHOW 2 allows you to scroll through the Consist memory to select a consist and make it
active. After pushing SHOW, 2, use the speed knob to scroll through consist memory to the
desired Consist which will be Con 12 for this example. Now push and release the # key.
The display will return to normal and Con 12 appears in the normal display. Selecting any
of the consisted locomotives in Con 12 and pushing # will also make Con 12 active.
Incidentally, the previously active locomotive or consist and all of its settings have been
automatically saved.
Pushing down on the direction key, while scrolling through consist memory, switches
the display to show the present speed and direction currently stored for that consist. Push
the direction key again to return to the consist display
Lc
Lc
Lc
Con
Blank
Blank
Blank
Blank
1st Consist
Lc
Lc
Lc
Con
Blank
Blank
Blank
Blank
2nd Consist
Lc
Lc
Lc
Con
Lead locomotive should be set for forward. Before building a consist, always set the
lead locomotive’s direction arrow to FORWARD. Although this is not mandatory, it can
lead to confusion especially when a consist is “Flipped.”
Rotate the speed knob one click to move to the first
consisted locomotive. Notice the direction orientation. It
too is set for forward.
No nested consists. A consist can not have another consist as a secondary locomotive.
Now go one more click to the next Lc locomotive which
is 110. Notice the direction is now showing reverse. This
was the setting given to 110 when it was added to the
consist.
Consist icons do not indicate actual number of locomotives during editing. When
adding, deleting or overwriting locomotives in an existing consist, the consist icons do
not reflect the actual number of locomotives in a consist.
No changes to a consist while active. Before editing, deleting or modifying consists
including flip consist, make sure it is not active.
Set the lead locomotive direction to forward before building a consist.
15
Blank
Blank
Blank
Blank
Initiating the SHOW 2 command places you at the 4th consist entry. The display shows the
flashing M plus the word Con. The fourth consist will be empty assuming you have not
built four consists. Rotating the speed knob one click brings you to the first consisted
locomotive of this consist indicated by the Lc which is also empty. Continue scrolling until
you reach the 2nd consist entry which is the Consist 12 built in the last example if you have
been following along with the examples. For the remainder of this example, the previously
built consist will be used to point out important items. Your display may be slightly
different but the key points are still valid.
Important Reminders For Consists
The consist icons make sense only when building a new consist. The consist icons
are not recalled with the SHOW 3 command. They are only visible when building a
consist.
Lc
Lc
Lc
Con
The first entry of a consist is always the lead locomotive and the display shows COn as a
reminder. The next 3 memory locations are for the locomotive addresses that are part of the
consist. They are always shown as Lc implying they are a “consisted locomotive. All
memory locations are shown, including empty Lc slots.
Push SHOW 2 and rotate the speed knob clockwise until
the Con 12 display appears. The M indicates you are
viewing a memory location. The Con indicates this is the
lead locomotive of the consist, 12 in this example. The
lead locomotive’s direction orientation and speed step
setting are also shown.
Pushing the 0 key while the stored consist speed is shown, instantly zeroes the stored
speed value. If the consist is running on the railroad and is now made active, it will
immediately stop.
Blank
Blank
Blank
Blank
3rd Consist
All consists are stored in this same format. You can view the contents of any consist at any
time. You may also edit any Lc locomotive to change its direction, shut off its lights or see
what speed value is currently store in memory. These will be described in later sections.
Push * to exit.
All consist edit and delete commands apply only to consists stored in
memory. To avoid unexpected results, do not edit active consists.
16
Deleting A Consisted Locomotive
SHOW 4
SEL 2, 3
Changing Consisted Loco Direction
Any consisted locomotive may be deleted from a consist. Similar to the rule for deleting
consists, the consist containing the locomotive to be deleted should not be active. Before
starting, make sure the active locomotive or consist is not showing on the normal display.
For this example, Lc 45 in consist 12 will be deleted.
This feature is handy if you find a consisted locomotive going in the opposite direction of
the consist. This command can be used at any time on any Lc locomotive in the consist
except the lead locomotive. The lead locomotive’s direction can not be changed with this
command. The consist should not be active.
Once again, SHOW 4 is the command for selecting a
consisted locomotive for deleting. Now scroll through
consist memory to find the Lc locomotive which will be
right after Con 12.
SEL, 2, 3 are the keys to push and release. Scroll through the consist memory and find the
locomotive that will be changed. With the selected locomotive displayed, push and release
the direction key. The display will return to normal. Use the SHOW 4 to review the consist
and confirm the direction has been changed.
When the display shows the locomotive to be deleted,
push the # key. This deletes the consisted locomotive.
The display returns back to the previously active
locomotive or consist.
Note: If the consist was active when this command was used, the change will not take effect
until the consist is recalled from memory using the SHOW 4 command.
Note 1: There is a good reason to not have the deleted consist also be currently active. If the
deleted consist is also the active consist, it may seem that nothing has changed, and the
deleted consist locomotive still runs with the consist. However, if you use the SHOW 2
command, you will find that the position occupied by the deleted locomotive is now empty.
The deleted locomotive will still be part of consist 12. However, the moment you select
another locomotive or recall the same consist from memory, the deletion becomes
permanent.
Before Delete
After Delete
Note 2: The deleted locomotive’s memory location Con
12
remains empty after deletion. This can be seen as you
Lc
45
scroll through memory.
110
Lc
Lc Blank
Deleting An Entire Consist
12
Con
Lc Blank
110
Lc
Lc Blank
SHOW 4
Any consist may be deleted from memory. The consist selected for deletion should not be
active. Before starting, make sure the active locomotive or consist is not showing on the
normal display. For this example, Consist 12 will be deleted.
SHOW 4 is the command for selecting and deleting a
consist. Now scroll through consist memory to find the
lead locomotive of the consist. The E indicates that you
are in the edit mode for consists in memory.
When the display shows the consist to be delete, push the
# key. This deletes the consist plus all locomotives added
to the consist. The display returns back to the previously
active locomotive or consist.
Note: There is a good reason to not have the deleted consist also be currently active. If the
deleted consist is also the active consist, it may seem that nothing has changed, except that
the E and M have turn off when you press the # key. However, if you use the SHOW 2
command, you will find that the deleted consist is no longer in memory. You can continue
to control the “deleted” consist but the moment you select another locomotive or consist,
the consist will officially be deleted.
17
SEL 2, 3
Turning Off Consisted Loco Functions
This feature is handy if you discover you have left the headlights on. This command can be
used at any time on any Lc locomotive in the consist except the lead locomotive. The
consist should not be active. This command only affects Function F0 through F4. If other
functions need to be changed, remove the locomotive from the consist, set the functions as
needed and then add it back to the consist.
SEL, 2, 3 are the keys to push and release. Scroll through the consist memory and find the
locomotive with the lights that need to be turned off. With the selected locomotive
displayed, push and release the 0 key. The display will return to normal.
Note: If the consist was active when this command was used, the change will not take effect
until the consist is recalled from memory using the SHOW 4 command.
SEL 4
Manual Update Of Active Consist Memory
The throttle’s consist memory contains a snapshot of the speed, direction, speed-step
setting and function status from the last time you either entered or recalled the consist
memory. If there have been any changes that you want to save to memory, you may do so at
any time, using the SEL-4 command. For this command, the consist should be active. For
the example, consist 110 will be used.
Push SEL followed by the 4 key. The envelope icon plus
the SLc means Save Consist number 110 status and
functions.
To cancel this command push *.
Push the # key to finish the command. The normal display returns but now you have an
updated copy of the current function settings, speed and direction for the consist.
The memory for the present consist is automatically updated anytime
you recall or enter a new locomotive or consist address.
18
Adding New Loco To Existing Consist
SEL 2,2
This feature is handy if you want to change or add locomotives to an existing consist. If
there are fewer than 4 locomotives, you can add a locomotive. If the consist is full, you can
replace a consisted locomotive by overwriting with a new address. Overwriting a consisted
locomotive automatically releases it from the consist. And, as you probably have already
figure out, the consist should not be active.
For this example, Consist 12 which has only three locomotives, a fourth locomotive will be
added, number 1024. To help visualize the process, we’ll use a picture of the consist
memory before and after the changes are made.
Consist 12
Consist 12
Before
Adding
1024
Lc Blank
110
Lc
Lc
45
12
Con
After
Adding
1024
Lc
Lc
Lc
Con
1024
110
45
12
SEL2, 2 puts you into the add/replace mode for an existing consist. Scroll through memory
and locate the 4th entry for Consist 12. Before entering the new number, always back up
one click to make sure you are in the correct location.
To add a new locomotive to the empty spot, push and release # 1,0,2,4, #. The final # will
terminate the sequence and return to the normal display. Use the SHOW 4 to confirm the
locomotive has been added.
If the consist is full, you must select one of the consisted locomotives to replaced. Any of
the locomotives, except the lead locomotive can be replaced. Once you have decided
which locomotive to overwrite, the same command sequence, SEL 2, 2 is used. However
you will enter the new locomotive when the locomotive to be replaced is in the display. For
example, locomotive 110 will be replaced by 88. Here’s how the memory appears before
and after the replacement.
Consist 12
Consist 12
Before
Replacing
110
Lc
Lc
Lc
Con
1024
110
45
12
After
Replacing
110 with 88
Lc
Lc
Lc
Con
1024
110
88
12
This command only adds the locomotive. It can not be used to change the direction of the
newly added locomotive. If the direction is wrong, use SEL2,3 to change it.
The locomotive to be added must not be a lead locomotive in another
consist. Secondary locomotives can belong to multiple consists.
Consist edit and delete commands apply only to consists stored in
memory. They do not alter or delete the presently active consist even if it
has the same number.
19
SEL 2, 3
Flip Consist
If you run your layout point-to-point, you’ll love this feature. The flip consist command
allows an existing consist to be flipped from end to end. What was the lead unit now
becomes the trailing unit. What was the trailing unit now becomes the lead unit. All
intermediate consist locomotives have their directions reversed. And all function
commands are sent to the new lead unit. In addition, the T9000 reorders the consist to
match the new orientations with the new lead unit becoming the Consist number.
To illustrate what occurs, here is the consist and its locomotives and the T9000 memory
entries for the consist, prior to the flip. Also shown are the directions set for the
locomotives when the consist was built.
Consist 12
Forward
Lc Blank
110 R
Lc
110
45
12
Lc
45 F
12 F
Con
Now lets invoke the flip consist command and see what happens. As usual, the consist
should not be active. You might want to turn off the lead units headlight and set the
functions as you wish them to behave with 12 becomes the trailing locomotive.
SEL 2, 3 should look familiar. It’s the change direction command. But this time, a different
key will be used, the # key, when the display shows the lead locomotive of the current
consist, 12. Make sure the display shows the lead locomotive and push the # key. The
display will return to normal.
Use SHOW 4 to find the new consist number which is 110. Consist 12 is no longer present.
Consist 110
Forward
Lc Blank
110
45
12
12 R
Lc
Lc
45 R
110 F
Con
As you scroll through the consist, notice that the direction arrows are now reversed from
their original position and that locomotive 12 is now last. In addition, the function
commands are sent to locomotive 110. This command can be used again to flip the consist
back to it original configuration.
Final Notes On Consists
After editing a consist, and to make the changes effective, use SHOW to select the
edited consist and make it active.
If a deleted consist is also the active consist, the active consist will still be active after
deleting the consist from memory. Selecting another consist or locomotive will
permanently remove the consist.
Flipped consists will be automatically rebuilt with the new lead loco number as the new
consist number. To make the flipped consist active, use SHOW 2 to select the new consist
number.
20
More Operating Tips and Techniques
Using A Lanyard Protects The Throttle From Drops. The 4-40 shipping screw has a
matching 4-40 nut permanently mounted on the faceplate. This nut makes a convenient
point to attach a 4-40 threaded screw to which a simple lanyard can be attached. Lanyards
are usually found in office supply stores. If you attend railroad or trade show conventions,
lanyards are often given away with name badges. Next time you find some, ask for a few
extras.
Take Advantage of Different Speed Step Settings. The AirWire decoder can have two
different responses to speed commands by using two different speed step settings. As a
reminder, when using either 14 or 28 speed steps, the decoder calculates a speed using
CV2, CV3, CV4, CV5 and CV6. Since CV5 sets the top speed, it can be set to ensure the
locomotive can reach no more than half of its maximum speed. This specific response
occurs as long as the throttle is set for either 14 or 28 speed steps.
However, if the throttle is set for 128 speed steps, only CV2 is used. Thus the locomotive
will always achieve top speed. That is why 128 speed steps is called direct drive. No
intervening CVs are used to modify the speed command.
By using the two settings, slow speed switching can be enhanced in yard operations. Yet,
full speed operation can be achieved when going out on the mainline by punching a few
keys on the throttle.
Flashing Headlights. If the headlights turn on and off as the speed is increased, the
AirWire throttle is set for 28 speed step mode, and the AirWire decoder is in 14 speed step
mode. Either change the throttle or change the decoder so both have the same setting.
No Control Of Headlights. If the AirWire decoder is set for 28 or 128 speed steps, the
throttle must also be set for 28 or 128 speed steps. Otherwise the headlights can not be
controlled.
Be Wary Of Other Transmitters. Always insure that each transmitter is on its own
frequency. Even if the transmitters are on different addresses, the AirWire decoder can be
jammed by having two nearby transmitters.
Be Wary of Lurking Decoders When Programming. Always make sure all decoders
sharing the same frequency are turned off when using service mode programming. The
throttle signal is not bothered by bushes, walls or trees and it is possible that nearby
AirWire decoders will be reprogrammed.
Leading zeroes are not needed. A locomotive addresses can be in the range of 1 to 9999.
And changing the throttle address can be done at any time and without turning off power.
The address change takes affect immediately. The old address is stored in memory and may
be recalled at any time.Address 0 is not allowed.
Throttle speed is always reset to zero after power is turned off and back on. Also, when
power is turned on, the default direction is always forward. This occurs even if there was a
non-zero speed stored in memory before power was turned off.
A consisted locomotive can not be made active with the # nnnn # command. If this is
attempted, the command is ignored.
SEL 5
Accessory Decoder Control
Accessory decoders may be controlled from the T9000. Due to memory constraints, the
allowed address range is 1 to 99. Accessory decoders are commonly used to control
turnouts, layout lighting and other stationary functions.
Like locomotive decoders, accessory decoders have addresses and functions which may be
controlled and programmed. Accessory addresses are different from locomotive
addresses. You can have a locomotive address 28 and an accessory address 28 without any
interference
Selecting and controlling accessory decoders is easy and you can still control your
locomotive’s speed while throwing turnouts.
Push and release SEL5 to bring up the accessory decoder
control display. Acc is the abbreviation for Accessory. At
this point you will enter the address of the accessory
decoder. For this example, lets use 28.
Push and release # 2 8 #. Notice that when you push the
first #, the display changes to show an address is being
entered. When the ending # is pushed, two icons, F1 and
F3 appear above the address. These are small and will be
flashing near the upper right corner.
The flashing F1 and F3 remind you that the “1” key and
the “3” key are used to control turnouts and/or on-off
effects such as lighting effects.
F1
F3
F1 is used to throw turnouts REVERSE or turn lights
OFF. F3 is used to throw turnouts NORMAL or turn
lights on. The appropriate icon, F1 or F3, will turn on
solid when the key is pressed. The turnout direction is not
remembered.
During the time you are controlling turnouts, the speed and direction controls will continue
to operate. However, changing direction will start the F1/F3 icons flashing again but this
should be ignored.
Once you have finished with the decoder address, you may enter a new address starting
with the # key. There is no need to push SEL 5 again.
Terminate or exit this mode and return to the normal display by pushing the * key.
Decoders are programmed like locomotive decoders and can be programmed by the
T9000. See the programming section in this manual plus the instructions accompanying
the decoder for programming details.
The T9000 throttle transmits the accessory decoder commands on the
same frequency as the active locomotive. The accessory decoder must be
on the same frequency.
A consisted locomotive can not be recalled from the memory even if it is displayed with
the SHOW 1 command.
21
22
Tips and Rules for Controlling Accessory Decoders
Decoder Programming Introduction
The correct “output” number, must be used and is in the range from 1 to 99. These numbers
are not the same as locomotive numbers. You may have an accessory decoder with output
number 1 and a locomotive number 1. There will be no conflict.
The T9000 throttle is also a full featured, DCC programmer capable of programming the
AirWire decoder AND any NMRA_DCC compatible decoder connected to the AirWire
decoder’s auxiliary DCC output.
The active locomotive’s speed and direction controls remain active when controlling
accessory decoders. However, locomotive functions are not available.
There are two modes of programming: Service Programming Mode and Operations
Programming Mode. .
Your installation and wiring of the switch machines will determine the actual direction the
switch throws. If a turnout throws the wrong direction reverse the two wires going to the
turnout.
Service Programming, abbreviated and using the SPR key, the throttle sends
programming commands direct to any decoder that is powered up and on the same
frequency as the throttle. Service mode means that an address is not necessary - any and all
decoders that “hear” the programming command will be programmed. The most common
use for this mode is setting the decoder’s address or number.
The transmit frequency for accessory decoders is the same one in use by the active
locomotive.
Accessory Decoder Programming Notes
OPS Programming, abbreviated and using the OPR key, the throttle sends
programming commands to the locomotive address currently set in the throttle. All other
locomotives on the same frequency, but having different addresses, will ignore the OPS
mode programming command. The most common use for this mode is fine-tuning sound
decoders connected to the AirWire decoder’s auxiliary DCC output. Note: the AirWire
decoder ignores all OPS Mode programming commands.
Accessory decoders may be service programmed just like locomotives (see the section on
Service Programming for key strokes and examples. The T9000 does not support
Operations programming for accessory decoders.
Programming commands send values to a decoder’s configuration variable
numbers (Cn) and each command will be comprised of the specific configuration number
and a numeric value. The AirWire T9000 throttle can program all of the NMRA-DCC
configuration variables and their full range of values.
Accessory Decoder activation commands are transmitted once. If the transmission is
blocked or garbled, the switch may not throw. However, you can simply push the key again
to retransmit the activation command.
Accessory decoders use Service Programming to set the following configuration numbers.
Always consult the decoder documentation for further details, features and limitations.
Configuration
Number (Cn)
Description
513
Accessory Decoder (card)Address - LSB
514
Local input enable/disable
515
On-time for output pairA
516
On-time for output pair B
517
On-time for output pair C
518
On-time for output pair D
519
Software version number
520
Manufacturer ID number
521
Accessory Decoder (card) address - MSB
There is no Operations Programming available for accessory decoders.
Use service mode programming only.
23
An optional DCC decoder, connected to the AirWire decoder’s DCC
output will receive all commands, including both service and operations
and operations programming commands. It is common for the AirWire
decoder and the optional decoder to be on the same address.
Service programming will program every decoder that receives the
command, independent of the their present address or number. Use
Service programming for programming decoders with their address or
number. Make sure all other decoders are not powered.
Use Service Programming for setting the decoder address. Do not
use Operations Programming.
24
Service Programming
SPR
Since service mode programming can change everything including addresses, an extra
keystroke has been added to confirm entering this mode. For this example, the decoder
address will be set to 45. Make sure that all other locomotives are turned off.
All service mode programming is done with following keystroke sequence, no matter
what CV is to be programmed.
Start by pushing and releasing SPR. Notice the $ sign and
SPR are both flashing. Imagine the dollar sign as a
warning about the “cost” of accidentally programming
more than one locomotive. It’s corny but it does serve as a
reminder to check that only the desired locomotive is
powered up. Push the SEL key to confirm and notice the
flashing has stopped.
Service Programming
continued
Tips and Tricks For Service Mode Programming
+ If a sound decoder, or any other type of decoder is connected to the Auxiliary DCC
output of the AirWire decoder, it too will also have its address changed at the same
time as the AirWire decoder. If this is not desired, disconnect the sound decoder from
theAirWire decoder’sAuxiliary DCC outputs with a SPST switch.
+ Multiple CVs may be programmed in sequence without having to reinitiate Service
mode programming.
$
The CV to be programmed is entered first. The T9000
uses the * key to enter CV numbers. Since the address is
CV1, start by pushing by pushing the * key. Cn means
configuration number. Now push 1 then 1 then * again.
Enter the value for the CV, by first pushing the # key.
Notice that the Cn is now just C with the colon flashing.
Enter the desired address, 28 for this example and then
push # to transmit the address. The colon will stop
flashing. The AirWire decoder will beep twice since the
address is in the range of 1 to 99. If it were higher than 99,
theAirWire decoder will beep 3 times.
+ Service mode programming is canceled by turning the throttle’s power switch off.
+ Only one decoder should be on during service mode programming. All other decoders
should be turned off. All decoders sharing the same frequency as the throttle and
powered on will be re-programmed. The throttle’s transmitter can reach quite far and
is not bothered by walls, roofs trees earth or bushes. Just because you can’t see another
locomotive, don’t assume it will not be programmed if it is sharing the same
frequency.
+ The AirWire decoder supports only specific CVs shown in the table below. Service
mode programming commands sent to CVs not listed are ignored.
+ Address 0 can not be used for a locomotive address.
AirWire Decoder - Supported CVs
CV#
Function
Default
At this point, you have two options.
1
LocomotiveAddress
Address
3
1. Enter another CV number , starting with the * key again and repeat the same sequence as
above. The * key does not end this mode. Pushing it means you want to enter another CV
number.
2
Motor Starting Voltage
MSV
7
3
Acceleration Rate
ACCL
2
4
Deceleration Rate
DECL
2
5
Maximum Voltage
Vmax
1
6
Midpoint Voltage
Vmid
1
8
Reset to factory defaults
RESET
n/a
11
Loss of Signal Timer
Packet Timeout
0
17
ExtendedAddress
Automatic - do not use
0
18
ExtendedAddress
Automatic - do not use
0
29
Decoder Setup
See decoder manual
2
67- 94
Custom Speed Table
See decoder manual
-
21) Exit the programming mode by pushing the SPR key. This is the only key with which
you can exit the service programming mode.
Special note aboutAirWire Decoder, CV1- the address CV.
CV1, the address CV, will accept a value between 1 and 9999. If the value is between 1 and
99 (classic 2-digit address), the throttle automatically sends the actual address to the
decoder’s CV1. If the value is from 100 to 9999, the throttle translates the number into the
proper values for CV17 and 18 and 29 and sequentially sends the values to the three CVs in
the decoder. This is automatic, you do not have to do anything to cause this to occur.
Special note about CV values
All other CVs, from 2 to 1024 can not have a value greater than 255. If the value
entered is greater than 255, the display will flash and the small "E" icon will be
flashing to indicate an out of range value. Press * to restart the sequence or SPR to quit.
Turning the throttle power switch off terminates all programming even if in the middle
of a sequence.
25
26
CV29 Options and Settings
Programming Custom Speed Curves
CV29 provides some basic setup features for your decoder. By programming specific
values into CV29, you enable or disable these features. Be sure to check your decoder
manual to verify which features are available. You can not harm a decoder with an incorrect
value. However, it may not operate as expected. The following functions are controlled by
CV29 in the AirWire Decoder: motor direction, speed steps in use and speed table in use
and long or short address mode.
Creating a Speed Curve
Your AirWire throttle can program custom speed curves, or tables, into the AirWire
decoder. This is sometimes done to help speed match two dissimilar locomotives,
especially when used together in a consist. Start by writing down how you want to assign
the speed values to the decoder.Atable makes it easy to keep track of the values.
This table is from the AirWire decoder manual and is included for reference. See the
decoder manual for additional details.
Note: CV2 (Start Voltage) is used as part of the calculation even when the decoder is using a
custom speed table.
Address
Speed Table
# Steps
Motor Direction
CV29 Value
Short
Standard
14
Normal
0
Short
Standard
14
Reversed
1
Short
Standard
28
Normal
2
Short
Standard
28
Reversed
3
Short
Custom
14
Normal
16
Short
Custom
14
Reversed
17
Short
Custom
28
Normal
18
Short
Custom
28
Reversed
19
Long
Standard
14
Normal
32
Long
Standard
14
Reversed
33
Long
Standard
28
Normal
34
Long
Standard
28
Reversed
35
Long
Custom
14
Normal
48
Long
Custom
14
Reversed
49
Long
Custom
28
Normal
50
Long
Custom
28
Reversed
51
If the throttle is set for 128 speed steps, this table is not used and the throttle directly drives
the motor without using CV3, CV4, CV5 or CV6.
Speed Step
Speed Step
in 14 step mode in 28 step mode
1
1
2
2
3
4
3
5
6
67
68
69
70
71
72
7
8
70
80
73
74
5
9
10
11
12
90
100
110
120
75
76
77
78
13
14
15
16
130
140
150
160
79
80
81
82
17
18
19
20
170
180
188
196
83
84
85
86
21
22
23
24
204
212
216
224
87
88
89
90
25
26
27
232
240
248
91
92
93
28
254
94
6
7
8
9
10
12
13
14
27
CV Number
4
11
CV29 is used in the AirWire Decoder. It comes already programmed with
the most common settings for CV29. This table is included as a reference.
The rectangle is around the default decoder setting.
Default
Speed Value
2
12
24
36
48
60
28
Programming Custom Speed Curves continued
OPR
Operation Programming
Programming theAirWire Decoder (Service Mode Programming Required)
This may be a bit tedious but it you can always go back and fine tune the speed values based
on the first pass results. Before starting, make sure the AirWire decoder is turned on and all
other decoders are turned off.
The T9000 throttle uses Operation Mode Programming, OPR, send programming
commands to a specific locomotive address. Unlike service programming, only the
locomotive decoder with the matching address will “hear” the programming commands.
Any other locomotive, on a different address will ignore the programming command.
1. Use Service Programming. Push the SPR key, followed by the SEL key to begin.
2. Push * 67 * and then # nnn #. The nnn represents your speed step value. The decoder will
beep, indicating the new speed step value has been stored in CV67.
OPR is the best way to fine-tune sound decoders attached to the AirWire decoder’s
Auxiliary DCC outputs. The sound effects can be programmed and tested in the middle of
operation, without worrying about reprogramming any other locomotives. You do not have
to turn off other decoders.
3. Push * 68 * and then # nnn#
to store the next speed value
in CV68.
All OPR programming is done with following keystroke sequence, for all CV’s to be
programmed. However, the CV1 can not be changed. If this is attempted, the throttle will
ignore the OPR commands. Consisted locomotives should have all programming done
before they are put in a consist.
Continue entering CVs and
values in the same manner
until all entries have been
stored.
OPR commands are always sent to the active address shown on the normal display. For this
example, the active locomotive address is 110 and CV 48 will be programmed to a value of
129.
CV Number
67
68
69
70
71
72
73
74
75
76
77
78
79
80
81
82
83
84
85
86
87
88
89
90
91
92
93
94
Your
Speed Value
Your
Speed Value
4. Finally, enable the new
table by programming a new
value for CV29 using service
mode programming.
Assuming the decoder is
using a short address, custom
speed table, 28 speed steps
and normal motor direction,
the value to enable the custom
speed table is 18. Push *29*
and #18#. This sets the
decoder to use the new
custom speed table.
5. Turn off the throttle and
turn it back on. The new speed
table is automatically used
when the throttle is set for
either 14 or 28 speed steps.
The new table is not used
when the throttle is set for 128
speed steps.
Start by pushing and releasing OPR. Notice the OPr and
the active locomotive number is now flashing. Push the
SEL key to confirm and notice the flashing has stopped.
The following key stroke and displays are exactly like
service programming mode.
The CV to be programmed is entered first. The T9000
uses the * key to signify that CV numbers are to be
entered. Push the * key, followed by 48. Cn means
configuration number. Push the * again.
Now enter the value for the CV, by first pushing the # key.
Notice that the Cn is now just C with the colon flashing.
Enter the desired value, 128 for this example and then
push # to transmit the programming commands. address.
The colon will go away upon transmission. The
programming command has been set.
At this point, you have two options.
1. Enter another CV number , starting with the * key again and repeat the same sequence as
above. The * key does not end this mode. Pushing it means you want to enter another CV
number.
21) Exit the programming mode by pushing the OPR key. This is the only key with which
you can exit the Operation Programming mode.
continued on the next page
Program CV29 To Use The New Speed Table
To use the new custom speed table, CV29 must be set to a value based on the
locomotive address.
If the address is from 1 to 99, program CV29 for a value of 18.
If the address is from 100 to 9999, program CV29 for a value of 50
29
30
Operations Programming
Advanced OPR “Bit” Programming
continued
Here are some notes and comments to consider when using operations programming.
. Do not use OPR to program the address. Use SPR to change the address.
. Typical installations use an optional sound decoder connected to the AirWire
decoder’s output and programmed with the same address. All OPR commands sent to
the AirWire decoder will be received by the optional decoder. If you do not want to
program the external decoder, disconnect it from theAirWire decoder.
. Some decoders, such as early version of Lenz decoders, require a power cycle for the
new CV values to take affect.
. The AirWire RF1300 throttle supports all 1024 of the NMRA-DCC configuration
variables.
. All CVs, from 2 to 1024 can not have a value greater than 255. If the value entered is
greater than 255, the display will flash and the small "E" icon will be flashing to
indicate an out of range value. Press * to restart the sequence or SPR to quit.
. OPR mode allows programming of multiple CVs without restarting. When one CV is
done, push * to begin entering another CV number.
. Pushing * does not exit OPR mode. To exit, push OPR.
. Turning the throttle power switch off terminates all programming even if in the
middle of a sequence.
Almost all CVs can be programmed with values in the range of 0 to 255. However, some
decoders, especially sound decoders, may need to have a specific “bit” programmed into a
CV. This is perhaps the most confusing aspect of decoder programming. This section
presents an overall scheme to program bits of a CV. Fortunately, a little arithmetic and a
bit of record keeping makes bit programming easier. Let’s start with an explanation of a
standard value and how it can be converted into bits. With that knowledge it will become
an easy matter to then convert bits back into decimal values that the AirWire throttle uses
during programming.
AirWire uses decimal values that range from 0 to 255 for all CVs except the address.
Converting the value into binary bits is easy as long as you remember that it takes 8 bits to
represent this range of values. Each bit can only represent one of two possible values, a 0
or a 1. And like familiar decimal numbers, the position of the bit indicates its associated
value. The table below shows what each bit position value is worth. If you add up all the
position values, the total is 255.
bit 7
128
bit 6 bit 5
64
32
bit 4 bit 3
16
bit 2
bit 1
4
2
8
bit 0
1
bit number
bit position value
Complex sound decoders use a single CV value to control many effects. This is possible
because each bit in the value controls a specific effect. Thus a single decimal value can
actually represent up to 8 individual effects where each effect is assigned to a specific bit
number. The CV can also be split in half to control two different items such as volume
levels.
For example, the diesel sound decoder by Soundtrax uses CV60 to control the volume of
the horn and bell. Notice that CV60 has the 8 bits split into two groups. Bits 0-3 control the
horn volume and bits 4-7 one group for the bell volume.
The horn volume has 16 possible settings from 0,0,0,1 to 1,1,1,1. Converted to binary, this
becomes 0 to 15. The bell volume also has 16 possible settings from 0,0,0,1 to 1,1,1,1.
continued on next page
CV 60 - Bell and Horn Volume Level Control
Operations programming only programs the active locomotive
number shown on the display. All other decoders will not receive the
programming commands even if powered on and on the same
frequency.
bit 7
128
bit 6 bit 5
64
32
bit 4
bit 3
bit 2
bit 1
16
8
4
2
0
0
0
1
Minimum Bell Volume
Decimal Value 16
0
1
1
1
Half Maximum Bell Volume
Decimal Value 112
31
1
1
1
1
Maximum Bell Volume
Decimal Value 240
bit 0
1
0
0
0
1
Minimum Horn Volume
Decimal Value 1
bit number
bit position value
CV60 = 16+1 = 17
0
1
1
1
CV60 = 112+7 = 119
Half Maximum Horn Volume
Decimal Value 7
1
1
1
1
Maximum Horn Volume
Decimal Value 15
CV60 = 240+15 = 255
32
continued from previous page
However, since the bell’s bit positions are shifted, the actual decimal values are different
and the range is from 64 to 240. Thus the value programmed into CV60 represents both a
horn volume setting PLUS a bell volume setting.
Here is a completed table that shows all possible settings and decimal values for both the
bell and horn volumes.
Horn Vol
off
1
2
3
4
5
6
7
8
9
10
11
12
13
14
15
Binary
0000
0001
0010
0011
0100
0101
0110
0111
1000
1001
1010
1011
1100
1101
1110
1111
Decimal
0
1
2
3
4
5
6
7
8
9
10
11
12
13
14
15
Bell Vol
off
1
2
3
4
5
6
7
8
9
10
11
12
13
14
15
Binary
0000
0001
0010
0011
0100
0101
0110
0111
1000
1001
1010
1011
1100
1101
1110
1111
Decimal
0
16
32
48
64
80
96
112
128
144
160
176
192
208
224
240
Notes
Off
Min Volume
½ Max Volume
Max Volume
This section will conclude with a simple example. CV60 will be OPR programmed for a
decimal value that puts both the horn and the bell at half maximum volume. Using the table
above, half volume is equal to 128 + 8 which is 136. The throttle is already set to the
desired locomotive address. And since both addresses are the same, the OPR
programming of CV60 will automatically be received by the sound decoder and ignored
by theAirWire motor decoder.
1. Make sure the locomotive number is active. Push the OPR key followed by the SEL key.
2. Enter the CV to be programed
* 60 *
3. Enter the value to be programmed.
# 13 6 #
4. Push the OPS key programming to exit. The changes take affect immediately.
If the resulting volume level is not correct, simply repeat the above sequence with a
new value for CV60. Don’t forget that the value is the sum of the horn volume
setting and the bell volume setting. It is easy to forget this and find that one or the
other has been shut off.
Additional Notes About The Run-Time Environment
This section describes a bit about the internal workings of the T9000. Unlike most other
controllers, the T9000 maintains two separate environments, one that is active and one that
is stored. The run-time “environment” describes a set of conditions in which a locomotive is
running or “active.” Environments can be edited while stored and then recalled an made
active. Once activated, all changes become effective.
The environment is always paired with a locomotive address. The environment consists of
the following variables:
Locomotive Address
from 1 to 9999;
Type Address
Short or long
Speed Value
0 to Speed Step Max (14 or 28 or 128)
Direction Setting
Forward or Reverse
Speed Steps
14 or 28 or 128
Function 0 through 20
On or Off, except for F2
Locomotive Status
Single, Consist-lead, Consist-secondary
Recalling a locomotive from memory, also restores its associated environment. Storing
the environment is usually done automatically but there are commands to force a manual
update for both a consist and a single locomotive.
Throttle and AirWire System Compatibility
The T9000 Wireless Throttle operates in the 902MHz to 928 MHz frequency band. As of
the date of this printing, no other large scale wireless systems use this band. Thus the
AirWire Wireless Throttle can be used along with other systems without fear of
interference. This feature is especially useful if you are upgrading from another wireless
system toAirWire. Locomotives can be gradually upgraded as time and budget permit.
The T9000 throttle can not be used with any other wireless equipment from CVP
Products.
The AirWire T9000 can not be changed or converted to an EasyDCC
compatible throttle.
33
34
Troubleshooting
Care of Your Throttle
Remember B - F- A
If your AirWire throttle doesn’t seem to be working, use the acronym B-F-A as a quicky
checklist.
Your throttle is designed for years of trouble free use. Follow these simple guidelines to
protect and extend your throttle’s life.
B = Battery
! Are the batteries oriented properly? Double check orientation. A reversed battery will
short out its adjacent battery and quickly run both down. The two batteries will also
become hot to the touch. If this occurs, remove and discard all batteries and install fresh
batteries.
Remove the batteries if the throttle is not to be used for several weeks. A leaky battery can
destroy the T9000.And there is no warranty coverage for a leaky battery.
Do not attempt to recharge alkaline batteries.
Keep the throttle dry. Do not expose it to moisture, steam, chemical vapors or rain.
! Are the batteries weak or dead? If the display is blank, replace the batteries.
Do not expose it or store it in high temperature locations.
F = Frequency
! Does the throttle’s frequency match the frequency setting on the locomotive? Check the
decoder’s frequency selector switch and re-select the throttles transmit frequency.
Clean the face plate and display with a damp cloth only. Do not use solvents or cleaning
solutions of any kind.
A= Address
! Look at the display. Did you key in the correct address. Sometimes a key will give two
entries instead of one or it was hit so quickly that it was missed. Key in the correct address
again. Push each key firmly and smartly. Don’t press and hold a key when entering
addresses. Just push and release each key, one at a time.
TheAirWire Decoder Must Be Turned On When Programming
Programming commands are sent directly to the decoder. They are not stored in the
throttle. The decoder must be powered on and within range of the throttle to receive
programming commands. The decoder will indicate receipt of valid programming
commands by beeping and with a short pulse of the motor. If nothing is seen or heard,
double check B-F-Aand decoder power.
Programming CommandsAffect Optional Decoder
Any decoder attached to the AirWire’s DCC output terminals will “hear” all service
programming commands sent by the throttle. Usually this isn’t a problem since the most
common command is an address change and both decoders should be on the same address.
If this is not desired, insert a SPST on/off switch in one of the two wires between sound
decoder and the AirWire DCC output terminals. Turn the switch off to prevent the optional
decoder from receiving any programming commands. Don’t forget to turn it back on
during normal operation.
Do not abuse the speed control. It can be damaged through excessive lateral or vertical
force.
Use a lanyard to protect against drops. See page 21 for information.
Do not place heavy objects on the throttle.
Do not bend the antenna. It is flexible near the tip but not near the connector.
Reset Decoder To Factory Defaults - Step by Step Guide
Use this procedure to reset an AirWire decoder to its original factory defaults. This
procedure does not affect the throttle in any way. It only forces the AirWire decoder to
revert to its factory default address of 3, 28 speed steps, sets configuration variables (CVs)
3 and 4 to a value of 2 and sets CV2 to a value of 0.All other CVs are cleared.
1. Make sure all other decoders are turned off.
1. Confirm that decoder frequency selection matches the T9000 transmit frequency.
2. Turn on the decoder to be reset and turn on the throttle.
3. Press SPR followed by SEL
Programming Problems
If your optional sound decoder doesn’t respond to programming
commands, but otherwise works OK, reverse the two leads between the
sound decoder and the DCC output terminals on theAirWire decoder.
$
4. Press * then 8 then *
5. Press #, then 1,3,5 then #.
6. If the decoder resets, you will hear two beeps.
7. Press SPR to exit service programming.
Service Mode programming will program both the AirWire decoder and
the decoder connected to the auxiliary DCC outputs.
35
8. Select 3 on the throttle and confirm the decoder operates on address 3.
36
AirWire T9000 Commands
37
Add/Run Loco Ln
Set Speed Steps
Quick Stop
Show Speed/direction
Quick Stop
Exit show speed
Select Memory Loco
Store Ln Run Changes
Delete Memory Loco
# nnnn #
# , DIR, 1/2/3
SELDIR
SHOW 0
0
*
SHOW 1, #
SEL3
SHOW 3, #
Build and store Consist
Add 2nd loco (Lc)
End and store
Edit Lc Direction
Change direction
Turn off F0-F4
Select/Run Consist
Run selected consist
Insert/Overwrite Lc
New Loco address
Flip Consist & Rebuild
Run Memory Consist
Delete Memory Consist
Store Consist run changes
SEL2,1
nnnn, #
*
SEL2,3
DIR
0
SHOW 2, #
#
SEL2, 2
# nnnn #
SEL2, 3, #
SHOW 2, #
SHOW 4, #
SEL4, #
Accessory Control
Enter address
F1
F3
Exit, quit
SEL5
#, nnnn, #
Off, Reverse
On, Normal
*
Service Programming
Enter Cn
Enter Cn’s value
Exit, quit
SPr, SEL
*n*
#v#
SPr
OPS Programming
Enter Cn
Enter Cn’s value
Exit, quit
OPr, SEL
*n*
#v#
OPr
Select Standard Freq
Reset to factory defaults
Show software Revision
SEL1, 0-7
SEL9, #
SHOW 9
Cut this out to make a handy reference card
T9000
Cheat Sheet on
Opposite Side
38
Notes
T9000 Command Summary and Reference
SHOW 0, n Show speed number and direction .....................................................6
n =0
Set speed to 0
SHOW 1, x Select locomotive - Ln - from memory..............................................9
x = DIR Show stored speed and direction of displayed Ln
SHOW 2, x Select consist - Con - from memory ..................................................15
x = DIR Show stored speed and direction of displayed Con or Lc
SHOW 3, x Show and delete locomotive, Ln, direction........................................10
x=#
Delete displayed Ln
x = DIR Show stored speed and direction of displayed Ln
SHOW 4, x Show and delete consist or consisted locomotive ..............................17
x=#
Delete displayed Con or Lc
x = DIR Show stored speed and direction of displayed Con or Lc
39
SHOW 9
Show platform and software version number ....................................12
SEL DIR
Set speed to zero on active loco or consist (Quick Stop) ...................4
SEL 1, n
Set transmit frequency - Standard - where n can be from 0 to 7........11
SEL 2, n
n = 1:
n = 2:
n = 3, x:
Consist building and editing
Build new consist ...............................................................................14
Add new consisted locomotive or overwrite existing Lc...................19
Edit consisted locomotive
x = DIR: Change displayed Lc direction .........................................18
x = 0: Turn off displayed Lc functions F0 - F4..............................18
x = 1: Flip and reorder entire consist .............................................20
SEL 3, #
Update displayed Ln’s memory .........................................................10
SEL 4, #
Update displayed Con’s memory .......................................................18
SEL 5
# nn #
1:
2:
Enter Accessory Decoder Control......................................................22
n = accessory decoder address from 1 to 99
1 = Reverse/Off
2 = Forward/On
SEL 9, #
Clear memory and reset T9000 to factory defaults ............................7
# DIR, n
n=1
n=2
n=3
Set Speed Steps ..................................................................................7
14 speed steps
28 speed steps
128 speed steps
40
T9000 Command Summary and Reference - continued
DIR
OPR Bit
Change direction of active locomotive or consist . . . . . . . . . . . . . . . 4
Using OPR to program individual CV bits . . . . . . . . . . . . . . . . . . . . 32
# nnnn #
Enter or recall locomotive number, Ln . . . . . . . . . . . . . . . . . . . . . . . 8
SPR, SEL,
* nnnn *
# nnnn #
SPR
Enter Service Programming mode - no address required . . . . . . . . . 25
Configuration variable number, Cn, where n is range of 1 to 1024
Configuration value 0 to 255 for Cn 2 and higher (1 to 9999 for Cn 1)
To exit mode
OPR, SEL,
* nnnn *
# nnnn #
OPR
Enter Operation’s Programming mode for active Locomotive, Ln. . 30
Configuration variable number, Cn, where n is range of 2 to 1024
Configuration value 0 to 255
To exit mode
n
Control Low Functions n where n is 0 to 9, except for n = 2 . . . . . 5
2
Activate F2 while 2 key is depressed, deactivate when released . . . 5
*, n
Control High Functions F10 through F19 where n is 0 to 9 . . . . . . . 5
CV29
Decoder configuration with several options . . . . . . . . . . . . . . . . . . . 27
Index
128 speed steps . . . . . . . . . . . . 7
14 speed steps . . . . . . . . . . . . . 7
28 speed steps . . . . . . . . . . . . . 7
Accessory decoders . . . . . . . . . 22
Accy Decoders . . . . . . . . . . . . 22
Add new loco to consist . . . . . 19
Address entry. . . . . . . . . . . . . . 8
Address Programming. . . . . . . 25
AirWire Decoder CVs . . . . . . . 26
Alkaline batteries. . . . . . . . . . . 2
Antenna care . . . . . . . . . . . . . . 12
Antenna replacement . . . . . . . Back
Batteries. . . . . . . . . . . . . . . . . . 2
Battery indicator . . . . . . . . . . . 11
Bit programming . . . . . . . . . . . 32
Build consist . . . . . . . . . . . . . . 14
F2. . . . . . . . . . . . . . . . . . . . . . . 5
Factory default listing . . . . . . . 7
Flip Consist . . . . . . . . . . . . . . . 20
Frequencies used . . . . . . . . . . . 11
Function control keys . . . . . . . 5
Headlights, flashing. . . . . . . . . 21
Help . . . . . . . . . . . . . . . . . . . . . Back
High Function Group . . . . . . . 5
Horn/Whistle Key . . . . . . . . . . 5
Jamming . . . . . . . . . . . . . . . . . 12
Key Definitions . . . . . . . . . . . . 3
Care of your throttle . . . . . . . . 36
Change consist direction . . . . . 20
Change Lc direction . . . . . . . . 18
Change transmit frequency . . . 11
Cheat card . . . . . . . . . . . . . . . . 37
Cleaning the throttle . . . . . . . . 36
Clear all memory. . . . . . . . . . . 7
Compatibility. . . . . . . . . . . . . . 34
Con, definition. . . . . . . . . . . . . 13
Consist activating . . . . . . . . . . 14
Consist building. . . . . . . . . . . . 14
Consist memory. . . . . . . . . . . . 16
Consisted Locomotive, Lc. . . . 16
Consists, Introduction . . . . . . . 13
Contact information. . . . . . . . . Back
Custom Speed curves . . . . . . . 28
CV 29 . . . . . . . . . . . . . . . . . . . 27
CVP Address . . . . . . . . . . . . . . Back
CVs, Accessory decoders . . . . 23
Decode programming . . . . . . . 24
Decoder CVs . . . . . . . . . . . . . . 26
Decoder function control. . . . . 5
Default display . . . . . . . . . . . . 6
Delete consist . . . . . . . . . . . . . 17
Delete Lc . . . . . . . . . . . . . . . . . 17
41
Delete Ln . . . . . . . . . . . . . . . . . 10
Direction Switch Location . . . 3
Display care. . . . . . . . . . . . . . . 3
Emergency Stop . . . . . . . . . . . 4
Enter Loco address . . . . . . . . . 8
Lanyard . . . . . . . . . . . . . . . . . . 21
Lc Function controls . . . . . . . . 18
Lc, consisted loco . . . . . . . . . . 13
LCD, care of . . . . . . . . . . . . . . 3,36
Lead loco . . . . . . . . . . . . . . . . . 14
Leading Zeroes . . . . . . . . . . . . 21
Leaky battery warning. . . . . . . Front
Ln . . . . . . . . . . . . . . . . . . . . . . 8
Locomotive address entry . . . . 8
Low battery indicator . . . . . . . 11
Low Function Group . . . . . . . . 5
Manual Ln memory update . . . 10
Memory, clear all. . . . . . . . . . . 7
Memory, consist . . . . . . . . . . . 18
Memory, locomotive . . . . . . . . 9
MU . . . . . . . . . . . . . . . . . . . . . 13
Multi-units. . . . . . . . . . . . . . . . 13
Normal display . . . . . . . . . . . . 6
Operations programming. . . . . 30
OPR . . . . . . . . . . . . . . . . . . . . . 30
continued on next page
42
Warranty Information
Index - continued
Program sound decoder................32
Programming Accy decoders .......23
Programming addresses ...............25
Programming bits.........................32
Quick-Stop ...................................4
Programming sound decoders......32
Recall locomotive ........................9
Recall consist ...............................14
Rechargeable Battery ...................2
Repair information .......................Back
Restore T9000 factory defaults ....7
Restore Decoder defaults .............36
RMA ............................................Back
Run-mode display ........................6
Run-time environment .................34
Safety ...........................................
Save locomotive ..........................8
Select stored locomotive ..............9
Service programming...................25
Show speed ..................................6
Software version .........................12
Sound decoder programming.......32
Speed curves ................................28
Speed steps...................................7
Speed table, custom .....................28
SPR ..............................................25
Stationary decoders ......................22
Store locomotive .........................9
Street Address ..............................Back
This warranty covers substantial defects in materials and workmanship in the T9000
Wireless Throttle.
What This Warranty Does Not Cover
This warranty does not cover any problems which result from improper operation, leaking
batteries, modifications or damage caused by exposure to moisture and rain. Normal wear
and tear are also not covered. Items subject to wear and tear include battery clips, the
removable antenna, antenna mounts, and the speed control.
Leaky Batteries Will Destroy The Throttle
Always remove batteries from an unused throttle. If the battery leaks on to the circuit
board, the throttle suffer damage that can not be replaced. The warranty does not cover
leaky batteries.
Warranty Duration
The coverage of this warranty lasts for 1 year.After this period, standard repair rates apply.
Need Help?
If you have questions or need help, your first call needs to be to your dealer or installer.
They are very familiar with the AirWire equipment and its use. If your dealer/installer
doesn’t have the answer, use the phone number below. In some cases, we will busy helping
other customers or it will be after hours. Please leave a message. Be sure to leave both
daytime and evening numbers along with your city and state. Have your manual and
equipment nearby before you call.
Do not send items to us for repair without first obtaining authorization. In many cases,
problems are easily solved via phone or email without the need or expense to return items
to us. If we authorize and request you to return an item, be sure to mark the “Return
Material Authorization” (RMA) number on the outside of the box. Items sent without an
RMA will be refused and returned at your expense. You are responsible for all shipping
charges.
CVP Products 415 N. Bowser, Ste. #101, Richardson, TX 75081
T9000 cheat card..........................37
Transmit range tips.......................12
Troubleshooting ...........................35
Update Con memory ....................18
Update Ln.....................................10
Version number ............................12
Warranty.......................................Back
FC
C
Your AirWire T9000 throttle is carefully designed and certified unlicenced low-power transmitter.
The FCC ID label and the compliance label serves to show the FCC has authorized this transmitter.
This transmitter has been tested and found to comply with the limits for a Class B digital device,
pursuant to part 15 of the FCC rules. These limits are designed to provide reasonable protection
against harmful interference in a residential installation. This equipment uses and can radiate radio
frequency energy and, if not installed and used in accordance with the instructions, may cause
harmful interference to radio communications. However, there is no guarantee that interference will
not occur in a particular installation. If this equipment does cause harmful interference to radio or
TV reception, which can be determined by turning the equipment off and on, the user is encouraged
to try to correct the interference by one or more of the following measures.
- Reorient or relocate the receiving antenna;
- Increase the separation between theAirWire transmitter and the TV/radio receiver.
FCC Licence ID: OKWTX904
43
CVP Products P.O. Box 835772 Richardson, TX 75083-5772
972-238-9966 10AM- 4PM Central Time, Weekdays
www.cvpusa.com
44
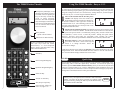
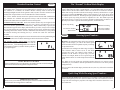
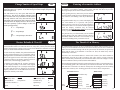
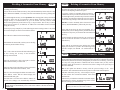
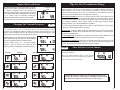
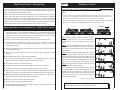
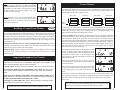
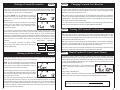
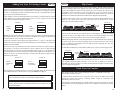

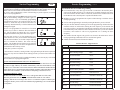

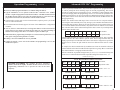
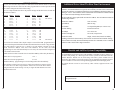
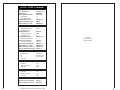

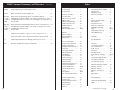
![AWD10SS [obsolete] User Manual](http://vs1.manualzilla.com/store/data/005777265_1-bc3e4afb4b891fb2fe3c32a930faa0e5-150x150.png)
![T9000E [obsolete]](http://vs1.manualzilla.com/store/data/005920932_1-890f13b4deb2f1c3de1d3a852a7c64ca-150x150.png)
![G2 Decoder [obsolete] Second Generation User Manual](http://vs1.manualzilla.com/store/data/005963661_1-2c18e92993151caf68904a7a924089ff-150x150.png)