Transcript
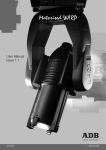
The User Manual
THE SILVERSTEIN LIGHT
DIRECTIONS
Cleaning a musical instrument can be difficult and inconvenient for woodwind and brass
instrument players. Most musicians use different methods of wiping, but real health
concerns come from germs that cannot be seen with the naked eye in hard-to-reach
corners of an instrument. The build-up of germs can be detrimental to a musician’s
health and respiratory system.
Mounting on Your Mouthpiece
The Silverstein Light is ergonomically designed to sanitize mouthpieces, instruments,
and reeds with the use of ultraviolet and ozone technology. The Silverstein Light has
been lab tested against various strains of bacteria and infection-causing microbes that
when left unattended can lead to a variety of health concerns. The Silverstein Light is
99.9% effective against several notable infections, including:
3. The mouthpiece should rest lightly on the rubber Mounter 3
covering the bottom of the UV lamp4. Do not push down on the
mouthpiece to prevent damage to the UV lamp4!
1. Remove the Main Cap1, and the Bell Cap2 (*) from the main
body of the device revealing the UV lamp 4.
2. Gently place the bore of the mouthpiece over the UV lamp4.
1. Main Cap 3. Mounter
2. Bell Cap 4. UV Lamp
• Escherichia coli (E. coli) – can cause food poisoning and gastroenteritis
Screw the Main Cap1 back in place until the tip of the mouthpiece lightly touches the
inside of the Main Cap1. Inside of the Main Cap1 is outfitted with a food-grade silicon pad
to protect the tip of your mouthpiece. Make sure not to overtighten, which may result in
damaging the mouthpiece and the UV lamp4.
• Staphylococcus aureus – can cause Staph infections, skin infections, respiratory
disease, and food poisoning
Mounting on Your Instrument
• Klebsiella pneumoniae – can cause destructive changes to lungs via inflammation and hemorrhaging, notably causing pneumonia, bronchitis, and respiratory
disease
1. To clean from the bell of the instrument, remove the Main Cap1, but leave the Bell Cap2
(if supplied*) attached to the main body of the device. Then insert the device “cap-first”
into the horn.
• MRSA – classified as antibiotic-resistant Staphylococcus aureus, particularly difficult to treat because of their learned resistance to conventional antibiotics
2. To clean from the upper opening or any part of the instrument that has a smaller opening than the bell, remove the Bell Cap2(*) from the main body of the device revealing the
UV lamp4. Then gently place the UV lamp4 into the opening to be cleaned, and situate the
device carefully.
* Testing of the Silverstein Light was conducted on a mouthpiece by KCL, a third party
medical research laboratory. For more information on testing results,
visit www.silversteinworks.com.
3. Do not move the instrument during operation. For better results, secure the instrument
in an enclosed space, such as inside of an instrument case.
CAUTION
• A
void direct skin and eye contact with the
UV lamp during operation.
• U
se the Main Cap as instructed above to properly shield the UV lamp from skin
and eye contact during operation. Please exercise caution during use.
• Ozone has a distinctive odor which is expected and normal.
• Keep out of reach from children.
• Use device for its intended purpose only.
• Keep away from water and humidity.
• This device should not be exposed to extreme temperatures. Keep away from fire.
Mounting on Your Reed
1. Remove the Main Cap1, and the Bell Cap2(*) from the main body of
the device revealing the UV lamp4.
5
5.Reed Holder
2. Gently situate the reeds in the rubber Reed Holder 7 that surrounds
the base of the UV lamp4. Reeds should be standing up right facing
outward away from the UV lamp4. Rubber reed holder5 holds up to 4 reeds at a time.
3. Screw the Main Cap1 back in place. Tighten just enough so the inside of the cap does
not touch the tip of the reeds. Overtightening may result in damaging your reeds.
*Bell Cap2 and reed holder7 are optional accessories, and are sold separately in some cases.
**For best results, the Silverstein Light should be used after every session or as often as possible to
not only sanitize your instrument, but also prevent against build-up of germs.
Setting the Timer
6
• T
he effectiveness of the device may vary
according to shape and size of the mouthpiece and instrument.
1. Turn on the device by press-and-holding the touch-sensitive power
button7 (located on the bottom surface of the device) for three
seconds until the multi-LED 6 blinks three times. Turn off the device
by press-and-holding the touch-sensitive power button7 for three
seconds until the multi-LED 6 blinks one time.
• T
his device should not be used as a sole method of instrument cleaning. This
device is designed to work in supplement to other conventional cleaning methods,
and not to replace them.
2. Once the device is turned on, set the time of operation by lightly tapping the touchsensitive power button7. The device counts down ten seconds (indicated by beeping
noise and blinking LED 6) for the user to set the time before beginning cleaning process.
• For indoor use only.
• Do not use for clinical or medical use.
• This device is RoHS compliant.
• Practice proper recycling when discarded
WARRANTY
The Silverstein Light comes with a 1-year limited warranty to the original owner against
defects in material and workmanship. Warranty does not cover damage from water,
abuse, wear and tear, accident, negligence, or usage not intended for original purpose.
Disassembly, and/or any alteration of the device will void the warranty. Damage not covered under warranty can be repaired for a reasonable rate. If the product ever fails due
to a manufacturing defect, even after extended use, we will repair the product without
charge, or replace it at our discretion. The Silverstein Light must be sent for warranty
service with all parts included. Any missing parts will void the warranty. The customer
will be responsible for all shipping charges for any warranty services. To obtain warranty
service, please contact us at (201) 471-0700 or [email protected].
7
6.LED
7. Power Button
First tap: 15 minute runtime displayed by white light (recommended for mouthpieces and reeds)
Second tap: 30 minute runtime displayed by green light (recommended for small
instruments, i.e. clarinet, soprano saxophone, trumpet)
Third tap: 60 minute runtime displayed by blue light (recommended for large
instruments).
Fourth tap: Turn off
*when battery is low (indicated by red-LED 6), the timer can only be set for the
amount of time that the battery has left to perform.
3. The device will automatically turn off once cleaning cycle is complete.
Charging
• Fully charge device before first time usage.
• Red-LED 6 will light up when battery is low.
• Red-LED 6 blinks when charging.
• Red-LED 6 will stop blinking when charging is complete.
• To recharge, use the USB-to-microUSB cable supplied in the package. Insert the
micro-USB end of the cord to the device and insert the USB end of the cord into an
USB port or an USB wall adapter.
• With a 5V, 1A power source (plugged into an outlet) it may take about 2~2.5 hours
to fully charge the battery.
• With a 5V, 0.5A power source (such as your computer) it may take about 4~5 hours
to fully charge the battery.
• Actual performance of the battery may vary depending on usage and other circumstances.