1
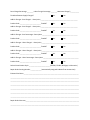
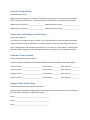
MaxxTraxx Pro CE
Getting Started
Workbook
Welcome new MaxxTraxx Pro CE user and congratulations on your decision to use one of the most
advanced, comprehensive automotive management systems available today to assist you with
making your business a great success. As you will discover, MaxxTraxx Pro CE has hundreds of
features that can help you run your business more effectively, but it can be a bit overwhelming!
Have no fear, as we at Scott Systems have the reputation of having the most capable and available
technical support staff in the industry. We’ll do everything we can to help you be successful, but the
burden of preparation is on you. This Getting Started Workbook is one of the tools to assist you.
The Getting Started Workbook is designed to guide you through the set up process to ensure you
have the proper computer hardware, the necessary training, and the tools to set up your software
program correctly before you write that first repair order. We have created checklists to follow as
well as information collection sections to as assist you with gathering and inputting your company
data. Completing the Setup Information section of the workbook to record this information can
help streamline the process, plus you will have a handy reference guide when you’re done. If you
are a MotorTraxx user converting your data to MaxxTraxx Pro CE, this guide will also explain what
data is converted and what data is to be entered manually.
Each new user will set up their MaxxTraxx Pro CE system a little bit differently depending on their
existing data, whether you are a brand new shop without any data; an existing shop with customer
data, or customer data and inventory, or customer data, inventory, and accounting; or a MotorTraxx
or MaxxTraxx Pro SE converted user with or without accounting data. The first step in the process
is to identify the checklist that applies to your shop then follow the MaxxTraxx Pro CE User Manual
in conjunction with the Setup Instructions in the workbook. Please note some checklist tasks must
be set up before you write your first repair order, while other sections can be set up along the way.
The workbook is broken down into seven sections: Steps, Checklists, Setup Information, Converted
Data, Hardware Requirements, Off-site Backup, and the Release. Follow each one of the ten steps
listed, which will reference the other six sections of the workbook as well as the MaxxTraxx Pro CE
User Manual and Order Form. If you have any questions along the way, please feel free to call us.
Our goal is to inform you of the process you are about to embark on and prepare you for a smooth
transition into using MaxxTraxx Pro CE to run your business.
Let’s get started…
Step 1: Verify your Hardware Specifications and Backup
The first step in preparing to use MaxxTraxx Pro CE in your business is to verify your computer
hardware meets the specifications needed to run the software. We have listed both recommended
and minimum specifications; note that the recommended levels will provide optimal performance.
An essential element of your hardware is the backup system. Ensure that you have a reliable, and if
possible, redundant daily backup for your data. And last, we will not install MaxxTraxx Pro CE on a
computer system that does not meet the minimum hardware requirements listed in this document.
Step 2: Arrange Training and a Practice Version
Once you have the necessary hardware in place, we can load a practice version of MaxxTraxx Pro CE
on your system. For MotorTraxx users who are converting to MaxxTraxx Pro CE, we can also load
your MotorTraxx data so you can view the converted data and practice on it. There are many tools
available to assist you with your training including a User Manual, Training Videos, Web Seminars,
Over-the-phone Training, and On-site Training for an additional fee. If you do not have a computer
that meets the minimum requirements yet, you can practice on our online demo in the meantime.
We have found that shops typically get in 12 hours of training and practice before they “go live”.
Step 3: Identify your Checklist and Review Tasks
An essential part of your training is learning about the Setup Process. There are three Setup
Checklists in this workbook, one for new shops that have not started operating their businesses;
one for existing shops without data pre-loaded or data converted from another software program;
and one for MotorTraxx users who will have their data converted from MotorTraxx to MaxxTraxx
Pro CE. Identify your checklist which lists each section of MaxxTraxx Pro CE that will require setup,
with some tasks requiring setup prior to writing your first require order. You will also notice there
are additional setup tasks for shops that intend on using the accounting in MaxxTraxx Pro CE.
Step 4: Review Setup Tasks
Each task on your checklist references a section of the MaxxTraxx Pro CE User Manual that you can
follow to complete that section. Review each task ahead of time following the procedures in the
user manual. And if you have a practice version of MaxxTraxx Pro CE loaded, we recommend that
you actually get the practice version completely setup, just as you would your live version. You will
accomplish a couple of things by doing this: You get familiar with the different features and options
available in the system; if you have converted data, you will see what information is converted, how
that converted information will look, and know what you will need to enter manually; and last, once
you decide how you would like your system setup, it will take less than an hour to get your “live”
MaxxTraxx Pro CE setup and ready to go.
Step 5: Review Conversion Details
For users that will have their MotorTraxx data converted to MaxxTraxx Pro CE, the Converted Data
section of the workbook details specifically what data is directly converted, what data is converted
in a modified version that will require correction, and what data is not converted at all. Some of the
data will need to be manually entered, such as the general ledger beginning balances. We’ve found
most shops keep a copy of their MotorTraxx program loaded on a single workstation for reference,
in case they want to access data that is not converted, such as parts purchase history or financial
reports for previous years. As mentioned in step 4, loading a practice version of MaxxTraxx Pro CE
with your MotorTraxx data is a great way to get a firsthand look at your data once it is converted.
Step 6: Gather your Information
The Information section of the workbook provides space to enter you company information that
you will need to complete the setup tasks on your Checklist. You may actually fill in the workbook
or just use the sections listed as a guide to ensure that your critical company information is setup in
MaxxTraxx Pro CE before you write your first repair order. You will notice that there is additional
information that will need to be entered if you are going to use the accounting section of MaxxTraxx
Pro CE notated under the section, “For Accounting Users.” The bulk of this accounting information
can be loaded in the days and weeks following your “go live” date; simply date your entries the day
you went live, which should also be the date of the financial documents you are referencing.
Step 7: Complete Order Form and Release
Once you have the necessary computer hardware, have completed training, and fully understand
the setup process, you are ready to schedule your “live” MaxxTraxx Pro CE installation and/or data
conversion. Fill out the Order Form, noting the number of users, if you will be using the accounting,
and if you want to subscribe to the off-site data backup service. Additionally, check off each box on
the Release stating that you have reviewed and completed each item on the release, sign, and enter
your desired “go live” date. Fax all three pages to our office and we will contact you to confirm the
date and time of your MaxxTraxx Pro CE installation and/or data conversion.
Step 8: Install and/or Convert to MaxxTraxx Pro CE
On the scheduled install/data conversion date, you will need to connect to our technical support
representative via a high-speed internet connection who will install MaxxTraxx Pro CE, you’re your
converted data, and set up your basic company information. If you are going to enter financial data
from another system, including MotorTraxx, you will want to close out your financials for that day
just prior to the conversion, and print all your financial reports at that time to use in the accounting
setup of MaxxTraxx Pro CE. The install process takes anywhere from two to four hours to complete.
Step 9: Follow Setup Procedures
Once your MaxxTraxx Pro CE installation and/or data conversion is complete, you will need to get
your system setup. Complete each task on your Checklist, referencing the applicable procedure in
the User Manual as needed. Note that there are items on the Checklist designated with an asterisk
that must be completed prior to creating a repair order. Other items can be set up as you go, just be
sure to date any beginning balance transactions the same date as your initial installation and/or
conversion. You may find that the vast majority of the setup procedures are left on the default
settings. Most shops use these defaults; however, we want to ensure that any customizations that
you would like to have in the system are done at the onset if possible, not to say that you cannot
make changes to your system setup at a later date, you can. And remember, if you have questions
or need assistance along the way, please do not hesitate to call us as we are here for you!
Step 8: Go Live! on MaxxTraxx Pro CE
After completing all the necessary tasks on your Checklist, you are ready to start using MaxxTraxx
Pro CE to run your business. You will probably find your training and setup of MaxxTraxx Pro CE to
be an evolutionary process. As you become more familiar with the various features and functions
throughout MaxxTraxx Pro CE, you might want to take advantage of some of these features and
make more customizations to the system to match your workflow. Please plan on reviewing the
user manual after running the system for a couple months, as there is a wealth of information about
the various features. Also, please feel free to give us a call if you would like to know more about a
particular feature or would like to know how to best utilize a function. We have found most shop
owners only use a portion of their software system capabilities, often times because they get the
basics down to run their business and then never go back to find out more. MaxxTraxx Pro CE is
one of the most advanced, comprehensive automotive management systems available today and we
want you to get the most you can out of your investment, so in a few months, give us a call, and let
us review how you are using the system and provide you with suggestions and information that can
help make your business a great success!
Hardware Requirements
The following are the recommended (and minimum) hardware requirements to install and operate
MaxxTraxx Pro CE. Note the recommended specifications will give you optimal performance.
Server:
1. Operating System
Microsoft Windows XP Professional, Vista Business, or Microsoft Windows
2003 Server-Standard Edition. For networks with more than six
workstations, we recommend Microsoft Windows 2003 Server. Be aware
that Small Business server will not support Terminal Services or Citrix.
(Minimum – Microsoft Windows XP Home)
2. CPU
3.0 GHz or better (Minimum – 1.5 GHz)
3. Memory
3 GB or better (Minimum – 2 GB)
4. Hard drive
80 GB or better. We also recommend, but do not require, RAID 1 or RAID 5
(mirrored drives) using at least two identical hard drives. (Minimum – 40
GB)
5. Network
100 MBit or faster (No wireless networks unless you use Terminal Service
or Citrix)
6. Backup
USB drive, DVD, CD, Tape, or off-site upload. (Scott Systems offers off-site
backup for a nominal fee)
7. Internet
Broadband, either DSL, T1, or Cable with Router/Firewall
Workstations:
1. Operating System
Microsoft Windows XP Professional, Media Center or Home, Vista (all
versions), Microsoft Windows 2000, ME or 98 (in that order)
2. CPU
3.0 GHz or better (Minimum – 1.0 GHz)
3. Memory
2 GB or better (Minimum – 1 GB)
4. Hard drive
40 GB or better (Minimum – 40 GB)
5. Network
100 MBit or faster (No wireless networks unless you use Terminal Service
or Citrix)
WE WILL NOT INSTALL MAXXTRAXX PRO CE ON A COMPUTER SYSTEM THAT
DOES NOT MEET THE MINIMUM HARDWARE REQUIREMENTS LISTED ABOVE.
Off-site Data Backup
For anyone who has ever suffered significant (or even minor) data loss from their primary business
software, they know the amazing inconvenience and frustration, as well as the time and money loss
involved in trying to recover and reconstruct that lost data, sometimes with little or no success. As
those of you who have been with us for many years know, we have always suggested that you have
a reliable backup system for your company data, preferably one with redundancy. After a data loss,
we spend a significant portion of our time searching for an archive of information that we can use
to start the recovery process. Our data backup manta has always been, “It’s not IF you will suffer a
hardware failure, it’s WHEN.”
After so many years of watching our customers forget to do their backups or realize that their
backup system had not been working as they thought, we decided to develop an alternative for
them. MaxxTraxx Pro CE now has a built-in ability to schedule and perform automatic backups and
deliver them to any device you choose. That new feature has been a big step forward and has
already proven to be a valuable safety net for several of our MaxxTraxx Pro CE users.
However, when we hear the horror stories of one shop who suffered a ship fire earlier this year that
destroyed not only all his computer hardware, but his backups as well, and another who was
inundated with a flood, not once but twice, it became apparent we needed to offer more options.
Off-site backup was the solution where fire, flood and theft in the shop cannot affect them.
Scott Systems is now able to offer all MaxxTraxx Pro CE users the ability to automatically send their
backups to our secure, off-site servers. We will store seven successful copies, one for each day of
the week, for you. The advantage to having Scott Systems backup and store your data for you is
that we can restore your SQL database to a fully operational status in short order, not a job
everyone knows how to do. We know your software, we know your business, and we know you.
For only $12.50 per month, you cannot beat the peace of month of knowing your data is safe and
can be restored to make your business operational in a matter of hours. How much is your data
worth? Be sure to indicate on your MaxxTraxx Pro CE Order Form if you would like to subscribe to
the off-site data backup service for a monthly fee of $12.50 billed with your support subscription.
New Shop Checklist
Shops starting to use MaxxTraxx Pro CE as of their first day of business
*These sections MUST BE COMPLETED PRIOR TO WRITING YOUR FIRST INVOICE
*Company Information (see under Setup)
*Repair Order and Parts Invoice Setup (see under Setup)
*This Workstation Printing and Miscellaneous Info Setup (see under Setup)
*Sales Tax Rates (see under New User Setup)
*Security Groups Setup (see under Setup)
*Employees and Employee Permissions (see Add An Employee under Payroll)
Customer Sources Setup (see under Setup, Marketing Setup)
Repair Order Status Setup (see under Setup, Lists)
Parts Invoice Status Setup (see under Setup, Lists)
Cancellation Reasons Setup (see under Setup, Lists)
Cash Drawers (see under New User Setup)
Departments (see under New User Setup)
Product Codes (see under New User Setup)
Payment Methods (see under New User Setup)
Database Backup Setup (see under Setup)
Enter Vendors (see Add A Vendor under Accounts Payable)
Enter Custom Labor Services (see Add A New Labor under Service Counter)
Enter Custom Kits (see Add A New Kit under Service Counter)
For Accounting Users:
*Fiscal Year Start Date (see under New User Setup)
*Default Account Posting (see under New User Setup)
*Product Codes (see under New User Setup)
Company Payroll (see under New User Setup)
Beginning Checking Balances (see under New User Setup)
Beginning General Ledger Balances (see under New User Setup)
Order computer checks**
**Computer checks for MaxxTraxx can be ordered through All Valley Printing at (559) 453-6950
Existing Shop Checklist
Shops already in business starting to use MaxxTraxx Pro CE
*These sections MUST BE COMPLETED PRIOR TO WRITING YOUR FIRST INVOICE
*Company Information (see under Setup)
*Repair Order and Parts Invoice Setup (see under Setup)
*This Workstation Printing and Miscellaneous Info Setup (see under Setup)
*Sales Tax Rates (see under New User Setup)
*Security Groups Setup (see under Setup)
*Employees and Employee Permissions (see Add An Employee under Payroll)
Customer Sources Setup (see under Setup, Marketing Setup)
Repair Order Status Setup (see under Setup, Lists)
Parts Invoice Status Setup (see under Setup, Lists)
Cancellation Reasons Setup (see under Setup, Lists)
Cash Drawers (see under New User Setup)
Departments (see under New User Setup)
Product Codes (see under New User Setup)
Payment Methods (see under New User Setup)
Database Backup Setup (see under Setup)
Enter Customers (see Add A Customer under Service Counter)
Enter Vehicles (see Add A Vehicle under Service Counter)
Enter Inventory (see Add New A Part under Service Counter)
Enter Vendors (see Add A Vendor under Accounts Payable)
Enter Custom Labor Services (see Add A New Labor under Service Counter)
Enter Custom Kits (see Add A New Kit under Service Counter)
Enter Existing Repair Orders and Parts Invoices (see all procedures under Service Counter)
For Accounting Users:
*Fiscal Year Start Date (see under New User Setup)
*Default Account Posting (see under New User Setup)
*Product Codes (see under New User Setup)
Company Payroll (see under New User Setup)
Beginning Checking Balances (see under New User Setup)
Beginning Accounts Receivable Balances (see under New User Setup)
Beginning Accounts Payable Balances (see under New User Setup)
Beginning Payroll Balances (see under New User Setup)
Beginning General Ledger Balances (see under New User Setup)
Order computer checks**
**Computer checks for MaxxTraxx can be ordered through All Valley Printing at (559) 453-6950
Converted Data Shop Checklist
Shops with converted data from MotorTraxx pre-loaded into MaxxTraxx Pro CE
*These sections MUST BE COMPLETED PRIOR TO WRITING YOUR FIRST INVOICE
*Company Information (see under Setup)
*Repair Order and Parts Invoice Setup (see under Setup)
*This Workstation Printing and Miscellaneous Info Setup (see under Setup)
*Sales Tax Rates (see under New User Setup)
*Security Groups Setup (see under Setup)
*Employees and Employee Permissions (see Add An Employee under Payroll)
Customer Sources Setup (see under Setup, Marketing Setup)
Repair Order Status Setup (see under Setup, Lists)
Parts Invoice Status Setup (see under Setup, Lists)
Cancellation Reasons Setup (see under Setup, Lists)
Cash Drawers (see under New User Setup)
Departments (see under New User Setup)
Product Codes (see under New User Setup)
Payment Methods (see under New User Setup)
Database Backup Setup (see under Setup)
Correct Custom Kits (see Manager, Manage Kits)
Correct Marketing Letters (see under New User Setup)
Enter Existing Repair Orders and Parts Invoices Detail (Parts, labor, and add-on charges on all
open invoices need to be re-selected and added under a Reason for Service in MaxxTraxx.)
For Accounting Users:
*Fiscal Year Start Date (see under New User Setup)
*Default Account Posting (see under New User Setup)
*Product Codes (see under New User Setup)
Company Payroll (see under New User Setup)
Beginning Checking Balances (see under New User Setup)
Beginning Accounts Receivable Balances Detail (see under New User Setup)
Beginning Accounts Payable Balances Detail (see under New User Setup)
Beginning Payroll Balances (see under New User Setup)
Beginning General Ledger Balances (see under New User Setup)
Order computer checks**
**Computer checks for MaxxTraxx can be ordered through All Valley Printing at (559) 453-6950
Converted Data
Due to changes in file and field formatting, there is some information in MotorTraxx that does not
translate into the structure in MaxxTraxx. These items are minimal, but it is important that you are
aware of what they are, so that you are not surprised or unprepared to re-enter the information
after the conversion.
Since you will still have access to your old MotorTraxx program, you will not lose any information,
but you may have to return to it to view or print it. Daily book is entirely different in MaxxTraxx,
and MaxxTraxx will not be able to run end of day information for anything prior to the conversion.
Customer records are converted. In MaxxTraxx, a customer is either a company or a person. If
there is information in the MotorTraxx Company Name field, their record is converted with their
Company Name for search and report purposes, and the customer first and last name are entered as
the contact. All paid invoices are converted and are in the customer history.
Vehicle records are converted. In MotorTraxx, you were allowed to modify the field names to
accommodate information that the defaults did not allow for. If you have changed the name of any
of the fields, those field entries will be converted, but with the default field names in MaxxTraxx.
Let us know if you have made changes to your vehicle field names, and we may be able to run a
utility to move your data into the appropriate fields. The Vehicle Tag ID, A/C designation, and Drive
Type are not converted.
Open invoices on the Service Counter and Parts Counter are converted with correct RO and Invoice
numbers without the parts and labors on them that were in MotorTraxx. You will need to re-enter
labor and parts, select a reason for service, enter any add-on charges, and RESELECT THE SALES
TAX DESIGNATION. THE DEFAULT SALES TAX RATE WILL BE AUTOMATICALLY APPLIED TO
ALL OPEN REPAIR ORDERS CONVERTED FROM MOTORTRAXX BY DEFAULT. After you setup
your sales tax rate under setups, reselect the sales tax code under the Miscellaneous Link on
all open repair orders and parts invoices. Going forward, all newly created repair orders and
parts invoices with have the sales tax rate you select in the sales tax setup applied automatically.
Labor service records are converted; except MaxxTraxx does not have a field for approximate parts.
Sublet labors are converted; the sublet codes will default to SUBLET which can be edited as needed.
Kits are converted in a modified version. All the labor and parts from the kit are converted, but a
labor placeholder line is creates that all the parts are listed under. You will need to move the parts
under each the appropriate labor service line.
Parts inventory and all the parts records, except the parts purchase history, are converted.
Custom product codes from MotorTraxx are converted; but if you changed their G/L assignments
from the default, you will need to re-enter the G/L account assignment you had in MotorTraxx.
Employee records are partially converted with employee information. Pay type, commissions, tax,
and security permissions settings as well as payroll year-to-date information need to be entered.
Employee records and their customer record are linked in MaxxTraxx, whereas in MotorTraxx
these records are not. If you have converted employee records from MotorTraxx, the employees
that also have “converted customer records” need to have their employee records deleted and recreated using the Edit Record Type feature under the customer record – Customer Options button.
By re-creating the payroll record from the customer record, the linking features between the
employee account and their customer record, such as paying their A/R balance automatically from
a payroll deduction will now be available. Open their customer record, select Make an Employee
from the View and Edit Record Type feature under Customer Options, and the system will create a
new employee record which you can then continue to set up with their payroll information.
Accounts Receivable and Accounts Payable balances (no detail) are converted as a single amount
due under each respective customer or vendor record. The total AR and AP amounts due will be
entered on the general ledger under the 12000 Receivables, Sales account and the 20000 Payables,
Trade account with the offsetting amount to the 19900 System Balance / Initial Setup account.
Bank balances are not converted; these need to be entered.
General ledger account numbers are reset to the defaults; any custom general ledger accounts and
all the account balances need to be entered with the exception of AR and AP account balances.
Default Account Postings which detail where automated transactions are posted on the general
ledger need to be verified and modified as needed as they are reset to their default accounts.
Company Information, i.e. company name, address, BAR #, etc., needs to be entered. Some of the
Repair Order or Parts Invoice setup is converted, i.e. labor rates, supply charges, etc., however these
entries need to be verified and the rest of the setup completed.
Important: Close the Daily Book and print all your financial
reports from MotorTraxx before your data conversion starts.
Setup Information
Company Information
Setups>>Company Information
Note: Do not remove the checkmark from TURN OFF SYSTEM SECURITY until you have set up your
employees, created passwords, and selected security groups!
Company Name _______________________________________________________________________
Print Name (as it appears on ROs) _________________________________________________________
Address ______________________________________________________________________________
City __________________________________ State _______________ Zip ________________________
Phone 1 __________________________________ Phone 2 ____________________________________
Comment 1 ___________________________________________________________________________
Comment 2 ___________________________________________________________________________
(Comments can be Bureau of Automotive Repair number, EPA number, Business License number, etc.)
Select the accounting system to be used: _____________________ (MaxxTraxx, QuickBooks, or None)
If your Report Printer will be different than your Repair Order printer, and is not your default printer,
indicate the correct printer in the Default Report Printer box. _________________________________
Beginning of workday time __________________ End of workday time ___________________________
Repair Order and Parts Invoice Setup
Setups>>RO and Part Invoice Setup
Shop Labor Rate A _________________________ Shop Labor Rate D _____________________________
Shop Labor Rate B _________________________ Shop Labor Rate E _____________________________
Shop Labor Rate C _________________________ Shop Labor Rate F _____________________________
Average Labor Cost Per Hour (if known) ____________________________________________________
Repair Order Miscellaneous Supply Charge Description ________________________________________
Parts Charge Percentage ________ Labor Charge Percentage ________ Maximum Charge $___________
Part Invoice Miscellaneous Supply Charge Description _________________________________________
Parts Charge Percentage ________ Labor Charge Percentage ________ Maximum Charge $___________
Tax Miscellaneous Supply Charges?
Yes
No
Add-On Charges: Part Charge 1 – Description ______________________________________________
Product Code __________________________ Taxable?
Yes
No
Add-On Charges: Part Charge 2 – Description ______________________________________________
Product Code __________________________ Taxable?
Yes
No
Add-On Charges: Part Percentage – Description ____________________________________________
Product Code __________________________ Taxable?
Yes
No
Add-On Charges: Labor Charge 1 – Description ______________________________________________
Product Code __________________________ Taxable?
Yes
No
Add-On Charges: Labor Charge 2 – Description ______________________________________________
Product Code __________________________ Taxable?
Yes
No
Add-On Charges: Labor Percentage – Description ____________________________________________
Product Code __________________________ Taxable?
Yes
No
Select Printed Invoice Style: __________________________ (Default, Florida, Michigan, or Wisconsin)
Repair Order Starting Number _____________ (automatically assigned in MotorTraxx conversions)
Estimate Disclaimer ____________________________________________________________________
_____________________________________________________________________________________
_____________________________________________________________________________________
_____________________________________________________________________________________
_____________________________________________________________________________________
_____________________________________________________________________________________
_____________________________________________________________________________________
Repair Order Warranty __________________________________________________________________
_____________________________________________________________________________________
Purchase Order Starting Number _______________ Part Invoice Starting Number _________________
Part Invoice Disclaimer __________________________________________________________________
_____________________________________________________________________________________
_____________________________________________________________________________________
_____________________________________________________________________________________
_____________________________________________________________________________________
_____________________________________________________________________________________
_____________________________________________________________________________________
Part Invoice Warranty ___________________________________________________________________
_____________________________________________________________________________________
Quote Starting Number __________________________ Quotes expire after __________________ days
Default New and Free Form Labors As Taxable
Yes
No
Default New Parts and Buyouts As Taxable
Yes
No
Default New Sublets As Taxable
Yes
No
Link Flat and Billed Rate Labors Together
Yes
No
Profit Percentage Target for Labor ____________ Profit Percentage Target for Repair Order __________
If your Tech Worksheet Printer will be different than your Repair Order printer, and is not your default
printer, indicate the correct printer in the Tech Worksheet Printer box. ___________________________
This Workstation Setup
Setups>>This Workstation>>Printing and Miscellaneous Info
If any of your print jobs need to print to other than your default printer, indicate the correct printer.
After printing repair orders or parts invoices, you find the alignment to be off, adjustments can be made.
Sales Tax Rates Setup
Setups>>Accounting and Payroll>>Sales Tax Rates
Sales Tax Rate _____________
Security Groups Setup
Setups>>Security Groups
Add as many security groups as you need. The default security groups are Accounting, Administrators,
Service Advisors, and Technicians. These default groups already have the security settings selected.
Additional Security Group _____________________ Additional Security Group _____________________
Additional Security Group _____________________ Additional Security Group _____________________
Employees and Employee Permissions
Payroll>>Employee List
If an employee is already on the list, click Edit, if not, click Add and fill out the information completely.
Critical information fields are Last Name, First Name, Employee Code, Password, and Security Group.
Click on Miscellaneous and indicate if the employee is a Technician or a Service Writer. Checking these
boxes will add the employee to the Technician and/or the Service Writer lists for assignment on ROs.
Customer Sources Setup
Setups>>Marketing>>Customer Sources
(Sources already preloaded include COUPON, DRIVEBY, EXISTING, REFERRAL, and YELLOW PAGES.)
Customer Source _________________________ Parts Discount __________ Labor Discount __________
Customer Source _________________________ Parts Discount __________ Labor Discount __________
Customer Source _________________________ Parts Discount __________ Labor Discount __________
Customer Source _________________________ Parts Discount __________ Labor Discount __________
Repair Order Status Setup
Setups>>Miscellaneous Lists>>Repair Order Status
(Statuses already preloaded include Appointment, Managers Hold, Waiting for Authorization, Waiting
for Parts, Work in Progress, and Work Not Started)
Status __________________________________________
Status __________________________________________
Status __________________________________________
Part Invoice Status Setup
Setups>>Miscellaneous Lists>>Part Invoice Status
(Statuses already preloaded include Open, Special Order, and Waiting for Parts)
Status __________________________________________
Status __________________________________________
Cancellation Reasons Setup
Setups>>Miscellaneous Lists>>Cancellation Reasons
(Reasons already preloaded include Employee Mistake, No reason given, Decided no to do service,
Decided price was too much, and No Show)
Reason __________________________________________
Reason __________________________________________
Part Price Matrix Setup
Parts Manager>>Parts Price Matrix Setup
Example: Parts priced using the profit margin method on three pricing levels up to $100, then just two.
Starting Part Cost 0.00 – Price A 50%; Price B 45%; Price C 40% and check the Profit Margin box on each
Starting Part Cost 25.00 – Price A 45%; Price B 40%; Price C 35% and check the Profit Margin box on each
Starting Part Cost 100.00 – Price A 40%; Price B 35% and check the Profit Margin box on each
Starting Part Cost 250.00 – Price A 35%; Price B 30% and check the Profit Margin box on each
Using this example, a part that costs 30.00 sold at Price A = 54.55 (45% profit margin). Another example,
a part that costs 10.00 sold at Price A = 20.00 (50% profit margin); at Price B = 18.18 (45% profit margin).
Starting Part Cost ____________
Price A ____________
Sales Price $
Profit Margin
Fixed $ Margin
Cost Multiplier
Price B ____________
Sales Price $
Profit Margin
Fixed $ Margin
Cost Multiplier
Price C ____________
Sales Price $
Profit Margin
Fixed $ Margin
Cost Multiplier
Price D ____________
Sales Price $
Profit Margin
Fixed $ Margin
Cost Multiplier
Price E ____________
Sales Price $
Profit Margin
Fixed $ Margin
Cost Multiplier
Price F ____________
Sales Price $
Profit Margin
Fixed $ Margin
Cost Multiplier
Correct Marketing Letters
Marketing>>Edit Letters and Postcards
The data merge fields need to be reselected using the MaxxTraxx merge fields. This only needs to be
done if you are converting data from MotorTraxx, not if you are converting from MaxxTraxx Pro SE.
FOR ACCOUNTING USERS:
If you plan on using QuickBooks as your accounting software and want to export the MaxxTraxx Pro CE
transactions, the general ledger account numbers must be the same in both programs, so setting up the
appropriate accounts in the MaxxTraxx Pro CE Default Account Posting setup is critical. Add the needed
account numbers to the Chart of Accounts in MaxxTraxx Pro CE that match your QuickBooks chart of
accounts and select the appropriate account numbers following the Default Account Posting procedure.
Fiscal Year Start Date Setup
Setups>>Accounting and Payroll>>Fiscal Year Start Date
Fiscal Year Start Dates ____________
Reason __________________________________________
Default Account Posting Setup
Setups>>Accounting and Payroll>>Default Account Posting
Cash and System Accounts
Default Account
Custom Account
A/R Account – Charges & Deposits
12000 Receivable, Sales
__________________________
Funds ready for Deposit (Safe)
11000 Undeposited Funds
__________________________
Inventory Valuation Balancing
57000 Inventory Valuation
__________________________
Overs & Shorts-Cash Drawer Close
63550 Financial, Over/Short
__________________________
Petty Cash – in Cash Drawer(s)
10000 Petty Cash – in Cash
__________________________
Returned Check Expense
63350 Financial, Returned
__________________________
Returned Check Income
47250 Income, NSF Check
__________________________
System Balance / Initial Setup
19900 System Balance / Ini
__________________________
R.O. Sales and Cost of Goods Sold
Default Account
Custom Account
Discounts, Labor
63400 Financial, Sales Disc.
__________________________
Discounts, Labor Warranty
63410 Financial, Warranty
__________________________
Discounts, Parts
63400 Financial, Sales Disc.
__________________________
Discounts, Parts Warranty
63410 Financial, Warranty
__________________________
Discounts, Sublet Labor
63400 Financial, Sales Disc.
__________________________
Inventory Adjustments
56000 Inventory Adjustment
__________________________
Sales Tax Collected
23600 Sales Tax, State
__________________________
Cash Payout Disbursements
Default Account
Custom Account
Employee Advance – Loan
12300 Receivable, Employee
__________________________
Freight Charge Expense
67500 shipping, Freight
__________________________
Gas for Company Vehicles
66150 Maintenance, Auto/Trk __________________________
Maintenance Exp. – Building
66900 Maintenance, Building
__________________________
Maintenance Exp. - Equipment
66500 Maintenance, Equip.
__________________________
Misc. Supplies – Cost to Expenses
50800 COGS, Misc. Supplies
__________________________
Office Meals Expense
67110 Office, Meals
__________________________
Office Supplies Expense
67100 Office, Supplies
__________________________
Postage Expense
66100 Mail/Postage
__________________________
Sales Tax on Purchases
68500 Tax, Sales
__________________________
Misc. Cash Income Disbursements
Default Account
Custom Account
Capital Investment – from Owner
39000 Capital
__________________________
Income – Miscellaneous
49000 Income, Miscellaneous
__________________________
Product Codes Setup
Setups>>Accounting and Payroll>>Product Codes
PARTS
Product Code
Description
Asset Acct
Income Acct
COGS
GI
General Inventory
13000
40000
50000
____________ ________________________
_________
___________
___________
____________ ________________________
_________
___________
___________
LABOR
Product Code
Description
Asset Acct
Income Acct
COGS
GL
General Labor
N/A
41000
N/
____________ ________________________
_________
___________
___________
____________ ________________________
_________
___________
___________
SUBLETS
Product Code
Description
Asset Acct
Income Acct
COGS
SUBLET
Sublet Repair
13300
40300
50300
____________ ________________________
_________
___________
___________
____________ ________________________
_________
___________
___________
CORES
Product Code
Description
Asset Acct
Income Acct
COGS
CORES
Cores
13200
40200
50200
____________ ________________________
_________
___________
___________
____________ ________________________
_________
___________
___________
ADD ON CHARGES
Product Code
Description
Asset Acct
Income Acct
COGS
FET
Federal Excise Tax
N/A
42220
N/A
HAZWASTE
Hazardous Waste Disposal Fee N/A
42210
N/A
TIREDISP
Tire Disposal Fee
N/A
42230
N/A
____________ ________________________
_________
___________
___________
____________ ________________________
_________
___________
___________
____________ ________________________
_________
___________
___________
Company Payroll Setup
Setups>>Accounting and Payroll>>Company Payroll
Hours per day before Overtime Starts ______________
Hours per day before Double Time Starts ___________
Hours per week before Overtime Starts ____________
SUTA Percentage ________________
SDIF Percentage _________________
Beginning General Ledger Balances***
Setups>>Accounting and Payroll>>Enter Beginning General Ledger Balances
11000 Undeposited Funds _______________________________________________________________
11010 Checking #1 _____________________________________________________________________
11110 Savings #1 ______________________________________________________________________
12000 Receivables, Sales ________________________________________________________________
13000 Inventory, Parts __________________________________________________________________
15000 Vehicles #1, Original Value _________________________________________________________
15300 Mach & Equip, Original Value _______________________________________________________
16300 Office Equipment, Original Value ____________________________________________________
16500 Office Furniture, Original Value ______________________________________________________
16700 Building, Original Value ____________________________________________________________
19000 Deposit, Rent ____________________________________________________________________
19400 Deposit, Utility ___________________________________________________________________
20000 Payables, Trade __________________________________________________________________
20300 Payables, Credit Card ______________________________________________________________
23400 Federal Income Tax – Accrual _______________________________________________________
23410 FICA, Employee – Accrual __________________________________________________________
23420 Medicare, Employee Accrual ________________________________________________________
23430 FUTA Employer – Accrual __________________________________________________________
23440 SUTA Employer – Accrual __________________________________________________________
23450 State Income Tax – Accrual _________________________________________________________
23460 Local Income Tax – Accrual _________________________________________________________
23470 Disability Insurance – Accrual _______________________________________________________
23510 FICA, Employer – Accrual ___________________________________________________________
23520 Medicare, Employer – Accrual _______________________________________________________
23600 Sales Tax, State – Accrual __________________________________________________________
37000 Owner’s Draw or 39000 Capital _____________________________________________________
*** These are a few of the “common” general ledger accounts that are set up in an auto repair shop.
This is not meant to be an exhaustive list, rather a starting point if you don’t currently have a
balance sheet. Please see your accountant for more information about setting up a general ledger.
Release to Install and/or Convert from MotorTraxx to MaxxTraxx Pro CE
Prior to scheduling the installation of your “Live” version of MaxxTraxx Pro CE, we need to ensure that
you have completed the necessary tasks and are both informed and prepared to use MaxxTraxx Pro CE.
Please check off the following items, complete, and sign the bottom section and fax to (866) 863-0777.
I have read and understand each task required on the Setup Checklist that applies to my shop
I have received the User Manual and understand how to access and read the procedures
I understand that I need to setup up certain sections of MaxxTraxx Pro CE prior to writing my
first repair order, and I will need to manually set up my general ledger and banking information
All employees that will be using MaxxTraxx Pro CE have received training in their specific areas
I have read, understand, and meet the minimum hardware requirements for MaxxTraxx Pro CE
I understand that I need to have a backup system in place to backup my MaxxTraxx Pro CE data
I read and understand that off-site data backup is available from Scott Systems for a monthly fee
For MotorTraxx Converted Users:
I understand that MaxxTraxx Pro CE does not have all the features that MotorTraxx has
I have read the Converted Data section and understand what is converted and what is not
I understand that there is some information converted from MotorTraxx in a modified version
I understand that I should keep a copy of my MotorTraxx to access non-converted information
I understand that dot matrix printers are not recommended and I should use a laser or inkjet
printer for all reports, checks and repair orders
Shop Name: ________________________________________ Phone: __________________________
Owner Name: _______________________________________
Owner’s Signature: ___________________________________
Date and Time Requesting Installation and/or Conversion: ____________________________________
(Must start between 8 a.m. and 3 p.m. Pacific Standard Time, Monday through Friday. Please note that
the installation and/or conversion may take up to three hours, not all times available as requested.)