1
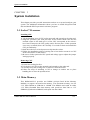
System Installation
CHAPTER 3
System Installation
This chapter provides you with instructions on how to set up and configure your
system. The additional information shows you how to install M-system Flash
disk and handle WDT operation in software program.
3-1 Socket 7 Processor
Installing CPU
1) Lift the handling lever of CPU socket outwards and upwards to the other end.
2) Align the processor pins with pin holes on the socket. Make sure that the
notched corner or dot mark (pin 1) of the CPU corresponds to the socket’s
bevel end. Then press the CPU gently until it fits into place. If this operation
is not easy or smooth, don’t do it forcibly. You need to check and rebuild the
CPU pin uniformity.
3) Push down the lever to lock processor chip into the socket.
4) Follow the installation guide of cooling fan or heat sink to mount it on CPU
surface and lock it on the socket 7.
5) Be sure to follow particular CPU speed and voltage type to adjust the jumper
settings properly.
Removing CPU
1) Unlock the cooling fan first.
2) Lift the lever of CPU socket outwards and upwards to the other end.
3) Carefully lift up the existing CPU to remove it from the socket.
4) Follow the steps of installing a CPU to change to another one or place
handling bar to close the opened socket.
3-2 Main Memory
This ROBO-485/515 provides one DIMM (168-pin Dual In-line Memory
Module) to support on-board main memory. The maximum memory size for
3.3V EDO DRAM or SDRAM is 128MB. The DIMM used could be either
3.3V EDO (Extended Data Out) memory with speed less than 70ns or 3.3V
SDRAM (Synchronized DRAM) with speed less than 100ns.
ROBO-485/515 User’s Manual
3-1
System Installation
For system compatibility and stability, don’t use memory module without brand.
You can also use the single or double-side DIMM without parity check and
ECC function.
Watch out the contact and lock integrity of memory module with socket, it will
impact on the system reliability. Follow normal procedure to install your DRAM
module into memory socket. Before locking, make sure that the module has
been fully inserted into card slot.
NOTE : For maintaining system stability, don’t change any of DRAM
parameters in BIOS setup to upgrade your system performance
except for getting technical information.
3-3 M-system Flash Disk
ROBO-485/515 reserves one 32-pin DIP sockets for installing M-system Flash
disk from 2MB to 144MB. This operation structure is running with pure ISAbus without PnP (Plug and Play) function. Before installing, make certain that
I/O address jumper setting is set on right position to prevent unworkable system
due to I/O resource conflict. Do remember to follow DOC (Disk-On-Chip)
installation procedure. Otherwise, the Flash chip is possible to be burned out
due to incorrect installation.
Installing DOC
Align the DOC with pin holes on the socket. Make sure that the notched corner
or dot mark (pin 1) of DOC corresponds to notched corner of the socket. Then
press the DOC gently until it fits into place. If installation procedure is correct,
the Flash disk can be viewed as a normal hard disk to access read/write data.
WARNING :
Please ensure that your DOC is properly inserted. Placing
the DOC in reverse will cause severe damage to it.
If you want to boot from this Flash disk, it is necessary to refer to the
application note from M-system. You can easily obtain relative information
from M-system shipping package (such as product manual) or Web-site
http://www.m-sys.com.
ROBO-485/515 User’s Manual
3-2
System Installation
3-4 Installing the Single Board Computer
To install your ROBO-485/515 into standard chassis or proprietary environment,
you need to perform the following :
□
□
□
□
Step 1 : Check all jumpers setting on proper position
Step 2 : Install and configure CPU and memory module on right position
Step 3 : Place ROBO-485/515 into the dedicated position in your system
Step 4 : Attach cables to existing peripheral devices and secure it
3-5 Watch Dog Timer Programming
An optional two-port Watch-Dog Timer (WDT) is provided on ROBO-485/515.
If this feature is enabled by jumper setting and software trigger, a system reset
will be generated unless the CPU triggers the timer periodically within time-out
period. This allows the system to restart in an orderly way in case of any
abnormal condition is found.
This WDT comes with 8 possible ranges of time intervals from 500 ms to 64 sec.
which can be adjusted by setting jumper positions. It could be enabled and
programmed by reading I/O port 0443H or 0433H to issue trigger continuously,
and disabled by reading I/O port 0343H or 0033H. A tolerance of 30% timer
limit must be considered. For instance, if the time-out interval is set to 1second,
the WDT trigger command must be issued within 700ms at least.
The below example gives you a reference algorithm for WDT programming via
I/O port 0433H and 0033H in your application program :
Enable WDT
MOV
IN
DX, 0433H
AL, DX
MOV
IN
DX, 0433H
AL, DX
MOV
IN
DX, 0033H
AL, DX
Re-trigger WDT
Disable WDT
ROBO-485/515 User’s Manual
3-3