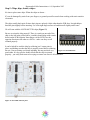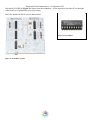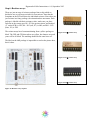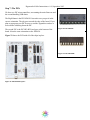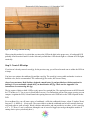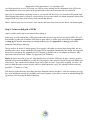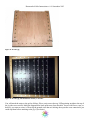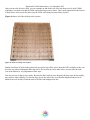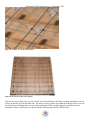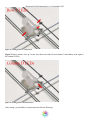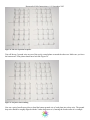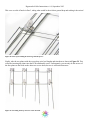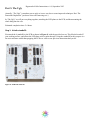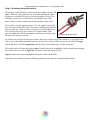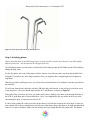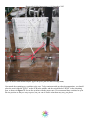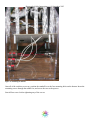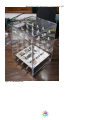
1
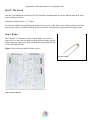
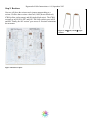
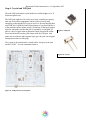
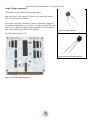
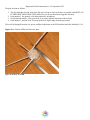
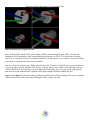
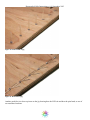
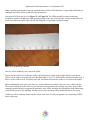
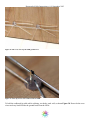
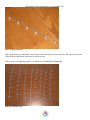
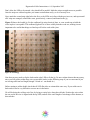
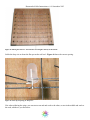
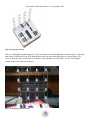
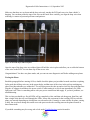
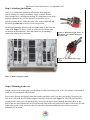
Hypnocube 4Cube Instructions v 6.4, September 2013 Things that go blink in the night Thank you for purchasing the Hypnocube 4Cube kit. Kit instructions and a user manual are online at www.hypnocube.com. You can email any questions to [email protected]. Parts List The following parts make up the 4Cube kit and should be in the box: 1. 5″ x 5″ x 7″ acrylic case in two pieces 16. 1K resistor x2 (brown-black-red-gold) 2. H4C printed circuit board (PCB) 17. 1N4148TR signal diode x24 (red) 3. 100VAC~240VAC USB power adapter 18. 22pF ceramic capacitor x2 4. 22 AWG straightened galvanized soft steel wire x40 19. 0.1uF ceramic capacitor x6 5. Diffuse common-cathode RGB LED x67 (3 spares) 20. 0.47uF ceramic capacitor (blue) 6. PIC18F4620 microcontroller (40 pins) 21. 10uF electrolytic capacitor 7. PIC18F14K50 microcontroller (20 pins) 22. 12Mhz crystal oscillator 8. SN74AHCT574 octal D-type flip-flop x4 (20 pins) 23. Mini-B USB cable 9. ULN2803A Darlington transistor array (18 pins) 24. 12” red wire 10. Mini-B USB jack 25. 24” white wire 11. 22 resistor array (16 pins) 26. Toggle switch 27. Momentary toggle switch x2 12. 47 resistor array (16 pins) 28. 1” threaded standoff x4 13. 68 resistor array (16 pins) 29. 3/8” 4-40 screw x8 14. 0 resistor (single black stripe) 30. Rubber feet x4 15. 47K resistor x4 (yellow-violet-orange-gold) USB Features We provide a few sample programs to interface with your device and change settings, control the Cube from your own application, etc. Check around www.hypnocube.com to get the latest instructions and/or software for that. Basic Button Commands The two buttons are named A and B. “A” denotes A button up, “a” denotes A button down, etc., for sequences. See the online user manual for more details. Button(s) Down on reset Neither Button A Button B Buttons A and B Buttons A and B, hold Sequence while running aA bB abAB Effect White screen Blue screen Green Screen Red Screen Red Screen, then blinking, then Reset Gadget baBA abBbBA -1- Description (Command name in bold) Next visualization. Prev visualization. Lock current visualization. Gadget shows a brief pause then continues running the visualization. Executing Next or Prev releases lock Pauses current image, resulting in a still image. Executing Next or Prev releases pause. Removes currently playing visualization from the playlist. Visualization can be reinstated through the console editor or through a Reset. Lock the visualization prior to removal to prevent accidently removing the wrong visualization. Hypnocube 4Cube Instructions v 6.4, September 2013 Introduction This is the first part of the instructions for building the 4×4×4 “4Cube” kit. The three main parts are titled “The Good”, “The Bad” and “The Ugly”. In “The Good” we lay down rules, review parts in the kit, construct the circuit board, and start the case layout. In “The Bad” we will construct four planes of LEDs, each being a 4×4 grid. This is the hardest part of the kit. Iin “The Ugly” we will attach the LEDs to the PCB, testing as you go, and finally put it all together in the case. Tools You will need the following minimum set of tools: 1. Soldering iron. Any iron can work, but a nicer one will make the job a lot easier. 2. Solder - we recommend 63/37 Sn/Pb rosin core. All normal electronics solders should work fine for the PCB, but the wire lattice can be quite particular (see page 17 for more details.) 3. Hardened wire cutter. Take care not to damage a delicate pair on the steel lattice wire. 4. Wire strippers (for 24 AWG wire). 5. Needle nose pliers. 6. Small Phillips screwdriver. To make the jig you'll also need one of the following: 1. Cardboard for making a poor jig. 2. Wood and wood tools for making a good jig. Disclaimers! Before you begin, some items to note: 1. READ EVERYTHING IN THE INSTRUCTIONS BEFORE YOU START! You will make a much nicer cube by knowing where steps are leading before constructing items. The instructions attempt to make the kit foolproof, but we all know that is impossible :) Don’t become a FAQ entry. 2. One good idea is to print out the instructions and cross off each paragraph as you finish it, to ensure you don’t miss a sentence or instruction step. This can save you trouble later. 3. This kit assumes you have built electronic kits before, and are proficient at soldering items to a circuit board. Chips and other parts can be damaged from too much heat, so be careful and don’t hold the iron on the leads too long. Make sure all solder joints connect well. 4. Many of the parts in this kit require correct orientation (rotation). When mentioned there is a right way and a wrong way to connect something, both of which look similar. Be sure to have them correctly positioned before soldering. 5. The LEDs are difficult to bend correctly. Make sure you are EXTREMELY diligent in bending them correctly. 6. Plan on spending some time constructing the kit. Chris’s first (and only) kit build took him about 10 hours, over three nights. Gene, with much experience (having constructed all others) can build one in about four hours. We have heard from a number of first-time builders who report from 6 – 12 hours. Plan on setting aside at least that much time. For a look at the finished cube see Figure 77. Good luck :) -2- Hypnocube 4Cube Instructions v 6.4, September 2013 Part 1: The Good Part one is assembling the controller PCB. This should be straightforward for anyone who has done PCB work; there's nothing exotic here. Estimated completion time: 1.5 - 3 hours. We will start with the lowest-profile parts and work our way up, as that allows your working surface to hold the parts in place while we solder the bottom. Besides that, there is no particular requirement for assembly order. Step 1: Diodes The first parts we will place are the 24 signal diodes. Orientation is important here; make sure the black stripe on the diode aligns with the stripe on the part outline. The diodes go in the three banks marked D0D7, D8-D15 and D16-D23. Figure 2 shows the board with all diodes in place. Figure 1: Diode Figure 2: Diodes in place. -3- Hypnocube 4Cube Instructions v 6.4, September 2013 Step 2: Resistors Next we will place the resistors and a jumper masquerading as a resistor. We have three resistor values here, 1K (brown-black-red,) 47K (yellow-violet-orange) and 0 (single black stripe). The 47K resistors go in R24, R26, R27 and R28. The 1K resistors goes in R25 and R29. Finally, the 0 “resistor” goes across J1. Resistor orientations do not matter. Figure 3: 47K (left) and 1K (right) resistors Figure 4: Resistors in place. -4- Hypnocube 4Cube Instructions v 6.4, September 2013 Step 3: Small capacitors Next solder the six 0.1uF and two 22pF ceramic capacitors, shown in Figure 5 and Figure 6: 22pF ceramic capacitors. The two look very similar so take care to not mix them up. The 0.1uF capacitors go in C4 through C9 (Shown if Figure 8: 0.1uF ceramic capacitors in place.) The 22pF capacitors go in C11 and C12 as shown in Figure 7: 22pF ceramic capacitors in place.. These ceramic capacitors are not orientation dependent. Figure 5: 0.1uF ceramic capacitor Figure 6: 22pF ceramic capacitors Figure 7: 22pF ceramic capacitors in place. Figure 8: 0.1uF ceramic capacitors in place. -5- Hypnocube 4Cube Instructions v 6.4, September 2013 Step 4: Crystal and USB jack The mini USB jack and the crystal both have similar heights so we’ll do them together next. The USB jack might be a bit tricky since it has a smaller pin spacing then any of the other components, and the leads are barely long enough to go through the PCB (it was, however, the only through-hole mini USB jack I could find, and I figured many of you would prefer it to the common surface mount variety.) Solder one of the large support legs first, and make sure that the jack is reasonably well aligned, as there is a bit of wiggle room in placement. Make sure that the solder flows into the holes to make good contact with the USB pins. Also make sure to solder the other support leg to give the jack extra support during insert/removal of the plug. Figure 9: USB jack The crystal on the other hand is a simple affair, and goes in the spot marked ‘XTAL’. It is not orientation sensitive. Figure 10: Crystal Figure 11: USB jack and crystal in place. -6- Hypnocube 4Cube Instructions v 6.4, September 2013 Step 5: Chips, dips, chains, whips... It's time to place some chips. When the chips are down.... ICs can be damaged by static from your fingers, so ground yourself as usual when working with static-sensitive electronics. The chips usually don't quite fit since their pins are splayed a little wider than the PCB slots. It might help to bend the pins slightly before inserting. Use a flat right-angle surface to bend them all slightly and at once. We will start with the 4 SN74AHC574N chips (Figure 12) Be sure to orient the chip properly! There is a notch on one end of the chip (to the left in the picture above,) and this should align with a notch drawn on the PCB footprint. Note that two of the SN74s face the opposite direction as the other two SN74s – make sure they are all oriented properly. It can be helpful to tack the chip by soldering just 2 corner pins in place, and making sure that the chip is properly seated before soldering the rest. Uneven seating won't harm anything, but may not look very Figure 12: SN74AHC574N good either. It's also good to double-check that the chip is oriented properly - you really don't want to be trying to extract one after it's all soldered in. Figure 13: SN74AHC574Ns in place. -7- Hypnocube 4Cube Instructions v 6.4, September 2013 Next do the ULN2803A (Figure 14.) Again, note the orientation – it’s the opposite of the other ICs on that side of the board, so it’s particularly easy to get wrong. Here’s the board with the first set of chips in place. Figure 14: ULN2803A Figure 15: ULN2803As in place. -8- Hypnocube 4Cube Instructions v 6.4, September 2013 Step 6: Resistor arrays These are just an array of resistors packaged into a chip which we decided to use over discrete resistors for convenience. Note that the footprints on the PCB still show the individual resistors. Since these are just resistors in a fancy package, the orientation does not matter. Each package is labeled with their resistance value; make sure you place each one in the correct spot. R0 – R7 (the green resistors, and marked ‘G’ on the PCB) is 47, R8 – R15 (red, ‘R’) is 68, and R16 – R23 (blue, ‘B’) is 22. The resistor arrays have been transitioning from a yellow package to black. The 22 and 47 shown here are yellow, but chances are good yours will be all black. The markings should be the same however. Figure 16: 22 resistor array The label on the 68 package is impossible to read on the picture here, but it’s there. Figure 17: 47 resistor array Figure 18: 68 resistor array Figure 19: Resistor arrays in place. -9- Hypnocube 4Cube Instructions v 6.4, September 2013 Step 7: The PICs We have two PIC microcontrollers, one running the main firmware and the second handling USB duties. The Big Kahuna is the PIC18F4620. Just make sure you put it in the correct orientation. The tab goes towards the edge of the board. If you plan to reprogram your PIC be sure to read the Appendices and use a socket before soldering down the PIC. The second PIC is the PIC18F14K50 and goes at the bottom of the board. It has the same orientation as the 18F4620. Figure 20: PIC18F4620 Figure 22 shows the PCB with all of the chips in place. Figure 21: PIC18F14K50 Figure 22: PIC18F4620 in place. - 10 - Hypnocube 4Cube Instructions v 6.4, September 2013 Step 8: Large capacitors Lastly, there are two capacitors that sit the highest. One is the blue 0.47uF capacitor. It goes in C10, next to the bottom PIC. It is not orientation sensitive. The second is the 10uF electrolytic capacitor. Electrolytic capacitors are orientation dependent - you will see a + symbol on the PCB for the positive wire, which is the longer of the capacitor leads. The negative lead is also marked on the body of the capacitor. Figure 23: 0.47uF capacitor The 10uF capacitor goes in C3. Figure 24: 10uF electrolytic capacitor. Figure 25: 10uF electrolytic capacitor Figure 26: All PCB components in place. - 11 - Hypnocube 4Cube Instructions v 6.4, September 2013 Part 2: The Bad In "The Bad" we will construct the LED lattice. This will consist of four steps: bending the LED leads into the required shape, soldering the LEDs into eight strips of eight LEDs each, then soldering the strips into an 8×8 grid, and finally cutting this grid CAREFULLY into four separate 4×4 grids. Along the way we will need to construct a couple of jigs to hold the LEDs as we work. This is the most challenging part of constructing the cube. We recommend that you read this section thoroughly to understand what is going to happen. Your cube will be much easier to make, less likely to have mistakes, and will cause you less grief if you understand this entire section before starting it. Plus doing this part very carefully will make your LEDs line up nicely, improving the aesthetic appeal. Estimated completion time: 2.5 - 5 hours. Step 1: Bend the LEDs Look at the 3-channel RGB LED in Figure 27. There is a flat side, next to the red pin. The ground pin is longest, and is next to the red pin. Note the kit has extra LEDs besides the 64 needed to complete the kit. Figure 27: Unbent LED. This part is tricky, so pay close attention. The leads from each of the 64 LEDs must be bent as in Figure 28 and Figure 29. Do not bend any yet! Read this section very carefully several times before starting to bend LEDs. Bending the leads back and forth too many times will break the leads. In all the cubes we have built we have broken none yet, but just in case we shipped you at least one extra LED. - 12 - Hypnocube 4Cube Instructions v 6.4, September 2013 The pins are bent as follows: 1. The first lead (the red lead, next to the flat spot) is bent as close to the base as possible, and MUST GO IN THE DIRECTION INDICATED. Make sure you do not bend in the opposite direction. 2. Lead number 2, the ground, is left alone and sticks straight out. 3. Next bend lead number 4, the green lead, to go in the opposite direction of the red lead. 4. Lead number 3, the blue lead, is bent at about a 30 degree angle from the green lead. Wires will be dropped from the red, green, and blue leads down to the PCB and into the holes labeled R, G, B. Figure 28 is what the LEDs look like once bent. Figure 28: Properly bent LED. - 13 - Hypnocube 4Cube Instructions v 6.4, September 2013 Figure 29: Rendering of a properly bent LED. Now, bend one LED, which will be your template to follow while bending the other LEDs. I recommend bending one LED, then double, triple, and quadruple checking that it is EXACTLY like the above pictures. Once you are convinced you have a perfectly bent LED, set it aside and use it as a reference when you bend the rest of them to check that all are the same orientation. Now we will need to bend 8 more LEDs to make the first strip. You can do each LED one at a time by hand, or, if you are using a wood jig, bend the LEDs in place in the jig, which can be a little easier and faster as the jig will hold the LED for you and allow you to use both hands to bend the pins. If you opt for the cardboard jig, then most likely the cardboard won’t hold the LED tightly enough to facilitate bending the pins. Figure 30 and Figure 31 show the wood jig holding the LEDs before and after bending. This can be combined with the step below to make strips while bending the LEDs, saving some time. - 14 - Hypnocube 4Cube Instructions v 6.4, September 2013 Figure 30: Unbent LEDs in jig. Figure 31: Bent LEDs in jig. Another good idea is to draw a picture on the jig showing how the LED sits and how the pins bend, as one of our customers has done. - 15 - Hypnocube 4Cube Instructions v 6.4, September 2013 Figure 32: Wood jig with LED drawing. When using this method, it is critical that you insert the LED in the hole in the proper way. A backwards LED probably won't be noticed until it's in the cube and you find that a LED doesn't light or a column of LEDs lights erratically. Step 2: Create LED strips If you haven’t already created a wood jig for the previous step, you will need to make one to solder the LEDs in to strips. You have two options: the cardboard jig and the wood jig. The wood jig is more stable and makes it easier to build the cube, and is recommended. The cardboard jig also works, but is more flimsy. (One of our customers, Rob Sheldon, designed a much better jig and provided us with instructions for making it. If you can handle a hand drill, you should make this jig. Check out the Appendix 2 for instructions on constructing this jig.) The jig requires 8 holes to hold 8 LEDs evenly spaced in a straight line. The spacing between each LED should be 1.25 inches (or 3.17cm to you civilized folks overseas.) To confirm that you have the proper spacing you can compare it against the PCB; it should match the spacing between each GND hole on the LED footprints on the PCB. For a cardboard jig, you will want a piece of cardboard - stiffer the cardboard is better - about 12 inches (30cm) long and 3 – 4 inches (6 – 10cm) wide. The extra width is so that the cardboard can be held vertically between two sturdy objects, such as books. Wood is thicker and sturdier, and can provide its own base, so for a wood jig a 12” x 1” (30cm x 3 cm) is sufficient, although it can of course be bigger (no need go through the trouble of cutting down a piece you already have.) - 16 - Hypnocube 4Cube Instructions v 6.4, September 2013 Make 8 equally spaced marks on the jig, and then make 8 holes of LED diameter. A pen punches holes fine in cardboard, and a drill works for the wood jig shown above. Next place 8 LEDs in the jig, as in Figure 33 and Figure 36. The LEDs must all be rotated in the same orientation, with the red and green leads pointing parallel to the axis of the jig holes. On the cardboard jig, the green wires should be on the edge with the blue (angled) wire pointing towards the center. Figure 33: A cardboard jig with LEDs. Next we will be soldering a wire across the LEDs. First, a note on solder. We’re about to solder to galvanized steel, which some people will tell you is insane. Well, it’s a bit loopy, but works well given the right solder. I use 63/37 Sn/Pb solder, which works quite well. I believe 60/40 works as well. 50/50 may not work, and I know the lead-free solders I’ve tried were miserable. Before attaching the cross wires, note there is a correct and incorrect side for the cross wire as shown below. The reason to lay them on this side is to provide more room to connect the red drop wires later. Note in these computer rendered images exaggerate the proximity of the LEDs, and show the red and blue leads intersecting; in real life they may be just touching, but this is not a concern as they will be trimmed down at a later step. All that we will be soldering in this step the yellow cross wires to each gray ground wire, connecting 8 LEDs into a single strip. - 17 - Hypnocube 4Cube Instructions v 6.4, September 2013 Figure 34: The cross wire (yellow) position. Figure 35: The cross wire (yellow) position. Now you can solder a wire down as in Figure 34, with the cross wire on the correct side and centered, with equal amounts hanging off either ends. You want to solder fairly close to the LED, at the same distance all the way across, and at the same height on ALL eight strips you will make. The small flat spot on the LED lead is a good reference point, but the exact distance isn't critical – the point is to be consistent. - 18 - Hypnocube 4Cube Instructions v 6.4, September 2013 Figure 36: The cross wire atop the LED ground wires. Figure 37: Close-up of cross wire soldered onto an LED. To hold the cardboard jig stable while soldering, two books work well, as shown Figure 38. Do not let the cross wires touch any leads besides the ground leads from the LEDs. - 19 - Hypnocube 4Cube Instructions v 6.4, September 2013 Figure 38: Soldering the LED strip on a cardboard jig. Soldering here can be tricky, since the long wires are galvanized steel (steel was necessary to provide sufficient structural strength, and also wasn't too expensive to get pre-straightened in low quantities.) Steel holds considerably more heat than the tinned copper you are probably used to, and consequently will both take longer to heat up (making cold solder joins more likely) and longer to cool off (the solder will take longer to solidify, allowing the wire to move for a couple seconds after removing the iron.) Because the wire takes longer to heat, we have to be careful about not damaging the LED. The best technique I've found is to hold the cross wire down with the iron, and letting solder wick around the bottom to the LED lead. This ensures that you get the cross wire hot enough for a good join, but you don't run the risk of damaging the LED by holding the iron directly on the LED lead for too long while waiting for the cross wire to heat up. You can start at one end and work towards the other, or start at the middle and work out towards the ends (the method I generally prefer.) Try them both and use the one that works better for you. However, don't solder the ends first and work to the middle, as this can cause the spacing to be off if the wire isn't perfectly straight. Again, make sure the cross wire is centered! We will use the ends to hold the strips in a jig at a later step, and you will need wire sticking out equally from both ends. Once the all eight LEDs are secure, carefully wiggle the strip out of the jig. Pulling gently on the grounds that stick straight out is a good strategy. Congratulations! You should now have one strip, and it should look like Figure 39. Take some time to double and triple check it against the instructions. Check the orientations of the LEDs, the side the ground wire is on, and that the cross wire is centered. - 20 - Hypnocube 4Cube Instructions v 6.4, September 2013 Figure 39: Single LED strip. Now repeat the process and make 7 more strips. On the last strip use your reference LED, and save any extra LEDs in their original form since they are easier to store. Once you have all eight strips made, you should have something like Figure 40. Figure 40: All 8 LED strips. - 21 - Hypnocube 4Cube Instructions v 6.4, September 2013 As a final spot check, go over all 8 strips, one LED at a time, making sure the orientation of the LED is the same and that the cross wires attach to the ground leads on the correct and same side for each LED. Once you are satisfied that everything is correct, you can trim off the excess wire from the LED ground leads. When clipping short wires it is best to wear protective eyewear since small wire shards sometimes shoot when snipped (at the very least, point it away from yourself and others!) Whew - that last part was a bit of work. Take a break, and come back when you are able to concentrate again. Step 3: Create an 8x8 grid of LEDs Again, read this entire step several times before starting it. In this step, we will combine the 8 LED strips made in the previous step into one 8x8 grid of LEDs. We will need another jig, this time to hold the LED strips in place while we solder wires across them. See Appendix 1: A cheap jig for detailed instructions on making cardboard jig. See Appendix 2: A nice jig for detailed instruction on making wooden jig. The jig needs to be about 12 inches square (30 cm square) with either two raised edges along either side or a opening in the center, across which the LED strips will be suspended. (Incidentally, this design was suggested by one of our customers. We originally used a U-shaped jig, but this one is a lot simpler to construct, more rigid, and works just as well. Thanks, we appreciate your feedback!) Figure 41 shows the wood jig we use. It has thumbscrews to hold the LED strips in place, which is great for repeated use but would probably be overkill for your purposes. One customer reports having used thumb tacks with success. Tape can also work, though it may not be quite as secure. You can use anything you want - the goal is to hold the strips securely in place while we solder them into a grid. The spacing between each strip should be 1.25 inches (3.17 cm.) Note that our jig has the holes for making the strips along the bottom, but there’s really no reason the two jigs have to be integrated (actually it’s probably easier to use separate, it just didn’t occur to me when building this jig) and we won’t be using the holes in this step. - 22 - Hypnocube 4Cube Instructions v 6.4, September 2013 Figure 41: Wooden jig. Figure 42: Wooden jig with thumbtacks made by a customer. You will attach the strips to the grid as follows. Place a strip across the top, LEDs pointing straight to the top of the jig (the cross section). Make the diagonal blue leads point away from the table. Secure with screws, tape, or however you want to secure it. Then clip the ground wires that are sticking down past the cross connectors (you could clip them before attaching to the jig if you desire). - 23 - Hypnocube 4Cube Instructions v 6.4, September 2013 Don’t allow the LEDs to be rotated - they should all be parallel. Make the strip as straight across as possible. Once the strips are soldered together you cannot reorient them easily, so do it correctly now. Next, attach the second strip right below the first, so the LEDs are in line with the previous row, and repeat until all 8 strips are arranged, oriented the same, spaced nicely, centered, and bound to the jig. Figure 43 shows the loaded jig. For the cardboard jig using electrical, duct, or even scotch tape to hold the wires in place is acceptable. The cardboard jig however is more wobbly than the wood one, making it more important to be careful that things are lined up well before each solder joint. Figure 43: Loaded jig. Note that you may need to clip the leads on the edge LEDs to fit the jig. Do not cut them shorter than necessary, since you will need to solder drop wires across those leads (see the following steps if you are concerned if you are leaving sufficient lead length, though 3/8 inch or 1 cm should do.) Before starting to solder double check that all LED flat sides are oriented the same way. If you solder one in backwards it can be very difficult to correct once in the lattice. We will be doing the red drop wire first, by laying a vertical wire along the red leads. Position the wire so that the one end of the wire is aligned with the top LED, and all of the extra length of wire hangs off the bottom, as shown below. - 24 - Hypnocube 4Cube Instructions v 6.4, September 2013 Figure 44: Placing the first wire. Note that the extra length is entirely at the bottom. Solder the drop wire at about the flat spot on the red lead – Figure 46 shows the correct spacing. Figure 45: Close-up of spacing for drop wire. Like when soldering the strips, you can start at one end and work to the other, or start in the middle and work to the ends, whichever you find easier. - 25 - Hypnocube 4Cube Instructions v 6.4, September 2013 Once you have the first wire done, you can continue on and do the rest of the red drop wires (8 in all.) While soldering, try to make sure that the LEDs remain lined up in a nice lattice. This is most important for the first set of drop wires; when you do the later wires the LEDs will already be pretty firmly in place. Figure 46 shows all of the red drop wires in place. Figure 46: First set of drop wires in place. Double check that all of the solder joints look good, then clip off the excess from the LED red leads, as they can be in the way when soldering the blue drop wires. Do not trim any of the other wires, as some (like the extra wire at the bottom) is very important for later steps. Now the next set of drop wires is tricky. Because the blue leads are on a diagonal, the drop wires do not readily stay in place while soldering. To alleviate this, elevate one side of the jig so that the diagonal leads are level. Books work well for this (I used the stack of PCBs I had sitting next to me.) - 26 - Hypnocube 4Cube Instructions v 6.4, September 2013 Figure 47: Soldering blue drop wires. The blue drop wire should be about level with the red drop wire already in place, and about the same distance from the LED. Figure 48: Close-up of two drop wires soldered in place. - 27 - Hypnocube 4Cube Instructions v 6.4, September 2013 Figure 49: Another view of the blue drop wire. Figure 50: Second set of drop wires in place. Once the two sets of drop wires (16 wires in all) have been soldered in, the lattice is strong enough that you can remove it from the jig to do the other side. The last set of wires will be easier than the first two, because you can lay it flat and you no longer have to worry about keeping the LEDs carefully aligned. Just follow the same techniques as above, and lay the wire down with the same spacing from the LED as before. - 28 - Hypnocube 4Cube Instructions v 6.4, September 2013 Figure 51: Lattice with all drop wires soldered. Once you have all three sets of drop wires soldered in place, we can clip the excess length off of all of the LED leads. Trimming the ground wires and drop wires takes a bit of caution, as it is important to keep some of them. You must leave all of the drop wire at the bottom, and the 4th and 8th ground wire on the left side (on the side of the red drop wire, and opposite side from the blue and green drop wires) as shown below. Figure 52: Finished 8x8 grid. - 29 - Hypnocube 4Cube Instructions v 6.4, September 2013 Congratulations again! You have completed the hardest part of the cube. The rest is being careful, and perhaps some troubleshooting if needed. Step 4: Cutting the grid We will now cut the 8x8 grid into 4 separate 4x4 grids. Be very careful when cutting, as cutting in the wrong spot will entail some very tricky soldering to fix. You will need to cut the 3 vertical wires in each column just above the LEDs in row 5. Likewise, cut the horizontal ground wire just to the right of the LEDs in column 6. Remember, we’re making 4x4 grids, so a good sanity check is to make sure that 4 LEDs are to either side of your cut. Figure 53: Cutting points. Figure 54 shows a close up of the cutting points. Cut the wires in between row 4 and row 5, immediately above the row 5 LEDs. - 30 - Hypnocube 4Cube Instructions v 6.4, September 2013 Figure 54: Cutting points for vertical wires. Figure 55 shows another close up. Cut the wires between column D and column E, immediately to the right of the column D LEDs. Figure 55: Cutting point for horizontal wires. After cutting, you should have 4 planes that look like the following. - 31 - Hypnocube 4Cube Instructions v 6.4, September 2013 Figure 56: The four separated 4x4 planes. Trim off the top 3 ground wires on two of the newly created planes to match the other two. Make sure you leave the bottom one! Your planes should now look like Figure 54. Figure 57: 4x4 planes after trimming. Now use a pair of needle nose pliers to bend the bottom ground wire of each plane into a drop wire. The ground drop wire should be roughly aligned with the 2 other drops next to it, forming the fourth corner of a rectangle. - 32 - Hypnocube 4Cube Instructions v 6.4, September 2013 This saves us a bit of hassle in Part 3, taking what would be the trickiest ground drop and making it the easiest! Figure 58: Close up of bending the bottom ground drop wire. Finally, take the two planes with the excess drop wire lead lengths and trim them as shown in Figure 59. This will make inserting the planes into the PCB considerably easier. Unfortunately you can only do this on two of the four planes as the leads on the other two are too short, but two is still better than none. Figure 59: Cascading the drop wires for easier insertion. - 33 - Hypnocube 4Cube Instructions v 6.4, September 2013 Figure 60: The 4 completed 4x4 planes. Congratulations, you have completed the second part of three. We would like to hear how long it took you to do this part, and other useful details, in order to make this exposition better. Part 2 is finished! Take a break, and then go on to the final part, Part 3: The Ugly. - 34 - Hypnocube 4Cube Instructions v 6.4, September 2013 Part 3: The Ugly (Actually, “The Ugly” is nowhere near as ugly as it once was, due to some improved techniques. But “The Somewhat Unpleasent” just doesn’t have the same ring to it.) In “The Ugly” we will put everything together, attaching the LED planes to the PCB, and then mounting the whole thing into the case. Estimated completion time: 2-4 hours. Step 1: Attach standoffs First attach the 4 standoffs to the PCB as shown in Figure 61 with the provided screws. This lifts the board off your working surface, and allows the LED plane wires to poke through. Using the standoffs for this purpose is a lot easier and more stable than propping the PCB over a box as our previous instructions had you do. Figure 61: PCB with stand offs - 35 - Hypnocube 4Cube Instructions v 6.4, September 2013 Step 2: Attaching the power switch We will next connect the power switch before proceeding with the LED planes. While they may get in the way a bit while attaching the planes, having power available will allow us to test each plane as we go. This will make it much easier to find and fix any problems in the LED lattice, while it is still accessible and not surrounded by other LEDs. First, cut the wires into approximately 6” (15 cm) lengths. You should have 2 red wires and 4 white wires. The colors will distinguish what the wires are used for – otherwise they’re identical 24 AWG stranded wire. The red wires will carry power from the AC adapter and the white wires are signal wires for the two buttons. In this step we will use only the red to wire the power switch. Figure 62: The power switch. We will use two red wires for the power switch. The power switch is not polarity sensitive, so just connect one of the wires to the middle tab and the other one to one of the side tabs. Make sure you use the ON-OFF toggle switch, and not the ON-OFF momentary switch! (If the switch springs back, it’s the wrong one.) The switch will be ON when the toggle is away from the wired side; something to keep in mind when mounting the switch to the case later. In Figure 62: The power switch. the switch is OFF. Figure 63 shows the connection points for the power switch on the PCB. Tinning the wire can help if you have difficulty getting the stranded wire cleanly through the holes. - 36 - Hypnocube 4Cube Instructions v 6.4, September 2013 Figure 63: Power switch connection point. Figure 64: Power switch attached - 37 - Hypnocube 4Cube Instructions v 6.4, September 2013 Step 3: Making the ground drop wires To connect the ground wires from each row to the PCB, you will need 12 drop wires, 4 each of 3 lengths (the fourth drop wire is already “built-in” to the plane.) Take 4 full length pieces of wire, and cut each one into 3 lengths – 5.25”, 4”, and 2.75” (or approximately 13.5cm, 10cm, and 7cm.) Figure 65 shows the cut wires next to one of the 4x4 planes as reference. Figure 65: Ground drop wire lengths. Next, use a pair of needle nosed pliers to bend the ends of each drop wire into a small hook. It doesn’t need to look exactly like the hooks I made, just so long as it will keep the drop wire from slipping off the cross wire while you solder it. - 38 - Hypnocube 4Cube Instructions v 6.4, September 2013 Figure 66: Close-up of hooks on the ground drop wires. Step 4: Attaching planes (Please note that many of the following pictures are from an older revision of the board so may look slightly different from yours – the instructions all still apply however.) We will add one plane at a time to the circuit board by first slotting it into the LED holes on the PCB, and then adding the drop wires. For the first plane, select one of the planes with the shortest wires (the ones that came from the top half of the 8x8 grid.) If you place one of the long lead planes first, you might not have enough length on later planes to align them. With the two planes with longer wires, you will need to trim them down to fit within the clearance provided by the standoffs. We will start from the back (the side with the USB jack) and work forward, as this will give us the best access to the drop wires. The wires should align with the R, G, and B holes, as shown in Figure 67. If the ends of the wires have any burrs, you made need to trim it slightly to get them to fit through the holes in the PCB. A good sharp pair of cutters helps here. Also, if you happened to get any solder on the wires while constructing the grid, you may need to clean it off. It can be tricky getting all of the wires in the proper holes. I find it helps to approach it at an angle, so that you start with the wires on one end and insert one at a time, rather than trying to get them to all align simultaneously which is a recipe for madness. Make sure that all drop wires go straight down to the proper hole. The bottom - 39 - Hypnocube 4Cube Instructions v 6.4, September 2013 ground wire should slot into the GND hole on the side marked “Lowest” on the PCB. Otherwise all of the GND holes should be open. Do not solder yet! Figure 67: Close up of the LED holes. First double check that all of the wires are in the proper holes. Next, adjust the plane so that the height of the LEDs from the PCB looks good to you, and that the LEDs are level to your satisfaction. Now solder only one wire at each end of the PCB. This will allow you to check that the alignment wasn’t disturbed, and allow you to make any fine adjustments before continuing. Once you have everything positioned to your satisfaction (grid is square, aligned, even, etc.), you can solder all of the remaining the leads. You can do all of the solder from the top; there’s no need to turn the cube upside down. Then clip off extra leads below the PCB. Figure 68 shows the PCB with the first grid soldered on. - 40 - Hypnocube 4Cube Instructions v 6.4, September 2013 Figure 68: First grid attached. Now we will attach the ground drop wires. Take one drop wire of each length that we made in Step 1, and insert them into the GND holes in the PCB, hooking them on to the horizontal ground wires as shown below. The wires go from the shortest on the left to the tallest on the right (there are also labels “lowest” and “highest” written on the PCB at the two extremes.) Figure 69: Hanging ground drop wires. - 41 - Hypnocube 4Cube Instructions v 6.4, September 2013 Make sure that there are no shorts and the drop wire only touches the PCB and cross wire from which it’s hanging. You can then solder the tops of the wires at the hook. How carefully you align the drop wire when soldering is a matter of personal preference and patience. Figure 70: Ground drops soldered in place. Once the tops of the drop wires are soldered, that will hold the wire in place and allow you to solder the bottom of the wires to the PCB. You can then clip off the excess wire. Congratulations! You have one plane made, and you can test some diagnostic stuff before adding more planes. Testing the Plane: Read this paragraph before starting it! First, double check the plane you just added to make sure that everything looks good, that all drop wires are in the proper holes, and that none of the wires in the grid are touching any other wires than what they are soldered to. You will then power the cube up and see how the first grid functions. Plug the AC adapter in and throw the power switch. If after turning it on you do not immediately see LEDs light, turn it off! There is something amiss with your power connections and supply. If you have problems, see troubleshooting. This is what you should see: first all LEDs will go completely white, and then red, then green, then blue, and then a single white dot will scroll through the LEDs. It may take a moment for the scrolling LED to reach the plane you inserted depending on which plane our code starts with. Currently we start with the far plane, causing a delay, but we plan to change this on the next code pass to make the scrolling start on the plane inserted in these instructions. If you think something may be wrong, take a look at the Troubleshooting section located in - 42 - Hypnocube 4Cube Instructions v 6.4, September 2013 Appendix 3: Troubleshooting. If this part passes on the first try, then you are doing great. Quite often you need to find a loose solder joint, fix shorted wires, or find some other missing or poor connection to get the cube flawless. Congratulations! You have one plane attached, and have passed initial testing! For each of the next three grid planes, follow these steps, rereading the above as necessary: 1. 2. 3. 4. 5. 6. 7. 8. Select the remaining grid with the shortest drop wires. Place it adjacent to the previous grid IN THE SAME ORIENTATION. Make sure it is aligned nicely relative to previous grids (LEDs level, in a nice cubical lattice). Insert all drop wires through the proper holes. Only solder the two end wires. Check placement. If correct, solder rest of leads and clip. Do ground wires. The order of the ground wires (lowest to highest) should match previous planes. Run the testing code to make sure all LEDs are functioning properly and that you have them ordered correctly. If there is anything out of order you fix it before adding more planes in order to have easy access to the internal wiring. At this point you should have a working cube, just yet in the case. Relax, and let it run a while to make sure it looks good. It is designed to hypnotize you into buying a few dozen for all your friends, family, and neighbors. Mmmmm, pretty shiny blinky things………… Now you should have a working LED cube that properly passes the testing routines, and then starts running visualizations. The testing routines always run on power up, and are useful if you ever jiggle a lead loose and need to fix it (you can skip the test routines in the future by pressing either of the buttons we are about to do in the next step.) There are also other testing possibilities described in the User Manual, based on switch settings on power up. Locate the User Manual on the Hypnocube site for further details. - 43 - Hypnocube 4Cube Instructions v 6.4, September 2013 Step 5: Attaching the buttons Well, we’re calling them buttons to differentiate from the power switch, but they are actually momentary toggle switches. Because these switches have a defined rest position, it is important to wire them properly (otherwise they will be “pressed” except when you’re actually pressing them!) Solder the white wires to the middle tab, and the tab on the same side as the lever in its rest position. We will then attach the buttons to the two button pads on the front side of the PCB. Figure 73 shows a close up of the area (the button pads are marked on the underside.) Since the buttons are just making a connection, polarity does not matter. Figure 71: Momentary toggle switch – in this picture, you would use the bottom two solder tabs Figure 72: Wired momentary toggle switch Figure 73: Button footprints on PCB. Step 6: Mounting in the case Alright, one last step! At this point you should have a fully functioning cube, so it’s just a matter of mounting it in the case for presentation and protection. First, remove the nuts and washers from the switches and power jack if you have not already. Next place the cube on its side (with the LED planes aligned vertically) as shown in the Figure 74. The USB jack should be toward the side of the case with the large hole. Now place the power switch through the nearest hole on the front of the case (the leftmost hole as viewed from the front of the case) and secure in place with its nut. We like to place the power switch oriented so that it is up in the off position and down when on, but you can do differently if you prefer. - 44 - Hypnocube 4Cube Instructions v 6.4, September 2013 Figure 74: Power switch mounted in place (ignore the power jack since that’s no longer used.) Next attach the remaining two switches to the case. To be consistent with our other documentation, you should place the switch labeled “BTN1” on the PCB in the middle, and the switch labeled “BTN2” in the remaining spot, as shown in Figure 75. Secure the switches with the proper nuts. We recommend these switches be up in the rest position so they are easy to press, but you can of course orient them any way you please. - 45 - Hypnocube 4Cube Instructions v 6.4, September 2013 Figure 75: Mounting the buttons. Once all of the switches are secure, position the standoffs over the four mounting holes on the bottom. Insert the remaining screws through the rubber feet, and screw the case to the spacers. Start all four screws before tightening any of the screws. - 46 - Hypnocube 4Cube Instructions v 6.4, September 2013 Figure 76: Mounting hardware as seen from below. Place the top of the case on, and voila! You have constructed a difficult yet beautiful kit! Be careful when picking it up that you do not grab the top half of the case, and accidentally drop the bottom half. If you want to attach the top more securely we suggest clear tape, one strip per edge along the bottom, which works pretty well. We don’t suggest anything too permanent however; if you close the kit permanently, you will not be able to access the lattice for repairs in case anything gets shaken loose. Congratulations, you have completed the final part of three. We would like to hear how long it took you to do this part, and other useful details, in order to make this exposition better. - 47 - Hypnocube 4Cube Instructions v 6.4, September 2013 Figure 77: The finished cube. - 48 - Hypnocube 4Cube Instructions v 6.4, September 2013 Appendices Appendix 1: A cheap jig I can’t recommend anyone use this jig since improvements have been made that make a nice jig much more accessible to those without woodworking tools or skills. See Appendix 2 below for more details. The cheap jig requires only cardboard, plus basic tools such as scissors and tape, and anybody should be able to make it. It won’t be as easy to use as the nice jig, but you should still be able to get good results with care and patience. Cut a piece of cardboard (the heavier and stiffer the cardboard the better) approximately 12 inches (30 cm) square. Cut a number of 1”x12” strips, and stack them on opposite sides to build up enough clearance for the LEDs. Depending on the thickness of the cardboard it will probably take 1 – 3 pieces on each side. Glue, tape, or otherwise secure the cardboard together, and mark off the spacing (every 1.25” or 3.17cm) for the LED strips. You might note that it is impossible to reach the backside - that's OK, by the time we're finished with the front the grid will be strong enough to hold itself together allowing you to remove it safely from the jig. To hold each LED strip in place, use pieces of tape. Thumbtacks may also work if the cardboard provides enough friction to keep them from popping loose. Appendix 2: A nice jig One of our customers, Rob Sheldon, designed a much better jig. If you can handle a drill, you should make this jig. You can download the excellent instructions Rob was kind enough to write up from http://hypnocube.com/downloads/instructions/. Figure 78: Rob's improved jig - 49 - Hypnocube 4Cube Instructions v 6.4, September 2013 The following wood jig is obsolete, though the canvas frame suggestion might still be useful for some. Tip: One of our customers suggested using the frame from an art canvas. I haven’t tried it, but it looks like you can get such canvases quite cheap (several dollars) and requires no carpentry tools or skills. Seems like an excellent idea – thanks Mark J.! The nice jig requires some wood, appropriate woodworking tools, and some basic woodworking knowledge. Nothing fancy, but it’s not for everyone either. Take a board approximately 12 inches (30 cm) square, and attach two strips down either side as shown Figure 79. There will be no stress applied to the pieces except for the weight of the wood itself, so nails, screws, or glue will work equally well. Each of the side pieces should be at least ¼ inch thick (or 1 cm – no, ¼ inches doesn't equal 1 cm but who's counting) in order to give the LEDs ample clearance. You might note that it is impossible to reach the backside - that's OK, by the time we're finished with the front the grid will be strong enough to hold itself together allowing you to remove it safely from the jig. To hold each LED strip, I have used a row of thumbscrews. This makes it really easy to use many times over, but probably overkill for a single use jig. One customer used thumbtacks to hold the strips in place, and this should work equally well (at least for the first one or two times.) Tape can also work, but probably will not hold the strips as securely. Whatever method you use, the spacing should be 1.25” (3.17cm) between each strip. Figure 79: Wooden jig. Spacing between the holes and between the thumbscrews is 1.25” (3.17cm) - 50 - Hypnocube 4Cube Instructions v 6.4, September 2013 Appendix 3: Troubleshooting With just about every problem, you should first make sure that the lattice wires are not shorting! There’s even been a case of a completely non-responsive cube (power problem, right? – that’s what we thought too) because every ground wire was shorted! Nothing happens when the cube is powered on: Make sure that the power jack is connected with the proper polarity. Make sure that the power switch is properly soldered. Make sure that PIC is soldered properly. If you have a voltmeter, check to see if you are getting 5V out of the regulator (one of the big capacitors is a good place to check.) Lack of power suggests something is wrong with the power jack or switch. If you are getting 5V, then odds are there are one or more shorts on the PCB or lattice wires (particularly with the Darlington IC and the ground wires.) A particular LED doesn’t light: Make sure that the LEDs leads are soldered properly. One color not lighting suggests that that color lead is not connected. If none of the colors light, it’s likely the ground lead. It is also possible that the LED was either damaged, defective, or oriented improperly (the last one you can definitively check by looking for the flat spot on the side of the LED.) If all other LEDs look fine, and the solder connections are good, the LED may need to be replaced. An entire row of LEDs doesn’t light: Make sure the row’s ground wire is not shorted to another wire in the lattice. Make sure that the ground drop wire for that row is soldered properly, both at the cross wire and at the PCB. Make sure that the Darlington IC is soldered properly. Make sure that PIC is soldered properly. An entire column of colors doesn’t light: Make sure that the column’s drop wires are not shorted to another wire in the lattice. Make sure that the drop wire for that color is soldered onto the PCB properly. Make sure that the register IC, the resistor chip, and the diodes for that color are all soldered properly. Make sure that PIC is soldered properly. A row of LEDs is lighting when it shouldn’t be: This can be caused by a damaged/defective LED or a backwards LED in the lattice. Usually this is accompanied by the offending LED also not lighting properly. Check for shorts in the lattice, particularly between the offending row’s ground cross wire and a column wire. The cube goes through the test sequence fine, but then acts erratically: Make sure that the USB module is soldered properly. Make sure that PIC is soldered properly. - 51 - Hypnocube 4Cube Instructions v 6.4, September 2013 Appendix 4: Programming your cube You can find detailed information on drawing to the cube from a PC program via the USB module in a companion manual available on the Hypnocube website. We released detailed specs on the protocol to talk to the PIC, sample C++ source code, and a sample program to fiddle with the Hypnocube settings. But for those who really want to get their hands dirty and reprogram the PIC microcontroller with their own code, here are some things to get you started. DISCLAIMER: REPROGRAMMING THE PIC IS NOT SUPPORTED. YOU DO SO AT YOUR OWN RISK! WE WILL NOT RELEASE OUR SOURCE CODE OR THE HEX FILE FOR THE CUBE, SO IF YOU ERASE YOUR PIC IT CANNOT BE RESTORED. WE HIGHLY RECOMMEND SOCKETING THE PIC AND USING A SPARE PIC, LEAVING THE ORIGINAL PREPROGRAMMED PIC UNTOUCHED. We have found that the Aries Series 526 low profile ZIF socket fits on the PCB as allows enough clearance to insert and remove the PIC from underneath the LED lattice with a bit of care. Another approach made by one customer was to place a socket on the bottom of the PCB, and bend all of the PICs pins up to maintain the proper connections. We can’t be responsible for broken pins, but it worked for him! The pins for the low voltage in-circuit programmer are broken out on the PCB (labeled LV-ICP). To connect a programmer you will need to look up the PIC18F4620 docs and see how the pins are exported from our PCB. Don’t ask us for help beyond this – though perhaps eventually we will have forums with questions and answers for hackers working on these items. The PIC programmer we used is the simple circuit and PicPGM software freely available from http://www.members.aon.at/electronics/pic/picpgm/. The UART is available and broken out on a header, and you can also re-appropriate the 2 GPIO pins used for the buttons for other purposes if you wish. This PCB, circuit, and PIC controller can give you a nice platform for a whole host of LED related projects. Basically you can use it to drive 64 3-color LEDs in any configuration you like, or 192 single color LEDs in any pattern you desire. The hardware allows individual pixel and color access, and with time multiplexing, you can even get many levels of color. - 52 -