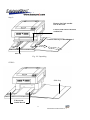
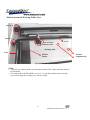
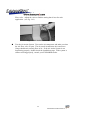
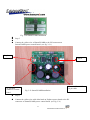
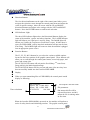
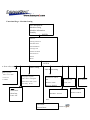
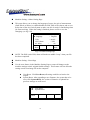
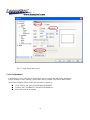
1
Dear Sir or Madam,
Thank you for choosing GCC and the LaserPro EXPLORER. You can be assured that
this machine meets all of the highest safety standards while using technological
innovations shared by no other laser engraver. The EXPLORER is backed by GCC, a
truly international company that is dedicated to helping your business grow.
We at GCC are proud to introduce the LaserPro EXPLORER, our most technologically
advanced laser engraver to date. This easy to operate machine has been designed with
quality, productivity, and safety in mind. With innovations like the QSMT M , Stellar
Quality Under High Speed, SmartFILE file management, and the new Linear Low
Maintenance Motion System, the EXPLORER is clearly on the cutting edge of all laser
systems.
GCC understands that a creative technical background is the key to successful growth in
the ever-changing information economy. We have a strong team of R&D experts who
propel our company to new heights. From product development to manufacturing, our
engineers are dedicated to innovation and quality.
Guiding our solid technical base is a world-class management team. At GCC, our leaders
bring together marketing, technical support, research development and distribution
experts to create an international network able to meet your demands. Over the years,
this network has been able to span the globe. Our technical support staff is committed to
provide you with impeccable service, and when your business is ready to grow, our team
will also be there!
Sincerely,
Leonard Shih
President of G.C.C.
1
EXPLORER USER MANUAL
CONTENT
CHAPTER I. SAFETY..................................................... 7
Safety Ratings ............................................................................................................. 7
Principles of CO2 Laser............................................................................................... 7
The Safety Interlock System....................................................................................... 7
Safety measures........................................................................................................... 7
Safety Labels ............................................................................................................... 8
CHAPTER II HARDWARE INSTALLATION .......... 10
Unpacking and Unloading ........................................................................................ 10
Accessories Kit Checklist ......................................................................................... 13
Working Environment............................................................................................... 14
CHAPTER III MECHANICAL OVERVIEW ............ 15
Front View ................................................................................................................ 15
Right Side View........................................................................................................ 16
Left Side View .......................................................................................................... 17
Back View................................................................................................................. 18
Motion System & Working Table View ................................................................... 21
Focus Lens Holder Assembly ................................................................................... 22
Manual Focus Gauge ................................................................................................ 22
Lenses........................................................................................................................ 24
Manual Focus Gauge Holders and Lens Combinations ............................................ 24
Exhaust System Installation...................................................................................... 25
Air Assist System Installation................................................................................... 27
Rotary Attachment Installation and Operation ......................................................... 29
SmartGUARD Fire Alarm ........................................................................................ 34
CHAPTER IV. SOFTWARE INSTALLATION ......... 39
Recommended Computer Configuration and Setup ................................................. 39
Connecting the LaserPro EXPLORER to the Computer .......................................... 39
Installation of the USB Driver (Using Windows) ..................................................... 40
Installation of the LaserPro EXPLORER driver (Using Windows) ......................... 41
How to Remove the Old USB Driver ....................................................................... 49
CHAPTER V. MACHINE OPERATION .................... 50
Graphic Control Panel Operation.............................................................................. 50
The Control Panel ..................................................................................................... 50
Control Panel Operation Chart.................................................................................. 53
Main Operation Page ................................................................................................ 59
Function Select Page ................................................................................................. 63
How to Set Origin ..................................................................................................... 75
CHAPTER VI. SOFTWARE OPERATION ............... 77
Page and Layout Setup.............................................................................................. 77
Color Adjustment ...................................................................................................... 79
Vector and Raster...................................................................................................... 80
2
EXPLORER USER MANUAL
Vector Cutting........................................................................................................... 80
Raster Engraving....................................................................................................... 84
Printing- EXPLORER Driver Editing ...................................................................... 84
CHAPTER VII. BASIC MAINTENANCE................ 100
Supplies Needed for Basic Maintenance and Cleaning .......................................... 100
Cleaning the Working table and Motion System.................................................... 100
Removing the Mirrors............................................................................................. 101
Cleaning the Mirrors and Lens ................................................................................ 104
Motion System Maintenance .................................................................................. 106
CHAPTER VIII. TROUBLE SHOOTING................ 109
Trouble Shooting..................................................................................................... 109
Other Problems ....................................................................................................... 109
Appendix ........................................................................ 111
GLOSSARY ........................................................................................................... 111
LaserPro EXPLORER Specification ................................................................. 113
3
EXPLORER USER MANUAL
FIGURE CONTENT
Fig.
Fig.
Fig.
Fig.
Fig.
Fig.
Fig.
Fig.
Fig.
Fig.
Fig.
Fig.
Fig.
Fig.
Fig.
Fig.
Fig.
Fig.
Fig.
Fig.
Fig.
Fig.
Fig.
Fig.
Fig.
Fig.
Fig.
Fig.
Fig.
Fig.
Fig.
Fig.
Fig.
Fig.
Fig.
Fig.
Fig.
Fig.
Fig.
Fig.
Fig.
Fig.
Fig.
3-1 Machine Front View ............................................................................ 15
3-2 Machine Right Side View ................................................................... 16
3-3 Power Switch and Inlet… … … … … … … … … … … … … … … … … … 16
3-4 Compressor Power .............................................................................. 16
3-5 Machine left side view ........................................................................ 17
3-6 Machine Back View ............................................................................ 18
3-7 Mirror Access...................................................................................... 18
3-8 Remove mirror 1 ................................................................................. 19
3-9 Remove mirror 1 ................................................................................. 19
3-10 Red Pointer Access Panel.................................................................. 20
3-11 Red Pointer Access............................................................................ 20
3-12 Print Port ........................................................................................... 20
3-13 Motion System .................................................................................. 21
3-14 Laser Carriage Assembly .................................................................. 22
3-15 Manual Focus Gauge ......................................................................... 22
3-16 Exhaust Outlet ................................................................................... 26
3-17 Exhaust System Installation .............................................................. 26
3-18 Air Assist Installation........................................................................ 27
3-19 Air Assist Installation........................................................................ 28
3-20 Rotary Attachment Top View ........................................................... 29
3-21 Rotary Attachment Installation ......................................................... 30
3-22 Rotary Attachment Side View ........................................................... 30
3-23 Rotary Attachment Software Operation ............................................ 32
3-24 Rotary Attachment Software Operation ............................................ 33
3-25 SmartGUARD Fire Alarm Review ................................................... 34
3-26 Install the SmartGUARD beneath here ............................................. 35
3-28 SmartGUARD Installation ................................................................ 36
3-29 SmartGUARD Installation ................................................................ 36
3-30 SmartGUARD Installation ................................................................ 37
3-31 SmartGUARD Installation ................................................................ 37
3-32 SmartGUARD Installation ................................................................ 38
4-1 USB Driver Installation....................................................................... 40
4-2 Driver Installation................................................................................ 41
4-3 Driver Installation................................................................................ 42
4-4 Driver Installation................................................................................ 43
4-5Driver Installation................................................................................. 44
4-6 Driver Installation................................................................................ 45
4-7 Driver Installation................................................................................ 45
4-8Driver Installation................................................................................. 46
4-9 Driver Installation................................................................................ 47
4-10 Remove Old USB driver ................................................................... 49
5-1 Graphic Control Panel View ............................................................... 50
5-2 Main Operation Page ........................................................................... 59
4
EXPLORER USER MANUAL
Fig. 5-3 Auto Focus Page .................................................................................. 60
Fig. 5-4 File Management Information Page .................................................... 61
Fig. 5-5 Job Pause Page .................................................................................... 62
Fig. 5-6 Function Select Page ........................................................................... 63
Fig. 5-7 File Management Page ........................................................................ 64
Fig. 5-8 File Management Information Page .................................................... 64
Fig. 5-9 File Management Edit Page ................................................................ 65
Fig. 5-10 File Edit Raster Page ......................................................................... 65
Fig. 5-11 File Edit Vector Page ........................................................................ 66
Fig. 5-12 File Edit Others Page2....................................................................... 66
Fig. 5-13 Change job printing sequence ........................................................... 67
Fig. 5-14 Change job printing sequence ........................................................... 67
Fig. 5-15 Change job printing sequence ........................................................... 67
Fig. 5-16 Change job printing sequence ........................................................... 68
Fig. 5-17 Change job printing sequence ........................................................... 68
Fig. 5-18 Change job printing sequence ........................................................... 68
Fig. 5-19 Change job printing sequence ........................................................... 69
Fig. 5-20 Change job printing sequence ........................................................... 69
Fig. 5-21 Change job printing sequence ........................................................... 69
Fig. 5-22 Change job printing sequence ........................................................... 70
Fig. 5-23 Change job printing sequence ........................................................... 70
Fig. 5-24 Change job printing seque nce ........................................................... 70
Fig. 5-25 Machine Setting Page ........................................................................ 71
Fig. 5-26 Set Lens Page .................................................................................... 71
Fig. 5-27 Auto Focus Tuning Page ................................................................... 72
Fig. 5-28 Other Setting Page ............................................................................. 73
Fig. 5-29 Machine Information Page1.............................................................. 74
Fig. 5-30 Machine Information Page2.............................................................. 74
Fig. 5-31 Set Origin Page .................................................................................. 75
Fig. 5-32 Set Origin Page .................................................................................. 75
Fig. 6-1 Page and Layout Setup in CorelDraw ................................................. 78
Fig. 6-2 Page Setup and Layout........................................................................ 79
Fig. 6-3 Color Management in CorelDraw ....................................................... 80
Fig. 6-4 Vector Cutting Illustration .................................................................. 81
Fig. 6-5 Vector Cutting Illustration .................................................................. 82
Fig. 6-6 Vector Cutting Illustration .................................................................. 82
Fig. 6-7 Vector Cutting Illustration .................................................................. 83
Fig. 6-9 Machine Output and Property ............................................................. 85
Fig. 6-10 Output Properties Setting .................................................................. 85
Fig. 6-11 Raster Dithering mode setting........................................................... 86
Fig. 6-12 3D Image and Sample ....................................................................... 88
Fig. 6-13 Stamp mode ....................................................................................... 89
Fig. 6-14 Adjust Stamp Power Level................................................................ 90
Fig. 6-15 The border setting of stamp............................................................... 91
Fig. 6-16 Invert Effect....................................................................................... 91
Fig. 6-17 Mirror Effect ...................................................................................... 91
5
EXPLORER USER MANUAL
Fig.
Fig.
Fig.
Fig.
Fig.
Fig.
Fig.
Fig.
Fig.
Fig.
Fig.
Fig.
Fig.
Fig.
Fig.
Fig.
Fig.
Fig.
Fig.
6-18 Laser Parameter Settings ................................................................... 93
6-19 Pen color adjustment ......................................................................... 93
6- 20 Save Laser Parameter Settings ......................................................... 95
6-21 Advance Setting ................................................................................ 97
6-22 Paper Size Setting.............................................................................. 99
7-1 Thumb Screw .................................................................................... 101
7-2 Mirror 2, 3, and 4 .............................................................................. 102
7-3 Remove Dust Cover .......................................................................... 102
7-4 Remove Mirror .................................................................................. 102
7-5 Uninstall Hex Screw .......................................................................... 104
7-6 Uninstall Mirror 4.............................................................................. 104
7-7 Drop Cleaner .................................................................................... 105
7-8 Pull Tissue ......................................................................................... 105
7-9 Uninstall Focus Lens ......................................................................... 106
7-10 Clean Focus Lens ............................................................................ 106
7-11 PS2 grease ....................................................................................... 107
7-12 Rails Maintenance ........................................................................... 107
7-13 How to Lubricate the Axis .............................................................. 108
7-14 Rail Dust Cleaning .......................................................................... 108
TABLE CONTENT
Table 1 Accessories checklist ........................................................................... 14
Table 2 Manual Foc us Holders and Lens ......................................................... 24
Table 3 DPI and Truncation Error .................................................................... 94
Table 4 Explorer Specification ....................................................................... 113
6
EXPLORER USER MANUAL
CHAPTER I. SAFETY
Safety Ratings
Laser engravers that have the CDRH safety rating of Class 1 are required to have key
safety features such as an enclosed laser beam and safety interlock mechanisms
designed to protect the operator. In addition to the safety features of a Class1 machine,
the LaserPro EXPLORER has been equipped with a red guidance pointer. This red
dot allows the operator to safely see the focal point of the laser beam. It also gives
EXPLORER the improved CDRH safety rating of 3a. Although the EXPLORER is
our most powerful laser engraver, when used correctly, it is an extremely safe machine.
Principles of CO 2 Laser
LASER is the acronym for Light Amplification by Stimulated Emission of Radiation.
A CO2 laser works by electrically stimulating the molecules of a carbon dioxide gas
mixture. When focused through a lens, this invisible intensive beam can vaporize
many materials. Depending on the speed and intensity of the beam, a CO2 laser may
be used to engrave or cut through a wide variety of materials.
The Safety Interlock System
The LaserPro EXPLORER is complete with a safety interlock system that
automatically shuts off the power supply to the laser whenever the top or front door is
opened. There are magnets on the top and front door, which activate this safety
mechanism. Do not attempt to remove or modify these magnets or any other
component of the safety interlock system.
Safety measures
l
l
Prior to operation, carefully read and be familiar with the warning labels on your
machine as well as in this manual.
Always wear certified safety goggles. Reflective materials such as mirrors,
enameled brass and anodized aluminum may reflect a portion of the invisible
laser radiation. This may cause sever eye damage if appropriate safety goggles
are not worn.
NOTE: Each LaserPro laser machine is equipped with a safety goggle, if you
need another one, please contact LaserPro for it or try to get one that meets the
following specification.
7
EXPLORER USER MANUAL
190-398 nm OD5+
10,600 nm OD5+
Visible light transmission: 92.9%
l
l
l
l
l
l
l
l
Connect the machine to a properly grounded power outlet. Make sure that the
voltage level of the machine matches that of the power source.
Do not open the laser access panel when the machine is plugged in.
The top door is equipped with a pair of magnets, which act as safety interlock
mechanisms. When the door is opened, the laser beam will cease operation. Do
not attempt to modify these magnets.
Do not attempt to modify or disassemble the laser module.
Good ventilation is required to remove odors and vaporized materials from the
work area of the machine. An exhaust system and the cutting table/honeycomb
table are recommended.
Do not work with heat sensitive surfaces or other materials that may produce
toxic fumes such as PVC and Teflon.
Have a fire extinguisher close to the working location at all times.
Make sure your smoke/fire detecting system is functioning.
NOTE: An excellent Fire Detection & Alarm System has been developed by
GCC. Ask your LaserPro EXPLORER dealer for details.
l
l
l
When using materials that may easily catch fire, such as acrylic, wood, or paper,
always use the air assist system to prevent flames.
Never leave the machine unattended during operation.
Follow the maintenance and cleaning instructions well. Not only will this enable
you to use the machine effectively, but it will also ensure long and safe operation.
Safety Labels
In compliance with CDRH standards, the LaserPro EXPLORER has all of the
appropriate safety labels attached. These labels are in key positions and are properly
attached to the machine at the time of manufacture. These labels are NOT to be
removed for any reason. Please become familiar with the safety messages and
locations of these labels. Below is a list of all the safety labels and their locations on
the machine.
On the right of top door and outside of the first mirror cover.
DANGER
INVISIBLE LASER RADIATION WHEN OPEN
AND INTERLOCK FAILED OR DEFEATED
AVOID EYE OR SKIN EXPOSURE DIRECT OR
SCATTERED RADIATION
8
EXPLORER USER MANUAL
On the upper center of the front door.
WARNING!!
Do not use reflective metals, heat sensitive
surfaces or other materials that may produce
toxic substances or cause corrosion problems,
such as PVC and Teflon.
On the front center of the top area.
CAUTION
AVOID PLACING YOUR EYES IN
THE RED B EAM PATH
On the front center of the top door.
9
EXPLORER USER MANUAL
CHAPTER II HARDWARE INSTALLATION
Unpacking and Unloading
The LaserPro EXPLORER is shipped in one crate that contains the machine, the
software and all of the necessary accessories. The following section has a detailed list
of the steps required for unpacking and assembly of the machine.
n
n
To prevent damage to the machine or personal injury, please get assistance
when loading and unloading the shipping crate.
Please save the original shipping crate in case it is needed for future
transport or product servicing.
Move the shipping crate close to the desired working location of the machine. Unpack
using the following steps.
Step 1:
Put the side board on the
floor. Make sure the
outer side faces up.
Fig. 2-1 Unpacking
10
EXPLORER USER MANUAL
Step 2:
Remove the fixed wooden
bar on the back
Unscrew and remove the fixed
wooden bar.
Connect slide step to the side board
Step 3.
Slide step
Fig. 2-2 Unpacking
STEP 3:
Slide Step
Take out the
Settled Boards
11
EXPLORER USER MANUAL
Fig. 2-3 Unpacking
STEP 4:
Unlock the wheels.
Carefully rolls the
EXPLORER off the
packing crate.
Fig. 2-4 Unpacking
12
EXPLORER USER MANUAL
Accessories Kit Checklist
Please check to make sure that all of the following items have been shipped with the
EXPLORER
ITEM
QUANTITY
Cleaning Kit
Cotton swabs
Lens cleaner solution
Lens tissue
1
1
1
Replacement Mirror
1
PS2 Machine Oil
1
Sponge
1
Hex Screw Wrench
1
2” Manual Focus Gauge (blue)
1
Position Fixture
1
AC Power Cord
2
Printer Port Cable
1
USB Port Cable
1
CD including EXPLORER user
manual, driver
1
13
EXPLORER USER MANUAL
Safety Goggle
1
Engraving Samples
1 pack
Table 1 Accessories checklist
Working Environment
It is very important to choose a working location that meets the following guidelines.
Improper work environments may lead to operational malfunction and/or unsafe
working conditions.
n
n
n
n
n
n
The Explorer is best suited in an office type environment. Avoid places
where the machine is exposed to high temperatures, dust, or high humidity
Ø Keep the machine where the room temperature is between 15 –
25 degrees Celsius or 60 – 78 degrees Fahrenheit.
Ø Avoid small, enclosed areas where a considerable amount of dust
is present.
Ø Avoid areas where the humidity is above 70% or where the
temperature is near the dew point.
Choose a flat surface that is not exposed to high levels of vibration. Be sure
to lock all four of the machine’s wheels to ensure that the machine remains
stationary when in use.
Choose a location that is large enough to accommodate the machine, the
exhaust system, the computer and a work/storage table.
Ø Having a separate working table or storage area prevents the
operator from possibly damaging the machine or the computer.
Have a fire extinguisher close to the working location at all times.
Ø Make sure your smoke/fire detecting system is functioning.
NOTE: A great Fire Detection & Alarm System has been developed by G.C.C. Ask
your LaserPro EXPLORER dealer for details.
14
EXPLORER USER MANUAL
CHAPTER III MECHANICAL OVERVIEW
Before you unload the EXPLORER and complete the installation, it is a good idea to
become more familiar with the machine’s features and components. You should also
make note of the new features that have been developed exclusively for the LaserPro
EXPLORER.
Front View
Top Door
Control
panel
Front Door
Air Assist Valve
Fig. 3-1 Machine Front View
15
EXPLORER USER MANUAL
Right Side View
On/ Off Switch
Fuse
AC Power Inlet
Fig. 3-3 Power Switch and Inlet
Switches & Ports
Fig. 3-2 Machine Right Side View
AC Power Air Assist
Inlet for Air Outlet
Fuse
Assist
Fig. 3-4 Compressor Power
16
EXPLORER USER MANUAL
Left Side View
Mirror 3
Access Panel
Mirror 3
Access Panel
Fig. 3-5 Machine left side view
17
EXPLORER USER MANUAL
Back View
Thump
Screw
Exhaust
Outlet
Communication Ports
Back
Door
Red Pointer
Access
Laser Access Panel
Fig. 3-6 Machine Back View
NOTE: 1. Never open laser access panel when machine is plugged in.
Reach mirror1 from laser
access panel
Mirror 1 with
dust cover
Fig. 3-7 Mirror Access
18
EXPLORER USER MANUAL
Take off the
dust cover to
access mirror 1
Fig. 3-8 Remove mirror 1
Fig. 3-9 Remove mirror 1
Red Pointer
Access Panel
19
EXPLORER USER MANUAL
Fig. 3-10 Red Pointer Access Panel
Red Pointer Access
Fig. 3-11 Red Pointer Access
Serial Port
Parallel Port
USB Port
Fig. 3-12 Print Port
20
EXPLORER USER MANUAL
Motion System & Working Table View
Mirror 2
Mirror 3
Lens Carriage
and air nozzle
X rail
Working table
Y rail
Position
Fixture
Fig. 3-13 Motion System
NOTE:
1. Typically the working table can load material about 65lbs./30kg, and 86lbs./40kg is
the maximum.
2. The origin point of EXPLORER is set at (3”, 0), and the position fixture can help
you to easily align the working piece with the origin.
21
EXPLORER USER MANUAL
Position
Alignment Jig
Focus Lens Holder Assembly
Mirror 4 Cover
Manual Focus
Gauge
Focus
Lens
Holder
Auto Focus Prob
Air Nozzle
Fig. 3-14 Laser Carriage Assembly
Manual Focus Gauge
Fig. 3-15 Manual Focus Gauge
The LaserPro EXPLORER comes equipped with the FOCAL SHARPT M Auto Focus
Gauge for consistent, precision etching and cutting. However, certain special laser
22
EXPLORER USER MANUAL
effects may require that the Auto Focus Gauge be disengaged. Blurred or fuzzy laser
cutting and etching techniques require different Manual Focus Gauges Holders to be
used. The LaserPro EXPLORER has three different sizes of Manual Focus Gauges
Holders available: Purple, Blue, Gold, and Red. Become familiar with the cutting and
etching difference between the FOCAL SHARP TM , Manual Focus Gauges Holders
and different Lens combinations. See Table 3-2 to find out how to use the Manual
Focus Gauges Holders.
23
EXPLORER USER MANUAL
Lenses
The LaserPro EXPLORER gives you the choice of four lens sizes to best suit your
cutting and engraving applications. Shorter lenses work better for most etching
application, as the laser’s focal point is targeted at the surface of the material. Longer
lenses are more suitable for cutting applications, as the laser’s focal point is targeted
behind the material. The machine comes equipped with a standard 2.0” Lens, and has
1.5”, 2.5” and 4.0” lenses available. The different lenses have been color coded
Purple, Blue, Gold and Red to easily pair with the Manual Focus Gauges Holders.
Manual Focus Gauge Holders and Lens Combinations
1.5”
Optional
Focus
Lens
Holde r
Purple
2.0”
Standard
Blue
Blue
2.5”
Optional
Gold
Gold
↑
↓
4.0”
Optional
Red
Red
Low
Thick
Manual Focus Gauge
Purple
Resolution
Cutting
Capability
High
Thin
Table 2 Manual Focus Holders and Lens
24
EXPLORER USER MANUAL
n
Exhaust System Installation
To properly remove dust, vaporized materials and smoke from the materials and the
machine, it is necessary to install a suitable exhaust system. Such a system will
remove these potentially harmful contaminants from the machine and the work area.
An exhaust system is not included with the machine. However, the exhaust blower
and other components are readily available from your LaserPro EXPLORER dealer or
nearest industrial supply company.
n
Install exhaust blower on the outside of the building close to the working
location of the EXPLORER. Mount the blower on the roof or on a cement
pad next to the building.
NOTE: It is useful to wire the exhaust blower to a wall switch
adjacent to the machine.
n
n
n
Attach an air duct from the exhaust blower to an appropriate hole through
the wall or ceiling. Use a rigid, smooth walled tubing such as PVC or sheet
metal that is the same diameter as the exhaust blower opening. Try to keep
this tubing as straight as possible as bends reduce the exhaust efficiency.
Use the appropriate sized clamps and sealants to ensure proper attachment.
In an easily accessible location, install a shut off gate to the exhaust blower
tubing. This gate restricts outside air and dust from gaining access to the
machine when not in use. It is highly recommended for cold and/or humid
climates.
n
For exhaust blowers that have larger than a 4” diameter outlet, install an
appropriate reducing coupler. The EXPLORER requires tubing that is 4” in
diameter.
n
Locate the exhaust outlet in the back door of the EXPLORER. This needs to
be reversed in order to be of use. Using a #2 Phillips screwdriver, unscrew
the outlet; reverse it so that the flange is facing outward and reattach. (see
fig. 3-16 & fig. 3-17)
25
EXPLORER USER MANUAL
Exhaust
Outlet
Fig. 3-16 Exhaust Outlet
Unscrew the outlet
and reverse it.
Fig. 3-17 Exhaust System Installation
n
From the reducing coupler to the EXPLORER, use 4” diameter flexible
rubber tubing. Attach with proper hose clamps.
26
EXPLORER USER MANUAL
Air Assist System Installation
One of the great features of the LaserPro EXPLORER is the Air Assist System. This
system removes much of the heat, vaporized particles and dust from the inside of the
machine. Using an exterior air compressor and ¼” tubing, the Air Assist System
safely blows heat and excess particles from the working table to the exhaust outlet,
allowing the exhaust system and the machine itself to function more effectively.
Follow the steps below to correctly install the Air Assist System.
n
n Use an air compressor capable of handling ¼” tubing to power the Air Assist
System. An electric air compressor can be plugged into the EXPLORER’s
auxiliary power outlet.
NOTE: To take advantage of EXPLORER’s computer controlled Air
Assist System, plug the compressor into the AC Power Outlet on
the side panel of the machine.
n
Use enough flexible ¼” tubing to connect from the air compressor to the
EXPLORER’s air assist valve. The valve is located at the lower right-hand
side of the front of the machine.
Press the ring to pull out
the air tube.
Air Flow
Fixer
Air inlet
connect to air
compressor
Turn clockwise to decrease the air
flow and counterclockwise to
increase the air flow.
Please avoid turn off.
Fig. 3-18 Air Assist Installation
n
n
n
Push the ¼” tubing into the Air Flow valve. Pull on the tubing to make sure
that it is locked into place. The outer ring of the valve needs to be pushed in
before the tubing can be disengaged. NOTE: It is important that the ¼”
tubing has clean, straight cuts on each end. Any jagged or slanted cuts will
not produce a good seal between the tubing and the valve. Use a sharp knife
on a flat surface to ensure a proper cut.
Open the Air Flow valve. The valve has a dial that allows and restricts
airflow. To avoid damage to the air compressor, never fully close the Air
27
EXPLORER USER MANUAL
Flow valve. Adjust the valve to find the setting that is best for each
application. (see fig. 3-19)
Fig. 3-19 Air Assist Installation
n
Test the Air Assist System. Turn on the air compressor and make sure that
the Air Flow valve is open. The air nozzle located near the Auto Focus
Gauge should emit a steady flow of air. If the Air Assist System is not
functioning properly, double-check the installation steps. If the system is
still not working properly, consult your EXPLORER dealer.
28
EXPLORER USER MANUAL
Rotary Attachment Installation and Operation
Instruction of Rotary
track
ruler
lever
Connect the cable of
rotary attachment to
the port at the middle
right of EXPLORER.
Center to 10”
Screw
Holes
Front Door
Fig. 3-20 Rotary Attachment Top View
29
EXPLORER USER MANUAL
Connect The
cable of rotary
attachment to the
port at the middle
right of
EXPLORER
Fig. 3-21 Rotary Attachment Installation
n
SIDE VIEW
The length of working piece
Adjustable end
motor
lever
Base of the
padded rubber
wheel
Offset
Open end of the working piece
Value
Fig. 3-22 Rotary Attachment Side View
Installation:
n
n
Turn off the power of the engraver.
Put the rotary attachment to the working table of EXPLORER. Ensure the
two screw holes match the two corresponding position jig on the engraving
30
EXPLORER USER MANUAL
n
n
n
n
table and have the left side of rotary attachment align to the 10 inch position
on the ruler (or position fixture), then tighten the screws to fix it.
Connect the cable of the rotary attachment to the port in the right middle side
of EXPLORER (refer to Fig. 3-21 ).
Turn on EXPLORER, the working table would automatically moves down to
the lowest position when it senses rotary attachment connected.
NOTE: The maximum length of the working project is 450 mm (17.71
inch). The maximum diameter of the padded rubber wheel is 94 mm. To get
an accurate engraving position during rotating, it is better that the diameter
of the working piece is not smaller than 90mm (3.54 inch). However, the
maximum diameter of the loaded object is 180mm and the limited loading
weight is 7 Kg (15.4 Lb.).
n
Operation
n
n
n
n
n
n
n
n
n
n
n
n
n
n
n
n
n
n
Measure the diameter and length of the working piece and set up the
software operation before engraving.
Lift the lever, loading the working piece, move the adjustable end to bottom
of the working piece firmly, then lower down the lever to fix the object.
If the working piece is too small, please apply 4-inch focus lens for operation
to prevent collision between lens carriage and rotary attachment device.
Turn on EXPLORER. EXPLORER would detect the rotary attachment and
the working table would move down to the bottom automatically along with
EXPLORER would initialize to the home position at the same time.
Set up focus.
NOTE: Set up focus after initializing the system to prevent the carriage hit
the engraving object.
The following is an example of engraving process by using CorelDRAW
V.9.0 or higher version with LaserPro EXPLORER XP driver.
Choose FILE and select PRINT SETUP (see fig. 3-23)
Choose LaserPro EXPLORER and click PROPERTIES to enter
EXPLORER driver setup
Choose PAPER section and check ROTARY FIXTURE (see Fig. 3-24)
Key in proper DIAMETER, PAPER SIZE and OFFSET values
Press OK to confirm the setting
Go to LAYOUT function of Corel Draw and choose PAGE SETUP (Refer to
Chapter VI Software Operation for PAGE SETUP )
Under page setup page, choose SET FROM PRINTER and then check
LANDSCAPE
Press OK to finish the setting
31
EXPLORER USER MANUAL
n
n
n
n
Go to start laser engraving by going to FILEà PRINTàchoose
EXPLORERà PROPERTIES (Refer to Chapter VI Software Operation for
LaserPro EXPLORER driver parameters setting)
Set up desired laser engraving parameters such as speed, power etc.
Press OK to start laser working
Fig. 3-23 Rotary Attachment Software Operation
32
EXPLORER USER MANUAL
Please key in proper
offset value after
measuring the
working piece.
Fig. 3-24 Rotary Attachment Software Operation
l
Key in proper diameter value after measuring the
working piece.
l
The X value here means the length of the working
piece
33
EXPLORER USER MANUAL
SmartGUARD Fire Alarm
From fig.3-25, you would find the reset button on the top of SmartGUARD and sensor
adjustment switch on the right side. The reset button enables you to reset the
SmartGUARD when it senses the fire and warns you by beeping. The sensor
adjustment switch provides you four options, 0, 1, 2, and 3. 0 represents turning off
the SmartGUARD, and 1 -3 represents different reaction times once SmartGUARD
senses fire. If you switch it to 1st level, SmartGUARD would automatically shut down
the laser and alert at the same time when it senses fire lasting for 1second, 2nd level is
for 4 seconds, and 3rd for 8 seconds.
n
Sensor adjustment switch level
Reaction time
st
1 level
1 second
2nd level
4 seconds
rd
3 level
8 seconds
Reset button
Sensor adjustment switch
Fig. 3-25 SmartGUARD Fire Alarm Review
Because SmartGUARD is an optional item of EXPLORER, if you purchase it for
EXPLORER after getting EXPLORER, you would need to follow the instruction
listed below to install the fire alarm.
n
n
n
n
Step 1.
Please attach SmartGUARD underneath the front center of top cover (see fig.
3-26). Please arrange the wires along the cover and fix it appropriately.
34
EXPLORER USER MANUAL
n
Attach SmartGUARD beneath here
n
n
n
n
Fig. 3-26 Install the SmartGUARD beneath here
Step 2.
Open the right side cover of the Explorer as indicated in fig. 3-27.
Open the side cover
of EXPLORER
Fig. 3-27 SmartGUARD installation
n
Step 3.
n
Feed the wires of SmartGUARD through the “A” opening next to the Y axis
on the right side of EXPLORER (see fig. 3-28)
n
35
EXPLORER USER MANUAL
A
Fig. 3-28 SmartGUARD Installation
n
n
n
n
Step 4.
Apply SmartGUARD power control board (the green board in fig. 3-30) to
EXPLORER with M3 screws. Fit the M1 and M3 openings on
SmartGUARD power control board to the two posts on EXPLORER mother
board separately (see fig. 3-29).
Explorer Power Board
Explorer Mother Board
Apply SmartGUARD power
control board here.
Fit with M3 opening
Fit with M1 opening
Fig. 3-29 SmartGUARD Installation
36
EXPLORER USER MANUAL
Fig. 3-30 SmartGUARD Installation
n
n
n
n
Step 5.
Connect the yellow wire of SmartGUARD to the JP2 connector on
SmartGUARD power control board. (see fig. 3-31 )
Step 5.
Step 6.
10 pin cable
connect to Control
Panel
n
n Step 6.
n
Fig. 3-31 SmartGUARD Installation
Connected from M/B
10 pin cable
Connect the yellow wire with white head on Explorer power board to the JP1
connector on SmartGUARD power control board. (see fig. 3-31 )
37
EXPLORER USER MANUAL
n
n
n
Step 7.
Connect the green wire of SmartGUARD to the connector on the Explorer
mother board. (see fig. 3-32)
Fig. 3-32 SmartGUARD Installation
n
n
n
n
n
Step 8.
Assemble the side cover of Explorer with screws to finish SmartGUARD
installation.
Step 9.
Turn on Explorer and it would initiate fire alarm function automatically.
38
EXPLORER USER MANUAL
CHAPTER IV. SOFTWARE INSTALLATION
Recommended Computer Configuration and Setup
The LaserPro EXPLORER is able to accommodate both Macintosh and Windows
operating systems. However, the EXPLORER driver and machine were designed to
work best using a Windows based system with the following minimum requirements.
Computer
• CPU
Pentium 90 (or equivalent) or greater
• DRAM
32 MB RAM and upgrade to 64MB
• FDD
One 3.5” 1.44 MB Floppy Disk Drive
• HDD
1.2 GB Hard Drive or greater
• SVGA
15” Super VGA Monitor
• On Board Parallel Mode (Setup from PC BIOS):
ü SPP – Preferred Mode
ü ECP – Cable (Less than 1.8 meters)
Scanner
• Flatbed scanner only
• Minimum resolution: 200 DPI
Software
•
GCC LaserPro EXPLORER driver is designed for Windows 95 or
newer operating system
NOTE: Win 95 and NT do not support USB port.
•
EXPLORER is compatible with any graphic design program that
can output HPGL commands. (CorelDRAW, Adobe Photoshop,
CASmate, PhotoPaint, AutoCAD, Illustrator, Signlab, etc.)
Connecting the LaserPro EXPLORER to the Computer
l
l
l
Make sure that the EXPLORER and computer are turned off
before connecting them to a power source.
Connect the male of the power cord to a good quality surge
protector then the surge protector into a grounded outlet.
Connect the female end of the power cord into the machine’s AC
Power Inlet (main) located on the side of the machine.
39
EXPLORER USER MANUAL
NOTE: The EXPLORER has been designed to switch from 100 – 240
VAC automatically.
l
The EXPLORER can communicate with a computer using either
a parallel or USB port.
NOTE: Explorer is not support Macintosh computer through serial
port yet. Please contact with your dealer for update.
Installation of the USB Driver (Using Windows)
NOTE: Please do not plug USB cable in your PC and then install USB driver before
installing EXPLORER laser driver.
STEP 1: Open computer and insert the LaserPro CD. Please keep EXPLORER off at
this moment.
STEP 2: Choose EXPLORERà USB Driver icon to start USB driver auto run
program (see fig. 4-1)
Fig. 4-1 USB Driver Installation
STEP 3: Once successfully install USB driver, please connect the USB cable between
PC and EXPLORER and then turn it on.
40
EXPLORER USER MANUAL
STEP 4: Start to install EXPLORER laser driver.
Installation of the LaserPro EXPLORER driver (Using Windows)
Before installing EXPLORER laser driver, please install USB driver first. And after
finishing laser driver installation, please go to add USB port to printer properties (see
Port Monitor Installation section).
STEP 1: Make sure the EXPLORER and computer are properly connected and turned
on
STEP 2: Put LaserPro compact disk into your computer
STEP 3: Choose EXPLORER à Laser Driver to start the printer installation wizard
Fig. 4-2 Driver Installation
STEP 4: Double click ADD PRINTER and start the ADD PRINTER WIZARD
41
EXPLORER USER MANUAL
STEP 5: Click NEXT STEP
Fig. 4-3 Driver Installation
STEP 6: Choose LOCAL PRINTER and click NEXT STEP
42
EXPLORER USER MANUAL
Fig. 4-4 Driver Installation
STEP 7: Insert the LaserPro EXPLORER driver disk into the compact disk reader.
STEP 8:Selec a Printer Port, and choose NEXT STEP.
43
EXPLORER USER MANUAL
Fig. 4-5Driver Installation
STEP 9: Select your system or bypass
44
EXPLORER USER MANUAL
Fig. 4-6 Driver Installation
STEP 10: Select the port that the machine is connected to and click OK
Fig. 4-7 Driver Installation
STEP 11: Choose EXPLORER to be the default printer and click NEXT STEP
45
EXPLORER USER MANUAL
Fig. 4-8Driver Installation
STEP 12: Select Replace existing driver and click NEXT STEP
46
EXPLORER USER MANUAL
Fig. 4-9 Driver Installation
STEP 13: Select NO when asked to print a test page and click NEXT STEP
Fig 4-10 Driver Instalation
47
EXPLORER USER MANUAL
STEP 14: Click FINISH to complete the Add Printer Wizard
Fig 4-11 Driver Installation
STEP: 15 Click CONTINUE to set up the driver
Fig 4-12 Driver Installation
48
EXPLORER USER MANUAL
STEP16: the Now the LaserPro EXPLORER driver is successfully installed. Don’t
forget to remove the driver disk from the computer and store it in a safe
place.
How to Remove the Old USB Driver
STEP 1: turn on your PC and EXPLORER
STEP 2: Plug in USB cable
STEP 3: Run Remove.exe to remove old USB driver files
Fig. 4-10 Remove Old USB driver
STEP 4: If Remove.exe still fail to remove old USB driver files, please enter Control
Panel to remove it.
49
EXPLORER USER MANUAL
CHAPTER V. MACHINE OPERATION
Graphic Control Panel Operation
Once you have the LaserPro EXPLORER connected to the computer and the driver
installed, you will need to familiarize yourself with the controls of the machine before
beginning any cutting or engraving. The EXPLORER driver will be the primary
sources of information for your machine. However, the manual controls on the
EXPLORER allow you to manipulate the file order, auto/manual focusing, starting
point and other important tasks.
The Control Panel
The control panel on the LaserPro EXPLORER provides easy access to all of the
manual controls needed for cutting and engraving. The liquid crystal display (LCD),
directional and selection buttons make navigating through the machine’s manual
controls easy to do.
(see fig. 5-1)
Fig. 5-1 Graphic Control Panel View
50
EXPLORER USER MANUAL
n
Direction Buttons
The four directional buttons on the right of the control panel allow you to
navigate the selection cursor through the control panel menu and adjust the
value of specific settings. Move the cursor with the UP and DOWN
directional buttons and adjust value settings with the LEFT and RIGHT
buttons. Press the ENTER button to confirm each selection.
n
LED Indicator Light
The three LED indicator lights above the Directional Buttons display the
status of the machine’s power and safety functions. The LASER indicator
light will infor m you if the laser is actively firing. The DOOR light will
inform you if either the Top Door or Front Door is open. If either door is
open, the EXPLORER’s safety interlock mechanism will prevent the laser
from firing. The POWER light will come on when the machine is plugged
into an appropriate power source.
n
n
n
n
n
n
n
Function Buttons
The F1, F2, F3, & F4 buttons let you select the various available options
located on the lower portion of the graphic control panel. These buttons will
allow you to scroll through the control panel menu, access help pages, and
pause and resume jobs.
The AUTO FOCUS button will activate the Focal Sharp TM Auto-Focus
Gauge while in the Main Operation Page.
The START/STOP button will let you start and pause jobs once they have
been successfully loaded into the LaserPro EXPLORER.
Display
When you start transmitting files to EXPLORER, the control panel would
display as following:
Time calculation
002 File name
Speed: XX % DPI: XXX
Power: XX % PPI: XXX
XX:XX:XX
001/ 004
File sequence and file name
File parameters
004 means this file will be
repeated four times, and 001
means the file is running under
its first time.
When the LaserPro EXPLORER is powered on, the machine will perform a
series of safety checks and initializing routines. The graphic control panel
51
EXPLORER USER MANUAL
will scroll through the GCC Copyright Page, Table Object Moving Page and
the Machine Initialize Page before reaching the Main Operation Page. Once
the machine has reached the Main Operation Page, it is ready for use. Refer
to the diagram of Fig. 5-2 for a detailed listing of the different pages within
the control panel menu.
NOTE:
1. Prior to initialization, the EXPLORER will display an image of a table on
the graphic control panel. This should prompt you to make sure that the
working table area is clear for unwanted obstructions.
2. Each time when you turn on EXPLORER, it would run initialization of
working table moving down and up, lens carriage bottom to top and air
blowing. Therefore, you have to wait for few seconds to finish air blowing
test before start work.
52
EXPLORER USER MANUAL
Control Panel Operation Chart
Power ON
Main Operation Page
GCC LaserPro
EXPLORER
Copyright 200x
Machine initialization
Main Working Page
002 File name
Speed: XX % DPI: XXX
Power: XX % PPI: XXX
XX:XX:XX
001/ 002
Prev Next
Z Func
Previous file
F1
START
Start working
F2
Next file
Z
001 File name
002 File name
003 File name
Carriage moving
Speed: XX % DPI: XXX
Speed: XX % DPI: XXX
Speed: XX % DPI: XXX
X: XX mm XX mm
Power: XX % PPI: XXX
Power: XX % PPI: XXX
Power: XX % PPI: XXX
Y: XX mm XX mm
XX:XX:XX
XX:XX:XX
XX:XX:XX
Prev Next
F4
001/ 001
Z
Func
Functional Page
Prev
Next
001/ 002
Z Func
Prev Next
Machine setting
Back
Func
Back to Job
Down
Speed: XX % DPI: XXX
Back to
Power: XX % PPI: XXX
job
Machine information
Standby
Z
XX:XX:XX
001/ 001
Filename
Speed XX% DPI: XX%
Power: XX% PPI XX%
F3
Help Recall
Z
F1
F1
002 File name
File management
001/ 001
: Select function
XX: XX :XX
Help file
: Adjust value
53 to go into items
Press ENTER
EXPLORER USER MANUAL
F4 Recall
UP
Stop or Pause Job
File name
Speed: XX % DPI: XXX
Power: XX % PPI: XXX
XX:XX:XX
001/ 001
F1
STOP
Pause Job
File name
Speed: XX % DPI: XXX
PAUSE!
XX:XX:XX
F1
File name
Speed: XX % DPI: XXX
STOP!
XX:XX:XX
001/ 001
001/ 001
Resume job
File name
Start
Speed: XX % DPI: XXX
Power: XX % PPI: XXX
XX:XX:XX
001/ 001
54
EXPLORER USER MANUAL
Auto Focus
File name
Speed: XX % DPI: XXX
Power: XX % PPI: XXX
XX:XX:XX
001/ 001
Auto Focus
Auto Focusing
Please Wait
Z: 00.00”
Manual Focus and Carriage Moving
File name
Speed: XX % DPI: XXX
Power: XX % PPI: XXX
XX:XX:XX
001/ 001
Directional keys
Carriage Moving
X: 00.00 mm
Y: 00.00 mm
Z
F3 or F4
Move Z distance
Z: 00.00 mm
55
EXPLORER USER MANUAL
Functional Page— File Management
Back to file selection
F1
* File management
Machine setting
Machine information
Standby
Enter
Delete All Files
F3
ENTER
Job queue
function to
F2
change job
printing
F4
01: File name
02: File name
03: File name
04: File name
Delete the selected file
Choose file for editing
ENTER
02 File name
Speed: XX % DPI: XXX
Power: XX % PPI: XXX
XX:XX:XX
001/ 001
F1
Back to file selection
F4
Raster setting
Vector setting
01: File name
02: File name
03: File name
04: File name
Repeat times: 000
Raster setting
Raster Power:
Edit file
Vector setting
%
Raster Speed:
%
SmartACT: YES or NO
Vector Pen:
Vector Power:
Vector Speed:
Vector PPI:
%
%
56
EXPLORER USER MANUAL
Functional Page— Machine Setting
File management
Machine setting
Machine information
Standby
ENTER
Set lens
Tuning auto focus
Set table down
Set Read Beam
Carriage lock
Set Parser Mode
Save Position
Others
Reset
ENTER
Auto focus value tuning
Other setting
Table down setting
Moving table
Enter: save value
Language: English
Lens: 4.0”
Table Down: YES or
Unit: me tric or English
Z: 00mm
NO
Carriage Free
Distance: 00mm
YES / NO
Save Position
EOF alarm: YES or NO
Air delay: 00 sec
Reset to default
Set Parser Mode
Select auto
focus lens
Lens: 4.0”
Red Beam: YES/ No
Reset
User57Reset
EXPLORER USER MANUAL
System Reset
Default or HPGL
Functional Page— Machine Information
File management
Machine setting
Machine information
Standby
Machine Information Page
ENTER
GCC LaserPro
EXPLORER
Copyright 200x
Down direction key
Firmware version: XXX
FPGA: V2.XX
58
EXPLORER USER MANUAL
Main Operation Page
The Main Operation Page will be the “home base” for the control panel menu. It will
remain on most of the time during normal operation. It has been designed to display all of
the basic information relevant to operation. This page will inform you of the speed, power,
PPI, DPI, time, and copies of each individual file loaded into the EXPLORER. The first
line of the Main Operation Page indicates the first job’s filename. If more than one job has
been downloaded, press the PREV and NEXT buttons to scroll through the jobs in the
buffer. Pressing the FUNC button will transport you to the Function Select Page, where
you will be able to edit File Management, Machine Settings and Machine Information. (see
Fig. 5-2)
--- Empty File
Speed:-----% DPI:-----Power:-----% PPI:--------:-Pre
---/---Next
Z
Func
Fig. 5-2 Main Operation Page
n
Focus Adjustment
While in the Main Operation Page, press the AUTO FOCUS button to activate
the Focal Smart T M Auto-Focus Gauge. The control panel menu will move to the
Auto Focus Page while the machine automatically adjusts the working table (Zaxis) to accommodate the thickness of your materials. At the same time, if you
need to adjust the working table by manual, you can do this function after AUTO
FOCUS (see fig. 5-3). After focus adjustment, you can using F1 to return Main
Operation Page.
59
EXPLORER USER MANUAL
Auto Focusing
Please Wait
Z: 0000.000”
Back
Fig. 5-3 Auto Focus Page
Certain blurred or soft laser effects require the materials on the working table to be
moved away from the laser’s optimum focal point. When the UP and DOWN
directional buttons are pressed while in the Auto Focus Page you will disengage
the auto focus system. This will allow you to manually raise or lower the z-axis.
After you have made adjustments to the z-axis, press the F1 button to return to the
Function Select Page.
NOTE: When adjusting the depth of the working table, make sure that the
materials do not come in contact with the laser carriage or focus gauge.
n
Job Starting Point
If you want to adjust the starting point of the job before you begin the cutting or
engraving, press the directional buttons while in the Main Operation Page.
Pressing the directional buttons will bring to the Carriage Moving Page. In this
page you can adjust the starting 0,0 point of the x and y rails. Without adjustment,
the 0,0 starting point of your job will be the extreme upper left hand corner of the
motion system. This point will correspond to the extreme upper left hand corner
of your graphics program. Manually moving the laser carriage will move the 0,0
starting point to a different location. The Carriage Moving Page will display in
millimeters how far the location is away from the default location.
60
EXPLORER USER MANUAL
n
Start Job
If you are satisfied with the existing settings, auto-focus adjustments and starting
point location, press the START button to start cutting or engraving. When a job
is in operation, the graphic control panel will display the Working Page. This
page informs you the speed, power, PPI, DPI, time, working time and copies
status. While in this page, at no time are you able to edit the laser or file settings.
You may press the F1 button to jump to the Working Pause Page, which will
pause and resume the operation. Or you may press the STOP button that will
cease all cutting and engraving and return the control panel menu back to the
Main Operation Page. (see fig. 5-4 )
01:File Name
Speed: 100.0% DPI: 1000
Power:100.0% PPI: 750
00:39:21
001/005
Pause
Fig. 5-4 File Management Information Page
n
Stop Job
In Working Page, you can press STOP button to stop a job.
n
Pause Job
In the Working Page, you can press F1 to pause the job temporary and press F1
again to restart the job in the Working Pause Page. (see fig. 5-5 )
61
EXPLORER USER MANUAL
01:File Name
Pause!
00:32:19
Resume Edit
000/000
Down
Up
Fig. 5-5 Job Pause Page
62
EXPLORER USER MANUAL
Function Select Page
Pressing the F4 button while in the Main Operation Page will bring you to the Function
Select Page. This page allows you to edit File Management and Machine Settings. Press
the directional keys to move the cursor to the File Management, Machine Setting
Machine Information and Standby Page. Press ENTER to confirm your selection. (see
Fig. 5-6)
◆ File management
Machine setting
Machine information
Standby
Back
Help
Recall
Fig. 5-6 Function Select Page
n
Function Select Page -- File Management
The File Management Page will show all of the files that have been downloaded
into the EXPLORER. Pressing the UP or DOWN directional buttons will scroll
through the available files. If a file is no longer needed or if the memory buffer
has reached its capacity and you would like to download new files, press F4 to
delete unwanted files. The F2 key would initiate the job queue function to manage
the job printing sequence (Please check page 65 and see how to change job
printing sequence). Using F3 to delete all files. Press ENTER to see the File
Settings in the File Management Information Page. ( see fig. 5-7 & 5-8)
63
EXPLORER USER MANUAL
◆ 01:File 1
02: File 2
03: File 3
04: File
Back
Link
D- ALL
Del
Fig. 5-7 File Management Page
After select a file, you may press F4 further to edit the settings of this file. Such
as raster, vector and repeat settings (see fig. 5-8). Or using Star and moving to
the main operation page.
01: File name
Speed:
Power:
00:03:35
Back
% DPI:
% PPI:
001/005
Edit
Fig. 5-8 File Management Information Page
Once F4 is pressed you will go to the File Management Edit Page to edit the
setting of the file. From here, press the Arrow Key directional buttons to
select to adjust the raster, vector and repeat settings and RIGHT or LEFT
directional button to adjust the setting value (see fig. 5-9).
64
EXPLORER USER MANUAL
◆ Raster Setting
Vector Setting
Others
Back
Fig. 5-9 File Management Edit Page
n
File Management -- File Edit Raster Page
This page will allow you to edit the raster settings of a select file. Use the
directional buttons to scroll through the editing options and adjust the values.
Adjusting the Raster Power and Raster Speed will override the saved settings
downloaded from the computer. Select the SmartACT option to initiate the
function of SmartACT to speed EXPLORETR operation speed when perfect
output quality is not a demand (see fig. 5-10). F3 button would provide you a
direct approach to main operation page.
◆ Raster Power:
Raster Speed:
SmarctACT: YES
%
%
Back
Fig. 5-10 File Edit Raster Page
n
File Management -- File Edit Vector Page
If your selected file features vector settings, this page will allow you to adjust
them. Use the directional buttons to adjust the pen, power, speed, and PPI
settings.(see fig. 5-11)
65
EXPLORER USER MANUAL
◆ Vector Pen:
Vector Power:
Vector Speed:
Vector PPI:
%
%
Back
Fig. 5-11 File Edit Vector Page
n
File Management-- Others
If you press ENTER at OTHERS item, you would be able to set the repeat times
of the selected file by using LEFT or RIGHT direction buttons to adjust repeat
times ( see fig. 5-12).
Repeat Times:
Back
Fig. 5-12 File Edit Others Page2
NOTE: If the Repeat Times is set to “ 0”, the file would be repeated without
limits.
n
File Management – Job Queue
LaserPro Explorer enables you to use LINK or DLINK to decide the job printing
sequence of a specified job queue and press START button once to print them all.
NOTE: Job queue means a group of files has been managed in printing sequence.
66
A. Where is the LINK/ DLINK function
Step 1. Go to the Main Working Page as fig. 5-13 shows
01| Laser1.cdr
Speed : 100.0% DPI: 300
Power: 50.0% PPI:762
--- : --- : --000/001
Prev Next
Func
Fig. 5-13 Change job printing sequence
Step 2. Press F4 key to enter Function Selection Page and pressing
ENETER to choose File Management
* File management
Machine setting
Machine information
Stand by
Back
Help
Recall
Fig. 5-14 Change job printing sequence
Step 3. Stop the cursor at the starting file you would like set as the first
printing job and press F2 key to initiate the LINK function or F4 to DLINK
(see fig. 5-15&5-16)
03| Laser3.cdr
* 01| Laser1.cdr
02| Laser2.cdr
Back Link
DLink
Fig. 5-15 Change job printing sequence
67
03| Laser3.cdr |---|--*01| Laser1.cdr |---|--02| Laser2.cdr |---|--Back Link
Dlink
Fig. 5-16 Change job printing sequence
B. How to Link Files
Take a printing sequence of Laser3.cdr--->Laser2.cdr--->Laser1.cdr for
example to show how to link different files.
Step 1. Go to the LINK/ DLINK function page as fig. 5 shows.
02| Laser2.cdr |---|--*03| Laser3.cdr |---|--01| Laser1.cdr |---|--Back Link
Dlink
Fig. 5-17 Change job printing sequence
Step 2. Stop cursor at Laser3.cdr and press F2 to start LINK. You would
find Laser3.crd file gets a X sign. The x sign means that the LINK is
working and you can link the current file to another one.
02| Laser2.cdr |---|--*03| Laser3.cdr |---x--01| Laser1.cdr |---|--Back Link
Dlink
Fig. 5-18 Change job printing sequence
Step 3. Move cursor by arrow keys and stop at Laser2.cdr file then press
F2 to link laser3.cdr and laser2.crd.
68
01| Laser1.cdr |----|--*02| Laser2.cdr | -03x--03| Laser3.cdr |----|-02
Back Link
Dlink
Fig. 5-19 Change job printing sequence
Step 4. Move cursor by arrow keys and stop at Laser1.cdr file then press
F2 to link laser2.cdr and laser1.crd.
03| Laser3.cdr |----|-02
*01| Laser1.cdr | -02x--02| Laser2.cdr |-03|-01
Back Link
Dlink
Fig. 5-20 Change job printing sequence
Step 5. Press F2 again to finish the LINK function and the x sign would
disappear.
03| Laser3.cdr |----|-02
*01| Laser1.cdr | -02|--02| Laser2.cdr |-03|-01
Back Link
Dlink
Fig. 5-21 Change job printing sequence
C. How to DLINK files
DLINK here stands for removing files from specified job queue. Here we
would show you how to remove Laser2.cdr from Laser3.cdr--->Laser2.cdr-->
Laser1.cdr job queue.
69
Step 1. Go to LINK/ DLINK function page and stop cursor at Laser2.cdr.
01| Laser1.cdr |-02|--*02| Laser2.cdr |-03|-01
03| Laser3.cdr |----|-02
Back Link
Dlink
Fig. 5-22 Change job printing sequence
Step 2. Press F4 key to initiate DLINK function and you would find
Laser2.cdris removed from the job queue.
01| Laser1.cdr |-03|--*02| Laser2.cdr |----|--03| Laser3.cdr |----|-01
Back Link
Dlink
Fig. 5-23 Change job printing sequence
NOTE:
1. The same file can’t print more than once in the same job queue.
2. Explorer can accept multiple job queues at the same time, each job queue
is independent and unable to link each other.
3. In order to know the printing sequence, the main working page would
remind you what is the next printing job. Find fig. 5-24 for example.
03| Laser3.cdr
*02
Speed : 100.0% DPI: 300
Power: 50.0% PPI:762
--- : --- : --000/001
Prev Next
Z
02 is the next file
Func “
Fig. 5-24 Change job printing sequence
70
n
Function Select Page -- Machine Setting
Under Machine setting page, you would have Set Lens, Tuning Auto Focus, Set
Table Down, Others and Reset options by pressing ENTER to go into each
function.
Set Lens
◆ Tuning Auto Focus
Set Table Down
Red Pointer
Others
Reset
Back
Fig. 5-25 Machine Setting Page
n
Machine Setting -- Select Lens Page
Please always adjust the lens in SELECT LENS PAGE when you apply different
focus lens for application. Pressing LEFT or RIGHT to adjust lens and F4 to
save adjustment. (Fig. 5-26) After adjusting to different focus lens, we would
suggest you to press AUTO FOCUS and EXPLORER would get the new focal
length accordingly.
Select Auto Focus Lens
Lens: 2.0”
Back
Save
Fig. 5-26 Set Lens Page
n
Machine Setting -- Auto Focus Tuning Page
After adjust focus lens, you can enter AUTO FOCUS TUNING PAGE to tune the
focal length if the default value can’t meet your application needs. The AutoFocus Tuning Page will allow you to edit the default auto-focus lens focal length,
that decides the distance between laser and the wor king table each time after you
using Auto Focus.
71
Use the directional buttons UP or DOWN to move the Z axis to a desired level ,
then press F4 to save the changing. (see fig. 5-27)
Moving table
Lens:2.0”
Z:
mm
Back
Save
Fig. 5-27 Auto Focus Tuning Page
n
n
n
Machine Setting -- Set Table Down
n
Machine Setting— Red Pointer
n
Red pointer function would help you to know where the laser moves more easily
and precisely. Under red pointer function, EXPLORER enables you to use LEFT
or RIGHT directional button to adjust red pointer on or off.
n
n
n
Machine Setting— Carriage Lock
This function would provide you an option if you need EXPLORER to show
“ Table will move down and remove objects on table “ warning message before
EXPLORER starts initialization. When the Set Table Down function is at YES
status, EXPLORER would move to initialization after you press ENTER to
confirm the warning message; when Set Table Down is at NO status ,
EXPLORER would not show the warning message. After all setting is determined,
please use F4 to save all the changing.
Carriage lock or free function would enable the lens carriage remain under always
free or lock status, under free status, user can manually move the lens carriage to
where the want. While under carriage lock status, user has to free the carriage by
any directional key and then can manually move it.
n
Carriage Free: Yes
Back
Save
72
n
Machine Setting-- Others Setting Page
n
This page allows you to change the language of usage, the unit of measurement
(from metric to inches), to enable/disable the EOF (end of file) alarm, and to set a
delay time of the Air Assist System to make sure the air assist is functioning when
job starts working. When the setting is finished, please use F4 to save the
changing. (see fig.5-28)
◆ Language
Unit
EOF Alarm
Air delay
Back
: English
:metric
: YES
:
sec
Save
Fig. 5-28 Other Setting Page
n
NOTE: The EOF (end of file) alarm will make an audible “beep” when your file
has been completed.
n
n
n
Machine Setting --Reset Page
Use the reset feature in the Machine Sett ing Page to return all changes to the
machine settings to their original default settings. This feature will not affect the
settings saved to an image file on the computer.
l
l
User Reset- Click User Reset, all setting would be set back to the
origins.
System Reset- After upgrading a new firmware, the system has to be
reset, click System Reset, the version of firmware is updated but
previous settings are well saved.
l
l
User Reset
System Reset
Back
73
n
Function Select Page -- Machine Information
Under the Machine Information Page, you can find the machine information
including G.C.C. logo, machine name and firmware version etc. By pressing
DOWN button, you can go further to next page. (see fig. 5-29 and 5-30)
GCC LaserPro
EXPLORER
Copyright 200x
More
Back
Fig. 5-29 Machine Information Page1
Firmware :
FPGA :
Back
Fig. 5-30 Machine Information Page2
74
How to Set Origin
LaserPro EXPLORER features setting origin per laser application changes. Please check the
following procedure about how to change origin.
n
n
n
n
n
n
n
n
n
n
n
n
n
n
n
n
n
Step 1.
Turn on EXPLORER, and hold ENTER key when display shows,
“GCC LaserPro
Explorer
Copyright 200x”
Until it shows,
Set Origin Page
Enter: Setting Origin
Start/ Stop: Restart
Back
Fig. 5-31 Set Origin Page
n
n
n
n
n
n
n
n
n
n
n
n
n
n
Step 2.
Press ENTER to set origin and the display will show:
Origin Position
X:
mm
Y:
Back
mm
Save
Fig. 5-32 Set Origin Page
n
n
n
Step 3.
Press arrow key to move the lens carriage for the new origin. And press F4 to save
the changing.
75
n
n
n
n
Step 4.
Press F1 and back to Set Origin Main Page. Press START/ STOP button once,
Explorer would restart in 30secs.
76
CHAPTER VI. SOFTWARE OPERATION
Before proceeding to EXPLORER laser working, please make sure the page and layout setting,
along with color adjustment of graphics software (here we illustrate Corel Draw) is set to
proper condition. Please check the following sections.
Page and Layout Setup
Now that your EXPLORER driver has been successfully installed, you will need to adjust
the printer and page size default settings before you can begin editing and completing jobs.
NOTE: Please make sure EXPLORER is set to the default printer before proceeding to the
page and layout setup.
n
n
n
n
n
Ensure that the LaserPro EXPLORER has been selected as the DEFAULT
PRINTER.
NOTE: Refer to default printer set up steps in Chapter IV, Software Installation.
Ensure that the paper size layout of your graphics program will accommodate the
size of the EXPLORER’s working table. Please follow the following steps to set
proper page and layout setup. (Example is for CorelDRAW, use comparative
methods for other graphics programs)
n
l
Click LAYOUT → PAGE SETUP (see fig. 6-1)
77
Fig. 6-1 Page and Layout Setup in CorelDraw
l
l
l
l
Using the SET FROM PRINTER paper option (see fig. 6-2)
Click DOCUMENT→ PAGE → SIZE (see fig. 6-2)
Ensure that NORMAL PAPER and LANDSCAPE are selected (see fig. 6-2)
Click OK to complete the paper size adjustment.
78
Fig. 6-2 Page Setup and Layout
Color Adjustment
LaserPro driver uses color pen to control laser engraver engraving and cutting parameters,
before heading for laser working, please make sure to uniform Corel Draw and LaserPro
driver color mapping. Please follow the procedure to adjust it.
n
n
n
Click TOOLS and select COLOR MANAGEMENT
Uncheck the CALIBRATE COLORS FOR DISPLAY
Press OK to finish the setting
79
Fig. 6-3 Color Management in CorelDraw
Vector and Raster
The LaserPro EXPLORER driver will interpret between raster mode (engraving) and vector
mode (cutting) by the types of lines and line widths used in your graphic image. Usually,
line widths that are set between 0.001” (0.025mm) and 0.004” (0.1mm) will prompt the
machine to use the vector mode. To ensure that the EXPLORER cuts out the outline of an
image, adjust the properties of the outline to change its width to the thinnest possible line.
Vector Cutting
When we say vector cutting here, it means use laser engraver to print out graphics
composed of lines, such as circle, triangle, etc.
The laser cutting is NOT doing a proper cutting, because the width of the text’s outline is
not set to its thinnest width. The MS-Windows® driver determines raster/vector cutting
based on the outline width of an object. Therefore to achieve a vector cutting, please set the
text’s fill to white and its outline to its thinnest width in CorelDraw.
80
NOTE: If the width of the line to be cut is not set at minimum value, the laser is going from
left to right back and forth instead of vector cutting. The laser unit looks like engraving
instead of cutting.
n
Select the text in which the change applies by clicking on the
text
Fig. 6-4 Vector Cutting Illustration
n
Change the text to be filled with white by left clicking on the white color of
“CorelDraw Color Palette” located on the right hand side of the screen.
81
Fig. 6-5 Vector Cutting Illustration
n
Change the color of text outline by right clicking on the desired color on
CorelDraw Color Palette.
Fig. 6-6 Vector Cutting Illustration
n
Change the outline to its thinnest width by right clicking on the selected text
82
Fig. 6-7 Vector Cutting Illustration
n
n
Go to the “Properties” option
Click on the “Outline” tab and change the “Width” to its thinnest dimension.
83
Fig. 6-8 Vector Cutting Illustration
n
n
n
Click on “OK” to apply the changes.
Print out the selected text again and the laser will do the letter cutting.
NOTE: When performing vector engraving or vector cutting job, we would suggest to
set the PPI value at 400 to obtain the superb vector output quality.
Raster Engraving
Laser engraver prints raster images as grids/ dots of individually pixels, any digital or scanned
images can be processed by a laser engraver. After the image or graphics is ready, please go
further to the laser printing operation.
Printing- EXPLORER Driver Editing
After the graphics is ready, take advantage of the many performance-editing features of the
EXPLORER driver by clicking FILE→PRINT→PROPERTIES (see fig 6-9)
84
Fig. 6-9 Machine Output and Property
File parameter
setting save, delete
or load function
Review and select
the saved file
parameter setting
here.
Fig. 6-10 Output Properties Setting
85
A. Choose Printing Mode
A-1 B/W (Black & White) Mode– It is useful to activate this mode when using ClipArt or
drawings with several colors, shades of gray, or many outlines. This mode will create a
laser output similar to that of a laser printer. The entire selected image will be engraved
using a single pen, black one (power & speed setting). The EXPLORER driver will
interpret colored and shaded areas as different shades of gray by producing a halftone effect
while engraving. Instead of engraving only solid lines, gray/halftone areas will be a
collection of dots. The resolution and depth of these halftone areas can be adjusted with the
DPI, the B/W mode dithering settings from 2x2 to 8x8, error diffusion, and pattern type.
Experiment with these different settings to get the best results.
Fig. 6-11 Raster Dithering mode setting
n
Dithering type – The gray areas of image will be filled with from a 5- grade
halftone with 2x2 dots to a 65- grade halftone with 8x8 dots. 8x8 dithering type
would presents the image into different shading effect than the 2x2 dithering,
while the 2x2 dithering type would have smaller dots than 8x8, that produces
higher resolution. The dithering type choice would depend on the image and
application.
n
Enhance dithering – The enhance dithering as what it reads would help to
compensate the shortage of smaller grade halftone type, such as choosing 2x2
dithering type and enhance dithering at the same time, the image would be printed
with 256- grade halftone and 2x2 dots, therefore, better shading effect with small
2x2 dots/ grids.
n
Error Diffusion – The error diffusion presents the shade of image as a spread
halftone instead of dots, therefore more detailed.
86
2*2 dithering
4*4 dithering
8*8 dithering
Error Diffusion
2x2 Enhance Dithering
8x8 Enhance Dithering
Dot
Bayer
Corner
n
Pattern Type – The halftone pattern has three kinds of layout options, which
determine the shape of each grid/ dot to compose the shading effect of raster
image.
l
Dot A halftone pattern consists of circle dots.
l
Corner The dark dot spread from the left uppe r corner of the pattern result in
a little triangle shape to imitate a shading effect.
l
Bayer A random halftone pattern.
NOTE: The B/W mode reads the processed image by shade and light, and if the image is a
colorful one, different color would get different shading effect. Usually we would suggest
transform the colorful image to a black and white one before output by a laser under B/W
mode.
87
A-2 Manual Color Fill Mode – Activate this mode when you wish to designate specific
power and speed settings to certain colors in your image. The EXPLORER driver has 16
available pen settings to choose from.
A-3 3D Mode – With this mode you can automatically get a sculptured 3D effect. Using
images that have gray areas, the EXPLORER driver can manipulate the image to give it
added depth. This mode can be adjusted with the DPI, PPI, power and speed settings.
3D Image File
Sample/ Material: Density Board
Fig. 6-12 3D Image and Sample
A-4 Stamp Mode -- Stamp production is one of the most dynamic functions of the LaserPro
EXPLORER. Due the nature of the engraving, stamp production requires different
operational steps than most engraving or cutting. In order to create stamps, select the Stamp
Mode and the corresponding settings: Set Shoulder, Pitch, Border, Invert, and Mirror. (see
fig.6-)
NOTE: The Cluster and automatic Border settings are located in EXPLORER driver
Properties → Advance.
88
Fig. 6-13 Stamp mode
n
n
n
Pitch Value & Shoulder Power Setting
The finished stamp will be a reversed image with engraved depressions and ridges.
Many of these ridges may be too thin and would break off or be unstable.
Creating pitch is a way to add support to the thin lines and ridges. The pitch value
setting allows you to adjust the width of the ridge. Broad pitch gives the
maximum amount of support for each ridge. Experiment with different pitch
value settings in order to produce the stamp that is best suited for your application.
You can specify the size into the pitch box under stamp mode and adjust the bar to
89
specify different laser power level for shoulder.
The central part
presents the
letter of stamp.
The blue bar means different laser power level to compose of the slope.
Higher level blue bar gets less engraving laser power.
Fig. 6-14 Adjust Stamp Power Level
n
n
Add Border
You may wish to include a thin or wide border around the outline of your stamp.
This can be done by creating outline greater than .001” thickness around the
image. When the Mirror setting is selected, this outline will automatically be
reserved as a ridge that does get engraved.
NOTE: The automatic Border setting is located in EXPLORER driver
Properties → Advance
90
Fig. 6-15 The border setting of stamp
n
Invert
The Invert mode will reverse the black and white outlines and fills in the
selected image. Black will become white and vice-versa, thus creating a high
area that will be covered with ink when the stamp is put to use. This function is
disabled when using the Manual Color Fill mode.
Invert
Fig. 6-16 Invert Effect
n
Mirror
When using a stamp, the image needs to be reversed or mirrored in order to
show up properly when the stamp is in use. This setting will transfer right to
left and vice-versa.
Mirror
Fig. 6-17 Mirror Effect
n
Cutting out the Stamp
91
After you have created a border around the stamp, you may wish to have the
EXPLORER’s vector setting cut out the stamp from the rubber sheet. To do
this, create a thin (0.001”) red line on the outline edge of the border or where
ever you wish the stamp to be cut. The vector setting will always be performed
after the engraving is complete.
n
Stamp Production
You may wish to create a full sheet of duplicated rubber stamps in order to have
them all engraved at once, saving on material costs and operational time. To do
this, copy and paste the image enough times to fill the page size that is smaller
or equivalent to the working table and the rubber sheet. Next make sure that the
image is mirrored, inverted and that the appropriate shoulder, border, power and
speed settings are in place.
B. Parameter Settings
The LaserPro EXPLORER allows the use of 16 different colors to represent 16 different
power and speed settings when cutting and engraving. These colors are referred to as PENS.
Try to think of each pen as a designated laser setting, rather than as a color. An image that
is only black and white will use only one power and speed laser setting (Black). An image
that includes black, red and blue colors will us e three different assigned power and speed
settings. In order to utilize up to 16 different pens, make sure your graphics program uses
the 16 colors recognized by the EXPLORER driver. (see fig. 6-18)
Adjust speed / power / PPI for each pen
92
Check to enable or disable raster / vector / air assist
function for each pen
Fig. 6-18 Laser Parameter Settings
Pen Settings – There are 16 available pen settings to match a specific laser setting with the
different colors used in the graphic image. If your image uses black outlines, and red and
blue color fills, then the EXPLORER driver will instruct the laser to use three different
power and speed settings on the three distinct areas. The speed and power settings
designated to each pen color, will represent a proportion of the master control speed and
power settings.
If you would like to use a color not include d in the driver’s original 16 colors, please double
click on the specified pen and the color manager window would jump out then you can
select the color you would like to apply. (see fig. 6-19 )
Check to enable or disable raster/ vector/ air assist
function for each pen.
Fig. 6-19 Pen color adjustment
NOTE: The driver can not store more than 16 pen colors for each file.
Speed – The master control for the laser’s motion system speed during operation. The
range is from 0.1 – 100%. 100% speed is equivalent to 80 inches per second; a 10% speed
setting would be equivalent to 8 inches per second. This will be the speed that the motion
system travels when cutting or engraving straight lines. The machine will automatically
slow down when it is cutting or engraving curves.
93
Power – The master control for the laser’s power during operation. The range, like the
speed setting, is from 0.1 – 100%. This percentage represents the power of each laser pulse
fired. Power and speed work together to determine the depth of a cutting and/or engraving.
Higher power and slower speeds will produce the deepest engraving.
Raster Vector On/Off – Each color in the graphic image may include a variety of color
fills and very thin lines. It is then possible for one pen color to require both raster and
vector modes. Turning eithe r Raster or Vector off will force the driver to ignore the pen
color’s fills or thin lines. You cancheck the Raster or Vector box to turn on/ off the function.
DPI – Dots Per Inch. This setting determines the quality of image resolution was using the
raster engraving. DPI can also be referred to as horizontal lines per inch or fill spacing.
The amount of raster strokes per vertical inch of travel will affect the image resolution of
the engraving. Higher DPI settings will have cleaner and deeper engravings, but will take
longer to complete. Lower DPI settings will have coarser and more shallow engravings, but
will take less time to complete. Experiment with different settings to get your desired effect.
You can find the DPI function at Explorer driver-> Properties-> Option.
NOTE: LaserProEXPLORER has 8 DPI options, 125, 250, 300, 380, 500, 600, 750, 1000.
If you choose to use 300 or 600 DPI, the output in full table size would has a truncation
error list below, in the meanwhile, 125, 250, 380, 500, 750, and 1000 DPI would gives you
real DPI choices.
The list DPI is set for user’s convenience to remember, the form below is provided for
corresponding to the real DPI.
125
250
300
380
500
600
750
1000
Real DPI 127
254
381
381
508
762
762
1016
Set DPI
Truncation error
Y rail
300DPI
600DPI
1.5mm
0.5mm
Table 3 DPI and Truncation Error
PPI – Pulses Per Inch. This setting should not be confused with DPI. PPI determines the
gross amount of laser pulses there will be per linear inch. PPI is exclusively for the vector
setting. A PPI setting of 500 results in the laser firing every .002” (500 times per inch). If
the standard lens is producing a vector laser focal point of .007”, then higher PPI settings
will result in deeper, overlapping laser pulses. PPI settings lower than 150 will result in the
individual laser pulses being spread far apart, so they will not touch each other. Low PPI
settings are a good example of how the LaserPro EXPLORER can perforate paper.
NOTE:
a) Set PPI value at 400 might result in better vector cutting effect.
94
b) When adjust the PPI bar to its maximum, Explorer would disable the PPI control
function after XP driver version v. 3.35
c) Adjust the PPI bar to the most right end with the value “X”, the PPI effect will be
turned off, that means the power ramp is disabled.
Save Parameters Setting -- Each job may require unique EXPLORER driver settings.
After you have adjusted all of the settings, remember to save it in a desired location for
future use (see Fig. 6-20 to save parameters setting). Press the SAVE icon of Fig. 6-20 and
save the parameter settings to the proper directory as wished or default for all applications,
then you can see the saved files shown in the History Files column. You can access your
saved settings by clicking on Load or by using the History scroll, which keeps track of the
settings most recently used.
NOTE:
a) These editing options can be saved to one image file such as CorelDraw graphics with
printer driver parameters setting or can be save d as the default settings in LaserPro
driver for future files.
b) Please make sure your ID to log in the computer is set to “Administrator” level,
therefore OS of 2000/ XP can allow you to save parameter settings.
Fig. 6- 20 Save Laser Parameter Settings
95
C. Advance Setting
C-1 Scaling
Adjust output inaccuracy if you find the actual output scale is different from what you set in
the computer, then you can use scaling function to modify it and get a perfect one. Here is
the example, if you set a 60cm straight line output, and the real output from EXPLORER is
only 58cm, then you can use (60-58)/ 1000 scaling value to adjust the difference.
NOTE: If you wish to use Border and Cluster, then the border must be less than the
distance specified in the Cluster setting.
C-2 Position mode options
n
Home – At the end and beginning of each job, the laser will return to top right.
n
Without Home – The laser will stop and start next job from the last position of the
current job.
n
Relative Move – The laser will return to the first position of the current job.
n
Center – The laser will recognize whenever location the lens carriage (the red beam) is
anchored as the center of the to-be-engraved graphic.
96
Fig. 6-21 Advance Setting
C-3 Image Output Direction
n
Top to Bottom – The laser would engraver from top to bottom of the image.
n
Bottom Up – Normally, the LaserPro EXPLORER engraves from top to bottom, left
to right. Selecting Bottom Up will force the machine to start from the bottom and
work its way to the rear of the working table. Some laminates will produce dust that
may get lodged in the engraved area if the machine engraves from top to bottom.
Since the exhaust system is located at the rear of the machine, the dust will be sucked
away from the engraved area.
C-4 Skip White
When Skip White function is enabled, the laser would only engrave the black image and
skip the white area to save time. The skip white enabled is the default setting of Explorer,
user can adjust it to disable according to applicatio ns.
97
C-5 SmartACT
When SmartACT is selected, the working time will be less, while the output quality may
drop a bit as a trade off. We would suggest to disable Skip While when SmartACT is under
function to get a better output quality.
C-6 Print Imme diately
When file size is bigger than the memory buffer, to avoid data lost, it is suggested to set
“Print Immediately” enabled to allow data being transmitted while Explorer is processing
the job.
C-7 Vector Setting
n
All Raster Output – When choose “all raster output” to print graphic including vector
line and raster image, the laser would take the vector line as raster data and print the
whole graphics as raster engraving image.
n
Vector sorting — When your image has one vector cut area enclosing another vector
cut area, this setting will automatically direct the laser to cut out the inside enclosure
before moving to the outside image.
n
Optimization – This is another setting that will automatically cut down on operation
time. When selected, the EXPLORER driver will analyze your image and find the
most efficient passing route to complete the job.
C-9 Cluster
n
To reduce the working time needed for multiple production, this setting may be
used. Let’s take multiple stamp production for example. When selected, the
EXPLORER driver will automatically determine the fastest method to engrave
more than one stamps. The laser may complete one stamp before starting another
or may undertake several stamps at the same time. Adjust the Distance setting to
determine the maximum distance the laser can “leap-frog” from one image to
another.
C-10 Rotary Attachment
Rotary attachment is specially designed for engraving on the surface of round objects or
cylinders. Please check rotary attachment installation and operation with Chapter III.
Paper Settings
These settings are included in EXPLORER driver Properties → Paper. They are used to
adjust several output settings.
98
Paper Size – As described in Paper and Layout Settings, ensure that the paper size is no
greater than the working table area: 32”x20” (812.8mm x 508mm) or 38”x20”
(963.2mmx506mm) under extend working area mode.
Unit – You can choose the unit measurement either with metric or imperial inch.
Extend – Enable the Extend function by checking the Extend box, the working area of
Explorer would expand to 38”x20” (963.2mmx506mm) when the output quality is not high
requirement.
NOTE: 3D and Stamp mode would be disabled under EXTEND working area.
Fig. 6-22 Paper Size Setting
99
CHAPTER VII. BASIC MAINTENANCE
Keeping your LaserPro EXPLORER clean and well maintained will ensure consistent
quality and reliability. Smoke or dust build-up inside the laser system and the mechanical
components can cause lower of laser power and irregularities in the motion system. This
section will advise you on how to keep the working table, the motion system, and the
mirrors and lens clean. The frequency of the cleaning schedule will depend entirely on the
types of material being used, the working environment, the regularity of usage and the
quality of the exhaust system.
Supplies Needed for Basic Maintenance and Cleaning
n
n
n
n
n
n
n
n
n
n
n
Soap solution or all purpose cleaner
Paper towels
Cotton cloth
Denatured alcohol (DO NOT use alcohol or any painted surface, plastic, or the
laser system)
Acetone (ONLY to be used on the working table)
Vacuum cleaner with a flexible nozzle capable of cleaning the working table and
motion system
Cotton swabs (Supplied)
Lens cleaner (Supplied)
Lint free lens tissue (Supplied)
#2 Phillips screwdriver
Allen wrench .050”
Cleaning the Working table and Motion System
Clean the working table and the motion system as frequently as possible using the following
steps.
n
n
n
n
Turn the power off and unplug the EXPLORER before cleaning.
Use a suitable vacuum machine to r emove dust and debris from the working table
and motion system.
Use a paper or cotton towel with soap solution, all purpose cleaner, alcohol, or
acetone to clean the working table.
Ø Never pour or spray alcohol or acetone directly to the working
table. Apply small amounts to a paper or cotton towel before
using.
Use a paper or cotton towel with soap solution, all-purpose cleaner, or alcohol to
wipe down the rails of the motion system. We recommend that the motion system
be cleaned after each prolonged usage.
Ø To keep the motion system functioning properly, we
recommend that the rails be lubricated on a semi-regular basis.
100
Use a small amount of light grade machine oil to a paper or
cotton towel and apply to the rails.
NOTE: Too much oil will accelerate the build up of debris.
Ø
Make sure that the residue from the cleaning products is dry
before continuing to use the EXPLORER. Oil, alcohol and
acetone can cause fires or smoke build-up if improperly used.
Removing the Mirrors
We recommend that you check the mirrors once or twice a week to see if they require
cleaning. If any debris or smoke residue is present, use the following steps to clean them.
Remove, clean and replace the mirrors one at a time.
NOTE: Turn off and unplug the EXPLORER before cleaning.
Mirror 1
n
n
Mirror 1 is located in the lower left side of the machine. Use a #2 Phillips to
remove the access panel. (see fig. 2-5)
Loosen the thumbscrew holding the mirror in place. (see fig. 7-1)
Fig. 7-1 Thumb Screw
n
Clean and replace the mirror. Tighten the thumbscrew and replace the access
panel.
Mirror 2 & 3
n
Mirror 2 & 3 are located behind their designated access panels (see fig. 3-5) Use a
#2 Phillips screw driver to remove the panels. You may need to use the control
panel to move the x rail/mirror 3 to a position adjacent to the Mirror 3 Access
Panel. Turn on the machine, use the control panel to move the x rail to an
101
n
appropriate location, turn off the machine and continue to remove and clean
mirrors 2 & 3.
Loosen the thumbscrew and remove the dust cover protecting Mirror 2. (see fig. 73)
Mirror 2
Mirror 4
Mirror 3
Fig. 7-2 Mirror 2, 3, and 4
Fig. 7-3 Remove Dust Cover
n
Loosen the black thumbscrews (in circle marked as fig. 7-4 show) holding the
mirrors in place.
Fig. 7-4 Remove Mirror
102
n
Clean and replace the mirrors. Tighten the thumbscrews and, for mirror 2, replace
the dust cover. (see the next section)
103
Mirror 4
n
n
n
Mirror 4 is attached to the laser carriage by three small hex screws. Using an allen
wrench, remove the three hex screws holding Mirror 4 in place. (see fig. 7-5)
Fig. 7-5 Uninstall Hex Screw
Loosen the thumbscrew holding the mirror in place.
Fig. 7-6 Uninstall Mirror 4
n
Clean and replace the mirror. Tighten the thumbscrew and replace the Mirror 4
holder. (see the next section)
n
Cleaning the Mirrors and Lens
Cleaning the Mirrors
Inspect each mirror for scratches, smoke residue and debris. If residue or debris
is present, use the following steps to clean the mirrors. The laser beam reflects
104
off the middle of the mirror, so do not worry about the outside edge of the mirror.
If the center of the mirror is scratched, contact your LaserPro EXPLORER
dealer for a replacement.
n
n
n
Hold the mirror with the reflective side up. Never touch the reflective side of the
mirror.
Drape a fresh piece of lens tissue over the mirror.
Put a few drops of lens cleaner on the tissue covered mirror. Apply enough drops
so that the tissue absorbs enough to cover the mirror surface. (see fig. 7-7)
Fig. 7-7 Drop Cleaner
n
Pull the tissue over the mirror in one direction only. (see fig. 7-8)
Fig. 7-8 Pull Tissue
n
n
Repeat the cleaning procedure if the mirror does not come clean on the first
attempt. DO NOT apply any finger pressure or other cleaning solutions to the
mirror surface.
Make sure that the mirror is dry before reinstalling it.
Cleaning the Focus Lens
n
Gently unscrew the focus lens cover and carefully pull out the focus lens. (see fig.
7-9)
105
Fig. 7-9 Uninstall Focus Lens
n
n
Clean the focus lens and the focus lens cover with cotton swabs and lens cleaner
solution. (see fig. 7-10)
Fig. 7-10 Clean Focus Lens
n
n
n
Be sure to clean both sides of the focus lens.
Use a cotton swab to gently dry the focus lens and focus lens cover.
DO NOT apply any finger pressure or other cleaning solutions to the lens surface.
Motion System Maintenance
In order to keep the motion system running smoothly, check for dirt and debris build up on
the rails after every prolonged usage. You can use a clean sponge or cloth with PS2 grease
to clean the dust piled up in the end of rails (see fig. 7-14). In addition, about every week,
please check if rails become dry or lens carriage moves not so smoothly, and lubricate the
rails with sponge applying with PS2 grease (check Fig. 7-12 and 7-13 to see how to apply
PS2 grease to rails). Then move the lens carriage from left to right along the x rails to
ensure the grease is evenly distributed.
NOTE: 1. Please clean the rails with PS2 grease each time after laser engraving or cutting
working piece which would produce much dirt and debris easily such as wood.
2. Please keep from hand touching or water with the groove of rails.
106
3. You can purchase PS2 grease from NSK dealers. Please surf
http://www.nsk.com/eng/company/network/index.html to find the local dealer’s
information.
Fig. 7-11 PS2 grease
Clean the opposite
side too.
Fig. 7-12 Rails Maintenance
Lubricate the groove of
rails with PS2 grease.
107
Clean the groove of
rails.
Fig. 7-13 How to Lubricate the Axis
Clean the dust piled up
in the end of groove on
rails.
Fig. 7-14 Rail Dust Cleaning
108
CHAPTER VIII. TROUBLE SHOOTING
Trouble Shooting
Proper care and maintenance should prevent most problems from happening. If your
machine is not functioning properly, use the following Trouble Shooting guide to diagnose
and find solutions to, common minor problems that may occur.
NOTE: If you can not easily find the source of your machine’s problems, or successf ully
administer the corrective measures, please contact your EXPLORER distributor or service
representative for immediate assistance.
NOTE: Unplug the machine before examining the mirrors, lens, motion system or any other
part of the laser system.
Common Problems
The following are the three most common problems which may affect the performance of
the EXPLORER. The need for cleaning and improper reinstallation after cleaning can
account for both laser and motion system problems:
1. The focus lens is not properly installed or loose in the holder.
2. Debris or dust has built up in the bearing tracks or X-Axis rails.
3. The focus lens and the mirror in the carriage are damaged or need cleaning.
Other Problems
Use the following tips if you are having pr oblems which are specifically affecting the laser
beam, the Auto-focus pin, or are getting a “graphic was clipped” message on your
computer screen when engraving.
Laser Beam Does Not Generate
n
n
n
n
n
n
n
If the red beam does not show, the laser beam is misaligned. Adjust the reflection
mirrors for exact focus.
If the red beam shows , the laser power may be too low to be detected. Increase the
percentage of laser power from the Explorer driver.
Check to see if the laser power connector is loose.
For safety reasons, the laser beam will not be generated when the top or front
cover is opened, unless you shorten the connector of the magnetic switches.
109
n
Check the all the fans around the laser tube and see they work nor mally. If laser
tube is overheated, laser beam will shut down automatically.
“Graphic Was Clipped… ” Message
n
n
n
n
n
The size or location of graphic image may be bigger or beyond legal working area.
Do not place graphic object, especially vectors, right from (3,0) origin position, or
0 at either x or y rail of working area on application software, Corel Draw for
instance, even vector line’s width has been set to the thinnest. Because at thinnest
line width, it still goes beyond the boarder and causes the error.
If the message appears randomly but frequently even image object is smaller or
within the legal boarder, check or change DRAM module, a bad contact or faulty
DRAM could cause such error.
n
Auto Focus Pin is Not Functioning
n
The focus pin could be stocked by greasy residue that coats on it. Clean the probe
with alcohol or acetone.
n
Check the cable of focus pin, there might be a bad contact or breakage.
110
Appendix
GLOSSARY
Color Fill – Term within the awards and engraving industry used to describe the variety of
techniques used to add color or contrast to engraving.
DPI – Dots Per Inch or Pixels Per Inch. The resolution of an image as defined by the
amount of dots/pixels included in an inch. The DPI setting of 500, will include tell the
machine to include 500 laser firings within an inch.
Driver – A software program that allows the computer to communicate with its components
and peripherals: printers, scanners, monitors, etc.
Error Diffusion (Dithering Method) - This effect uses a series of random black and white
pixels to represent shading.
Firmware – Programming permanently set into a computer’s ROM chips. This information
is burned into the computer chips and can only be changed by replacing the chips, or in the
case of EEROM, by special procedure.
Parallel Cable – The cable connection between the computer and another device (usually
the printer). This allows the computer to send several bits of data simultaneously.
Parallel Port – An outlet on your computer or electronic device that allows the computer
and device to be connected and share inf ormation simultaneously. Another common name
for the parallel port is the LPT port.
PPI – Pulses Per Inch. PPI determines the gross amount of laser pulses there will be per
linear inch. PPI is exclusively for the vector setting. A PPI setting of 500 results in the
laser firing every .002” (500 times per inch). If the standard lens is producing a vector laser
focal point of .007”, then higher PPI settings will result in deeper, overlapping laser pulses.
PPI settings lower than 150 will result in the individual laser pulses being spread far apart,
so they will not touch each other. Low PPI settings are a good example of perforate paper.
Raster – The process of rendering a cutting or engraving by multiple horizontal lines. For
example: when cutting out or engraving a square, the raster setting will make the laser use
numerous horizontal lines to fill in the outlined space.
Raster Image – An image that is defined as a collection of arranged pixels in a rectangular
array of lines. A raster image is similar to a “Bitmap” graphics image.
Raster Line – A raster line is the individual horizontal line that makes up the raster image.
111
Serial Communication – An interface between a computer and one of its devices that
transfers one bit of data at a time.
Serial Port – A connection that allows a computer to send data to a peripheral device one
bit at a time. Usually a COM port that meets the RS232C specification.
Vector – The process of cutting or engraving an image by using single horizontal, vertical
and curved lines. For example: when cutting out or engraving the outline of a square, the
vector setting will make the laser use a thin single line to follow the outline of the shape.
112
LaserPro EXPLORER Specification
Explorer
E-30 E-35 E-40 E-45 E-60 E-75 E-100 E-120
30W 35W 40W 45W 60W 75W 100W 120W
Laser Source
Sealed Air Cooled CO 2 Laser
Work Area
32" X 20" (812mm x 508mm)
all doors closed 40.5" X 22.8" X 6.5" (1030mm X 580mm X 165mm)
Max. Working Piece all doors open 39" X ∞ X 6.3" ( 990mm X ∞ X 160mm)
Table Size
40.5" X 22.8" (1030mm X 580mm)
Overall Dimensions
50.4" X 28.5" X 38.5" ( 1280mm X 725mm X 980mm)
Drive
DC Servo control
Available from 0.1~100% of 80ips with up to 16 colors
Speed Control
linked speed setting per job
Available from 0.1~100% and 16 colors linked power
Power Control
setting per job
Z Axis Moving
Automatic
Resolution (DPI)
Available 125, 250, 300, 380, 500, 600, 750, 1000
Computer Interface
Standard print port and USB port
Memory Buffer
32MB standard and upgrade to 64MB
Standard 2.0" focal lens in enclosed lens carriage;
Lens
optional lenses available. (1.5", 2.5", 4.0")
Display Panel
Graphic LCD display
Safety
Class IIIa for red pointer
Facility Requirements
Electricity
100~240VAC auto switch 200~240V
Power Consumption
1100W
2000W
3000W
Exhaust System
External exhaust system is required
Optional
Rotary Attachment
Honeycomb Table
SmartGUARD Fire Alarm
Above specification is subject to change without prior notice.
Table 4 Explorer Specification
113
3D engraving / Material: 1cm Acrylic
Step Speed
25%
1
25%
2
100%
3
0.2%
4
Power
100%
100%
100%
100%
DPI
600
600
600
500
by Mercury 25W
PPI
Focus
auto
Auto Focus
auto Lower down table 2.5mm
800 Lower table again 2 mm
auto Move table up 1.3mm
3D engraving / Material: 1cm Acrylic
Step Speed
13%
1
13%
2
100%
3
0.1%
4
Power
100%
100%
100%
100%
DPI
600
600
600
500
Remarks
3D Mode Engraving
3D Mode Engraving
Black and White Mode Polishing
Cutting off
by Venus 12W
PPI
Focus
auto
Auto Focus
auto Lower down table 2.5mm
800 Lower table again 2 mm
auto Move table up 1.3mm
Lens: 2 inch
Lens: 1.5 inch
Remarks
3D Mode Engraving
3D Mode Engraving
Black and White Mode Polishing
Cutting off
3D engraving / Material : 1 cm Acrylic by Explorer 60W Lens: 2”
Step Speed
Power DPI PPI
Focus
Remarks
13%
100% 1000 auto
Auto Focus
3D Mode Engraving
1
13%
100% 1000 auto Lower down table 2.5mm 3D Mode Engraving
2
114