1
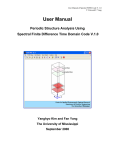
VERSAT - S2D & VERSAT - D2D Version 2012.09 STATIC AND DYNAMIC 2-DIMENSIONAL FINITE ELEMENT ANALYSIS OF CONTINUA - USING WINDOWS XP, VISTA & WINDOWS 7 Volume 2: USER MANUAL RELEASE 2001 © 1998-2012 Dr. G. WU © 1998-2012 Wutec Geotechnical International, B.C., Canada Website: http://www.wutecgeo.com VERSAT-S2D and VERSAT-D2D Version 2012.09 Page I ____________________________________________________________________________________________________ LIMITATION OF LIABILITY The following terms and conditions with regard to limitation of liability must be accepted to proceed with the use of VERSAT-2D. ______________________________________________________________________________ Wutec Geotechnical International, Canada (www.wutecgeo.com) VERSAT-S2D and VERSAT-D2D Version 2012.09 Page II ____________________________________________________________________________________________________ TABLE OF CONTENTS Page LIMITATION OF LIABILITY ............................................................................................................................................... I 1. INTRODUCTION ............................................................................................................................................................. 1 2. PREPARING DATA FOR A NEW PROBLEM............................................................................................................. 4 2.1. 2.2. 2.3. 2.4. 2.5. 2.6. 3. SETUP A STATIC ANALYSIS ...................................................................................................................................... 21 3.1. 3.2. 3.3. 3.4. 4. TURN ON DYNAMIC .................................................................................................................................................... 29 KEY PARAMETERS FOR A DYNAMIC ANALYSIS .......................................................................................................... 29 SETUP A DYNAMIC ANALYSIS .................................................................................................................................... 29 ASSIGN BOUNDARY CONDITIONS FOR DYNAMIC ANALYSIS ....................................................................................... 34 DEFINE SOIL AND STRUCTURE PARAMETERS FOR A DYNAMIC ANALYSIS .................................................................. 35 SAVE DATA AND START A DYNAMIC ANALYSIS ........................................................................................................ 36 DYNAMIC ANALYSIS OF ONE DIMENSIONAL SOIL COLUMN ....................................................................................... 37 INTERPRETING RESULTS OF A STATIC ANALYSIS .......................................................................................... 38 5.1. 5.2. 6. FIRST STATIC RUN – RUN 1 ........................................................................................................................................ 21 DEFINE SOIL AND STRUCTURE PARAMETERS ............................................................................................................. 25 SECOND AND MORE STATIC RUNS.............................................................................................................................. 26 SAVE DATA AND START A STATIC ANALYSIS ............................................................................................................ 28 SETUP A DYNAMIC ANALYSIS ................................................................................................................................. 29 4.1. 4.2. 4.3. 4.4. 4.5. 4.6. 4.7. 5. CREATE A SETTING FILE FOR MODEL SCALE, AXIS SCALE AND OTHERS ..................................................................... 4 CREATE A FINITE ELEMENT MESH................................................................................................................................ 5 SET BOUNDARY CONDITIONS ..................................................................................................................................... 14 APPLY DISTRIBUTED LOADS....................................................................................................................................... 16 ASSIGN SOIL ZONES ................................................................................................................................................... 18 SPECIAL ITEMS FOR MODEL CONSTRUCTION .............................................................................................................. 20 OUTPUT QUANTITIES .................................................................................................................................................. 38 DISPLAY RESULTS OF A STATIC ANALYSIS USING THE PROCESSOR ........................................................................... 39 INTERPRETING RESULTS OF A DYNAMIC ANALYSIS ..................................................................................... 40 6.1. 6.2. 6.3. 6.4. OUTPUT QUANTITIES .................................................................................................................................................. 40 DISPLAY RESULTS OF A DYNAMIC ANALYSIS USING THE PROCESSOR ....................................................................... 41 RETRIEVING TIME-HISTORY RESPONSE ...................................................................................................................... 41 REGARDING NODAL RESPONSE FOR OUTCROPPING VELOCITY OPTION...................................................................... 41 ______________________________________________________________________________ Wutec Geotechnical International, Canada (www.wutecgeo.com) VERSAT-S2D and VERSAT-D2D Version 2012.09 Introduction 1. Page 1 INTRODUCTION VERSAT-2D is a software package consisting of three computer programs, namely, VERSAT2D Processor (the Processor), VERSAT-S2D and VERSAT-D2D. It is noted that these three components of VERSAT-2D function independently. Interactions among them take place through data files saved in a Windows Explorer file folder. A brief description for each program is provided below. VERSAT-2D Processor (the Processor) is a Windows based graphic interface program. It serves as a pre and post processor for VERSAT-S2D and VERSAT-D2D. The program is used to generate a finite element mesh, define soil zones, assign material properties, define boundary conditions, assign pressure loads, and generate input data for VERSAT-S2D & VERSAT-D2D. The program can also display and plot results from analyses such as stresses, displacements, accelerations, pore-water pressures, and a deformed mesh. VERSAT-S2D is a computer program for static 2D plane-strain finite element analyses of stresses, deformations, and soil-structure interactions. The static analyses can be conducted using stress-strain constitutive relationships from linear elastic model to elasto-plastic models, i.e., Mohr-Coulomb model and Von-Mises model. This program can also be used to compute or determine static pre-existing stresses for use in a subsequent dynamic finite element analysis. Main features of VERSAT-S2D are: Linear elastic model Von-Mises model Mohr-Coulomb model Stress level dependent stiffness parameters External load applications Staged construction by adding layers Staged excavation by removing layers Pore water pressure application Calculation of stresses and deformations caused by strain-softening of soils Simulation of sheet pile wall and anchors Updated Lagrangian analysis Factors of safety calculation Gravity on and off Calculation of pre-existing stresses for use in a dynamic analysis using VERSAT-D2D ______________________________________________________________________________ Wutec Geotechnical International, Canada (www.wutecgeo.com) VERSAT-S2D and VERSAT-D2D Version 2012.09 Introduction 4-node, 6-node and 8-node solid elements to represent soils 2-node line elements to represent sheet pile walls (beam) or anchors (bar/truss) Use of any consistent units and sign conventions Page 2 VERSAT-D2D is a computer program for dynamic 2D plane-strain finite element analyses of earth structures subjected to dynamic loads from earthquakes, machine vibration, waves or ice actions. The dynamic analyses can be conducted using linear, or nonlinear, or nonlinear effective stress method of analysis. The program can be used to study soil liquefaction, earthquake induced deformation and dynamic soil-structure interaction such as pile-supported bridges. Main features of VERSAT-D2D are: Application of horizontal, or horizontal and vertical, ground accelerations at a rigid base Application of horizontal outcropping ground velocities at a viscous/elastic base Application of a load-time-history at any nodal points Global force equilibrium enforced at all time Linear elastic model Non-linear hyperbolic stress-strain model for sand Non-linear hyperbolic stress-strain model for clay Stress level dependent stiffness parameters Effective stress model including dynamic pore water pressure Three models for computing dynamic pore water pressure Strain-softening but dilative silt model Mohr-Coulomb failure criterion Modified stiffness parameters by dynamic pore water pressure Calculation of ground deformations caused by soil liquefaction Calculation of factor of safety against liquefaction Simulation of sheet pile wall and anchors Updated Lagrangian analysis Gravity on and off Free-field stress boundary 4-node solid elements to represent soils 2-node line elements to represent sheet pile walls (beam) or anchors (bar/truss) Use of any consistent units and sign conventions ______________________________________________________________________________ Wutec Geotechnical International, Canada (www.wutecgeo.com) VERSAT-S2D and VERSAT-D2D Version 2012.09 Introduction Page 3 FLOW CHART TO ILLUSTRATE TYPICAL STEPS IN A DYNAMIC ANALYSIS: Step 1: VERSAT-2D Processor Generate a finite element mesh (2D) Define soil zones and material parameters Define structural elements and parameters Define boundary conditions, apply pressure loads Generate input data for VERSAT-S2D or VERSAT-D2D Step 2: VERSAT-S2D Conduct static stress analyses Conduct static deformation analyses Conduct static pore water pressure applications Conduct static soil-structure interaction analyses Determine pre-existing stresses Step 3: VERSAT–D2D Conduct dynamic linear analyses with or without gravity Conduct dynamic nonlinear analyses of earth structures subjected to dynamic loads from earthquakes, machine vibration, waves or ice actions Conduct dynamic nonlinear effective stresses analyses to determine soil liquefaction and earthquake induced deformations Conduct dynamic analyses of soil-structure interaction such as pilesupported bridges Step 4: VERSAT-2D Processor View and print finite element mesh including node, element numbers View and print soil material zones (Color printer required) View and print analysis results of stresses or displacements View and print acceleration values, if applicable View and print analysis results of shear strain or pore water pressure View and print deformed mesh Save graphics as image files (.emf, or .gif, or .jpeg etc) ______________________________________________________________________________ Wutec Geotechnical International, Canada (www.wutecgeo.com) VERSAT-S2D and VERSAT-D2D Version 2012.09: Users Manual page 4 2. PREPARING DATA FOR A NEW PROBLEM 2.1. Create a Setting File for Model Scale, Axis Scale and Others 1. The model scale (problem extent) and axis details (axis extent) are defined using ‘Set scale’ under SETTING. The Processor window only shows the part of a model within the X and Y extent defined herein. 2. The defined model scale and axis details are saved using ‘Save Setting’ under SETTING. A setting file can be retrieved next time using ‘Load Setting’ under SETTING. A setting file has a file type (extension) of log. 3. In addition to the Problem Extent and Axis Extent, a setting file also saves the following: a. Font size of text and numbers (node and element etc) shown on the model b. Position, font size and content of all texts added through using ‘Draw text’ command under TOOLS. Note: Setting file is a text file. Therefore, all items in a setting file (font sizes, text position, color ranges, etc) can be edited outside the Processor and then re-loaded into the Processor to take effect. 4. The x-multiplier and y-multiplier is used to scale up or scale down a model by multiplying the X and Y coordinates by x-multiplier and y-multiplier, respectively. For examples, the multipliers can be used to convert the model between different units. Normally they are kept as one. ______________________________________________________________________________ Wutec Geotechnical International, Canada (www.wutecgeo.com) VERSAT-S2D and VERSAT-D2D Version 2012.09: Users Manual page 5 2.2. Create a Finite Element Mesh The following commands may be used in creating a finite element mesh: Select ‘New’ under FILE to start a new problem. Use ‘Finite element node/grid points’ under DEFINE to pre-define the four nodes with their exact X and Y coordinates. Choose ‘Draw finite element grid’ under TOOLS to create finite elements. Enter number of elements for each grid side and press OK. Then click on screen for 1st, 2nd, 3rd, and 4th nodes that form the finite element grid. Use ‘Draw line’ under TOOLS to create a boundary within a finite element mesh. It is required to organize the mesh after this modification. Choose ‘Cut/remove finite elements’ under TOOLS to remove finite elements that are not needed. Then click on screen to select four points. The nodes and elements within a block enclosed by the four points will be removed. It is required to organize the mesh after this modification. To organize a modified mesh: choose ‘Clear duplicate nodes/elements’ under MODIFY, then perform ‘Sort node(..)/element(..)’ under MODIFY. This process renumbers nodes and elements of the model. If needed, use ‘Finite element node/grid points’ under DEFINE to change X and/or Y coordinates of a node. If needed, use ‘move grid line’ under TOOLS to move a grid line within a finite element mesh. An example for creating a finite element mesh follows: [Very important notes: During the course of mesh construction, it is recommended that data be saved, using ‘Save Data’ under FILE, as frequently as possible. You may find it necessary to save data, from various stages in a mesh construction, using different names such as con1, con2, con3, con4, etc., because the Processor does not provide “undo” functions.] ______________________________________________________________________________ Wutec Geotechnical International, Canada (www.wutecgeo.com) VERSAT-S2D and VERSAT-D2D Version 2012.09: Users Manual page 6 Step 1 Use ‘Finite element node/grid points’ under DEFINE to pre-define four nodes Step 2 Use ‘Draw finite element grid’ under TOOLS to create a 10x10 finite element grid ______________________________________________________________________________ Wutec Geotechnical International, Canada (www.wutecgeo.com) VERSAT-S2D and VERSAT-D2D Version 2012.09: Users Manual page 7 Step 3 OK and then click on nodes 1, 3, 4 and 2 to create a 10x10 grid Step 4 Use ‘Clear duplicate nodes/elements’ then ‘Sort node(..)/element(..)’ under MODIFY to re-organize the mesh ______________________________________________________________________________ Wutec Geotechnical International, Canada (www.wutecgeo.com) VERSAT-S2D and VERSAT-D2D Version 2012.09: Users Manual page 8 Step 5 Add more nodes using ‘Finite element node/grid points’ under DEFINE ______________________________________________________________________________ Wutec Geotechnical International, Canada (www.wutecgeo.com) VERSAT-S2D and VERSAT-D2D Version 2012.09: Users Manual page 9 Step 6 OK to show nodes 122 and 123 Step 7 Use ‘Draw finite element grid’ under TOOLS to create a 4x10 finite element grid ______________________________________________________________________________ Wutec Geotechnical International, Canada (www.wutecgeo.com) VERSAT-S2D and VERSAT-D2D Version 2012.09: Users Manual page 10 Step 8 OK and then click on nodes 111,122, 123 and 121 to create a 4x10 grid Step 9 Use ‘Clear duplicate nodes/elements’ then ‘Sort node(..)/element(..)’ under MODIFY to re-organize the mesh Note: Suggest saving the data as demo1.sta ______________________________________________________________________________ Wutec Geotechnical International, Canada (www.wutecgeo.com) VERSAT-S2D and VERSAT-D2D Version 2012.09: Users Manual page 11 Step 10 Choose ‘Draw line’ under TOOLS then click on Node 5 and Node 121 Step 11 Choose ‘Cut/remove finite elements’ under TOOLS then click four points ______________________________________________________________________________ Wutec Geotechnical International, Canada (www.wutecgeo.com) VERSAT-S2D and VERSAT-D2D Version 2012.09: Users Manual page 12 Step 12 Use ‘Clear duplicate nodes/elements’ then ‘Sort node(..)/element(..)’ under MODIFY Step 13 Use ‘Finite element node/grid points’ under DEFINE to adjust X and Y coordinates of node 12 and node 50 ______________________________________________________________________________ Wutec Geotechnical International, Canada (www.wutecgeo.com) VERSAT-S2D and VERSAT-D2D Version 2012.09: Users Manual page 13 Step 14 Perform ‘Clear duplicate nodes/elements’ then ‘Sort node(..)/element(..)’ under MODIFY Notes: Suggest saving the data as demo2.sta The purpose of adjusting coordinates of node 12 and 50 (shown in Step 12) is to reduce the band width of the model. This is done by relocating node 12 and node 50 so their Xcoordinates are equal to or greater than those of node 17 and node 58 (also shown in Step 12), respectively. The model after the node adjustment is shown in Step 14. This process reduces the maximum node difference in the model from 18 to 12. This kind of node adjustment may reduce a problem size to half. As an example, a finite element grid of 6000 elements (120 × 50) should have a band width of approximately 100 and a problem size of approximately 12,000,000. However, the problem size could be doubled when the band width is 200 due to inadequate node numbering. As a result, computing time in a dynamic time history analysis may be increased from 4 hours to 8 hours for one analysis. ______________________________________________________________________________ Wutec Geotechnical International, Canada (www.wutecgeo.com) VERSAT-S2D and VERSAT-D2D Version 2012.09: Users Manual page 14 2.3. Set Boundary Conditions Continue on the example: Step 1: Choose ‘free all boundary’ under MODIFY Step 2: Choose ‘assign boundary conditions’ under TOOLS to define boundary conditions. For left boundary, click node 2 and 5. For the bottom, click node 1 and 124. For right boundary, click node 125 and 134 and then assign boundary code as appropriate. All nodes on the segment within the two points will be assigned to a specified boundary condition. ______________________________________________________________________________ Wutec Geotechnical International, Canada (www.wutecgeo.com) VERSAT-S2D and VERSAT-D2D Version 2012.09: Users Manual page 15 Step 3: Choose ‘model view options’ under VIEW Check “show boundary condition” Check “Show x, y axis” Uncheck all others Click OK Note: The boundary conditions of the model are shown above in red (solid circle = fixed/zero displacement in X and Y directions; vertical line=free vertical displacement; horizontal line=free horizontal displacement). ______________________________________________________________________________ Wutec Geotechnical International, Canada (www.wutecgeo.com) VERSAT-S2D and VERSAT-D2D Version 2012.09: Users Manual page 16 2.4. Apply Distributed Loads This command is used to apply uniform or non-uniform distributed loads on a surface, such as structural loads on a footing and water pressures on a submerged surface. Continue on the example: Step 1: Bring back the model with node numbers [i.e., check “show node numbers”]; then choose ‘apply distributed load’ under TOOLS, click nodes 90 and 134 Step 2: Enter ‘pressure/shear intensity’ at the 1st and 2nd nodes [40 and 20 respectively], then enter ‘inclination angle’ of the pressure [0° for pressure normal to the surface]. Note: Use an inclination angle of 90° if pressure is parallel to the surface. The pressure intensity between the two nodes is computed by linear interpolation. ______________________________________________________________________________ Wutec Geotechnical International, Canada (www.wutecgeo.com) VERSAT-S2D and VERSAT-D2D Version 2012.09: Users Manual page 17 Step 3: Choose ‘model view options’ under VIEW check “show load vectors” check “show x, y axis” uncheck all others and click OK Note: Force vectors are shown in red lines, starting from the nodal points. Step 4: Choose “setup static analysis/setup window” under DEFINE. The forces/loads on nodes 90, 101, 112, 123 and 134 are calculated by the program and shown in this window for review [click “Exit Setup” to close this window]. ______________________________________________________________________________ Wutec Geotechnical International, Canada (www.wutecgeo.com) VERSAT-S2D and VERSAT-D2D Version 2012.09: Users Manual page 18 2.5. Assign Soil Zones Continue on the example: Step 1: Bring back the model with node numbers [i.e., check “show node numbers”]; then choose ‘assign soil zones’ under TOOLS. Click four points as shown below. Step 2: Enter soil material number in the Input Box [1 for soil zone 1] and click OK. Elements inside the area bounded by the four points are assigned to Material #1. ______________________________________________________________________________ Wutec Geotechnical International, Canada (www.wutecgeo.com) VERSAT-S2D and VERSAT-D2D Version 2012.09: Users Manual page 19 Step 3: Repeat above steps but assign Material #2 to the red zone shown in the next figure Step 4: Choose ‘model view options’ under VIEW check “show element number” check “show x, y axis” check “show material color” uncheck all others click OK Notes: Suggest saving the data as demo3.sta The color codes for material zones are always the same as follow: Yellow for Material #1; Red for Material #2; Blue for Material #3 Green for Material #4 Orange for Material #5 Dark blue for Material #6 Brown for Material #7 and more ______________________________________________________________________________ Wutec Geotechnical International, Canada (www.wutecgeo.com) VERSAT-S2D and VERSAT-D2D Version 2012.09: Users Manual page 20 2.6. Special Items for Model Construction 1. Define beam or truss elements: choose ‘Assign beam/bar elements’ under TOOLS, then click on screen to select two nodal points. This action does not add nodes, but add elements. All nodal points on the line segment within the two nodes are assigned as beam or bending elements when the “beam” option is chosen so, or One truss element is added to the model to connect the two nodes when the “truss” option is chosen. Nodes on a beam element are assigned rotational degree-of-freedom in addition to the two translational degree-of-freedoms, as shown in blue circles. It is recommended that this action be performed at the end of a mesh construction. Note: This figure on beam element is shown for display only. The beam elements are not included in the example that is presented earlier and later. 2. Computer loads from water pressure: choose “Verify or use water loads from ywt0” under TOOLS. This option allows that water loads on a submerged ground surface be calculated by the program automatically using a defined water level of “ywt0”, such as in a reservoir. This parameter “ywt0” is specified in a setup window in Figure 3.1 (Section 3.1 bulletin 7) for a static analysis and in Figure 4.1 (Section 4.3 bulletin 9) for a dynamic analysis. More detailed instructions regarding its usage are provided in the Processor when the option is invoked. ______________________________________________________________________________ Wutec Geotechnical International, Canada (www.wutecgeo.com) VERSAT-S2D and VERSAT-D2D Version 2012.09: Users Manual page 21 3. SETUP A STATIC ANALYSIS 3.1. First Static Run – Run 1 A static analysis is setup using DEFINE. parameters that control the analysis including Choose ‘General parameters’ to define key An option for gravity ON [default] or OFF constants of gravity acceleration, unit weight of water and atmospheric pressure an option of linear or nonlinear [default] static analysis, and an option for small strain [default] or large strain (updating mesh) The default constants are for metric units. Choose ‘Setup static analysis’ and then ‘Setup Window’ to start a setup window as shown in Figure 3-1. An input file for a static analysis can contain one or multiple static runs. The first of these static runs is called “Run 1”. A static run may include one or a combination of the following parameters or load applications: 1. Add Soil Layers [add gravity force]: A static run can start with NPRE elements that already have stresses [default NPRE=0]. Gravity forces have already been applied to these [NPRE] elements having stresses. A sub window “Apply No of Elements in a Layer” is used to add one layer or multiple layers of elements to NPRE to which gravity forces are applied. A static run can contain multiple load applications, i.e., multiple layers. Gravity is applied or turned on layer by layer, but one layer each time. Assuming the number of elements in the layer is NADD, the total number of elements included in this load application should be NPREupdated[=NPRE+NADD]. All other elements with an element number greater than NPREupdated are automatically excluded in this load application. At the end of this load application, elements in this layer are then included in NPRE elements (i.e., elements having stresses) and NPRE is increased automatically. A static run can also contain no layer of elements to be added to NPRE. In this case, gravity forces are applied to all elements in the model and NPRE is deemed to be equal to the total number of elements of the model. Thus, the sub window “Apply No of Elements in a Layer” is left blank. In addition to being used in “Run 1”, this load application “Add Soil Layers” can also be used in subsequent static runs until the updated NPRE reaches the total number of elements of the model. This load application “Add Soil Layers” is void when the option for gravity is set OFF. ______________________________________________________________________________ Wutec Geotechnical International, Canada (www.wutecgeo.com) VERSAT-S2D and VERSAT-D2D Version 2012.09: Users Manual page 22 2. Apply a Water Table: A water table or a piezometric surface is defined in a sub window “Applying a Water Table”. Points are added manually by clicking the “Add” button and entering X and Y coordinate of a point. A water table connects all points in the sub window consecutively. A water table or a piezometric surface, once defined, will remain unchanged until they are replaced/updated by another one defined in a subsequent static run. Note: Choose ‘define water level or pore pressures’ under TOOLS to: (1) compute pore water pressures from a pre-defined water level, or (2) assign constant pore water pressures or pore pressure ratios within a soil zone [see Volume I: Technical Manual for details of applications]. Detailed instructions are provided in the Processor when this operation is invoked. This window may be left blank if a water table does not exist. LWSTEP=1 should be used 3. Apply nodal forces or loads: In addition to using ‘Apply distributed load’ under TOOLS as described in Section 2.4, individual loads can also be added or edited in a sub window “Applying Nodal Forces or Loads”. Loads should not be applied to elements that are not included in the current model as defined by NPREupdated LSTEP=1 should be used. 4. Perform Excavation: This is a reverse process of adding soil layers described above. The option in the sub window “Performing Excavation?” is set to YES. The number of elements to be excavated or removed (NEXC) is entered in the sub window “Apply No of Elements in a Layer”. Only one layer of elements should be defined in this sub window. Multiple layers of elements should not be used for this application. The element number of these NEXC elements is entered in the sub window “Performing Excavation?” 5. Modify Material Parameters One set of material parameters are used for one static run. A set of material parameters will remain unchanged and effective until they are replaced/updated by another set of parameters defined in a subsequent static run When initiating a new static run, a user has the option to define a new set of parameters which can be modified from the current set of parameters. Modifying soil parameters from strong to weak such as strength reduction due to soil liquefaction can cause deformations in sloped grounds. ______________________________________________________________________________ Wutec Geotechnical International, Canada (www.wutecgeo.com) VERSAT-S2D and VERSAT-D2D Version 2012.09: Users Manual page 23 6. Review maximum no. of iterations (ITERMX): A static load application terminates when ITERMX is reached or the requirement for “allowed unbalanced force…” is satisfied. 7. Review the water level parameter “ywt0” [default=0 for function not used]: For static runs, this parameter is applied only when the “large-strain” option is chosen for the analysis (see Section 4.3 bulletin 9 for more details on its usage). Continue on the example in Step 4 of Section 2.5: Start “Setup static analysis” and ‘Setup Window’ Delete the nodal forces within the sub window “Applying Nodal Forces or Loads”. They are added later in static Run 2. Click “Add a layer” in sub window “Apply No of Elements in a Layer”, add two new layers with 28 elements each. Click “Apply” and “Exit Setup” Figure 3.1 A static setup window ______________________________________________________________________________ Wutec Geotechnical International, Canada (www.wutecgeo.com) VERSAT-S2D and VERSAT-D2D Version 2012.09: Users Manual page 24 Choose ‘model view options’ under VIEW check “show element number” check “show x, y axis” check “show layers by color” uncheck all others click OK Figure 3.2 A window showing layers in color ______________________________________________________________________________ Wutec Geotechnical International, Canada (www.wutecgeo.com) VERSAT-S2D and VERSAT-D2D Version 2012.09: Users Manual page 25 3.2. Define Soil and Structure Parameters Continue on the example: Choose ‘Input material parameters’ under DEFINE Enter “1” in material number box Select “Sand” in the sub window “Select a Material Type” Edit the parameter boxes as needed [default values are shown herein] Click “Add/modify a material” button Enter “2” in material number box Select “Clay” in the sub window “Select a Material Type” Edit the parameter boxes as needed [default values are shown herein] Click again “Add/modify a material” button Click “APPLY ALL” button to save and exit this window. Figure 3.3 A window showing material parameters defined in Run 1 ______________________________________________________________________________ Wutec Geotechnical International, Canada (www.wutecgeo.com) VERSAT-S2D and VERSAT-D2D Version 2012.09: Users Manual page 26 3.3. Second and More Static Runs A new static run is normally required when nodal loads, or the water table, or soil properties are changed. These quantities are unchangeable within a static run. Continue on the example to setup a second static run – Run 2: Start “Setup static analysis” and ‘Setup Window’ again. Press “NEW RUN” button and “YES” to initiate a new static run “Copy Soil Parameters from RUN 1?” and “No” to not redefine soil parameters. If changes on parameters are required, then answer “YES” to copy and modify. Click “Add a layer” in the sub window “Apply No of Elements in a Layer”, add one new layer with 59 elements as shown in Figure 3.4 Figure 3.4 A static setup window for Run 2 ______________________________________________________________________________ Wutec Geotechnical International, Canada (www.wutecgeo.com) VERSAT-S2D and VERSAT-D2D Version 2012.09: Users Manual page 27 Click “Add” in the sub window “Apply a Water Table”, add two points to define a water table as shown in Figure 3.4. Click “Apply” and then “Exit Setup”. Follow steps in Section 2.4 to apply non-uniform distributed loads on the surface from node 90 to node 134 [Section 2.4 is there for instruction purpose]. Go back to “Setup static analysis” and ‘Setup Window’ again. The window as shown in Figure 3.4 should contain the loads for nodes 90, 101, 112, 123 and 134. Refresh the model using “Show layers by color” and “Show load vectors” as shown in Figure 3.5 Figure 3.5 A window showing layers and loads for Run 2 Note: A static run can be deleted by pressing the “DELETE LAST” button. Only one static run with the highest run number is deleted at a time. ______________________________________________________________________________ Wutec Geotechnical International, Canada (www.wutecgeo.com) VERSAT-S2D and VERSAT-D2D Version 2012.09: Users Manual page 28 3.4. Save Data and Start A Static Analysis Continue on the example: Save the data as Run2.STA using ‘Save Data’ under FILE. Choose ‘Run versat-s2d’ under RUN Enter the User Name and Password Press “Connect Now’ (see Figure 3.6) Select the input file “run2.sta” to run after an authorization is obtained Figure 3.6 A window showing ‘Run versat-s2d’ under RUN Note: Results of this static run include a file named “run2.pr4”. This file is needed in a subsequent dynamic time-history analysis. An Internet connection is required in order to run any analyses using VERSAT-2D. However, it is not required for data preparation. ______________________________________________________________________________ Wutec Geotechnical International, Canada (www.wutecgeo.com) VERSAT-S2D and VERSAT-D2D Version 2012.09: Users Manual page 29 4. SETUP A DYNAMIC ANALYSIS 4.1. Turn On Dynamic In general, a dynamic analysis can start only when gravity-induced static stresses within a finite element model are determined in a static analysis. As such, the dynamic analysis model can be constructed using the same finite element model as the one used for that static stress analysis. Continue on the example in Section 3 and prepare data for a dynamic run: 1. Restart the Processor 2. Load the setting file (see Section 2.1) using “Load Setting” under SETTING 3. Load the data file “run2.sta” (see Section 3.4) using “Load Data” under FILE 4. Click ‘Dynamic On’ under SETTING and select “Yes” Note: “DYNAMIC ON” should be shown at the bottom of the Processor. 4.2. Key Parameters for a Dynamic Analysis 1. Choose “General parameters” under DEFINE 2. Gravity on/off: On [default] Choose Gravity Off [enter 1 in the box] to run dynamic analysis of a 1D soil column 3. Gravity acceleration: 9.81 m/s2 [default] for metric unit Enter “-9.81” in this box to use a sine input instead of a time-history input. The use of a sine input is demonstrated in an example file called ex_d2.dyn. 4. Method of analysis: non-linear [default] Choose “non-linear effective stress” to include dynamic pore water pressures in the calculation of soil strengths and ground displacements (see Section 3.5 of the Technical Manual for details) 4.3. Setup a Dynamic Analysis Continue on the example and name the input file of the dynamic analysis as “run3.dyn”: 1. Choose ‘Setup dynamic analyses’ to start a setup for dynamic analysis. 2. Enter “115” for NPRE. When the dynamic analysis starts, the program automatically looks for an input file named “run3.prx” to read in the stresses of these “115” elements. It is required that the file “run2.pr4” [see Section 3.4] be renamed manually as “run3.prx” prior to this dynamic analysis. Otherwise, the program stops because of incomplete input files. ______________________________________________________________________________ Wutec Geotechnical International, Canada (www.wutecgeo.com) VERSAT-S2D and VERSAT-D2D Version 2012.09: Users Manual 3. page 30 Select “Hori Base Acceleration” [default] under a sub window “Options for input motions/forces (NBF)”. When the dynamic analysis starts, the program automatically looks for an input file named “run3.ACX” to read in time-history data of accelerations at the rigid base (the input ground motions). It is required that the file “run3.ACX” be created prior to the dynamic analysis. Otherwise, the program stops because of incomplete input files. The data format for “run3.ACX” is shown in the left and lower area of the setup window, as shown in Figure 4.1, where NPOINT is the total number of acceleration data to be used in the analysis, DT is the time interval of the accelerations, FAMPL is a linear scaling factor by which the data are multiplied; and Figure 4.1 A setup window for a dynamic analysis ______________________________________________________________________________ Wutec Geotechnical International, Canada (www.wutecgeo.com) VERSAT-S2D and VERSAT-D2D Version 2012.09: Users Manual page 31 NRVSUB is number of sub time step: 0 for no modification to the ground motion data and time interval provided in the file run3.ACX, 1 for inserting one point, 2 for inserting two points, 3 for inserting three points, and so on, to two consecutive data. All sub time steps are created by linear interpolation of acceleration data and time interval DT. NLINE is number of record lines, and NoPerLine is number of data per record line. Data points must be in CSV format or comma delimited. The data for ground motions are in the same unit as the gravity acceleration [m/s2 for metric unit]. It is also noted: When the option “Hori + Vert Base Accelerations” is chosen, another input file “run3.ACY” is required. This file provides data for vertical ground accelerations at the base of the model. It is noted that the time interval (DT) must be same for “run3.ACX” and “run3.ACY”; otherwise DT from run3.ACX is used for run3.ACY. When the option “Forces at Nodal Points” is chosen, the input force time history is provided in the file “run3.FXY”. When the option “Hori. Outcropping Velocity” is chosen, the input velocity time history is provided in the file “run3.VEX”. The data format is same for “run3.ACY”, or for “run3.ACX”, or for “run3.FXY”, or for “run3.VEX”. Refer to “NicoM_1c.ACX” in the examples library [copy “NicoM_1c.ACX” to “run3.ACX”]. 4. Review, modify as needed, the following parameters: viscous damping (%) of mass [=λm, see Section 3.2 of the Technical Manual, default=0.5] viscous damping (%) of stiffness [=λk, also see Section 3.2, default=2] time interval (s) for saving output [default=100 sec]: All recordable quantities such as accelerations, displacements, shear stress, and pore water pressure are printed at this specified time interval (in sec) in the output file (*.oud) and in the plotting files (*.dis, *.sig). time interval (s) to update viscous damping [default=1.5 sec]: In a nonlinear analysis, the frequencies of the model vary with time of shaking. The viscous damping constants (a, b in Section 3.2 of the Technical Manual) are updated at the specified time interval (in sec). PWP not generated after this time (sec) [default=50 sec]: In a non-linear effective stress analysis and within this specified time of shaking, dynamic pore water pressures are calculated and added to stresses of soil elements and are included in the force equilibrium. Beyond this time, dynamic pore water pressures are kept the same as at this time, i.e., constant with time. Enter a large number (e.g, 999) when this restriction is not required. ______________________________________________________________________________ Wutec Geotechnical International, Canada (www.wutecgeo.com) VERSAT-S2D and VERSAT-D2D Version 2012.09: Users Manual page 32 Static iteration at end of dynamic loads [default=100]: At the end of shaking, static equilibrium analyses are carried out. All quantities related to vibrations such as accelerations and velocities are set to zero in this post-dynamic static analysis. 5. The sub window “To modify” allows changes to List A, C (enabled when the model is subjected to dynamic loads instead of ground shaking, not used in example “run3.dyn”) and D. While the option “List A” is chosen and on, time history response of nodes and elements can be requested through the sub window “List of Nodes/Elements for Time Histories” as follows: Click on “Add an item” and enter “node or element no & response code” Repeat above for each pair of “node or element no & response code” until the required number of response points are entered. Notes: The requested time history data are saved using the file name of the input data and a file extension (or file type) of CSV such as NicoM_1c.csv, run3.csv etc. The time history data are compatible with Microsoft Excel. Response codes for node response are: 1 = X-displacement 2 = X-velocity 3 = X-acceleration 4 = Y-displacement 5 = Y-velocity 6 = Y-acceleration 7 = X-acceleration at the base 8 = Y-acceleration at the base Response codes for element response are: -1 = Stress-X (σx) or bending moment at centre of a beam element -2 = Shear Strain (in %)(γxy) or axial force of a beam/truss element -3 = Shear Stress (τxy) or shear force of a beam element -4 = Pore Pressure Ratio (PPR) or bending moment at J-node of a beam element -5 = Stress-Y (σy) -6 = Normal strain X (in %) (εx) -7 = Normal strain Y (in %) (εy) -8 = Volumetric strain (%) 6. The option “List B” is disabled in Version 2011. 7. While the option “List C” under the sub window “To modify” is chosen and on, location and magnitude of dynamic loads are entered by clicking “Add an item”. The input box requires ______________________________________________________________________________ Wutec Geotechnical International, Canada (www.wutecgeo.com) VERSAT-S2D and VERSAT-D2D Version 2012.09: Users Manual page 33 two parameters: a) nldof = degree-of-freedom number (printed in run3.oug) at which the load is applied, and b). fdof = linear scaling factor for nldof by which the input loads in run3.eq1 are multiplied. This option is not used in this example. 8. While the option “List D” under the sub window “To modify” is chosen and on, a water table can be defined by clicking “Add an item”. A water table already defined in a static analysis is maintained and transferred into a dynamic analysis when “Dynamic On” is turned on. 9. Review the water level parameter “ywt0” [default=0 for function not used]: An input box is located above the “APPLY” button in Figure 4.1. This function is invoked by entering a positive value (commonly the reservoir elevation) in the input box. Be very cautious in initiating this function. Once it is invoked, water loads on all submerged surfaces are automatically computed and updated with time of shaking using Y-coordinate of the deformed surfaces. Its usage is recommended when submerged ground surface is expected to deform under loading or ground shaking. Refer to Section 2.6 bulletin 2 for its verification. ______________________________________________________________________________ Wutec Geotechnical International, Canada (www.wutecgeo.com) VERSAT-S2D and VERSAT-D2D Version 2012.09: Users Manual page 34 4.4. Assign Boundary Conditions for Dynamic Analysis In addition to the boundary conditions used in a static analysis as described in Section 2.3, boundary conditions used in dynamic analysis also include the free-field stress boundary and the viscous boundary. Free-field Stress Boundary The free-field stress boundary is described in Section 3.12 of VERSAT-2D Technical Manual. This boundary condition should only be used in a dynamic analysis and only for side boundaries, and it is assigned by typing boundary code “-1” in the input box in Figure 4.2 (see Section 2.3). Viscous Boundary The viscous boundary must be, and is only, applied when “Hori Outcropping Velocity” is chosen as the option for input ground motion in Figure 4.1. In order to use this option, the finite element model should have a horizontal base with a viscous boundary. The viscous boundary condition is assigned by typing boundary code “-2” in the input box in Figure 4.2 (see Section 2.3). Figure 4.2 A finite element model assigned with free-field stress boundary on the sides and viscous boundary at the base ______________________________________________________________________________ Wutec Geotechnical International, Canada (www.wutecgeo.com) VERSAT-S2D and VERSAT-D2D Version 2012.09: Users Manual page 35 4.5. Define Soil and Structure Parameters for a Dynamic Analysis Continue on the example: 1. choose “Input material parameters” under DEFINE to define material parameters for dynamic analysis as shown in Figure 4.3. 2. Enter “1” in material number box 3. Select “Sand” in the sub window “Select a Material Type”. Note that the sub window “PWP model parameters (DYNAMIC)” is now enabled for PWP model and its parameters. 4. Edit the parameter boxes as needed [default values are shown herein, except Rf=1000] 5. Click “Add/modify a material” button 6. Enter “2” in material number box 7. Select “Clay” in the sub window “Select a Material Type” 8. Edit the parameter boxes as needed [default values are shown herein] 9. Click again “Add/modify a material” button 10. Click “APPLY ALL” button to save and exit this window. Notes: Click on a parameter box in blue to see further explanations on the parameter See Section 3.4 of the Technical Manual for details of Rf See Section 3.5 of the Technical Manual for details of various PWP models. Figure 4.3 A window showing input parameters for a dynamic analysis ______________________________________________________________________________ Wutec Geotechnical International, Canada (www.wutecgeo.com) VERSAT-S2D and VERSAT-D2D Version 2012.09: Users Manual page 36 4.6. Save Data and Start A Dynamic Analysis Continue on the example: Save the data as run3.dyn using ‘Save Data’ under FILE. Choose ‘Run versat-d2d’ under RUN Enter the User Name and Password Press “Connect Now’ Select the input file “run3.dyn” to run after “Successful! Goto STEP 2” in red is obtained as shown in Figure 4.4. Figure 4.4 A window showing a dynamic run in progress ______________________________________________________________________________ Wutec Geotechnical International, Canada (www.wutecgeo.com) VERSAT-S2D and VERSAT-D2D Version 2012.09: Users Manual page 37 4.7. Dynamic Analysis of One Dimensional Soil Column An example of this application is provided in the example library under “example_1D”. 1. Determine static stresses: Static stresses are computed from a static analysis of the one dimensional (1D) soil column. An example 1D soil column is shown in Figure 4.5. For the static analysis, the boundary conditions of nodes along the two sides are “free in vertical displacement”, i.e., boundary fixity = 1 (see Section 2.3). The static stresses are required in order to compute the stiffness and shear strength parameters of the 1D soil column in a dynamic time-history analysis. 2. Follow steps in Sections 4.1 through 4.6 for a dynamic analysis of the 1D soil column with the following special treatments: For the dynamic analysis, the boundary conditions of nodes along the two sides are “free in horizontal displacement”, i.e., boundary fixity = 2 (see Section 2.3). Specify “Gravity OFF” in “General parameters” under DEFINE. Refer Section 4.2 for this option. Figure 4.5 An example 1D soil column showing soil zones, a water table and boundary conditions for a static analysis ______________________________________________________________________________ Wutec Geotechnical International, Canada (www.wutecgeo.com) VERSAT-S2D and VERSAT-D2D Version 2012.09: Users Manual page 38 5. INTERPRETING RESULTS OF A STATIC ANALYSIS 5.1. Output Quantities Now let’s use “ex_d10” from the example library as an example for Sections 5 and 6. The main output file from a static analysis carries an extension of “OUT” such as ex_d10.out. The quantities in the main output file include ‘node disp-x rot. disp-y elem sig-x(mx0) sigy(ta) tau-xy(sh.) gamm_xy%(mi) pp su fos sig-m’. The meanings of these quantities are explained as follows: 1. node: list of node number in this column; 2. disp-x: list of displacement in X-direction (incremental if imsh=0; cumulative if imsh=1). 3. rot.: rotation at this node (applicable for a beam node only); 4. disp-y: list of displacement in Y-direction; 5. elem: list of element number in this column; 6. sig-x(mx0): effective stress in horizontal (X) direction (σx) for a soil element; If this is a beam element, mx0 is the bending moment at the centre of the element; 7. sig-y(ta): effective stress in vertical (Y) direction (σy); If this is a beam element, ta is the axial force in the element; 8. tau-xy(sh.): shear stress in the XOY plane (τxy); If this is a beam element, sh. is the shear force of the element; 9. gamm_xy(%)(mi): shear strain (in percentage) in XOY plane. If this is a beam element, mi is the bending moment at the first node of the element; 10. pp: pore water pressure in the element; 11. su: shear strength; 12. fos: factor of safety against a shear failure; 13. sig-m: effective mean normal stress (σm). To present the results using the Processor, nodal displacements are duplicated in an output file with an extension of “DIS” such as ex_d10.dis, and element quantities are duplicated in an output file with an extension of “SIG” such as ex_d10.sig. The geometry output file carries an extension of “OUG”, such as ex_d10.oug, and contains the geometry input data including node information (X and Y coordinates, degrees of freedom) and element information (node composition, element type, material number, and pore water pressures). ______________________________________________________________________________ Wutec Geotechnical International, Canada (www.wutecgeo.com) VERSAT-S2D and VERSAT-D2D Version 2012.09: Users Manual page 39 The stress output file carries an extension of “PR4”, such as ex_d10.pr4, and contains stresses at every Gauss point of the finite element model including structural elements. The stresses contained in this file are referred as the pre-existing stresses1. In a subsequent static or dynamic analysis, this file should be renamed or copied as an input file with an extension of “PRX”. 5.2. Display Results of a Static Analysis Using the Processor 1. Select FILE and choose LOAD DATA to load an input data file such as ex_d10.sta. 2. Select SETTING and choose LOAD SETTING to load a problem specific setting file such as ex_d10.log. This will allow the geometry of the model to be shown properly on screen. 3. Select FILE and choose LOAD OUTPUT to load the output files containing displacements and stresses such as ex_d10.dis and ex_d10.sig. It is noted that the Processor can only load one set of results (displacements, stresses etc) to display. Therefore, the first set of results must be deleted from a DIS file and a SIG file in order to load the second set of results. Note: The finite element model for ex_d10.sta is shown in Figure 5.1. More details on showing results of analyses are provided in Section 6.2. Figure 5.1 Finite element model showing element number and soil zones for ex_d10.sta 1 In VERSAT-2D static and dynamic analyses, pre-existing stresses are always obtained from an input file with an extension of PRX, which contains model stresses computed from a previous static analysis and saved (in an output file with an extension of PR4) for a subsequent static analysis or for a dynamic analysis. The PR4 file is then renamed as PRX file. ______________________________________________________________________________ Wutec Geotechnical International, Canada (www.wutecgeo.com) VERSAT-S2D and VERSAT-D2D Version 2012.09: Users Manual page 40 6. INTERPRETING RESULTS OF A DYNAMIC ANALYSIS 6.1. Output Quantities The main output file from a dynamic analysis carries an extension of “OUD” such as ex_d10b.oud. The quantities in the main output file include ‘node disp-x disp-y acc-x(g) accy(g) elem sig-x(mx0) sig-y(ta) tauxy(sh.) gamm%(mj) tauxy_dyn/sigv0' vol(%) ppr(FSliq)’. The meanings of these quantities are explained as follows: 1. node: list of node number in this column; 2. disp-x: list of displacement in X-direction (instant at time t; or maximum); 3. disp-y: list of displacement in Y-direction; 4. acce-x: list of acceleration in X-direction (instant at time t; or maximum); 5. acce-y: list of acceleration in Y-direction; 6. elem: list of element number in this column; 7. sig-x(mx0): effective stress in horizontal (X) direction (σx) for a soil element; If this is a beam element, mx0 is the bending moment at the centre of the element; 8. sig-y(ta): effective stress in vertical (Y) direction (σy); If this is a beam element, ta is the axial force in the element; 9. tauxy(sh.): shear stress (including static shear stress) in the XOY plane (τxy); If this is a beam element, sh. is the shear force of the element; 10. gamm%(mj): shear strain (in percentage) in the XOY plane (γxy); If this is a beam element, mj is not defined; 11. tauxy_dyn/sigv0': the ratio of maximum dynamic shear stress (not including static shear stress) over the initial effective vertical stress. 12. vol(%): volumetric strain in percentage (%) caused by dynamic loads; 13. ppr(FSliq): dynamic pore water pressure ratio (PPR) or factor of safety against liquefaction (FSliq). To present the results using the Processor, nodal displacements are duplicated in an output file with an extension of “DIS” such as ex_d10b.dis, and element quantities are duplicated in an output file with an extension of “SIG” such as ex_d10b.sig. The geometry output file carries an extension of “OUG”, such as ex_d10b.oug, and contains the geometry input data including node information (X and Y coordinates, degrees of freedom) and element information (node composition, element type, material number, and pore water pressures). ______________________________________________________________________________ Wutec Geotechnical International, Canada (www.wutecgeo.com) VERSAT-S2D and VERSAT-D2D Version 2012.09: Users Manual page 41 6.2. Display Results of a Dynamic Analysis Using the Processor 1. Select SETTING and choose DYNAMIC ON to turn on dynamic option. 2. Select FILE and choose LOAD DATA to load an input data file such as ex_d10.dyn. 3. Select SETTING and choose LOAD SETTING to load a problem specific setting file such as ex_d10.log. This will allow the geometry of the model to be shown properly on screen. 4. Select FILE and choose LOAD OUTPUT to load the output files containing displacements and stresses such as ex_d10.dis and ex_d10.sig. It is noted that the Processor can only load one set of results (displacements, stresses etc) to display. Therefore, the first set of results must be deleted from a DIS file and a SIG file in order to load the second set of results. 5. Select VIEW and choose “MODEL VIEW OPTIONS” to select the type of information you want to show on screen including node numbers, element numbers, material colors, boundary conditions, displacements, stresses, and others. Notes: An example of ground displacements at the end of shaking is shown in Figure 6.1, using NicoM_1c.dyn as input data. The data entered in the windows in Figure 6.1, such as “Value range for color”, can be saved in a setting file. The setting file can be retrieved later. Details on setting file are provided in Section 2.1. 6.3. Retrieving Time-History Response The time history data are saved in a file with an extension of CSV, such as ex_d10b.csv. Bulletin 5 of Section 4.3 provides details on how to obtain time history data for acceleration and displacement for nodes, and stress, strain and pore water pressure data for elements. 6.4. Regarding Nodal Response for Outcropping Velocity Option When the Outcropping Velocity Option is used, absolute values of displacement and acceleration at all nodes in the finite element model are computed directly by the program, and therefore all reported quantities (including instant values, maximum values and time history data) on displacements and accelerations should be interpreted as absolute values2. 2 When the Acceleration Option is used, the reported quantities on displacements and velocities are relative to the model base. ______________________________________________________________________________ Wutec Geotechnical International, Canada (www.wutecgeo.com) VERSAT-S2D and VERSAT-D2D Version 2012.09: Users Manual page 42 Figure 6.1 Display of horizontal displacements (Disp-x) in color ______________________________________________________________________________ Wutec Geotechnical International, Canada (www.wutecgeo.com) Appendix A Examples for plotting displacements (and others) by values or by color Plotting steps to show disp values: 4. Select “Show by value..” with format “0.00” 1. Load input data (run2.sta); 5. Select a variable (Disp-x) as shown 2. Load output data (run2.dis, *.sig) 6. Press OK 3. Load setting file (setting_gw.log) Plotting steps to show disp by color: 1. Load input data (run2.sta); 2. Load output data (run2.dis, *.sig) 3. Load setting file (setting_gw.log) 4. 5. 6. 7. 8. 9. Select “Show variable by color” Select a variable (Disp-x) as shown Change value ranges as required, Select “Show color legend”, Press OK manually add text indicating disp ranges Plotting steps to show disp by color: 1. Load input data (run2.sta); 2. Load output data (run2.dis, *.sig) 3. Load setting file (setting_gw.log) 4. 5. 6. 7. 8. 9. Select “Show variable by color” Select a variable (Disp-y) as shown Change value ranges as required, Select “Show color legend”, Press OK manually add text indicating disp ranges Plotting steps to show disp by value and by color: 1. Load input data (run2.sta); 2. Load output data (run2.dis, *.sig) 3. Load setting file (setting_gw.log) 4. 5. 6. 7. Select “Show variable by color” Also Select “Show by Value..” Select a variable (Disp-x) as shown Press OK