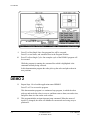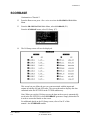
1
ER-SIMULATION
Robotic Simulation Software for
SCORBOT-ER III
USER’S MANUAL
Catalog No.100055 Rev.D
Copyright ©1993–1999 by Eshed Robotec (1982) Limited
Catalog #100055 Rev.D
March 1999 PDF version
Every effort has been made to make this book as complete and accurate as
possible. However, no warranty of suitability, purpose, or fitness is made or
implied. Eshed Robotec is not liable or responsible to any person or entity for loss
or damage in connection with or stemming from the use of the software, hardware
and/or the information contained in this publication.
Eshed Robotec bears no responsibility for errors which may appear in this
publication and retains the right to make changes to the software, hardware and
manual without prior notice.
Table of Contents
Part I
CHAPTER 1.1
CHAPTER 1.2
CHAPTER 1.3
CHAPTER 1.4
Part II
CHAPTER 2.1
CHAPTER 2.2
CHAPTER 2.3
Part III
CHAPTER 3.1
CHAPTER 3.2
User’s Manual
9903
Introduction
What is ER-SIMULATION?
About this User’s Manual
Manual Organization
Typographical Conventions
Setting Up ER-SIMULATION
System Requirements
Hardware Installation
Installing ER-SIMULATION
Getting Started
Activating ER-SIMULATION
Command Line Activation
Robot Simulation Software Main Menu
User Interface
Module Overview
Going On From Here
1-2
1-3
1-3
1-4
1-5
1-5
1-5
1-6
1-7
1-7
1-7
1-7
1-7
1-8
1-9
Tutorials
Tutorial 1:Loading and Running an Application
DEMO 1
DEMO 2
Tutorial 2:Manipulating the Simulated Robot
Tutorial 3: Inputs and Outputs
DEMO 3
Graphic Simulation
SCORBASE
2-2
2-2
2-4
2-6
2-9
2-9
2-9
2-11
The Graphic Simulation Module
Introduction to The Graphic Simulation Module
Starting the Simulation
Activating the Simulation Module
ER-SIMULATION
SCORBOT-ER III
3-2
3-3
3-3
v
CHAPTER 3.3
CHAPTER 3.4
CHAPTER 3.5
Part IV
CHAPTER 4.1
CHAPTER 4.2
vi
Graphic Simulation Main Menu
Graphic Simulation Module Overview
Simulated Robot Manipulation
Activating the MANIPULATE Screen
The MANIPULATE Screen
Viewing Options
Manipulating the View
Robot Manipulation
Programming Commands
Additional Notes
Exercise
Simulated Program Execution
Activating the RUN Screen
The RUN Screen
Viewing Options
Manipulating the View
Program Execution
Run Program Options
Graphic Tracking
Inputs/Outputs
Off-Line Mode
On-Line Mode
Exercise
Simulating the Environment
Activating the SETUP Screen
The SETUP Screen
Manipulating the View
Cube Manipulation
Selecting the Cube
Setup File Management
Exercise
3-3
3-3
3-5
3-5
3-5
3-6
3-7
3-8
3-11
3-12
3-12
3-13
3-13
3-13
3-14
3-14
3-16
3-17
3-18
3-18
3-18
3-19
3-19
3-20
3-20
3-20
3-21
3-23
3-23
3-25
3-25
The SCORBASE Module
Introduction to SCORBASE Level 5
Starting SCORBASE Level 5
Activating SCORBASE
SCORBASE Module Main Menu
SCORBASE Module Overview
User Interface
ER-SIMULATION
SCORBOT-ER III
4-2
4-3
4-3
4-3
4-4
4-5
User’s Manual
9903
CHAPTER 4.3
CHAPTER 4.4
CHAPTER 4.5
CHAPTER 4.6
CHAPTER 4.7
CHAPTER 4.8
CHAPTER 4.9
Part V
APPENDIX A
APPENDIX B
APPENDIX C
User’s Manual
9903
Teaching Positions
User Interface
Coordinates Display
Manual Control
Additional Direct Mode Commands
Teaching Positions
List/Delete Position Screen
Program Editing
User Interface
Program Commands
Program Editing Commands
List/Delete/Edit Screen
Program Handling
4-6
4-6
4-7
4-8
4-8
4-9
4-13
4-15
4-15
4-16
4-23
4-24
4-26
Homing and Configuration
Program Execution
Run Options
Run Actions
Program Status Reports
Input/Output Setup
Cell Control
4-30
4-33
4-33
4-35
4-35
4-37
4-39
Appendices
Commmand Line Options
Size Options
Device Options
Automatic Run Options
SCORBOT-ER III Coordinate Systems
Robot Joints
XYZ - Cartesian Coordinates
Cylindrical Coordinates
Spherical Coordinates
Variable Programming
ER-SIMULATION
SCORBOT-ER III
5-2
5-2
5-3
5-3
5-4
5-4
5-5
5-5
5-6
5-7
vii
Part I
Introduction
User’s Manual
9903
ER-SIMULATION
for SCORBOT-ER III
1-1
INTRODUCTION
CHAPTER
1.1
What is ER-SIMULATION?
Eshed Robotec’s ER-SIMULATION is a software package for three- dimensional
graphic simulation and tracking of the SCORBOT-ER III robot.
ER-SIMULATION enables off-line robot simulation of the SCORBOT-ER III robot
for position teaching, programming and program execution. ER-SIMULATION
can therefore serve as a desk-top simulator, for users without access to a
SCORBOT-ER III robot.
ER-SIMULATION also provides on-line robot tracking. The software graphically
duplicates and reports the robotic system’s functions – in real time – while an
actual SCORBOT-ER III is in operation.
When ER-SIMULATION is connected to a SCORBOT-ER III robot, you can
create and execute a robotic program in the following manner:
1-2
•
Write a robotic program using the software’s SCORBASE Module.
•
Teach the robot positions using the Graphic Simulation Module.
•
Run and debug the SCORBASE program using the simulator.
•
Execute the SCORBASE program using the actual SCORBOT-ER III robot,
without graphic tracking.
ER-SIMULATION
for SCORBOT-ER III
User’s Manual
9903
INTRODUCTION
CHAPTER
1.2
About this User’s Manual
This User’s Manual serves as both a tutorial for you to learn how to use
ER-SIMULATION, and as a reference guide for use after you have become
familiar with the software.
Manual Organization
This manual is organized into the following sections:
User’s Manual
9903
•
Introduction: Instructions for configuring the system, installing the
software, and getting started.
•
Tutorials: Three lessons which guide you through a number of procedures,
to help you become familiar with the software.
•
The Graphic Simulation Module: A complete description of the simulation
module.
•
The SCORBASE Module: A complete description of SCORBASE Level 5
for the SCORBOT-ER III robotic system.
•
Practical and Theoretical supplementary information: in the Appendices.
ER-SIMULATION
for SCORBOT-ER III
1-3
INTRODUCTION
Typographical Conventions
Throughout this manual, text appears in several typefaces:
Important notes and warnings appear in italics.
•
Bulleted lists are used for itemized information.
3. Numbered lists are procedural steps for you to follow.
This represents text displayed
on the computer monitor.
Bolded characters or CAPS indicate user entries and file names.
The software does not distinguish between uppercase or lowercase. You may use
either to enter data.
It is recommended that you have basic computer skills, and know how to enter
commands from the computer keyboard. However, all instructions contained
within this manual are as explicit as possible, so that even novices can operate
ER-SIMULATION.
Specific details about user interface within the various modules are described and
explained wherever necessary throughout this manual.
1-4
ER-SIMULATION
for SCORBOT-ER III
User’s Manual
9903
INTRODUCTION
CHAPTER
1.3
Setting Up ER-SIMULATION
System Requirements
You need the following hardware and software to load and use
ER-SIMULATION:
•
IBM PC/AT, or an 80386 or 80436 based computer, or a fully compatible
computer. An 80386 or higher is recommended.
•
640K bytes of RAM
•
Hard disk drive.
•
VGA or SuperVGA display adapter and monitor.
(The software is compatible with most EGA adapters and monitors.)
•
DOS version 3.0 or later.
You may also wish to prepare the following accessory:
•
A set of 3 different colored cubes, each measuring 20x20x20 mm.
Hardware Installation
The very nature of ER-SIMULATION is such that you do not need to connect a
robot in order to utilize the software.
If you plan, however, to use the software for graphic tracking, install your
SCORBOT-ER III robot according to the instructions in the SCORBOT-ER III
User’s Manual.
No additional cabling or setup is required.
User’s Manual
9903
ER-SIMULATION
for SCORBOT-ER III
1-5
INTRODUCTION
Installing ER-SIMULATION
The ER-SIMULATION software is supplied on a 3.5" 1.44 MB diskette. This
diskette contains all the software (including SCORBASE Level 5) needed for
using ER-SIMULATION with the SCORBOT-ER III robot.
It is recommended that you use DISKCOPY or a similar program to make a
backup copy of the ER-SIMULATION diskette. Store both the original and
backup in a safe place after you have installed the software.
The software should be installed on your computer’s hard disk. To install
ER-SIMULATION on your hard disk, do the following:
Insert the ER-SIMULATION diskette into one of your computer’s floppy disk
drives, and make that the default drive — for example, A:.
To install the software on drive C: (default), type:
A:>INSTALL
To install on another drive, specify the drive; for example:
A:>INSTALL D:
The installation procedure creates a directory on your hard disk named ROBSIM,
and a subdirectory called TUTOR. All files are then copied from the diskette to
their proper locations.
If a number of different users will be using the ER-SIMULATION, you may now
also create other directories or subdirectories which will serve as the working
directory for your ER-SIMULATION applications.
You are now ready to begin working with the software.
1-6
ER-SIMULATION
for SCORBOT-ER III
User’s Manual
9903
INTRODUCTION
CHAPTER
1.4
Getting Started
Activating ER-SIMULATION
To load the ER-SIMULATION software, type RS3 at the DOS prompt:
C:\ROBSIM>RS
<Enter>
Once the software has loaded, the Robot Simulation Software Main Menu will be
displayed.
Command Line Activation
When activating ER-SIMULATION from the DOS command, you can include the
parameters which will determine the specific options used by the software when it
is loaded.
Refer to Appendix A, “ Command Line Options,” for altering start-up options.
Robot Simulation Software Main Menu
The Robot Simulation Software Main Menu allows direct access and activation of
the ER-SIMULATION modules.
User Interface
The Main Menu options can be selected in either one of the following ways:
User’s Manual
9903
•
Simply press the corresponding function key; or,
•
Use the up <↑> and down <↓> arrow keys to highlight the desired option,
and press <Enter>
ER-SIMULATION
for SCORBOT-ER III
1-7
INTRODUCTION
Module Overview
From the Main Menu, the following options can be activated:
SCORBASE
(F1)
The SCORBASE Module contains a complete version of SCORBASE Level 5 for
the SCORBOT-ER III robot.
For complete details, refer to Part IV of this manual.
Simulation
(F2)
The Simulation Module is the heart of the ER-SIMULATION software. It
provides graphic simulation of SCORBASE robotic programs as well as on-line
graphic tracking of SCORBOT-ER III activities.
For complete details, refer to Part III of this manual.
Exit To DOS
(F9)
Press F9 to exit to DOS. You will be prompted to confirm:
1-8
ER-SIMULATION
for SCORBOT-ER III
User’s Manual
9903
INTRODUCTION
Before exiting ER-SIMULATION, make sure you have saved your program,
positions and/or simulation setup to disk.
ER-SIMULATION will not warn you of changes which have not been saved.
To cancel, press N or <Esc>.
To exit to DOS, press Y.
Going On From Here
If you are eager to begin working with ER-SIMULATION, continue to the
tutorials in Part II of this manual.
If you first want to learn more about the graphic simulation software, continue to
Part III.
If you have not yet worked with SCORBASE Level 5, and want to familiarize
yourself with the robotic software commands, continue to Part IV.
User’s Manual
9903
ER-SIMULATION
for SCORBOT-ER III
1-9
INTRODUCTION
This page intentionally left blank.
1-10
ER-SIMULATION
for SCORBOT-ER III
User’s Manual
9903
Part II
Tutorials
User’s Manual
9311
ER-SIMULATION
for SCORBOT-ER III
2-1
TUTORIALS
CHAPTER
2.1
Tutorial 1:
Loading and Running an Application
In this tutorial you will load and run demonstration programs.
DEMO 1
1.
To work with the Tutorials, activate ER-SIMULATION by typing TUTOR at the
C:\ROBSIM> prompt:
C:\ROBSIM>TUTOR
2.
<Enter>
From the Robot Simulator Main Menu, select SCORBASE (F1).
Simply press F1; or, use the ↑ up and ↓ down arrow keys to highlight
SCORBASE, and press <Enter>.
2-2
3.
From the SCORBASE Menu, select Program Handling (F3).
4.
The Program Handling screen is displayed.
ER-SIMULATION
for SCORBOT-ER III
User’s Manual
9311
TUTORIALS
Make sure the Working Directory field shows: C:\ROBSIM\TUTOR.
Select the Catalog option (F9). A list of the application files in the current
directory will be displayed on the screen. Make sure you see a listing of the
DEMO files, as shown here.
5.
Using the arrow keys, bring the cursor to the Name field.
Type:
DEMO1
6.
<Enter>
Select the Load option (F5).
Once the application has loaded, the message “ -DONE-” is displayed.
Press <Esc> to exit the Program Handling screen.
Press <Esc> again to exit the SCORBASE menu.
7.
From the Robot Simulator Main Menu, select Simulation (F2).
8.
From the Graphic Simulation menu, select Run (F2).
The Run Screen will now be displayed, as illustrated here.
User’s Manual
9311
ER-SIMULATION
for SCORBOT-ER III
2-3
TUTORIALS
9.
10.
Press F1 to Run Single Line. One program line will be executed.
Press F1 several times, and watch the lines in the Program Window.
Press F3 to Run Single Cycle. One complete cycle of the DEMO1 program will
be executed.
While the program is running, the command line which is highlighted is the
command currently being executed.
In this demonstration program the robot picks up the cubes and places them in
new positions.
DEMO 2
11.
Repeat Steps 1-8 to load the application named DEMO2.
Press F3 or F5 to execute the program.
This demonstration program is a continuous loop program, in which the robot
picks up and stacks the cubes in a tower, and then removes them, one and a time,
and places them in a line on the work surface.
12.
2-4
This programincludes an input interrupt jump command. When the status of
input #1 is changed, the robot will abandon its current task and swing away to
position 99.
ER-SIMULATION
for SCORBOT-ER III
User’s Manual
9311
TUTORIALS
To see how the interrupt handler works, press the number 1 key during the
program execution to change the current status of Input #1.
Note that Output #1 is switched on and off during the interrupt.
13.
Press <Esc> to stop the
program execution.
Press <Esc> again to exit
the Run Screen.
User’s Manual
9311
ER-SIMULATION
for SCORBOT-ER III
2-5
TUTORIALS
CHAPTER
2.2
Tutorial 2:
Manipulating the Simulated Robot
In this tutorial you will practice moving the simulated robot and adjusting the
views.
1.
Activate ER-SIMULATION by typing TUTOR at the C:\ROBSIM> prompt:
C:\ROBSIM>TUTOR
<Enter>
From the ER-SIMULATION Main Menu, select Simulation (F2).
From the Graphic Simulation Menu, select Manipulation (F1).
2.
Press the F8 key to rotate the work surface in the Main View.
Press the F7 key to rotate in the other direction.
You may use the <Shift>+F7 and <Shift>+F8 key combinations to speed up the
rotation.
3.
Press the F9 key to zoom in the view.
Press the F10 key to zoom out.
4.
Press the left arrow key to move the work surface to the left.
Press the right arrow key to move the surface to the right.
5.
2-6
Repeat Steps 2-4 until the robot in both the Main View and the Top View face the
same direction. The three cubes in both views will be be in a straight line on the
right.
ER-SIMULATION
for SCORBOT-ER III
User’s Manual
9311
TUTORIALS
The display on your monitor will appear similar to the one shown here.
6.
Using the W and 2 keys, and the E and 3 keys, manipulate the robot’s shoulder
and elbow so that the gripper moves toward the green cube – the cube farthest
from the robot.
7.
Slow down the speed of the robot: either press F6 repeatedly until a low speed is
displayed; or, press S and enter a low value (such as 2 or 3) at the prompt for a
speed.
As in SCORBASE, a slower speed enables more precise movements of the robot.
8.
Using the R and 4 keys, adjust the
pitch of the gripper.
When the gripper is within reach
of the cube, the display on your
monitor should appear similar to
the one shown here.
If the robot’s position is below
the work surface, the work
surface will turn black.
User’s Manual
9311
ER-SIMULATION
for SCORBOT-ER III
2-7
TUTORIALS
Note the XYZ position values displayed beneath the Top/Gripper View. A
negative Z value indicates the gripper has reached a position below the work
surface.
9.
10.
To help you see the spacial relationship of the gripper and the cube, try using the
up and down arrow keys to adjust the angle of the work surface. Or press the
<Tab> key to see the Side View.
Press C to close the gripper.
You will hear a short beep as the
gripper closes.
If the gripper successfully grasps
the cube, you will see the cube
lifted up slightly into the gripper.
11.
Using the keys for the shoulder
and elbow, lift up the cube, and
bring the robot to a position
similar to the one shown here.
12.
Using the T and 5 keys,
manipulate the gripper’s roll.
You may want to zoom in to see the results more clearly.
13.
Attempt to place the cube back on the work surface.
Whenever you open the gripper, any cube within its grasp will fall to the work
surface.
2-8
ER-SIMULATION
for SCORBOT-ER III
User’s Manual
9311
TUTORIALS
CHAPTER
2.3
Tutorial 3: Inputs and Outputs
In this tutorial you see how inputs and outputs are defined, manipulated and
displayed in both the SCORBASE Module and the Graphic Simulation Module.
DEMO 3
Graphic Simulation
1.
To work with the Tutorials, activate ER-SIMULATION by typing TUTOR at the
C:\ROBSIM> prompt:
C:\ROBSIM>TUTOR
<Enter>
2.
From the Robot Simulator Main Menu, select SCORBASE (F1).
3.
From the SCORBASE Menu, select Program Handling (F3).
4.
Once the Program Handling screen is displayed, make sure the Working
Directory field shows: C:\ROBSIM\TUTOR.
Select the Catalog option (F9).Make sure you see a listing of the DEMO files.
5.
Using the arrow keys, bring the cursor to the Name field.
Type:
DEMO3
6.
<Enter>
Select the Load option (F5).
Once the application has loaded, the message “ -DONE-” is displayed.
Press <Esc> to exit the Program Handling screen.
7.
User’s Manual
9311
From the ER-SIMULATION Main Menu, select Simulation (F2).
ER-SIMULATION
for SCORBOT-ER III
2-9
TUTORIALS
8.
From the Graphic Simulation menu, select Run (F2).
The Run Screen will now be displayed.
9.
Press F3 or F5 to begin program execution. The DEMO3 program will be
executed in a continuous loop.
Watch the I/O Frame during program execution. The DEMO3 program turns on
the outputs in sequence, and then turns them off.
Press <Esc> to stop program execution.
10.
DEMO3 includes a variable input interrupt jump commands. When an input is
turned on, the robot will go to the position defined for the specific input interrupt.
Restart program execution by pressing F3 or F5.
To see how the interrupt
handler works, press a number
key (from 1 through 8) while
the program is being executed.
For example, press the number
4 key. The robot will
immediately swing to position
number 4, and then return to its
original position, as illustrated
here.
You may press other number
keys, and observe the result.
The DEMO3 program reacts
only to input ON signals. You may toggle off the inputs at any time during
program execution.
11.
2-10
Press <Esc> to stop the program execution.
ER-SIMULATION
for SCORBOT-ER III
User’s Manual
9311
TUTORIALS
SCORBASE
Continuation of Tutorial 3.
12.
From the Run screen, press <Esc> twice to exit to the ER-SIMULATION Main
Menu.
13.
From the ER-SIMULATION Main Menu, select SCORBASE (F1).
From the SCORBASE menu, select I/O Setup (F7).
14.
The I/O Setup screen will now be displayed.
This screen lets you define the text you want associated with the inputs and
outputs in both the ON and OFF states. The screen shown here displays the data
contained in the file SETUP.IO in the TUTOR subdirectory.
Note: When you exit the I/O Setup screen, the data on the screen is automatically
saved in the file SETUP.IO, which SCORBASE generates. Simply delete this file
in order to restore the blanks on the screen.
For additional details on the I/O Setup screen, refer to Part IV of this
manual—the SCORBASE module.
User’s Manual
9311
ER-SIMULATION
for SCORBOT-ER III
2-11
TUTORIALS
15.
Press <Esc> to exit the I/O Setup screen.
From the SCORBASE menu, select Run Cell Control (F6).
16.
The Run Cell Control screen will now be displayed.
Press F3 or F5 to begin program execution. The DEMO3 program will be
executed in a continuous loop.
During off-line execution of the program, the Run Cell screen provides a textual
display of the program lines and input/output status.
The output status display is determined by the actual program command lines. As
the outputs are turned on and off by DEMO3, the corresponding fields indicate
their status.
17.
Press <Esc> to stop the program execution.
Press <Esc> twice to recall the Main Menu.
Press <F9> to exit the ER-SIMULATION software.
2-12
ER-SIMULATION
for SCORBOT-ER III
User’s Manual
9311
Part III
The
Graphic
Simulation
Module
User’s Manual
9311
ER-SIMULATION
for SCORBOT-ER III
3-1
SIMULATION
CHAPTER
3.1
Introduction to
The Graphic Simulation Module
ER-SIMULATION’s Graphic Simulation Module allows you to prepare the
positions and paths to be used in SCORBOT-ER III robot programs, to execute
programs in simulation (off-line), and to execute programs (on-line) with realistic
graphic tracking of the robot’s movements and I/O status.
If you are already familiar with the SCORBASE robotics control software, you
can see that the Robot Simulation Software utilizes the same programming
functions and options as SCORBASE.
The Robot Simulation Software includes the following features:
3-2
•
Control and graphic display of the five robot axes and the gripper.
•
Display of program lines during program execution.
•
Status display of 8 inputs and 8 outputs.
•
X, Y, Z, pitch and roll position display and speed display.
•
Manipulation of the simulated view, in all operational modes.
•
Recording of robot positions.
ER-SIMULATION
for SCORBOT-ER III
User’s Manual
9309
SIMULATION
CHAPTER
3.2
Starting the Simulation
Activating the Simulation Module
To activate the Graphic Simulation Module, select F2 from the
ER-SIMULATION Main Menu:
When activating ER-SIMULATION from the DOS command, you can include the
parameters which will determine the specific options used by the Graphic
Simulation when it is loaded.Refer to Appendix A, “ Command Line Options,”
for altering the start-up options.
Graphic Simulation Main Menu
Once you have activated the Graphic Simulation Module, the Graphic Simulation
menu is displayed.
Graphic Simulation Module Overview
User Interface
The options in the Graphic Simulation menu can be selected in either one of the
following ways:
User’s Manual
9311
•
Simply press the corresponding function key; or,
•
Use the up <↑> and down <↓> arrow keys to highlight the desired option,
and press <Enter>.
ER-SIMULATION
for SCORBOT-ER III
3-3
SIMULATION
Press <Esc> to exit the Graphic Simulation Module.
From within the screens, press <Esc> to exit to the Graphic Simulation Main
Menu.
Manipulate
(F1)
The Manipulate screen allows you to perform the manipulation functions found in
SCORBASE’s Teach Positions menu: direct control of the simulated robot’s
movements, and the recording of positions.
Run
(F2)
The Run screen allows you to perform the program execution functions provided
by SCORBASE’s Run Program and Cell Control screens: running partial or
complete programs, in both on-line and off-line modes.
Setup
(F3)
The Setup screen enables you to configure the placement of the three cubes which
the robot handles.
3-4
ER-SIMULATION
for SCORBOT-ER III
User’s Manual
9309
CHAPTER
3.3
Simulated Robot Manipulation
Activating the MANIPULATE Screen
To activate the Manipulate screen, select F1 from the Graphic Simulation menu.
Press <Esc> to return to the ER-SIMULATION Main Menu.
The MANIPULATE Screen
The Manipulate screen lets you move the simulated robot and teach it positions,
just as you would operate the SCORBOT-ER III by means of SCORBASE’s
Teach Positions screen.
The Manipulate screen provides three different views of the simulated robot,
which let you clearly see and follow the movements of the robot.
The Manipulate screen’s elements can be classified into the following three
categories:
•
Viewing
•
Manipulating
•
Programming
The keys needed for moving the robot and altering the views are all displayed on
the screen. Complete explanations of their use are given in the following sections.
User’s Manual
9311
ER-SIMULATION
for SCORBOT-ER III
3-5
SIMULATION
Viewing Options
The Manipulate screen has one large frame containing the Main View of the
robot. The smaller frame displays either the Top or Gripper View.
Main View
The Main View shows a full view of the robot. The angle and perspective change
according to the user’s manipulation.
Top and Gripper View
The Top View and Gripper View toggle by means of the <Tab> key, as explained
later in this chapter.
Top View: Shows
a bird’s-eye view
of the robot.
3-6
ER-SIMULATION
for SCORBOT-ER III
User’s Manual
9309
SIMULATION
Gripper View:
Aligns with and follows
the movement of the
gripper. This view is
very useful for guiding
the gripper while picking
up or placing an object.
Manipulating the View
The green line at the bottom of the Manipulate screen shows the keys for
adjusting your view of the simulated robot.
Rotate
F7
Rotate Left: The work surface in the Main View rotates to the left.
F8
Rotate Right: The work surface in the Main View rotates to the right.
<Shift>
Hold down the <Shift> key while pressing F7 or F8 to rotate in larger increments,
thus speeding up the rotation.
Zoom
F9
F10
User’s Manual
9311
Zoom In. The view of the robot is enlarged. The robot appears closer. Zooming
in allows you to more clearly see the movement and position of the gripper, for
example.
Zoom Out. The view of the
robot is reduced. The robot
appears father away. Zooming
out gives you a better overall
view of the robot’s location
and movements.
ER-SIMULATION
for SCORBOT-ER III
3-7
SIMULATION
Move
The arrow keys adjust the position of the work surface.
←
Left: The work surface moves to the left of the screen.
→
Right: The work surface moves to the right of the screen.
↑
Up: The work surface tilts up. If you continue tilting it, you will see the
underside of the work surface, identified by the color magenta.
↓
Down: The work surface tilts down.
<Tab>
Toggles the Top and Gripper Views.
View
Note that the position of the work surface remains
fixed in the Top View, even when it is rotated in the
Main View.
In the Top View, the +X direction is always to the
right.
Robot Manipulation
ER-SIMULATION lets you move the simulated robot and record the location of
the positions it reaches by means of the computer keyboard.
Position
The current location of the simulated robot is displayed in Cartesian coordinates.
The XYZ values are updated continually as the robot moves. In addition, the
pitch and roll of the gripper are displayed in degrees.
The location of the gripper is the distance in millimeters from the robot’s point of
origin (a point at the bottom center of its base) to a point midway between the
gripper’s jaws, as illustrated here.
3-8
ER-SIMULATION
for SCORBOT-ER III
User’s Manual
9309
SIMULATION
Speed
The current speed setting is the speed of the robot’s movements in the
Manipulation screen, both when moved manually and when instructed to Go to
Position.
As in SCORBASE, the robot’s speed can be defined by values from 1 (slow) to
10 (fast). The default speed is 10.
F6
[Ctrl]+F6
S
Decreases the speed of the robot’s movements during manipulation.
Increases the speed of the robot’s movements during manipulation.
As in SCORBASE, pressing the S key causes a command line to appear on the
screen, prompting you for a speed setting:
Enter speed (1-10)
:____
Enter a value from 1 to 10, and press <Enter>.
The displayed speed setting change accordingly.
The slower the speed setting, the more precisely you will be able to position the
robot.
The yellow line at the bottom of the Manipulate screen shows the keys for
controlling the simulated robot’s movements. These are the same keys used by
SCORBASE to control the movements of the robot’s axes.
User’s Manual
9311
ER-SIMULATION
for SCORBOT-ER III
3-9
SIMULATION
Move Base
1
Base moves right.
Q
Base moves left.
Move Shoulder
2
W
Shoulder moves up
Shoulder moves down.
Move Elbow
3
Elbow moves up.
E
Elbow moves down.
4
Wrist moves up.
R
Wrist moves down.
5
Wrist rotates to the right.
T
Wrist rotates to the left.
Pitch
Roll
Gripper
O
Gripper opens.
C
Gripper closes.
A slight beep will be heard when the gripper closes.
In addition, a beep will be heard if you attempt to move the robot to a position
which is not within its working range.
3-10
ER-SIMULATION
for SCORBOT-ER III
User’s Manual
9309
SIMULATION
Programming Commands
ER-SIMULATION can be used as a
tool for defining the positions to be
used later in a robotic application.
To save the recorded positions, use the
SCORBASE File Manager.
Record Position - F1
This command instructs the system to record the current location of the robot.
Press F1 to record the current position.
The option line turns yellow, and a command line appears in the center of the
screen, prompting you for the position number:
Record position (1-100)
:____
The software’s default setting allows 100 positions to be recorded.
Type any number, from 1 to 100, and press <Enter>.
Record Relative Position
(F2)
This command instructs the system to record the current location of the robot
relative to another position.
Press F2 to record a relative position.
The option lines turns yellow, and a command line appears at the left of the
screen, prompting you for the position number:
Record position (1-100)
:____
Type a number from 1 to 100, and press <Enter>.
You are then prompted for the relative position number:
relative to position (1-100)
:____
Type the number of a previously recorded position, and press <Enter>.
Note that if the location of the first position changes, the location of the relative
position will also change.
User’s Manual
9311
ER-SIMULATION
for SCORBOT-ER III
3-11
SIMULATION
Go Position - F3
This command sends the robot to a previously recorded position at the currently
defined speed setting.
Press F3 to activate the Go Position command.
The option line turns yellow, and a command line appears at the center of the
screen, prompting you for the position number:
Go to position
(1-100)
:____
Type the number of a previously recorded position, and press <Enter>.
Press <Esc> to abort the movement.
Additional Notes
Note the following characteristics of ER-SIMULATION:
•
The color of the work surface will turn black if the robot reaches a -Z
position, that is, a position below the work surface.
•
A beep will sound when the robot reaches its physical limit.
•
A beep will sound when the close gripper command is executed.
•
Whenever the gripper opens, any cube within its grasp will fall to the work
surface.
•
When you place a cube on top of another cube, the top cube will
automatically align itself with the cube below it.
Exercise
3-12
1.
If you have not yet tried the Tutorials in Part II, it is recommended that you now
turn to Tutorial 2 and practice manipulating the views and the robot.
2.
Repeat Tutorial 2, with the following additions:
•
Define positions as you manipulate the robot. Especially, define the position
when you reach the point at which the gripper can grasp the green cube.
•
Instruct the robot to go to these positions.
ER-SIMULATION
for SCORBOT-ER III
User’s Manual
9309
SIMULATION
CHAPTER
3.4
Simulated Program Execution
Activating the RUN Screen
To activate the Run screen, select F2 from the Graphic Simulation menu.
Press <Esc> to return to the ER-SIMULATION Main Menu.
The RUN Screen
The Run Screen has the combined capabilities of SCORBASE’s Run Program and
Cell Control screens.
The Run screen lets you simulate the execution of your SCORBASE programs
off-line or track the program’s execution on-line. In addition, the I/O display
provides off-line simulation of the inputs, and on-line tracking of the SCORBOT
controller’s inputs and outputs.
The Run screen elements can be grouped into four categories:
•
Viewing
•
Program Execution
•
Graphic Tracking
•
Inputs/Outputs
The keys for activating these elements are displayed on the screen. Complete
explanations of their use are given in the following sections.
User’s Manual
9311
ER-SIMULATION
for SCORBOT-ER III
3-13
SIMULATION
Viewing Options
The Run screen provides three different views of the simulated robot to enable
you to clearly see and follow the movements of the robot.
The viewpoints can be manipulated even during program execution.
Main View: The large frame in the Run screen contains the Main View of the
robot.
Top View: Shows a bird’s-eye view of the robot.
Gripper View: Aligns with and follows the movement of the gripper. This view
is very useful for observing the gripper during pick and place operations.
Manipulating the View
The green line at the bottom of the Run screen shows the keys for adjusting your
view of the simulated robot.
3-14
ER-SIMULATION
for SCORBOT-ER III
User’s Manual
9309
SIMULATION
View
<Tab>
Toggles the Top and Gripper Views.
The position of the work surface remains fixed in the Top View, even when the
viewpoint changes in the Main View.
Move
The arrow keys adjust the position of the work surface in the Main View.
←
Left: The work surface moves to the left of the screen.
→
Right: The work surface moves to the right of the screen.
↑
Up: The work surface tilts up. If you continue tilting it, you will see the
underside of the work surface, distinguished by a different color.
↓
Down: The work surface tilts down.
Rotate
F7
Rotate Left: The work surface in the Main View rotates to the left.
F8
Rotate Right: The work surface in the Main View rotates to the right.
<Shift>
Hold down the <Shift> key while pressing F7 or F8 to rotate in larger increments,
thus speeding up the rotation.
Zoom
F9:
Zoom In. The view of the robot is enlarged. The robot appears closer. Zooming
in allows you to more clearly see the movement and position of the gripper, as
illustrated here.
F10
Zoom Out. The view of the robot is reduced. The robot appears farther away.
Zooming out gives you a better overall view of the robot’s location and
movements.
User’s Manual
9311
ER-SIMULATION
for SCORBOT-ER III
3-15
SIMULATION
Program Execution
Speed
The speed setting in the Run screen indicates the speed defined for the movement
when the command was programmed.
During program execution, the speed setting changes to show the speed definition
of the program line currently being executed.
Position
During program execution, the position setting is continually updated to show the
robot’s current location.
The position is displayed in Cartesian coordinates, and indicates the distance from
the robot’s point of origin to the gripper. The pitch and roll of the gripper are also
displayed, in degree values.
Display Lines - F4
By default, this option is active, and program lines are displayed in the Program
Frame.
If a program has not been loaded, the Program Frame will display the following
message:
Press F4 to toggle the display of the program lines off and on. When active, the
Display Lines option line is red.
The display of lines during program execution or simulation allows you to study
the program flow.
The command line currently being executed is displayed in bolded text.
3-16
ER-SIMULATION
for SCORBOT-ER III
User’s Manual
9309
SIMULATION
Run Program Options
The Run screen offers the same functions available in SCORBASE for the
execution of complete or partial programs.
The Run and Jump options have the
same effect in both off-line and
on-line program execution.
Press <Esc> to stop program
execution at any time.
Run Single Line - F1
Press F1 to execute the current program line.
When activated, this option line turns yellow.
Run Single Cycle - F3
Press F3 to execute the program once.
When activated, this option line turns yellow.
Run Continuously - F5
Press F5 to execute the program in an endless loop.
When the program reaches the last line, it automatically jumps to line 1 and
continues program execution.
When active, this option line is yellow.
Jump To Line - F2
Press F2 to instruct the program to jump to another line.
When activated, this option line turns yellow, and a prompt for the program line
appears:
Jump to Line QQQQ - F4
Type and <Enter> the desired program line.
The program will jump to the specified command line, and the next run command
(F1, F3 or F5) will begin at that line.
User’s Manual
9311
ER-SIMULATION
for SCORBOT-ER III
3-17
SIMULATION
Graphic Tracking
OnLine & Tracking - F6
By default, the Run screen normally operates in the off-line mode, and this option
line is not highlighted.
When the program runs off-line, the simulated robot executes all commands, and
the simulated outputs are switched.
You can thus simulate the actual execution of the program.
OnLine & Tracking - F6
The Run screen may be used for on-line graphic tracking.
Press F6 to activate the On-Line and Tracking option. This option line is red
when the on-line mode is active.
Whenever the On-Line option is activated, the simulated robot immediately assumes
the same position as the connected SCORBOT robot.
When the program runs on-line, the robot, peripherals (if any) and I/Os execute
all program commands.
The status of the inputs and the outputs is reflected in the I/O display.
Inputs/Outputs
During program execution, the settings in the I/O Frame indicate the status of the
inputs and outputs.
Off-Line Mode
Simulating Inputs
You can simulate the status of the inputs when executing your program in the
off-line mode.
3-18
ER-SIMULATION
for SCORBOT-ER III
User’s Manual
9309
SIMULATION
1, . . . ,8
Toggle Input On and Off
Press a specific number key to toggle the status of the corresponding input.
When an input is on, its corresponding box will light up in the I/O Frame.
If the program encounters an input command, for example:
IF INPUT #4 ON JUMP TO LINE 99
It will simply check the state of the simulated input, and continue program
execution according to the input’s status.
On-Line Mode
When tracking the program execution in real-time, the I/O Frame displays the
actual status of the SCORBOT-ER III controller’s inputs and outputs.
During on-line operation, ER-SIMULATION cannot simulate input status. Instead
it indicates the actual status of the inputs as they are activated by the working
robotic system.
Exercise
If you have not yet tried the Tutorials in Part II, it is recommended that you now
turn to Tutorial 1.
User’s Manual
9311
•
Perform the tasks defined in Tutorial 1, “ Loading and Running a
Demonstration Program,” using the applications DEMO1 and DEMO2.
•
If your installation includes a SCORBOT-ER III robot, try running the
program on-line. (It is suggested, but not essential, that you actually place
three cube in the robot’s environment.)
ER-SIMULATION
for SCORBOT-ER III
3-19
SIMULATION
CHAPTER
3.5
Simulating the Environment
Activating the SETUP Screen
To activate the Setup screen, select F3 from the Graphic Simulation menu.
Press <Esc> to return to the ER-SIMULATION Main Menu.
The SETUP Screen
The Setup screen allows you to move and set the initial positions of the cubes
which will be handled by the robot.
The Setup screen has three elements:
•
Viewing
•
Environment Setup
•
Setup File Management
The keys for altering the views and moving the cubes are all displayed on the
screen. Complete explanations of their use are given in the following sections.
3-20
ER-SIMULATION
for SCORBOT-ER III
User’s Manual
9309
SIMULATION
Manipulating the View
The Setup screen provides three different viewpoints.
Main View: The large frame in the Run screen contains the Main View of the
robot.
Top View: Shows a bird’s-eye view of the robot. This view is useful for seeing
the placement of the cubes.
Gripper View: Aligns with and follows the movement of the gripper.
The green and yellow lines at the bottom of the Setup screen show the keys for
adjusting your view.
View
<Tab>
Toggles the Top and Gripper Views.
Note that even when the work surface is rotated in the Main View, it remains
fixed in the Top View.
User’s Manual
9311
ER-SIMULATION
for SCORBOT-ER III
3-21
SIMULATION
Rotate
F7
Rotate Left: The work surface in the Main View rotates to the left.
F8
Rotate Right: The work surface in the Main View rotates to the right.
<Shift>
Hold down the <Shift> key while pressing F7 or F8 to rotate in larger increments,
thus speeding up the rotation.
Zoom
F9
F10
Zoom In. The view is enlarged. You can see the cubes on the work surface more
closely.
Zoom Out. The view is reduced. The work surface appears distant.
Speed
The speed setting is the speed at which the cubes are moved.
F5
Decreases the speed of the cube’s movements during the setup.
F6
Increases the speed of the cube’s movements during the setup.
The fastest speed is 10. The slowest speed is 1.
The slower the speed setting, the more precisely you will be able to position the
cubes.
Move View Point
The viewpoint can be altered when the Select Cube option is not active.
As in the other Graphic Simulation screens, the arrow keys adjust the position of
the work surface.
3-22
←
Left: The work surface moves to the left of the screen.
→
Right: The work surface moves to the right of the screen.
↑
Up: The work surface tilts up. If you continue tilting it, you will see the
underside of the work surface, distinguished by a different color.
↓
Down: The work surface tilts down.
ER-SIMULATION
for SCORBOT-ER III
User’s Manual
9309
SIMULATION
Cube Manipulation
Selecting the Cube
The Select Cube option line allows you
to identify the cube you want to
manipulate.
Select Cube - F1
Press F1 to activate the cube selection
option.
The Select Cube option line turns brown, and now displays the option Change
Cube. This indicates that the brown cube can now be moved.
In addition, the X, Y and Z coordinates of the center point of the active cube are
now displayed on the screen.
Press F1 again, and the option line turns pink. The pink cube can now be
manipulated.
Press F1 again, and the option line turns green. The green cube can now be
manipulated.
Press F1 again, and the option line will revert back to the Select Cube option. The
cubes cannot be manipulated now.
Move Current Cube
When the Select Cube option has been activated and the Change Cube option line
appears, the arrow keys take on a different function, as shown in the yellow line
at the bottom of the screen:
The Current Cube is the cube whose color is indicated by the Change Cube
option line – pink, brown or green.
←
Left: The current cube moves to the left of the screen.
→
Right: The current cube moves to the right of the screen.
↑
Up: The cube moves to the top of the screen.
↓
Down: The cube moves to the bottom of the screen.
User’s Manual
9311
ER-SIMULATION
for SCORBOT-ER III
3-23
SIMULATION
The arrow keys move the
cubes on the screen in the
same direction seen by the
user, regardless of the
work surface’s orientation,
as illustrated here.
[PgUp]
Stack: The cube will be
moved on top of another
cube.
In order to stack a cube
(for example, the brown
cube), move it until it is
superimposed on another
cube (for example, the
pink cube). Then press
<PgUp>. The active,
brown cube will now
appear on top of the static,
pink cube.
Now, when you move the
bottom, pink cube at speed
8 or less, the top, brown
cube will move along with
it.
When you move a cube at
speed 9 or 10, any cubes stacked on top of it will fall off.
Cube Position
The position setting in the Setup screen indicates the current location of the active
cube.
3-24
ER-SIMULATION
for SCORBOT-ER III
User’s Manual
9309
SIMULATION
Setup File Management
From the Setup screen you can save
the location of the cubes. The setup is
saved in a file whose extension is
.SIM.
Save Setup - F1
Press F1 to save the setup of the cubes.
When activated, this option line is highlighted, and a prompt for a setup file name
is displayed:
Type and <Enter> the desired setup file name.
The ER-SIMULATION software contains a default setup file, P1.SIM. Take
care not to use this file name when saving a different simulation setup.
If you will want the setup to be loaded with a specific application, it is
recommended that you give the setup file the same name as the application file
(the extensions will be different).
Load Setup - F2
Press F2 to load the setup of the cubes.
When activated, this option line is highlighted, and a prompt for a setup file name
is displayed.
Type and <Enter> the setup file name.
The file P1.SIM contains the default cube positions. Load this file when you
want to return to the original simulation setup.
Exercise
1.
Practice selecting different cubes and changing their location.
2.
If you have not yet tried the Tutorials in Part II, it is recommended that you now
turn to Tutorial 3, “ Inputs and Outputs,” and follow the procedures given there.
User’s Manual
9311
ER-SIMULATION
for SCORBOT-ER III
3-25
SIMULATION
This page intentionally left blank.
3-26
ER-SIMULATION
for SCORBOT-ER III
User’s Manual
9309
Part IV
The
SCORBASE
Module
User’s Manual
9311
ER-SIMULATION
for SCORBOT-ER III
4-1
SCORBASE
CHAPTER
4.1
Introduction to
SCORBASE Level 5
The ER-SIMULATION software package contains the robotics control software,
SCORBASE Level 5 for the SCORBOT-ER III, for programming and operating
the robot and its peripheral accessories.
If you are already familiar with SCORBASE Levels 1, 2 and 3, you will see that
Level 5 offers the same programming options, and many additional ones.
SCORBASE Level 5 features include:
4-2
•
Control and real-time status display of up to 8 axes: 5 robot axes, a gripper
and one or two peripheral axes.
•
Full support and real-time status display of 8 inputs and 8 outputs, including
user defined text for each I/O status.
•
Four coordinate systems for position definition and display: robot joints
(encoder units), Cartesian (X,Y,Z, pitch and roll), cylindrical and spherical.
•
User-defined number of up to 10,000 program lines (400 default), and 7000
positions (100 default).
•
Extensive variable programming.
•
Interrupt programming for monitoring and handling responses to changes in
input status.
•
Bell ringing and timer facilities.
•
Recording of robot positions during program execution.
•
Home search during program execution.
•
Print output of program lines and messages during program execution.
•
Saving and loading of programs and position tables either separately or together,
as well as merging of positions and program lines.
ER-SIMULATION
for SCORBOT-ER III
User’s Manual
9311
SCORBASE
CHAPTER
4.2
Starting SCORBASE Level 5
Activating SCORBASE
To activate the SCORBASE Module, select F1 from the ER-SIMULATION Main
Menu:
When activating ER-SIMULATION from the DOS command, you can include the
parameters which will determine the specific options used by SCORBASE when
it is loaded. Refer to Appendix A, “ Command Line Options,” for altering the
start-up options.
SCORBASE Module Main Menu
The SCORBASE menu is displayed:
User’s Manual
9311
ER-SIMULATION
for SCORBOT-ER III
4-3
SCORBASE
SCORBASE Module Overview
User Interface
The SCORBASE Main Menu options can be selected in either one of the
following ways:
•
Simply press the corresponding function key; or,
•
Use the up <↑> and down <↓> arrow keys to highlight the desired option,
and press <Enter>
•
Press <Esc> to exit the SCORBASE Module.
Teach Positions
(F1)
From the Teach Positions screen you can control the robot movements directly
and teach the robot positions.
Note that movements and the recording and storing of positions are performed in
the PC RAM.
Edit Program
(F2)
The Edit Program screen lets you write and edit your robot programs. The
programs are created by SCORBASE and maintained in the PC RAM.
Program Handling
(F3)
The Program Handling screen enables you to save and load programs and
positions tables to and from disk(ette). It also lets you merge programs and
position tables.
Run Program
(F4)
The Run Program screen lets you run your SCORBASE program. Since the
current program is maintained only in the PC, the commands which control robot
movement and I/O status are translated into the ACL format and sent sequentially
to the controller.
4-4
ER-SIMULATION
for SCORBOT-ER III
User’s Manual
9311
SCORBASE
Home
(F5)
The Home screen enables you to home the robot, and configure and home the
peripheral equipment. Since the SCORBOT should be homed each time the
controller is turned on, begin each working session by first activating the Home
screen and performing the necessary operations.
Run Cell Control
(F6)
The Run Cell Control screen lets you run your SCORBASE program together
with a complete runtime screen display reporting the status of inputs and outputs.
The report includes the names you assigned to the various I/O ports.
I/O Setup
(F7)
The Input/Output Setup screen is used to assign names or text for both the on and
off states of each input and output port.
User Interface
Throughout SCORBASE, the following keys are used to activate screens and
enter commands and options.
<PgUp>
or <Esc>
<Esc>
<Enter>
<Backspace>
User’s Manual
9311
Recalls the screen previously displayed.
Cancels a command line which has been activated.
Accepts commands, options and field entries.
Erases field entries which have been typed, but not yet accepted.
ER-SIMULATION
for SCORBOT-ER III
4-5
SCORBASE
CHAPTER
4.3
Teaching Positions
The Teach Positions screen allows you to move the robot, and to teach and define
the various types of positions and movements.
User Interface
As you can see, the Teach Positions menu has two sides. Only one side is active
at a time!
The active side is indicated by the highlighted frame around it. Use the left arrow
key <←> to activate the left side of the menu, and the right arrow key <→> to
activate the right side. Or use the space bar to toggle the currently active side.
The left side of the menu contains the commands which directly control
movements and outputs, while the right side contains the commands for teaching
and reaching positions.
Most of the commands are activated by a two letter code, which usually
represents the two initial letters of the commands themselves. The code letters are
4-6
ER-SIMULATION
for SCORBOT-ER III
User’s Manual
9311
SCORBASE
bolded in the screen display. For example, to activate the Record Position
command, type RP.
Whenever the system responds to a command by displaying dots and a cursor, you
must type in a number or variable and press <Enter>.
Coordinates Display
The current robot location is continuously displayed at the bottom of the screen.
You can change the coordinate display system by typing CC when either side of
the menu is active.
After you press CC, the cursor jumps to the option line. You now select:
COORDINATE :ROBOT /
XYZ
/ CYLINDRICAL / SPHERICAL
Use the left and right arrow keys to highlight your choice, and then press <Enter>.
The position display options are as follows:
AX-1
0
AX-2
0
AX-3
0
AX-4
0
AX-5
0
AX-6
0
AX-7
0
XYZ:
X
168.99
Y
0.00
Z
504.29
PITCH
-63.56
ROLL
0.00
AX-6
0
AX-7
0
CYLINDRICAL:
RADIUS
168.99
ALPHA
0.00
HEIGHT
504.29
PITCH
-63.56
ROLL
0.00
AX-6
0
AX-7
0
SPHERICAL:
RADIUS
531.86
ALPHA
0.00
BETA
71.47
PITCH
-63.56
ROLL
0.00
AX-6
0
AX-7
0
ROBOT:
SCORBASE Level 5 for the SCORBOT-ER III supports programming and
operation in four coordinate systems: Cartesian (XYZ), vertically articulated
(robot axes), cylindrical and spherical.
The robot display shows the robot joints position in encoder pulses.
The XYZ display shows the Cartesian coordinates in millimeters, and the pitch
and roll in degrees.
The cylindrical display shows the radius and height in millimeters and the angle
(α) in degrees.
The spherical display shows the radius in millimeters and the horizontal (α) and
vertical (β) angles in degrees.
Refer to Appendix B, “ Coordinate Systems,” for more information.
User’s Manual
9311
ER-SIMULATION
for SCORBOT-ER III
4-7
SCORBASE
Manual Control
The left side of the menu contains
the commands for direct control of
the servo axes and the outputs.
Keys
Movement
1/Q
Robot base moves right and left.
2/W
Shoulder moves up and down.
3/E
Elbow moves up and down.
4/R
Wrist pitches up and down.
5/T
Wrist rolls right and left.
6/Y
Axis no. 6 moves forward and backwards.
7/U
Axis no. 7 moves forward and backwards.
The robot will move as long as the activating key is depressed.
Additional Direct Mode Commands
OG/CG
Open/Close Gripper
These commands open and close the gripper.
F/S
Fast/Speed 10 movement
These commands set the speed for manual robot movement.
Type F to set the fastest speed (10). This is the default speed.
Type S, and then enter any speed from 1 (the slowest) to 9 .
ON/OF
turn Output #. oN / oFf
These commands switch the specific output port on and off.
Type ON or OF to activate the command, and type in a specific output number at
the prompt.
4-8
ER-SIMULATION
for SCORBOT-ER III
User’s Manual
9311
SCORBASE
Teaching Positions
The right side of the menu
contains the commands for
teaching and reaching the desired
positions.
CC
Change Coordinate display
For a complete explanation, refer
to the section, “ Coordinates
Display,” at the beginning of this
chapter.
RP
Record Position . . .
This command records the current joints position of both the robot axes and the
peripheral axes. A maximum of 100 positions can be recorded. At the prompt, type
in a valid position number and press <Enter>.
RR
Record Relative position . . .
This command records (in joints values) the current position of the robot arm and
peripheral axes relative to another position. Make sure you have first recorded the
reference position. The format for recording a relative position is:
RECORD POSITION (1-100) ...
RELATIVE TO ...
If the reference position changes, the relative position also moves.
At the Record Position and Relative To prompts, type in valid position numbers
and press <Enter>.
If you simply press <Enter> without specifying a number for the reference
position, the position you record will be relative to the current position of the
axis. For example:
RECORD POSITION 12 RELATIVE TO CURRENT
If your position is relative to current, you are prompted to define values for the
relative movement of each axis. The format is as follows:
RECORD POSITION (1-100) ... RELATIVE TO CURRENT
AXIS 1 = 0
.....
AXIS 2 = 0
.....
AXIS 3 = 0
.....
AXIS 4 = 0
.....
AXIS 5 = 0
.....
AXIS 6 = 0
.....
AXIS 7 = 0
.....
User’s Manual
9311
ER-SIMULATION
for SCORBOT-ER III
4-9
SCORBASE
Pressing <Enter> without specifying a value for a particular axis accepts the
offset default value, which in all the instances above is 0.
A position which is relative to current means the specified offset will be
computed from wherever the robot is located at the time it is sent to the relative
position.
Be sure to enter a value of 0.0 for axes 6 and/or 7 if peripheral equipment is not
connected to these axes.
TP
Teach Position. . . (xyz)
This command enables you to record (teach) a position according to its XYZ
location.
When defining a position using the Cartesian coordinate system, you specify the
location of the tip of the robot’s gripper (in XYZ distance from the point of
origin). To complete the definition, you must also specify the pitch and roll of the
gripper (in degrees).
You are prompted to complete the command as follows:
CURRENT POSITION
X(MM)
=168.99
Y(MM)
=0.00
Z(MM)
=504.29
PITCH (DEG)=-63.56
ROLL (DEG) =0.00
RECORD POSITION (1-100) ...
TEACH POSITION (x,y,z)
Pressing <Enter> for a coordinate accepts the default value. The default is always the
current value of the coordinate, as displayed. For example:
X (mm) = 168.99 .....
You may now enter a new X coordinate, or press <Enter> to accept the default,
which is 168.99.
TR
Teach Relative position . . .(xyz).
This command allows you to teach a position which is relative to another position
by an XYZ offset.
You are prompted to complete the command as follows:
TEACH RELATIVE POSITION (x,y,z)
X(MM)
= 0.00
Y(MM)
= 0.00
Z(MM)
= 0.00
PITCH(DEG)= 0.00
ROLL(DEG) = 0.00
RECORD POSITION (1-100) .... RELATIVE TO ...
4-10
ER-SIMULATION
for SCORBOT-ER III
User’s Manual
9311
SCORBASE
Pressing <Enter> for a coordinate accepts the offset default value, which in all the
instances above is 0.
Pressing <Enter> without specifying a reference position creates a position which
is relative to the current position.
A position which is relative to current means the specified offset will be
computed from wherever the robot is located at the time it is sent to the relative
position.
TC
Teach Cylindrical position . . . (R,α,H)
This command allows you to teach a position according to its cylindrical
coordinates.
You are prompted to completed the command as follows:
CURRENT POSITION
TEACH CYLINDRICAL POSITION(R,α,H)
RADIUS
=168.99
ALPHA
=0.00
HEIGHT
=504.29
PITCH (DEG) =-63.56
ROLL (DEG) =0.00
RECORD POSITION (1-100) ...
Pressing <Enter> for a coordinate accepts the default value. The default is always
the current value of this coordinate, as displayed.
Refer to Appendix B, “ Coordinate Systems.”
RC
Teach Relative Cylindrical Position (R,α,H)
This command allows you to teach a position which is relative to another position
by an offset in cylindrical coordinates.
You are prompted to completed the command as follows:
TEACH RELATIVE CYLINDRICAL POSITION (R,α,H)
RADIUS(MM) = 0.00
ALPHA(DEG) = 0.00
HEIGHT(MM) = 0.00
PITCH(DEG) = 0.00
ROLL(DEG) = 0.00
RECORD POSITION (1-100) .... RELATIVE TO ...
Pressing <Enter> for a coordinate accepts the offset default value, which in all the
instances above is 0.
Pressing <Enter> without specifying a reference position creates a position which
is relative to the current position.
A position which is relative to current means the specified offset will be
User’s Manual
9311
ER-SIMULATION
for SCORBOT-ER III
4-11
SCORBASE
computed from wherever the robot is located at the time it is sent to the relative
position.
Refer to Appendix B, “ Coordinate Systems.”
TS
Teach Spherical position . . . (R,α, β)
This command allows you to teach a position according to its cylindrical
coordinates.
You are prompted to completed the command as follows:
CURRENT POSITION
TEACH SPHERICAL POSITION (R,α, β)
RADIUS(MM) =168.99
ALPHA(DEG) =0.00
BETA (DEG) =504.29
PITCH (DEG)=-63.56
ROLL (DEG) =0.00
RECORD POSITION (1-100) ...
Pressing <Enter> for a coordinate accepts the default value. The default is always
the current value of this coordinate, as displayed.
Refer to Appendix B, “ Coordinate Systems” .
RS
Teach Relative Spherical Position (R,α, β)
This command allows you to teach a position which is relative to another position
by an offset in spherical coordinates.
You are prompted to completed the command as follows:
TEACH RELATIVE SPHERICAL POSITION (R,α,β)
RADIUS(MM) = 0.00
ALPHA(DEG) = 0.00
BETA(MM)
= 0.00
PITCH(DEG) = 0.00
ROLL(DEG) = 0.00
RECORD POSITION (1-100) .... RELATIVE TO ...
Pressing <Enter> for a coordinate accepts the offset default value, which in all the
instances above is 0.
Pressing <Enter> without specifying a reference position creates a position which
is relative to the current position.
4-12
ER-SIMULATION
for SCORBOT-ER III
User’s Manual
9311
SCORBASE
A position which is relative to current means the specified offset will be
computed from wherever the robot is located at the time it is sent to the relative
position.
Refer to Appendix B, “ Coordinate Systems.”
GP/GH
Go to Position . . . /Go Home
The GP command sends the robot to the position specified. At the prompt, enter a
specific position number.
The GH command sends the robot to its Home position.
List/Delete Position Screen
This screen allows you to display, delete and print the positions. To activate this
screen, select the L option in the Teach Positions screen.
Note that the listing operations display the position table stored in the controller.
This requires extensive communication with the controller and may result in a
delay in response time.
The following operations are available in this screen:
LP
List Position . . .
Displays the coordinates of the specified position using the currently active
coordinate display system.
LF
List From position . . .
Displays a list of the positions starting from the specified position, using the
currently active coordinate display system.
If there are more positions listed than can be displayed in one screen, the system
will pause and prompt you:
PRESS <ESC> TO EXIT LISTING/ANY OTHER KEY TO CONTINUE
User’s Manual
9311
ER-SIMULATION
for SCORBOT-ER III
4-13
SCORBASE
Pressing any other key moves the display down one screen.
Pressing <PgUp> moves the display up one screen.
Pressing <Enter> moves the display down one position.
PP
Print Position (to printer)
Prints the Position Table on a connected printer. The positions will be printed
using the currently active coordinate display system.
CC
Change Coordinate display : ROBOT/XYZ/CYLINDRICAL/SPHERICAL
Changes the coordinate system in which the positions are listed.
When you press CC, the cursor jumps to the option line. Use the left and right
arrow keys to make your selection, and press <Enter>.
The listing last requested will now be displayed according to the coordinate
display system you have selected.
DP
Delete Position . . .
Deletes the position specified.
DF
Delete From position . . . to position . . .
Deletes the positions specified.
DA
Delete All positions
Deletes from controller memory all the recorded positions.
Before executing any of the deletion commands, the system will prompt you for
confirmation:
ARE YOU SURE (Y/N)? N
Press Y to delete. Any other key will be regarded as no.
4-14
ER-SIMULATION
for SCORBOT-ER III
User’s Manual
9311
SCORBASE
CHAPTER
4.4
Program Editing
The Edit Program screen allows you to write and edit your robotic programs.
User Interface
As described in the preceding chapter, you create a program line by typing the
two activating letters. These letters are bolded in the screen display for easy
reference. For example, to activate the Call Subroutine command, type CS.
When you are prompted to enter a value or an option, you may also press <Enter>
to accept the default setting as your choice.
SCORBASE Level 5 provides a large number of program editing commands.
User’s Manual
9311
ER-SIMULATION
for SCORBOT-ER III
4-15
SCORBASE
Program Commands
OG/CG
Open/Close Gripper
These commands open and close the gripper.
GP
Go to Position . . . fast/speed #.
This command sends the robot to the specified position at the specified speed. At
the Go Position prompt, enter a number or a variable.
If you press <Enter> instead of specifying a position, SCORBASE automatically
enters the next sequential default position number.
After you enter the position number, you are prompted for a speed. Press <Enter>
or F to enter the fastest speed. If you press S, you must also include a speed value.
Type in a number from 1 (slowest) to 9, or a variable, and <Enter>.
W
Wait . . . 10 ths of seconds.
This command halts program execution for the specified time.
Examples:
WAIT 4 10TH OF SECONDS
(Delay of 0.4 seconds)
WAIT 600 10THS OF SECONDS (Delay of one minute)
At the Wait prompt, type a number or a variable, and press <Enter>.
J
Jump to line # . . .
This command causes the program to jump to the specified line.
IL
If Limit switch #. jump to . . .
This command causes the program to jump to the specified line if the specified
limit switch is depressed (on). At the Limit switch # prompt, enter a number from
1 through 7, or a variable. (1-5 are located on the robot arm; 6 and 7 are on the
peripherals). Then type the line number to jump to and press <Enter>.
II
If Input #. on/off jump/call . . .
This command causes the program to jump to the specified line or to call a
subroutine if the state of the tested input matches the status requested (on or off).
At the Input # prompt, type a number or a variable. Then press <Enter> or N for
on, or F for off.
4-16
ER-SIMULATION
for SCORBOT-ER III
User’s Manual
9311
SCORBASE
At the jump/call prompt, press <Enter> or J for the program to jump to another
line, or press C for the program to call a subroutine.
At the next prompt, enter the line number to jump to, or the number of the
subroutine to call.
OI
On input Interrupt#. on/off
call sub #. . / jump to line . .
This command sets the condition for an input interrupt service. The service (Call
Subroutine or Jump to Line) will be performed whenever the condition (input
status) is satisfied, regardless of the current program flow.
At the # prompt, enter a specific input number or a variable. Or press <Enter> to
accept any input interrupt.
At the oN/oFf prompt, press <Enter> or N for the on state, or F for off. (ON
causes an interrupt when the input switches on, while OFF causes an interrupt
when the input switches off).
At the Call/Jump prompt, you can do either of the following:
•
Press <Enter> or C to call a subroutine. Then enter the subroutine number or
variable.
If you enter a variable, the subroutine selected is determined by the value of
the variable at the time the interrupt command is initially processed, and not
when the actual interrupt is executed.
•
Press J to jump to a specific line. Then press <Enter> to jump to the next line,
or enter a specific line number.
An interrupt command causes the program to abandon (interrupt) the command it
is currently executing (which can also be a movement or a delay) and to
immediately execute the command specified for this interrupt. If the specified
command is a Call Subroutine, the program will resume from the point where it
was suspended as soon as the subroutine completes its execution.
Example:
ON INPUT INTERRUPT #1 ON JUMP TO LINE 1
When input 1 is turned ON , the program is suspended and reactivated from
line 1.
Example:
ON INPUT INTERRUPT #5 ON CALL SUBROUTINE # 5
When input 5 is turned on, the program immediates calls subroutine #5. If any
axes are moving when the interrupt occurs, they will stop. When the
subroutine is completed (Return from Subroutine command is reached), the
axes will reassume the position and status that were interrupted, and the
program will continue from the point where it was interrupted.
User’s Manual
9311
ER-SIMULATION
for SCORBOT-ER III
4-17
SCORBASE
Example:
ON INPUT INTERRUPT ANY OFF CALL SUBROUTINE # 60
Whenever any of the inputs is turned off, an immediate call to subroutine 60
will occur.
DI/EI
Disable /Enable input Interrupt .
The Disable Interrupt command causes the specified input interrupt to become
inactive. When an interrupt is inactive, it is disregarded until the Enable Interrupt
command reactives it.
At the # prompt, enter an input number or variable, or press <Enter> to accept all
input interrupts.
Example:
If subroutine #5 is an interrupt servicing subroutine, and you do not want another
interrupt command to interfere with the execution of the subroutine, structure
your program as follows:
SET SUBROUTINE #5
DISABLE INPUT INTERRUPT # ALL
.
.
.
ENABLE INPUT INTERRUPT # ALL
RETURN FROM SUBROUTINE
ON/OF
turn Output #. oN/oFf.
This command sets or resets the specified output. At the # prompt, enter an output
number or a variable, and press <Enter>.
RE
REmark :
You can insert a comment (remark) line into the program for explanation and
documentation. Type any text of up to 48 characters.
PR
PRint :
This command prints text on the screen at run time. A maximum of 48 characters
can be printed in one command line.
RB
Ring Bell
When executed, this command sounds a beep using the computer’s internal
loudspeaker.
RP
Record present Position as Position . . .
When executed at run time, this command records the current location of the
robot arm as the specified position. At the prompt, enter a specific number or
variable and press <Enter>. Note that you can overwrite positions using this
command. This command is very useful in palletizing applications.
4-18
ER-SIMULATION
for SCORBOT-ER III
User’s Manual
9311
SCORBASE
PH
Set present Position as HOME !!
When executed at run time, this command changes the Home position of the
robot. All current axes positions are reset to 0.
Use this command with caution! It immediately changes the physical location of
all the recorded positions.
SH
Search Home !!
This command sends the robot to search for its actual home location; that is, the
SCORBASE checks the limit switch on each axis as in the homing procedure.
SA
Set Axis #. to Zero
This command resets the position of the axis specified by setting its value to 0.
This command is very useful for performing a cyclical motion of an accessory,
such as a conveyor or a rotary table.
RT
Reset Timer
This command resets the value of the SCORBASE timer to 0.
SCORBASE contains a timer which measures time in tenths of a second. The
timer operates for approximately 50 minutes, from either the time SCORBASE is
loaded, or the point at which the timer is reset.
To use the timer, it must be assigned to a variable, using the SV command.
Example:
Set Variable T3 = Timer
The value of the variable is the time measured since the RT command was
executed. The value can be checked by using the IF command. Actions can be
generated according to the time measured.
IF T3 > 30 JUMP TO LINE 66
SV
Set Variable. to . . . /sensor/timer
computation(+,* etc.)
This command allows you to assign a value to a variable. For a detailed
explanation of the use of variables in SCORBASE, refer to Appendix C,
“ Variable Programming.”
To set the value of the variable, type SV. At the prompt, enter the name of the
variable. The name may be either one or two letters, or a letter and a digit.
SCORBASE then prompts you to select one of four options for setting the
variable value:
Number or variable / Sensor / Timer / Computation
User’s Manual
9311
ER-SIMULATION
for SCORBOT-ER III
4-19
SCORBASE
•
Press N to set the variable to a number or to the value of another variable.
Type a valid integer (any value, -32767 through +32767) or a variable name,
and press <Enter>.
•
Press S to set the variable to the value of the gripper sensor. During
operation the variable is set to the value (in millimeters) of the gripper
opening.
The Set Variable to Sensor command is used for measuring objects with the
gripper sensor. When the command is executed, it reads the gripper’s current
encoder value, and computes the difference between the current value and the
value stored in the ZERO file. The difference is then converted to millimeters,
thus resulting in the (variable) measurement of the object which is being
grasped by the gripper.
•
Press T to set the variable to the value of the SCORBASE timer. During
operation the variable is set to the timer value (in tenths of a second).
•
Press C to set the variable to the result of a specified computation. A
computation consists of two arguments and an operator. An argument can be
either an integer or a variable.
SCORBASE prompts you for the first argument:
Example:
SET VARIABLE A = .
Enter an integer or a variable name, and press <Enter>. This example uses the
variable BB. SCORBASE then prompts you for the operator:
SET VARIABLE A = BB ..
Enter an operator, and press <Enter>. Pressing <Enter>without an operator enters
the plus sign (for addition). This example uses the plus sign. SCORBASE then
prompts you for the second argument:
SET VARIABLE A = BB + ......
Enter an integer or a variable name, and press <Enter>.
SET VARIABLE A = BB + 2
4-20
ER-SIMULATION
for SCORBOT-ER III
User’s Manual
9311
SCORBASE
The following operators can be used with the Set Variable command:
Arithmetic Operators
+
*
/
M
P
Addition
Multiplication
Subtraction
Division
Modulus (returns the remainder of the first argument divided by the second);
displayed as MOD
Power (raises the first argument to the power of the second argument); displayed
as POWER
Comparison Operators
=
<
>
<=
>=
<>
Equal to
Less than
Greater than
Less than or equal to
Greater than or equal to
Not equal
The result of a comparison operation is 1 (true) if the relation is correct.
Otherwise the value is 0 (false).
Logical (Boolean) Operators
A
O
X
And
Or
Exclusive or; displayed as XOR
The result of a logical operation is 1 (true) or 0 (false). Any operand with a
non-zero value is considered true, while a zero value is considered false.
Examples:
User’s Manual
9311
SET
SET
SET
SET
SET
SET
SET
SET
SET
VARIABLE
VARIABLE
VARIABLE
VARIABLE
VARIABLE
VARIABLE
VARIABLE
VARIABLE
VARIABLE
Z1 = Z - 15
D1 = E * Z
DD = DD + 1
DS = A MOD 3
T = MM XOR NN
(M = NOT (M))
M = M XOR 1
QK = Q >= 15
V1 = V <> 1
R = 3 POWER 2
ER-SIMULATION
for SCORBOT-ER III
4-21
SCORBASE
IF
IF Variable . <=> . . . . jump to line . . .
This command is used to compare the values of variables, and to activate other
commands depending on the result of that comparison..
At the prompt, enter the variable name. Then enter the comparison operator.
Pressing <Enter> without a comparison operator enters the > (greater than) sign.
Then enter the second variable name, or a number. Then enter the line number to
jump to if the comparison condition is true.
The comparison operators used for this command are the same as those used for
the Set Variable command.
Example:
SS
IF VARIABLE CO <= 0 JUMP TO LINE 7
Set Subroutine #. .
The command marks the beginning of the specified subroutine. You can program
up to 64 subroutines. At the # prompt, enter any number from 1 though 64.
During normal program flow, the program will skip over (without executing) the
lines containing a subroutine definition. The only way to execute a subroutine is
to use the Call Subroutine command.
RS
Return from Subroutine.
This command marks the end of a subroutine. At run-time it terminates the
execution of the subroutine, and the program resumes execution at the line which
follows the Call Subroutine command.
CS
Call Subroutine # . .
This command activates (calls) the specified subroutine. At the # prompt, enter
any number from 1 though 64.
OM
On Motor #. error, jump . . . c/s/o
This command allows you to receive information about motor errors and to
respond with a jump to another command line (for sounding an alarm or stopping
the robot, for example).
At the # prompt, enter a number. Or press <Enter> to accept any motor error.
(Note that the command line will show Motor ALL Error.)
At the jump prompt, enter a line number. If you simply press <Enter> without
specifying a line number, the following will be displayed:
ON MOTOR 1 ERROR JUMP TO NEXT
Continuously/Single/Off
This defines a jump to the next line of the program. Should a motor error occur
on the specified motor during its execution of any movement, the movement will
be aborted. The program will jump to the next line and continue running.
4-22
ER-SIMULATION
for SCORBOT-ER III
User’s Manual
9311
SCORBASE
At the c/s/o prompt, you have the following options:
•
Press C. For example:
ON MOTOR 1 ERROR JUMP TO 37
CONT.
Any motor error on axis 1 which occurs subsequent to this command cause the
program to jump to line 37. This jump occurs in the form of an interrupt.
•
Press S. For example:
ON MOTOR 1 ERROR JUMP TO 37
SING.
Only the first occurence of a motor error on axis 1 subsequent to this command
causes a jump to line 37. The second occurrence will cause the program to halt
and display a motor error message.
•
Press O. For example:
ON MOTOR 1 ERROR JUMP TO 37
OFF
This command cancels the effect of any preceding motor error instructions in the
program relating to motor 1.
Program Editing Commands
ctrl-I
Insert line . . .
This command allows you to insert lines into a program.
Type <Ctrl>+ I. You are then prompted for the line at which you wish to insert
command lines. All command entries are subsequently inserted, until you press
<Enter> to exit the insert mode.
When program lines are inserted, all previously entered Jump commands are
automatically updated.
ctrl-R
Replace line . . .
This command allows you to replace a command line.
Type <Ctrl>+R. At the prompt, enter the line number. The command line
specified is displayed and you are prompted for the new command. Pressing
<Enter> without a new command leaves the original line unchanged.
L
List/Delete/Edit
Press L to activate the List/Delete/Edit screen.
In addition to editing your programs in the List/Delete/Edit screen, you might
find it is easier to write your programs from this screen since more program lines
User’s Manual
9311
ER-SIMULATION
for SCORBOT-ER III
4-23
SCORBASE
can be displayed. All of the commands described in the Edit Program screen are
active in the List/Delete/Edit screen.
<Esc>
Returns you to the Main Menu.
List/Delete/Edit Screen
The List/Delete/Edit screen is activated by pressing L from the Edit Program
screen. It is similar to the List/Delete Position screen called from the Teach
Positions screen.
LL
List Line . . .
Displays the command line specified.
LF
List From Line . . .
Displays the command lines starting from the line specified.
If there are more positions listed than can be displayed in one screen, the system
will pause and prompt you:
PRESS <ESC> TO EXIT LISTING/ANY OTHER KEY TO CONTINUE
Pressing any other key moves the display down one screen.
Pressing <PgUp> moves the display up one screen.
Pressing <Enter> moves the display down one line.
PP
Print Program (to printer)
Prints the program on a connected printer.
4-24
ER-SIMULATION
for SCORBOT-ER III
User’s Manual
9311
SCORBASE
DL
Delete Line . . .
Deletes the command line specified.
DF
Delete From line . . . to line . . .
Deletes the command lines specified.
DA
Delete All lines
Deletes from memory all the recorded lines.
Before executing any of the deletion commands the system will display all lines
specified and prompt you for confirmation:
ARE YOU SURE (Y/N)? N
Press Y to delete. Any other key will be regarded as no.
User’s Manual
9311
ER-SIMULATION
for SCORBOT-ER III
4-25
SCORBASE
CHAPTER
4.5
Program Handling
The Program Handling screen enables you to load (restore) and save (backup)
program lines and position tables. Program lines and positions can be
transferred between computer RAM and disk(ette)s. In SCORBASE Level 5
position tables and program lines can be loaded and saved in either separate or
combined operations.
The option lines at the top left of the screen let you select the specific modes in
which the loading and saving operations are performed. To move from one option
line to another use the up <↑> and down <↓> arrow keys.
Use the left <←> and right <→> arrow keys to highlight the field you want to
activate, and press <Enter>. Leaving the option line without pressing <Enter>
will accept the selection last recorded for that option. Depending upon your
responses, additional option lines may appear, as described in this chapter.
4-26
ER-SIMULATION
for SCORBOT-ER III
User’s Manual
9311
SCORBASE
MODE :
LINES / POSITIONS / BOTH
This option line allows you to select the mode in which the load and save
operations are performed.
LINES
When loading or saving in this mode, only the program lines are affected.
POSITIONS
When loading or saving in this mode, only the positions are affected.
BOTH
When loading or saving in this mode, both the position table and the program
commands are affected. This is the default.
Working Directory : C:\
The default is the directory from which SCORBASE was activated. To alter the
directory, simply type the new directory and press <Enter>. The directory
definition may include a drive specification (A:, B:).
This entry is written to disk. Therefore, the new directory remains the default,
even if you have exited to DOS or shut off power.
NAME :
Use this option to assign a name to a program you have created. You can then use this
file name when performing save, load or delete operations.
When you type in the file name, do not use more than 8 characters, and do not use
an extension. The first character of the file name may not be a number.
All files saved by SCORBASE Level 5 for are automatically assigned the file
name extension .L5 .
LINES : REPLACE / INSERT
This option line will appear if you have selected the LINES mode. The selection
you now make will affect only the loading operation.
REPLACE
The program lines you are loading will replace the lines currently residing in
memory.
User’s Manual
9311
ER-SIMULATION
for SCORBOT-ER III
4-27
SCORBASE
INSERT :
The program lines you are loading will be inserted into the program currently
residing in memory.
If you select INSERT, an additional option line will appear:
INSERT AT LINE :
Your response determines where the program is to be inserted. If you enter the
line number which follows the end of the currently residing program (displayed
as the default), the loaded program is then appended to the end of the current
program.
When using INSERT to load a program, the Jump commands in the original
program are updated accordingly. The insertion of large programs into large
programs may take up to two minutes because of the extensive updating.
POSITIONS: REPLACE TABLE/ADD
This option line will appear if you have selected the POSITIONS mode. The
selection you now make will affect only the loading operation.
REPLACE TABLE
The positions you are loading will replace the positions currently residing in
memory.
ADD
The positions you are loading will be added to those positions currently
residing in memory.
After making your selections in the mode option lines, you may select the following
operations. Press the function key corresponding to your choice.
SAVE (F3)
Saves on disk(ette) lines or positions or both, depending on the mode selected.
4-28
ER-SIMULATION
for SCORBOT-ER III
User’s Manual
9311
SCORBASE
LOAD (F5)
Loads from disk(ette) lines or positions or both, depending on the mode selected.
DELETE
(F7)
Deletes from disk(ette) the file which contains the lines and positions.
Before the deletion the system will prompt you for confirmation:
ARE YOU SURE (Y/N)?
N
Press Y to confirm. Any other key is regarded as no.
CATALOG (F9)
Displays a list (catalog) of all the SCORBASE program files.
<Esc>
Exits the Program Handling screen.
User’s Manual
9311
ER-SIMULATION
for SCORBOT-ER III
4-29
SCORBASE
CHAPTER
4.6
Homing and Configuration
The Home Menu screen is used for configuring and homing the robot and
peripheral equipment.
Many of the commands in the Home screen are identical to those found on the
left side of the Teach Positions screen.
Additional SCORBASE features found in the Home screen are:
G
PRESS ’G’ KEY TO HOME THE ROBOT
The SCORBOT should be homed each time the controller is turned on. To
perform the fixed home search, press G. During the homing procedure,
SCORBASE displays messages stating whether each of the joints has reached its
fixed home position. If a joint has not found its home location, the homing
program automatically runs once more.
If the homing is not fully successful, the following message is displayed:
ROBOT IS NOT AT HOME !
4-30
ER-SIMULATION
for SCORBOT-ER III
User’s Manual
9311
SCORBASE
When the robot reaches its home position, a message is displayed:
HOMING COMPLETED
To stop the homing while the operation is in progress, press any key. For an
immediate break, press B.
CA
CAlibrate Robot Arm
The calibration procedure for the robot arm should be performed prior to using
SCORBASE for the first time, and after prolonged use of the robot. During
calibration SCORBASE moves the axes at each of the ten speeds, measures the
exact rate of movement, and calculates the true speed ratios between axes.
To perform the calibration, press CA. The robot first searches for its hard home,
and then begins the calibration process. The procedure can take up to 10 minutes.
The calibration data is stored in the ZERO file on your disk(ette). When you copy
SCORBASE to another diskette, be sure to copy the ZERO file as well.
P
Peripheral Equipment Setup
The homing of axes 6 and 7 depends upon the peripheral equipment you have
connected. To define the peripheral equipment, press P. You are then prompted:
MOTOR (6/7)
Type the number of the axis/motor you want to define. The system now displays:
MOTOR 7 IS CONNECTED TO
Slidebase/Rotary-table/Conveyor/Not connected
Press S, R, C or N according to the connected equipment. The homing procedure
for the peripheral equipment is as follows:
Slidebase:
The slidebase is moved to one side until it
cannot move any further.
Rotary-table:
Search for microswitch is performed.
Conveyor:
No search is performed.
Not connected:
No search is performed.
This setup is recorded in the ZERO file and placed on your disk(ette). The next
time you load SCORBASE the correct peripheral setup will automatically be
configured. You do not need to repeat the setup operation unless you actually
alter a peripheral or its axis connection.
Z
User’s Manual
9311
This command opens the gripper, which sets the gripper’s encoder to zero; it then
closes the gripper completely, and registers the encoder value at that position. The
encoder value of the closed gripper is recorded in the ZERO file and placed on
your disk(ette). The recorded encoder value helps produce more accurate
measurements when measuring objects with the gripper.
ER-SIMULATION
for SCORBOT-ER III
4-31
SCORBASE
D
Define gripper sensor
not installed
A sensor mounted within the gripper can be used to control the amount of force
exerted by the gripper when executing a Close Gripper (CG) command. The
sensor is connected to the SCORBOT controller through one of the 8 input ports.
When the force reaches a predefined threshold, the sensor sends an ON signal to
the input.
This command allows you to define which input port is used for the sensor
connection.
Press D. You are then prompted:
IS GRIPPER SENSOR CONNECTED (Y/N)? Y
Press Y or <Enter> to connect a gripper sensor. Otherwise, press N.
If a gripper sensor is connected, the following prompt is then displayed:
GRIPPER SENSOR CONNECTED TO INPUT (1 - 8) ..
Enter the number of the input port. Your response (input 4, for example) is then
reflected in the menu line:
input 4
Define gripper sensor
Input 4 will now be checked when Close Gripper commands are executed.
H
set present position as Home
If you want to start the robot from a position other than its fixed home, move the
robot to the desired position, and press H.
Be careful when using this command. Altering the home position may
invalidate other positions you have recorded.
At the Change Values for XYZ (Y/N) prompt, you can insert new Cartesian
values for the new home position. In addition, you can also change the following:
<Esc>
4-32
BASE HEIGHT(MM)=
.....
Used when the robot base is not at table
level.
TOOL LENGTH(MM)
.....
Used to program XYZ positions for a tool
connected to the gripper.
Press <Esc> to exit the Home screen.
ER-SIMULATION
for SCORBOT-ER III
User’s Manual
9311
SCORBASE
CHAPTER
4.7
Program Execution
The Run Program screen lets you run your programs both on-line and off-line,
and activate the robot’s execution of the programs.
Run Options
To move from one option line to another, use the up <↑> and down <↓> arrow
keys. Use the left <←> and right <→> arrow keys to highlight the field you want
to activate, and press <Enter>. Leaving the option line without pressing <Enter>
will accept the selection last recorded for that option.
DISPLAY PROGRAM : OFF / ON / PRINTER
This option lets you select the mode of display during program execution.
User’s Manual
9311
ER-SIMULATION
for SCORBOT-ER III
4-33
SCORBASE
OFF
Program lines will not be displayed on screen. This is the default.
ON
Program lines will be displayed on screen.
PRINTER
Program lines will be displayed on screen and printed on a connected printer.
This option is very useful for studying the program flow.
LINE : OFF LINE / ON LINE
This option allows you to choose whether your programs will run in the on-line
or off-line mode.
ON LINE
When the program runs on line, the robot, peripherals and I/Os execute all
program commands. This is the default.
OFF LINE
When the program runs off-line, all the commands for executing actions are
suppressed. The robot arm is not moved and the outputs are not switched. The
robot can even be disconnected when this mode is active.
When the program is running off-line, it will halt at the commands which test
the state of the inputs or limit switches, and will prompt you for a simulated
status.
Example:
When the program reaches this line:
IF INPUT #1 ON JUMP TO LINE 25
It will stop and prompt:
IS INPUT #1 ON (Y/N)?
You can thus simulate the actual execution of the program.
Note that the off-line option in this screen can also be used when SCORBASE is
connected to a controller and is in the on-line mode.
4-34
ER-SIMULATION
for SCORBOT-ER III
User’s Manual
9311
SCORBASE
Run Actions
RUN SINGLE LINE (F1)
Executes the current program line. The line is displayed in the program
window.
RUN SINGLE CYCLE (F3)
Executes the program once.
RUN CONTINUOUSLY (F5)
Executes the program in an endless loop. When it reaches the last line, the
program jumps automatically to line 1.
JUMP TO LINE #. (F2)
After pressing F2 you must enter a line number. The program will jump to the
specified command line and execute it.
BRAKE <B>
Pressing B immediately stops program execution.
Pressing any key will cause the program execution to stop after completing
the current command.
Pressing B will also stop movement of the speed controlled conveyor.
Program Status Reports
The left side of the screen contains the dynamic program reports.
The highlighted field indicates the running status of the current
program:
The right side of the screen contains the command reports. The
highlighted field indicates the type of command currently being
executed by the program.
User’s Manual
9311
ER-SIMULATION
for SCORBOT-ER III
4-35
SCORBASE
ROBOT
Indicates movement of the robot or the peripherals.
I/O
Indicates commands related to the inputs, outputs and limit switches.
The window at the bottom of the screen displays the program lines and various
messages. The program is displayed if the Display mode is active or if the
program is executed in Run Single Line mode. When the program is stopped
(STOP is highlighted), the next command to be executed is displayed.
4-36
ER-SIMULATION
for SCORBOT-ER III
User’s Manual
9311
SCORBASE
CHAPTER
4.8
Input/Output Setup
The I/O Setup screen lets you define the text or names you want associated with
the input and output ports and their states.
The SCORBOT-ER III controller has 8 input and 8 output ports. You can assign
different names or text to the ON and OFF status of each port.
To move from one text field to another, use the following keys:
↓
Moves to the next field.
↑
Moves to the previous field.
<Home>
Moves to the first field in the screen.
<End>
Moves to the last field in the screen.
<Tab>
<Tab>
Toggles between the input and output fields.
To insert text, bring the cursor to the desired field, type in the text, and press
User’s Manual
9311
ER-SIMULATION
for SCORBOT-ER III
4-37
SCORBASE
<Enter>. If you leave the field without pressing <Enter>, the text will not be
recorded. You can change the existing name in a field simply by typing in new
text and pressing <Enter>. A name may contain up to 8 characters.
The text assigned to each I/O is displayed accordingly when a program is
executed from the Run Cell Control screen.
Example:
INPUTS
ON
OFF
1: mill on
mill off
2: ok!
error!
As long as input 1 is ON the text: mill on is displayed. While input 1 is OFF, the
text: mill off appears. Similarly, ok! or error! are displayed according to the status
of input 2
Press <Esc> to return to the SCORBASE Module’s main menu.
When you exit the I/O Setup screen, the I/O setup is automatically saved on your
disk(ette) under the filename: SETUP.IO . It is not attached to any specific
program.
When you reload SCORBASE Level 5, the I/O setup is automatically loaded.
If the SETUP.IO file is not present in the current directory when SCORBASE
Level 5 is loaded, all text entries are initialized as blanks.
4-38
ER-SIMULATION
for SCORBOT-ER III
User’s Manual
9311
SCORBASE
CHAPTER
4.9
Cell Control
The Run Cell Control screen allows you to execute your SCORBASE program
off-line while a full run time report of the I/O status is displayed.
The center portion of this screen is similar to the Run Program screen. For a
description of the function keys and options, refer to the SCORBASE chapter,
“ Program Execution.”
On the left and right sides of the screen you will find the Cell Control I/O report
fields. The fields on the left report the status of input ports, while those on the
right report output status.
The text appearing in the I/O report fields is determined by the definitions you
recorded in the I/O Setup screen. When an I/O port is on, its corresponding field
is highlighted (in reverse video) and the assigned text is displayed. When an I/O
port is off, the field simply displays the assigned text for this status.
The report fields are constantly updated as long as the PC is connected to the
controller. Even when you are not running a program, the I/O report is active.
User’s Manual
9311
ER-SIMULATION
for SCORBOT-ER III
4-39
SCORBASE
This page intentionally left blank.
4-40
ER-SIMULATION
for SCORBOT-ER III
User’s Manual
9311
APPENDIX A
Part V
Appendices
User’s Manual
9311
ER-SIMULATION
for SCORBOT-ER III
5-1
APPENDIX A
APPENDIX
A
Commmand Line Options
When loading ER-SIMULATION, you can add switches to the command line to
activate specific options. The complete syntax for loading the software is:
RS [ /L /P /T /C /O ] [applname /R /S ] [ /H ]
The options within brackets [ ] are strictly optional and can be omitted. During
normal operation the default values are used. Once you have entered an option, it
overrides the default settings.
Size Options
/L
Defines the maximum number of available program lines.
Default : 400
Maximum : 10000 (or memory limit)
/P
Defines the maximum number of positions.
Default : 100
Maximum : 7000 (or memory limit)
/T
Defines the maximum number of text lines (PRINT and REMARK statements)
available when writing a program.
Default : 50
Maximum : 1000 (or memory limit)
Example:
RS /L2000 /P500 <Enter>
This command loads ER-SIMULATION and enables the SCORBASE Level 5
software to use up to 2000 lines and 500 positions.
Note that when you execute partial (LINES ONLY or POSITIONS ONLY) load
and save operations, SCORBASE creates a temporary copy of the program. If you
define a very large number of lines, you may be unable to execute these partial
operations due to memory size limitations.
5-2
ER-SIMULATION
for SCORBOT-ER III
User’s Manual
9311
APPENDIX A
Device Options
/C
Defines the RS232 port used for communication with the robot controller.
/C1 : COM1
/C2 : COM2
/O
Defines the parallel printer port to be used when printing.
/01 : PRN1
/02 : PRN2
/03 : PRN3
Example:
RS /C2
ER-SIMULATION will be loaded with the robot communications on COM2.
Automatic Run Options
applname
/R
Example:
If you specify an application file name, the SCORBASE program file (extension
.L5) will be loaded automatically when you activate ER-SIMULATION. The
simulation definition file (extension .SIM) will also be loaded, if it exists.
If you add this option, the SCORBASE program will automatically run one cycle
as soon as it is loaded. When execution of the program is completed,
ER-SIMULATION will return control to the operating system.
RS TEST /R
The SCORBASE Level 5 program named TEST will automatically be loaded and
executed. When execution of TEST is completed, ER-SIMULATION will return
control to the operating system
/S
Normally, the robot is considered to be at the Home position at the start of the
program. This option allows you to specify a different position for the robot when
SCORBASE is loaded.
Example:
RS3 PROGRAM /S20
/H
User’s Manual
9311
Instructs the system to run the HOME program before activating
ER-SIMULATION.
ER-SIMULATION
for SCORBOT-ER III
5-3
APPENDIX B
APPENDIX
B
SCORBOT-ER III Coordinate Systems
SCORBASE Level 5 for the SCORBOT-ER III robot supports work in four
different coordinate systems, which reflect the different robot mechanical
structures:
•
Robot Joints
•
Cartesian (XYZ) coordinates
•
Cylindrical coordinates
•
Spherical coordinates
Robot Joints
Robot coordinates specify the location of each joint in terms of encoder pulses.
When the robot moves, the optical encoders generate alternating high and low
electrical signals. The number of pulses generated is proportional to the amount
that the joint turns or slides. By counting the number of pulses, you can determine
how far an axis has moved. Similarly, you can define a robot movement or
position by specifying the number of pulses in relation to the home position, or a
coordinate, for each axis.
The location of the peripheral axes (6 and 7) is always stated in encoder pulses.
The SCORBOT-ER III is a vertically articulated robot arm. Control of the
SCORBOT using other coordinate systems is achieved by SCORBASE’s
converting the various coordinates to joints coordinates.
5-4
ER-SIMULATION
for SCORBOT-ER III
User’s Manual
9311
APPENDIX B
XYZ - Cartesian Coordinates
The XYZ coordinate system is a
geometric system used to specify the
position of the gripper tip by defining its
distance, in millimeters, from the point of
origin along three linear axes. To
complete the definition you must also
specify the pitch and roll, in degrees, of
the gripper.
The point of origin in the XYZ coordinate
system, as well as in the cylindrical and
spherical systems, is located at the center
and bottom of the SCORBOT’s base.
Cylindrical Coordinates
Similar to the XYZ coordinate system, the
cylindrical system specifies the position
of the gripper tip by defining it as a point
on a cylinder, using three axis
values:
SCORBOT-ER III XYZ Coordinate System
Radius: the horizontal distance, in
millimeters, of the gripper from the
point of origin).
Alpha α: the horizontal angle, in
degrees, of the robot base in
relation to the base home position).
Height: the vertical distance, in
millimeters, of the gripper from the
point of origin).
Cylindrical Coordinate System
User’s Manual
9311
ER-SIMULATION
for SCORBOT-ER III
5-5
APPENDIX B
To complete the definition you must also specify the pitch and roll (in degrees) of
the gripper.
Note that the height coordinate is similar to the Z Cartesian coordinate, and the
alpha coordinate is a conversion of the base (robot axis 1) rotation into degrees.
Spherical Coordinates
Similar to the XYZ and cylindrical coordinate systems, the spherical system
specifies the position of the gripper tip by defining it as a point on a sphere, using
three axis values:
Alpha α: the horizontal angle, in degrees, of the robot base in relation to the
horizontal home.
Radius: the distance, in millimeters, of the gripper from the point of origin.
Beta β: the angle of elevation, in degrees, of the gripper position in relation to the
point of origin.
To complete the definition you must also specify the pitch and roll (in degrees) of
the gripper.
Note that the alpha
coordinate is a
conversion of the
base (robot axis 1)
rotation into degrees.
Spherical Coordinate System
5-6
ER-SIMULATION
for SCORBOT-ER III
User’s Manual
9311
APPENDIX C
APPENDIX
C
Variable Programming
SCORBASE Level 5 allows extensive variable programming. Variables are useful
for creating loops and subroutines in robot programs. They let you write
commands that change as the state of the robot or its environment changes during
program execution.
Up to 962 variables can be used by SCORBASE Level 5. Variables are referred to
by names of one letter, two letters, or a letter and a digit (for example: A or AB or
B1).
Variables can have integer values from -32767 through +32767.
When programming in SCORBASE, you can specify a variable instead of a
numeric value in most editing commands. You cannot use a variable to specify a
Jump To line number (in the J, IL, II and OI commands), or in the Set Subroutine
command.
The following commands accept variables, in the fields marked with a dot:
GO POSITION • SPEED# •
WAIT • 10THS OF SECONDS
IF LIMIT SWITCH # •
IF INPUT # • ON/OFF
ON INPUT INTERRUPT # •
DISABLE / ENABLE INPUT INTERRUPT # •
TURN OUTPUT # • ON/OFF
RECORD PRESENT POSITION AS POSITION # •
SET AXIS # • TO ZERO
SET VARIABLE • TO •
IF VARIABLE • <=> •
User’s Manual
9311
ER-SIMULATION
for SCORBOT-ER III
5-7
APPENDIX C
Before using a variable in a command, be sure you have defined it using the SV
(Set Variable) command.
Note: If, at run time, the program encounters a variable whose value is not
defined or is out of range, an error message is displayed:
VALUE IS OUT OF RANGE
Examples:
GO POSITION A FAST
Whenever this command is executed, the robot is sent to position A (recorded
in the Positions Table). The value of A is determined at run time.
TURN ON OUTPUT PP
This command will turn on output number PP (according to the value of PP at
run time).
Examples of Short Programs
The following program moves the gripper consecutively from one position to the
next, waits 5 seconds at each position, and continues until it reaches the one
hundredth position in the Positions Table.
1
2
3
4
5
6
SET VARIABLE CP 1
SET VARIABLE W 50
GO POSITION CP * FAST
WAIT W 10THS OF SECONDS
SET VARIABLE CP = CP + 1
IF VARIABLE CP <= 100 JUMP TO 3
The following program sequentially scans all 8 inputs, and sends the robot to the
positions which correspond to the ON inputs.
1
2
3
4
5
6
7
8
9
5-8
SET VARIABLE I TO 1
SET VARIABLE L TO 8
IF INPUT #I ON CALL SUB. 1
SET VARIABLE I = I + 1
IF VARIABLE I <= L JUMP TO 3
JUMP TO LINE #1
SET SUBROUTINE #1
GO POSITION I SPEED #8
RETURN FROM SUBROUTINE
ER-SIMULATION
for SCORBOT-ER III
User’s Manual
9311