1
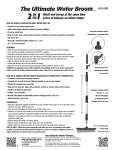
Thanks for shopping with Improvements! Motion Activated Security Camera Item #387146 Accessories Included: “Photo Patrol” Camera USB Cable Mounting Hardware Warning Label User Manual Specifications: Resolution: Internal Memory: External SD Memory: Best Distance: Effective Range: Format: Power Adapter: Battery Type: 640x480 16 MB up to 2 GB (not included) 9 to 16 feet 23 feet JPEG 5V/500MA (not included) 4x AA (not included) PC System Requirements (no software needed) Windows 2000 XP Vista Windows 7 IMPORTANT: ALWAYS FOLLOW YOUR STATE LAWS REGARDING THE USE OF SECURITY CAMERAS. ENSURE THAT YOU AVOID USING HIDDEN SECURITY CAMERAS IN AREAS WHERE THERE IS A REASONABLE EXPECTATION OF PRIVACY SUCH AS BATHROOMS, BEDROOMS, DRESSING ROOMS AND OTHER PLACES WHERE PRIVACY IS EXPECTED. To order, call 1-800-642-2112 West Chester, OH 45069 If you have any questions regarding this product, call 1-800-642-2112 and ask for our product specialists (Mon.-Fri. 9:00-5:00 EST) or e-mail: [email protected] See many more products on the Internet! www.ImprovementsCatalog.com 1 Inserting the Batteries Open the battery door and insert 4 fresh AA batteries. Place the batteries so the positive (+) and negative (-) polarities are lined up correctly as indicated in the battery compartment. Close the battery cover. Note: If you plan to use the item for an extended and continuous manner, the purchase of an AC adapter (5V/500MA 5store. ) is recommended. The adapter can be purchased at any good electronics 2 Always remove all batteries prior to using with the adaptor. Battery Warning Do not mix old and new batteries. Do not mix alkaline, standard, or rechargeable batteries. Note: The photos in the internal memory will be lost if the batteries are exhausted or removed. 3 Programming the Date and Time Press and hold down the ON/OFF button for 3 seconds, until screen turns on. Press and hold MODE button until dAt appears on the screen then press SET button. Press ON/OFF button to scroll. Once you’ve set the desired number press SET button to save. FORMAT: 1XX = Year (Example for 2009, it should read 109) 2XX = Month (Example for July, it should read 207). 3XX = Day (Example for July 11, it should read 311). 4XX = Hour (Military Setting – Example for 12:00 pm, it should read 412 and for 1:00 pm, it should read 413). 5XX = Minutes (Example for 12:30, it should read 530). Note: Upon turning ON, the device will warm up for about 3 minutes and will immediately start taking photos. Note: The date and time must be set each time the unit is RESET. 4 Memory / Storage Capacity The “Photo Patrol” Camera has 2 types of memory capacity. 1. Internal memory - can store up to 200 pictures 2. Optional SD memory card SD Card 32 MB 64 MB 128 MB 256 MB 512 MB 1 GB 2 GB # of Pictures 400 800 1600 3200 6500 13,000 26,000 IMPORTANT INFORMATION: The photos in the internal memory will be lost if the batteries are exhausted or removed. We recommend saving the pictures to your computer once the internal memory is full. If using only the internal memory, the camera must be reset after each use by opening the battery compartment door. We strongly suggest that you use an optional SD card (available everywhere) for picture storage. 5 SD memory card will override the internal memory. The “Photo Patrol” will accept up to a 2GB card. Photos Optional stored in the SD card will not be erased if the batteries are exhausted or removed. Always turn the device off when inserting or removing a memory card to avoid any damage. 5 Mounting Use the supplied hardware to mount your “Photo Patrol” Camera securely on walls. Turn the unit ON before mounting by pressing the ON/OFF button. For best results, make sure to place your “Photo Patrol” camera directly in front of entryways or objects you intend to monitor. Keep in mind that the pictures come out clearer when the object being photograph is walking towards the camera rather than walking by it. Ensure that the area is well lit, especially at night or you can use along with a motion sensor light. Note: If using outdoors, the device should be mounted only in protected locations such as under eaves and porches. It is not meant for direct contact with water or rain and cannot be left out in the elements. Note: PIR sensors can be activated by gusts of warm air such as, heaters or heating ducts. It may be necessary to experiment with several mounting positions in order to determine the optimal location for the item. 6 Image Viewing and Saving No software downloads are needed to view the pictures from the “Photo Patrol” Camera on your PC. Turn off the device by pressing ON/OFF button for 3 seconds. Connect the supplied USB cable to an empty USB port on your PC. Connect the other end to the “Photo Patrol” Camera. Ignore the messages that appear on the lower right hand side of your PC. If your PC doesn’t recognize the device, unplug the USB cable for 10 seconds and re-plug back into your PC. Click on “My Computer” Click on the “Removable Disc” icon. Click on the “DCIM” folder. Click on the “Images” folder and you should be able to view and/or print your pictures. To save the pictures on your PC, you can simply drag the “DCIM” folder onto your desktop.