1
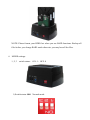
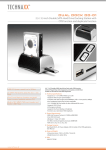
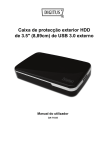
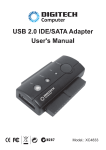
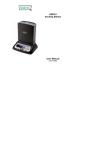
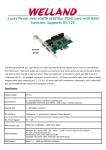
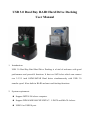
USB 3.0 Dual Bay RAID Hard Drive Docking User Manual 1. Introduction: USB 3.0 Dual Bay Raid Hard Drive Docking is a kind of enclosure with good performance and powerful functions. It has two SATA slots which can connect two 2.5/3.5 inch SATAI/SATAII Hard drives simultaneously with USB 3.0 transfer speed. It has built-in RAID and one touch backup functions. 2. System requirement: Support INTEL 586 above computer. Support WIN98/ME/2000/XP/VISTA/7,LINUX and MAC8.6 above. USB3.0 or USB2.0 port. 3. Specifications: Install and take out HDD Easily. Support two 2.5 or 3.5 inch SATA HDD up to 2×2TB. Hot Plug & play. Blue Power LED and HDD LED indicators. USB2.0 speed up to 480Mb/s USB3.0 speed up to 5Gb/s Support HDD RAID1, RAID0, JBOD and normal modes. Support OTB function. 4. Accessories: USB3.0 Dual bay docking 1 PCS USB3.0 A to B cable 1PCS AC cable 12V/3A 1PCS Power adapter Driver and User Manual CD 1PCS 1PCS 5. Hardware installation: Connect AC cable to power, DC cable to dual bay docking DC port. Connect USB 3.0 cable to computer. Setup your HDD Mode and then power on the docking, it will display USB icon. You can find two HDD or RAID HDD in “My Computer”. It’s no need to install driver for OS: WINDOWS2000/XP/VISTA/7. NOTE: Please format your HDD first when you use RAID functions. Backup all files before you change RAID mode otherwise you may loss all the files. 6. MODE settings: 1, 2, 3 switch status: ON: 1,OFF: 0 1) Switch status: 000 Normal mode. 2) Switch status: 110 RAID 1 mode. This mode is Safe mode. If any one of the two HDD in the dual bay docking gets bad, you can replace it with a new HDD. The dual bay docking will rebuild all files in the new HDD. 3) Switch status: 010 RAID 0 mode. This mode makes you improve access speed of HDD. 4) Switch status: 100 JBOD mode. In this mode, two HDD integrate to be one big HDD. 7. One Touch backup: Please insert the driver CD into your CD-ROM, then open” PCCLONEEX” to run “Setup”, After the installation completed, you can setup all. Then press “OTB” button on the docking, it will back up the files in the folder you set to HDD automatically. 8. Take out your HDD: Please hold the HDD by your hand, then press pop key, the HDD will pop up to your hand. Thanks a lot for your purchase of our product!