1
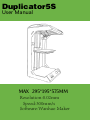
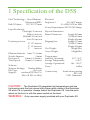
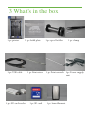
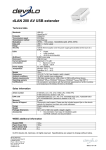
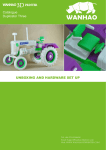
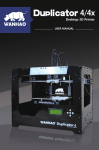
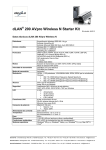
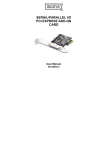
Desktop 3D Printer
Duplicator 5S
User Manual
www.wanhao3dprinter.com
This User manual is designed to help you
start your experience with Duplicator 5S. .Within
these pages, we want to show you how simple
and easy it is to produce great prints.You might
be familiar with earlier types of Wanhao printers
or other 3D-printers. It is essential that your read
this manual carefully as there are a lot of new
procedures with Duplicator 5S.
WANHAO is excited to welcome you to the world of
the WANHAO Duplicator 5S .Following this guide
will help ensure that you are getting the most out
of your machine, and that you continue to make
amazing things.
电话: +86-579-82346658
邮箱: Sales@WanHao3D Printer.com
网址: www.wanhao3dprinter.com
Duplicator5S
User Manual
MAX 295*195*575MM
Resolution:0.02mm
Speed:300mm/s
Software:Wanhao Maker
1 Specification of the D5S
Print Technology: Fused filament
Fabrication(FFF)
Build Volume: 295*195*575mm
Layer Resolution:
Ultra high: 20 micron
High:60 micron
Medium:100 micron
Low:200 micron
Position precision :
X 12.5 micron
Y 12.5micron
Z
5 micron
Filament diameter: 3mm±0.15mm
Nozzle diameter:
0.4mm
Print speed:
30mm/s-300mm/s
Travel speed:
30mm/s-350mm/s
Software:
Software Package: WanhaoMaker
File Type:
stl,Gcode
Support: windows(XP32bit/7+)
Mac OS X(10.6 64bit)
Electrical
Intrpiucta l:
100-240V 4amps
50-60Hz 200Watt Max
Power Requirements:24V [email protected]
Physical dimensions
Frame Dimension
Shipping box
Net Weight:
Gross Weight:
Temperature:
Ambient Operating:
Storage Temperatuer:
Average Operational:
Noise:
Connectivity:
Length 455mm
Width 415mm
Height 810mm
Length 575mm
Width 530mm
Height 910mm
28kg(62lbs)
39kg(86lbs)
10℃-38℃
0-40℃
180—260℃
48dba
Stand-alone printing
SD Card
USB(firmware)
CAUTION: The Duplicator 5S generates high temperatures and has
hot moving parts that can cause injury.Never reach inside of the Duplicator
5S while it is in operation. Always control the Duplicator 5S from the push
wheel on the front or with the power-switch on the back.
WARNING: Only use power supply provided with your Duplicator 5S.
2 Unboxing
1.Place The Duplicator 5S box on the 2.Cut of the rope and Discard
ground next to a clean, flat workspace the top cardboard insert.
3.Now remove the inner cardboard
box, and take the Duplicator 5S
out of its box.
4.Now you can clear away the
packging films and get the
Duplicator 5S.
3 What's in the box
1 pc printer
1 pc bulid plate
1 pc USB cable
1 pc SD card reader
1 pc Print raiser
1 pc SD card
1 pc spool holder
1 pc clamp
1 pc Print wrench 1pc Power supply
unit
1 pc 3mm filament
4 D5S glance
1.LED display
2. Push and Rotate button
3. Extruder Cable
4. Filament tube
5. MK10 Extruder
6. Building Plate
7. Building Plate Screw
8. Spool Holder
9. USB Socket
10. Power Switch
11. Material Feeder
12. Power Socket
5 Install Power Supply
Now the next step is to give the Duplicator 5 power.This is done by attaching
the external power supply.
1. If the power supply has to be detached,the first step is to make sure the
Duplicator5S turned off.
2.The corresponding power cable (for your country) has to be inserted in
the power brick of the power supply.
3. The connector has to be inserted at the back of the Duplicator5S, in
the round hole next to the on/off switch and USB slot.The flat side of the
power plug has to face towards the top of the Duplicator5S.
4.Now plug the external power supply into the wall socket.
5.Next take the power plug out of the wall socket.
CAUTION:Please make sure not to pull the cable.
6.The main cable in the power brick can be detached by pulling it out
gently.
6How to level the buling plate
1. Navigate the Rotate button and push 2. Navigate the Rotate button to utility
the button
and Push the button
3. Navigate to Calibrate plate and push
the button
5.Push the button and adjust nut below
the plate
7.Navigate to Step2, 3 and 4
4.Prepare a name card, Wait untilautohoming f inshed
6.Insert one name card between the
nozzle and plate(0.1mm thick)
8.Adjust the rest 2 nuts and ensure name
card can go through
7Loading filament material
1.Now that we have completed the
initial leveling tasks we [Continue]
and go to the step where we are
going to insert filament material
in the material feeder.Navigate the
control button to ---Utility---Load
2. Wait the extruder to heat up to
220℃. Warning, never touch the
nozzle while printer power on.You
are only allowed to touch the nozzle
when the printer is power off.
3.Please make sure you have a
filament spool positioned over
the spool holder,guided along the
filament guide,with the filament in
counter clockwise direction.
4.This step needs some extra focus.
The wheel in the material feeder
will start rotating slowly. Take the
material and put it in the hole at the
bottom of the material feeder. There
is a holewhere it should go into right
above the sticker. Follow the display
instruction with the supporting
images below but WAIT! before
pushing and check the next page for
more instructions.
8How to Install
Wanhao Maker software prepares your 3D model into Machine
language which required to make 3D object. Wanhao Maker is
developed by Wanhao International Team aimed to make 3D
printing式。Wanhao Maker as affordable and easy as possible.It
contains most function you need to prepare a 3D file for printing.
It is fully preconfiguresed to work on every Duplicator5 S.Wanhao
comes with a easy setup program that helps you install the lastest
firmware as well as to calibrate your printer.While you make
decisions on the look and quality of your 3D your model at the
background. Faster than ever.From there it is just seconds away
from your object, Wanhao Maker’s slicer engine prepares your
model at the background. Faster than ever.From there it is just
seconds away from your printer and ready to become your physical
object.
1. Down load Wanhao Maker or copy
software from SD card. Double click the
Wanhao Maker.exe to install software
2.Language selection. We provide 3
language at present, English, Simplify
Chinese, Chinese
3.Folder route. Please take default route
for faster slicing speed.
4. Installation wizard will continue to
finish the rest steps.
9Wanhao Maker界面
1.Load file:Click this button to load an object to your print area. You can add as many objects
as you can fit on the plate.
2.Start Making:Press this button to start Slicing. There will be more options after pressing the
button.
3.Save toolpath (SD):When you press this button the prepared toolpath will be saved on the
SD card.
4.Load file:Click this button to load an object to your print area. You can add as many
objects as you can fit on the plate.
5.Delete:Click on any item then delete an object from the plate.
6.View:Check the object from different angle.
7.Pan:To Move the plate from all directions, so you can check more clear.
8.Move:Move the object left, right, front and back wards.
9.Rotate:Move the object with different angle. X,Y, Z axis can be with suitable angle for
printing.
10.Scale:To enlarge to shrink the object.
11.Mirror X:Options to mirror the object from X axis.
12.Mirror Y:Options to mirror the object from Y axis
13.Mirror Z:Options to mirror the object from Z axis
14. Duplicate:To duplicate the object in same size.
15.Reset:Let the object back to start position
16.Start Making:Press this button to start Slicing. There will be more options after pressing the
button
17.Build plate:This is the plate your object to be printed.