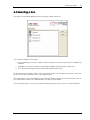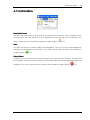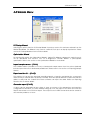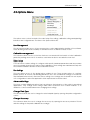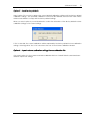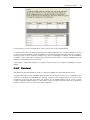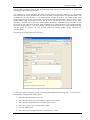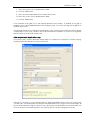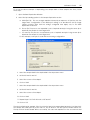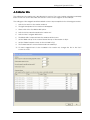
1
CASCAS- 1200 Liquid Handling System
Operation Manual
Version 4.9
4.9
©2007 Corbett Robotics Pty. Ltd.
CAS-1200
Operation Manual
By the Corbett Robotics Team
The CAS Series of Robotic Liquid Handling Systems provide a precise and
labour saving means to perform a wide range of pipetting tasks. The
instruments are highly configurable and can be programmed to set up a
variety of tasks.
The software provides a user friendly, easy to follow user interface. The
screen layout corresponds to the plates set up on the robot. The status of
any component can be examined by clicking it on the screen. Likewise,
any alterations are executed by simply pointing to the corresponding
hardware on the screen and changing the desired parameters.
This manual is designed to be used as an introduction and quick
reference to the CAS-1200.
CASCAS- 1200 Liquid Handling System
Operation Manual
All rights reserved. No parts of this work may be reproduced in any form or by any means - graphic,
electronic, or mechanical, including photocopying, recording, taping, or information storage and
retrieval systems - without the written permission of the authors.
Products that are referred to in this document may be either trademarks and/or registered
trademarks of the respective owners. The publisher and the author make no claim to these
trademarks.
While every precaution has been taken in the preparation of this document, the publisher and the
author assume no responsibility for errors or omissions, or for damages resulting from the use of
information contained in this document or from the use of programs and source code that may
accompany it. In no event shall the publisher and the author be liable for any loss of profit or any
other commercial damage caused or alleged to have been caused directly or indirectly by this
document.
Printed:
Oct-07
© Corbett Robotics 2007
Hardware
1
Contents
1
................................................................
................................................................
.......................................................
HARDWARE ................................
................................
................................
....................... 4
1.1
1.2
1.3
1.4
1.5
2
UNPACKING ........................................................................................................................................ 5
BOX CONTENTS .................................................................................................................................... 6
THE INSTRUMENT ................................................................................................................................. 11
THE COMPUTER .................................................................................................................................. 13
SPECIFICATIONS.................................................................................................................................. 14
UP
................................................................
................................................................
.................................. 16
SAFETY AND SETTING U
P ................................
................................
................................
2.1
2.2
2.3
2.4
2.5
2.6
2.7
2.8
2.9
2.10
3
SAFETY .............................................................................................................................................. 17
POSITIONING THE ROBOT ..................................................................................................................... 18
CONNECTING THE ROBOT.................................................................................................................... 19
SOFTWARE INSTALLATION ..................................................................................................................... 20
UN-INSTALLING THE SOFTWARE ............................................................................................................. 25
OTHER FEATURES ON THE CD ............................................................................................................... 25
MULTIPLE ROBOTS FROM ONE COMPUTER............................................................................................... 25
STARTING FOR THE FIRST TIME ................................................................................................................ 26
CALIBRATIONS.................................................................................................................................... 29
LID .................................................................................................................................................... 30
................................................................
................................................................
.......................................
SOFTWARE IN DETAIL ................................
................................
................................
....... 31
3.1
3.2
3.3
3.4
3.5
3.6
3.7
3.8
3.9
3.10
3.11
3.12
3.13
3.14
3.15
3.16
3.17
3.18
3.19
3.20
3.21
3.22
3.23
4
SOFTWARE OVERVIEW ......................................................................................................................... 32
STARTING THE SOFTWARE ..................................................................................................................... 34
SELECTING A RUN ............................................................................................................................... 35
THE SOFTWARE WORKSPACE ................................................................................................................ 36
TOOLBAR ........................................................................................................................................... 38
FILE MENU ......................................................................................................................................... 42
CONTROL MENU ................................................................................................................................ 44
WIZARDS MENU.................................................................................................................................. 45
OPTIONS MENU.................................................................................................................................. 46
HELP MENU ....................................................................................................................................... 79
PLATE BUTTONS .................................................................................................................................. 82
TIP AVAILABILITY MENU........................................................................................................................ 83
PLATE OPERATIONS MENU ................................................................................................................... 84
ADDING WELLS TO SAMPLE BANKS ....................................................................................................... 86
CHOOSING THE RIGHT PLATE ............................................................................................................... 88
RIGHT-HAND PANE ............................................................................................................................. 93
STARTING A RUN ............................................................................................................................... 137
WARNINGS ...................................................................................................................................... 139
PRE-RUN REPORT .............................................................................................................................. 140
ABORTING A RUN ............................................................................................................................. 142
POST-RUN REPORT ............................................................................................................................ 143
EXCEPTION HANDLING ...................................................................................................................... 144
SHUTTING DOWN .............................................................................................................................. 146
..........................................................
SETTING UP A TYPICAL PCR RUN - AN EXAMPLE ................................
.......................... 147
4.1
4.2
4.3
4.4
4.5
4.6
4.7
5
INITIAL SETUP .................................................................................................................................... 148
REAGENTS ....................................................................................................................................... 152
MASTER MIX .................................................................................................................................... 154
STANDARDS ..................................................................................................................................... 157
SAMPLES.......................................................................................................................................... 158
REACTIONS ...................................................................................................................................... 159
SETTING UP THE TABLE ........................................................................................................................ 161
................................................................
................................................................
.............................................
USING WIZARDS ................................
................................
................................
............. 163
5.1
5.2
PCR SETUP WIZARD.......................................................................................................................... 164
OPTIMISATION WIZARD...................................................................................................................... 167
© Corbett Robotics 2007
Hardware
6
2
................................................................
................................................................
..................................................
APPENDICES ................................
................................
................................
.................. 169
6.1
6.2
6.3
6.4
6.5
6.6
6.7
6.8
6.9
6.10
APPENDIX A - HELPFUL HINTS ............................................................................................................. 170
APPENDIX B - MAINTENANCE ............................................................................................................. 172
APPENDIX C - SELF DIAGNOSTIC TOOLS .............................................................................................. 173
APPENDIX D - PIPETTOR SERVICING .................................................................................................... 175
APPENDIX E - DECONTAMINATION PROCEDURES.................................................................................. 178
APPENDIX F - PRECISION VS. ACCURACY ............................................................................................ 180
APPENDIX G - FREQUENTLY ASKED QUESTIONS .................................................................................... 182
APPENDIX H - TROUBLESHOOTING....................................................................................................... 184
APPENDIX I - ERROR CODES .............................................................................................................. 187
APPENDIX J - CONTACT DETAILS ........................................................................................................ 188
© Corbett Robotics 2007
Hardware
3
CASCAS-1200 Robotic Liquid Handling System
The CAS-1200 Robotic Liquid Handling System provides a precise and labour saving means for setting
up PCR reactions. The CAS-1200 can also perform a vast variety of other pipetting operations. The
instrument is highly configurable and can be programmed to set up a range of reactions at the
same time. It is capable of preparing multiple Master Mixes, standard dilutions and can use multiple
groups of samples.
For maximum precision the CAS-1200 uses graphite-impregnated conductive tips, which enables
liquid level sensing. The tip moves to just below the surface of the liquid rather than the bottom of the
tube preventing carry over of material on the outside of the tip. Non-conductive tips can also be
used without the level sensing function.
The Robotics Software provides a friendly, easy to follow user interface that has been primarily
geared towards PCR set-up. The screen layout corresponds to the plates set up on the robot. The
status of any component can be examined by a simple mouse point and click of the component
displayed on the screen. Likewise, any alterations are executed by simply selecting the module on
screen and changing the desired parameters.
The progress of a run can be followed in real time. The software highlights the position of the pipette
head on the screen as it moves. A progress bar and an update table show the course of a run.
Reports are generated before and after a run and are automatically saved for future reference.
Laborious calculations are unnecessary as the software calculates the amount of Master Mix and
reagent necessary for each experiment.
The Robotics Software can also be run in Virtual Mode. In Virtual Mode, runs can be set up, progress
followed and files stored even if the robot is switched off or not connected. Therefore, it is possible to
configure runs at a remote location. Virtual mode is also a useful tutorial tool.
For customer convenience, sample data can be imported from text-based spreadsheets with flexible
options to handle a variety of formats. The reaction list generated by the robot can also be exported
as a spreadsheet and loaded into other programs such as the Corbett Rotor-Gene real time PCR
software.
For further information or assistance, please do not hesitate to contact the Corbett Team or your
nearest Corbett distributor.
Corbett Robotics Pty. Ltd.
42 McKechnie Dr.
Eight Mile Plains
Qld 4113
Australia
Ph: + 61 7 3841 7077
Fax: + 61 7 3841 6077
http://www.corbettrobotics.com
For general enquiries about our products and sales, contact:
[email protected]
For technical assistance contact:
[email protected] (or [email protected])
© Corbett Robotics 2007
Hardware
4
1 Hardware
Congratulations on the purchase of the CAS-1200 Robotic Liquid Handling System. This section covers
the unpacking of the CAS-1200, some of its features, such as level sensing, and the accessories that
are delivered as standard with your robot. Please refer to Setting Up for details on how to get started
with your CAS-1200.
© Corbett Robotics 2007
Hardware
5
1.1 Unpacking
Great care and attention has been taken to design the packaging for the CAS-1200 to ensure that
the instrument arrives in the same condition as it left the factory. To unpack the instrument, please
follow the instructions provided in the lid of the robot's shipping container. These instructions should
also be used when packing the instrument.
Please do not discard the packaging. The packaging must be used if the instrument is to be returned
for servicing.
As you unpack the instrument please ensure that the box contents matches the packing list included
with the CAS-1200.
Once the robot is removed from the shipping container and its foam base, the arm support must be
removed. To remove the arm support and z-axis locking mechanism, follow these simple steps,
1. Unscrew the screws marked A and B on the locking plate to right of the arm.
2. Slide the arm (and pipetting head) all the way to right.
3. Lift the wooden arm support off the table of the robot.
4. Replace the locking plate and screws A and B into the arm support.
5. Look at the robot from the left hand side and identify the z-axis lock screw (shown in the picture
below).
Unscrew the z-axis locking screw. When this screw is removed the pipetting head will drop.
Secure the removed z-axis locking screw and associated parts into the side of the arm support as
shown, store the arm support with the rest of the packaging.
The most important components of the packaging are the z-axis lock screw and the wooden arm
support. These must be used whenever the CAS-1200 is moved from one location to another. Failure
to do so will void warranty.
© Corbett Robotics 2007
Hardware
6
1.2 Box Contents
The CAS-1200 Robotic Liquid Handling System shipping container includes the items listed on the
packing slip. These items typically include:
• 1 x CAS-1200
• 1 x IEC Mains Cable
• 1 x RS-232 Serial cable
• 1 x Software CD
• 1 x (5 x 5mL Tubes) Master Mix Blocks
• 1 x (1 x 5mL, 4 x 1.5mL Tapered Tubes) Master Mix Blocks
• 1 x Reagents/Standards Block
• 2 x 96-Well Plate
• 1 x 32 Well Plate set
• 1 x Pipettor Service Kit
• 4 x Tip Racks
• 1 x Pack of Sample Tubes
• 10 x Tip Disposal Boxes
To operate the CAS-1200 requires a PC, which may or may not be delivered with the instrument.
IEC Mains Cable and Power
A standard 3-wire IEC mains cable is required to connect the CAS-1200 Robotic Liquid Handling
System to mains power. Typically these cables are the same as used to provide PCs with power. The
cable must be a 3-wire cable as the earthing wire is critical for correct level sensor operation.
The CAS-1200 is available in a number of power options. Please see the Specifications.
Serial Cable
A serial cable is required to connect the CAS-1200 Robotic Liquid Handling System to the host
computer's RS-232 serial port. The serial cable is of the 9-pin male to 9-pin female "straight through"
kind.
© Corbett Robotics 2007
Hardware
7
Software CD and User Manual
The CAS-1200 Robotic Liquid Handling System is delivered with a Software Manual and the current
Software CD. The Software CD contains the latest Robotics Software required to control the CAS1200 Robotic Liquid Handling System. It also contains the Operation Manual (this document) as a PDF
document.
Occasionally, Robotics Software updates are released to provide new functionality. To ensure you
are always using the latest Robotics Software please visit the Corbett Robotics website at
www.corbettrobotics.com. It is the user's responsibility to update software to ensure the instrument
operates to the best of its ability.
Corbett software updates are free of charge to all users of Corbett instruments. We feel this is the
only way to give our users the fastest access to new features. This of course means that new versions
can be released several times per year.
1.2.1
Loading Blocks and Plates
The CAS-1200 Robotic Liquid Handling System is delivered with a wide variety of loading blocks.
These blocks support the tubes that are typically used on the robot.
All CAS-1200 loading blocks are manufactured from high quality aluminium which is anodised to give
the block a hard wearing, durable black finish. The white feet are made from high temperature
silicone rubber. The blocks are fully autoclavable. They can also be kept in a fridge or freezer before
placing them on the robot, thus keeping the tube contents cool. The blocks can be washed in
bleach or water. Please note that some solvents or salts may stain the anodised surface.
The blocks delivered as standard with the CAS-1200 are only a small sample of the variety of blocks
available from Corbett Robotics. For a full list of available blocks and accessories, you can request
an up-to-date plate catalogue from your nearest Corbett distributor or look in the Robotics Software
under Changing Plate Type for an indication of available blocks.
Master Mix Blocks
There are two Master Mix Blocks. The first is designed to hold five 5 mL free standing tubes. The
second block holds one 5 mL free standing tube and four 1.5 mL tapered tubes. Both blocks are
intended to hold diluent and master mix on the robot's workspace. However, their function can be
re-defined if necessary.
5 x 5 mL Free Standing
1 x 5 mL and 4 x 1.5 mL Free Standing
Reagent Block
One reagent block is delivered as standard. This block is designed to hold eight 1.5 mL tapered
tubes, eight 2 mL free standing tubes and 16 x 200 µL PCR tubes. Typically, the larger tubes are used
for reagents and the 16 smaller tubes are used for creating dilution series.
© Corbett Robotics 2007
Hardware
8
Standard Footprint Blocks
The CAS-1200 is delivered with three blocks which have the standard 128 x 86mm footprint. There are
two blocks that hold 96 tubes of dimensions similar to the 200 µL PCR tube. These blocks can be used
to hold strip tubes, unskirted or half-skirted PCR plates.
The CAS-1200 is also delivered with a 32 x 1.5 mL well block. The design of this block allows the caps
to be locked in position preventing interference with the pipette tip. This block comes with a tube
lifter plate which can be placed underneath the block for easy removal of the tubes.
1.2.2
Pipettor Service Kit
The pipettor service kit should be stored in a safe place so that it can be found when the CAS-1200
pipette requires servicing (after 300,000 operations). As is the case with manual pipettes, occasionally
these need to be serviced to maintain pipetting precision. This kit and its instruction sheet will allow
the user (or a trained service technician) to conduct the pipettor service.
© Corbett Robotics 2007
Hardware
1.2.3
9
Tip Racks and tip rack holders
The CAS-1200 Robotic Liquid Handling System is delivered with four metal tip rack holders. Two
different tip sizes (200 µL and 50 µL) are typically used, with 10 racks of 200 µL tips and 10 racks of 50
µL tips delivered with the instrument. Each rack contains 96 tips. Please note that the tips are
packaged sterile.
Normally, the tips used on the robot are carbon impregnated, conductive and filtered. Conductive
tips allow the CAS-1200 to use its level sensor for optimal pipetting precision. Non-conductive tips can
be used on the CAS-1200. However, these will not allow level sensing functionality. To use nonconductive tips, the level sensor will need to be disabled in software. The use of non-conductive tips
affects the pipetting precision of the robot and is hence not recommended for critical applications.
We recommend the use of filtered tips to avoid potential cross-contamination. Further, because the
CAS-1200 uses both 200 µL and 50 µL tips, if 50 µL unfiltered tips are placed on the robot by mistake
(instead of 200 µL tips) the pipettor may become contaminated. This situation will require a pipettor
service and thus the use of non-filtered tips is not recommended.
A tip rack holder loaded with a rack of 96 x 50 µL conductive tips
To load tip rack into the tips rack holder follow this diagram:
1.2.4
Sample Tubes
The CAS-1200 Robotic Liquid Handling System can pipette from a wide variety of tubes. Some typical
tubes are provided as samples with the instrument. Please note that the sample tubes provided are
not guaranteed sterile.
© Corbett Robotics 2007
Hardware
10
Take great care with tubes. Tubes from different manufacturers, although they might look quite
similar, can have significantly different depths and geometries. These variations can influence the
calibrations (especially height calibrations) on the CAS-1200.
It is recommended that once a particular consumable is chosen, the user always uses that
consumable from the same manufacturer to avoid frequent re-calibration.
The sample tubes delivered with the instrument are as follows:
5 mL Free Standing tubes
These tubes are typically used to hold diluent and large volumes of master mix. These tubes are
normally supported in the Master Mix Block.
200 µL PCR tubes
These tubes are typically used to hold samples and reactions and are supported in the 96 and 36well Loading Blocks.
1.2.5
Tip Disposal Boxes
The tip disposal boxes are provided as a way of collecting discarded tips on the side of the CAS1200. These tip boxes will hold approximately 400 used tips. However, due to the way tips fall into the
box, occasional shaking of the partially filled tip box may be necessary to avoid tips stacking up on
the tip ejector chute. Using the supplied tip collection boxes is optional. Alternative boxes can be
used at the user's discretion and may better suit the individual situation.
© Corbett Robotics 2007
Hardware
11
1.3 The Instrument
The CAS-1200 Robotic Liquid Handling System is a high-precision instrument designed primarily for the
setting up of real-time PCR reactions. The instrument has a number of significant elements which are
shown in the figure below.
The off-white paint used on the CAS-1200 is two part epoxy paint, which provides a very hard
wearing and UV resistant finish. The paint may yellow slightly over time, and some cleaning solvents
may stain the paint. The painted surfaces should be cleaned with a soft cloth with water. The paint
finish has been tested to be resistant against bleach, ethanol, methylated spirits and most liquids
commonly used in a laboratory environment. However, all spills of any sort should be wiped up
immediately to avoid any damage to the paint. Solvents usually associated with painting such as
mineral turpentine, acetone or paint thinners should never be used on the instrument. Due to the
hard nature of the paint, sharp objects should never be used on the painted finish as chipping of the
paint may occur. Similarly, dropping heavy items (such as master mix and reagent blocks) onto
painted surfaces is likely to result in chipping. Damage to the painted surface by solvents and
incorrect care is not covered by warranty.
The master mix and reagent blocks on the CAS-1200 as with most other black components on the
instrument (such as the table rails) are manufactured from Aluminium and anodised black. The
anodising provides a hard durable finish. The black finish may stain if wiped with certain cleaning
products.
The arm (y-axis) on the robot provides support for the pipetting head. Under no circumstances should
the user ever apply any force to the y-arm. This may misalign the arm resulting in pipetting errors.
The pipetting head is the mechanism that can be seen under the pipetting head cover. It consists of
a motor driven backlash-compensated pipetting mechanism. This mechanism is similar to most hand
pipettes. The pipetting head can be dismantled for the purposes of servicing.
© Corbett Robotics 2007
Hardware
12
The feet are height adjustable and have a non-slip silicone base to ensure that the CAS-1200 is
securely positioned on a laboratory bench. Do not attempt to slide the instrument on a bench
without lifting as damage to the silicone base of the feet may result.
The lid of the CAS-1200 is manufactured from impact resistant polycarbonate. Please refer to the lid
section for further details.
All electronics with the exception of the level sensor are housed in the rear of the machine. The
instrument has a number of moving parts: the X, Y, and Z-axis as well as the pipetting head.
Maintenance of these parts is low. Safety is a primary concern with the use of the CAS-1200. The lid
has an electronic interlock to prevent normal operation of the instrument while the lid is open.
On the rear of the machine are a number of connectors, as shown below. Use of these connectors is
further described in Setting Up.
Level Sensor
For maximum precision the CAS-1200 Robotic Liquid Handling System is equipped with a liquid level
sensor. This level sensor relies on conductive tips and allows the robot to automatically detect when
the pipette tip is touching liquid within a tube. The use of the level sensor helps prevent carry-over of
material on the outside of the tip.
The liquid level sensor is a very sensitive electronic device. It is capable of detecting very small
amounts of liquid (see Specifications for further details). It relies on a good earth connection for the
robot, typically provided via the cable which connects the robot to mains power. Further, the earth
must be free of electrical noise (see Troubleshooting for further details).
The level sensor on the CAS-1200 operates by detecting the change in capacitance when the tip
touches the liquid inside a tube. The sensed capacitance is developed between the liquid in the
tube and the metal external to the tube; the smaller the amount of liquid in the tube, the smaller the
change in capacitance when the tip touches the liquid. Eventually the detectable change in
capacitance "drowns" in electrical noise. This noise limit defines the minimum amount of liquid that
can be sensed (see Specifications).
Further, some liquids are more easily detected than others. The level sensor relies on the liquid being
conductive: if a liquid is not conductive, the level sensor cannot sense any change in capacitance.
For example, liquids that cannot be easily sensed include ultra-pure water and oil. Some liquids
which are normally non-conductive can be made slightly conductive by impurities (typically salts).
These slightly conductive liquids may be detectable by the sensor in volumes significantly larger than
the level sensor minimum.
In rare circumstances, the robot may need to pipette from wells that contain liquid less than the level
sensor limit. It may be necessary to switch the level sensor off or set the error detection levels
differently. It may also become necessary to manually calibrate the plate height closer to the base
of the tube.
© Corbett Robotics 2007
Hardware
13
1.4 The Computer
A personal computer running the Microsoft Windows operating system is required to control the CAS1200 Robotic Liquid Handling System. This PC can be provided by Corbett Robotics or its agent. If a
PC is supplied by the user, please observe the minimum specifications to run the Robotics Software
for a CAS-1200 which are listed in the Specifications section.
Windows NT, Windows 2000, and Windows 98 are no longer supported. These operating systems may
produce unstable or unreliable software operation.
© Corbett Robotics 2007
Hardware
14
1.5 Specifications
Pipetting Volumes:
Volumes:
• Between 1 µL and 200 µL
Precision:
Precision:
• 5 µL to 200 µL, less than 1% C.V.
• 2 µL to 5 µL, less than 5% C.V. into wet wells
Accuracy:
Accuracy :
• Accuracy can be calibrated in software
•
1% calibrated, volumes > 5 µL
Level Sensing:
Sensing :
• 10 µL of 10 x PCR Buffer in 200 µL PCR tubes supported in an Aluminium reagent block
• 20 µL of 10 x PCR Buffer in larger tubes supported in an Aluminium reagent block
Please note that the level sensor cannot sense all types of liquids, including oil and very pure water
(PCR-grade water is reliably detected).
Throughput:
• 384 pipetting operations per hour (tested using a typical PCR setup)
Electrical Requirements:
Requirements:
• 220 - 240Vac 50Hz, or
• 100 Vac 60Hz, or
• 110 Vac 60Hz
• 250 VA
• Good earth connection via mains outlet
Table Capacity:
• 6 standard footprint 128 x 86mm plates (up to 384 wells, with wells no smaller than 3.5mm
diameter)
• 37 additional tubes (combinations of 5 mL, 2 mL, 1.5 mL and 200 µL tubes)
Number of Pipetting Channels:
• One
Communication:
• RS-232
Lid:
• Polycarbonate lid is standard on all machines
• UV light for work surface sterilisation is available as factory fitted accessory
• HEPA filter unit for positive pressure under lid is available as factory fitted accessory
© Corbett Robotics 2007
Hardware
15
Weight:
• 25kg
Dimensions:
All dimensions are in mm and exclude any computer equipment.
• Lid closed, 490 mm(w), 580 mm(d), 390 mm(h)
• Lid open, 490 mm(w), 580 mm(d), 770 mm(h)
• The connection of cables at the rear of the instrument adds 70 mm to its depth
Computer Requirements:
• Platform may be one of:
•
Windows XP® Pro SP2 + 2.6 GHz Pentium® 4 CPU (desktop) or 1.6 GHz Pentium® M CPU
(laptop) + 512 MB RAM
•
Windows Vista® Business + Core™ 2 Duo CPU + 1 GB RAM + DirectX 9 capability
• RS-232 serial port (or USB port with separate USB-to-RS-232 converter)
• DVD/CD-ROM
• 80 GB hard disk (at least 100MB of free hard disk space)
• Monitor with at least 1024 x 768 pixel screen resolution (1280 x 1024 preferred)
Operational Temperatures:
• Constant 15 deg C to 35 deg C - temperature cycling not permitted
Operational Humidity:
• 40 - 70% RH
•
Lower humidity levels may affect precision due to evaporation
© Corbett Robotics 2007
Safety and Setting Up The Robot
16
2 Safety and Setting Up
Before going any further, please consult the section on Safety. This section covers the setting up of
the CAS-1200 Robotic Liquid Handling System.
© Corbett Robotics 2007
Safety and Setting Up The Robot
17
2.1 Safety
The CAS-1200 Robotic Liquid Handling System has a variety of moving parts. There are a number of
places that present significant pinch points. For your own safety and to prevent damage to the
instrument, please observe the following safety requirements:
• The robot is for indoor use only
• Always use the packaging provided with the robot when moving the machine
• Do not lift the CAS-1200 by yourself
• Do not disable the lid interlock
• Do not interfere with robot while it is running
• Do not attempt to move any plates or tubes while the robot is operating
• Do not, under any circumstance place your hand under the pipetting head while it is lowering
• When calibrating plates with the lid up, always stand clear of the robot when making
adjustments. Similarly, do not click on the mouse or keyboard while looking closely at plate
calibrations. The lid interlock is disabled during calibration mode, wait until the robot arm has
completed its movements before moving any plates or tubes.
• Do not calibrate the tip ejector unless you are confident in operating the CAS-1200
• Use only recommended tips and tip racks
• Keep the lid of the instrument closed whenever possible
• NEVER place any items on the y-arm of the instrument
• NEVER apply any force (by hand or otherwise) in the upward or downward direction on the yarm (the pipetting arm).
• Use the Stop/Pause button located on the tool bar of the software to stop/pause the robot
before removing plates or tubes. Please note that the CAS1200 will complete the current
action before stopping or pausing.
© Corbett Robotics 2007
Safety and Setting Up The Robot
18
2.2 Positioning the Robot
The location/position requirements of the CAS-1200 Robotic Liquid Handling System are not very
demanding. However, a few points should be observed.
• The robot can be installed on any sturdy laboratory bench or table.
• The robot must not be installed near generators of static electricity (e.g. ionisers, large screen
televisions etc.)
• The robot should be installed in a laboratory environment free of excessive airborne dust.
• The robot can operate in temperatures from 4 degrees Celsius to 30 degrees Celsius. Do not
subject the robot to repeated temperature cycling. The instrument can be operated in a cool
room of consistent temperature.
• Do not subject the robot to a relative humidity of > 70% for extended periods of time.
• Ensure that all four of the robot's feet are firmly located on the table surface (the front feet can
be height adjusted using a 10mm spanner).
• Ensure that the lid can fully open upwards without any obstructions.
• Ensure that the on/off switch at the rear of the instrument is easily reached.
If you have not done so already, please remove the arm support and z-locking screw as discussed in
the Unpacking Section.
Helpful Hint
Positioning the robot close to the left hand edge of a laboratory bench or table will allow tips to be
readily ejected out of the robot into a rubbish bin without the use of a tip disposal box.
© Corbett Robotics 2007
Safety and Setting Up The Robot
19
2.3 Connecting the Robot
The connections for the CAS-1200 Robotic Liquid Handling System are very straight forward. Please
set up the PC according to the manufacturer's instructions, and then follow these steps to connect
your CAS-1200.
1. With the host PC and robot both switched off; connect the supplied 9-pin serial cable to
the instrument. The serial cable socket is on the rear of the robot as indicated in the
diagram below.
2. Connect the other end of the serial cable to the PC. By default, the software is configured
to look for a robot on serial port 1.
3. Connect the power cable on the rear of the robot and connect it to the mains supply.
Once connected, switch on the CAS-1200 and the PC. The On/Off switch is located at the back of
the unit, next to the power cable socket. Upon switching on the robot, the pipetting head should rise
out of view. If this is not the case, please consult the troubleshooting section.
If your CAS-1200 Robotic Liquid Handling System is fitted with a UV light, ensure that it is firmly
connected to the UV light connector on the rear of the robot.
© Corbett Robotics 2007
Safety and Setting Up The Robot
20
2.4 Software Installation
1. Ensure that all other software (particularly Corbett software) is shut down.
2. It is important that all screen savers and power save modes are disabled for error free
operation of the CAS-1200 Robotic Liquid Handling System. Please consult Microsoft Windows
Help on how to disable these. Typically there are two power save modes and one screen saver
option important to the installation. The power save modes are those of the monitor and the
hard disk drive.
3. Some virus scanners are known to interfere with software operation. Typically these virus
scanners make the software run extremely slowly. Corbett Robotics advises caution when
installing the robotics software on computers with virus scanners installed.
4. Insert the Robotics Software CD into the CD-ROM of the computer.
5. The installer splash screen should be displayed automatically after a few seconds.
6. If the splash screen is not displayed, you can start the installation process by going to the 'Start
Menu', selecting 'Run' and typing d:\setup.exe.
7. Select 'Install Software' on the splash screen.
8. The installation process will begin.
You will be presented with a series of screens:
Screen 1 - Welcome to the Robotics4 Setup Wizard
This screen informs the user of the software version and recommends that the user close all other
programs before installing the software. Please note that if other Corbett software is not shut down
prior to the installation of the Robotics Software it may be necessary to reset the computer.
Selecting 'Cancel' allows the user to exit the setup. Selecting 'Next' takes the user to the next screen.
© Corbett Robotics 2007
Safety and Setting Up The Robot
21
Screen 2 License Agreement
This screen details the license agreement for the Robotics 4 software. You must read and accept the
terms of agreement before continuing with the software installation. Once the agreement has been
read, select ‘I accept the agreement’. Otherwise select ‘cancel’ to exit the software installation.
Selecting 'Back' takes the user back to the previous screen. Selecting 'Next' takes the user to the next
screen.
© Corbett Robotics 2007
Safety and Setting Up The Robot
22
Screen 3 - Select Destination Location
This screen allows the user to select the folder into which they want the software to be installed. The
'Browse' button enables the user to locate specific folders. Selecting 'Back' takes the user back to
the previous screen. Selecting 'Cancel' allows the user to exit the setup. Selecting 'Next' takes the
user to the next screen.
If a previous version of the software is installed, you will receive the following warning and by
selecting ‘Yes’ you are agreeing to have the previous version of the software uninstalled. By
selecting ‘No’ the previous version of software will remain installed and the installation of the new
version cannot proceed. If you choose to uninstall the previous version of software, your calibration
settings and run files will be retained.
© Corbett Robotics 2007
Safety and Setting Up The Robot
23
Screen 4 - Select Components
This screen allows the user to select the software components they wish to install. Selecting 'Back'
takes the user back to the previous screen. Selecting 'Cancel' allows the user to exit the setup.
Selecting 'Next' takes the user to the next screen.
Screen 5 - Select Start Menu Folder
This asks the user into which location they would like the program to install the program's shortcuts.
Selecting 'Back' takes the user back to the previous screen. Selecting 'Cancel' allows the user to exit
the setup. Selecting 'Next' takes the user to the next screen.
© Corbett Robotics 2007
Safety and Setting Up The Robot
24
Screen 6 - Select Additional Tasks
This screen asks the user to specify which additional tasks they would like to be performed while the
program is installing the software. Selecting 'Back' takes the user back to the previous screen.
Selecting 'Cancel' allows the user to exit the setup. Selecting 'Next' takes the user to the next screen.
Screen 7 - Ready to Install
This screen allows the user to review details entered and gives the option of selecting 'Back' to alter
details, or 'Next' to proceed with the installation. Selecting 'Cancel' allows the user to exit the setup.
© Corbett Robotics 2007
Safety and Setting Up The Robot
25
Screen 8 - Completing the Robotics4 Setup Wizard
This screen directs the user on how to launch the software.
UnUn- installing the Software
Software
To completely remove the Robotics Software, you can either select 'Uninstall Robotics4' from the
Program Group (accessible via the Start Menu). Alternatively you can select 'Control Panel\Add
Remove Programs' and select the Robotics Software from the menu.
You must also remove the c:\Program Files\Robotics4 directory. You can do this using Windows
Explorer. Please note that deleting this folder will destroy all calibration data and run files that may
have been saved in the c:\Program Files\Robotics4\Data directory.
Other Features on the CD
Other features on the Robotics Software CD include:
• The X-tractor Gene and Corbett Rotor-Gene Multimedia demo available for viewing.
• Adobe Acrobat Reader available for installation.
Multiple robots from one computer
Multiple X-tractor Gene and CAS-1200 robots can be operated from one computer. However, only
one instrument may be operated at a given time. Multiple instruments cannot be used
simultaneously from the one host PC. While Corbett Robotics does not recommend these
arrangements, strategies to setup multiple robots on the one host PC include:
•
Use multiple installations of the Robotics Software, one per instrument, each into a different
installation directory. Manual editing is needed to setup distinct desktop icons for each
robot. Also, the CAS4 file association must be disabled to prevent automatic launch of the
software on double-click of a CAS4 file.
• Share one installation of the Robotics Software:
•
Use multiple physical serial ports on the PC permanently connected to the robots and
manually change the required serial port selection in the software for each use.
•
Use a single physical serial port on the PC and manually connect the required robot for
each use.
•
Use a single physical serial port on the PC attached to a separate external RS232 serial
multiplexer permanently connected to the robots and manually switch the multiplexer to
the required robot for each use.
© Corbett Robotics 2007
Safety and Setting Up The Robot
26
2.5 Starting for the first time
Starting the Robotics Software for the first time is no different than starting the software any other
time. However, Virtual Mode is a software feature that the user must be aware of when first starting
the software.
Please close the lid of the robot.
Double Click the Robotics Software icon on your desktop.
You will see the following splash screen when the software starts. The serial port on which the
software is trying to communicate is displayed in the middle of the splash screen. To change the
serial port, see Table Setup.
If the robot is connected via the serial port to the PC and both robot and PC switched on, the
software should operate normally, please wait until the main software window appears (this will take
a few seconds).
If no robot is connected to the PC or the robot is switched off, after 10 seconds a timeout will occur
and the software will request that you choose a robot model on a screen similar to the window
below (unless only software for one model was installed - see installation). Alternatively, if you know
that you want to start in Virtual Mode you can skip the timeout by clicking on the "Force Virtual
Mode" button on the splash screen.
© Corbett Robotics 2007
Safety and Setting Up The Robot
27
Alternatively, you can choose to cancel and the software will be shut down. See troubleshooting if
your robot is switched on and connected on the correct serial port.
To shut the software down, please consult Shutting Down.
Normal First Time Operation
When the software starts normally, you will see the main window appear. If the robot lid is open, you
will be prompted to close the lid. The robot will proceed to home all the axes.
You will be presented with an options screen described in Selecting a Run. Click on 'Empty Project' to
proceed.
If starting for the first time, a window in the centre of the screen will ask you to select which tip ejector
your CAS-1200 has. Selection of your type of tip ejector will lead to tip ejector calibration. Please
complete the tip ejector calibration before proceeding.
© Corbett Robotics 2007
Safety and Setting Up The Robot
28
You have now successfully started the software for the first time and have completed the most
important calibration - the tip ejector calibration. You are ready to continue with the setup process
and select the workspace layout. This involves selecting the types of plates you are using and then
performing calibrations for those plates.
Virtual Mode
When running in Virtual Mode, the software performs as normal. At the top of the screen you will see
a message that reflects that the software is operating in Virtual Mode.
In Virtual Mode, all functions are enabled. The user can develop application run files and carry out
mock runs. The software highlights the tubes it is currently pipetting into or out of. Setups can be
saved to act as templates for new runs that will be run on a robot at a later stage. This feature
enables the user to set up runs on a remote computer and transfer the template onto the PC
connected to the robot reducing the time required on the instrument. Virtual Mode is also a useful
tool for new users to familiarise themselves with Robotics Software.
If your robot has been factory identified with an electronic serial number, any modifications made to
calibrations in Virtual Mode will not affect calibrations on the actual instrument. Any software running
in Virtual Mode on a PC different to the PC the CAS-1200 is connected to, will also not affect any
calibration settings.
If your robot does not have an electronic serial number, then any modification of calibration settings
whilst in Virtual Mode will take effect when the robot is connected and you are not running in Virtual
Mode.
© Corbett Robotics 2007
Safety and Setting Up The Robot
29
2.6 Calibrations
The CAS-1200 has six locations for plates and two locations for master mix and reagent blocks as
described. The robot also has a tip ejector that assists in the disposal of tips from the pipetting head.
Before the instrument can be used, it needs to know where the locations of these items are;
therefore the CAS-1200 must be calibrated. The volume can be calibrated to ensure the CAS-1200
accurately pipettes the volumes as specified.
There are four calibrations that can be made on the CAS-1200 Robotic Liquid Handling System. These
are:
• Tip Ejector Calibration (See section 3.9.3.1)
• Position Calibration (See section 3.9.3.2)
• Height Calibration (See section 3.9.3.3)
• Volume Calibration (See section 3.9.3.5)
All blocks and plates are removable. The Master Mix and Reagents/Standards blocks are located by
pins which ensure the blocks are always returned to the table at the same location. These pins also
serve to orientate the blocks correctly. Similarly, the plates are located by table rails. Care must be
taken with some plates to ensure that correct orientation is maintained. Depending on the model
CAS-1200, the tip ejector is either secured permanently or it is removable. If it is removable, the
ejector is secured by a high precision dove tail mechanism which ensures the tip ejector is always in
the same location.
Owing to the precision of these locating mechanisms, once the CAS-1200 has been installed and
calibrated, there should be no need to re-calibrate the positions for the tip ejector chute or any
given plate. If the instrument has been moved, it is recommended that the position calibrations be
checked and re-calibrated if needed.
Similarly, the volume calibration need only be performed if the pipetting mechanism has had a
service or it is found that the instrument is inaccurate.
Further information on why and how to perform the individual calibrations can be found in the
individual topics.
All calibration data is unique to a particular instrument and is stored locally as part of the software
installation. The calibration data is not saved with the run files. This allows run files to be transferred
between instruments at different sites around the world without modification. When a run is
executed, the software always uses the local calibration data specific to the instrument on which it is
run.
If a robot is relocated from one host PC to another, its calibration data can also be moved without
impacting the calibrations of other robots previously used on the new hosting PC.
Warning: Usually one instrument is connected to a computer. If you change the instruments
connected to the computer and the instrument has not been identified with an electronic serial
number, it is possible that the wrong calibrations will be used. Serious damage may result (Note: If
your instrument has no serial number contact Corbett Robotics).
© Corbett Robotics 2007
Safety and Setting Up The Robot
30
2.7 Lid
The lid of the instrument serves two primary purposes. The first is to provide an isolated enclosure for
setting up reactions; the second is to provide a safety mechanism.
The lid is manufactured from highly impact resistant polycarbonate. The polycarbonate is also 100%
UV absorbent. Cleaning the lid should only be performed with water and a clean, soft cloth.
Alternatively a cleaning product specifically designed to clean polycarbonates or acrylics can be
used. Any cleaning product should be tested on a small inconspicuous section of the lid first. Please
note that the black edging of the lid will not resist solvents of any kind.
The lid incorporates a sensor to determine if the lid is closed or not. Under no circumstances should
bypassed.
this sensor be bypa
ssed.
The lid must be closed for the software and hardware to initialise on start-up and for the run to begin.
Opening the lid while the robot is performing a run will cause the robot to pause. This pause will be
recorded in the post-run report. Extreme care should always be taken when opening the lid during a
run as the pause in the robot's operation may take up to 2 seconds to register.
The lid need not be closed during position, height and tip-ejector calibrations. Do not interfere with
robot movement during these calibrations and do not place hands into the robot's workspace while
the robot is moving.
For operation in small spaces (such as a laminar flow cabinet), the lid can be removed. Please
contact Corbett Robotics for information on lid removal and the disabling of the electronic lid
interlock.
© Corbett Robotics 2007
Software in Detail
31
3 Software in Detail
Using the Robotics Software is straightforward. However, there are many options that can be used to
adjust the behaviour of the CAS-1200 Robotic Liquid Handling System. This section deals with all
aspects of the software in detail.
© Corbett Robotics 2007
Software in Detail
32
3.1 Software Overview
The Robotics Software is primarily designed with the PCR user in mind, and is geared to supporting
rapid setup of liquid handling operations involving addition of master mix, reagent, and sample into
reaction tubes for subsequent PCR. Such operations can be setup using a simple wizard and saved in
a run file for later reuse.
For the advanced user, the software allows a variety of options to be changed that affect the run.
These options include air volumes, pipetting speeds, and so on. These options are saved with a run
file. They can also be saved to act as default settings in subsequent uses of the software.
When the set up of a run has been completed, the user may save the run for later use or perform the
run immediately. When saved, the run file created records the settings of all options and the
configuration of all run instructions. A saved run file can be loaded into the software for modification
or execution.
The software verifies the integrity of the run whenever it is loaded or changed. If there are any errors
with the run set up, the software prompts the user to correct these errors. Warnings can be ignored,
but must be acknowledged before the run can start. A pre-run report can also be generated that
gives a summary of the set up and the contents of the reaction tubs.
A very useful feature of the software is Virtual Mode. If the software is started either without a CAS1200 connected to the PC or the robot switched off, it will start in Virtual Mode. In this mode, all
software functions are available to the user and runs can be set up, saved and simulated. This way,
the user can create and simulate runs without the use of the actual instrument.
The basic functions relating to the setting up of a PCR reaction are quite straightforward to use.
However, there are many functions in the software that allow the user to set up runs that are quite
different to the PCR roots of the software. When the software is started for the first time, the user is
required to perform a number of calibrations. Once these calibrations have been carried out, the
software is ready for use.
The main screen of the software visually simulates the table layout of the robot workspace. The six SBS
socket positions along with master mix and reagent blocks are shown on the left, and a window
known as the right-hand pane is shown on the right. The display in the right-hand pane changes
depending on which plate is selected on the left. A plate can be selected by left-clicking on it.
The setting up of a run is performed by a combination of functions in both the left and right areas of
the screen.
The Options Menu provides the user with control over a number of functions that are not accessible
through other parts of the software.
On the CAS-1200 Robotic Liquid Handling System, each pipetting operation is described in terms of
actions using six types of liquid groups. These six groups are:
• Samples
• Standards
• Diluent
• Reagents
• Mixes
• Reactions
Each of these liquid groups is treated differently in the Robotics Software. Typically, the liquid groups
are used as follows:
© Corbett Robotics 2007
Software in Detail
33
•
Samples are source liquids (eg. representing material from which DNA/RNA is to be
extracted). Samples may have unique identifiers and are grouped into banks for
processing. Each sample is used as an ingredient in a final reaction.
•
Standards are used in the same way as samples but allow the user to easily create
dilution series with known concentrations for quantification applications.
•
Diluent is a source liquid used for the creation of dilution series as well as the making of
master mix.
•
Reagents are source liquids described in terms of a per-reaction volume. They are used as
ingredients for the construction of master mixes and may be also used directly to process
samples in a reaction.
•
Mixes are combinations of reagents and diluent, and can be prepared on the robot prior
to use in reactions, or which may be supplied as source liquids.
•
Reactions describe liquids in destination wells. These are constructed by the robot as a
combination of a Sample, Standard or Diluent with Master Mix and/or Reagents.
With the above in mind, a great variety of runs can be set up to meet many requirements that the
user may have.
© Corbett Robotics 2007
Software in Detail
34
3.2 Starting the Software
To start the software correctly so that it communicates with the CAS-1200 Robotic Liquid Handling
System, please ensure the instrument is switched on, connected to the PC and the lid is closed.
Double Click the Robotics Software icon on your desktop.
You will see the following splash screen when the software starts. Displayed on the splash screen is
the port of the robot to which the computer is attached. The serial port through which the software is
trying to communicate is displayed in the middle of the splash screen. To change the serial port,
please see Table Setup.
If you wish to run the software in Virtual Mode, you click on the 'Force Virtual Mode' button. If no
robot is connected, or the robot is switched off you can wait for the time-out (10 seconds). If you are
unfamiliar with Virtual Mode, please refer to the section on Starting for the first time.
Within a short period of time, you should see the main Window appear with an options screen;
please refer to Selecting a Run.
© Corbett Robotics 2007
Software in Detail
35
3.3 Selecting a Run
The option screen below appears when selecting to create a new run.
A run can be created in three ways:
• If a run had previously been saved, it can be opened, used as it was saved or modified as
needed.
•
A Wizard, such as the PCR Setup or Optimisation Wizard, can be used to create a run.
•
You can select an "Empty Project" and create entirely new run files.
To open a previously saved run file, click on the "Recent" tab. From the directory structure, select the
file you wish to open and then click on the "Open" button.
The screen above shows two Wizards. To use a specific Wizard, select it from the list and then click on
the "Open" button. Refer to the ‘Wizards Menu’ section for more details.
Click on "Empty Project" if you wish to start an entirely new project. Then click on the "Open" button.
© Corbett Robotics 2007
Software in Detail
36
3.4 The Software Workspace
The software workspace is the main area where runs are created. Some of the Robotics Software
functions are controlled directly from this workspace. Important sections of the workspace are
indicated in the figure below.
Default Workspace Layout
The Menus include the File Menu, Control Menu, Wizards Menu, Options Menu and the Help Menu.
From these menus almost all the remaining software functions can be controlled. There is some
overlap between the functions that can be controlled directly via the workspace and the menus.
The virtual mode Indicator shows whether or not the software is operating in virtual mode.
The Toolbar, which is always visible, allows runs to be opened, saved, started and paused. If there is a
problem with a run, this toolbar also shows an icon to warn the user.
The Plate Buttons allow for simple plate function to be accessed directly via these buttons. If a plate
is not calibrated, the calibration screens can also be accessed.
There are tip racks shown in four of the six plate locations on the table layout in the figure above. The
racks are in locations A1, A2, B1 and B2. This is the default configuration. These plate locations can
be configured as plates if needed.
One of the major features of the workspace is the Right-Hand Pane; this area changes depending
on which plate is currently selected. In this area, all functions relating to setting up standards,
reagents, master mixes, samples and reactions are accessible.
At the bottom of the screen there are a variety of indicators. These include the two most important
functions that affect pipetting precision: if the level sensor is enabled and how often tips can be reused. By double clicking on either of these fields, you can change these options without going
through the Options Menu.
© Corbett Robotics 2007
Software in Detail
37
The robot model and COM port are also shown in the bar at the base of the screen.
The Status Bar displays the current operation or action of the robot during a run.
The Robotics Software Version Number is displayed in the bottom left-hand corner of the workspace.
By clicking on the Reagent or Master Mix Block, the user is able to control functions relating to
reagents and master mixes in the Right-Hand pane.
The six Plate Locations shown in the workspace are numbered the same way microtitre plates are
numbered. Letters indicate the rows and numbers indicate the columns. Thus the locations are
numbered A1, A2, B1, B2, C1 and C2 from the top left across and down towards the lower right.
These plate locations can be configured depending on the run that is being set up.
Help and support functions are available by accessing the Help Menu.
© Corbett Robotics 2007
Software in Detail
38
3.5 Toolbar
The Toolbar allows easy access to and exposes some of the main functions in the software. These are
described here.
New file...
Begins a new run. See Selecting a Run.
Open file...
Allows you to select and open an existing runfile.
Save file
Saves the current setup as a *.CAS4 runfile.
Start run
Begins the run. Please refer to Starting a Run for more details.
Pause the run
During a run, clicking on this icon while robot is performing a run will cause the robot to pause. This
pause will be recorded in the post-run report. Extreme care should always be taken when pausing
and opening the lid during a run.
When the run is paused, a message box will appear. The run can be continued by clicking ‘Continue
Run’ in the message box. To abort the run click ‘Abort Run’.
Send arm to home position
This option causes the robot to go through its homing routine for each axis. Upon completion of the
homing routine, the robot will return to its resting position at the rear right of the workspace. This is the
Tool Bar equivalent of selecting the menu item 'Control', and then 'Send robot home'.
© Corbett Robotics 2007
Software in Detail
39
Lab Notebook
This opens the Lab Notebook. This option allows the user to enter comments for a specific run in plain
text. This feature can be used as a type of laboratory notebook to document the purpose of the run.
This feature is also accessible via the File Menu.
Show help
Displays this help file.
Well Indicator Toggles
While hovering over a well, the source and destination (target) wells will be indicated for the current
well. Source wells are indicated with a pink border and destination wells with a yellow border
around the well. Click on the buttons to show or hide the indication of source and/or destination
wells.
UV light
If a UV light is installed on the CAS-1200 and the UV functionality is enabled in the software, this will
display the UV light dialog. If the UV light has not been enabled or is not installed, this option is
greyed out.
If a HEPA Filter is installed on the CAS-1200 and the HEPA functionality is enabled in the software, the
HEPA Filter is turned off and on by selecting the Fan Icon. The fan colour changes between green
(on) and red (off) when toggled. This option is greyed out if the HEPA Filter is not installed.
Warning
If the Warning Icon is shown, it means there is a potential problem with the run. Before a run can
commence, these warnings need to be removed or acknowledged.
UV Light Operation
To operate the optional factory fitted UV light on your CAS-1200 Robotic Liquid Handling System; you
must ensure that the UV light is connected at the rear of the robot. The UV light feature must also be
enabled in the software.
On the rear of the UV light there is an on/off switch, please ensure that this switch is in the ON
position.
Due to the nature of UV light, the lid must be closed for the UV light to operate. An electronic
interlock ensures that the light can only be operated when the lid is closed. Please ensure that the lid
on your CAS-1200 is tightly closed before operating the UV light. Under no circumstances should the
interlock be disabled.
© Corbett Robotics 2007
Software in Detail
40
During UV irradiation, the robot arm moves between two locations in 5 second intervals. Please
remove all accessories to ensure the workspace is fully exposed. The UV light does not irradiate
certain areas due to the robot's construction. These areas include the pipetting head.
To operate the UV light, click on the
symbol on the toolbar. The UV dialog will appear. There
are two ways of enabling the UV light, timed control and manual control. Under manual control the
robot arm does not move and shadowing will result. For manual control, click on the "Enable Lamp"
and "Disable Lamp" buttons.
Under timed operation, the dialog allows the user to set exposure times between 1 second and 30
minutes. Please select the desired exposure time by clicking on the slider and dragging it left and
right. When the desired time is selected, click the "Start" button. After the elapsed time, the robot will
return to the rear right resting position and the UV light will turn off automatically. The software can
be set to close after the UV operation has completed.
HEPA Filter operation
To operate the optional factory fitted HEPA filter on your CAS-1200 Robotic Liquid Handling System,
you must ensure that the HEPA filter is connected at the rear of the robot to one of the available
accessory ports. The accessory cable supplies power to the HEPA filter in addition to software
commands to turn the HEPA filter on or off.
Please make sure that the HEPA filter is connected to the CAS-1200 via the accessory cable before
powering up the robot and initialising the software.
To operate the HEPA filter, press the
button on the toolbar.
Replacement of the HEPA Filters
1. Remove the thumb screws from the HEPA filter assembly
2. Lift the filter Cover vertically and remove
3. Lift the locking plate and remove
4. Remove the HEPA filters
© Corbett Robotics 2007
Software in Detail
41
5. Replace the HEPA filters and reassemble
© Corbett Robotics 2007
Software in Detail
42
3.6 File Menu
The File Menu gives access to a number of file related functions. Some of the functions in the File
Menu can also be accessed via the Toolbar.
New (Ctrl+N)
This option allows the user to create a new run. Selecting this option will display the Selecting a Run
dialog.
Open… (Ctrl+O)
Tis option opens an existing run file. This file can be modified to create a new run, or it can be used as
is. Please note that all options are stored as part of the run file.
Save… (Ctrl+S)
Tis option saves the current setup to a new run file. All parameters except tip availability are saved.
Lab notebook…
This option allows the user to enter comments for a specific run in plain text. This feature can be used
as a type of laboratory notebook to document the purpose of the run.
Exit (Ctrl+Q)
To closes the Robotics Software select this option.
3.6.1
Run Files
The CAS-1200 Robotic Liquid Handling System run files contain all the information required to
construct a run on the robot. These files have a file extension of *.CAS4. As well as containing
information on where the liquids are and where these liquids need to be transferred to, the run file
also contains all other applicable program settings:
• Level Sensor on/off status
• Tip re-use settings (including multi-eject settings)
• Mix and tip re-use settings for standards
• Error reporting level
• Air volumes
© Corbett Robotics 2007
Software in Detail
43
• Pipetting Speed
• Master mix or standard extra volumes
• Amount of liquid initially present in target plates
• Standard names and dilution data
• Sample groupings (banks)
• Sample, reagent and master mix names
• Sample concentrations
© Corbett Robotics 2007
Software in Detail
44
3.7 Control Menu
Send robot home
This option causes the robot to go through its homing routine for each axis. Upon completion of the
homing routine, the robot will return to its resting position at the rear right of the workspace. This
option can also be accessed via the workspace toolbar using the
icon.
Start
This option prompts the 'checklist' window to be displayed. Once the user has acknowledged the
warnings, the robot begins the selected run. This option can also be accessed via the workspace
toolbar using the
icon.
Pause/Abort
Clicking on this icon while the robot is performing a run will cause the robot to pause. This pause will
be recorded in the post-run report. Extreme care should be taken when pausing and opening the lid
during a run. This control can also be accessed via the workspace toolbar using the
icon.
© Corbett Robotics 2007
Software in Detail
45
3.8 Wizards Menu
PCR Setup Wizard
Selecting this option starts the PCR Setup Wizard. In previous versions this has been referred to as the
Master Mix Wizard. This Wizard is very useful to create PCR set ups in a step-by-step fashion. Please
see the PCR Setup Wizard section for further details.
Optimisation Wizard
By selecting this option, the Optimisation Wizard is started. This Wizard is designed to make it easy to
set up specialised PCR functions such as a Magnesium Chloride titration or primer/probe
optimisation. Refer to the section on the Optimisation Wizard for more detail.
Import sample names… (Ctrl+I)
The software makes it possible to not only cut and paste sample names from the system clipboard,
but also import these from text based spreadsheets. Please refer to the section on Importing Sample
Names.
Export reaction list… (Ctrl+E)
The reaction list can also be exported, permitting transfer of reaction well details (ie. components
and volumes) to external files in a variety of formats. There are special features to export the reaction
data in a way that the Corbett Rotor-Gene software can import this data. Please see Exporting
Reaction Lists for further details.
Generate report (Ctrl+R)
A report can be generated at any stage to view a summary of the parameters and reactions
configured thus far. When you have finished setting up a run, this report is the same as the Pre-Run
Report and similar to the Post-Run Report. These reports are in HTML format and can be saved for
documentary evidence of a run.
© Corbett Robotics 2007
Software in Detail
46
3.9 Options Menu
The options menu controls the bulk of the robot setup. Run settings, calibration settings and pipetting
behaviour are configured here. The items in the Options Menu are:
User Management
This sub-menu provides access to the user permission control administration facilities of the software.
These facilities govern the accessibility of software functions to different classes of users.
Calibration management
This sub-menu allows access to functions that are concerned with the transfer of robot calibration
(and other) settings from one PC to another, useful when a robot is relocated to a new host.
Robot setup
T This sub-menu contains settings to configure robot-specific hardware parameters and also provides
access to wizards to perform the various robot calibrations. These settings are maintained locally with
the software installation and are not associated with run files.
Run Settings
This menu allows access to the global options relating to runs. These include options to configure
pipette speeds, air volumes, tip handling behaviours, etc. Also included are settings for master mix
and standard extra volumes, and Level Sensor settings. Such settings are stored with the run as part
of its configuration to allow the application to be reproduced on another robot.
Advanced Settings
This menu contains additional options that can influence the behaviour of the robot for specialised
applications. Only change these settings under direct instructions from Corbett Robotics or its
distributors. Care should be taken when changing these settings.
Change Plate Type
This sub-menu allows the user to change the selected plate type by opening the plate configuration
screen.
Change Accessory
This sub-menu allows the user to change the accessory by opening the accessory window. This will
alter the settings for the plate calibration accordingly.
© Corbett Robotics 2007
Software in Detail
3.9.1
47
User Management
This sub-menu allows restrictions to be enforced on certain user groups. The robotics software does
not provide a login facility, but instead runs in the context of the current user logged into the
Windows domain on the PC hosting the robot. A user is expected to first login as needed to Windows
to gain access to the hosting PC in a suitable Windows domain. When the robotics software then
runs, it can identify the currently logged in user. For a new user to be identified as the operator of the
software, the software must be shutdown, the original user must logout of Windows, and the new user
must then login to Windows and start the software. This user identification function is always active
and the user’s identification is reported in all pre and post run reports as well as diagnostic logs
produced by the software during normal operation.
Note that access privileges are included only to support a particular usage policy for the software
and are not intended to prevent accidental or intentional circumvention of the policy or misuse of
the software.
Enable Access Control
Selecting this command will activate the user control settings. The robotics software supports 3
classes of user: ‘Administrator’, 'CAS designer' and 'CAS operator'. These classes are organized
hierarchically as follows:
An ‘Administrator’ is a member of the standard Windows Administrators group with full administrative
access in the login domain (as for an IT administrator at the site). Such a user can enable/disable the
access control function in the robotics software and can update group membership for each of
these group types. These operations are supported using the ‘Enable User Access’ and ‘Users and
Groups’ options of the ‘User Management’ Option menu. An Administrator also has all the privileges
of a ‘Designer’.
A ‘Designer’ has read/write access to all functions of the software including the ability to design
table layouts, calibrate the instrument, define run settings, setup the reaction list, and import/export
data. Designers are expected to define template run setups and establish robot calibrations for use
by Operators.
An ‘Operator’ has access to only a subset of ‘Designer’ capabilities, with very limited ‘edit’ access
to robotics functions. The intent is to allow navigation and inspection of table layout, run settings and
reaction list data as "view/read only", with edit access only to:
•
update lab notebook text information;
•
set tip availability;
•
assign plate IDs/barcodes and well IDs/barcodes to sample/reaction wells defined in
the run;
•
modify the set of wells associated with sample banks used in the run.
An Operator cannot modify reaction properties.
All users are able to edit and save modified run files thus overwriting any previous instance of those
run files. If required, standard Windows file system write-protection mechanisms may be used to
protect run file data.
Users Groups
The robotics software includes a tool to allow users to be assigned to the 'Designer' and 'Operator'
classes. This tool is activated by the ‘Users and Groups’ option of the ‘User Management’ Option
menu. Any user with access to the software may operate the tool, but only Administrator users may
effect changes to the group membership. On initial install, the robotics software user access control
features are disabled and any user operating the software in this mode has the capabilities of
'Designer' (at least). An Administrator enables the user access control facility using the ‘Enable User
Access’ option. At the next restart of the software only Administrator and registered 'Designer' and
'Operator' users may operate the software; unregistered users are presented with a failure message
© Corbett Robotics 2007
Software in Detail
48
indicating the need to arrange access. When an Administrator disables the user access control
facility, all users once again have at least ‘Designer’ access. Upgrade of the software from a prior
version in the same location does not affect user access control settings – such settings are retained.
3.9.2
Calibration Management
Management
This sub-menu allows access to functions that deal with the transfer of calibrations and other settings
of the Robotics Software and CAS-1200 from one PC to another.
Save calibrations on setup disk
This option saves all calibrations and a variety of other data onto a floppy disk or other media. This
disk is called the "Setup Disk" and is robot specific. Under no circumstances should a Setup Disk
created for one robot and used on another. The information can be used if the specific robot that
the disk was created for is connected to a new computer with newly loaded software. It is not
necessary to use the disk when the software is updated to a new version.
To create a Setup Disk follow these simple steps:
1. Click on the Options/Calibration Management/Save calibrations on setup disk option.
2. A default filename and location is supplied. Browse to the folder where you want the set up
information to be stored (for example, the A drive is typically the floppy disk drive).
3. Click on OK.
Load calibrations from setup disk
This is the reverse of the above process. Data that was previously saved on a disk can be restored
using this function. Follow these steps to retrieve the information:
1. Click on the Options/Calibration Management/Load calibrations from setup disk option.
2. Locate the file where the set up information is stored.
3. Click on OK.
Calibrations…
Delete Multiple Calibrations
…
This option will allow the user to delete the calibration settings associated with the connected robot.
To delete the calibration settings, select which settings you would like to delete by checking the
option on the form and selecting Delete.
© Corbett Robotics 2007
Software in Detail
3.9.3
49
Robot Setup
This section explains the functions accessible from the Options/Robot Setup Menu. It explains how to
perform a variety of calibrations and why these calibrations are important. Also explained is selection
of the COM port.
Calibrate plate heights…
heights…
If an exclamation symbol:
is visible in the top right-hand corner of a plate, the plate may need to
be height calibrated. Refer to the section on height calibration to perform this task. The height
calibration is a very critical calibration and if done incorrectly, it will have the most impact on
pipetting results.
Calibrate volumes…
volumes…
To perform a volume calibration on the CAS-1200, please refer to the section on volume calibration.
Calibrate plate positions…
positions…
If an exclamation symbol:
is visible in the top right-hand corner of a plate, the plate may need a
position calibration. Calibrating plate positions is very straight forward. To perform a position
calibration, refer to the specific section on position calibration.
Calibrate tip offsets
offset s…
As a default, the software assumes that the tip endpoint (the lowest point on a tip after the robot has
picked up the tip) of a 200 µL tip and a 50 µL has a constant offset. However, with some tips, due to
manufacturing variations, the offset between 50 µL and 200 µL tips may vary from batch to batch. To
allow flexibility with slight length variations between different types of tips, the Robotics Software
allows the user to calibrate for the length differences between tips. This allows the user to calibrate all
plates with 50 µL tips, then calibrate the tip length offset between the 50 µL and 200 µL tips and the
software will automatically determine the correct height calibration for the 200 µL tips. Without the tip
offset calibration, every plate would need to be calibrated with all tips available to the robot. Refer
to the Tip Offset Calibration section to perform this task. Please note that this calibration is not
required to start a run, it is provided as an option in case of tip inconsistencies.
Setup tip ejector…
ejector…
A tip ejector calibration must be carried out if the robot is failing to eject tips correctly. Please refer to
the more detailed section to perform this calibration.
Select COM port…
port…
The default setting for connection to the computer is COM port 1. If the robot is connected to a
different COM port the software will start in virtual mode. In virtual mode, choose the COM port to
which the serial cable from CAS-1200 has been connected. Restart the software to ensure the new
COM port setting has taken effect.
Enable UV light (robot
(r obot has lamp)
If the robot has a UV light installed but the UV was not selected during installation of the Robotics4
software, this option will allow the user to enable the UV light.
3.9.3.1 Setup Tip Ejector
It is very important that the tip ejector calibration be carried out correctly. The robot relies on a good
tip ejector calibration to properly eject tips and to ensure the vacuum hub (the device which picks
up the tip) is not damaged. The tip ejector calibration must be performed before any other
calibration on the robot.
Performing the tip ejector calibration can be a little difficult. It helps if the user has plenty of space
around the left side of the robot. In some positions, a flashlight may assist in the calibration. The
© Corbett Robotics 2007
Software in Detail
50
calibration procedure makes reference to the x, y and z axes of the robot. The x-axis is the left/right
movement of the robot arm, the y-axis is the forwards/backwards movement of the pipetting head
and the z-axis refers to the raising or lowering of the pipetting head. To complete the calibration,
follow the steps below.
Click on Options/Table Setup/Set up tip ejector.
When warned about calibrating the ejector, read the warning and select 'Yes'
The following screen is shown asking the user to select which tip ejector the CAS-1200 has. Click on
the image of the tip ejector to select the model.
The tip ejector on the left is the older type, whereas the tip ejector on the right is the newer
removable kind. Please note, that the newer style tip ejector can not be retro-fitted to older models.
Follow the instructions provided in the window as well as the instructions below. Please note that any
reference to "hub" in this section refers to the stainless steel or brass section at the end of the
pipetting head.
Adjusting the X Axis
Initially, the hub is to be moved close to the tip ejector. The hub should be moved within 5 mm away
from the right edge of the tip ejector. Under no circumstances should the hub be positioned so that
the hub is above or inside the tip ejector at this stage. Click on the left and right arrow buttons to
move the pipetting head left or right. Click 'Next' when the left/right position is correct.
Adjusting the Y Axis
Once the x-axis is closer to the tip ejector, the y-axis can be adjusted so that the hub is in the centre
of the slot. Use the up/down arrow buttons in the window to move the arm. View the tip ejector from
the lower left-hand side to get a better view of the slot. Click 'Next' when the forwards/backwards
position is correct.
Adjusting the Z Axis
To adjust the z-axis of the robot, click on the up/down arrow buttons. The correct height of the z-axis
sees a gap of approximately 2 mm between the wide part of the pipetting barrel (the wider black
section above the stainless steel or brass hub) and the top surface of the tip ejector. Please note that
with the newer, removable tip ejector, the 2 mm gap is between the top surfaces that can be seen
© Corbett Robotics 2007
Software in Detail
51
through the cut-out on the side of the tip ejector. Refer to the picture to ensure this calibration is
correct. If the gap is more than 2 mm (or referenced from the wrong section on the tip ejector) the
robot may be damaged. Click 'Next' when the height is correct.
Adjusting the Eject Location
The final adjustment allows for the positioning of the x-axis so that the hub is inside the tip ejector's
slot. A fine adjustment for the y-axis is also allowed to ensure the hub is in the middle of the slot. The
correct x-axis position of the hub in the slot is far enough to the left so that the hub is fully inserted into
the slot, with a gap of approximately 2 mm remaining between the wire on the right side of the hub
and the right face of the tip ejector.
Once the final adjustment has been made, the eject position can be tested by clicking the 'Test'
button. The user will be prompted to manually place a tip on the pipetting head - the ejection of the
tip should be smooth, without any metal on metal contact noise.
When the test is completed successfully, click on the 'Finished' button - this will save the new tip
ejector calibration settings.
3.9.3.2 Calibrate Plate Position
A plate position calibration must be carried out for every plate on the robot's table before that plate
can be used for the first time. Once a position calibration has been carried out, it does not normally
need to be repeated. Every plate type in the Robotics Software has its own calibration values. Thus,
once a plate has been calibrated, the calibration for that plate can be recalled at a later time even
if other plates have been in use in the meantime.
Caution: the robot arm will move during position calibration while the lid is raised. Never click on any
buttons while parts of your body are within the robot's workspace.
The position calibration ensures that the robot moves to the correct location for every well on a
plate. To perform a position calibration, follow these steps:
1. Open the robot's lid.
2. Place the plates that are to be calibrated on the robot. Where possible, do not place
consumables in the plates. Position calibration should be performed on the 'true' position of a
well, not a position that may be skewed by an ill-fitting consumable.
3. Ensure the robot has 200 µL tips available in at least one tip rack.
4. Select Options/Table Setup/Calibrate plate positions.
5. Read the warning about changing these calibrations and select 'Yes'.
6. The Position Calibration Window will appear.
7. From the list on the left side of the window, select which plate to position calibrate (a position
calibration on all plates listed can be performed in turn). Always calibrate any tip racks first.
Note that the tip racks are listed as 96-well plates, this is normal.
8. The image on the right of the window indicates with which well the position calibration must be
performed (this well is coloured red).
9. Lower the robot's pipetting head by clicking on the 'Lower Tip' button several times. By lowering
the pipetting head to just above the plate to be calibrated, the calibration can be carried out
with greater accuracy. Ensure that the tip is not touching any plates or tips before proceeding.
10. Using the X-position and Y-position arrow buttons, move the robot's arm to a location directly
above the centre of the well (or tip) indicated by the red well. Look at the robot directly from
the front and directly from the side to ensure correct alignment. The pipetting head may be
lowered further to facilitate easier alignment.
11. When the correct position has been aligned, click on the 'Save' button. Without clicking this
button, the current position will not be stored as the calibrated value.
© Corbett Robotics 2007
Software in Detail
52
12. If desired, click on the 'Check Position' button to validate that the correct position has been
saved.
13. If further position calibrations need to be carried out, click on the next plate in the list and
continue from point 7.
Note, when calibrating plates, it will be necessary to place a tip on the robot's pipetting head. The
tip racks will need to be calibrated first.
Once all desired position calibrations have been carried out, click the 'Close' button.
Calibrate
3.9.3.3 Calibrat
e Plate Height
Plate height calibration defines the base position of the wells of the plate for the robot. Correct plate
height calibration is extremely important to ensure successful pipetting behaviour on the robot, as
this value is used in tip placement calculations.
A plate height calibration must be carried out for every plate on the robot's table before that plate
can be used for the first time. Every plate type in the Robotics Software has its own calibration values.
Thus, once a plate has been calibrated, the calibration for that plate can be recalled at a later time
even if other plates have been in use in the meantime.
Caution: the robot arm will move during height calibration while the lid is raised. Never click on any
buttons while parts of your body are within the robot's workspace.
The height calibration is a very important calibration on the robot. Despite the CAS-1200 being
equipped with a level sensor, the robot must have default heights calibrated for every plate. These
default heights are used when the level sensor is not used, the well is empty or when there is
insufficient liquid in a well for the level sensor to sense. The default height calibration is also very
important for tip placement during mixing and general pipetting.
It is vital that the default height is calibrated correctly at a position neither too high nor too low. If the
tip is calibrated too high, as liquid is ejected, a droplet may form at the end of the tip and this
droplet may not fall off into the tube due to surface tension. If the default calibration is too low the
tip may form a seal at the base of the tube and not eject liquid, alternatively the tip may be
damaged. At the correct tip height, the tip is just off the base of the tube and once the liquid is
ejected, the liquid is higher than the end of the tip.
© Corbett Robotics 2007
Software in Detail
53
There are two ways to perform a tip height calibration, manually and automatic. During the
automatic height calibration the robot advances the pipetting head very slowly until the base of the
tube is sensed. The calibrated height then becomes the sensed height of the tube base minus a
small predetermined offset. The sensing of the tubes base can be automatically repeated to take an
average of several values. During manual height calibration, it is up to the user to set the distance
between the tip end and the base of the tube.
To perform an automatic height calibration, follow these steps:
1. Ensure that the plate to be height calibrated is already position calibrated.
2. Ensure that there are 50 µL tips available, that the tip rack is calibrated and that the correct
tips are set as available.
3. Ensure that each plate has at least the number of tubes in its first locations as the number of
averages that will be taken (see below).
4. Select Options/Table Setup/Calibrate heights.
5. Read the warning about changing these calibrations and select 'Yes'.
6. The Height Calibration Window will appear.
7. Shown at the top of the window, is a list of available plates/tubes. Note that plates which have
multiple segments (e.g. reagent plate) appear in the list several times, each time listing the
different tubes in each segment.
8. Select the plates that are to be automatically height calibrated. Do this by ticking the box next
to the plate in the list. Alternatively you can select all plates by clicking the 'Select All' button.
9. Select how many wells to take the average of by clicking the up/down buttons. Corbett
Robotics recommends that an average of four be taken.
10. The 'Reuse tips during height probe' option allows the user to specify if a new tip should be
used for every height probing operation or whether to re-use the same tip. Please note that this
only applies to the probing of tubes on the same plate (i.e. the wells that are used in the same
average), the re-use tip option does not span plates.
11. Click on the 'Autodetect' button at the base of the window.
12. The robot will proceed to calibrate all the selected plate heights, you are required to accept
or reject the sensed numbers. If the averages for one plate are within 10 units of one another,
then accept the numbers. If the numbers are not that close, check that all your tubes are
sitting correctly and that the tip is not bent. If a calibration is rejected, that calibration will have
to be repeated.
© Corbett Robotics 2007
Software in Detail
54
13. Click 'Close' when all calibrations are complete.
To perform a manual height calibration, follow these steps:
1. Ensure that the plate to be height calibrated is already position calibrated.
2. Ensure that there are 50 µL tips available, that the tip rack is calibrated and that the correct
tips are set as available.
3. Ensure that each plate that is to be calibrated has one tube in its first position.
4. Select Options/Table Setup/Calibrate heights.
5. Read the warning about changing these calibrations and select 'Yes'.
6. The Height Calibration Window will appear.
7. Shown at the top of the window, is a list of available plates/tubes. Note that plates which have
multiple segments (e.g. reagent plate) appear in the list several times, each time listing the
different tubes in each segment.
8. Select the plate that is to be height calibrated. Do this ensuring the highlight is on the plate to
be calibrated.
9. Click on the 'Manual Setup' button.
10. If the plate had a previous calibration, the software will ask whether or not to reset the height
to 0 (the top) or whether you wish to retain the current setting. If the current setting is retained
and the plate in the position is too high, the tip may jam into the plate and bend the tip.
11. By using the up/down arrow buttons in the manual height calibration window, the head can
be raised and lowered. To adjust the height correctly, the distance between the tip and the
tube base must be adjusted as described above. As in most cases it is not possible to see the
distance between the tip and the base, the distance must be "felt" by manually lifting the tube
from its support plate.
12. If the z-axis (the pipetting head) was accidentally moved to far and it bottomed out, ensure
that the head has not "lost its position" by resetting the pipetting. Do this by clicking the 'Home
Z-axis' button.
13. Click 'OK' when the correct height calibration has been set.
14. Click 'Close' when all calibrations are complete.
3.9.3.4 Calibrate tip offsets
The tip offset calibration is an optional calibration. This calibration can account for manufacturing
tolerances between different types of tips. For example, the collar size of the 50 µL and 200 µL tips
should normally be equal; however, sometimes small variations exist. See the diagram below.
© Corbett Robotics 2007
Software in Detail
55
To allow flexibility with slight length variations between different types of tips, the Robotics Software
allows the user to calibrate for the length differences between tips. The advantage of calibrating for
this offset only once is that the software will automatically determine the correct height calibration
for the 200 µL tips based on the normal height calibration performed with 50 µL tips.
To perform a tip length offset calibration follow these steps:
1. Ensure that a reaction plate is available that has well sizes large enough to accommodate
both, 50 and 200 µL tips. For example, a 96-well plate with 200 µL PCR tubes would work. The
plate must be position and height calibrated.
2. Place a tube into the first well of the plate.
3. Ensure that there are 50 and 200 µL tips available, that the tip racks are calibrated and that the
correct tips are set as available.
4. Select Options/Table Setup/Calibrate tip offsets.
5. Read the warning about changing these calibrations and select 'Yes'.
6. The Tip Length Offset Calibration Window will appear.
7. If more than one reaction plate is available on the workspace, select the correct plate by
clicking the '...' button.
8. Select the tip to calibrate by placing a tick in the box next to the tip (typically only the 200 µL
tips are displayed in the list).
9. Select how many repeat samples to test to calculate the average offset.
11. The robot will now probe the height of the plate with the 50 µL and the selected tip to
calculate the offset.
12. Click 'Close' when the calibration is complete.
3.9.3.5 Calibrate Volumes
Volume calibration is the set of operations that establishes the relationship between the actual
dispensed volume and the corresponding nominal or selected volume of the pipette.
A simplistic view of this process requires that a pipette delivers a chosen volume of liquid with
accuracy, and that in repetitive pipette operations, the chosen volume is delivered with precision.
© Corbett Robotics 2007
Software in Detail
56
For example, a pipette should deliver 100 µL of liquid exactly, and should do so each time 100 µL is
dispensed.
Accuracy and precision are verified by gravimetric measurement. That is, pure water weighs 1
mg/µL and therefore the volume dispensed by a pipette is validated by its weight; therefore 5 µL
weighs 5 mg, 50 µL weighs 50 mg, and so on.
Error
In the process of pipette calibration, there are a number of factors that must be considered in order
to minimise error in accuracy and precision. In general terms, these include gravimetric error and
pipette error.
Gravimetric error, are those factors that contribute to error in weight measurement:
• Accuracy of scales,
•
Minimum unit of measurement,
•
Barometric pressure,
•
Ambient temperature,
•
Humidity,
•
Vapour pressure of the liquid used,
•
Differences in liquid and air temperatures.
Pipette error, are those factors that contribute to error while dispensing liquid from the pipette:
• Those factors affecting gravimetric measurement,
•
Age and condition of the pipette mechanism (O-rings etc),
•
The method of operation (individual's technique),
•
Fluid retention characteristics of the pipette tip,
•
Viscosity of liquid dispensed.
The factors that affect accuracy and precision are measured as systematic and random error, and
that the magnitude of error is inversely proportional to the volume calibrated.
Error in accuracy (Systematic error) - Is the difference between the dispensed volume required and
the dispensed volume delivered. The systematic error is determined by taking the mean of 10
measurements.
Error in precision (Random error) - Is the variation of the dispensed volumes around the mean of the
dispensed volumes. The random error is determined by taking the repeatability standard deviation
of 10 measurements.
Volume calibration
Volume calibration of the robot is performed using a wizard interface (please see screen capture
below). Two methods of volume calibration are available: manual and gravimetric adjustment. One
aspect of the gravimetric adjustment is the ability to use data from a third party certified gravimetric
process.
In addition to the default calibration values of 2, 5, 10, 20, 50, 100, 150, and 200 µL, the user can
choose four other volumes to calibrate within the default range. Finally, a facility exists to view
current and historical calibration settings, and if necessary revert to a historical setting or the factory
default settings.
© Corbett Robotics 2007
Software in Detail
57
P-axis units
An electronic motor moves the pipette piston up and down in the vertical axis (P-axis). There is a
direct relationship between the rotation of the motor shaft and the vertical movement of the
pipette's piston. This relationship is known as P-axis units or steps. There are nominally 26 units or steps
for each 1 µL of liquid aspirated or dispensed.
To open the 'Volume Calibration Wizard' from the main menu
Setup>Calibrate Volumes. Read the warning and then select 'Yes'.
choose
Options>Robot
Volume Calibration Wizard
Wi zard Interface
Option 1
Calibrate using measured weights. Robot performs pipetting. User enters tube weights
before and after pipetting. Software calculates p-axis units.
Option 2
Calibrate using measured volumes. Robot performs pipetting. User verifies and enters
volume dispensed. Software calculates p-axis units.
Option 3
Calibrate manually. Robot performs no pipetting. User enters p-axis values directly for
each calibration volume.
Option 4
View current calibration settings and review calibration history.
Option 5
Load factory defaults.
Option 6
Import volume calibration settings from calibration file.
© Corbett Robotics 2007
Software in Detail
58
Option 1 Calibrate using measured weights. Robot performs pipetting. User
User enters
tube weights before and after pipetting. Software calculates pp -axis units
Option 1 is the recommended method for volume calibrating the robot. The user pre-weighs 200 µL
PCR tubes and enters the tube weight for each tube into the pre-weight table. To do a standard
calibration you require 8 default volumes x replicate number and up to 4 additional volumes x
number of replicates for each user selected weight. The robot pipettes the default volumes and any
user specified volumes (see Option 4) from the user specified reagent tub containing PCR grade
water. The user then reweighs the tubes and enters the new average tube weights into the postweight table.
PrePre-volume calibration
calibration setup:
Place a rack of 200 µL fine-bore pipette tips in SBS position B1 and a rack of 50 µL fine-bore pipette
tips in SBS position B2. See 'Plate Position Calibration' for further instructions.
Ensure that SBS positions C1 and C2 are defined with Plate Layout, 96-well Vertical and Plate Type,
96-well column. Also ensure that the function for these plates has been set to Reaction Plate. See the
topic 'Plate Position Calibration' for further instructions.
Place sufficient PCR-grade water to be used for volume calibration into the diluent tube of the
Master Mix Block.
Volumes::
Define Calibration Volumes
Selecting option 1 opens the Define Calibration Volumes' window.
1. Read the instructions on the form then select the volumes to be calibrated.
© Corbett Robotics 2007
Software in Detail
59
2. Enter the 'Number of Replicates' required (1 to 8).
3. Selecting next opens the 'Volume Calibration Wizard – Configure' window. Selecting 'Back'
returns the user to the main 'Volume Calibration Wizard' window.
Volume Calibration Wizard – Configure
1. Read the instructions in the 'Volume Calibration Wizard – Configure' window. The plate
configuration on the CAS-1200 can be adjusted by selecting ‘Table Setup’.
2. Ensure that the first reaction plate is set to C1 and the second to C2 as depicted above.
3. Preload 10 µl of water into all tubes that will have less than 10 µl pipetted into them.
4. Select 'Next' and the 'Volume Calibration Wizard – Pre-Weight' window opens. Selecting 'Back'
returns the user to the main 'Define Calibration Volumes' window.
© Corbett Robotics 2007
Software in Detail
60
Volume Calibration Wizard – Pre Weight
6. Weigh each tube and enter its weight in the 'Average Pre Tube Weight' column. If the average
weight of the 200 µL PCR tubes is known, the user can select 'Set Average Weight' and enter
this value in the pop-up window that appears. The table will be populated with this value
automatically. Note that for all volume calibration targets below 10 µL, the average weight will
be incremented by 10 mg to allow for the 10 µL of PCR grade water preloaded into these
tubes before pipetting starts.
7. Select 'Next' and the 'Volume Calibration Wizard – Pipette Liquid' window opens. Selecting
'Back' returns the user to the 'Volume Calibration Wizard – Configure' window.
© Corbett Robotics 2007
Software in Detail
61
Volume Calibration Wizard – Pipette Liquid
8. Confirm that the actions indicated in items 1 - 3 depicted above have been completed.
9. Read the 'Note' about the layout of the PCR tubes and the pipetting order.
10. If you wish to calibrate using the factory default volume calibration, tick the checkbox.
Otherwise, the robot will pipette volumes using the existing calibration data.
11. Starting at Column 1 of the plate in position C1, insert the pre-loaded tubes into the plate as
directed; 2 µL tube(s) in Column 1, 5 µL tube(s) in Column 3 etc. Then insert dry tubes into the
remaining columns of plates C1 and C2 as shown. Note that an empty column separates each
column of tubes.
12. Select 'Next' and ‘Ready to pipette liquid using robot?’ will be asked. Selecting 'Back' returns
the user to the 'Volume Calibration Wizard – Pre Weight' window. Select ‘yes’ and the robot will
pipette the selected calibration volumes; if ‘No is selected, the user will return to the ‘Pipette
Liquid’ screen. When the robot has finished the 'Volume Calibration Wizard – Post Weight'
window will open.
13. Again, weigh each tube and enter its values into the 'Post Weight' table as depicted below.
© Corbett Robotics 2007
Software in Detail
62
Volume Calibration Wizard – Post Weight
14.
Select 'Next' to open a window that displays the new calculated P-axis values.
© Corbett Robotics 2007
Software in Detail
63
15. Select 'Accept Changes' to save the new values and complete the Volume Calibration
Wizard. Selecting 'Re-Enter Values' returns the user to the 'Volume Calibration Wizard – Pipette
Liquid' window.
© Corbett Robotics 2007
Software in Detail
64
Option 2 Calibrate using measured volumes. Robot performs pipetting. User verifies
and enters volume pipetted. Software calculates pp -axis units
Verification is often required by external accrediting organisations. Select option 2 if you need to
verify volume calibration for third party certification. The robot pipettes the default volumes and any
user specified volumes. The user independently verifies the volume dispensed, usually by a
gravimetric method, and enters the verified volume data into the calibration table. The software
uses these values to adjust the P-axis values.
Pre--volume calibration setup:
Pre
Place a rack of 200 µL fine-bore pipette tips in SBS position B1 and a rack of 50 µL fine-bore pipette
tips in SBS position B2. See 'Choosing the Right Pipette Tips' for further instructions.
Ensure that SBS positions C1 and C2 are defined with Plate Layout, 96-well Vertical and Plate Type,
96-well column. Also ensure that the function for these plates has been set to Reaction Plate. See the
topic 'Choosing the Right Plate' for further instructions.
Place sufficient PCR-grade water to be used for volume calibration into the diluent tube of the
Master Mix Block.
Define Calibration Volumes
Selecting option 2 opens the Define Calibration Volumes' window.
1. Read the instructions on the form then select the volumes to be calibrated.
2. Enter the 'Number of Replicates' required (1 to 8).
© Corbett Robotics 2007
Software in Detail
65
3. Selecting next opens the 'Volume Calibration Wizard – Configure' window. Selecting 'Back'
returns the user to the main 'Volume Calibration Wizard' window.
Volume Calibration Wizard – Configure
5. Read the instructions in the 'Volume Calibration Wizard – Configure' window. The plate
configuration on the CAS-1200 can be adjusted by selecting ‘Table Setup’.
6. Ensure that the first reaction plate is set to C1 and the second to C2 as depicted above.
7. Preload 10 µl of water into all tubes that will have less than 10 µl pipetted into them.
8. Select 'Next' and the 'Volume Calibration Wizard – Pre-Weight' window opens. Selecting 'Back'
returns the user to the main 'Define Calibration Volumes' window.
© Corbett Robotics 2007
Software in Detail
66
Volume Calibration Wizard – Pipette Liquid
6. Confirm that the actions indicated in items 1 - 3 depicted above have been completed.
7. Read the 'Note' about the layout of the PCR tubes and the pipetting order.
8. If you wish to calibrate using the factory default volume calibration, tick the checkbox.
Otherwise, the robot will pipette volumes using the existing calibration data.
9. Starting at Column 1 of the plate in position C1, insert the pre-loaded tubes into the plate as
directed; 2 µL tube(s) in Column 1, 5 µL tube(s) in Column 3 etc. Then insert dry tubes into the
remaining columns of plates C1 and C2 as shown. Note that an empty column separates each
column of tubes.
10. Select 'Next' and ‘Ready to pipette liquid using robot?’ will be asked. Selecting 'Back' returns
the user to the 'Volume Calibration Wizard – Pre Weight' window. Select ‘yes’ and the robot will
pipette the default volumes and any user specified volumes; if ‘No is selected, the user will
return to the ‘Pipette Liquid’ screen. When the robot has finished the 'Volume Calibration
Wizard – Post Weight' window will open.
11. Weigh each tube and convert the weight to volume using 1 mg = 1 µL (Conversion for Water).
Enter the volumes into the 'Enter Volume Pipetted' table as depicted below.
© Corbett Robotics 2007
Software in Detail
67
Volume Calibration Wizard – Enter Volume Pipetted
12. Select 'Next' to open a window that displays the new calculated P-axis values.
13. Select 'Accept Changes' to save the new values and complete the Volume Calibration
Wizard. Selecting 'Re-Enter Values' returns the user to the 'Volume Calibration Wizard – Pipette
Liquid' window.
© Corbett Robotics 2007
Software in Detail
68
Option 3 Calibrate manually. Robot performs no pipetting. User enters p
p--axis values
directly for each calibration volume
Select option 3 if you would like to manually adjust the P-axis unit value. Increasing the p-axis value
increases the volume aspirated or dispensed. Conversely, decreasing the P-axis value decreases the
volume aspirated or dispensed. Remember that there are approximately 26 P-axis units per 1 µL.
Adjust the unit values in the right-hand column of the table as required. When finished, select 'Save'
and these will become the new default values. Select 'Back' to return to the wizards opening
window.
Volume Calibration Wizard – Manual Calibration
If you have not saved the new values, and proceeded to select either 'Next' or 'Back' a pop-up will
open and ask if the new values are to be saved. Selecting either the 'Yes' or 'No' option will open the
'History of Calibration Data' window. However, 'No' will result in the historical data being retained
and 'Yes' will result in an interim pop-up advising that the new values were saved.
The 'History of Calibration Data' displays the 'Current Settings' and provides the user with several
useful options: 'Generate Report', 'Revert to Displayed Settings', 'Back', and 'Finish'.
© Corbett Robotics 2007
Software in Detail
69
History
Volume Calibration Wizard – Hist
ory of Calibration Data
'Finish' closes the window and advises the user that the wizard is complete, returning the user to the
GUI of the robotic workspace. 'Back' returns the user to the 'Volume Calibration Wizard – Manual
Calibration' window.
'Generate Report' opens a scrollable window that contains the current and historical data for up to
10 calibrations.
© Corbett Robotics 2007
Software in Detail
70
These details can be 'Printed', 'Saved', 'E-mailed', or entered into a 'To Word' document. When 'Close'
is selected, this window closes and returns the user to the 'History of Calibration Data' window. From
here selecting 'Finish' closes the window and advises the user that the wizard is complete, returning
the user to the GUI of the robotic workspace.
'Revert to Displayed Settings' is used in conjunction with the 'History of Calibration Data' drop down
menu. The 'Current settings' are displayed by default. However, up to nine previous settings are
stored by the software, and can be accessed through the drop down menu. By selecting one of
these previous calibrations, the associated calibration data will be displayed. To make this
calibration data the new default volume calibration, select 'Revert to Displayed Settings'.
© Corbett Robotics 2007
Software in Detail
71
Option 4 View current calibration settings and review calibration history
Select option 4 if you would like to review the current calibration settings and review the calibration
history.
The 'History of Calibration Data' displays the 'Current Settings' and provides the user with several
useful options: 'Generate Report', ‘Use displayed settings as new calibration’, 'Back', and 'Finish'.
Volume Calibration Wizard – History of Calibration Data
'Finish' closes the window and advises the user that the wizard is complete, returning the user to the
GUI of the robotic workspace. 'Back' returns the user to the main 'Volume Calibration Wizard'
window.
'Generate Report' opens a scrollable window that contains the current and historical data for up to
10 calibrations.
© Corbett Robotics 2007
Software in Detail
72
These details can be 'Printed', 'Saved', 'E-mailed', or entered into a 'To Word' document. When 'Close'
is selected, this window closes and returns the user to the 'History of Calibration Data' window. From
here selecting 'Finish' closes the window and advises the user that the wizard is complete, returning
the user to the GUI of the robotic workspace.
‘Use displayed settings as new calibration’ is used in conjunction with the 'History of Calibration Data'
drop down menu. The 'Current settings' are displayed by default. However, up to 9 previous settings
are stored by the software, and can be accessed through the drop down menu. By selecting one of
these previous calibration events, the associated calibration data will be displayed. To make this
previous calibration data the new default volume calibration, select 'Revert to Displayed Settings'.
© Corbett Robotics 2007
Software in Detail
Option 5
73
Load factory defaults
Select option 5 if you wish to replace the current default calibration settings with the factory default
calibration settings. User specified calibration volumes will be retained, however their P-axis values
will be recalculated to comply with the factory default settings.
When you select option 6 you will be asked to confirm the restoration of the factory default volume
calibration settings to the current settings.
If 'Yes' is selected, the current calibrations will be replaced by the factory default volume calibration
settings. Selecting either 'Yes' or 'No' also returns the user to the Volume Calibration window.
Option 6
Import volume calibration settings from a calibration file
Only select option 6 to if you have received a calibration file from Corbett Robotics and have been
asked to import new settings.
© Corbett Robotics 2007
Software in Detail
3.9.4
74
Run Settings
The menu options under Options/Run Settings are explained in this section. These settings primarily
deal with software functions that are directly related to the machine's runs. New program settings
can be set as default or old defaults can be restored.
Configure tip air intake
Accessing this menu will present the user with a screen telling the user that changing these settings
may result in reduced robot performance. Click 'Yes' to continue.
This option allows the user to set the volume of air the pipette head takes up before aspirating liquid.
The air is blown out upon ejection. This makes sure all liquid is ejected. Air volumes for Samples,
Standards, and Master Mixes are set independently. Higher air volumes may assist when pipetting
viscous liquids. Corbett Robotics recommends 7 µL as the default air intake volume.
Configure pipette speed
This option controls the aspirate and dispense pipetting speed. The default speed of 150 µL/second
should be selected for most purposes. Slower speeds can be chosen if pipetting a viscous liquid. The
reagent liquid group has two speed settings, a normal and a viscous setting. The viscous setting is
used when the reagent has been selected as viscous. See Reagents for more information.
The mixing speed is the speed that controls all mixing operations. Corbett recommends setting this
speed to as fast as possible to promote good mixing.
The pipette speeds can be reset to their default values through the Run Settings menu.
Use liquid level when pipetting?
This controls the means by which the liquid level is determined, and the consequent placement and
behaviour of the pipette tips during aspirate and eject operations.
Ignore errors during run?
This option is further detailed in ‘Ignore errors during run?’
Set master mix extra volume
The CAS-1200 can prepare master mix that is required for a particular run. To do this, the software
calculates how much volume of the master mix is required to set up the reactions. Additional to the
© Corbett Robotics 2007
Software in Detail
75
actual amount required, the robot requires an extra volume (a dead volume) to be made. This
option allows you to set this additional volume of master mix as well as an extra amount per reaction
to allow for pipette loss. The total amount is calculated by the software and rounded up to the next
whole reaction
For example, if five 20µL reactions are setup with the additional volume set to 50 µL and extra volume
per reaction set to 1µL, then 60 µL additional master mix will be prepared. This is because 60 µL is
whole number multiple of 20 µL that is larger than 55 µL.
As with the additional standard, this option can be useful if master mix is required for other manual or
future robot assays. Corbett Robotics recommends a minimum of 20 µL additional volume in 200 µL
PCR tubes. In larger tubes this volume should be increased.
Set standard extra volume
The CAS-1200 can automatically generate standard dilutions that are required for a particular run. To
do this, the software calculates how much volume of a standard is required to set up the reactions.
Additional to the amount required, the robot requires an extra volume (a dead volume) to be made.
This option allows you to set this additional volume of standard that is prepared. This option can be
useful if additional standard is required for other manual or future robot assays. Corbett Robotics
recommends a minimum of 50 µL additional volume.
Set tip usage options
The user can configure tip usage on the CAS-1200. Please see Tip usage options for more details
regarding this feature.
Set default
defaul t file location
The factory set default file location for all saved files is c:\Program Files\Robotics4\Data. The run files
are stored in this directory. This directory also contains three sub-directories, Logs, Reports, and
SupportPackages, that store the automatically generated log files, post-run reports and diagnostic
support packages. The default file location can be changed to suit your particular needs. Please
note that the log, report and support package directories will automatically be generated as subdirectories in the new file location.
Save current settings as new defaults
All options that can be changed under the options menu can be altered and set as the new
software defaults. By changing any option and setting it as the default, every time the software is
started, it will start with these default options. These options and their factory defaults are:
• Level Sensor: On
•
Error Mode: Do not ignore errors
•
Pipetting Speeds: all 150 µL/sec with the exception of reagent (viscous) 70 µl/sec
•
Standard Extra Volume: 50 µL
•
Master Mix Extra Volume: 30 µL with 1µL extra per reaction
•
Fast Simulation: Off
•
Air volumes: all 7 µL
•
Tip re-use: once only
Please note that the calibration settings are not part of these options. The calibration settings are
saved separately and cannot be reset to factory settings.
Reset settings to factory defaults
This option resets all the above options to factory default values. This option does not affect any
calibration settings.
© Corbett Robotics 2007
Software in Detail
76
System colour configuration
This option allows the user to change the default colours for samples, reagents, reactions, etc.
3.9.4.1 Use liquid level when pipetting
Pipetting accuracy and precision depends on several factors, including the amount of tip-liquid
contact during the operation. The CAS-1200 Robotic Liquid Handling System supports 3 modes of
determining the where the tip is placed vertically in the wells for pipetting operations. The mode is
chosen by the ‘Use liquid level when pipetting’ setting. Options are as follows.
Detect liquid level using sensor
The CAS-1200 is equipped with a real-time liquid level sensor which uses electrical capacitance
properties to sense when the pipette tip is in contact with the liquid. Level sensing can only work with
carbon impregnated (black) conductive tips. When this option is selected, the robot automatically
locates the surface of the liquid (the meniscus) when lowering the tip, and can optimize the vertical
placement of the tip to achieve high accuracy and precision during aspirate and eject operations.
The use of the level sensor helps prevent carry-over of material on the outside of the tip. This is the
default setting on the CAS-1200. Please see Level Sensor for details regarding this feature.
Use liquid level estimate
In some situations it is not possible to use the CAS-1200 liquid level sensing function, such as when the
liquid is covered with foil or the liquid is non-conductive (oil, pure water). To achieve accuracy and
precision similar to that possible using level sensing, the software implements a liquid level tracking
and estimation function. This uses information obtained from the run configuration (eg. as performed
using the PCR Setup Wizard) regarding liquid volumes used in all liquid transfers. It also uses builtin
data about the geometry of consumable types used in the run. The software tracks the movement of
liquid volumes from well to well and is able to estimate the height of the liquid surface at each
pipetting step to determine the optimal tip placement. This function relies on the assumption that all
source wells are initially supplied with sufficient starting volume as calculated and shown by the
software prior to run start.
Do not use liquid level
This option performs all pipetting operations at the height calibration position for the plate/tube, as
set by the operator using automatic or manual height calibration. This effectively performs all
pipetting at the calibrated base of the well without concern for the volume of liquid present. Due to
increased likelihood of liquid retention on the outside of the tips, pipetting accuracy may be
reduced using this method. It is provided for use in exceptional circumstances.
3.9.4.2 Ignore errors during run?
The CAS-1200 Robotic Liquid Handling System is equipped with a level sensor that allows the
machine to sense when the pipette tip is touching liquid. Conversely, the robot can detect when a
tube contains less than a certain volume of liquid. If, during a run, a tube has been emptied so that
insufficient liquid remains for further operation, an error would normally be flagged.
The specification of the CAS-1200 defines the level sensor detection limit. In some circumstances it
may be necessary to deliberately have less liquid than the specified limit in a tube. This circumstance
typically arises when there is insufficient sample available. In this instance, every aliquot from the
sample plate would cause the robot to flag an error, requiring user intervention every time.
To allow stand-alone operation without user intervention, the Robotics Software has three different
error levels. The errors referred to in this option all refer to level sensing errors. The three levels and their
effects are listed below.
Do not ignore errors
This is the default in the Robotics software. All errors are reported during a run, requiring user
intervention every time an error occurs.
© Corbett Robotics 2007
Software in Detail
77
Interrupt run on serious errors
The robot will only require user intervention after fatal errors although all errors will reported in the post
run report.
Ignore all errors
When this option is chosen, level sensing errors for all plates are ignored.
Regardless of the error level, all errors are reported in the post-run report. This cannot be disabled.
Options
3.9.4.3 Set Tip Usage O
ptions
A special feature of the CAS-1200 is the ability to configure tip usage options. The effect of this
feature is generally a dramatic reduction in the number of tips required during a run. Upon selecting
Options/ Run Settings/ Set tip usage options, the user will be presented with the following screen:
By clicking on the drop-down menu, two tip usage options become available:
1. Use each tip for one operation only. This option will use one tip for each take/eject cycle. This
option gives the highest precision, but will result in the use of a large number of tips, thus
increasing run costs, and completion time. 'Multiple ejections of a single liquid pickup' is a
further option available.
2. Re-use tips where possible. This option will use simple optimisation strategies to try and re-use
tips where possible, performing several aspirate/eject cycles using the same tip. The number
of times to use the tips is configurable. Note that tip reuse lowers accuracy and precision as
liquid is built up on the inner and outer walls of the tip with each use. Corbett Robotics
recommends a maximum tip reuse count of 8.
For both ‘single operation’ and ‘multiple operation’ tip use options, it is possible to specify use of
multi-dispense pipetting. In this case, each operation or use of the tip is a single (large volume)
aspirate followed by a series of (small volume) ejections. This function can reduce run cost and
run time significantly, but accuracy and precision is reduced. The option is chosen using ‘Allow
multiple ejections of a single liquid pickup’. When selected, use the ‘Multi-eject Settings’ button
to open the options for multi-eject. These options are required to make the multi-eject more
accurate:
© Corbett Robotics 2007
Software in Detail
78
a. Select the air option if a blow-out on the last ejection is required. This is compulsory
when tip reuse is selected to avoid accumulation of liquid in the tip.
b. Select the initial ejection volume: this is the extra volume aspirated and ejected
back into the source well before multi-ejecting to target wells. If no initial ejection is
required choose [Specify Initial Ejection Volume] and set the volume to 0 µL.
c. Set the extra volume to the desired amount. The extra volume is the volume that is
aspirated over and above the volume required for the ejections. As a rule of thumb,
set the extra volume to half of the actual aliquot with a maximum of 10 µL.
3.9.5
Advanced Menu
The advanced menu contains settings that can seriously affect the performance of the robot.
Changing of any of these settings must be performed by experienced users or under specific
instructions from Corbett Robotics or its distributors.
© Corbett Robotics 2007
Software in Detail
3.10
79
Help Menu
The Help Menu is useful when accessing this help file and to create support packages that can help
the Corbett Team solve problems that may have arisen.
Contents
Displays this help file.
Save support package…
This option manually creates a zipped support package. This package contains run settings,
calibration data, and log information describing the recent context of the system. To request
assistance to troubleshoot a problem, this package must be submitted along with a description of
operator observations to the nearest Corbett representative or directly to Corbett Support.
Note that the software automatically saves a support package on completion of every run.
However, for problems that occur outside the context of a run is important to manually create the
support package immediately after a suspected error has occurred.
Choose support package…
package …
This option allows the user to browse a list of support packages from recent runs. Review of the
packages can be according to the name of the run and time of completion. The list can also be
sorted based on the exceptions that have occurred during recent runs.
SelfSelf -Diagnostic Tools
This option will open a self diagnostics form. For further details on each of the tests refer to the
appendix.
Enable serial communications logging
This option should only be enabled under instruction from Corbett Robotics or its distributors.
View axis usage options
This option allows the user to browse the number of movements each axis has performed since the
instrument’s last service.
Explore save directory
Launches a file Explorer window with the default file directory where run files are saved.
© Corbett Robotics 2007
Software in Detail
80
Display log file
The software logs information about run setup and all commands sent to the robot from the PC. The
log file is updated as new runs are carried out, with the oldest data being removed. This log file is
part of the support package that can be created.
About Robotics4…
Robotics4…
This displays a window which contains information about Corbett Robotics Pty. Ltd and release notes
for the software. It also shows some other system specific information that you may be asked to
supply by the Corbett Technical Support Team. This includes the version number of the software, the
serial number of the instrument and the firmware version of the instrument.
3.10.1
About
About Window
The 'About Window' shows a variety of information. The most important information that the user may
be asked by the Corbett Technical Support Team is the version number of the software, the serial
number of the instrument and the firmware version of the instrument.
How to identify the serial number of your CASCAS -1200
All CAS-1200 are identified with a unique serial number. This is shown on serial number badge at the
rear of the robot. In most cases, the serial number is also stored electronically in the robot itself,
allowing the robot to be identified by the software.
To view the CAS-1200 Robotic Liquid Handling System electronic serial number, consult the 'About
Robotics4…' Window and select the 'General Information' Tab. On this screen you will find the serial
number of the instrument - this number should match that on the rear of the machine. If the numbers
do not match, contact Corbett Robotics. If the serial number field is blank, your CAS-1200 software
should indicate it is running in Virtual Mode, otherwise contact Corbett Robotics.
© Corbett Robotics 2007
Software in Detail
81
How to identify the version number of the software you are running
All Robotics Software versions are identified with a version number consisting of at least three groups
of numbers and letters separated by dots. In the About Robotics4… Window, the version number is
found in the upper section. In the figure, the version number is 4.0.Y. This software version number can
also be identified in the lower left region of the status bar on the Software Workspace.
How to identify the Firmware version number of your CASCAS -1200
All CAS-1200s are identified with a firmware version number. The firmware refers to software that is
running on the microprocessor computer system inside the robot. The firmware version can also be
identified from ‘General Information’ Tab in the About Robotics4… Window as indicated in the
figure. If, as shown in the figure, there is no number, your software has not been able to
communicate with the robot and is most likely running in virtual mode.
© Corbett Robotics 2007
Software in Detail
3.11
82
Plate Buttons
The plate buttons appear in the top right corner of each of the plates. Normally these buttons only
appear when the mouse pointer is hovering over one of the six plates, reagent or master mix blocks.
However, the warning button is an exception.
The four plate buttons are:
Warning - this icon appears if the plate is missing either its position or height calibration. The
button will remain visible until all the calibrations for the particular plate are complete. By
clicking the button, you are given the option to calibrate the plate.
Zoom - by clicking on this icon, you can enlarge the view of the plate. When clicking on this
button in the enlarged view, you will return to the normal size.
Info - by clicking on this button, details about the current plate are displayed.
Switch - clicking this button toggles between a photo of the current plate and the schematic
plate view.
© Corbett Robotics 2007
Software in Detail
3.12
83
Tip Availability Menu
The tip operations menu can be accessed by right clicking while the mouse pointer is over a tip rack
on the software workspace. These six options are used to set the tip availability.
The software uses this tip availability information to determine where tips are available. If this
information is incorrect, then the run will not proceed correctly as the robot may attempt to pick up
a tip from a location where no tip is available.
On the software workspace, available tips are shown in either dark red or dark blue (depending on
the tip type); unavailable tips are shown in white.
Set selected tips
tip s to Available / Unavailable
These two options can be used to make individual tips or a group of tips available or unavailable.
Before this option can be used, tips must be selected. To select tips, move the mouse pointer to the
top left corner of the tips to be selected, press and hold the left mouse button and drag the mouse
to the opposite corner of the group that is to be selected. The selected tips will be shown with a red
border. Individual tips can be selected by left-clicking them. Once some tips are selected, right-click
on the tip rack and select one of the above two options to make the selected tips available or
unavailable. Only one group of tips can be selected at one time so the process may need to be
repeated until the correct tips are set to available.
Set all tips on current plate to Available / Unavailable
These options can be used to make an entire tip rack unavailable or available without the need for
selecting certain tips first.
Set all tips on all plates to Available / Unavailable
These options can be used to make all tip racks currently on the workspace unavailable or available
without the need for selecting certain tips first.
Tip availability shortcut
A convenient shortcut has been added to allow individual tips to be toggled between available and
unavailable. To do this, simply hold down the ‘Alt’ button and then click on individual tips. The tip
will toggle between available and unavailable.
© Corbett Robotics 2007
Software in Detail
3.13
84
Plate Operations Menu
The Plate Operations menu can be accessed by right-clicking on either a sample or reaction plate.
The first five options deal with adding or removing particular wells from sample banks.
Individual samples (in wells) must first be assigned to sample banks before they are available for use
in a reaction set up. In addition to ‘Sample’ liquid wells, please note that wells with the liquid
description of 'Reaction' can also be treated like samples and grouped into named sample banks.
Note also that sample bank names must be unique within the run.
A single form is used to manage the samples in a sample bank; this form is described in more detail in
the following section. Each option in the Plate Operations menu will open the sample bank editor
with the appropriate wells pre-selected.
Add selected wells to sample bank
This option adds selected wells to a sample bank. To select wells, move the mouse pointer to the top
left corner of the wells to be selected, press and hold the left mouse button and drag the mouse to
the opposite corner of the group that is to be selected. The selected wells will be shown with a red
border. Individual wells can be selected by left-clicking them. Once some wells are selected, rightclick on the plate and select 'Add selected wells to sample bank' on the menu that become visible.
See ‘Editing Sample Banks' for further details on adding wells.
Add first 'n' wells on plate to sample bank
As an alternative to selecting wells to be added to a bank, a specified number of wells can be
added consecutively to a bank, starting with the first well on the plate (usually position 1 or A1). To do
this, right click on the plate that contains the wells to be added, select 'Add first n wells on plate to
sample bank'. A prompt will appear that allows the user to enter how many wells will be added,
enter the desired number. See ‘Editing Sample Banks' for further details.
Add all wells on plate to sample bank
As a shortcut, all wells on a plate can immediately be added to a sample bank by right clicking on
the plate in question and selecting 'Add all wells on plate to sample bank'. See 'Editing Sample
Banks' for further detail on adding wells.
Add list of wells on plate to sample bank
In some cases it may be more convenient to add a list of locations to a sample bank. The locations
are defined as an alpha-numeric pair such as H6. A list can be comprised of several of such
descriptions. For example: "A3-H7, E10, A1, B10" is a valid location listing. Note that the wells defined
by A3-H7 would refer to wells A3, B3, C3, D3, ..., E7, F7, G7 and H7 if a vertical 96-well plate is chosen.
© Corbett Robotics 2007
Software in Detail
85
If a horizontal plate was defined, then A3-H7 would refer to A3, A4, A5, A6, ..., H4, H5, H6, H7. To add
wells in this manner, right click on the plate in question, select 'Add list of wells on plate to sample
bank'. The user will be prompted to enter the list of wells (note that this list can be cut and pasted),
click 'OK' to continue. See ' Editing Sample Banks’ for further detail on adding wells.
Remove selected wells from sample bank
This allows the removal of certain wells from a sample bank. Select wells as described in the option
'Add selected wells to sample bank'. Once the wells to be removed are selected, right-click on the
plate and select 'Remove selected wells from sample bank'. The Sample Bank window will appear,
and the user must now select the sample bank that contains the wells that are to be removed, once
selected, click 'OK'. If unsure of which bank the wells in question belong to, select 'Cancel'. Sample
banks can be highlighted by clicking on the sample banks in the sample bank list in the right-hand
pane. The removal of wells from the wrong sample bank has no effect.
Toggle sample bank list
The sample bank list is part of the sample view in the right hand pane of the workspace. This sample
view is only made visible when a sample plate is left-clicked. In some run set ups it is possible that no
plates may be defined as sample plates and only reaction plates are available. However, access to
reaction plates may be necessary to modify, delete or highlight sample banks. To make the sample
view available in the right-hand pane when only reaction plates are on the workspace, select the
'Toggle sample bank list' option.
For a more detailed description on sample banks please refer to the section on Samples.
Set Preload volume
This option is available only for Reaction plates, and is used to ensure that mix on ejection operates
as expected. It is also used in conjunction with liquid level estimation and tracking. The user enters
the volume of reagents preloaded into reaction tubes before the run begins. For example the
reaction tubes may have been preloaded with 5 µL sample and so the value entered into this option
is 5 µL.
Toggle Image
Selecting this option toggles between a photo of the current plate and the schematic plate view.
Toggle Zoom
Selecting this option toggles between a schematic view of the selected plate in the context of the
other plates and consumables on the workspace, and an enlarged schematic view of only the
selected plate.
Delete Calibration Data
This option clears the calibration values previously configured for the plate type at the selected
location.
Change plate type
See Choosing the Right Plate for details of this.
Change accessory
See Choosing an Accessory for details of this.
Change plate function
See Choosing the Right Plate for details of this.
© Corbett Robotics 2007
Software in Detail
3.14
86
Editing Sample Banks
Wells are added to sample banks using the ‘Update Sample Bank’ form. This is presented whenever
any of the sample bank manipulation Plate Operations functions described above is selected by
right-clicking on the sample or reaction plate segment. The ‘Update Sample Bank’ form is as follows:
Plate Schematic
The plate schematic shown at the bottom of the form presents selected wells with a red border.
When the form is initially presented, the selection shows wells which were highlighted on the selected
plate prior to opening the form. Selections can be edited using the mouse – ‘Ctrl-click’ toggles
membership in the selection – or using the controls in the ‘Sample Selection’ and ‘Filter Selection’
parts of the form.
Any wells of the plate segment which already reside in an existing sample bank prior to opening the
form are shown with a filled colour on the plate schematic.
Sample Bank Name
To create a new sample bank, select ‘New Bank’, enter the sample bank name and select "Add
Selection" by pressing enter. Bank names must be unique (and cannot be blank or whitespace only).
The sample bank will be created and the selected wells added.
To edit an existing sample bank, select ‘Existing Bank’, and choose the bank from the list. The wells
presently in the bank are indicated on the plate schematic with a faint highlight distinct from the red
© Corbett Robotics 2007
Software in Detail
87
border showing selected wells. Press "Add Selection" or “Delete Selection” to add or remove the
selected wells from the existing bank.
Sample Selection
The sample selection section allows the user to specify the selection of samples based on a range, list
or membership in an existing sample bank. For convenience, all wells can be selected, or the whole
selection can be cleared.
Note that the list of samples in the selection is shown in real time in the ‘List of Wells’ list – when this
option is later chosen, the list becomes selectable and can be copied to the clipboard (this facility
may allow a sample bank to be copied to a similar plate/segment located elsewhere on the deck,
provided it uses an identical labelling scheme).
F ilter Selection
The filter selection section of the sample bank form allows the user to filter the samples in a plate
based on concentration when concentration values are specified. This allows samples that meet the
filter criteria to either be added or removed from the sample bank.
Use the Sample Selection methods or use the mouse in the plate schematic to select wells, then
configure the filter and press the ‘Apply’ button. The filter then modifies the selection as specified.
After application of the filter, the resulting selection can be added to or removed from a sample
bank.
© Corbett Robotics 2007
Software in Detail
3.15
88
Choosing the Right Plate
Choosing the right plate type and the plate's function for the robot's table setup is very important.
Only with the correct plate type selected will the correct calibration settings for that plate take
effect. Moreover, based on selections made, the software uses information in its plate library to
determine the tip placement during pipetting operations. Incorrect plate selection may cause
pipetting problems.
The plate configuration established in the software must match the actual plates in use on the
robot.
On the CAS-1200 there are eight locations that can support a variety of plates, loading blocks and
tip racks. These eight locations are:
Master Mix Block towards the top left on the screen (rear left on the robot)
Reagent Block below (in front of) the Master Mix Block
Six SBS locations for tip racks, adaptor blocks or standard 128 mm by 76 mm plates
Changing
Changing Plate Type
To accommodate the wide variety of consumables and different types of runs, the type of block or
plate in these locations can be changed in the software. To change the plate type, follow these
simple steps:
1. Position the mouse pointer above a well of the plate that is to be changed
2. Right mouse click
3. On the menu that becomes visible, select "Change plate type"
4. The Plate Configuration window will appear:
© Corbett Robotics 2007
Software in Detail
89
In the top-left of the Plate Configuration window, the different plate layouts are listed. These layouts
include 96-well plates in a vertical or horizontal (column-wise or row-wise) configuration, 384-well
plates and many others. The top-right window shows the actual plate type, for example a Corbett
Plate Adaptor holding individual 200 µL PCR tubes.
To select the plate that matches your plate the closest, scroll through the list until you have found a
plate that is either the same or very similar to the plate that you are using. If you cannot find a plate
that matches or very closely resembles the plate you are using, contact the Corbett Support team.
At the bottom right in the Plate Configuration Window are a number of filters. To view all plates that
are available in the software, ensure all filters are ticked. If you wish to see tip racks only, ensure that
only the tips filter is ticked.
Plates that you commonly use can also be added to 'Favorites'. To add a plate to your favourites,
click the 'Add Favorite' button. Similarly you can remove a plate from the Favorites. To view your list
of favourite plates, ensure that only the favourites filter is checked.
When the desired plate is selected, click on OK. The chosen plate will appear on the workspace.
Changing the plate type can also be useful when different plate configurations are needed. This is
particularly important for the Reagent Block. When choosing the reagent block, you will see a
number of blocks listed in the Plate Layout window (top-left). On the right, in the Plate Type window,
you will see a number of different layouts. For example, although the physical block is the same, you
may choose a layout which has 2 standard banks of 8 tubes or a block with 1 standard bank of 16
tubes. Despite the block being physically the same, the software requires the user to calibrate
different plate layouts as if it were a different block.
© Corbett Robotics 2007
Software in Detail
90
Plate Segments
Some plates are broken into several segments. For example the default reagent block has four
segments, these are two segments of 8 wells for dilution series, a segment of 8 tapered wells for
reagents and a second set of 8 flat base wells for reagents. Other plates may have different
segmentations. Most 96 and 384-well plates have one segment with all wells belonging to the one
segment. Segments are factory defined and cannot be changed. The function of a segment on a
plate can be changed independent of other segments of the plate.
Changing Plate Function
Once the correct plate type is chosen the plate's function can also be changed. This allows the user
to select whether the plate will hold samples, reactions, reagents or some of the other liquid groups.
You can change the plate's function as follows:
1. Right click on a well of the plate that is to be changed
2. On the menu that becomes visible, select "Change plate function"
3. The available functions will appear as a sub-menu
4. The appropriate function can now be chosen
There are 6 possible plate functions that can be set:
1. Sample: A sample is always added to a reaction last, it is never contaminated and must be
grouped as a sample bank to be used.
2. Reagent: A reagent can be combined with other reagents to construct a mastermix, or added
individually to a reaction. Reagents will always be pipetted before samples to help reduce tip
consumption if tip reuse is allowed.
3. Mastermix: A mastermix is a pooled group of reagents that can be added to a reaction plate.
Mastermixes are always added to a reaction first.
4. Reaction: A reaction is the destination for the samples, mastermixes and reagents. A reaction
plate allows access to the pipetting functions.
5. Standard: A standard is a sample that can be pipetted into a dilution series.
6. Diluent: Diluent can be moved to any position where a single well can be selected.
In addition there is a ‘Tips’ plate function to accommodate the pipette tips. The tip function is forced
once the plate type has been set as tips.
Please note that on some plates, sub-sections of the plate can have different functions. For example,
the reagent plate combines standards and reagents on the same plate. If the plate is broken into
more than one segment, the function of a segment can be changed in the same way. Simply right
click in the segment that needs to be changed.
3.15.1 Choosing an Accessory
Accesso ry
In some cases it may be necessary to place an optional “accessory
accessory” under a plate for an
accessory
application. An example optional accessory is a cooling block to keep samples or reactions cool. (By
comparison, a plate “adaptor
adaptor” is a device that is mandatory to place under a plate to use the
adaptor
plate on the robot.) Placing an accessory under a plate affects the height calibration of that plate.
To add an accessory to a plate, follow these simple steps:
1. Right-click on the plate where the accessory is to be added
2. Select the 'Change accessory' option
3. The Select Accessory window will appear
© Corbett Robotics 2007
Software in Detail
91
4. The required accessory can be chosen from the drop-down menu
5. Click 'OK'
Once an accessory is chosen, the background colour of the location of the accessory will change.
Please note that as the accessory affects the height of the plate, the “plate + accessory”
combination must be calibrated in its own right separately from the plate alone. If the plate alone
was calibrated before the accessory was added, then when the accessory is removed through the
software, the original calibration will again take effect.
3.15.2 Mix Operations
The mix operation options are accessible by right-clicking on a mix plate (e.g. the master mix block)
once a master mix has been defined. The operations only refer to mixes of liquids, not the mixing of
liquid by repeated aspirating and ejecting.
The only option available is the copying of mix setup.
Copy mix setup
This option allows mix set ups to be copied from one well to another. This function will only work on
wells with their function defined as 'Mix'. To perform the copy function, left-click on the previously
created master mix, and then right-click and select 'Copy mix setup'. The Copy Mix Setup Window
will appear.
© Corbett Robotics 2007
Software in Detail
92
The correct source master mix should already be listed. If this is not the case, select the correct "from"
mix. Select the well that the setup is to be copied into and click 'OK'. The set up will be copied to the
new location.
© Corbett Robotics 2007
Software in Detail
3.16
93
RightRight- hand Pane
The right-hand pane refers to the area on the right hand side of the software workspace. When the
software first starts, this area is typically grey in colour and contains no information. As the mouse is
used to left click on one of the plates in the software, the right-hand pane displays information
relating to the plate's function. A plate or wells can have one of seven functions:
•
Tips
•
Standards
•
Reagents
•
Mixes (master mixes)
•
Samples
•
Reactions
•
Diluent
With the exception of the Diluent, each of the other six plate types have associated right-hand
panes. The functionality of these is described in detail in the following sections.
The diluent has no user definable functions associated with it; therefore the right-hand pane for the
diluent is blank. The diluent is coloured light blue. The diluent is always assumed to be PCR-grade
water and is used to dilute the master mix, dilute samples and create dilution series. By positioning
the mouse pointer above the diluent well, a hover box reports the amount of diluent required.
Please note that as with all liquids presented to the CAS-1200, a minimum additional ‘dead volume’
amount is required (shown here as 20µL). This amount depends on the type of tube.
3.16.1 Tips
The right-hand pane showing tip information appears after left-clicking on any tip plate on the
software workspace. In the case of tips, the right-hand pane provides information only. The overall tip
status as well as the status of each tip plate is shown. Information on how many tips are available,
how many tips are required for the current run and whether or not enough tips are available is
presented.
© Corbett Robotics 2007
Software in Detail
94
For information on how to load tip racks, refer to the section on Tips and Tip Racks.
As can be seen in the information presented in the right-hand pane, the software maintains a record
of which tips are available. The tip availability is recorded at regular intervals while the software is
running as well as upon software shutdown. Thus upon re-starting the software, the tip availability
should be correct unless tips were physically removed from the robot. Correct tip availability should
always be verified before a run is started.
If tip supply is exhausted during a run, please see the section on Exception Handling for further
details.
3.16.2 Standards
Standards may be prepared by the robot, or may be supplied as a pre-made dilution series.
The right-hand pane for the standards appears when a well, with its function set to 'standard', is leftclicked. As a default, the standards are typically located on the reagent block on the left of the
workspace. There may be more than one location for a standard dilution series, each of these
locations operates independently of other dilution series. The right-hand pane presents a significant
number of options to the user. These are discussed below.
© Corbett Robotics 2007
Software in Detail
95
Setting up a Dilution Series
First click on the Standard Plate. The above right-hand pane will appear.
Place a tick in the box marked 'Use Standards'. This enables the selected set of standards.
Standards are given a default name. If desired, the dilution series name can be changed. Do this by
clicking in the 'Standard name' field and typing a new name, there is no need to press Enter.
Alternatively, the default name can be left in place.
If the standards are pre-made and the robot is not to prepare the dilution series, then place a tick
into the 'Use pre-mixed standard series?' box. Pre-made standards are specified by a series of
concentration values. These can be entered directly in the grid at the base of the pane, or using the
‘Set Custom Conc’ button.
Robot-made standards are specified by a series of dilution ratios. Select the standard series size (the
number of dilution concentrations) you want. Initially, use the up/down control buttons to set the
number of standards to 2. The dilution ratio can then be entered into the table at the bottom. The
number of standards can now be increased to the required number. The dilution ratio is copied
down the table as more standards are added.
Enter the concentration of the first standard. This concentration is purely for documentation purposes
and does not affect the operation of the CAS-1200.
© Corbett Robotics 2007
Software in Detail
96
To ensure a quality dilution series, mixing should always be enabled. Mixing would only be disabled in
rare circumstances. Mixing during dilution refers to the repeated aspiration and ejection of the liquid.
Corbett Robotics recommends that a minimum of 5 mixes is selected. This will aspirate and eject the
liquid five times.
If desired, tips can be exchanged between each dilution. Typically standards are created with the
same tip. The tip would be used to take an aliquot from the most concentrated undiluted stock well.
This aliquot is then transferred to the next well in the dilution series and mixed. An aliquot is then taken
to the next well in the dilution series and so on without changing tips. Each dilution in the standard
series can be prepared with a fresh tip if this option is ticked.
The ‘minimum volume required if unused in reactions’ field sets the minimum volume of standards to
create if the standards have not been used in any reactions. This allows the user to create one set of
standards that can be used for multiple subsequent runs. The minimum volume will be the amount
entered plus the amount set in the ‘standard extra volume’ from the run settings menu.
Note that if a dilution series with varying ratios is required, the individual ratios listed in the table can
be edited by clicking in the appropriate cell and entering a new number. This allows maximum
flexibility when creating dilution series. Also note that if it is more convenient to provide the details of
the dilution series as a list of concentrations, you can configure the standard as pre-made, enter the
concentration values, then uncheck the ‘Use pre-mixed standard series?’ checkbox; the software will
calculate the dilution ratios for you and the robot will prepare the series as requested.
The concentrations of the standards listed in the table at the bottom of the right-hand pane are
based on the concentration of the first standard and the dilution ratios. The columns of water
volume, sample volume and total volume are automatically filled in once the standard is used in a
reaction.
Required Standard Volume
Once the dilution series has been added to a reaction, the software will calculate how much
volume of each standard is required.
If the robot is creating the dilution series then the volume of the first undiluted well is the most
important volume as this is what must be supplied. The required volume can be checked by
positioning the mouse pointer above the undiluted (highest concentration) well of the standard
series. The hover box which becomes visible reports the amount needed.
During construction, losses can occur due to mixing. For reliable aliquotting of robot made standards
to reactions, extra volume for each dilution is made up according to the ‘Standards Extra Volume’
run setting. The extra needed for the initial undiluted well represents dead volume only and is
determined by the properties of the tube,
The volumes calculated and shown in the hover boxes and on the Standards right hand pane
indicate the total amount of diluent and higher concentration liquid added to the well. As the
values displayed do not take into consideration the volumes removed to make up lower
concentration wells of the series, the numbers can sometimes appear misleading. The value shown
for the lowest concentration dilution in the series represents the sum of the volume of standard
needed in reactions and the extra volume required to account for losses and dead volume (eg. if 20
µL of standard is needed in reactions, and the standards extra volume is set to 50 µL, the value
shown for this item of the series is 70 µL; values shown for higher concentration wells made by the
robot are higher).
The software generates a warning if the series cannot be constructed (eg. because the tube sizes
are inappropriate, or because the configuration would require the robot to move < 1 µL of liquid).
For pre-made standards, the user must supply the required volume for all wells of the series. In this
case, the volume shown includes an extra volume to account for dead volume only (not losses due
to mixing), and this value will depend on the properties of the tubes used for the series.
© Corbett Robotics 2007
Software in Detail
97
3.16.3 Reagents
To use reagents, left click on a well that is to be used as a reagent. The right-hand pane for reagents
will appear on the software's workspace. Reagents are normally located on the reagent block but
can be located on other plates as well. Note that some plates may have several segments and
therefore several possibilities for the location of reagents. Refer to the section on 'Choosing the Right
Plate' for more details on segments and plate functions.
Reagents can be added directly into the reaction tubes, or can be used to make up a master mix
which can then added to the reaction tubes. Before reagents can be used in master mixes, these
reagents need to be set up as described below.
It is preferable to make a master mix rather than pipetting individual reagents into reaction tubes.
This is certainly true when the per-reaction volume of reagent is < 1 µL, as this is outside the CAS-1200
pipetting range. Preparing a master mix not only saves on tips, but will usually give better results. This
reasoning also applies when making multiple master-mixes for primer arrays and the like.
Setting up the Reagents
Click on the desired plate segment and the above screen will appear in the right hand pane.
Enable the use of the reagent segment by ticking the 'Use Reagents?' option.
The table that is shown in the right-hand pane allows the user to enter for each reagent a name, the
per-reaction (default) volume, an indication that the reagent is viscous or not, and the mix count for
each reagent.
To make it usable, a reagent must be assigned a name. If a reagent's name is blank, the reagent will
neither be useable in the master mix component selection nor the reaction configuration.
If a reagent is declared viscous, a slower pipetting speed is used.
The mix count for a reagent defines the number of times the reagent is to be premixed before its first
use, whether being used as an ingredient when constructing a master mix or directly in a reaction.
This feature can be used to ensure that reagents are homogenous.
The ‘default’ volume entered in this table is the volume for that reagent to be added directly to the
final reaction. If the reagent is used in a master mix, this per-reaction volume can be changed
(overridden) in the master mix component selection. Note that if a reagent's ‘default’ volume is 0,
the reagent can still be used in the master mix component selection but it will not be shown in the
reaction configuration.
The ‘Clear Names’ button will clear the names for all of the listed reagents. The ‘Set All Volumes’
button will change the volume of all named reagents to a selected amount.
© Corbett Robotics 2007
Software in Detail
98
If a reagent's name is left blank, that reagent will be shown in grey on the robot's workspace. This can
be seen in the bottom two wells in the diagram below.
Reagent Volume Required
The software will calculate the total volume of the reagent that is required for this run once the
reagents have been added to the reactions (either through a master mix or directly in the reaction),
The required volume can be checked by positioning the mouse pointer above the reagent well. The
hover box which becomes visible reports the amount needed. This includes an extra volume required
to account for losses and dead volume dependent on the tube type.
3.16.4 Master Mix
Master mixes can be prepared as a combination of reagents and diluent. The right-hand pane
allows access to all functions required to prepare master mixes. To prepare a master mix, left click on
a well that is to be used as a master mix. The right-hand pane for mixes will appear on the software's
workspace. By default, master mixes are located on the master mix block but can be located on
some other plates if needed.
There are two ways to make use of master mixes. A pre-mixed master mix can be defined or the
robot can automatically prepare a master mix. A pre-mixed master mix is a mix that the user may
have prepared off-line. A pre-mix contains all the necessary reagents. If a pre-mix is used, the user
only need define the volume of master mix per reaction.
If the CAS-1200 is to automatically prepare a master mix, then the software needs to be set up with
the individual reagents and their volume per reaction. The order in which the reagents are added to
the mix can also be adjusted. Once the master mix has been added to reactions, the software
calculates the required volumes for reagents and diluent to make the master mix.
© Corbett Robotics 2007
Software in Detail
99
Setting up a Master Mix
Click on the well where the master mix is to be positioned. The above right-hand pane will appear.
To enable the master mix, tick the 'Use Master Mix' checkbox.
PrePre -mixed Master Mix
Please note that commercial master mixes do not fall into the pre-mixed master mix category when
dealing with the CAS-1200. Typically, these commercial master mixes require primers to be added.
Thus a commercial master mix and the required primers would be set up as reagents in the software
and then combined in a robot prepared master mix.
If a pre-made master mix is to be used, place a tick in the 'Use pre-mixed Master Mix' option. If it
should be mixed prior to its first use in reactions, adjust the ‘Number of times to mix before use’ as
desired. This allows the pre-made master mix to be homogenised before aliquotting to reactions.
A name for the mix can be entered by clicking in the name text box and typing a name. There is no
need to press Enter.
Specify the volume per reaction of the pre-made master mix.
This completes the setting up of a pre-made master mix. Please see the section on Master Mix
Volumes to ensure a tube of sufficient size is used for the master mix.
Master Mix prepared by the CASCAS -1200
If the master mix is to be made by the robot, ensure the 'Pre-mixed Master Mix' option is not ticked.
A name for the mix can be entered by clicking in the name text box and typing a name. There is no
need to press Enter. The default name can be left in place.
© Corbett Robotics 2007
Software in Detail
100
In the Machine-mixed Master Mix, the total volume of master mix to be made is shown as well as the
volume of master mix per sample; by default, this is set at 20µL. If only a master mix is to be made
and no reactions are to be setup using this master mix in the run file, the total number of reactions to
make up can be set with the ‘Total reactions to prepare (if unused)’ option.
The CAS-1200 performs mixing of the master mix as reagents are added, and then again after all of
the reagents have been added to the master mix tube. The mixing settings can be changed by
modifying the ‘No. of times to mix each reagent’ and ‘No. of times to mix at end’ options. The mixing
has been shown to be very effective for a wide variety of master mixes. The robot can be made to
pause after adding the final ingredient by ticking the ‘Wait for confirmation after adding final
ingredient’ checkbox. The robot can also be paused after the final mix by ticking the 'Wait for
confirmation after performing final mix' options. These options can be useful if the master mix is to
have extra reagents manually added or be vortexed after completion.
Typically the diluent water is added to the master mix first as this usually has the largest volume.
Following the addition of the water, as each reagent is added, the robot performs a per-ingredient
mixing operation by drawing liquid into the pipette tip and then ejecting again. This operation is
performed using the same tip as used for the reagent ejection, and using the same volume as used
for the reagent ejection. The pipettor is not moved up and down in the liquid. The purpose of the
per-ingredient mix is to maximise recovery of the reagent from the tip into the mixture and to
equalise the concentration of liquids left inside the tip with those of the mixture to avoid distorting the
composition ratios of the assay. By default, three mix cycles are used. If desired, this number can be
changed. The reagent insertion order can be adjusted by selecting ‘Adjust insertion order’.
After the last reagent has been added, the CAS-1200 performs another mixing process by repeated
aspirating and ejecting of liquid. This operation is performed using a new tip and using as large a
volume as possible (80% of tip capacity or 80% of liquid volume in the tube, whichever is the smaller).
The pipettor is cycled in the liquid so that the aspirate occurs at the base of the well and the ejection
at the top. The purpose of the final mix is to maximise homogeneity of the assay. By default, five mix
cycles are used. If desired, this number can be changed.
The next step in configurating a master mix is to add the reagents. To do this, click on the 'Configure
Mix' button. The Master Mix Component Selection window will be shown. Please refer to this section
for information on adding reagents.
Once the reagents have been added, you can view these reagents in the table at the bottom of
the right-hand pane as shown below.
© Corbett Robotics 2007
Software in Detail
101
The reagents in the table are listed in the order in which they will be added to the master mix tube. It
is preferable that a large volume is added initially, followed by smaller volumes, and then followed
by a large volume towards the end. This order promotes the best mixing. Additionally, it is preferable
to add any buffer containing detergents at the end. This reduces the risk of froth forming on the
master mix.
To change the order in which reagents are added to the master mix, click on the 'Adjust Insertion
Order' button. The Insertion Order window will appear.
© Corbett Robotics 2007
Software in Detail
102
To move a reagent up or down the list, simply select the reagent by left clicking it and then click on
the 'Up' and 'Down' buttons to move the reagent in the list. This process can be repeated for all
reagents. When the desired order is defined, click on the 'Close' button.
Volume of Master Mix
The right-hand pane shows the total volume of master mix to be made as well as the additional
volume of master mix. These volumes are initially 0 until the master mix is added to a reaction. Please
ensure that a tube large enough to accommodate the sum of the two volumes is chosen as a
master mix tube. If a smaller tube is chosen, the software will issue an error which needs to be
resolved before the run can commence. Please refer to the section on tip re-use for additional
information on setting additional volumes for master mix creation. Tip re-use can affect the amount
of extra master mix volume required.
Additional Master Mixes
To set up another master mix click on another master mix tube and repeat the above steps. Please
note that reagents that are common between different master mixes can easily be added as
above. If certain master mixes have the same reagents but with different volumes (for example, in
optimisations), the reagent volume can be changed in the Master Mix Component Selection
window.
Preparing Master Mix without Reactions
The CAS-1200 can be used to mix master mixes without these being added to reactions. To do this,
set up a master mix as described above and define the total number of reactions to make up using
the ‘Total reactions to prepare (if unused)’ option.
Pipetting of the Master Mix
The master mix is always pipetted into a reaction well first as it typically constitutes the greater
volume of the reaction. This behaviour is fixed in the Robotics Software and cannot be changed.
© Corbett Robotics 2007
Software in Detail
103
Load prepre-set mix
This option is accessed via the 'Load' button in the 'Mix Selection' section of the right-hand pane. It
allows the user to load a master mix that had previously been defined and saved as a pre-set master
mix. Selecting this option will prompt the user to select a file that is a pre-set master mix. Upon
opening a file, the Reagent Selector Window appears. As the pre-set master mixes use reagents that
may not have been defined yet, the user must specify the location of each reagent that is used in
the pre-set master mix. When the Reagent Selector Screen first appears, some reagent locations may
already be in use by reagents previously defined.
If the name of the reagent used in the pre-set master mix is identical to reagents already set up,
these will automatically be allocated to those positions. All reagents must be assigned to locations;
otherwise the reagent import will be cancelled.
On the right of the screen, each reagent to be assigned appears in a white box. To assign a reagent
to a specific location, click and drag the white box to the well that is to be used. Alternatively, if the
exact location does not matter, click and drag the 'Auto' white box from the lower right to the
desired reagent segment. The reagents will automatically be assigned to a location. As each
reagent is assigned a location, the white boxes turn grey.
The 'Reset All' button un-assigns all reagent locations (other than those that were defined upon
entering this screen).
Click 'Next' to continue.
Save prepre-set mix
This option allows the user to save the master mix that has been set up as a pre-set master mix. This is
particularly useful if a master mix is used regularly but the sample and the reaction configuration
changes frequently.
Master Mix Component Selection
To add or modify reagents that are contained in master mixes or to modify the amount of master mix
per reaction, follow the steps outlined in this section.
The window shown below controls the components of a master mix. The table allows for reagents to
be added by simply clicking in the 'Use?' column. Volumes can be altered to suit the master mix that
is being modified.
At the top of the window, enter the master mix volume per reaction. A value can be typed into the
text box or the arrow buttons next to the text box can be used. There is no need to press Enter.
Enter the default sample volume that is to be used (please note that this sample volume can be
edited when configuring the reaction). The total reaction volume is then calculated and shown – the
total reaction volume cannot be edited.
Now the reagents that are contained in the master mix must be chosen. Do this by clicking on the
cell in the 'Use?' column and either ticking or un-ticking the check box. Repeat this until all the
reagents are chosen. The water (diluent) volume is automatically adjusted to make up the
difference between the combined reagent volume and the volume of master mix per reaction. The
water will always be added unless the reagent volumes add up to the desired master mix volume.
In the software there are two ways of defining how much reagent is added to each of the master
mixes. The first way is by setting up the reagent volumes as part of the reagents. The values entered
at this point reflect the 'default' volumes of that particular reagent. These default values are the
values initially shown in the Master Mix Component Selection table (below) as well as the volume
reported for the reagents in the pre and post-run report. If these are the correct volumes for the
master mix, then leave the values shown as they are.
© Corbett Robotics 2007
Software in Detail
104
The second way is by changing the default volume in the table above. By clicking on these volumes
individually, the amount of that reagent, in this particular master mix can be altered. It is important
to note that changing the volume of the reagent in the master mix configuration is NOT reflected in
the reagent right-hand pane and thus does not alter the volume for that reagent if the reagent is
used anywhere other than this master mix. This feature is very important as it allows for one reagent
to be used in different master mixes in varying volumes. When all the reagents have been added
and the volume adjusted, click 'OK'.
3.16.5 Samples
On the CAS-1200, samples are source liquids which can be assigned a name, an ID (such as a
barcode) and a starting concentration. This data can be defined and imported from an external
source such as an Excel spreadsheet. The Robotics Software treats sample wells specially to prevent
cross-contamination by tip re-use.
To use samples in a reaction, they must first be organised into groups called sample banks. Samples
assigned to a given sample bank are treated identically when the bank is used in a reaction. A given
sample well may reside in more than one sample bank. The sample banks can be continuous groups
of wells or a combination of individual (cherry picked) wells scattered over a plate. Sample banks
cannot span multiple plates or plate segments.
When a sample plate segment is left-clicked, the right-hand pane for samples is shown. At the top of
this window, the sample bank list is shown. Under the sample bank list a number of buttons control
functions associated with the sample banks. At the bottom of the window, all the samples available
on the selected sample plate are shown. Note that the samples in grey are currently not assigned to
a sample bank.
© Corbett Robotics 2007
Software in Detail
105
Sample Bank List
The sample bank list at the top of the right-hand pane lists all the available sample banks. The diluent
water is always shown in the list as the diluent and can be utilised as a "sample" for non-template
controls (NTC's). The list also shows standards as these, once set up, are treated in the same way as
samples in a bank. In the example above, the only "true" sample banks are the “cDNA” banks. This
name was entered when the sample banks were created as described under 'Plate Operations'. The
right-hand pane can be used to rename sample banks, delete sample banks, add new banks and
edit sample banks.
To delete a sample bank, select the bank to be deleted by left-clicking on the bank in the list. By
clicking on the 'Delete Bank' button the sample bank will be deleted. Deleting the sample bank will
not affect sample names, IDs or concentrations.
© Corbett Robotics 2007
Software in Detail
106
To rename a sample bank, select the sample bank by left-clicking on it in the list. Then click on the
'Rename Bank' button. The user will be prompted to enter a new name.
A new bank can be created by clicking on the 'New Bank' button. The user will be prompted to
enter a name for the sample bank. Once the new bank is created, this bank will contain no wells.
The 'Edit Bank' function is described below.
There are three ways of adding samples to a sample bank, the first method is described under 'Plate
Operations' and involves selecting wells on the plate and then adding these to a sample bank. The
second and third methods are discussed below.
Indicating Samples per Sample Bank
Click on a sample bank in the Sample Bank List to indicate the sample wells. The system will highlight
all sample wells on the table layout as well as in the sample well list.
Editing Sample Banks using ‘New/Edit Bank’
If a new sample bank is needed, create a bank using the 'New Bank' button. Alternatively, an
existing bank can be selected by left clicking it in the sample bank list. With a bank selected, click
the 'Edit Bank' button. The Update Sample Bank window will appear as shown below.
© Corbett Robotics 2007
Software in Detail
107
Click and drag to select the wells, or ‘Ctrl-click’ (hold down the CTRL-key and click) on wells to
toggle their selection state. When finished, click on "Add Selection" to add the selected wells, or on
"Delete Selection" to remove selected wells from the sample bank. Once all editing to the sample
banks has been performed, clicking "done" will close the window.
Editing Sample Banks using the Sample Table
If a new sample is needed, create one first as described above. In the Sample Data area, click on
the <select sample bank> drop down menu. When the menu appears, click on the sample bank
that wells are going to be added to.
Once the sample bank is selected, an additional column will appear in the table. The additional
column displays a 'Yes' if a well is in the samples bank or a 'No' if not. By clicking on the cell with the
'Yes' or 'No', the status of the well can be changed.
A column of Yes/No values can be copy-pasted from a spreadsheet onto this column of the Sample
right hand pane (right-click in the cell of the required starting row and select ‘Paste to current cell’ to
copy the column data from the system clipboard (starting at that row).
© Corbett Robotics 2007
Software in Detail
108
Plate ID
A plate identifier can be entered as a ‘Plate ID’ for the sample plate. The ID may be any
alphanumeric sequence of characters, and may be entered using a barcode scanner.
Sample Data
Data
Sample data such as a sample name, sample ID and a concentration can be entered in the sample
table. Samples are automatically given default names based on their position in the Sample Plate.
Sample ID and Concentration can also be entered in separate columns.
All sample data can be cut and pasted to and from spreadsheets, including Microsoft Excel. The
sample data is used in the post-run report and when exporting reaction data to other systems
including the Corbett Rotor-Gene.
Alternatively, sample data can be imported from a variety of text-based files. To import sample data,
click on the 'Import sample names' button and refer to the section on importing sample names.
The barcode icon will open a window so the sample names can be entered using a barcode reader
interactively. Scanned items can be immediately grouped into a sample bank.
Sample data can be exported to files in a variety of formats.
Sample Volume required and Setting up
Samples can be stored in a variety of plates or tubes. Refer to the section on 'Choosing the Right
Plate Type' for further details on selecting an appropriate plate to present samples to the CAS-1200.
The software reports individual sample volumes required in a hover box. The hover box appears
when the mouse pointer is positioned over a sample well.
For reliable pipetting, it is essential to add a minimum of 20 µL of volume on top of the actual volume
needed.
In the case of samples, 20 µL may not always be available. To pipette from wells that contain less
than 20 µL of volume, a manual height calibration may need to be performed to ensure that the
pipette tip can go low enough into the sample tube to take a full aliquot. Further, the error detection
© Corbett Robotics 2007
Software in Detail
109
level may need to be set differently to avoid repeated reporting of level sensing errors. It has been
shown that the CAS-1200 can take an aliquot of 5 µL from as little as 10 µL.
Importing Sample Data from a File
Sample data can be imported from any text-based spreadsheet file using the generic file importer.
This allows integration with external data storage systems (eg. LIMS environments). From software
such as Microsoft Excel which does not normally save its data in a text-based format, files can be
exported to a text format by using the 'Save As…' option and selecting 'CSV (Comma Delimited)'
[comma separated variables) as the file type from the 'Save as Type' selection box.
To Import Sample Data:
1. Click on the Sample plate to show the sample right-hand pane. Click on the 'Import...'
button. The Import window will appear.
Importing of a text-based file is illustrated using a Microsoft Excel spreadsheet as shown below.
This spreadsheet was saved as a .csv file. When opened with Notepad, the csv file looks like this.
2. In the Import window Filename area, click on the
or TXT as desired to locate and open a file to import.
button. Choose the file type as CSV
3. Ensure that the Separator is selected as the comma. This will be the default when
selecting a CSV file. Other separators such as Tab can be used. If needed, the ASCII code
for any character can be specified, making the import function universal.
4. In the Import Option area, select the starting import row as required. For this example,
import is from row 2 (to prevent importing the column headings present in row 1). Select
the starting export well as needed. Here, A1 is chosen to ensure that the imported data is
applied to the run from the first well of the plate. Limit the number of sample rows to
import as required. Note that the software will automatically limit the number of rows
imported to prevent overrunning the end of the import file and to prevent overrunning
the available wells on the plate.
5. Specify from which column the sample names are to be imported. Looking at the *.csv
file above, the sample names are in column 1. In the example above, barcodes are listed
in column 4. If these barcodes are to be imported, place a tick into the check box to
enable the importing of sample IDs. Select column 4 as the ‘ID’ import column.
© Corbett Robotics 2007
Software in Detail
110
6. The example above does not contain information on sample concentrations. If the
concentration is to be specified, enable the concentration import by placing a tick in the
‘Conc’ column check box and specify the column containing the sample concentration.
The image below illustrates this (using column 5).
7. The ‘Row Filter’ section at the lower left of the form allows the user to define a filter to be
applied to rows according to the value of the field selected in the ‘Conc’ column. A
range of concentration values can be specified as a filter, with rows matching the criteria
to be included or excluded from the import process as specified. In the image above,
rows with concentrations in the range 0 to 10 in the ‘Conc’ column (column 5) are
selected. Other rows are shown as blank in the preview window and are skipped during
the import.
8. During import, the samples can be added directly to a sample bank. The sample bank
can be specified in the 'Add to new sample bank, named:' field. A new sample bank can
be defined, or an existing sample bank can be selected from the list. This function can be
particularly useful when setting up plates to be cherry-picked, especially when using
template style run files with unpopulated sample banks.
9. Some text-based spreadsheets contain text or symbols that do not have any meaning.
These can include strings of $, " or # symbols. If these are not required as part of the
names, they can be removed by typing them into the 'Remove from text' box. Multiple
© Corbett Robotics 2007
Software in Detail
111
character sequences can be removed by separating them with a semi colon, unless
otherwise specified. Ensure that the check box is also ticked if these kinds of symbols are
to be removed.
10. The Import Preview window shows the desired sample names in the 'Name' column.
Similarly, the barcodes are in the 'ID' column and the concentrations in the ‘Conc’
column. The data is now ready to be imported, click the 'Import' button. The imported
data will look as follows in the sample right-hand pane.
Notes:
•
No data is imported from a row in which all fields are empty, skipping those wells.
•
Previous sample data in wells corresponding to the imported rows is overwritten.
•
Multiple sample banks can be successively populated from the same import file. To do
this, organise the import file to have a column representing each sample bank and
populate the rows in each such column with a concentration value (eg. 0) to indicate
membership of that sample in that bank. Set the Row Filter to include rows with
concentration in the range [0, 0]. Now set the ‘Conc’ column and sample bank name,
click Import, and repeat for each sample bank column in the file. When finished, click
Done.
Interactively Scanning Sample ID Barcodes
Use the barcode icon to perform interactive input of sample ID barcodes.
Alphanumeric barcode sample IDs can be imported directly using most barcode readers designed
to connect to a computer using USB or a Keyboard Wedge. A Keyboard Wedge is an input device
inserted between the keyboard plug and the computer’s keyboard socket. The software
accompanying the Keyboard Wedge interprets the data from a barcode reader and converts the
barcode information into simulated keyboard strokes. For best usability, the barcode scanner system
must also be able to simulate user TABs or Carriage Returns appended to the barcode. These
simulated TABs or Carriage Returns automatically move the data input point (cursor) on the data
table to the next input cell each time a barcode is read. See the diagram below.
© Corbett Robotics 2007
Software in Detail
112
As each barcode is interactively scanned, the data is automatically loaded into the Barcode Entry
table and the entry point moves to the next point in the barcode column. The option 'Add to sample
bank, named:' is available to allow direct import of scanned samples into a new or existing sample
bank. Once all samples have been scanned, select 'OK'.
Exporting Sample Data to a File
Any data shown in the sample data table in the right-hand sample pane of the software workspace
can be exported in a variety of formats. The export feature allows users to pass sample data in
formats suitable for the Corbett CAS-1200 family of instruments, the Corbett Rotor-Gene or other
data storage systems (eg. LIMS environments). Select the 'Export' option in the right-hand sample
pane to open the configuration window.
© Corbett Robotics 2007
Software in Detail
113
A variety of formats can be chosen under 'Export Mode'. Some of the export modes are configurable
so that the exact content of the exported data can be specified. Other modes are 'quick' to use
and have the data content pre-determined. The available formats are as follows.
Export to RotorRotor -Gene
Supported Rotor-Gene export options are as follows.
Rotorgene v4.4 - a *.sam sample file compatible with the Corbett Rotor-Gene software version 4.4 or
earlier. The data is fixed and contains location, sample name and sample type.
Rotorgene v4.6 - a *.smp sample file compatible with the Corbett Rotor-Gene software version 4.6 or
later. The data contains the sample concentration and a user selectable sample identifier which can
be one of:
•
•
Sample name
Sample ID
Export to Comma/Tab Separated Variables (Tabular Spreadsheet Style)
Supported tabular export options are as follows. For the custom formats, data fields are described by
substitution strings outlined below.
CSV File (Excel compatible) - a *.csv text file with comma separators between columns. The data is
fixed and contains the following: number, location, sample name, reagent name, sample type,
concentration, and target volume.
Custom, comma separated - a *.csv text file with comma separators between columns. The data
can be user defined.
© Corbett Robotics 2007
Software in Detail
114
Custom, tab separated - a *.txt text file with tab separators between columns. The data can be user
defined.
Export directly into Excel 97 or later - creates an .xls spreadsheet file and if Excel is installed on the PC,
automatically launches Excel with the data imported. The data can be user defined.
Available data fields
The data fields available for export and their export string designators are as follows:
•
Separator: %0
•
Sample Number: %1
•
Sample Location: %2
•
Sample Type: %3
•
Known Concentration: %4
•
Sample + Reagent Name: %5
•
Sample ID: %I (upper case i)
•
Plate ID: %P (upper case P)
In the export modes where the data can be freely defined, the user must specify the data content
by writing an export string. For example, to generate a *.csv file which contains the Sample Number,
the Sample Location and the Sample ID, a valid format string would be:
%1 %0 %2 %0 %I
The %0 between the individual data fields indicates that a separator is to be inserted. A separator will
result in comma in the case of a *.csv file. In an Excel spreadsheet, a column break would be
inserted.
3.16.6 Reactions
Setting up reactions on the CAS-1200 is the mechanism by which liquid handling operations are
programmed. Each reaction instruction defines a particular type of high level operation and options
for its configuration. The most commonly used reaction instruction is used to combine a sample or
standard with master mix and optional additional reagents in a reaction plate, as for PCR setup
applications. Reaction instructions can also refer to other operations, such as copying a plate,
pausing the robot to allow user intervention and several others. The robot's functions in a given run
are defined by the sequence of reactions which are listed in the Reaction List, located in the upper
half of the reaction right-hand pane.
The right-hand pane for the reaction is made visible by left-clicking on a reaction plate.
© Corbett Robotics 2007
Software in Detail
115
The lower half of the reaction right-hand pane is known as the Reaction Data. It lists all the wells and
their contents on the selected reaction plate. The columns are:
•
Well: This indicates the label of the reaction well, as determined by the selected plate type.
The sequence in which wells are listed may be altered by changing the ‘Well Display
Order’. By default, wells are shown in ‘pipetting sequence’. In most cases, the ‘label
sequence’ is identical to this. However, for special applications, the plate library includes
some plate types in which the label sequence may be horizontal and pipetting sequence
vertical, or vice versa.
• Final Contents: This describes the final contents of liquids in the well as determined by a
complete simulation of the run. This is presented as a list of ingredients comprising the
volume and name of each liquid present in the well on completion of the run, including
any preloaded liquid. Note that where pipetting operations add liquids to a well and later
remove liquids from the well, the final contents may appear as empty. Note also that the
data presented here is different in general from the data presented when hovering the
mouse over the well on the table layout – the hover box shows only liquids added to the
well and excludes and transfers out of the well. The contents text cannot be edited.
• ID: The ID column shows a combination of identifiers associated with the reaction well. This
includes a ‘Reaction ID’ which can be assigned as a fixed attribute of the well, akin to a
label. It also includes a list of the IDs of samples present in the well on completion of the run
as determined by simulation of the pipetting operations. The “label” ID and “contents” IDs
© Corbett Robotics 2007
Software in Detail
116
are combined together as a ‘Full ID’ using a ‘|’ character as separator, with the user
assigned “label” ID listed first.
• Conc: This shows a concentration value associated with the well. Where the well contains
exactly one sample (or a standard) with a specified or known starting concentration, the
value shown is the calculated final concentration of that sample in the reaction. Where
there is more than one sample in the well, no concentration value can be calculated, so
no value is shown. A concentration value can be assigned to the well by the operator.
Such user-assigned concentrations are presented in a blue colour. This facility is useful for
samples or stock wells to be diluted which are supplied initially in reaction plates. Where a
user-defined concentration value is entered for a well which also has a valid calculated
concentration value based on contents, the user assigned value is shown in red colour to
indicate that it is overriding an otherwise visible calculated value. The concentration value
shown here will also be visible while hovering over the reaction well. It is also output in the
post-run report.
Note that groups of cells in the ID or Conc columns can be set in bulk to a specified value. Use the
mouse to select the required cells in a single column, then right click on the selection. The menu
presented will include an option to ‘Assign IDs’ or ‘Set concentrations’ for cells selected in the ID or
Conc columns respectively.
The reaction data can be exported in a variety of formats. To export reaction data, click on the
'Export reaction list' button and refer to the section on exporting reaction data.
The Reaction List
The Reaction List is manipulated by the buttons below the list. These are as follows:
To set up a new "simple" reaction click the 'Add' button. The Reaction Configuration
window will appear.
Existing reactions can be altered by selecting a reaction to be changed (left click on the
item in the Reaction List) and clicking the 'Edit' button. The window appropriate to the reaction will
be opened.
Existing reactions can be copied by selecting a reaction to be changed (left click on the
item in the Reaction List) and clicking the 'Copy' button. The user will be prompted to copy the
reaction in place or to the end of the list. By choosing the 'in-place' option the reaction copy will
appear immediately after the selected reaction. If copied to the end of the list, the reaction copy
will be added to the end of the list.
Existing reactions can be deleted by selecting a reaction (left click on the item in the
Reaction List) and clicking the 'Delete' button. Once a reaction is deleted, the operation is
irreversible. Multiple reactions can be deleted by selecting multiple items in the list. This can be done
while holding down the shift key.
Reactions that involve pipetting operations are bound to a specific target plate. If the
target plate is to be changed the reaction can be edited. Alternatively, the reaction can be retargeted as follows. Select the reaction to be retargeted by left-clicking in the Reaction List, select
the new target plate by left-clicking on it and then click on the 'Retarget' button. The selected
reaction will be moved to the new plate.
The '?' button gives a short summary of each reaction type.
© Corbett Robotics 2007
Software in Detail
117
The order of reactions may need to be changed. Click on the reaction that is to be
moved up or down in the Reaction List. Then click on either the 'Up' or 'Dn' buttons to move the
selected reaction up or down. Multiple reactions can be moved up and down by selecting multiple
items in the list. This can be done while holding down the shift key.
To set up a new "special" reaction click the 'Special...' button. The Special Reaction
menu will appear.
The 'Select All' button selects all the reactions in the list.
The Reaction Indicator toggle buttons allow you to show/hide well indications which
highlight the participants of a selected liquid handling reaction instruction. For a given selected
reaction instruction, source reagent type wells (master mixes and reagents) are indicated with
green, source sample type wells wells (diluent, standards, sample banks) are indicated with orange
and destination reaction wells are indicated with blue. The indications can be individually toggled.
If the total number of reactions configured on one plate exceeds the number of reaction wells a
warning will be flagged. This warning must be resolved before the run can be started.
By default, reactions are added to the reaction plate consecutively. For example, if two reactions
are set up in triplicate with a sample bank of 12 samples, the two reactions would each use 36 wells
with each of the 12 samples used in a series of 3 reactions grouped adjacently per sample. These 36
wells would be added consecutively to the reaction plate thus using 72 wells.
Types of Reactions
The CAS-1200 and software can be configured to set up numerous types of reactions. Outlined
below are some examples. All these reactions can be configured via the ‘Add…’ button
(conventional Reaction Configuration window) or via an option in the Special… button Reaction
menu.
The Reaction Configuration, accessed via the 'Add' button allows for relatively straight forward
reaction set ups. These primarily involve combinations of master mix or reagents with sample banks or
standards. Reactions with only master mix or only sample banks (e.g. plate loading or copying) can
also be set up.
The reactions that can be configured with the Special Reaction menu are significantly more
specialised and complex. Please refer to the relevant sections for further details.
Setting up the Reaction Plate
The reactions are often set up on 96-well, 36-well or 72-well loading blocks. Refer to the section on
'Choosing the Right Plate' for details.
Checking the Set Up
A reaction set up can easily be verified by running a simulation in virtual mode. Alternatively, if the
mouse pointer is positioned above a particular well, the software will highlight the source wells from
which liquid is transferred to the well and the destination wells to which liquid is transferred from the
well. For example, if the mouse pointer is positioned over a master mix, the wells of the reaction plate
in which the master mix is present will also highlight. This is a very convenient way of checking that
the set up is correct.
3.16.6.1
Reaction Configuration
The conventional Reaction Configuration window becomes visible upon clicking the 'Add...' button
on the reaction right-hand pane. The Reaction Configuration contains a variety of options to
© Corbett Robotics 2007
Software in Detail
118
combine liquids that have been defined as samples, diluent, master mix, standards or reagents.
Options exist for pre-mixing or post-mixing, selecting destination of plates and others. Unavailable
options are greyed out.
The reaction configuration works on the following principle:
The reaction configuration window is broken down into several sections accordingly. These sections
are
• Samples
• Mixes and reagents in Mix wells
• Unmixed reagents
• Target reaction plate
• Volume
• Target wells
• Mix settings
• Normalise samples?
These sections can be identified in the figure below.
© Corbett Robotics 2007
Software in Detail
119
Samples Section
This option allows selection of one of the available sample banks. No more than one sample bank is
allowed per reaction. This would lead to cross-contamination of samples by pooling. Pooling is
discussed with the special reactions. By clicking on the drop down menu as shown below, all
available sample banks are listed. The sample bank list includes:
•
No Samples – choosing ‘empty wells’ allows setup of liquid handling operations which do not
include sample transfers.
• Diluent/Water – the ‘water’ sample bank is very useful when creating non-template controls
(NTCs).
• Standards – all pre-made and robot-made standards defined in the run are listed.
• Sample banks – all sample banks, whether present in sample or reaction segments, are listed.
An option is provided to pre-mix samples. If this option is ticked, as an aliquot from the sample tube is
taken, the pipetting head repeatedly pipettes up and down before taking the final aliquot. This
option can be useful for samples that have a tendency to settle. The pre-mix draws a volume equal
© Corbett Robotics 2007
Software in Detail
120
to the amount to be aspirated; this volume is fixed and cannot be changed. The pre-mix is repeated
as many times as is selected in the ‘Pre mix before taking sample’ field.
Mixes and reagents in Mix wells
A single or multiple master mixes can be added to reaction wells. Place a tick next to the master mix
that is to be added to the reaction. Any master mix well configured as type ‘Mix’ and enabled with a
non-zero per-reaction volume, whether pre-made or robot-made, can be chosen.
Unmixed Reagents
Any reagent that has been configured with a non-blank name and non-zero per-reaction (‘default’)
volume can be added to the reaction. Place a tick next to the reagent that is to be added to the
reaction.
Target reaction plate
By clicking on the
button, all available reaction plates will be shown in a window. Choose the
reaction plate that the current reactions are to be added to. If only one reaction plate is available,
this plate is selected by default.
Volume Section
If a sample bank is selected, the per-reaction volume of the sample bank can be defined.
Whenever any sample bank except ‘No samples’ is selected, a non-zero sample volume must be
specified. Note that all wells in a sample bank are treated equally. For example, if a sample bank
contains 10 wells and 5 µL is selected as a volume, then 5 µL of each of the 10 wells is used in the
reactions.
The master mix and reagent volumes have previously been configured elsewhere. These volumes
cannot be altered in the reaction configuration. The total volume is automatically calculated based
on the combination of the sample, reagent and master mix volumes.
Target Wells
By default, reaction wells are allocated sequentially in the order in which reaction instructions are
specified.
For a given reaction instruction, there are 2 independent methods for specifying the number of
reaction wells to be prepared. This depends on the type of sample bank chosen.
When ‘No samples’ or ‘Water’ is selected in the “Samples” section, the target well count is specified
by the ‘Number of wells’. Specifying a non-zero value for ‘No samples’ has the effect of skipping that
number of wells in the target plate (ie. no samples are pipetted into that sequence of wells).
When a Standard or Sample Bank is selected in the “Samples” section, the target well count is
specified by the number of ‘Replicates’. This defines the number of reactions to be made for each
sample in the bank. The user enters the required number of replicates in the “Replicates” option; the
total number of wells is calculated automatically. For example, if a standard has 8 wells in the dilution
series and 2 replicates are specified, a total of 16 wells are consumed. This is indicated in the greyed
out ‘Number of wells’ field. The software processes each sample of the bank in turn and generates
‘Replicates’ reactions for each as a consecutive series of reaction wells, repeating this process for
each sample in the bank.
© Corbett Robotics 2007
Software in Detail
121
The maximum number of replicates (or wells) that can be specified for a given reaction instruction on
a given target reaction plate is limited by the number of wells consumed by preceding instructions
and by the total number of wells on that plate. Attempts to specify instructions that would consume
more reaction wells than are available on the plate are notified to the user via the Warning
indication in the toolbar.
An option is provided to automatically make every second well in the reaction plate a “No Template
Control” (NTC). By selecting the option 'Alternate sample wells with water' option, every second well
in the reaction plate will be prepared with water rather than sample. If this option is selected, the
replicates option is disabled and automatically defaulted to one replicate. This function is provided
as a convenience to allow rapid setup of cross-contamination test runs.
For some applications it is important to mimic the pattern of sample wells of a bank when
constructing reactions in the target plate. A facility to support this can be enabled using ‘Preserve
Well Indices’ option of the ‘Options’ ‘Run Settings’ ‘Advanced’ menu. If this option is activated and
selected, it disables other Target Well specification options. This function ensures that each sample
included in the reaction setup is placed into a target reaction well that has the same relative
address from the start of the plate (in pipetting sequence) as in the sample plate, leaving gaps in the
reaction plate where they are present in the sample bank. Multiple 'preserved address' reactions
may be setup this way into a given reaction plate, but where different reactions would collide into a
common target well a warning is generated. When 'non-preserved address' reactions are setup into
the same plate as a 'preserved address' reaction, the non-preserved address reactions are allocated
contiguously from the first available position after the last preserved address reaction well.
Mix
Mi x Settings
In a standard reaction setup that combines master mix and sample, the master mix is added first and
the sample second. In this case, the sample can be mixed into the master mix by repeated drawing
liquid into the pipette and ejecting it again. To enable this option, tick the 'Mix on ejection?' check
box. The number of mix cycles can also be changed. The volume mixed is the larger of either the
well contents or the last volume of liquid added. This option is particularly useful when pipetting a
very small volume of sample (less than 3 µL) as the mixing 'rinses' all of the sample out of tip.
Normalise
Normalise Samples
Sample s?
Sample normalisation provides functionality to normalise samples of varying concentrations to one
final concentration. The sample normalisation works by adding reduced amounts of sample to the
reactions and then making up the shortfall by adding diluent.
The sample normalisation option can only be used if the concentrations of all samples in the sample
bank are defined (> 0). The option is enabled by placing a tick into the 'Use normalisation?' option. If
normalisation is selected, the final concentration must be specified. The final concentration refers to
the concentration of the sample in the target sample volume, not the concentration of the sample
in the total reaction volume.
Note that the robot is not able to pipette volumes less than 1 µL, and this limits the scope of
normalisation operations that are feasible. The operation is limited by the smallest amount of either
sample or diluent that needs to be pipetted, which in turn depends on the range of concentrations
to be normalised and the total volume of normalised sample in the reaction. This limitation usually
© Corbett Robotics 2007
Software in Detail
122
implies that the samples cannot span concentrations of more than one order of magnitude. If the
normalisation cannot be performed, an error condition will be flagged.
For many applications, exact normalisation to the required final concentration is not absolutely
essential. In this case, it may be possible to perform approximate normalisation by checking the
‘Auto adjust small volumes’ option. In this case, for any wells where a sample volume less than 1 µL
would need to be moved, the volume is adjusted to 1 µL and the complementary volume of diluent
is also adjusted accordingly; similarly, where less than 1 µL of diluent would need to be moved, none
is moved and the whole sample volume is taken from the sample well. Using this option replaces the
normalisation error condition with a soft warning.
Typical Reactions
Following is a list of typical reactions and how these can be set up using the Reaction Configuration
window.
1. Master mix with no sample
2. Master mix with standard
3. Master mix with any sample bank
4. Sample bank with no master mix (sample bank copying)
5. Sample bank with reagents not used in a master mix
6. Sample bank with master mix and reagents not used in a master mix
7. No Template Control with master mix
8. Alternate samples or standards with NTC
9. Empty wells
1. Master Mix with no sample
In the samples section choose 'No samples (empty wells)'
In the master mix section choose the master mix
In the repeats section enter the number of wells to be pipetted (as no sample bank is used, the
number of repeats will equal the number of wells in the reaction plate)
Click 'OK'
2. Master Mix with standard
In the samples section choose the dilution series (a sample bank) to be used
In the master mix section choose the master mix
In the repeats section enter the number of repeats (the number of wells in the reaction plate
will be the result of the number of standards in the dilution series multiplied by the number of
repeats, e.g. 3 fold dilution series in triplicate results in 9 wells)
Click 'OK'
3. Master Mix with sample bank
In the samples section choose the sample bank to be used
In the master mix section choose the master mix
In the repeats section enter the number of repeats (the number of wells in the reaction plate
will be the result of the number of wells in the sample bank multiplied by the number of
repeats, e.g. 10 sample wells in triplicate results in 30 wells)
Click 'OK'
© Corbett Robotics 2007
Software in Detail
123
4. Sample bank with no master mix
In the samples section choose the sample bank to be used
In the repeats section enter the number of repeats (the number of wells in the reaction plate
will be the result of the number of wells in the sample bank multiplied by the number of
repeats, e.g. 10 sample wells in triplicate results in 30 wells)
Click 'OK'
5. Sample bank with reagents not used in a master mix
Reactions can be set up by pipetting individual reagents into the reaction tubes. Although
possible, it is not recommended practice.
In the samples section choose the sample bank to be used
From the listed reagents, choose the reagents to be used
In the repeats section enter the number of repeats (the number of wells in the reaction plate
will be the result of the number of wells in the sample bank multiplied by the number of
repeats, e.g. 10 sample wells in triplicate results in 30 wells)
Click 'OK'.
reagents
6. Sample bank with master mix and reag
ents not used in a master mix
In the samples section choose the sample bank to be used
In the master mix section choose the master mix
From the listed reagents, choose the reagents to be used
In the repeats section enter the number of repeats (the number of wells in the reaction plate
will be the result of the number of wells in the sample bank multiplied by the number of
repeats, e.g. 10 sample wells in triplicate results in 30 wells)
Click 'OK'.
7. No Template Control with master mix
In the samples section choose the water which forms the basis for the NTC
In the master mix section choose the master mix
In the repeats section enter the number of wells to be pipetted (as water is used, the number
of repeats will equal the number of wells in the reaction plate)
Click 'OK'.
8. Alternate samples or standards with NTC
In the samples section choose the sample or standard bank to be used
In the master mix section choose the master mix
In the repeats section, check the 'Alternate samples wells with water' check box. The number
of repeats entered is irrelevant and cannot be set. The number of wells in the reaction plate will
be twice the number of wells in the sample or standard bank.
Click 'OK'
9. Empty wells
The software can be configured to "skip" wells. It does this by inserting empty wells into the
reaction list
In the samples section choose 'No samples (empty wells)'
Select no reagent or master mix
In the repeats section enter the number of wells to be skipped (as no sample bank is used, the
number of repeats will equal the number of wells skipped in the reaction plate)
Click 'OK'.
© Corbett Robotics 2007
Software in Detail
3.16.6.2
124
Special Options (Special…)
The special reaction menu lists a number of reactions that cannot be set up using the standard
reaction configuration window. The reactions listed below involving pipetting operations (all but the
first four items) typically have a special feature that allows for minimum tip usage. However, due to
minimum tip usage, in a number of cases cross-contamination may occur. Before using these
'special' reactions, ensure that the function is well understood. It is also recommended that the user
perform simulations before using these reactions.
Add pause (30 sec.)
In some reaction set-ups a timed pause may be required between pipetting operations. For
example, some set up may require incubation times before more liquid is added to the plate. By
selecting this option, a 30 second pause is inserted into the reaction list.
Add pause (arbitrary)
Similar to the 30 second pause above, but the user is prompted to enter a time which can be any
length between one second and 4 days (96 hours).
Add 'reset eject position'
As the reaction list grows, wells in the reaction plate are consumed in a consecutive manner.
However, a resetting of the ejection location forces the software to start pipetting into a reaction
plate from its first well again, typically well A1.
For example, if two reactions are set up in triplicate with a sample bank of 12 samples, the two
reactions would each use 36 wells. These 36 wells would be added consecutively to the reaction
plate thus using 72 wells. In some instances, for example when pooling sample plates, it may be
convenient to reset the eject position between reaction set ups. In the example above, the two sets
of 36 wells would normally be pipetted consecutively, if a 'reset eject position' was added between
the two reactions in the reaction list, the robot would initially pipette the first set of 36 wells, reset
back to well A1, and then pipette the second 36 wells. The result is that the two sets of 36 wells would
be pooled on top of one another without contaminating the sample banks.
Add 'pause until
until confirmation'
Similar to the timed pauses above, adding this pause causes the robot to wait. However, these
pauses do not have a time limit, these pauses wait for the user to perform a task and then click 'OK'
to continue. When setting up this type of pause, the user is prompted to enter a message which will
be part of the message box that appears during the run.
Add sample bank pooling step
This pooling operation refers to the pooling of sample banks, making it possible to pool two or more
sample plates (each plate defined as a separate sample bank) or to pool individual samples
defined as sample banks on one plate. Sample pooling was touched on above under the 'reset
© Corbett Robotics 2007
Software in Detail
125
eject position' heading. However, this specialised pooling function provides options to control tips
handling during the pooling operation.
The following run set up illustrates this plate pooling function and the difference to the pooling
discussed thus far. Three sample banks are to be pooled. All sample banks are separate plates, one
located in position B1, B2 and C1. All sample banks contain 96 wells. If the sample banks were
pooled using a reset of the eject position, the pooling would require 288 tips: ninety-six tips for each
sample bank. Using this pooling function, the tip count can be reduced to 96 tips for the entire
operation. However, two of the three sample plates would be contaminated. The operation would
be as follows: the robot picks up a tip, takes an aliquot from sample plate B1, then sample plate B2,
and then sample plate C1. The three samples will then be ejected into the corresponding well in the
reaction plate at position C2. The second and third sample plates would therefore be
contaminated.
The Sample pooling window looks as follows:
To set up this type of sample pooling, select the 'Add sample bank pooling step...' from the menu the Sample Pooling window will be shown.
1. Select the reaction plate to pool into.
2. Select the first well in the reaction plate - typically this is well A1.
3. Select the first sample bank from the drop down menu.
4. Select the volume of this sample bank to add.
5. Click the 'Add' button.
6. Select the second sample bank from the drop down menu.
© Corbett Robotics 2007
Software in Detail
126
7. Select the volume of this sample bank to add.
8. Click the 'Add' button.
9. Select the third sample bank from the drop down menu.
10. Select the volume of this sample bank to add.
11. Click the 'Add' button.
In this example an air gap of 5 µL was placed between each sample. If needed, an air gap of
variable volume can be added between the sample pick ups. Do this by selecting the 'Air gap' from
the drop down menu.
The alternate tip ejection mode allows separate tips to be used for each transfer to prevent sample
contamination. In this case, samples can be premixed before aspiration to improve homogeneity
before transfer to the pooled reaction well.
Add sample bank duplication step
This reaction step is used to duplicate sample banks, for example for the purposes of plate copying.
The Bank Duplication Window should look as follows.
Although it is possible to copy sample banks by adding standard reaction steps, this special step
conserves tips. If a sample bank of 8 samples was duplicated 5 times using the normal technique, 40
tips would be required. Using this method, only 8 tips will be used. By default, this method makes use
of the multi-eject functionality (see tip re-use options), but this can be changed if necessary.
© Corbett Robotics 2007
Software in Detail
127
To set up the above example of duplicating one sample bank of three samples five times, follow
these steps:
1. Open the Bank Duplication Window
2. Select the tip handling option for this Sample Duplication action:
a. Multi-Eject Tip. This uses a single aspirate followed by a sequence of ejections into the
target wells. Configuration of the Multi-eject settings is as described in Set Tip Usage
Options (3.9.4.3). Note that the settings configured here apply only to this bank
duplication instruction.
b. Re-use Tip. This process use repeated cycles of aspirate and eject using the same tip to
duplicate the sample to each target well.
c. Use new Tip. This process use repeated cycles of aspirate and eject using a new tip to
duplicate the sample to each target well.
For this example, multi-eject is used with the following configuration.
3. Select the sample bank to be duplicated in the drop-down menu
4. Set the first well to well A1
5. Select the volume of the aliquot
6. Click on 'Add'
7. Select the sample bank to be duplicated in the drop-down menu
8. Set the first well to well A3
9. Select the volume of the aliquot
10. Click on 'Add'
11. Repeat steps 2 to 5 with first wells of A5 and A7
12. Click on 'OK'
The robot will take a tip, aspirate 103 µL from the first well in the sample bank and eject 3 µL back into
the sample well, and eject 25 µL into wells A1, A3, A5 and A7. The last ejection will be a blow-out.
The tip will then be discarded. With a second tip, the robot will aspirate from the second well and
© Corbett Robotics 2007
Software in Detail
128
eject into wells B1, B3, B5 and B7 and so on. The total tip usage for this multi-eject example will be the
number of samples in the selected sample bank (here 4, 1 for each of the 4 wells).
Add sample dilution step
The sample dilution step is a specialised function that allows the dilution of a sample bank by adding
varying quantities of diluent and sample. The following is an illustrative example of how to set up a
special dilution step.
In this example, a sample bank contains four samples. We wish to dilute the sample bank as follows:
8 µL sample, 2 µL diluent; 6 µL sample, 4 µL diluent; 4 µL sample, 6 µL diluent and finally 2 µL sample
and 8 µL diluent. Follow these steps to set up the dilution.
1. Create a sample bank with 4 samples
2. Open the Sample Dilution Step window
3. Ensure that Diluent is selected as the diluent
4. Ensure that the correct sample bank is selected
5. Select the desired reaction plate
6. Select the first well to be well A1
7. Select 8 µL sample volume and 2 µL diluent volume
8. Click 'Add'
9. Select 6 µL sample and 4 µL diluent volume
10. Click 'Add'
11. Repeat steps 9 and 10 for 4 + 6 µL and 2 + 8 µL sample + diluent respectively.
12. Tip use is configurable. By default this function uses the multi-eject feature to minimise tip
usage, and the multi-eject settings can be specified for both the diluent and the sample
independently.
a. Multi-Eject Tip Setting can be specified for both the diluent and the sample. See the
section describing Set Tip Usage Options (3.9.4.3). Note that the settings configured
here apply only to this sample bank dilution instruction.
b. Re-use Tip will apply to sample only and the global selected tip option will apply to
diluent.
c. Use new Tip will apply to sample only and the global selected tip option will apply
to diluent.
13. The total sample and total diluent volumes as the bottom of the window indicates the total
liquid to be aspirated, including optional extra volumes according to multi-eject settings.
14. Click on 'OK' when finished.
Assuming use of default multi-eject settings, the final setup should look as shown below.
© Corbett Robotics 2007
Software in Detail
129
The robot will use 8 tips to perform this task. Four tips are used to pipette the diluent and four tips are
used for the samples as follows. Initially the robot would take a tip, draw up 22 µL of diluent from the
reservoir, dispense 1 µL back into the diluent well, and eject 2, 4, 6 and 8 µL into wells A1, A2, A3 and
A4 respectively. The remaining 1 µL is discarded with the tip. This operation is repeated with a fresh tip
for each remaining sample in the bank (ie. using 3 more tips). The fourth tip is used to draw up 22 µL
of sample from the first well in the sample bank, 1 µL is dispensed back into the well, and 8, 6, 4, and
2 µL is ejected into wells A1, A2, A3 and A4 respectively. This process is repeated for the remaining
samples of the bank (ie. using 3 more tips).
Add serial dilution step
The serial dilution step is an alternative to setting up a dilution series as a standard. The advantage of
this serial dilution function is that it can be performed in any reaction plate. Combined with the ability
to assign any well grouping in a reaction plate into a sample bank, this allows for only selected
dilutions in the series to participate in subsequent liquid handling operations. This is unlike Standards,
in which all dilutions of the standard are always part of the bank and all must be used in reactions.
For this set up to work an initial undiluted ‘stock’ sample bank needs to be created with the same
well count as the pipetting channels on the robot. In the case of the CAS-1200 this is limited to a
single channel and thus a sample bank with only one well.
An illustrative sample is used to demonstrate the operation of this function. A dilution series of 1:10,
1:10, 1:5 and 1:5 is to be created. A total volume of 50 µL of each standard is to be made. Follow
these steps to create the dilution series.
© Corbett Robotics 2007
Software in Detail
130
1.
Create a sample bank which contains only one well (called UndilutedStock for this example)
2.
Open the special Serial Dilution window by selecting it from the 'Special' menu
3.
Select Diluent as the diluent
4.
Ensure the correct sample bank is selected
5.
Select the reaction plate
6.
Select the first well in the reaction plate, A1 in this example
7.
Select the volume that is to be created, 50 µL in this case
8.
Select a dilution ratio of 1:10
9.
Click 'Add'
10. Select a dilution ratio of 1:10
11. Click 'Add'
12. Repeat steps 10 and 11 with a dilution ratio of 1:5
13. Click 'OK' when the set up is complete
The completed setup is shown in the Dilution window. The robot's actions are the same as making a
standard dilution series.
© Corbett Robotics 2007
Software in Detail
131
In this example, the UndiliutedStock is in plate B1, well A1, and the dilution series is constructed in the
adjacent wells starting at well B1. The NOTES region at the bottom of the form indicates the required
volume of starting UndilutedStock (sample) and diluent, along with tips used.
Add sample bank normalisation
The sample normalisation feature can be accessed via the normal reaction configuration tool.
However, the function as it is presented here is useful for a greater variety of tasks. This sample
normalisation can be used to prepare a stock plate of normalised samples as well as a working plate
with a minimum number of tips. If a minimum number of tips are used, the sample plate is
contaminated with a very small amount of diluent.
Once again, an illustrative example is used to explain the functionality.
Assume a sample bank with eight samples is set up. The concentrations of the eight samples range
from 60 - 150 ng/µL (note that the concentration units are irrelevant). It is required that a stock plate
of normalised sample is created with a volume of 100 µL of stock solution at a concentration of 50
ng/µL. In addition, a working plate with 10 µL of the stock solution is required.
To set up this reaction, follow these steps:
© Corbett Robotics 2007
Software in Detail
132
1. Create a sample bank of eight samples with varying concentrations between 60 and 150
2. Ensure two reaction plates are available at locations B2 and C2
3. Open the special sample normalisation window
4. Select the Diluent as diluent
5. Select the correct sample bank
6. Select the reaction plate to dilute into (the stock plate), in this example plate C1
7. Select the first well in the stock plate, well A1 in this example
8. Select a final dilution volume of 100 µL
9. Select the desired concentration 50 ng/µL in our case
10. The set up for the stock plate is now complete
11. Place a tick in the 'Use secondary target?' option
12. Select the second plate, plate C2 in this example
13. Select the first well in the secondary (working) plate
14. Select a volume of 10 µL to be transferred to the working plate
15. Place a tick in the option to allow contamination
The robot will take a tip, pick up diluent, aspirate liquid from the first well in the sample bank and
eject the entire volume into well A1 of the stock plate and mix the dilution 3 times. The robot will then
use the same tip to take an aliquot of 10 µL from the stock plate and transfer this to the working
plate. This process is then repeated seven more times. The tip consumption for this job is only eight
200 µL tips.
Using the same sample bank, but changing the final volume to 5 µL and Desired Concentration to 50
will result in volumes to be moved that are less than the recommended limits for the robot. The
system will indicate some hints to a better normalisation in the Notes. The system will also notify when
some samples do not have a valid concentration. The source wells are listed in the NOTES so that it
can be selected and copied to be used in the sample bank editor window if needed.
Remove Waste
The remove waste command allows the user to specify a reaction plate as a ‘waste’ receptacle.
Treating a pipetting operation as dispensing into a ‘waste’ reaction well disables the usual sequential
reaction well allocation strategy. This allows a sample bank comprising multiple wells to be ‘copied’
to a single target well, effectively pooling all members of the bank into a single well. This is done with
optimal use of tips and no contamination of the source plate.
3.16.6.3
Exporting Reaction Lists
Any data shown in the reaction list can be exported in a variety of formats. The export feature allows
users to pass sample data directly to the Corbett CAS-1200 family of instuments, Corbett Rotor-Gene
or other data storage systems (eg. LIMS environments). Upon selecting the 'Export Reaction List'
option from the Wizards Menu or the reaction right-hand pane, the Export Reaction Info window is
shown.
© Corbett Robotics 2007
Software in Detail
133
A variety of formats can be chosen under 'Export Mode'. Some of the export modes are configurable
so that the exact content of the exported data can be specified. Other modes are 'quick' to use
and have the data content pre-determined. The available formats are as follows.
Export to RotorRotor -Gene
Supported Rotor-Gene export options are as follows.
Rotor-Gene v4.4 - a *.sam sample file compatible with the Corbett Rotor-Gene software version 4.4
or earlier. The data is fixed and contains location, sample name and sample type.
Rotor-Gene v4.6 - a *.smp sample file compatible with the Corbett Rotor-Gene software version 4.6
or later. The data contains a user selectable sample identifier and concentration. The sample can be
identified by one of:
•
•
•
•
Sample name (a list of sample names present in the reaction well)
Sample ID (a list of sample identifiers present in the reaction well)
Reaction ID (as assigned to the reaction well itself like a label)
Full ID (comprising the identifier of the reaction well and all identifiers of contained samples)
The concentration can be chosen from either the initial value associated with the source sample well
or the final value after dilution with other ingredients in the reaction well.
Rotor-Gene v6.x - a *.smp sample file compatible with the Corbett Rotor-Gene 3000 software version
6.x or Rotor-Gene 6000 version 1.x or later. The data contains a user selectable sample identifier, user
© Corbett Robotics 2007
Software in Detail
134
selectable concentration source, sample type, and may be organised into ‘pages’ according to a
user selectable partitioning and naming scheme. The sample can be identified by one of:
•
•
•
•
Sample name (a list of sample names present in the reaction well)
Sample ID (a list of sample identifiers present in the reaction well)
Reaction ID (as assigned to the reaction well itself)
Full ID (comprising the identifier of the reaction well and all identifiers of contained samples)
The concentration can be chosen from either the initial value associated with the source sample well
or the final value after dilution with other ingredients in the reaction well.
The reaction data can be organised into Rotor-Gene ‘pages’ as follows:
•
Master Mix – reactions are segregated according to the master mix present in the well, with
one page created for (and named after) each master mix.
• Reaction ID – reactions are segregated according to the reaction ID (user assigned label)
associated with the well, with one page created for (and named after) each reaction ID.
• Both Master Mix and Reaction ID – reactions are segregated into pages according to the
combination of master mix and reaction ID, one page per combination (and named as
the conjunction of the master mix name and reaction ID).
• None – all reactions are placed into a single page called ‘Page 1’.
Export to Comma/Tab Separated Variables (Tabular Spreadsheet Style)
Supported tabular export options are as follows. For the custom formats, data fields are described by
substitution strings outlined below.
CSV File (Excel compatible) - a *.csv text file with comma separators between columns. The data is
fixed and contains the following: number, location, sample name, reagent name, sample type,
concentration, and target volume.
Custom, comma separated - a *.csv text file with comma separators between columns. The data
can be user defined.
Custom, tab separated - a *.txt text file with tab separators between columns. The data can be user
defined.
Export directly into Excel 97 or later - creates an .xls spreadsheet file and if Excel is installed on the PC,
automatically launches Excel with the data imported. The data can be user defined.
Available data fields
The data fields available for export and their export string designators are as follows:
•
Separator: %0
•
Sample Number: %1
•
Sample Location: %2
•
Sample Type: %3
•
Known Concentration: %4
•
Sample + Reagent Name: %5
•
Target Volume: %7
•
Sample Name: %8
•
Reagent Name: %9
•
Sample & Reagent Name, no volume: %A
© Corbett Robotics 2007
Software in Detail
•
Sample Name, no volume: %S
•
Reagent Name, no volume: %R
•
Sample volume: %R
•
Final Concentration (if known): %F
•
Target Plate ID: %P (upper case P)
•
Source Plate ID: %p (lower case P)
•
Full (Constituent & Tube) ID: %I (upper case i)
•
Constituent (sample) ID: %C
•
Tube (reaction) ID: %T
135
In the export modes where the data can be freely defined, the user must specify the data content
by writing an export string. For example, to generate a *.csv file which contains the sample location,
the sample name and the expected total volume, a valid format string would be:
%2 %0 %8 %0 %7
The %0 between the individual data fields indicates that a separator is to be inserted. A separator will
result in comma in the case of a *.csv file. In an Excel spreadsheet, a column break would be
inserted.
Export to ABI 7000/7500 SDS software
The CAS-1200 software allows export of reaction data to Applied Biosystems SDS v1.2.3 'Setup Table
Format' as used with the ABI 7000 and ABI 7500 instruments, for both absolute quantification and
allelic discrimination. To use these export functions, you need to ensure your master mixes are named
in the software according to special conventions which allow the identification of Detector,
Reporter, Quencher and Marker entities required by the SDS software. For absolute quantification,
master mixes must be named as:
[?:]D_R_Q{:D_R_Q}
where:
• colon ':' is a separator
• the leading '?' is any string you like (excluding the colon character)
• D, R, and Q are placeholders for Detector, Reporter, and Quencher as used in the ABI SDS
software.
• [] indicates an optional component
• {} indicates 0 or more items
For example, "Mix C:EBV_FAM_TAMRA" specifies a mix with detector for EBV using FAM reporter and
TAMRA quencher, and the 'Mix C' portion of the name is unused by the SDS software.
For allelic discrimination, you need a marker M identifying a pair of detector/reporter/quencher sets,
so the convention required for master mixes is:
M:D_R_Q:D_R_Q
where
•
•
M is the marker name
all other items as above
For example, "Mix D:CMV_FAM_TAMRA:EBV_JOE_TAMRA" specifies a mix with detector for CMV using
FAM reporter and TAMRA quencher and detector for EBV using JOE reporter and TAMRA quencher,
© Corbett Robotics 2007
Software in Detail
136
with 'Mix D' representing the Marker name in the SDS software. To use the export functions, select
your reaction plate, then Export button, and select either:
•
•
ABI7000/7500 SDS absolute quantification
ABI7000/7500 SDS allelic discrimination
Assuming you define an export filename XXX, the absolute quantification function exports a single
file, XXX.TXT. The allelic discrimination function exports 2 files, XXX.TXT and XXXend.TXT (for endpoint
analysis).
The ABI SDS export functions ignore reactions whose master mix name do not match the required
format. Thus, in the resulting files, wells are only listed where their master mix contents are named so
that they match the required format.
© Corbett Robotics 2007
Software in Detail
3.17
137
Starting a Run
Before starting a run, please ensure the following:
•
All tubes and plates are in their correct places and caps have been removed
•
The correct tips are set as available
•
Sufficient volume has been added to reagent and sample wells (all required volumes can
be checked by hovering over the wells)
•
Enough diluent has been provided
•
Correct plate types have been chosen
•
All plates are correctly calibrated (position and height)
To start a run, press the
button located on the toolbar.
Shortly after clicking the run button, a checklist window will appear. This checklist looks similar to this.
The start checklist shows warnings and errors that may exist with the run. Error messages are shown in
red and a run cannot start until the errors are resolved. Warning messages are shown in blue and
simply require an acknowledgment before the run can start. However, the warnings are presented
for a reason and in most cases it is advisable that all warnings be resolved before starting the run.
Details of a warning or error message are displayed in the information box below the message list, for
the current selected message.
If no warnings or errors exist then the checklist will look like this.
© Corbett Robotics 2007
Software in Detail
138
If the user wishes to see a pre-run report, click on the 'Pre-Run Report' button.
After selecting OK, the run will commence.
Progress of the run will be shown in the right-hand pane.
© Corbett Robotics 2007
Software in Detail
3.18
139
Warnings
Warnings and errors are indicated by the
message(s) in the pre-start checklist.
symbol in the toolbar or red (error) or blue (warning)
The source of the error or warning can be identified by clicking on the toolbar symbol. Warnings are
non-critical and the run can commence with active warning messages. Please note, warning
messages and errors are logged in the post-run report and in any support packages.
The following are warnings and do not need to be resolved to start a run but can lead to erroneous
results.
•
Not Enough Small Tips - there is an insufficient supply of 50 µL tips
•
Not Enough Large Tips - there is an insufficient supply of 200 µL tips
•
Well Too Full - too much liquid will be ejected into a well
•
Well Too Small - a well cannot contain sufficient liquid to supply the run
•
Eject Volume Too Low - a volume less than 5 µL is ejected into a dry well
•
Will Contaminate - the run contains reaction elements that will contaminate sample wells
•
Volume Too Small - the run requires a volume to be pipetted that is too small
•
Multi Eject - the run is set up with multi-eject functionality which can lead to reduced
precision
•
Master mix extra volume too small – The master mix extra volume is set to prepare a total
extra volume lower than recommended to avoid shortages.
•
Standards volume too high – A robot prepared standard well has a volume too large for
the largest tip to mix effectively.
•
Speed not set – A speed parameter has not been set, default settings will be used.
•
Air intake limits - the maximum volume that can be pipetted is limited by the amount of
pre-aspirated air.
Errors are listed below and must be resolved before the run can start.
•
Not Enough Output Wells - there are not enough output wells in the reaction plate
•
Too Many Standards - the software can accommodate a limited number of dilution series
(16 maximum)
•
Invalid Sample Config - sample banks are set up incorrectly
•
Operation Impossible - an item in the reaction list or combination thereof cannot be
performed
•
Dilution Out Of Range - the sample and target concentration are set to values that are
not achievable
•
Bad Plate Config - a plate configuration is not usable
•
Reagent Name - problems with reagent naming in the optimisation wizard have occurred
•
Non unique tip type for volume – The correct tips for the required volume are not
available.
For system error messages and codes see the Appendix.
© Corbett Robotics 2007
Software in Detail
3.19
140
PrePre-run Report
Upon clicking the Start button the user is presented with the Pre-run Checklist. This checklist allows the
user to display the Pre-run Report. This report summarises the run set up in a text-based format. The file
format of the report is HTML and can thus be opened on any computer with a type of Internet
Explorer. The Pre-run Report contains information on:
•
The robot type and robot serial number (or operation in Virtual-Mode).
•
The user and run file name.
•
The configuration of any standards or dilution series used in the run.
•
The configuration of master mixes (if robot prepared) and the reagent volumes per
reaction used in the master mix.
•
The configuration of reagents, their location and the amount of reagent required during
the run.
•
The individual well contents of each well in all reaction plates.
•
Significant program settings including air volumes, pipetting speeds, tip usage and other
options.
•
The current time and date.
The pre-run report offers options to print the report, save the report (in html format), e-mail the report
(only available if the PC has e-mail software set up) and an option to export the report into Microsoft
Word. These options are available via the toolbar at the top of the report. The export into Word
allows the report to be edited if necessary.
The report can be closed by clicking on the 'X' or the 'Close' button.
The elements of the Pre-run Report are described below.
Reactions
The listing of the reaction plate contains information on the contents of each well and the final
volume in each of the wells. This information, particularly the final volume can be very useful to
quickly check that the run set up is correct.
Standards
The standards section shows information on the dilution series that the robot will create. Shown are
the total volumes of standard made as well as the components that make up the individual
standard.
Master Mix
The master mix configuration shows all the reagents and the location of the reagents used in the
master mix. Further, a summary of the volume of each reagent (per reaction) in the master mix is
provided. Please note that the volumes shown here are the volumes set up in the master mix
component selection window and may differ to the default volumes set up for the reagents. Below
the table a summary is provided showing the total volume of master mix per reaction and the total
volume of master mix that will be made for this run.
© Corbett Robotics 2007
Software in Detail
141
Reagents
The reagent section shows the location of the reagents, the reagent name, its default volume and
the total volume required for the run. Please note that a reagent is only annotated as not in use if it is
not used in a run, regardless of whether that reagent's name is blank or its volume set to 0. If reagents
are set up in separate blocks (or block segments), two or more tables showing the reagent
configuration may be displayed in the report.
Settings
Settings pertinent to the run are displayed in four tables. These settings include:
• Tip Usage
• Air Volumes
• Pipetting Speeds, and
• Program Settings
At the base of the report the date, time and software version number is recorded.
© Corbett Robotics 2007
Software in Detail
3.20
142
Aborting a Run
The run can be paused and aborted at any time. To pause a run, click on the
button in the
toolbar. The robot will finish its current operation and then pause. The user will be presented with an
option to select OK to continue or Cancel to abort. Please note that the robot does not stop
immediately once the lid is opened, wait until the robot arm has ceased movement and the warning
screen is displayed before continuing.
A run can also be paused by lifting the robot lid. Pausing the run in either of these ways is logged in
the post-run report. If the user chooses to abort the run, the robot will discard the tip and return to its
resting position at the rear right. The lid must be closed for the run to completely abort.
Please note, once a run is aborted, it cannot be restarted at the point where it was aborted.
© Corbett Robotics 2007
Software in Detail
3.21
143
PostPost-run Report
At the completion of a run a Post-Run Report will appear. The report is very similar to the Pre-run
Report. The information about the individual components set up such as reagents, master mix and
standards is the same as in the Pre-run Report. As with the Pre-run Report, the Post-Run report also
provides information on the contents of individual wells in the reaction plates that had been set up in
the run. Further, the report includes information on any errors or warnings (termed exceptions) that
may have occurred during the run. For example, the Post-run report records events such as the
opening of the lid during a run, level sensing errors, machine errors and similar events.
Duration
This item provides details about the date, starting time, completion time, and the duration of the run.
Exceptions occurred during
duri ng this run
The occurrence of an exception is highlighted in the report. Details of each exception are recorded.
These details include:
• Date and time of exception
• Robot activity at time of exception
• The exception that occurred, and
• The user’s response.
Reaction Plate Details
Deta ils
• Details about each reaction are recorded. These details include:
• Well Number,
• Well Location,
• Final Well Contents (Desired/Expected),
• Final Well Contents (Actual), and
• Volume Pipetted (Total to Well).
Similar to the Pre-Run report, the Post-run Report may be printed, saved (in HTML format), e-mails or
exported to Microsoft Word. Please not the Post-run Report is automatically saved in a sub directory
called Reports in the current run file save directory (the default directory is c:\Program
Files\Robotics4\Data).
© Corbett Robotics 2007
Software in Detail
3.22
144
Exception Handling
During a run, if an exception (an error or a warning) is encountered, the user will be prompted with a
window similar to the one shown below (a different window is shown if tips are exhausted during a
run). As well as the warning windows, an audible warning will sound for the first 30 seconds, then in 30
second intervals. The window contains information on the error that occurred.
Selecting 'Abort run' will cancel the run. Selecting 'Retry operation' will cause the robot to throw
away the current tip and move the pipetting head to the rear right of the robot. This gives access to
the entire workspace where the error may be resolved. A message box appears prompting the user
to click 'OK' to continue the run. If 'Ignore error' is selected, the robot will continue its operation as if
nothing had happened.
Exhausting tip supply during a run
If more tips than available are required for a run, the software will issue a warning to that effect
before the run is started. If this warning is ignored and the tip supply is exhausted during a run, the
robot will pause and allow the user to replenish tips. A 'Replace Tips' window appears.
© Corbett Robotics 2007
Software in Detail
145
Select the tip plate where the tips have been replaced by placing a tick in the box next to the
correct plate. Once ticked, select OK to continue the run. Alternatively, if 'Cancel' is selected the run
will be aborted. More than one tip rack can be replenished at one time. Please note that running out
of tips will be logged in the post-run report.
Other error messages are covered in the Appendix.
© Corbett Robotics 2007
Software in Detail
3.23
146
Shutting Down
The Robotics Software can be shut down by clicking the 'X' in the top right hand corner of the
computer screen or by selecting "Exit" in the File Menu.
When shutting the Robotics Software down and turning the CAS-1200 Robotic Liquid Handling System
off, there are two options. The first refers to "Moving to a Safety Position" and the second option refers
to shutting down "Immediately".
Moving to a Safety Position
The robot will go through its homing routine and then lower the pipetting head in a known safe
location. The user is prompted when it is safe to shut the robot down. All the robot axes are
disengaged and can be moved freely. Upon switching the robot off a small click will be heard as the
pipetting head drops 1 or 2 mm further. This is the preferred method of shutting down.
Shutting down Immediately
Immediately
This is the faster way of shutting down. The robot axes remain engaged and the pipetting head is still
in its upward position. Upon switching the robot off, the pipetting head will drop approx. 70 mm. This
will not damage the robot but may, inadvertently pick up a pipette tip. The other technique is the
preferred technique for shutting down.
© Corbett Robotics 2007
Setting Up A Typical PCR Run
147
4 Setting up a Typical PCR Run - an example
This section describes the setting up of a typical PCR run. Although realistic in its set up, this section
does not describe the chemistry that is used. Described elsewhere is the setting up of the CAS-1200
including calibrations.
The master mix is set up manually (not using the PCR Setup Wizard).
The run that is to be set up has the following requirements.
• 18 samples are to be tested in triplicate. The samples are stored in the first 18 wells (A1 - B3) of a
96-well skirted PCR plate.
• A standard curve with 5 orders of magnitude is to be created in triplicate, the concentration of
the first standard is 3 x 10^8 copies per mL, thus 1.5 x 10^6 per 5 µL.
• A No Template Control is required in triplicate.
• The master mix is to be made by the robot from individual reagents as listed below.
• 25 µL reactions are to be made consisting of 5 µL sample/standard and 20 µL master mix.
• All reactions are to be set up to be run in a 72-well rotor on the Corbett Rotor-Gene.
The master mix (per reaction) is to be set up as follows:
• Water 8.75 µL (in diluent tube)
• 10x Buffer 2.5 µL (in tapered 1.5 mL tube)
• MgCl2 1.5 µL (in tapered 1.5 mL tube)
• dNTP 2 µL (in tapered 1.5 mL tube)
• Primer (fwd) 1.5 µL (in flat base 2 mL tube)
• Primer (rev) 1.5 µL (in flat base 2 mL tube)
• Probe 2 µL (in tapered 1.5 mL tube)
• Taq 0.25 µL (in flat base 2 mL tube)
The preparation will include the following details:
• Initial Set Up - selection of the right plates, correct plate functionality and tip availability
• Reagents - entering names and volumes
• Master Mix - selection of reagents for the master mix
• Standards - setting up the dilution series
• Samples - setting up the samples
• Reactions - setting up the reactions in the reaction plate
• Setting up the Table - placing tubes on the CAS-1200
© Corbett Robotics 2007
Setting Up A Typical PCR Run
148
4.1 Initial Setup
Setu p
The workspace must be set up with the correct plates to facilitate the run. This section describes how
to select the correct plates for this example. This section also explains other options such as tip re-use
for this run.
First, the requirements for plates/tubes need to be identified. These are:
• Master mix
• Samples in a 96-well skirted plate
• Reactions to be set up on a 72-well Corbett Rotor-Gene
• Standards are required
• Reagents are in both, tapered 1.5 mL tubes and 2 mL flat base tubes
• Tips
Starting out
Ensure the robot is switched on and connected to the PC. Start the Robotics Software, select 'Empty
project' when prompted and answer 'Yes' to reset to defaults.
Master Mix
The reaction requirement is 18 samples, no template controls (NTC) and 5 standards all in triplicate.
These results in 72 reactions with 20 µL master mix each. A master mix volume of 1560 µL (1440 µL +
120 µL extra) will be required as a minimum.
Select the correct master mix block as follows:
1. Left-click on a well in the master mix block located in the upper left of the workspace to select
it
2. Right-click the block
3. Select 'Change plate type'
4. From the left window, select the block that you have (either a 5-hole or 4-hole block)
5. In the right window, select the block that will hold the required volume - this will need to be the
5 mL diluent volume and the 5 mL master mix volume (the tapered tubes only hold 1.5 mL)
6. Click on 'OK'
7. The correct master mix block is now selected
8. Right-click on the well in the master mix block that is to be used as the master mix well - well C
in this example (the choice of well is arbitrary but well C will be used throughout this example.)
9. Select 'Change plate function'
10. Confirm that the plate function is set to 'Mix'.
Note that the master mix block can be removed from the robot and placed in a freezer before the
run. This will keep the master mix cool while the robot is preparing the reactions.
Samples
The samples are stored in a 96-well skirted PCR plate. This plate will need to be chosen in the
software. Select the plate as follows:
1. Left-click on plate C1 on the workspace to select it
© Corbett Robotics 2007
Setting Up A Typical PCR Run
149
2. Right-click plate C1
3. Select 'Change plate type'
4. Enable the "Other" filters at the lower right-hand corner by ticking them
5. From the left window, select the '96-well plate (vertical)' A vertical plate is needed as the 18
samples are stored in the plate from wells A1 through B3 in a column by column manner for this
example
6. In the right window, select the 'Generic, skirted, tapered 200 µL' plate
7. Click on 'OK'
8. The correct sample plate is now selected
8. Right-click on plate C1 again
9. Select 'Change plate function'
10. Confirm that the plate function is set to 'Sample'.
Reactions
The reactions are to be made for a 72-well Corbett Rotor-Gene rotor. Select the correct plate as
follows:
1. Left-click on plate C2 on the workspace to select it
2. Right-click plate C2
3. Select 'Change plate type'
4. Enable only the Corbett filter at the lower right-hand corner by ticking the Corbett box and
clearing the others - this will only show plates designed by Corbett Robotics
5. From the left window, select the '72-well rotorgene plate 1-72'
6. Click on 'OK'
7. The correct reaction plate is now selected
8. Right-click on plate C2 again
9. Select 'Change plate function'
10. Confirm that the plate function is set to 'Reaction'.
Note that the reaction block can be removed from the robot and placed in a freezer before the run.
This will keep the reactions cool while the robot is preparing the reactions.
© Corbett Robotics 2007
Setting Up A Typical PCR Run
150
Standards and Reagents
In this example, the standards and reagents will be set up on the same block, the reagent block on
the left side of the workspace. There are a variety of reagent blocks available. Therefore we need to
ensure that the correct plate is chosen:
1. Left-click on reagent plate on the workspace to select it
2. Right-click the plate
3. Select 'Change plate type'
4. Enable only the Corbett filter at the lower right-hand corner by ticking the Corbett box and
clearing the others - this will only show plates designed by Corbett Robotics
5. From the left window, select the reagent block that was delivered with the robot. Normally this
is the plate labelled 'Reagent block (standard 200 flat, tapered)'.
6. In the right window the correct configuration must be chosen. For this assay we require a block
to hold standards and reagents in two different tubes - select the 'Default Configuration'
7. Click on 'OK'
8. The correct reaction plate is now selected
9. In the default configuration, The reagent block has in the default configuration has 4 segments,
two segments for standards (8 + 8 tubes on the left), a segment for 8 reagents in the centre
and another segment of reagents on the right. Each of these segments can be highlighted by
left-clicking on them. Right-click on the standard segment (wells A1 - A8) on the top left of the
block
10. Select 'Change plate function'
11. Confirm that the segment's function is set to 'Standard'
12. Right-click the segment in the centre
13. Confirm that the segment's function is set to 'Reagent'
14. Right-click the segment on the right
15. Confirm that the segment's function is set to 'Reagent'.
Note that the reagent block can be removed from the robot and placed in a freezer before the run.
This will keep the reagents cool while the robot is preparing the reactions.
Tips
As no other tubes or plates are required for this set up, the remaining locations of A1, A2, B1 and B2
on the workspace can be selected as tip racks. For this run, both 50 µL and 200 µL tips will be
required. To select the tip racks follow these steps:
1. Left-click on plate A1 on the workspace to select it
2. Right-click plate A1
3. Select 'Change plate type'
4. Enable only the Tips filter at the lower right-hand corner by ticking the Tips box and clearing the
others - this will only show tips racks
5. In the left window, the '96-well plate (vertical)' will be selected as it is the only available tip
"plate"
6. In the right window select the '200 µL Tecan Tip Plate'
7. Click on 'OK'
8. The correct tip plate is now chosen.
Repeat the above steps for locations A2, B1 and B2 choosing 50 µL racks for these locations.
© Corbett Robotics 2007
Setting Up A Typical PCR Run
151
If all tip racks that will be used are new, right-click on any tip plate and select 'Set all tips on all plates
to available'. If the tip racks are not new and have tip missing, ensure the correct tips are set to
available. This is further described in Plate Operations. The tip racks can be placed onto the robot at
this time, see Tips and Tip Racks for more information.
If the photo view is selected for the plates (this is done by clicking the icon in the top right corner of
every plate), the following workspace setup will be visible.
Change the view back to the diagrammatic view by selecting the icon again.
Setting other options
To ensure the desired robot behaviour other options should be checked while setting up a run. For full
details on all options refer to the section describing the Options Menu. For the purposes of this run, all
options can be left as the factory default options. These include:
• All air volumes set to 7µL
• Pipetting speeds set to 150 µL/sec (viscous reagent speed to 70 µL/sec)
The two most critical settings that affect precision are shown at the bottom right of the workspace;
these are tip re-use and level sensing. Ensure that the level sensing indicator reads "Liquid level: Tip
Sensor" and Tip re-use is 'disabled'. If this is not the case, double click on either option at the base of
the workspace or change the option via the Options Menu.
Continue setting the example by setting up the reagents.
© Corbett Robotics 2007
Setting Up A Typical PCR Run
152
4.2 Reagents
Reagents
The setting up of the reagents is described in this section. The correct reagent plate has already
been chosen. This section describes the setting of the reagent volumes and the entering of the
reagent names.
• The reagents needed in this run are:
• 10X Buffer 2.5 µL (in tapered 1.5 mL tube)
• MgCl2 1.5 µL (in tapered 1.5 mL tube)
• dNTP 2 µL (in tapered 1.5 mL tube)
• Primer (fwd) 1.5 µL (in flat base 2 mL tube)
• Primer (rev) 1.5 µL (in flat base 2 mL tube)
• Probe 2 µL (in tapered 1.5 mL tube)
• Taq 0.25 µL (in flat base 2 mL tube)
To use these reagents, follow these steps:
1. Move the mouse pointer above a well in the central segment of the reagent block.
2. A hover box will appear, this box contains information on the type of well. If previous
instructions on setting up have been completed, then the well in the central segment will be a
2 mL flat base tube. Similarly, hovering over the right segment will reveal that the wells on the
right are 1.5 mL tapered tubes. If the old style reagent block was chosen, then the wells are
reversed
3. Left-click on the segment with the flat base tubes
4. The right-hand pane for reagents will appear
5. At the top of the right-hand pane, place a tick in the 'Use reagents' box
6. A table listing all the wells in this segment becomes visible.
7. Left-click in the name cell of the first well
8. Delete any name that may be present
9. Enter the name of the first reagent in a flat base tube - " Primer (fwd)".
10. Click on 'Ok'
11. Click in the default volume cell for that reagent and enter "1.5"
12. Click on 'Ok'
13. Repeat steps 7 to 12 for the next two wells (as named below).
© Corbett Robotics 2007
Setting Up A Typical PCR Run
153
14. For the Taq, click on the cell in the viscous column and select 'Yes', this will use the viscous
reagent pipetting speed
15. For the remaining 5 reagents, delete any default names and set their volumes to 0
16. Left-click on the reagent segment that contains the tapered tubes
17. At the top of the right-hand pane, place a tick in the 'Use reagents' box
18. A table listing all the wells in this segment becomes visible.
19. Left-click in the name cell of the first well
20. Delete any name that may be present
21. Enter the name of the first reagent in a tapered tube - "10X Buffer"
22. Click on 'Ok'
23. Click in the default volume cell for that reagent and enter "2.5"
24. Click on 'Ok'
25. Repeat steps 19 to 24 for the next three wells, being MgCl (1.5 µL), dNTP (2 µL), and Probe (2
µL)
26. For the remaining 4 reagents, delete any default names and set their volumes to 0.
This completes the reagent set up. The reagents that have been set up in the plate should now be
light orange in colour, while the unused reagents will have remained grey. Set up the master mix
next.
© Corbett Robotics 2007
Setting Up A Typical PCR Run
154
4.3 Master Mix
The setting up of the master mix is described in this section. The correct master mix plate has already
been chosen. This section describes the selection of the correct reagents for this example.
The setting up of the reagents and their default volume is a pre-requisite for the following procedure.
1.
Left-click on well C in the master mix block.
2.
The right-hand pane for this master mix will appear.
3.
Place a tick in the 'Use Master Mix' option.
4.
Left-click in the name box and enter ’master mix’.
5.
Left-click the 'Configure Mix' button.
6.
The Master Mix Component Selection window will be shown.
7.
Set the 'Make mix up to this volume' field at the top of the window to 20 µL.
8.
Set the 'Default sample volume for this mix' field to 5 µL.
9.
The 'Default reaction volume' field should now read 25 µL.
10. For each reagent that is to be included in the master mix, change the 'No' in the 'Use?'
column to a 'Yes'.
© Corbett Robotics 2007
Setting Up A Typical PCR Run
155
11. After all reagents have been "added" to the master mix, check that the water volume has
been automatically calculated to 8.75 µL per reaction. If this is not the case, it is likely that one
of the reagents has not been added, the master mix per reaction volume is incorrect or a
reagent default volume has not been set up correctly. Note that the volume of a reagent can
be changed in the table by simply clicking in the volume cell. The default volume previously set
up for that reagent will not change but the volume in this master mix will be altered.
12. Click 'OK'.
13. In the right-hand pane, a list of reagents now appears in the lower right corner.
14. Click on the 'Adjust Insertion Order' button.
15. In the Insertion Order Window, select the 10x Buffer by left-clicking on it.
16. Repeatedly click the 'Dn' button to move the 10x Buffer to the end of the list. As discussed
under master mix previously, this ensures the best possible mixing as well as reducing the
possibilities of froth forming on top of the master mix.
17. Click the 'Close' button.
18. All other options shown should remain as their defaults.
This completes the master mix set up - master mix well C should now be yellow in colour.
© Corbett Robotics 2007
Setting Up A Typical PCR Run
156
The reagents colour will have changed from a light orange to a richer orange. Continue by setting
up the standard.
© Corbett Robotics 2007
Setting Up A Typical PCR Run
157
4.4 Standards
The setting up of the standard is explained in this section.
1. Left-click on the left segment in the reagent plate.
2. The right-hand pane for standards will appear on the right.
3. Place a tick in the 'Use standards' option.
4. The default name of 'Standard 1' can be left in place.
5. Enter 1500000 into the concentration of the first standard.
6. Clear the 'Change tips after each dilution' check box.
7. Ensure the dilution ratio in the table is set to 1 in 10.
8. Left-click on the up arrow of the 'No. of standards' box to increase the number to 5.
9. The table will show the concentrations of the diluted standards.
This completes the setting up of the standard. Five wells in the standard segment of the reagent
plate will now be coloured Brown. Continue the example with setting up the samples.
© Corbett Robotics 2007
Setting Up A Typical PCR Run
158
4.5 Samples
The setup of the 18 samples is described below. In this example, the sample name import function is
not described. It is assumed that the correct sample plate has been chosen.
1. Left click on the sample plate in position C1 on the workspace.
2. The right-hand pane for samples becomes visible.
3. Right-click on the plate.
4. Select 'Add first n wells on plate to sample bank'.
5. Enter "18" when prompted for the number of sample to add (note there are a number of other
ways to add samples to a sample bank, these are described in the Samples section and under
Plate Operations).
6. Enter "Bank 1" when prompted for a sample bank name.
7. At the top-right, in the sample bank list, you will see Bank 1 appear under Standard 1 and
Water.
This completes the setting up of the samples. The first 18 wells on the sample plate will now be
coloured.
© Corbett Robotics 2007
Setting Up A Typical PCR Run
159
4.6 Reactions
Reaction s
The final step in setting up the software is the creation of the reactions list. In total 72 reactions will be
set up as three separate sets. These sets are:
• Master mix plus standard
• Master mix plus samples
• Master mix plus water (NTC)
All of the above reactions are to be set up in triplicate. To create these reactions, follow these steps:
1.
Left-click on the reaction plate in position C2 on the workspace.
2.
The right-hand pane for reactions becomes visible.
3.
Left-click on the 'Add' button.
4.
The Reaction Configuration window becomes visible.
5.
In the samples section, click on the drop-down menu and select 'Standard 1'.
6.
In the mixes section, place a tick next to the ‘master mix'.
7.
Notice that all the reagents disappear from the list as these are all contained in the master
mix.
8.
At the bottom left, the 72-well reaction plate will be chosen by default.
9.
Ensure that the volumes are correct at the top right (5 µL for samples, derived from the
default sample volume set up when selecting master mix components and a total volume of
25 µL).
10. In the ‘Number of wells' field, enter 3.
11. Left-click on 'OK'.
12. 15 wells in the reaction plate will now be shown in brown; these are the 5 standards in
triplicate.
13. Left-click on the item created in the reaction list.
14. Left-click on the 'Copy' button.
15. A second line will appear in the reaction list.
16. Left-click on the second line in the list.
17. Left-click on 'Edit'.
18. The Reaction Configuration screen will be shown.
19. Notice that the set up is that which was set up a short while ago.
20. In the drop-down menu in the samples section, select 'Bank 1' - our samples.
21. Click on 'OK'.
22. 54 coloured wells will appear on the reaction plate, 18 samples in triplicate.
23. Left-click on the second line in the reaction list.
24. Left-click on the 'Copy' button.
25. When prompted, select to 'copy to the end of the list'.
26. A third line will appear in the reaction list.
27. Left-click on the third line in the list.
28. Left-click on 'Edit'.
29. The Reaction Configuration screen will be shown.
© Corbett Robotics 2007
Setting Up A Typical PCR Run
160
30. In the drop-down menu in the samples section, select 'Water', the NTCs.
31. Click on 'OK'.
32. Three light Blue wells will appear on the reaction plate, a triplicate NTC.
33. The reaction plate is now completely filled.
The run set up is now complete; the workspace should look like this.
Repeats are pipetted into the reaction plate in groups so that one sample is grouped together. In
the case above, the sample from well A1 is pipetted into consecutive wells, B8, C1 and C2. This
behaviour of grouping sample wells is fixed in the software and cannot be changed. However, by
creating more involved run files, other sequences of reactions can be achieved.
© Corbett Robotics 2007
Setting Up A Typical PCR Run
161
4.7 Setting up the Table
To complete the set up for this example assay, the robot workspace needs to be set up.
Ensure that all plates have been position and height calibrated. Ensure the height calibration has
been carried out with the consumables that are to be used for this experiment.
The tips have already been set up and the correct tips set to available.
The reaction set up can easily be verified by positioning the mouse pointer over the master mix tube.
All wells that receive master mix are highlighted. Similarly, if the mouse pointer is positioned above
the reagents, the master mix tube is highlighted showing that the reagents are inserted into the
master mix.
To prepare the reaction plate, place 72 (18 strips of 4) 100 µL Rotor-Gene tubes into the 72-well plate
and ensure the locking plate firmly holds the tubes in place. Place the 72-well plate into position C2
on the robot's workspace. Well A1 is at the rear left of the plate location.
To prepare the master mix block, place a 5 mL tapered tube into position C on the master mix block.
Position the mouse pointer over the diluent well (top left on the master mix block). The software will
report how much diluent is required for this run. As the diluent well is quit large, it is recommended
that at least 50 - 100 µL of extra diluent is provided. Therefore, fill the diluent well with 1100 µL of PCR
grade water.
Place the 96-well skirted plate onto the robot in position C1. Well A1 is to be positioned at the rear left
of the plate location.
Place a 200 µL strip tube into the top left of the reagent plate. Positioning the mouse over well A1 on
the reagent plate on the software workspace will reveal the amount of standard that is required in
the first well. It is recommended that a minimum of 15 µL extra be added to the tube.
Similarly, the correct location and required volumes of the reagents can also be determined. Place
the reagents on the reagent block as set out in the software. An additional 50 µL of each reagent
must be available in each tube.
Ensure that all the tubes are open and that their caps do not interfere with other tubes.
Close the lid on the robot and click on the
button on the toolbar. If everything has been set up
correctly, the pre-start checklist will list no warnings or errors.
Select the 'Check all' check box.
© Corbett Robotics 2007
Setting Up A Typical PCR Run
162
Click on 'OK' to start the run.
© Corbett Robotics 2007
Using Wizards
163
5 Using Wizards
Wizards are utilised in the Robotics Software to simplify the setting up of certain types of runs. The
wizards offer a guided step-by-step approach to setting up a variety of options. The software
currently offers two Wizards, these can be selected from the Wizards Menu or alternatively by
selecting them when a new run is created.
The wizards are largely self explanatory. The discussion in the following sections will concentrate on
the main aspects of the wizards.
The currently available wizards are:
PCR Setup Wizard
The PCR Setup Wizard allows the setting up of entire PCR runs that include one or more master mixes.
Also provided in this wizard, is the option of setting up only master mixes.
Optimisation Wizard
The Optimisation Wizard can be utilised when setting up optimisations such as magnesium titrations
or primer/probe optimisations.
© Corbett Robotics 2007
Using Wizards
164
5.1 PCR Setup Wizard
The PCR Setup Wizard can be used to set up typical PCR reactions with samples, standards and
master mixes. The wizard allows the user to set up reagents and then use these to prepare master
mixes. The wizard can also be used to set up master mixes without setting up reactions.
To start the Wizard, select 'PCR Setup Wizard' from the Wizards Menu or by selecting the PCR Setup
Wizard when creating a new run. Described below are all the screens that comprise the wizard.
Depending on the exact options chosen, only some of the screen may be used.
Introduction Screen
When starting the wizard, an introductory screen is shown. The user is asked to select:
• Whether to ONLY create a master mix using reagents or to set up an entire run with samples,
standards, reagents and master mix
Further, the user is asked if:
• A single master mix is to be made or multiple master mixes. If a single master mix is chosen then
it is possible for the user to select from a set of pre-set master mixes. The list of available pre-set
master mixes is presented as a drop-down menu. This list can be added to as described later
in this section.
• Standards (dilution series) are to be used in this run.
• Whether or not sample banks are to be automatically named. Please note that this does not
refer to the naming of individual samples but the naming of sample banks. The advantage of
automatically naming sample banks is that the run set up is a little faster with less options for
the user.
Table Setup
The software needs to be set up with the plates that are to be used. This process is very similar to that
described in Choosing the Right Plate Type. Further, the software needs to know what functions are
to be assigned to each plate. As in the main software, the changing of plate types and functions
can be achieved by right-clicking on a plate and selecting the appropriate type. The same can be
done with the plate function. Alternatively, a plate can be selected and the 'Set Plate’ and 'Set
Function' buttons can be used to change the plate type and function respectively.
Click 'Next' to continue.
Reagent Entry
The Reagent Entry Screen allows for reagents to be set up on all plates that have their function
defined as 'reagent'. Upon left-clicking on the reagent segment, the user is presented with a table
entitled 'Please enter reagent details'. Enter the reagent names and specify if the reagent is viscous.
Specifying a reagent as viscous causes it to be pipetted with a slower pipetting speed. If a reagent
name is left blank, it will not be available at a later stage. Click on 'Ok'.
If reagents are used from the reagent block, the tube type (whether flat base or tapered) can be
identified by positioning the mouse pointer over a well. The hover box that appears contains
information on the type of tube.
Click 'Next' to continue.
Plate/Well Selector
This screen requires the user to specify the location of the master mix. This is done by clicking on a
specific well in the highlighted region of the robot workspace.
© Corbett Robotics 2007
Using Wizards
165
Master Mix Configuration
If more than one master mix is to be made, the user is presented with the Master Mix Configuration
Screen. Here individual master mixes can be named, edited, loaded from pre-set master mixes or
saved as new pre-set master mixes. Additionally, the location of the master mix can be viewed on
the robot's workspace when the 'Show' button is pressed.
To create a new master mix from the reagents previously defined, place a tick in the check box next
to the master mix. Please note the location of the master mix. Upon placing the tick or clicking on the
'Edit' button, the Master Mix Component Selection Window appears. This window is the same as is
used in the main software to configure master mixes. Please refer to this section for further details on
adding reagents to master mixes.
A defined master mix can be saved as a pre-set selection for later use by clicking the 'Save' button.
This will make the master mix available at a later stage and there will be no need to define the
reagents again. Similarly, to load a previously made master mix, click the 'Load' button.
Click 'Next' to continue.
Reagent Selector
The Reagent Selector Window appears when a pre-set master mix is used. As the pre-set master
mixes use reagents that may not have been defined yet, the user must specify the location of each
reagent that is used in the pre-set master mix. When the Reagent Selector Screen first appears, some
reagent locations may already be in use by reagents previously defined.
If the name of the reagent used in the pre-set master mix is identical to reagents already set up,
these will automatically be allocated to those positions. All reagents must be assigned to locations;
otherwise the reagent import will be cancelled.
On the right of the screen, each reagent to be assigned appears in a white box. To assign a reagent
to a specific location, click and drag the white box to the well that is to be used. Alternatively, if the
exact location does not matter, click and drag the 'Auto' white box from the lower right to the
desired reagent segment. The reagents will automatically be assigned to a location. As each
reagent is assigned a location, the white boxes turn grey.
The 'Reset All' button un-assigns all reagent locations (other than those that were defined upon
entering this screen).
Click 'Next' to continue.
Standards Editor
If standards were chosen in the introduction screen, then the Standards Editor will appear. Here,
dilution series can be named, edited, loaded from pre-sets or saved as new pre-set standards.
Additionally, the location of the standard can be viewed on the robot's workspace when the 'Show'
button is pressed.
To create a standard as part of the run, place a tick in the check box next to the standard. Please
note the location of the standard. Upon placing the tick or clicking on the 'Edit' button, a window
appears allowing the user to define the standard. In this window, select the number of standards in
the dilution series, enter the concentration of the first standard (note that the concentration is only
used for documentation purposes), and finally specify the dilution ratio. Click on 'OK' once the
standard is defined.
To save a standard as a pre-set configuration, click on the 'Save' button. This will make the dilution
series available at a later stage and there will be no need to define it again. Similarly, to load a
previously defined dilution series, click the 'Load' button.
Click 'Next' to continue.
© Corbett Robotics 2007
Using Wizards
166
Sample Editor
The Sample Editor Screen is used to set up sample banks. Sample banks can be added, edited or
removed in a manner similar to the main software. See the Samples Section for further details and an
explanation of sample banks.
To add a new sample bank, click on the plate you would like to add a sample bank from. If the
option to auto-name sample banks was disabled, the user will be prompted to enter a sample bank
name. After the name has been entered, a window will be displayed that allows the addition of
wells to a sample bank. Left-click on the wells that are to be added to the sample bank. When
finished, click on 'OK'.
To add additional wells to a bank or remove wells, you "edit" a bank. Highlight the bank in the list you
wish to edit and then click on 'Edit Bank'. In the subsequent window, add or remove wells by leftclicking them.
To rename a bank, highlight the bank you wish to rename and click on 'Rename Bank'. To delete a
bank, highlight the bank you wish to delete and click on Delete Bank.
Click 'Next' to continue.
Reaction Editor
To complete the PCR Setup Wizard, reactions need to be configured. These can be configured in
the Reaction Editor. Reactions typically consist of a master mix combined with either a standard or a
sample. The reactions are prepared into a target plate in multiple repeats.
Based on the set ups completed, choose a master mix from the drop-down menu. Similarly, choose a
sample, standard or NTC from the second drop-down menu that is to be combined with the
selected master mix. Select the number of repeats of the selected sample bank. Also select the
desired target plate by clicking on the '...' button. To add the desired reaction to the reaction list,
click the 'Add' button.
Additional reaction combinations can be added in a similar way. When finished, click 'Next'.
This completes the wizard. The reactions will now be transposed into the main part of the software. If
needed, the reactions can be edited in the main software, alternatively the wizard can be re-started
and changes can be made via the wizard.
© Corbett Robotics 2007
Using Wizards
167
5.2 Optimisation Wizard
The Optimisation Wizard creates matrix combinations of reactions based on different concentrations
of reagents. For example, if one wanted to optimise a probe and primer (forward and reverse
combined). Then one could potentially try three different concentrations of the probe and three
different concentrations of primers. The result would be a matrix of nine reactions. The wizard
automatically sets up these matrices. Several optimisations are possible using the wizard.
The robot does not create the varying concentrations of the reagents. The user is expected to
provide all required concentrations of all the variables that are to be optimised.
To start the Wizard, select 'Optimisation wizard' from the Wizards Menu or by selecting the
optimisation wizard when creating a new run.
Optimisation Wizard Introduction
This screen allows the user to choose from three optimisation options. These available optimisations
are:
This optimisation creates one variable to be optimised. For example, this can be used for a
Magnesium Chloride optimisation or a flourophor optimisation.
This option creates two reagents as the variables for an optimisation. This can be used for a
probe/primer optimisation.
The third option creates three variables to optimise. This can be used for a probe/primer
optimisation where the forward and reverse primers are separate.
The wizard combines a variety of screens to set up the required variables. The elements of the
wizards are common and whether there are one, two or three variables that are too optimised, the
process is very similar. This section summarises the main features of each of the screens in the wizard.
Please note that the wizard only provides for the setting up of the optimisation matrix, it does not
allow for a master mix to be set up. The wizard does have an option to include a pre-mixed master
mix but a master mix from individual reagents cannot be set up. This can be done using the PCR
Setup Wizard or from the main software. It is preferable to create the master mix before starting the
optimisation wizard but it can be done afterwards also. Additionally, the template DNA should be
made part of the master mix.
Optimised Reagents
Whether one, two or three reagents, this screen is repeated the appropriate number of times. Enter
the name of the reagent that is to be optimised (the name typically defaults to something common).
Select the reagent volume per reaction. The user must also choose how many different
concentrations of the reagent are to be tested in the matrix.
The various concentrations should also be entered. Do this by clicking in the concentration cell and
entering a value. Please note that these concentrations are for documentation purposes only and
do not affect the functionality.
This screen will be repeated for the different reagents as necessary. Click 'Next' to continue.
Reagent Selector
The user must specify the location of each reagent that is used in the optimisation.
On the right of the screen, each reagent to be assigned appears in a white box. To assign a reagent
to a specific location, click and drag the white box to the well that is to be used. Alternatively, if the
© Corbett Robotics 2007
Using Wizards
168
exact location does not matter, click and drag the 'Auto' white box from the lower right to the
desired reagent segment. The reagents will automatically be assigned to a location. As each
reagent is assigned a location, the white boxes turn grey. The 'Reset All' button un-assigns all reagent
locations.
If reagents are used on the reagent block, the tube type (whether flat base or tapered) can be
identified by positioning the mouse pointer over a well. The hover box that appears contains
information on the type of tube.
Click 'Next' to continue.
Replicates
The number of replicates can be chosen. For example in a 3 x 3 optimisation of two variables, 9 wells
will be used per replicate. If the optimisation is to be done in duplicate or triplicate then 18 and 27
wells would be required respectively.
At this stage, a master mix can be included in the run. The wizard does not allow for a master mix to
be generated from within the wizard. This is better done using the PCR Setup Wizard or from the main
software. If a master mix was not previously set up or a pre-mixed master mix is to be used, then click
on the 'Create Premixed MM' button.
The user is prompted to select the location of the pre-mixed master mix and then prompted for the
volume of this master mix per reaction. Note that this volume should not include the volume of the
reagent that is to be optimised.
A target plate needs to be chosen for the reactions, select the target plate by clicking the '...'
button.
Previous reactions may have been set up; these can be cleared by ticking the 'Clear existing
reactions' check box.
Click 'Next' to continue.
This completes the wizard.
To edit the master mix, refer to the section on creating master mix. The reactions will now be
transposed into the main part of the software. If needed, the reactions can be edited in the main
software.
© Corbett Robotics 2007
Appendices
169
6 A ppendices
Appendix A - Helpful Hints
Appendix B - Maintenance
Appendix C - Self Diagnostic Tools
Appendix D - Pipettor Servicing
Appendix E - Decontamination Procedures
Appendix F - Precision vs. Accuracy
Appendix G - Frequently Asked Questions
Appendix H - Troubleshooting
Appendix I - Error Codes
Appendix J - Contact Details
© Corbett Robotics 2007
Appendices
170
6.1 Appendix A - Helpful Hints
The Robotics Software has a number of features that are not covered in the bulk of the manual. In
most cases these features are a little obscure but they can make certain setups easier.
Tip availability shortcut
A convenient shortcut has been added to allow individual tips to be toggled between available and
unavailable. To do this, simply hold down the 'Alt' button and then click on individual tips. The tip will
toggle between available and unavailable.
Cutting and pasting samples into sample banks
It is possible to define which samples belong to a sample bank by cutting and pasting a column of
data from a spreadsheet. Refer to the section on Samples or Plate Operations for information on
adding samples to sample banks. As described, it is possible to add samples to a sample bank by
clicking in the Yes/No column of the sample list. It is possible to copy this Yes/No column from a
spreadsheet.
For example, the following spreadsheet may be set up.
The user can select and copy column B. In the Robotics Software, right-click in the first cell that
corresponds to the copied column, in this case well A1. Then select 'Paste to current cell'.
The information will be copied into the table. This copy and paste operation is also possible with 1
and 0 instead of ‘Yes’ and ‘No’ respectively.
Cutting and pasting sample names
Sample names can not only be imported using the import functionality, but sample names can also
be copied and pasted. In a spreadsheet, copy the column that contains the sample name
information. In the Robotics Software right-click on the cell from which the copy is to take place.
Select 'Paste to current cell', and the names will be copied.
Copying and Pasting
Copy and paste functionality is available in all tables throughout the software. Simply right-click in
the desired cell or cells to display the copy/cut/paste menu.
© Corbett Robotics 2007
Appendices
171
Tip rere -use and Pipetting
Tip re-use is a useful function that not only saves on tips but it also on time. Time is saved because
additional tip pickups are not necessary. However, be aware that tip re-use reduces pipetting
precision (please see the pipetting precision report in the Appendix).
MultiMulti -eject reduces Precision
The multi-eject functionality significantly improves tip usage, especially when it is utilised in the special
pipetting operations. However, the multi-eject functionality has been tested and results show that the
precision of this pipetting method is worse than that of tips being re-used. The user should be aware
of this whenever the multi-eject is used. This is also why a warning is issued when the multi-eject
option is used.
Volume Calibration and Liquid Retention
Volume calibration has a side effect that more volume than expected is used. This is primarily due to
liquid retention in the pipetting tips. Consider a situation where a robot that is not volume calibrated
pipettes 19.7 µL when asked to pipette 20 µL. Volume calibration can resolve this short fall. If a
volume calibration were to be conducted, the robot would then deliver 20 µL. However, to deliver
this volume the robot must take an aliquot of 20.3 µL. The 0.3 µL is a result of liquid retention in the tip.
If this volume were delivered over a 96-well plate, the robot would apparently use 28.8 µL more than
it should have. There is no easy solution to this problem other than low retention tips (however,
Corbett Robotics does not guarantee the precision or accuracy if tips other that those
recommended are used). The user must be aware of this shortfall and account for it when supplying
the robot with liquid in reservoirs.
Joystick
The use of a joy pad (a game controller that only has buttons and no stick) can make position
calibration significantly easier. A USB joy pad can be connected to the computer that controls the
CAS-1200 Robotic Liquid Handling System. During calibrations the user can use the joy pad to move
the robot arm; this can significantly speed up calibrations, especially position calibrations.
Multiple
Multiple plate Cherry Picking
During the discussion of samples it was shown how samples can be added to sample banks in
"random", disjointed locations on a sample plate - cherry picking. This feature can be utilised to
perform this task from multiple plates, for example a plate library where a few samples are to be
taken from each plate and added in sequence to a new 96-well plate, successively swapping the
source plate after all samples from it have been taken.
To set up a run such as this, a distinct sample bank must be created for every plate in the library. For
each sample bank (library plate), define which wells belong to the bank. This entire operation will
seemingly take place on the one sample plate. Thus a number of overlapping sample banks is likely
to appear, which is no problem.
When setting up the reactions, set up the first reaction to take aliquots from the first sample bank. The
second "reaction" should be a "Wait until confirmation' pause from the Special Menu. When
prompted, the comment should be something like "Change plate at location C1 to library plate 2".
This combination of actual pipetting operation and pause should then be repeated for all plates in
the library.
As the run is taking place, the user will repeatedly be prompted to change plates and the robot then
takes the appropriate aliquots from all the plates.
Primer Arrays
Although the software has certain pre-defined names for the liquid groups, these being sample,
reaction, standard, diluent, reagent and master mix, the user should not be misguided by these. It is
possible to replace the samples with reagents, such as primers. This way, a master mix can be made
with all other reagents, including a DNA template. The primers can then be treated as samples. The
resulting reactions will be reactions with a variety of primers rather than a variety of samples.
© Corbett Robotics 2007
Appendices
172
6.2 Appendix B - Maintenance
The CAS-1200 Robotic Liquid Handling System requires minimal maintenance. Nonetheless, here are
a few helpful hints that will keep your CAS-1200 in good working order.
Pipettor ReRe -greasing
The pipetting head occasionally needs to be serviced. Tests have shown that after approximately
500,000 pipetting operations, the O-rings in the pipetting head should be replaced and the piston regreased. The software has a built-in maintenance counter that will remind the user after 300,000
pipetting operations that the pipetting head needs a service. The service is a straightforward
procedure. Your CAS-1200 is delivered with a pipettor service kit. Keep this kit in a safe place until it is
needed. The kit contains all parts needed to perform a full service.
Rails
The rails are the hardened steel rails that support the linear bearings that allow the robot to slide
back and forth easily. Do not wipe these rails with a cloth. Any wiping of the rails will only serve to
remove the grease. As the rails are hardened steel, these will rust very quickly if there is no layer of
grease to protect them. If a rail starts to rust, the corrosion must be removed as soon as possible. The
rail must then be re-greased.
The linear bearings incorporate seals to keep the bearings free of dust or grit.
The rails and bearings have been tested on the CAS-1200 in excess of 2,000,000 operations without
any sign of degradation.
Cleaning
The CAS-1200 needs to be kept clean. All surfaces (with the exception of the rails) can be wiped
down with a soft cloth. Diluted bleach can be used on all surfaces. Common alcohols such as
isopropanol, ethanol and methanol have been tested and found to be safe.
However, the black edges on the outside of the lid should not come in contact with any alcohol or
solvent.
The white paint is very hard paint. It is hard wearing and will resist short wavelength UV exposure.
However, due to its hardness, the paint can chip very easily. Take care not to drop any accessories
onto the robot workspace as the paint may chip or crack.
Any solvents commonly associated with painting such as mineral turpentine, paint thinners and
acetone should never be used near the robot.
Lid
As mentioned above, any alcohol is to be avoided on the painted edges of the lid. The lid is
manufactured from highly impact resistant polycarbonate. The polycarbonate is UV absorbent. The
polycarbonate also scratches very easily, always use a soft clean cloth to wipe down the lid.
Accessories
The Master Mix and Reagent blocks are autoclavable. These can also be placed in a dishwasher if
needed.
Service
Should servicing be required, Corbett Robotics or one of its agents will endeavour to service the
instrument on site. If it is not possible to service the instrument on site, please contact the Corbett
team.
© Corbett Robotics 2007
Appendices
173
6.3 Appendix C - Self Diagnostic Tools
WARNING: Please remove all items on the deck, such as plates, tip-ejector, and CR blocks, prior to
conducting the diagnostic. Fail to do so may result permanent damage to the pipettor head.
These tests are designed to collect information to help with troubleshooting and should only be
performed by experienced users. If errors are encountered, save a support package and contact
Corbett Robotics support ([email protected]).
Close: Close and exit Self Diagnostic Tools form.
Stop: Stop currently performing test. This button is only visible when the robot is in middle of a test.
Go Home: Home all axes and refresh the robot’s position.
Clear Messages: Clear the content in Messages textbox.
Messages textbox: Display test results and user actions into this textbox.
6.3.1
Mechanical Tests
Check for loss of steps: This test will identify whether the robot has a reliable movement while
operating at customer’s site. The default iteration setting of 200 will take an extremely long time to
complete, a setting of 5 iterations is sufficient. Reported loss of steps for the z and p axis of +/- 8 steps
is acceptable but for any errors greater than this or errors on the x or y axis save a support package
and contact Corbett Robotics support ([email protected]).
© Corbett Robotics 2007
Appendices
174
Rail Smoothness Rating: Automatically derive the smoothness rating for x,y,z,&p axes by working out
the fastest speed it can move reliably with 15% power. The rating serves as a guideline only to help
technician troubleshoot for the cause of “loss of steps” defined in previous test. Depending on the
condition of a machine, the smoothness rating for a CASCAS-1200 would be in the vicinity of:
Smoothness Rating for X = 1/100/1@15%
Smoothness Rating for Y = 1/42/1@15%
Smoothness Rating for Z = 1/230/1@15%
Smoothness Rating for P = 1/200/1@15%
Check Home-Opto Alignment: Test to ensure the optical homes in X, Y and possibly Z axis in CAS
Robotic Instruments are 3~5 steps away from their L297 software home respectively. This test will not
fail p-axis and z-axis of a multi-channel machine due to their small step size.
Cycle Pipettor Head: After calibration or the robot has been stagnant for long periods of time, it is
sometimes advantageous if the pipettor is cycled. This can help distribute the grease evenly.
6.3.2
Electrical Tests
Check SPI/RS232 COM: RS232 bridges communication between PC and the robot’s main controller,
whereas SPI bridges communication between the main controller to its slave controllers, i.e.
Accessories and axes controllers. EMI (Electro-Magnetic Interference) generated from outside
environment or within the robot could ruin integrity of the communicated signal, thus requiring a
check. During this test, a SPIERROR(#11) error message will be generated if the SPI link is unstable or
alternatively a BADRXCHKSUM(#137) error message appears if there is an unstable RS232 link. This test
checks the four internal axes, and any accessories (if connected). If no error box pops up during the
test, the communications links are fine.
Liquid Sensor Test: Validate the liquid sensor circuitry is in working order, such that it only triggers
when the conductive tip touches the liquid.
Check Home-Opto Stability: Verify stability of home-opto on each axis.
means it incorrectly reports its status when it is homed.
An unstable home-opto
© Corbett Robotics 2007
Appendices
175
6.4 Appendix D - Pipettor Servicing
To maintain the precision of the CAS-1200 pipettor, the pipettor must be serviced occasionally. The
servicing usually involves nothing more than dismantling, cleaning, inspection, re-greasing and
assembly. You will require the following tools to complete this task:
1.5mm Allen Key (part of service kit)
#1 Phillips Head Screwdriver
Lint free cloth or tissues (part of service kit)
Pipettor Grease (part of service kit)
2 O-rings (part of service kit)
A pipettor service kit is supplied with the CAS-1200, please contact your local distributor for
replacement service kits.
Perform the following steps to service your pipettor.
On the pipettor hub, unscrew the screw that secures the level sensor wire to the pipettor hub, see
Figure 1. You will need a Phillips head screwdriver for this purpose.
As indicated in Figure 2, loosen (not remove) the grub screw which holds the pipettor internals in
place. You will need a 1.5mm Allen Key for this. As you loosen the grub screw, support the pipettor
hub with your finger.
Pipettor head cover
Loosen grub screw
Remove screw
Pipettor hub
Figure 2 View from left
Figure 1 View from front
Upon loosening of the grub screw, the pipettor internals will drop out of the pipettor barrel. Ensure
that you have the pieces shown in Figure 3 in front of you. Note that a spare grub is part of the
pipettor service kit.
Piston
Spring
Guard
Upper O-ring
Lower O-ring
Vacuum Hub
Figure 3 Pipettor parts
Remove any old grease and any foreign matter from all the pipettor components shown in Figure 3
by wiping all components with a cloth moistened with methylated spirits or similar alcohol.
Inspect all components for any obvious damage. Pay particular attention to the piston and the
metal section of the hub. The piston must be free from scratches or scoring. The hub should not show
signs of wear from picking up tips. If the O-rings are showing wear, they must be replaced.
The pipettor may now be re-assembled using Pipettor Grease
Grease. Note that the type of lubricant used
has a significant effect on the pipetting precision. Additionally, it should be noted that excessive of
insufficient grease can also cause pipetting imprecision. To avoid any imprecision, the following
assembly sequence should be adhered to.
© Corbett Robotics 2007
Appendices
176
Apply a small amount of grease to the piston rod (not the brass top) and evenly spread the grease
over the entire piston surface. If the correct amount of grease is used, there should be a thin film of
grease over the entire piston with no obvious dry spots or large accumulations of grease.
Attach one end of the spring to the smaller end of the guard ring as shown in Figure 4.
Figure 4
Slide the piston into the spring/guard assembled in the above step. Ensure that the spring fits over
the ridge at the top of the piston.
Figure 5
Compress the spring as shown in Figure 5.
Slide the upper O-ring over the piston and apply a small drop of grease (approx. the size of a grain of
rice) above and below the upper O-ring as shown in Figure 6.. Spread the drops of grease around
the piston to ensure even coverage above and below the O-ring.
Grease
Figure 6
Slide the lower O-ring onto the piston, followed by another drop of grease (similar size to above)
below the O-ring. Spread this drop
drop of grease evenly around the piston.
piston
Grease
Figure 7
Figure 8
Main arm
Screw terminal facing arm
Hub flush with barrel
Figure 9
Slide the entire assembly in Figure 7 into the Vacuum Hub as shown in Figure 8.
Insert the assembly shown in Figure 8 into the pipettor barrel and tighten the grub screw. Ensure that
the shoulder of the hub is flush with the bottom of the barrel and the screw terminal is facing towards
the robot’s main arm as shown in Figure 9.
Attach the level sensor wire back onto the pipettor hub. Ensure that the wire is horizontal with respect
to the pipettor and is not touching the barrel. Also ensure that there is a washer on either side of the
wire mounting tab.
© Corbett Robotics 2007
Appendices
177
Once the robot is operational, open the self diagnostic tools and perform the Cycle Pipettor Head
for 200 iterations. This will help distribute the grease evenly.
A volume calibration is required after every pipettor service.
© Corbett Robotics 2007
Appendices
178
6.5 Appendix E - Decontamination Procedures
Fundamental to most applications of the CAS-1200, is the requirement that the robot remains free of
contaminants, especially DNA and RNA. To eliminate cross-contamination and ensure validity of
results, the robot must be routinely decontaminated. The following procedure describes this process
for the CAS-1200.
Caution:
•
Common alcohols, such as isopropanol, ethanol and methanol have been tested and
found to be safe. Note however, that the black edges on the outside of the lid should
not come into contact with any alcohol or solvent.
•
Do not use solvents associated with oil based paint, such as mineral turpentine, paint
thinners, or acetone. These solvents will damage the painted surface of the robot.
•
The polycarbonate material of the robot's lid is easily scratched, therefore, never use
abrasive materials to clean this. Instead, a clean soft cloth is recommended.
•
Avoid removing grease from the rails (X and Y axis) that support the linear bearings. These
rails support the pipette head and allow it to slide back and forth easily.
•
Wiping these rails will remove the grease that is vital both to function of the robot and also
to preventing corrosion.
Preventative measures:
•
Always wear gloves and change them frequently.
•
Use filter-barrier pipette tips.
•
Use a dedicated set of pipettes to assemble reagent aliquots.
Aliquot reagents to each individual investigator; that way contamination sources can be identified
and contained.
Decontamination Procedures
Materials Required:
•
Liquid bleach concentrate
•
Absolute ethanol
•
Sterile, nucleic-acid-free water
•
Detergent
•
3 Sterile squirt bottles
•
1 plastic bucket (~ 9 litres) and lid.
•
A liquid reagent spray bottle containing household bleach at a final concentration of 1%
(10,000 ppm) chlorine: typically a 1:5 or 1:10 dilution of bleach depending on initial
sodium hypochlorite concentration.
•
A liquid reagent bottle containing nucleic-acid-free deionised or MilliQ water.
•
A liquid reagent bottle containing nucleic-acid-free 70% ethanol.
•
Soft, clean paper towelling
Steps:
© Corbett Robotics 2007
Appendices
179
The following decontaminating steps should be used regularly to ensure that the robot is free of
DNA/RNA contamination. The free chlorine available in bleach acts to cross-link the DNA in addition
to its cleaning and disinfectant properties.
11. Add bleach concentrate to a clean bucket and dilute to 1% free chlorine with sterile
nucleic-acid-free water. You require approximately 5 litres of dilute bleach.
12. Remove all plates, reagent blocks, tip racks, and the tip ejector chute from the CAS1200's
deck. Wash these with detergent and rinse with clean water. Place the clean
components into the bleach solution and soak for 15 to 30 minutes. Rinse the components
completely will DNA-free sterile water. Rinse briefly with absolute ethanol and dry with a
soft paper towel. Make sure all components are free of detergent and bleach.
13. Spray the workspace of the robot with the dilute bleach and let stand for 15 to 30 minutes
to cross-link the DNA. Wipe off the excess bleach of the robot with clean paper towels.
Spray the work space with sterile water and dry off. Repeat this process three times. Now,
rinse the workspace with ethanol and allow too dry.
14. Place all components back onto the work space and close lid.
15. If your robot is fitted with the optional UV light, turn the light on and run for 15 minutes.
© Corbett Robotics 2007
Appendices
180
6.6 Appendix F - Precision vs. Accuracy
Pipetting precision and accuracy are the primary specifications by which to measure any pipetting
instrument, either automated or manual. This appendix is written to provide a brief overview of what
the terms accuracy and precision refer to.
Accuracy
In the case of a pipetting instrument, accuracy can be defined as the closeness of the pipetted
volume to the internationally recognised standard of 1 litre (or fraction thereof). Typically accuracy is
quoted as an absolute volume variation, i.e. +/- mL at a given volume. Alternatively accuracy can
also be expressed as a percentage, i.e. +/- %.
Precision
In the case of a pipetting instrument, precision is a measurement that defines how close the pipetted
volumes of repeated operations are to one another. Precision is quoted as an absolute volume
variation, i.e. +/- mL at a given volume. Alternatively, the convention used for the CAS-1200,
precision can be quoted as a statistical definition, coefficient of variation or %C.V.
To illustrate, consider each cross as a pipetting operation or a statistical sample. The line represents a
scale of volume that is pipetted. The illustrations shows data of an experiment to pipette 20 µL
repeated 10 times.
Coefficient of variation
Coefficient of Variation (C.V.) is defined as
C.V. = (standard deviation / mean) * 100%
What C.V. means (statistically) is that 66% of all samples will fall within plus/minus one standard
deviation from the mean (the bell curve principle). Our specification of 1% C.V. means that we
guarantee that our standard deviation is less than 1% of the mean, i.e., if there were 50 samples of 20
µL and the mean turns out to be 19.3 µL. We guarantee that 66% of samples fall within 19.107 µL and
19.493 µL. This means that in the set of 50 samples there will be up to 16 samples that lie outside these
limits. It is also possible that a sample might be 18.9 or another sample that might be 20.0 µL.
Statistically, it is possible that a sample is only 10.0 µL - although this is very improbable and would
indicate an instrument fault.
The 19.3 µL being 3.5% different from the desired volume of 20 µL is an accuracy issue. This can be
resolved by volume calibrating the instrument.
© Corbett Robotics 2007
Appendices
181
Accuracy (Volume Calibration)
Different liquids have different surface tension properties and viscosities. These physical properties
significantly affect tip retention and allowable maximum pipetting speeds. Depending on which
liquid the volume calibration is performed with, different results will be obtained. It is generally
recommend that a volume calibration be carried out with pure water (distilled or PCR).
Volume calibration will change slightly upon performing a pipettor service.
Testing Precision
Precision can be tested in a variety of ways. A set of pipetting samples can be weighed and
statistically analysed. Although this would be the best way of performing a test, it is very time
consuming due to the weighing of the tubes. Alternatively, precision can be measured by pipetting
samples of dye (visible of fluorescent) into an optically clear plate and then reading the samples on
a plate reader.
Precision should never be determined by performing an amplification on samples pipetted by the
CAS-1200. The chemistry can introduce too many significant variables.
© Corbett Robotics 2007
Appendices
182
6.7 Appendix G - Frequently Asked Questions
The volumes pipetted are incorrect?
Make sure the 50 µL and 200 µL tips are correctly identified on the software.
Why do I have to recalibrate a plate when I change it from a vertical to a horizontal
orientation?
Despite the physical plate being the same type, the software is set up in a way that treats these
plates as different entities. This applies to all plates that are defined in the software.
Pipetting less than 5 µLL
Pipetting less than 5 µL can reduce accuracy and precision. This is particularly the case when
pipetting into dry wells. The problem with pipetting into dry wells is the surface tension that needs to
be overcome to ensure the liquid stays in the well rather than being lifted out on the outside of the
tip. Furthermore, pipetting at levels below 1% of maximum piston displacement will reduce precision.
For example, in the case of CAS-1200 the maximum piston displacement is 200 µL. Therefore anything
less than 2 µL (1%) is less than ideal. Most hand pipettes have volume ranges of 10% to 100% of
maximum (e.g. 20 to 200 µL).
1 µLL Volumes
The CAS-1200 has been successfully demonstrated with sample volumes of 1µL in 10 µL or 20 µL
reactions. However, this practice is generally not recommended.
What maintenance does the CASCAS -1200 require?
The pipettor must be serviced annually. There is an automatic reminder in the software to alert the
user that a service is due. The linear bearings and rails should remain maintenance free. A service kit
is supplied with the CAS-1200, otherwise please contact your local distributor to order a replacement
CAS-1200 service kit.
Can I autoclave the accessories of the CASCAS -1200?
1200?
Yes, the aluminium accessories can be autoclaved.
Can I mix my samples using the CASCAS -1200?
Yes, there are options in the software to enable mixing of both samples and master mix when added
to reaction wells.
Can I keep my samples and reagents cool on the CASCAS -1200?
Yes. Samples, reagents and master mixes can be kept cool by pre-cooling the aluminium block that
holds them (at 4°C).
Does the viscosity of the Polymerase reagent affect pipetting?
Yes. However, to minimize this effect the CAS-1200 software slows the pipetting speed when a
reagent is nominated as viscous.
Can I pipette from a well containing less than the level sensor limit?
Yes, this is permitted. However an error will be reported. If the plate heights have been set correctly
and the well is not dry, the robot will pipette the volume accurately.
Can I use nonnon-conductive tips?
© Corbett Robotics 2007
Appendices
183
Yes, when using non-conductive tips ensure that Use Liquid Level Sensor (located in Options > Robot
Setup) is turned off. The use of non-conductive tips affects pipetting precision and is not
recommended for critical applications.
Can I use nonnon-filtered tips?
Yes, but to avoid contamination ensure that the correct size tips are used. The use of non-filtered tips
is not recommended.
Can I use tips other than those recommended?
recommended?
Yes, other tips may be used on the CAS-1200. The tips must have a Tecan compatible hub size and
volume capacity. Please note that Corbett Robotics does not guarantee the pipetting precision or
accuracy of tips other than those recommended.
Can I use nonnon-standard plates on the CASCAS -1200?
Yes. In some circumstances, an adaptor plate may be required. Please discuss your needs with your
local representative.
Does the CASCAS -1200 work with the RotorRotor -Gene, LightCycler, 7900HT, SmartCycler or
other realreal -time PCR
PC R system?
Yes, optional blocks for LightCycler capillaries, Cepheid SmartCycler tubes and many more are
available. For details contact your local Corbett representative.
© Corbett Robotics 2007
Appendices
184
6.8 Appendix H - Troubleshooting
Please also refer to the Appendix on Helpful Hints for additional information.
Robot not Detected when Software Started
The default setting for connection to the computer is COM port 1. If the robot is connected to a
different COM port the software will start in virtual mode. In virtual mode, choose the COM port to
which the serial cable from CAS-1200 has been connected. Restart the software to ensure the new
COM port setting has taken effect.
Running out of Master Mix
Ensure that all reagent tubes in one segment on the plate are the same type of tube. Also ensure
that the tubes that are being used are in fact the tubes the robot was calibrated with. There are
significant variations in tubes even though they look reasonably similar. If the pipette tip collides with
the base of a tube, it will most likely form a seal and thus pipette inadequate amounts of fluid. For
example, if Taq is supplied in a tube that has a different base height than the other tubes, transfer
the Taq to another tube. Alternatively ensure the level sensor is switched on and there is a lot of Taq
available in the tube.
Check that sufficient volume of all reagents is provided; it is recommended that a minimum of 20 µL
extra is provided of each reagent. If the robot detects liquid in a tube it will aspirate the set volume
even if some of that volume is air. In this case no error will be flagged in the Post-Run Report as liquid
was detected.
Is there a length difference between the 50 µL and 200 µL tips? Refer to tip length offset calibration
for further details.
Pipetting speeds can affect the amount pipetted if a reagent is particularly viscous; repeat the
experiment with slower pipetting speeds.
Are the air bubbles in the reagent tubes? Air bubbles or air pockets in a tube will have significant
impact on the actual volume pipetted.
Tip retention can be a problem. Tip retention can be as high as 0.8 µL, typically the retained volume
is around 0.4 µL; this impacts significantly on the amount of volume used. For example, if the robot is
volume calibrated and it is asked to pipette 20 µL. The volume calibration allows for the retention of
0.4 µL. Thus the robot will actually pick up 20.4 µL to deliver 20 µL. If this is repeated over a 96-well
plate, 0.4 µL quickly adds up to almost 40 µL. Thus it would seem that the robot is using more master
mix than it should. There is no simple solution to this problem. Additional master mix may need to be
made.
A similar problem arises with tip re-use. As soon as a tip has been used once (the tip has become
wet), it tends to draw a small volume into the pipette tip by capillary action. This occurs as soon as
the tip comes into contact with fluid. This small volume is drawn into the tip before the pipetting
piston moves. Thus, every time an aliquot is taken from the master mix tube, a small volume, typically
between 0.3 and 0.5 µL additional liquid is drawn into the tip. Once again, over 96 wells this quickly
adds up to between 30 and 50 µL of additional master mix. When air is used during each pipetting
operation to try to maximise recovery from the tip on ejection, the subsequent aspirate draws
retained liquids up the inner walls of the tip, which can increase pipetting losses and severely
degrade pipetting performance if contact with the tip filter occurs..
Uneven Levels in Reaction Tubes
Uneven levels in the reaction tube can be caused by air bubbles trapped in the sample tubes or the
master mix tube. In particular, any frothing in any liquid will lead to pipetting error. This is because the
level sensor will trigger equally well on froth or the fluid itself.
© Corbett Robotics 2007
Appendices
185
Software Locks or Crashes
Crashes - Screen Savers and PowerPower -Save Modes
Power save modes, particularly those for the hard disk can interfere with robot operations. It is
recommended that screen saver, monitor power save modes and hard disk power save modes are
disabled. Refer to Software Installation for further details.
Z-axis not rising after power has been turned on
If the green LED on the front of the robot comes on but the z-axis (pipetting head) does not retract,
an internal fault on the robot has occurred. Please contact a Corbett representative for service.
If the LED does not come on, ensure that all power cords are securely plugged in.
Replicates are not tight
Check the set up. If the robot is used to make the master mix check that the correct volumes have
been entered for each reagent.
Is the master mix being adequately mixed? Use the 'Wait for confirmation after creating mix' option
to manually mix the master mix.
What volume of DNA is being pipetting into the reaction tube? For best results, it is recommended
that 5 µL or larger volumes are used as sample volumes.
Are air bubbles trapped in any of the tubes? Also check the sample tubes. It may be necessary to
spin the sample plate before using it on the robot.
Run some corresponding hand pipetted replicates along side of robot prepared reactions to check
whether the spread is caused by robot pipetting or assay/reagent problems.
If the replicates of standards are not tight, ensure that the standard is being mixed adequately.
Sometimes air bubbles are introduced into the standard during the addition of the diluent or the
more concentrated standard. By increasing the amount of extra standard that is made, the risk of
pipetting air (due to the air bubble) instead of liquid is reduced.
Software is Very Slow - Virus Scanners
Some virus scanners are known to interfere with software operation. Typically these virus scanners
make the software run extremely slowly. Corbett Robotics advises caution when installing the
robotics software on computers with virus scanners installed.
Depending on the speed of the CPU in the controlling PC, some operations may be slow. These
typically include operations on standard plates and 384-well plates. If the reaction list becomes very
long, the software can significantly slow down.
Uninterruptible Power S upply (UPS)
A number of installations require an uninterruptible power supply (UPS) to be installed on the robot as
well as the controlling PC. This will usually function quite well. However, due to the way most UPS's
generate a supply voltage from their batteries, the power supply can become extremely noisy. This
may lead to level sensor malfunction. In some instances the level sensor may start to malfunction
even if the UPS is receiving power from the mains.
Robot is Pipetting in MidMid -air / Liquid is being Sprayed Everywhere / No liquid is pipetted
This is commonly the first sign of level sensor malfunction. To confirm a malfunctioning level sensor,
disable the level sensor and repeat the experiment. If the run now works correctly, it is likely that the
level sensor is malfunctioning.
Level sensor malfunction is often caused by poor power supply voltages or poor earthing of the
instrument. Try shifting the robot to another room or connecting it to a different power outlet.
© Corbett Robotics 2007
Appendices
186
If there is a moisture build up between the metallic tip of the pipetting head and the surrounding
metal structure, level sensor errors may result. Remove any moisture that may be present. Ensure that
the black wire running from the metal tip does not make contact with other metal components.
On some rare occasions it has been observed that static electricity build up on tubes or plate can
lead to false triggering of the level sensor. This typically only occurs in deep well plates. It has been
shown that this can be resolved with an anti-static gun used for removing static from vinyl records.
If none of the above options resolve the problem, contact your nearest Corbett representative.
Received "Ran out of
o f Liquid" error but
b ut there is liquid still in source well.
The robot may have been configured to pick up tips that weren't present in the tip tray. Ensure that
tip configuration is correct.
The height calibration may be wrong for the plate. If a plate is height calibrated in a position that is
too high, then the tip may not be able to reach low enough into the tube to extract all the fluid.
Error messages occurred on the PostPost -Run Report but the run still worked.
The volumes of reagents or samples could be below that of the minimum required for the liquid
sensing to work. The pipette would then go to the bottom of the well, the default calibrated height. If
there was liquid in the tube it would be pipetted but since liquid was not detected an error would
have been reported in the Post-Run Report.
It is recommended that a minimum liquid volume of 20 µL is added on top of any volume that may
be needed. We suggest diluting samples and reagents and pipetting larger volumes rather then
pipetting small volumes of concentrated solutions.
When starting the software I get an error with a nonnon-human readable error message.
This is typically related to the installation or the updating of software. It is possible, particularly when
skipping software versions, that the correct plate definitions are not installed. This can lead to error
messages on start up. The easiest solution is to un-install the software completely and re-install the
new version.
Software refuses to start and the "A required library file is not correctly installed or
registered"
reg istered" message is displayed.
There is a version conflict with an older version of the software. Uninstall all instances of the software.
Reinstall the most recent version of the Robotics software.
Software running incorrectly with a "Software error: aborting."
abor ting." Message.
The communications channel to the robot is being interrupted. Ensure that no other devices (such as
modems) are attempting to use the serial port that the robot is configured for. Additionally, try
configuring the robot to use a different serial port and connecting the robot to that port.
© Corbett Robotics 2007
Appendices
187
6.9 Appendix I - Error Codes
There are a number of sources of error messages. These include run set up, machine errors or
software errors. For run set up errors, refer to the section on warnings.
Machine Errors
Machine errors have error numbers starting at 40000. All error code listed, are added to this offset. If
these are encountered, contact Corbett Support. Immediately after encountering an error, save a
support package. See the section ‘save support info to disk’ for details.
1
2
3
4
5
6
7
8
9
10
11
129
130
131
132
133
134
135
136
137
138
139
140
141
142
143
144
145
146
147
148
FIFO overrun error
bad checksum error
bad axis number used when an axis number is not supported by command
if robot is sent an unknown command
if vacuum sensor cannot sense vacuum
if an axis is not enabled
if the tip sensor did not detect liquid
if tip sensor could not be reset
if the home switch could not be found within limit
82C55 I/O pins are unstable
an error has occurred in SPI coms
an invalid axis was specified
the robot did not respond with the first reply
the robot did not respond with a second reply
the com port has problems
the micro firmware is mismatched
an invalid COM port was chosen
an attempt was made to move an axis beyond its limit
too many replies were specified in send Packet
in a received packet a wrong checksum was encountered
the first reply was corrupt
the second reply was corrupt
the local receive FIFO overflowed
an incorrect number of replies was received
if specified packet ID could not be found in collection
specified accessory port number does not exist
specified accessory port unoccupied
an unknown accessory was detected
a bad temperature reading was taken
a bad packet length was received
more data was received while processing
© Corbett Robotics 2007
CAS-1200™ Robotic Liquid Handling System 188
6.10
Appendix
Appendix J - Contact Details
Corbett Robotics Pty. Ltd. can be contacted as follows:
Corbett Robotics Pty. Ltd.
42 McKechnie Dr.
Eight Mile Plains
Qld 4113
Australia
Ph: + 61 7 3841 7077
Fax: + 61 7 3841 6077
http://www.corbettrobotics.com
[email protected]
For technical support please contact:
[email protected]
© Corbett Robotics 2007