1
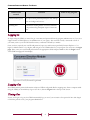
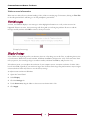
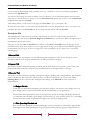
The Basics
Introductory Manual for Staff and Administrators
Last Updated: February, 2010
All information in this manual referring to
individuals or organizations (names, addresses,
company names, telephone numbers, social
security numbers, etc.) is fictitious and used
strictly for illustration. Any reference to an
actual individual or organization is coincidental
and completely unintentional.
National Resource Center for Participant-Directed Services
WHAT YOU NEED TO KNOW TO START ............................................................................... 1
Introduction and Terms Definitions ........................................................................................................................... 1
Logging In ................................................................................................................................................................... 2
Logging Out ................................................................................................................................................................ 2
Timing Out .................................................................................................................................................................. 2
Forgotten Password ..................................................................................................................................................... 3
Getting Help ................................................................................................................................................................ 3
Tables .......................................................................................................................................................................... 3
Choose Number of Rows to Display ....................................................................................................................... 3
Sort by column headings ......................................................................................................................................... 3
Links to more information ...................................................................................................................................... 4
Display Settings ........................................................................................................................................................... 4
User Messages ............................................................................................................................................................. 4
GETTING AROUND IN THE CDM ...........................................................................................5
Navigation: Your Dashboard and Tabs ....................................................................................................................... 5
Home Area................................................................................................................................................................... 5
Quick Links ............................................................................................................................................................ 6
Participant Quick Search ........................................................................................................................................ 6
Homepage Tables ................................................................................................................................................... 6
File Area....................................................................................................................................................................... 6
Advanced Search ..................................................................................................................................................... 6
Participant File ........................................................................................................................................................ 7
Forms\Reports Area ................................................................................................................................................... 11
Forms ..................................................................................................................................................................... 11
Reports ................................................................................................................................................................... 11
Broadcast Area ............................................................................................................................................................ 11
Notifications Area ....................................................................................................................................................... 11
Alerts ...................................................................................................................................................................... 11
Notifications .......................................................................................................................................................... 11
Admin Area ................................................................................................................................................................. 11
ii
CONSUMER DIRECTION MODULE: THE BASICS
What You Need to Know to Start
Introduction and Terms Definitions
This manual provides all users with an introduction to using and navigating the Consumer Direction Module (CDM).
The CDM is your link to the people and agencies working within your participant-directed program. It helps
administrators manage the program, enables support agencies to work with participants and maintain their records,
and allows participants to easily communicate with agency staff, view their own files, and access the tools needed to
direct their own care. No matter your role, this manual introduces you to the basic tools and information within the
CDM.
To begin, we will clarify some terminology. Different participant-directed programs use different phrases and titles.
The following table defines these terms, shows the names we use for them in the CDM manual, and provides space
for you to note the names used within your participant-directed program.
Name in this
manual
Function
Participant
The person directing their own services.
Participant
Representative
An unpaid person selected by the Participant. Helps
with decision making and/or managing employees.
Legal Guardian
If a Participant has a legal guardian, that person can
use the system instead of the Participant.
Support Broker
The person who helps the Participant to create the
spending plan. Also keeps tabs on how the person
handles services over time.
Support Broker Agency
An organization that manages Support Brokers.
FMSA
(Financial Management
Services
Agency/Entity)
An organization that acts as the fiscal employer
agent and provides fiscal management services on
behalf of the Participant, who is the employer.
Local Program Office
In some states, a regional office that administers the
program locally. Your program may or may not
have Local Program Offices.
Program Office
The office that administers and oversees the
program.
CDM System
Administrator
The person responsible for the setup, customization
and ongoing maintenance of the CDM.
1
Name in my program
CONSUMER DIRECTION MODULE: THE BASICS
Name in this
manual
Function
Self-Directed Program
The option through which participants may manage
their own budget and services.
Spending Plan
A document showing details of services and items
to be purchased by participant as part of their care
plan.
Name in my program
Logging In
To begin using the CDM, you must first get a username and password from the program administrator or, if you are a
support broker or FMS employee, the administrator of your agency. The user ID is usually a shortened version of
your name, such as your first initial and last name, sometimes followed by a number.
Once you have received your user ID and password, open your web browser (preferably Internet Explorer v.7 or
higher or Mozilla Firefox v.3 or higher) and navigate to the CDM website for your program. You are now at the login
page. Here, enter your user ID and password into the appropriate fields and press enter or click the Login button.
Your CDM homepage will then display.
Login screen: User ID, Password. Login button
Logging Out
The CDM contains personal information subject to HIPAA safeguards. Before stepping away from a computer while
using the CDM, you should always log out. To do so, click the Logout link at the top of the screen.
Timing Out
In case you forget to log out, the CDM automatically logs you out if you are inactive for a period of time. The length
of this time period is set by your program administrator.
2
CONSUMER DIRECTION MODULE: THE BASICS
Forgotten Password
If you forget your password, click “I forgot my password” on the Login screen. Your password will be emailed to the
address you gave when you registered. If this does not work, contact the program administrator.
Getting H elp
Click on the Help link at the upper right corner of your homepage. Here, you are able to browse the topics discussed
in this manual. If needed, you can keep Help open as you work. If you have other questions, contact your program
administrator.
Tables
A lot of information in the CDM is displayed in table form. You can manipulate the table features to view more
information or change the way it is displayed.
Choose Number of Rows to Display
You can choose the number of records to display within many tables. In the Display drop-down menu at the upper
right-hand corner of the table, click the arrow, make your selection, then click Go.
At the bottom left of each table is a row of linked numbers. Click these numbers to navigate through all the records in
the table. For example, the Notifications table below is displaying six rows at a time. The links indicate that there are a
total of two "pages" in the table. If you choose to display more rows per page, there may be fewer pages. The number
without an underline is the page you are viewing.
Notifications table with six rows displayed sorted by date
Sort by column headings
The information in the tables can be sorted by any column headings that are blue. If you would like to see the
Notifications sorted alphabetically by individual instead of by date, click on the Individual column heading. Click it
again to sort in reverse alphabetical order. Notice that the rows are sorted by date in the in the picture above.
NOTE
If a column heading is not blue, you cannot sort the table by that column.
3
CONSUMER DIRECTION MODULE: THE BASICS
Links to more information
When text in a table cell (not a column heading) is blue, it links to another page. For instance, clicking on View File
in the table pictured above will bring you to that participant’s personal file.
User Messages
At times, the CDM will display a user message to either highlight information or to tell you that an error has
happened. If there is an error, the user message will often guide you in fixing the problem. Be sure to read the
message carefully and then click OK to remove it from your screen.
Example of user message
Display Settings
If the CDM is not displaying well in your browser, there are a few things you can do. First, try adjusting the text size
of your browser. While in the browser window, hold down the Ctrl key and press the + key at the same time. Each
time you press +, the text will get larger. To make it smaller, hold down the Ctrl key and press the - key.
If that doesn’t work, you can adjust the resolution of your computer screen. A monitor resolution of 1024 x 768 is
best for the CDM, especially if your monitor is larger than 15 inches. Some larger flat panel monitors may use higher
screen resolutions and it may be best to use the factory settings.
To adjust screen resolution in Windows:
1. Open the Control Panel.
2. Select Display.
3. Click the Settings tab.
4. Under Screen area, drag the slider to select screen resolution 1024 x 768.
5. Click Apply.
4
CONSUMER DIRECTION MODULE: THE BASICS
Getting Around in the CDM
Navigation: Your Dashboard and Tabs
Dashboard with tabs and sub-tabs
The dashboard is your key to getting around the CDM quickly. It is at the top of your page and has icons that link to
the main areas of the CDM. For example, the File icon takes you to the area where you can search for, edit, and
create participant files. The dashboard stays at the top of your page, so you can get to any of these areas with one click
at any time. The main areas are explained in following sections.
NOTE
You may not see all of the dashboard icons. This is because some areas are only used by
certain user roles, so if you don’t see an icon, you don’t need to access that area.
In some areas of the CDM, tabs appear below the dashboard. You may work on tabs in any order. Some screens have
sub-tabs, which display as a second row below the tabs. The picture above paragraph shows the tabs (Personal,
Program, Financial, etc) and sub-tabs (Budget, View Spending Plan, Spending Plan, etc) below the dashboard. The tab
for the page you are viewing at any time is shown in bold, such as the Financial tab and the View Spending Plan
sub-tab pictured here.
Home Area
The first page you see after logging in is your home page. This is customized to your user role to conveniently present
the information most useful to you.
5
CONSUMER DIRECTION MODULE: THE BASICS
Homepage with Dashboard, Quick Links, Participant Quick Search, and Tables labeled
Quick Links
Quick Links give you one-click access to information and tools frequently used by you and others in your user role. It
displays only on your home page. Your Quick Links may have different links than the ones pictured here.
Participant Quick Search
Use this box to find a participant’s file quickly. Begin typing all or part of a participant’s last name and it will display all
names that match your criteria. For example, if you enter “ab”, then all participants with a last name beginning with
“ab” will display. Scroll down to the correct name and hit enter to go to that participant’s file.
Homepage Tables
The rest of your homepage is made up of tables. The program administrator decides which tables are displayed here.
Click on the table heading to expand the “accordion” display to see the information in the table. Clicking on the
header again, or clicking on another table header, will collapse the table.
File Area
Advanced Search
This is where you land when you click on the File icon. You can use any of the fields to search for a participant. For
instance, you can search by name by entering all or part of a participant’s first or last name and clicking Search. Or
6
CONSUMER DIRECTION MODULE: THE BASICS
you can search for all participants with a particular status (e.g. “enrolled” or “active”) by making the appropriate
selection in the File Status field.
You can also search using more than one field at a time. For instance, you can find all participants whose last name
starts with “L” that are inactive by typing “L” into the Last Name field and selecting “inactive” from the File Status
dropdown menu and clicking Search.
After clicking Search, you will see the results page. Click View File to go to a participant’s file.
The File Area is also where you can create new participant files if you have the permission to do so. To create a new
participant file, click on the Create File tab, fill out all relevant information, and click Save File.
Participant File
The participant file is where most information is kept and tasks are done. It is made of nine sections that are
represented as tabs. The first three, Personal, Program and Financial, are used the most. Below are explanations of
the information kept in each section.
Each page of a file has a Save or Save File button. When you click Save or Save File on any of the pages, all the
information in the entire file is saved. If you leave a page without saving, you can still save from a different page and
the data will be kept, as long as you have not logged out or left a participant’s file. It is always best to save before
switching pages.
>Personal Tab
This section contains the participant’s contact and demographic information, as well as their emergency contact
information and file status. Program administrators can add special fields to this page.
>Program Tab
This section contains information regarding enrollment and the dates that the last assessments, plans of care, and
phone and in-home monitoring took place. Program administrators can add special fields to this page.
>Financial Tab
This section contains information regarding a participant’s budgets, spending plans, and expenditures. The Financial
section is divided into nine subsections, represented by a second row of tabs at the top of your screen. View
Spending Plan is the first subsection that will display after clicking on the Financial tab. Each subsection is
described below.
>>Budget Sub-tab
In this table you will find the participant’s past and current budgets, with the most recent budget at the top.
Here, budgets can be created, viewed, edited, and deleted (depending on your permissions).
Effective Date and Expiration Date show the time period covered by each budget. The Budget Period tells
you which time unit into which a given budget is broken down (e.g. yearly, monthly, weekly, etc.). The Budget
Amount shows the amount the participant was approved to receive per budget period.
>>View Spending Plan Sub-tab
Here you will find a participant’s current spending plan and its associated start and end dates, approval date,
and budget amount. Each spending plan category is displayed along with the aggregate budget amount for
7
CONSUMER DIRECTION MODULE: THE BASICS
that category. Click on the Details button to view all information for a spending plan category. Click the
button again to collapse the detailed information.
>>Spending Plans Sub-tab
Here you can view all past and current spending plans for a participant. Users with appropriate permissions
can also edit the start and end dates and status of a spending plan.
This is also where you upload spending plans once they have been filled out. Click Browse to open the
upload dialog box. Find the saved spending plan you want to upload and click Open. Enter comments if you
need to and then click Submit.
>>Get Spending Plan Sub-tab
This is where you download spending plans in order to create a new one or to view or print an old one.
>>View Expenditure Reports Sub-tab
In this tab you can view a participant’s actual recorded expenditures. First, from the Available Spending
Plans dropdown menu choose the spending plan period that contains the expenditures you want to see. If
you want to view all expenditures for the spending plan period, check the box and click Go. Or, if you want
to only view expenditures that took place during a shorter period, such as a particular month, enter a date
range and click Go.
>>Submit Expenditure Reports Sub-tab
Once an individual expenditure report has been filled out, this is where you upload it back into the CDM.
Simply click Browse, locate the file, click Open and then Submit. Unless you receive special instructions
from the program administrator, ignore the Standard Upload dropdown menu.
>>Get Expenditure Reports Sub-tab
Here is where you begin the individual expenditure reporting process. From the dropdown menu, select the
spending plan period for which you want to enter expenditures and click Download.
>>History Sub-tab
The table in this tab gives you a quick comparison of spending plan, budget, and expenditure amounts.
>>Affirmations Sub-tab
This is a checklist of affirmations set by the program administrator.
>FMSA Admin Tab
This is where you can find the contact information for or person or organization that provides fiscal management
services for a participant. If you have the proper permissions, this is also where you assign or change which FMS the
participant employs.
8
CONSUMER DIRECTION MODULE: THE BASICS
>Support Broker Tab
This is where you can find the contact information for a participant’s support broker and, when applicable, support
broker agency. If you have the proper permissions, this is also where you assign or change which support broker is
assigned to the participant.
>Medical Provider Tab
The name and contact information of a participant’s medical provider can be kept here. Program administrators can
add special fields to this page.
>Participant Rep Tab
If the participant has a representative, the name and contact information can be kept here. Program administrators
can add special fields to this page.
>Legal Guardian Tab
If the participant has a legal guardian, the name and contact information can be kept here. Program administrators can
add special fields to this page.
>Employee Tab
Names and contact information for a participant’s employees can be kept here. Program administrators can add
special fields to this page.
>Notes Tab
In this part of the participant file, you can create several types of notes, designate who sees the note, and sends a
notification to those people. Notes can also be responded to here. The types of notes include:
•
•
•
Appeals
Assessment
General
•
•
•
Grievance
Health and Safety
Incident
•
•
Monitoring Visit
Phone Monitoring
>Documents Tab
Electronic documents can be added to a participant file by uploading them here. You can use this tool to gather and
keep completed forms, waivers, employee tax documents, budget worksheets, and assessments, or any other
documents that may be needed.
NOTE
The Documents section within a participant file is where you keep documents associated
with a particular participant, while the Forms section (accessed in the Forms\Reports area)
is where you can access blank forms or workbooks uploaded by program administrators,
such as tax forms for FMS entities and participants’ employees, or program handbooks for
support brokers and participants.
9
CONSUMER DIRECTION MODULE: THE BASICS
Forms\Reports Area
Forms
In this table, you can download blank forms uploaded by the program administrator. You will only see forms here if
the administrator has uploaded them and adjusted designated your user role as able to see this form.
Reports
The CDM comes with 20-30 reports that give appropriate users a high level view of enrollment, financial information,
monitoring activities, and other data that help ensure quality and safety in participant-directed programs. A description
of each report is available in the “Reports Documentation” manual. As with forms, you need to have been given
permission by an administrator to view a report. New reports can be created by program administrators using any tool
that can create Crystal Reports.
Broadcast Area
From here, some users are able to send mass email messages to all users of a certain role. For example, you can email
all support brokers about a new policy, or you can email all FMS admins that an updated tax form has been uploaded
to the Forms section. Simply enter the subject, the message, and choose which user roles should receive your message.
Notifications Area
Alerts
Alerts tell you when you need to act in response to an event that has happened or a deadline that is approaching or
has passed. Administrators are able to modify the text that each alerts displays, the time at which an alert should
display (e.g. 10 days before an assessment deadline), and who receives an alert. The alerts that currently come with the
CDM include:
•
•
•
•
•
•
•
•
•
•
•
Annual Plan of Care is due
Annual Plan of Care is past due
Assessment is Due
Assessment is Past Due
Caseload over Limit
In-person monitoring visit is due
10
In-person monitoring visit is past due
No notes since creation
Participant is approaching specified age
Spending Plan approval past due
Spending Plan not submitted
CONSUMER DIRECTION MODULE: THE BASICS
Notifications
Notifications are automatic communications tools like Alerts, except that they are meant to inform you of an event
rather prompt you to take an action. Administrators can modify the text of the notification, the number of days it is
displayed, who receives it, and, if enabled, whether or not it will generate an email. The notifications that currently
come with the CDM include:
•
•
•
•
•
•
•
•
•
•
•
•
•
•
•
•
•
•
•
•
•
•
•
•
•
•
•
A new note in file
A new response in file
A response to a note has been entered in the
file
Account Balance Without Savings
Budget Amount Underspent
Employee Information Change
Employee is cleared to begin working
Expenditure Batch Process Complete
Expenditure Batch Production Upload
Complete
Expenditure Batch Production Upload Errors
Expenditure Batch Upload Errors
File Updated
Fiscal Agency is Assigned
Health and Safety note has been documented
Monthly Statement uploaded
Negative account balance
New Budget Amount
New file created
Over-spending reached threshold
Participant has made a note in File
Participant Re-Assessment Completed
Participant's Status is Changed
Spending Plan Approved
Spending Plan Date Change
Spending Plan Needs Modification
Spending Plan Submitted for Approval
Admin Area
This area is visible only to program administrators, systems administrators, and administrators of support broker and
FMS agencies. This is where administrators can:
•
•
•
•
•
•
•
Change the appearance of CDM
Edit permissions for the user roles
Upload new reports or forms and determine who can view them
Configure the layout and formulas of assessments, spending plans, and expenditure reports
Set tax rates
Create or delete users, or change a person’s user role
Edit what alerts and notifications say, when they are sent out, and who receives them
11
CONSUMER DIRECTION MODULE: THE BASICS
NRCPDS
Boston College
314 Hammond Street
Chestnut Hill, MA 02467
(617) 552-6727 Fax: (617) 552-1975
www.participantdirection.org
The National Resource Center for Participant-Directed Services provides research-based technical assistance on all aspects of
designing, implementing, managing and evaluating participant-directed programs.


![[WAP035] [Evaluating Twittervane] Project Final Report](http://vs1.manualzilla.com/store/data/005882807_1-a2020170b6b6795bf72e9c3d683c54a5-150x150.png)