Download User`s Manual
Transcript
User’s Manual
Chapter One
Product introduction
1. 1 Introduction
Welcome to use the GPS navigator, which is mainly used for navigating and also has
the optional function of video playing, audio playing, Bluetooth hands free, FM,
Bluetooth, photo viewing, and E-Book etc.
1.2 Package
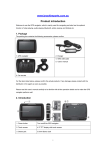
The packing box contains the following accessories:
1. GPS navigator
2. Travel AC Charger
3. Car charger
4. MINI USB cable
5. Earphone
6. User’s manual
7. Glass sticker
8. Unit clipper
For the actual products maybe not include above 8 items ,maybe more item. Please
contact with the distributor or the agent .
Chapter Two
Features and specifications
2.1 Main features
◆Operating system: Microsoft Windows CE ;
◆4.3”/5〞/6〞/7”TFT LCD display with 480*272 or HD 800*480 pixels;
◆Hi-Fi stereo earphone and built-in Hi-Fi speaker, volume adjustable;
◆Button and touch-screen operation;
◆Built-in sensitive GPS antenna;
◆The navigating software could run the micro SD card directly;
◆Video format supported: ASF,AVI,WMV,3GP,MP4,FLV;
◆Photo format supported: BMP, JPG, PNG;
◆E-book format supported : TXT;
◆MINI USB port;
◆Built-in rechargeable Li-battery which can be powered by travel and car charger.
2.2 Specification
CPU
LCD display
Touch-screen
Battery
Battery Charging
port
AC Charger
Car Charger
Navigation
Software
MediaTek MT3351
4.3/5/6/7 inch TFT LCD display,
Resolution :800X480/ 480X272
High-accuracy, endurable touch-screen
Built-in rechargeable Li-battery
DC 5V port
100/230V charger, 5V/1.5A 2A(7”)
DC9-24V, 5V/1.5A 2A (7”)
Micro SD card or built in memory
Video Player
ASF,AVI,WMV,3GP,MP4,FLV;
Audio Player
MP3 and WMA
Photo viewer
E-Album, JPG, GIF, BMP, PNG
EBook Viewer
TXT
System setting
[FM Transmitter] [Screen adjustment] [Default
set] [Volume] [Power] [Backlight] [Time and
Date] [Language] [Sys Info]
Chapter Three
Manual Instruction
3.1 Power supply and charge
If this navigator is first used, please use AC adaptor to fully charge it.
3.1.1 Power supply
There are three types of supplying power: battery, adaptor, USB cable.
GPS navigator uses the Li-battery to supply power when it is not connected with
adaptor. The mark [
] on the up right of interface indicate the current electric
volume.
GPS navigator uses the external power when it is connected with the adaptor.
GPS navigator uses the USB cable to supply power when the GPS connects to the
PC.
【Note】This machine adopts built-in, unchangeable Lithium battery. In order to avoid
fire and burning, please do not poke, bump or take it apart or throw it into fire or
water.
3.1.2 Use the travel charger to supply power
When the GPS navigator is first used, please use the AC adaptor to charge it.
1.
Connect the DC part of the adaptor with the power interface at the left side
of the unit (The power interface is same as USB interface );
2. The other part connect to the power socket, it supplies power while charging.
3.1.2 Use the car charger to supply power
1.
Connect the DC part of the adaptor with the power interface;
2. The other part connect to the power socket, it supplies power while charging.
3.2 Power on/off
3.2.1 Power on:
Please check:The battery is enough, or it is connected to external power source;
Please press the button on the top of the unit to boot.
3.2.2 Power off
Press the button on the top of the unit to turn off, the unit will enter the power
saving mode and maintain the last operation status when boot next time.
3.3 Reset system
If the system cannot work, you can reset the system by the following way:
Click the reset key on the right part of the machine to reset the system by using the
stylus.
3.4 Use bracket to fix navigator
When use GPS in the car, you should fix the device to the part of window besides the
panel by using the bracket.
3.6 Micro SD card
The attached TF card contains the navigation software, map data and media file.
Please insert the card correctly when use it.
3.7 Connect with computer
The device can be connected with the computer through the MINI USB on its
left part. You can copy the document between navigator and computer or copy the
data from GPS navigator to computer so as to recover the data in GPS when you are
in need of them.
1. Please confirm the GPS navigator is power on;
2. Connect the MINI end [
] of USB cable with the USB port on the left part
of GPS device and the normal end [
] with the Host port on computer.
3. After connecting, the screen will display the interface as below:
4. Please pull out the MINI USB cable after you finished your operation, the GPS
navigator will return to the pre-operation interface.
Chapter Four
Primary function
4.1 The main interface and the function
4.1.1. Main menu
4-1
4.2 Navigation functions and features
According to your choice of navigation system, the GPS navigator can make
position by GPS satellite signal receiver and display on the navigation map. The
system can calculate a best route after setting the destination, which can help users to
arrive the destination safely and rapidly.
The system can let you enjoy the individual charm and enjoy your trip by many
different ways such as vision map, vivid animation, voice indication, and words
indication.
The specific navigation functions are depended on your choice of navigating
software. Please refer to the Navigation Software Instruction.
Notes
1. Receiving signal
Many factors such as high, dense buildings (in the tunnel, between the high
building, underground parking, under the trestle), various weather condition, and
closure of the satellite will affect the ability to receive signal so as to result in
inaccurate position, inefficiency of navigation operation and system function.
4.3 Bluetooth setting and Instructions:
This chapter introduces how to use this navigator's Bluetooth to connect with cell
phone for call making and answering.
Operation method
4.3.1 Single click the button
in main menu to open the Bluetooth interface
as the following picture:
4-2
4.3.2 Single click the button Pair/Connect as the following picture:
4-3
4.3.3 Single click botton Search ; you will get the following pictures
4-4
Single click the device you want to connect and click Connect ;then turn to your
mobile ,input 1234 password .
After successful pairing and connecting, you return to the first bluetooth page as 4-2
picture and operate:
4.4 Audio player operation interface
1.Single
click the button
to enter Music
file Choose the song to enter the playing interface
4-23
4.5 Video operation Interface
4.5.2 Operation
1.
Single click the Video button
to enter the video file
4-26
4.6 Photo viewer operation interface
4.6.2 Operation method
Single click the button
to open the photo
4-29
4.7 E-book reader interface and operation
1.
single click button
to enter Ebook
2.
Choose file name to enter e-book reader as 4-32
4-32
4.8 Game interface and operation
Single click
to choose different games as 4-36
4-36
4.9 Tool
Single click
to choose different tools as4 -37
4-37
4.10 System setting Interface and operation
Click
to enter “Setting” menu, then you can set the relevant functions.
There are backlights, volume, languages, FM, time, calibration, system info and
default etc.
4-38
4.10.1 Backlight setting
Single click
to enter backlight setting interface as 4-98
4-39
4.10.2 Volume adjust
“Volume adjustment” includes:
1. Speaker volume adjustment
2. “Screen click tone” setting
4-40
4.10.3 FM
Transmitter
Single click
to enter the FM setting as 4-41
4-41
FM Transmitter will send out the audio signal to the radio devices. Take 86.7MHZ
frequency for example, both the GPS transmitting frequency and the received
frequency of the radio should be 86.7MHZ, then all the sounds of the GPS will be
input through the amplifier system of the radio.
4.10.4 Navigation path
Set navigation path as 4-22
4-42
4.10.6 Screen Calibration
Click the
to enter the screen calibration as 4-45
4-45
Click
it will move from in the sequence of the center, left up, left down, right
down and right up till the calibration succeed, then click any where on the screen to
save the calibration and exit to the main interface automatically. If not save the
information, please wait 30 seconds and it will exit from current interface
automatically.
4-46
4.10.7 Language setting
4-47
Single click your favorite language and then exit.
4.10.8 Default set
Single click
to enter the default setting as 4-48:
4-48
Single click
to
restore the default settings,single click
to exit the default settings.
4.10.9 GPS Information
Single click the button
and enter GPS information interface as 4-49
4-49
4.10.10 System information
System information includes:
1. Firmware version;
2. APP version;
3. System ID.
Chapter Five
Simple Problem shooting and maintenance
IF your GPS navigator cannot work normally, please check it as follows. If you
cannot solve the problem, please contact our service center.
Reason
Reason
Solution
Can not turn on the
Lack of power
Charge the battery
Low battery
Charge the battery
navigator
The device turn off
suddenly
The back light is not
Adjust the backlight
bright enough
Can not display clearly
The back light has Click the LCD; the screen will turn
been turned off
No
response
bright again.
when The touch-screen is
Calibrate the touch-screen
clicking the button
not calibrated
The volume is at the
lowest condition
Increase the volume
Without sound
Fm is open
Close fm function
Can not communicate The USB cable is not
Connect USB cable
with computer
connected well
In building or close The signal is weak, it need more
No signal
place
than 3 minutes or go outside
Gps info reset
The map data is lost
Contact your agent or distributor


