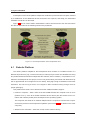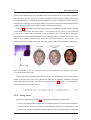
1
A Receptionist Robot:
Interface and Coordination
Manuel Malhado
Dissertação para obtenção do Grau de Mestre em
Engenharia Electrotécnica e de Computadores
Presidente:
Orientador:
Co-Orientador:
Vogais:
Prof.
Prof.
Prof.
Prof.
Júri
Carlos Jorge Ferreira Silvestre
Rodrigo Martins de Matos Ventura
Pedro Manuel Urbano de Almeida Lima
José Alberto Rosado dos Santos Victor
Outubro de 2008
Acknowledgments
I would like to thank Professors Rodrigo Ventura and Pedro Lima for the opportunity to work in
this project, as well as for their help and ready assistance.
I also thank my co-worker and friend Ana Cristina Aleixo for all her hard work and helpful ideas,
without which this project would probably not yet be complete.
I would like to express my gratitude towards my friends and colleagues Ricardo Alcácer, David
Jerónimo and Ricardo Carona for their helpful comments, and continuous and cheerful support.
I’m also grateful to all my family and friends, who always believed in me and whose moral
support and friendship was essential for the completion of this thesis and graduation.
Abstract
This thesis presents a project that consists on the development of a receptionist robot for the
Institute for Systems and Robotics (ISR), Lisbon. This robot is stationed at ISR’s 6th floor elevator
lobby where it waits for nearby visitors. At this point it attempts to interact with them in order to
find out whether they wish to be lead to a specific room on this floor.
The followed development methodology focuses on the integration of several modules, featuring navigation and localization capabilities, a graphical interface, speech recognition and synthesis, people detection, face detection, and behavior control, in order to achieve an autonomous
system. In order to save time and effort, as well as obtaining a robust solution, “off-the-shelf”
software packages are used whenever possible.
This project is covered by two Master theses. The present one focuses, apart from the conception of the robot’s hardware and software architecture design, on its human-robot interaction
capabilities, as well as on the integration and coordination among all modules.
Experimental results obtained in order to evaluate the employed speech recognition engine
robustness in the present application and the integrated system overall performance, are also
presented in this thesis.
Keywords
Receptionist robot, human-robot interaction, graphical interface, speech recognition, behavior
control.
iii
Resumo
Esta tese apresenta um projecto que consiste no desenvolvimento de um robot recepcionista
para o Instituto de Sistemas e Robtica (ISR), Lisboa. O robot encontra-se estacionado no lobby
dos elevadores do 6o piso do ISR, onde espera por visitantes. Após a chegada de um visitante,
o robot tenta interagir com ele, de modo a averiguar se ele deseja ser conduzidos a uma sala
especı́fica neste piso.
A metodologia de desenvolvimento seguida foca a integração de vários módulos, suportando
capacidades de navegação e localização, uma interface gráfica, reconhecimento e sı́ntese de
fala, detecção de pessoas, detecção de caras e controlo de comportamentos, de modo a alcançar
um sistema autónomo. Este projecto é abordado por duas teses de mestrado. Para além do design das arquitecturas de software e hardware do robot, a presente tese foca as suas capacidades
de interacção homem-robot, assim como a integração e coordenação de todos os módulos do
recepcionista.
Resultados experimentais obtidos de modo a avaliar a robustez do motor de reconhecimento
de fala utilizado na aplicação e a performance global do sistema integrado são apresentados
nesta tese.
Palavras Chave
Robot rececionista, interacção homem-robot, interface gráfica, reconhecimento de voz, controlo de comportamentos.
v
Contents
1 Introduction
1
1.1 Motivation . . . . . . . . . . . . . . . . . . . . . . . . . . . . . . . . . . . . . . . . .
2
1.2 Objectives . . . . . . . . . . . . . . . . . . . . . . . . . . . . . . . . . . . . . . . . .
3
1.3 Main contributions . . . . . . . . . . . . . . . . . . . . . . . . . . . . . . . . . . . .
4
1.4 Thesis outline . . . . . . . . . . . . . . . . . . . . . . . . . . . . . . . . . . . . . . .
4
2 Background
7
2.1 Human-Robot Interaction . . . . . . . . . . . . . . . . . . . . . . . . . . . . . . . .
8
2.2 Robot Control . . . . . . . . . . . . . . . . . . . . . . . . . . . . . . . . . . . . . . .
9
3 Solution Design
11
3.1 Context scenario . . . . . . . . . . . . . . . . . . . . . . . . . . . . . . . . . . . . .
12
3.1.1 Human-robot interaction scenario example . . . . . . . . . . . . . . . . . .
12
3.2 Required capabilities survey . . . . . . . . . . . . . . . . . . . . . . . . . . . . . . .
13
3.3 System architecture . . . . . . . . . . . . . . . . . . . . . . . . . . . . . . . . . . .
14
3.3.1 Modules . . . . . . . . . . . . . . . . . . . . . . . . . . . . . . . . . . . . . .
14
3.3.2 YARP (inter module/device communication) . . . . . . . . . . . . . . . . . .
16
3.4 Work Plan . . . . . . . . . . . . . . . . . . . . . . . . . . . . . . . . . . . . . . . . .
17
4 Physical Platform
19
4.1 Robotic Platform . . . . . . . . . . . . . . . . . . . . . . . . . . . . . . . . . . . . .
20
4.2 Additional Devices . . . . . . . . . . . . . . . . . . . . . . . . . . . . . . . . . . . .
21
4.2.1 Tablet PC . . . . . . . . . . . . . . . . . . . . . . . . . . . . . . . . . . . . .
21
4.2.2 Camera . . . . . . . . . . . . . . . . . . . . . . . . . . . . . . . . . . . . . .
22
4.2.3 Microphone . . . . . . . . . . . . . . . . . . . . . . . . . . . . . . . . . . . .
22
4.2.4 Laser Range Finder . . . . . . . . . . . . . . . . . . . . . . . . . . . . . . .
22
4.3 Hardware Architecture . . . . . . . . . . . . . . . . . . . . . . . . . . . . . . . . . .
23
4.3.1 Linux Monitor Subsystem . . . . . . . . . . . . . . . . . . . . . . . . . . . .
23
vii
Contents
5 Speech Recognition
5.1 Considered Software Packages . . . . . . . . . . . . . . . . . . . . . . . . . . . . .
26
5.1.1 CMU Sphinx . . . . . . . . . . . . . . . . . . . . . . . . . . . . . . . . . . .
26
5.1.2 Julius . . . . . . . . . . . . . . . . . . . . . . . . . . . . . . . . . . . . . . .
27
5.1.3 SAPI SDK . . . . . . . . . . . . . . . . . . . . . . . . . . . . . . . . . . . . .
27
5.1.4 Outcome . . . . . . . . . . . . . . . . . . . . . . . . . . . . . . . . . . . . .
27
5.2 SAPI SDK Useful Functionalities . . . . . . . . . . . . . . . . . . . . . . . . . . . .
28
5.2.1 Grammar XML Files . . . . . . . . . . . . . . . . . . . . . . . . . . . . . . .
29
5.3 Speech Recognition Control . . . . . . . . . . . . . . . . . . . . . . . . . . . . . . .
29
5.4 Speech Recognition Feedback . . . . . . . . . . . . . . . . . . . . . . . . . . . . .
29
5.5 Experimental Results . . . . . . . . . . . . . . . . . . . . . . . . . . . . . . . . . .
30
6 On-screen Interface and Speech Syntheses
33
6.1 Interface Prospects . . . . . . . . . . . . . . . . . . . . . . . . . . . . . . . . . . . .
34
6.2 Considered Software Packages . . . . . . . . . . . . . . . . . . . . . . . . . . . . .
35
6.2.1 The Expression Toolkit . . . . . . . . . . . . . . . . . . . . . . . . . . . . . .
35
6.2.2 Verbot . . . . . . . . . . . . . . . . . . . . . . . . . . . . . . . . . . . . . . .
35
6.2.3 Xface toolkit . . . . . . . . . . . . . . . . . . . . . . . . . . . . . . . . . . . .
35
6.2.4 Outcome and Selection of the Interface Development Environment . . . . .
36
6.3 Interface Layout . . . . . . . . . . . . . . . . . . . . . . . . . . . . . . . . . . . . . .
37
6.3.1 Face Panel . . . . . . . . . . . . . . . . . . . . . . . . . . . . . . . . . . . .
38
6.3.2 Dialog Panel . . . . . . . . . . . . . . . . . . . . . . . . . . . . . . . . . . .
39
6.3.3 Commands Panel . . . . . . . . . . . . . . . . . . . . . . . . . . . . . . . .
40
6.3.4 Room and Person Pop-up Lists . . . . . . . . . . . . . . . . . . . . . . . . .
41
6.3.5 Map Panel . . . . . . . . . . . . . . . . . . . . . . . . . . . . . . . . . . . .
42
6.3.6 Status Panel . . . . . . . . . . . . . . . . . . . . . . . . . . . . . . . . . . .
44
6.3.7 Cams Panel . . . . . . . . . . . . . . . . . . . . . . . . . . . . . . . . . . . .
44
6.4 Display Data Update . . . . . . . . . . . . . . . . . . . . . . . . . . . . . . . . . . .
45
6.5 Dialog Tasks Control . . . . . . . . . . . . . . . . . . . . . . . . . . . . . . . . . . .
45
6.6 Random Expression generator . . . . . . . . . . . . . . . . . . . . . . . . . . . . .
46
7 Coordination
viii
25
47
7.1 Behavior Model Selection . . . . . . . . . . . . . . . . . . . . . . . . . . . . . . . .
48
7.1.1 Considered Software Packages . . . . . . . . . . . . . . . . . . . . . . . . .
48
7.1.1.A SMC – The State Machine Compiler . . . . . . . . . . . . . . . . .
48
7.1.1.B UML StateWizard . . . . . . . . . . . . . . . . . . . . . . . . . . .
49
7.1.1.C UML statecharts . . . . . . . . . . . . . . . . . . . . . . . . . . . .
50
7.1.1.D Outcome . . . . . . . . . . . . . . . . . . . . . . . . . . . . . . . .
51
Contents
7.2 Model Architecture . . . . . . . . . . . . . . . . . . . . . . . . . . . . . . . . . . . .
51
7.2.1 Modes of Operation Hierarchy Layer . . . . . . . . . . . . . . . . . . . . . .
52
7.2.2 Autonomous Behavior Hierarchy Layer . . . . . . . . . . . . . . . . . . . . .
53
7.2.3 User Feedback Confirmation Hierarchy Layer . . . . . . . . . . . . . . . . .
53
7.3 Data Reception and Event triggering . . . . . . . . . . . . . . . . . . . . . . . . . .
55
8 System Integration
57
8.1 System Startup . . . . . . . . . . . . . . . . . . . . . . . . . . . . . . . . . . . . . .
58
8.2 Overall system performance analysis . . . . . . . . . . . . . . . . . . . . . . . . . .
58
8.2.1 Receptionist Test Scenario . . . . . . . . . . . . . . . . . . . . . . . . . . .
58
8.2.2 Demonstration Test Scenario . . . . . . . . . . . . . . . . . . . . . . . . . .
59
8.2.3 Test Results . . . . . . . . . . . . . . . . . . . . . . . . . . . . . . . . . . . .
61
9 Conclusion
9.1 Future work . . . . . . . . . . . . . . . . . . . . . . . . . . . . . . . . . . . . . . . .
65
66
Bibliography
69
A Appendix A – System’s YARP ports and connections
73
B Appendix B – Speech recognition language model grammars
77
C Appendix C – Coordination Module’s Ports and Associated Messages and Statechart
Events
D Appendix D – System Startup Script
81
87
ix
Contents
x
List of Figures
2.1 Autonomous robot platforms . . . . . . . . . . . . . . . . . . . . . . . . . . . . . . .
10
3.1 System Architecture . . . . . . . . . . . . . . . . . . . . . . . . . . . . . . . . . . .
15
4.1 Virtual representation of the Receptionist robot . . . . . . . . . . . . . . . . . . . .
20
4.2 Hardware Architecture . . . . . . . . . . . . . . . . . . . . . . . . . . . . . . . . . .
24
5.1 Finite state machine representation of the Speech Recognition Module . . . . . . .
30
5.2 Speech Recognition results obtained in the realistic and reference scenarios . . .
32
6.1 Considered software packages faces samples
. . . . . . . . . . . . . . . . . . . .
36
6.2 Graphical interface at startup . . . . . . . . . . . . . . . . . . . . . . . . . . . . . .
38
6.3 Illustration on how eye contact with the user is performed through two rotations of
the Receptionist’s head model around its center. . . . . . . . . . . . . . . . . . . .
39
6.4 Interface panels . . . . . . . . . . . . . . . . . . . . . . . . . . . . . . . . . . . . . .
41
6.5 Destination pop-up lists . . . . . . . . . . . . . . . . . . . . . . . . . . . . . . . . .
42
6.6 Two representations of the “Map” Panel . . . . . . . . . . . . . . . . . . . . . . . .
43
7.1 Representation example of the StateWizard’s State Chart and State Tree for a sample applications . . . . . . . . . . . . . . . . . . . . . . . . . . . . . . . . . . . . . .
50
7.2 Modes hierarchy layer statechart . . . . . . . . . . . . . . . . . . . . . . . . . . . .
52
7.3 Autonomous behavior hierarchy layer statechart . . . . . . . . . . . . . . . . . . .
53
7.4 User feedback confirmation hierarchy layer statechart . . . . . . . . . . . . . . . .
54
8.1 Graphic representation of the receptionist test scenario . . . . . . . . . . . . . . .
59
8.2 Graphic representation of the demonstration test scenario . . . . . . . . . . . . . .
60
8.3 Graphic representation of the step times obtained from the system tests . . . . . .
61
xi
List of Figures
xii
List of Tables
8.1 Step times obtained from the system tests . . . . . . . . . . . . . . . . . . . . . . .
61
8.2 User opinions . . . . . . . . . . . . . . . . . . . . . . . . . . . . . . . . . . . . . . .
61
xiii
List of Tables
xiv
1
Introduction
Contents
1.1
1.2
1.3
1.4
Motivation . . . . .
Objectives . . . . .
Main contributions
Thesis outline . . .
.
.
.
.
.
.
.
.
.
.
.
.
.
.
.
.
.
.
.
.
.
.
.
.
.
.
.
.
.
.
.
.
.
.
.
.
.
.
.
.
.
.
.
.
.
.
.
.
.
.
.
.
.
.
.
.
.
.
.
.
.
.
.
.
.
.
.
.
.
.
.
.
.
.
.
.
.
.
.
.
.
.
.
.
.
.
.
.
.
.
.
.
.
.
.
.
.
.
.
.
.
.
.
.
.
.
.
.
.
.
.
.
.
.
.
.
.
.
.
.
.
.
.
.
.
.
.
.
.
.
.
.
.
.
.
.
2
3
4
4
1
1. Introduction
1.1
Motivation
Autonomous robotics is a research field which has been in development since the middle of
the 20th century and it is currently one of the main areas of interest within the field of Robotics.
Even though great breakthroughs have been achieved throughout the years, this area still has a
long way to go, as much in terms of sensory, mechanical, and mobility capabilities as well as in
the artificial intelligence and decision making domain, before it can achieve efficient and flexible
behaviors comparable to the ones observed in animals and humans.
Current real life applications using robot agents are relatively scarce and usually restricted to
particular areas (such as industry and space exploration) where the use of human labor is not
possible or is inconvenient, either because the task at hand is life threatening or inaccessible to
human beings.
A common requirement for the environment where the robot shall operate, is that it has to
be relatively predictable, since current robot agents’ capacity to adapt to new and unexpected
situations is still very limited. This fact is a major reason why there are still so few successful
initiatives that use robotic agents to assist and interact with regular people, since these can be
extremely unpredictable and different from each other.
People’s unpredictability is very much related with the different reactions they can express
towards an unusual and unknown identity such as an automaton. For this reason, today’s key for
developing a successful people interacting agent might not be employing an extremely complex
decision system that seeks to cover all possible situations, but rather to use a human being’s
almost unlimited self adaptive capacity to adjust itself to the robot platform. This can be achieved
by providing, on the one hand, the means to help them feel comfortable with the whole situation,
and on the other hand, to guide them through the process of interaction by initially taking the
initiative to start a “conversation”/communication, and then directing and narrowing it through an
expected line of reasoning. In order to make a person feel more at ease while interacting with the
robot agent, besides presenting an intuitive and enjoyable interface, the automaton might feature
human/animal like characteristics, with whom people are accustomed to deal with.
The current project falls under the mentioned field of applications, consisting on the development of a demonstration robot targeting an audience of people who manifest a certain curiosity
for the field of robotics. The robot should behave as a receptionist that socially interacts with
approaching people, being capable of guiding them to on-the-spot requested locations within a
known environment. Adequate dimensions and hardware support are required features for the
robot to navigate around the intended environment and to interact/communicate with people using speech and visual interfaces (some hardware was readily available from previous projects, but
extra devices had to be acquired).
The desired robotic agent requires several specific capabilities, covering a set of different fields
2
1.2 Objectives
of research and development. Since various promising initiatives (which may or may not have
been originally designed to be implemented on a robotic platform) capable of solving particular
robot requirements are available as commercial or open-source software packages, it is of this
project’s interest to find the most robust and powerful solutions and adapt them to the proposed
goals.
The Receptionist’s development process consisted of several individual steps, starting with the
research for featured capabilities on similar initiatives, followed by the conception of the robot’s
software and hardware architectures, the implementation and testing of individual sections, and
finally the progressive integration of each developed subsystem into a fully working system. This
project’s work was divided into two separate theses which shared the tasks of research and conception, but from that point onward were assigned different responsibilities. The present thesis
is responsible for the development of all the Robot’s human-robot interaction capabilities, as well
as for the implementation of the receptionist’s behavior and integration of all system’s individual
parts. The companion thesis [1] is devoted to the implementation of a navigation and localization
solution, capable of fulfilling the defined requirements, and to handle all Robot image processing,
necessary to implement people and face detection functionalities.
1.2
Objectives
This project’s objective consists of the development of an autonomous robot whose purpose
is to serve as a demonstration platform for the Institute for Systems and Robotics (ISR), located
at Instituto Superior Técnico (IST). The robot will be stationed and navigate within ISR’s 6th floor,
where it should act as a receptionist for ISR’s visitors, by interacting with them and guiding them
to any location in that floor they may wish to be led to.
The Receptionist’s development process consists of several individual steps. These steps
are divided into two separate theses, that share the task of designing and projecting the whole
system’s software and hardware architectures. Upon this project’s first development phase, the
current thesis is responsible for:
• Implementing the Robot’s established human-robot interaction requirements, consisting of
speech synthesis and recognition functionalities and a graphical interface;
• Projecting and developing the Receptionist’s behavior;
• Integrating all of the system’s individual components, including the ones developed in the
companion thesis, thus resulting in a fully functional autonomous robot platform.
The initial development approach of this platform’s individual components consists of adapting
state-of-the-art off-the-shelf software packages (preferentially open source tools, but should the
3
1. Introduction
need arise, commercial ones should also be considered), and only in the case that no suitable
solutions are found, one shall be developed from scratch.
1.3
Main contributions
This thesis’ main contribution consists on the research and adaptation of state-of-the-art algorithms and integrating them into a fully functional platform.
Another relevant contribution results from the solution design process, which provides a gathering of important aspects and respective possible solutions to take into account while projecting
an autonomous robot agent as is the case of the Receptionist.
Some exploration was also performed in the field of human-robot interaction, considering the
approaches and decisions taken in an effort to provide to the user an enjoyable and intuitive
interacting experience with the robot agent.
This project was presented, with a poster, in RecPad 2007 [2] 13th Portuguese Pattern Recognition Conference, where special relevance was given to the people detection algorithm.
1.4
Thesis outline
This thesis is sectioned into eight chapters aside from the current introductory one:
• Chapter 2, Background – provides a brief historical description of similar initiatives featuring
autonomous robot agents that navigate and interact within a populated environment, as well
as a review of state-of-the-art algorithms and solutions that could be used in this project.
• Chapter 3, Solution Design – describes the Receptionist’s intended behavior and scenario
in which it will operate, as well as the projected system’s software architecture.
• Chapter 4, Physical Platform – describes the initially available robotic platform, the additional
devices that have been integrated, and the role that each hardware component plays in the
system’s implementation.
• Chapter 5, Speech Recognition – covers the considered software packages for this module’s implementation, how this component operates, its functionalities, control and output
interface, and its performance measurement obtained through executed experiences.
• Chapter 6, On-screen Interface and Speech Synthesis – describes the Receptionist’s graphical interface and speech synthesis capabilities.
• Chapter 7, Coordination – covers the Receptionist behavior model design and implementation and its integration with the rest of the system’s components.
4
1.4 Thesis outline
• Chapter 8, System Integration – highlights certain systems integration aspects and performed experiments.
• Chapter 9, Conclusions – reports the thesis outcome and results, and discuses future work
opportunities that stem from this thesis.
5
1. Introduction
6
2
Background
Contents
2.1 Human-Robot Interaction . . . . . . . . . . . . . . . . . . . . . . . . . . . . . . .
2.2 Robot Control . . . . . . . . . . . . . . . . . . . . . . . . . . . . . . . . . . . . .
8
9
7
2. Background
Considering that this project covers several unrelated technological areas, most of which are
not developed from scratch but rather adapted from existing solutions, this chapter succinctly
describes the human-robot interaction (HRI) and robot control fields in the Receptionist’s context,
which are the areas related to this thesis. Of-the-shelf software packages that are suitable to
implement the other Receptionist’s technological necessities, are addressed in chapters 5, 6, and
7.
2.1
Human-Robot Interaction
Even though this thesis’ main focus is to assemble a fully working autonomous agent using
pre-developed software solutions, some exploration is performed in the multidisciplinary area of
HRI.
In the last few years, HRI has aroused an increasing interest, thanks to advances achieved
in areas such as navigation, computer technologies, artificial intelligence, and speech synthesis
and recognition, which bring us closer to a reality where robots coexist in the same environment
as human beings.
Human-computer interaction (HCI) is an area that is closely related to HRI. Having featured
a great research effort throughout the years, it reached the point where usability, usefulness,
and an appreciation of technologys social impact, including its risks, are widely accepted goals.
Considering its achieved maturity, HCI offers a rich resource for research and design in humanrobot interaction.
The research platform called iCat [3] (figure 2.1) is an initiative example that mainly focuses
on the HRI field, using a desktop user-interface robot and a specific programing toolkit to study
human-robot interaction. The robot platform features several servos and DC motors to control
facial expressions and head movements, RGB LEDs to express modes of operation, several touch
sensors, a webcam, and speakers and a microphone for speech recognition and synthesis. Its
software toolkit supports the necessary features to control all animation through all on-board
actuators control as well as to program the robot’s behavior, enabling the definition of specific
robotic personalities.
Another interesting initiative, which participated in the American Association for Artificial Intelligence (AAAI) 1 2002 conference, is the GRACE autonomous robot [4] (figure 2.1), consisting of
a five institutions’ effort to solve as much AAAI challenges as possible. This platform features a
15” flat screen displaying an expressive face, touch, infrared, sonar, and laser range finder sensors, a two camera stereo vision system, another camera with zoom capabilities, several on-board
processing units, and microphone and speakers for speech recognition and synthesis. GRACE’s
human-robot interaction capabilities were put to test while registering itself in the AAAI conference (one of this event’s competitions). The approach taken was based on a set of finite state
1 http://www.aaai.org/Conferences/AAAI/aaai.php
8
(last retrieved in 09/2008)
2.2 Robot Control
machines [5] and it used a limited vocabulary speech recognizer, along with a parser program to
distill the recognized speech to its relevant primitives. Feedback to the cashier was accomplished
through speech synthesis and the expressive face.
From the set of international conferences that cover HRI, Human-Robot Interaction conference
2
is currently perhaps the one that focuses most on this research area. AAAI and the International
Conference on Intelligent Robots and Systems (IROS) 3 conferences also addresses HRI, as well
as other research areas, and the recent Human-Robot Personal Relationships conference
4
is
also a good place to look for interesting approaches on this topic.
2.2
Robot Control
In [6], a spectrum of possible types of strategies for the robot control problem is presented.
On one side there are the deliberative approaches, which totally rely on the robot’s knowledge
of the world, modeled through symbolic representations, to predict the outcome of individual actions and consequently plan its next move. These solutions require a rather complete, consistent,
and reliable world model, which is built using prior knowledge about the environment, and progressively reconstructed using sensory data. Generally, these approaches have only been able
to operate in relatively static and controlled environments (e.g., factories), having a difficult time
functioning in dynamic and rapidly changing areas (e.g., a crowded room). This control strategy’s
origin remotes to the traditional artificial intelligence way of thinking, and the Shakey autonomous
robot [7] (figure 2.1) is one of the oldest and better known systems that use this approach.
At the other side of the referred spectrum we find the reactive behavior based approaches,
which, in the extreme (in which case are called reflexive), are sensory driven, relying solemnly
on the current limited observed data to decide the robot’s next move. Opposite to the previous
strategy, this one avoids using explicit world models, considering that such a process is too time
consuming and error-prone. These kind of approaches’ devotees (being Rodney Brooks one of
the most fervent, as well as, considered by many, the father of this line of research) defend that a
complex and intelligent robot behavior can emerge from the combination and relationship of well
defined simple behaviors, as well as from the interaction between the robot and the uncertain and
unpredictable environment (that cannot be accurately analytically modeled).
There are several available formal models for expressing behaviors, such as robot schema
[6], situated automata [6], finite state machines [5] and its variations, petri nets [8], etc.. The
choice of a particular model should be based on the kind and complexity of the behavior to be
implemented, since these models vary in flexibility, supported features, and consequently in the
ease to understand and design them.
2 http://hri2008.org/
(last retrieved in 09/2008)
(last retrieved in 09/2008)
4 http://www.unimaas.nl/humanrobot/ (last retrieved in 09/2008)
3 http://www.iros.org/
9
2. Background
Considering the set of tasks the Receptionist robot has to perform, a reactive behavior based
approach is adopted, where a UML statechart model [9] is employed to coordinate the Receptionist behavior, which is further discussed in chapter 7.
Figure 2.1: Autonomous robot platforms. From left to right: iCat research platform, GRACE robot, and
Chakey
10
3
Solution Design
Contents
3.1
3.2
3.3
3.4
Context scenario . . . . . .
Required capabilities survey
System architecture . . . . .
Work Plan . . . . . . . . . . .
.
.
.
.
.
.
.
.
.
.
.
.
.
.
.
.
.
.
.
.
.
.
.
.
.
.
.
.
.
.
.
.
.
.
.
.
.
.
.
.
.
.
.
.
.
.
.
.
.
.
.
.
.
.
.
.
.
.
.
.
.
.
.
.
.
.
.
.
.
.
.
.
.
.
.
.
.
.
.
.
.
.
.
.
.
.
.
.
.
.
.
.
.
.
.
.
.
.
.
.
.
.
.
.
.
.
.
.
.
.
.
.
.
.
.
.
12
13
14
17
11
3. Solution Design
This chapter describes the process of development from which resulted the Robot’s architecture. This process started with the formulation of the context scenario for the receptionist robot.
By analysis of the resulting scenario, a survey of the main capabilities that the receptionist would
require is presented, and according to these, a system structure that would answer to the robot’s
needs was defined.
The work plan used for the system development is also presented in this chapter.
3.1
Context scenario
The receptionist robot is stationed in the elevators lobby of ISR’s 6st floor, waiting for a person
to approach it. Upon detection of their presence, the robot approaches the person, facing them,
and initializes dialog interaction by introducing itself and offering its services. If the person shows
them self to be interested, by acknowledging the robots introductory intervention, the receptionist
inquires about the room/location the person would like to be guided to, and subsequently starts to
move towards the destination indicated by the person. Upon arrival to the requested destination,
the receptionist announces the arrival and inquires whether further assistance is needed. If the
person shows to be already satisfied with its help, the robot returns to its starting position, where
it awaits for the arrival of another person.
In section 3.1.1, an example of a possible dialog scenario between a human user and the
receptionist robot is presented.
3.1.1
Human-robot interaction scenario example
This section presents an example of interaction between a person and the robot as a case
study, which was then used as a starting point for the specification of the Robot’s required capabilities.
The robot is stationed at its base, when a person arrives, coming from an elevator. After
detecting the person, the receptionist approaches the person, intercepting them: “Hello. Would
you like me to guide you to any room on this floor?”
To which the person answers: “Yes, please.”
The robot grasps it as an affirmative response, and asks: “Which room would you like to go
to?”
“Take me to room 6.07”, says the person.
The receptionist confirms room 6.07 exists on this floor, and replies: “Of course. Follow me,
please.”
Sequentially, it starts heading towards room 6.07, assuming that the person is following it.
When they arrive to their destination, the robot turns towards the person and says: “Here we
are! This is the room. Have a nice day.”
12
3.2 Required capabilities survey
“Thank you.”
“You are welcome.”
The receptionist returns to its initial location, where he will wait for another visitor to arrive.
3.2
Required capabilities survey
By analysis of the case study presented in section 3.1, a list of capabilities for the Robot was
made, so that it can perform as described.
For each of the following capabilities, it is also presented a set of hardware devices and a set
of software solutions and algorithms believed to be able to implement these capabilities:
1. Detection and localization of a nearby person:
• Hardware:
– Omnidirectional vision system, capable of capturing images with data corresponding to a 360◦ area around the robot.
• Software
– Periodically scan, visually, the whole area around the robot.
– Detect movement while the robot is standing still.
– Associate a specific geometry with a person, the person’s legs and feet should
present characteristic geometry features.
– Explore other human characteristics (E.g, color).
2. Communication with people:
• Hardware:
– microphone.
– speakers.
– touch-screen.
• Software:
– Speech recognition.
– Speech synthesis.
– menu based On-screen interface, as an alternative communication mechanism.
3. Social/human behavior. which should convince the user that he is in the presence of a
seemingly intelligent agent, thus turning the whole interaction experience more appealing
and enjoyable:
• Hardware:
13
3. Solution Design
– Screen, for visual data display.
– Camera facing the user.
• Software:
– Virtual animated face - provides a way for the receptionist to express emotions.
– face detection algorithm - render the necessary data for the robot to maintain eye
contact with the user.
4. Navigation in a familiar environment:
• Hardware:
– Odometry board.
– Laser range sensors.
– Ultrasonic sensors.
• Software:
– Self localization within a known environment(previously generated map.)
– Trajectory planer, so that the robot can travel from one point to another.
3.3
System architecture
By analysis of the considered capabilities (section 3.2), it is now possible to specify the architecture of the overall system.
Considering the problem at hand, it was decided that a modular architecture would be the most
fitting. This architecture is very flexible, permitting the segmentation of the development process
(design, implementation and testing) into separate and somewhat independent modules (since the
work effort is divided into two different theses, each of them is responsible for the development
of specific modules), and easing the task of future development by allowing the replacement of
specific modules and introduction of new ones without the need to alter the entire system.
In figure 3.1, a diagram of the system architecture is presented, where the dashed and full
bordered boxes represent hardware devices and modules; the double bordered box represents
the module that is responsible for all modules’ control; the orange and black arrows represent the
data flow of inter module/device communication, using YARP middleware [10] connections and
built in connections.
3.3.1
Modules
The modules which are fully covered by this thesis (i.e., Coordination, Speech Synthesis and
On-Screen Interface, and Speech Recognition), are described in detail in the following chapters.
14
3.3 System architecture
Figure 3.1: System Architecture
1. Coordination:
Responsible for the top level system coordination between modules, it controls all the receptionist robot’s reactions to external stimuli, ultimately resulting in the robot’s overall behavior.
This module runs over a hierarchical finite state machine, implemented using the UML
StateWisard toolkit’s1 framework.
This module is thoroughly described in chapter 7.
2. Navigation and localization:
As its name implies, this module covers all the robot’s navigation and localization necessities.
This module is implemented over Carnagie Mellon Navigation toolkit (CARMEN) [11], an
open source software package for mobile robot control which performs the referred tasks,
using the data provided by the receptionist’s laser sensor and odometry board, and a previously generated map.
A detailed description of this module can be found in the companion thesis [1].
3. On-Screen Interface and Speech Synthesis:
A graphical interface was developed with the use of wxWidgets [12], a Cross-Platform GUI
1 http://www.intelliwizard.com/
(last retrieved in 09/2008)
15
3. Solution Design
programing toolkit, and Xface [13], a toolkit for the creation of embodied conversational
agents. It has several GUI elements that can be accessed through the touch-screen, and it
is responsible for all non-voiced interaction with the user.
Speech synthesis is also this module’s responsibility, and it is performed by Microsoft’s
Speech Application Programming Interface (SAPI)2 , which is incorporated in Xface for lipsynchronization purposes.
For a more detailed description on this module, refer to chapter 6.
4. Speech Recognition:
By use of a set of different predefined grammars (with a limited lexicon), which are employed
according to the current context of operation, speech recognition is performed through Microsoft’s SAPI SDK.
For a full description of this module, refer to chapter 5.
5. Face Detection:
As mentioned in section 3.2, for the robot to be able to maintain eye contact with the user,
an algorithm that performs face detection is required. Thus, OpenCV’s [14] face detection
algorithm is used as a base for this module’s development.
A more detailed description of this module can be found in the companion thesis [1].
6. People Detection:
Omni-directional vision systems are not commonly used for the task at hand, hence no
readily available algorithm has been found for this purpose and one had to be developed
from scratch. In a general way, this algorithm starts by performing motion detection (through
background subtraction) and, by analysis of the image region where movement was detected, it evaluates the region’s geometry by matching it to the geometry features of a person’s legs and feet.
OpenCV’s libraries are widely used for this module’s image processing necessities.
This module is fully discussed in the companion thesis [1].
3.3.2
YARP (inter module/device communication)
The middleware especially designed for robots, known as Yet Another Robot Platform (YARP)
[10], consists of a set of open-source libraries, protocols, and tools which are able to perform
communication between different software modules and hardware devices in a decoupled and
accessible way.
YARP is designed to be operating system independent, and allows communication between
modules/devices that coexist in the same computer (using the operating system’s shared memory)
2 http://www.microsoft.com/speech/speech2007/default.mspx
16
(last retrieved in 09/2008)
3.4 Work Plan
or that are running in different machines on an IP network, through the use of carrier protocols
like UDP (for data streaming), TCP (for data that absolutely needs to arrive to the destination, like
commands) and multi-cast.
To activate YARP’s functionalities, a YARP name server is requiered to be running in one of
the computers in the network. This server stores all the information related to the created output
and input YARP ports (used as the interface for sending and receiving data), and the connections
between these ports. YARP ports support several data types (e.g., images, integers, text) and
multiple connections with different carriers, hence a port can receive/send data from/to two or
more ports, using any of the available protocols.
YARP uses the bottle structure to transmit several types of data (e.g., integers, doubles and
strings) through the network. It consists of a list that may contain a combination of any amount
and type of data elements, and a set of methods to manipulate and access this list. This structure
is used in all the Receptionist’s non-image data transmissions through YARP connections.
Since the number of ports in the receptionist’s architecture is relatively large, and in order to
keep better track of them, a syntax for naming these ports was adopted. According to this syntax,
a port name has three fields separated by underscores (’ ’): the first field has a label that identifies
which module owns the port; the next one describes what kind of data this port deals with; the
third one indicates whether this is an input or output port by using the flags “rcv ” or “send”. As
an example, a port with a name such as “coord userCommands rcv ” would be owned by the
Coordination module and would be used for receiving commands issued by the user.
In appendix A, a list of all system’s YARP ports can be found (organized by module), along
with all the connection associated with each port.
3.4
Work Plan
Taking into account the system’s modular architecture, a bottom-up development plan was
considered:
1. Design, implementation and testing of the Speech Recognition module;
2. Design, implementation and testing of the On-screen Interface and Speech Synthesis module;
3. Design, implementation and testing of the Coordination module;
4. Integration of all the modules and evaluate their performance as an integrated system;
17
3. Solution Design
18
4
Physical Platform
Contents
4.1 Robotic Platform . . . . . . . . . . . . . . . . . . . . . . . . . . . . . . . . . . . . 20
4.2 Additional Devices . . . . . . . . . . . . . . . . . . . . . . . . . . . . . . . . . . 21
4.3 Hardware Architecture . . . . . . . . . . . . . . . . . . . . . . . . . . . . . . . . 23
19
4. Physical Platform
A description of the robotic platform adopted for the Robot is presented in this chapter, followed
by a detailed list of the additional devices that had to be acquired, and finally, the assembled
hardware architecture is discussed.
Figure 4.1 can be used to better understand the robot’s structure and to see how and where
the devices described in the following sections are positioned.
Figure 4.1: Virtual representation of the Receptionist robot
4.1
Robotic Platform
The robotic platform adopted for the Receptionist robot consists of a modified version of a
Nomatic SuperScout II [15], a commercial unicycle robot (unicycle robots are classified as having
two parallel wheels that feature independent but collinear axes of rotation). This platform is considered to be adequate for this project, since it has good mobility, and human-like dimensions (it
has an approximate 80 cm height and 20 cm radius), being big enough to facilitate human-robot
interaction, and not too big so that it can navigate in ISR’s corridors leaving enough room for
people passing by.
This platform also holds a set of devices that offer suitable hardware support:
• Pentium 3 computer – With a 1Ghz CPU and 512MB of RAM, this computer runs on Linux
(Fedora Core 7), since all on-board hardware device drivers (like the wheels motor controllers and odometry board) were developed for this operating system.
This computer also holds an IP network adapter which is required to connect both computers that are present in the Receptionist’s platform (see section 4.2.1 for details on the other
computer).
• Wheels motor controllers – Allow the control of each wheel’s velocity.
20
4.2 Additional Devices
• Odometry board – Supplies the x and y current coordinates in milimeters, and orientation in
degrees.
• Omni-directional Vision System – This system captures “below the waist line” images that
cover an area of 360◦ around the robot. It consists on a Philips ToUcam Pro, a webcam
that is used with a resolution of 320x240 (even though 640x480 is supported), in order to
preserve the limited system resources, and on an isometric mirror [16] that provides the
wide-angle images. This mirror has an approximately conical shape and is specially designed to minimize ground level distortion by intrinsically performing a linear transformation
from the ground level plane to the plane captured by the image.
• Sonar Ring – Composed by sixteen ultra sonic range sensors, uniformly distributed around
the robot. These are not actually used in the Receptionist robot, since they are not currently
supported by CARMEN (toolkit used for navigation and localization – see section 3.3.1). A
Hokuyo-URG-04LX laser range finder (refered in section 4.2) is used instead.
• Bumpers – Eight contact sensors uniformly distributed around the robot. These are considered unnecessary for this application and, therefore, are not used.
4.2
Additional Devices
Due to the Receptionist robot’s physical requirements (these are presented in section 3.2),
additional hardware had to be acquired.
4.2.1
Tablet PC
In order to implement an on-screen interface, a touch-screen is mandatory. Therefore several
LCD monitors with tactile sensibility, specially designed for vehicles, were considered.
It was soon realized, however, that the computer on-board the robotic platform did not have
the required resources to handle the whole software architecture. So, the search for an adequate tablet PC begun (this kind of laptops are classified as featuring a touch-screen, and also
conveniently include speakers that will be required to play the Receptionist’s voice).
Since the number of different models of tablet PCs capable of operation with a bare finger
existent in the market is relatively small, and because the search was also restricted to the models
available in local hardware stores (the tablet PCs’ touch-screens had to be tested in order to
evaluate how they responded to the direct use of a person’s finger, instead of the recommended
stylus pen), the following compatible laptops were considered:
1. Asus R2H – 7” display, Intel ULV Celeron M processor (900 MHz), 512 MB RAM.
2. Flybook v33i - 8.9” wide screen display, Intel Pentium M 733 (Dothan) processor (1.1 GHz),
1 GB RAM.
21
4. Physical Platform
3. Fujitsu Lifebook T4020 - 12.1” display, Intel ULV Pentium M 740 processor (1.73 GHz), 512
MB RAM.
4. Toshiba Portg M400 - 12.1” display, Intel Core Duo T2400 processor (1.83 GHz), 512 MB
RAM.
By analysis of each of the possible solutions, it was realized that option 2 offered the best assortment of features. Unlike options 3 and 4, the Flybook is small enough to cleanly fit in the robotic
platform. Considering option 1, where it concerns the display size and performance features,
option 2 offers a bigger display (which should be as big as possible in order to be able to clearly
present the on-screen interface with all its features), and features a considerably faster CPU and
more RAM memory, which is crucial, considering how much image processing the Robot requires.
The Flybook v33i has also shown good responsiveness to direct finger touch, and so was deemed
the appropriate choice.
The selected tablet PC is distributed with Microsoft’s Windows XP, which is maintained since
the manufacturer does not provide drivers (like the crucial touch-screen driver) for other operating
systems. As an additional benefit, a computer with a different operating system from Linux (already used in the on-board computer) extends the field of software packages that can be used to
implement the system’s modules.
4.2.2
Camera
In order to perform face detection, the Receptionist requires an extra camera, facing the user
(just like the touch-screen). Since the Robot does not require any special features for this device,
a readily available Philips ToUcam Pro is used (the same model as the camera employed in the
omni-directional vision system).
4.2.3
Microphone
Even though the chosen tablet PC has a microphone incorporated in its structure, a Labtec
PC Mic 333 has shown more promising results on the task of speech recognition, and hence, it is
used for performing that task.
4.2.4
Laser Range Finder
Laser sensors are more reliable (less noisy), and perform much more discretized and precise
sweeps than ultrasonic sensors. For this reason, CARMEN [11] developers rely on planar (2
dimensional) laser range finders for the tasks of navigation and localization. This toolkit currently
supports the following commercial devices:
22
4.3 Hardware Architecture
1. SICK LMS 200 - 155 x 210 x 156 mm dimensions (W x H x D), 4.5 kg weight, 20 W power
consumption, 80 m scanning range, 180◦ field-of-view, 0.25◦ angular resolution, and ±15
mm systematic error.
2. SICK S300 - 102 x 152 x 105 mm dimensions (W x H x D), 1.2 kg weight, 8 W power
consumption, 30 m scanning range, 270◦ field-of-view, 0.5◦ angular resolution, and ±20
mm systematic error.
3. Hokuyo-URG-04LX - 50 x 70 x 50 mm dimensions (W x H x D), 160 g weight, 2.5 W power
consumption, 4 m scanning range, 240◦ field-of-view, 0.36◦ angular resolution, and ±10
mm systematic error.
Given this set of sensors, option 3 was considered to be the right choice, mainly because of
its very compact size, light weight and low power consumption. Even though the Hokuyo-URG04LX’s range is much smaller than the ranges of the other devices, it is reckoned to be sufficient,
considering the geometry of ISR’s facilities (these are relatively narrow, granting enough walls
and structural features to always be present at close range for CARMEN to perform localization,
independently of the Receptionist’s current position).
4.3
Hardware Architecture
In Figure 4.2 a representation of the system architecture, from a physical point of view, is
presented: The gray and red rectangles represent the computers running on Linux and Windows
XP, respectively; the light blue boxes are the systems modules, which are implemented in either
of the available computers; the dashed bordered boxes represent hardware devices (the ones
in red bordered boxes are built-in to the Windows XP computer); the black and orange arrows
represent the data flow of communication between modules/devices either supported by builtin or YARP [10] connections, respectively; the dashed arrows represent connections over an IP
network; the blue arrow represents a regular TCP Ethernet connection using sockets, and the
yellow boxes represent the processes that implement the Linux Monitor (see section 4.3.1 for a
description of this subsystem).
4.3.1
Linux Monitor Subsystem
The Linux Monitor provides a way to control the Linux computer through the Windows XP
computer. This subsystem is completely independent from the Receptionist’s main system architecture, as it does not even use YARP for communication, which makes it useful for debugging
purposes and provides the means to shut down and reboot the whole system through the onscreen interface (these user commands are presented in section 6.3.3).
23
4. Physical Platform
Figure 4.2: Hardware Architecture
As can be seen in Figure 4.2, the Linux Monitor consists of a server process (entitled control
socket) that runs at start-up and is constantly expecting new commands incoming from a predefined port. The linux pc control is the client process, that needs to be ran in order to issue
a new command. The commands submitted to the client process (and respectively sent to the
server) are passed as command line arguments and are coded in a case insensitive character,
which can be one of the following:
• ’l’ - Start navigation. Launch the Navigation and Localization module.
• ’x’ - End navigation. All the Navigation and Localization module’s processes are terminated.
• ’r’ - Restart navigation. The Navigation and Localization module is restarted (i.e., it is first
terminated, and then launched once more).
• ’b’ - Reboot. The Scouts computer is rebooted.
• ’s’ - Shutdown. The Scouts computer is shut down.
24
5
Speech Recognition
Contents
5.1
5.2
5.3
5.4
5.5
Considered Software Packages .
SAPI SDK Useful Functionalities
Speech Recognition Control . . .
Speech Recognition Feedback .
Experimental Results . . . . . . .
.
.
.
.
.
.
.
.
.
.
.
.
.
.
.
.
.
.
.
.
.
.
.
.
.
.
.
.
.
.
.
.
.
.
.
.
.
.
.
.
.
.
.
.
.
.
.
.
.
.
.
.
.
.
.
.
.
.
.
.
.
.
.
.
.
.
.
.
.
.
.
.
.
.
.
.
.
.
.
.
.
.
.
.
.
.
.
.
.
.
.
.
.
.
.
.
.
.
.
.
.
.
.
.
.
.
.
.
.
.
.
.
.
.
.
.
.
.
.
.
.
.
.
.
.
.
.
.
.
.
26
28
29
29
30
25
5. Speech Recognition
This module is responsible for recognizing speech sequences within an expected limited set
of context dependent sentences, spoken by any person that the Receptionist Robot might interact
with (expectantly, fully grown adults with good knowledge of the English language).
5.1
Considered Software Packages
Current speech recognition engines require a large speech corpus (formed by audio speech
and the corresponding text transcriptions) in order to build robust acoustic modules for recognition.
Since the kind of resources needed to gather/acquire such a corpus is not accessible, and only
freely available speech repositories in English could be found in the speech recognition community
(within the set of logical language choices, like Portuguese or French), the Receptionist is only
able to recognize sentences spoken in this language. VoxForge1 is a free speech corpus resource
that supports all the open source speech recognition software packages later mentioned in this
section.
The main concern, at this stage, is to find an application development oriented software package that offers robust and fast recognition performance, speaker independent recognizer and
context dependent language models. Having this in mind, the following set of software packages
was considered.
5.1.1
CMU Sphinx
CMU Sphinx2 is perhaps the most successful open source speech recognition system, and
is being developed at Carnegie Mellon University since 2000. It consists of a set of speech
decoders (Sphinx-2, Sphinx-3, Sphinx-4 and Pocketsphinx), a set of acoustic models trained with
large speech corpora, a phonetic dictionary (cmudict), the CMU Statistical Language Model toolkit
and an acoustic model trainer that produce continuous or semi-continuous Hidden Markov Models
(HMM) [17] (SphinxTrain).
From the set of available decoders, Sphinx-2 and Sphinx-3 (both developed in C) are the most
appropriate for the Receptionist situation.
Sphinx-2 is fast performance-oriented, designed for real-time recognition tasks, and uses
HMMs with semi-continuous output probability density functions. Sphinx-2’s latest release version is 0.4 and it is not currently being further developed.
Sphinx-3 is more accurate (representing the CMU’s current state-of-the-art recognizer), but
has the disadvantage of being considerably slower (more computationally demanding), and uses
HMMs with continuous output probability density functions. Sphinx-3’s latest release version is
0.7.
1 http://www.voxforge.org/
(last retrieved in 09/2008)
2 http://cmusphinx.sourceforge.net/html/cmusphinx.php
26
(last retrieved in 09/2008)
5.1 Considered Software Packages
5.1.2
Julius
Julius3 is an open source, two-pass large vocabulary continuous speech recognition decoder
software for speech-related researchers and developers. Developed since 1997 and currently
supported by the Interactive Speech Technology Consortium, it’s based on word n-gram and
context-dependent HMM, and, according to it’s developers, is able to perform almost real-time
decoding on most current PCs in 60,000 words dictation task. Its latest revision is 4.0.2.
Since revision 3.4, a grammar-based recognition parser named “Julian” is integrated into
Julius. Julian is a modified version of Julius that uses hand-designed Finite State Grammars
(FSG) as a language model.
Being Julius a Japanese initiative, its developers focused their efforts in optimizing its performance for this language, and so, unfortunately, the currently available acoustic model for the
English language does not rival with the ones from other systems.
5.1.3
SAPI SDK
Even though Microsoft’s Speech Application Programming Interface (SAPI4 ) is not open source,
version 5.1 is redistributable, free to use, and distributed under SAPI Software Development Kit
(SDK) 5.1.
SAPI SDK 5.1 is application development oriented, providing easy-to-use interfaces to develop Windows applications with speech recognition support. It intends to mask all the complexity
associated with the task of speech recognition, providing an already trained, speaker independent, and mature speech recognition engine that does not feature any tools for “tuning” purposes
(Actually, Windows does provide a tool to adapt the recognition engine to a particular user using
speech samples, but this feature is useless in the Receptionist case), or even any documentation
concerning the engine’s approach to the speech recognition problem.
This recognizer has a fast performance and it is well known in the application development
community. It has been employed in some commercial applications, such as Dragon NaturallySpeaking5 and Microsoft Voice Command6 , as well has other research initiatives like [18]
and [19].
SAPI supports FSG as language models, which can be configured through XML grammar
files.
5.1.4
Outcome
Even though SAPI 5.1 does not feature a state-of-the-art recognizer, fast performance is of
grater value than accuracy for the Receptionist robot situation, since an alternative communication
3 http://julius.sourceforge.jp/en
index.php (last retrieved in 09/2008)
(last retrieved in 09/2008)
5 http://www.nuance.com (last retrieved in 09/2008)
6 http://www.microsoft.com/windowsmobile/en-us/downloads/microsoft/about-voice-command.mspx
4 http://www.microsoft.com/speech/speech2007/default.mspx
27
5. Speech Recognition
interface is available (which is described in section 6.3.2). Considering this, SAPI is the adopted
software package for the Speech Recognition module implementation, not only due to its userfriendly interface between the recognition engine and the applications, but also for the following
reasons:
• Unlike Julius, which currently does not supply reliable acoustic modules in English, SAPI
offers a ready-to-use recognition engine;
• SAPI supports the implementation of FSGs, which is exactly the kind of language models
needed by the Receptionist. Sphinx lacks this kind of support, since it only provides tools
for implementing statistical language modules;
• SAPI is quite well documented: it is supported by a detailed manual plus several tutorials,
and sample code are available throughout the Internet.
5.2
SAPI SDK Useful Functionalities
SAPI supports two main modes of operation:
1. “Dictation” – It consists of a continuous real-time recognition process that attempts to recognize everything that is captured by the microphone, by progressively matching the spoken
speech to all the words supported by the recognizer, while weighting the likelihood of the
recognized speech sequence according to a statistical language model. This mode of operation is intended for the applications where the aim of the speech recognition functionality
is to work as an input for text digitalization through speech.
2. “Command and Control” – It is employed in applications that use speech recognition to
fire actions/routines, triggering the same kind of events a GUI element would upon user
interaction. This mode is the one used in the Speech Recognition Module, since it demands
the definition of grammar rules, by optionally resorting to XML grammar files (these files’
structure and syntax is discussed in section 5.2.1), which specify the set of sentences the
recognizer will attempt to match with the spoken speech.
In order for an application to be able to deal with new recognition data, SAPI generates a
Windows event that includes useful information concerning the recognition result. This includes,
but it is not restricted to:
• The recognition’s successfulness, which can be one of three values: successful recognition,
unsuccessful recognition, and interference detected;
• The kind of interference that was detected, if perceived. It can be one of the following: no
signal, noise, too loud, too quiet, too fast, or too slow;
28
5.3 Speech Recognition Control
• The index of the recognized output;
• The exact sentence that the recognizer conceives was spoken;
• The confidence level of the recognition, which can be one of three values: hight, normal and
low;
5.2.1
Grammar XML Files
The XML grammar files are used to implement the FSG language modules to be used by
SAPI’s recognition engine. These grammars permit the definition of the phrases the engine is
able to recognize, through a sequence of words contained in tags that define: if that set of words
has to be expressed at that particular point of the sentence; if one of the set of words in a group is
expected at that point; if a set of words is optional (i.e., this set of words may or may not be uttered
by the speaker; the recognizer will reckon the rest of the sentence either way). XML grammar files
syntax and lexicon is fully described in SAPI’s help documentation.
With these files, it is possible to implement flexible grammars where a number of possibly
spoken sentences result in the same output index (which is also defined in the grammar file), thus
allowing the receptionist to understand a large number of possible user responses.
Both grammar files employed in this module are presented in appendix B.
5.3
Speech Recognition Control
The Speech Recognition module’s control is performed through the /sr srControl rcv YARP
port. The set of available commands are coded in a character, which can be one of the following:
• ’g’ – Load the grammar file which name follows the command identifier character, in the
same message;
• ’r’ – Perform a recognition procedure;
• ’s’ – Stop/interrupt the current recognition procedure.
This module has two possible states of operation: it is either waiting for control commands, or
waiting for new sound input, in order to perform a recognition. In figure 5.1, a Mealy finite state
machine [5] representation of this module is presented.
5.4
Speech Recognition Feedback
This module outputs its recognition results through the /sr userFeedback send YARP port.
The messages sent through this port consist of two integers followed by a string. The first and
29
5. Speech Recognition
Figure 5.1: Finite state machine representation of the Speech Recognition Module. Transitions are represented in an event/action manner
second integers represent the recognition result and the confidence level of the recognition; the
string contains the recognized speech.
Negative values of the first integer correspond to unsuccessful recognitions (in this situation,
the second integer takes the value of -2 and the string is enforced to be empty), which are coded
has follows:
• -1 – Failed recognition;
• -2 – No signal detected;
• -3 – Noise detected;
• -4 – The user spoke too loud;
• -5 – The user spoke too quietly;
• -6 – The user spoke too fast;
• -7 – The user spoke too slowly;
In case of a successful recognition, the first integer represents the output index of the recognition and the second integer takes the values of -1, 0, or 1 depending if the confidence of the
recognition is low, normal or high.
5.5
Experimental Results
In order to evaluate SAPI’s recognition robustness in the current application, a set of experiments using 6 different speakers were performed. It was asked each speaker to speak the same
sequence of sentences in two different scenario, each with a specific goal:
30
5.5 Experimental Results
1. The goal of this scenario is to be as close as possible to this modules intended context of
operation, in order to evaluate its robustness in realistic conditions. The hardware configuration that is used is the one available in the Receptionist platform (the tablet PC’s sound
card is used to acquire the sound captured by the available microphone), see section 4.2),
and the speakers where asked to speak while standing up and about one meter behind the
Robot;
2. This scenario is defined as a reference to understand how much of the recognition performance is conditioned by the Receptionist’s context of operation. To do so, a different (less
noisy) hardware configuration was employed, using a SilverCrest Bass Vibration Headset
and a Toshiba Tecra A3X laptop’s sound card for data acquisition.
Two different language models are used during the Receptionists regular operation, which are
defined by the yes no.xml and destination rooms.xml files, presented in appendix B. Considering that these models feature rather different characteristics, since the first one only has
two possible outcomes and short recognizable sentences, and the second is considered more
challenging for featuring 25 different possible outcomes and considerably longer recognizable
sentences, their recognition performance is evaluated separately and three different sentences to
be spoken by the test subjects are defined for each language model.
In the model defined by yes no.xml case, the sentences (in this case, words) to be spoken
by the speakers are “yes”, “no”, and “maybe”. While the first two represent the shortest possible
recognizable sentences and cover both possible recognition outcomes, “maybe” is not included
in the set of recognizable sentences and is used to evaluate how well the recognizer handles
sentences that are not supposed to be recognized. Since it would be impractical to evaluate all
25 destination rooms.xml model’s possible recognition outcomes, two random outcomes where
chosen for evaluation: one is represented with a standard size sentence – “Guide me to room six
oh seven” – and the other features the longest recognizable sentence supported by this grammar
– “Could you please show me the way to the Evolutive Systems and Biomedical Engineering Lab”
– and possibly the most challenging to recognize. This model’s defined third sentence is “lead me
to nowhere”, and has the same purpose as the “maybe” sentence in the previous grammar.
In order to facilitate and systematize these test procedures, a program has been developed
that subsequently request and recognizes each of the defined sentences. Each sentence is requested to be spoken three times, in order to acquire more recognition samples, resulting in more
statistically relevant results.
Considering the role of the Speech Recognition module in the Receptionist system, the sentences spoken in the performed experiences that are not recognized in perfection, but still result
in the outcome featured by the intended sentence, will be taken as a successful recognition.
In figure 5.2 the obtained recognition results for each sentence is presented, for both the
realistic and reference scenarios.
31
5. Speech Recognition
Figure 5.2: Speech Recognition results obtained in the realistic (on top) and reference (on bottom) scenarios.
The variables represented in the x axis represent each of the test sentences: S1 – “yes”; S2 – “no”; S3 –
“maybe”; S4 – “take me to room six oh seven”; S5 – “Could you please show me the way to the Evolutive
Systems and Biomedical Engineering Lab”; S6 – “lead me to nowhere”
By analysis of both scenario results it can be concluded that this module’s recognition performance is clearly affected by speech capturing conditions. In the reference scenario case, the
recognition rate was of 100% for all users except one (which, in its turn, solomly suffered one
false recognition while speaking one of the S5 sentence uterances). Distinctly different results are
observed in the realistic scenario, since alltough the recognition rate obtained in the S1 and S2
sentences is satisfactory, sentences S4 and S5 present drasticaly lower recognition rates (about
66% and 11%). These results also evidence how the increased size of the set of recognizable
sentences defined by the language model, negatively affects the recognition performance.
Considering the results obtained for the S3 and S6 sentences, the recognizer does not seem
to have been optimized to identify as unrecognized, spoken sentences that are not covered by
the language model. This situation is clear in both scenarios, where these results cannot be
conclusively compared since they are inconsistent (S3 shows a higher rate of false recognitions
in the realistic scenario than in the reference scenario, but the opposite is verified for the S6
sentence) and the number of test samples is relatively small.
32
6
On-screen Interface and Speech
Syntheses
Contents
6.1
6.2
6.3
6.4
6.5
6.6
Interface Prospects . . . . . . .
Considered Software Packages
Interface Layout . . . . . . . . .
Display Data Update . . . . . . .
Dialog Tasks Control . . . . . .
Random Expression generator
.
.
.
.
.
.
.
.
.
.
.
.
.
.
.
.
.
.
.
.
.
.
.
.
.
.
.
.
.
.
.
.
.
.
.
.
.
.
.
.
.
.
.
.
.
.
.
.
.
.
.
.
.
.
.
.
.
.
.
.
.
.
.
.
.
.
.
.
.
.
.
.
.
.
.
.
.
.
.
.
.
.
.
.
.
.
.
.
.
.
.
.
.
.
.
.
.
.
.
.
.
.
.
.
.
.
.
.
.
.
.
.
.
.
.
.
.
.
.
.
.
.
.
.
.
.
.
.
.
.
.
.
.
.
.
.
.
.
.
.
.
.
.
.
.
.
.
.
.
.
.
.
.
.
.
.
.
.
.
.
.
.
34
35
37
45
45
46
33
6. On-screen Interface and Speech Syntheses
For the user to be able to communicate with the Receptionist in a non-verbal way, it was
necessary to develop a graphical interface, which is displayed and interacted through the tablet
PC screen.
An effort has been made to make this interface portable to other physical location environments, without requiring a recompilation of the source code. This is possible through a set of
configuration text files that are loaded at run time, and are further discussed in this chapter.
6.1
Interface Prospects
Considering the objectives initially defined for this thesis (chapter 1), as a way of disseminating
the interest for science and technology, one of the key aspects of the interface is that it should
present as much information as possible regarding the sensors and mechanisms that condition
the Robot’s behavior. It is also imperative, for demonstration purposes, that the interface features
the necessary controls to perform direct commands (e.g., choosing a destination by manually
selecting a room), which should be executed independently of the Receptionist’s current state
of operation (the actual behavior is supervised by the Coordenation module – chapter 7 – that
receives input from this one).
In order for the Robot to present suitable human-robot interaction, it was determined that it
would require an animated virtual face, integrated in the graphical interface, capable of expressing emotions (this way the Receptionist would be able to, for instance, express joy or sadness,
depending on whether a requested task had been performed successfully or not). Several software packages which supply a virtual animated faces were considered (these are discussed in
section 6.2).
Even though the target audience is likely to be familiar with several kinds of graphical user
interface (GUI) environments, thus demonstrating a certain “intuition” while navigating around
unfamiliar interfaces, this module intends to be accessible to as many people as possible. In
order to accomplish this, an effort was made in developing an interface that respects, as much as
possible, general usability principles like the ones defined by Jakob Nielsen [20], as well as the
interface design principles presented by Bruce Tognazzini1 (both authors are software consultants
specialized in user interface usability).
Professional user interface development is an iterative procedure that involves users that fit
the target profile. In a general way, the design process starts by performing a survey of the users
problems and necessities, followed by the conception and subsequent prototyping of a solution,
and finishes with the evaluation of the current solution performed by real users. If some issues
are still found, the design process starts all over again. Employing this kind of procedure in full
in this project would be too time consuming; instead, the implementation process (which was still
1 http://www.asktog.com/basics/firstPrinciples.html
34
(last retrieved in 09/2008)
6.2 Considered Software Packages
iterative) was closely followed by helpful colleagues as well as the developer himself, since all
share the profile of the target audience.
6.2
Considered Software Packages
Several software packages with the required features to implement the expressive animated
face are evaluated in this section.
6.2.1
The Expression Toolkit
Expression2 is an open source 3D animation system based on an anatomical model of the
face. It features muscle simulation, real time performance, an event based animation system,
a scripting language for generating compound expressions, and provides a sample application
that demonstrates its lip synchronization capabilities and uses Microsoft’s Speech Application
Programming Interface3 for speech synthesis.
Unfortunately, this software is not being actively developed, does not have much community
support, and the available face’s (figure 6.1) texture and expression qualities cannot rival with
today’s more realistic models.
6.2.2
Verbot
Verbot4 is a commercial Windows software toolkit used to create 2D expressive speaking
virtual agents. It provides an editor for creating knowledge bases (not only through simple input/output rule definition but also through other resources like C# files) that not only provides
control over the agent’s behavior but also provides some operating system level control (e.g., running applications). Verbot supplies several different face models (a representation of one of them
is presented in figure 6.1), and sample knowledge bases.
There are three caveats to the use of this toolkit: the fact that it is neither open source nor
free to use; the source code of the face player is not available at all nor the necessary tools
to include it in an application; 2D animated models do not have the same potentialities that 3D
models possess (e.g., rotations cannot be performed in 2D models).
6.2.3
Xface toolkit
Xface [13] is a set of open source tools for the creation of embodied conversational agents
using MPEG-4, through muscle based deformation, and keyframe interpolation based animation
using morph targets, driven by SMIL-Agent scripting language [21, 22].
2 http://expression.sourceforge.net
(last retrieved in 09/2008))
3 http://www.microsoft.com/speech/speech2007/default.mspx
4 http://www.verbots.com
(last retrieved in 09/2008)
(last retrieved in 09/2008)
35
6. On-screen Interface and Speech Syntheses
This toolkit features the blending of visemes (face animations associated with phonemes, the
combination of which ultimately results in lip synchronization), emotions and expressions in combination with SAPI 5 to perform SMIL-script generated animations.
Xface features four pieces of software:
• Xface Core – The main library for developers. All the other software in the project uses this
library;
• XfaceEd – An editor that provides an interface to generate MPEG-4 ready meshes from
static 3D models as well as preparing morph targets for keyframes based animation;
• XfacePlayer – A sample application that demonstrates the toolkit in action. It supports
SMIL-Agent scripts and FAPs (file type that archives MPEG-4 animations) as input.
• XfaceClient – It can be used as a SMIL-script editor and as a XfacePlayer over-network
controller.
A ready-to-use and realistic face model (figure 6.1) is supplied by Xface.
Figure 6.1: Considered software packages faces samples. From left to right: The Expression Toolkit, Verbot
and Xface
6.2.4
Outcome and Selection of the Interface Development Environment
From the set of considered software packages, Xface proved to be the best choice for this
project, not only for suppling a quite detailed head model, but also because it is still being actively
developed, and provides a powerful scripting language that features expressive and verbal implementation. Its sample application proved to be an excellent starting point for the development of
the interface.
Xface integrates Microsoft SAPI 5.1 in order to perform speech synthesis while simultaneously
synchronizing the face’s lips according to the spoken phonemes. As it happens with this toolkit’s
36
6.3 Interface Layout
speech recognition engine (used in the Receptionist’s Speech Recognition module and described
in section 5.1.3), no technical information regarding SAPI’s approach to the speech synthesis
problem is supplied by Microsoft.
All Xface applications were developed in C++ and use wxWidgets [12]. This open source
widgets toolkit is a cross-platform GUI programing software package. Instead of emulating the
display of widgets using graphic primitives like other similar GUI developers (e.g., Swing [23]),
it uses operating system’s native controls, featuring better performance results. wxWidgets applications can be transfered to different operating systems with few to no changes in the source
code.
wxWidgets was the chosen interface development environment, selected amongst several
similar packages (e.g., Qt5 , FOX toolkit6 , YAAF7 ) since, not only it substantially shortened the
development time by allowing a lot of XfacePlayer’s source code to be reused, but it is also a
mature, actively developed and supported software package that supplies all necessary features
to implement the intended interface.
6.3
Interface Layout
The Interface consists of two equally sized notebook windows (a type of window that features a
set of selectable tabs), placed side by side, completely filling the screen environment (figure 6.2).
These notebooks feature the same combination of tabs (implying the duplication of each corresponding panel), except for the “Face” panel (described in section 6.3.1) which is only presented
in the notebook on the left, since all the animation and voice handling mechanism responsible for
the face control is implemented in this window’s class, and the effort of exporting it to a higher
level class is not justifiable. While this option of layout might confuse inexperienced users, it grants
great flexibility to the interface, since it permits any combination of two panels to be visible at the
same time.
Since the refresh rate of the visual data displayed on the various panels greatly affects the
interface’s system resource consumption, the compromise found for the refresh periodicity is 0.1
seconds.
At the system startup, the default combination of displayed panels is the one presented in
figure 6.2, since these are sufficient for the Receptionist to fully operate in Autonomous mode
(which is described in chapter 7), and are considered more inexperienced user-oriented (see
sections 6.3.1 and 6.3.2 for these panels description).
5 http://trolltech.com/products/qt/learnmore/whats-new
(last retrieved in 09/2008)
(last retrieved in 09/2008)
7 http://www.yaaf.org/index.html (last retrieved in 09/2008)
6 http://www.fox-toolkit.org
37
6. On-screen Interface and Speech Syntheses
Figure 6.2: Graphical interface at startup. In the left – the “Face” panel; in the right – the “Dialog” panel
6.3.1
Face Panel
This panel presents the Receptionist’s expressive face (figure 6.2). The XfacePlayer sample application of the Xface toolkit was used as a starting point for the development of this
panel. The original task handling mechanism was preserved, consisting of a queue of instructions (e.g.,resume playback, stop playback, load SMIL-script) that control the face behavior, which
corresponding tasks are executed as soon the previous ones are completed.
Since it is crucial that the Coordination module is informed when the previous speech animation finished (so that a recognition from the Speech Recognition module is not requested while the
Receptionist is talking), notifications are submitted to this module through the /itfc itfcNotifi
cation send port. Several types of notifications are submitted through this port, where the first
message’s string corresponds to the type of the notification, the following integer is the notification
status, and the last integer is 1 in case the notification’s origin is local (generated by the Random
Expression Generator, section 6.6 ) or 2 if it resulted from a remote source.
To ensure a better human/robot interaction, it was referred in section 3.2 that the Receptionist’s
face should be able to maintain eye contact with the user, using input data from the Face Detection
module (developed in the companion thesis [1]). Unfortunately this is not possible since, as
studied and concluded in [24], visual perception of images represented in a planar surfaces (in this
case the tablet PC screen) remains largely unchanged regardless of the vantage point, resulting
in the impression that, if the face looks straight ahead, it will seem it is looking straight at the
viewer, independently of their position relative to the screen (for instance, Da Vinci’s Mona Lisa
38
6.3 Interface Layout
seems to be looking directly at us, regardless of the point of view from which we view the painting).
The opposite is also true: if the face is looking anywhere else, the viewer will always feel the face
is looking elsewhere. Considering this last statement, the aim of rotating the virtual head in a
reactive way according to the user face position is to give the impression that the Receptionist is
paying attention to them, inviting them to further interact with the Robot.
In figure 6.3, an example of the face rotation process is presented, consisting of two rotations
of the virtual head model around its center. In this figure’s top left corner, a frame captured
by the Robot’s camera that corresponds to the Receptionist face’s point-of-view is presented.
Considering the represented referential, the face primarily performs a rotation around the Y axis,
followed by a rotation around a vector (dependent on the first rotation) in the XZ plane. The
rotation angles are calculated using the user’s face position and manually adjusted coefficients.
Figure 6.3: Illustration on how eye contact with the user is performed through two rotations of the Receptionist’s head model around its center.
To avoid that the Receptionist’s face instantly “looks” at a detected face when, in the previous
instant, it was facing the other way, a discrete low pass filter is employed, resulting in smoother
and realistic head movements. This filter is employed by use of 6.1, where ’c’ is a gain that has
been hand adjusted to the value of 0.5.
6.3.2
N ewF aceP osX = c × U serF aceP osX + (1 − c) × LastF aceP osX
N ewF aceP osY = c × U serF aceP osY + (1 − c) × LastF aceP osY
(6.1)
Dialog Panel
This panel is represented in figure 6.2, and it features the following components:
• A text control window where a log of the conversation between the user and the Receptionist is maintained. Red text represents the Receptionist speech (in the beginning of each
sentence, the emotion expressed by the Receptionist’s face while speaking it is presented
39
6. On-screen Interface and Speech Syntheses
between brackets), and the blue text represents the user’s speech lines. This window might
be useful in case the user fails to hear/understand what the Robot says.
• A list box where the user’s currently available options of speech are presented, serving as
an alternative means of communication with the Receptionist, as well as a reference to what
the user can say that will be recognized.
• A button labeled “Submit Answer”, which posts the currently selected option in the list box
through the /itfc userFeedback send port. The message structure is the same as the one
used to submit the speech recognition results (posted in section 5.4), but in this case the
first integer will never be negative and the confidence level will always be high (2nd integer
equals 1);
• A check box labeled “Use Speech Recognition” is used to activate or deactivate speech
recognition by submitting a command coded with a ’v’ and featuring an integer with the
value of 1 or 0, through the /itfc userCommand send port.
6.3.3
Commands Panel
All available buttons on this panel (figure 6.4), activate the Receptionist’s Manual operation
mode, except the button labeled “Resume Autonomous Mode” which triggers the Autonomous
operation mode (see chapter 7 for the definition of both these modes). The remaining buttons
perform as follows:
• “Room” and “Person” buttons – Both trigger a pop-up list that features the available rooms
and persons, which the user can select as a destination;
• “Base” button – Instructs the Robot to go to it is default location where it waits for a person
to approach, while in Autonomous mode;
• “(Pinpoint)” button – Switches to the Map Panel tab (section 6.3.5), and activates its “Pinpoint Destination” button;
• “Pause”/“Continue” button – If pressed while its label is “Pause” the Receptionist interrupts
its current route, while if the button’s label is “Continue” the Robot proceeds to the last
defined destination. This button is generally larger than the others in order to make it more
accessible, since it is primarily used to interrupt the current locomotion to a specified goal,
making it harder to use the interface;
• “Reset Autonomous Mode” button – Resets the Autonomous mode’s state machine;
• “Return To Base And Turn Off” button – Sets the “Base” position as destination, and, as
soon as it arrives, turns off the whole system (including both computers);
40
6.3 Interface Layout
• “Turn Off” button – Turns off the whole system;
• “Reboot” button – Reboots the whole system.
All commands generated by these buttons are submitted by specific types of instructions
through the /itfc userCommand send port. These instructions are identified by a character as
follows:
• ’n’ – Go to the location specified by the string that follows the identifier character in the
message;
• ’s’ – Interrupt/continue the currently defined route;
• ’i’ – Reset the Autonomous mode’s state machine;
• ’a’ – Resume Autonomous mode;
• ’b’ – Go to Base and turn off the system;
• ’o’ – Turn off the system;
• ’r’ – Reboot the system;
Figure 6.4: Interface Panels: left – Commands panel; center – Status panel; right – Cams panel.
6.3.4
Room and Person Pop-up Lists
The Room and Person pop-up lists (presented in figure 6.5) are used to manually define a
specific room, or the room where a specific person might be found, as a destination, and are
accessible through the “Room” and “Person” buttons in the Commands panel.
These two lists feature a room/person per row and, in the Room list case, two different columns
featuring a room’s illustrative image and room code, and the room description; while in the Person
list, three columns are presented, holding a persons photography and name, their work phone
extension, and the room where they might be found.
41
6. On-screen Interface and Speech Syntheses
Figure 6.5: Destination pop-up lists: left – Room list; right – Person list.
By selection of a particular column label, the list elements are sorted in alphabetic order according to the text displayed by each element in that columns.
These lists windows are objects of the same generic implemented window class, and are populated at run time with data obtained from (rooms.txt and personnel.txt text files (making this
data more accessible for manipulation), and image files for each specific list element’s illustration/photography.
At the bottom of these lists two buttons can be found: the “GO!” button that is used for submitting the currently selected destination; the “Cancel” button which hides the this pop-up list
window.
6.3.5
Map Panel
This panel (figure 6.6) is inspired on today’s GPS navigation devices’ interfaces. It features
an image of the environment where the Receptionist can navigate (in the current case, ISR’s 6th
floor), where several objects are represented:
• The Receptionist – Represented by an orange circle with a black line segment indicating its
orientation;
• The laser sweep – Represented by the area covered with intersecting green lines;
• The person’s position as perceived by the People Detection module – Represented by a
42
6.3 Interface Layout
blue circle;
• The current destination – Represented by the drawing of a a red “target”;
• Waypoints and trajectory plan – Represented by blue circles and lines.
A configuration text file (map parameters.txt), loaded at runtime, defines several display aspects. This file eases the burden of moving the Receptionist to a different environment by providing the following setup options: map image file name, origin x and y coordinates on the map
image, and conversion ratio from meters to map pixels. This text file also provides the means to
configure aesthetic related aspects of the map: Robot image file name, Robot’s diameter, goal
image file name, trajectory line color and with, and laser sweep color.
This panel also provides two buttons – “Pinpoint Destination” and “Place Robot” – that while
selected and upon pressing a location in the map and dragging to select a orientation, submit an
instruction through the /itfc userCommand send port with ’g’ or ’p’ as identifier characters, and
the selected coordinates, to define a destination goal or the Robot’s believed position.
The other available controls are zoom related: with the “Zoom” button one can zoom in and
out of the map; with the “x2” and “x4” buttons, the zoom level can be shifted between two and
four times the map image’s original size; while activated, the “Track Robot” button sets the Robot’s
current position as the zoom focus point, keeping the Receptionist in the center of the viewable
zoomed map; one can manually change the zoom focus point by pressing and dragging the map
image, while in zoom mode.
Figure 6.6: Two representations of the “Map” Panel. left – no zoom; right – zoom 4x
43
6. On-screen Interface and Speech Syntheses
6.3.6
Status Panel
In this panel (figure 6.4), several system related data is presented, from the Receptionist’s
point of view:
• In the center, a representation of the Robot is presented;
• The numbered black circumferences with increasing radii and centered on the Robot represent distance ranges in meters;
• The green area represents the last laser sweep;
• The blue circle represents the person’s position as perceived by the People Detection module;
• The blue vertical and red horizontal arrows, both with origin in the center of the panel,
represent the current linear and angular velocities. These are also numerically displayed in
the upper right corner of the panel;
• The drawn representation of a battery represents the tablet PC’s current battery capacity;
• In the bottom left corner, Coordination module’s status are presented: the current mode of
operation, the current Autonomous mode’s active state, and the last transition that led to the
referred state.
6.3.7
Cams Panel
This panel (figure 6.4) exhibits, almost in real time, the images captured by both cameras that
are featured in the Receptionist’s platform (the one present in the omnidirectional vision system
– bottommost image – and the one used for face detection – topmost image –, see chapter 4 for
details on these cameras).
On the images captured by the face detection camera, the detected faces are encircled by a
red circumference with the same radius as the detected face.
In order to seize the images captured by the cameras and displayed through the /faceCam send
and /omniCam send ports, two threads are launched when this panel is selected from its tab. Each
thread connects the /itfc faceCam rcv or /itfc omniCam rcv port to the corresponding camera
port, and actively waits for the streamed images. Upon arrival of subsequent images, only the
even or odd columns are alternately updated in the image that will be displayed, resulting in faster
image update and preservation of system resources, with low image distortion. When this panel’s
tab is unselected, both threads disconnect the ports and terminate.
44
6.4 Display Data Update
6.4
Display Data Update
Almost all the data displayed in the interface is captured through the /itfc displayData rcv
port, which handles incoming data from all the system’s modules (except the Speech Recognition
module). The DisplayDataUpdateThread thread, launched at the interface startup, actively waits
for new data to arrive to the referred port, and captures and stores it by replacing older samples
of the same data type. Only the data types that are currently being used are updated, in order to
avoid unnecessary data processing. The following data/message types, identified by a character,
are expected by this thread:
• ’t’ – Trajectory. The first three doubles following the identifier character represent the Robot’s
location coordinates; the last two doubles represent the current goal’s x and y coordinates,
if any is defined; the variable number of pairs of doubles between these two sets are the
waypoints’ x and y coordinates;
• ’l’ – Laser sweep. The identifier character is followed by N doubles with the ranges of each
sample, where N is the number of samples per sweep;
• ’v’ – Robot velocities, the identifier character is followed by the linear and angular velocity;
• ’p’ – Person’s position in polar coordinates with the pole in the Robot’s center and the polar
axis oriented as the Robot’s front. The identifier character is followed by the radial and
angular coordinates;
• ’f’ – Person’s face position. The identifier character is followed by the face’s x and y coordinates (the origin of the coordinate system is the top left corner of the images captured by
the camera) and its radius;
• ’s’ – Coordination’s current state. The identifier character is followed by three strings: the
current mode of operation, the current Autonomous mode’s active state, and the last transition that led to the referred state.
6.5
Dialog Tasks Control
To handle all tasks related with the dialog between the Receptionist and the user, incoming
through the /itfc dialogData rcv port, the DialogThread thread was created.
In order to display the dialog data to the user in an organized manner, newly arrived tasks are
inserted in a queue and are submitted as soon as the next task in the queue finishes.
The following types of tasks, identified by characters, are received through the referred port:
• ’r’ – Receptionist’s lines of speech. A variable number of pairs of strings follow the identifier
character. The first string of each pair indicates the emotion with which the Robot’s line in
45
6. On-screen Interface and Speech Syntheses
the second string should be expressed. These “expression” and “line” pairs are presented
in the text control in the Dialog panel, and a SMIL-script is built and submitted to the Face
panel’s task queue, so that they can be expressed;
• ’u’ – User’s line of speech, carried in the string following the identifier character, and submitted to the text control in the Dialog Panel;
• ’o’ – User’s options of speech. These are contained in the variable number of strings that
follow the identifier character, and are submitted to the list box in the Dialog panel;
• ’s’ – SMIL-script, contained in the string following the identifier character, and submitted to
the the Face panel’s task queue. This type of instruction is used when it is intended for the
face to display a noiseless expression (e.g., blinking).
6.6
Random Expression generator
A person’s face, even when it is not speaking or expressing any emotion in particular, is not
a static element “carved like stone” – there are always involuntary expressions present. While
playing a SMIL-script, Xface’s engine introduces random head movements and blinking, but when
no animation is being played the face is static.
To avoid the referred situation, the ExpressionGenerator process was developed. This process
randomly submits SMIL-scripts through the /itfc randomExpression send port, corresponding
to expression animations, using the C programming language’s pseudo random number generator function (rand) where the CPU time is used as the first generated number’s seed, and the
previously generated numbers are used as seeds for the following generation.
This process loads a configuration text file (expressions file.txt) that defines the expression generation period, the file names of the expressions’ SMIL-scripts and the corresponding
probability of being submitted on each generation period.
46
7
Coordination
Contents
7.1 Behavior Model Selection . . . . . . . . . . . . . . . . . . . . . . . . . . . . . . 48
7.2 Model Architecture . . . . . . . . . . . . . . . . . . . . . . . . . . . . . . . . . . 51
7.3 Data Reception and Event triggering . . . . . . . . . . . . . . . . . . . . . . . . 55
47
7. Coordination
Through communication with all other system’s modules but the Face Detection module, the
Coordination module is responsible for controlling the Receptionist’s overall behavior.
It has been decided that the Receptionist robot should be able to function in two different
modes of operation:
• The Autonomous mode where the Robot should behave as a receptionist, by autonomously
performing as mentioned in section 3.1, where the tasks that the Receptionist has to execute
are described. While in this mode, the user can interact with the Robot by speech or through
the Dialog panel (section 6.3.2).
• The Manual mode should be considered as a method of demonstrating particular Robot
features, providing a way for the Robot to perform direct instructions. In this mode, the
Robot is static and waiting for any manual commands submitted through the Command or
Map panels (described in sections 6.3.3 and 6.3.5 respectively).
7.1
Behavior Model Selection
Considering the Receptionist’s requirements for the Autonomous mode of operation, a Finite
State Machine (FSM) [5] was considered the best choice as the model of behavior to be used for
the Receptionist’s automation needs.
Several software packages (presented in section 7.1.1), where considered for this module’s
development. Even though such a tool is not essential, since state machines can be implemented
using regular programming functionalities like switch statements and transition matrices, it assists
in developing a more organized, easier to follow and to understand source code, as well as easing
the task of maintaining and modifying the state machine as needed.
7.1.1
Considered Software Packages
The following software packages mentioned in this section were considered for supporting this
modules implementation. The use of other toolkits was also deliberated (FSMGenerator [25] and
Nunni FSM Generator1 ), but these present an approach very similar, yet not quite as well featured,
to the one used by the FSM tool discussed in section 7.1.1.A (these do not offer a behavior model
with as much functionalities or support for as many programming languages).
7.1.1.A
SMC – The State Machine Compiler
The SMC toolkit2 , developed since 1991, provides the necessary tools to implement state
machine applications in several different programming languages.
1 http://www.nunnisoft.ch/nunnifsmgen/en/home.jsp
2 http://smc.sourceforge.net
48
(last retrieved in 09/2008)
(last retrieved in 09/2008)
7.1 Behavior Model Selection
This toolkit supports several capacities also featured in Augmented Transition Networks [26]
like jump transitions, transition guards, push/pop transitions, and default transitions, as well as
other advance features like transition arguments and entry, exit and transition actions.
In a general way, the process of development used by this toolkit consists on designing a state
machines on a SMC’s .sm file using an appropriate syntax, followed by this files compilation using
an included tool written in Java, generating source code for one of the supported programming
languages. This source code can now be associated with the source code written by the developer, that by usage of particular calls, can trigger transitions defined is the generated source
code, resulting in state changes and in the eventual call of routines associated with that transition
or the new state, but implemented by the developer in his source code. This kind of architecture,
where the state machine implementation is decoupled from the rest of the source code, makes it
easier to maintain/alter the state machine configuration.
7.1.1.B
UML StateWizard
UML StateWisard3 used to be a commercial product, but it is currently covered by GNU’s
Lesser General Public License.
This toolkit acts like a Visual C++ add-in and provides a Unified Modeling Language (UML)
statecharts [9] programming mechanism (UML statecharts are succinctly described in section
7.1.1.C).
It integrates two modeling tools, accessible through the Visual C++ environment. The first
is the State Tree (figure 7.1 in the right), where each of the system’s states is represented with
its associated child states, transitions and Entry and Exit actions branching down from it. The
second tool is the State Chart, which presents a graphical representation of the system’s states,
with child states contained inside their parent states, and the transitions connecting these states.
State Charts can be drawn from a particular state’s point of view, in which case it only represents
its child states and associated transitions.
The UML StateWizard regular process of model development is performed through the two
mentioned tools, which support state and transition creation/manipulation. This tools dynamically
translates the abstractly defined statechart that is being implemented into C++ source code, using
this toolkit’s specific macros to define the behavior model, and a high level class to store the
states’ and transitions’ actions/routines, in the form of class members. Both these tools facilitate
navigation through the source code, since they provide the means to directly access the displayed
elements definition locations.
UML StateWizard’s developers publicize their toolkit’s reverse engineering and round-trip engineering capabilities, resulting from the fact that source code synchronization with the State Chart
and State Tree is performed in both ways.
3 http://www.intelliwizard.com/
(last retrieved in 09/2008)
49
7. Coordination
Figure 7.1: Representation example of the StateWizard’s State Chart (in the left) and State Tree (in the right)
for a sample applications
The provided state machine engine is based on a cross-platform OS API library, for Linux/Win32.
While in a Windows platform, Win32 events are supported as a trigger for the systems transitions.
7.1.1.C
UML statecharts
UML statecharts derive from the ones defined by Harel [27, 28], and add to conventional FSM
the following features:
• State hierarchy levels – This feature permits for whole state machines to be contained in
higher rank states, so called composite states. Transitions from states in different branches
of the state hierarchical tree are allowed;
• Orthogonal states – These are composite states which are composed by two or more concurrent sub state machines that run in parallel, this concept also introduces the so called
compound transitions, which can either be fork or join transitions (from one state to several
or from several to one, respectively) or a combination of both (UML StateWizard implements
these transitions by use of “pseudostates”);
• History transitions – This type of transitions permits re-entering the state that was active
before the current one;
• Transition guards – These guards are conditions associated with each specific transition,
that have to be fulfilled before the transition can trigger (when its corresponding event occurs);
• Timers – Used to implement time bounds in states (like timeouts), triggering transitions;
• Actions (do not necessarily correspond to function/routine executions but usually do) –
50
7.2 Model Architecture
These are associated with transitions and states, and there are four kinds of actions that
can be defined:
– Entry and Exit actions which are activated as soon as the corresponding state is activated or deactivated, respectively;
– Do actions that are executed while the system is in that particular state. These are
not directly supported by UML StateWizard, but on the other hand, this toolkit supports
Internal transitions, which differ from regular transitions with the same state defined
as origin and destination, in the fact that the state’s Exit and Entry actions are not
triggered;
– Transition actions which are performed when the corresponding transition is triggered.
These are performed after the previous state Exit action and before the new state Entry
action.
7.1.1.D
Outcome
As can be concluded from both toolkits descriptions, UML StateWizard presents a different
approach from the one used by the SMC FSM tool, where it concerns model implementation in
source code. Although SMC state machine configuration is much more decoupled from the rest
of the application’s implementation, UML StateWizard synchronization and navigation capabilities
between modeling tools and the source code provides the same (or better) level of accessibility in
altering the state machine’s configuration.
Where it concerns the behavior model’s features supported by each toolkit, UML statechart’s
Hierarchical structure is convenient for the system at hand, since it permits the two modes of
operation (Autonomous mode and Manual mode) to be modeled in the same architecture as the
Autonomous mode state model, as top level states.
History transitions are also an interesting feature for the Receptionist intended behavior, since
it provides the means to, while in Manual mode, return to the Autonomous mode state that was
active before a manual command was issued.
Timers provide the means to implement the required timeouts to reset the Autonomous mode’s
state machine in case a person leaves in an unexpected situation.
The previous considerations resulted in the adoption of UML StateWizard to model and implement the Robots behavior.
7.2
Model Architecture
The designed UML statechart model features three hierarchy levels with specific conceptual
significance.
51
7. Coordination
7.2.1
Modes of Operation Hierarchy Layer
The top level layer implements the Receptionists two possible modes of operation, modeled by
two states (AutonomousMode and ManualMode), and features a third state (Booting) which is exited
as soon as all system modules’ ports are connected, meaning that the Receptionist is ready to
operate (figure 7.2).
Figure 7.2: Modes hierarchy layer statechart
Upon exiting the Booting state, the state machine transits to the ManualMode state. In this
state, all manual commands emitted by the On-screen Interface and Speech Syntheses module
(chapter 6) are handled by the following set of internal transitions (which are presented in a regular
transition like syntax – “transition triggering event” / “action”):
• GoToCoordinates / Go to received coordinates;
• PlaceInCoordinates / Place robot at received coordinates;
• PauseContinue / Stops/resumes the last previously defined course;
• GoToPlace / Go to received room string;
• ResetAutonomousMode / Define Going2Base as the ManualMode->AutonomousMode history transition end state;
• TurnOff / Signals the Linux computer to shutdown, run script for all modules termination,
shuts down computer;
• GoToBaseAndTurnOff / Go to base, and signals flag for TurnOff event triggering upon arrival
to base;
• Reboot / Signals the Linux computer to reboot, run script for all modules termination, reboots
computer.
The behavior performed by the Receptionist robot while in the AutonomousMode state is modeled by a lower level sub state machine, which is further discussed in section 7.2.2.
52
7.2 Model Architecture
7.2.2
Autonomous Behavior Hierarchy Layer
At this hierarchy level, all individual behaviors that make up the receptionist overall behavior
are modeled by states, and transitions between these states are triggered mainly by external
events (some particular events are triggered by internal transitions) that are fired upon arrival
of specific data through this module’s ports (data reception and event triggering is described is
section 7.3). In figure 7.3 this layer’s statechart is presented.
Figure 7.3: Autonomous behavior hierarchy layer statechart. Where SR and ITFC refer to the Speech
Recognition and On-screen Interface and Speech Synthesis modules.
In order to ease the chore of moving the Receptionist to a different environment, rather than
having the list of accessible rooms hard coded in the source code, this list is accessed through
the rooms.txt text file. This data is required to, while in the Where2Go state, submit the available options of destination to the On-screen Interface and Speech Synthesis module, as well
as to decode the user’s selected destination, since only the destination index is returned to the
Coordination module (see section 7.3 for this module’s data reception details).
Besides the regular transitions represented in the referred figure, this layer’s states feature the
following internal transitions, which are presented in an organized by state manner:
• WaitForAcknowledge, MightRequireFurtherAssistance:
– UserAnswers / if user answered affirmatively, trigger UserIsInterested event, if negatively, trigger UserIsNotInterested event;
7.2.3
User Feedback Confirmation Hierarchy Layer
In order to handle the uncertainty associated with the Speech Recognition module’s recognized speech, required whenever user feedback is requested by the Receptionist, the general
purpose state machine represented in figure 7.4 was developed. This state machine purpose is
53
7. Coordination
to ask the user for a confirmation in case the recognizer is not sure of the speech that was comprehended, in which case the Speech Recognition module returns a confidence value lower than
one (see section 5.4 for a detailed description of the data returned by the referred module).
Figure 7.4: User feedback confirmation hierarchy layer statechart. Where SR and ITFC refer to the Speech
Recognition and On-screen Interface and Speech Synthesis modules.
Since the confirmation procedure is meant to be employed in several Autonomous behavior
statechart’s states, its design was developed so that it could be reused in each of the these states
as a sub state machine. Even though UML statechart models do not support multi parenthood,
and so the same state machine cannot directly be enclosed in more than one higher level state,
this model has been developed in order for the same state structure, transition events, and action
routines to be reused.
This layer’s state machine structure is supported by the following list of internal transitions,
which are presented in an organized by state manner:
• WaitForFeedback:
– FeedbackGoodConfidence / Submit user speech sequence to the on-screen interface;
trigger UserAnswers event;
• Confirm, Confirm2:
– FeedbackGoodConfidence / Submit affirmative or negative user answer; If affirmative
trigger UserAnswers event, if negative trigger No event and ask to repeat spoken text;
– FeedbackNormalConfidence / Submit affirmative or negative user answer; If affirmative
trigger UserAnswers event, if negative trigger No event and ask to repeat spoken text;
• ConfirmInterface:
– FeedbackGoodConfidence / Submit affirmative or negative user answer; If affirmative
trigger UserAnswers event, if negative trigger No event and ask to repeat spoken text.
54
7.3 Data Reception and Event triggering
7.3
Data Reception and Event triggering
Most of the events used to activate this module statechart’s transitions are triggered by incoming data from the other system’s modules through a set of read ports.
Since the UML statewisard framework action processing cannot afford to be disrupted by
regular YARP port’s read function calls, which wait’s for new data to arrive, YARP’s data reception callback functionality was employed. By defining a class for each reception port that
inherits from YARP’s PortReader class (and associating it with a specific port by calling the
port::SetReader()), one can specify a routine (which is implemented by the defined class’ read
method) to be ran whenever new data arrives to that port.
This module’s ports and associated messages, as well as the statechart events that are triggered by specific message types, are presented in appendix C.
55
7. Coordination
56
8
System Integration
Contents
8.1 System Startup . . . . . . . . . . . . . . . . . . . . . . . . . . . . . . . . . . . . 58
8.2 Overall system performance analysis . . . . . . . . . . . . . . . . . . . . . . . 58
57
8. System Integration
8.1
System Startup
Upon development of all system’s individual modules, the next necessary step consists on
their integration. The overall system architecture is defined in chapter 3, and in appendix A all
system ports and respective connections are presented.
Where the Receptionist startup is concerned, in appendix D the run receptionist.bat script
file is presented. This file is ran at the Receptionist’s Tablet PC startup, and is responsible for
launching all modules handled by this computer, as well as to establish all systems YARP connections except the ones where the /omniCam send or the /faceCam send ports are one of the
connection’s members.
The Navigation and Localization module setup is handled by a Linux script file, presented
in [1], which is launched at the on-board computer startup, and waits for the YARP server to be
ran in the tablet PC, before running this modules processes.
The order by which each module is ran is the one defined in the run receptionist.bat script,
where the Coordination is the last module to be launched, in order to guaranty that all other
modules are already operational by the time Coordenation is ready to operate.
8.2
Overall system performance analysis
In order to evaluate how well the Receptionist performs both tasks to which it was designed
(to function as a receptionist on the floor where it is stationed, and to serve as a demonstration
platform of its robotic capacities), two different test scenarios were considered, where three users
that fit the profile of the Robot’s target audience (section 1.1) are requested to interact with the
platform and perform a set of predefined tasks.
8.2.1
Receptionist Test Scenario
This test scenario aims at evaluating the Robot’s capacity to function as an interactive identity,
which purpose is to address incoming persons and to serve them.
The Receptionist is initially stationed at its “base” position (in a corner at the elevators lobby),
and the test subjects, which do not have any previous knowledge of the Receptionist behavior
or of its interface (besides the fact that the Robot recognizes speech commands and features a
touch screen interface), are asked to approach the Receptionist and interact with it in order to
request that it takes them to the toilet.
The users are only free to ask any questions before the test starts, no questions are allowed
while performing the requested task.
The test subject is closely watched while performing the referred task, in order to register any
unexpected reactions to the Receptionist’s behavior.
58
8.2 Overall system performance analysis
Upon finishing the requested task, each user is questioned about their opinion concerning the
Robot’s capacity to perform as intended, by numerically classifying from 1 to 5 (where 1 is the
lowest rate) each of the following topics:
• Interface ease of use;
• Overall system Robustness;
• Displayed information interest considering the task at hand;
The users are also welcome to express any comments or suggestions concerning the robot
platform.
Figure 8.1: Graphic representation of the receptionist test scenario. The blue and orange circles represent
the user and robot initial positions; the green and red arrows represent the user approach course and the
Receptionist general trajectory to the toilets.
8.2.2
Demonstration Test Scenario
This test scenario focuses on evaluating how intuitive and accessible it is to issue direct commands to the Robot through it’s on-screen interface, and how well it performs the requested tasks.
Before the test subjects know the tasks they will be asked to perform, they are submitted to
a comprehensive explanation/demonstration concerning the Receptionist’s overall capacities and
it’s on-screen interface functionalities. As soon as the users know the tasks to be performed, they
are not allowed to ask any questions, during the presentation they are free to do so.
59
8. System Integration
In this test scenario the Receptionist is booted while stationed at the top left corridor’s corner
of the map (facing down). Considering this initial state of events, the user is asked to perform the
following tasks:
1. Indicate to the Robot its current position correctly (at system startup, the Receptionist’s
default position is at “base”);
2. Instruct the Robot to go to the lower left corridor’s corner of the map and follow it;
3. As soon as the Robot passes the 6.09 room door, instruct the robot to stop;
4. Instruct the Robot to go to a specific person’s office.
Just like it happens with the previous test scenario: the test subjected is closely watched
for particular reactions; the time it takes to perform each task is registered and compared with
reference values; the users are asked to answer the same questions as before, but this time
concerning these particular functionalities of the robot. They are also free to express any comments/suggestions concerning the tested robot features.
Figure 8.2: Graphic representation of the demonstration test scenario. The blue, orange, and crossed
circles represent the user and robot initial positions, and the position where the Robot initially assumes
to be located; the green, red, and blue arrows represent the user redefinition of the Robot’s position, the
first trajectory defined by the user, and the last Robot’s course, which starts where the user interrupted the
Robot’s previous course.
60
8.2 Overall system performance analysis
8.2.3
Test Results
The time it took for each test subject to perform each required step to achieve both desired
goals is registered in 8.1 and 8.3, and compared with the set of reference values obtained by the
author of this thesis (which is familiarized with the platform and has optimized his interaction with
it), while performing the same task.
Test Scenario
Receptionist
Demonstration
Step
St1
St2
St3
St1
St2
St3
St4
St5
Ref.
12
9
45
6
5
22
9
69
1
42
44
46
50
32
28
38
71
2
19
51
45
41
55
24
48
71
Test Subjects
3
min max
*
19
42
51
44
51
41
41
46
105 41
105
25
25
55
25
24
28
31
31
48
73
71
73
mean
30.5
48.7
44.0
65.3
37.3
25.7
39.0
71.7
Table 8.1: Step times obtained from the system tests. All values are represented in seconds. Step executed condition caption: Receptionist scenario: St1 – “yes” answer successfully submitted when asked
if assistance is required; St2 – “toilet” specification as a destination accepted; St3 – Destination reached.
Demonstration scenario: St1 – Robot’s position specified correctly; St2 – Pin-pointed destination submitted;
St3 – Robot’s course interrupted; St4 – destination as a person submitted; St5 – arrived to destination
Figure 8.3: Graphic representation of the step times obtained from the system tests. In the left – time values
obtained for the receptionist scenario; in the right – time values obtained for the demonstration scenario
In table 8.2, each user judgment concerning the system’s performance in both test scenarios
is presented.
Test Scenario
Receptionist
Demonstration
topic
ease of use
robustness
info available
ease of use
robustness
info available
1
4
5
4
4
5
4
2
3
3
3
3
5
4
Test Subjects
3 min max
3 3
4
3 3
5
4 3
4
4 3
4
4 4
5
5 4
5
mean
3.3
3.7
3.7
3.7
4.7
4.3
Table 8.2: User opinions. All values are represented from a range of 1 to 5.
61
8. System Integration
In the Receptionist test scenario, the test subjects did not react to the on-screen interface
quite as expected. Subjects 1 and 3 generally seemed to overlook it, since the first one initially
ignored the options of speech available and instantly requested to be lead to the toilet, while
subject 3 ignored both what the Robot said and the information available in the Dialog panel,
using directly the “room” button in the Command panel (being this the reason why subject 3’s
St1 time is represented by ’*’ – St2 time value represents the time he/she took to submit the
destination using the alternative method); for this reason, the time results obtained by this subject
in this scenario were not used in the step times mean value calculation.
Subjects 1 and 2 were forced to confirm the requested destination, taking considerably more
time to perform this particular step than the reference subject, whose request was understood at
the first attempt.
As the subjects later confirmed, these results show that: the screen size revealed itself too
small and is positioned too low to catch the users’ full attention; the available options displayed are
not clearly highlighted as such; and the synthesized speech is not completely clear for relatively
long sentences.
Where it concerns the Demonstration scenario, all subjects revealed some difficulty in understanding how to correctly define the Robot’s position, specially its orientation, and none of them
thought to use the zoom functionality to assist in the robot positioning. Another situation that
revealed troublesome consisted on using the graphical interface while the robot was moving, despite the increased size of the “Pause” button relatively to the other buttons. Nevertheless, the
test subjects reacted well to the rest of this scenarios steps, and confirmed that the next time they
performed a similar task they would be surer on how to use the interface.
The test subjects’ judgment presented in table 8.2 reveal that subjects 2 and 3 felt more at
ease while interacting with the robot in the more direct and command oriented demonstration
scenario, where no oral communication, and the uncertainty associated with it, is involved. Subject
1 seemed content with both scenarios.
Other general comments performed by the test subjects include:
• “Two windows displaying the same set of tabs is confusing” (subject 2) – This duplicative
design decision is consciously taken as less intuitive, nevertheless, only this test subject
showed confusion concerning this design.
• “The screen is very low, I have to bend so i can reach it.” (subject 3) – It was originally planed
to position the tablet PC on top of the omni-directional vision system, where it would be
more accessible, but this concept was discarded for it was considered that such a structural
option could compromise the Receptionist’s overall stability by elevating the structure’s mass
center.
• “I would rather use a pen to interact with the on-screen interface” (subject 3), “It’s hard to use
62
8.2 Overall system performance analysis
the finger in the interface” (subject 2) – Even though it was decided that no device should be
required to interact with the on-screen interface, the tablet PC used in the Receptionist was
originally designed to be operated using the included pen device, and so its sensibility to the
direct finger touch is not perfect (it might require some practice). The small size of certain
widget elements (e.g., scroll bars), which no scaling support is offered by wxWidgets [12],
also negatively affects interaction.
While experimenting with the Receptionist platform, several general and unexpected stability
issues have been detected:
• In unpredictable situations, a destination command issued by the Coordination module to
the Navigation and Localization module results in the termination of the second module.
• Considering the Speech recognition module, when several subsequent sentences are spoken while a recognition is being performed and before a recognition result is issued, SAPI
seems to stack this audio data and use it in the following recognition requests, resulting in
unexpected recognition results.
• The On-screen interface process presents a memory leak, consuming increasingly more
memory every time a speech/expression sequence is played. The source of this leakage
appears to be in Xface’s core libraries, since their face player application suffers from the
same problem.
63
8. System Integration
64
9
Conclusion
Contents
9.1 Future work
. . . . . . . . . . . . . . . . . . . . . . . . . . . . . . . . . . . . . . 66
65
9. Conclusion
All predefined requirements to successfully implement this project’s autonomous robot were
achieved.
In an initial stage of development, by analysis of the preestablished objectives defined for this
project, critical conception decisions were taken concerning the Receptionist’s overall system. It
was settled that the Robot would have a modular architecture and the set of different modules that
it would feature were defined, as well as the mechanism they would use for communication.
The robotic platform used in this project was successfully modified in order to adapt it to the
receptionist’s needs, implying the acquisition and assembly of several hardware devices on the
original platform.
Human-robot interaction and coordination capabilities were implemented in the Receptionist
through the development of the Speech Recognition, On-screen Interface and Speech Synthesis, and Coordination modules. The development of these modules implied the use/adaption of
several software packages, as well as the development of unique design solutions.
The Speech Recognition module was successfully employed, but the set of tests performed on
several different speakers revealed that this module is not completely reliable in terms of recognition performance.
The On-screen Interface and Speech Synthesis module’s usability, besides particular design
issues that could be still resolved/improved, showed itself to be sufficient for the level of interaction
required by the Receptionist.
All modules have been successfully integrated through the implemented Coordination module,
resulting in an overall working system that can be migrated with small effort to different locations.
Nevertheless, the system still demonstrates punctual instability situations that should be resolved
in the future.
9.1
Future work
The Receptionist robot resulting from this project provides the perfect platform to support and
test algorithms/solutions in several research areas of autonomous robotics (e.g., navigation, autonomous control, human-robot interaction). Thanks to the robot’s modularity, new modules can
easily be added to the system’s architecture, or alternatively, the existing ones can be replaced
by improved solutions.
In an effort to further improve the Receptionist’s human-robot interaction capabilities, it might
be interesting to supply it with face or voice recognition functionalities, which would enable the
Robot to provide a more personalized interaction experience to the user. It would also be interesting if, upon encountering an unknown user, the Robot could autonomously capture a visual
sample of the user’s face (using the Robot’s face detection capabilities to segment it), or a sound
sample of the user’s speech, and extract unique features from this sample data in order to add this
66
9.1 Future work
person to the Receptionist’s database. Sound and visual data could also be used to detect the
user moods/expressions, providing the means for the Robot to adapt its own interaction approach
accordingly (by, for example, mimicking the user’s face expressions or commenting on the user’s
mood)
Considering the Receptionist’s Coordination module’s architecture, new and complex modes
of operation can be added in a strait forward way using the adopted abstraction hierarchy layers.
It might be interesting to develop an operation mode where the robot platform would be used
as a sentinel, performing regular rounds around a specific floor, looking for abnormal situations
(such as unauthorized personnel). Upon detection of such a situation, the Robot would report
it to a stationed human security guard, which could take control of the robot platform in order to
further investigate the cause of alarm. Communication between the Robot and the operator could
be performed using YARP and through the table PC’s Wireless network card.
67
9. Conclusion
68
Bibliography
[1] A. C. Aleixo, “Receptionist robot: Navigation and image processing,” Master’s thesis, Instituto
Superior Tcnico, Under Preparation.
[2] A. Aleixo, M. Malhado, R. Ventura, and P. Lima, “People detection and tracking in a receptionist robot,” in Proc. of RecPad 2007 - 13a Conferência Portuguesa de Reconhecimento de
Padrões, Lisboa, Portugal, 2007.
[3] A. van Breemen, X. Yan, and B. Meerbeek, “icat: an animated user-interface robot with
personality,” in AAMAS ’05: Proceedings of the fourth international joint conference on
Autonomous agents and multiagent systems. New York, NY, USA: ACM, 2005, pp. 143–144.
[4] R. Simmons, D. Goldberg, A. Goode, M. Montemerlo, N. Roy, B. Sellner, C. Urmson,
M. Bugajska, M. Coblenz, M. Macmahon, D. Perzanowski, I. Horswill, R. Zubek, D. Kortenkamp, B. Wolfe, T. Milam, M. Inc, and B. Maxwell, “Grace: An autonomous robot for the
aaai robot challenge,” AI Magazine, vol. 24, pp. 51–72, 2003.
[5] F. Wagner, Modeling Software with Finite State Machines: A Practical Approach.
FL :
Auerbach: Boca Raton, 2006.
[6] R. Arkin, Behavior-based robotics. The MIT Press, 1998.
[7] N. J. Nilsson, “Shakey the robot,” AI Center, SRI International, 333 Ravenswood Ave., Menlo
Park, CA 94025, Tech. Rep. 323, Apr 1984.
[8] T. Murata, “Petri nets: Properties, analysis and applications,” Proceedings of the IEEE,
vol. 77, no. 4, pp. 541–580, 1989.
[9] M. Samek, Practical UML Statecharts in C/C++, 2nd ed.
Newnes, 2008.
[10] G. Metta, P. Fitzpatrick, and L. Natale, “Yarp: Yet another robot platform,” International
Journal of Advanced Robotics Systems, special issue on Software Development and
Integration in Robotics, vol. 3, no. 1, 2006.
[11] M. Montemerlo, N. Roy, and S. Thrun, “Perspectives on standardization in mobile robot programming: The carnegie mellon navigation (carmen) toolkit,” in In Proc. of the IEEE/RSJ Int.
Conf. on Intelligent Robots and Systems (IROS, 2003, pp. 2436–2441.
69
Bibliography
[12] J. Smart, R. Roebling, V. Zeitlin, R. Dunn, and et al, wxWidgets 2.8.7: A portable C++ and
Python GUI toolkit, 2007.
[13] K. Balci, E. Not, M. Zancanaro, and F. Pianesi, “Xface open source project and smilagent scripting language for creating and animating embodied conversational agents,” in
MULTIMEDIA ’07: Proceedings of the 15th international conference on Multimedia.
New
York, NY, USA: ACM, 2007, pp. 1013–1016.
[14] G. Bradski, “The OpenCV Library,” Dr. Dobbs Journal of Software Tools, 2000.
[15] Nomad Scout User’s Manual, 1999.
[16] P. U. Lima, A. Bonarini, C. Machado, F. M. Marchese, C. F. Marques, F. Ribeiro, and D. G.
Sorrenti, “Omni-directional catadioptric vision for soccer robots,” Robotics and Autonomous
Systems, vol. 36, no. 2-3, pp. 87–102, 2001.
[17] L. Rabiner and B. Juang, “An introduction to hidden markov models,” ASSP Magazine, IEEE
[see also IEEE Signal Processing Magazine], vol. 3, no. 1, pp. 4–16, 1986.
[18] H. Motallebipour and A. Bering, “A spoken dialogue system to control robots,” Department of
Computer Science, Lund Institute of Technology, Lund, Sweden, Tech. Rep., 2003.
[19] H. Gu, J. Li, B. Walter, and E. Chang, “Spoken query for web search and navigation,” in
WWW Posters, 2001.
[20] J. Nielsen, Usability Engineering. San Francisco: Morgan Kaufmann, 1994.
[21] SMIL-AGENT Quick Reference (Synchronized Multichannel Integration Language for a
synthetic Agent), 2005.
[22] K. Balci, M. Guerini, N. Mana, E. Not, F. Pianesi, and M. Zancanaro, Synchronized
Multichannel Integration Language for Synthetic Agents (SMIL-AGENT) 0.1 Specification,
2005.
[23] M. Hoy, D. Wood, M. Loy, J. Elliot, and R. Eckstein, Java Swing.
Sebastopol, CA, USA:
O’Reilly & Associates, Inc., 2002.
[24] J. J. Koenderink, A. J. vanÿDoorn, A. M. L. Kappers, and J. T. Todd, “Pointing out of the
picture,” Perception, vol. 33, pp. 513–530, 2004.
[25] P. Bekkerman, FSMGenerator, Finite State Machine generating software, 2003.
[26] W. A. Woods, “Transition network grammars for natural language analysis,” Commun. ACM,
vol. 13, no. 10, pp. 591–606, October 1970.
70
Bibliography
[27] D. Harel, “Statecharts: A visual formulation for complex systems,” Sci. Comput. Program.,
vol. 8, no. 3, pp. 231–274, 1987.
[28] D. Harel and A. Naamad, “The statemate semantics of statecharts,” ACM Trans. Softw. Eng.
Methodol., vol. 5, no. 4, pp. 293–333, 1996.
71
Bibliography
72
A
Appendix A – System’s YARP ports
and connections
73
A. Appendix A – System’s YARP ports and connections
This appendix features a reference of all system’s YARP ports in an organized by module
manner. The connections associated with each port are also presented (following the sintax:
associated port / connection protocol):
• On-scree Interface and Speech Recognition module:
– /itfc dialogData rcv port:
∗ /itfc randomExpression send / UDP;
∗ /coord dialogData send / TCP;
– /itfc itfcNotification send port:
∗ /coord itfcNotification rcv / TCP;
– /itfc userFeedback send port:
∗ /coord userFeedback send / TCP;
– /itfc userCommand send port:
∗ /coord userCommand rcv / TCP;
– /itfc randomExpression send port:
∗ /itfc dialogData rcv / UDP;
• Speech Recognition module:
– /sr srControl rcv port:
∗ /coord srControl send / TCP;
– /sr userFeedback send port:
∗ /coord userFeedback rcv / TCP;
• Face Detection module:
– /fd faceCam rcv:
∗ /faceCam send / UDP;
– /fd facepos send port:
∗ /itfc displayData rcv / UDP;
• People Detection module:
– /pd omniCam rcv:
∗ /omniCam send / UDP;
– /pd person send port:
∗ /itfc displayData rcv / UDP;
74
∗ /coord personPos rcv / TCP;
• Navigation and Localization module:
– /nav command rcv port:
∗ /coord commandNav send / TCP;
– /nav trajectory send port:
∗ /iftc displayData rcv / UDP;
∗ /coord trajectory rcv / TCP;
– /nav status send port:
∗ /coord navStatus rcv / TCP;
– /nav laser send port:
∗ /iftc displayData rcv / UDP;
– /nav velocity send port:
∗ /iftc displayData rcv / UDP;
• Coordination module:
– /coord srControl send port:
∗ /sr srControl rcv / TCP;
– /coord commandNav send port:
∗ /nav command rcv / TCP;
– /coord dialogData send port:
∗ /itfc dialogData rcv / TCP;
– /coord coordStatus send port:
∗ /iftc displayData rcv / TCP;
– /coord userFeedback rcv port:
∗ /iftc userFeedback send / TCP;
∗ /sr userFeedback send / TCP;
– /coord userCommand rcv port:
∗ /iftc userCommand send / TCP;
– /coord itfcNotification rcv port:
∗ /iftc itfcNotification send / TCP;
– /coord navStatus rcv port:
75
A. Appendix A – System’s YARP ports and connections
∗ /nav status send / TCP;
– /coord trajectory rcv port:
∗ /nav trajectory send / TCP;
– /coord personPos rcv port:
∗ /pd person send / TCP;
• (Hardware Devices):
– /faceCam send:
∗ /fd faceCam rcv / UDP;
– /omniCam send:
∗ /pd omniCam rcv / UDP;
76
B
Appendix B – Speech recognition
language model grammars
77
B. Appendix B – Speech recognition language model grammars
In this appendix both grammars employed in the Speech Recognition module are presented.
yes no.xml:
<GRAMMAR LANGID="409">
<DEFINE>
<ID NAME="OPTION\_00" VAL="0"/>
<ID NAME="OPTION\_01" VAL="1"/>
</DEFINE>
<RULE ID="101" TOPLEVEL="ACTIVE">
<L PROPNAME="yes\_or\_no">
<P VAL="OPTION\_00">Yes</P>
<P VAL="OPTION\_00">Yes please</P>
<P VAL="OPTION\_00">Please yes</P>
<P VAL="OPTION\_01">No</P>
<P VAL="OPTION\_01">No thanks</P>
<P VAL="OPTION\_01">No thank you</P>
</L>
</RULE>
</GRAMMAR>
destination_rooms.xml:
<GRAMMAR LANGID="409">
<DEFINE>
<ID NAME="OPTION\_00" VAL="0"/>
<ID NAME="OPTION\_01" VAL="1"/>
<ID NAME="OPTION\_02" VAL="2"/>
<ID NAME="OPTION\_03" VAL="3"/>
<ID NAME="OPTION\_04" VAL="4"/>
<ID NAME="OPTION\_05" VAL="5"/>
<ID NAME="OPTION\_06" VAL="6"/>
<ID NAME="OPTION\_07" VAL="7"/>
<ID NAME="OPTION\_08" VAL="8"/>
<ID NAME="OPTION\_09" VAL="9"/>
<ID NAME="OPTION\_10" VAL="10"/>
<ID NAME="OPTION\_11" VAL="11"/>
<ID NAME="OPTION\_12" VAL="12"/>
78
<ID NAME="OPTION\_13" VAL="13"/>
<ID NAME="OPTION\_14" VAL="14"/>
<ID NAME="OPTION\_15" VAL="15"/>
<ID NAME="OPTION\_16" VAL="16"/>
<ID NAME="OPTION\_17" VAL="17"/>
<ID NAME="OPTION\_18" VAL="18"/>
<ID NAME="OPTION\_19" VAL="19"/>
<ID NAME="OPTION\_20" VAL="20"/>
<ID NAME="OPTION\_21" VAL="21"/>
<ID NAME="OPTION\_22" VAL="22"/>
<ID NAME="OPTION\_23" VAL="23"/>
<ID NAME="OPTION\_24" VAL="24"/>
</DEFINE>
<RULE ID="101" TOPLEVEL="ACTIVE">
<O>Could you</O>
<O>Please</O>
<L>
<P>Go</P>
<P>Take me</P>
<P>Guide me</P>
<P>Lead me</P>
<P>Show me</P>
<P>Show me the way</P>
</L>
<P>to</P>
<O>the</O>
<O>room</O>
<L PROPNAME="rooms">
<P VAL="OPTION\_00">six one</P>
<P VAL="OPTION\_00">six oh one</P>
<P VAL="OPTION\_01">elevators</P>
<P VAL="OPTION\_01">elevator</P>
<P VAL="OPTION\_01">lift</P>
<P VAL="OPTION\_02">six seven</P>
<P VAL="OPTION\_02">six oh seven</P>
<P VAL="OPTION\_03">six eight</P>
<P VAL="OPTION\_03">six oh eight</P>
79
B. Appendix B – Speech recognition language model grammars
<P VAL="OPTION\_04">six nine</P>
<P VAL="OPTION\_04">six oh nine</P>
<P VAL="OPTION\_05">six ten</P>
<P VAL="OPTION\_06">six eleven</P>
<P VAL="OPTION\_07">six twelve</P>
<P VAL="OPTION\_07">Intelligent Systems Lab</P>
<P VAL="OPTION\_08">six thirtreen</P>
<P VAL="OPTION\_09">south stairs</P>
<P VAL="OPTION\_10">six fourteen</P>
<P VAL="OPTION\_11">toilets</P>
<P VAL="OPTION\_11">toilet</P>
<P VAL="OPTION\_11">bath room</P>
<P VAL="OPTION\_11">loo</P>
<P VAL="OPTION\_12">six fifteen</P>
<P VAL="OPTION\_13">six sixteen</P>
<P VAL="OPTION\_14">six seventeen</P>
<P VAL="OPTION\_14">Fellowship Researcher’s Room</P>
<P VAL="OPTION\_15">six three</P>
<P VAL="OPTION\_15">six oh three</P>
<P VAL="OPTION\_16">six eighteen</P>
<P VAL="OPTION\_17">six nineteen</P>
<P VAL="OPTION\_17">ISR’s informatics Center</P>
<P VAL="OPTION\_18">six twenty</P>
<P VAL="OPTION\_18">Evolutive Systems and Biomedical Engeneering Lab</P>
<P VAL="OPTION\_19">six twenty one</P>
<P VAL="OPTION\_20">six twenty two</P>
<P VAL="OPTION\_20">Laseeb’s Cognitive Physiology Lab</P>
<P VAL="OPTION\_21">six twenty three</P>
<P VAL="OPTION\_21">Aeronautics Group</P>
<P VAL="OPTION\_22">north stairs</P>
<P VAL="OPTION\_23">six twenty four A</P>
<P VAL="OPTION\_24">six twenty four</P>
</L>
</RULE>
</GRAMMAR>
80
C
Appendix C – Coordination
Module’s Ports and Associated
Messages and Statechart Events
81
C. Appendix C – Coordination Module’s Ports and Associated Messages and Statechart
Events
This appendix presents a list of all Coordination module’s ports, as well as the messages
associated with each port and the events which are triggered by specific message types.
The following four ports are used for data reception and event triggering:
• /coord userFeedback rcv
– Message structure – spoken option index (integer, < 0 => not recognized); recognition
confidence (integer, -1 => bad, 0 => normal, 1 => good); recognized speech (string).
– Associated Events (event – received message condition that triggers this event):
∗ FeedbackNotUnderstood – option index < 0;
∗ FeedbackGoodConfidenceId – confidence = 1;
∗ FeedbackNormalConfidenceId – confidence = 0;
∗ FeedbackBadConfidenceId – confidence = -1;
• /coord userCommand rcv
– Message structure – command code (character):
∗ ’n’ – Go to the location specified by the string that follows the identifier character in
the message;
∗ ’s’ – Pause/resume last defined journey;
∗ ’i’ – Reset the Autonomous mode’s state machine;
∗ ’a’ – Resume Autonomous mode;
∗ ’b’ – Go to Base and turn off the system;
∗ ’o’ – Turn off the system;
∗ ’r’ – Reboot the system;
∗ ’v’ – Specify if speech recognition should be or not used, in which case the following
integer is 1 or 0;
∗ ’g’ – Go to the coordinates specified by the three floating point with double precision
(double) values following the coding character;
∗ ’p’ – Set the robots believed position specified by the three double values following
the coding character;
– Associated Events (event – received message condition that triggers this event1 ):
∗ AutonomousModeSelected – message code is ’a’;
∗ ManualModeSelected – message code is different from ’a’ or ’v’;
∗ GoToCoordenates – message code is ’g’;
∗ PlaceInCoordenates – message code is ’p’;
1 the
82
same message might trigger more than one event
∗ GoToPlace – message code is ’n’;
∗ PauseContinue – message code is ’s’;
∗ ResetAutonomous – message code is ’i’;
∗ GoToBaseAndTurnOff – message code is ’b’;
∗ TurnOff – message code is ’o’;
∗ Reboot – message code is ’r’;
• /coord itfcNotification rcv
– Message structure – type of the notification (string); notification status (integer); notification’s origin (integer, 1 if it was locally generated in the On-screen Interface and
Speech Synthesis module, or 2 if it resulted from a remote instruction).
– Associated non statechart event: RobotSpeechFinishedEvent – triggered by a notification with type RESUME PLAYBACK, status 3 (Finished), and origin 2. This module event
is required to detect when a submitted speech sequence finishes being uttered, during
which time this module’s processing is interrupted.
• /coord navStatus rcv
– Message structure – ’s’ character; Navigation and Localization module status (character):
∗ ’m’ – Moving;
∗ ’o’ – Obstacle that the robot cannot circumvent found;
∗ ’g’ – At goal;
∗ ’w’ – At base.
– Associated events (event – received message condition that triggers this event):
∗ DestReached – Previous and current navigation status are ’m’ and ’g’;
∗ ObstacleFound – Previous navigation status was not ’o’ and the current one is ’o’;
∗ TurnOff – Current navigation status is ’w’ and GoToBaseAndTurnOff was the last
issued command;
∗ BaseReached – Previous and current navigation status are ’m’ and ’w’.
• /coord trajectory rcv
– Associated class – TrajectoryReceiver;
– Message structure – ’t’ character; Robot’s current coordinates (3 doubles); A variable
number of values representing waypoints and goal coordinates, not required by this
module.
83
C. Appendix C – Coordination Module’s Ports and Associated Messages and Statechart
Events
– Does not trigger any events, but the Receptionist’s current position is required to turn
towards a person when transiting from StandBy state to WaitForAcknowledg state.
• /coord personPos rcv.
– Message structure – ’p’ character; distance between Robot and detected person (double); detected person angular coordinate relative to the current Robot direction.
– Associated events (event – received message condition that triggers this event):
∗ BootingComplete – First received message. This port is used to trigger the Robot’s
operation startup since it is the last system’s port to be connected.
∗ PersonDetected – Distance between Robot and detected person > 0.
This module features four ports for data submission and other modules’ control:
• /coord srControl send – This port is used for Speech Recognition module control, by issuing
the following commands, coded in a character:
– ’g’ – Load the grammar file which name follows the command identifier character, in
the same message;
– ’r’ – Perform a recognition procedure;
– ’s’ – Stop/interrupt the current recognition procedure.
• /coord commandNav send – Navigation and Localization module control is performed through
this port. The following commands are submitted though this port, identifiable by their coding
character:
– ’g’ – Go to the coordinates specified by the three double values following the coding
character;
– ’n’ – Go to the location specified by the string that follows the identifier character in the
message;
– ’p’ – Set the robots believed position specified by the three double values following the
coding character;
– ’s’ – Stop the robot.
• /coord dialogData send – This port is required to submit speech related data to the Onscreen Interface and Speech Recognition module. The different types of data submitted
trough this port are identifiable by the following set of coding characters:
– ’r’ – Receptionist’s lines of speech. A variable number of pairs of strings follow the
identifier character. The first string of each pair indicates the emotion with which the
Robot’s line in the second string should be expressed;
84
– ’u’ – User’s line of speech, carried in the string following the identifier character;
– ’o’ – User’s options of speech. These are contained in the variable number of strings
that follow the identifier character;
• /coord coordStatus send – Used to submit the Coordination module status. This port’s messages are coded with a ’s’ character, which is followed by three strings: the current mode of
operation, the current/last Autonomous mode’s active state, and the last transition that led
to the referred state.
85
C. Appendix C – Coordination Module’s Ports and Associated Messages and Statechart
Events
86
D
Appendix D – System Startup Script
87
D. Appendix D – System Startup Script
In this appendix the run receptionist.bat script file, ran in the tablet PC at system start up,
is presented. This script begins by launching the YARP server process, and then progressively
runs all system’s modules, waiting for each module’s ports to be launched before running the following module, and performs all inter module connections:
START yarp server
SLEEP 5
cd D:\receptionist programs\Cara VS7\xface wx287 2tabs comCord\xface\wxFacePlayer\Release
START XfacePlayer.exe
cd D:\receptionist programs\Cara VS7\xface wx287 2tabs comCord\xface\expressionGenerator\Release
START ExpressionGenerator.exe
yarp wait /itfc dialogData rcv
yarp wait /itfc itfcNotification send
yarp wait /itfc userFeedback send
yarp wait /itfc userCommand send
yarp wait /itfc randomExpression send
yarp connect /itfc randomExpression send /itfc dialogData rcv ”udp”
cd D:\receptionist programs\SR VS7\release
START SR.exe
yarp wait /sr srControl rcv
yarp wait /sr userFeedback send
START D:\receptionist programs\camara\release\cam
START D:\receptionist programs\omni cam\release\omni
yarp wait /faceCam send
yarp wait /omniCam send
cd D:\receptionist programs\facedetect\release
START facedetect.cmd
yarp wait /fd facepos send
yarp connect /fd facepos send /itfc displayData rcv ”udp”
cd D:\receptionist programs\people detection\release
START ppl detection.exe
yarp wait /pd person send
yarp connect /pd person send /itfc displayData rcv ”udp”
88
yarp wait /nav command rcv
yarp wait /nav trajectory send
yarp wait /nav status send
yarp wait /nav laser send
yarp wait /nav velocity send
yarp connect /nav trajectory send /itfc displayData rcv ”udp”
yarp connect /nav status send /itfc displayData rcv ”udp”
yarp connect /nav laser send /itfc displayData rcv ”udp”
yarp connect /nav velocity send /itfc displayData rcv ”udp”
cd D:\receptionist programs\Coordenation\Coordenation\Debug
START Coordenation.exe
yarp wait /coord srControl send
yarp connect /coord srControl send /sr srControl rcv
yarp wait /coord commandNav send
yarp connect /coord commandNav send /nav command rcv
yarp wait /coord dialogData send
yarp connect /coord dialogData send /itfc dialogData rcv
yarp wait /coord coordStatus send
yarp connect /coord coordStatus send /itfc displayData rcv
yarp wait /coord userFeedback rcv
yarp connect /itfc userFeedback send /coord userFeedback rcv
yarp connect /sr userFeedback send /coord userFeedback rcv
yarp wait /coord userCommand rcv
yarp connect /itfc userCommand send /coord userCommand rcv
yarp wait /coord itfcNotification rcv
yarp connect /itfc itfcNotification send /coord itfcNotification rcv
yarp wait /coord navStatus rcv
yarp connect /nav status send /coord navStatus rcv
yarp wait /coord trajectory rcv
yarp connect /nav trajectory send /coord trajectory rcv
yarp wait /coord personPos rcv
yarp connect /pd person send /coord personPos rcv
89
D. Appendix D – System Startup Script
90