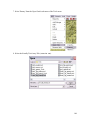
1
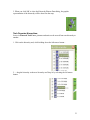
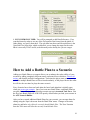
Building Armored Task Force Scenarios
This tutorial walks you through the process of creating and editing scenarios for
Armored Task Force using the ATF Scenario Builder and ATF Power Toolkit. With
these tools you can do just about anything we can do to create add-ons and new scenarios
for Armored Task Force. In short, these are the most powerful and easy-to-use mod
tools we have ever created for a ProSIM Company product.
ATF Scenario Builder
The ATF Scenario Builder provides all of the tools you will need to build full featured
scenarios with existing maps and databases. With it, you can build units and hierarchies,
create enemy Battle Plans, and create detailed Faction AI scripts to challenge ATF
players who play your scenario. Here is a list of some of the many tasks you can
accomplish with this powerful tool.
•
•
•
•
•
•
•
•
•
•
•
•
•
•
•
•
•
•
•
•
•
•
•
•
•
•
•
Create a new scenario
Save a scenario
Edit the Environment component
Edit the Maneuver Graphics and Enemy SITTEMP
Edit the Mission Components
Create an Event Box
Add a Unit Package
Edit a hierarchy
Copy units
Add a block of obstacles
Add a block of holes
Edit an enemy path
Create a hierarchy
Add the Company Wave Attack mission
Add the Attack by Fire mission
Cancel a mission
Add the Position Area Mission
Create a Faction AI script
Add an AI Time Limit condition
Edit a Faction AI script
Add an Event Box Condition
Edit an AI Phase Order
Use the clock to test a scenario
Add a Toggle/Cancel Toggle Order
Add a Battle Plan to a scenario
Add an OPORD to a scenario
Flip a scenario.
1
How to Create a New Scenario
A scenario is a collection of files which go together to define every aspect of the play
experience for a single game of Armored Task Force. Some files, such as maps and
databases (created using the ATF Power Toolkit), are used across multiple scenarios.
Some files, such as unit lists and graphics, are specific to a single scenario. These are the
files that are edited using the ATF Scenario Builder.
It will surprise you to find out, however, that there is a minimum of file management
involved in building a scenario. All of the scenario components are edited from within
the scenario editor and managed transparently to you as you work. All of the scenario
file names are generated automatically based on the file title you input during the create
process. So, as long as you have all of the files in the 'Data' sub-directory of the
Armored Task Force install directory (which the Scenario Builder will do
automatically), they will run fine in the game.
Should you wish to share your handiwork with other ATF players, just zip all of the files
that begin with your file title into a single zip file and they are ready to share with the
world. For players to use them, they just need to unzip the package into the 'Data' subdirectory of their own Armored Task Force install directory
The first step in creating a new scenarios is, well, creating a new scenario. Luckily, the
ATF Scenario Builder includes an easy-to-use wizard which walks you through the
entire process.
Use the Scenario Wizard to Create a New Scenario:
We are going to use the ATF Scenario Builder to create a new scenario. Whenever we
want to stop building our scenario for a while, we just use the 'Save' function. Then, in
order to start editing again, we just re-open the ATF Scenario Builder, and select 'Open
an Existing Scenario' from the opening dialog.
1. Start the ATF Scenario Builder.
2
2. Select 'Create an All New Scenario' from the opening window.
3. You will be prompted to enter a file title for the scenario. The scenario editor will not
allow you to use file titles that were used for scenarios that shipped with Armored Task
Force.
4. Enter a name. If you use a title from an ATF scenario that shipped with the game, you
will be prompted to enter another one.
3
5. Next you will be prompted to enter a scenario display name. Again, the scenario editor
will not allow you to use display names that were used for scenarios that shipped with
Armored Task Force.
6. Enter the display name for your scenario.
7. Now you need to select the map to use for the scenario. For a map to be usable by
Armored Task Force, all of its files must be in the 'Data' sub-directory of the Armored
Task Force install directory.
4
8. Select the map.
9. The OPORD for a scenario is written in either HTML or Plain Text format in an editor
outside of the ATF Scenario Builder. We are going to wait to add the order. See Add
an OPORD to a Scenario.
10. Next, you must enter the 'base time' for the scenario. This is the time that appears in
the clock window as 'game time' at the beginning of the game.
5
11. Enter a time. You can change it later by selecting the 'Base Time' function from the
'Time' menu.
12. You are done creating a new scenario! In the rest of the tutorial we will just continue
to add additional objects and instructions to the scenario we have just created.
How to Save a Scenario
Save your scenario often! Even with all of the great tools available in the ATF Scenario
Builder, it still takes some work to create a scenario. And nothing is worse than having
to redo work because you forgot to save it.
The 'Save' function allows you to stop working to continue later in a new session. After
you have saved your scenario, it is safe to close the ATF Scenario Builder (if you forget
to save, the editor will prompt you to save before you exit). To continue working on your
scenario later, just start up the Scenario Builder again and select 'Open an Existing
Scenario' from the opening dialog.
Save Your Scenario:
Saving a scenario is no different than in any other Windows application. What you can't
see is that the scenario editor is also saving each component file in the scenario, to ensure
changes are not lost.
6
1. Select 'Save', either from the toolbar or the 'File' menu.
2. The first time you save the scenario, the editor will ask you to confirm the file title of
the scenario you are saving. We do not recommend changing this name. Changing this
name will not change the name of the entire subordinate files in the scenario, and will
make the individual files in the scenario harder to find.
How to Edit the Environment Component
The Environment Component describes all of the conditions under which the scenario
will be played, including wind speed and when the sun will go up and down.
7
Edit the Environment Component:
1. To edit the environment, select 'Environment' from the 'Component' menu.
2. Input the environment data. All times are 24-hour, military times.
•
•
•
•
•
•
•
•
•
•
•
Temperature. In degrees Fahrenheit. Affects how long smoke and chemicals
remain on the ground.
Relative Humidity. Also affects smoke and chemicals.
Wind Speed. In meters per second. Describes how smoke moves across the
map. Also effects how long chemicals remain on the ground.
Wind Direction. Given in mils (0-6400, 0 is north, measured clockwise). The
direction smoke moves on the ground.
Percent Illumination. When the moon is up, describes how much residual
visibility is available.
BMNT. Before Morning Nautical Twilight. The time, before sunrise, at which
the sun begins providing ambient illumination.
Sunrise, Sunset. Self-explanatory.
EENT. Early Evening Nautical Twilight. The time, after sunset, at which he sun
stops providing ambient illumination.
Moon Is Up? During hours of darkness, whether or not to use the Percent
Illumination entry.
Is Night? Obsolete. No entry required.
Events. Not yet implemented.
8
How to Edit Maneuver Graphics and
Enemy SITTEMP
Maneuver Graphics provide boundaries in which you intend the player to play, tell him
where he can initially place his forces, and orient him on an objective for the mission.
When referenced in the OPORD, they give him all of the information he needs to play the
scenario.
For a complete description of the maneuver graphics that are used in the US military, see
the Armored Task Force User's Manual and FM 101-5-1, which ships with Armored
Task Force in electronic format, on the CD.
The steps for editing the Enemy SITTEMP (which gives the player an idea of how the
enemy may be arrayed) are identical except that, instead of initially selecting 'Maneuver
Graphics', you select 'Enemy SITTEMP' from the 'Component'-'OPORD'-'Edit' menu.
Initiate The Graphics Edit Mode:
Initially, your scenario does not have Maneuver Graphics. However, adding a Maneuver
Graphics component is done automatically by the editor when you begin the process of
editing the graphics.
9
1. Select 'Component', 'OPORD', 'Edit', and 'Maneuver Graphics'.
Change the Pen Width:
All graphics (Maneuver and Enemy SITTEMP) are drawn with the current 'pen'. By
setting the width of the pen, you can change the thickness of all subsequent lines drawn
while editing. Each graphic object you draw 'remembers' what pen width it was drawn
with and will always draw itself with that pen width.
1. Select 'Pen Width', either from the toolbar or from the 'OPORD' sub-menu of the
'Component' menu.
10
2. Enter a number corresponding to the number of pixels for lines in subsequently created
graphics.
Draw a Line on the Graphics:
The line is the most basic object you will create to build graphics. A line is defined by a
number of points that you identify on the map. Each point you identify will be
highlighted with a green square.
1. Select 'Line', either from the toolbar or from the 'OPORD' sub-menu of the
'Component' menu.
2. Begin left-clicking on the map to indicate the points in the line.
11
3. Right-click anywhere on the map when you are done drawing.
Draw Rectangles and Circles:
Circles and rectangles indicate important locations such as artillery position areas,
objectives, and attack positions. The ATF Scenario Builder makes it easy to build them.
1. Select 'Rectangle', either from the toolbar or from the 'OPORD' sub-menu of the
'Component' menu.
2. Left-click on the location of one of the corners of the rectangle and, while holding
down the left mouse button, drag to the opposite corner of the rectangle. Release the left
mouse button when you are done drawing the box.
12
3. The circle is drawn in exactly the same way except that you select 'Circle', either from
the toolbar or from the 'OPORD' sub-menu of the 'Component' menu.
Draw Text:
The Text Tool allows you to add text to your maneuver graphics, so that you can
reference objects from the Maneuver Graphics in your OPORD.
13
1. Select 'Text', either from the toolbar or from the 'OPORD' sub-menu of the
'Component' menu.
2. Enter the text you wish to have displayed on the screen.
3. Move the cursor to the map and you will find that it is dragging a Text object around
the map. When it is where you want it, left-click once to 'drop' the object in position.
Copy Graphic Objects:
The ATF Scenario Builder makes it easy to draw a large number of similar graphics
quickly by copying or cutting objects from one location and pasting them in multiple
locations elsewhere.
1. Select an object or group of objects either by clicking on one object, shift-clicking on
multiple objects, or drag-clicking over a group of Graphic objects.
14
2. Select 'Copy' either from the toolbar or from the 'OPORD' sub-menu of the
'Component' menu. To cut the object or group of objects, select 'Cut' instead.
Paste Copied Graphic Objects:
Once you have copied graphics, the 'Paste' function will become active. This allows you
to place any number of copies of the copied graphics on the map.
1. Select 'Paste' either from the toolbar or from the 'OPORD' sub-menu of the
'Component' menu.
2. When you move the cursor to the map, you will find that it is dragging a copy of the
copied graphics around the map. When the copy is where you want it, left-click once to
'drop' the copy in position.
Edit the Enemy SITTEMP or End Editing:
To edit the Enemy SITTEMP component, Select 'Enemy SITTEMP' either from the
toolbar or from the 'Edit' sub-menu of the 'OPORD' sub-menu of the 'Component' menu.
To cancel editing of graphics select the currently selected graphics type (Maneuver
Graphics if you are editing the Maneuver Graphics, Enemy SITTEMP if you are editing
the SITTEMP). Or, you can hit the 'ESC' key.
15
How to Edit the Mission Components
Mission components give ATF important information about the basic orientation of
forces. It also tells Armored Task Force what conditions the player must meet in order
to win the game. Finally, it is one of the places where the Display Name for the scenario
is located (the other is with the OPORD), and the short description of the scenario which
is displayed in the opening dialog of ATF, when the player is selecting a scenario.
There are three Mission components: Friendly, Enemy, and Neutral. Only the Friendly
component needs to be completely filled out. The only important data for the Enemy and
Neutral Mission components is the 'Global Direction'. The other entries are not currently
implemented or used.
Edit the Friendly Mission Component:
The Friendly Mission is the most important Mission Component. It defines the victory
conditions, the win-loss messages, the scenario description, and the friendly global
direction. In this example, we are going to set victory conditions for a defensive
scenario. An attack victory condition will use the 'Objective Ellipse' to define the ground
the player must control to win, instead.
1. Select 'Edit Friendly' from the 'Mission' sub-menu of the 'Component' menu.
16
2. Fill out the basic data in the Mission Edit dialog.
•
•
•
•
Mission Name. This is filled in automatically by the Scenario Wizard. It is the
name displayed in the title bar of Armored Task Force when the scenario is
loaded. If you wish to change it, you must also change the value in the OPORD
dialog.
Global Direction. In mils (0-6400, 0 is north, clockwise angle). This is the basic
orientation direction of the friendly player's force (the direction of attack or
defense to face the enemy).
Victory Message. This is the message displayed in the Results window if the
player wins the mission.
Loss Message. This is the message displayed in the Results window if the player
loses the mission.
After the form is completed, select 'Add' to begin adding Victory Conditions.
3. When the 'Time Limit' condition is placed in the Victory Conditions box, it means that
the player must 'hold on' until the defined time. When it is in the Loss Conditions box, it
means the player must achieve the victory conditions before that time, or he cannot win.
17
4. Enter the time limit. Since this is in the Victory Conditions box, it means that the
player must defend beyond this time.
5. Now we are going to add the Loss Conditions. Before this step, we need to define an
'Event Box'.
An Event Box is just a box defined on the ground. It is used by conditions to look at
regions of the map.
If you need to define an Event Box, select OK, define the Event Box, and then re-select
the 'Edit Friendly' function.
Now select 'Add' from the 'Loss Conditions'
18
6. The 'Prevent Penetration Box' condition counts the number of enemy units in a defined
Event Box and is 'true' when the enemy count is equal to or exceeds the defined number.
19
7. Fill out the form for the Prevent Penetration Box.
•
•
•
Penetration Box. This is the name of the 'No Pen Line'. It is displayed with the
Mission Objectives and Results in the 'Results Window'.
Number of Enemy. When this number of enemy are within the defined box, the
Prevent Penetration Box will be 'True'
Enemy Maneuver Only. When this box is checked, Armored Task Force will
only count enemy maneuver vehicles, not non-maneuver vehicles such as
engineer and artillery units.
8. We're done! Select 'OK'.
20
Edit the Neutral and Enemy Mission Components:
The only values used in the Neutral and Enemy Mission Components are the Global
Directions. Even if you do not plan on adding Neutral units to the scenario, it is a good
idea to fill in the Global Direction (use the same direction as the Friendly Global
Direction), in case someone modifies your scenario by adding Neutral units later.
1. Select 'Edit Neutral' from the 'Mission' sub-menu of the 'Component' menu.
2. You do not have to fill out the entire Mission Edit dialog.
•
•
Mission Name. This is filled in automatically by the Scenario Wizard. It is not
used by Armored Task Force. Changing it has no effect.
Global Direction. In mils (0-6400, 0 is north, clockwise angle). This is the basic
orientation direction of the neutral units (the direction of attack or defense to face
the enemy). It will normally be the same as the Friendly Global Direction.
21
3. Select 'Edit Enemy' from the 'Mission' sub-menu of the 'Component' menu.
22
4. Again, you do not have to fill out the entire Mission Edit dialog.
•
•
Mission Name. This is filled in automatically by the Scenario Wizard. It is not
used by Armored Task Force. Changing it has no effect.
Global Direction. In mils (0-6400, 0 is north, clockwise angle). This is the basic
orientation direction of the neutral units (the direction of attack or defense to face
the player's forces). It will normally be 3200 mils different from the Friendly
Global Direction.
How to Create an Event Box
An Event Box is just a rectangular region that you designate on the ground. It is used
when creating conditions either for Mission Components or Faction AI, to tell Armored
Task Force what region to look at to test a condition.
23
You can Create an Event Ellipse in the same way, except that you select 'Ellipse' instead
of 'Box' from the 'Event' menu. Event Ellipses are identical to Event Boxes, except that
they are elliptical rather than rectangular. There are also only a limited number of
conditions that use Ellipses.
Create an Event Box:
1. Select the 'Box' function from the 'Event' menu in the ATF Scenario Builder. The
currently defined Event Box will be displayed in Blue, if applicable. If that is the box
you want, you can select the 'Box' menu item again (or hit the 'Esc' key) to cancel the
process of defining a new event box.
2. Click on one of the corners of the box and then, while holding the left mouse button
down, drag to the opposite corner of the box. Release the left mouse button when you are
complete.
How to Add a Unit Package
A unit package is a pre-defined order of battle for a company or platoon organization.
The ATF Scenario Builder contains pre-defined packages for just about every kind of
heavy US and FSU (Former Soviet Union) task organization imaginable, from Attack
24
Aviation Companies to Engineer Platoons. This prevents you from having to manually
create platoons and companies, one unit at a time.
Of course, not every possible organization is defined. Sometimes you will have to build
hierarchies from scratch. But the Unit Package can definitely give you a head start.
NOTE: In Armored Task Force, enemy platoons are represented on the map and in
windows as companies, and companies as battalions. Besides this, in every respect, they
behave just as friendly hierarchies.
Add a Unit Package:
1. Select 'Friendly' from the 'Add Package' sub-menu of the 'Unit' menu.
2. Select the type of unit package you wish to add.
25
3. If you select a company, you will be prompted to give a company name. If you select
a platoon, you will be prompted to give a platoon and company name.
4. Enter a name. This company name will be applied to every unit and hierarchy in the
package.
5. You will also be prompted to add a battalion and regimental name.
6. Enter a name. Again, this will be added to every unit and hierarchy.
26
7. When you move the cursor down to the map, you will find that you are 'dragging' a
line of units and hierarchies. Left-click anywhere on the map to 'drop' these units and
hierarchies where you want them.
Add an Enemy Unit Package:
The process for adding an Enemy Unit Package is exactly the same except that, initially,
you select 'Enemy' from the 'Add Package' sub-menu of the 'Unit' menu.
Delete Units and Hierarchies:
In creating the friendly order of battle that you want, you may find that you need to
remove some units and hierarchies added either manually or while adding a Unit
Package. This is an even simpler process then adding units!
27
1. Select the units and/or hierarchies you wish to delete, either by shift-clicking on them,
clicking on them, or drag-clicking over them.
2. Select 'Delete' from the 'Unit' menu.
3. The ATF Scenario Builder will ask you if you are sure you want to delete the units.
If you are, select 'Yes'.
28
4. While the 'Delete' function is active, any unit or hierarchy you click on will be selected
for deletion. When you are done deleting units, make sure you select 'Delete' from the
'Unit' menu (or 'Esc') to turn it off.
How to Edit a Hierarchy
A Hierarchy is an object that represents either a platoon or a company. It contains units
and hierarchies which represent the hierarchy's subordinate units. In the ATF Scenario
Builder hierarchies are generated either manually or during the process of adding a Unit
Package. From the Hierarchy Tree window, you can edit the appearance or attributes of
a hierarchy, no matter how it is created.
NOTE: In Armored Task Force, enemy platoons are represented on the map and in
windows as companies, and companies as battalions. Besides this, in every respect, they
behave just as friendly hierarchies.
Open the Hierarchy Tree Window:
While hierarchies are visible on the map, they can only be edited from the Hierarchy Tree
window. While, in Armored Task Force, there is only a friendly Hierarchy Tree
window, in ATF Scenario Builder, there are three Hierarchy Tree windows: Friendly,
Enemy, and Neutral.
29
1. Select 'Friendly' from the 'Hierarchy Tree' sub-menu of the 'View' menu.
Edit a Hierarchy:
On the map, hierarchies are depicted by flags or NATO piece markers. When you add a
Unit Package, it may or may not have the correct flag and, even if it does have the correct
flag, it will almost certainly not be labeled correctly. To fix the problem, you will have to
edit the appearance of the hierarchy.
To begin editing a hierarchy, right-click on it in the Hierarchy Tree window, and select
'Edit'.
1. To change the attributes or appearance of a hierarchy, make changes in the Hierarchy
Platoon or Company Data dialog.
•
•
•
•
•
•
•
•
•
Name. The screen name of the hierarchy, which appears both in the Hierarchy
Tree window and in the 'tool tip' labels on the map.
Max Units. The maximum number of directly subordinate units or hierarchies
under this hierarchy (both units and platoon hierarchies, but not subordinate
platoon's units).
Spacing. The distance between units in the hierarchy while in formation (in tens
of meters).
Command Radius. Not currently implemented.
Command and Control, BOS Flags. These flags are combined to determine what
kinds of formations and Missions are available to this hierarchy.
NATO Piece. The NATO symbol that represents the hierarchy, both in the
Hierarchy Tree and on the map.
Graphic Piece. The 'Flag' that represents the hierarchy on the map when vehicles
are visible.
Graphic Label Piece. The number or letter that is displayed on the flag.
Destroyed NATO and Graphic Piece. Not implemented.
30
•
Locked? If this box is checked, hierarchies and units can not be added to or
removed from the hierarchy.
2. To change the flag, click on the 'Graphic Piece' button and select a piece of the type
'..._flag'.
31
3. To change the letter or number on the flag, select 'Graphic Label Piece'...
4. ... And select a piece with a name of the form '..._label'.
32
5. When you click 'OK' to close the Hierarchy Platoon Data dialog, the graphic
representation of the hierarchy will be altered on the map.
Task Organize Hierarchies:
Just as in Armored Task Force, platoons and units can be moved from one hierarchy to
another.
1. Click on the hierarchy and, while holding down the left-mouse button...
2. ... drag the hierarchy to the new hierarchy and 'drop' it by releasing the left mouse
button.
33
Edit a Unit in the Hierarchy Tree:
Units are also represented in the Hierarchy Tree window. Their attributes effect not only
how they are depicted in the Hierarchy Tree, but also how they are depicted on the map
when NATO icons are selected. These attributes also effect the unit's ability to lead
hierarchies.
1. Right-click on a unit in the Hierarchy Tree and select 'Edit'.
2. Now you can alter the attributes of the unit.
•
•
•
Name. The name of the unit. This will supersede any name set for the unit on the
map.
Rank. If the unit also has 'Platoon Leader Capable' or 'Company Commander
Capable' set, this number sets the order of precedence in which this unit will
assume command of the hierarchy of which it is a part. For instance, a unit with a
Rank of 1 will assume command before a unit with a Rank of 2. A zero or
negative Rank will override the leader settings and prevent this unit from
assuming command.
Platoon Leader Capable, Company Commander Capable. If one of these is
checked, and the unit has a positive Rank, the unit will assume command of the
hierarchy of which it is a direct member, unless a unit with a lower Rank is
present. Obviously 'Platoon Leaders' can only lead platoons and 'Company
Commanders' can only command companies.
34
•
•
•
NATO Piece. The NATO icon which represents the unit both on the map and in
the Hierarchy Tree. This setting will override settings for the vehicle type of the
unit.
Graphic Piece, Destroyed NATO Piece, Destroyed Graphic Piece. Not
implemented.
Locked? If checked, the unit can not be moved from its current hierarchy to
another hierarchy or out of all hierarchies.
How to Copy Units
If you wish to create a mirror image of units and hierarchies that you have already
created, you can use the Unit Copy features of the ATF Scenario Builder.
Copy Units:
First, we need to copy the units we want to copy to the clipboard. This will allow us to
paste any number of copies of the units and hierarchies to the scenario. You can even
copy friendly units and hierarchies to the neutral or enemy Unit Lists.
35
1. Select the units and hierarchies you wish to copy either by clicking on them, shiftclicking on them or drag-clicking over them.
2. Once the units you want to copy are selected, you are ready to copy them.
36
3. Select 'Copy' from the 'Unit' menu. Now the units are stored on the clipboard and
ready to paste to any Unit List, any number of times.
Paste Units to the Scenario:
Once units are stored in the clipboard, they can be pasted to any of the Unit Lists in the
scenario. We are going to do the most common action, pasting copied units to the list
from which they were copied.
1. Select 'Friendly' from the 'Paste' sub-menu of the 'Unit' menu.
37
2. ATF Scenario Builder alerts you whenever units or hierarchies have duplicate
names. You will need to provide new names for the copied units.
3. For each copied unit or hierarchy, you will be prompted to change the name. Select a
new name for each and select 'OK'.
4. The new units will be pasted in the exact same location as that at which the copied
units were copied. They will also be selected as a group.
38
5. 'Grab' one of the units or hierarchies in the group by left-clicking on it and 'drag' it to
the new desired location.
How to Add a Block of Obstacles
Obstacles are an important facet of Armored Task Force scenarios. They either allow
the player to canalize the enemy if he is defending or form a hurdle for him to overcome
if he is attacking.
While you can add obstacles manually, it is easiest to add them in 'blocks'.
Add a Block of Obstacles:
39
1. Select 'Friendly' from the 'Block Add' sub-menu of the 'Obstacle' menu.
2. The attributes in the Obstacle dialog will be applied to every obstacle in the block that
you create.
•
•
•
•
•
Length, Width. The size (in tens of meters) of the obstacles.
Attitude. The orientation of the length of the obstacle in mils (0-6400, 0 is north,
clockwise angle).
Obstacle Type. The type of obstacle effects what type of breaching vehicle can
breach it and, in the case of Road Craters, the shape of the obstacle and when it
becomes effective.
Density. A very low density obstacle will only stop a percentage of the vehicles
that pass through it.
Time to Fire. Only used with Road Craters.
40
3. You will be prompted to enter the total number of obstacles.
4. You will also be prompted to enter the number of rows of obstacles in the block.
5. When you move the cursor to the map, you will find that you are dragging a block of
obstacles with the attributes you specified. Left-click anywhere on the map to 'drop' the
obstacles in position.
How to Add a Block of Holes
Holes, in Armored Task Force, provide protected fighting positions to enhance the
survivability of either the player's or enemy's vehicles. They are an integral part of a
combined-arms defense in modern warfare.
You can add holes manually, one at a time. But the easiest way to add holes to your
scenario is using the 'Block Add' functions.
Add a Block of Holes:
41
1. Select 'Friendly' from the 'Block Add' sub-menu of the 'Hole' menu.
2. The Hole Properties dialog allows you to edit the attributes of all of the holes you are
adding.
•
•
Hole Type. All holes are either for dismounts or for vehicles, and the two are not
interchangeable.
Direction. The orientation of the hole in mils (0-6400, 0 is north, clockwise
angle)
3. Enter the total number of holes you want to add.
4. Enter the total number of rows you want the holes arrayed into.
42
5. When you move the cursor back to the map, you will find that you are dragging a
block of holes. Left-click on the place in which you want to 'drop' the holes.
How to Edit an Enemy Path
The basic method for building a Faction AI script is to first, plan paths for enemy
hierarchies, then plan Missions for enemy hierarchies, and then, finally, create a Faction
AI that triggers units to begin movement and execute Missions as triggers are met.
The first step in creating an enemy battle plan to challenge the player is planning paths
for enemy units. Obviously, if the enemy is defending in the scenario, you need only
place the units and plan the commitment of a reserve. But in our example, to make things
interesting, we will have the enemy attack to destroy the defending player.
Planning a path for an enemy unit or hierarchy is almost the same as doing so for friendly
units and hierarchies, except that all 'stop' nodes have 'cancel times', at time at which they
revert to 'go' nodes. This allows you to create a kind of 'poor man's AI' if you do not
want to script a simple move.
Edit an Enemy Path:
43
1. Select 'Show Path' either from the toolbar or the 'Edit' menu.
2. Select a unit or hierarchy by double-clicking on it.
44
3. Plan the path for the unit or hierarchy.
To add a node, left-click on the last node in the path and, while holding down the left
mouse button, drag to the next node location. Release the button to 'drop' a node.
4. To change a node to/from a 'stop' node, right-click on it. When a node is changed to a
'stop' node, you will be prompted to input an elapsed time when it will revert to a 'go'
node. If you don't want it to change, enter a really high number in the 'hours' block such
as 999.
45
5. Select 'Show Path' from the toolbar or 'Edit' menu again to cancel path planning.
How to Create a Hierarchy
Sometimes, no Unit Package will exist to add the type of organization you want to add to
your scenario. In such a case, you are going to have to build a hierarchy from scratch.
No problem! ATF Scenario Builder makes this almost as simple as adding a unit
package.
NOTE: In Armored Task Force, enemy platoons are represented on the map and in
windows as companies, and companies as battalions. Besides this, in every respect, they
behave just as friendly hierarchies.
Add a New Hierarchy:
Before completing this step, make sure that no units or hierarchies are selected as a group
on the map. If they are, ATF Scenario Builder will try to add them to the newly created
hierarchy, which can have unexpected results.
1. Right-click away from any hierarchies or units in the Hierarchy Tree window for the
faction to which you want to add your new hierarchy. Select 'Platoon' from the 'Add'
menu (or 'Company' if you want to add a company).
46
2. To change the attributes or appearance of a hierarchy, make changes in the Hierarchy
Platoon or Company Data dialog.
•
•
•
•
•
•
•
•
•
•
Name. The screen name of the hierarchy, which appears both in the Hierarchy
Tree window and in the 'tooltip' labels on the map.
Max Units. The maximum number of directly subordinate units or hierarchies
under this hierarchy (both units and platoon hierarchies, but not subordinate
platoon's units).
Spacing. The distance between units in the hierarchy while in formation (in tens
of meters).
Command Radius. Not currently implemented.
Command and Control, BOS Flags. These flags are combined to determine what
kinds of formations and Missions are available to this hierarchy.
NATO Piece. The NATO symbol that represents the hierarchy, both in the
Hierarchy Tree and on the map.
Graphic Piece. The 'Flag' that represents the hierarchy on the map when vehicles
are visible.
Graphic Label Piece. The number or letter that is displayed on the flag.
Destroyed NATO and Graphic Piece. Not implemented.
Locked? If this box is checked, hierarchies and units can not be added to or
removed from the hierarchy.
47
3. Select a NATO piece which represents the hierarchy. They are all of the type
'Enemy...' or 'Friendly...' or 'Neutral...'.
48
4. You will also need to select a Graphic Piece and Graphic Label Piece for the
Hierarchy. For more on these attributes, see Edit a Hierarchy.
Copy a Hierarchy:
n the ATF Scenario Builder, there is no 'Copy' function. However, there is a 'Cut'
function, which allows you to cut the hierarchy out of the Hierarchy Tree window and
move it to the clipboard. You can then paste any number of copies of the hierarchy back
to the Hierarchy Tree.
We recommend that you only Cut and Paste empty hierarchies. Cutting and Pasting
hierarchies that contain Platoons and Units can have unexpected results.
49
1. Right-click on a hierarchy (again, we suggest, empty) and select 'Cut'.
2. Now, right-click anywhere on the Hierarchy Tree away from units and hierarchies and
select 'Paste'.
50
3. To add a second copy of the hierarchy, again right-click anywhere on the Hierarchy
Tree away from units and hierarchies and select 'Paste'.
4. The ATF Scenario Builder will not allow you to create a hierarchy with a duplicate
name. Select 'Yes' to change the name of the second hierarchy...
5. ... And change the name to finish the process.
51
How to Add a Company Wave Attack
Mission
The basic method for building a Faction AI script is to first, plan paths for enemy
hierarchies, then plan Missions for enemy hierarchies, and then, finally, create a Faction
AI that triggers units to begin movement and execute Missions as triggers are met.
Now that we have planned all of the enemy paths, it is time to begin planning Missions
for enemy hierarchies. If an enemy hierarchy, based on the situation, may execute more
than one Mission, we must plan multiple Missions for the hierarchy. After each Mission
is planned, we will cancel the Mission, so that it is not executed until the proper trigger is
met.
The Company Wave Attack Mission is much like the friendly Company Attack to Breach
Mission, except that the enemy, as it gets closer to its objective, will spread out into
wider and wider formations.
Add a Company Wave Attack Mission:
1. Right-click on the hierarchy for which you wish to plan the mission. Select 'Company
Wave Attack to Breach' from the 'Mission' sub-menu.
52
2. Drag-click over the region on the ground which represents the objective for the attack.
Select 'OK'.
3. You can enter an objective or leave it blank. It will make no difference to game play.
It can help you remember where the objective is, though.
4. If you un-check one of these boxes, it will cause the hierarchy to 'skip a step' in the
attack, such as not forming a Support By Fire (SBF) position or not conducting a breach.
53
5. If the hierarchy has dismounts and this box is checked, the unit's dismounts will walk
from their current location to the attacks Operational Rally Point (ORP).
6. Check this box to tell the hierarchy to use its currently planned path (rather than
planning its own path) to the Operational Rally Point.
7. In this order, the 'Platoon' entry is ignored. The 'Company' entry tells the unit what
formation to assume when it gets to the Rally Point.
54
8. Placing a time in this block will cause the hierarchy to delay before executing the
attack.
9. If the hierarchy has mortars or other indirect fire assets attached, this order will tell
them what formation to assume when they reach their firing position.
10. The ATF AI will make an initial estimate of where the obstacles are. When the
hierarchy hits the number of obstacle strikes indicated here, it will recalculate the
assumed obstacle locations based on new evidence.
55
11. The only valid forces here are 'Assault', 'Breach', and 'Support Force'. The indicated
elements will assault through the breach once it is cut.
12. The hierarchy will abort the attack if its forces fall below the given percentage. A
zero means the hierarchy will continue until every vehicle is dead.
13. If the hierarchy does abort, this is the formation it will assume.
56
14. This is the initial formation the unit will use when it initiates the attack. All of these
formations are set to '.None.' in this example because of the severely restricted terrain.
15. And the next formation...
16. ...And the final formation before the ORP.
57
How to Add the Attack By Fire Mission
The basic method for building a Faction AI script is to first, plan paths for enemy
hierarchies, then plan Missions for enemy hierarchies, and then, finally, create a Faction
AI that triggers units to begin movement and execute Missions as triggers are met.
Now that we have planned all of the enemy paths, we will continue planning Missions for
enemy hierarchies. If an enemy hierarchy, based on the situation, may execute more than
one Mission, we must plan multiple Missions for the hierarchy. After each Mission is
planned, we will cancel the Mission, so that it is not executed until the proper trigger is
met.
The 'Attack By Fire' Mission directs a hierarchy to move to a point and assume an
'SBF/Defense' formation oriented in the indicated direction. It is identical to the 'Support
By Fire' mission, except that the hierarchy does not assume a 'Suppress' SOP at the
destination.
Add an Attack By Fire Mission:
1. Right-click on the hierarchy for which you wish to plan the Mission. Select 'Attack By
Fire' from the 'Mission' sub-menu.
58
2. Click on the location where you wish to set the Attack By Fire position and then, with
the left mouse button still down, drag to turn the position to the correct orientation.
3. Drag-click over the area on which you would have the hierarchy orient when it
assumes the 'SBF/Defense' formation.
4. If you check this box and the hierarchy has dismounts, the hierarchy will walk the
entire distance to the Release Point.
59
5. If checked, the hierarchies will as much as possible, use its current path to reach the
Release Point.
6. The hierarchy will use the applicable column (based on its size) to determine the
formation it will assume at the Release Point.
7. The hierarchy will abort the movement if its forces fall below the given percentage. A
zero means the hierarchy will continue until every vehicle is dead.
60
8. If the hierarchy does abort, this is the formation it will assume.
9. The hierarchy will use the applicable column (based on its size) to determine the
formation to reach the Release Point. We use '.None.' because the terrain to the Release
Point is very restrictive.
10. If this box is checked, the hierarchy will dismount at the Release Point and the
dismounts will walk to their positions in the 'SBF/Defense' formation.
61
How to Cancel Mission
The basic method for building a Faction AI script is to first, plan paths for enemy
hierarchies, then plan Missions for enemy hierarchies, and then, finally, create a Faction
AI that triggers units to begin movement and execute Missions as triggers are met.
Cancel a Mission:
When a hierarchy's Mission is canceled, it remembers all of the settings you gave it,
including objectives and locations picked on the map. When the Faction AI re-initiates
the mission, the hierarchy will default to its last Mission settings, and the Mission will be
conducted just as you planned it.
1. Right-click on a hierarchy and select 'None' from the 'Mission' submenu. The unit's
mission will be canceled.
How to Add the Position Area Mission
The basic method for building a Faction AI script is to first, plan paths for enemy
hierarchies, then plan Missions for enemy hierarchies, and then, finally, create a Faction
AI that triggers units to begin movement and execute Missions as triggers are met.
Now that we have planned all of the enemy paths, it is time to continue planning
Missions for enemy hierarchies. If an enemy hierarchy, based on the situation, may
execute more than one Mission, we must plan multiple Missions for the hierarchy. After
each Mission is planned, we will cancel the Mission, so that it is not executed until the
proper trigger is met.
62
The 'Occupy Position Area' Mission is used with mortar, artillery, and air defense
hierarchies to automatically move them to a location to assume the 'Position Area'
formation.
Add the Position Area Mission:
1. Right-click on the hierarchy for which you wish to plan the mission. Select 'Occupy
Position Area' from the 'Mission' sub-menu.
2. Click on the location where you wish to set the position area and then, with the left
mouse button still down; drag to turn the position to the correct orientation.
63
3. If the hierarchy has dismounts and this box is checked, the hierarchy's dismounts will
walk from their current location to the attack's Release Point.
4. Check this box to tell the hierarchy to use its currently planned path (rather than
planning its own path) to the Release Point.
5. The hierarchy will use the applicable column (based on its size) to determine the
formation it will assume at the Release Point.
64
6. The hierarchy will abort the movement if its forces fall below the given percentage.
7. If the hierarchy does abort, this is the formation it will assume.
8. The hierarchy will use the applicable column (based on its size) to determine the
formation to reach the Release Point. We use '.None.' because the terrain to the Release
Point is very restrictive.
65
9. If this box is checked, the hierarchy will dismount at the Release Point and the
dismounts will walk to their positions in the 'Position Area' formation.
How to Create a Faction AI Script
The basic method for building a Faction AI script is to first, plan paths for enemy
hierarchies, then plan Missions for enemy hierarchies, and then, finally, create a Faction
AI that triggers units to begin movement and execute Missions as triggers are met.
Now that we have planned all of the enemy paths, and we have planned and canceled the
Missions for all our hierarchies, it is finally time to start building a Faction AI script. At
its heart, a Faction AI script is just a list of triggers, or conditions that must be met, and
orders to be executed upon those triggers.
The best advice we can give you is keep it simple. The more complicated your script, the
more likely it will break. Think about what you want the enemy to do, and when they
need to do it, and describe it as simply as possible in the script. Unnecessary orders or
triggers almost always have unintended effects.
Create an Enemy Faction AI Script:
Both the Neutral and Enemy Unit Lists have Faction AI's. Our scenario example does
not include Neutral Units, so we will concentrate on building an Enemy Faction AI script.
66
1. Select 'Unit', 'Hierarchy', 'Faction AI', 'Create', and "Enemy'.
2. The AI Order Edit dialog is the foundation for the Faction AI script.
•
•
•
•
•
Order Name. Not used. Can be left blank.
Prerequisite Data. Stuff that you want to store for use throughout the script is
stored here. Most commonly, you will store routes by copying them to the
clipboard and then 'Adding' the 'Route' Data object.
Abort Conditions. The conditions under which the entire script will abort early.
Abort Orders. Final orders that will be given just before the script aborts.
Order Phases. These are operational phases that will be executed in order to
execute the script. A new phase will not start until the previous phase's 'Phase
End Conditions' have been met.
67
Add an Order Phase to the AI Script:
An Order Phase is a set of instructions that are executed at roughly the same time.
Ideally, all of your orders will fit in one phase. However, sometimes simplicity or
necessity will demand that the orders be broken into multiple phases.
68
1. Select 'Add' next to the 'Order Phases'.
2. The AI Order Phase Edit dialog contains all of the components of a phase.
•
•
•
•
Phase Name, Phase Long Description. Provided to help you keep track of what
the script is doing. Not used by the AI or Armored Task Force.
Initiate Hierarchy Orders. Orders that are given as soon as the phase begins. If
this is the first phase, then these orders will be given when time is first started.
Phase End Conditions. The conditions which will cause the phase to end and the
next phase to begin.
Sustain Orders. A set of condition-order combinations that will be constantly
checked as long as the phase is in effect.
69
3. The most common Phase End Condition is an AI Time Limit. This is just an elapsed
time at which the condition becomes true. Select 'Add' from the 'Phase End Conditions'
box, select 'AI Time Limit', and then enter an elapsed time.
Always provide some Phase End Condition! If you do not, the phase will end the first
time it is cycled through.
Add an AI Phase Order:
'Sustain Orders' in the 'AI Order Phases' dialog are all in the form of 'AI Phase
Orders' these are condition-order linkages that execute a list of instructions when the
condition list has been triggered. This is the heart of the 'decision point' tactics the
Armored Task Force AI executes.
70
1. The AI Phase Order Edit dialog allows you to create and edit Phase Orders.
•
•
•
•
Last Order. An order title that allows you to add a memory aid to remember the
purpose of the Phase Order.
Delete After Execution. This will almost always be checked! This tells the AI
Order Phase to delete this Phase Order after it is executed (all of the conditions
are met). If you fail to check this, the hierarchy orders listed will be triggered
repeatedly, without ever getting a chance to execute. Failure to check this box is
the most common cause of bugs in Faction AI scripts.
Order Execution Conditions. This is a list of all of the conditions that must be
'true' before the Hierarchy Orders are executed.
Hierarchy Orders. This is a list of orders, each set to act on a certain hierarchy,
when the 'Order Execution Conditions' are met.
2. The first thing you should do is decide on a condition or conditions for the order. The
trigger for the movement of artillery battalions will be when the elapsed time in
Armored Task Force is 10 minutes. We will set an AI Time Limit condition for this
Phase Order.
71
3. Next we add a Hierarchy Order. The Hierarchy Order Dialog will allow us to do this.
A Hierarchy Order executes an order on a specified hierarchy, unit, or group of units.
You may either specify the hierarchy, unit, or group by name or select a list of codes to
pick the target.
•
•
•
Order Type. This is the order you want executed. More on that in a minute.
Hierarchy Name. If you wish to execute the order on a specific hierarchy or unit
(the most common method), click here to select a name.
Target Code, Echelon. This is a list of toggles which allows you to specify a
target by describing it. These toggles are seldom used and can often have
unexpected result. We recommend selecting a 'Hierarchy Name'.
4. Most commonly, you will use Hierarchy Orders to initiate Missions, which are called
AI Orders by the ATF Scenario Builder. You may also use the 'Toggle Order' or
'Cancel Toggle Order' orders to turn on and off Orders and SOP's such as 'stop' or 'hold
fire'. More on this later.
72
5. You need to pick the 'Mission' you want to execute. Remember that we planned these
Missions previously for our hierarchies. DO NOT give a Mission (AI Order) to a
hierarchy until you have planned it, executed it, and canceled it. Doing so will cause
the unit to act without objectives, locations, or orientations set, having buggy and
unpredictable results. If you need to plan a Mission, close all of the Faction AI windows
by selecting OK, plan the mission, and then come back to this spot to edit the Faction AI.
6. With the order set, we can now specify the hierarchy to which we want the order given.
7. We are telling artillery battalions to move to their Position Areas, so we pick all of the
artillery hierarchies.
73
8. That's it! We have finished building the hierarchy order.
9. If we want the order to use any of the 'Prerequisite Data' from the initial AI Order
dialog, we specify it here. This is most commonly used if we have given the 'Assign
Path' order in our Hierarchy Order dialog. We would specify the stored 'Route' data item
we want to assign here.
10. We can use a single Phase order to give multiple orders to our Faction...
74
11. ... So we are going to use the same Phase Order to order all of our artillery to move at
once.
12. With this phase order completed, we continue to add Sustain Orders until we have all
of the condition-order sets completed that we want to execute in this phase of the battle.
Remember, the AI will continually check all of these sustain orders while this phase is
active, and continually check the Phase End condition. If a Phase Order has 'Delete After
Execution' set (the most common setting), when a Sustain Order is triggered, it will be
executed and deleted. When the Phase End Condition is met, the whole Phase will be
deleted (whether all of the Sustain Orders have been triggered or not) and the next Phase
will begin.
75
13. We have finished adding Phase Orders and this Order Phase is complete.
76
How to Add an Event Box Condition
The basic method for building a Faction AI script is to first, plan paths for enemy
hierarchies, then plan Missions for enemy hierarchies, and then, finally, create a Faction
AI that triggers units to begin movement and execute Missions as triggers are met.
Now that we have planned all of the enemy paths, and we have planned and canceled the
Missions for all our hierarchies, we are building a Faction AI script. At its heart, a
Faction AI script is just a list of triggers, or conditions that must be met, and orders to be
executed upon those triggers.
An 'Event Box' condition is the second most commonly used trigger in a Faction AI
script. It tells Armored Task Force to look at a location on the map, and, when it
contains a specified number of vehicles of a specified group or hierarchy, do something.
Add the Event Box Condition:
The basic steps of the addition of an 'Event Box' condition are to add the event box, add
the condition, and then edit the condition attributes.
1. The first step is to create an Event Box. See Create an Event Box for details on how to
do this.
If you are currently editing a Faction AI, you will have to close it in order to do this.
The 'Event Box' condition will also accept Event Ellipses.
77
2. Now, you can add the condition. The condition can be used wherever conditions are
accepted: 'Abort Conditions' in the base Faction AI, 'Phase End Conditions' for an AI
Order Phase, or 'Order Execution Conditions' in an AI Phase Order.
3. When prompted, select the 'Event Box' condition.
4. This prompt is provided for editing the Faction AI. If you come back and edit the
script, and the correct Event Box is no longer selected, select 'No' and the old Event Box
will be retained in the condition.
78
5. NOT COMMONLY USED. You will be prompted to add Data References. If we
want the condition to use any of the 'Prerequisite Data' from the initial AI Order dialog,
we specify it here. This is most commonly used if we have a large number of events
which all look at the same Event Ellipse location. We create an 'Objective Ellipse' item
in the 'Prerequisite Data'. Then we specify the stored 'Objective Ellipse' data item we
want to look at here.
6. Finally, we tell the condition what we want to look for in the specified location.
•
•
•
•
•
•
•
•
•
Box Name. This is used to help you keep tabs on what Event Box corresponds to
this condition, since no visual cue is provided.
Select the number of vehicles which will make this condition 'true'.
Check Enemy? This is in relation to the Faction! If you are building the
Enemy Faction AI, then checking this block will look at Friendly and Neutral
Faction Vehicles. If you are editing a Neutral Faction AI, checking this block will
look for Enemy Faction Vehicles. Remember, at execution time during a game,
the enemy will only react to what it sees, so your enemy observation plan must be
looking in this box.
Box is Ellipse? Checking this box will cause the condition to set the current
Event Ellipse rather than Event Box as its checked region.
Count Unidentified? If you also have 'Check Enemy' selected, use this to count
both identified and unidentified vehicles in the Event Box.
Referenced Force. Not commonly used. Allows you to specify a force to look
for by reference rather than by specifying a name. Not used in combination with
'Check Enemy’'.
Hierarchy Name. Usually, if you have not selected 'Check Enemy?', you will fill
this box to specify the force you want to count in the Event Box.
Compare How? Determines when this condition is 'true'. Usually, you will use
'Greater Than' and 'Equal To' for conditions. You might use 'Less Than' to
determine when a hierarchy has left the Event Box.
BOS Flags. Only valid with 'Check Enemy'. Counts only vehicles of the
specified type in the count. If nothing is checked, the condition will count all
vehicles.
79
7. Usually, you will select 'Hierarchy Name' and choose the hierarchy in the Faction you
want to count. If 'Hierarchy Name' is left blank, the condition will look at the whole
faction. If 'Check Enemy' is selected, this entry is ignored.
80
8. In this example, we are going to look at an Event Box we drew around the 2S1
Position Area location, for 1 vehicle of the hierarchy '1 / 919 MRR'. If one or more
vehicles are in this box, the condition will return 'true'.
9. With the condition set, we can assign orders to be executed when this condition is true.
81
How to Add an AI Time Limit Condition
The basic method for building a Faction AI script is to first, plan paths for enemy
hierarchies, then plan Missions for enemy hierarchies, and then, finally, create a Faction
AI that triggers units to begin movement and execute Missions as triggers are met.
Now that we have planned all of the enemy paths, and we have planned and canceled the
Missions for all our hierarchies, we are building a Faction AI script. At its heart, a
Faction AI script is just a list of triggers, or conditions that must be met, and orders to be
executed upon those triggers.
An 'AI Time Limit' condition is the most commonly used trigger in a Faction AI script. It
simply tells Armored Task Force to do something at a given elapsed time.
Add an AI Time Limit Condition:
'AI Time Limit' conditions can and will be used anywhere conditions can be inserted.
They will be used for 'Abort Conditions' in the top level AI Order dialog of the Faction
AI, in the 'Phase End Conditions' block of the AI Order Phase dialog, and in the 'Order
Execution Conditions' of an AI Phase Order.
1. The first step in adding an AI Time Limit Condition is to select 'Add' from one of these
blocks...
82
2. ... And then select the 'AI Time Limit' condition.
3. NOT COMMONLY USED. First you will be prompted to add Data References. If
we want the condition to use any of the 'Prerequisite Data' from the initial AI Order
dialog, we specify it here. This is most commonly used if we a large number of events to
happen at the same time (never a good practice, as it bogs down the AI engine). We
create a 'Time' item in the 'Prerequisite Data'. Then we specify the stored 'Time' data
item we want to assign here.
4. We specify the elapsed time at which we want this condition to trigger an action.
How to Edit an AI Phase Order
The basic method for building a Faction AI script is to first, plan paths for enemy
hierarchies, then plan Missions for enemy hierarchies, and then, finally, create a Faction
AI that triggers units to begin movement and execute Missions as triggers are met.
Now that we have planned all of the enemy paths, and we have planned and canceled the
Missions for all our hierarchies, now we are building a Faction AI script. At its heart, a
Faction AI script is just a list of triggers, or conditions that must be met, and orders to be
executed upon those triggers.
83
As we are building our script, and we begin to test it by running the clock, we will
inevitably have to go back to the script and make changes. This topic explains how.
Edit an AI Phase Order:
Prior to the steps of this topic, we must already have re-opened the Faction AI for editing.
1. Select the AI Order Phase that contains the phase order you want to edit. Select the
Phase Order from the 'Sustain Orders' which you want to edit and select 'Edit'.
84
2. To edit a 'Hierarchy Order', select it and click 'Edit'.
3. Changing the hierarchy target for the order is done by clicking 'Hierarchy Name'.
Editing the order is done by selecting 'Order Type'
85
4. This is why it is always a good idea to have a detailed description of what the Phase
Order does in the 'Last Order' block of the Phase Order Edit dialog: The Hierarchy Order
dialog will not tell you what the last Order Type selected was. Select the Order Type you
want, fill out the appropriate Order Edit dialog, and click OK.
5. If you decide to edit an Event Box condition, you will be presented with this dialog.
If you do not have the correct Event Box for this condition currently selected, select
'No'! This will preserve the Event Box that was selected when you originally created the
Event Box condition.
How to Use the Clock to Test a Scenario
The basic method for building a Faction AI script is to first, plan paths for enemy
hierarchies, then plan Missions for enemy hierarchies, and then, finally, create a Faction
AI that triggers units to begin movement and execute Missions as triggers are met.
Now that we have planned all of the enemy paths, planned and canceled the Missions for
all our hierarchies, and built a Faction AI script, it is time to test our Faction AI script to
make sure everything is running correctly. At its heart, a Faction AI script is just a list of
triggers, or conditions that must be met, and orders to be executed upon those triggers.
This is where we make sure that those triggers are set correctly.
86
Use the Clock to Test Your Scenario:
Just as in Armored Task Force, in ATF Scenario Builder you can control when the
clock is started and stopped and at what speed it runs. However, unlike in ATF, in the
Scenario Builder, the clock is not always 'on'. You have to turn it on in order to run
time.
There are three important points to remember when testing your scenario.
•
•
•
CHANGES TO UNITS MADE WHILE THE CLOCK IS ON WILL BE LOST
WHEN THE CLOCK IS TURNED OFF! If you find an error in your scenario,
turn OFF the clock before making changes to correct the problem.
Enemy triggers require an enemy! If you have an Event Box condition set,
with the 'Check Enemy?' box checked, you must have friendly and/or neutral units
(or enemy units if we are talking about a Neutral Faction AI) moved into the
Event Box in order for the trigger to be 'true'. This is the only way to test the
orders that correspond to this trigger.
Remember, if you have an Event Box condition set, with the 'Check Enemy?' box
checked, at execution time during a game, the enemy will only react to what it
sees. Your enemy observation plan must be looking into trigger areas. During
testing, the trigger will be true if there are vehicles there, but during a game of
Armored Task Force, the enemy must SEE vehicles in the Event Box to react.
1. Select 'Clock' from the 'Time' function to turn on the clock.
2. The options from the 'Compression' sub-menu of the 'Time' menu allow you to change
how fast the clock runs. For testing purposes you will usually be able to run the clock at
the fastest setting, '8/1' or eight-to-one.
87
3. To start the clock, select 'Start', either from the toolbar or the 'Time' menu. Before
doing this, make sure you have dragged units into Event Boxes, if needed, to trigger the
orders you want to test.
4. Watch the game run. You are looking to make sure that the Faction AI is doing what
you wanted it to, that no units are moving when they shouldn't be, and that triggers are
behaving as they should. If you need to make changes, turn the clock off first!
88
5. To stop time, select 'Stop', either from the toolbar or the 'Time Menu'.
6. When you are done testing, or you need to make changes before re-testing, select
'Clock' again from the 'Time' menu to turn OFF the clock.
How to Add a Toggle/Cancel Toggle
Order
The basic method for building a Faction AI script is to first, plan paths for enemy
hierarchies, then plan Missions for enemy hierarchies, and then, finally, create a Faction
AI that triggers units to begin movement and execute Missions as triggers are met.
Now that we have planned all of the enemy paths, and we have planned and canceled the
Missions for all our hierarchies, we are building and refining our Faction AI Script. At
its heart, a Faction AI script is just a list of triggers, or conditions that must be met, and
orders to be executed upon those triggers.
One of the simplest and most effective orders you can give to your hierarchies is the
'Toggle' or 'Cancel Toggle Order'. This simply activates or deactivates one of the Orders
or SOP's, such as 'Stop' or 'Hide on Contact' for the entire hierarchy
Add a Cancel Toggle Order to a Hierarchy Order:
89
1. The 'AI Phase Order' consists of a series of conditions and a series of orders, executed
when the conditions are true. Each order in the AI Phase Order is a Hierarchy Order,
consisting of a single order-hierarchy pair. The order is the instruction to be given and
the hierarchy is the target for the order. We are going to change the order for this
Hierarchy Order to a 'Cancel Toggle Order'.
2. We select 'Cancel Toggle Order' from the list. This will turn OFF the Orders or SOP's
we select. If we wanted to turn ON Orders or SOP's, we would select 'Toggle Order'
instead.
3. Select the Orders and SOP's you want to turn off.
'Suppress' can only be turned off. Selecting it with a Toggle Order has no effect.
'Field of Fire' and 'Max Range' can only be turned on with a Toggle Order if they have
previously been set for each unit in the hierarchy. Any unit that has never had this order
set will not respond to the Toggle Order request.
90
4. NOT COMMONLY USED. You will be prompted to add Data References. If we
want the hierarchy order to use any of the 'Prerequisite Data' items from the initial AI
Order dialog, we specify them here. The only data item that would be useful here is the
'Specified Force' data item, which would allow you to change the target for the order.
But it is not really THAT useful; as the hierarchy order already lets you set a target.
How to Add a Battle Plan to a Scenario
Adding new Battle Plans to a scenario allows you to enhance the replay ability of your
scenario by adding completely different enemy and neutral force structures, Faction AI
scripts, and obstacle and hole configurations. Each time the player starts your scenario,
one of the multiple Battle Plans will be selected randomly, so the player has no idea what
he will face the next time he plays the same scenario.
Every Scenario has at least one battle plan, the basic battle plan that is initially open
when you create your scenario. Once you create new Battle Plans, each Battle Plan has
an equal chance of being selected during scenario start up in Armored Task Force. But
the first, base Battle Plan will ALWAYS open by default when you load your scenario in
the ATF Scenario Builder.
After you have created additional Battle Plans for your scenario, you can open them for
editing using the 'Open' sub-menu from the 'Battle Plan' menu. Changes to the units,
obstacles, and holes only effect the currently loaded Battle Plan. The 'Save' function
from the 'File' menu will save the currently loaded Battle Plan.
91
If you choose not to save your changes, they will be lost when you close a Battle Plan to
return to the base Battle Plan (using the 'Close' sub-menu of the 'Battle Plan' menu).
Add a New Battle Plan:
The ATF Scenario Builder completely automates the process of adding a new Battle
Plan to your scenario. It also makes it easy to develop the Battle Plan by allowing you to
start with a copy of the Battle Plan that is currently loaded.
1. Select the 'Enemy' function from the 'New' sub-menu of the 'Battle Plan' menu.
2. You will be prompted to save changes to the currently loaded Battle Plan before you
continue. Select 'Yes'.
3. If you answer 'Yes' to this question, your new Battle Plan will begin with a copy of
your current Unit List. If you select 'No', you will start with a completely blank Unit List
and have to recreate all of the units you want in the Battle Plan.
92
4. If you answer 'Yes' in step 3, answer 'Yes' here! Otherwise, only the units will be
copied, not the platoons and companies that comes with them!
5. If you answer 'Yes' here, any obstacles built for this Faction will be copied to this
Battle Plan.
6. If you answer 'Yes' here, any holes built for this Faction will be copied to this Battle
Plan.
7. That's it! Your new Battle Plan is created, loaded, and ready for editing.
93
8. When you are done editing the Battle Plan, select 'Enemy' from the 'Close' sub-menu
of the 'Battle Plan' menu. You can Open it again for editing at any time from the 'Open'
sub-menu.
How to Add an OPORD to a Scenario
Well, we are just about finished building our scenario. The only thing left to do is to add
our OPORD (Operations Order). An OPORD is a document, usually in Plain Text or
HTML format that our scenario will display when it is opened. The OPORD gives the
player all of the background information, objectives, and restrictions for your scenario.
Because it is in HTML format, you can add any pictures or objects you want to the
OPORD very easily.
You can also add the OPORD when you create your new scenario. But we think it makes
more sense to do it here, at the end of the process because, when you start, you have not
created all of the Maneuver Graphics, units, and other objects you will reference in your
OPORD.
Add an OPORD to a Scenario:
The ATF Scenario Builder does not include a text or HTML editor, so you will have to
use some third party software to write your OPORD, before importing it into your
scenario. The OPORD must be in the 'Data' sub-directory of the Armored Task Force
install directory to be used by an ATF scenario.
1. Write your OPORD using some third party software and save it in the 'Data' subdirectory of the Armored Task Force install directory.
We recommend saving the file using the same file title you specified when creating the
new scenario, as it will make it easier to identify that this file is part of the scenario.
94
2. Select 'Component', 'OPORD', 'Edit', and 'Order'.
3. The Operations Order dialog will allow you to designate the OPORD file for this
scenario. The 'Mission' block was filled in by the Scenario Wizard when you created a
new scenario. Changing the name here will only change the title on the OPORD
window, when the OPORD is displayed in Armored Task Force.
95
Select 'Orders Page'.
4. Select the OPORD file that you created in step 1.
5. That's it. Select 'OK' and the OPORD will now be included in the Scenario.
How to 'Flip' a Scenario
Unlike some other wargames, the AI is so complex in Armored Task Force that all
scenarios cannot, by default, be played as either side. However, it is a very simple
matter, using the ATF Scenario Builder for anyone to 'flip' a scenario; that is, make the
player forces into 'enemy' forces and the enemy forces into player forces, in order to play
as the 'other side' in a scenario..
96
The remainder of this topic discusses the particulars of 'flipping' a scenario, but, in
general, the steps are as follows:
•
•
•
•
•
Make a copy of the original scenario and save it.
Flip the friendly and enemy forces.
Flip the friendly and enemy obstacles.
Flip the friendly and enemy holes.
Flip the components, battle plans, and AI scripts.
Make a copy of the original scenario:
We want to begin by making a copy of the original scenario to edit, so that we do not
alter the original scenario. To do this, we will use the ATF Scenario Builder Wizard.
This topic assumes only that you have started the ATF Scenario Builder.
1. Select 'Create a New Scenario from an Existing Scenario' and 'Next'.
2. Click 'OK'
97
3. Select the name of the original scenario that you want to copy.
4. You are going to specify a 'file title' for this scenario. This is the base file name from
which all of the filenames in this scenario will be constructed. Select 'OK'.
5. Select a name and click 'OK'.
98
6. Now you can specify a new scenario name. This is the name that will appear when the
scenario is being selected and in the main window when the scenario is loaded.
7. Specify a name and select 'OK'
8. You have now completed copying the scenario. Select 'OK'
9. You must save the scenario before continuing. You will need to manipulate files of
this scenario, so they must be saved first. Select 'Save' from the 'File' menu or the
toolbar.
99
10. The Scenario Builder will suggest the file title as the name for this scenario. Select
'Save'.
Flip Unit Arrays and Hierarchy Arrays:
Now that you have copied the original scenario, you must 'swap' enemy and friendly units
and hierarchies. Units are stored in a 'Unit Array', saved with a file name ending in the
extension '.unt'. Hierarchies (companies and platoons) are stored in a 'Hierarchy Array'
with a file extension of '.hra'.
The basic steps in 'flipping' units and hierarchies are:
•
•
•
•
•
Remove all of the units from the enemy and friendly faction
Load the enemy units as friendly units.
Load the friendly units as enemy units.
Load the enemy hierarchies as friendly hierarchies.
Load the friendly hierarchies as enemy hierarchies.
100
1. Select 'Friendly' from the 'Remove Units' sub-menu of the 'Unit' menu.
2. Select 'Yes' to confirm this action.
101
3. Select 'Enemy' from the 'Remove Units' sub-menu of the 'Unit' menu.
4. Select 'Yes' to confirm this action.
102
5. Select 'Friendly' from the 'Open Units' sub-menu of the 'Unit' menu.
6. Select the enemy 'Unit Array' file (extension .unt). Note that if the original scenario
has a battle plan, there will be more than one enemy Unit Array. In this case (as in the
example here), select the one that does not end in a number. This is the 'base' enemy Unit
Array, which is loaded when you load the scenario in the Scenario Builder.
103
7. Select 'Enemy' from the 'Open Units' sub-menu of the 'Unit' menu.
8. Select the friendly 'Unit Array' file (extension .unt).
104
9. Select 'Friendly' from the 'Open Hierarchy' sub-menu of the 'Unit' menu.
10. Select the enemy 'Hierarchy Array' file (extension .hra). Note that if the original
scenario has a battle plan, there will be more than one enemy Hierarchy Array. In this
case (as in the example here), select the one that does not end in a number. This is the
'base' enemy Hierarchy Array, which is loaded when you load the scenario in the
Scenario Builder.
105
11. Select 'Yes' to confirm this action.
12. Select 'Enemy' from the 'Open Hierarchy' sub-menu of the 'Unit' menu.
106
13. Select the friendly 'Hierarchy Array' file (extension .hra).
14. Select 'Yes' to confirm this action.
Flip the Obstacle Arrays:
Obstacles (mines, wire, tank ditches, and road craters) are stored in 'Obstacle Arrays'.
There are two types of Obstacle Arrays. Friendly Obstacle Arrays, with an extension of
'.fob', are used by the friendly faction in scenarios. Enemy obstacle Arrays, with an
extension of '.eob', are used by neutral (allied) and enemy factions in a scenario. These
file types are not interchangeable.
Luckily, however, the ATF Scenario Builder includes a utility to 'convert' enemy
Obstacle Arrays to friendly Obstacle Arrays, and vice versa.
107
The rest of this section provides detailed instructions for 'flipping' Obstacle Arrays. But,
in general, the steps are as follows.
•
•
•
•
Convert the enemy Obstacle Array to a new friendly Obstacle Array.
Load the converted obstacles as the friendly Obstacle Array.
Convert the friendly Obstacle Array to a new enemy Obstacle Array.
Load the converted obstacles as the enemy Obstacle Array.
1. Select 'Enemy to Friendly' from the 'Convert' sub-menu of the 'Obstacle Menu'.
2. Select the enemy 'Obstacle Array' file (extension .eob). Note that if the original
scenario has a battle plan, there may be more than one enemy Obstacle Array. In this
case (as in the example here), select the one that does not end in a number. This is the
'base' enemy Obstacle Array, which is loaded when you load the scenario in the Scenario
Builder.
108
3. Specify a file name for the converted enemy Obstacle Array. Do not overwrite the
friendly Obstacle Array. Select a new file name instead.
4. Select 'Open' from the 'Obstacle' Menu.
109
5. Select the new, converted Obstacle Array (file extension .fob) that you just created.
6. Select 'Yes' to confirm this action.
7. Select 'Friendly to Enemy' from the 'Convert' sub-menu of the 'Obstacle' menu.
110
8. Select the friendly Obstacle Array (extension .fob).
9. Select a new name for the converted Obstacle Array. Do not overwrite the current
enemy obstacle array.
111
10. Select 'Open' from the 'Obstacle' menu.
11. In 'Files of Type', select 'Enemy or Neutral Obstacle Array (*.eob)' to list all of the
enemy Obstacle Arrays (extension .eob) in the 'Data' sub-directory of your ATF install
directory.
112
12. Select the new, converted Obstacle Array (file extension .eob) that you just created.
13. Select 'Yes' to indicate that you want to load this as the enemy Obstacle Array (as
opposed to the neutral or allied obstacle array).
14. Select 'Yes' to confirm this action.
113
Flip the Hole Arrays:
Vehicle and dismount holes are stored in 'Hole Arrays'. Each faction has its own Hole
Array, but they are completely interchangeable (i.e. there are not separate enemy and
friendly formats, as with Obstacle Arrays).
The rest of this section provides detailed instructions for 'flipping' Hole Arrays. But, in
general, the steps are as follows.
•
•
Load the enemy holes as the friendly Hole Array.
Load the friendly holes as the enemy Hole Array.
1. Select 'Open' from the 'Hole' menu.
2. Select the enemy Hole Array.
114
3. Select 'Friendly' and 'OK'
4. Select 'Open' from the 'Hole' menu.
5. Select the friendly Hole Array.
6. Select 'Enemy' and 'OK'.
115
7. Select 'Yes' to confirm this action.
Other changes:
As we mentioned at the outset, the AI in Armored Task Force is more complex than in
many other wargames. As a result, simply swapping files is not sufficient to 'flip' most
scenarios.
In addition to the steps above, the following, additional changes must be made to flip a
scenario.
•
•
•
•
Delete and/or create battle plans.
Change Missions and Victory Conditions.
Flipping Maneuver Graphics and Enemy SITTEMPS
Creating new 'Enemy' Faction AI Scripts
1. Select 'Enemy' from the 'Delete' sub-menu of the 'Battle Plan' menu.
116
2. Highlight a battle plan and 'OK'.
3. Select 'Yes' to delete the battle plan.
Repeat steps 1-3 until all battle plans have been removed.
You can now add new enemy battle plans for the 'flipped' scenario. For more, click here.
4. Select 'Edit Friendly' from the 'Mission' sub-menu of the 'Component' menu.
You will need to change the 'Global Direction', win and loss text, and victory conditions
to reflect the objectives for the 'new' friendly (player controlled) force. To see more,
click here.
Make sure you also change the 'Global Direction' in the neutral and enemy Mission
components.
117
5. To continue, you will need to save the scenario. Select 'Save' from the 'File' menu or
toolbar.
6. Close the ATF Scenario Builder by selecting 'Exit' from the 'File' menu or the 'Close'
button at the top-right of the main window.
7. Using Windows Explorer, change the name of the Maneuver Graphics (the friendly
.gra file) to the name of the Enemy SITTEMP (the enemy .gra file). Then do the reverse,
changing the Enemy SITTEMP file name to that of the Maneuver Graphics.
When you are done, restart the ATF Scenario Builder. You will find that the Enemy
SITTEMP is now displayed in blue, as the Maneuver Graphics, and the Maneuver
Graphics are now displayed in Red, as the Enemy SITTEMP.
Additional editing to the graphics may be required. For information on how to do this,
click here.
118
8. Finally, you might need to create Faction AI for the 'new' enemy (opposing) units and
hierarchies. Select 'Enemy...' from the 'Create' sub-menu of the 'Faction AI' sub-menu of
the 'Hierarchy' sub-menu of the 'Unit' menu (phew!).
For more information on creating a Faction AI script, click here.
119